Campaigns
Want to be part of a group build? This is where to start, plan, and meet about them.
Official: Sink the Bismarck Campaign
JJ1973
#345
Visit this Community
Niedersachsen, Germany
Joined: August 22, 2011
KitMaker: 1,835 posts
Model Shipwrights: 1,832 posts
Posted: Sunday, April 30, 2017 - 10:35 PM UTC
Ok, and now for something 'very special' - an update!!! And this time, no small stuff like AAA, I really resumed work on the main ship!

Here only a few pics, more later on my HMS Hood build log.

I resumed work on the lower bridge, added my scratch built flag lockers and finally installed the lower bridge to the hull.


Now it's again time for surfacer, sanding, and cleaning up. And adding so many details. But I should be able to install the wooden main deck soon, and repair some areas on the hull, that suffered while I was working on the forecastle deck...

Cheers,
Jan
TimReynaga
Staff MemberAssociate Editor
MODEL SHIPWRIGHTS
Visit this Community
California, United States
Joined: May 03, 2006
KitMaker: 2,500 posts
Model Shipwrights: 1,830 posts
Posted: Monday, May 01, 2017 - 12:17 AM UTC
Jan,
You are making some good, steady progress on your Hood - she's looking better and better! Hit the bench hard... maybe you can get her in commission in three weeks after all!

TimReynaga
Staff MemberAssociate Editor
MODEL SHIPWRIGHTS
Visit this Community
California, United States
Joined: May 03, 2006
KitMaker: 2,500 posts
Model Shipwrights: 1,830 posts
Posted: Monday, May 01, 2017 - 06:43 AM UTC

Quoted Text

Hi Tim:

I do remember San Antonio Hobbies, didn't know they were closed, they had quite the large store with lots of stuff.

I remember this kit and look forward to seeing you work some modeling finesse into this.
Mark

...Tim, that's a really nice addition!! I wonder how you will do that in three weeks - I've never seen you just finishing a model - once you start, you start to add and modify things, and build works of art even from the simplest kits... I'm really looking forward to see you building that nice old kit!!

Cheers,
Jan


Thanks Mark and Jan, but I really do want to just enjoy this old kit as a fast, clean build. My goal is to showcase the kit’s good features without driving myself crazy worrying about its shortcomings. We’ll see if I can do it!

As with all of their 1/720 scale series ships, Revell’s Ark Royal model was designed to be either full hull or waterline with the lower hull being removable after assembly. This is a fun idea that I just loved as a kid, but Revell’s engineering was not really up to the task and the poor fit left a ragged join at the waterline, so I just cemented everything together for a permanent full hull model.


Before attaching the flight deck, I had to attend to the eight 4.5 inch gun galleries. These were provided as separate parts to be attached from the inside of the hull sides. Unfortunately, the vague fit left steps and gaps right in the middle of the galleries. Eliminating the steps required raising the level of the gallery parts slightly to match the portions of the stations on the hull sides, which made the gallery back walls foul the flight deck underside when I test fitted it; so I sanded the walls down until the flight deck would fit. Inside the galleries, filling the gaps with putty was no problem, but the confined spaces there made them a challenge to sand; I had to super glue bits of sanding film to a length of plastic to reach inside and smooth the floors.
After all that, though, the test fitting the gun mounts showed that the gaps should ultimately be hidden pretty well.
Man, these old kits really do force you to engage with them!
Mgunns
Visit this Community
Arizona, United States
Joined: December 12, 2008
KitMaker: 1,423 posts
Model Shipwrights: 99 posts
Posted: Monday, May 01, 2017 - 07:14 AM UTC
Hi Tim:

I remember doing this kit back then and thinking what a dog it was and difficult to build. Usually Revell had pretty good engineering and fit, but some of the stuff was really bad, this being one of them and their other 1/720 line up: they must have gotten some new engineers fresh out of school and assigned them these tasks. I like your approach. Looking forward to more updates.
Cbacon84
Visit this Community
California, United States
Joined: October 10, 2012
KitMaker: 204 posts
Model Shipwrights: 22 posts
Posted: Monday, May 01, 2017 - 07:58 AM UTC
Hi Tim

I'm going to be interested in how this turns out, as I have fond memories of building (rather poorly) Revells 1/720 Arizona and Missouri as a kid.
MichaelSatin
Staff MemberCampaigns Administrator
AEROSCALE
Visit this Community
Colorado, United States
Joined: January 19, 2008
KitMaker: 3,909 posts
Model Shipwrights: 255 posts
Posted: Monday, May 01, 2017 - 04:55 PM UTC
Some really excellent work going on here as we approach the end of this campaign! Keep it up, gents!

Michael
TimReynaga
Staff MemberAssociate Editor
MODEL SHIPWRIGHTS
Visit this Community
California, United States
Joined: May 03, 2006
KitMaker: 2,500 posts
Model Shipwrights: 1,830 posts
Posted: Tuesday, May 02, 2017 - 07:00 AM UTC

Quoted Text

Hi Tim:
I remember doing this kit back then and thinking what a dog it was and difficult to build. Usually Revell had pretty good engineering and fit, but some of the stuff was really bad, this being one of them and their other 1/720 line up: they must have gotten some new engineers fresh out of school and assigned them these tasks. I like your approach. Looking forward to more updates.


Mark, I have to agree with you about the engineering of this kit. I guess the guys at Revell were trying to pack in as much detail as they could while keeping the parts count low for young modelers (as we ourselves were in the 1970s!)

The boats, rafts, and railing directly relief-molded into the hull sides are examples of this. These compromises I could accept, but the poor fit of the major parts overall really undoes the advantages of those simplifications. As a kid I too would have found this build frustrating and difficult!

Of course now, labor intensive as this kit is, I must admit that hours at the work bench are still better than hours at the office!

JJ1973
#345
Visit this Community
Niedersachsen, Germany
Joined: August 22, 2011
KitMaker: 1,835 posts
Model Shipwrights: 1,832 posts
Posted: Tuesday, May 02, 2017 - 09:34 AM UTC
Hi Tim,

could not agree more with your statement regarding bench/office time!!! However, not much choice...so off the the office...

Cheers,
Jan
TimReynaga
Staff MemberAssociate Editor
MODEL SHIPWRIGHTS
Visit this Community
California, United States
Joined: May 03, 2006
KitMaker: 2,500 posts
Model Shipwrights: 1,830 posts
Posted: Friday, May 05, 2017 - 10:05 PM UTC
The Ark’s hull is now basically prepped. Bonded together with plastic cement, the upper and lower portions have been blended using small applications of super glue, sanded smooth.

Those joins at the waterline and at the flight deck took a disconcerting amount of effort to hide! The poor fit was only partly to blame; partly it was my desire to protect the heavy, semi-accurate surface detailing on the parts to preserve the feel of the original kit.


And after all that work and nearly a week into the project, the difference isn’t even all that noticeable!

Oh, well. Two more weeks to get her finished...
TimReynaga
Staff MemberAssociate Editor
MODEL SHIPWRIGHTS
Visit this Community
California, United States
Joined: May 03, 2006
KitMaker: 2,500 posts
Model Shipwrights: 1,830 posts
Posted: Sunday, May 07, 2017 - 05:16 AM UTC
I had resolved for this build to overlook as many of the kit’s shortcomings as I could... but those gaps behind the antiaircraft and searchlight galleries were just too much!

The voids were even more glaring with the molded-in searchlights and MGs removed for platform clean up. I closed them off with bits of sheet plastic.

The aft platforms got the same treatment. They’ll all look better once the equipment is reinstalled and things are painted up.

Also, Revell included no representation of the ship’s prominent anchors, so I added simple hawsepipes from plastic discs cut with a .081 inch Waldron punch.

Drilled through with an X-acto, they will later accommodate photoetch brass anchors from the White Ensign set.
JJ1973
#345
Visit this Community
Niedersachsen, Germany
Joined: August 22, 2011
KitMaker: 1,835 posts
Model Shipwrights: 1,832 posts
Posted: Sunday, May 07, 2017 - 09:22 AM UTC
Hi Tim,

quick and good progress on your Ark Royal!! It's nice to see one of those old kits, with just the bare minimum corrected but preserving the 'spirit' of the kit!!

Over the weekend, I did get a little progress on my Hood - actually I am quite happy. After the lower bridge was glued into place and filled/sanded, it was time for quite a few repairs to the paint of the ship, damages that occurred while installing the extensive PE. So that was done, and I considered it was time to install the wooden deck, first part down. And non-skid on the shelter deck.


Cheers,
Jan
TimReynaga
Staff MemberAssociate Editor
MODEL SHIPWRIGHTS
Visit this Community
California, United States
Joined: May 03, 2006
KitMaker: 2,500 posts
Model Shipwrights: 1,830 posts
Posted: Sunday, May 07, 2017 - 12:54 PM UTC
Jan, your Hood is coming together beautifully. I love that wood deck-it really stands out against all that gray and corticene!
RedDuster
Visit this Community
England - South East, United Kingdom
Joined: March 01, 2010
KitMaker: 7,078 posts
Model Shipwrights: 6,649 posts
Posted: Monday, May 08, 2017 - 10:03 PM UTC
Very nice Jan,

Always a real step getting the deck down.

Keep up the great work.

Cheers

Si
RedDuster
Visit this Community
England - South East, United Kingdom
Joined: March 01, 2010
KitMaker: 7,078 posts
Model Shipwrights: 6,649 posts
Posted: Monday, May 08, 2017 - 10:08 PM UTC
Very quick update.

Cranes sorted.


first twin '37 done.


Hope to get a bit further next weekend, but real life may well get in the way,

Cheers

Si
RedDuster
Visit this Community
England - South East, United Kingdom
Joined: March 01, 2010
KitMaker: 7,078 posts
Model Shipwrights: 6,649 posts
Posted: Monday, May 08, 2017 - 10:27 PM UTC
Hi Tim,

Many apologies, almost missed you excellent work on the ok Revell Ark, coming on great guns, had a bash at that with the WEM etch many years ago, not up to the standards of your build.

Cheers

Si
TimReynaga
Staff MemberAssociate Editor
MODEL SHIPWRIGHTS
Visit this Community
California, United States
Joined: May 03, 2006
KitMaker: 2,500 posts
Model Shipwrights: 1,830 posts
Posted: Tuesday, May 09, 2017 - 07:04 AM UTC
Thanks, Si. Your Bismarck is looking terriffic – love those cranes! And those 37mms... awesome!

As for my own build, the kit island is reasonably well detailed with doors, porthole scuttles, and other details, but it includes no representation of the bridge windows. I had first thought to depict them with black decal squares (as I have done on some 1/1200 scale builds) to save time, but in this larger scale it would not look very convincing. Instead, I cut a slit for the windows through the bridge structure with a razor saw...

...and then added a section of 1/350 scale photoetch ladder to serve as the window frames.

It was a little bit more work, but a ship must have its “eyes,” mustn’t it?

JJ1973
#345
Visit this Community
Niedersachsen, Germany
Joined: August 22, 2011
KitMaker: 1,835 posts
Model Shipwrights: 1,832 posts
Posted: Tuesday, May 09, 2017 - 09:18 AM UTC
Great work, Si and Tim! I defiantly agree with Tim, your Bismarck really look awesome!!

Tim, that's a very smart and effective fix to the bridge windows, brilliant idea.!

Thanks for your kind comments on my Hood - it's only the forecastle deck for now, the rest should follow soon, this weekend. But yes, it really feels like a big step, something's moving forward!!

Cheers,
Jan
TimReynaga
Staff MemberAssociate Editor
MODEL SHIPWRIGHTS
Visit this Community
California, United States
Joined: May 03, 2006
KitMaker: 2,500 posts
Model Shipwrights: 1,830 posts
Posted: Wednesday, May 10, 2017 - 08:56 AM UTC
For the sake of quick construction I won’t be mounting the model on the usual wood display board with brass pedestals, but the little plastic “feet” provided with the kit are pretty uninspiring. To liven things up I thought I’d reuse a nameplate from a derelict Revell Prince of Wales.

With a new name (and maybe a better paint job!) it should make for a nicer display.
steve-o
Visit this Community
Ohio, United States
Joined: February 05, 2004
KitMaker: 545 posts
Model Shipwrights: 113 posts
Posted: Wednesday, May 10, 2017 - 10:58 PM UTC
Nice work everyone! It's great to see everything really coming together nicely.

Last week, I was quite worried about making the deadline. Work, Travel, Mother's Day... But, I've made progress, and should get it done.

Painting Problem: I went to my local shop, and bought WWII British Naval colors 507-A (Prewar Dark Gray) and 507-C (Prewar Light Gray") only to find out that I actually needed the one do not carry "507-B Neutral Gray". Seriously??? So, instead of spending $8 to get a little bottle shipped to me, I mixed the two together and added some "US Ocean Gray" to make a hopefully passable 507-B.


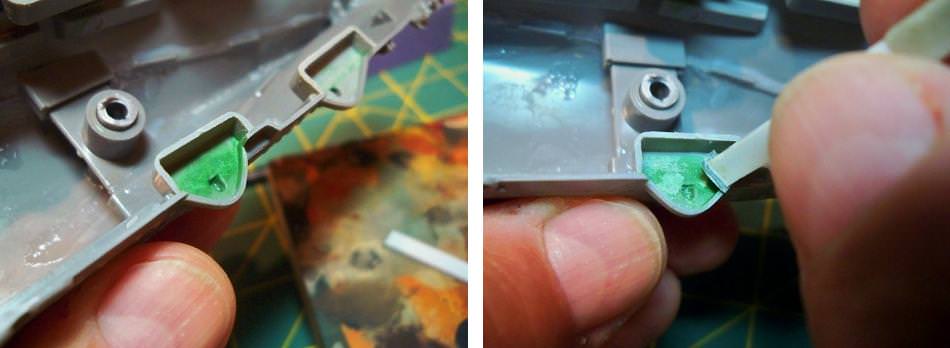
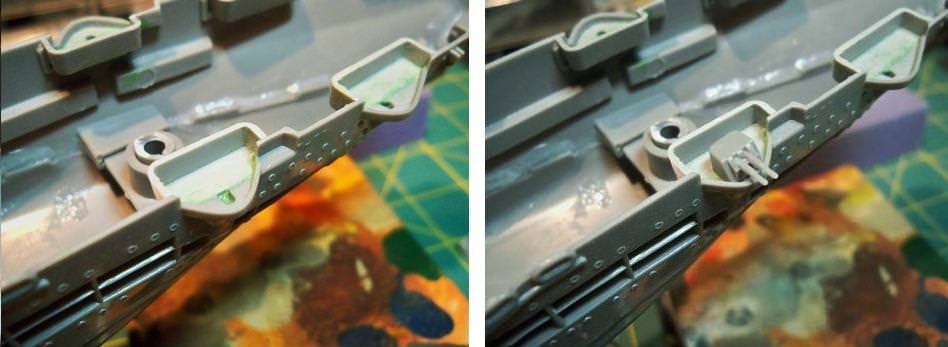
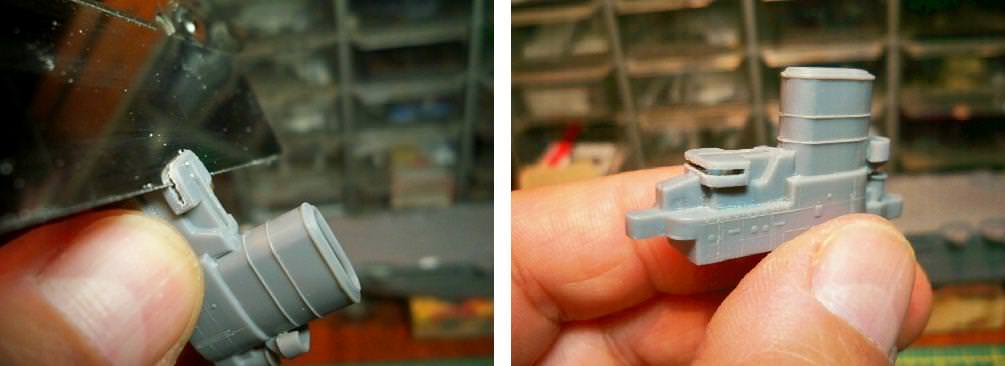
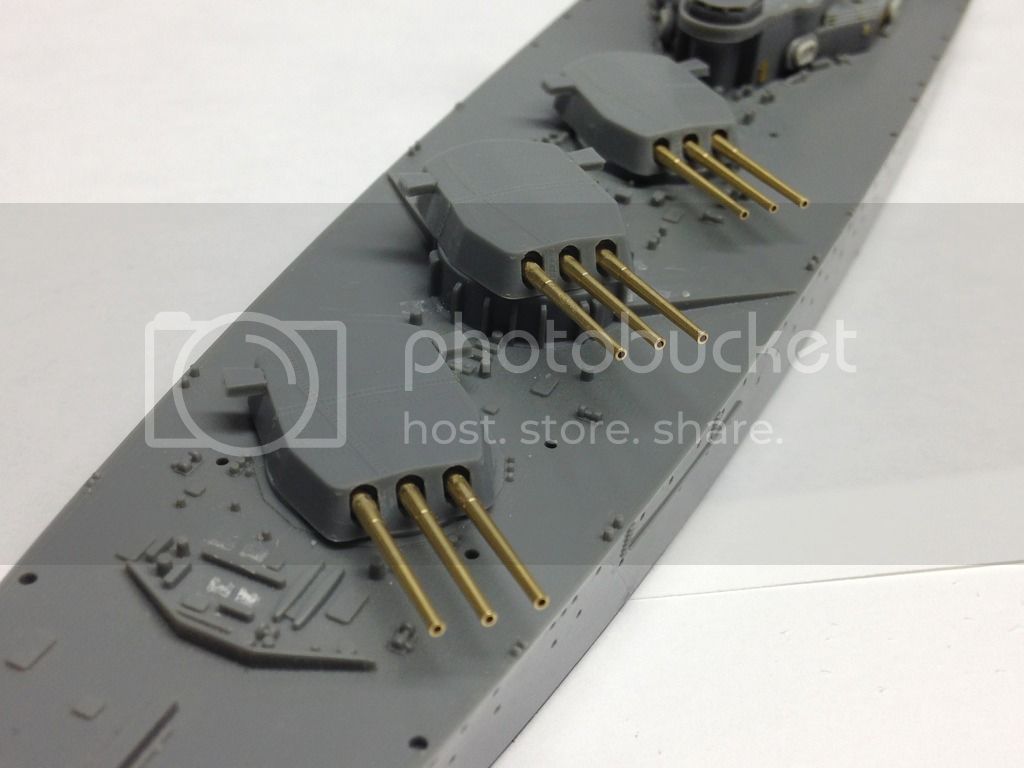
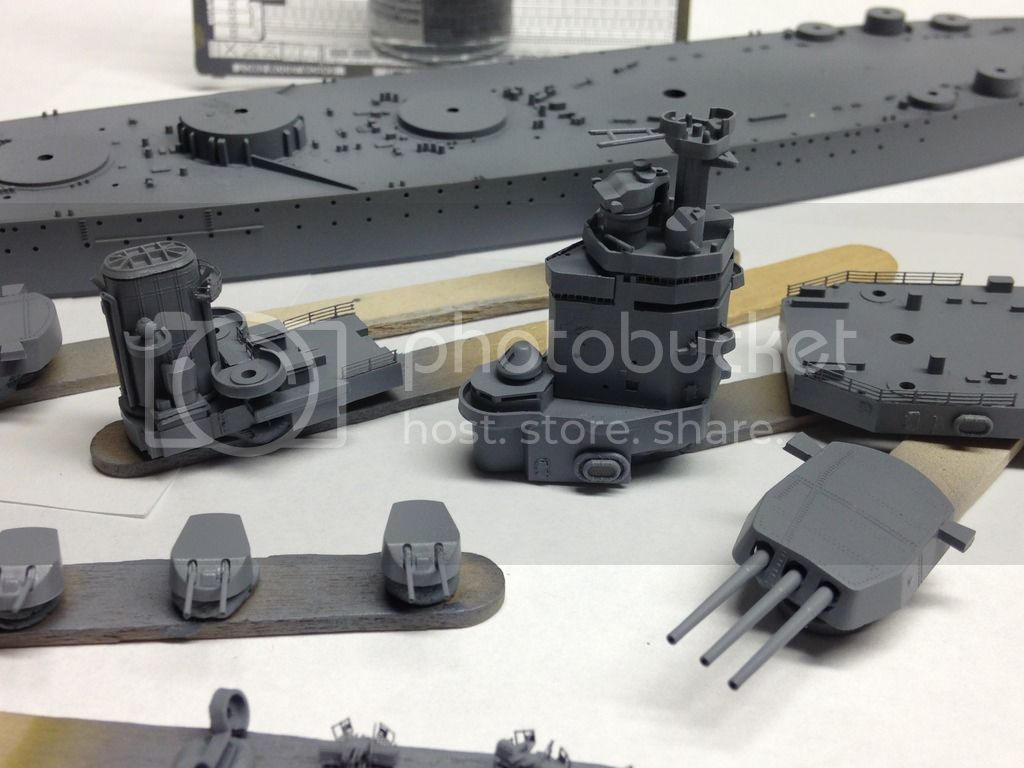
Added some Metal Barrels, I had to completely reconstruct the attachment points for them inside the turret. I used extra turret sleeves from a DML Arizona kit. It seemed to work out well, and I should be able to go in later and make them adjustable.


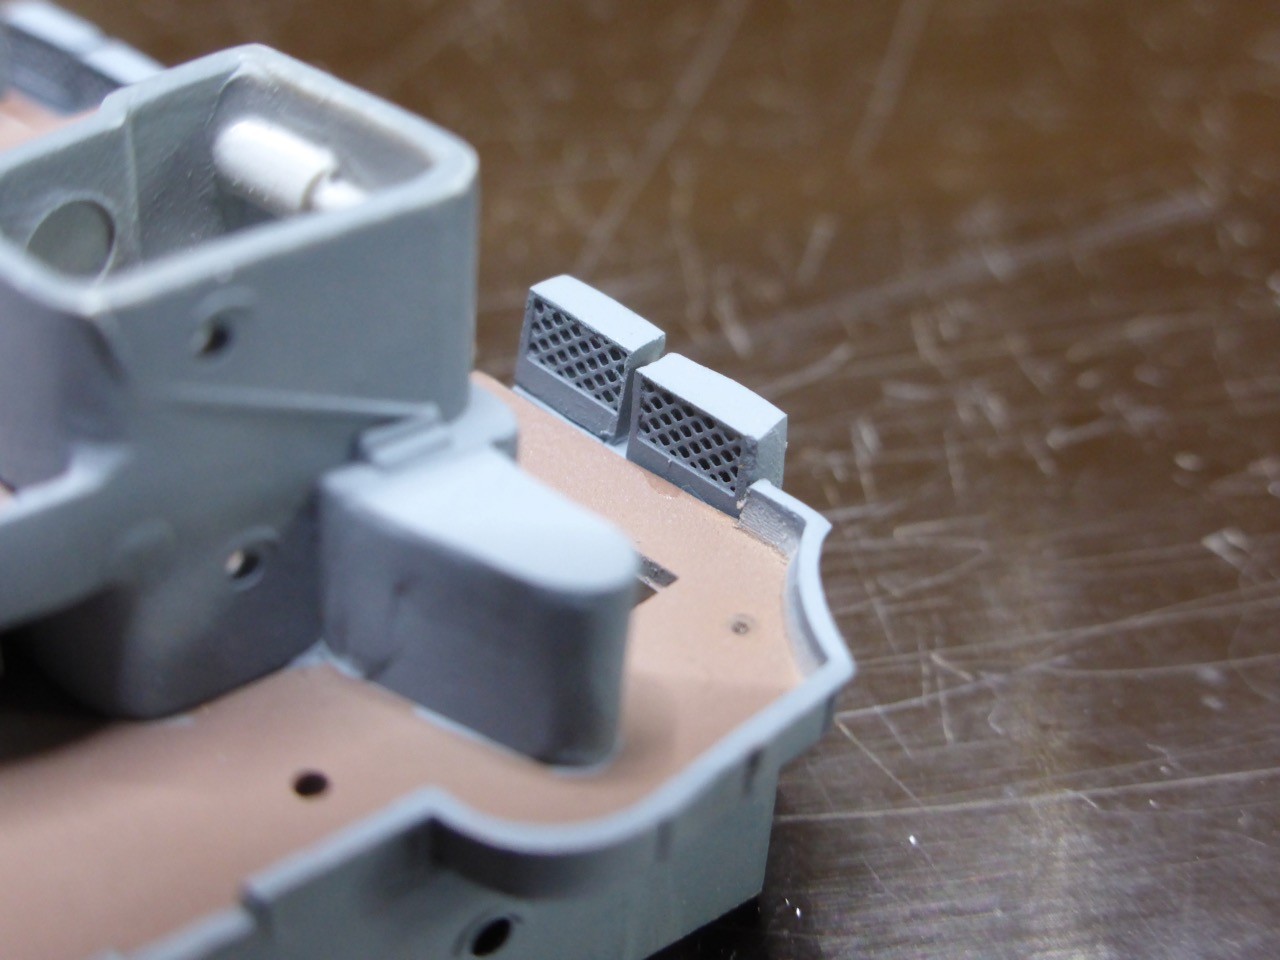
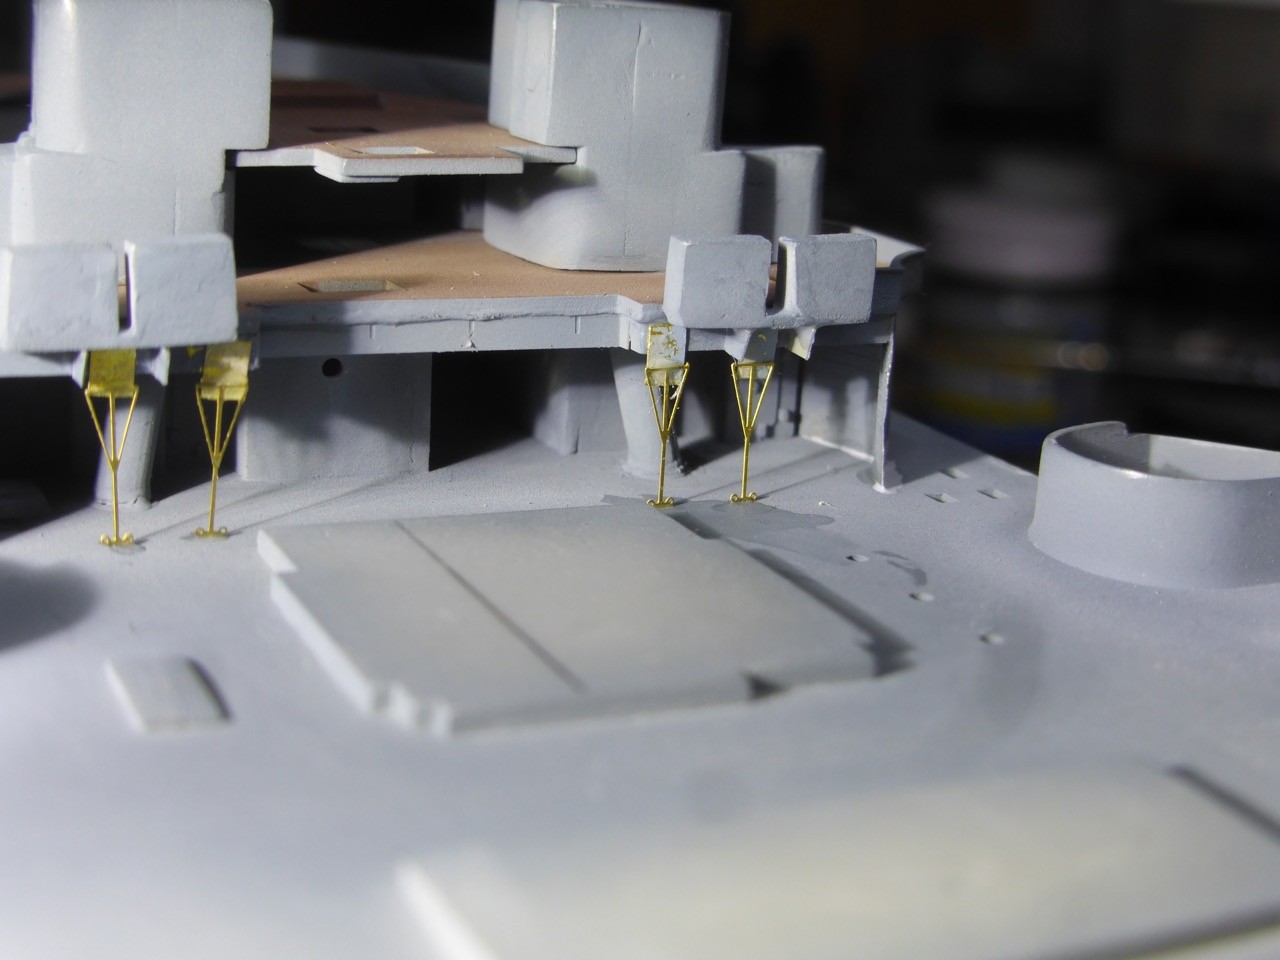
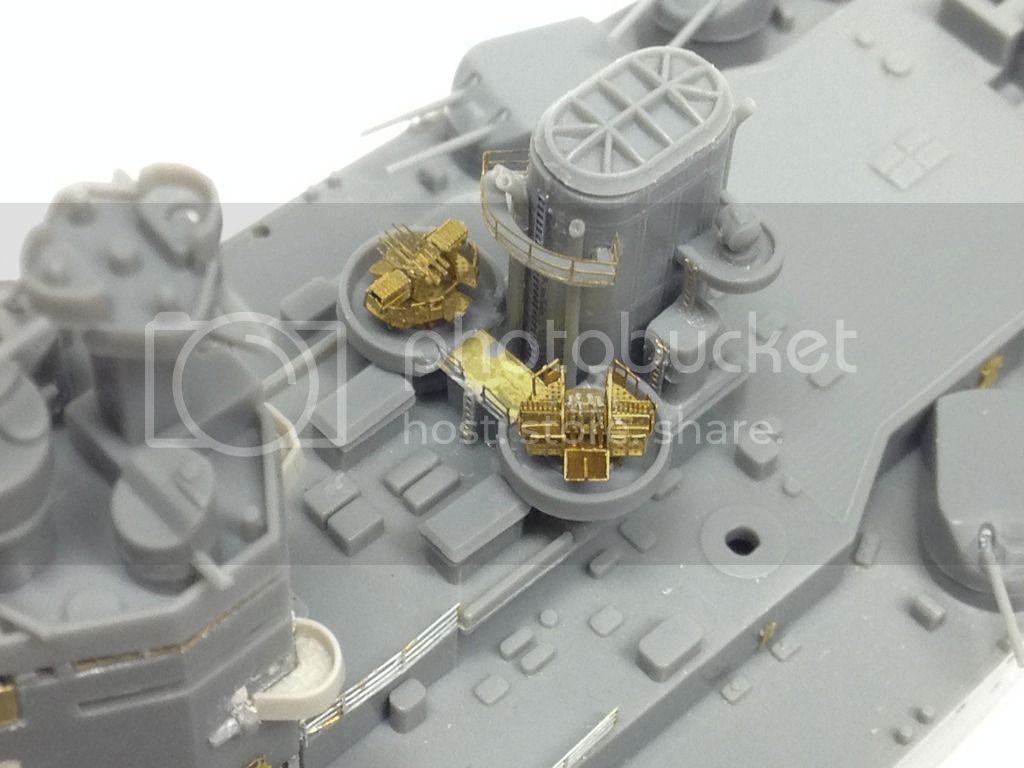
1/700 PE Pom-poms turned out better than I expected. But, I'd rather use resin or plastic that has round barrels. Painting should help a bit.


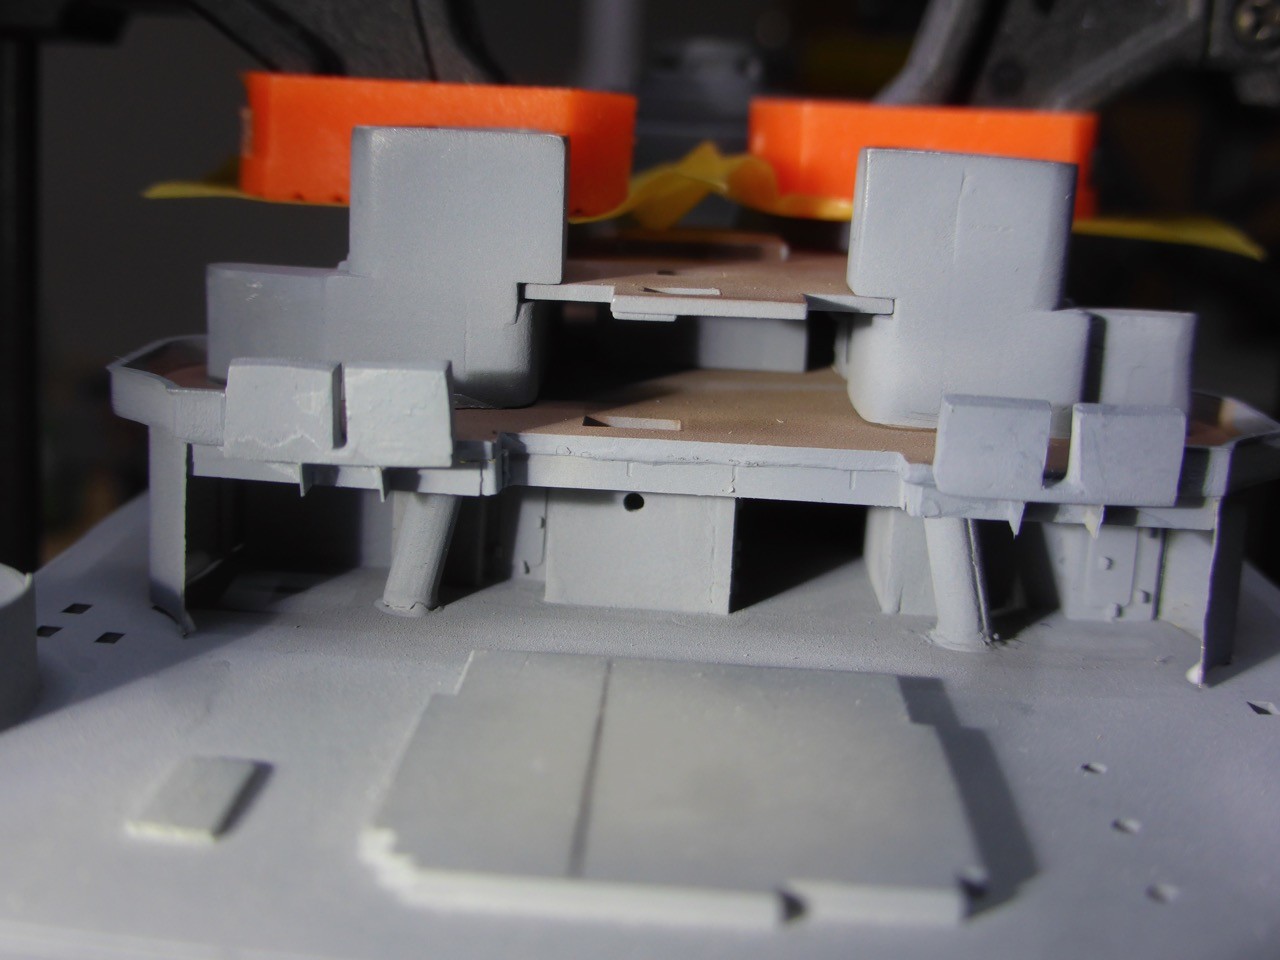
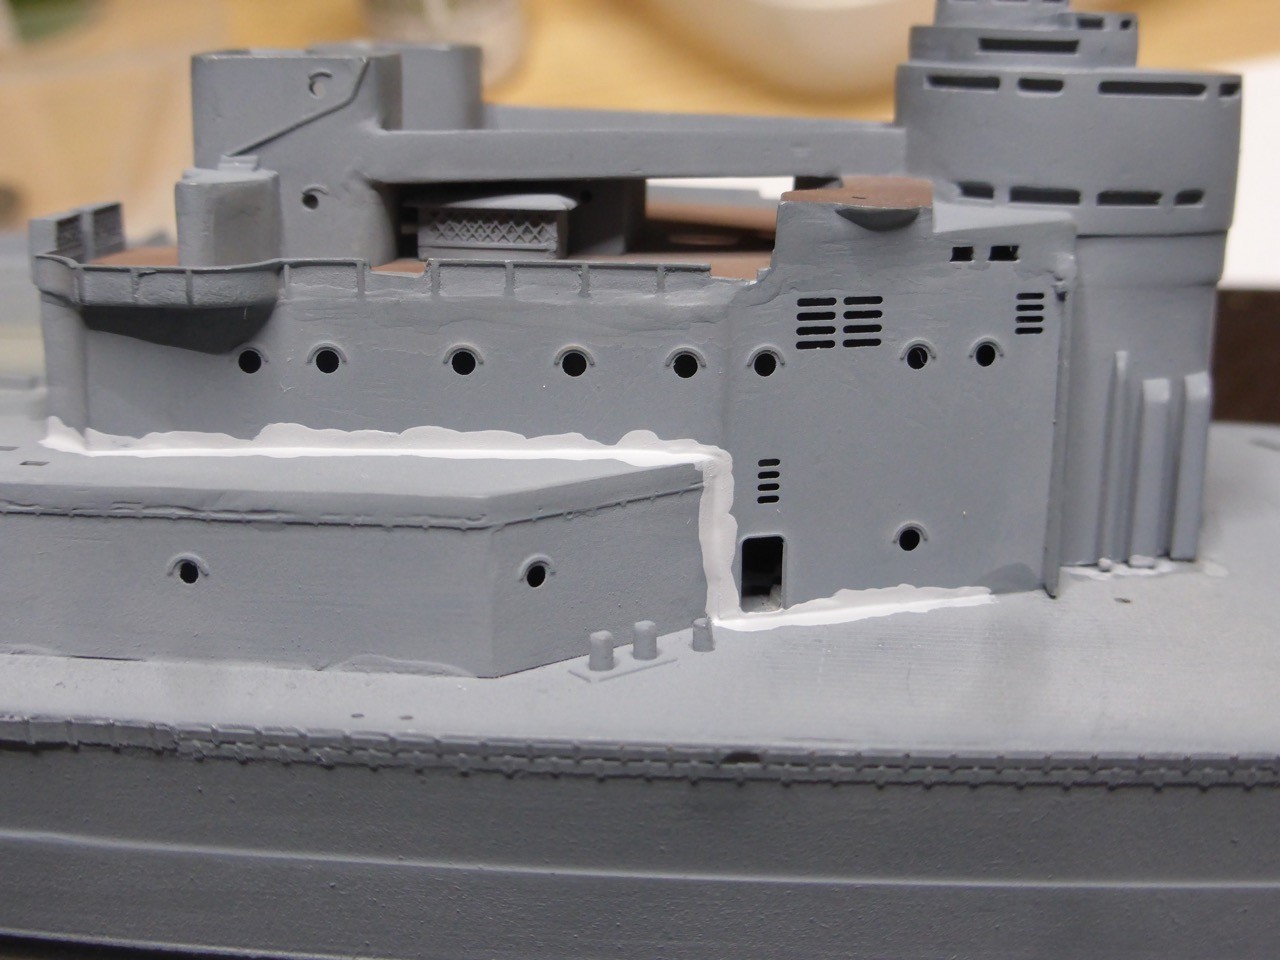
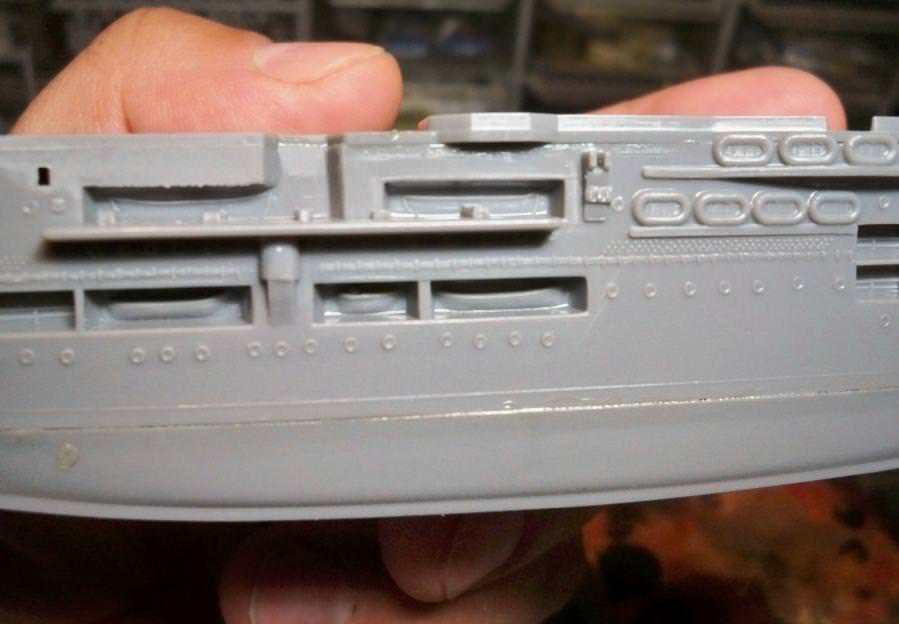
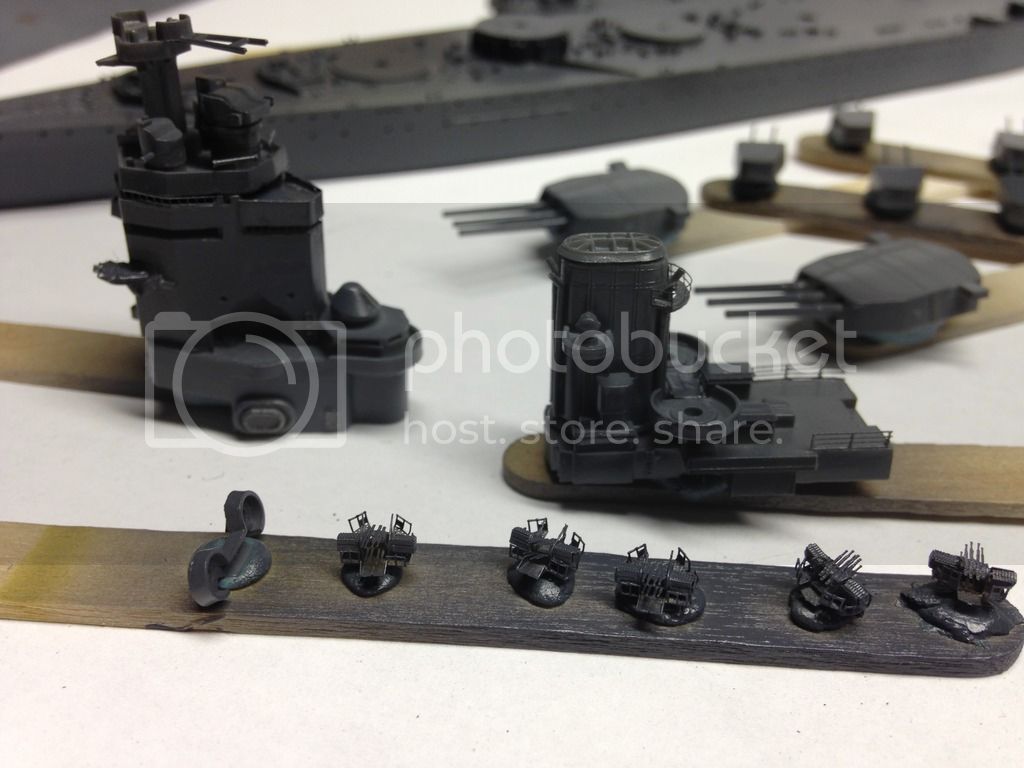
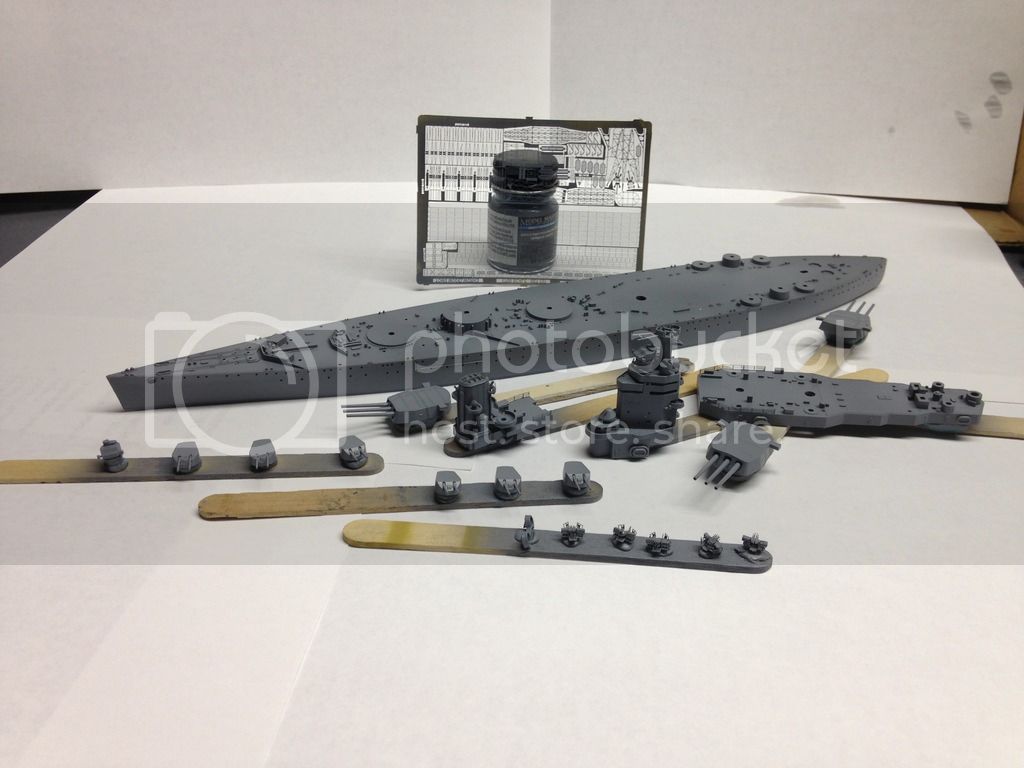
Preshading with 507-A (i made some use of the extra bottle)


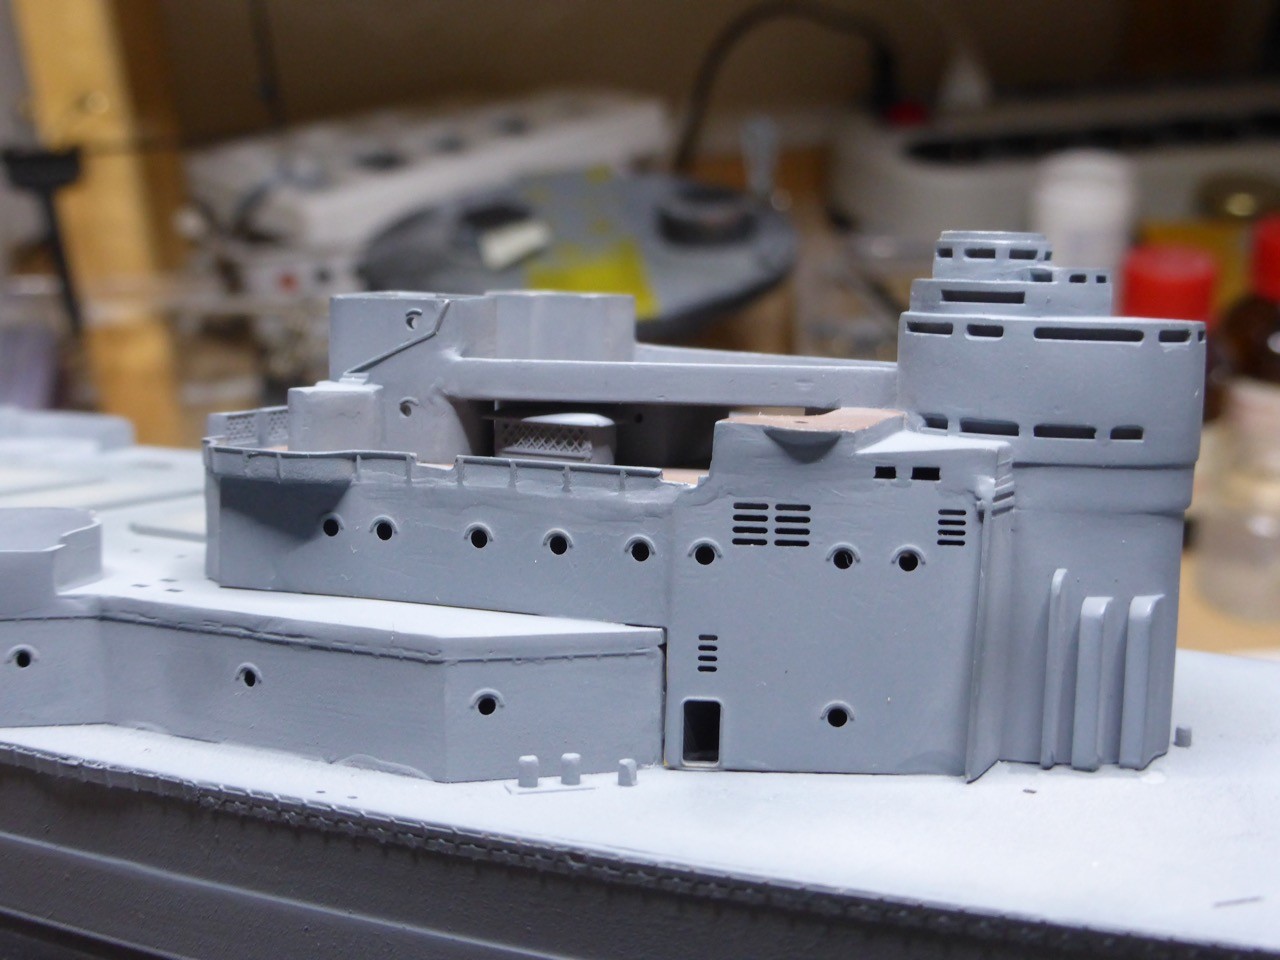
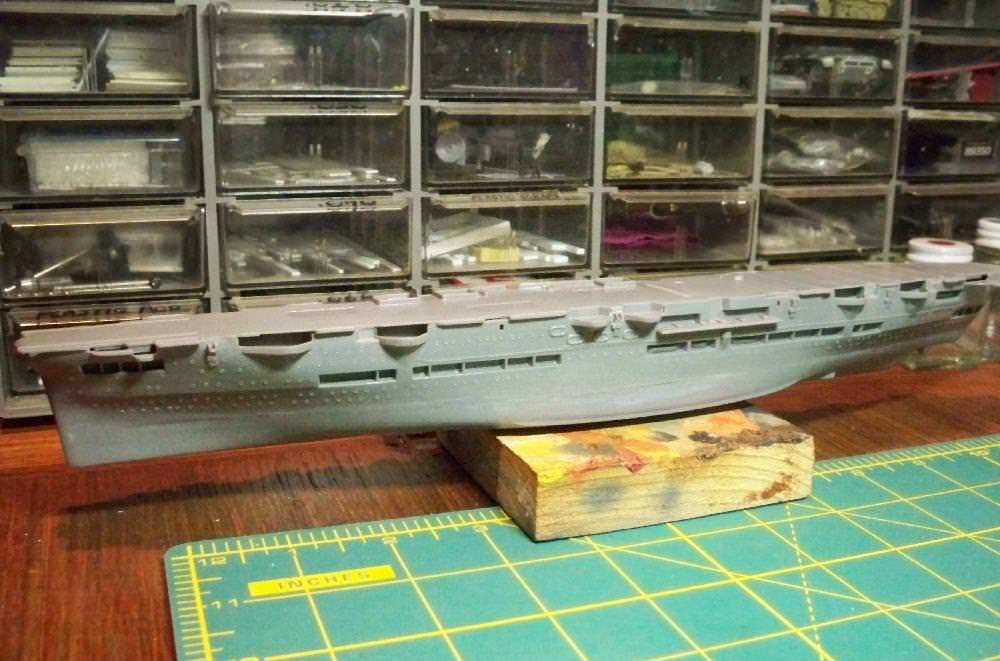
Over-spray of my best shot at 507-B
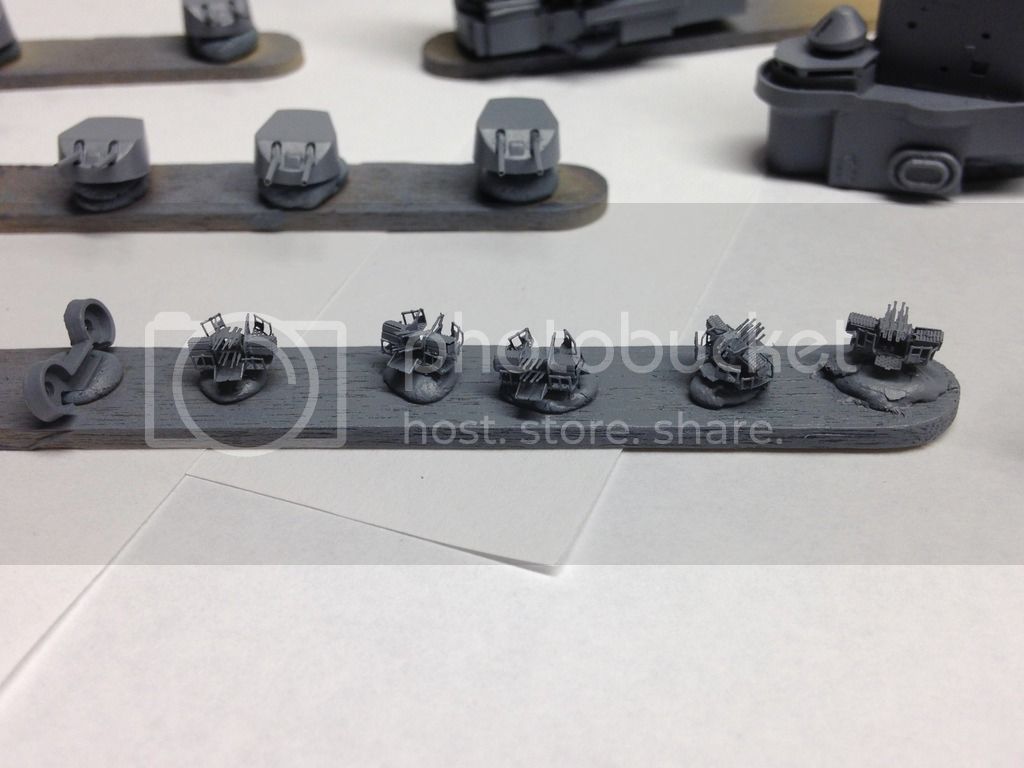
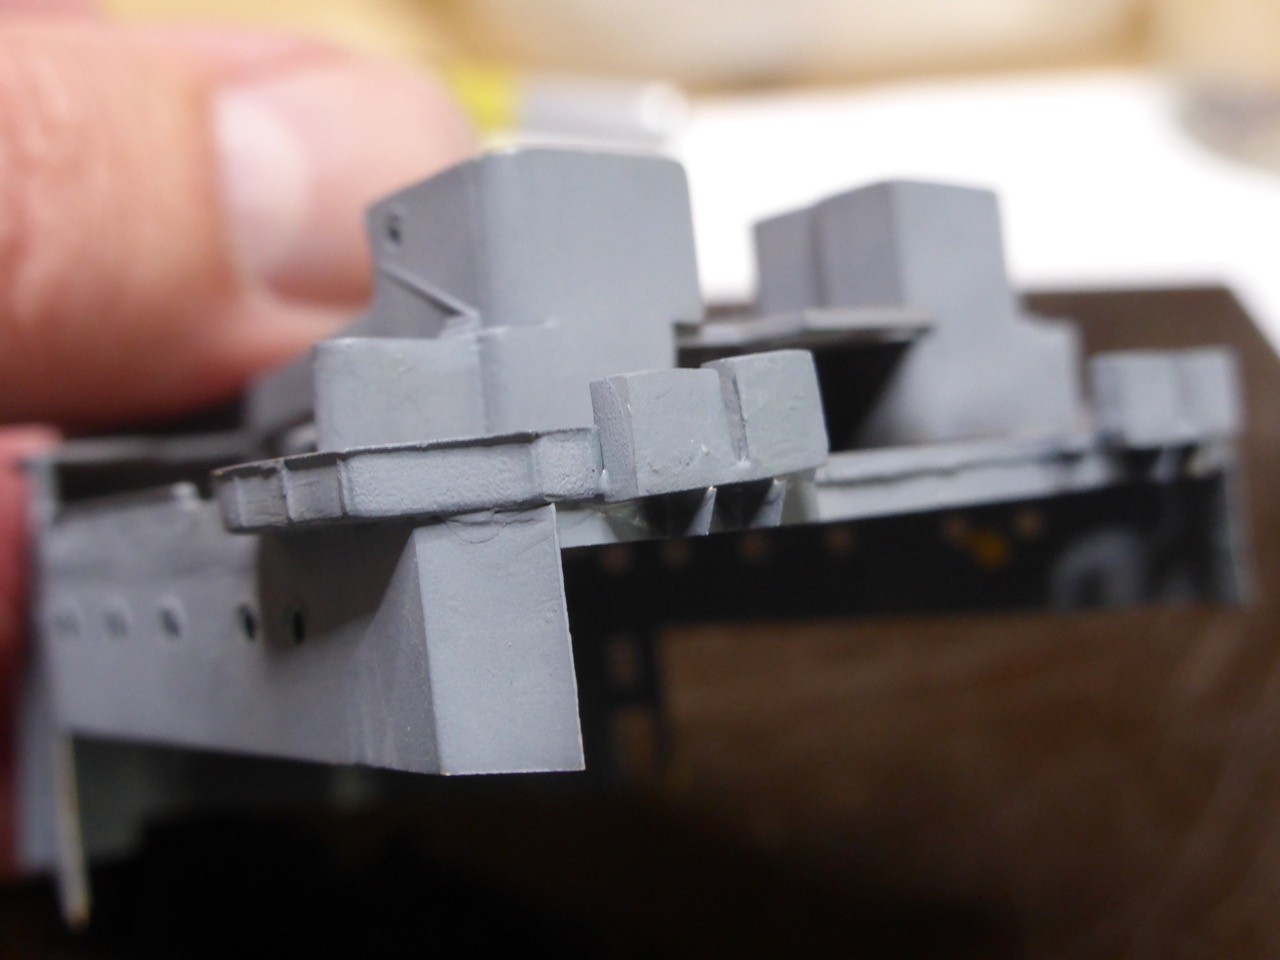
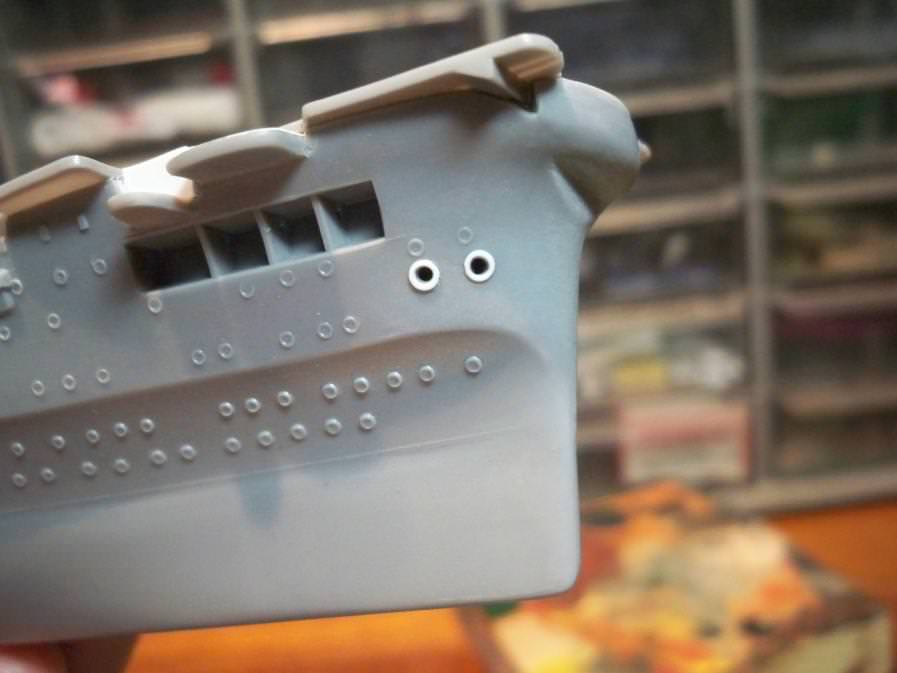
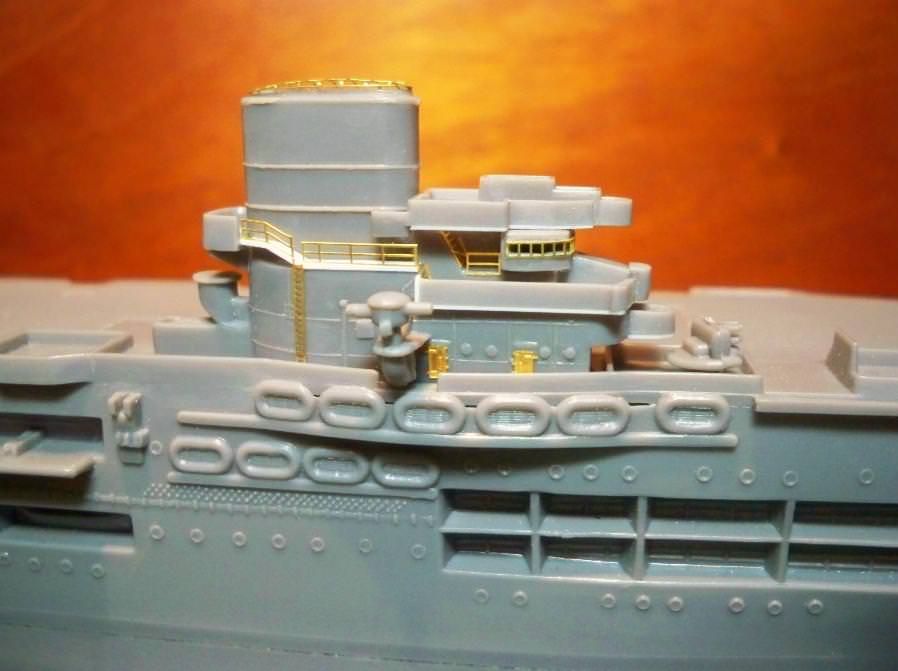

Close-up


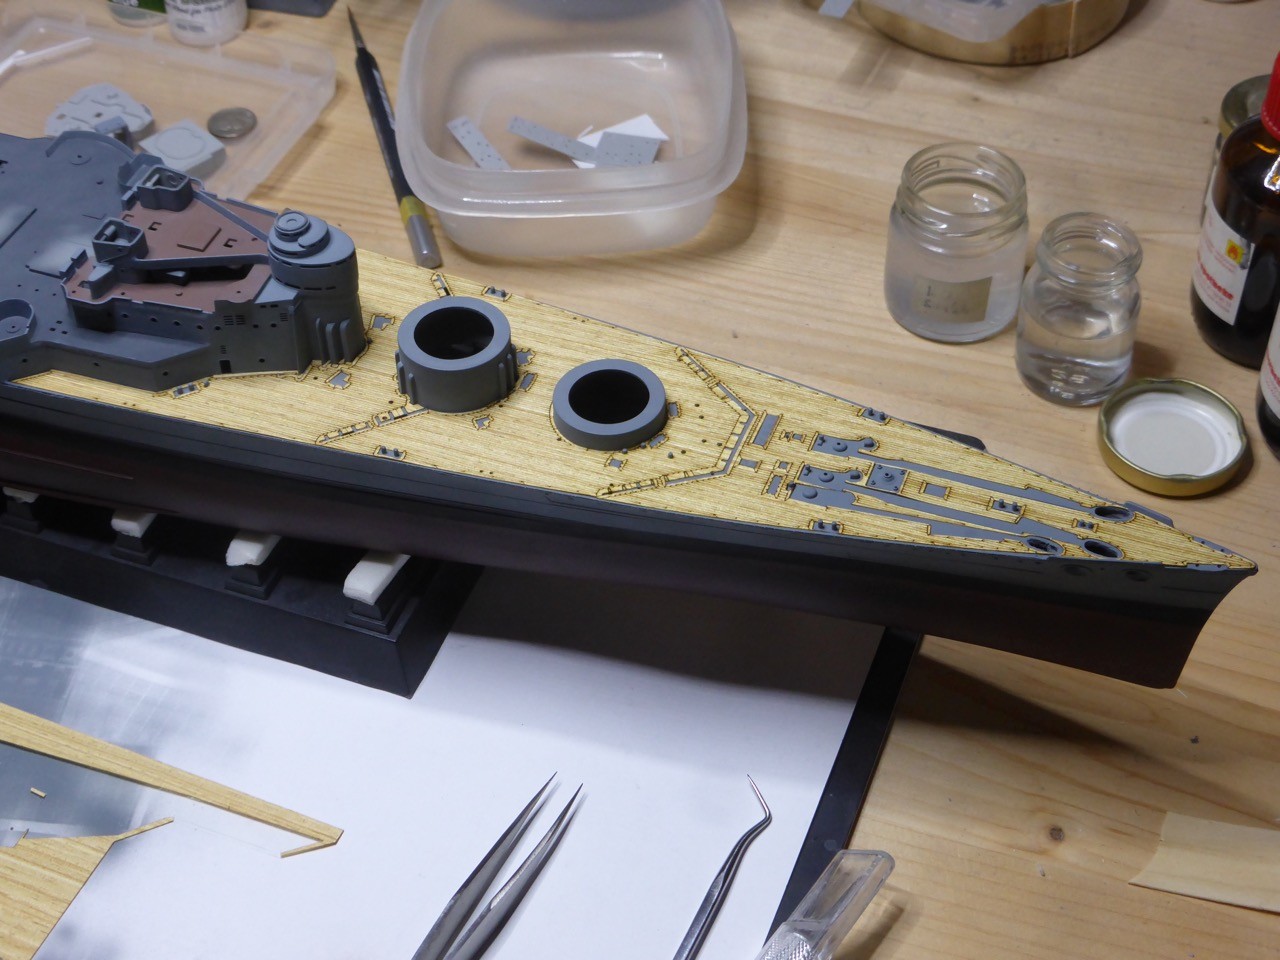
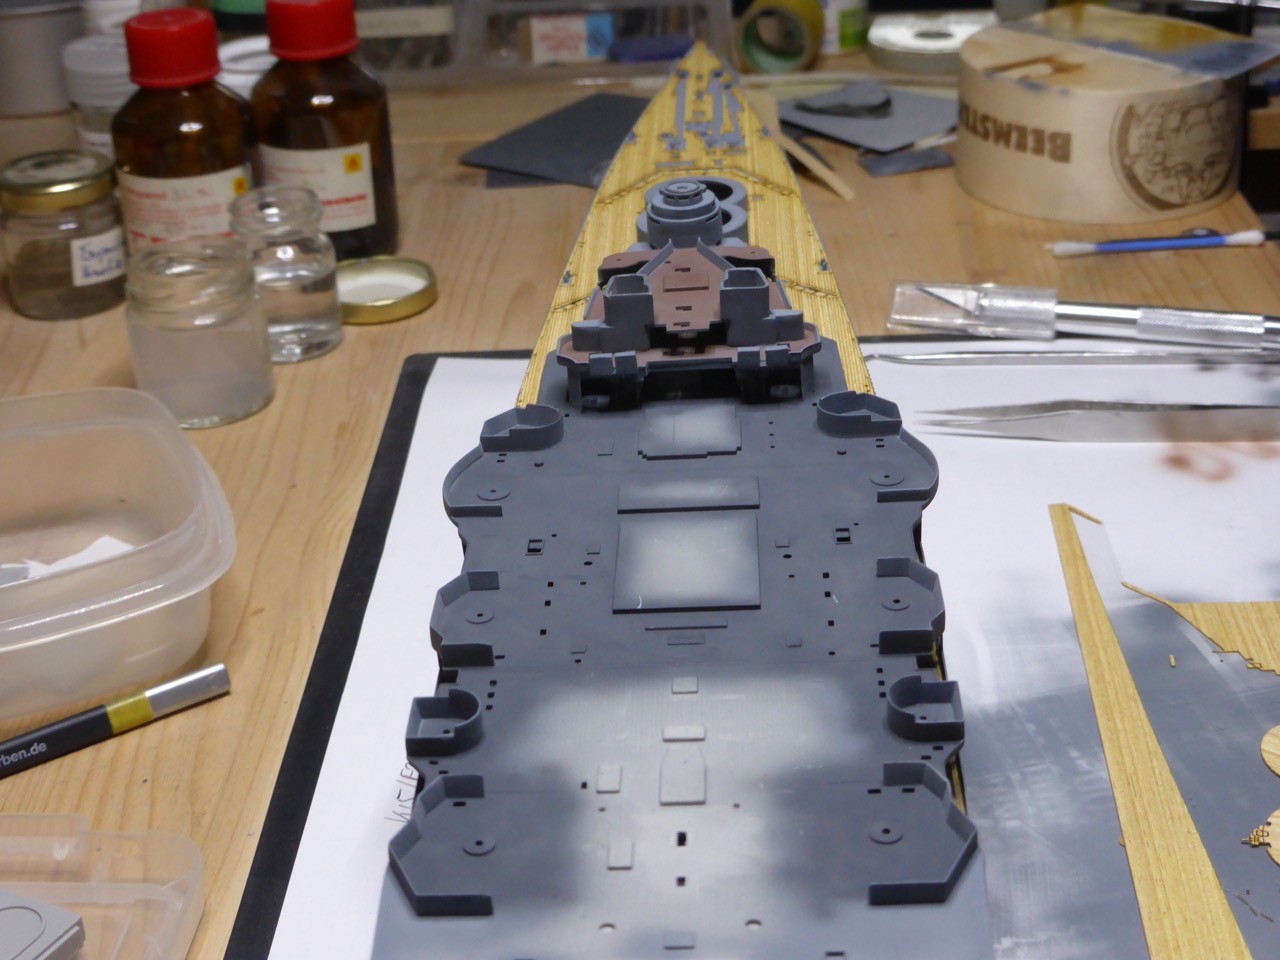
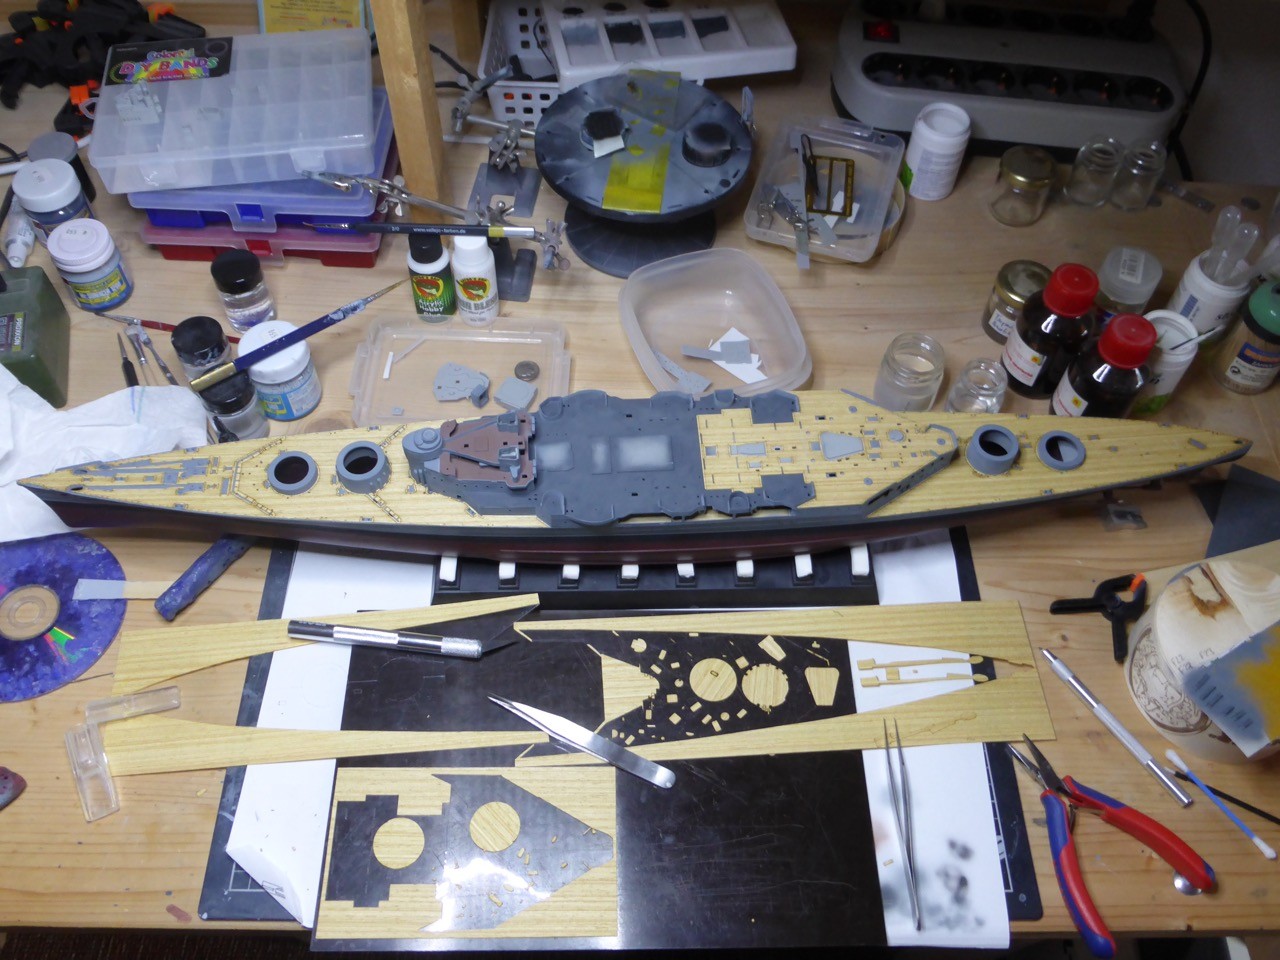
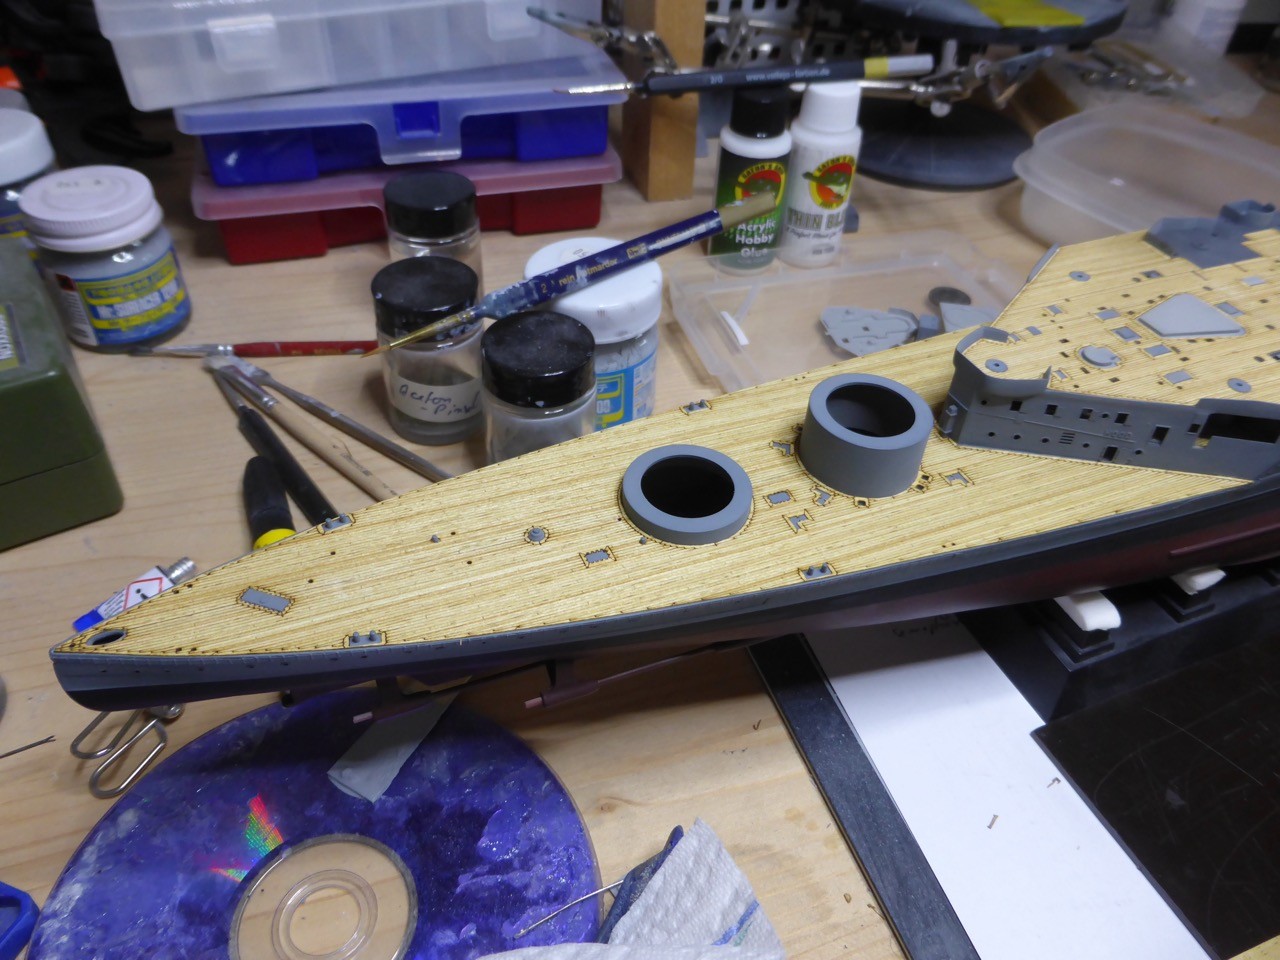
Now, I'm ready to do a bit of weathering and add the wooden deck! (If you can't tell - I'll REALLY excited to try my first ArtWox wooden deck)


Then AAA, lifeboats, the crane, rigging, and we're set!

Happy building!

Steve
RedDuster
Visit this Community
England - South East, United Kingdom
Joined: March 01, 2010
KitMaker: 7,078 posts
Model Shipwrights: 6,649 posts
Posted: Friday, May 12, 2017 - 12:58 AM UTC
Thanks Jan & Tim,

The Veteran '37s are very well designed, balanced mix of resin & etch.

Great work on the ancient Ark Tim, I do recall it was a pain to build back in the 60's but I loved the kit as it came with the destroyer as well.

Rodney looking Excellent Steve, nice conversion to bring the fit up to '41

Cheers

Si
TimReynaga
Staff MemberAssociate Editor
MODEL SHIPWRIGHTS
Visit this Community
California, United States
Joined: May 03, 2006
KitMaker: 2,500 posts
Model Shipwrights: 1,830 posts
Posted: Saturday, May 13, 2017 - 10:57 PM UTC
Nice progress on the Rodney, Steve - can't wait to see that wood deck! With only a week to go, I too am thinking about that deadline...

Some more progress on the Ark’s island:

The White Ensign photoetch set includes a delicate open funnel grill, so I opened up the solid kit funnel top to accept it. The grill was flat etched as a single piece, but the real grill was arched, so I cut the grill from the surrounding brass oval and formed gentle curves in the arms. Reattached over the oval, the grill now has a more accurate shape.

I’ve been trying my best to make as few alterations to the kit parts as possible, but the horribly thick catwalks with the molded on railings by the funnel just had to go. I replaced these with sheet plastic and White Ensign railing.

Also, because of the thick molding of the plastic kit parts, the insides of the shields on the platform decks were very shallow. To bring them closer to their proper height I carved away the decks and replaced them with .010 inch sheet plastic. This way if I add figures later they won’t tower over the bulwark sides.

So much for today - it is Mother's Day here in the U.S. , I'm off with mom to the gun range (really, that's what she likes to do for Mother's Day each year...)

JJ1973
#345
Visit this Community
Niedersachsen, Germany
Joined: August 22, 2011
KitMaker: 1,835 posts
Model Shipwrights: 1,832 posts
Posted: Monday, May 15, 2017 - 09:16 AM UTC
Very nice work and progress, Steve and Tim!! - you're really fighting hard to meet the deadline!!

Cheers,
Jan
JJ1973
#345
Visit this Community
Niedersachsen, Germany
Joined: August 22, 2011
KitMaker: 1,835 posts
Model Shipwrights: 1,832 posts
Posted: Monday, May 15, 2017 - 09:21 AM UTC
And some progress on my HMS Hood - but I'm out of the competition for meeting deadlines...

Wooden deck ist down, and some small stuff added - first inclined ladders to the lower bridge, and started with some structures form the shelter deck, partly because they were needed to see that the wooden deck is in the correct place.


Most of those will get tech replacements from Eduard - big improvement, I think!


First inclined ladders


Cheers,
Jan
TimReynaga
Staff MemberAssociate Editor
MODEL SHIPWRIGHTS
Visit this Community
California, United States
Joined: May 03, 2006
KitMaker: 2,500 posts
Model Shipwrights: 1,830 posts
Posted: Monday, May 15, 2017 - 09:33 AM UTC
Jan,

Hood is looking fantastic - those decks alone are really making the build stand out! And those etch replacement structures...awesome!

MichaelSatin
Staff MemberCampaigns Administrator
AEROSCALE
Visit this Community
Colorado, United States
Joined: January 19, 2008
KitMaker: 3,909 posts
Model Shipwrights: 255 posts
Posted: Monday, May 15, 2017 - 04:56 PM UTC
Everyone's work is really excellent here. But there's not much time left. Should I be asking for an extension? If so, how much?

Michael