

Welcome a board Rade,
Nice old kit you have there, good luck with your build.
Cheers
Si


Go to modelshipwrights.com for the current dynamic site!
Campaigns
Want to be part of a group build? This is where to start, plan, and meet about them.
Want to be part of a group build? This is where to start, plan, and meet about them.
Hosted by Jim Starkweather
Official: Sink the Bismarck Campaign

RedDuster

Joined: March 01, 2010
KitMaker: 7,078 posts
Model Shipwrights: 6,649 posts

Posted: Monday, September 05, 2016 - 02:06 PM UTC

Deranius

Joined: April 08, 2014
KitMaker: 60 posts
Model Shipwrights: 56 posts

Posted: Thursday, September 08, 2016 - 01:35 AM UTC
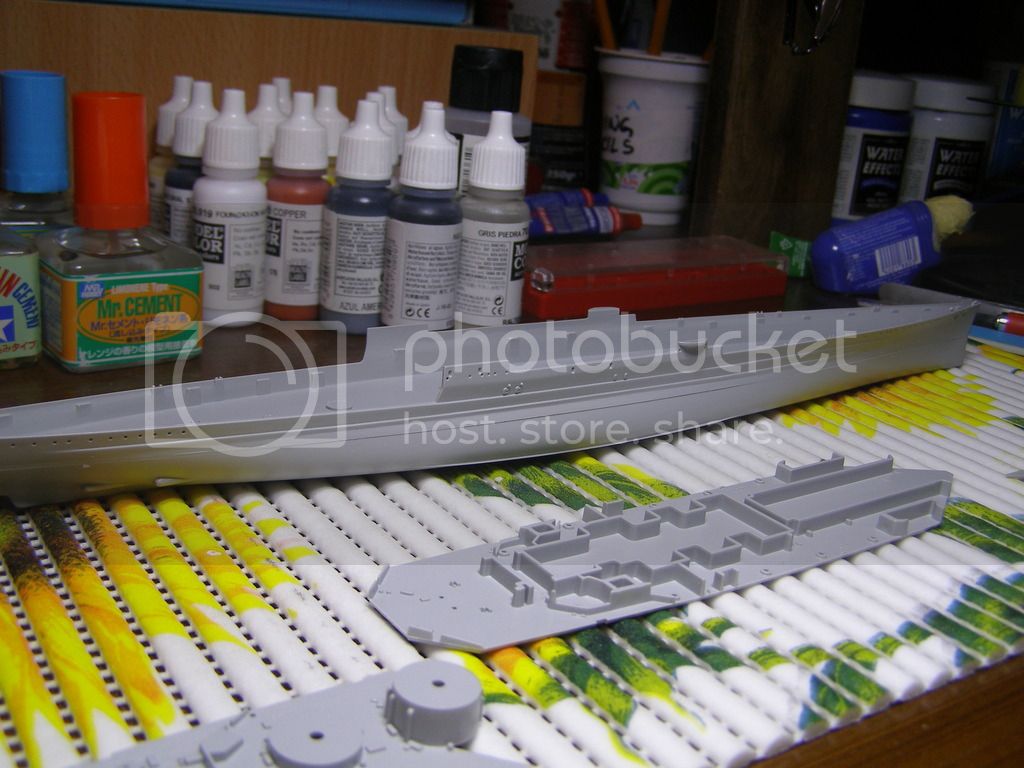
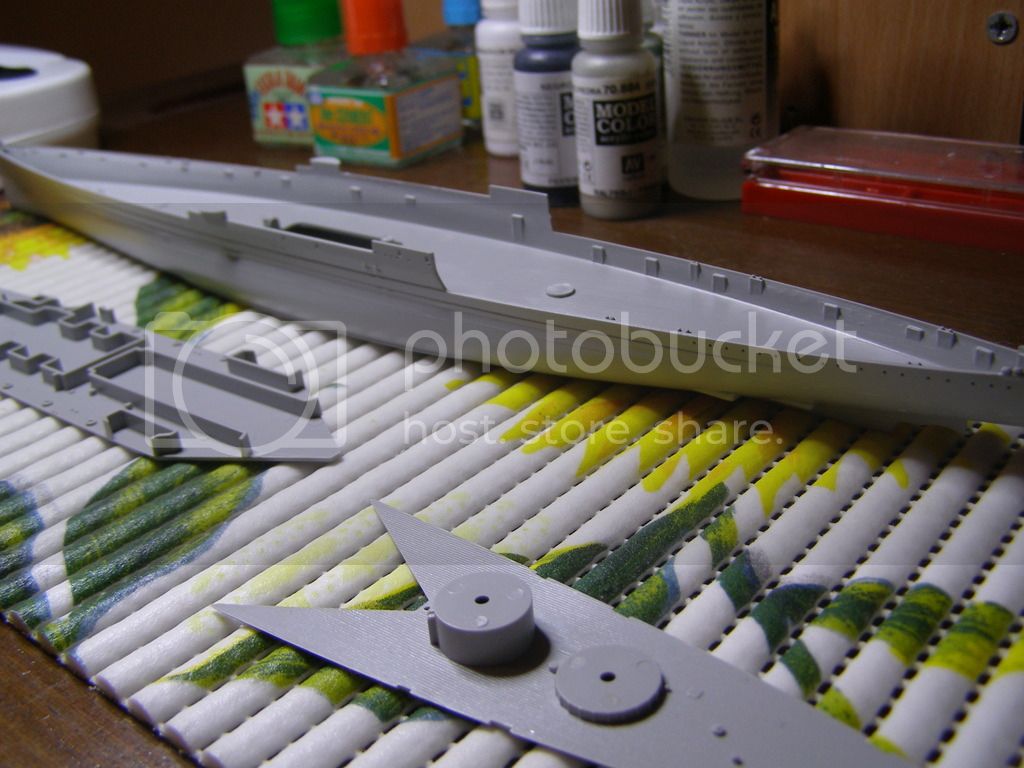
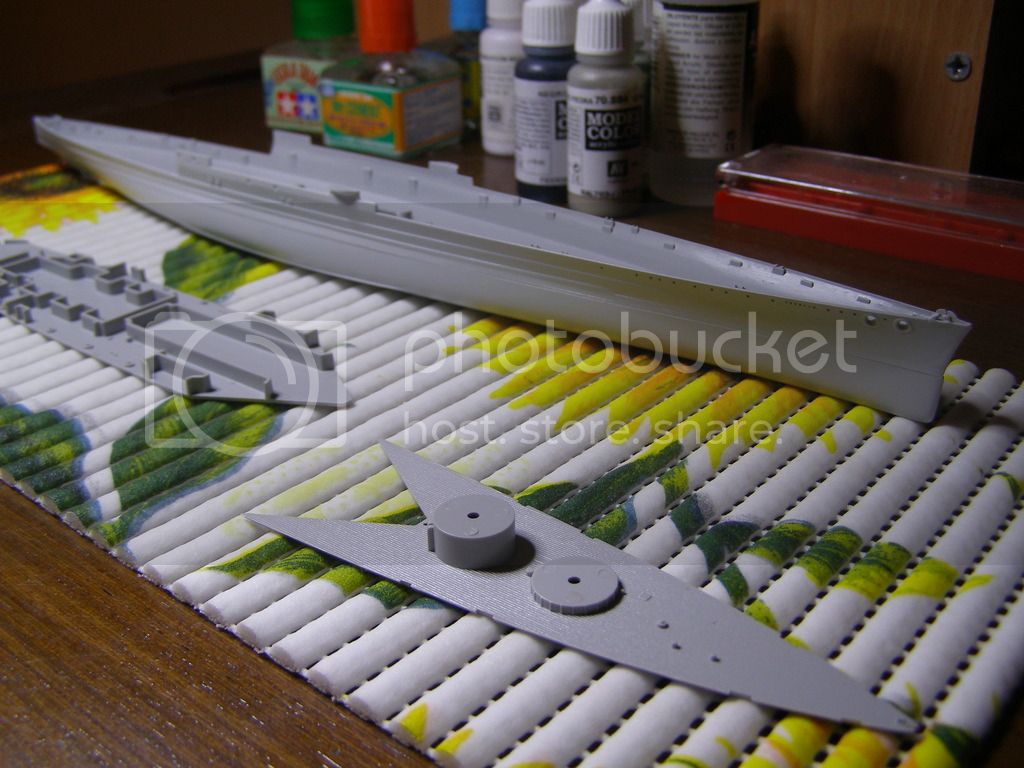
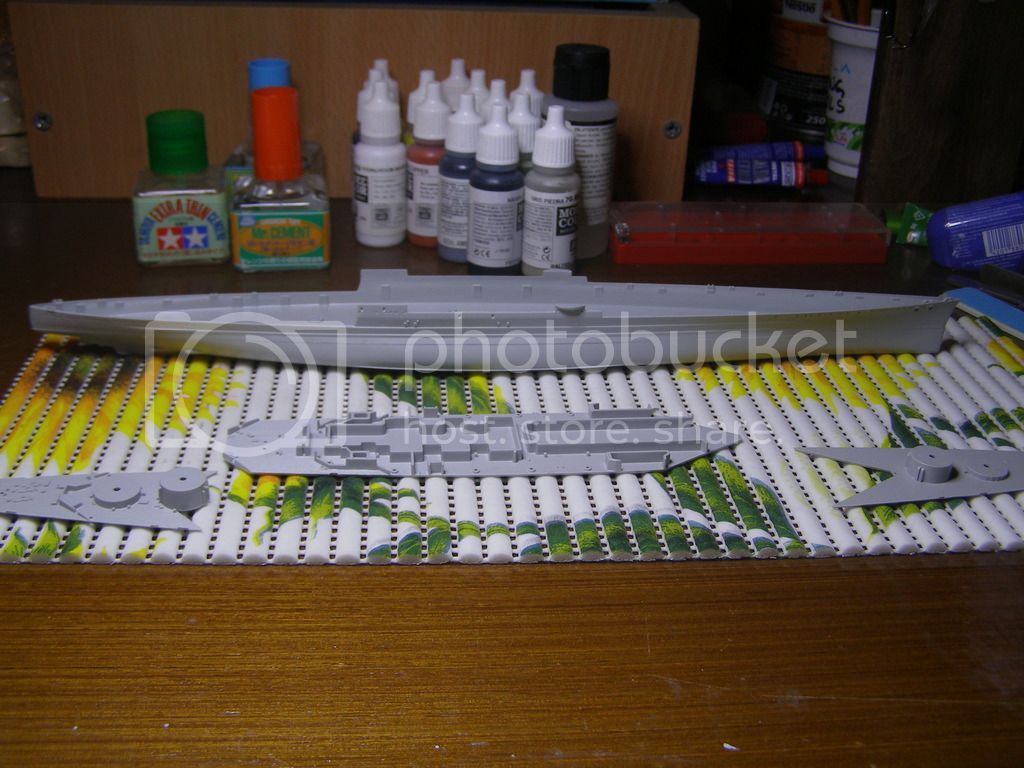
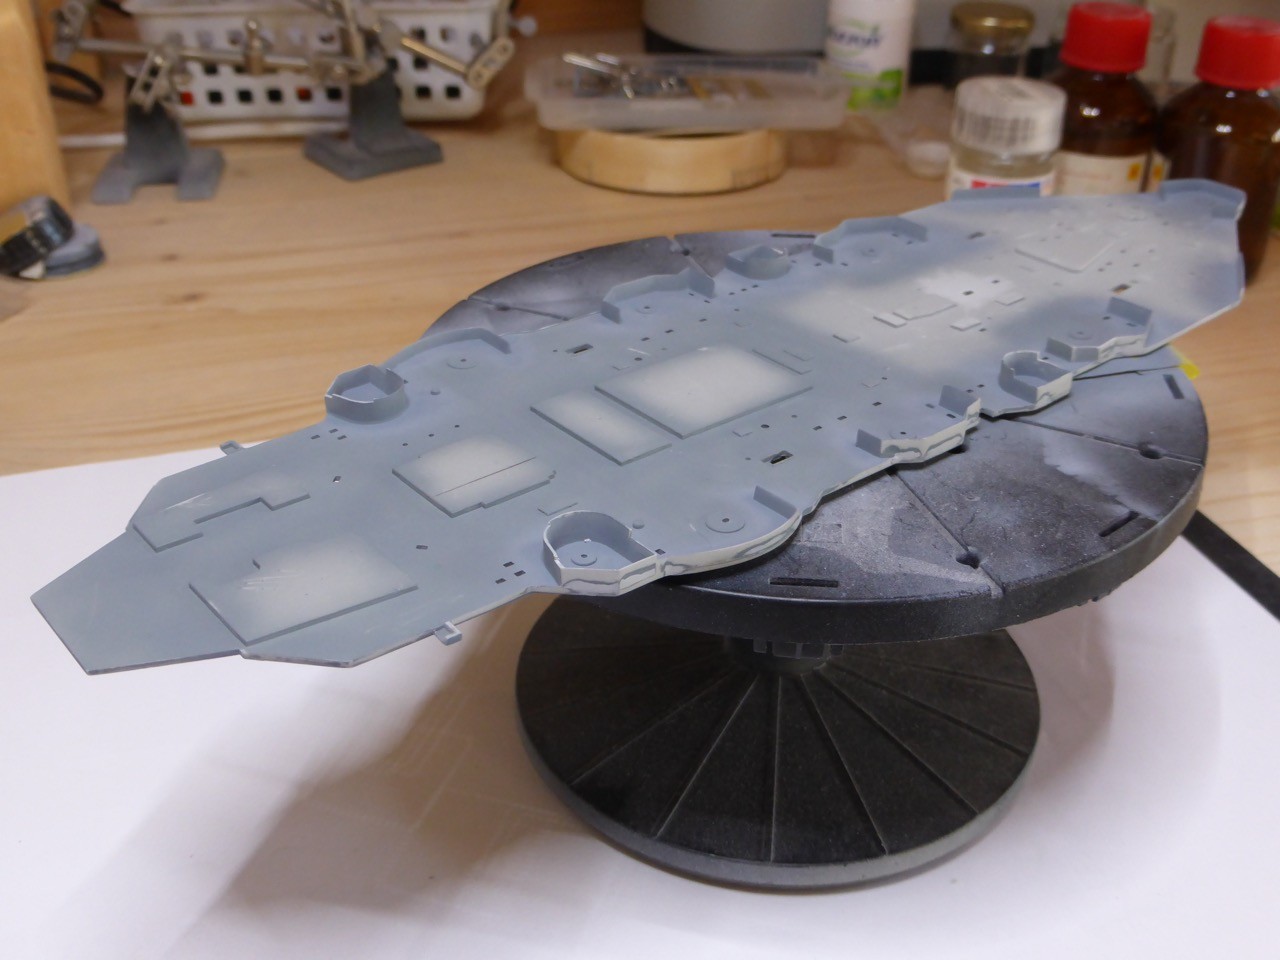
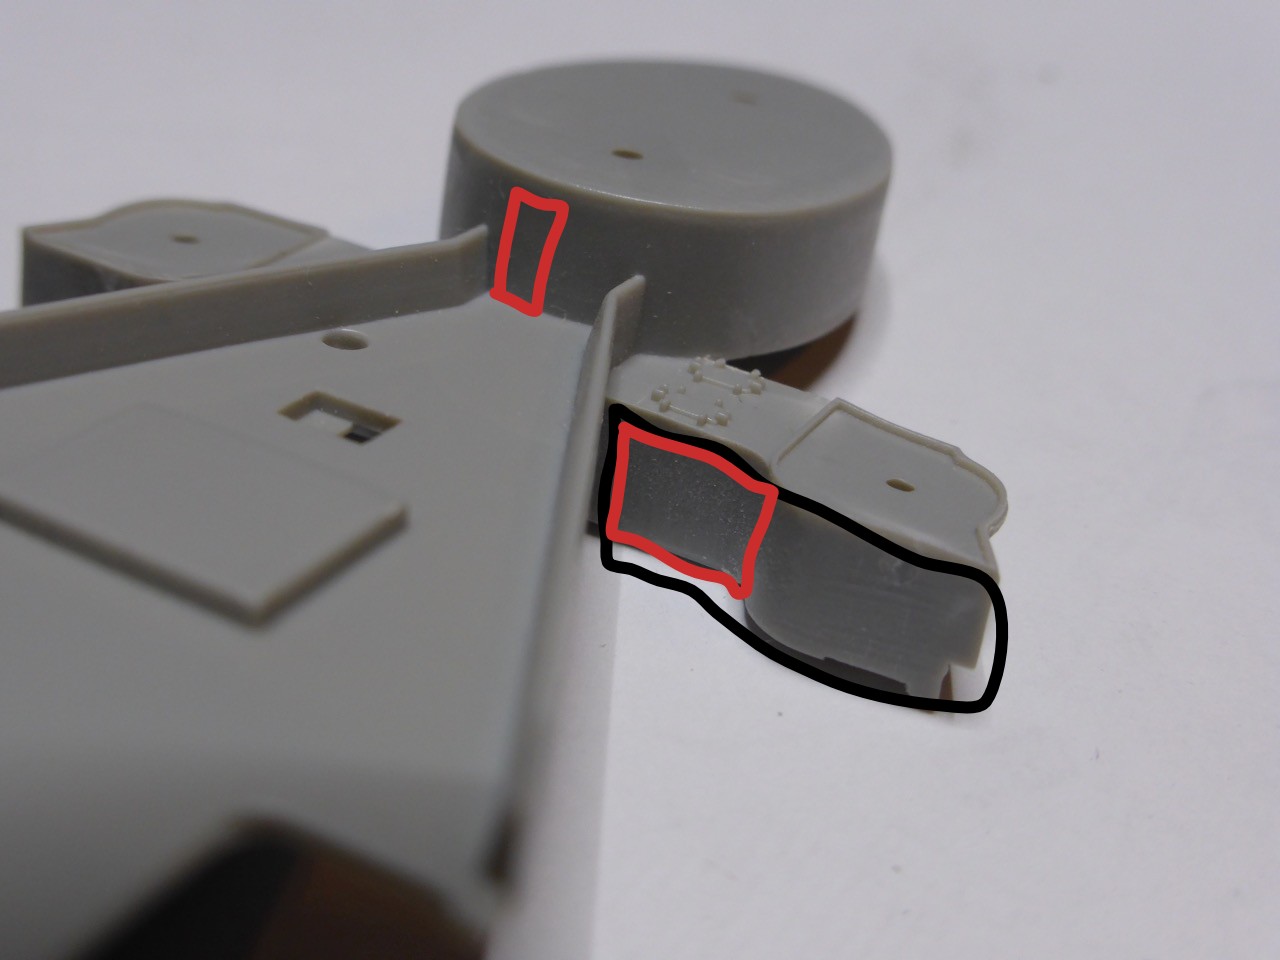
Small update on the Italeri Hood. The fit of the three-part hull is actually perfect, no oversize of either upper or lower half (it appeared that there is a difference of 2-3 mm during dry-fit check because lower hull - underwater part was bent from mold ejectors). Lower hull actually comes in two parts (port and starboard halves) which complicates the assembly a little in terms of proper alignment. Anyhow here are the pics...


RedDuster
Joined: March 01, 2010
KitMaker: 7,078 posts
Model Shipwrights: 6,649 posts
Posted: Thursday, September 08, 2016 - 11:07 PM UTC
Nice start Rade,
For it's age that kit does go together rather well.
Looking forward to more progress.
Cheers
Si
For it's age that kit does go together rather well.
Looking forward to more progress.
Cheers
Si
Deranius
Joined: April 08, 2014
KitMaker: 60 posts
Model Shipwrights: 56 posts
Posted: Thursday, September 08, 2016 - 11:24 PM UTC
More progress after the weekend as I'm not home for the weekend...

JJ1973

#345

Joined: August 22, 2011
KitMaker: 1,835 posts
Model Shipwrights: 1,832 posts

Posted: Saturday, September 10, 2016 - 10:28 PM UTC
Rade,
the general setup of the Italeri kit doesn't look to bad - way better at least than the 1/400 Hood from Heller that I did OOB some years ago...
Cheers,
Jan
the general setup of the Italeri kit doesn't look to bad - way better at least than the 1/400 Hood from Heller that I did OOB some years ago...
Cheers,
Jan
RedDuster
Joined: March 01, 2010
KitMaker: 7,078 posts
Model Shipwrights: 6,649 posts
Posted: Monday, September 12, 2016 - 01:20 AM UTC
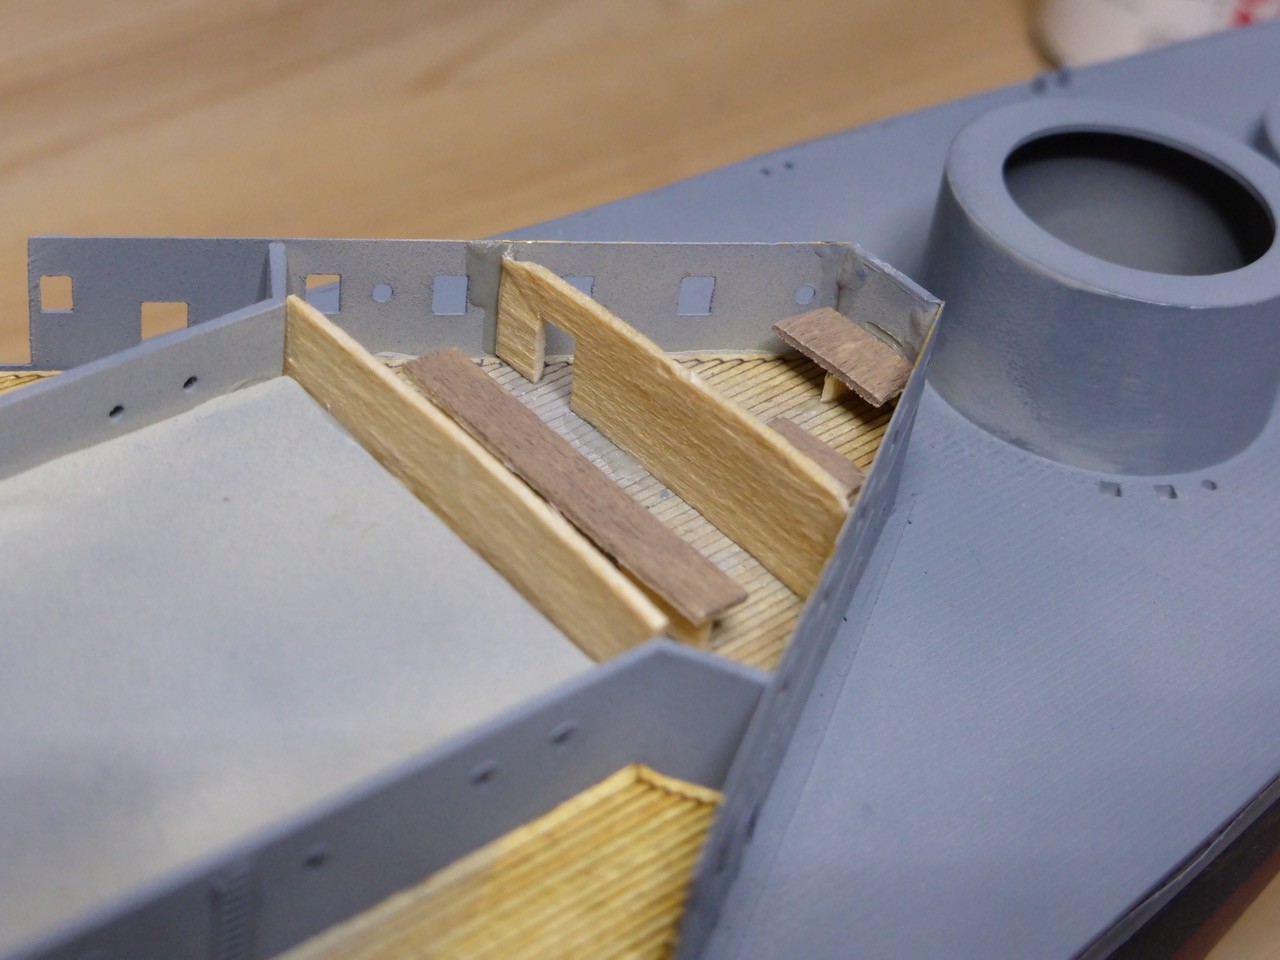
This weekend's progress.
Ground tackle in place.
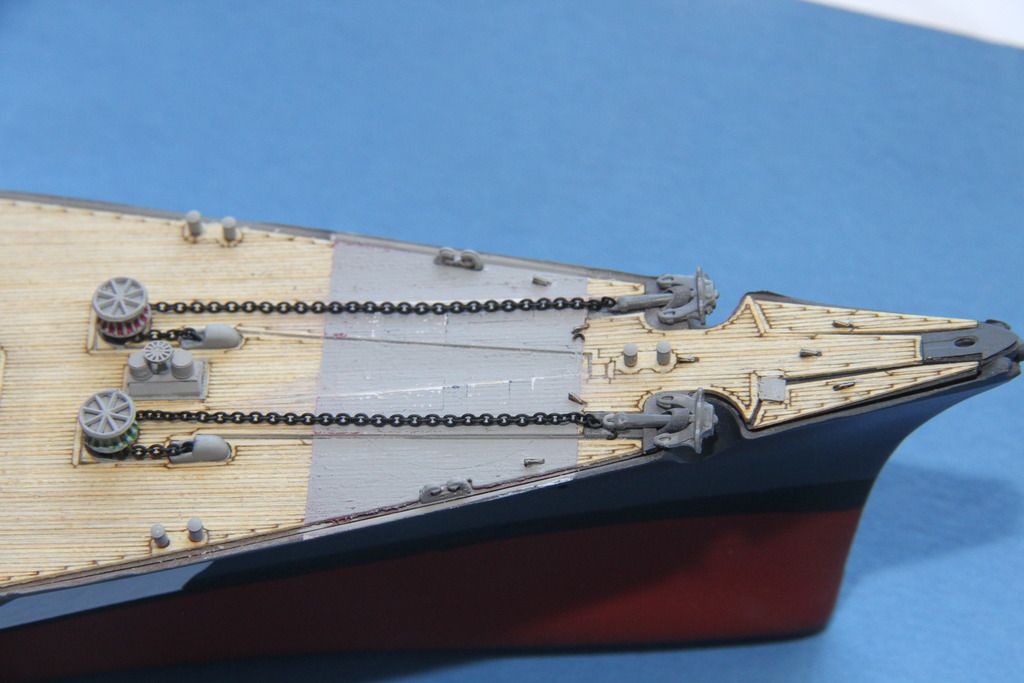
chain stoppers still to do.
Catapults test fiited.

End pieces for the cats assembled.

work under way on the signal platform at the base of the mainmast.

The kit components are on the left.
Cheers
Si
Ground tackle in place.

chain stoppers still to do.
Catapults test fiited.

End pieces for the cats assembled.

work under way on the signal platform at the base of the mainmast.

The kit components are on the left.
Cheers
Si
Deranius
Joined: April 08, 2014
KitMaker: 60 posts
Model Shipwrights: 56 posts
Posted: Monday, September 12, 2016 - 03:10 AM UTC
Quoted Text
Rade,
the general setup of the Italeri kit doesn't look to bad - way better at least than the 1/400 Hood from Heller that I did OOB some years ago...
Cheers,
Jan
As far as I read the reviews it is in the top three kits in the 1/700 scale (with Tamiya and Trumpeter).
Si, your build leaves me breathless so far... Keep up the great work.
JJ1973
#345
Joined: August 22, 2011
KitMaker: 1,835 posts
Model Shipwrights: 1,832 posts
Posted: Monday, September 12, 2016 - 09:18 AM UTC
Nice work, Si!!
And a little progress on the mighty Hood, more details on that as usually on my separate build log.
Parts of the wooden deck down on areas that will be 'inside' eventually:
Degaussing cable back on, and the eyelids to the portholes restored by PE:
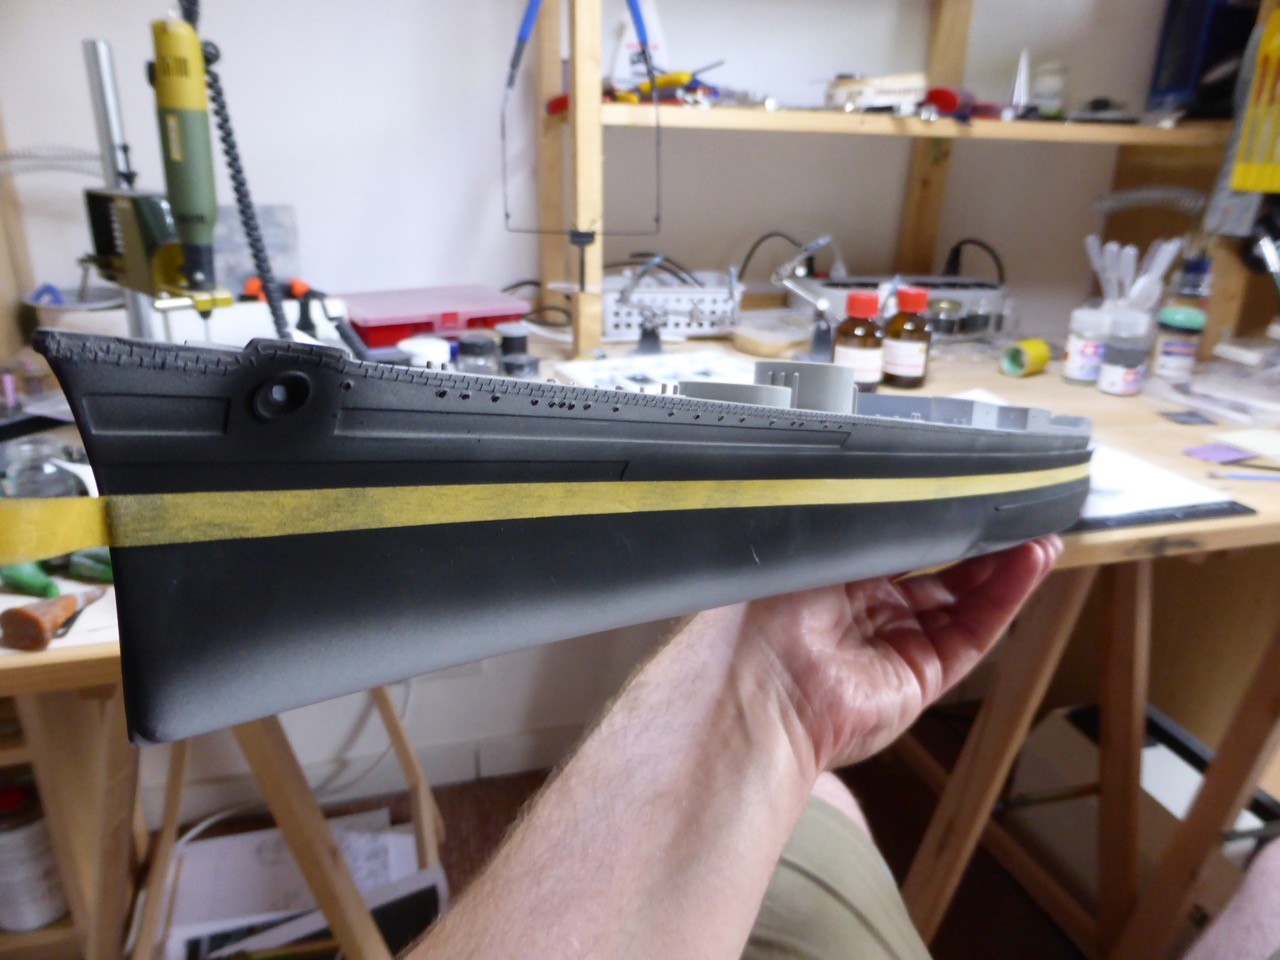
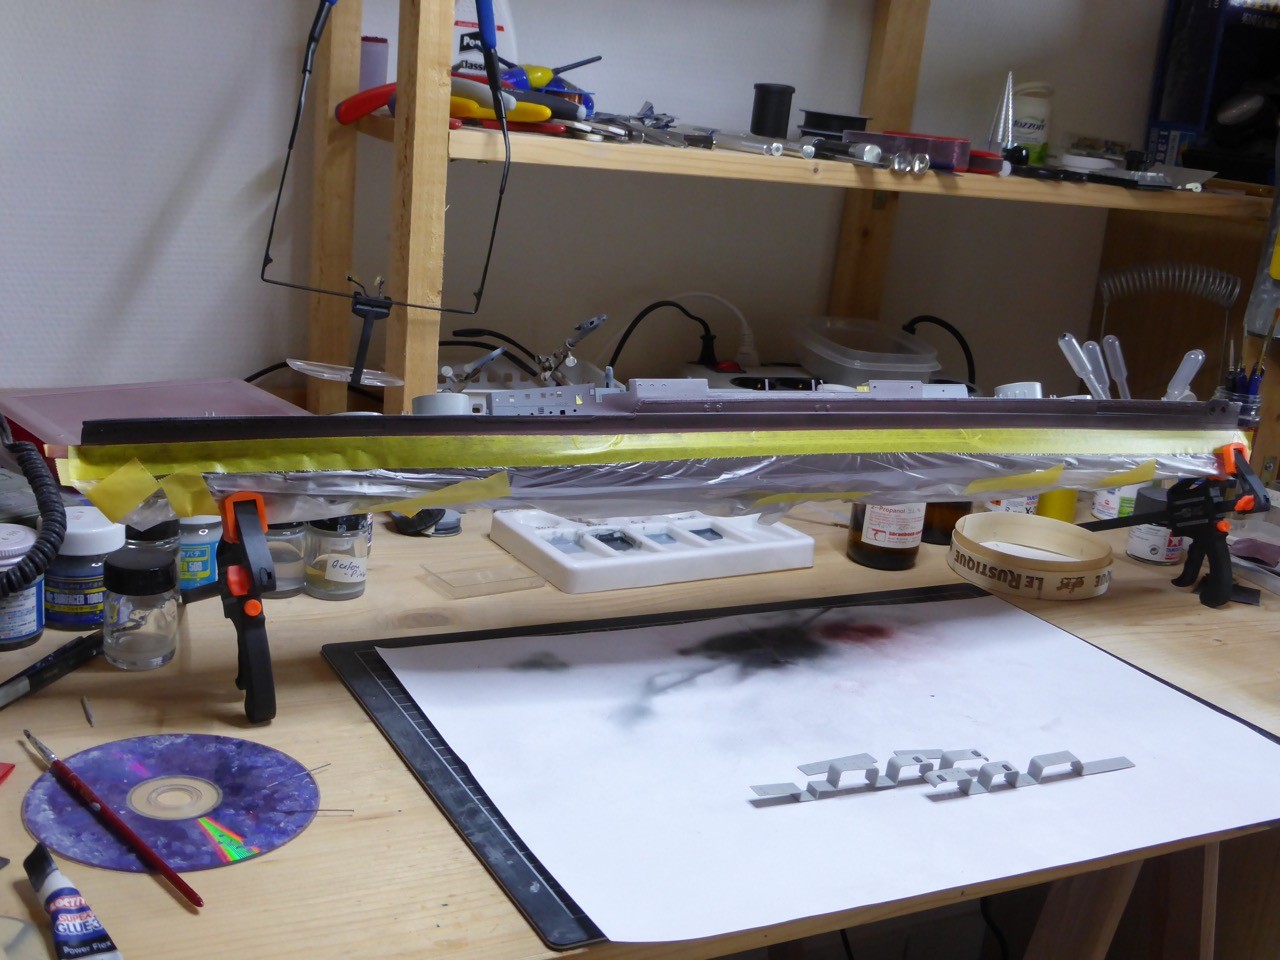
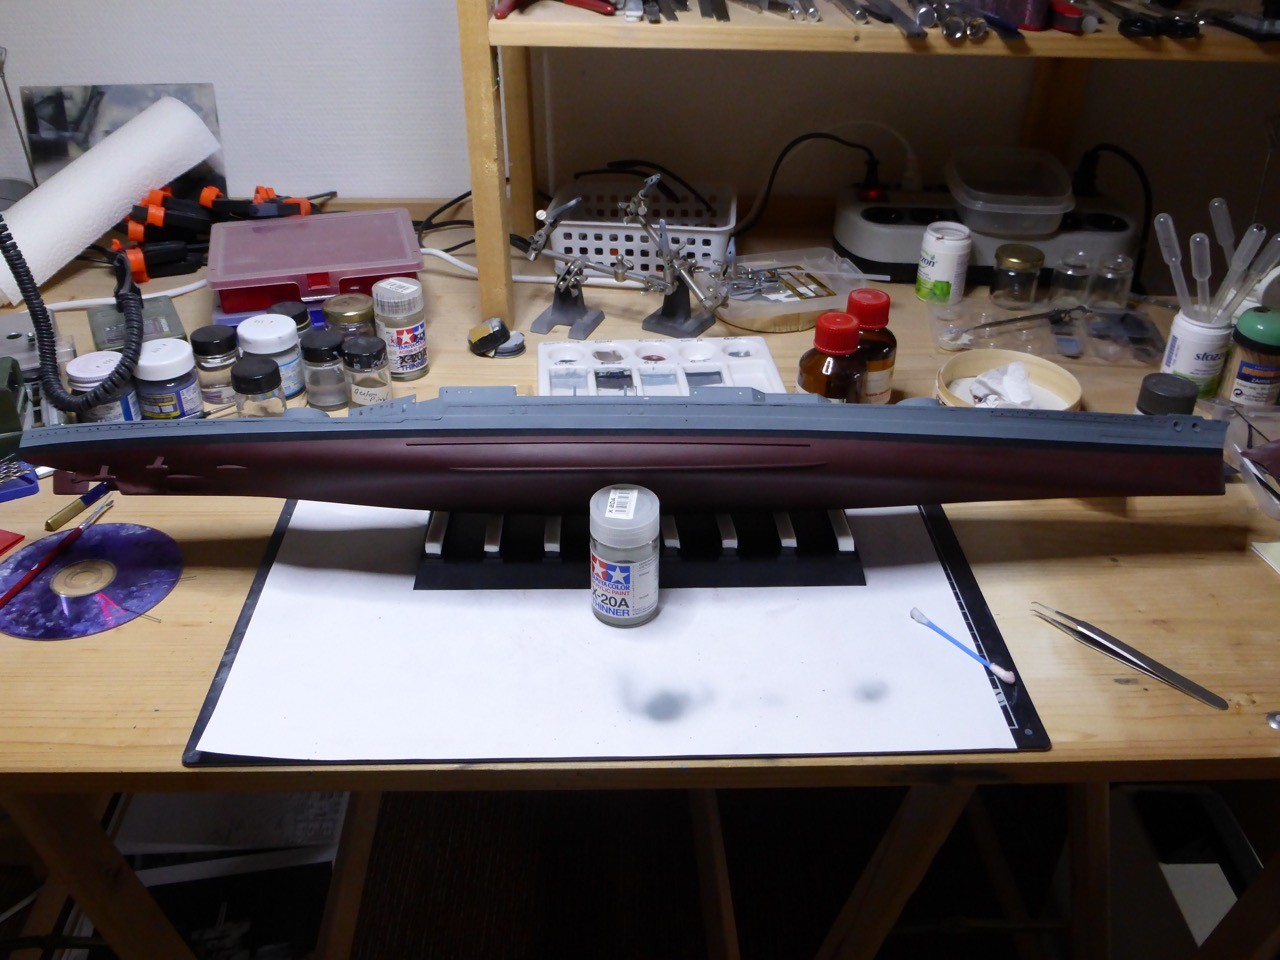
Preparations to get the boot topping down. My way of doing it: paint a broad black stripe and mask the boot topping wit 6 mm tape.
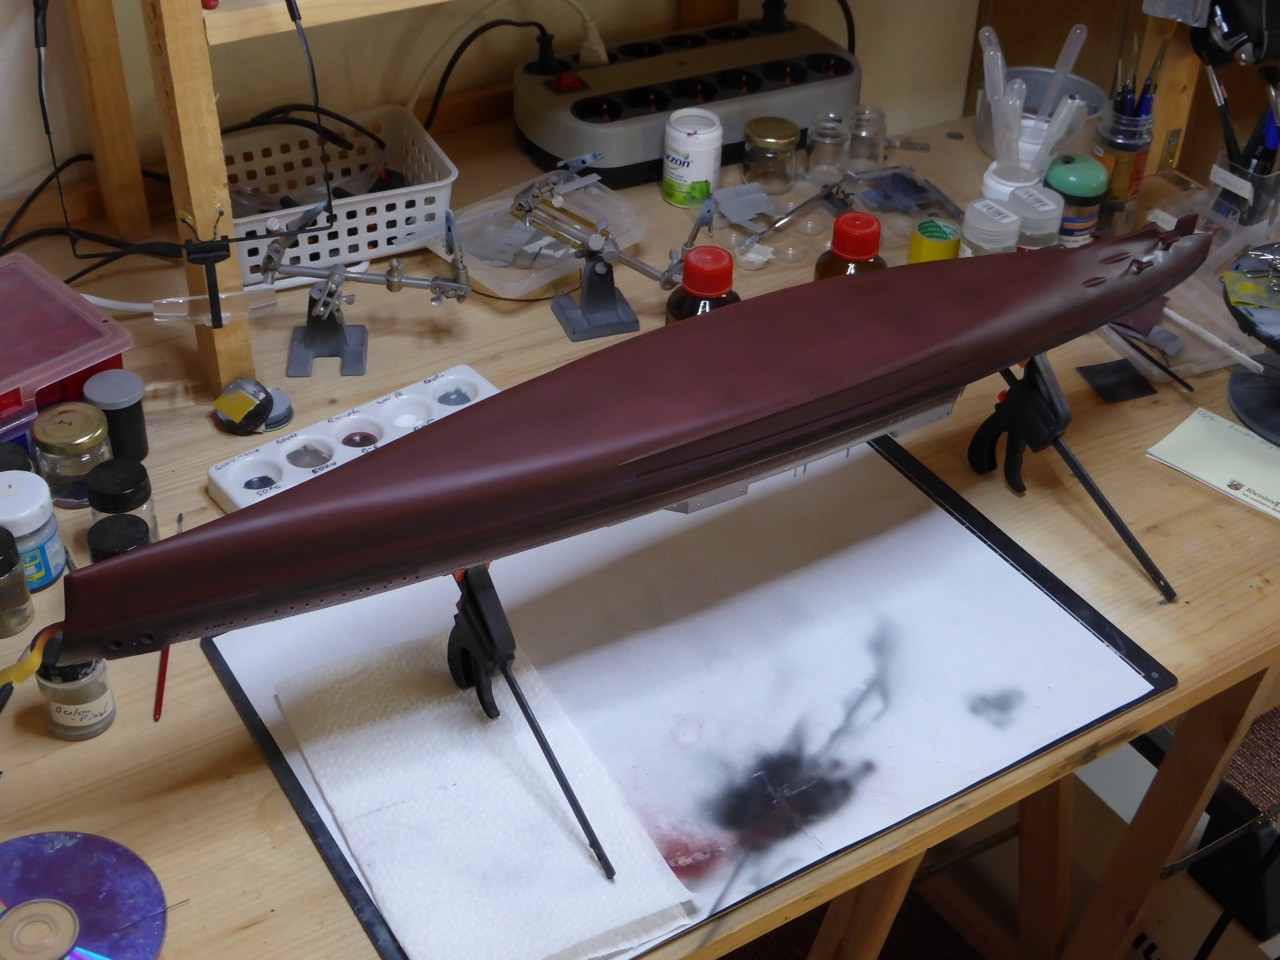
And finally the lower hull sprayed hull red:
Finally called the endless filling/sanding procedure done and moving ahead - that really feels good!! More next week,
Cheers,
Jan
And a little progress on the mighty Hood, more details on that as usually on my separate build log.
Parts of the wooden deck down on areas that will be 'inside' eventually:
Degaussing cable back on, and the eyelids to the portholes restored by PE:
Preparations to get the boot topping down. My way of doing it: paint a broad black stripe and mask the boot topping wit 6 mm tape.
And finally the lower hull sprayed hull red:
Finally called the endless filling/sanding procedure done and moving ahead - that really feels good!! More next week,
Cheers,
Jan
RedDuster
Joined: March 01, 2010
KitMaker: 7,078 posts
Model Shipwrights: 6,649 posts
Posted: Tuesday, September 13, 2016 - 12:13 AM UTC
Thanks Jan,
Pretty cool job you are doing yourself mate.
Cheers
Si
Pretty cool job you are doing yourself mate.
Cheers
Si
Deranius
Joined: April 08, 2014
KitMaker: 60 posts
Model Shipwrights: 56 posts
Posted: Tuesday, September 13, 2016 - 01:38 AM UTC
Jan,
You've made some nice progress there and next to your kit and level of detail I am almost ashamed to post my Hood in the same topic...
You've made some nice progress there and next to your kit and level of detail I am almost ashamed to post my Hood in the same topic...
JJ1973
#345
Joined: August 22, 2011
KitMaker: 1,835 posts
Model Shipwrights: 1,832 posts
Posted: Saturday, September 17, 2016 - 11:11 PM UTC
Rade and Si,
thank you very much!! Rade, definitely no reason for that, you are doing a fine job, and 1 / 350 kits naturally are different and allow different detailing than 1 / 700 scale. I couldn't build 1 / 700, just too small for my fingers and my eyesight...
Here's what I've accomplished this weekend, the long story as always on the separate build log.
Masking the lower hull:
Masking removed, the hull painted. Some touch ups remain to be done, of course.

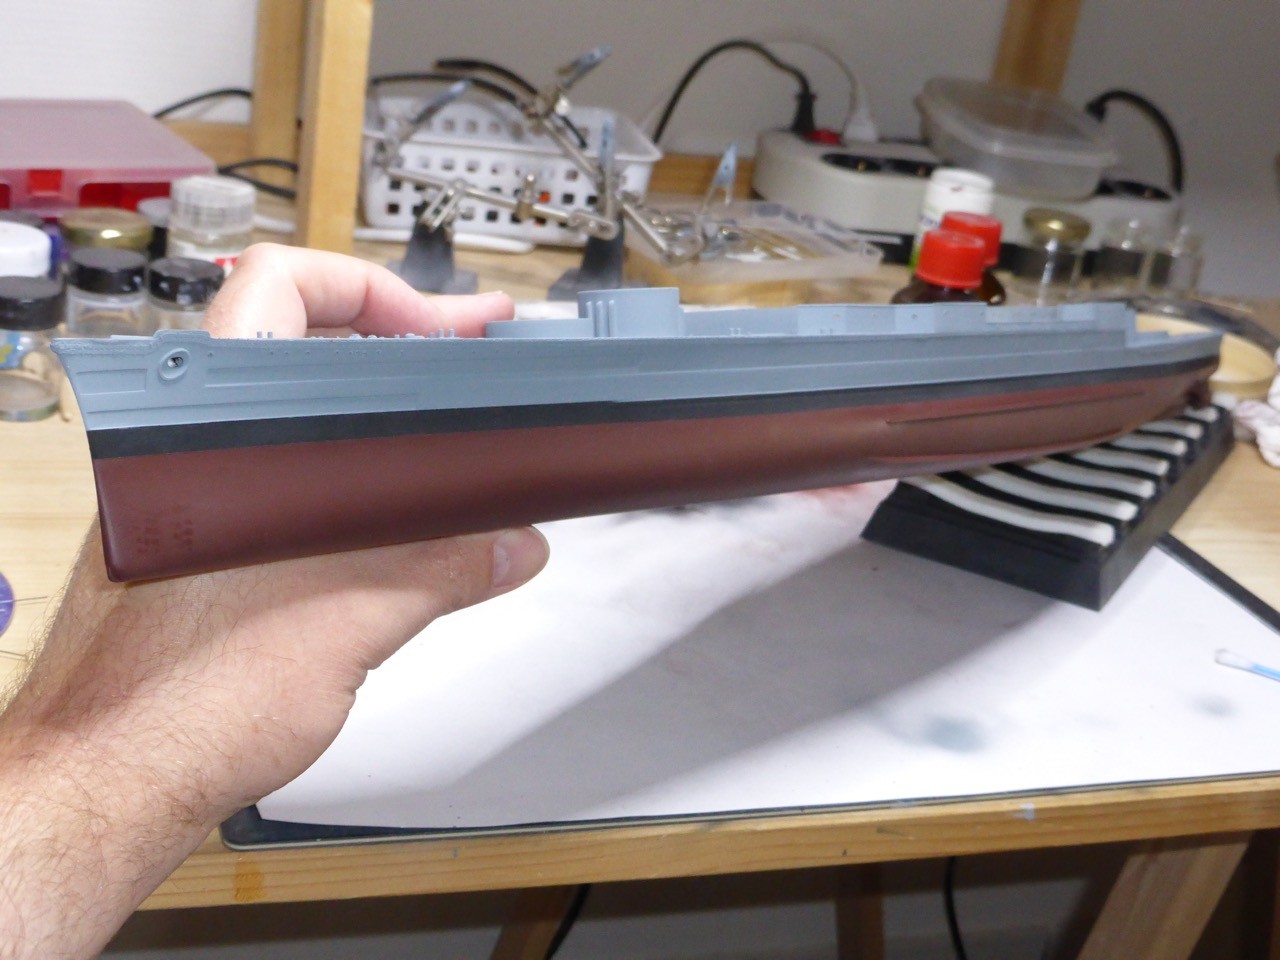
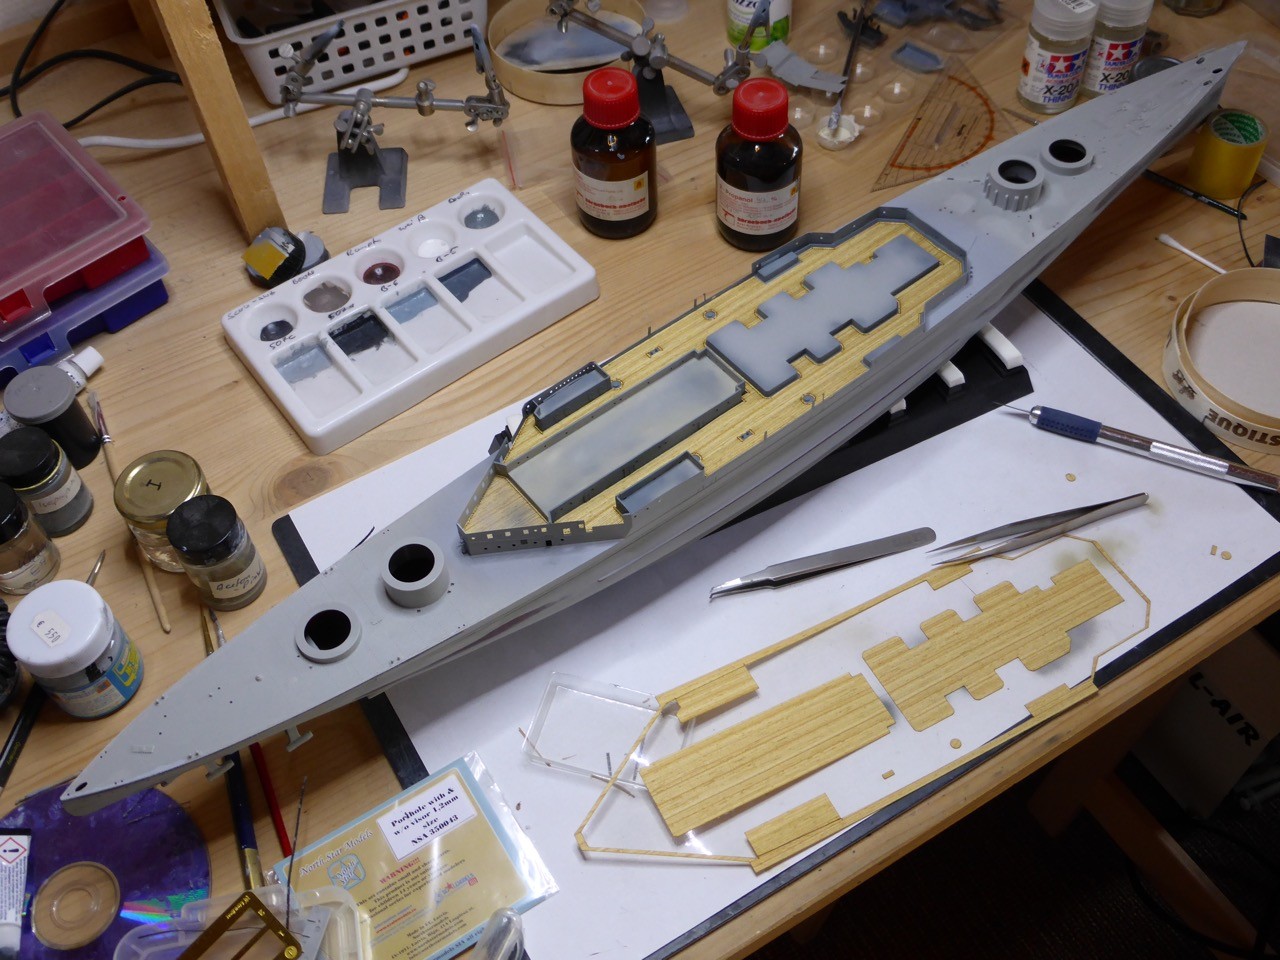
Some work on the 'inner forecastle area', some details to the Admiral's cabin and test-fitting the boat deck.
The boat deck will require some extensive work - the basic fit is quite good, but to get it flush, as good as possible, with the bulkheads below will be interesting. More about that next week - I hope I can show you some progress about that than...
For now that's about where I am at:
For now,
Cheers,
Jan
thank you very much!!
Rade, definitely no reason for that, you are doing a fine job, and 1 / 350 kits naturally are different and allow different detailing than 1 / 700 scale. I couldn't build 1 / 700, just too small for my fingers and my eyesight...Here's what I've accomplished this weekend, the long story as always on the separate build log.
Masking the lower hull:
Masking removed, the hull painted. Some touch ups remain to be done, of course.
Some work on the 'inner forecastle area', some details to the Admiral's cabin and test-fitting the boat deck.
The boat deck will require some extensive work - the basic fit is quite good, but to get it flush, as good as possible, with the bulkheads below will be interesting. More about that next week - I hope I can show you some progress about that than...
For now that's about where I am at:
For now,
Cheers,
Jan
RedDuster
Joined: March 01, 2010
KitMaker: 7,078 posts
Model Shipwrights: 6,649 posts
Posted: Sunday, September 18, 2016 - 12:36 AM UTC
Nice adding interior to the Flag Quarters, always adds a bit of depth. Good luck getting the boat deck down,
Looking forward to seeing more progress.
Cheers
Si
Looking forward to seeing more progress.
Cheers
Si
RedDuster
Joined: March 01, 2010
KitMaker: 7,078 posts
Model Shipwrights: 6,649 posts
Posted: Monday, September 19, 2016 - 01:15 AM UTC
Work this weekend.
The signal platform completed.
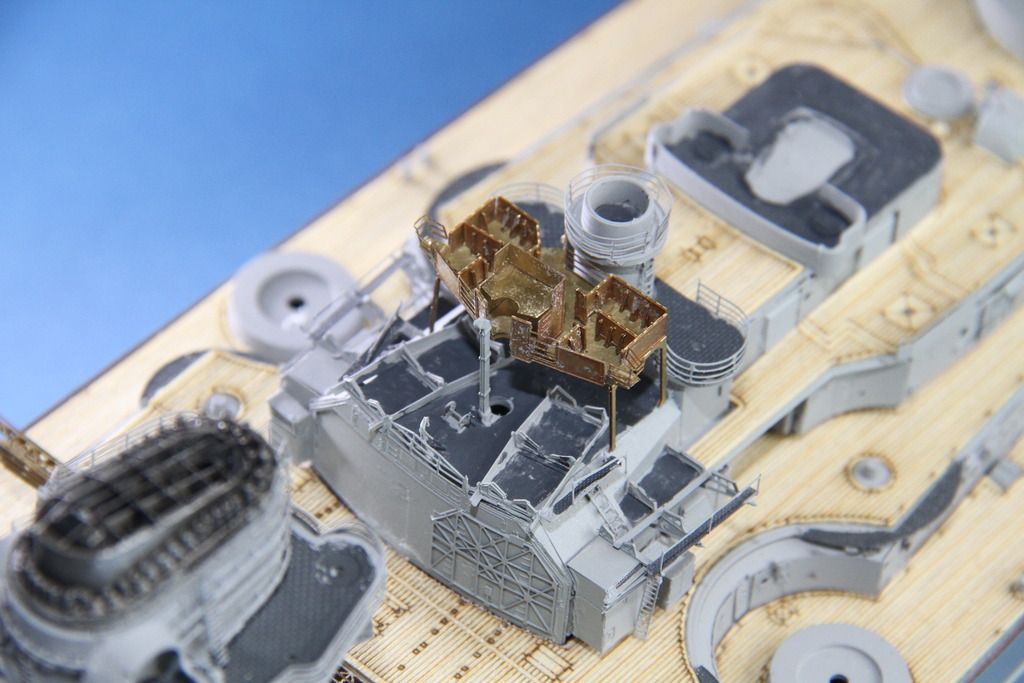
Some more of the bridge structure assembled.

More soon,
Si
The signal platform completed.

Some more of the bridge structure assembled.

More soon,
Si
JJ1973
#345
Joined: August 22, 2011
KitMaker: 1,835 posts
Model Shipwrights: 1,832 posts
Posted: Monday, September 19, 2016 - 09:01 AM UTC
Very nice work on the signal platform, Si! Looks outstanding!!
PE origami at its best!
Cheers,
Jan
PE origami at its best!
Cheers,
Jan
Deranius
Joined: April 08, 2014
KitMaker: 60 posts
Model Shipwrights: 56 posts
Posted: Wednesday, September 21, 2016 - 03:20 AM UTC
Guys you make hell of a progress, hopefully I'll try to catch up with you during weekend. 
JJ1973
#345
Joined: August 22, 2011
KitMaker: 1,835 posts
Model Shipwrights: 1,832 posts
Posted: Saturday, September 24, 2016 - 10:08 PM UTC
Hi all,
some more work on the mighty Hood done this weekend.
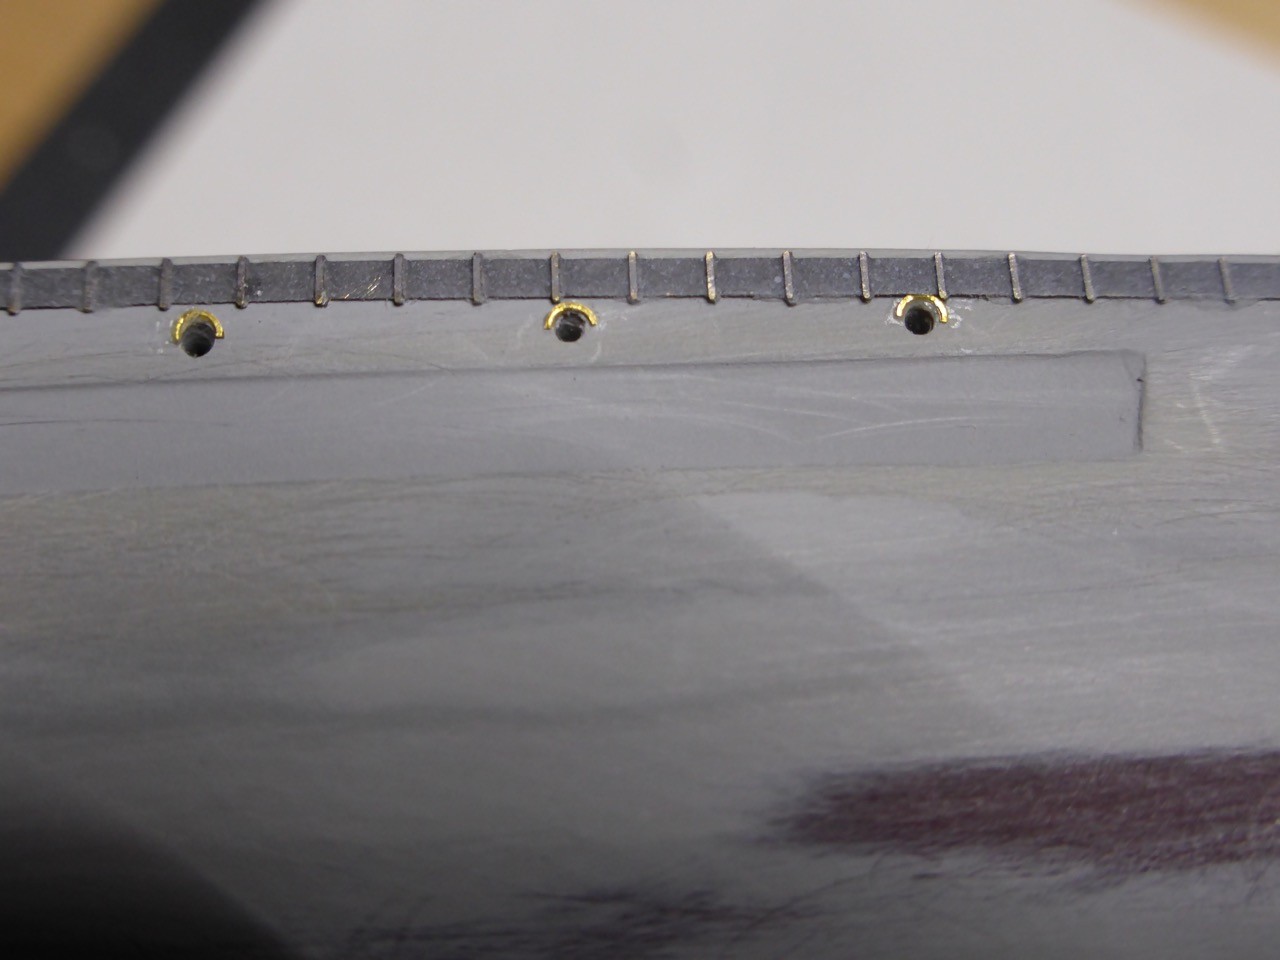
Missed some PE and fixed some portholes
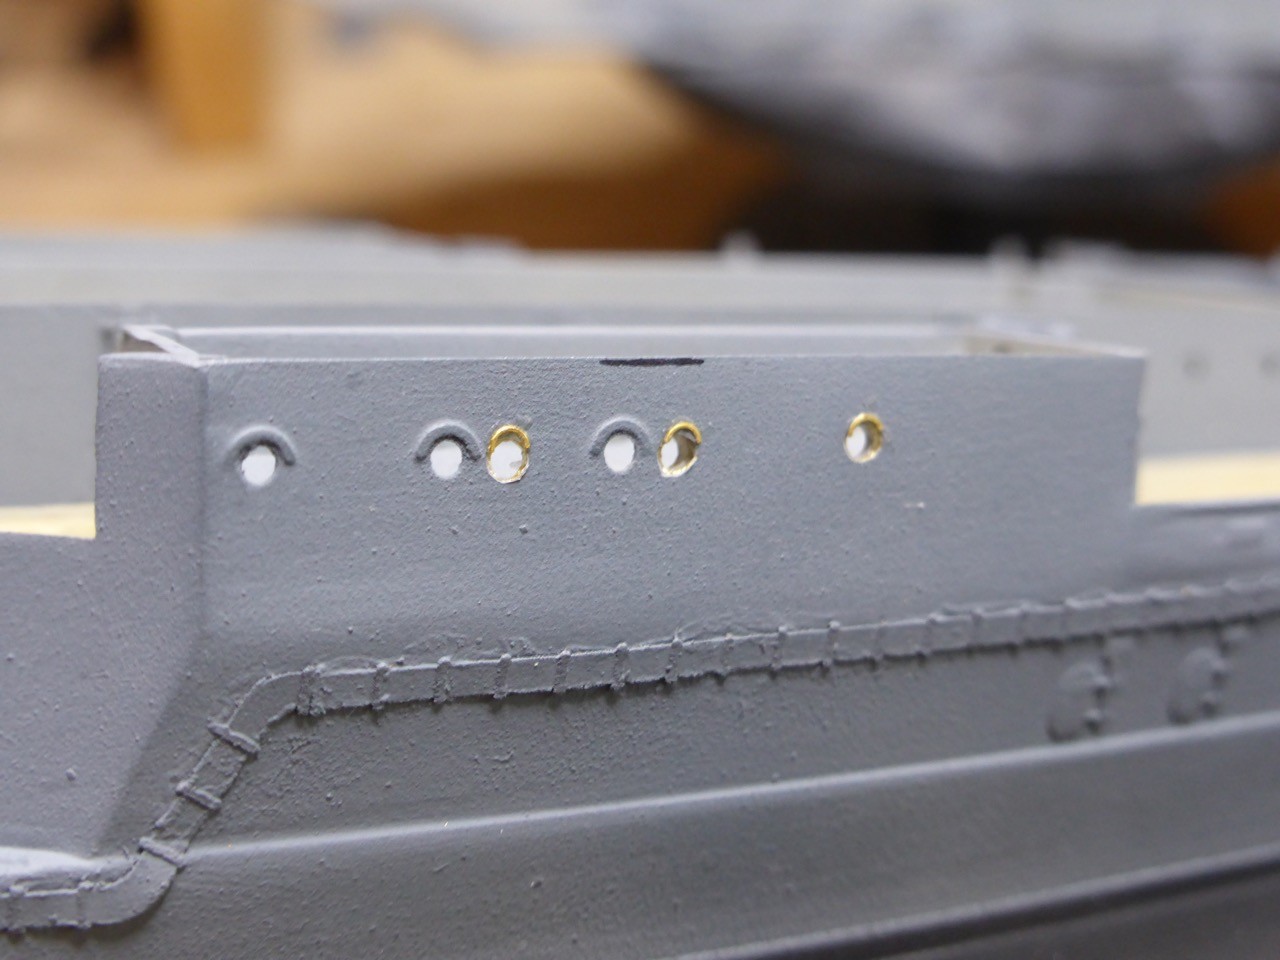
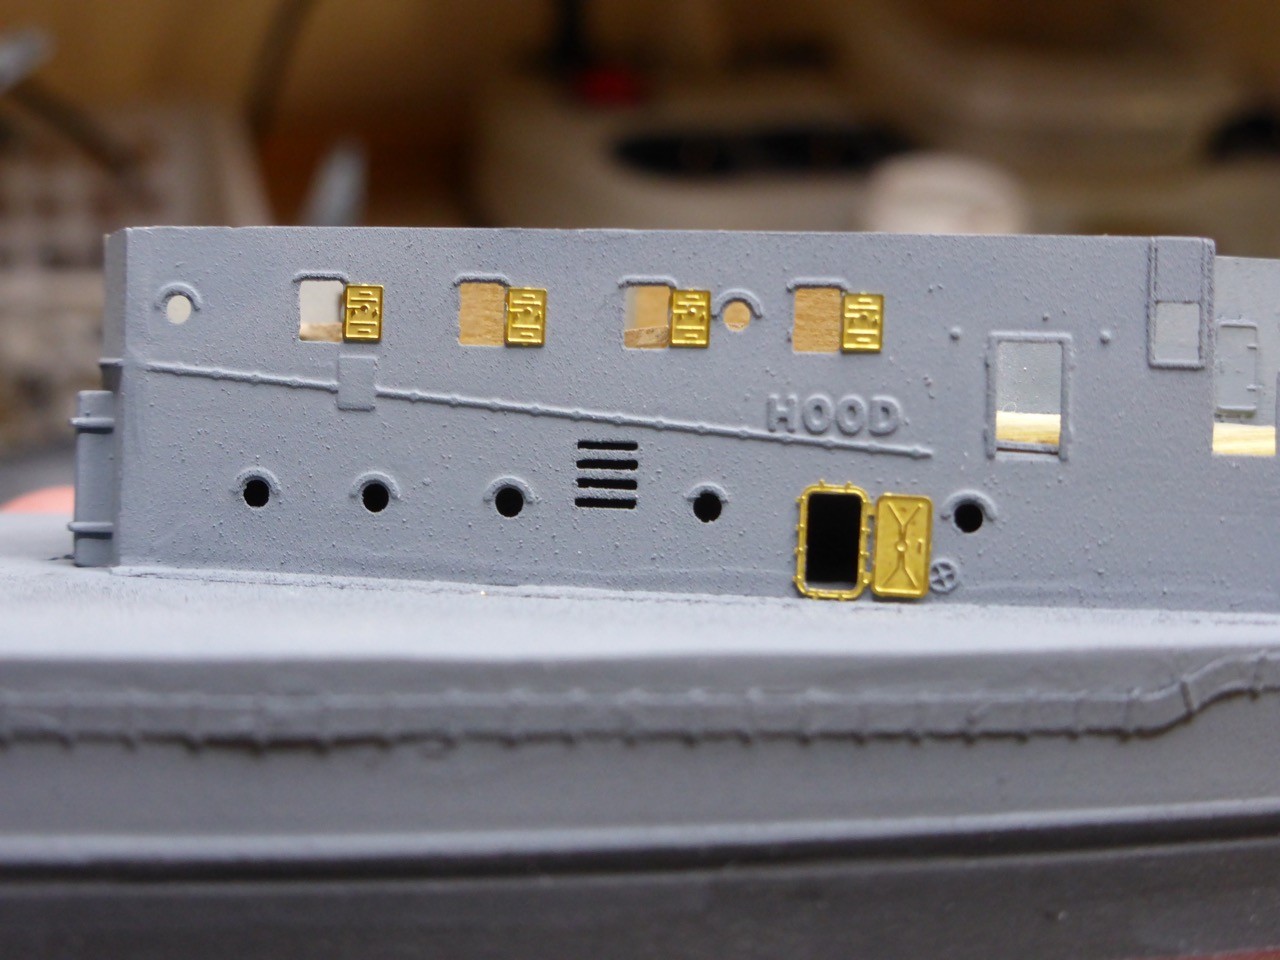
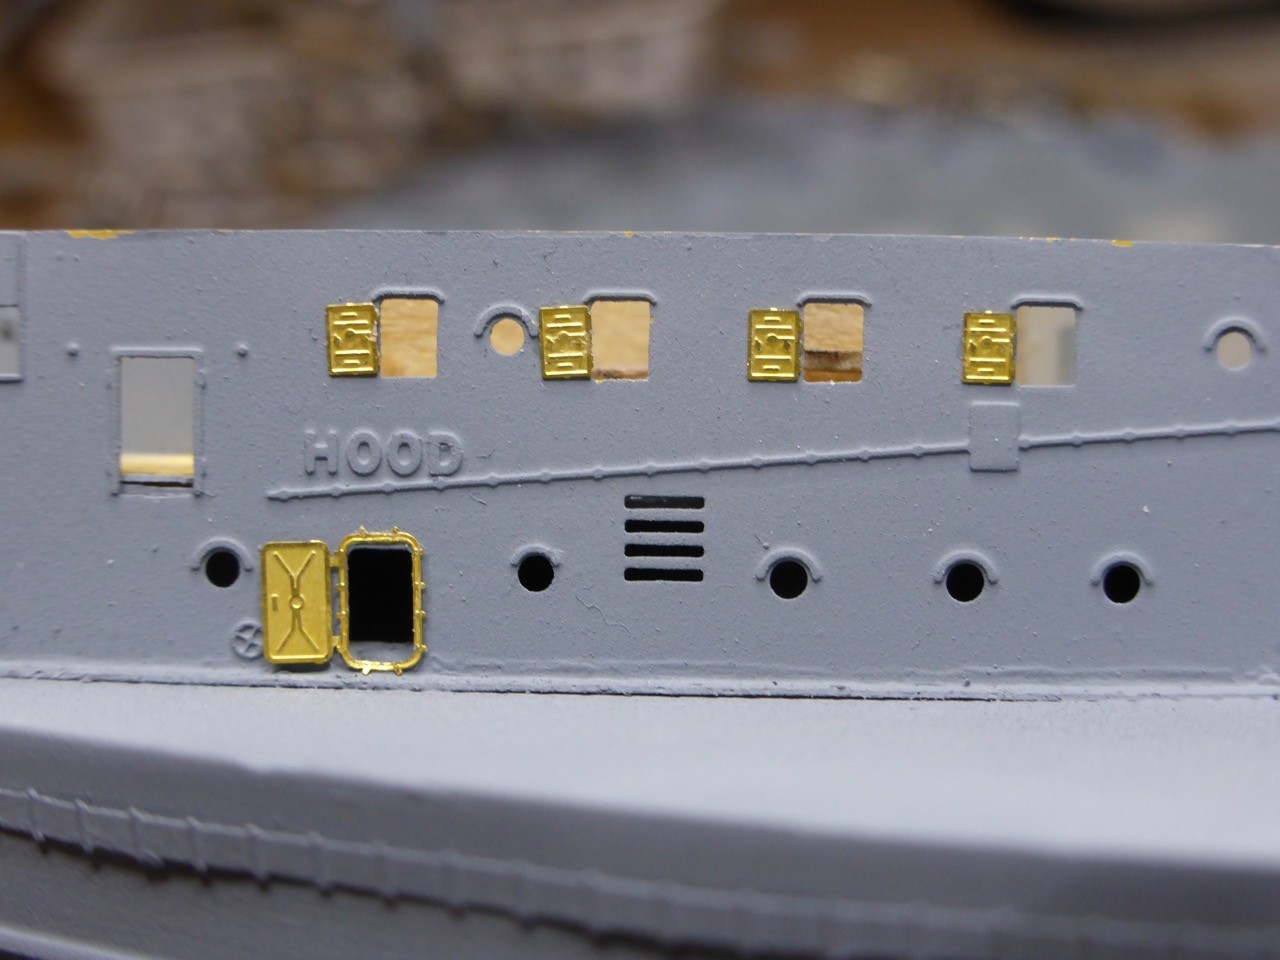
Some work on the shelter deck
and the shelter deck glued in place. Now the next round of filling and sanding will begin...
Cheers,
Jan
some more work on the mighty Hood done this weekend.
Missed some PE and fixed some portholes
Some work on the shelter deck
and the shelter deck glued in place. Now the next round of filling and sanding will begin...
Cheers,
Jan
RedDuster
Joined: March 01, 2010
KitMaker: 7,078 posts
Model Shipwrights: 6,649 posts
Posted: Tuesday, September 27, 2016 - 12:25 AM UTC
Very nice work indeed Jan,
Good luck with the filing and filling.
Cheers
Si
Good luck with the filing and filling.
Cheers
Si
RedDuster
Joined: March 01, 2010
KitMaker: 7,078 posts
Model Shipwrights: 6,649 posts
Posted: Tuesday, September 27, 2016 - 12:32 AM UTC
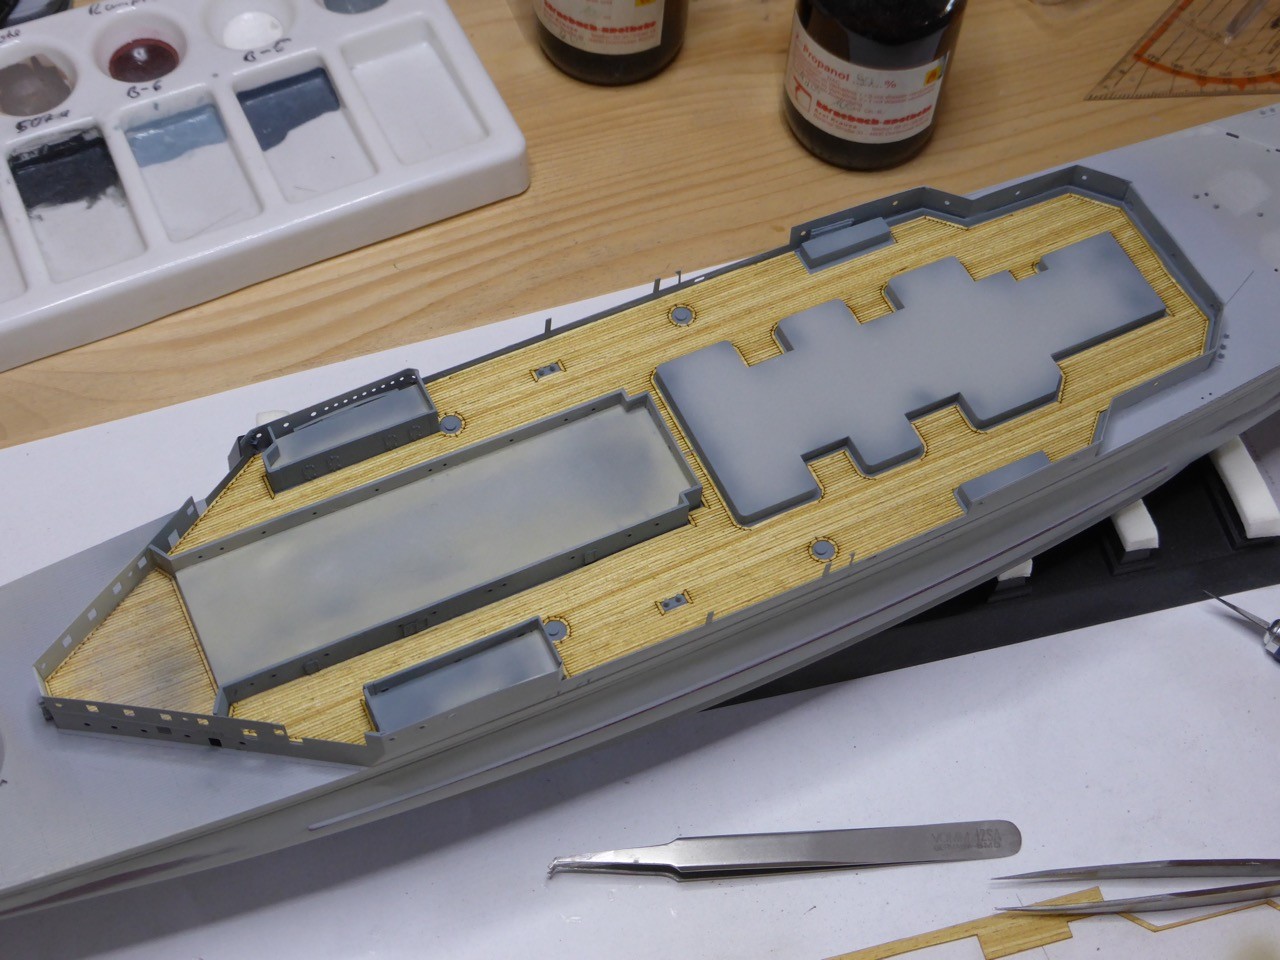
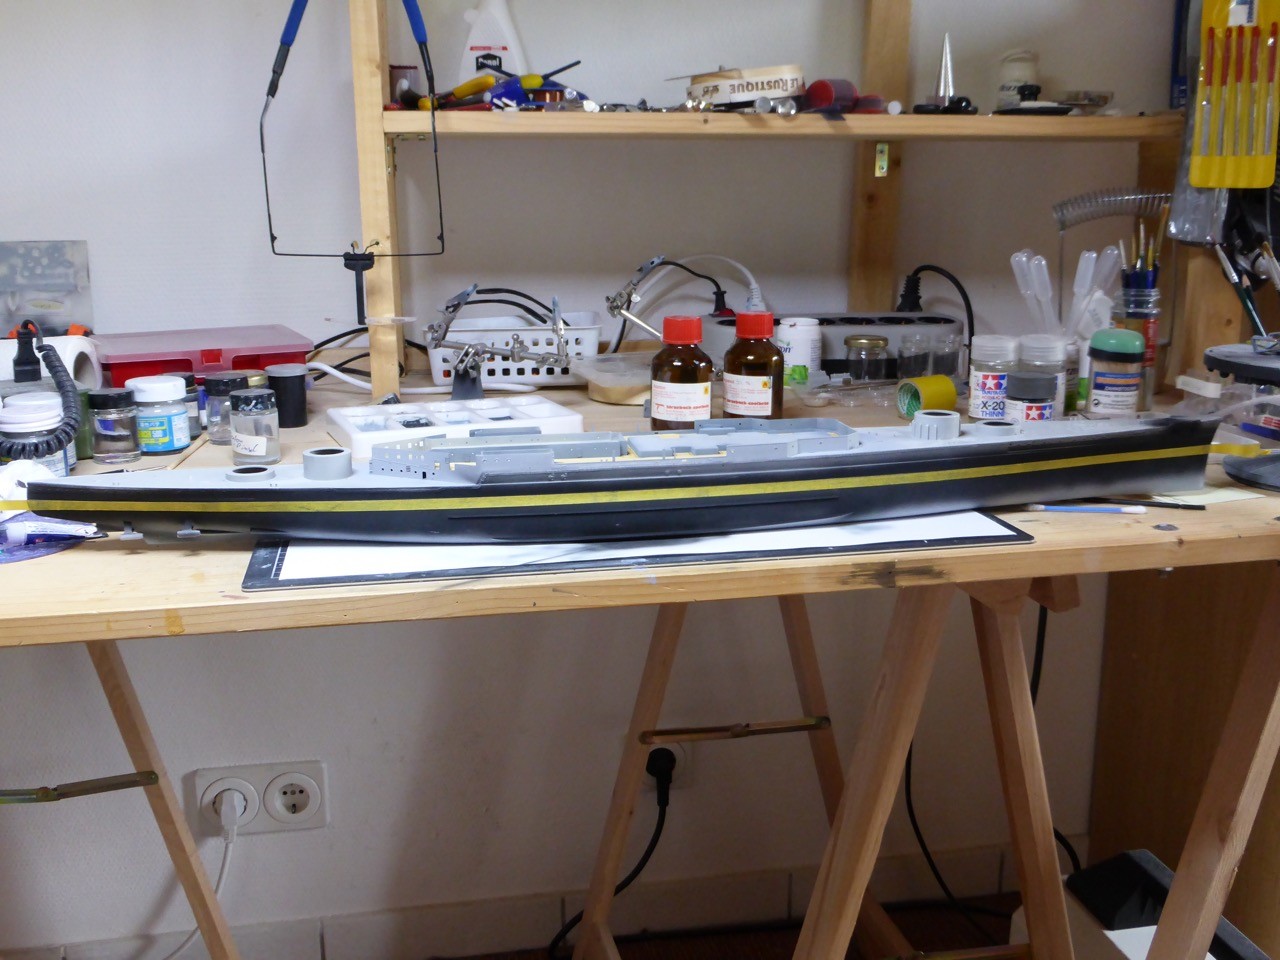
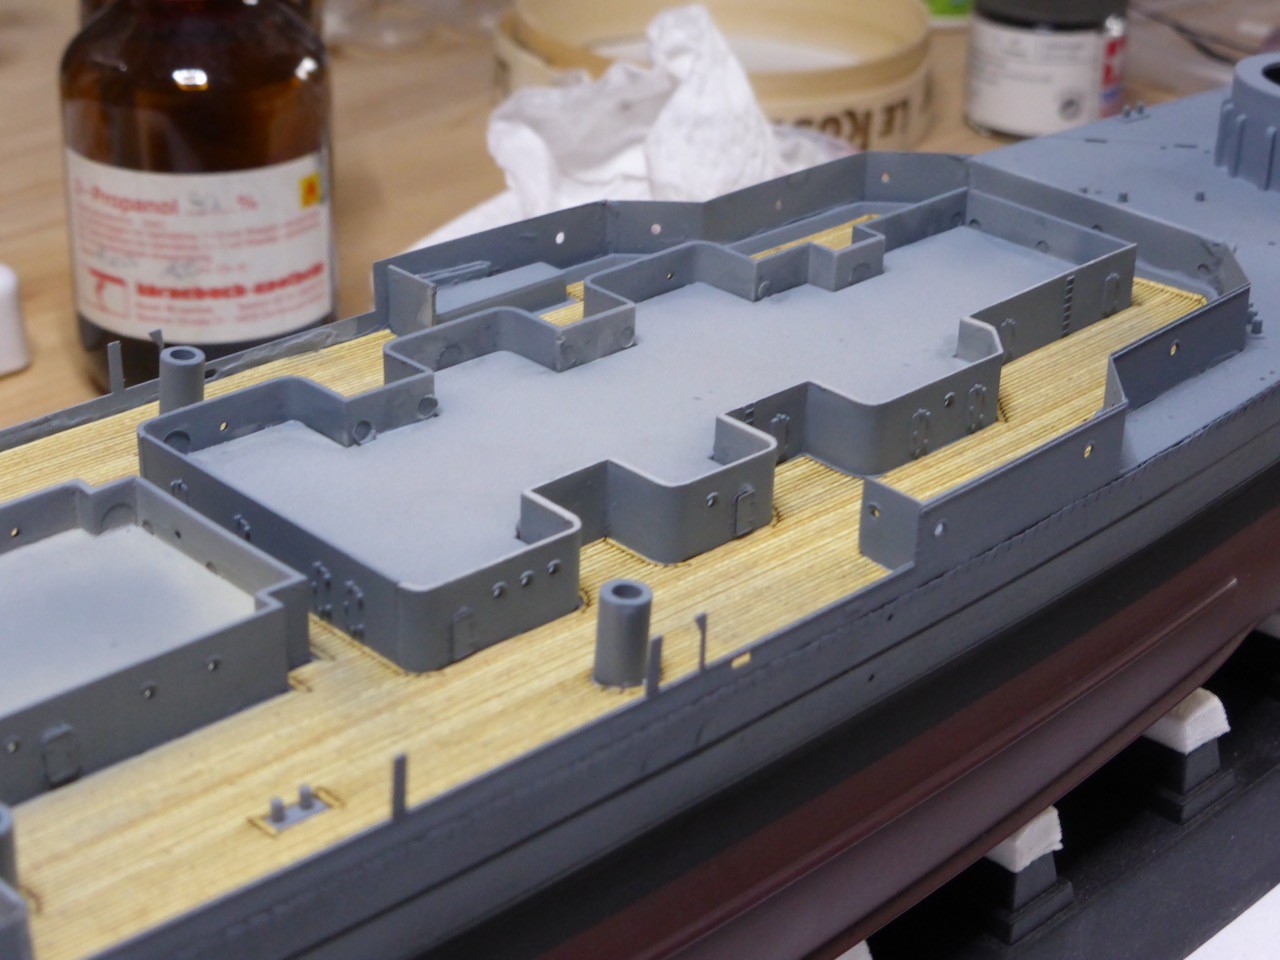
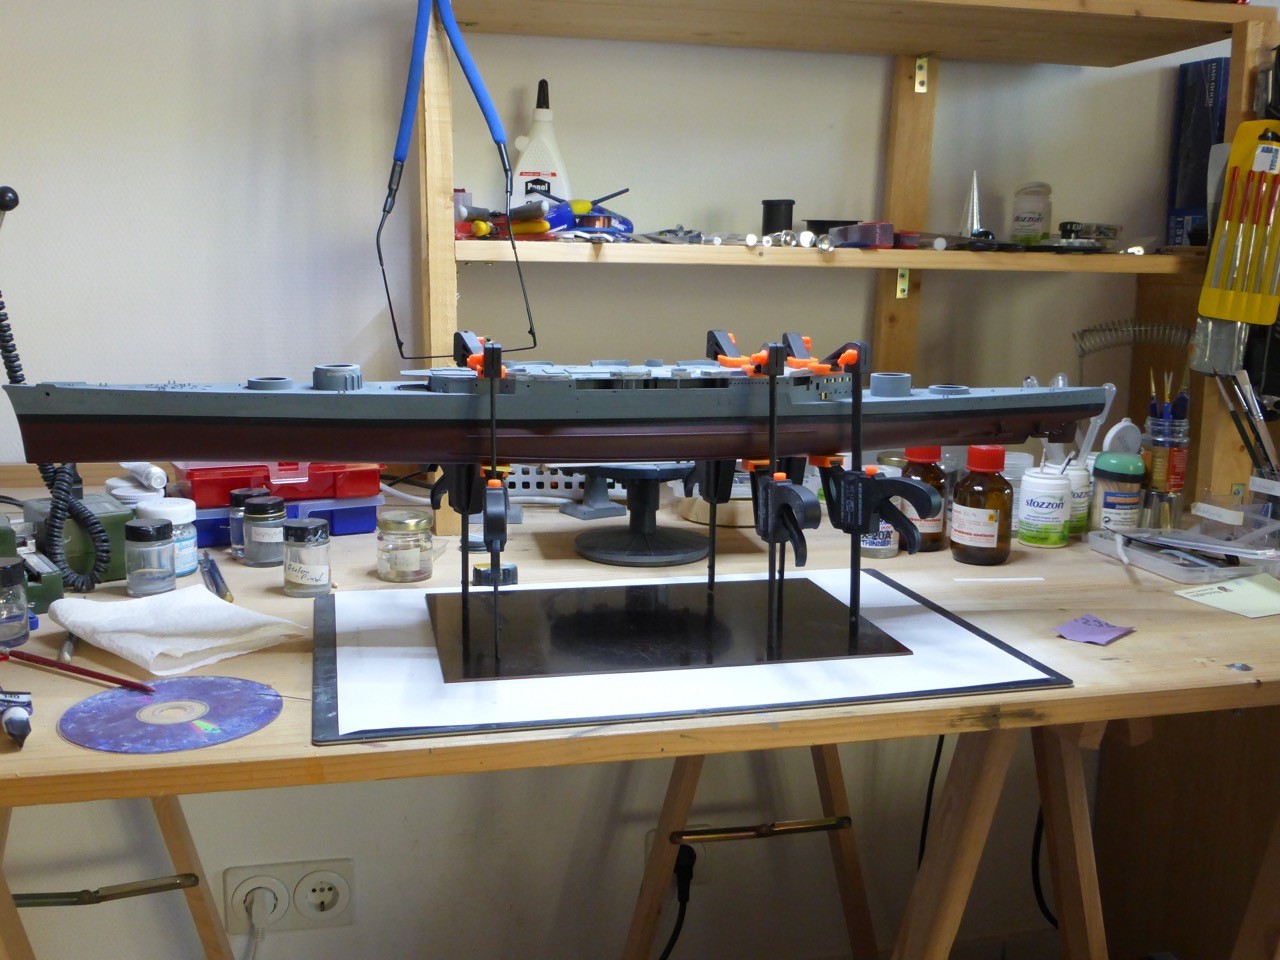
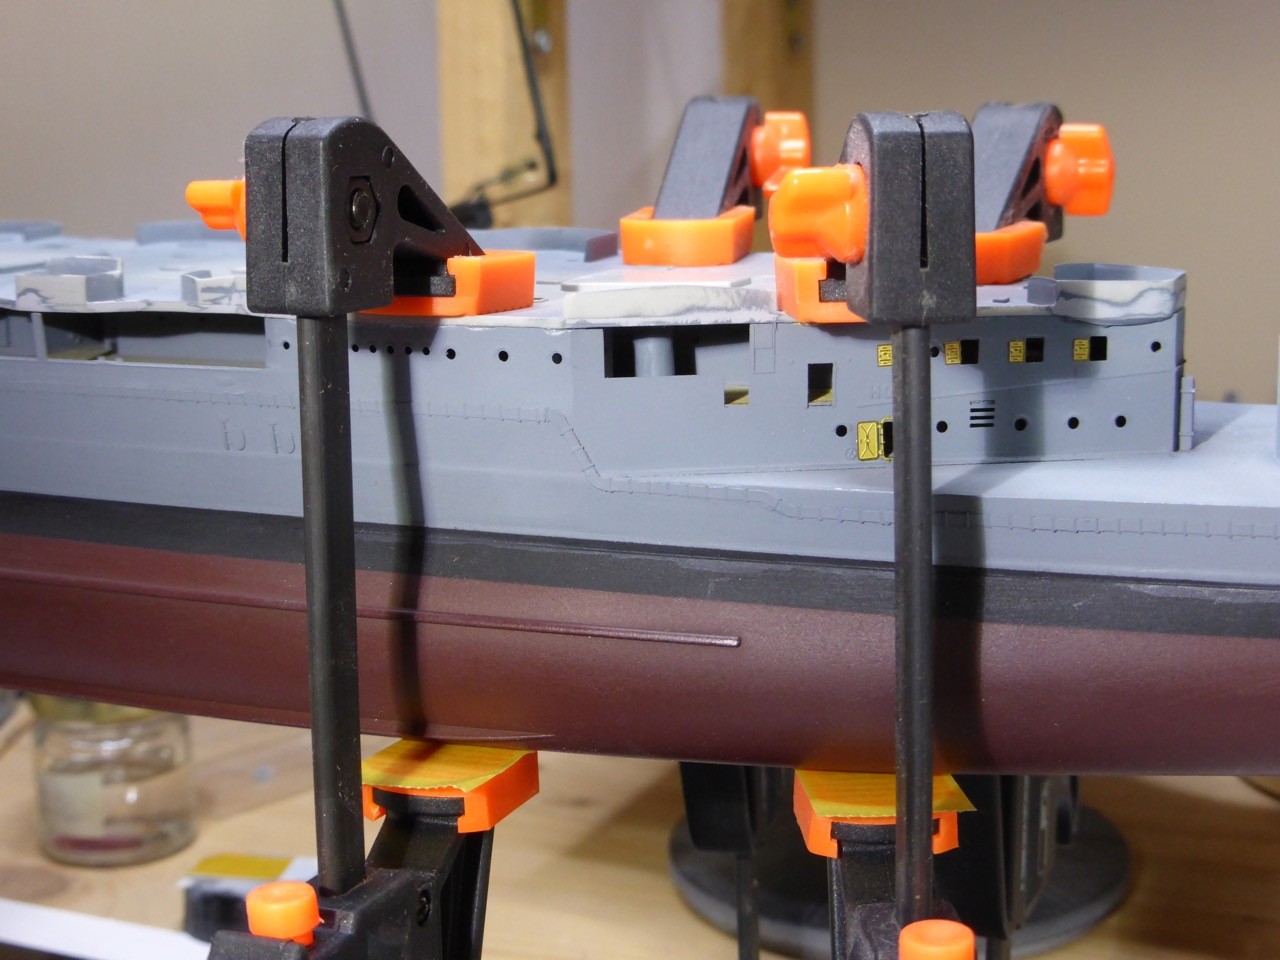
Last weekend's progress.
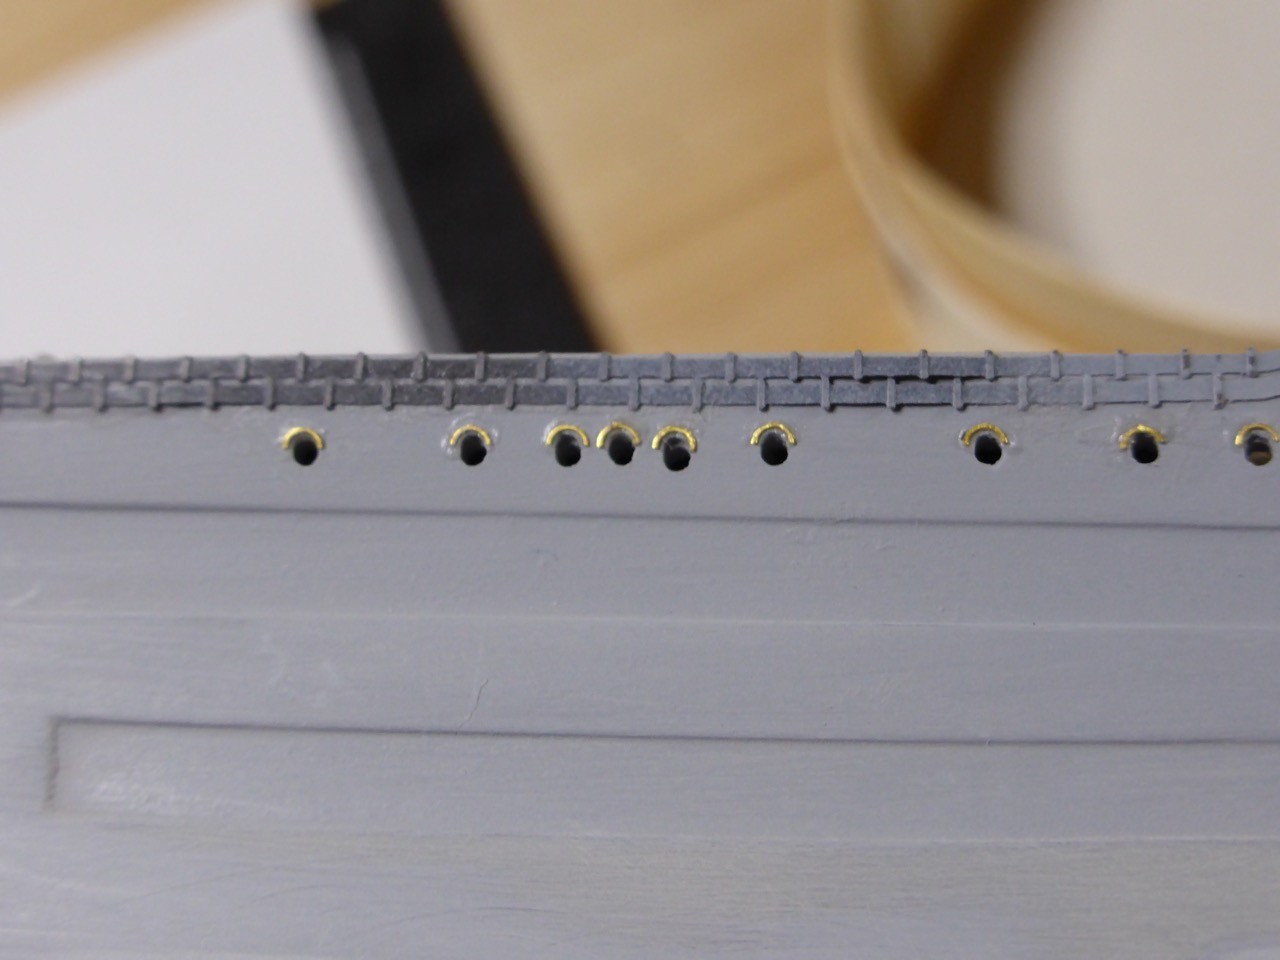
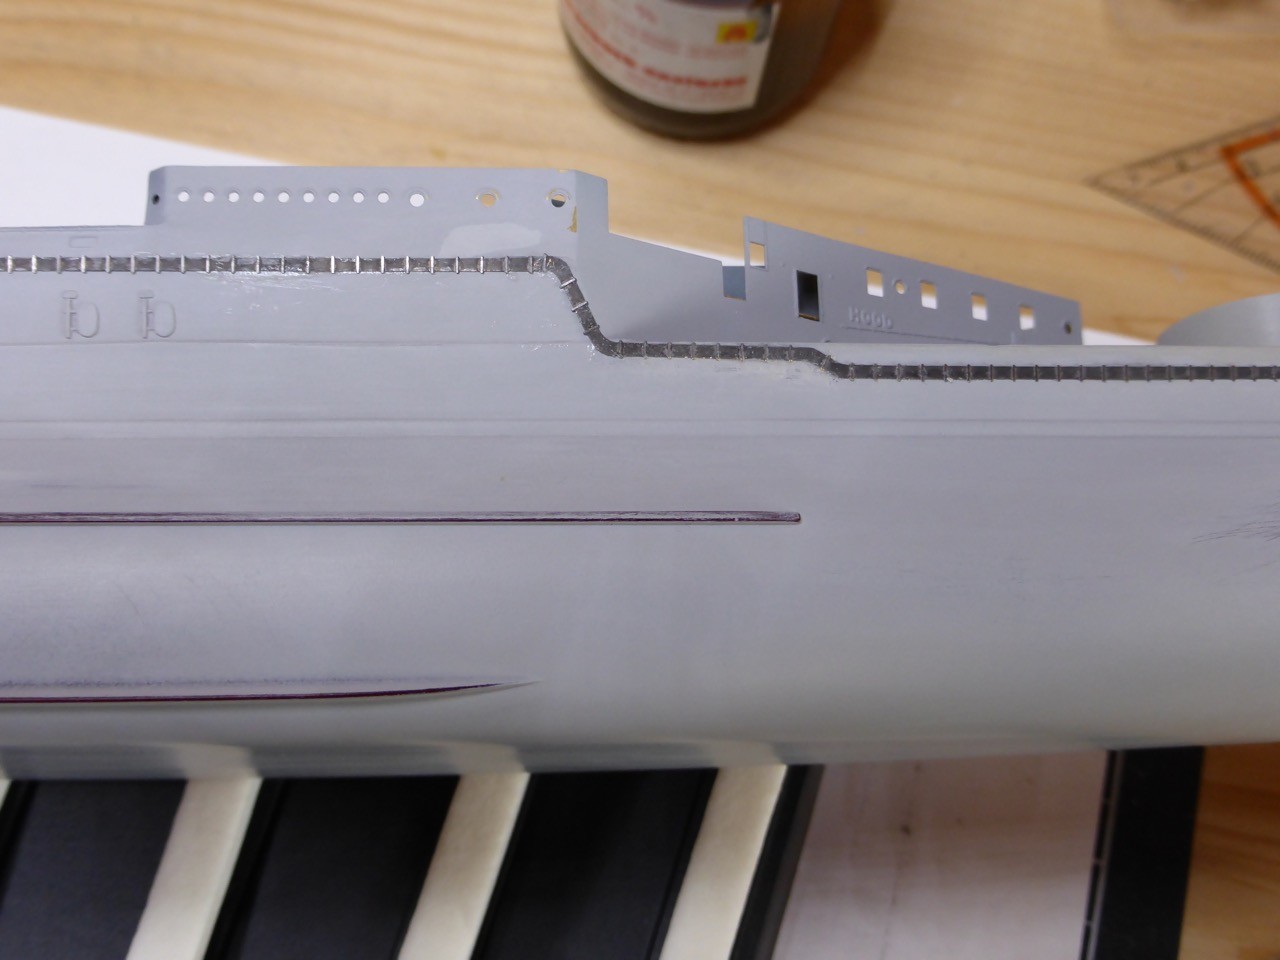
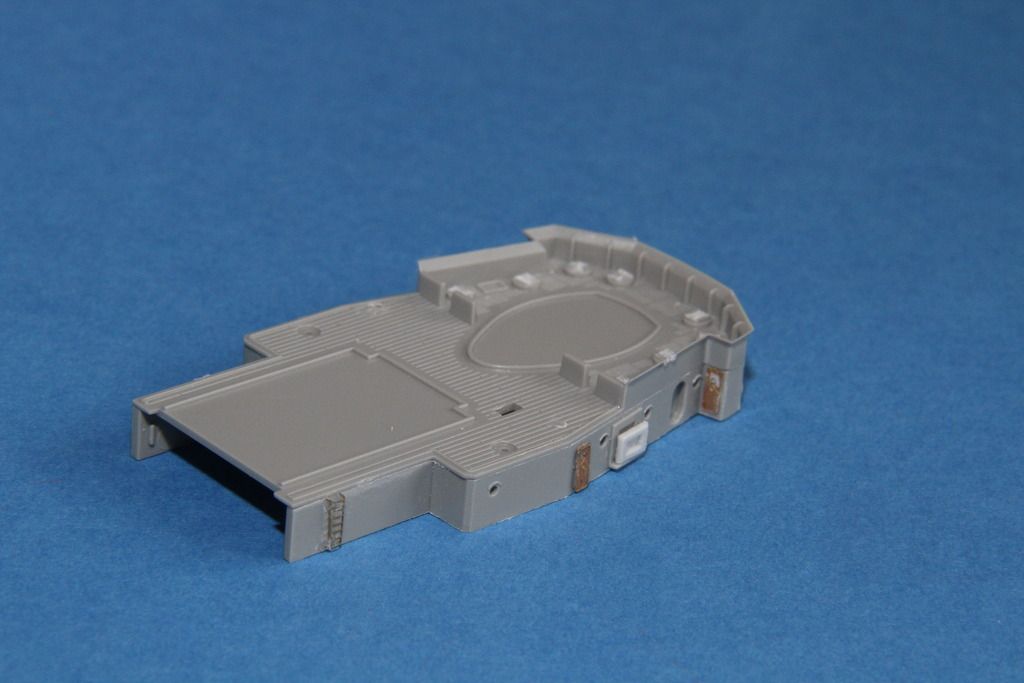
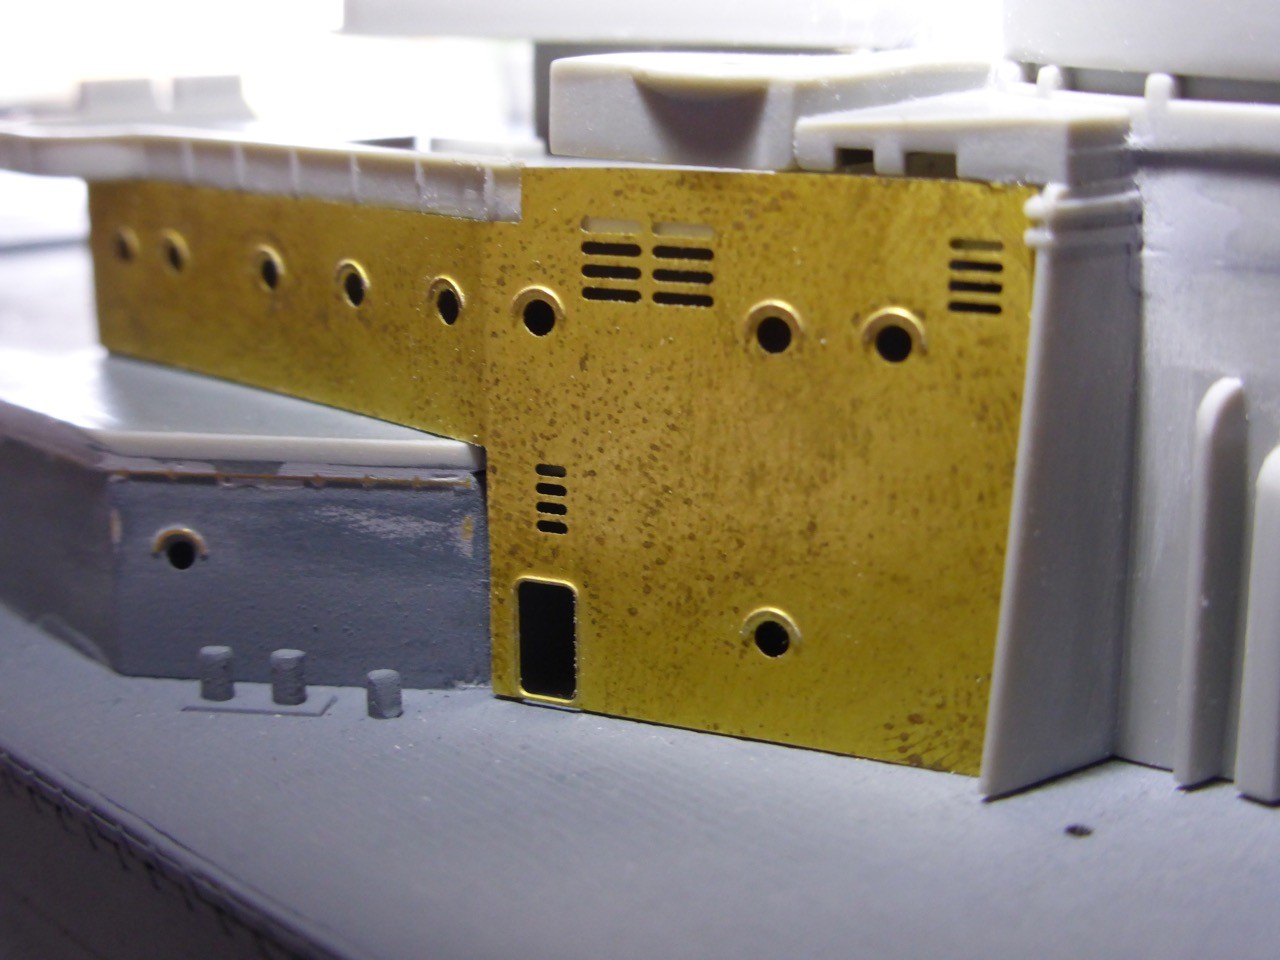
Superstructure sub assemblies, the roof of the forward director base has had some Veteran resin to replace the moulded detail (Note the raised periscope.)


Foredeck details going down, including etched breakwaters.

Catapults sprayed and in place.

Bridge sub assemblies with some paint on.

Overview.
Cheers
Si
Superstructure sub assemblies, the roof of the forward director base has had some Veteran resin to replace the moulded detail (Note the raised periscope.)


Foredeck details going down, including etched breakwaters.

Catapults sprayed and in place.

Bridge sub assemblies with some paint on.

Overview.

Cheers
Si
RedDuster
Joined: March 01, 2010
KitMaker: 7,078 posts
Model Shipwrights: 6,649 posts
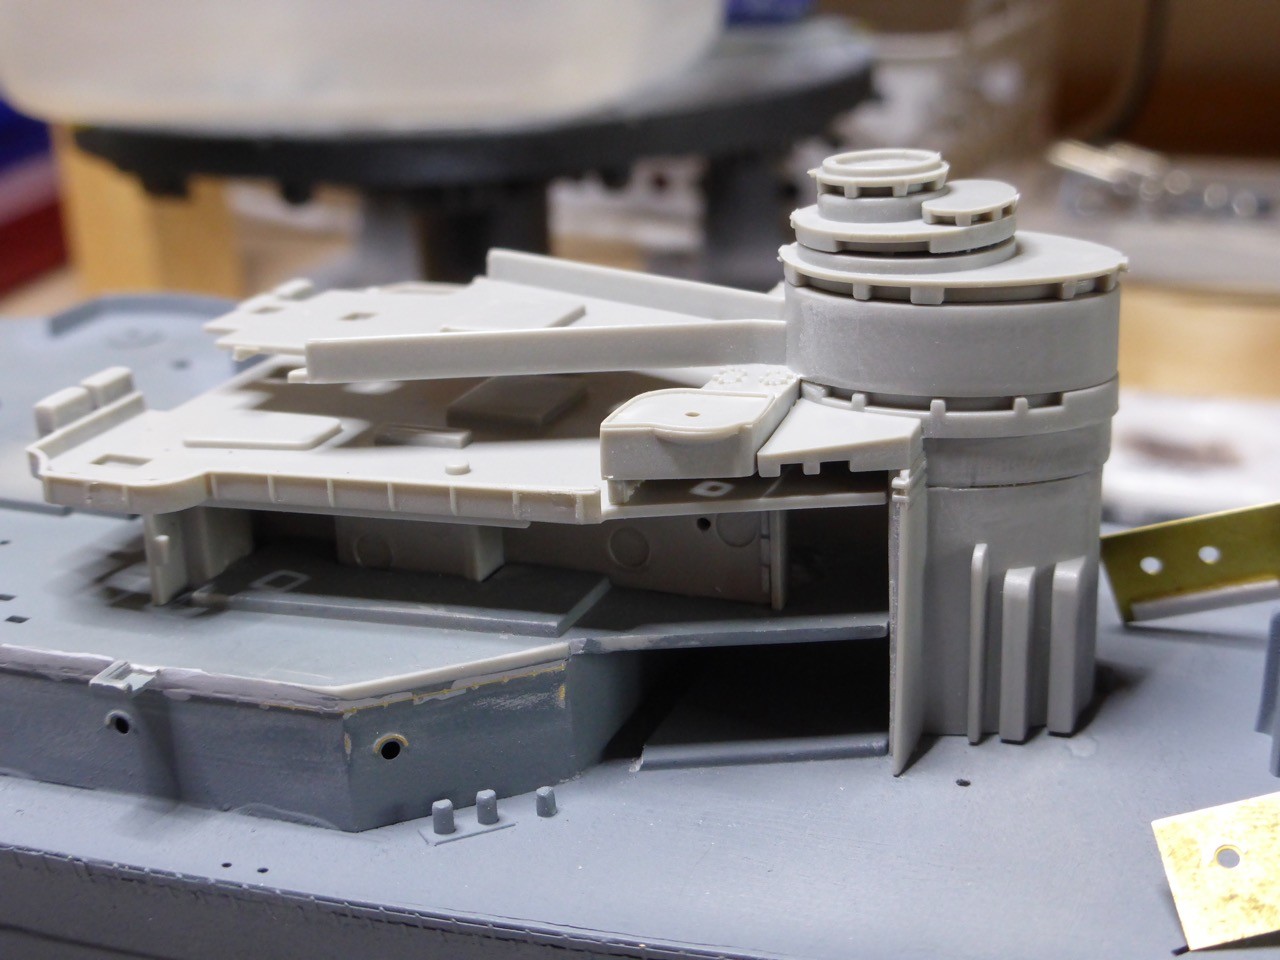
Posted: Sunday, October 02, 2016 - 11:48 PM UTC
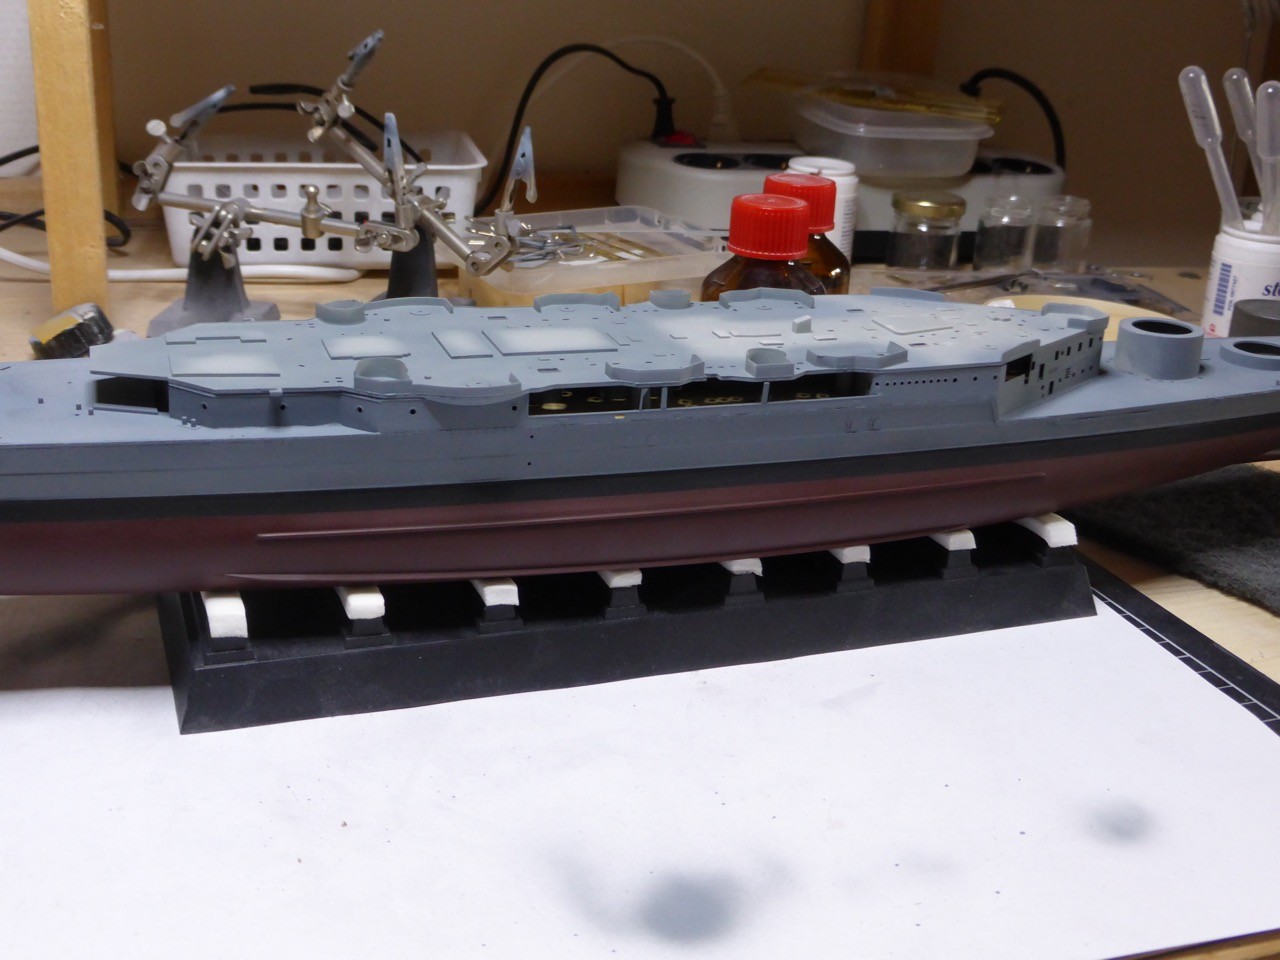
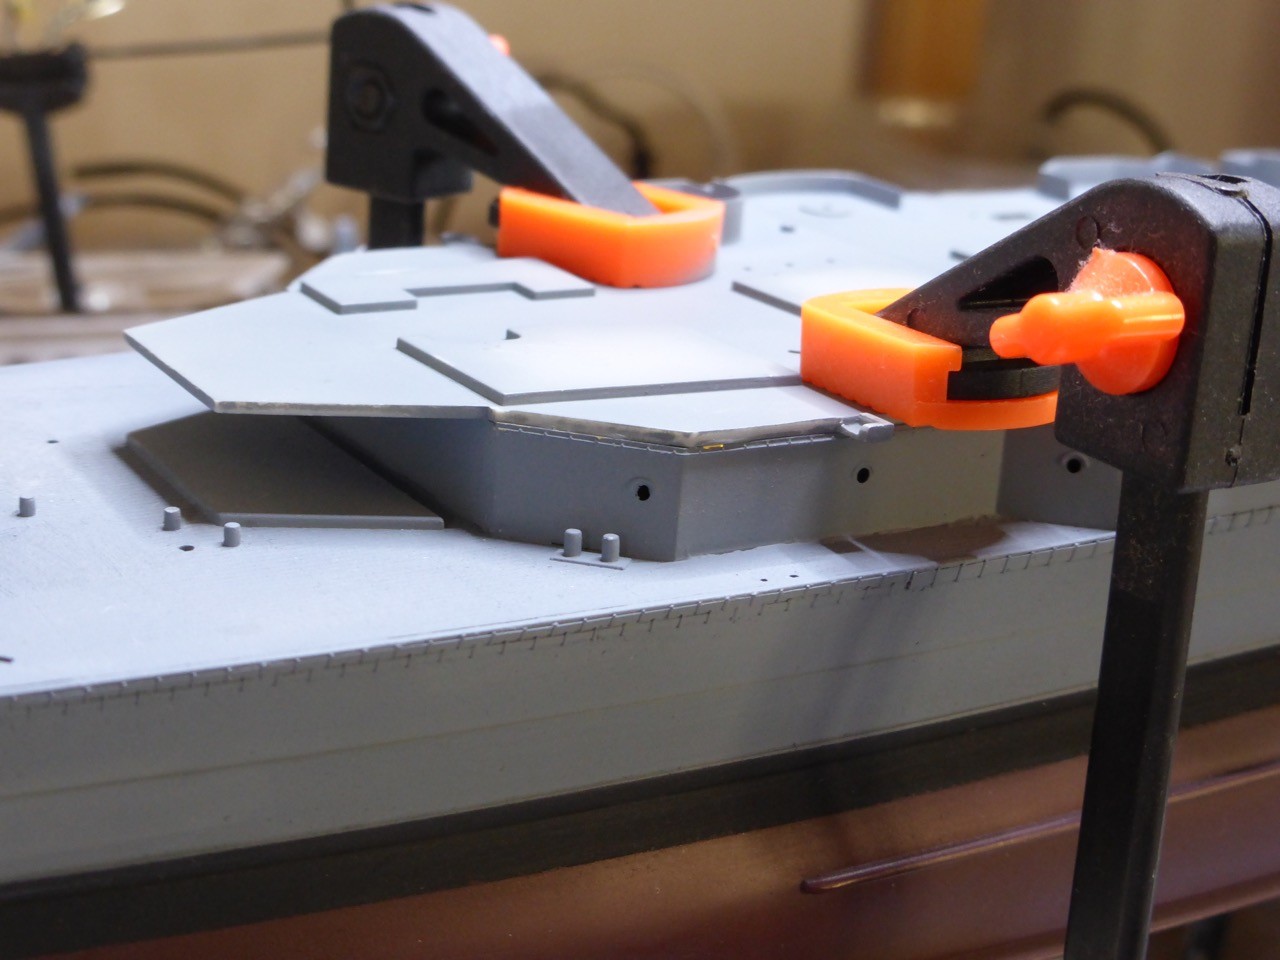
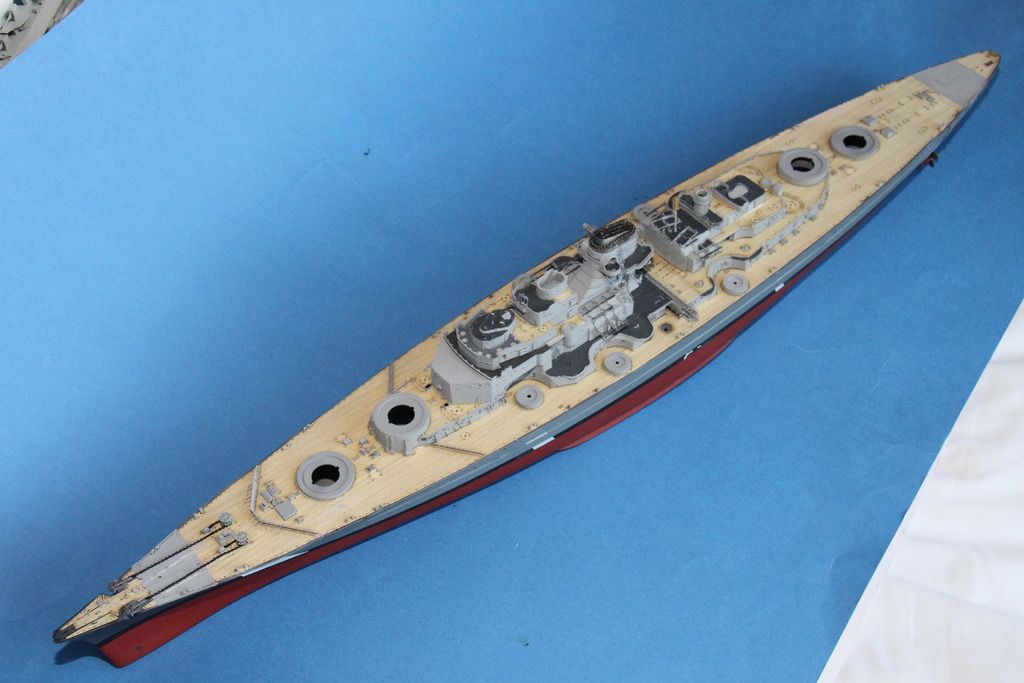
This weekends progress.
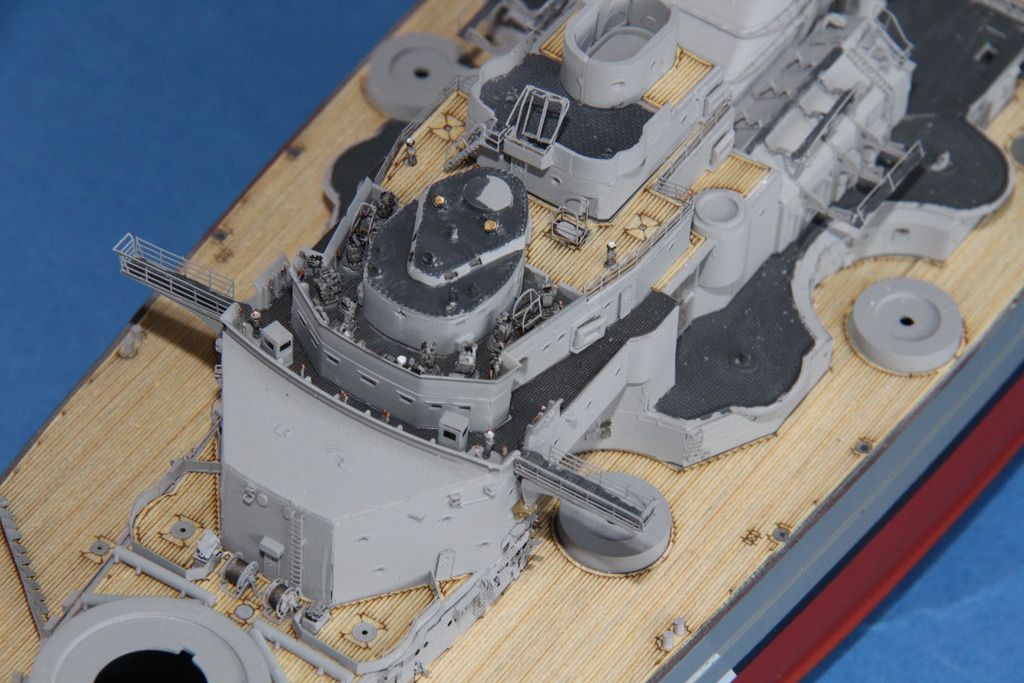
fitting detail around the barbettes.
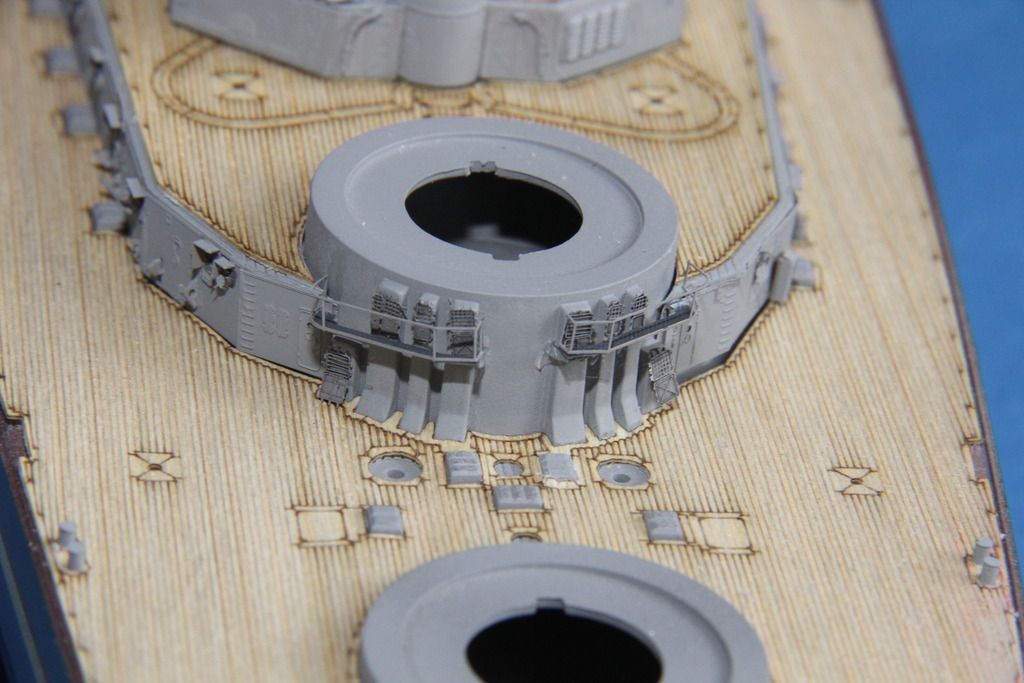
Detail going on the navigating bridge.

complete, (except for a tidy up)
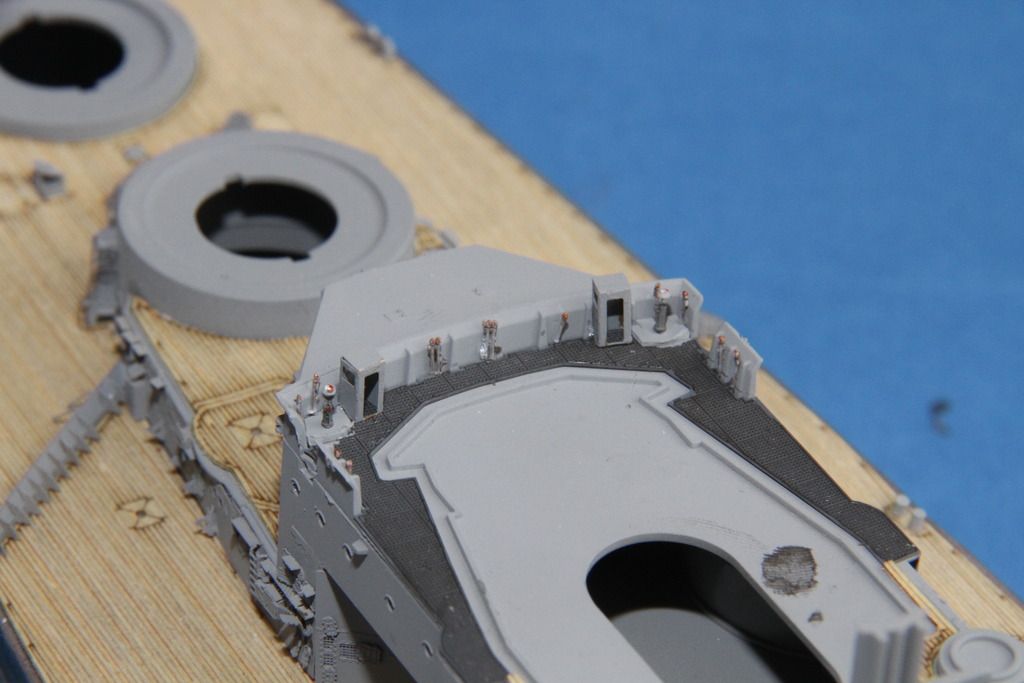
Pontos cable reel assembled and painted, very nice indeed.

deck behind Bruno barbette detailed.
and the bridge wings in place.
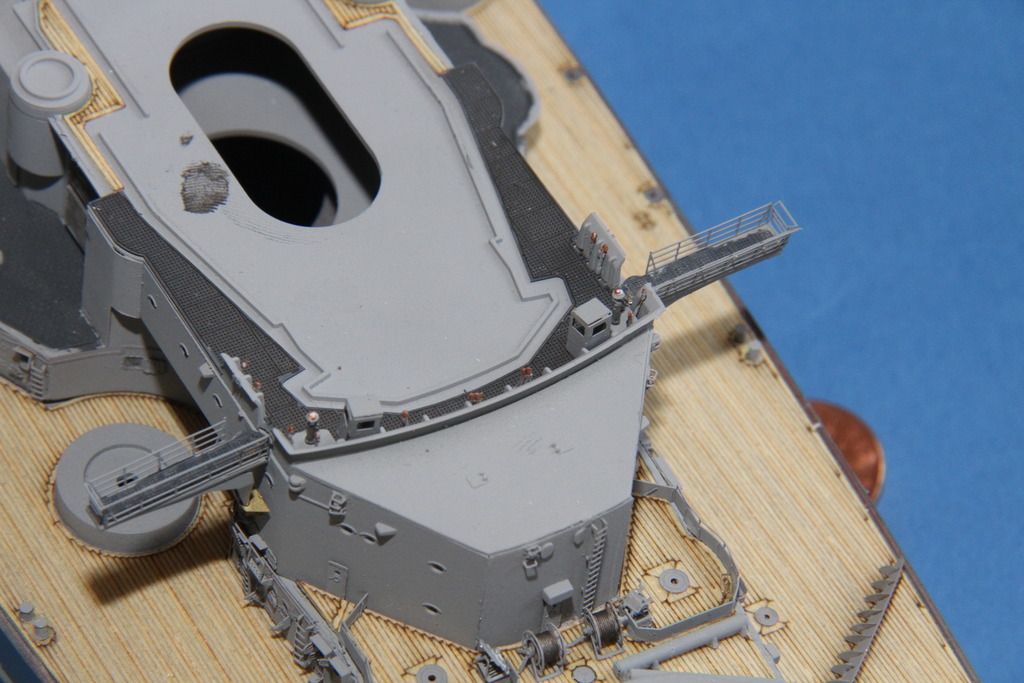
Cgeers
Si
fitting detail around the barbettes.


Detail going on the navigating bridge.

complete, (except for a tidy up)

Pontos cable reel assembled and painted, very nice indeed.

deck behind Bruno barbette detailed.
and the bridge wings in place.

Cgeers
Si
RedDuster
Joined: March 01, 2010
KitMaker: 7,078 posts
Model Shipwrights: 6,649 posts
Posted: Sunday, October 16, 2016 - 09:08 PM UTC
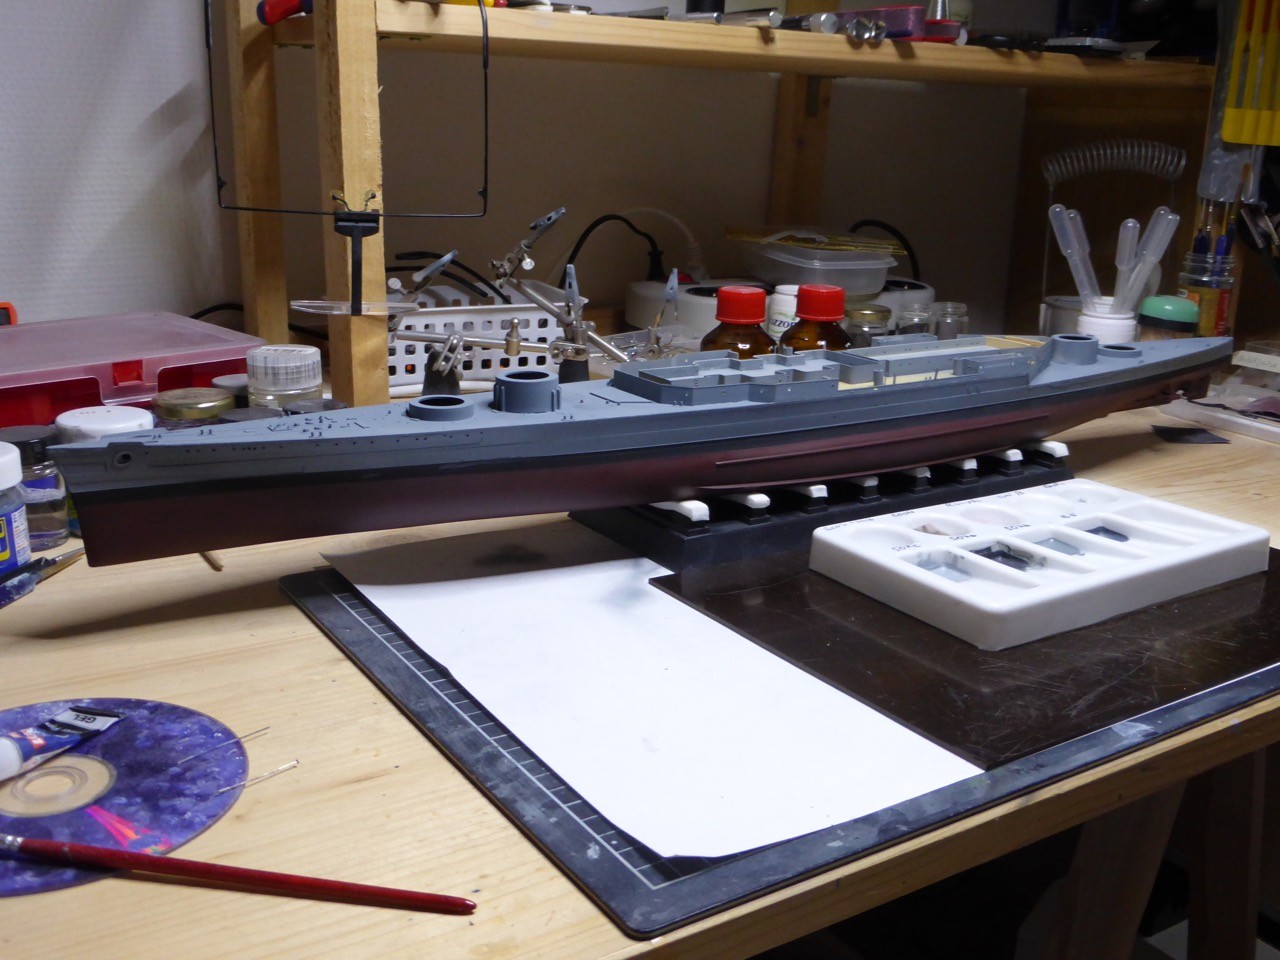
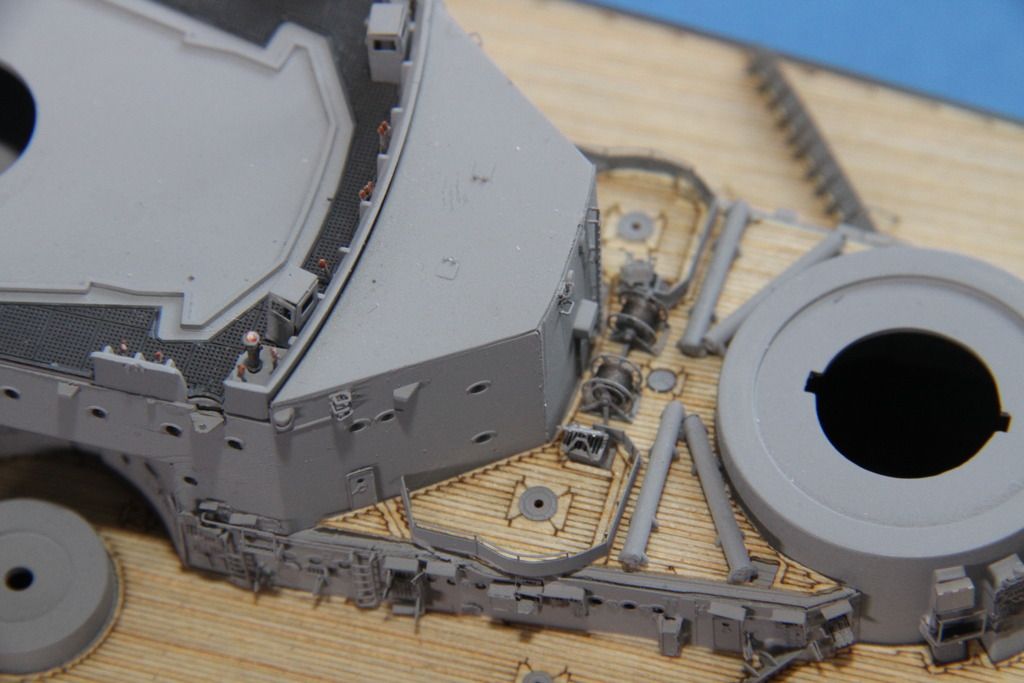
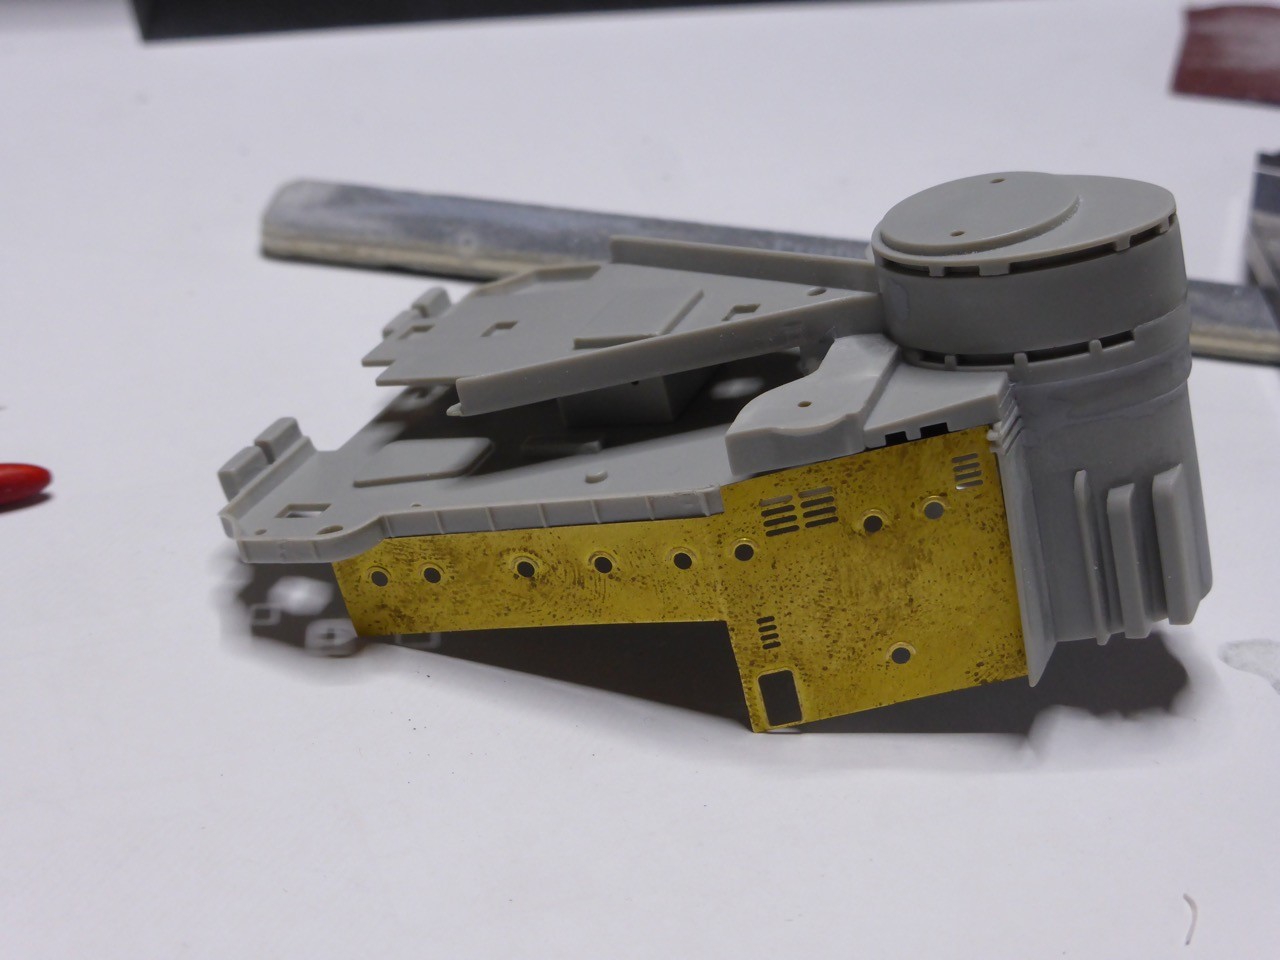
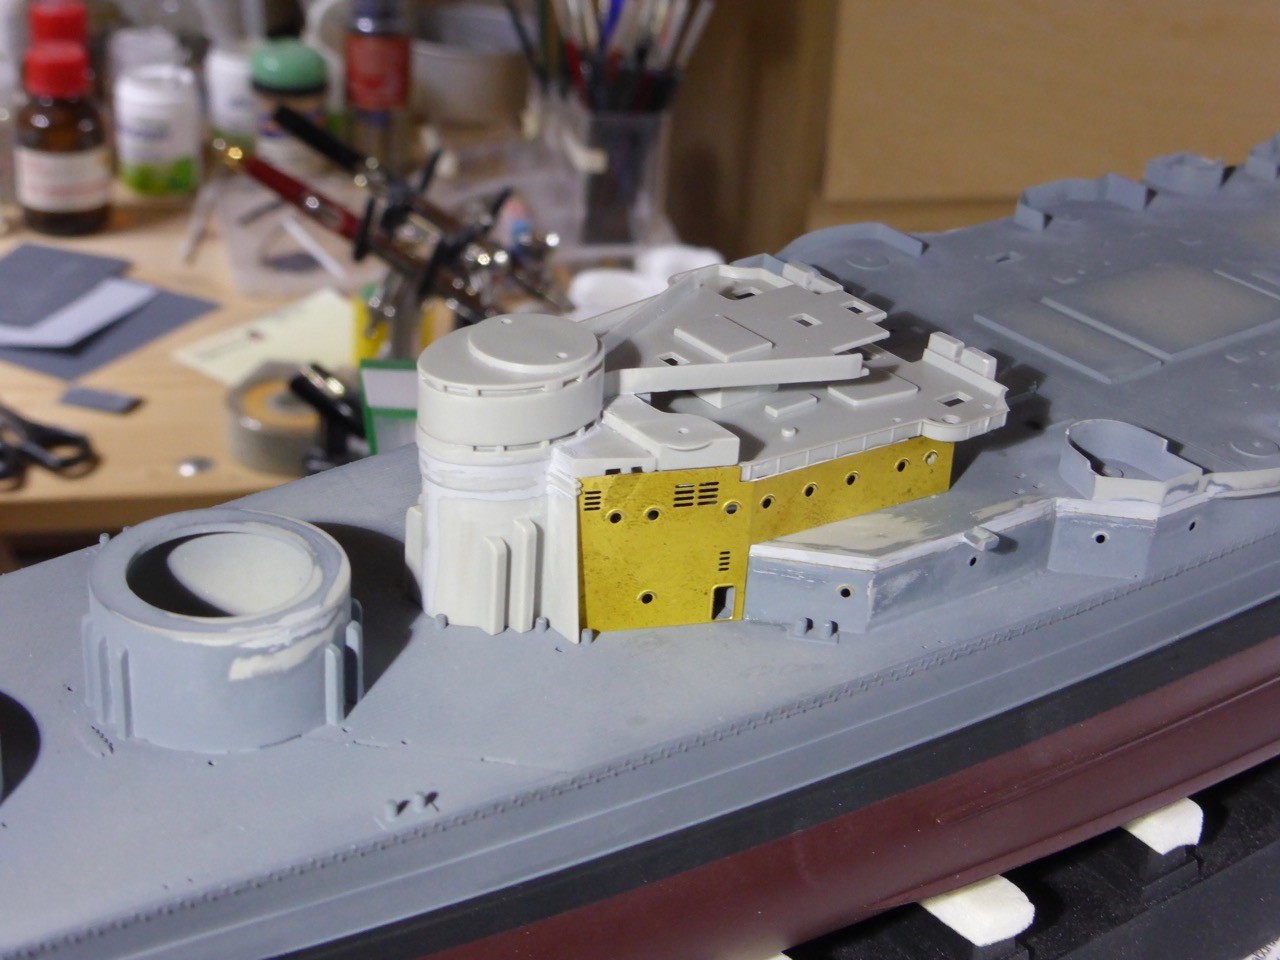
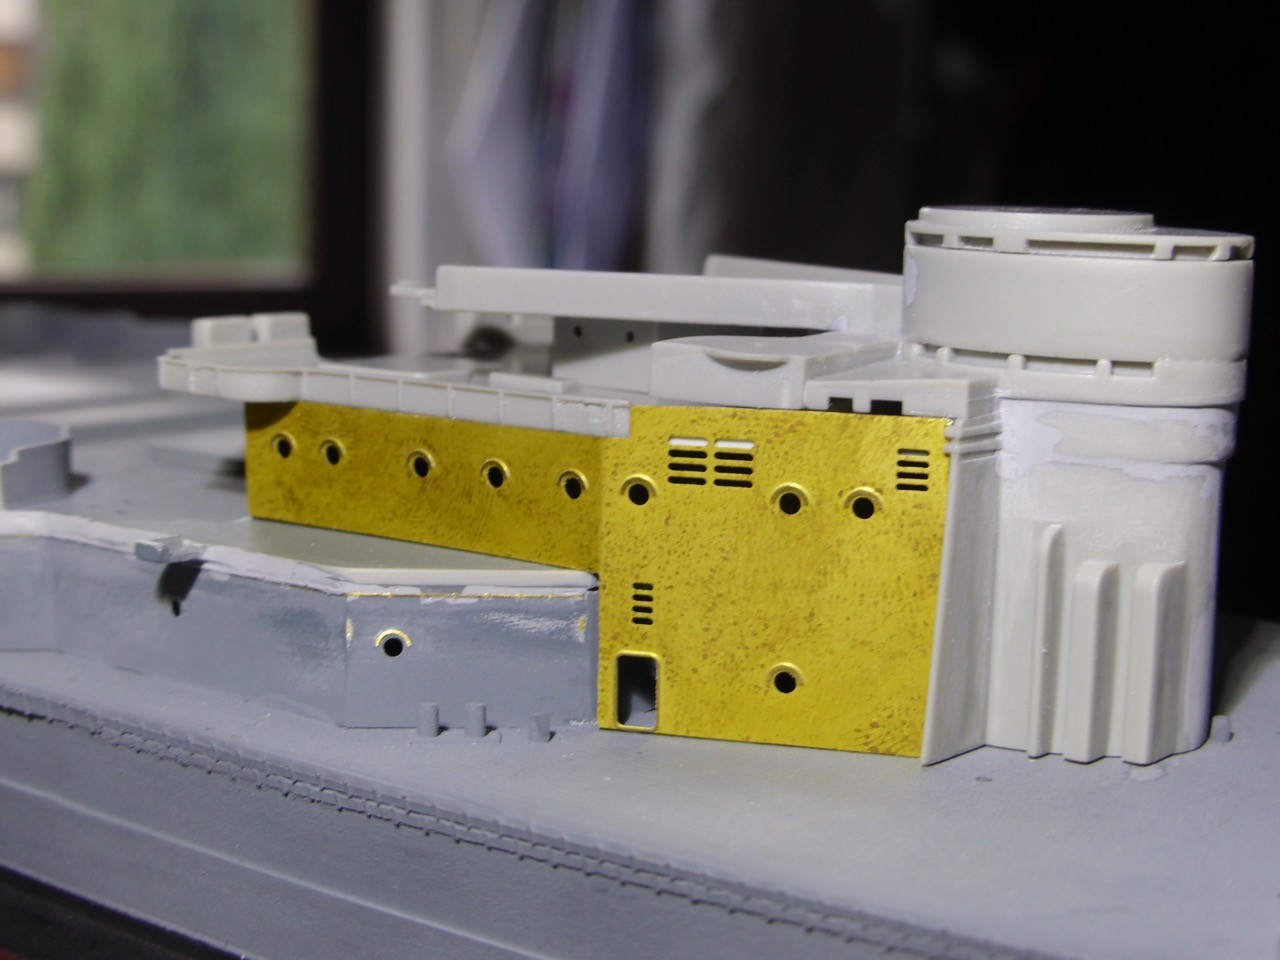
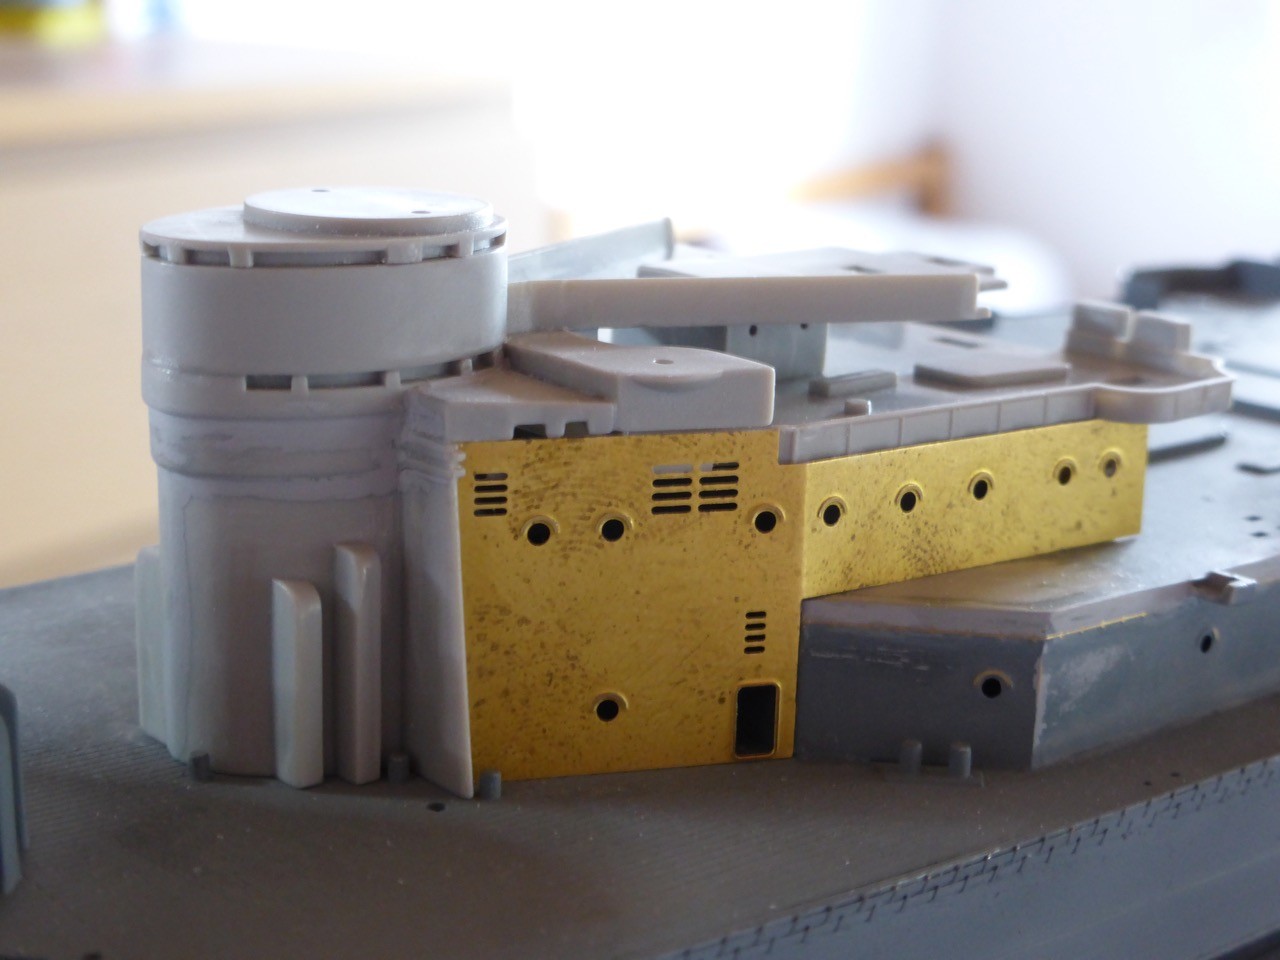
Detailing the upper bridge.
Scratchbuilt instrumentation.

replacement resin bridge equipment from Veteran models given a coat of paint, and a wash to bring out the detail.
All painted and fitted in place.
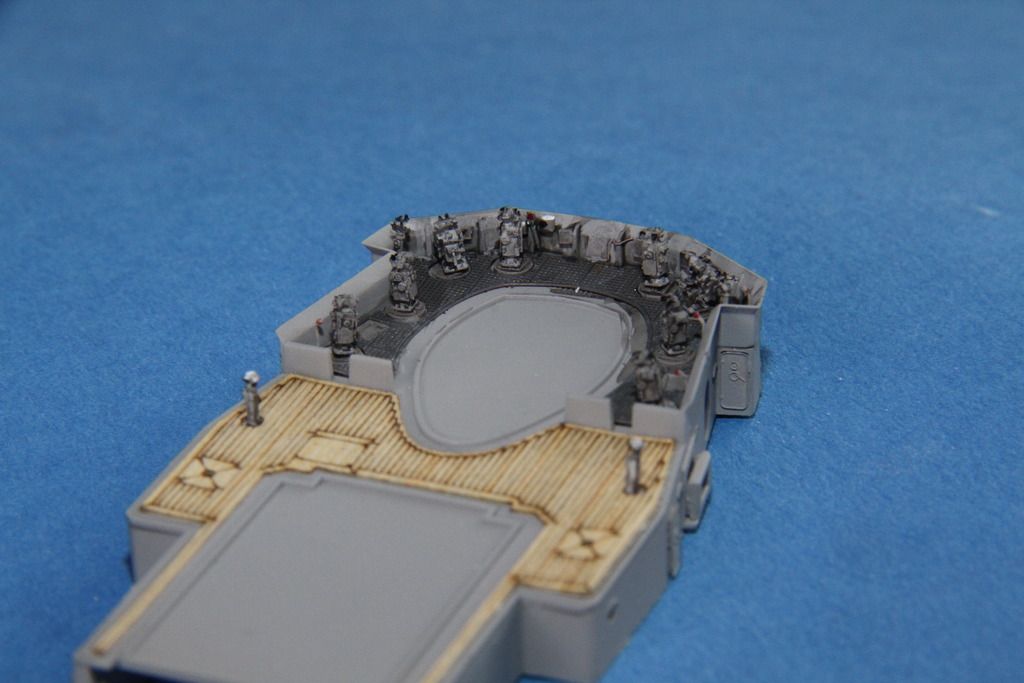
Test fitted in place, with the 37mm gun deck.
Fixed down, along with the forward AA directors.

More soon.
Si
Scratchbuilt instrumentation.

replacement resin bridge equipment from Veteran models given a coat of paint, and a wash to bring out the detail.

All painted and fitted in place.

Test fitted in place, with the 37mm gun deck.

Fixed down, along with the forward AA directors.

More soon.
Si
JJ1973
#345
Joined: August 22, 2011
KitMaker: 1,835 posts
Model Shipwrights: 1,832 posts
Posted: Thursday, October 20, 2016 - 09:33 AM UTC
Hi Si,
great work on your Bismarck, the detailing of the bridge looks awesome!! Only that penny seems to be ever growing 
Real-life business was keeping me way more busy than I had anticipated, so nothing to report from the HMS Hood - yet. But this weekend finally should provide some good bench time, so I am hoping to be able to present a substantial update by Sunday!!
Cheers,
Jan
great work on your Bismarck, the detailing of the bridge looks awesome!! Only that penny seems to be ever growing
Real-life business was keeping me way more busy than I had anticipated, so nothing to report from the HMS Hood - yet. But this weekend finally should provide some good bench time, so I am hoping to be able to present a substantial update by Sunday!!
Cheers,
Jan
RedDuster
Joined: March 01, 2010
KitMaker: 7,078 posts
Model Shipwrights: 6,649 posts
Posted: Thursday, October 20, 2016 - 10:53 PM UTC
Thanks Jan,
Ok I have been rumbled! I will have to get a better chocolate Penny!
Cheers
Si
Ok I have been rumbled!
I will have to get a better chocolate Penny!Cheers
Si
JJ1973
#345
Joined: August 22, 2011
KitMaker: 1,835 posts
Model Shipwrights: 1,832 posts
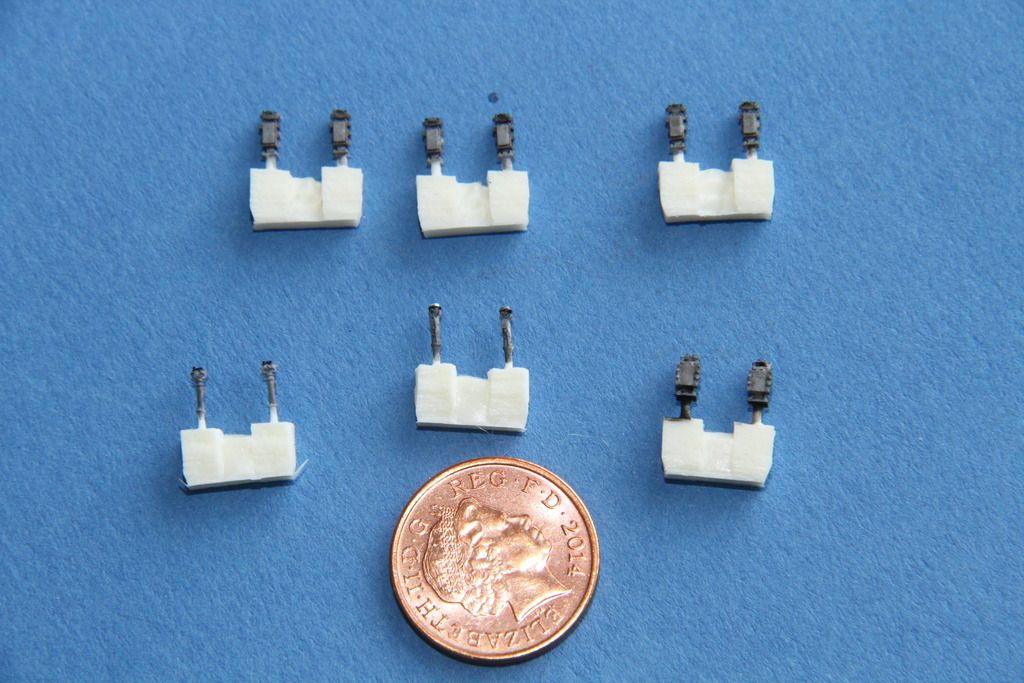
Posted: Saturday, October 22, 2016 - 11:42 PM UTC
Hi all,
just some quick essential pics here, the full story as always on my Hood build log!
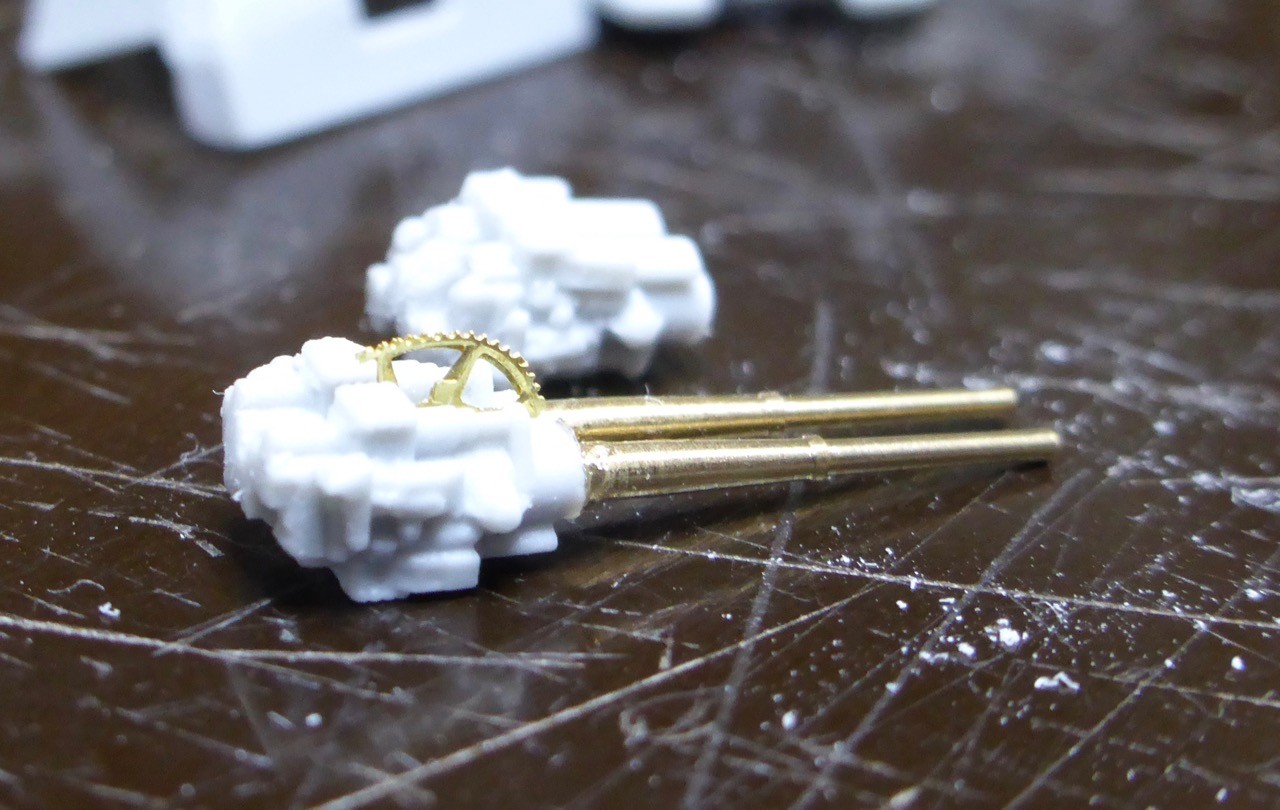
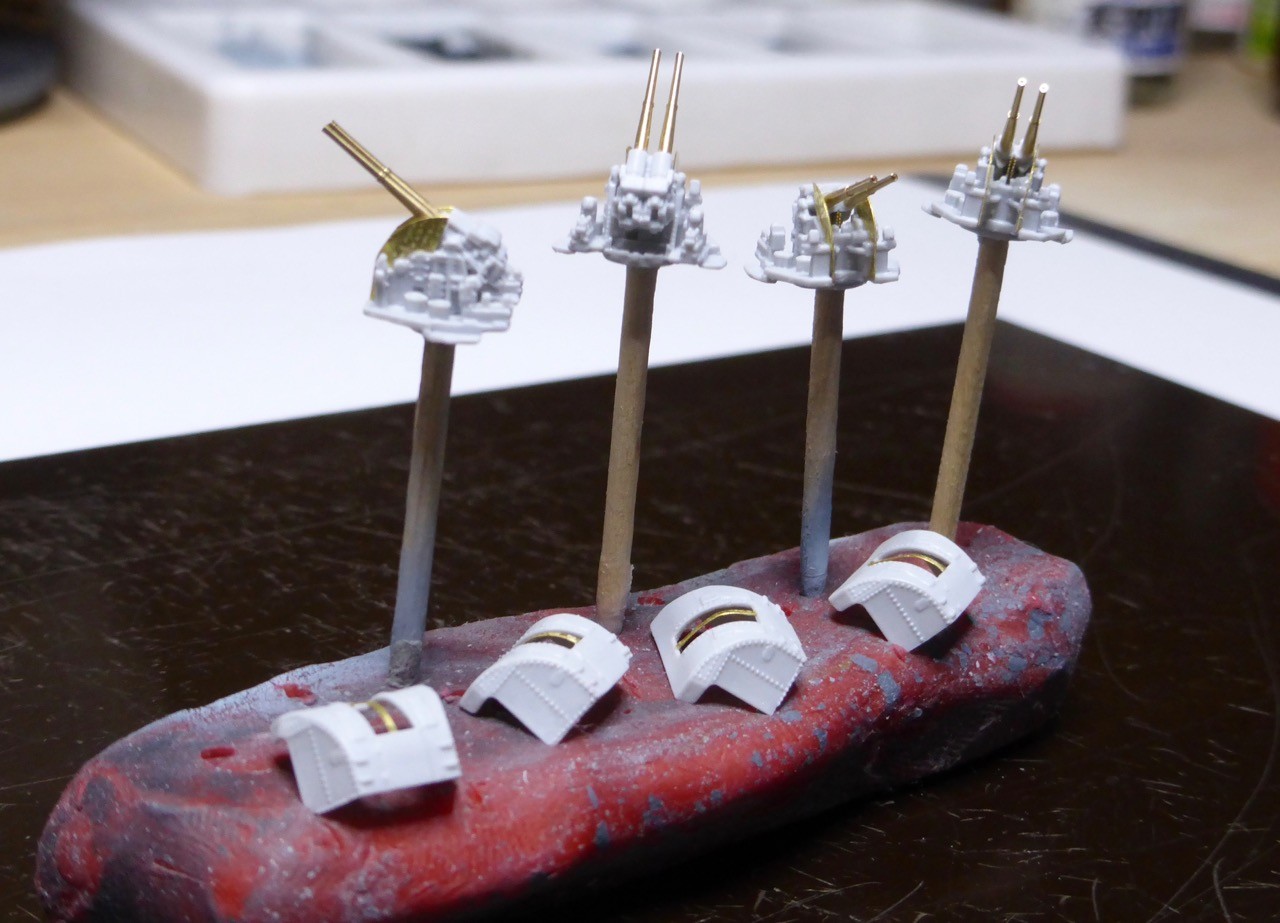
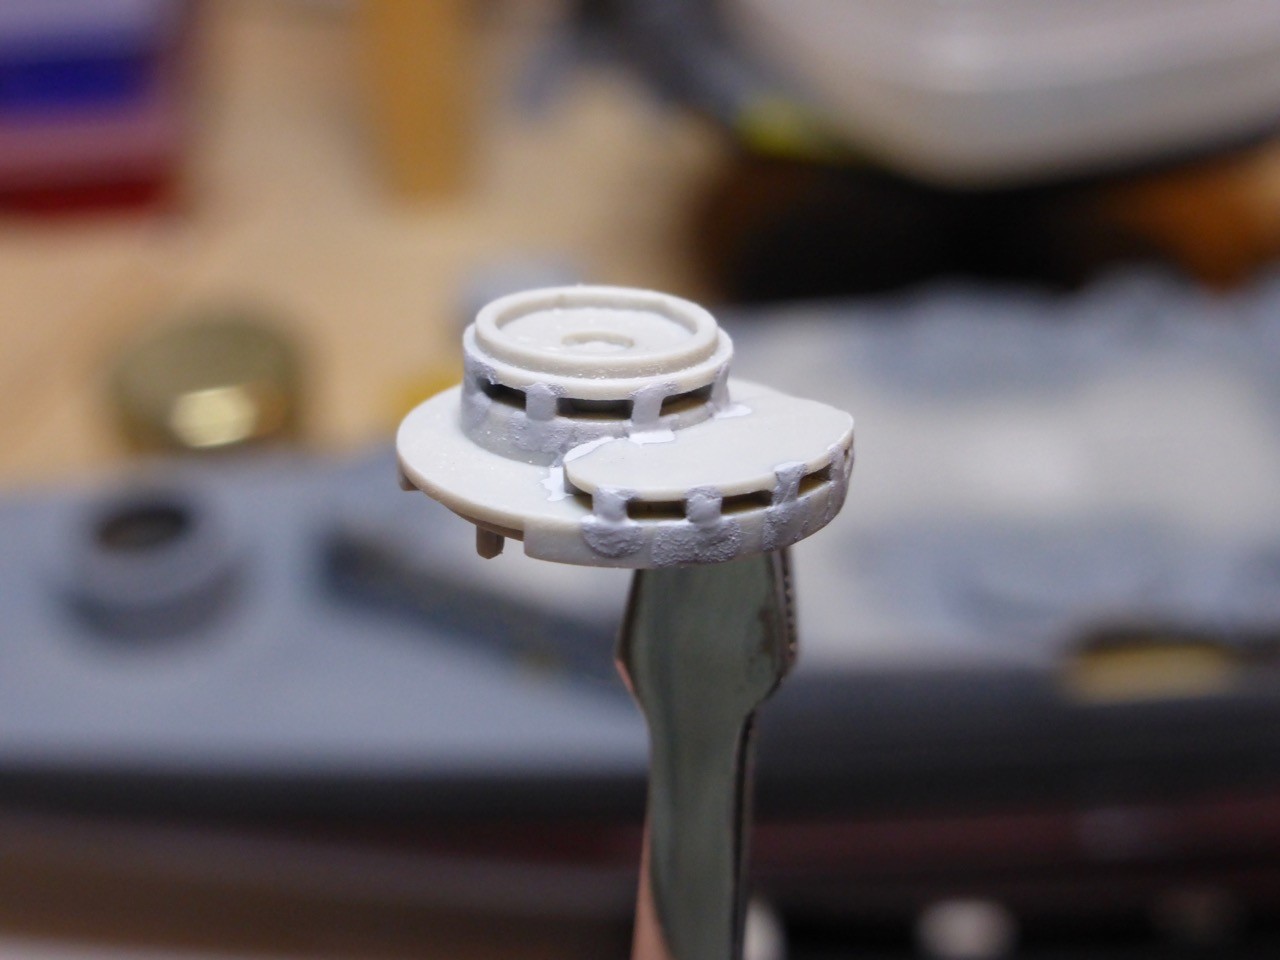
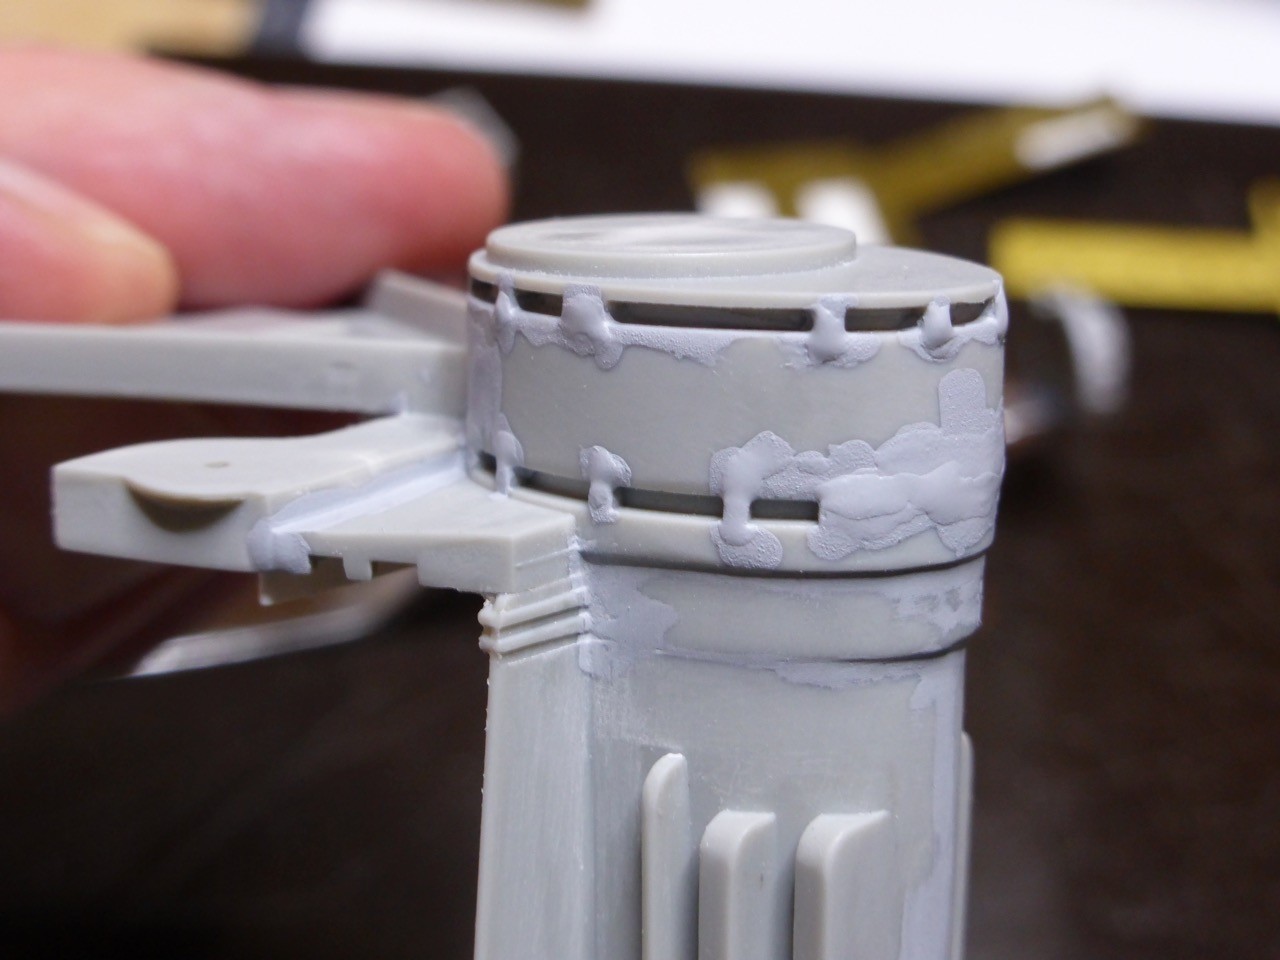
Much more filling and sanding done to the forecastle deck, no pictures of the here. But I started a first sub-assembly, the NorthStar 4" mounts. Just great little kits!!
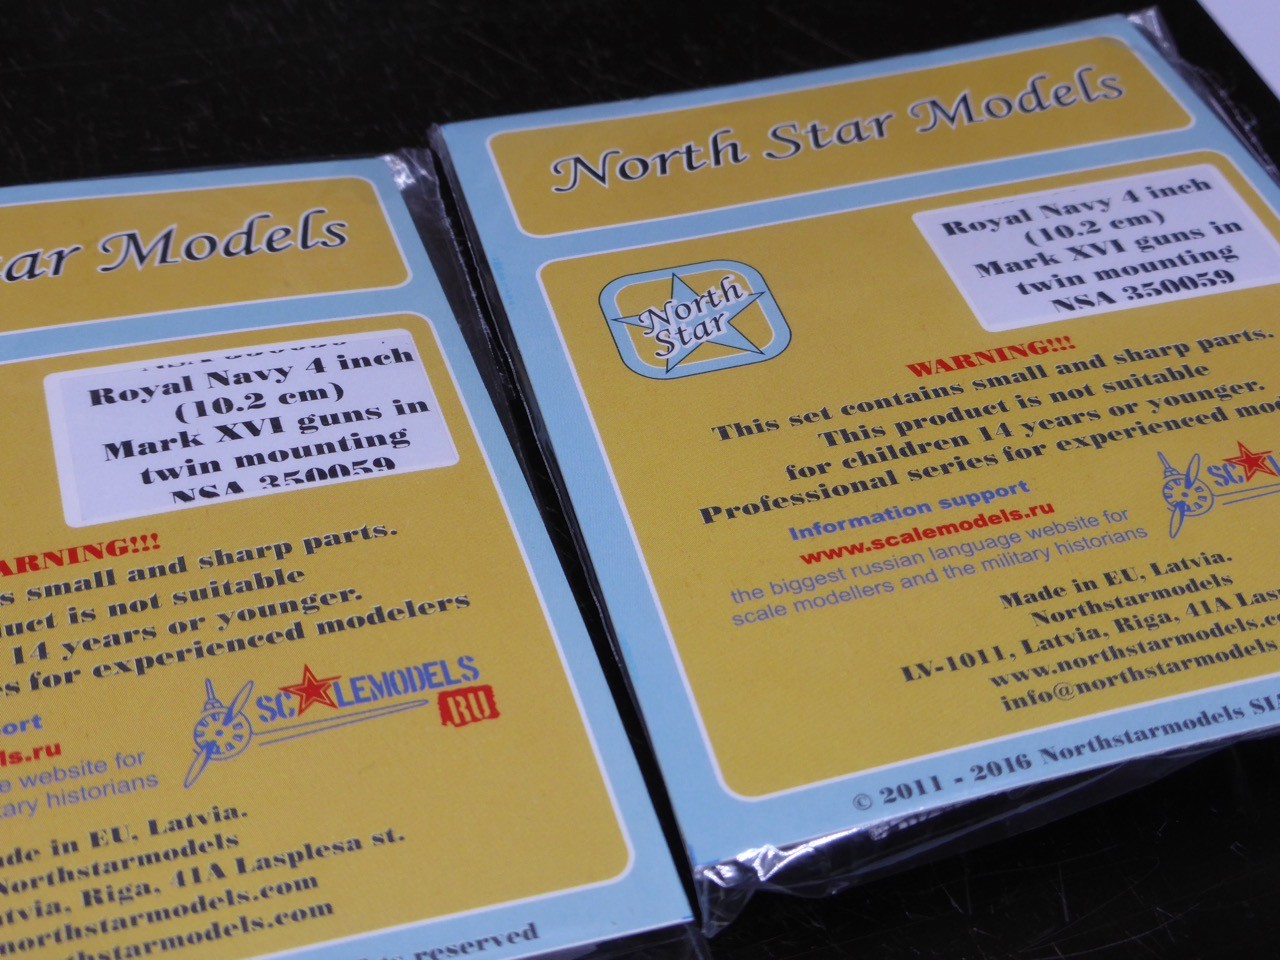
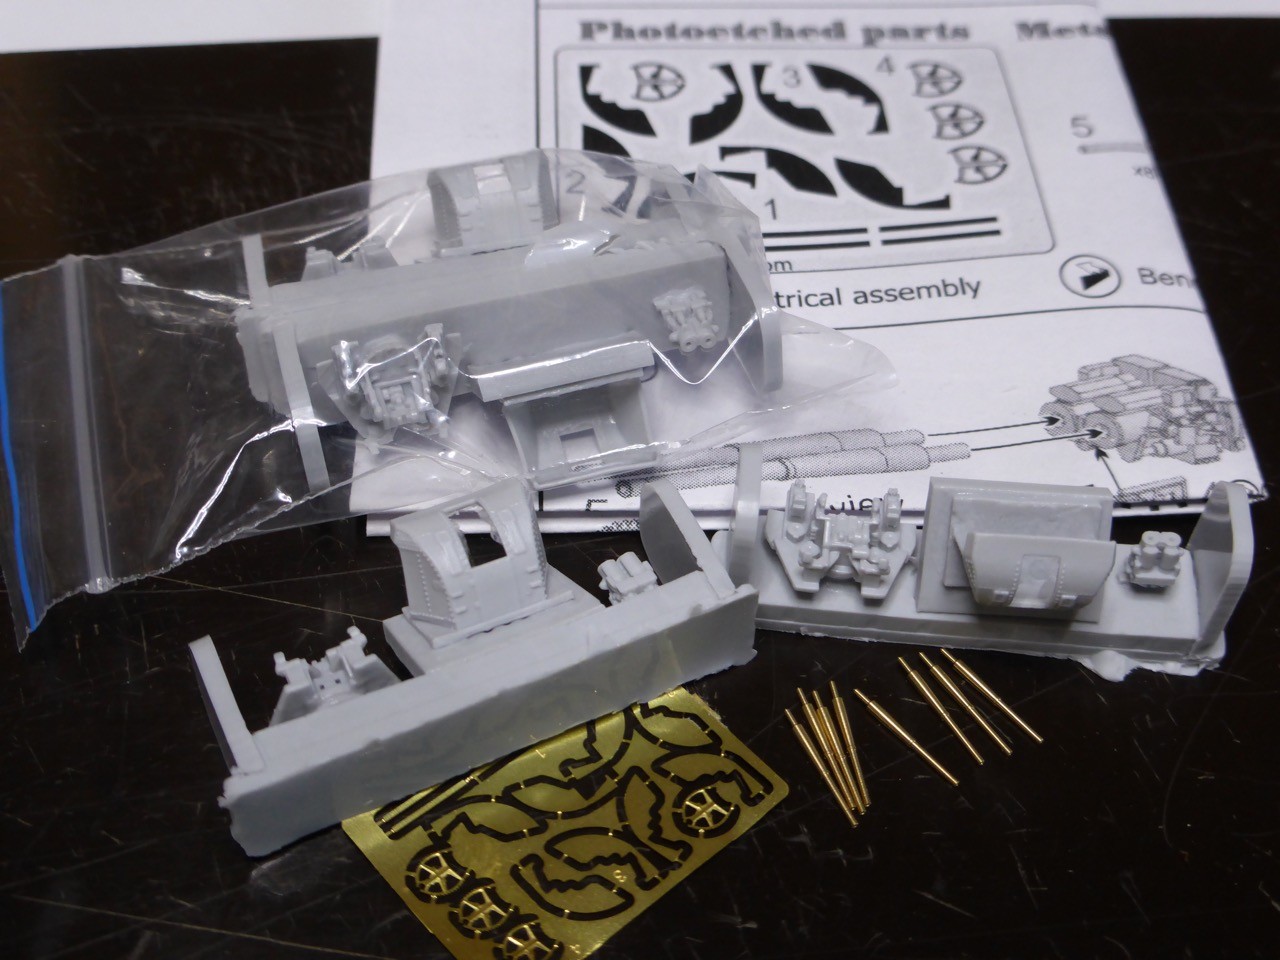
They build into very nice mounts, and they build without much complications, really easy and lots of fun!!
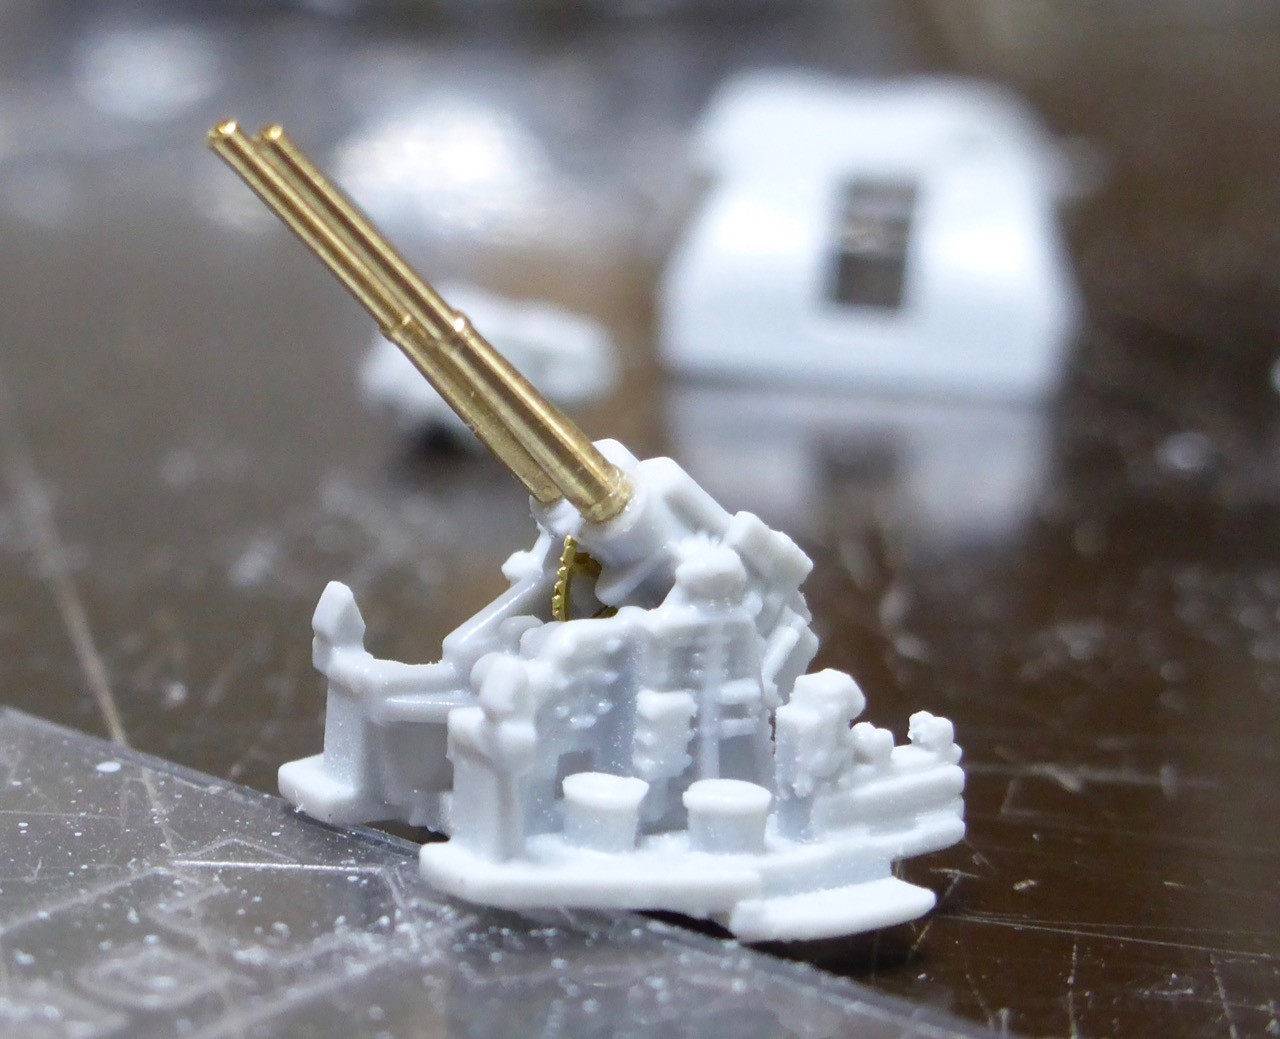
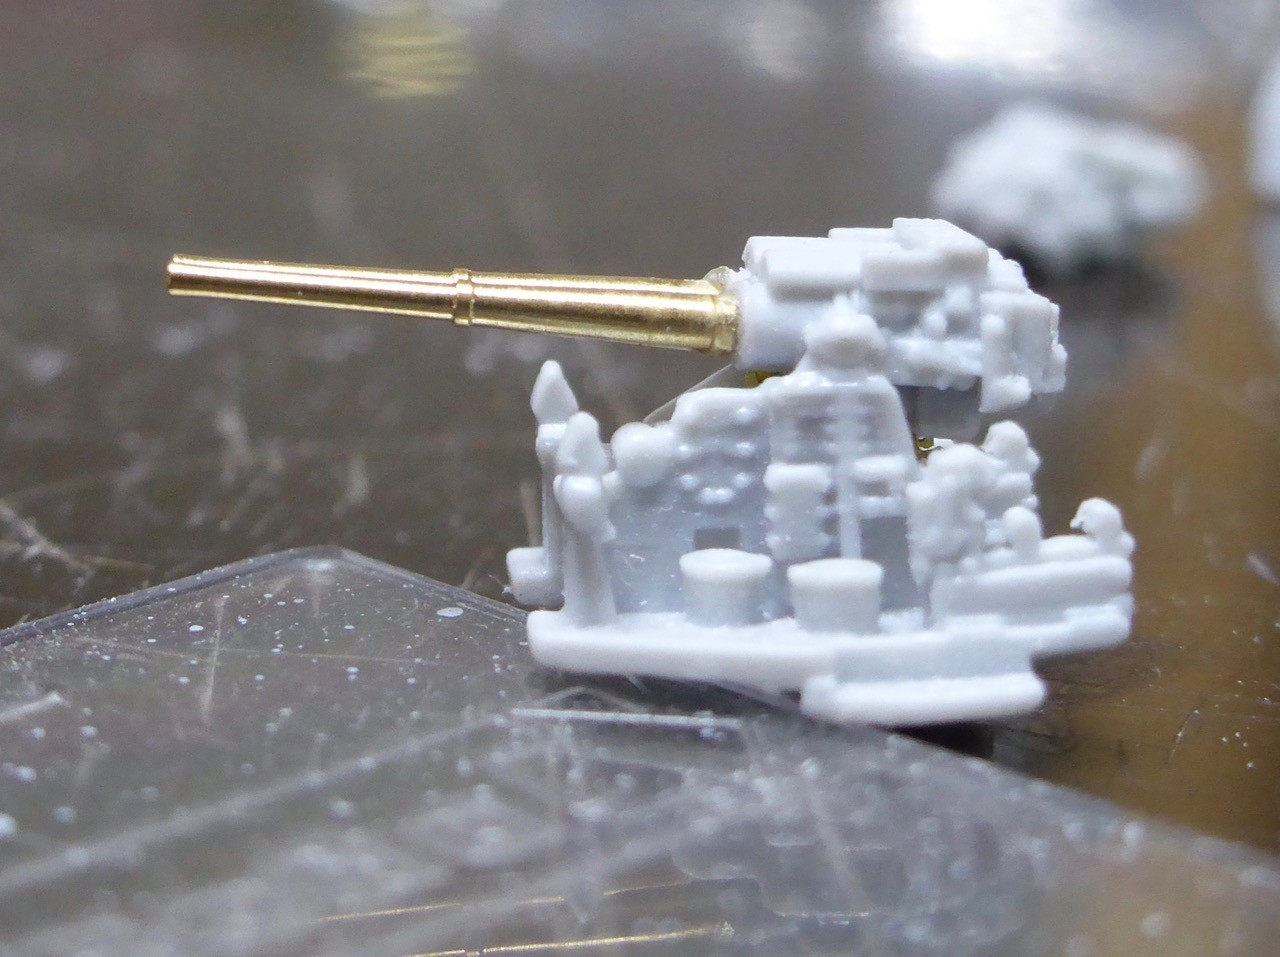
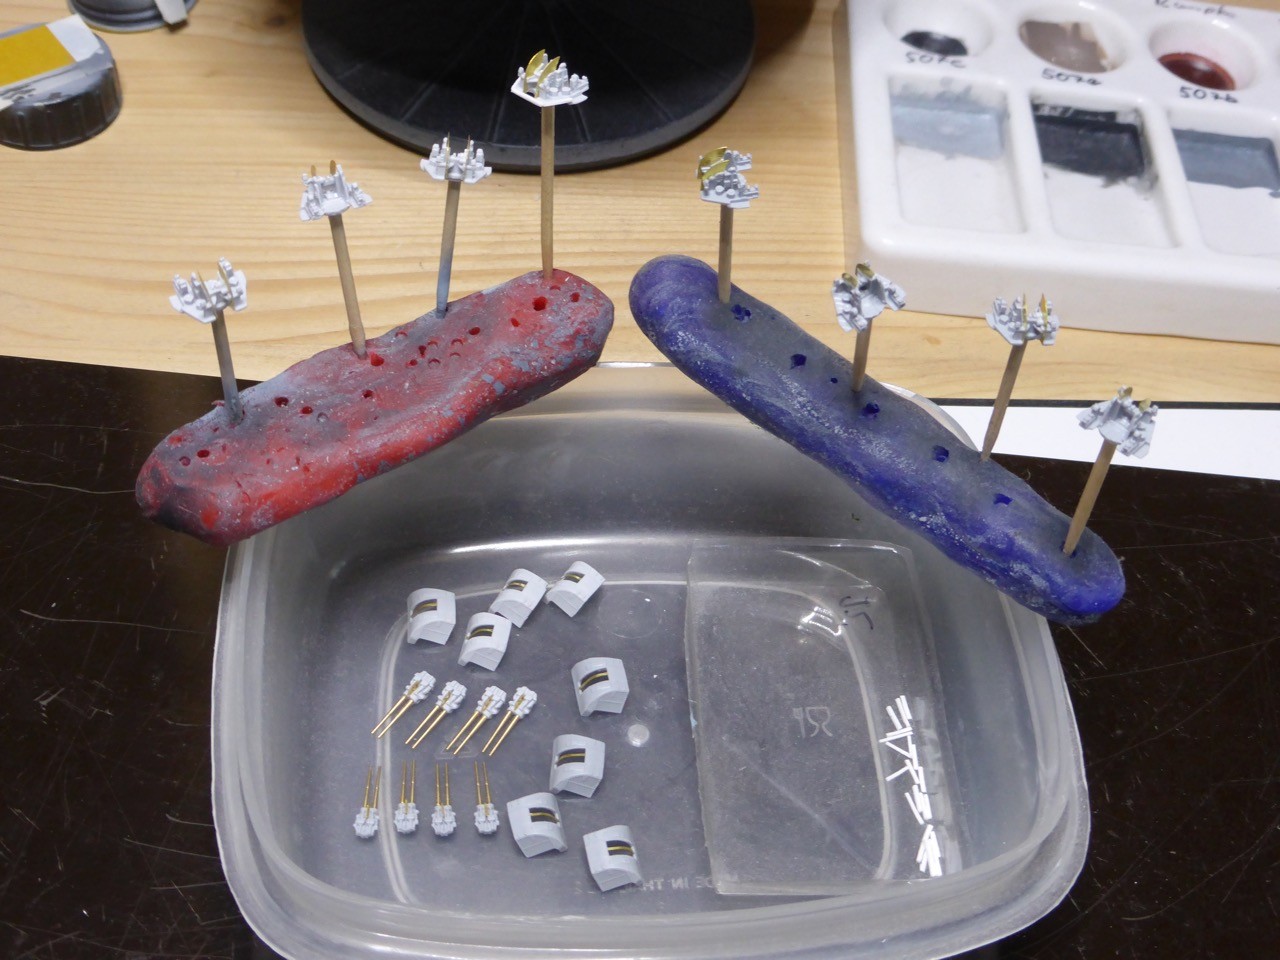
Production line started, four built and ready for painting, seven needed. I will build four more, so I can choose on 'ugly' and go with the seven best
Cheers,
Jan
just some quick essential pics here, the full story as always on my Hood build log!
Much more filling and sanding done to the forecastle deck, no pictures of the here. But I started a first sub-assembly, the NorthStar 4" mounts. Just great little kits!!
They build into very nice mounts, and they build without much complications, really easy and lots of fun!!
Production line started, four built and ready for painting, seven needed. I will build four more, so I can choose on 'ugly' and go with the seven best
Cheers,
Jan
JJ1973
#345
Joined: August 22, 2011
KitMaker: 1,835 posts
Model Shipwrights: 1,832 posts
Posted: Sunday, November 06, 2016 - 11:39 PM UTC
Wow, this good campaign has been a little bit neglected, by my as well as I did not post anything of my last weekend's work.
But that can be helped!
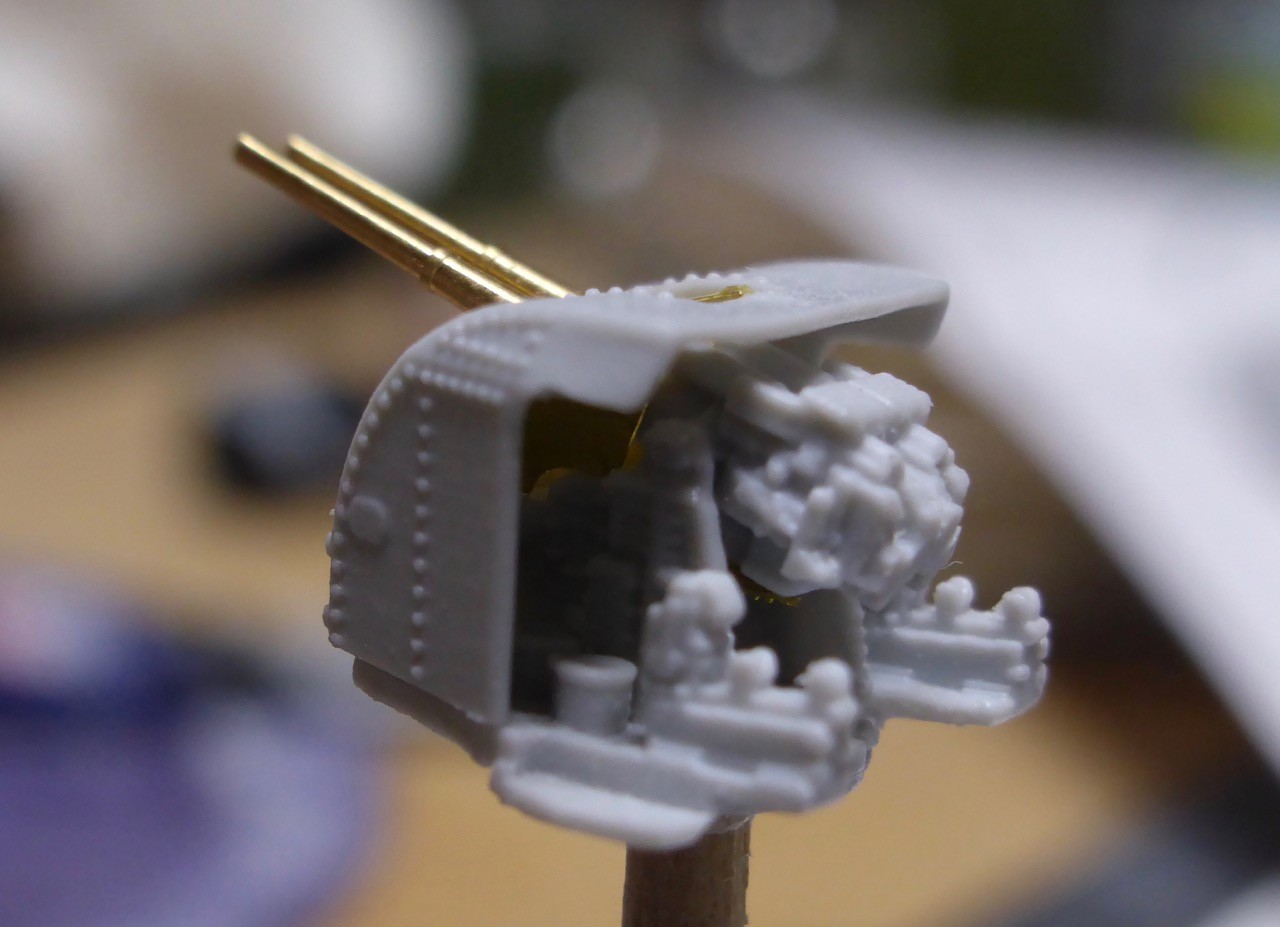
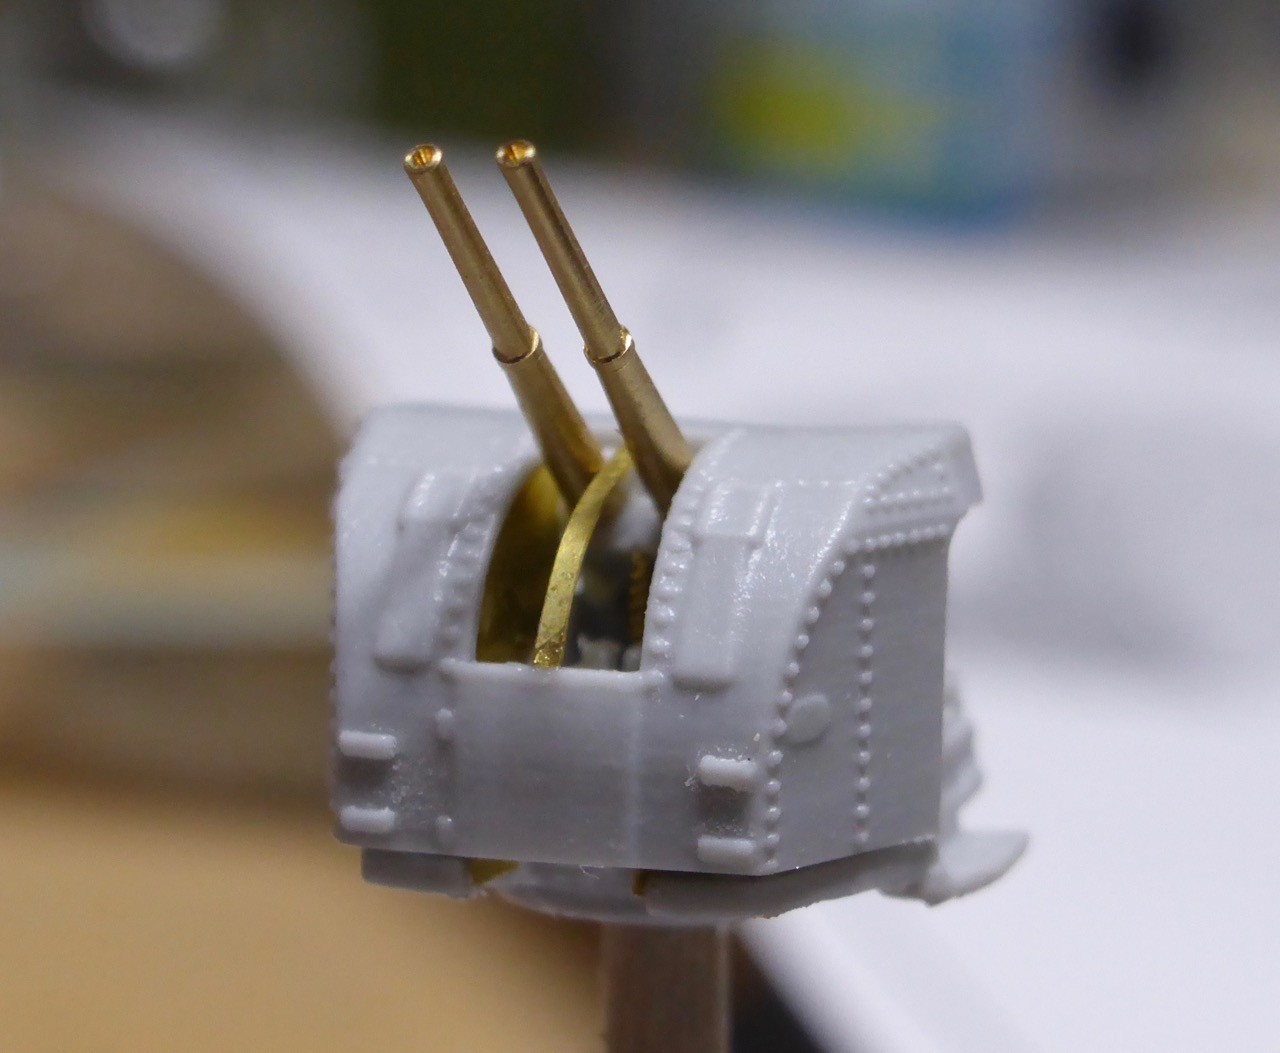
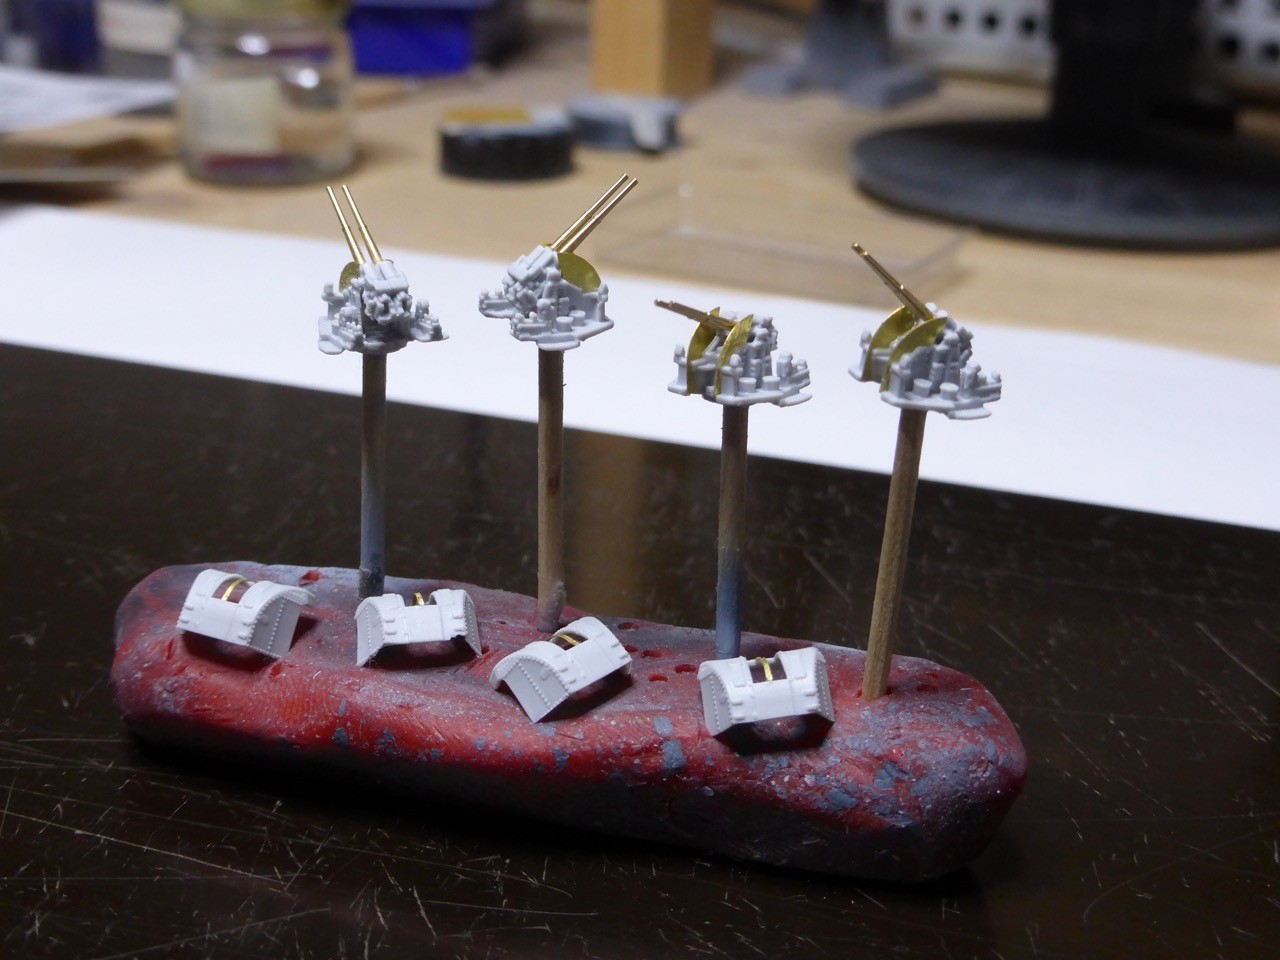
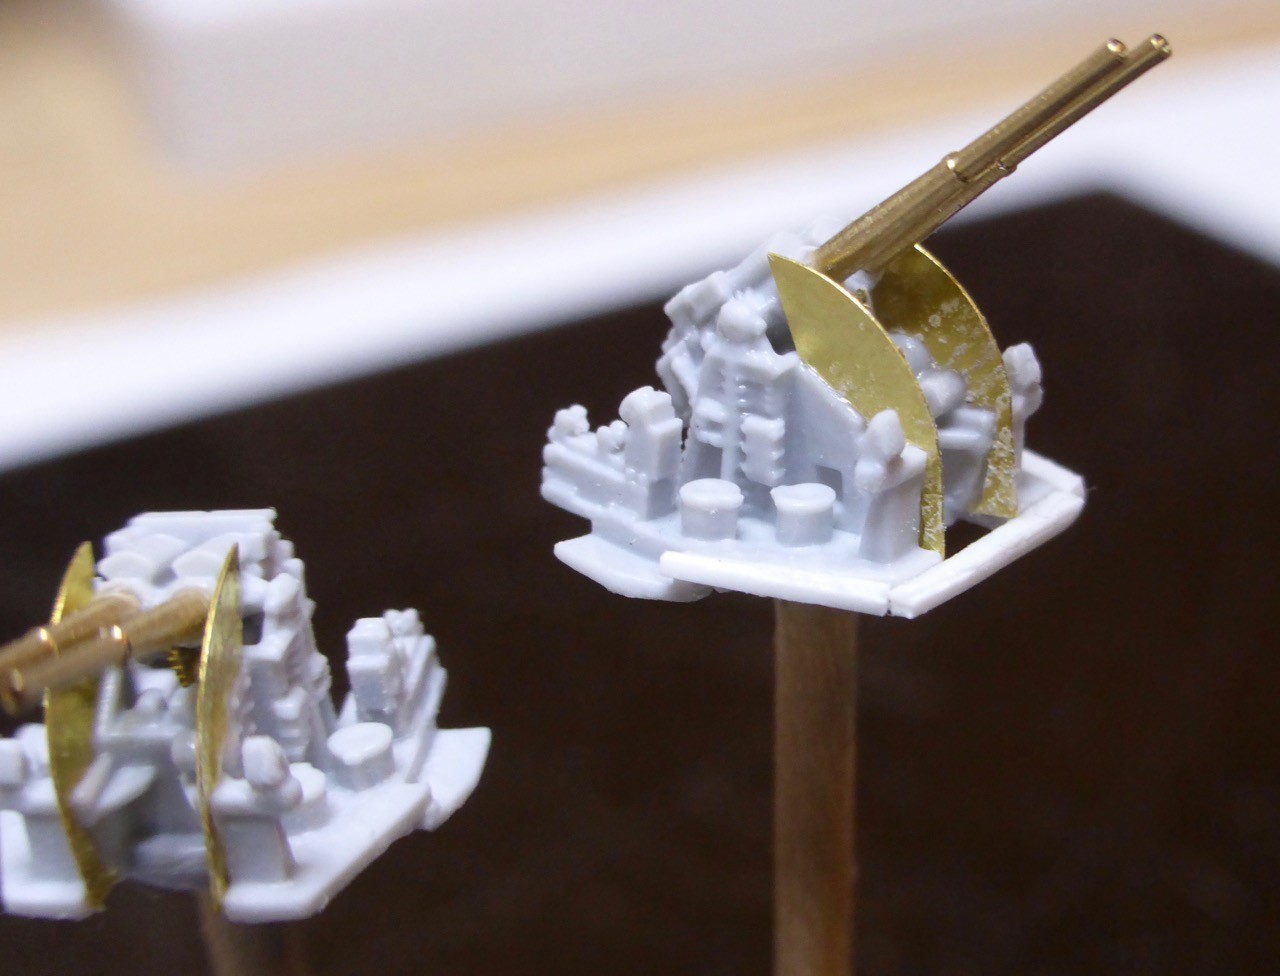
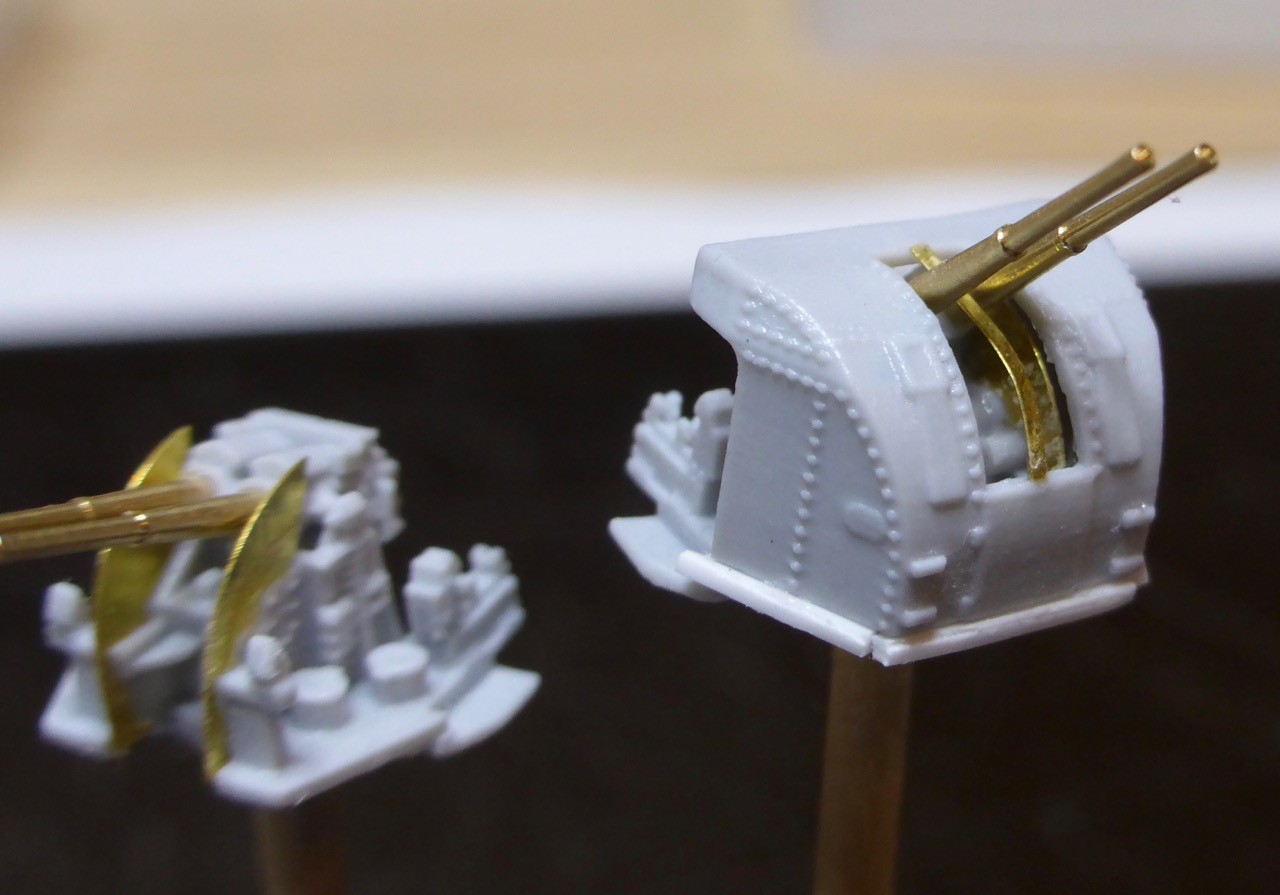
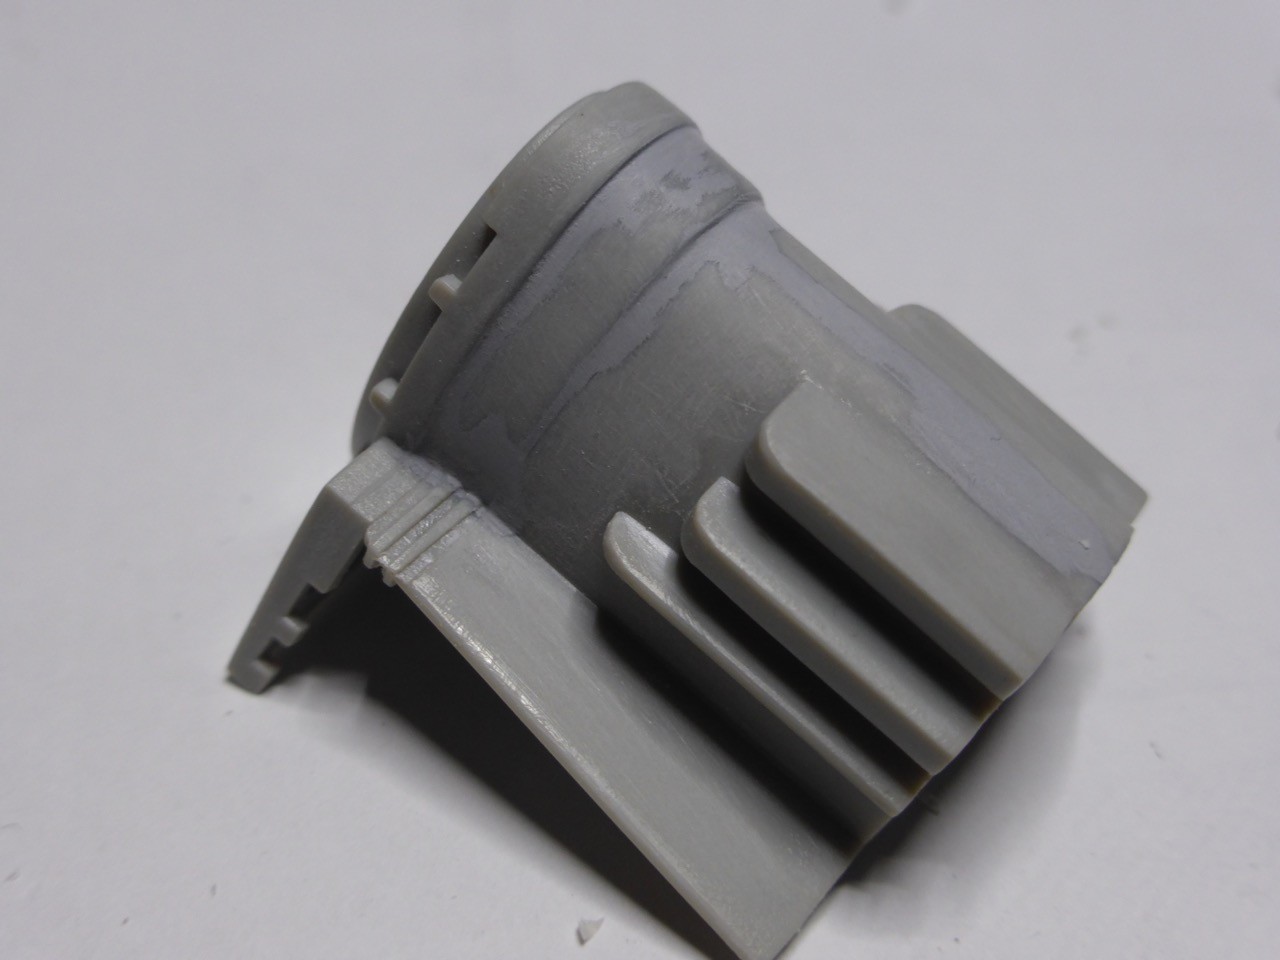
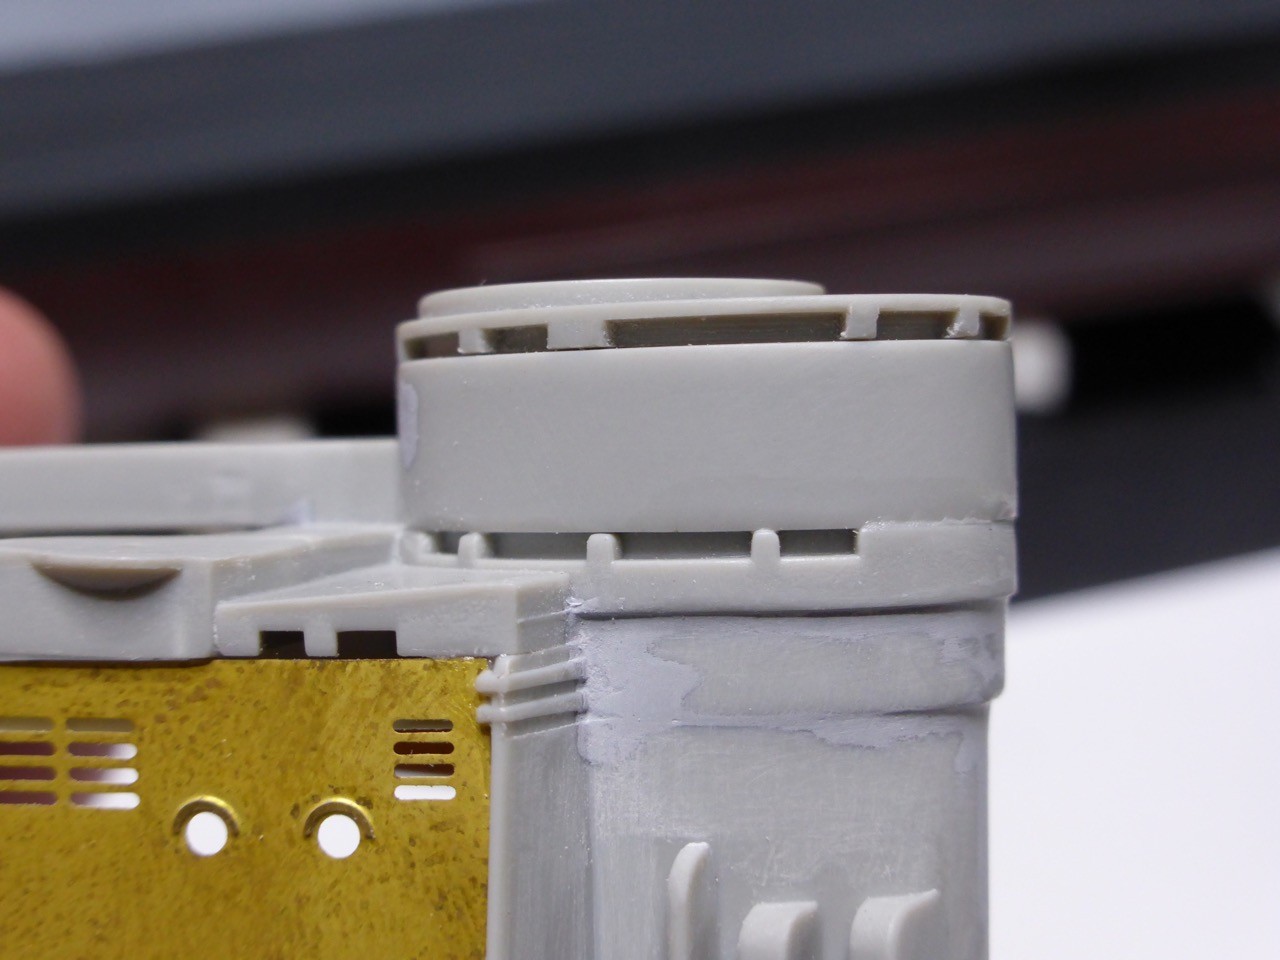
So I think I have found a pretty good workaround for the 'short' gun houses:
(Of course, sanding will be required until everything is nice and flush...)
...and duly set up and finished a production line of eight (only seven needed, of course but while I was at it...)
Work then started on the forward superstructure.
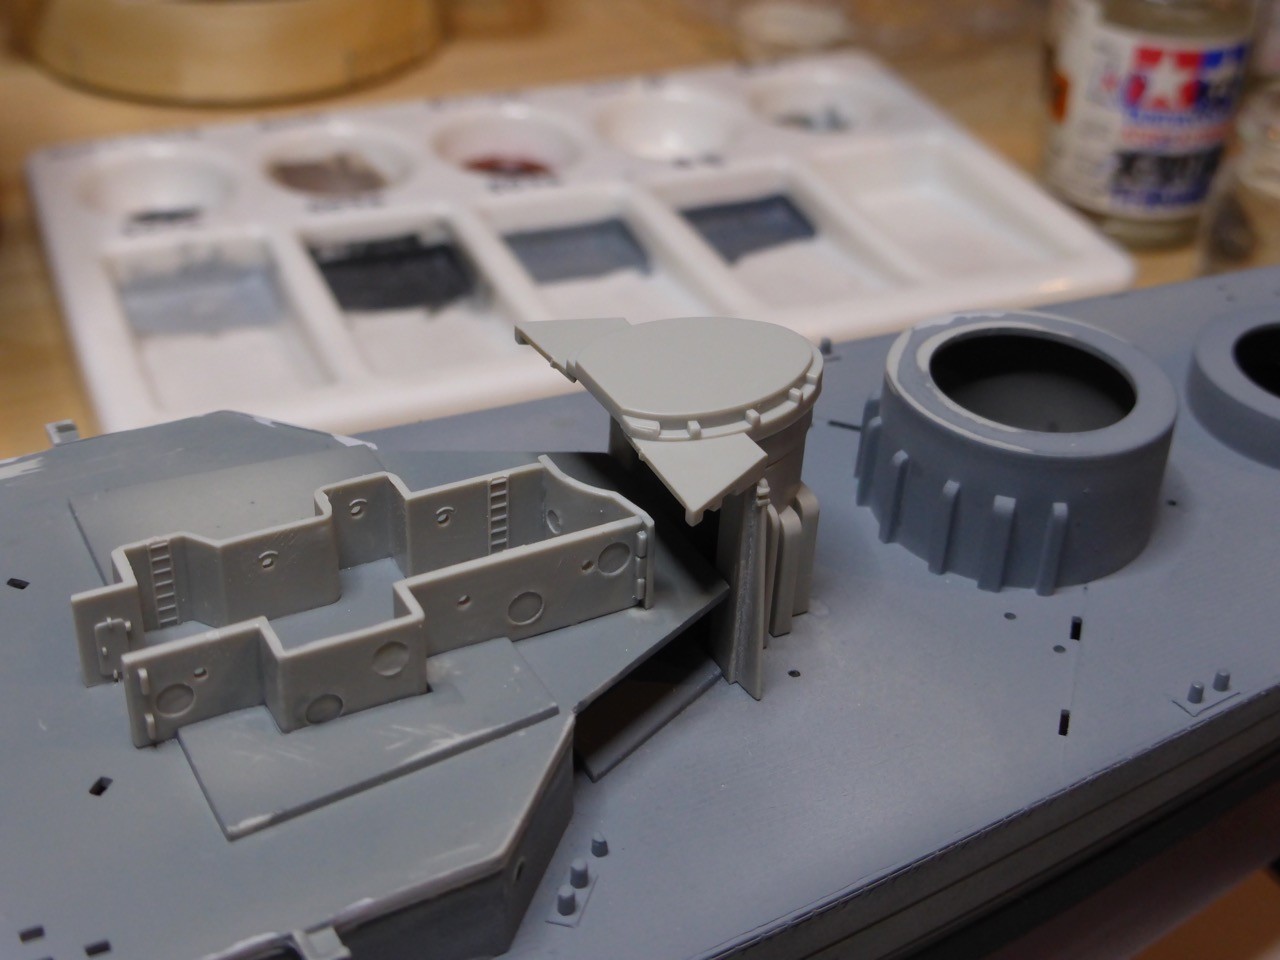
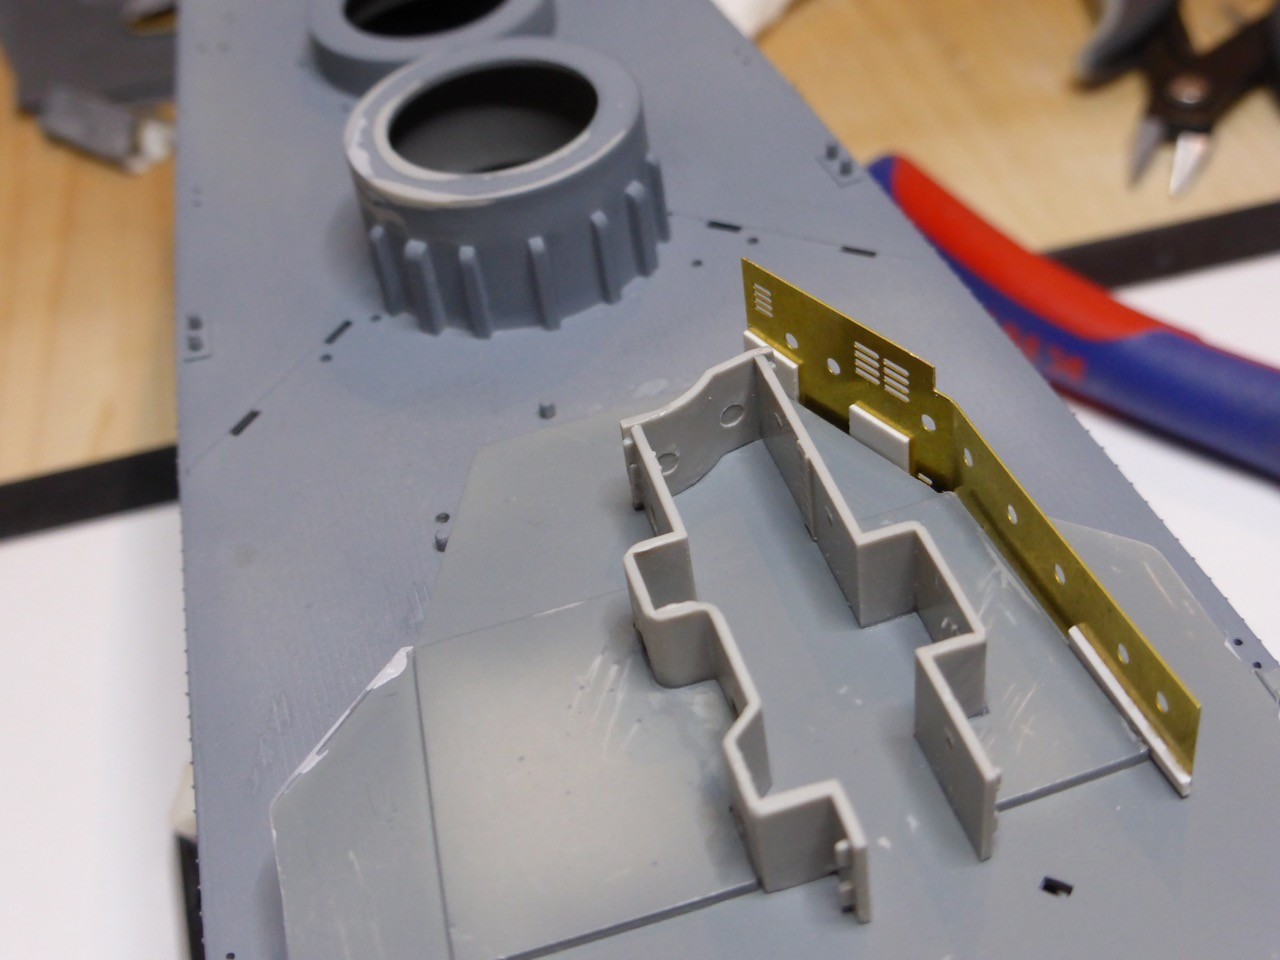
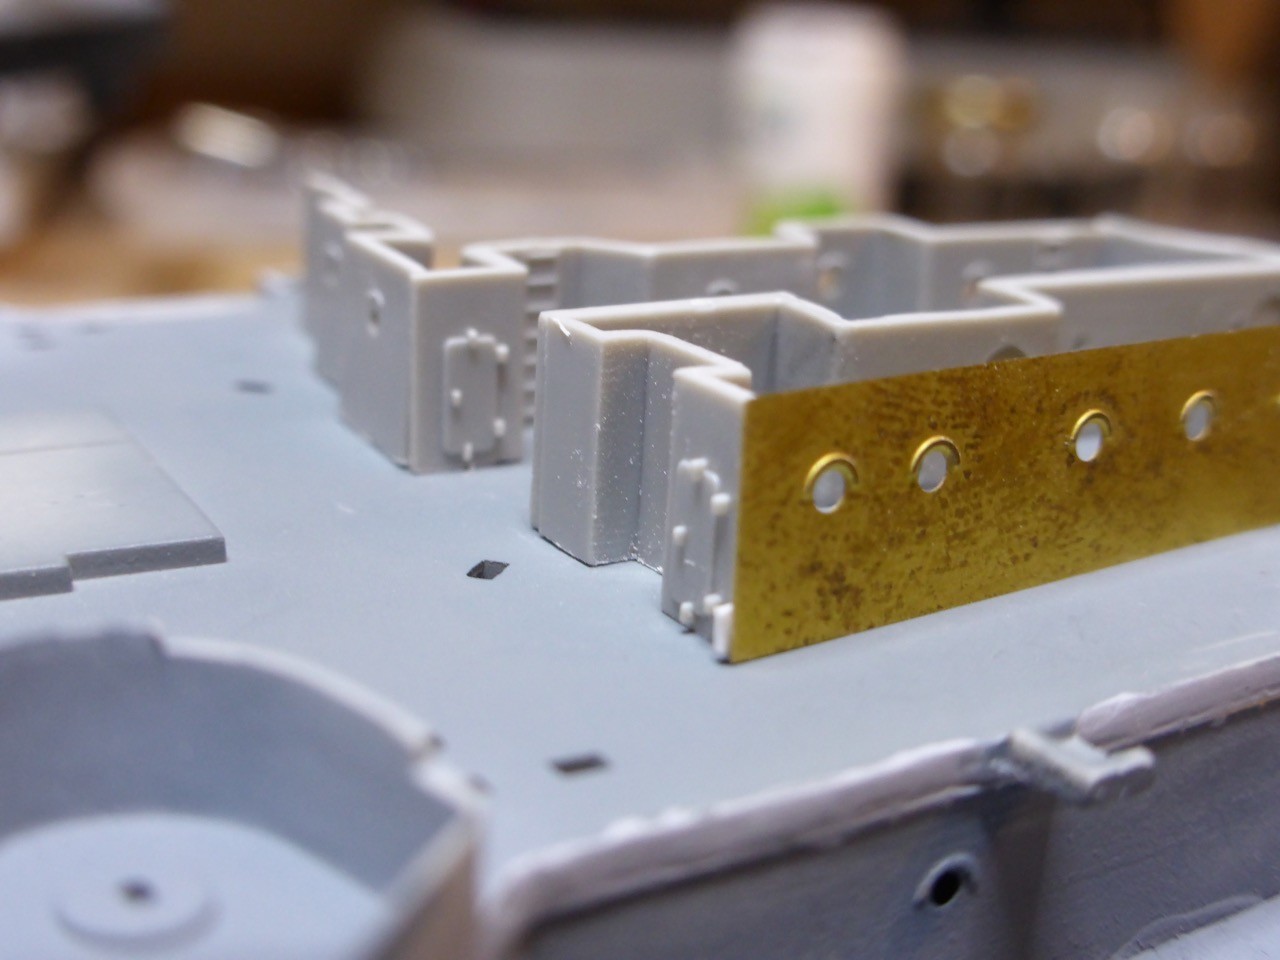
Quite a few corrections and modifications necessary

...and even more filling and sanding, to get the initially rather uneven structure of the conning tower into one flush structure.
Some test-fitting the bridge and forward structure, some pictures before the surfacer was applied. More detail work to be done, but one can see the general bridge structure emerging.
As always, the - in this case much - longer story on my HMS HOOD build log.
More soon and thanks for looking!!
Cheers,
Jan
But that can be helped!
So I think I have found a pretty good workaround for the 'short' gun houses:
(Of course, sanding will be required until everything is nice and flush...)
...and duly set up and finished a production line of eight (only seven needed, of course but while I was at it...)
Work then started on the forward superstructure.
Quite a few corrections and modifications necessary
...and even more filling and sanding, to get the initially rather uneven structure of the conning tower into one flush structure.
Some test-fitting the bridge and forward structure, some pictures before the surfacer was applied. More detail work to be done, but one can see the general bridge structure emerging.
As always, the - in this case much - longer story on my HMS HOOD build log.
More soon and thanks for looking!!
Cheers,
Jan
Hangelafette

Joined: April 22, 2012
KitMaker: 344 posts
Model Shipwrights: 2 posts

Posted: Monday, November 07, 2016 - 07:13 AM UTC
Hi all,
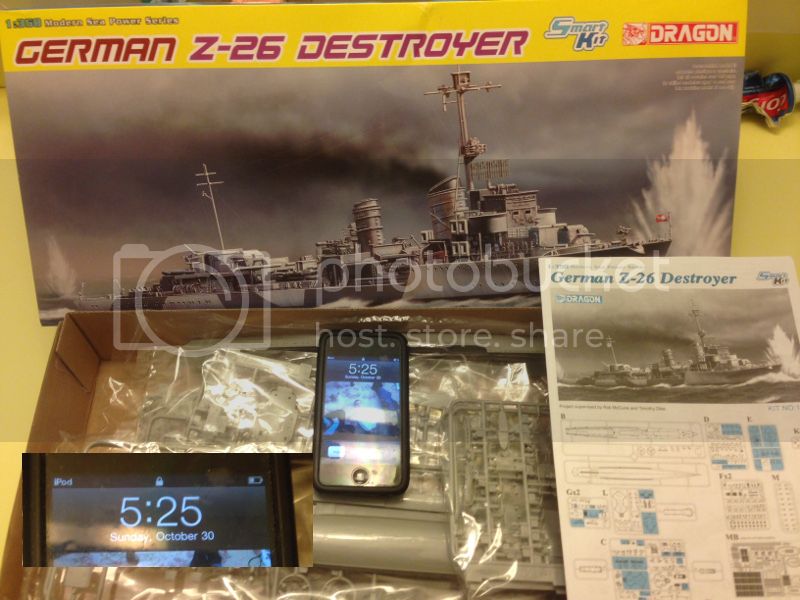
I recently caught the ship bug and decided to jump in with Dragon's 1/350 Z-26. As it belongs in the same class, I figured it could be modeled as the Z-23.
Anyone aware of a good reference book? The one undated image I have found of the Z23 has no radar fitted. I suspect the picture is pre-1941.
Simply stunning work in this campaign by the way!
-Nate
 |

WEB HOSTING BY


Copyright ©2021 Model Shipwrights and Kitmaker Network, a subsidiary of Silver Star Enterprises
All Rights Reserved. Please read our Conditions of Use and Privacy Policy.
All Rights Reserved. Please read our Conditions of Use and Privacy Policy.