Campaigns
Want to be part of a group build? This is where to start, plan, and meet about them.
Official: Sink the Bismarck Campaign
JJ1973
#345
Visit this Community
Niedersachsen, Germany
Joined: August 22, 2011
KitMaker: 1,835 posts
Model Shipwrights: 1,832 posts
Posted: Monday, July 18, 2016 - 09:35 AM UTC
Hi Si,

very nice progress!! ...and that reminds me that I entirely forgot to update here on the campaign... will do that shortly...

Cheers,
Jan
RedDuster
Visit this Community
England - South East, United Kingdom
Joined: March 01, 2010
KitMaker: 7,078 posts
Model Shipwrights: 6,649 posts
Posted: Tuesday, July 19, 2016 - 12:41 AM UTC
Thanks Jan,

will look forward to that,

cheers

Si
RedDuster
Visit this Community
England - South East, United Kingdom
Joined: March 01, 2010
KitMaker: 7,078 posts
Model Shipwrights: 6,649 posts
Posted: Tuesday, July 19, 2016 - 12:46 AM UTC
Thanks Dave,

I will be using Tamiya XF19 sky grey, looks about right on the main barbettes

Cheers

Si
JJ1973
#345
Visit this Community
Niedersachsen, Germany
Joined: August 22, 2011
KitMaker: 1,835 posts
Model Shipwrights: 1,832 posts
Posted: Tuesday, July 19, 2016 - 09:33 AM UTC
Hi all!

Before I miss out again in between mad office hours, here are some pictures of my latest work on the Hood

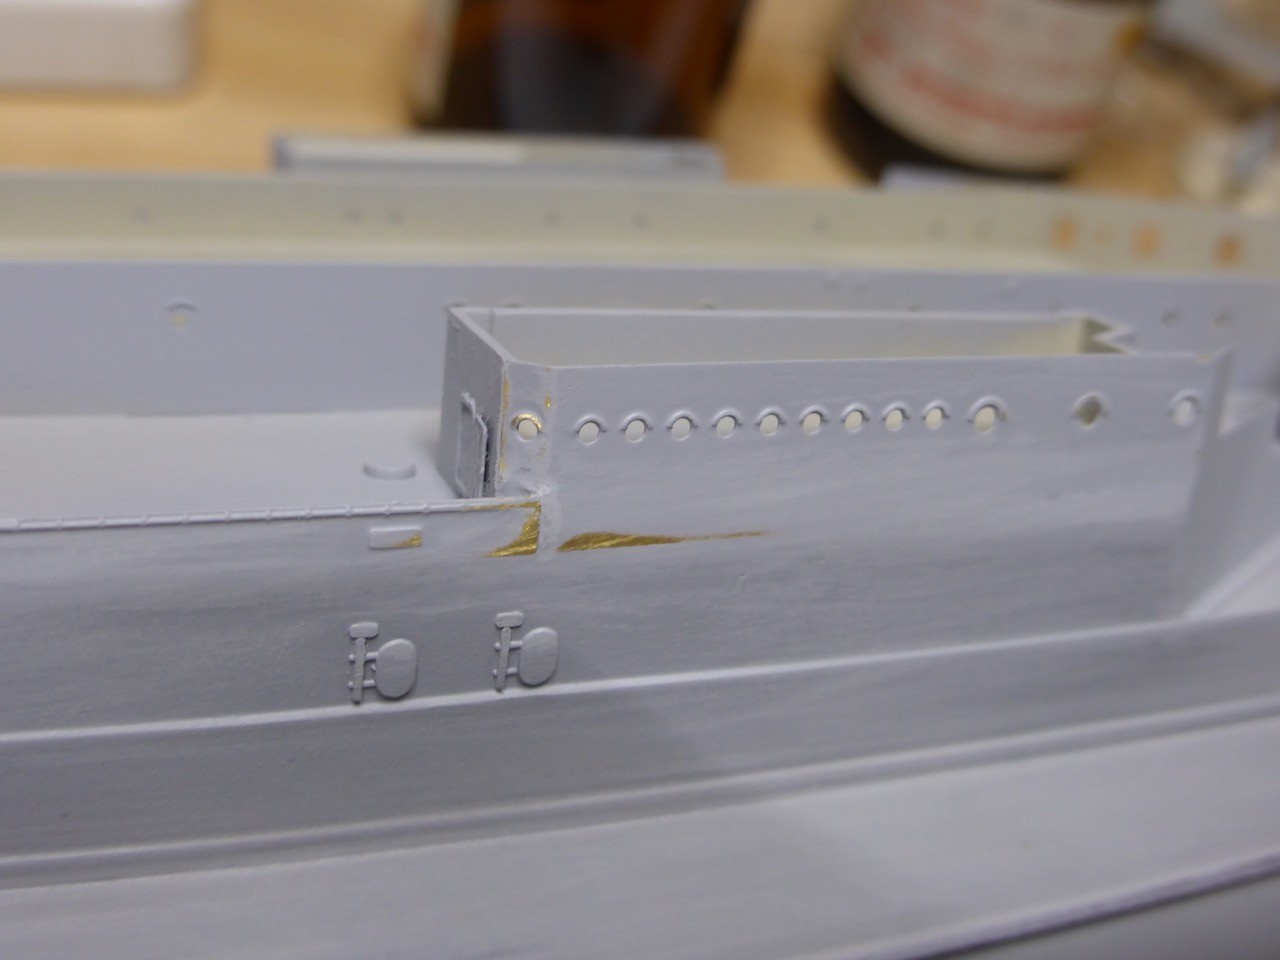
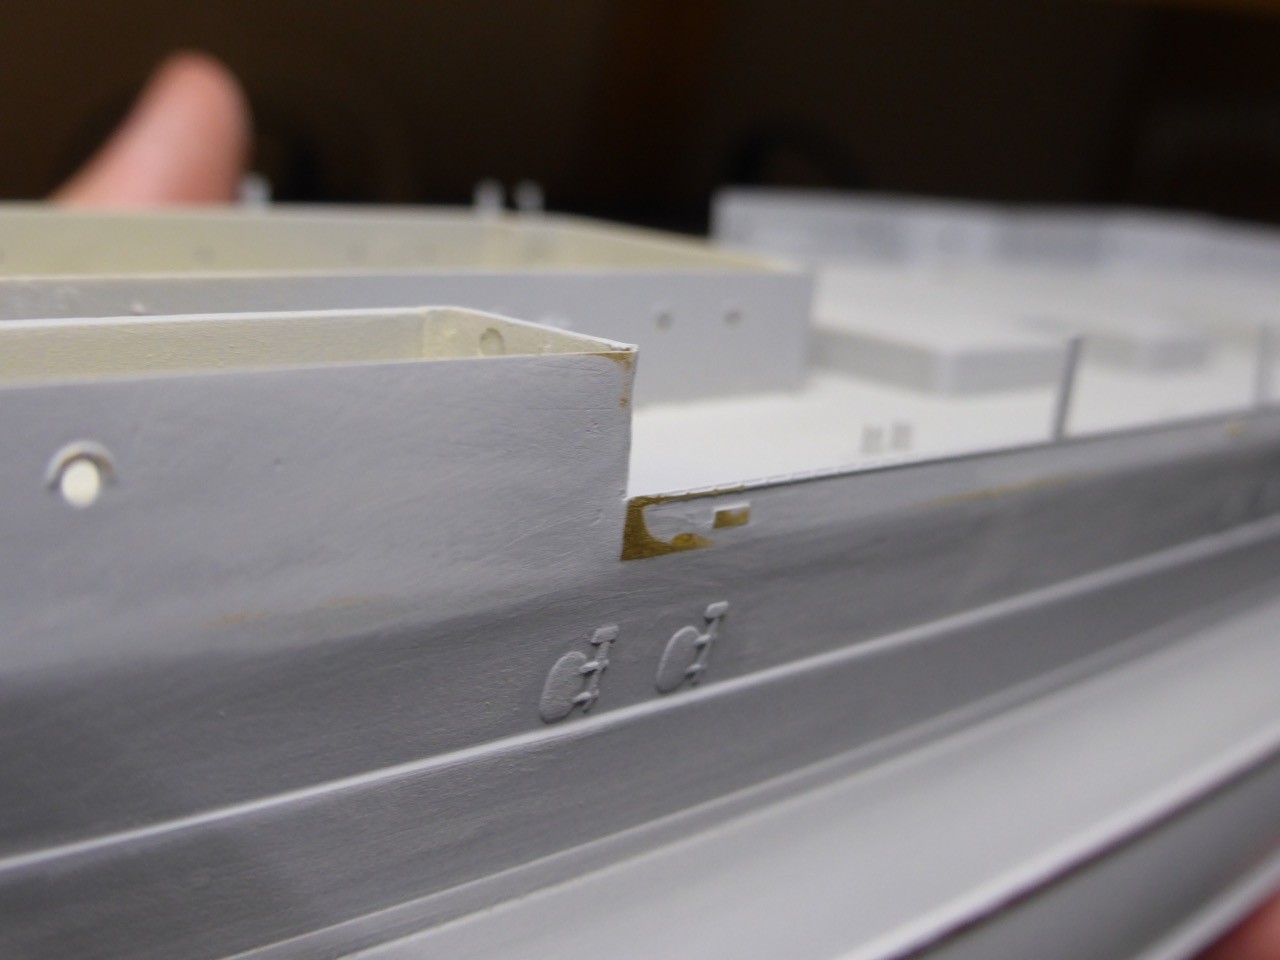
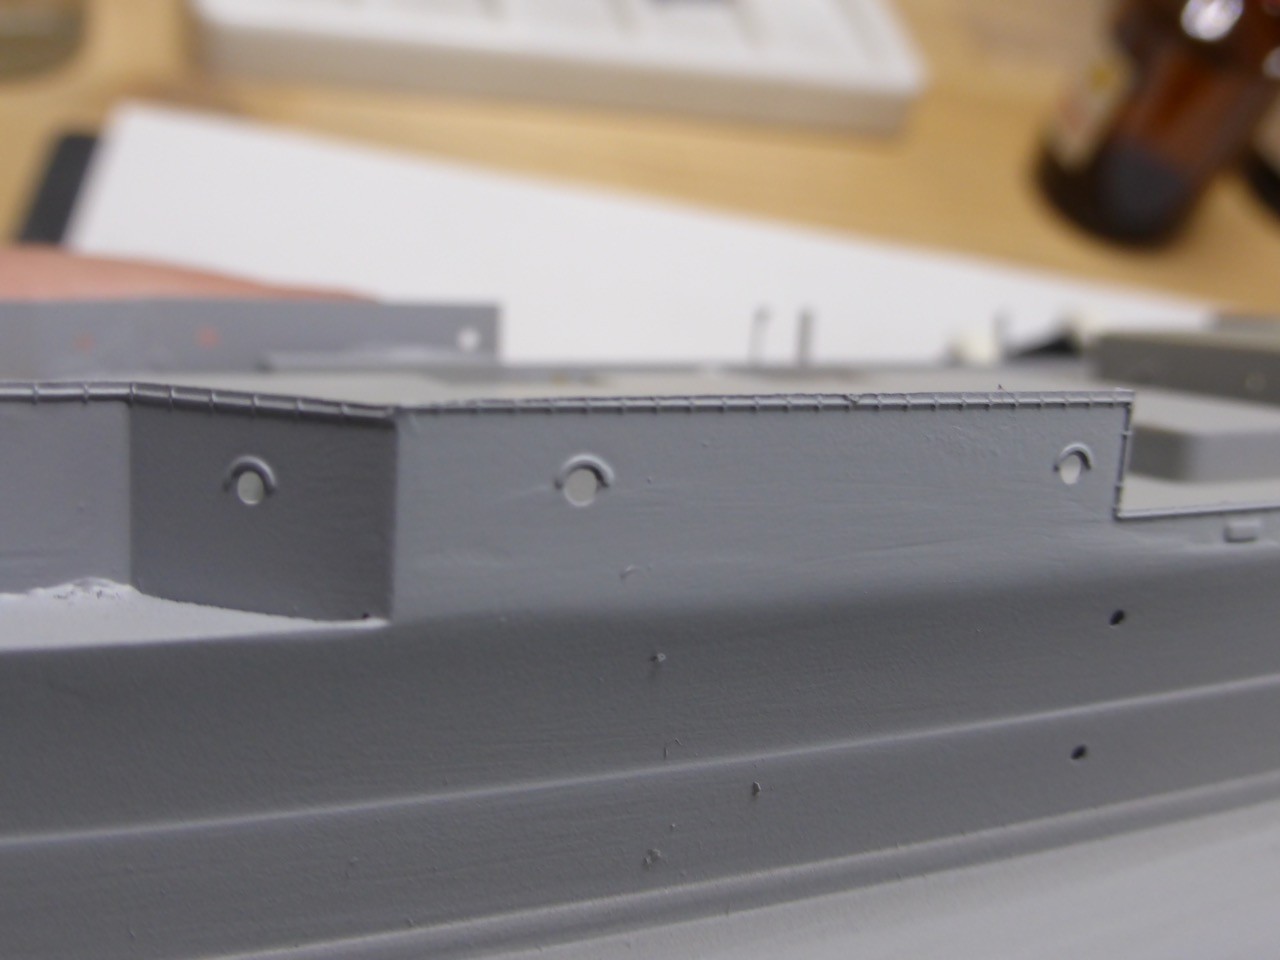
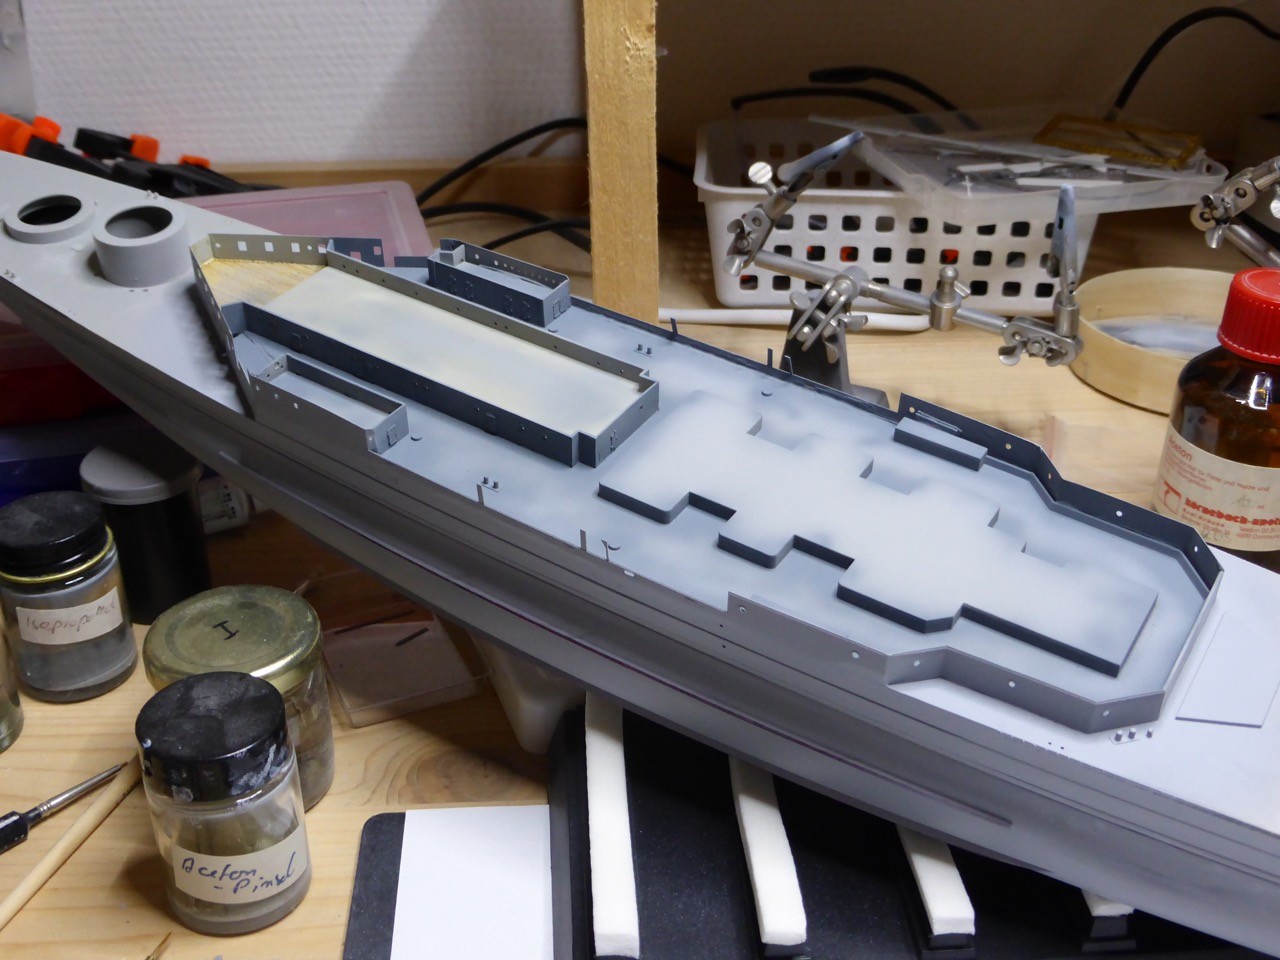
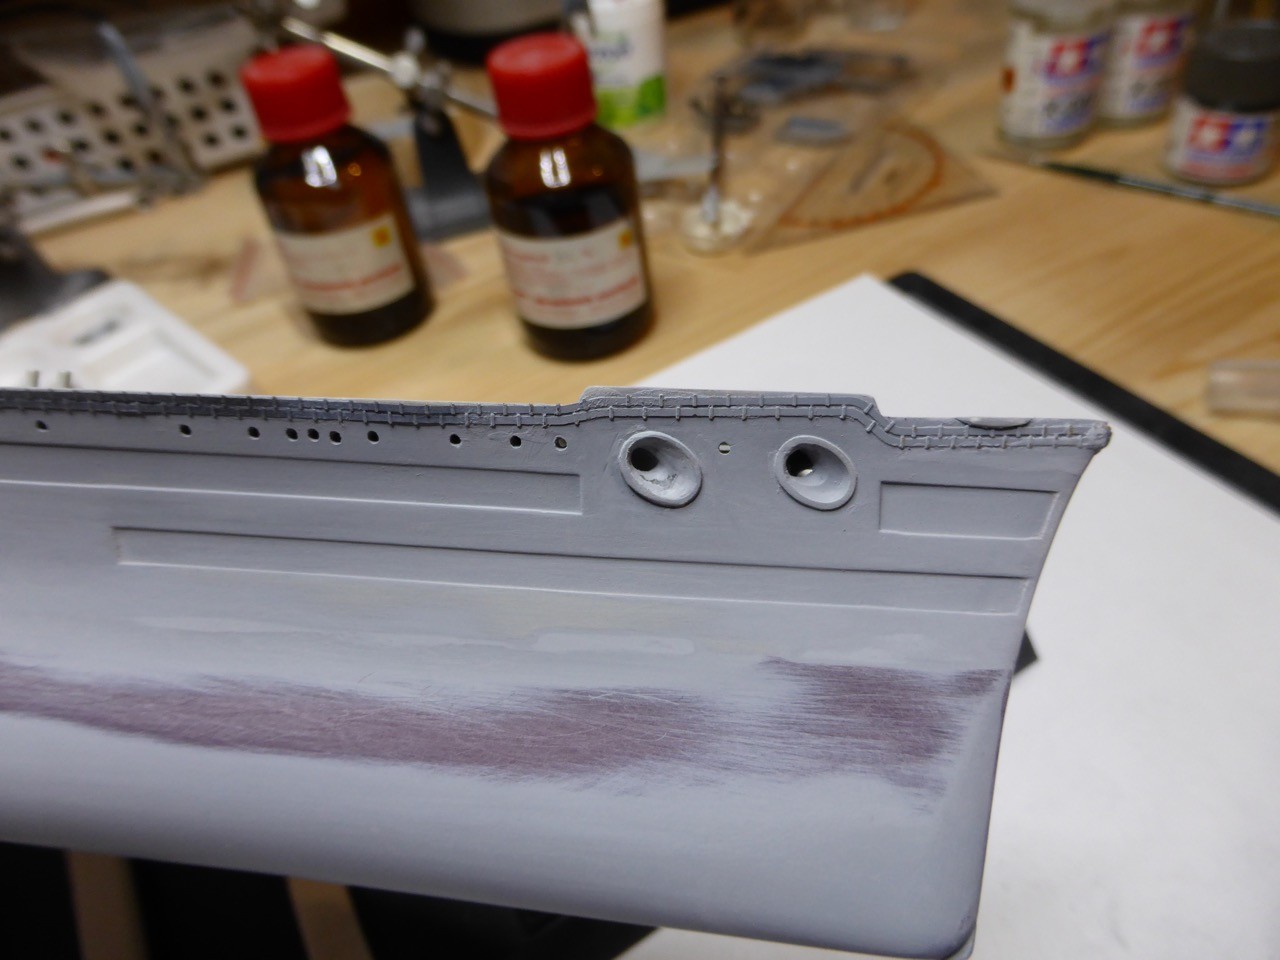
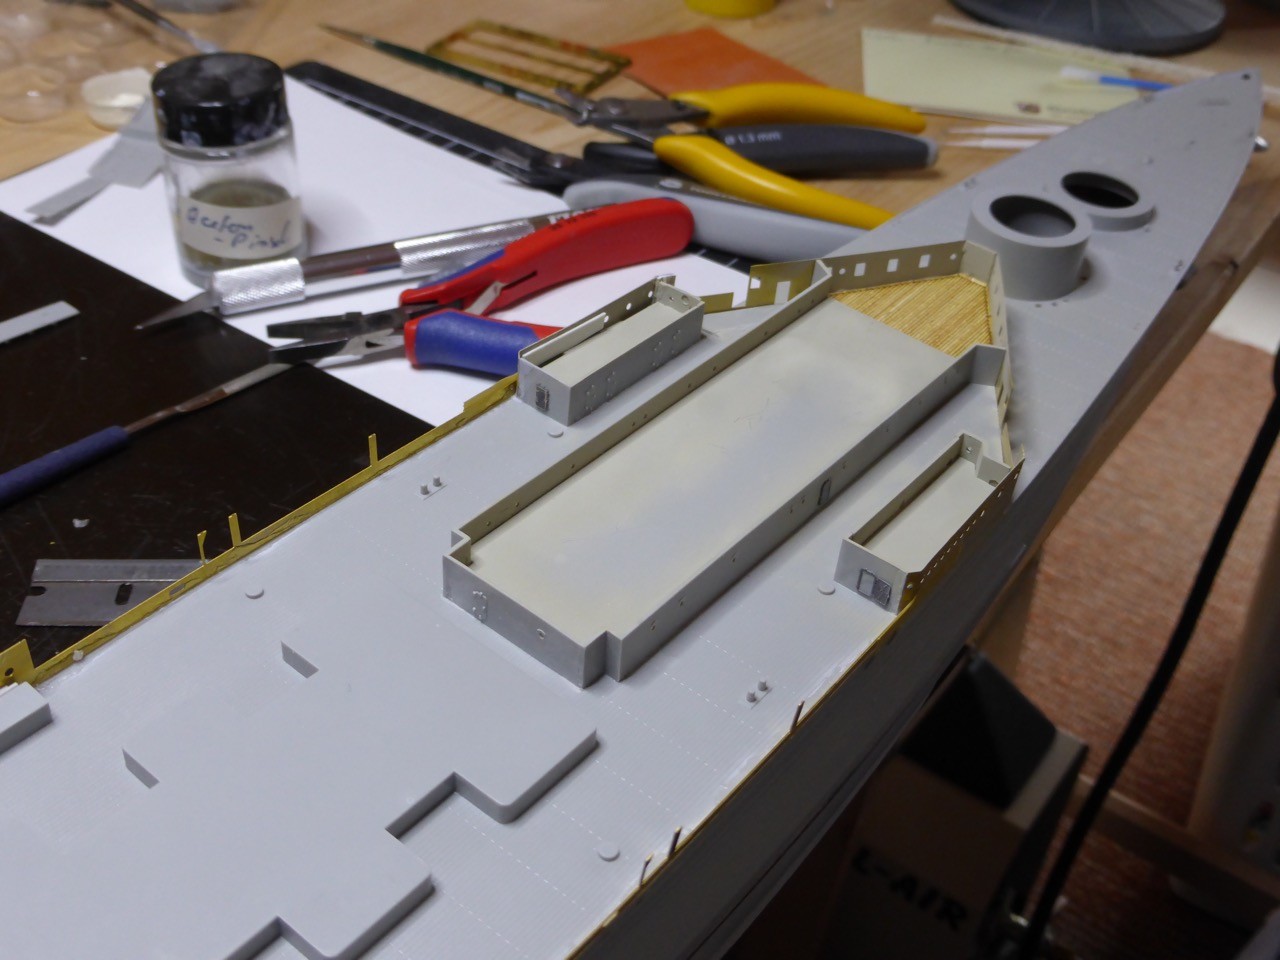
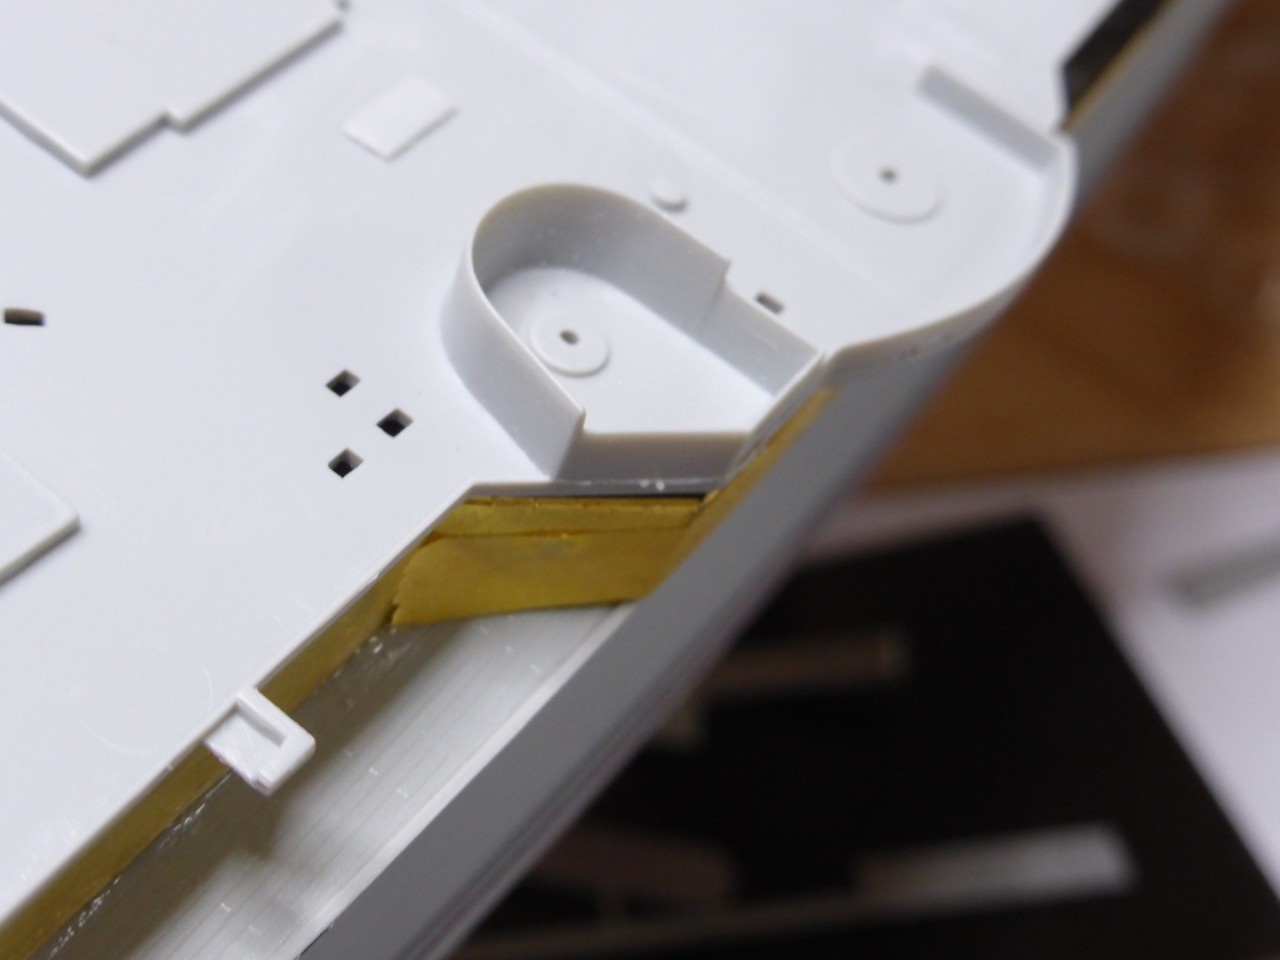
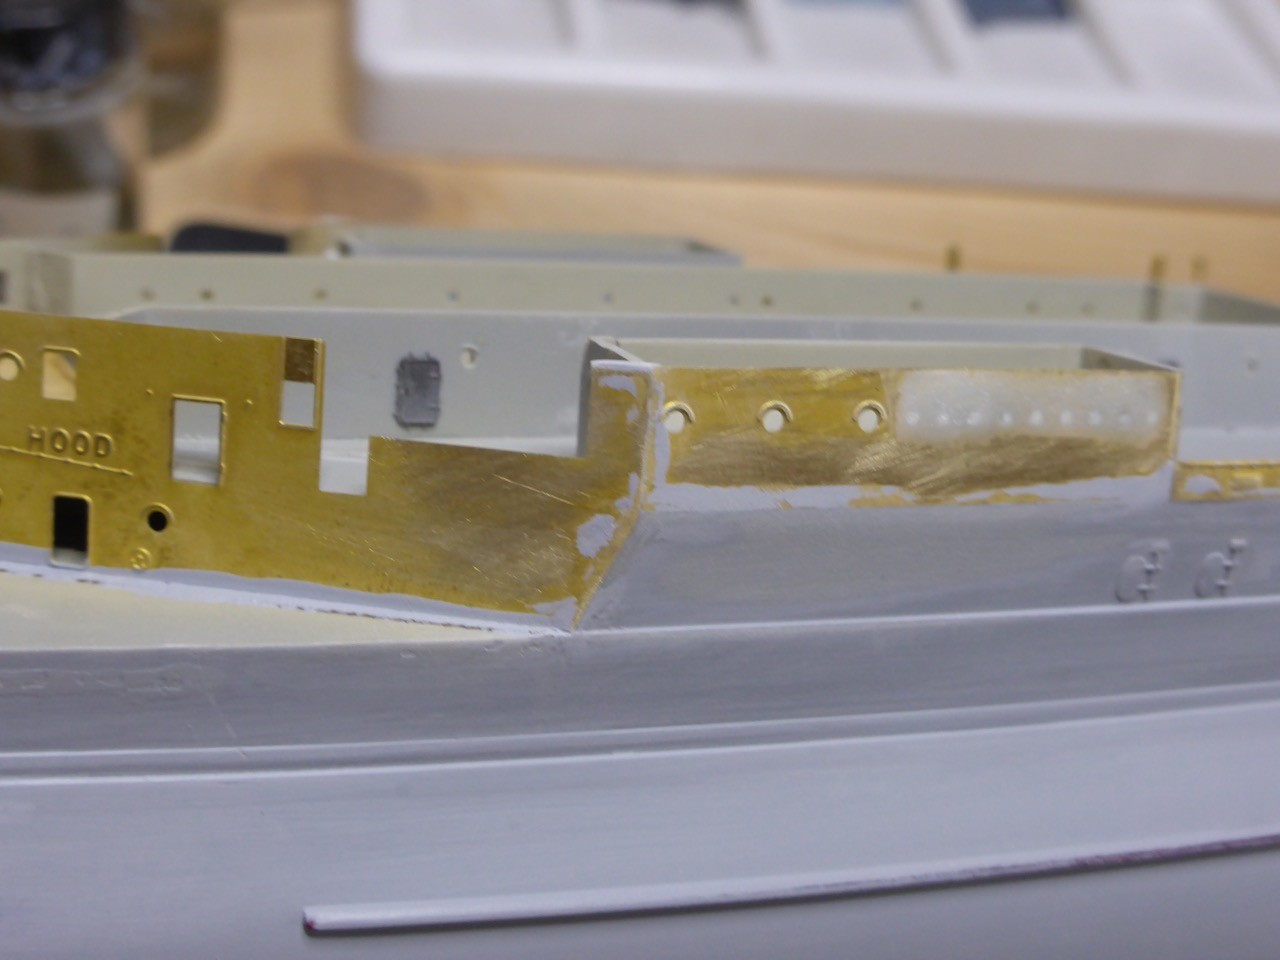
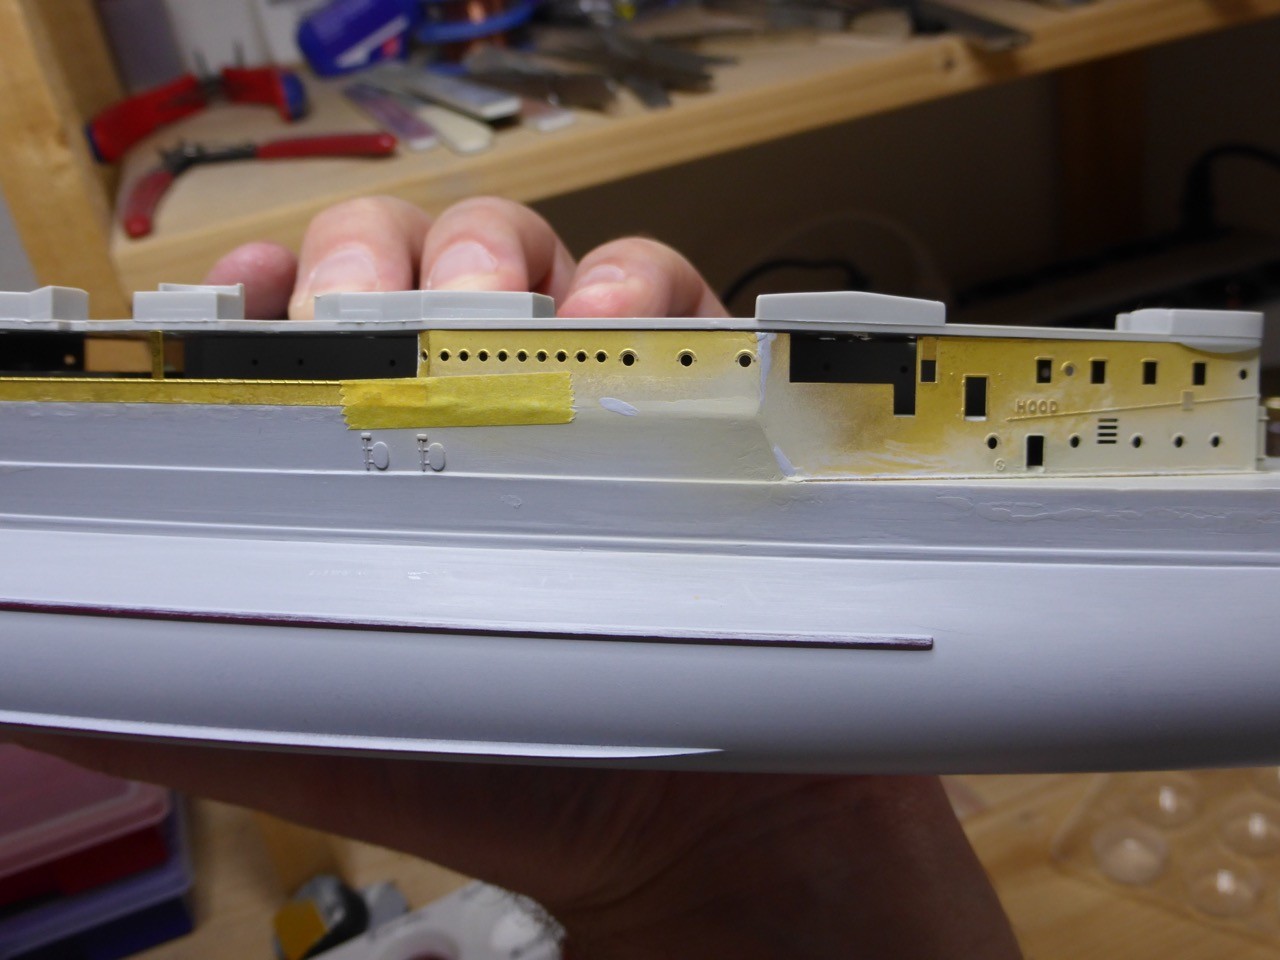
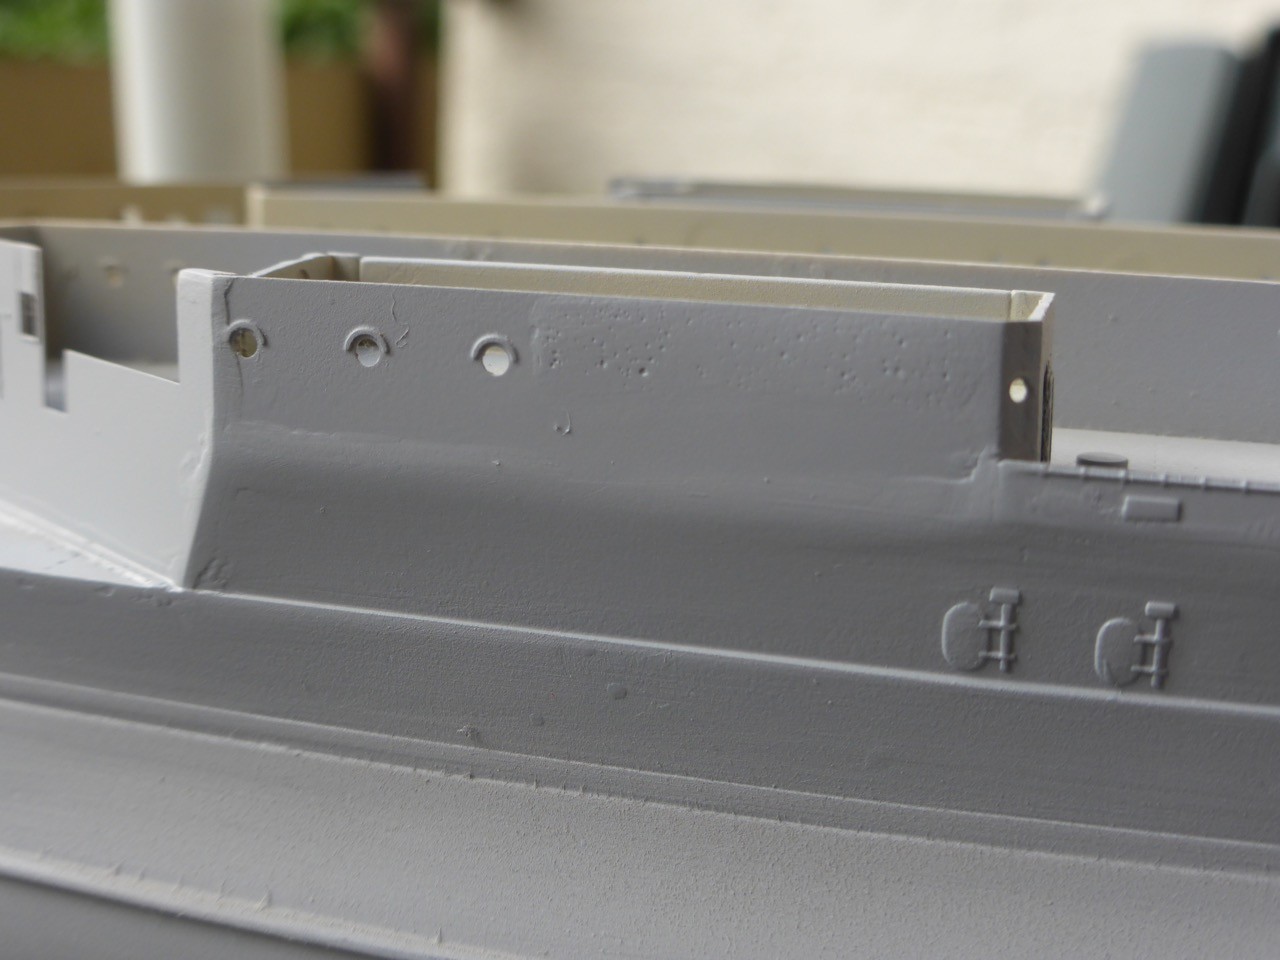
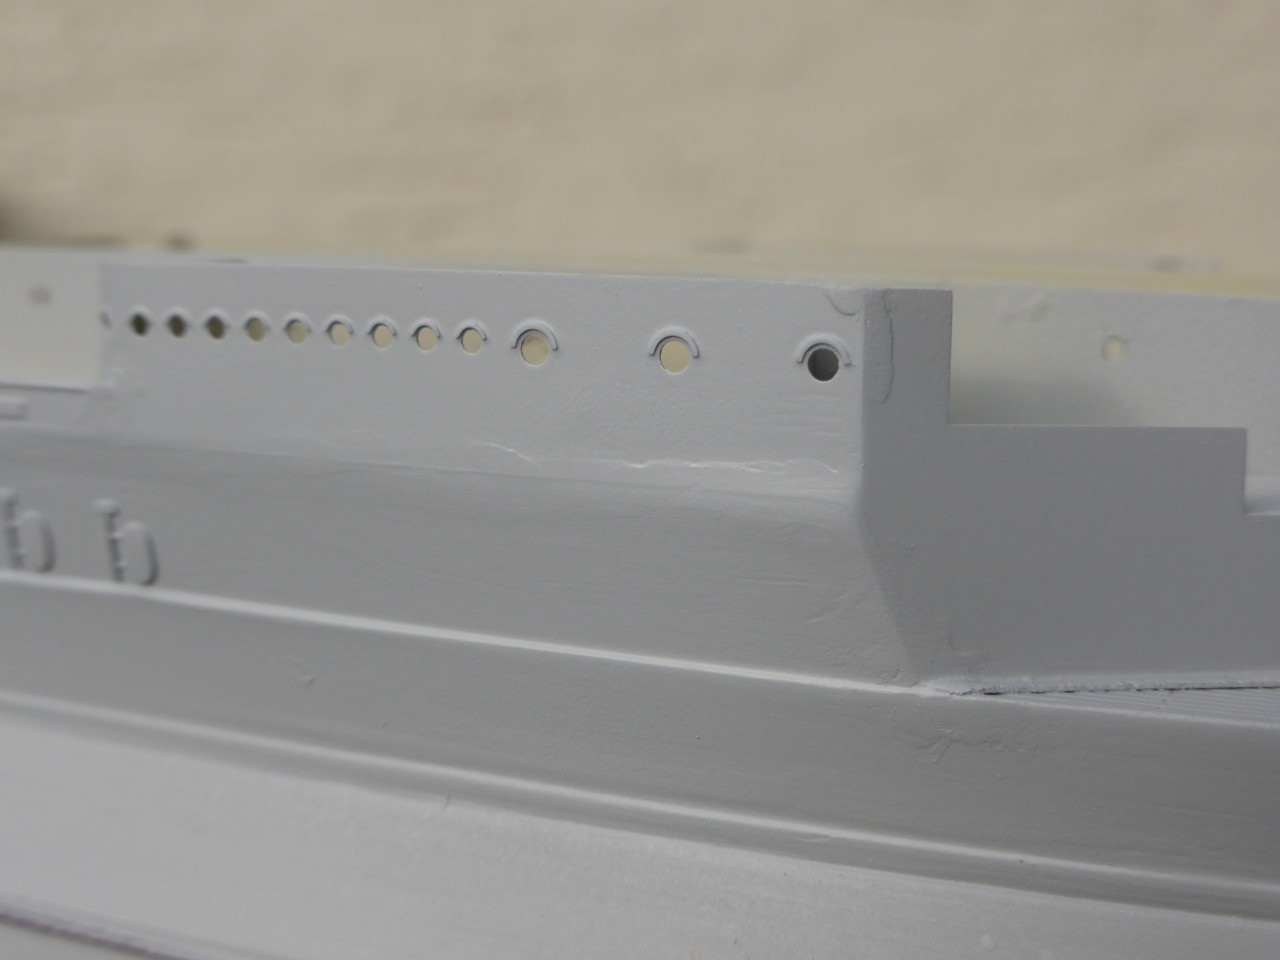
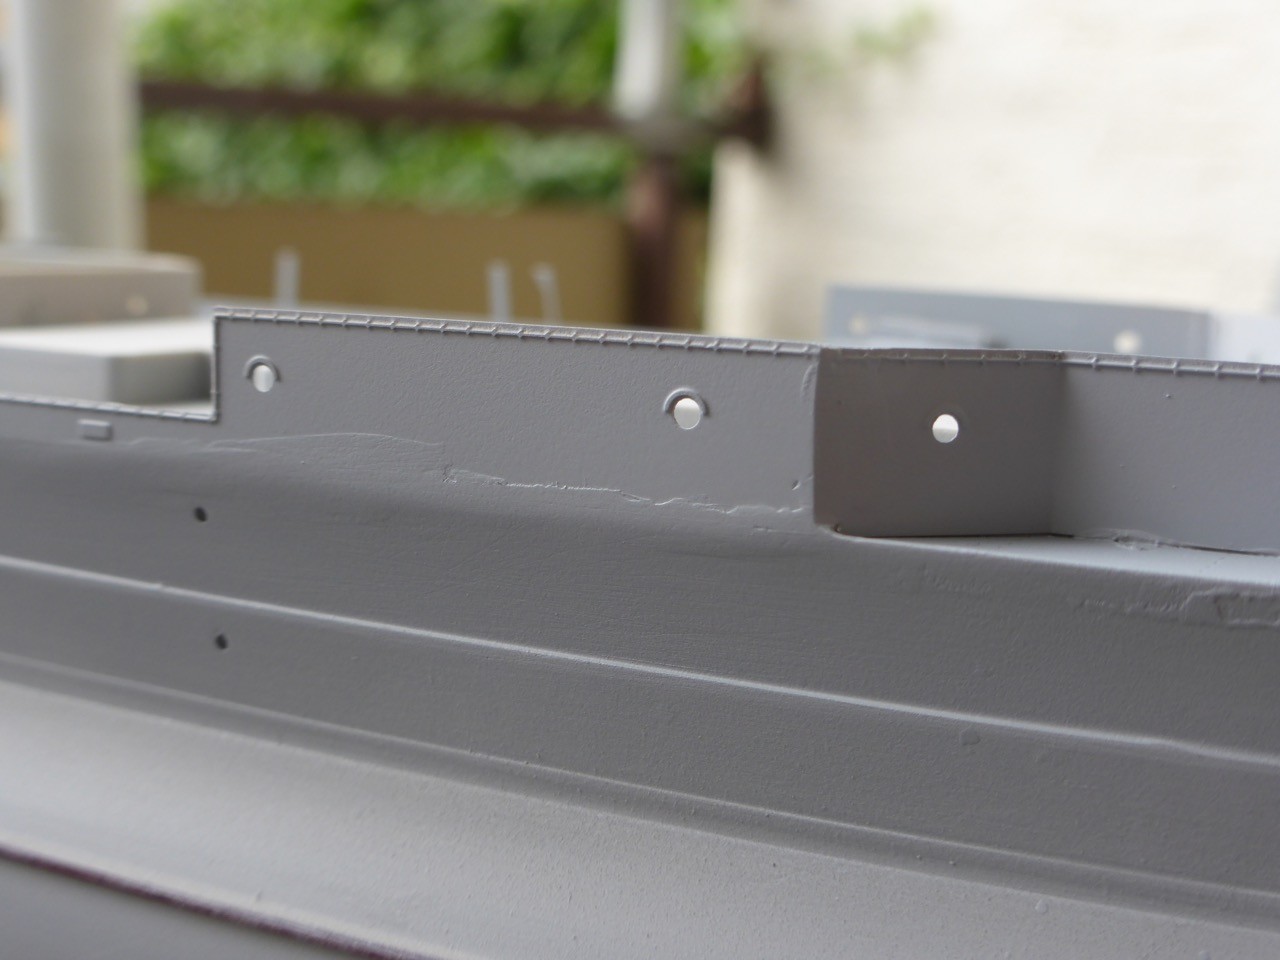
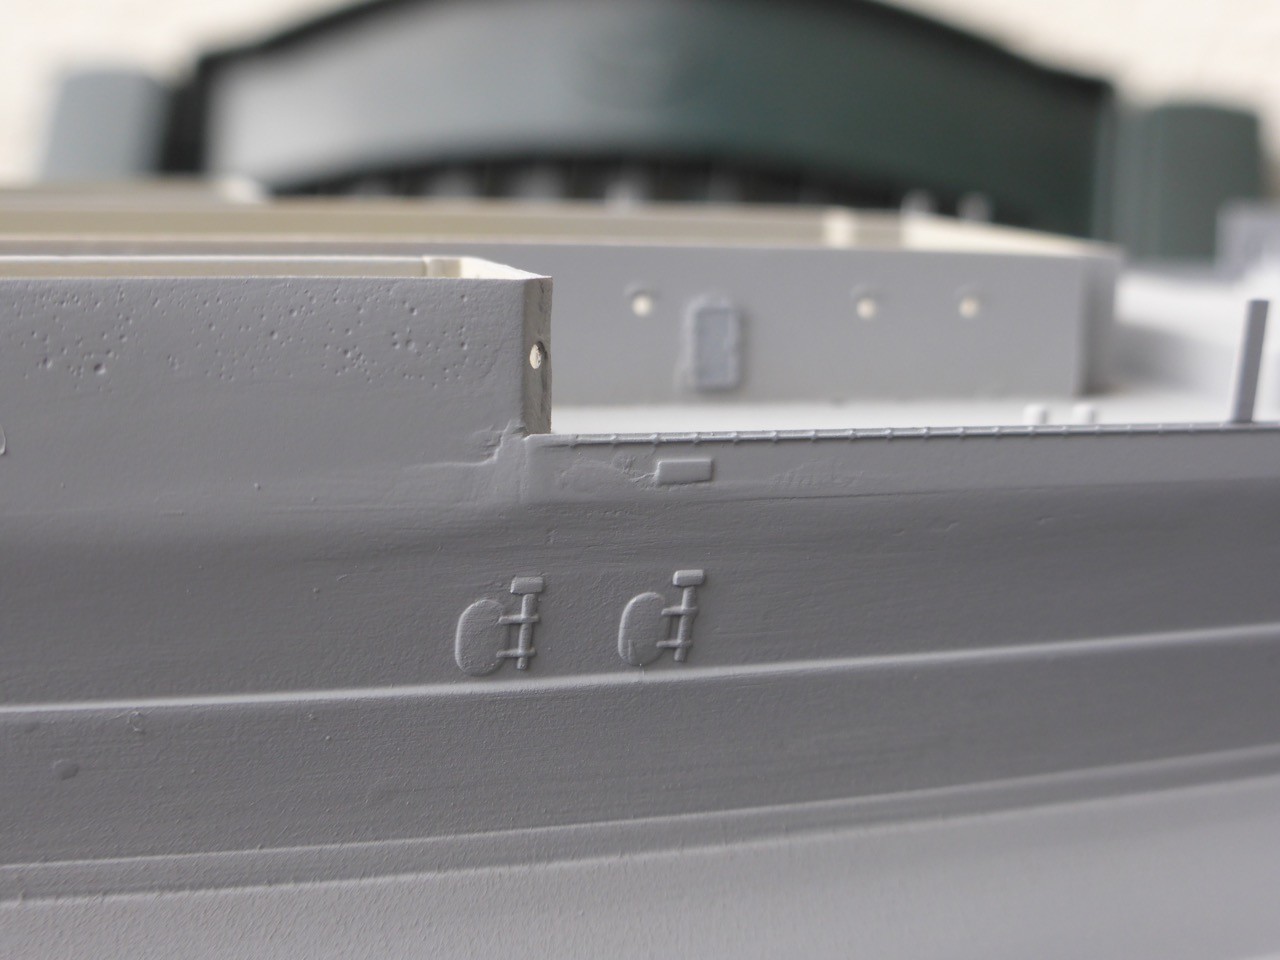
So by now all the main brasswork on the forecastle deck is installed, and the portholes starboard aft have been filled. More filling and sanding needed, since all the brass along the place where the 5.5"er were needs to be flush with the hull.
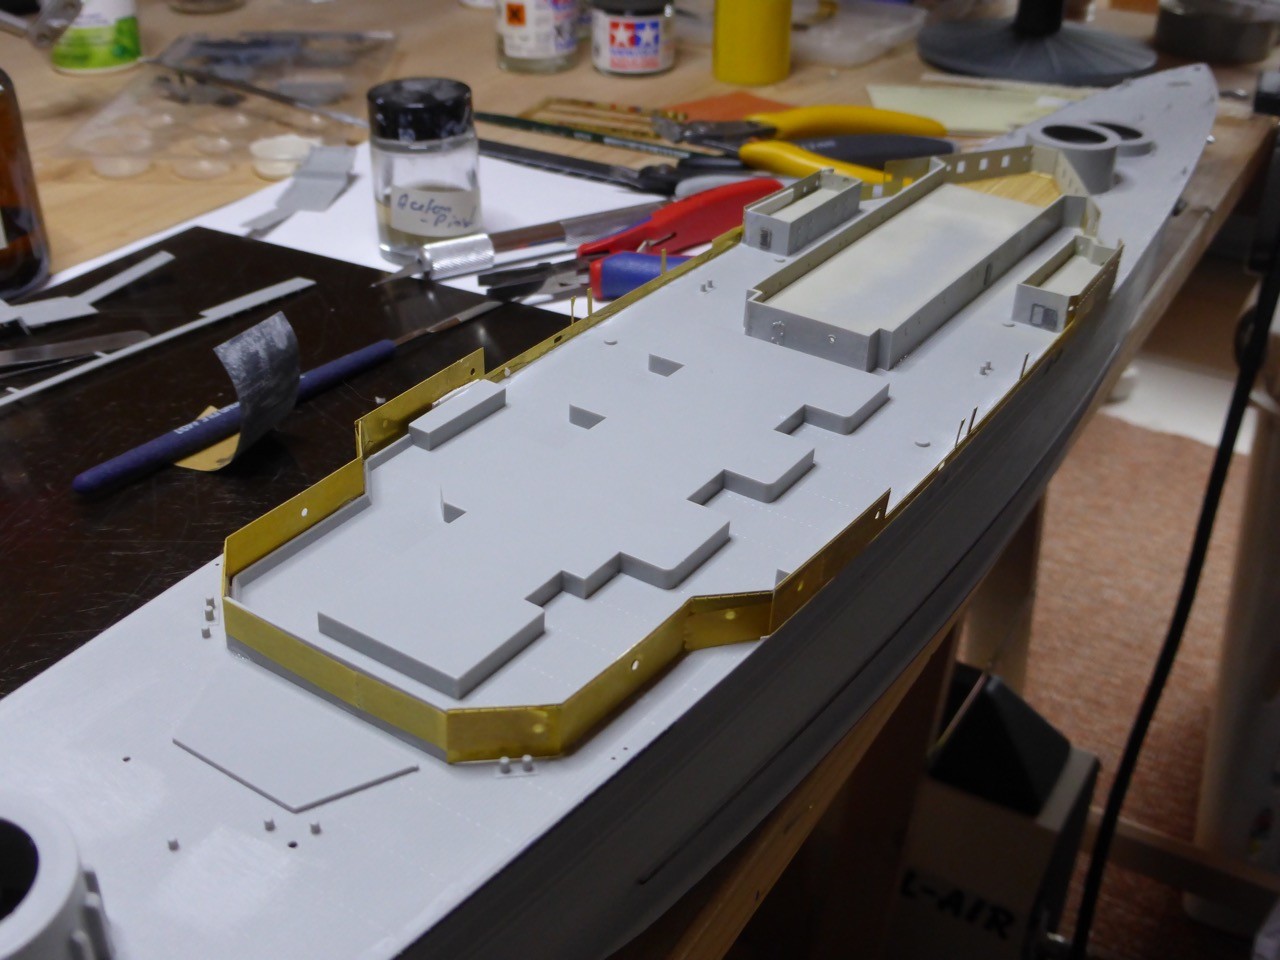
Finally some surfacer sprayed on, to see what work has still to be done - well yep. Not too bad, but still plenty inaccuracies that require more surfacer and sanding.
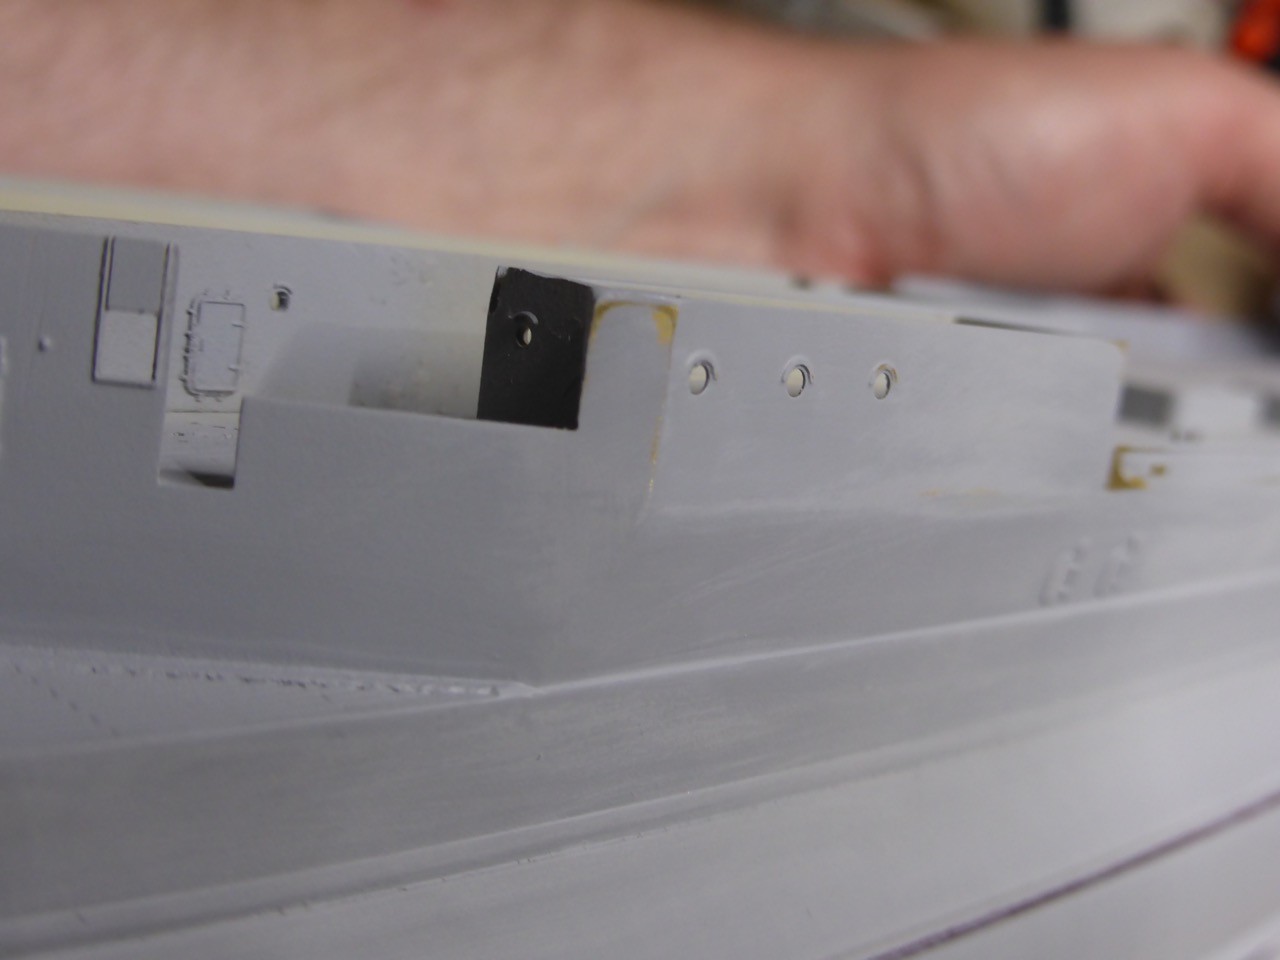
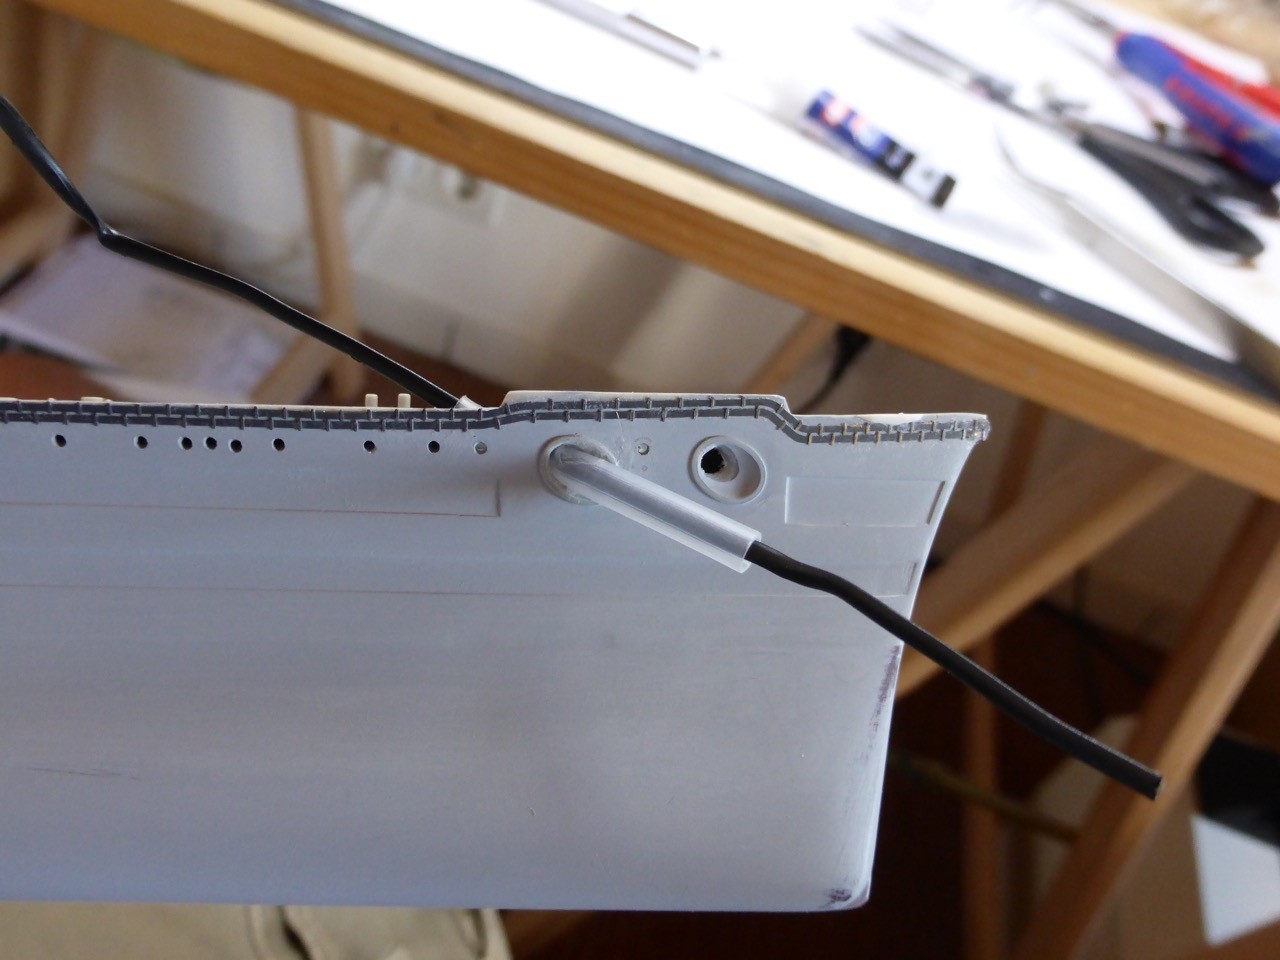
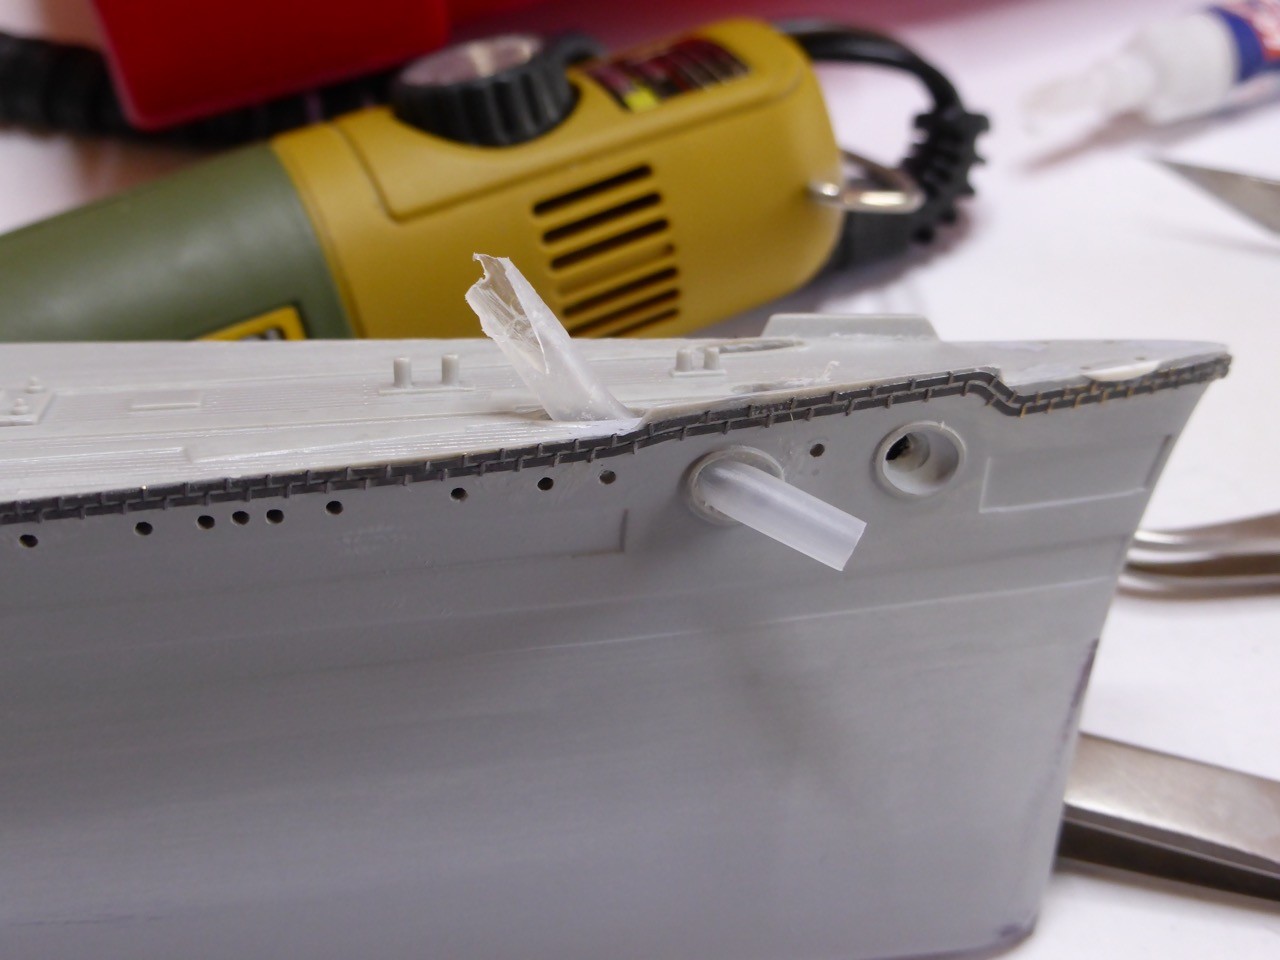
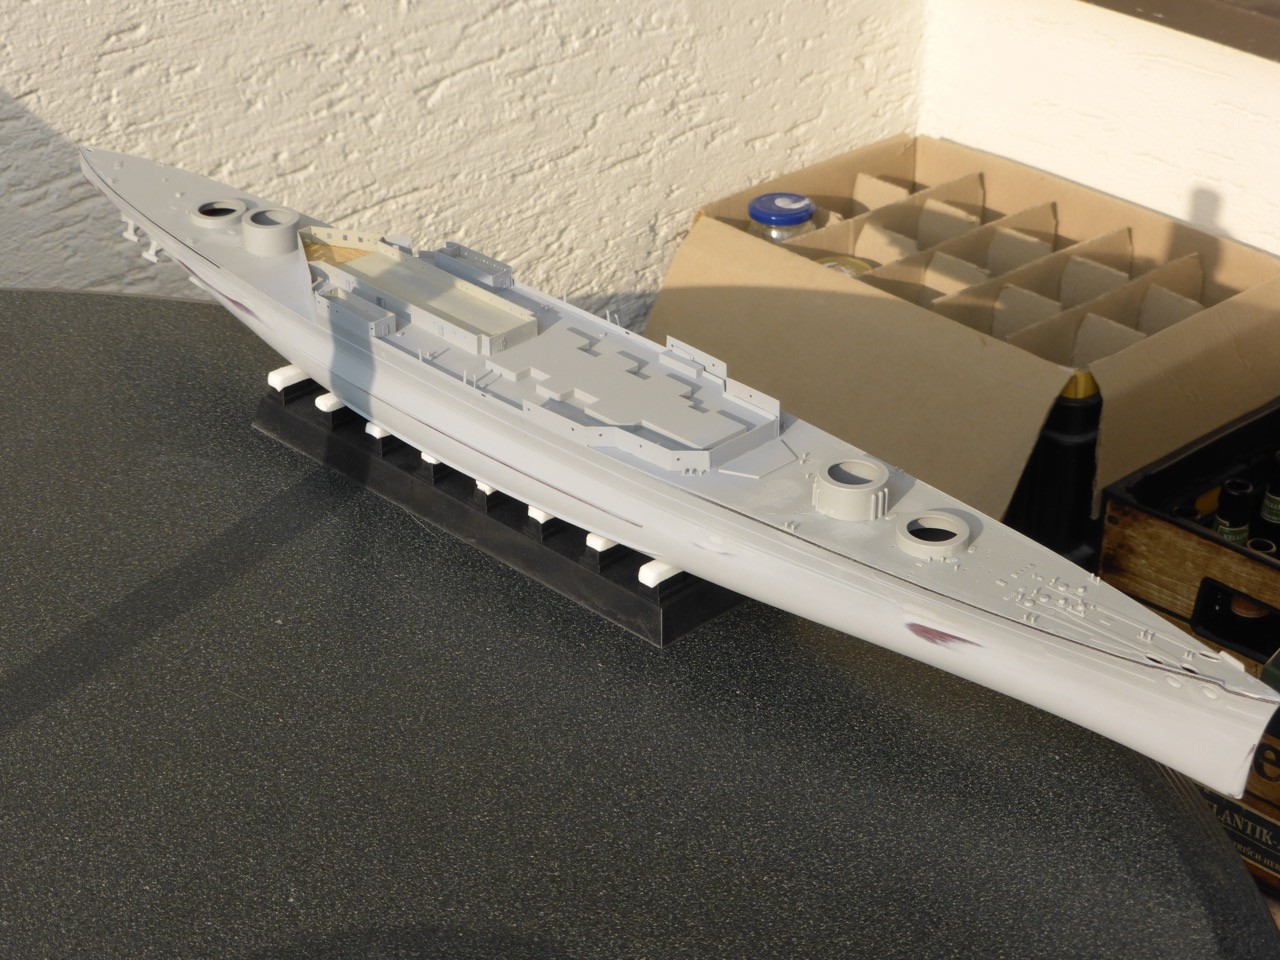
Test fitted the shelter deck, so that fit seems pretty good! Will require more filling and sanding (of course...), but there's a long way to go before I worry about the shelter deck: once the hull / main deck is as flush as I want it to be, eyebrows to the hull portholes, degaussing cable bad on, not forgetting opening the hawsepipes, the inner structure of the main deck, wooden deck, Admirals day cabin...

So here are some pictures of the latest progress:


The long story as always on my Hood build log!

Si - for the color questions on the Bismarck, well before I had my Snyder & Shorts paint chips, I built the Graf Spee basically in the DKM 50/51-scheme (light grey for superstructure and medium grey for hull) with camouflage added on that. I think Bismarck was the same, 50/51, and whatever stripes etc. on top. I used Tamiya colors XF 19 / XF 66 for the 50/51, and it looked pretty convincing. I did not do any reality check, just the impression was pretty good!

Cheers,
Jan
RedDuster
Visit this Community
England - South East, United Kingdom
Joined: March 01, 2010
KitMaker: 7,078 posts
Model Shipwrights: 6,649 posts
Posted: Tuesday, July 19, 2016 - 10:49 PM UTC
Hi Jan,

Thanks for the colour confirmation, used XF19 on the barbettes and deck detail, and looked about right to me.

Hood looking very good so far mate, will go and have a look on your main blog.

Cheers

Si
RedDuster
Visit this Community
England - South East, United Kingdom
Joined: March 01, 2010
KitMaker: 7,078 posts
Model Shipwrights: 6,649 posts
Posted: Sunday, July 24, 2016 - 01:35 AM UTC
Full update on by build log over on "Ship types by class"

Got this far along the starboard side.


Boat racks around the funnel completed.


Funnel platform and upper funnel details in place,


moulded detail from the funnel cap removed.


Cheers

Si
JJ1973
#345
Visit this Community
Niedersachsen, Germany
Joined: August 22, 2011
KitMaker: 1,835 posts
Model Shipwrights: 1,832 posts
Posted: Sunday, July 24, 2016 - 09:34 AM UTC
Gerat work, Si!!

The boat racks are simply stunning!! Astonishing work!!

Nothing from the Hood for this week - stand by for next week - - I hope.

Cheers,
Jan
RedDuster
Visit this Community
England - South East, United Kingdom
Joined: March 01, 2010
KitMaker: 7,078 posts
Model Shipwrights: 6,649 posts
Posted: Monday, July 25, 2016 - 01:28 AM UTC
Thanks Jan,

And they went together without too much fuss, very well designed etch.

Cheers

Si
Illini
Visit this Community
Colorado, United States
Joined: March 27, 2003
KitMaker: 345 posts
Model Shipwrights: 17 posts
Posted: Sunday, July 31, 2016 - 05:02 AM UTC
I like to move around to different "mini builds" , and this big Bismarck provides plenty of opportunity. So, I decided to work on some of the guns. They are just loosely place, as are the superstructure parts.

It may be hard to see, but I applied some PE to the portholes on the hull.

I also did one on the superstructure, a porthole with "cover". As you can see this is way better than the molded on part (even if it is off center - which I will fix).

However, I don't think the rectangular bits above it are too bad. I'm wondering if it's worth the effort to remove and replace them, especially after some wash.

Opinions, of any kind, are welcome.


JJ1973
#345
Visit this Community
Niedersachsen, Germany
Joined: August 22, 2011
KitMaker: 1,835 posts
Model Shipwrights: 1,832 posts
Posted: Sunday, July 31, 2016 - 10:00 AM UTC
Hi Dave,

your big B looks good so far! Nice work!
The portholes are definitely worth the effort - as for all the molded on parts above, it'S hard to tell from a picture, I think one must see the real thing to make a call. From what I can see the covers and vents look pretty convincing, the hose reel looks a little bit toyish. But that might well be a wrong impression, to the good or the worse...

Cheers,
Jan
JJ1973
#345
Visit this Community
Niedersachsen, Germany
Joined: August 22, 2011
KitMaker: 1,835 posts
Model Shipwrights: 1,832 posts
Posted: Sunday, July 31, 2016 - 10:06 AM UTC
Some (very) small progress on the Hood - more filling and sanding. Getting there...


Really not much to report, more a sign that there's still something going on. Real life is really keeping me away from the workbench and will continue to do so over the next weeks.

Cheers,
Jan
Illini
Visit this Community
Colorado, United States
Joined: March 27, 2003
KitMaker: 345 posts
Model Shipwrights: 17 posts
Posted: Tuesday, August 02, 2016 - 12:41 AM UTC

Quoted Text

Hi Dave,

your big B looks good so far! Nice work!
The portholes are definitely worth the effort - as for all the molded on parts above, it'S hard to tell from a picture, I think one must see the real thing to make a call. From what I can see the covers and vents look pretty convincing, the hose reel looks a little bit toyish. But that might well be a wrong impression, to the good or the worse...

Cheers,
Jan


I temporarily applied one of the PE parts just below the cast on part, then did a wash (Flory gray) over all the adjacent parts.

IMHO the cast parts don't look bad, not quite as good as the PE, but. If I remove and replace all those cast bits, I won't be done, ever, I'll just roll over.

I will do the portholes, and covers, they're awful as can be seen in an earlier post.

Illini
Visit this Community
Colorado, United States
Joined: March 27, 2003
KitMaker: 345 posts
Model Shipwrights: 17 posts
Posted: Tuesday, August 02, 2016 - 12:45 AM UTC
I'm trying to add the handrails to the funnel, and basically, it's like herding cats

I have little experience with PE, and this is way beyind my pay grade. Any suggestions, tips, tricks, etc

FYI, in the lower right, under the xacto, you can see the individual "rungs" for ladders. I won't be doing that, I'll use ladders, like on the front of the funnel, instead.


RedDuster
Visit this Community
England - South East, United Kingdom
Joined: March 01, 2010
KitMaker: 7,078 posts
Model Shipwrights: 6,649 posts
Posted: Sunday, August 14, 2016 - 02:10 AM UTC
Good stuff going on here whilst I have been away, will catch up with that tomorrow, but needed to get back into the workshop.

Some progress, funnel cap sorted.


Main superstructure ready for paint.


Sprayed, along with the funnel cap.


Test fitted on the hull, with the decks painted and fitted.


meantime stared the destruction on the after superstructure.


more detail over on my main blog.

Cheers

Si
RedDuster
Visit this Community
England - South East, United Kingdom
Joined: March 01, 2010
KitMaker: 7,078 posts
Model Shipwrights: 6,649 posts
Posted: Sunday, August 21, 2016 - 11:39 PM UTC
Latest update.

Hanger / after superstructure assembled and test fitted.


Foredeck windlass assembly, Pontos brass compared with the kit part.


cladding the after superstructure.


checking the bend on the rear section.


done and test fitted in place.


cheers

Si
Cosimodo
#335
Visit this Community
Auckland, New Zealand
Joined: September 03, 2013
KitMaker: 1,808 posts
Model Shipwrights: 871 posts
Posted: Monday, August 22, 2016 - 04:45 AM UTC
Nice update Si.
The Pontos etch for this kit seems endless but I like the detail it adds.

cheers

Michael
RedDuster
Visit this Community
England - South East, United Kingdom
Joined: March 01, 2010
KitMaker: 7,078 posts
Model Shipwrights: 6,649 posts
Posted: Thursday, August 25, 2016 - 09:55 PM UTC
Hi Michael,

Feels like it, still loads of structural stuff to as well as well as all the small stuff.

Cheers

Si
RedDuster
Visit this Community
England - South East, United Kingdom
Joined: March 01, 2010
KitMaker: 7,078 posts
Model Shipwrights: 6,649 posts
Posted: Sunday, August 28, 2016 - 11:19 PM UTC
More progress on the after superstructure.


Mooring bits, there are 30 of them


Bow bits down, capstan test fitted.


superstructure sprayed.


One side of the cat built.


After superstructure decks done and fitted.


More soon

Si
JJ1973
#345
Visit this Community
Niedersachsen, Germany
Joined: August 22, 2011
KitMaker: 1,835 posts
Model Shipwrights: 1,832 posts
Posted: Friday, September 02, 2016 - 12:07 AM UTC
Hi Si,

as always great work and progress on your Bismarck. The amount of metal gaining into her is just amazing - as I mentioned earlier, I do have the same kit and Pontos set in my stash, but that will have to wait for some time when I really have plenty of time to work in the shipyard...

My Hood should join back in by Sun or Mon - I hope. Shipyard work should re-commence tomorrow...

Cheers,
Jan
RedDuster
Visit this Community
England - South East, United Kingdom
Joined: March 01, 2010
KitMaker: 7,078 posts
Model Shipwrights: 6,649 posts
Posted: Friday, September 02, 2016 - 01:53 PM UTC
Thanks Jan,

It is a great set.

Looking forward to seeing a bit of progress on the mighty Hood.

Cheers

Si
MichaelSatin
Staff MemberCampaigns Administrator
AEROSCALE
Visit this Community
Colorado, United States
Joined: January 19, 2008
KitMaker: 3,909 posts
Model Shipwrights: 255 posts
Posted: Friday, September 02, 2016 - 06:51 PM UTC
The level of work going on here is simply outstanding!

Michael
JJ1973
#345
Visit this Community
Niedersachsen, Germany
Joined: August 22, 2011
KitMaker: 1,835 posts
Model Shipwrights: 1,832 posts
Posted: Sunday, September 04, 2016 - 10:28 PM UTC
Finally - just a little progress on the 'mighty Hood'.

First paint inside forecastle deck in oder to prepare for the wooden deck - that needs to be put in place soon.


One actual hawse pipe has to be installed, because there will be no anchor to conceal the bare opening. That is done with a soft piece of plastic pipe and the help of a wire.


...and a few pictures in proper 1:1 scale: Hood's birthplace.

Her slipway, looking across the River Clyde into the River Cart:


And her fitting out basin with the still existing 150t crane 'Titan':


Those picture were taken by me on August 16 this year at the old or former facilities of John Brown's Shipyard.


So much for now, next update should be here in about a week!

Cheers,
Jan

Deranius
Visit this Community
Novi Sad, Serbia & Montenegro
Joined: April 08, 2014
KitMaker: 60 posts
Model Shipwrights: 56 posts
Posted: Monday, September 05, 2016 - 03:30 AM UTC
Hi everyone,
I was told by the campaign organizer that it's OK so I participate in this campaign with 1/720 HMS Hood by Italeri.
Here are the photos of the package opened few days ago.


It will be OOB build without any aftermarket. I didn't even started building it and stumbled upon first issue with the kit (and as far as I know it will be only one that is sort of bigger). Lower hull is somewhat longer (approx 2-3 mm) than the upper (waterline) and I wish to build this as full hull. So sanding awaits... Hopefully the shape of the tip will be preserved.
JJ1973
#345
Visit this Community
Niedersachsen, Germany
Joined: August 22, 2011
KitMaker: 1,835 posts
Model Shipwrights: 1,832 posts
Posted: Monday, September 05, 2016 - 09:34 AM UTC
Rade, welcome aboard!! There's definitely room for more than one (or even two) Hoods in here!

Cheers,
Jan
RedDuster
Visit this Community
England - South East, United Kingdom
Joined: March 01, 2010
KitMaker: 7,078 posts
Model Shipwrights: 6,649 posts
Posted: Monday, September 05, 2016 - 02:05 PM UTC
Hi Jan,

Good to see you back at the bench, nice work on the Hawse pipes.

Cheers

Si