

Thanks Gaz,
Useful resource Guitar strings, nice timing young Duster restringing one of his guitars.
Cheers
Si


Go to modelshipwrights.com for the current dynamic site!
Ships by Class/Type
For discussions on ships by class and type.
For discussions on ships by class and type.
Hosted by Jim Starkweather
Z10 Hans Lody May 1941

RedDuster

Joined: March 01, 2010
KitMaker: 7,078 posts
Model Shipwrights: 6,649 posts

Posted: Friday, October 07, 2016 - 01:37 PM UTC
RedDuster
Joined: March 01, 2010
KitMaker: 7,078 posts
Model Shipwrights: 6,649 posts
Posted: Saturday, October 08, 2016 - 09:48 PM UTC
This weekend's update, small one as not much time in the workshop.
Basic structure of midships deckhouse built.
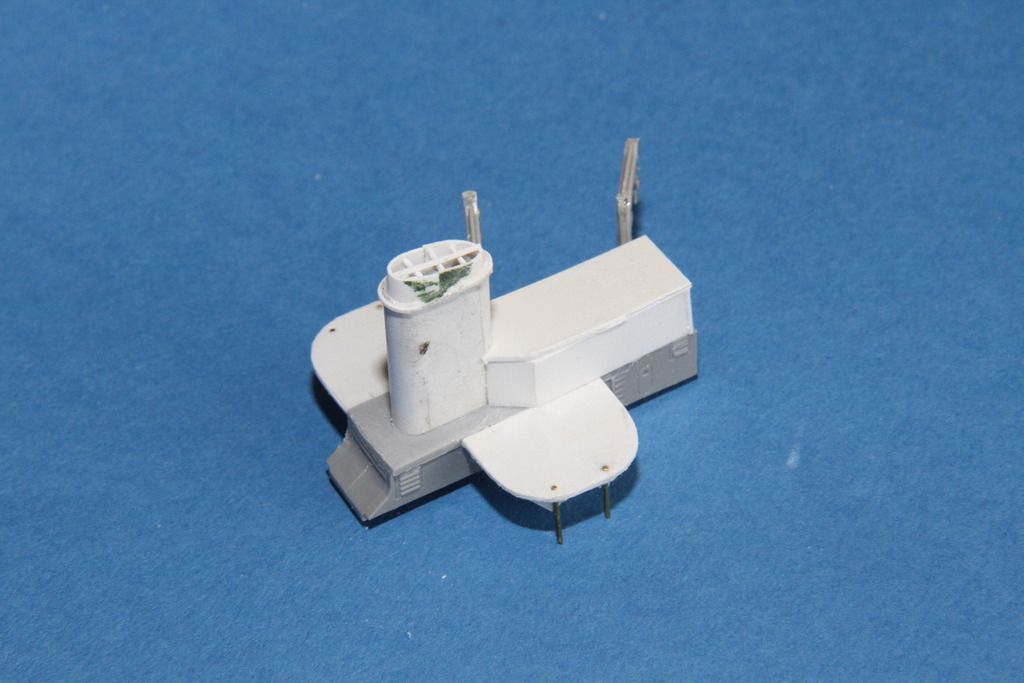
detail going on, scrap etch, guitar strings, and some left over vents from the Repulse's kit after superstructure.
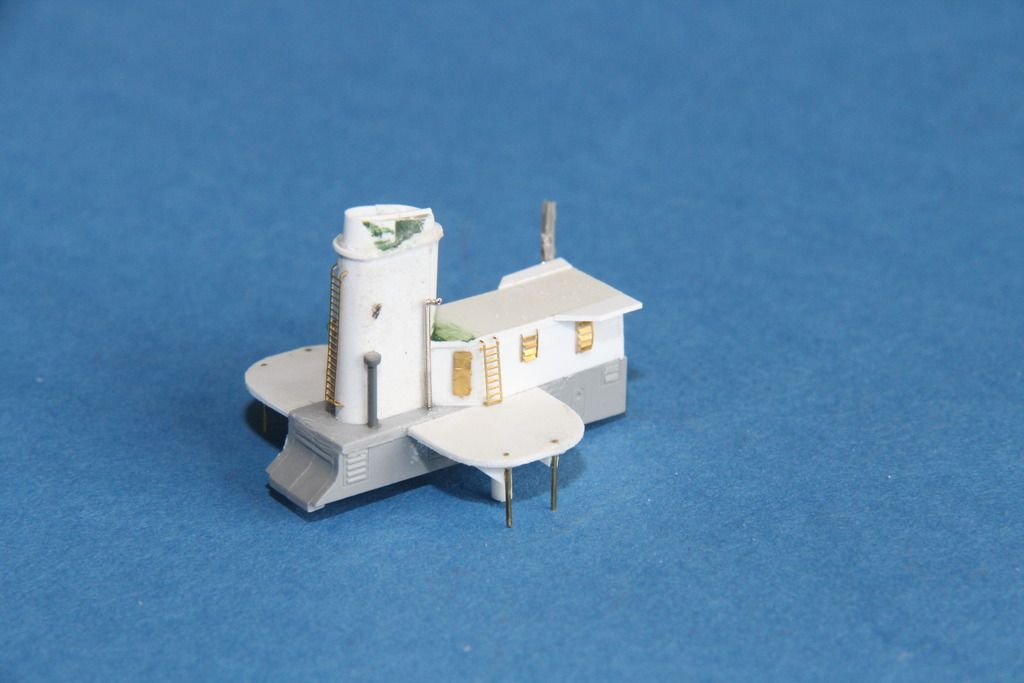
Bulwarks built up.

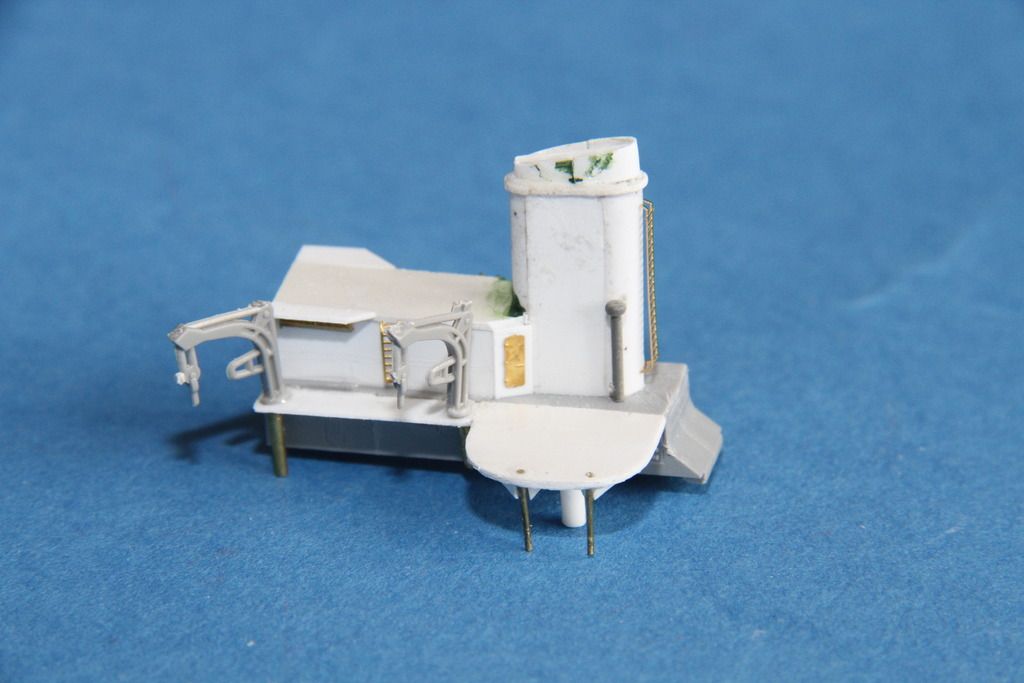
Searchlight platform added to the back of the funnel.
Railings need a little tweaking, and the scrape here and there, but basically done.
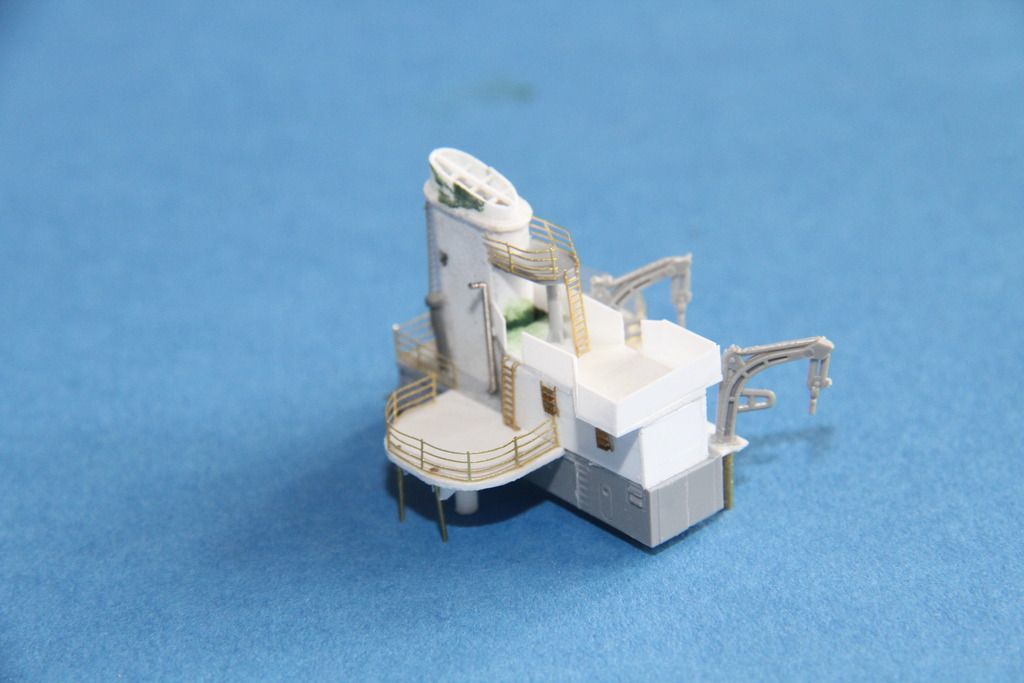
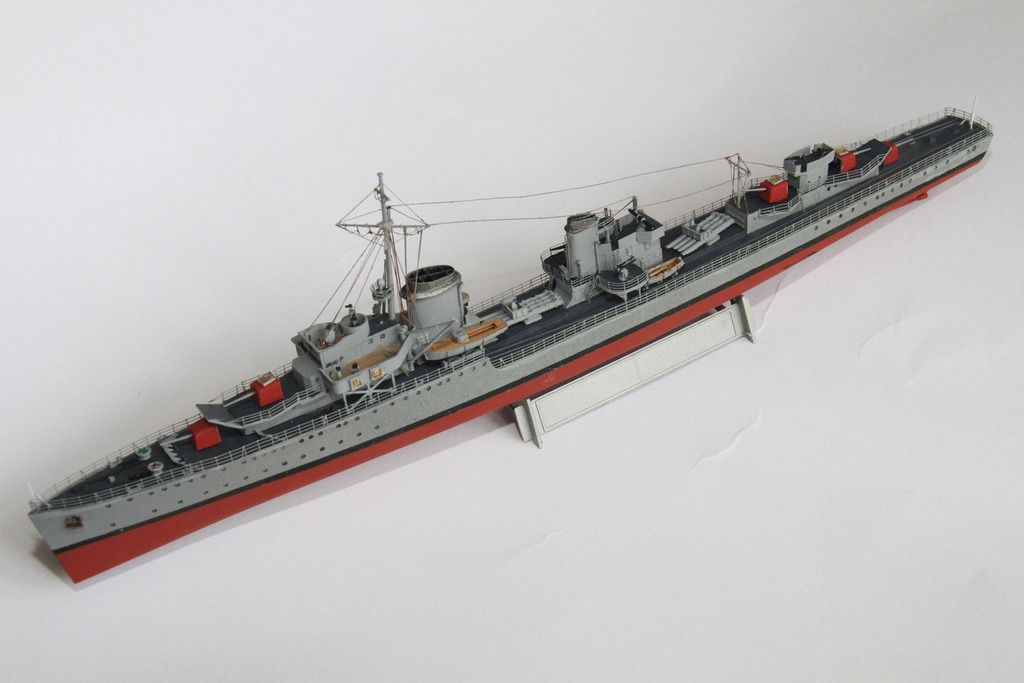
Overview on the ship so far.
Just the deck house on the after gun deck, to do a little work on then, at last it is ready for some paint.
More soon.
Cheers
Si
Basic structure of midships deckhouse built.

detail going on, scrap etch, guitar strings, and some left over vents from the Repulse's kit after superstructure.


Bulwarks built up.

Searchlight platform added to the back of the funnel.

Railings need a little tweaking, and the scrape here and there, but basically done.
Overview on the ship so far.

Just the deck house on the after gun deck, to do a little work on then, at last it is ready for some paint.
More soon.
Cheers
Si

GazzaS

#424

Joined: April 23, 2015
KitMaker: 4,648 posts
Model Shipwrights: 249 posts

Posted: Saturday, October 08, 2016 - 10:44 PM UTC
A bit of paint, and only by using calipers and a sliderule, could anyone tell the difference. Nice stuff, Simon.
Gaz
Gaz
RedDuster
Joined: March 01, 2010
KitMaker: 7,078 posts
Model Shipwrights: 6,649 posts
Posted: Sunday, October 09, 2016 - 11:40 PM UTC
Very kind of you to say so Gaz,
I will admit to a certain amount of guesswork with dimensions in some areas, as this was done from photos, I had no scale drawings.
One more small bit I do need to before spraying, the deckhouse on the after gun deck deckhouse needs to be a little longer.
Hope to get back in the workshop come the weekend.
Cheers
Si
RedDuster
Joined: March 01, 2010
KitMaker: 7,078 posts
Model Shipwrights: 6,649 posts
Posted: Friday, October 14, 2016 - 10:07 PM UTC
Some progress today, struggling with a bit of a winter bug.
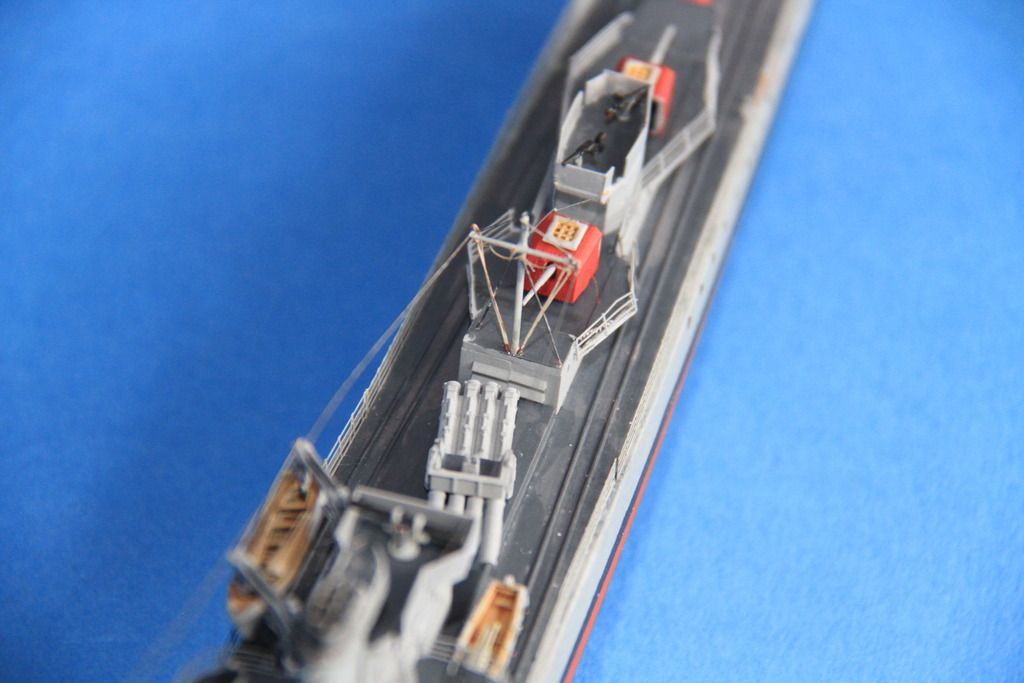
After deckhouse and torpedo tubes, I used the control positions from the Trumpeter kit, they looked better and more accurate. On test fitting the guns I decided not to extend the after deckhouse.
The superstructure units sprayed hellgrau.
Main gunhouses sprayed red.

All test fitted.

More soon, maybe tomorrow if I can find the energy.
Cheers
Si
After deckhouse and torpedo tubes, I used the control positions from the Trumpeter kit, they looked better and more accurate. On test fitting the guns I decided not to extend the after deckhouse.

The superstructure units sprayed hellgrau.

Main gunhouses sprayed red.

All test fitted.

More soon, maybe tomorrow if I can find the energy.
Cheers
Si
RedDuster
Joined: March 01, 2010
KitMaker: 7,078 posts
Model Shipwrights: 6,649 posts
Posted: Saturday, October 15, 2016 - 10:28 PM UTC
A bit more progress today.
Base coat on the decks, and details on the funnel caps painted.

Also fixed the seam in the port side of the funnel.
Kit anchor cables, don't look too bad,

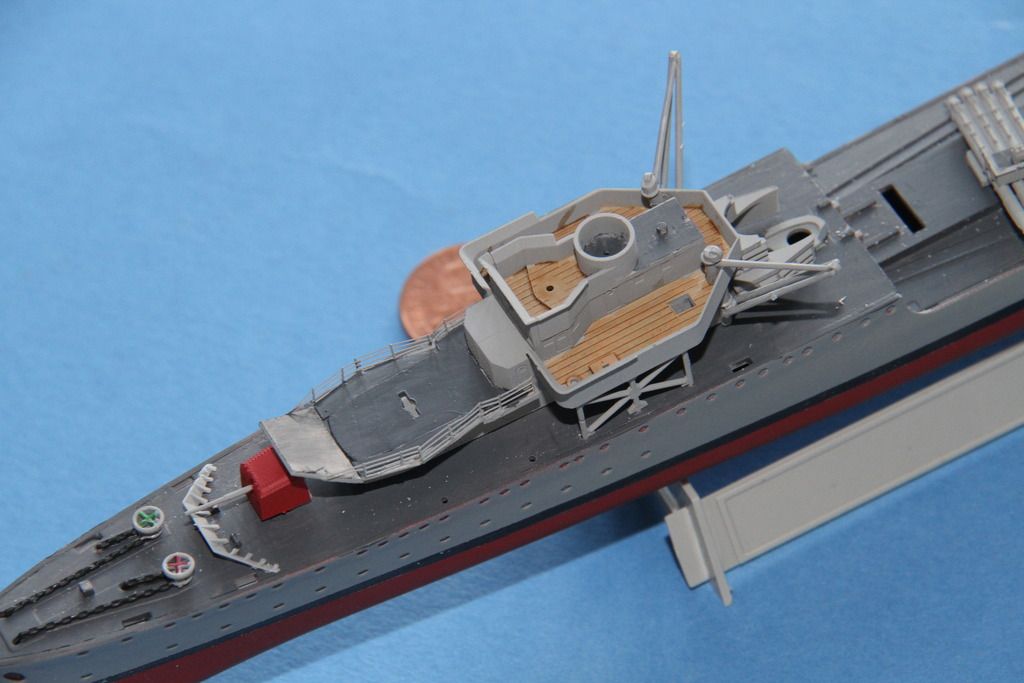
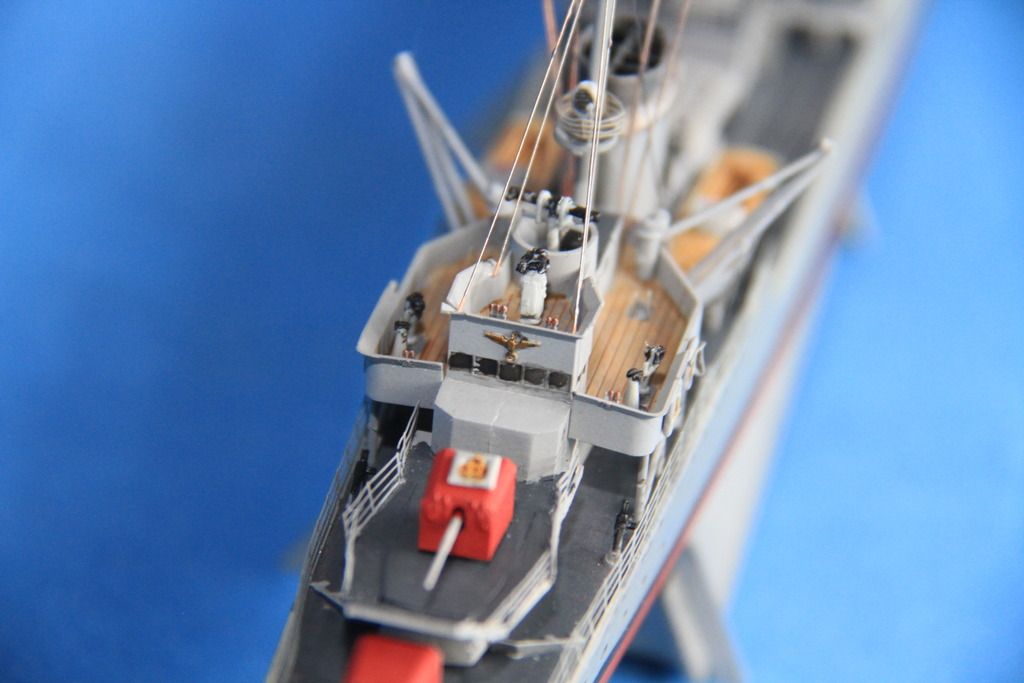
Painted, No. 1 gun also detail painted, and along woth the breakwater fitted. The Capstan wheels are a bit basic, but as I had nothing the right size better, they are adequate.

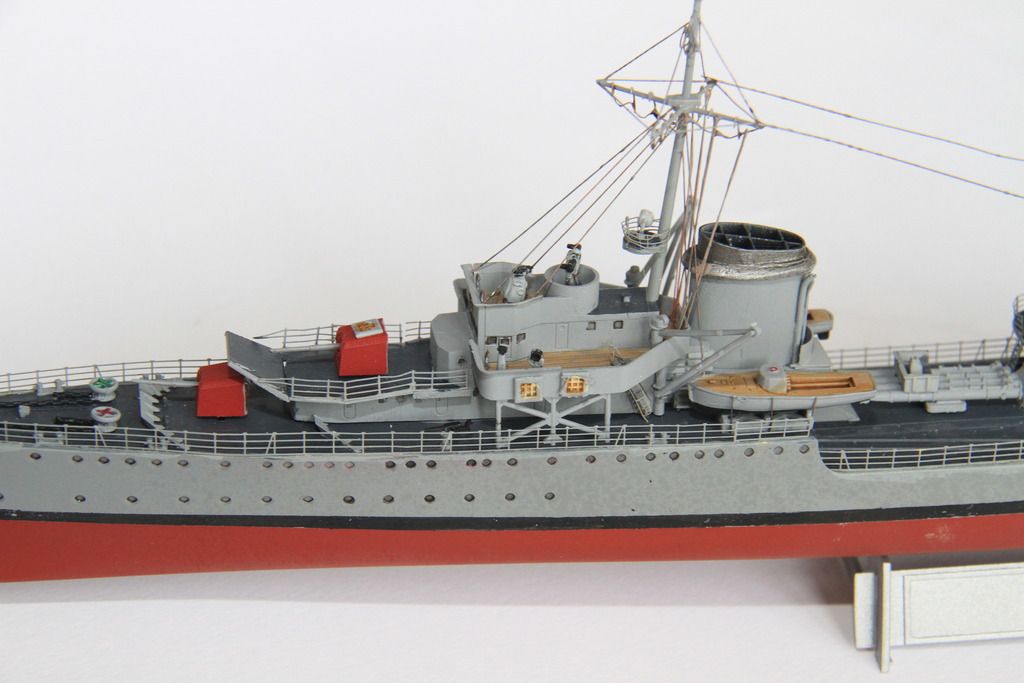
Wash on the wood decking on the bridge and cranes fitted.
Bridge deck fitted in place,
That's as far as today got
Cheers
Si
Base coat on the decks, and details on the funnel caps painted.

Also fixed the seam in the port side of the funnel.
Kit anchor cables, don't look too bad,

Painted, No. 1 gun also detail painted, and along woth the breakwater fitted. The Capstan wheels are a bit basic, but as I had nothing the right size better, they are adequate.

Wash on the wood decking on the bridge and cranes fitted.

Bridge deck fitted in place,

That's as far as today got
Cheers
Si
GazzaS
#424
Joined: April 23, 2015
KitMaker: 4,648 posts
Model Shipwrights: 249 posts
Posted: Saturday, October 15, 2016 - 10:53 PM UTC
Simon,
Your conversion is coming along quite well.
Gaz
Your conversion is coming along quite well.
Gaz
RedDuster
Joined: March 01, 2010
KitMaker: 7,078 posts
Model Shipwrights: 6,649 posts
Posted: Saturday, October 15, 2016 - 11:18 PM UTC
Thanks Gaz,
He is getting there, most of the tricky stuff is now done, becoming more like an ordinary build.
Cheers
Si
He is getting there, most of the tricky stuff is now done, becoming more like an ordinary build.
Cheers
Si

JJ1973
#345

Joined: August 22, 2011
KitMaker: 1,835 posts
Model Shipwrights: 1,832 posts

Posted: Thursday, October 20, 2016 - 09:37 AM UTC
Si,
that is some awesome stuff you're doing there to the Lody!! Your scratch work and re-build looks spot on!!
Cheers,
Jan
that is some awesome stuff you're doing there to the Lody!! Your scratch work and re-build looks spot on!!
Cheers,
Jan
RedDuster
Joined: March 01, 2010
KitMaker: 7,078 posts
Model Shipwrights: 6,649 posts
Posted: Thursday, October 20, 2016 - 05:24 PM UTC
Thank you very much Jan,
Coming from you that is high praise indeed!
Cheers
Si
Coming from you that is high praise indeed!
Cheers
Si
RedDuster
Joined: March 01, 2010
KitMaker: 7,078 posts
Model Shipwrights: 6,649 posts
Posted: Sunday, December 11, 2016 - 01:36 PM UTC
Been a bit of a hiatus on all my builds, although looks like I have posting some of the work.
Got back in workshop yesterday, and apart from error that needs correcting, I will leave you guys to spot that before the next update.
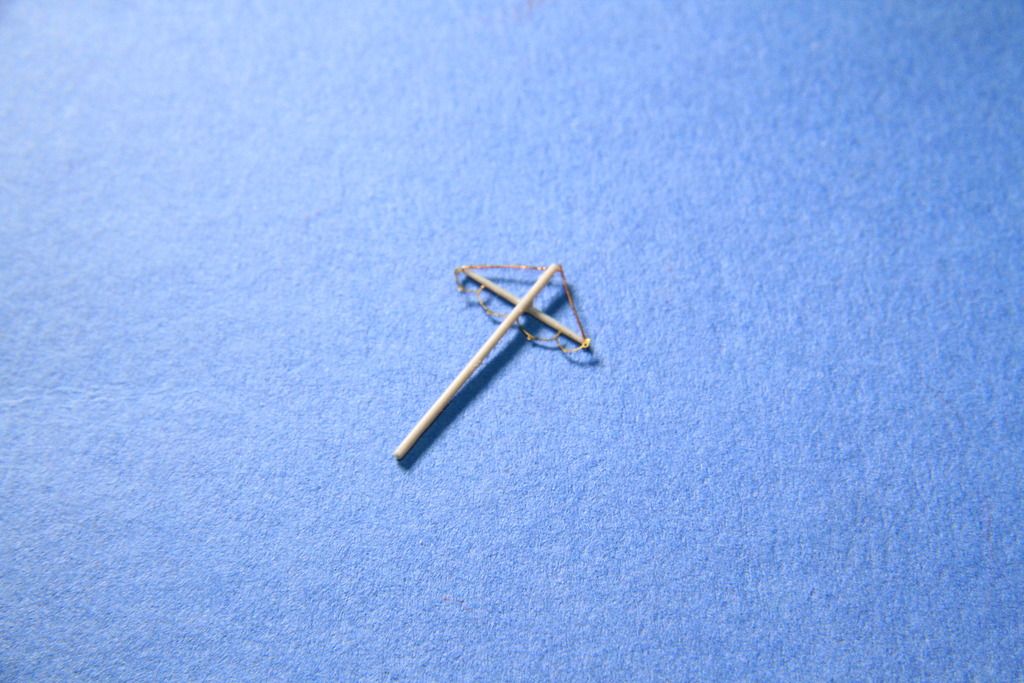
Work on the mainmast. I had no spare etched footropes, so first attempt at scrathbuilding them.

not perfect, but better than bare yard yarms.
Overview of where she is, I have used the kit twin 37mm, mainly because they are very nice mouldings, The motor boats are spare trump mouldings, a little better than the kit options.
The spare Revell cutter with oars and rudder fitted.

One small gripe I have with almost every ship model, no cable drums at the foot of the davits! this time I found a couple of spares around the right size.

Cutter fitted.
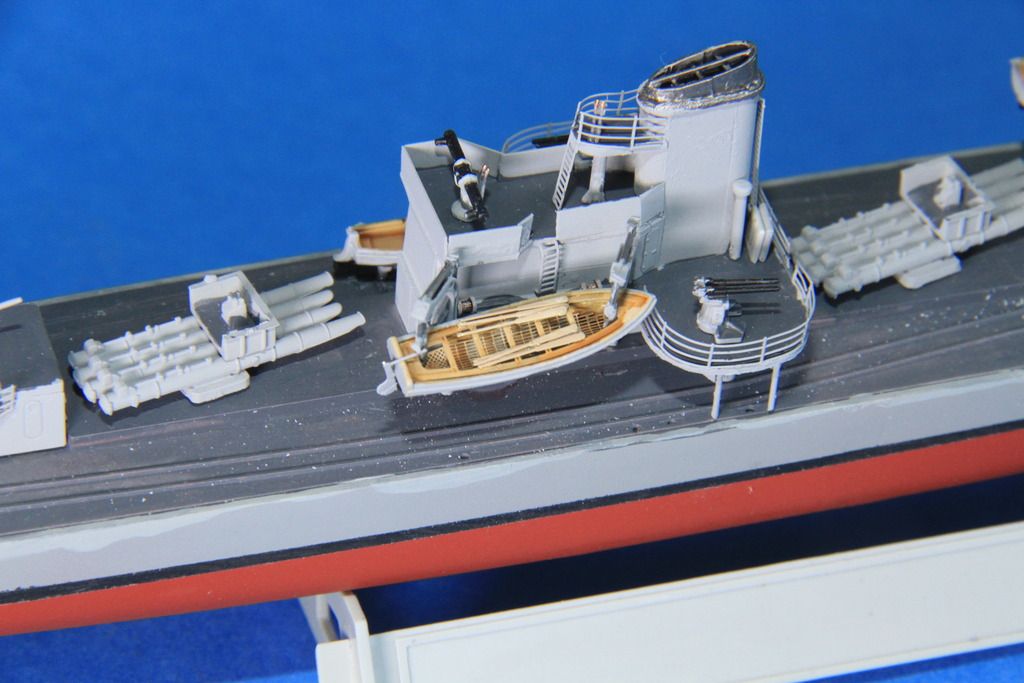
Foremast fitted, along with some spare bridge details, the kit parts were ok, but a little clunky.
Overveiw of the build, most of the railings on, one more correction to do, rigging and a few minor details to fit.
Cheers
Si
Got back in workshop yesterday, and apart from error that needs correcting, I will leave you guys to spot that before the next update.
Work on the mainmast. I had no spare etched footropes, so first attempt at scrathbuilding them.


not perfect, but better than bare yard yarms.
Overview of where she is, I have used the kit twin 37mm, mainly because they are very nice mouldings, The motor boats are spare trump mouldings, a little better than the kit options.

The spare Revell cutter with oars and rudder fitted.

One small gripe I have with almost every ship model, no cable drums at the foot of the davits! this time I found a couple of spares around the right size.

Cutter fitted.

Foremast fitted, along with some spare bridge details, the kit parts were ok, but a little clunky.

Overveiw of the build, most of the railings on, one more correction to do, rigging and a few minor details to fit.

Cheers
Si

rolltide31
#377

Joined: June 27, 2010
KitMaker: 1,481 posts
Model Shipwrights: 1,332 posts

Posted: Sunday, December 11, 2016 - 05:14 PM UTC
Si,
Great work. I never thought to place rope reels near the davits. I will have to readjust my approach.
Dave
Great work. I never thought to place rope reels near the davits. I will have to readjust my approach.
Dave
RedDuster
Joined: March 01, 2010
KitMaker: 7,078 posts
Model Shipwrights: 6,649 posts
Posted: Sunday, December 11, 2016 - 06:16 PM UTC
Thanks Dave,
Just an old seaman mate, got to have some drums to stow the falls on. Not sure if those davits would have a powered winch, doubt it on a destroyer, not that far to haul the boat up by manpower,
Cheers
Si
Just an old seaman mate, got to have some drums to stow the falls on. Not sure if those davits would have a powered winch, doubt it on a destroyer, not that far to haul the boat up by manpower,
Cheers
Si
JJ1973
#345
Joined: August 22, 2011
KitMaker: 1,835 posts
Model Shipwrights: 1,832 posts
Posted: Monday, December 12, 2016 - 10:32 AM UTC
Hi Si,
great to see you back at the bench, mate!! Great work on the Hans Lody! You truly did a amazing job with your scratch work and modifications!
I was trying to find the 'required correction' - as you gave that little challenge to us. Only thing I have to offer is the position of the after small mast, according to the drawings that is positioned a little forward, in front of number three 5" gun...?!?
And great work on the copper foot ropes, by the way - copper's alive
Cheers,
Jan
RedDuster
Joined: March 01, 2010
KitMaker: 7,078 posts
Model Shipwrights: 6,649 posts
Posted: Monday, December 12, 2016 - 07:07 PM UTC
Hi Jan
10/10 you are correct mate, it is the small mast, will teach me to have the drawings in front of me at all times!
Good to be back, have another update to post, maybe later today, the camera power pack is on charge.
Hope for updates on Bismarck and Repulse by the end of the weekend.
Cheers
Si
10/10 you are correct mate, it is the small mast, will teach me to have the drawings in front of me at all times!
Good to be back, have another update to post, maybe later today, the camera power pack is on charge.
Hope for updates on Bismarck and Repulse by the end of the weekend.
Cheers
Si

TRM5150
Joined: January 03, 2010
KitMaker: 2,159 posts
Model Shipwrights: 1,400 posts

Posted: Monday, December 12, 2016 - 07:32 PM UTC
Fine work there Si! Welcome back to the bench! Nice job dressing up the mast...every little bit counts!
Nice job dressing up the mast...every little bit counts! RedDuster
Joined: March 01, 2010
KitMaker: 7,078 posts
Model Shipwrights: 6,649 posts
Posted: Monday, December 12, 2016 - 09:44 PM UTC
Thanks Todd,
Good to be back building again. That was a first attempt at scratching footropes, I am quite pleased with them.
Thanks for looking in.
Si
Good to be back building again. That was a first attempt at scratching footropes, I am quite pleased with them.
Thanks for looking in.
Si

Fordboy

Joined: July 13, 2004
KitMaker: 2,169 posts
Model Shipwrights: 1,597 posts

Posted: Tuesday, December 13, 2016 - 12:52 AM UTC
Ahoy Simon
Nice work and great update.
Great to see getting back to it.
You are shaming me as has Russell previously.
Cheers
Sean
Nice work and great update.
Great to see getting back to it.
You are shaming me as has Russell previously.
Cheers
Sean
RedDuster
Joined: March 01, 2010
KitMaker: 7,078 posts
Model Shipwrights: 6,649 posts
Posted: Tuesday, December 13, 2016 - 02:25 PM UTC
Hi Sean,
No shaming intended mate.
Thanks for looking in and you kind comments.
One or two finishing touches and I will post the final update on this member of the duo, then on with Z23.
Cheers.
Si
No shaming intended mate.
Thanks for looking in and you kind comments.
One or two finishing touches and I will post the final update on this member of the duo, then on with Z23.
Cheers.
Si
RedDuster
Joined: March 01, 2010
KitMaker: 7,078 posts
Model Shipwrights: 6,649 posts
Posted: Tuesday, December 13, 2016 - 06:24 PM UTC
The home run, last couple of days progress in one go.
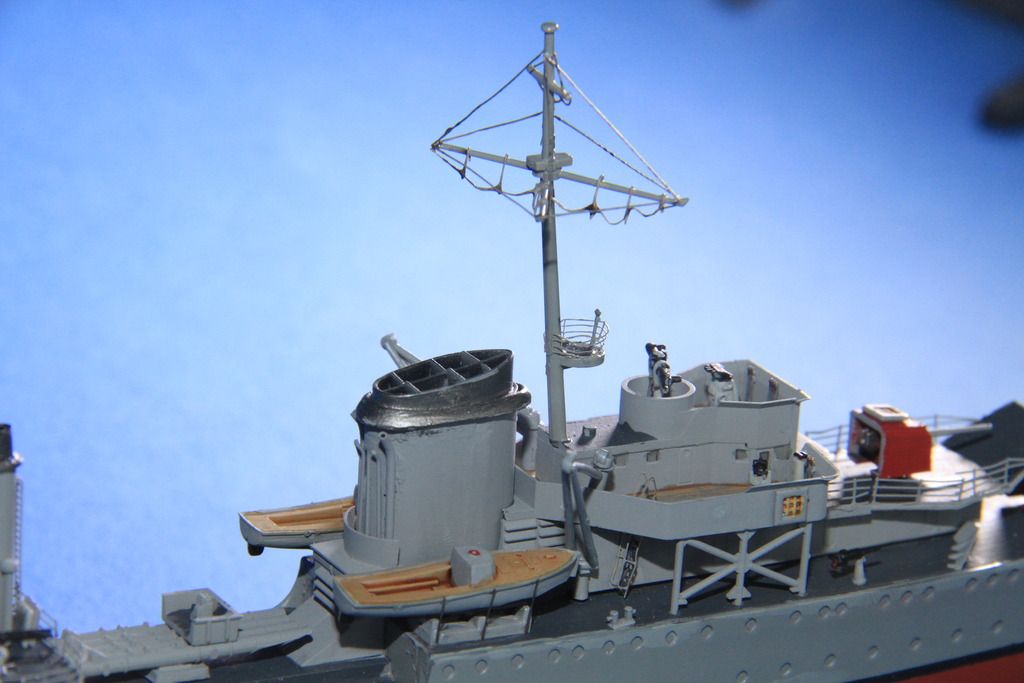
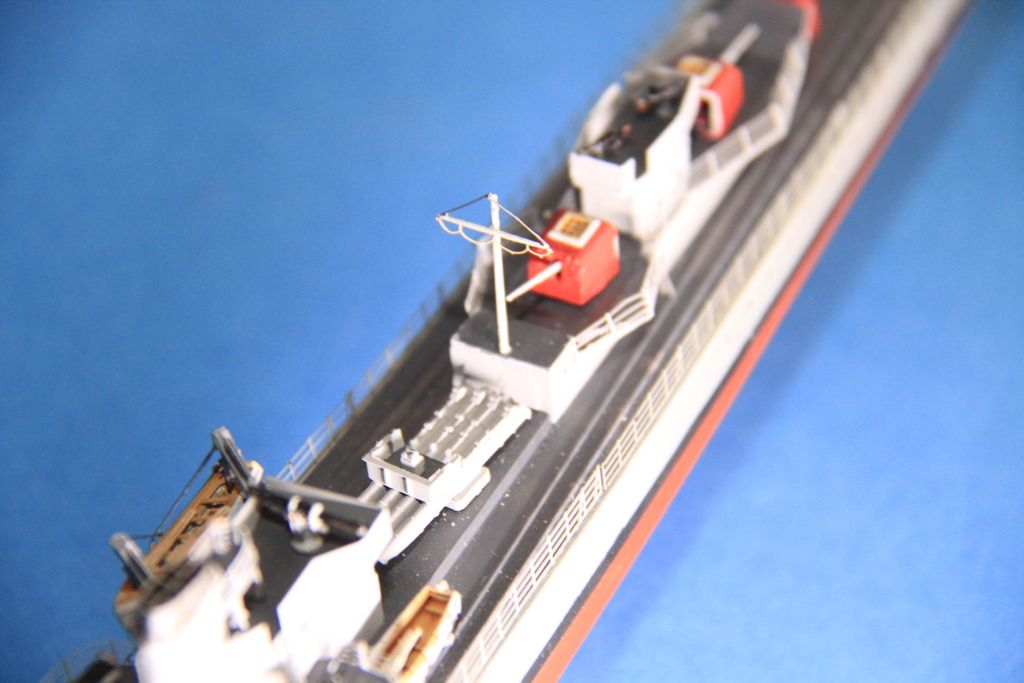
The corrected mast.
Fitted in the right place.
Signal halyards fitted to the foremast.

Anchors fitted.

Forestays in place.
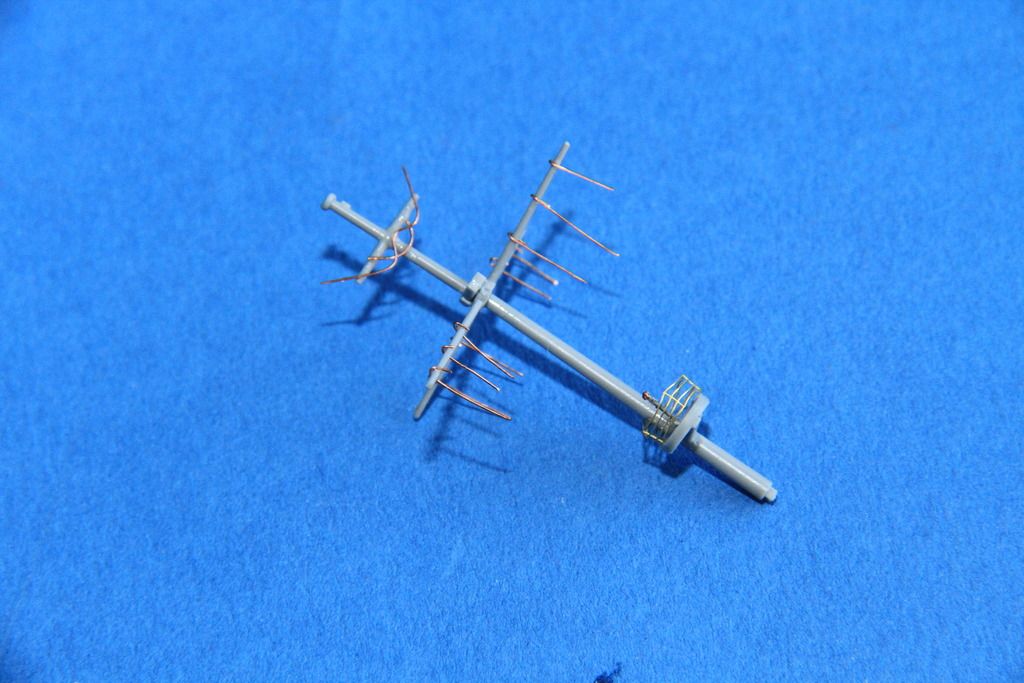
aftermast rigged, (technically the main mast I suppose) main aerial runs also just about visible in this shot.
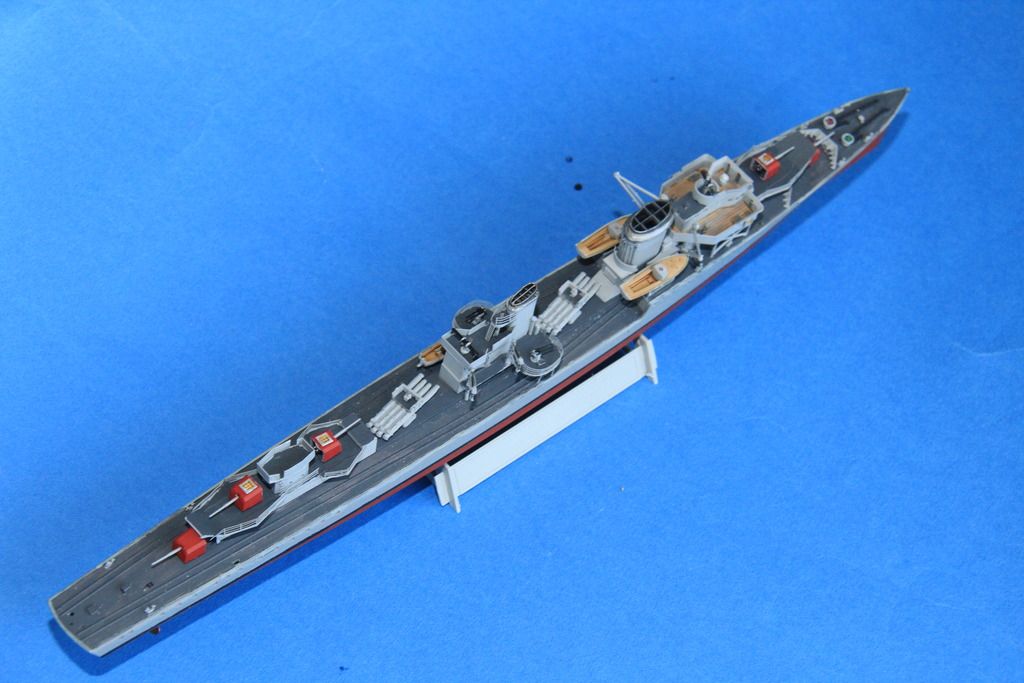
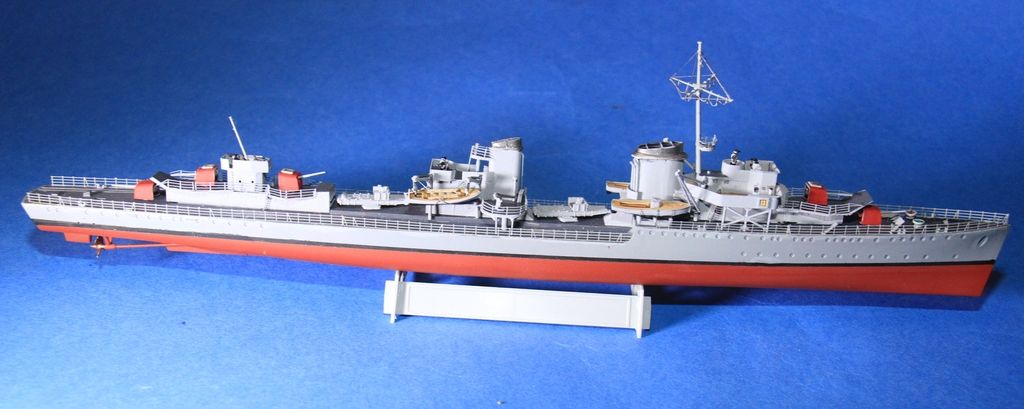
Finished.

Now to complete Z23.
Cheers
Si
The corrected mast.

Fitted in the right place.

Signal halyards fitted to the foremast.

Anchors fitted.

Forestays in place.

aftermast rigged, (technically the main mast I suppose) main aerial runs also just about visible in this shot.

Finished.


Now to complete Z23.
Cheers
Si
rolltide31
#377
Joined: June 27, 2010
KitMaker: 1,481 posts
Model Shipwrights: 1,332 posts
Posted: Tuesday, December 13, 2016 - 09:19 PM UTC
Si,
Great work on the aerials and signal halyards. I really need to try the brass wire approach. The thread I used for the Z32 started out nice and taught but as I added more it slackened out.
Only part I am not too happy about on that build.
Anyway, great work.
Dave
Great work on the aerials and signal halyards. I really need to try the brass wire approach. The thread I used for the Z32 started out nice and taught but as I added more it slackened out.
Only part I am not too happy about on that build.
Anyway, great work.
Dave

Cosimodo
#335
Joined: September 03, 2013
KitMaker: 1,808 posts
Model Shipwrights: 871 posts

Posted: Wednesday, December 14, 2016 - 04:09 AM UTC
Excellent work Si, especially on the masts with the rigging.
The finished boat looks great. A nice addition to your fleet.
cheers
Michael
The finished boat looks great. A nice addition to your fleet.
cheers
Michael
JJ1973
#345
Joined: August 22, 2011
KitMaker: 1,835 posts
Model Shipwrights: 1,832 posts
Posted: Wednesday, December 14, 2016 - 10:19 AM UTC
Great work on the Hans Lady, Si! The boat looks excellent!!
Now I am looking forward to see the Z23 commissioning...!
Cheers,
Jan
Now I am looking forward to see the Z23 commissioning...!
Cheers,
Jan
RedDuster
Joined: March 01, 2010
KitMaker: 7,078 posts
Model Shipwrights: 6,649 posts
Posted: Wednesday, December 14, 2016 - 02:44 PM UTC
Thanks guys,
That has been an interesting build, largest amount of srcatchbuilding / converting on a ship so far. Would most certainly have another go if / when I find the right project.
Cheers
Si.
That has been an interesting build, largest amount of srcatchbuilding / converting on a ship so far. Would most certainly have another go if / when I find the right project.
Cheers
Si.
RedDuster
Joined: March 01, 2010
KitMaker: 7,078 posts
Model Shipwrights: 6,649 posts
Posted: Sunday, December 18, 2016 - 01:48 AM UTC
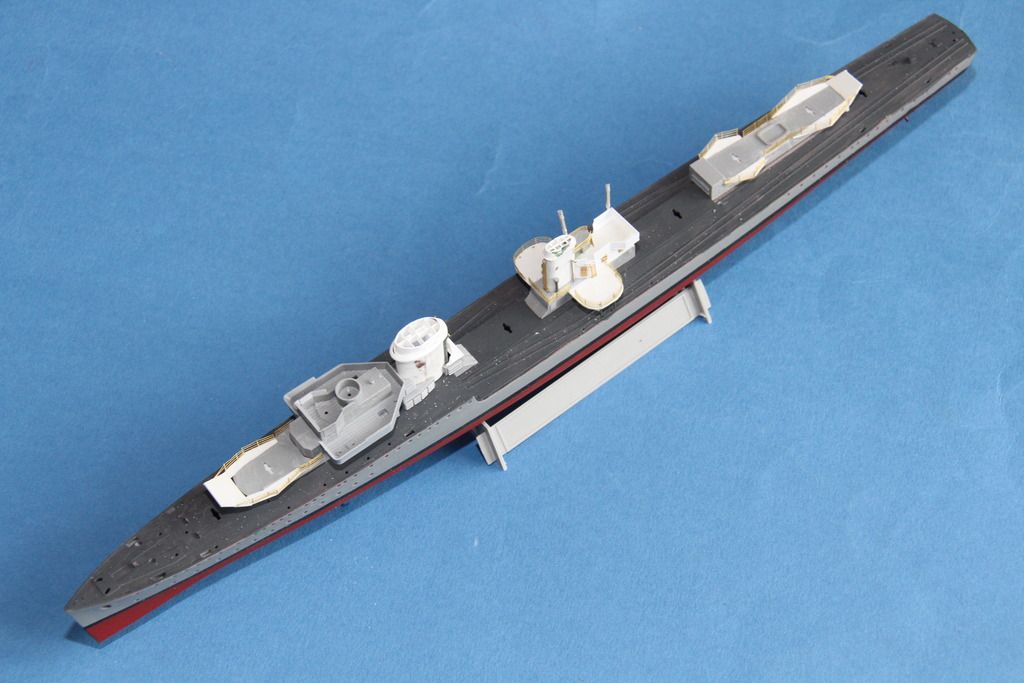
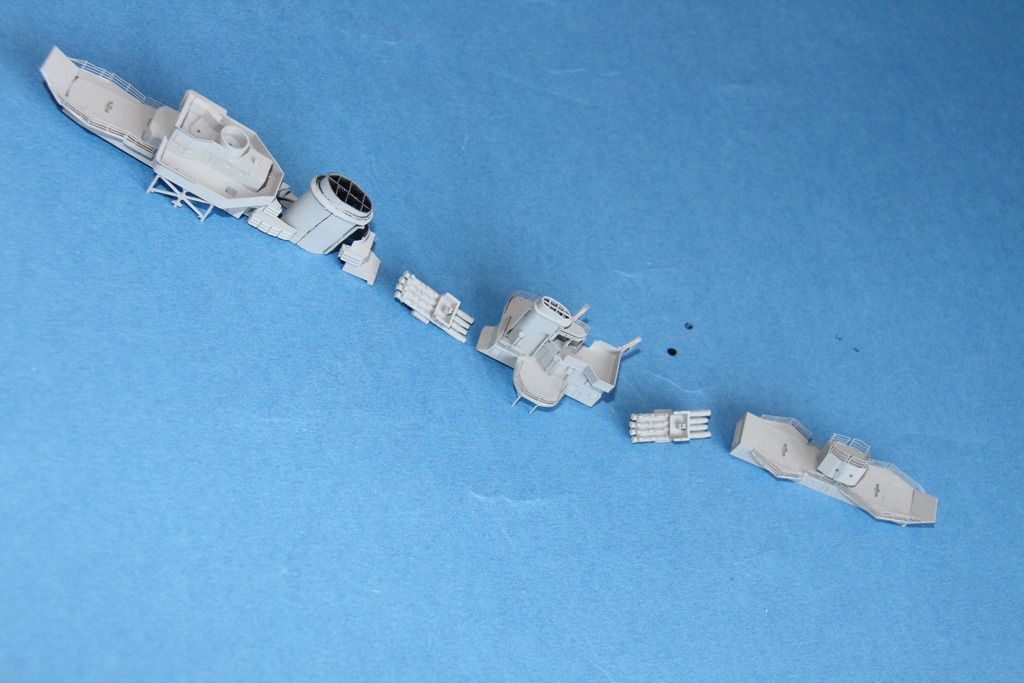
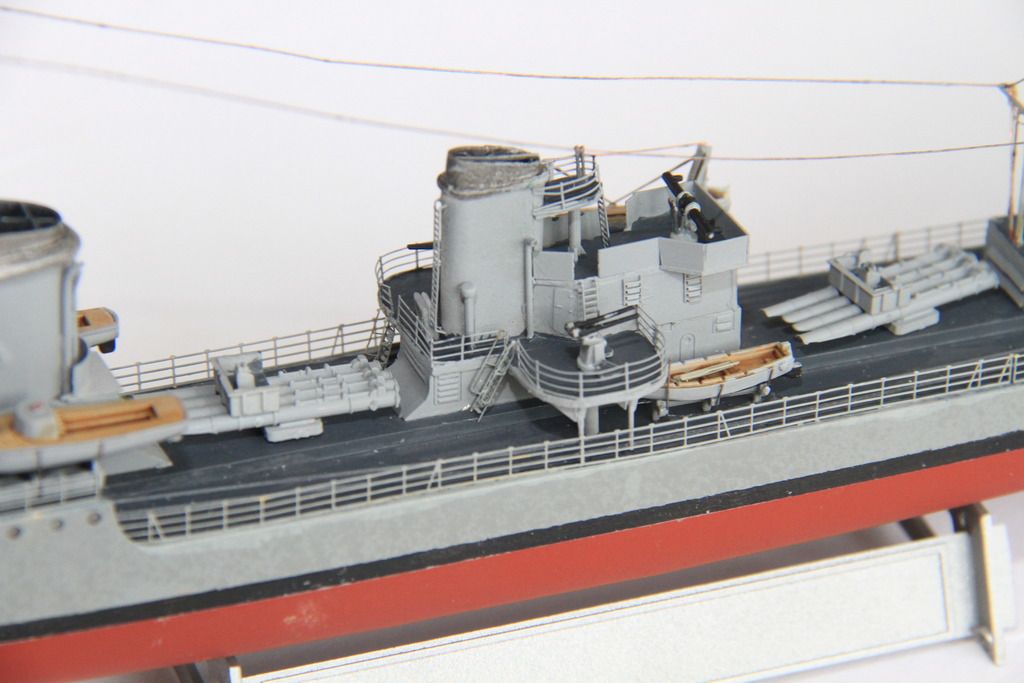
Right having done the hard part, on with the Z23.
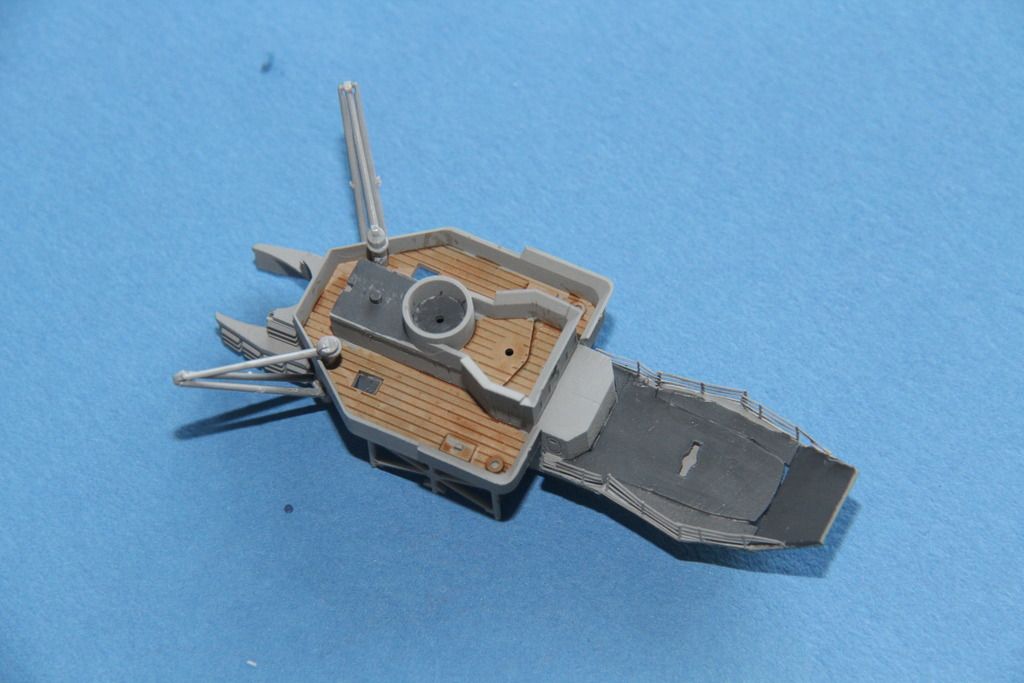
Detail on the quarterdeck.
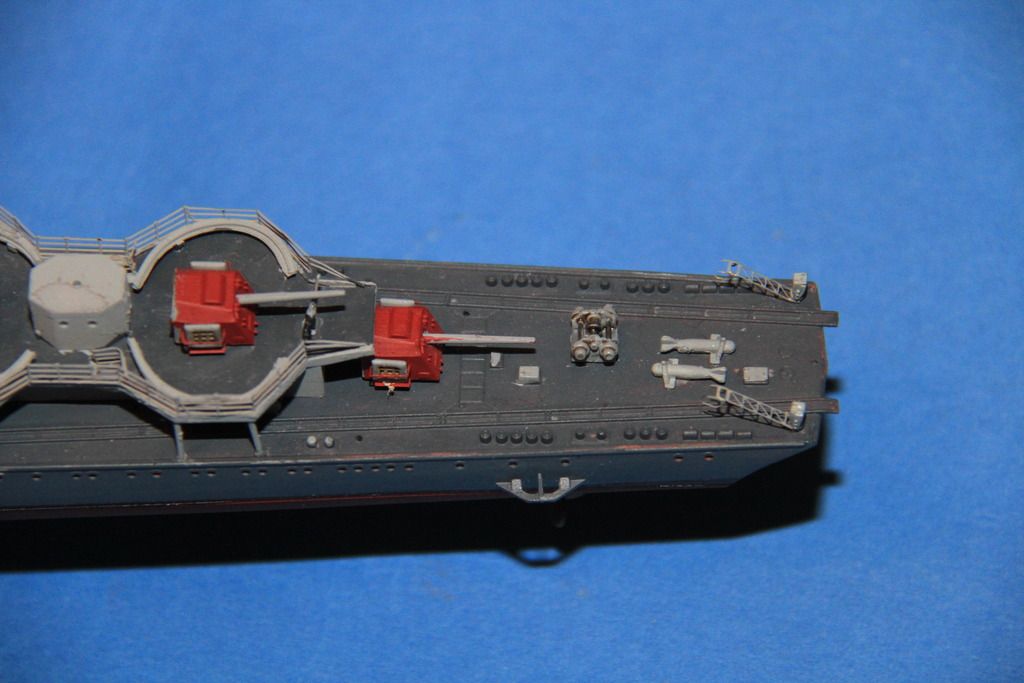
And the midships superstructure.
 .
.
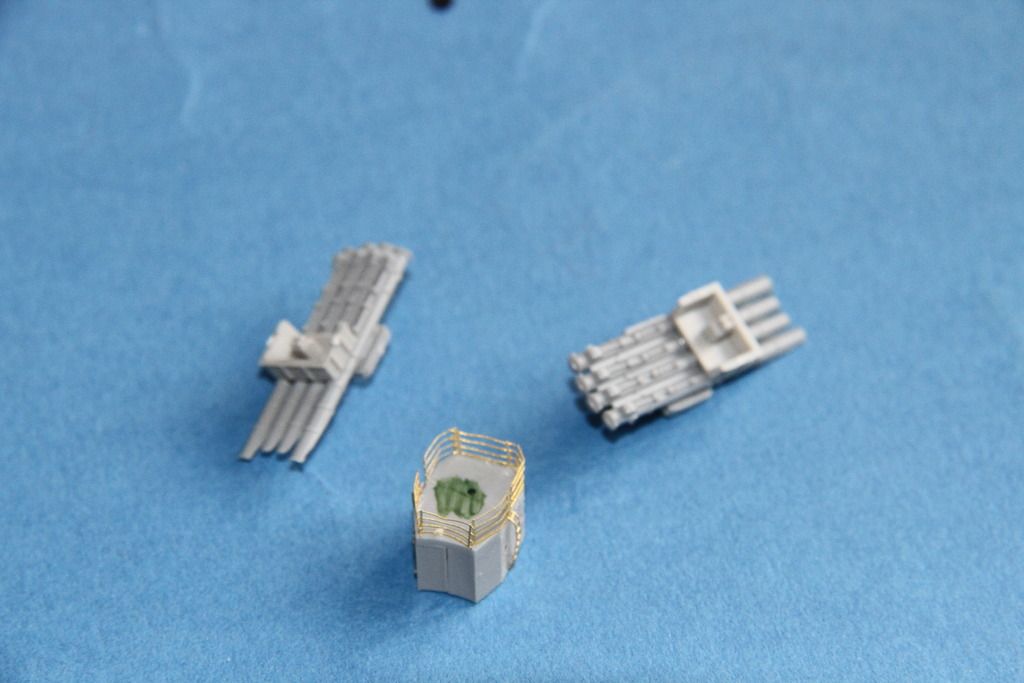
more sub assemblies, trumpy twin 37s with eduard etch, and a motor boat.
Cheers
Si
Detail on the quarterdeck.

And the midships superstructure.
 .
.more sub assemblies, trumpy twin 37s with eduard etch, and a motor boat.
Cheers
Si
 |

WEB HOSTING BY


Copyright ©2021 Model Shipwrights and Kitmaker Network, a subsidiary of Silver Star Enterprises
All Rights Reserved. Please read our Conditions of Use and Privacy Policy.
All Rights Reserved. Please read our Conditions of Use and Privacy Policy.