

Thanks Dave,
Looking forward to attacking the brass Mate, it does look very tempting on the frets, and all those lovely turned parts as well.
Cheers
Si


Go to modelshipwrights.com for the current dynamic site!
Ships by Class/Type
For discussions on ships by class and type.
For discussions on ships by class and type.
Hosted by Jim Starkweather
1/350 Tamiya KAGERO with Inifini upgrade.

RedDuster

Joined: March 01, 2010
KitMaker: 7,078 posts
Model Shipwrights: 6,649 posts

Posted: Wednesday, May 10, 2017 - 12:49 AM UTC
RedDuster
Joined: March 01, 2010
KitMaker: 7,078 posts
Model Shipwrights: 6,649 posts
Posted: Wednesday, May 10, 2017 - 12:52 AM UTC
Thanks Jan,
This was the easy bit, aided by Tamiya's excellent engineering.
There will be a bit of slow down over the next week or two, real life is about to get in the way.
Cheers
Si
This was the easy bit, aided by Tamiya's excellent engineering.
There will be a bit of slow down over the next week or two, real life is about to get in the way.
Cheers
Si
RedDuster
Joined: March 01, 2010
KitMaker: 7,078 posts
Model Shipwrights: 6,649 posts
Posted: Tuesday, May 16, 2017 - 01:28 AM UTC
Another small progress.
The upper hull and steel deck areas sprayed.
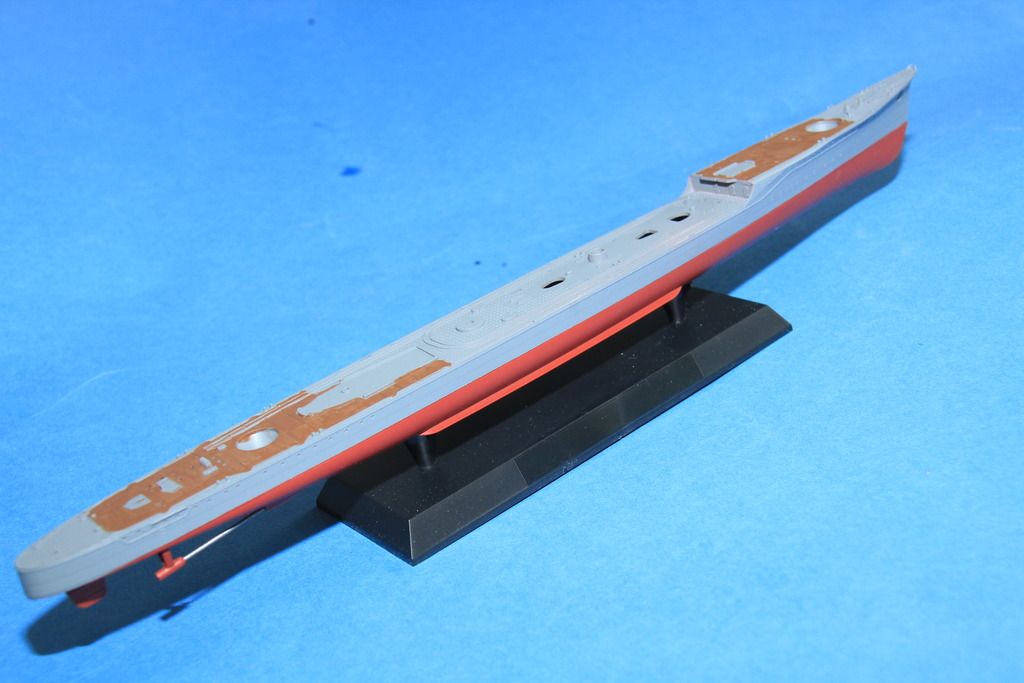
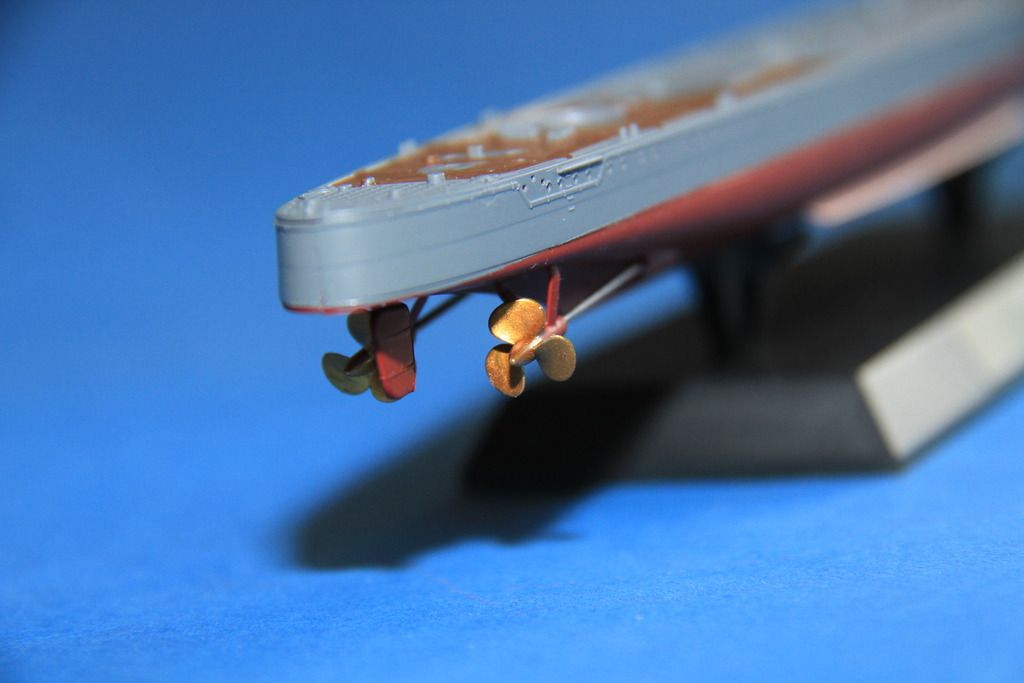
Propellers painted and fitted.
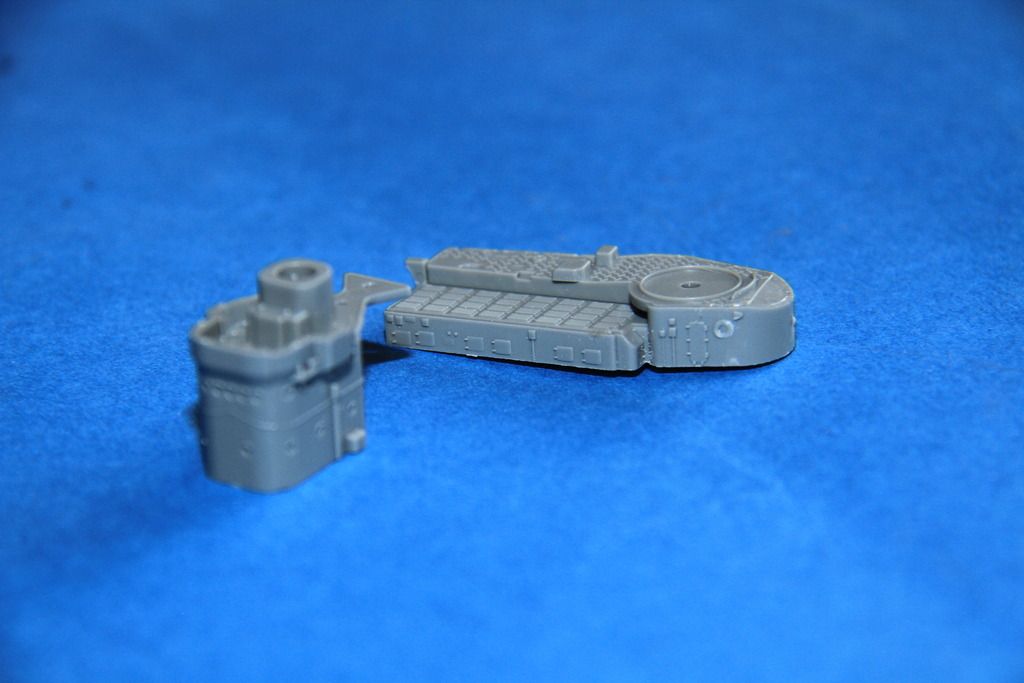
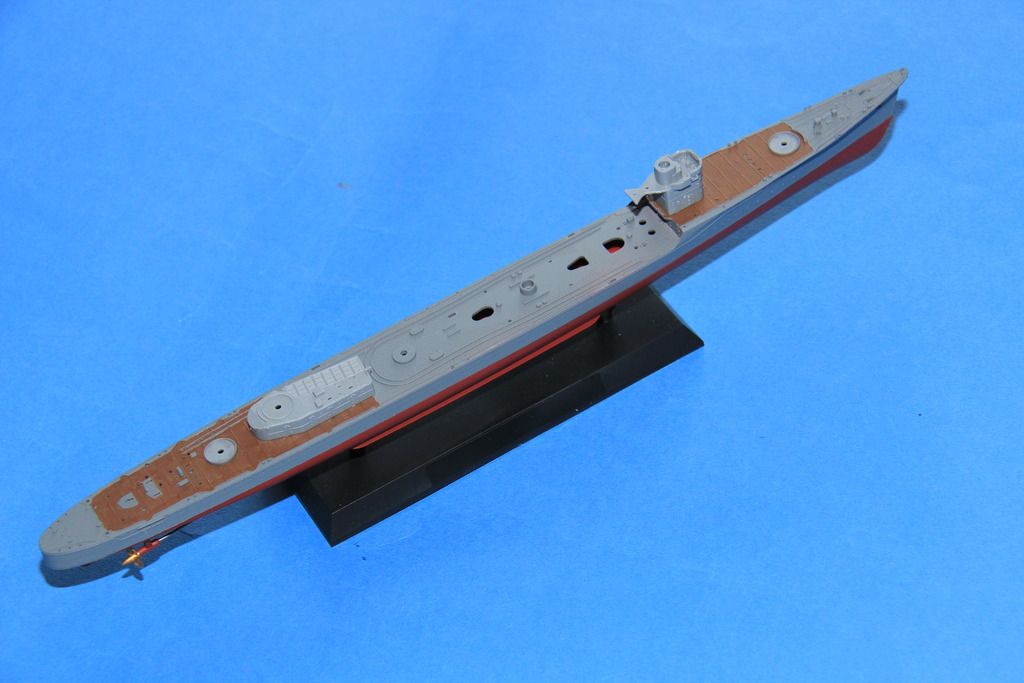
In order to ensure no issues later, the bridge and after superstructure units basically assembled, so they can be tacked in place whilst the brass strips are fitted to the linoleum sections of the deck.
test fitted in place.
next job, the brass strips.
Cheers
Si
The upper hull and steel deck areas sprayed.

Propellers painted and fitted.

In order to ensure no issues later, the bridge and after superstructure units basically assembled, so they can be tacked in place whilst the brass strips are fitted to the linoleum sections of the deck.

test fitted in place.

next job, the brass strips.
Cheers
Si

rolltide31

#377

Joined: June 27, 2010
KitMaker: 1,481 posts
Model Shipwrights: 1,332 posts

Posted: Tuesday, May 16, 2017 - 01:51 AM UTC
Si,
Nice progress. Should have thought about tacking the bridge and then adding the brass verse the opposite route I took.
For the most part the brass strip fits nicely, I think I had to shave down one just a tad.
Looking forward to seeing more progress soon.
Dave
Nice progress. Should have thought about tacking the bridge and then adding the brass verse the opposite route I took.
For the most part the brass strip fits nicely, I think I had to shave down one just a tad.
Looking forward to seeing more progress soon.
Dave

RussellE
#306

Joined: June 27, 2010
KitMaker: 3,959 posts
Model Shipwrights: 2,777 posts

Posted: Tuesday, May 16, 2017 - 08:29 AM UTC
The engineering on this kit looks great!
No signs of gaps/filler so far
No signs of gaps/filler so far


JJ1973
#345

Joined: August 22, 2011
KitMaker: 1,835 posts
Model Shipwrights: 1,832 posts
Posted: Tuesday, May 16, 2017 - 08:43 AM UTC
Very nice progress here, Si! -and as Russ says, the engineering of the kit seems really good!!
Cheers,
Jan
Cheers,
Jan
RedDuster
Joined: March 01, 2010
KitMaker: 7,078 posts
Model Shipwrights: 6,649 posts
Posted: Wednesday, May 17, 2017 - 01:22 AM UTC
Hi Dave,
Learned that the hard way when I built the Chikuma, trying to trim back bits of trim without damaging the strip or the finish.
Thank you for looking in mate.
Cheers
Si
Learned that the hard way when I built the Chikuma, trying to trim back bits of trim without damaging the strip or the finish.
Thank you for looking in mate.
Cheers
Si
RedDuster
Joined: March 01, 2010
KitMaker: 7,078 posts
Model Shipwrights: 6,649 posts
Posted: Wednesday, May 17, 2017 - 01:30 AM UTC
Thanks Russ,
Got to love Tamiya engineering, filler has stayed in the tube far.
Cheers
Si
Got to love Tamiya engineering, filler has stayed in the tube far.
Cheers
Si
RedDuster
Joined: March 01, 2010
KitMaker: 7,078 posts
Model Shipwrights: 6,649 posts
Posted: Wednesday, May 17, 2017 - 01:36 AM UTC
Thanks Jan,
Loving the build so far, next step is getting to grips with the infini upgrade, it looks really great on the fret, and lots of turned components.
Cheers
Si
Loving the build so far, next step is getting to grips with the infini upgrade, it looks really great on the fret, and lots of turned components.
Cheers
Si

seabee1526
Joined: September 14, 2007
KitMaker: 185 posts
Model Shipwrights: 26 posts

Posted: Sunday, May 21, 2017 - 11:48 PM UTC
RedDuster
Joined: March 01, 2010
KitMaker: 7,078 posts
Model Shipwrights: 6,649 posts
Posted: Monday, May 22, 2017 - 11:24 PM UTC
Not d bit of Japanese rock there,
thanks Steve.
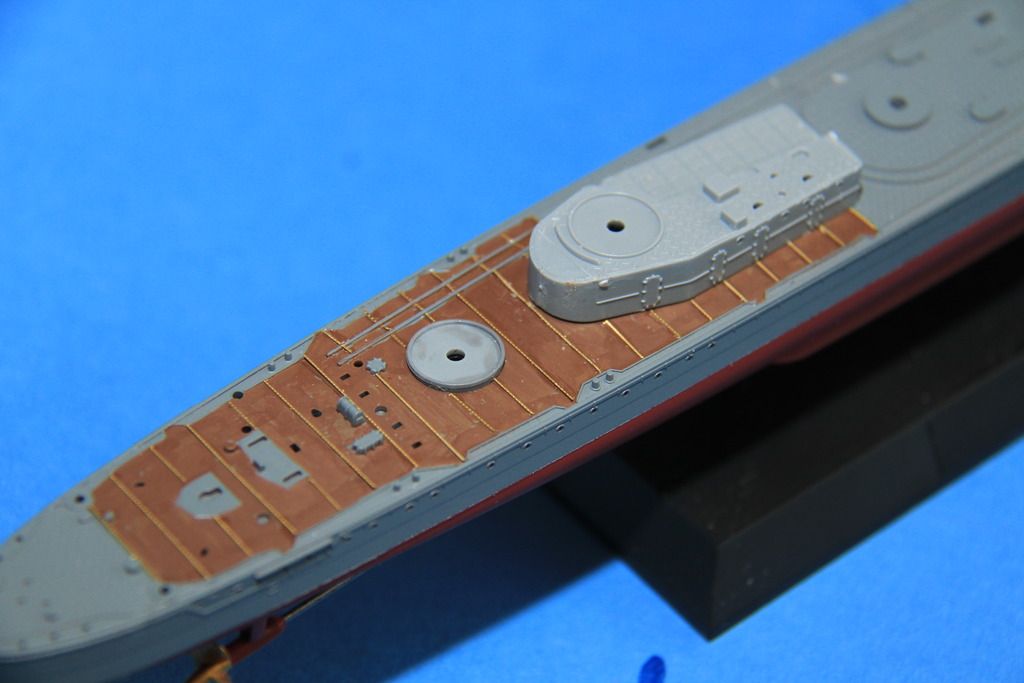
Finally, Sunday's progress.
The piece of infini etch down.
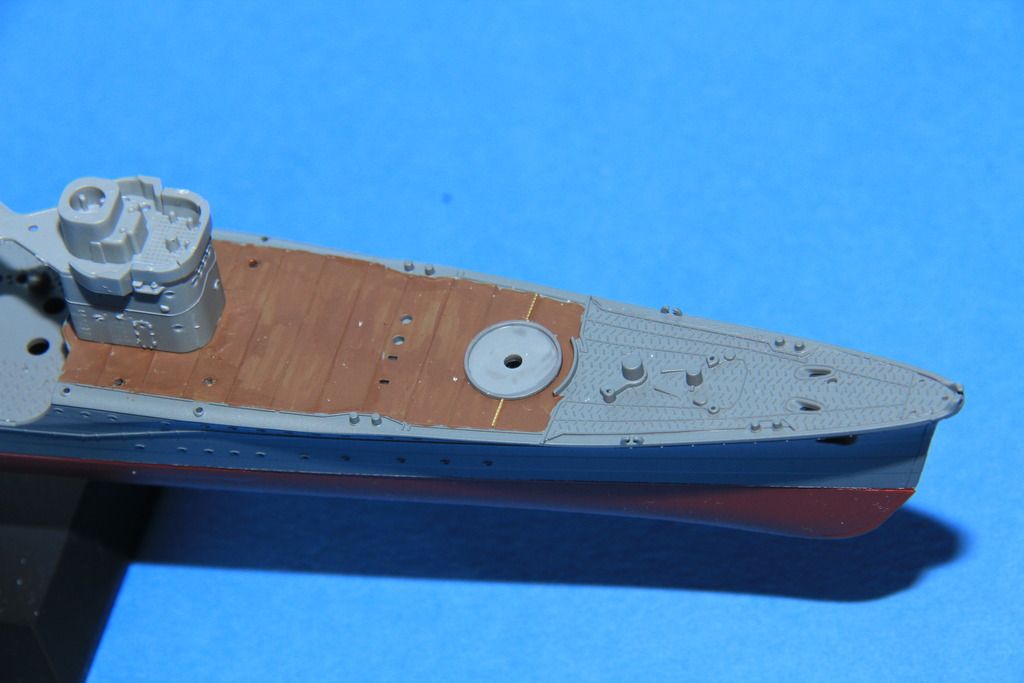
The foredeck done.
great fit, all of the sections, Infini are very thoughtful in the layout of the fret, all the sections are in the order you need them.

Detail going on the bridge.
Bit of destruction first.
On with the etch
More soon.
Cheers
Si
thanks Steve.
Finally, Sunday's progress.
The piece of infini etch down.

The foredeck done.

great fit, all of the sections, Infini are very thoughtful in the layout of the fret, all the sections are in the order you need them.

Detail going on the bridge.
Bit of destruction first.

On with the etch


More soon.
Cheers
Si
rolltide31
#377
Joined: June 27, 2010
KitMaker: 1,481 posts
Model Shipwrights: 1,332 posts
Posted: Tuesday, May 23, 2017 - 01:27 AM UTC
Si,
She is coming along nicely. On hind sight I wish I had laid down the brass strip earlier in the build.
Dave
She is coming along nicely. On hind sight I wish I had laid down the brass strip earlier in the build.
Dave

TimReynaga
Joined: May 03, 2006
KitMaker: 2,500 posts
Model Shipwrights: 1,830 posts
Posted: Tuesday, May 23, 2017 - 08:19 AM UTC
She's looking good, Si. That Infini photoetch upgrade looks fantastic! I even see louvres on the funnel top piece. Very cool.

RedDuster
Joined: March 01, 2010
KitMaker: 7,078 posts
Model Shipwrights: 6,649 posts
Posted: Tuesday, May 23, 2017 - 11:26 PM UTC
Thanks Dave,
I learnt the lay the brass strip early building the Chikuma, also the next trick, will be to put a light matt coat down over the brass, just to dull it down a fraction, and seal it.
Cheers
Si
I learnt the lay the brass strip early building the Chikuma, also the next trick, will be to put a light matt coat down over the brass, just to dull it down a fraction, and seal it.
Cheers
Si
RedDuster
Joined: March 01, 2010
KitMaker: 7,078 posts
Model Shipwrights: 6,649 posts
Posted: Tuesday, May 23, 2017 - 11:31 PM UTC
Thanks Tim,
It is a very complete set, and so far impressive fit, the funnel louvres do look good indeed, the depth charge rack and the paravane cranes are even more impressive.
Cheers
Si
It is a very complete set, and so far impressive fit, the funnel louvres do look good indeed, the depth charge rack and the paravane cranes are even more impressive.
Cheers
Si
rolltide31
#377
Joined: June 27, 2010
KitMaker: 1,481 posts
Model Shipwrights: 1,332 posts
Posted: Wednesday, May 24, 2017 - 01:30 AM UTC
Si,
Thanks for the reminder, with regards to the paravane cranes, take care when folding the base. The outside folds are a little delicate and one side tends to break off. It happened to me on both cranes.
once you get past that though they look amazing.
Dave
Thanks for the reminder, with regards to the paravane cranes, take care when folding the base. The outside folds are a little delicate and one side tends to break off. It happened to me on both cranes.
once you get past that though they look amazing.
Dave
RedDuster
Joined: March 01, 2010
KitMaker: 7,078 posts
Model Shipwrights: 6,649 posts
Posted: Wednesday, May 24, 2017 - 10:35 PM UTC
Thanks for the heads up Dave,
Appreciate that, always good to know where the pitfalls are likely to be.
Cheers mate,
Si
Appreciate that, always good to know where the pitfalls are likely to be.
Cheers mate,
Si

Fordboy

Joined: July 13, 2004
KitMaker: 2,169 posts
Model Shipwrights: 1,597 posts

Posted: Thursday, May 25, 2017 - 12:13 AM UTC
Ahoy Si
I love these IJN Destroyers with the lino decks etc.
Following along with great interest.
Cheers
Sean
I love these IJN Destroyers with the lino decks etc.
Following along with great interest.
Cheers
Sean
RedDuster
Joined: March 01, 2010
KitMaker: 7,078 posts
Model Shipwrights: 6,649 posts
Posted: Friday, May 26, 2017 - 02:12 PM UTC
Thanks Sean,
Glad to have you along, should be a bit of progress over the weekend.
The Linoleum deck areas do add quite a lot of interest to an almost one colour scheme. (especially with the brass strips)
Cheers
Si
Glad to have you along, should be a bit of progress over the weekend.
The Linoleum deck areas do add quite a lot of interest to an almost one colour scheme. (especially with the brass strips)
Cheers
Si
RedDuster
Joined: March 01, 2010
KitMaker: 7,078 posts
Model Shipwrights: 6,649 posts
Posted: Saturday, May 27, 2017 - 10:42 PM UTC
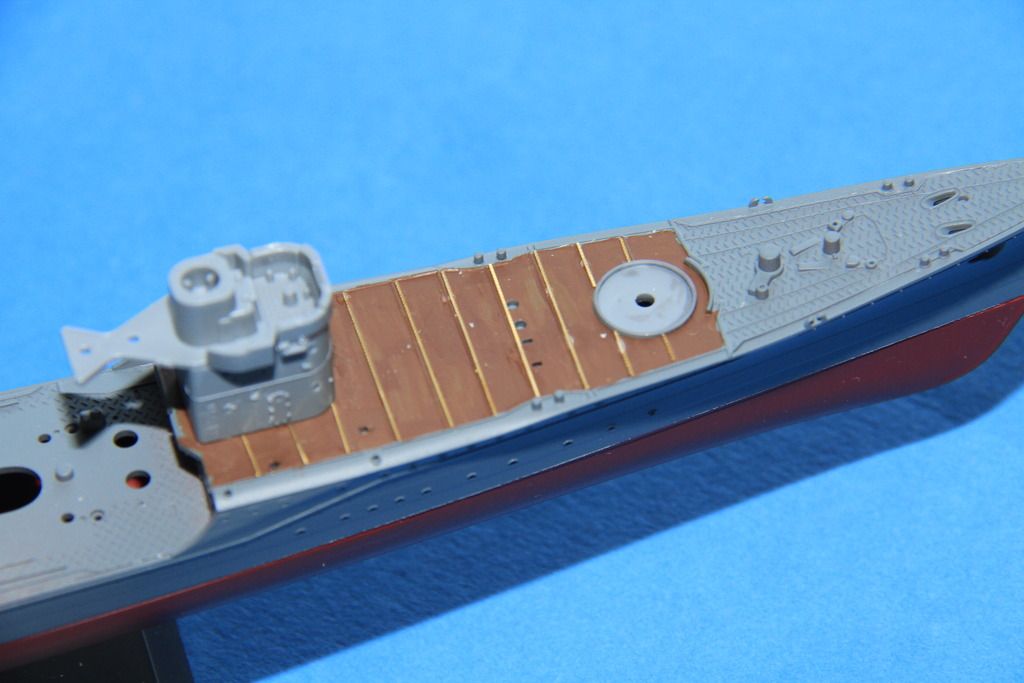
Quick update.
Bridge, up the window level detailed.
Started the strips on the quarterdeck. Some of the pieces are very small.(Good job I have got some stock strip, likely to drop more than one of those little swines)
Bridge sprayed, and the linoleum given the hairly stick treatment.
Cheers
Si
Bridge, up the window level detailed.

Started the strips on the quarterdeck. Some of the pieces are very small.(Good job I have got some stock strip, likely to drop more than one of those little swines)

Bridge sprayed, and the linoleum given the hairly stick treatment.

Cheers
Si
RedDuster
Joined: March 01, 2010
KitMaker: 7,078 posts
Model Shipwrights: 6,649 posts
Posted: Tuesday, May 30, 2017 - 12:25 AM UTC
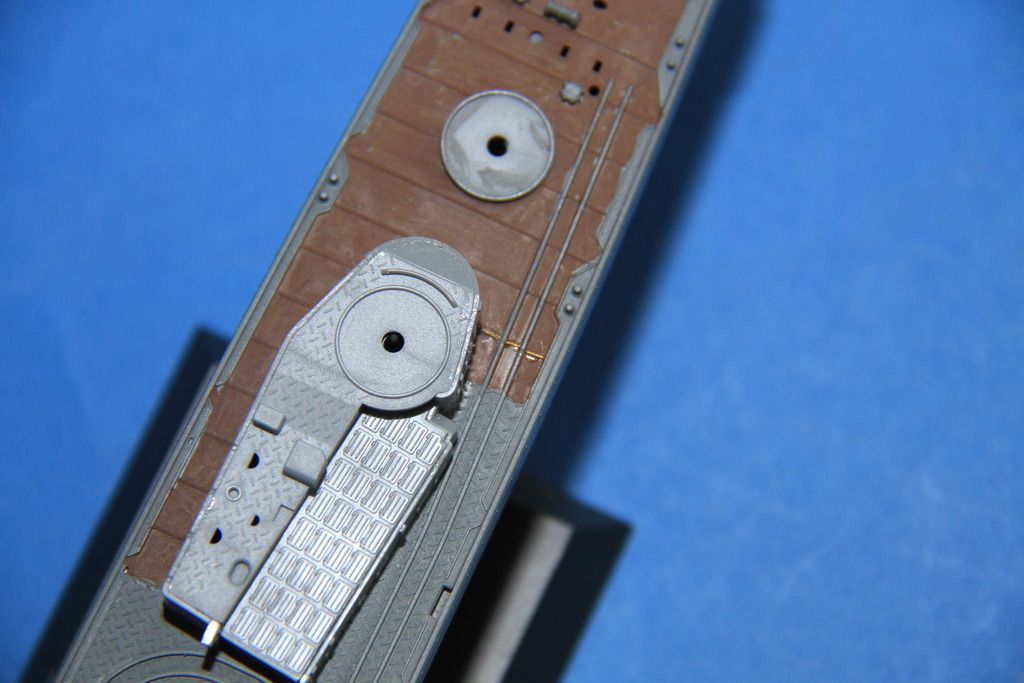
A bit of progress yesterday.
More brass going on the quarterdeck.

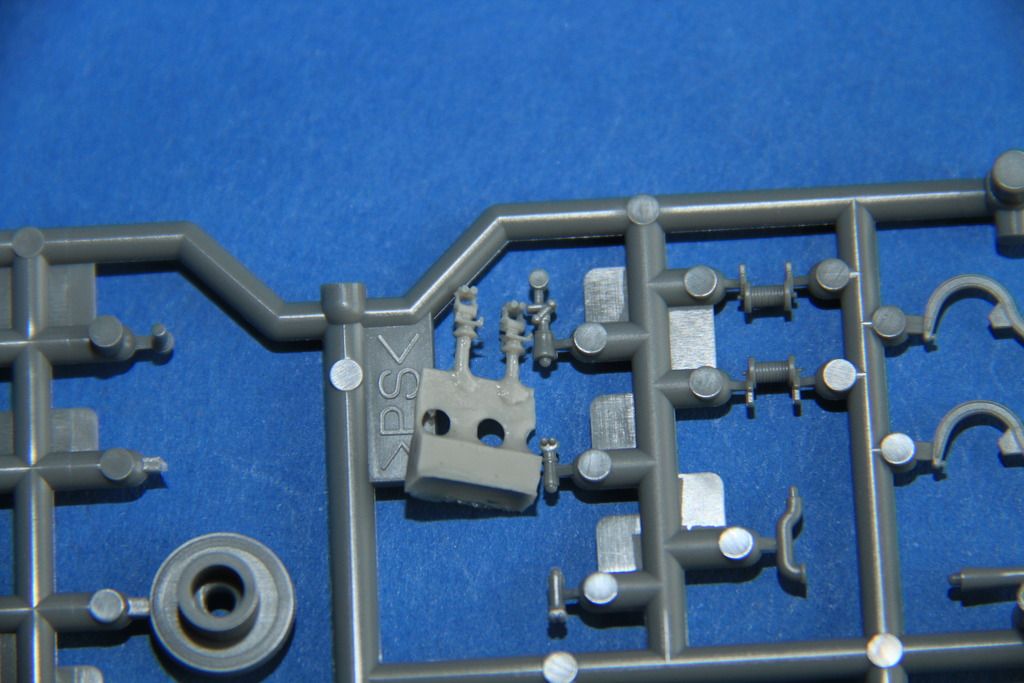
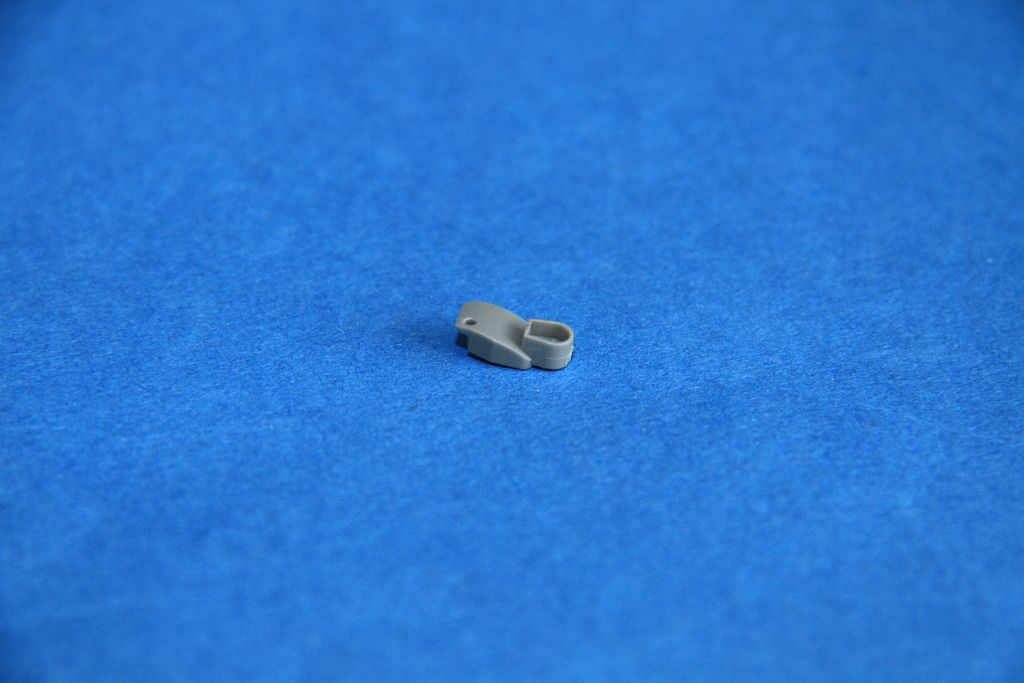
Had some left over veteran binocular mounts from my Chikuma build, they needed shorting slightly, but finer than the Tamiya parts.
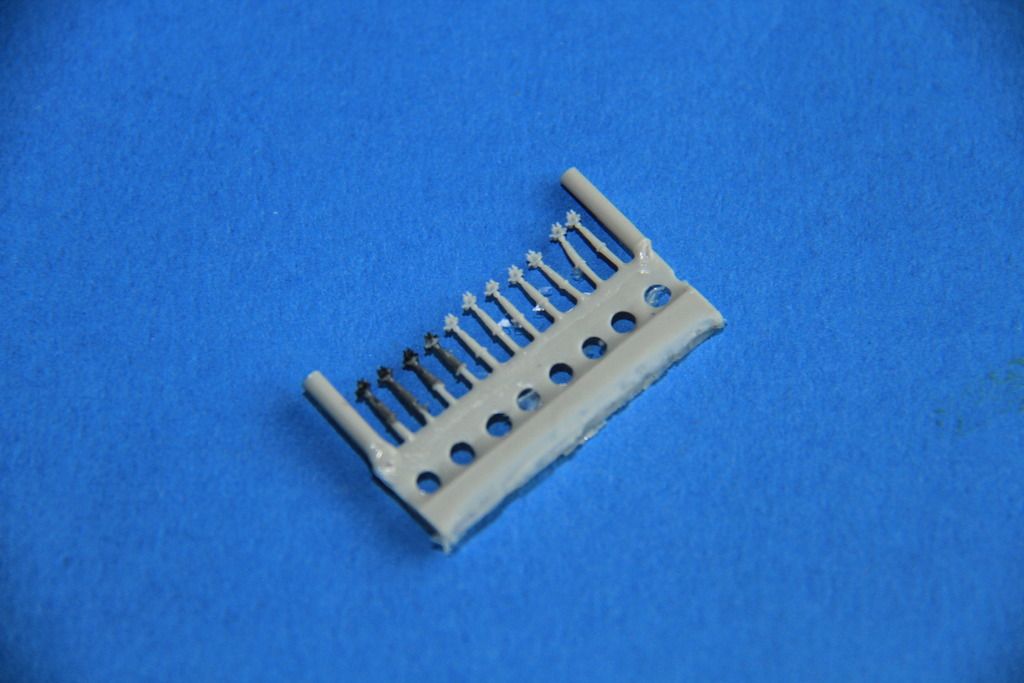
Also found these which look like a good replacement for P15.
Binocular mounts fitted, after end of the DCT needs a touch up.
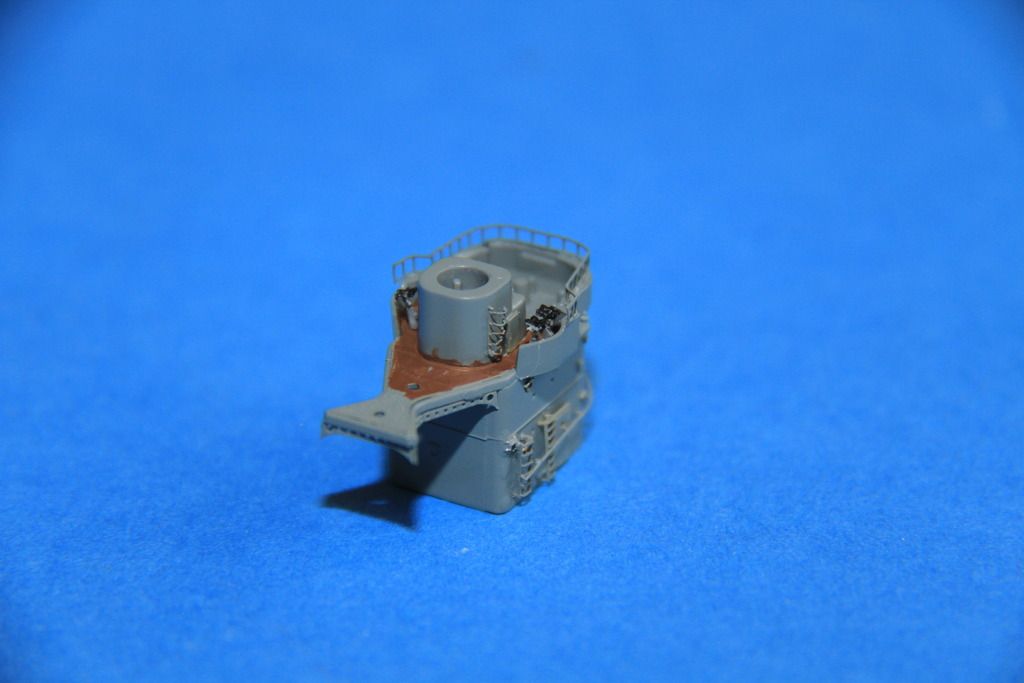
Pity they almost disappear when the bridge roof is fitted.
Brass all down on the quarterdeck, not 100% straight, but considering the number of small sections I am not displeased with the result.
More soon.
Cheers
Si
More brass going on the quarterdeck.

Had some left over veteran binocular mounts from my Chikuma build, they needed shorting slightly, but finer than the Tamiya parts.

Also found these which look like a good replacement for P15.

Binocular mounts fitted, after end of the DCT needs a touch up.

Pity they almost disappear when the bridge roof is fitted.

Brass all down on the quarterdeck, not 100% straight, but considering the number of small sections I am not displeased with the result.

More soon.
Cheers
Si
rolltide31
#377
Joined: June 27, 2010
KitMaker: 1,481 posts
Model Shipwrights: 1,332 posts
Posted: Tuesday, May 30, 2017 - 02:36 AM UTC
Si,
Great work. I too replaced the kit bino's with veteran resin copies. A big improvement on the detail. The kit parts are a little clunky.
The brass strip looks great.
Nice progress on the bridge too. I took some North Star Figures and added them to the bridge, but only after sanding their legs down since the didn't fit.
Looking good.
Dave
RedDuster
Joined: March 01, 2010
KitMaker: 7,078 posts
Model Shipwrights: 6,649 posts
Posted: Wednesday, May 31, 2017 - 01:06 PM UTC
Thanks Dave,
The Resin parts do help the bridge, which is pretty good out of the box, except as you say some chunky bits.
Cheers
Si
The Resin parts do help the bridge, which is pretty good out of the box, except as you say some chunky bits.
Cheers
Si
RedDuster
Joined: March 01, 2010
KitMaker: 7,078 posts
Model Shipwrights: 6,649 posts
Posted: Sunday, June 11, 2017 - 02:00 AM UTC
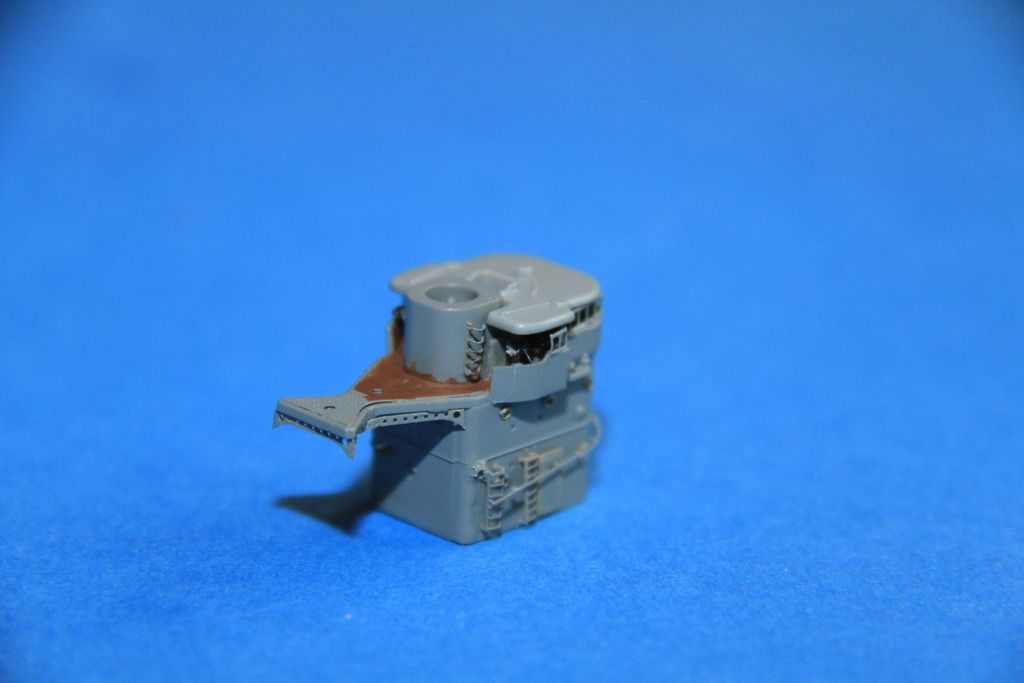
A bit of progress around the spider's web of Bismarck's rigging.
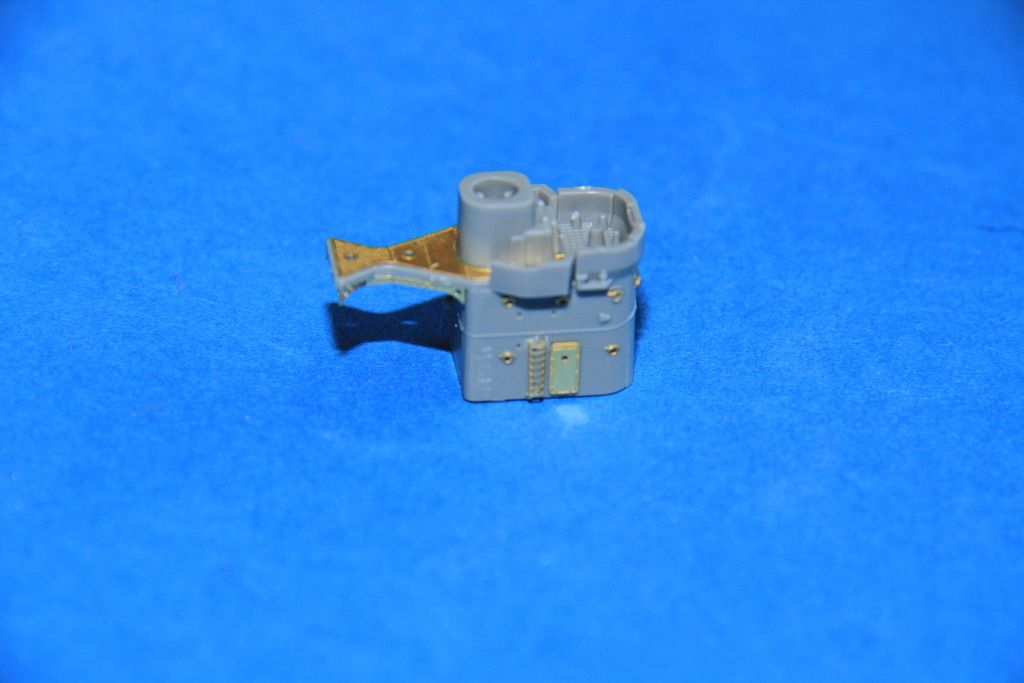
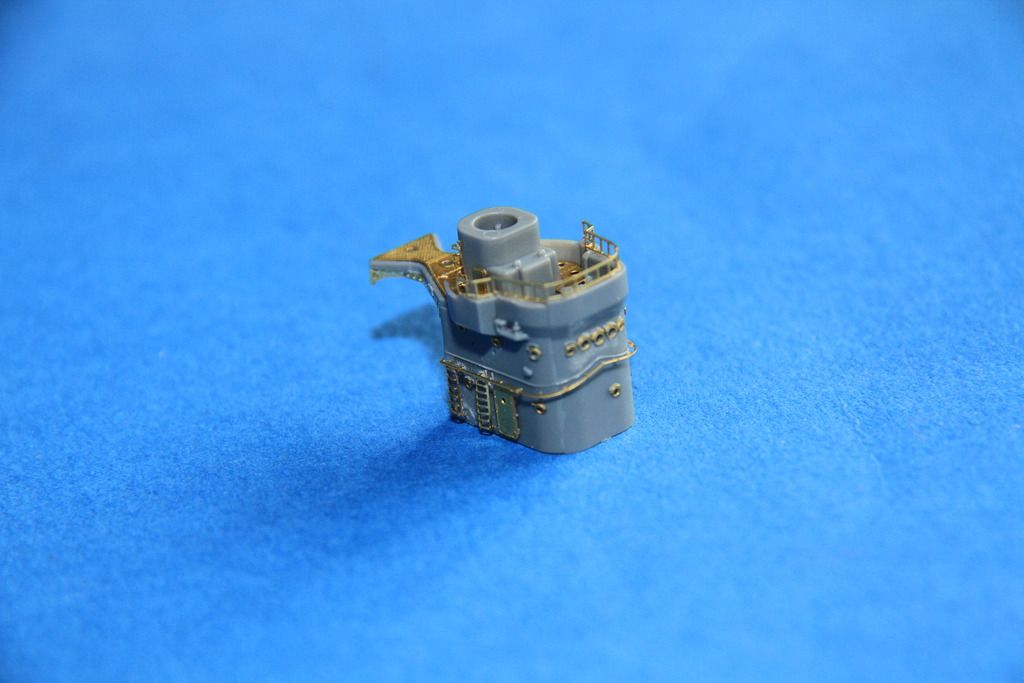
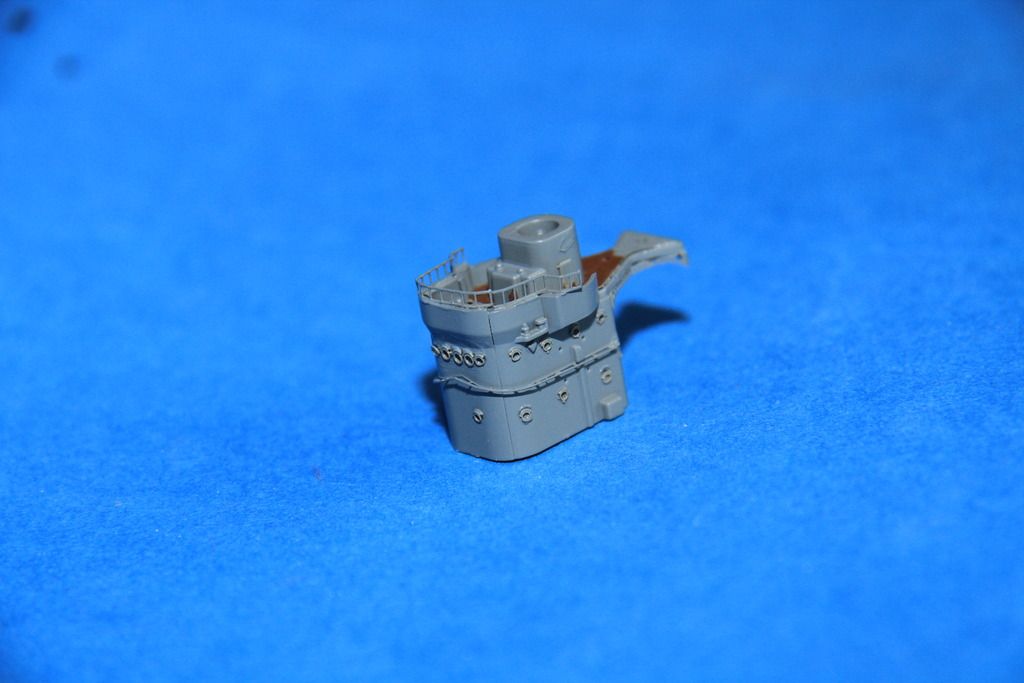
The etch going on the after superstructure.

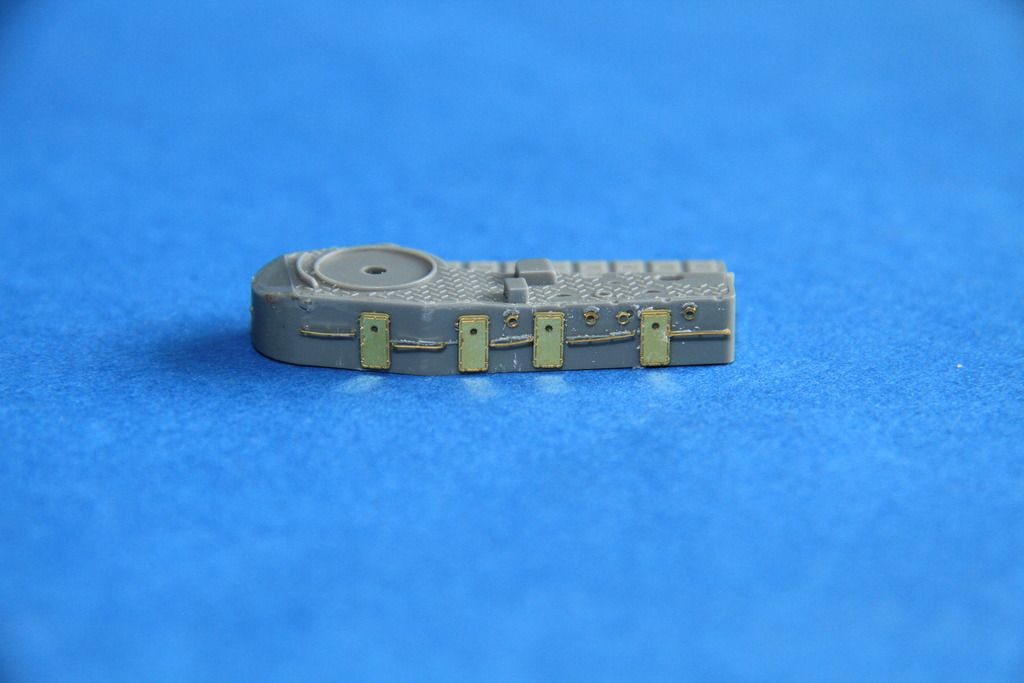
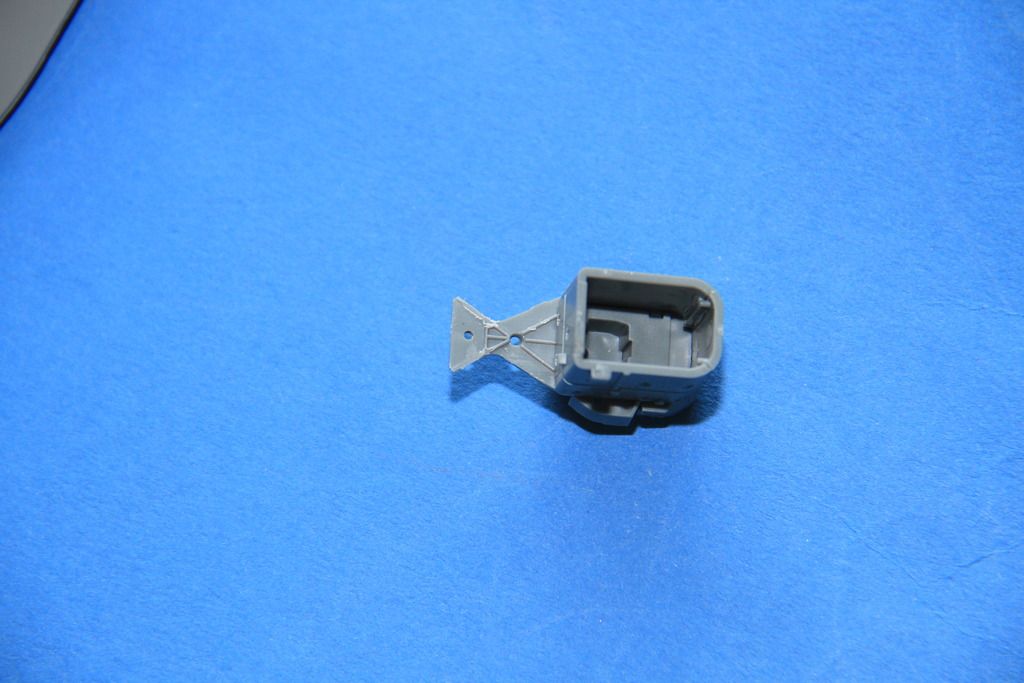
The after searchlight platform as provided in the kit.
destruction done, and fitted.

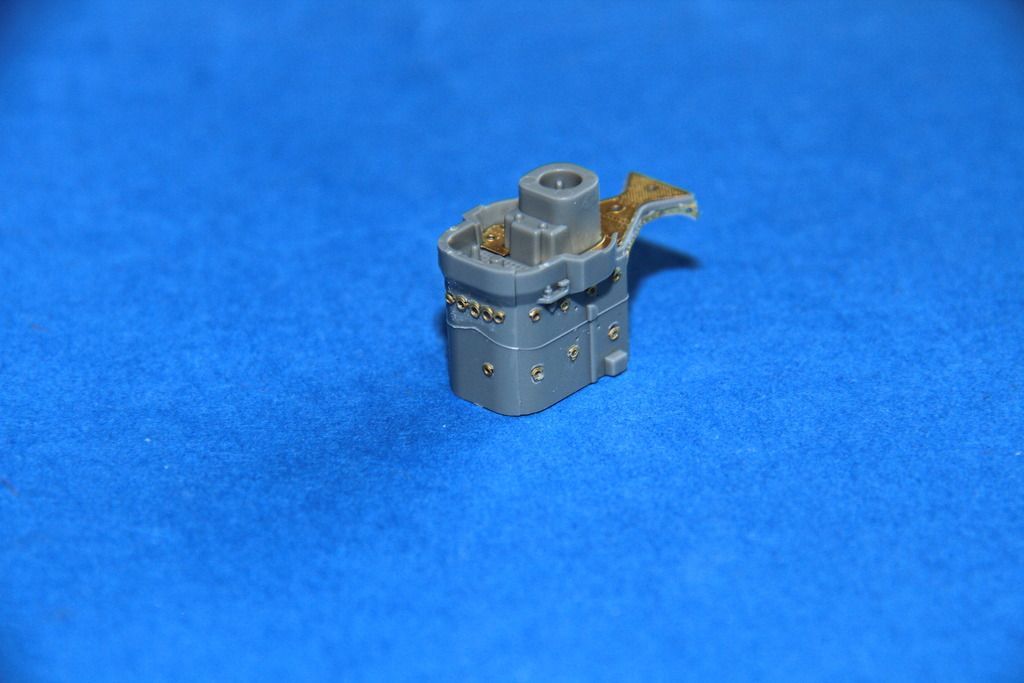
All etched up.
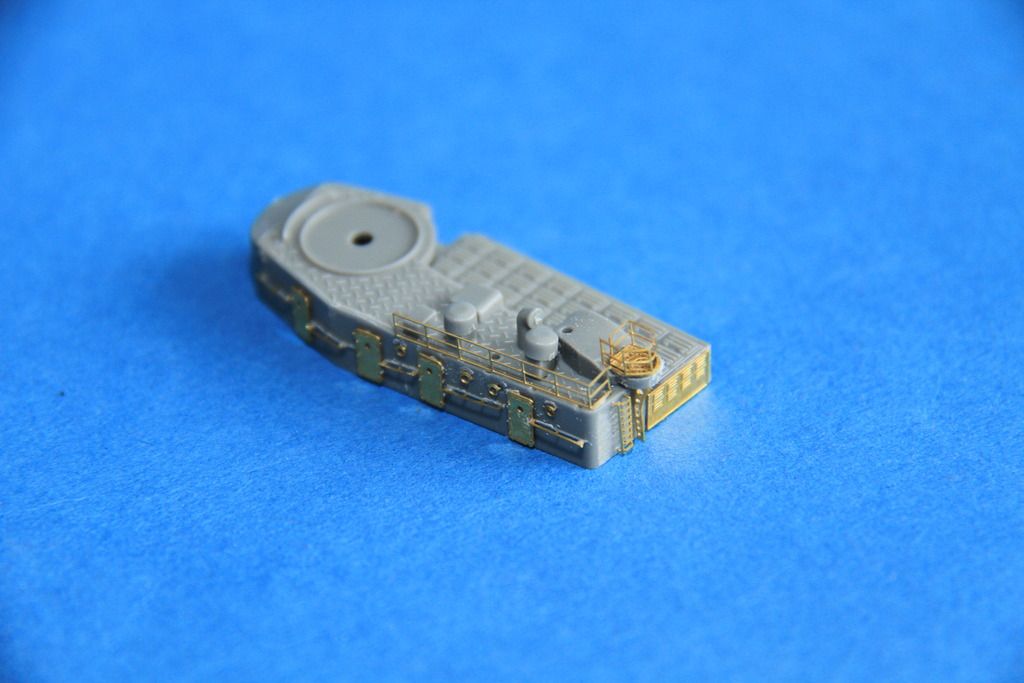
The after torpedo crane, main structure together and test fitted.
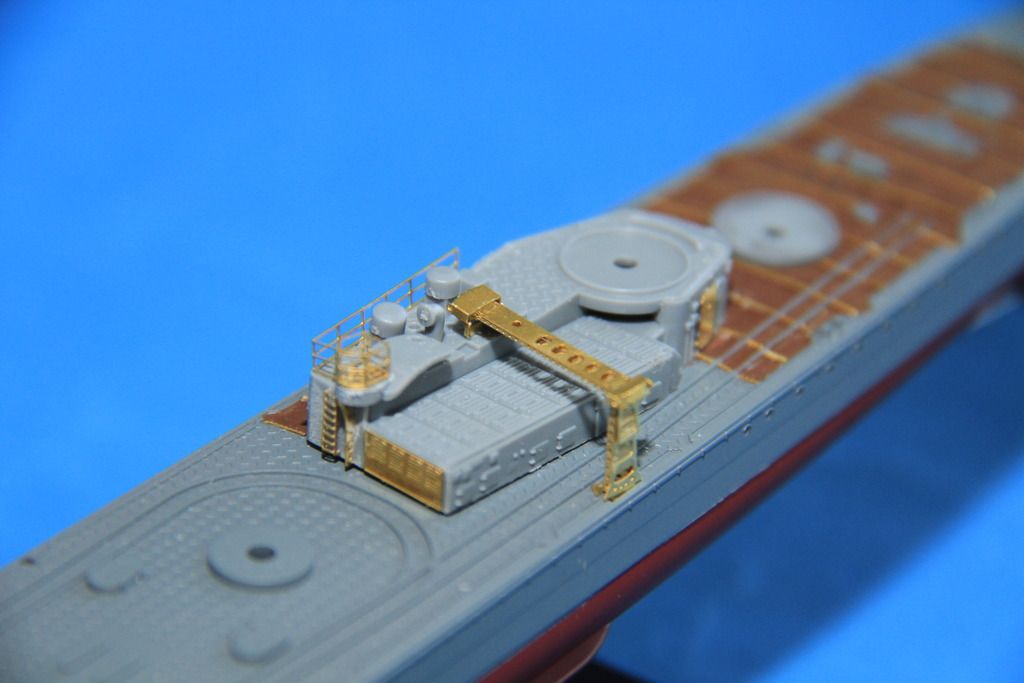
Few details to add on, then fixed to the after superstructure, then a spray job.
cheers
Si
The etch going on the after superstructure.


The after searchlight platform as provided in the kit.

destruction done, and fitted.

All etched up.

The after torpedo crane, main structure together and test fitted.

Few details to add on, then fixed to the after superstructure, then a spray job.
cheers
Si
rolltide31
#377
Joined: June 27, 2010
KitMaker: 1,481 posts
Model Shipwrights: 1,332 posts
Posted: Sunday, June 11, 2017 - 03:43 AM UTC
Si,
She is looking really good. I found that the aft torpedo crane was a little bit challenging to put together. In the end I think mine came out fine. Yours looks really good.
Looking forward to seeing some more soon.
Dave
She is looking really good. I found that the aft torpedo crane was a little bit challenging to put together. In the end I think mine came out fine. Yours looks really good.
Looking forward to seeing some more soon.
Dave
 |

WEB HOSTING BY


Copyright ©2021 Model Shipwrights and Kitmaker Network, a subsidiary of Silver Star Enterprises
All Rights Reserved. Please read our Conditions of Use and Privacy Policy.
All Rights Reserved. Please read our Conditions of Use and Privacy Policy.