1/350 Kleiner Kreuzer Emden - Tsingtau 1913
Bayern, Germany
Joined: December 11, 2009
KitMaker: 823 posts
Model Shipwrights: 551 posts
Posted: Friday, October 05, 2018 - 11:37 PM UTC
As I have had two days off work I was able to continue with my Emden. I glued on some Details at the outer ships hull and started with some etched superstructures at the ships middle part. So far the progress:
I am still unsure how to continue - prebuild as much as possible of the pe-structures first and paint them later before Installation at the ship or build and glue them on first and paint them altogether later...
Anyhow first needed to be the guns of the tween decks get some paint on. Therefore I showed a comparison of the protected and unprotected main guns between the excellent Shapeways products and the ships plastic guns:
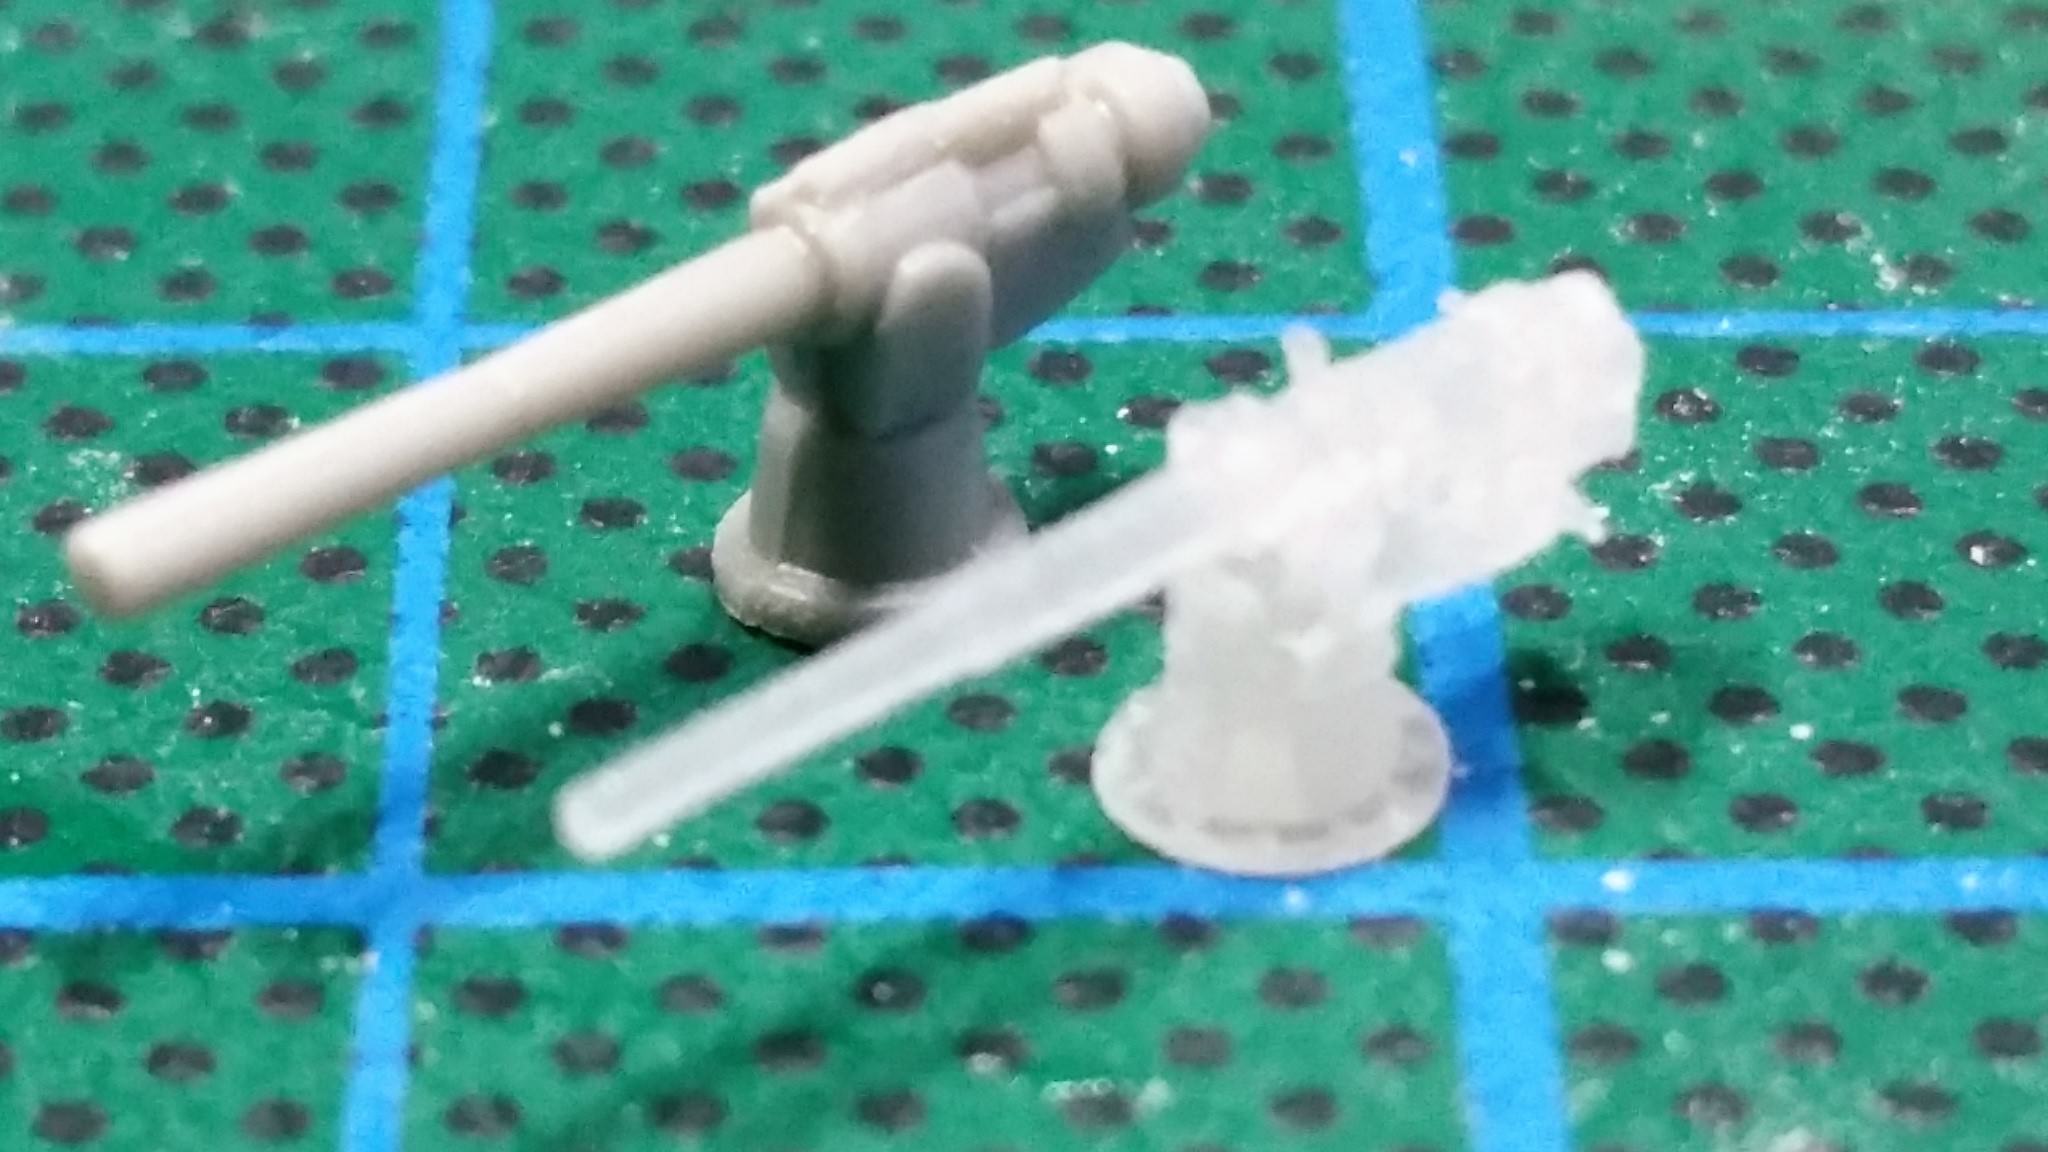
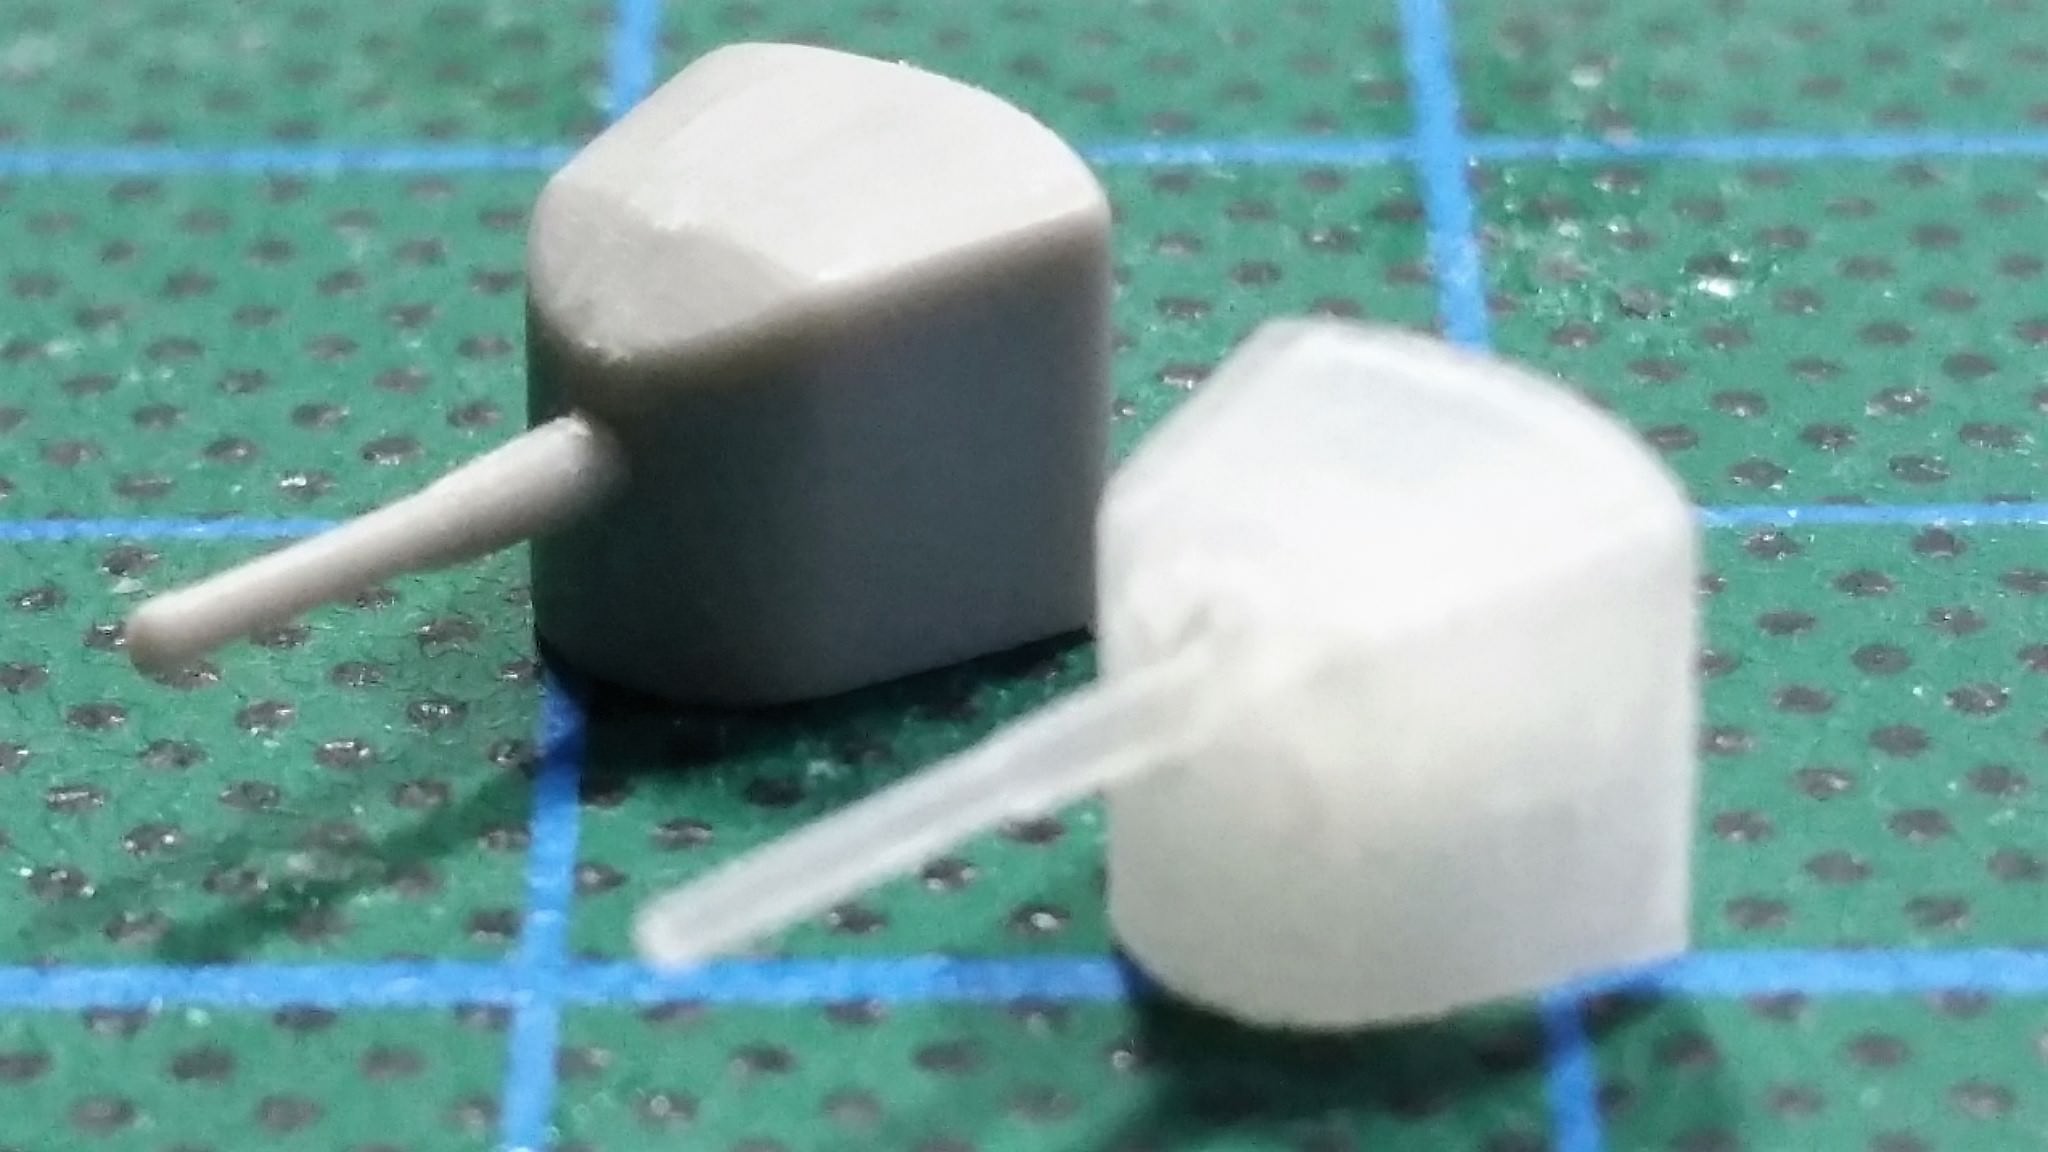
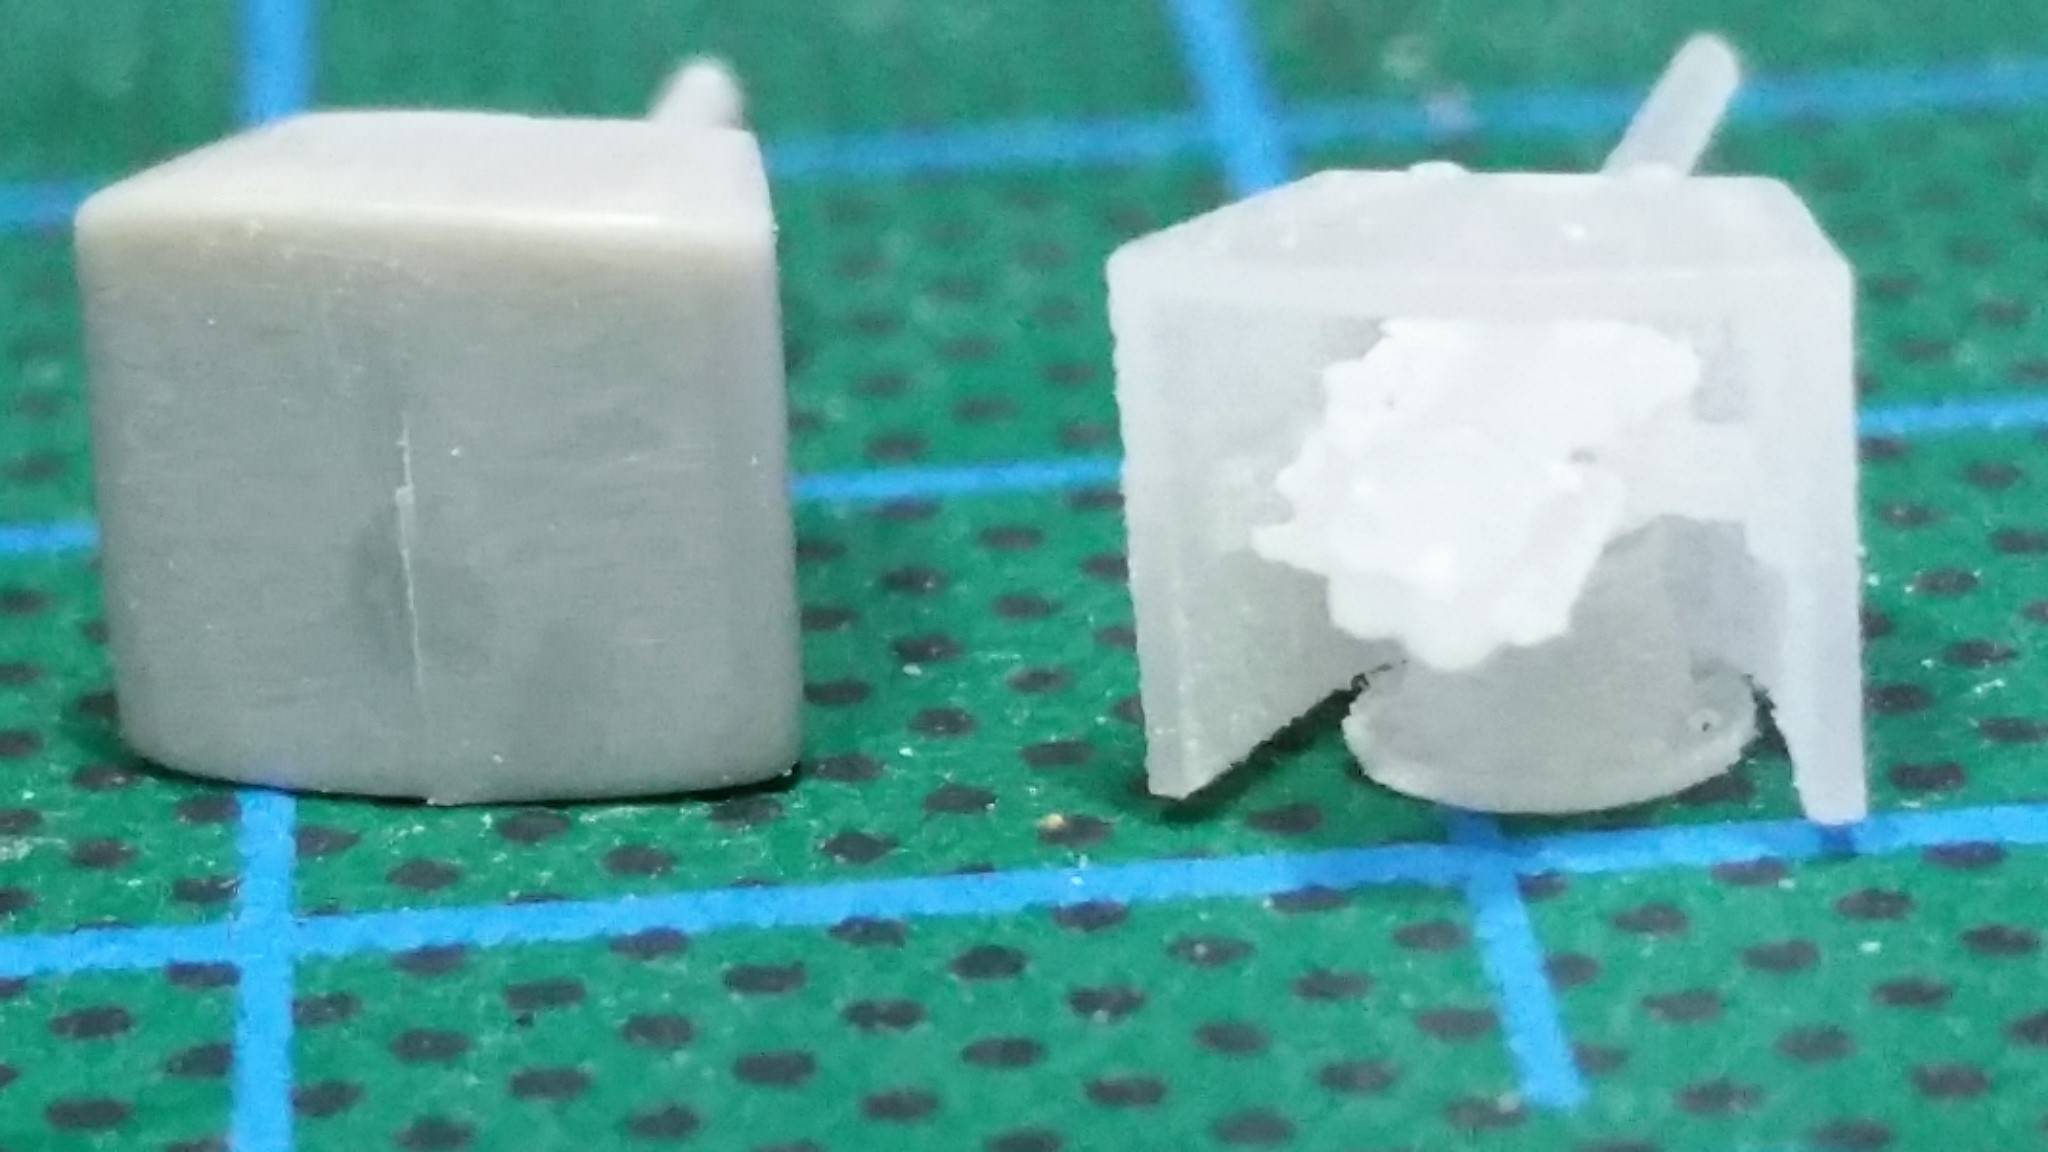
In german we say there is a difference "like day and night".
Cheers

Bayern, Germany
Joined: December 11, 2009
KitMaker: 823 posts
Model Shipwrights: 551 posts
Posted: Friday, October 05, 2018 - 11:46 PM UTC
Two questions for the educated audience:
1) where can I get those blackened anchor chains? (why does the usual aftermarked companies who sell the veneer decks include just the brass colored chains?!) Or can I blacken my chains by myself in an easy way without painting? Painted chains will loose their primer color very soon I learned the hard way.
2) I desperately look for Northstarmodels 350070 tightening screws and eybolds in 1/350 for this build but it seems no one carries them; even Northstarsmodels have them out of stock for quite some time now. Some tips were to find these?
Thanks for your help in advance!

#453
Texas, United States
Joined: August 28, 2016
KitMaker: 1,925 posts
Model Shipwrights: 1,298 posts
Posted: Saturday, October 06, 2018 - 02:18 AM UTC
Thomas,
I paint my chains but you can try putting those bass chains in gun bluing to turn them black. Have you tried you-tube for how to videos on coloring chains. I believe I have run across several in the past.
The photo-etch superstructure pieces in your photos, did you glue them together or solder them? I was just wondering how you got the corners so square?
Found the turnbuckles at this hobby shop on line;
https://www.ssnmodellbau.de/Photoetch-14/Photoetch-1-350/North-Star-Models-99/?page=3. I believe for 6.5 euros.
Mark

TimReynaga
 Associate Editor
California, United States
Joined: May 03, 2006
KitMaker: 2,500 posts
Model Shipwrights: 1,830 posts
Posted: Saturday, October 06, 2018 - 12:12 PM UTC
Quoted Text
Tim, extra for you - just in case you will come one day as a guest to us and crouching down in front of my Emden and stirring around with a penlight...
Thanks Thomas! Though I may make fun of you, I too have gone down that road of detail madness:
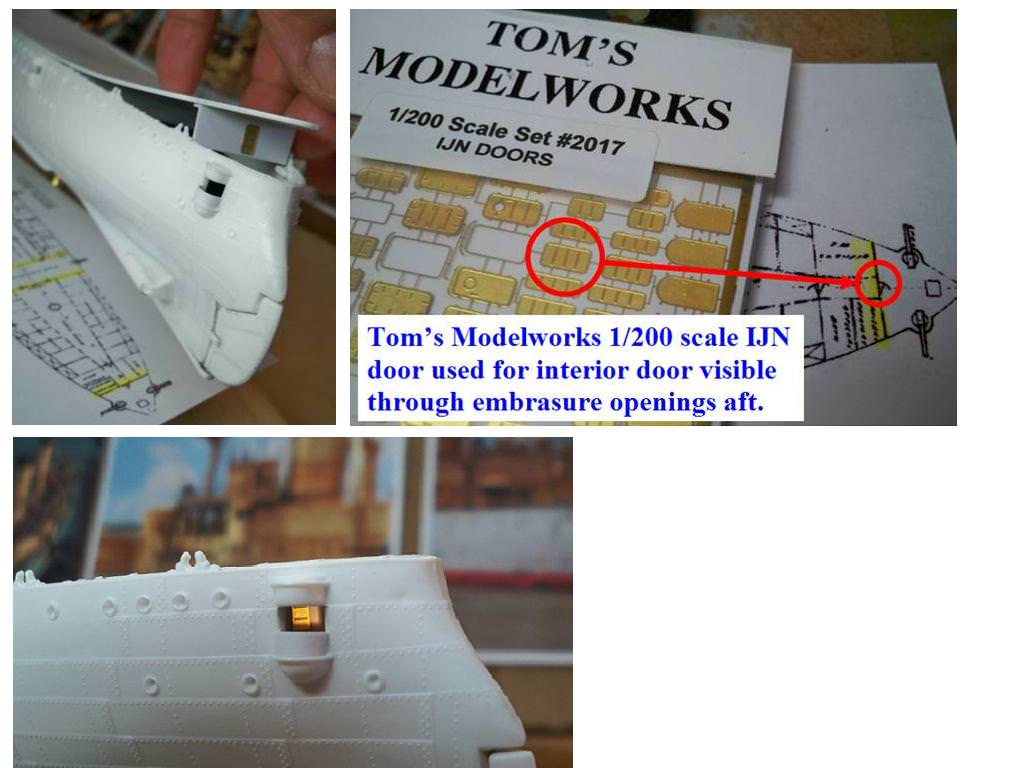
May your interiors be more visible than mine!

#424
Queensland, Australia
Joined: April 23, 2015
KitMaker: 4,648 posts
Model Shipwrights: 249 posts
Posted: Saturday, October 06, 2018 - 05:40 PM UTC
If you want to go down the road of modelling madness, buy enough figures to have every station manned for battle.
I did a Z-32 in 1/350 with 86 crewmen at their battle stations. Still... better a full crew than no crew.
Gaz
"Artillery adds dignity, to what would otherwise be an ugly brawl."
Frederick The Great
North Carolina, United States
Joined: June 06, 2006
KitMaker: 4,691 posts
Model Shipwrights: 258 posts
Posted: Saturday, October 06, 2018 - 11:59 PM UTC
Quoted Text
If you want to go down the road of modelling madness, buy enough figures to have every station manned for battle.
I did a Z-32 in 1/350 with 86 crewmen at their battle stations. Still... better a full crew than no crew.
Gaz
Hey Gary,did you ever see this one,talk about madness,but very impressive.
https://m.youtube.com/watch?v=wggei32XrLo #306
Victoria, Australia
Joined: June 27, 2010
KitMaker: 3,959 posts
Model Shipwrights: 2,777 posts
Posted: Monday, October 08, 2018 - 10:44 PM UTC
Hi Thomas!
looking good!
FWIW I paint my anchor chains. I use enamel paints so don't experience the paint flaking off.
Just a head's up on those printed parts: They're nylon and it doesn't take too well to paint, so be careful with them...
Last but not least, don't burn out adding detail to areas that wont be seen-just my 2cents

Stay home and build models!
In 1/72
Gloster Gladiator MkII for the Bi-planes Campaign
In 1/350
Airfix 1:350 Type 45 Destroyer
Bayern, Germany
Joined: December 11, 2009
KitMaker: 823 posts
Model Shipwrights: 551 posts
Posted: Sunday, October 14, 2018 - 05:47 AM UTC
Quoted Text
Thomas,
I paint my chains but you can try putting those bass chains in gun bluing to turn them black. Have you tried you-tube for how to videos on coloring chains. I believe I have run across several in the past.
The photo-etch superstructure pieces in your photos, did you glue them together or solder them? I was just wondering how you got the corners so square?
Found the turnbuckles at this hobby shop on line; https://www.ssnmodellbau.de/Photoetch-14/Photoetch-1-350/North-Star-Models-99/?page=3. I believe for 6.5 euros.
Mark
Ok I will try to darken my chains with vinegar. No idea if this will work.
Until now I didn´t used soldering, just because I don´t own that Equipment. But one day I will try that too. All parts are just glued. A proper bending tool is very helpful here though!
The turnbuckles in this shop are already gone. I did checked it before. But thank you for your efforts
Bayern, Germany
Joined: December 11, 2009
KitMaker: 823 posts
Model Shipwrights: 551 posts
Posted: Sunday, October 14, 2018 - 05:48 AM UTC
Quoted Text
If you want to go down the road of modelling madness, buy enough figures to have every station manned for battle.
I did a Z-32 in 1/350 with 86 crewmen at their battle stations. Still... better a full crew than no crew.
Gaz
Gaz may I see a pic of your Z-32? I would be very interested to see it. Must have quite some work to paint an place such a lot crew members.
Bayern, Germany
Joined: December 11, 2009
KitMaker: 823 posts
Model Shipwrights: 551 posts
Posted: Sunday, October 14, 2018 - 05:51 AM UTC
Quoted Text
Hi Thomas!
Just a head's up on those printed parts: They're nylon and it doesn't take too well to paint, so be careful with them...
Last but not least, don't burn out adding detail to areas that wont be seen-just my 2cents
Thanks for that tip my friend, I think I will prime them first with a enamel color and then we will see how things are going.
You are Right about the detailing of the guns under deck. I will not continue the detailing of These compartments as you can barely can see anything there. Just the protruding guns will be the eyecatcher.
Bayern, Germany
Joined: December 11, 2009
KitMaker: 823 posts
Model Shipwrights: 551 posts
Posted: Sunday, October 14, 2018 - 06:03 AM UTC
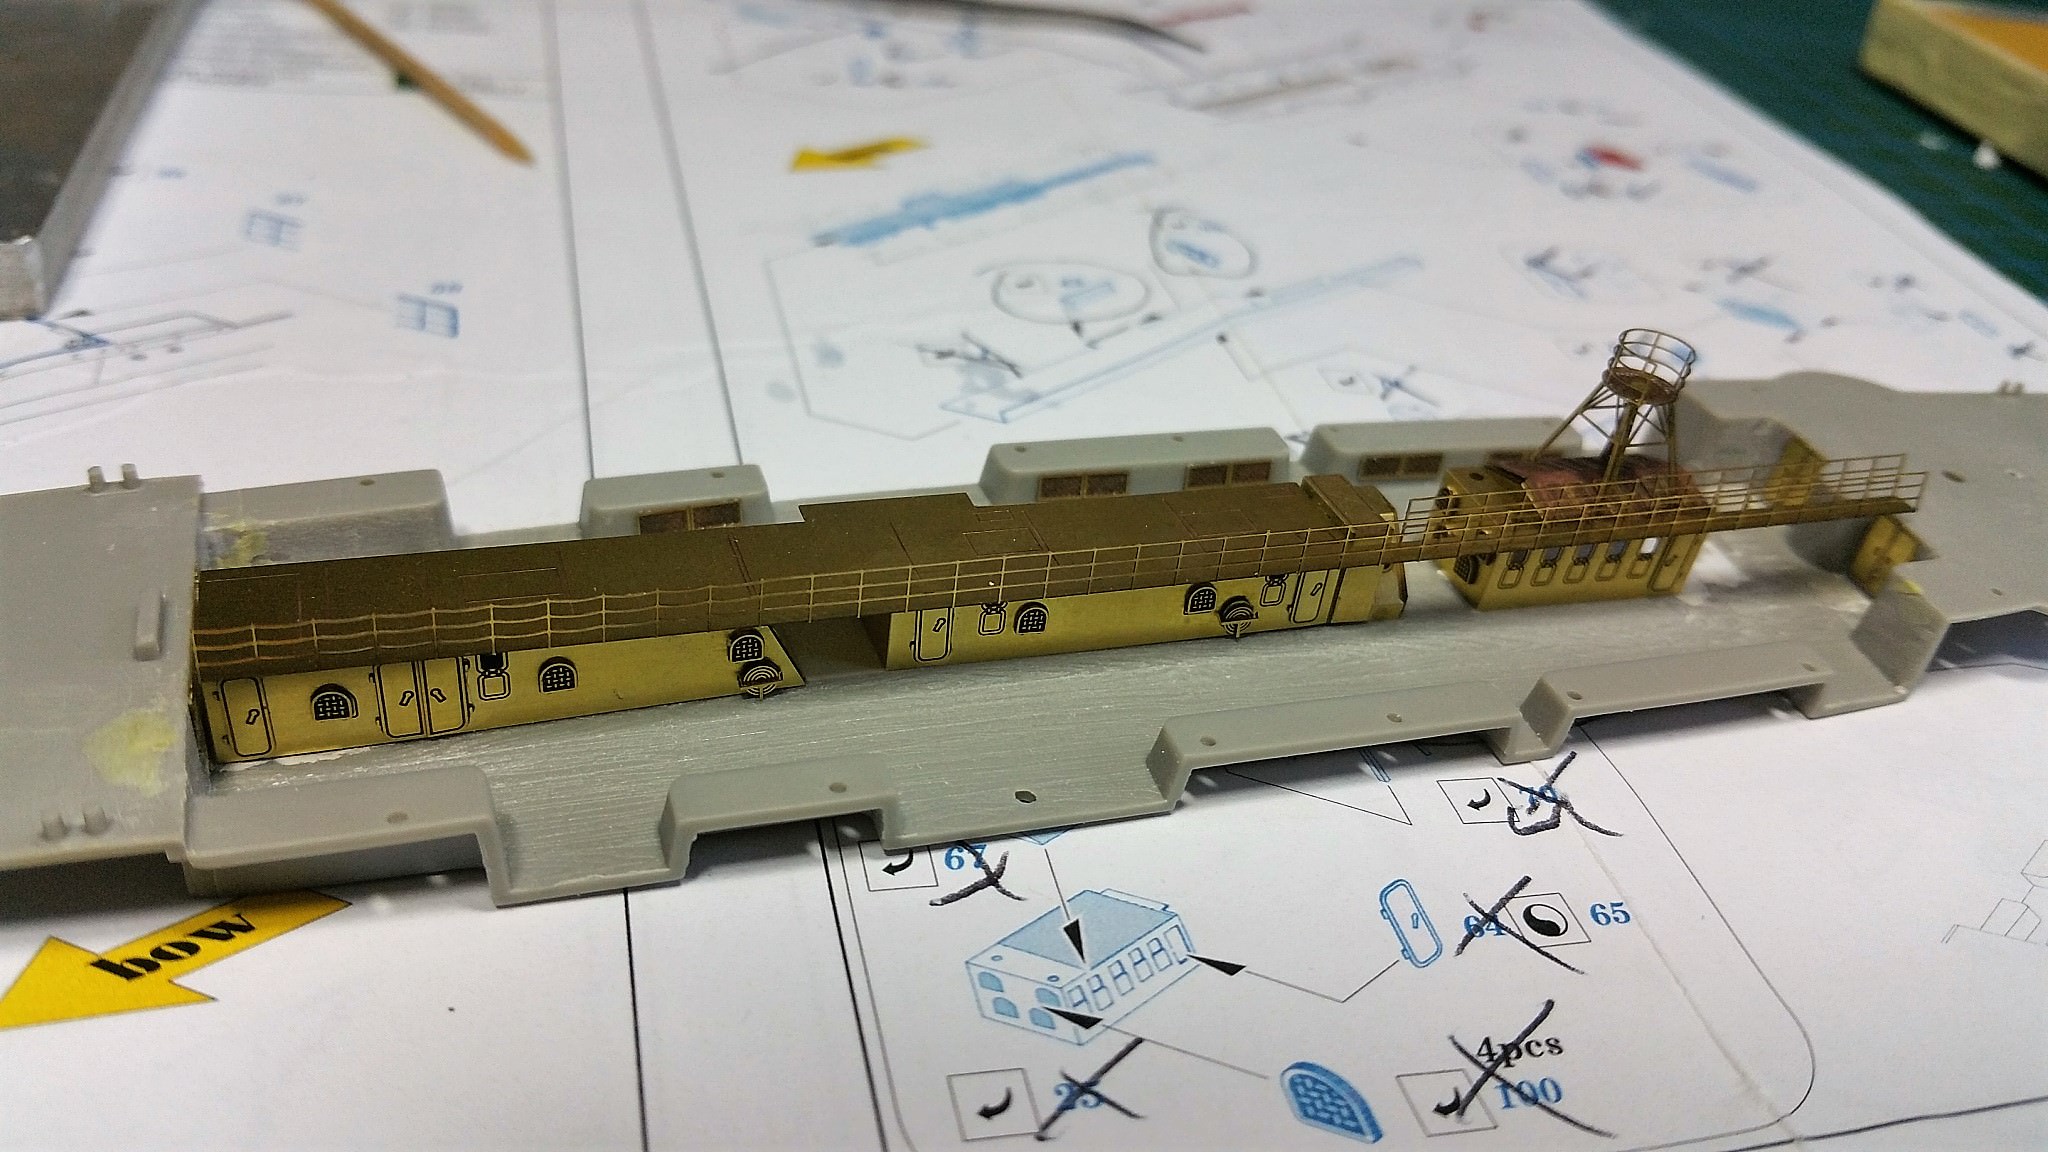
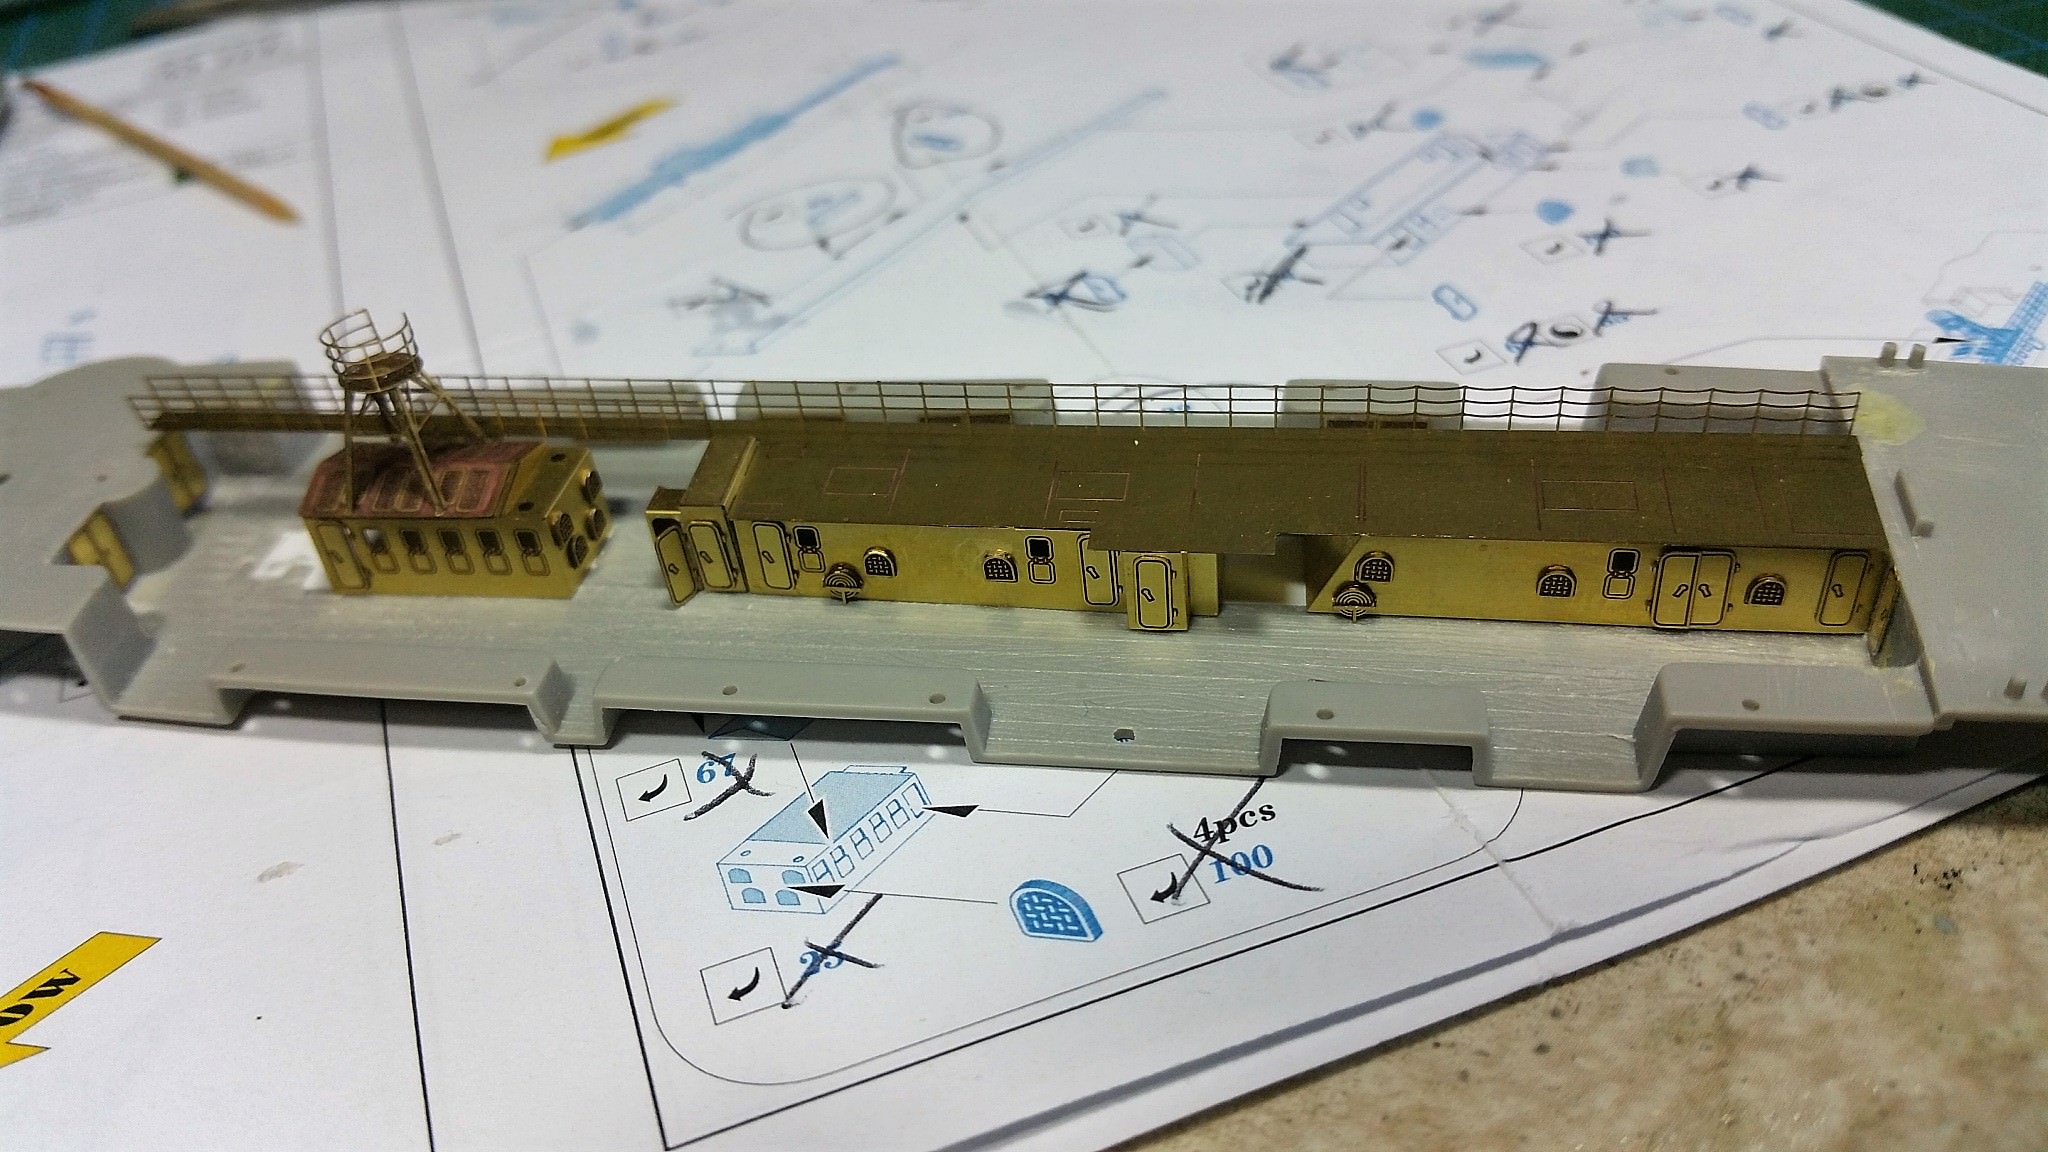
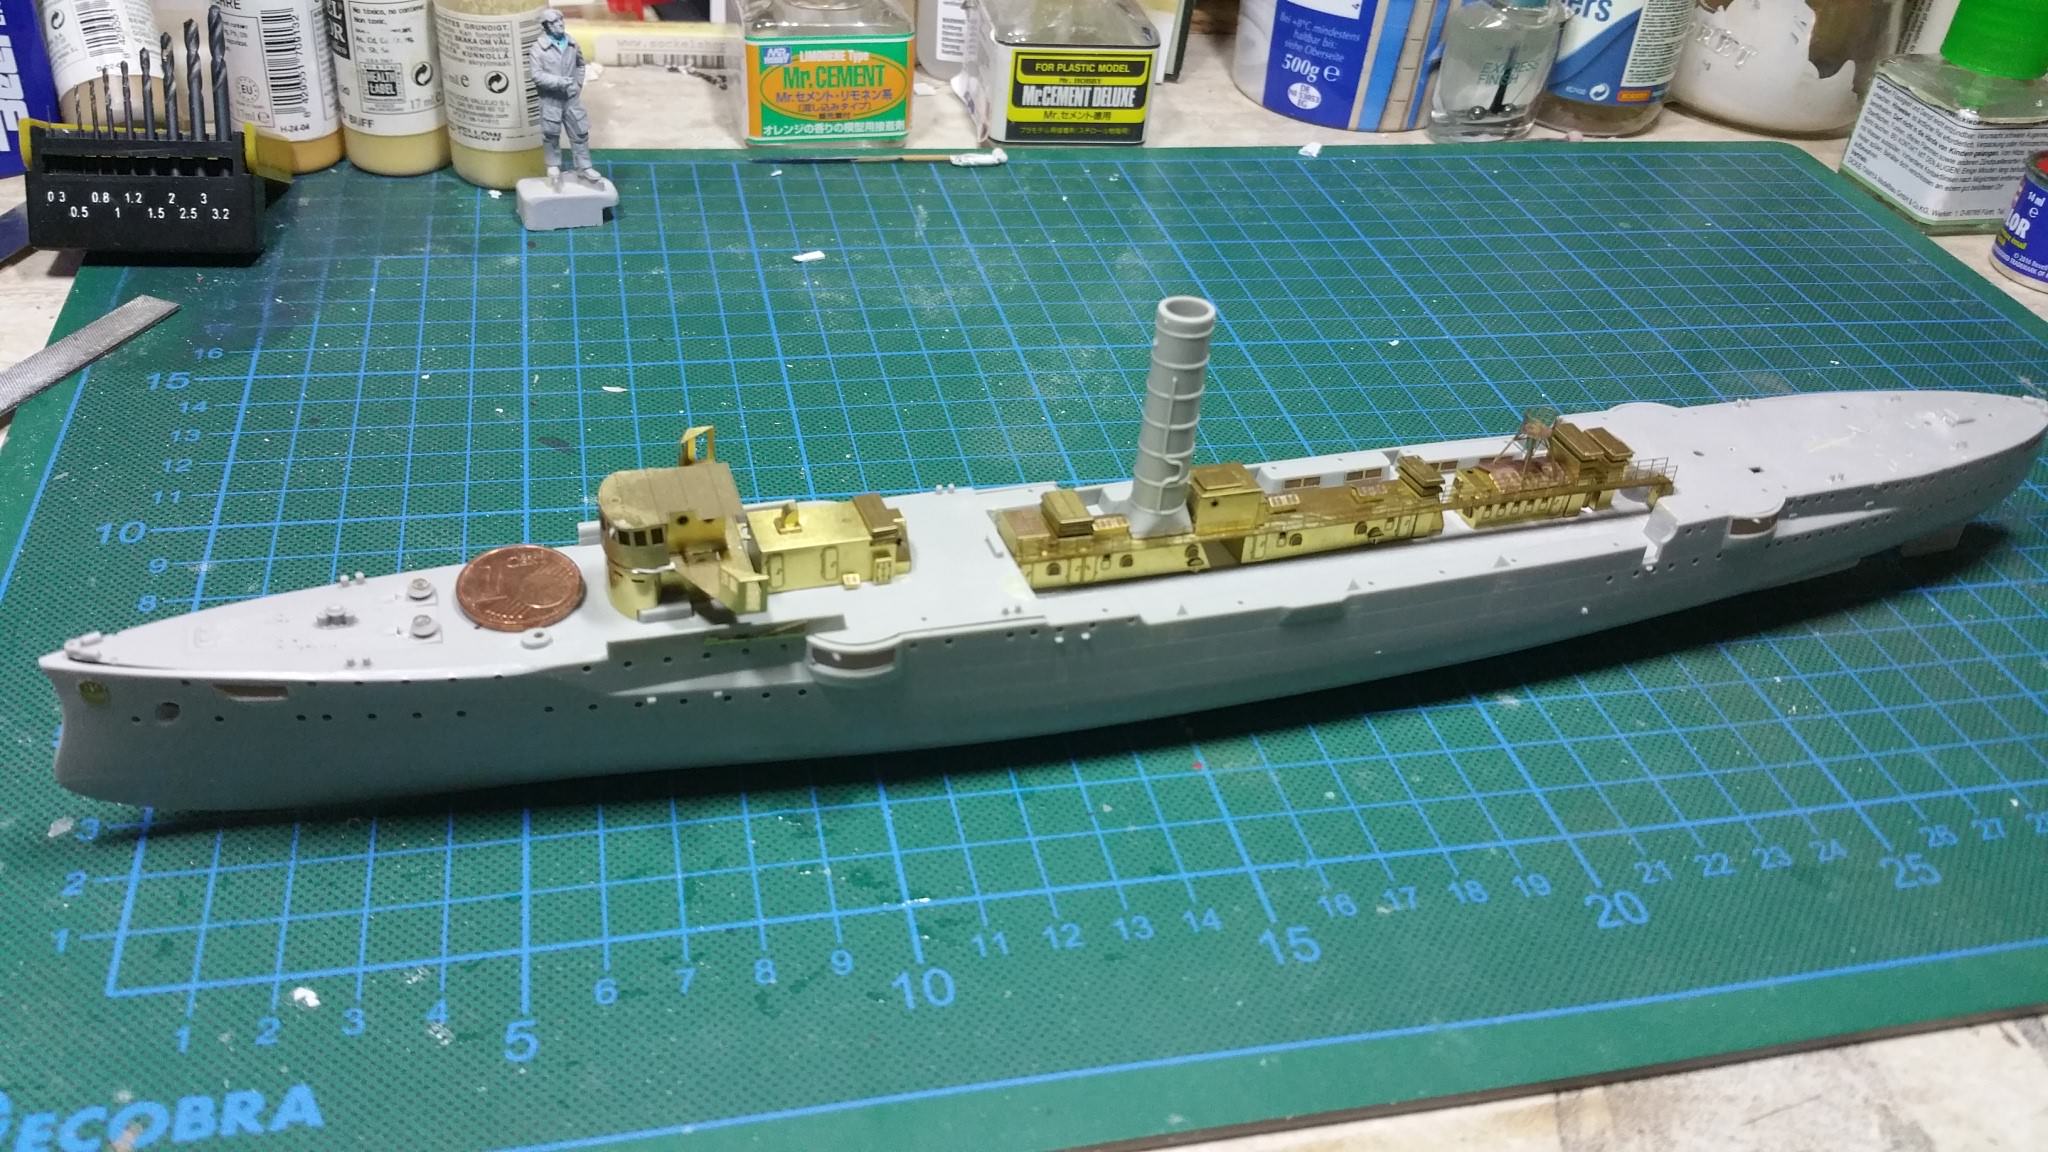
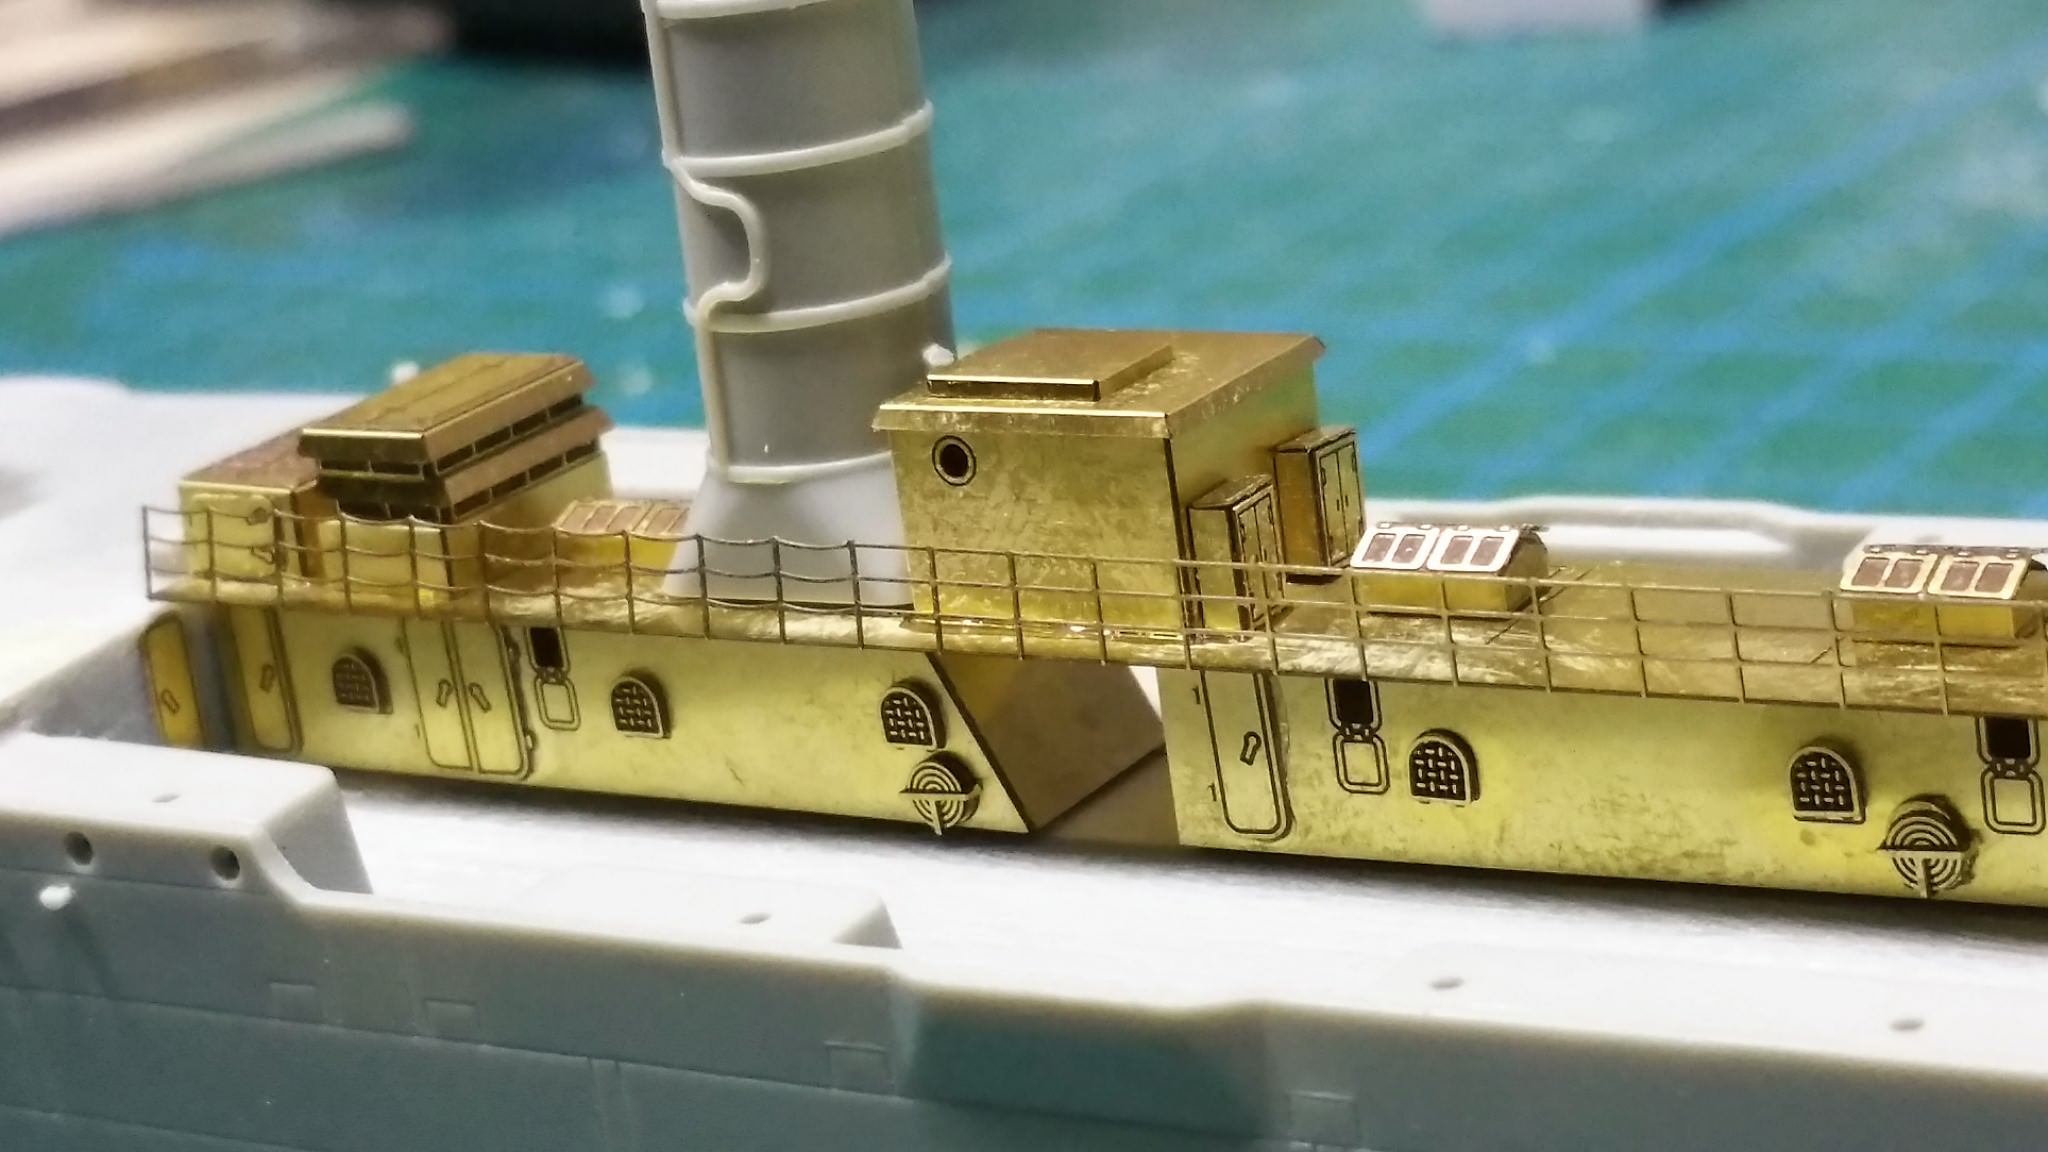
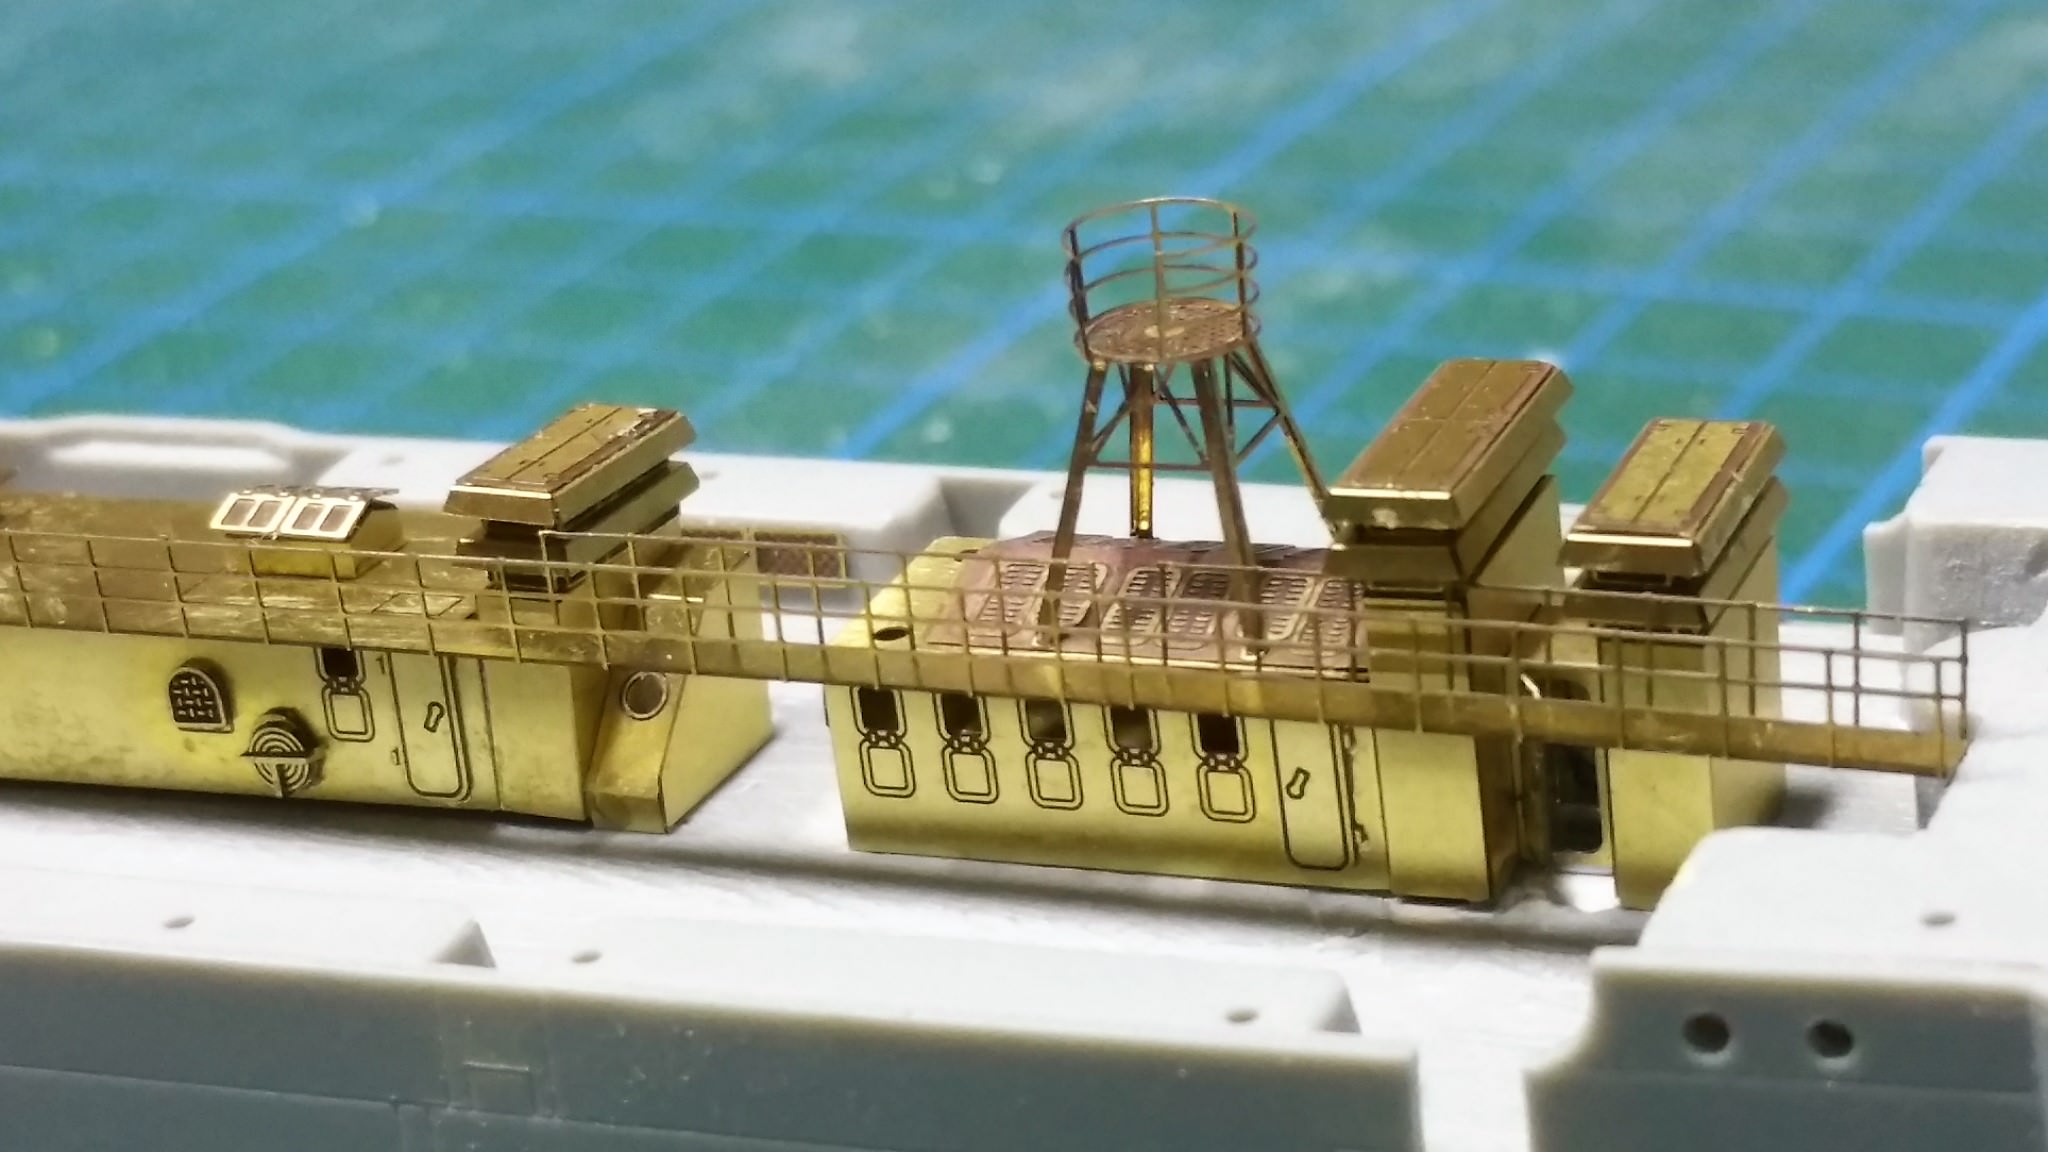
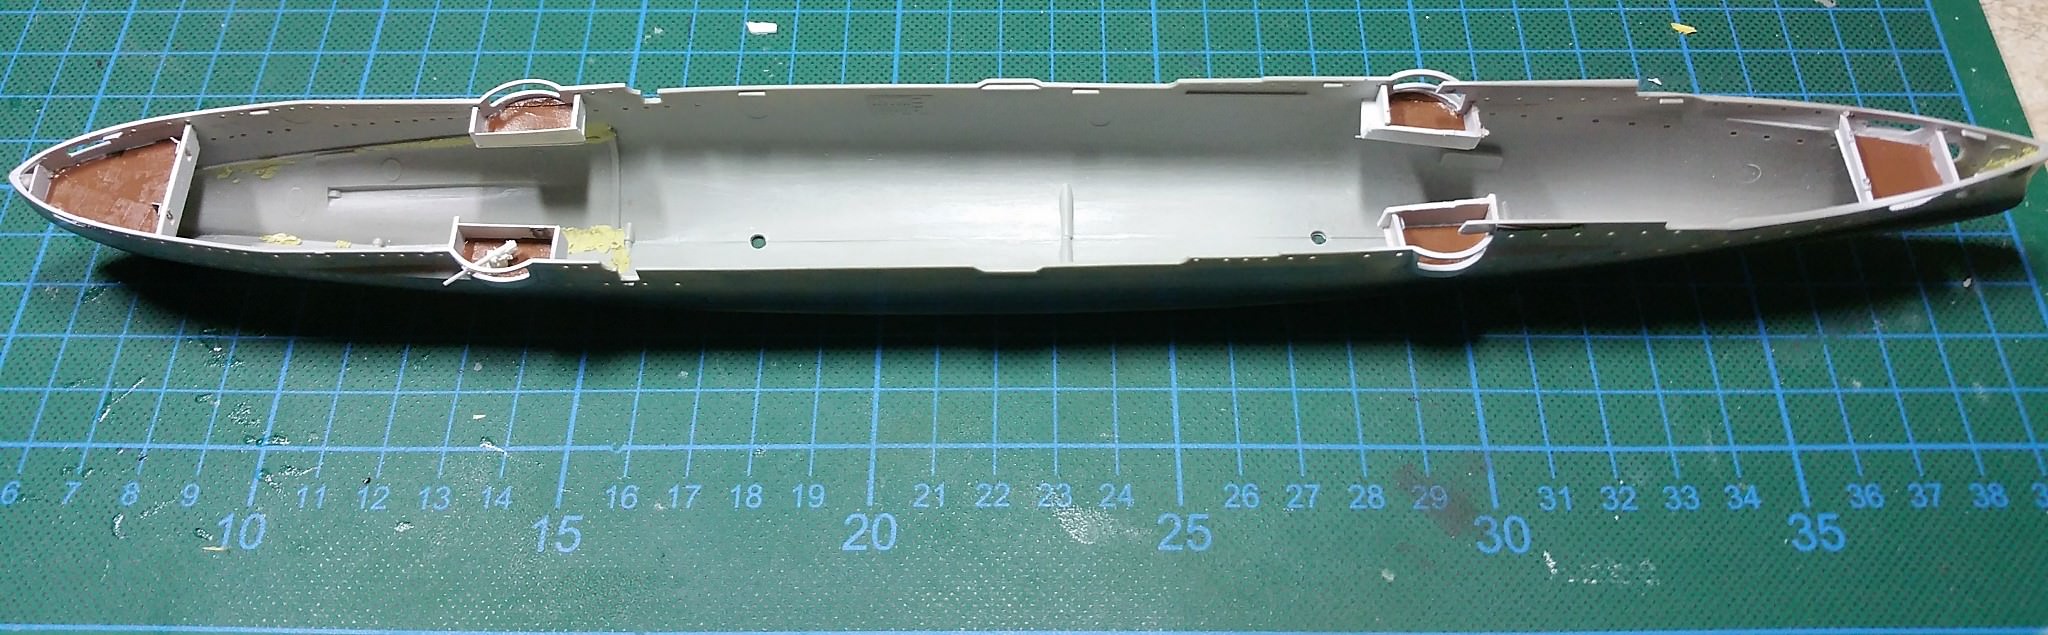
Ahoy, its update time again! Although there is maybe not that much to see as expected (hey the ship is small) I really was busy with replacing all these plastic compartments with the etched parts of EDUARD´s Part 1 set. And I already used about 75% of it now.
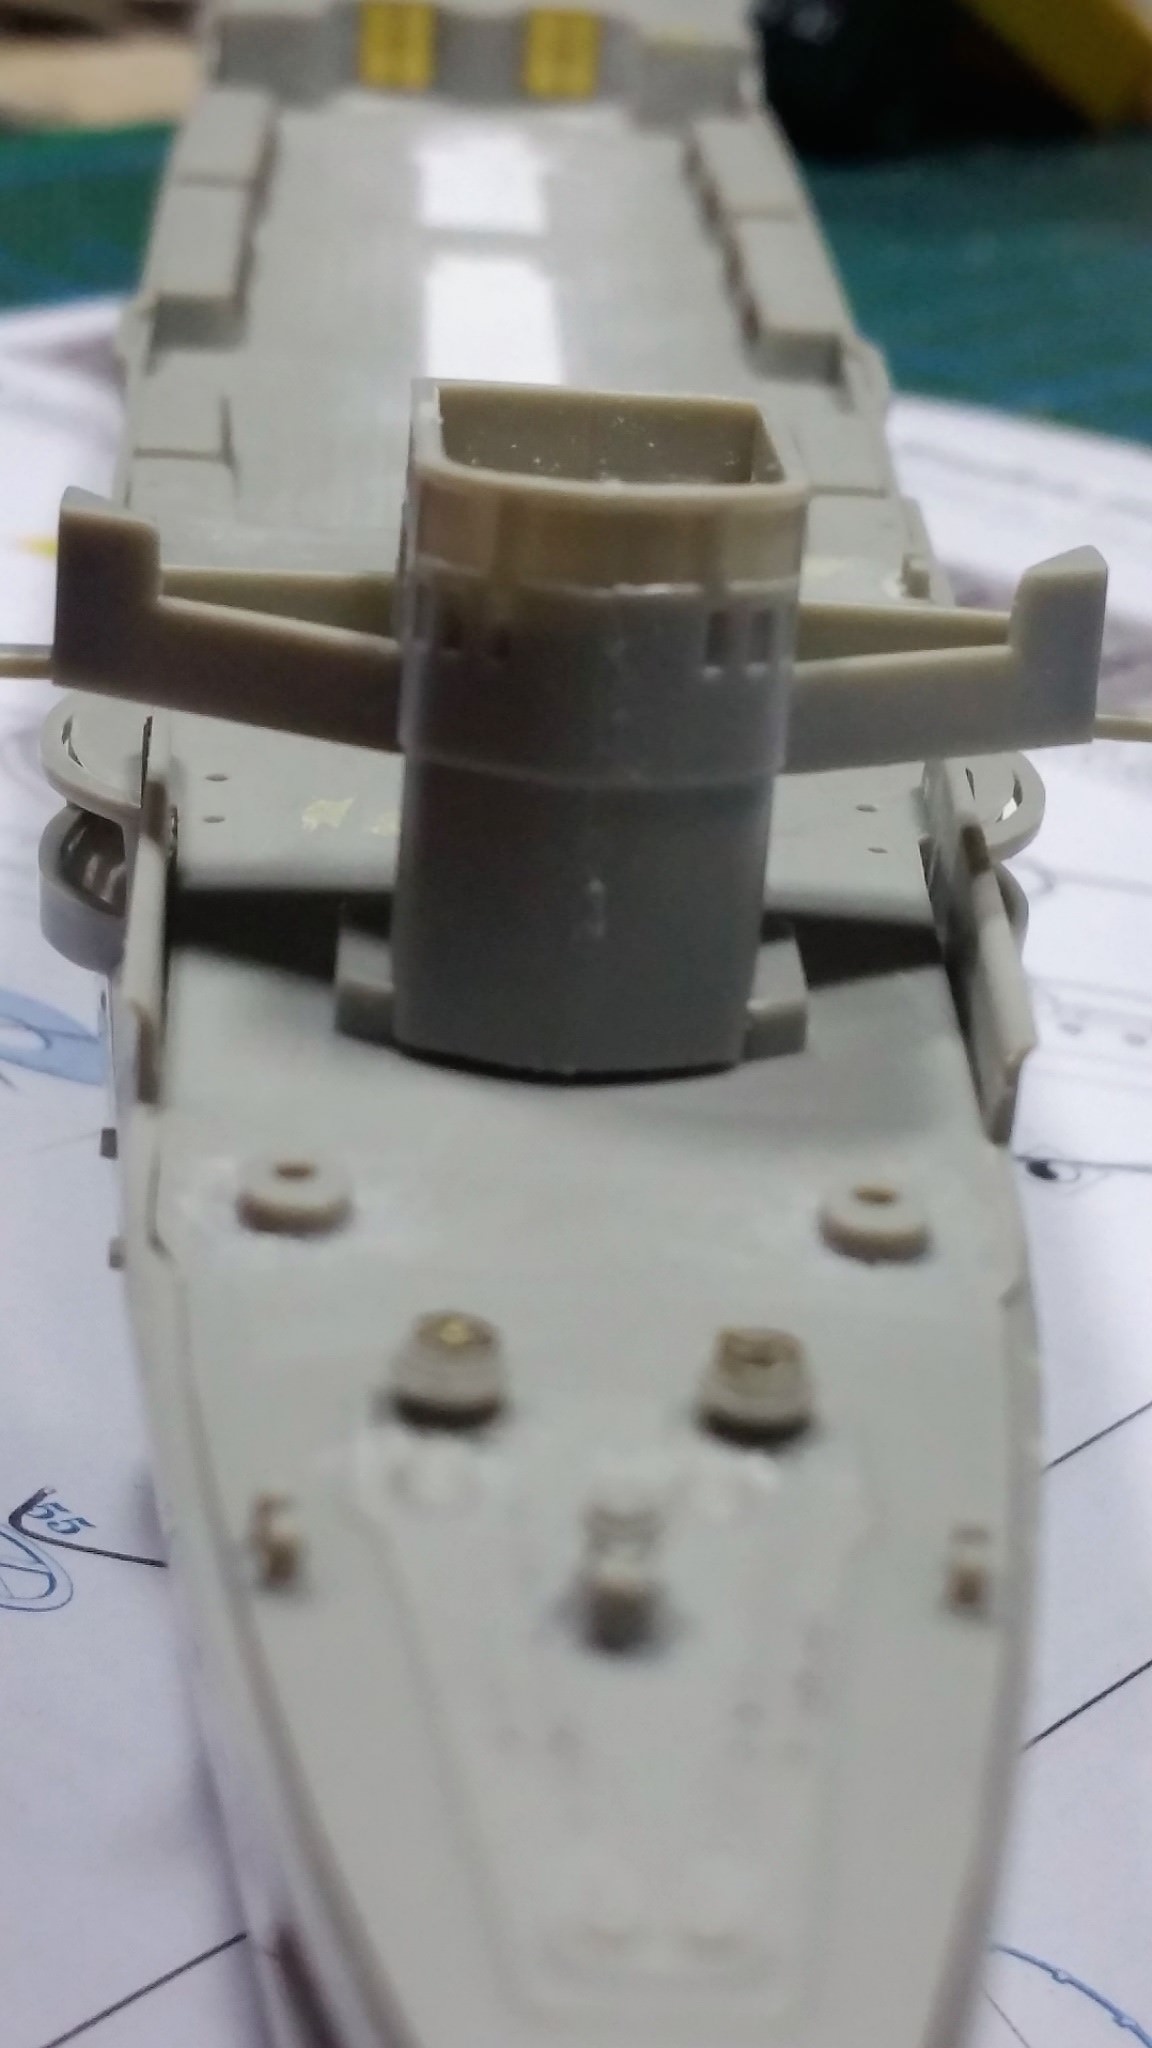
The most tricky part was to get the two differend ellipsoid shape of both the armored bridge and the usual Bridge. I heatened the photoetched parts and this allowed me the bending over a drill and get the shapes as I needed. The upper bridge compartment is not even with its upper deck surface. Therefore I had to make me a small distance ring out of styrene between the floor and the sidewalls. It has to get cleaned up than there will nothing of it to be seen later. Until now I am happy about that build.
Complete view of the ship dry fitted:
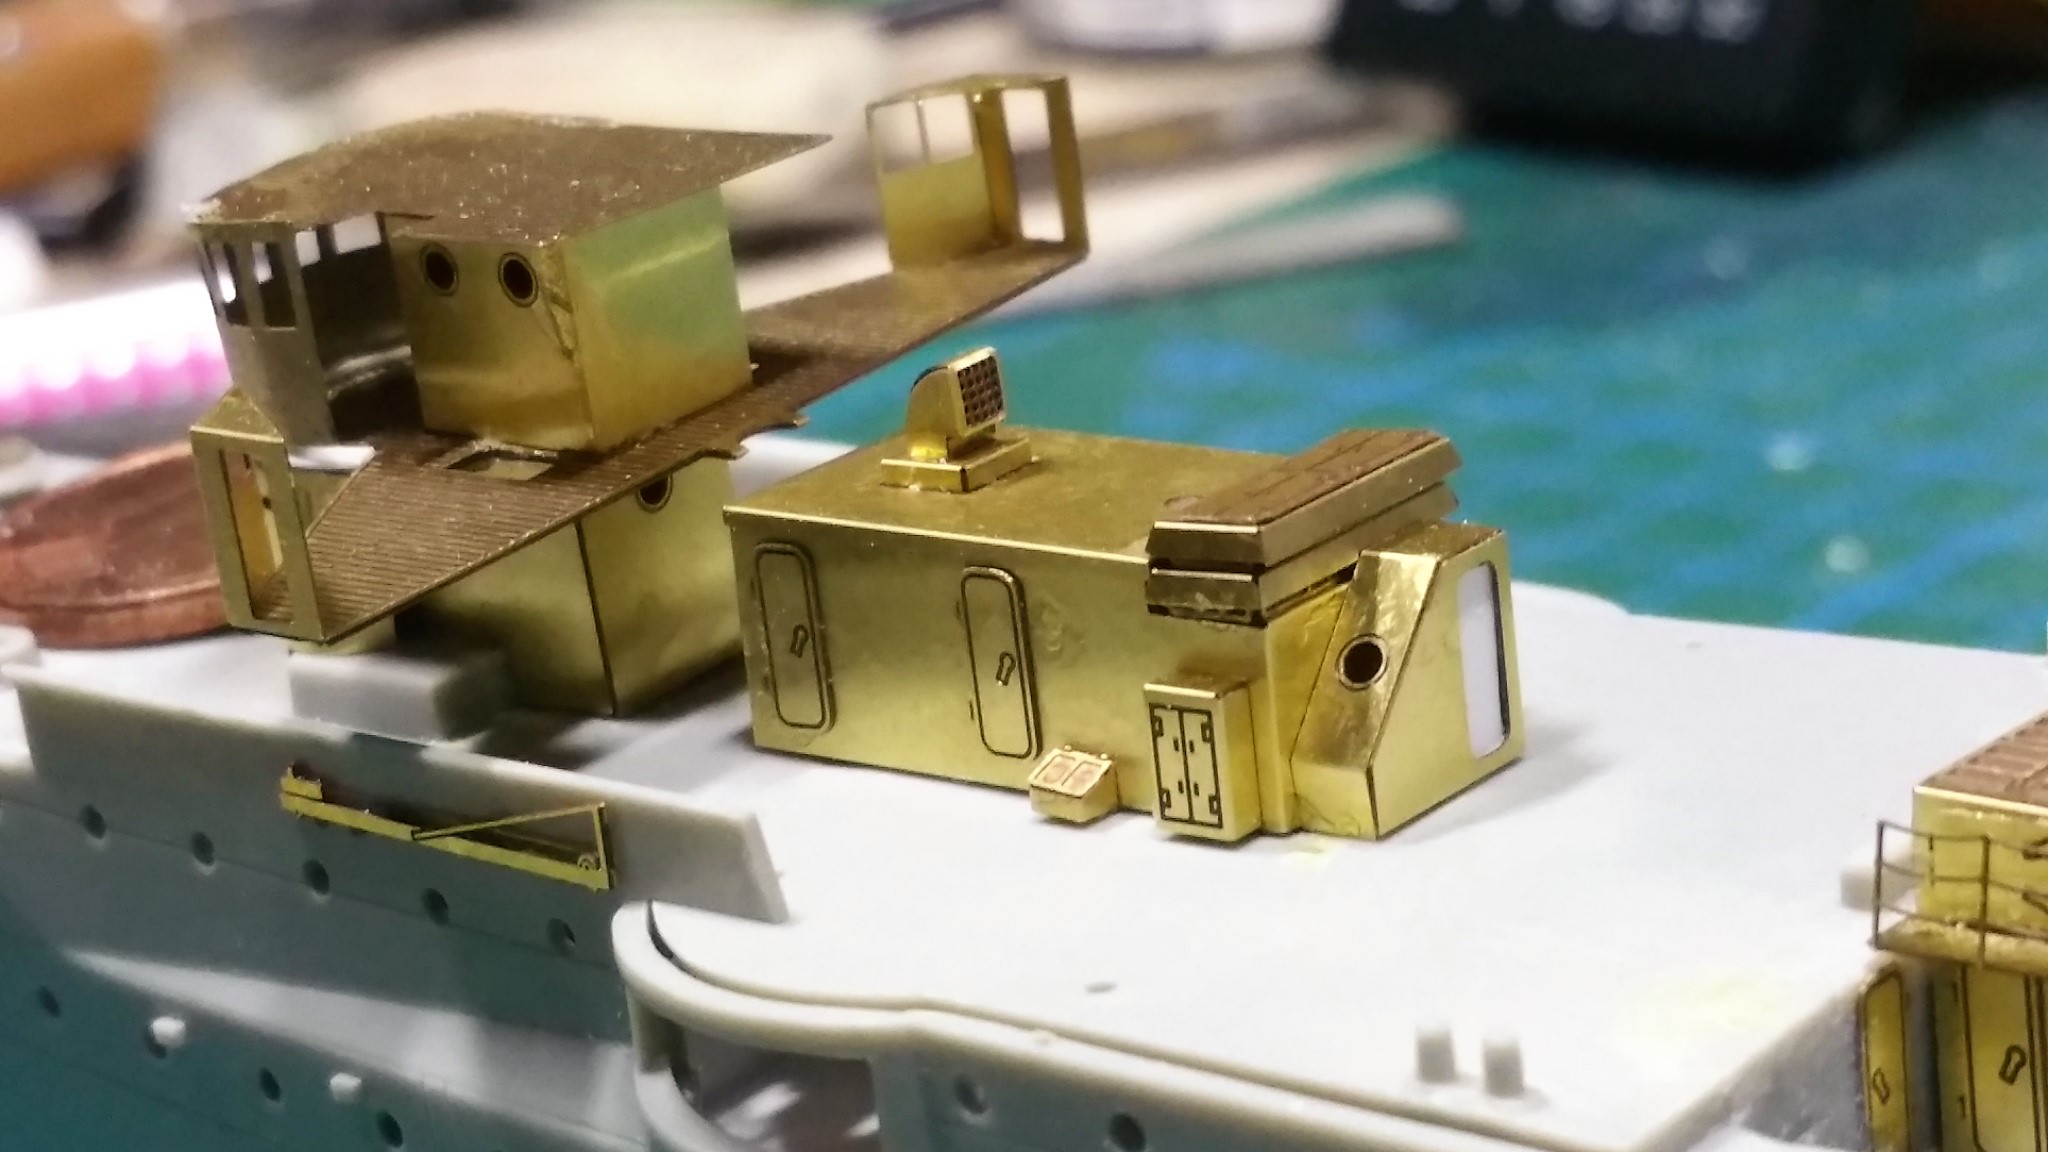
Frontal view of the bridge:

Backside view of the Bridge - there are still a lot parts missing. Actually I will need to paint the interior first before I glue everything together:
front midship:
aft midship:
Cheers
Bayern, Germany
Joined: December 11, 2009
KitMaker: 823 posts
Model Shipwrights: 551 posts
Posted: Sunday, October 14, 2018 - 07:25 AM UTC
#424
Queensland, Australia
Joined: April 23, 2015
KitMaker: 4,648 posts
Model Shipwrights: 249 posts
Posted: Sunday, October 14, 2018 - 09:00 AM UTC
HI Thomas,
That PE certainly looks better than the plastic, my friend. I'm really looking forward to seeing this ship come to completion. I don't think I would ever try it without the PE and I really don't like much PE.
I generally don't put my photos in another persons build logs, but since you asked I'll do so. They are old photos and not very good, but I hope they give you the ideas you seek. They are meant to show the ship at the battle of Ushant, 9 June 1944.

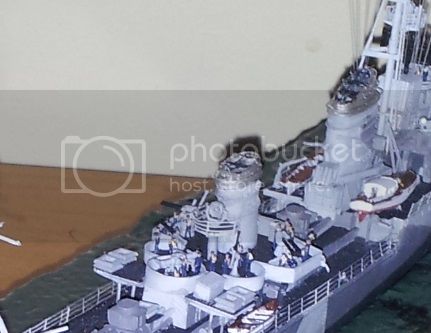
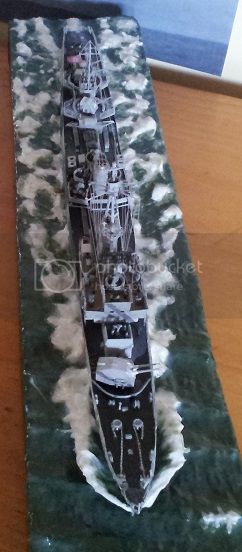
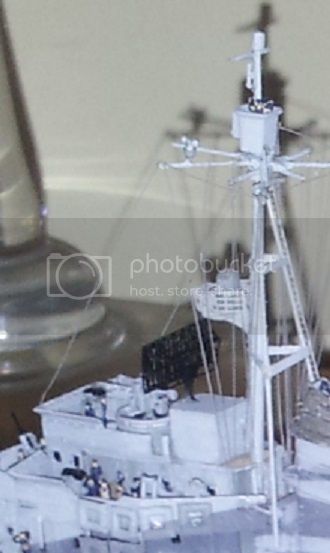
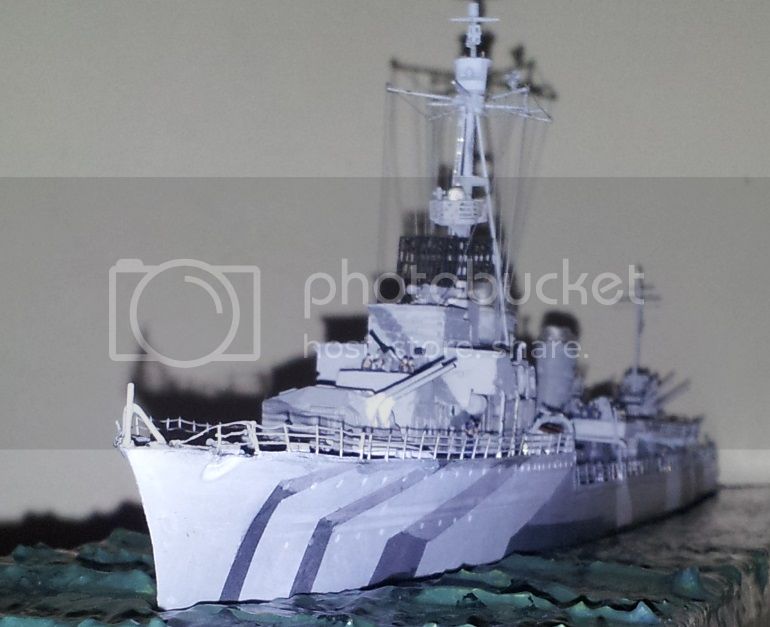
Once done I took some "mood shots" with a heavy-weather background photos:
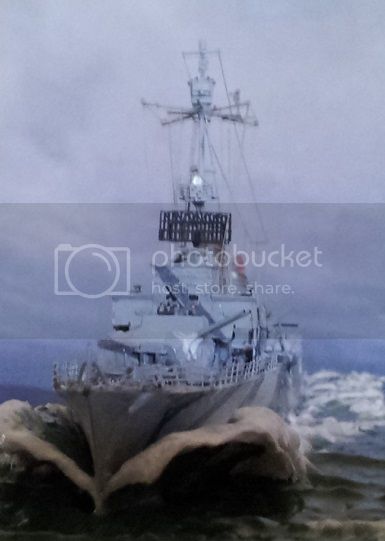

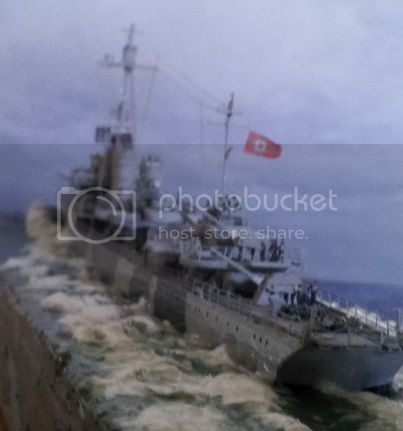
I would have taken fresh photos today, but the model has grown fuzzy with dust over time. Hope you like.
Gaz
"Artillery adds dignity, to what would otherwise be an ugly brawl."
Frederick The Great
#335
Auckland, New Zealand
Joined: September 03, 2013
KitMaker: 1,808 posts
Model Shipwrights: 871 posts
Posted: Monday, October 15, 2018 - 09:18 PM UTC
Caught up on this Thomas. Great work with the PE which as always adds so much more detail to a kit, especially these older ones.
cheers
Michael
Campaign:
Strip, Track and Trail - Porsche 917/20 - On the bench
Phantoms at 60 - F-4J Marines
Below 1000 tons - M50 minesweeper - Sailed for duty
#306
Victoria, Australia
Joined: June 27, 2010
KitMaker: 3,959 posts
Model Shipwrights: 2,777 posts
Posted: Monday, October 15, 2018 - 10:09 PM UTC
Looking good Thomas

Certainly the brass is a massive improvement over the styrene parts
Stay home and build models!
In 1/72
Gloster Gladiator MkII for the Bi-planes Campaign
In 1/350
Airfix 1:350 Type 45 Destroyer
England - South East, United Kingdom
Joined: March 01, 2010
KitMaker: 7,078 posts
Model Shipwrights: 6,649 posts
Posted: Monday, October 15, 2018 - 10:30 PM UTC
Very nice work with the Etch Thomas, This looks like one of Eduard better ship sets.
Following along with interest, and getting very tempted to have a got at one of these myself.
Cheers
Si
Bayern, Germany
Joined: December 11, 2009
KitMaker: 823 posts
Model Shipwrights: 551 posts
Posted: Saturday, October 20, 2018 - 05:04 AM UTC
@ Gaz: very nice looking ship you have there and the crew give it a very lifelike appeareance!
@ Michael and Simon: Welcome aboard mates. These etched sets are really a pleasure until now and will change the look of the ship drastically later (I hope

)
Cheers
Bayern, Germany
Joined: December 11, 2009
KitMaker: 823 posts
Model Shipwrights: 551 posts
Posted: Saturday, October 20, 2018 - 05:17 AM UTC
A small update about my work of yesterday and today:
First I did sprayed the Linoleum decks with Mr. Color H37 wood brown
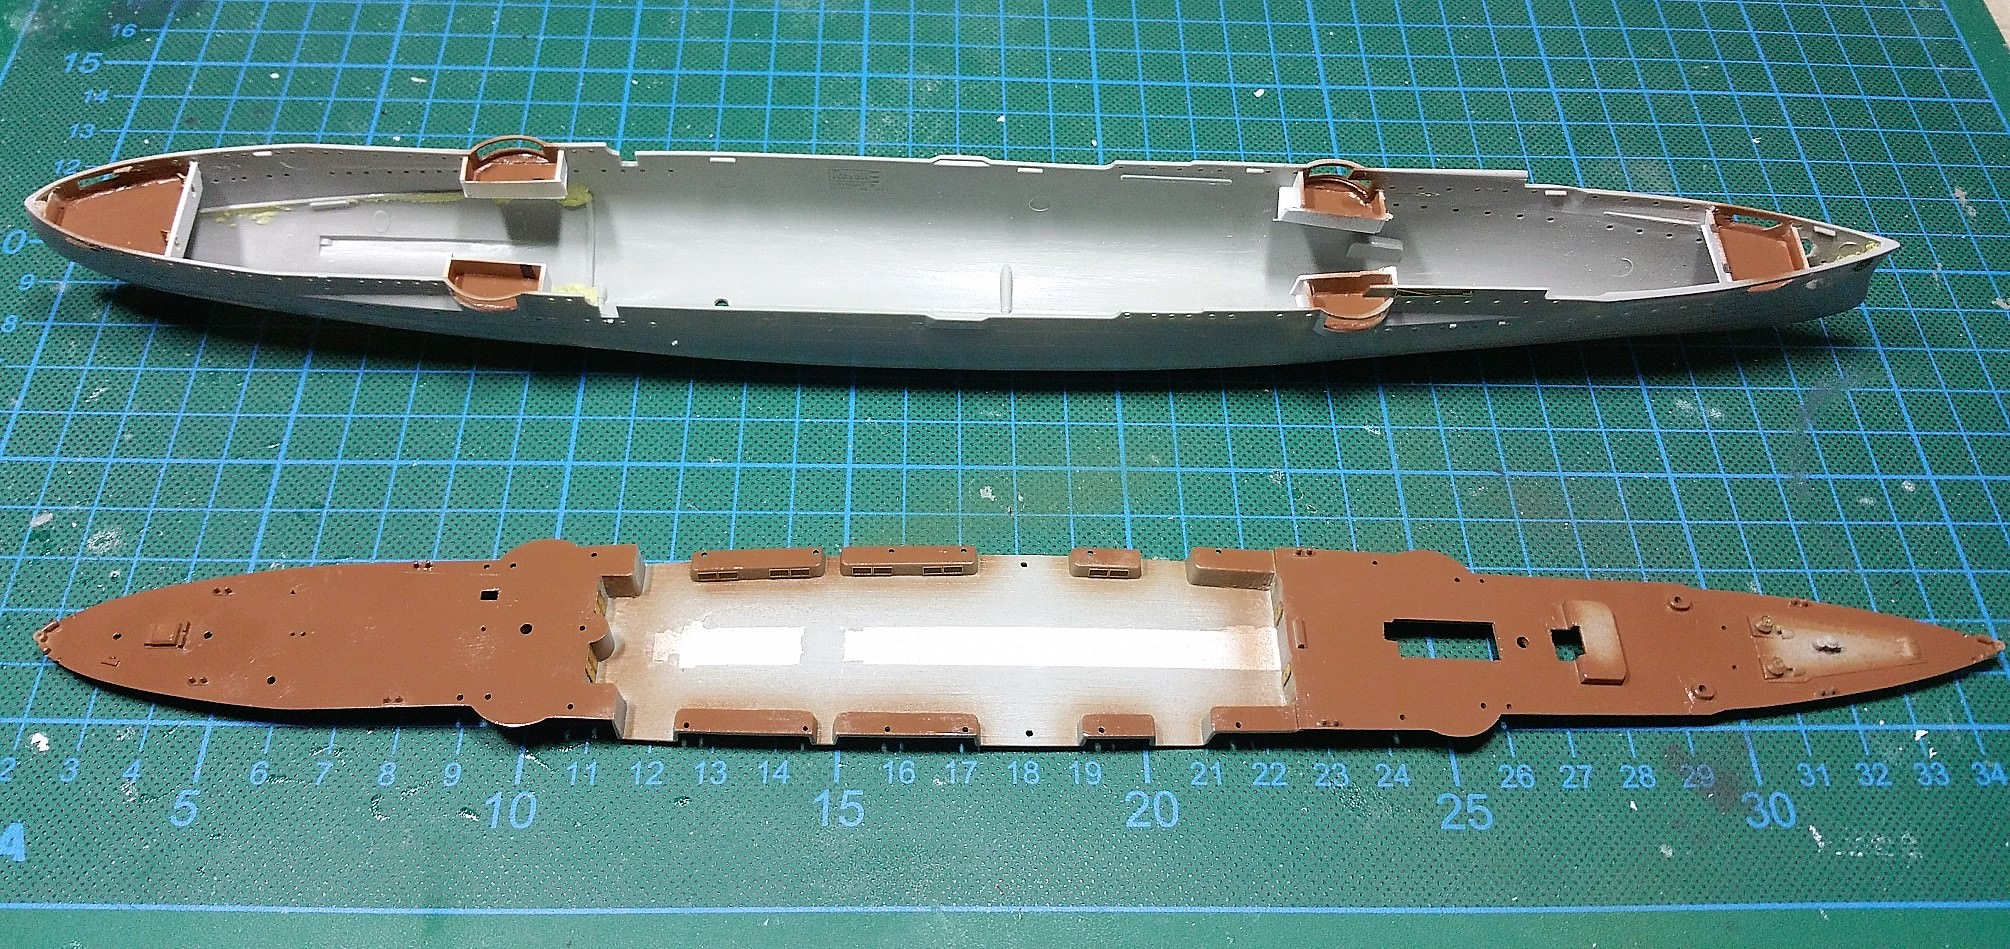
After letting the Color drying over night I masked off all floor areas

Then I did sprayed the inside walls, all the shapeway guns and the frontal upper gun sockets in Mr. Color 69 offwhite, the anchor chain area (don´t know the exactly nautical designation about this) and the bollards in black and the waterline mark at the ship´s outside wall in anthracite
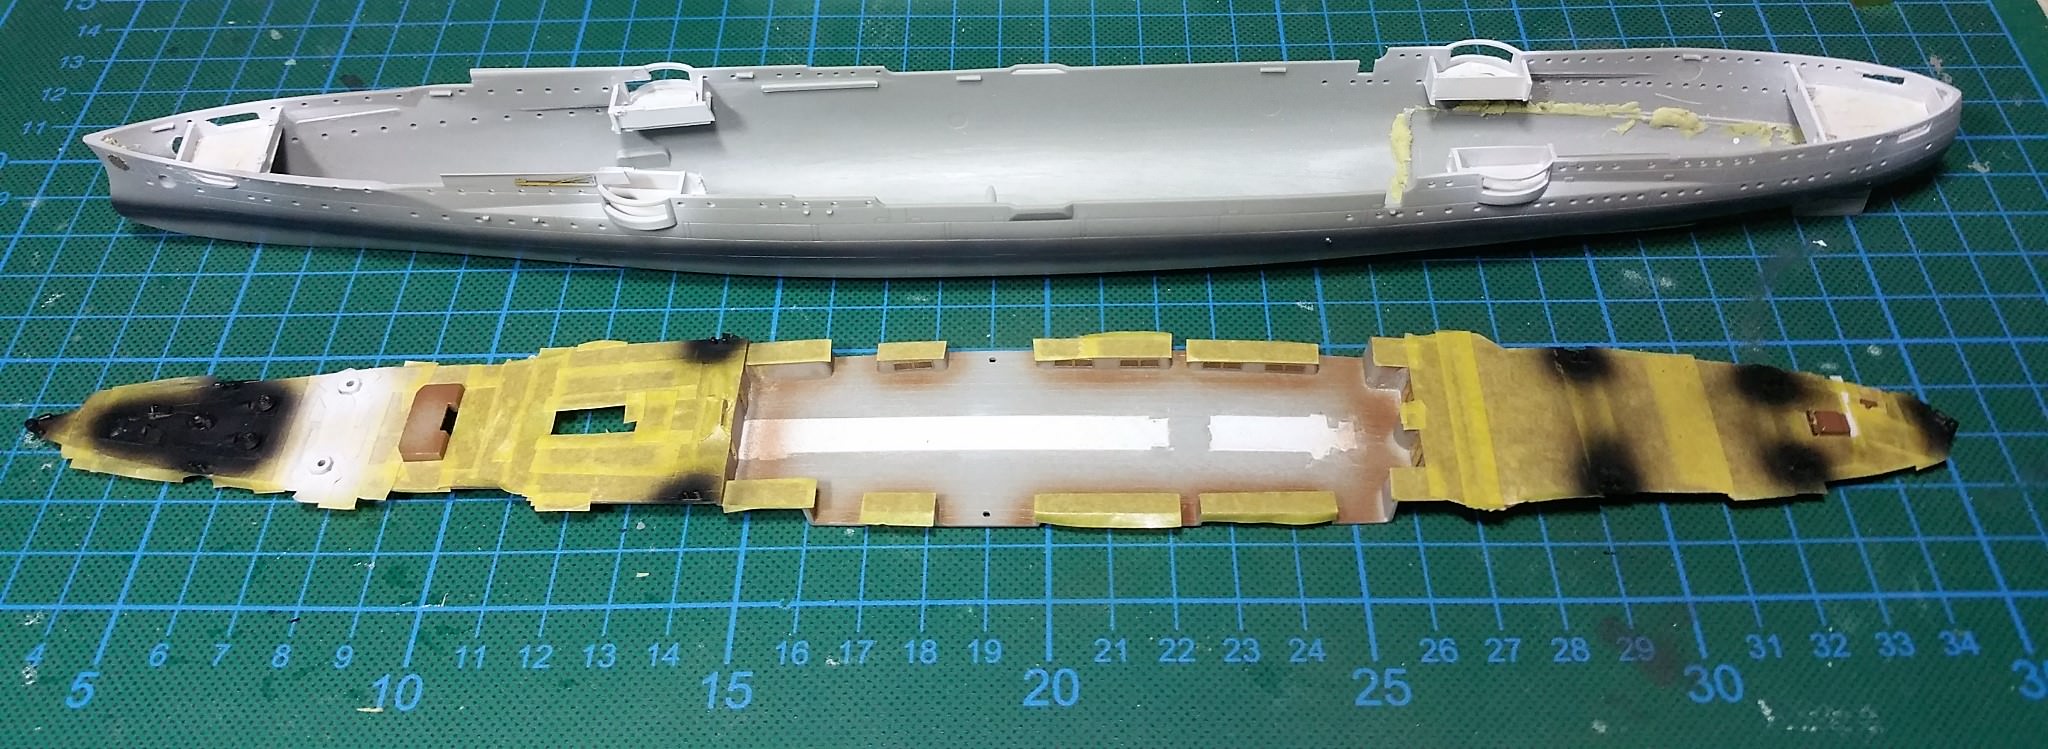
After peeling off the tween decks mask you can see how nice the linoleum floor will look from outside later
Next step will be a wash and installation of the tween deck guns and glueing the upper deck with the ship.
Harbor workers dismissed for today!
TimReynaga
Associate Editor California, United States
Joined: May 03, 2006
KitMaker: 2,500 posts
Model Shipwrights: 1,830 posts
Posted: Saturday, October 20, 2018 - 06:27 AM UTC
Nice work! When I built this Emden when it came out all those years ago (1990s?) I thought to open up the casemates, but didn't. It is more work, but you clearly made the better choice!
#453
Texas, United States
Joined: August 28, 2016
KitMaker: 1,925 posts
Model Shipwrights: 1,298 posts
Posted: Saturday, October 20, 2018 - 07:06 AM UTC
Thomas,
Agree, nice work on the decks. Its a lot of masking but well worth it.
Mark
#424
Queensland, Australia
Joined: April 23, 2015
KitMaker: 4,648 posts
Model Shipwrights: 249 posts
Posted: Saturday, October 20, 2018 - 08:47 AM UTC
Thomas,
Nice work! I like the inner decks painted with the linoleum.
Gaz
"Artillery adds dignity, to what would otherwise be an ugly brawl."
Frederick The Great
Bayern, Germany
Joined: December 11, 2009
KitMaker: 823 posts
Model Shipwrights: 551 posts
Posted: Saturday, October 20, 2018 - 06:10 PM UTC
Quoted Text
Nice work! When I built this Emden when it came out all those years ago (1990s?) I thought to open up the casemates, but didn't. It is more work, but you clearly made the better choice!
You can still make it with it´s available sister ship DRESDEN

. I bought the dual set cheaply from Ebay. Now I really think about making the sister ship later in its gray livery steaming through relentless patagonian waters...
England - South East, United Kingdom
Joined: March 01, 2010
KitMaker: 7,078 posts
Model Shipwrights: 6,649 posts
Posted: Saturday, October 20, 2018 - 09:04 PM UTC
Nice work Thomas,
Masking is not my favourite sport, by some distance.
Cheers
Si
#306
Victoria, Australia
Joined: June 27, 2010
KitMaker: 3,959 posts
Model Shipwrights: 2,777 posts
Posted: Monday, October 22, 2018 - 08:29 AM UTC
Great to see some colour going on Thomas... Looking forward to the big reveal after the masking is removed-always my favorite part of the process

Stay home and build models!
In 1/72
Gloster Gladiator MkII for the Bi-planes Campaign
In 1/350
Airfix 1:350 Type 45 Destroyer
North Carolina, United States
Joined: June 06, 2006
KitMaker: 4,691 posts
Model Shipwrights: 258 posts
Posted: Monday, October 22, 2018 - 10:35 AM UTC
Just a little,thats a lot of metal and it looks great.


