Campaigns
Want to be part of a group build? This is where to start, plan, and meet about them.
MSW Group Build : Peter F : G Averoff
peterf
Visit this Community
England - South East, United Kingdom
Joined: November 23, 2007
KitMaker: 426 posts
Model Shipwrights: 424 posts
Posted: Monday, September 08, 2008 - 01:02 AM UTC
This new sequence of images shows the rebuilding of the bridge.

I decided that the solid resin piece didn't go into enough detail for my needs but perfectly good if anyone who wants to build Averoff to ignore this stage as it's very exact and time consuming.


So, I sliced off the bridge from its parent part, and used this as a template to trace off and form replacement parts in plastic sheet. I still thought the roof was useful so I salvaged this from the bridge resin.


The plastic card base is built up with a space piece of pe sprue, and the Lion Roar window frame part is used for - the windows. The roof is put on later but not before I filled out the bridge with the wheel, comapss etc and crew members. All is painted as required


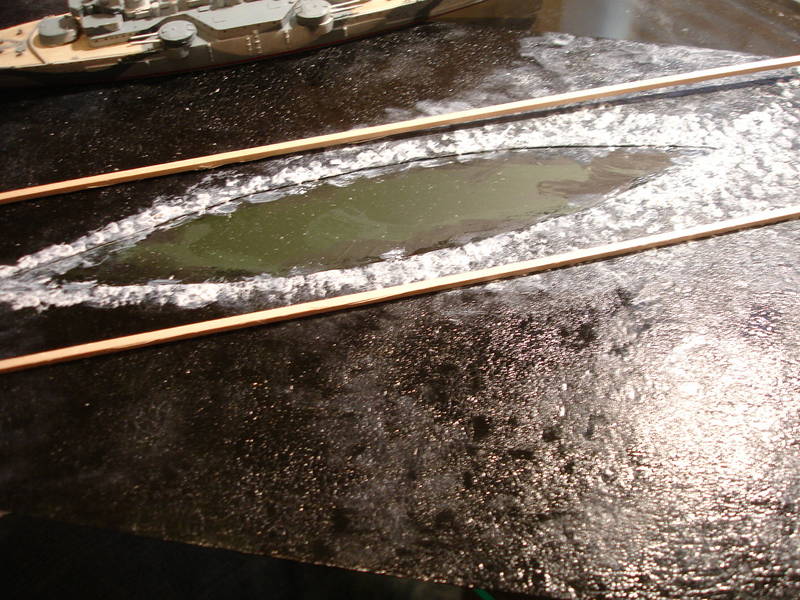
The window frame - just about see all this in the pictures - is pva glue stretched over the frame and left to dry clear. The roof is put om and the new bridge stuck to the superstructure - job done - go and lay down.

Peter F

skipper
Visit this Community
Lisboa, Portugal
Joined: February 28, 2002
KitMaker: 5,182 posts
Model Shipwrights: 4,070 posts
Posted: Monday, September 08, 2008 - 02:47 AM UTC
Hi Peter!

Nice looking scratched bridge!
I just wonder is the PVA glue will work for the glass windows, or if it will have a foggy finish?
Have you considered using Humbrol "Clear Fix" instead?
Just a thought - if it works fine with PVA... I'll shut my mouth!

Keep up
Rui
peterf
Visit this Community
England - South East, United Kingdom
Joined: November 23, 2007
KitMaker: 426 posts
Model Shipwrights: 424 posts
Posted: Monday, September 08, 2008 - 03:56 AM UTC
Hi, Rui, the windows have dried clear. I usually use this method on my aircraft instead of painting the canopy black/silver etc. I drill out the cockpit paint it duck egg blue, put in a pe man, and then fill the whole thing with pva which dries clear. I then add to that until the canopy shape is right.


Thanks for your continued help, Rui, I haven't tried the Humbrol product yet but I certainly will give it a go.

Cheers,

Peter F.
#027
Visit this Community
Louisiana, United States
Joined: April 13, 2005
KitMaker: 5,422 posts
Model Shipwrights: 5,079 posts
Posted: Monday, September 08, 2008 - 04:05 AM UTC
Looking very good Peter. That's a neat trick for aircraft canopies. I may have to try that.

Kenny
peterf
Visit this Community
England - South East, United Kingdom
Joined: November 23, 2007
KitMaker: 426 posts
Model Shipwrights: 424 posts
Posted: Tuesday, September 23, 2008 - 08:13 PM UTC
This next routine is fairly standard for me and is one that can be done away from the hobby table.

Some time ago I bought the Skywave Liberty Ship, and with it came a decal sheet of flags including the Hellenic Navy standard. The decal is a bit too small, and bright so the next stage is to put them in the colour photocopier at 200% size increase, and with colours toned down. The result is I have a whole new batch of flags including the one I want and all on paper.


I next cut the flag out with a scalpel, and into two halves. The two halves are glued together with paper glue, and held at the flag pole end with tweezers. This keeps the flag pole end straight while I scrunch up the rest of the flag with my fingers, and while the paper is still wet with glue, to simulate it moving in the wind.


Not at this stage but later, I will butt joint the flag to the staff or fix it to sprue which in turn is stuck to the pole top and bottom. In other words, try to avoid looping the flag around the pole.

Then to complete the routine, and this time with a matching blue pencil, go over the joints where the two halves of the flag fit together, and show white where it should be blue.

Peter F
Gunny
Visit this Community
Pennsylvania, United States
Joined: July 13, 2004
KitMaker: 6,705 posts
Model Shipwrights: 4,704 posts
Posted: Tuesday, September 30, 2008 - 09:46 PM UTC
"Build Session 4 closed-Keep Modeling!"
peterf
Visit this Community
England - South East, United Kingdom
Joined: November 23, 2007
KitMaker: 426 posts
Model Shipwrights: 424 posts
Posted: Thursday, October 02, 2008 - 04:40 AM UTC
Moving forward and in response to completing the sea effects, I have a series of routines below which take the base modelling to a conclusion.

Usually this takes place at a later stage but there's no harm in trying and tesing various methods as you go along to see what takes your fancy at the time.

Looking through various books for examples of how the wake and other effects should appear, I have decided to have the ship moving at a reasonable speed through the water and thus create some foam and churn.

I have measured this out with wooden roda to get the spacing and direction right, they are easy to manipulate and came to hand so there they are. I then applied the white guashe which is easy to use both with a normal brush, and some dry brush. The dry brush is exactly what it says, and gets the paint on very sparingly. Its like scrubbing the paint on to make in faid into the sea I've already painted.


Also to help highlight the model around the hull, I use a green mixed with white to achieve the various shades of thin water mixed with the foam.


I also added some lateral water effects, and again used the wooden straight edges to line it all up correctly.


After all the brush work, I went back to my black acryllic watered down with thinners and applied this with my dry brush to grade the work down to what is an acceptable effect. Have in mind that this is 700 scale so everything should eventually be subtle and subdued.


At last I added another coat of varnish which may be repeated as desired, but eventually its down to personal taste as to how you want to present the work - very simple as I have shown earlier, or with more effects - that only comes when you want to try a different approach. Don't be afraid to experiment.


Peter F


Edit. Note:
Be sure to watch for the full MSW Feature of Peter's base making tutorial for even more detailed images!
~Gunny
Karybdis
Visit this Community
Maryland, United States
Joined: December 27, 2006
KitMaker: 846 posts
Model Shipwrights: 740 posts
Posted: Thursday, October 02, 2008 - 05:53 AM UTC
Hey Peter,

Now the big question, when can we see those water base steps in photos?

Edit: Huh! When I made this post, there were no pictures shown. Now suddenly there are! Great work and really interesting!
Clanky44
Visit this Community
Ontario, Canada
Joined: September 15, 2005
KitMaker: 1,901 posts
Model Shipwrights: 934 posts
Posted: Thursday, October 02, 2008 - 08:30 AM UTC
Well done Peter, this ship of yours is really inspiring me. I'm placing orders with Bill at Pacific Front for some Combrig kits and can't wait to try out some of your techniques.

Frank
peterf
Visit this Community
England - South East, United Kingdom
Joined: November 23, 2007
KitMaker: 426 posts
Model Shipwrights: 424 posts
Posted: Friday, October 03, 2008 - 02:07 AM UTC
There is now a feature article on this site, Dade. The water still is not entirely complete as the ship has to sit in it, and be blended in, but it does conclude enough information to explain the methodology.

Which COMBRIG kits, Frank, they're all good.

Cheers,

Peter F
skipper
Visit this Community
Lisboa, Portugal
Joined: February 28, 2002
KitMaker: 5,182 posts
Model Shipwrights: 4,070 posts
Posted: Friday, October 03, 2008 - 03:45 AM UTC
Good... good! I must even say very good!
Thank you Peter - you are making this build blog a Master Tutorial for all ages and skill levels!
Keep up!


Rui
peterf
Visit this Community
England - South East, United Kingdom
Joined: November 23, 2007
KitMaker: 426 posts
Model Shipwrights: 424 posts
Posted: Tuesday, October 14, 2008 - 08:22 PM UTC
To all intents and purposes, the sea effects is now complete but to take it that one step further, and with the scenario devevloping in my mind, I can see the water whipping up in a squall, and the crew having to reacte quickly with stowing away loose gear, and wrapping up the awnings. I like the idea of something about to happen as it tells a story, and leaves the snapshot on the brink like a good thriller.

So, fixing the hull into position, I have given the base another coat of pva, working in white guashe with my dry brushes which I have lined up for inspection.


Not yet finished, I apply a really thick coat of pva to create the whiteness in the water, and thus the beginnings of the squall.


Then, I will increase the bow wave by building up the pva, from a pointed nozzle source, and then dragged the glue with a coacktail stick to fill in the cracks, and create ripples.


When this is dry, I will estimate if it needs more build up as the glue contracts as it dries out.


Then, I'll see whether the whole effect is right OR, not.

Peter F
Clanky44
Visit this Community
Ontario, Canada
Joined: September 15, 2005
KitMaker: 1,901 posts
Model Shipwrights: 934 posts
Posted: Wednesday, October 15, 2008 - 11:19 AM UTC

Quoted Text

Which COMBRIG kits, Frank, they're all good.

Cheers,

Peter F


I have the Agincourt and the Dreadnought and have the Inflexible, Royal Sovereign, Thunderer and Erin coming soon.

Are there any others you would suggest as being good for a relative resin newcomer? And have you found any thin British railings, most of the ones I've come across seem too thick.

Frank
peterf
Visit this Community
England - South East, United Kingdom
Joined: November 23, 2007
KitMaker: 426 posts
Model Shipwrights: 424 posts
Posted: Wednesday, October 15, 2008 - 08:13 PM UTC
Great stash, Frank, and now your problem is which one to do.

I think the one missing in that list is HMS Tiger, a great looking ship, and WEM has marketed the pe to go with it, and all the references are there to create an informed build.

When you look at pe railing, the Gold medal extra fine is the one we like however there is also the Atlantic Models pre-dread railing where the "rails" have a curvature and therefore more accurate - you'll need this for Royal Sovereign.

Best wishes.

Peter F
Tailor
Visit this Community
Nordrhein-Westfalen, Germany
Joined: May 26, 2008
KitMaker: 1,168 posts
Model Shipwrights: 676 posts
Posted: Wednesday, October 15, 2008 - 11:15 PM UTC
Hey Frank!
Nice start for a British Fleet! Excellent stuff you have ordered! You gotta stick to Peters recommendation for the details!
You'll definitely have problems to decide what to start with!
Cheers, mate!
Guido
MikeM
Visit this Community
Wales, United Kingdom
Joined: December 31, 2004
KitMaker: 219 posts
Model Shipwrights: 182 posts
Posted: Thursday, October 16, 2008 - 07:21 AM UTC
I have built the Dreadnought and whilst a superb kit I wouldn't recommend it if you are new to resin kits. The midship superstructure is tricky and the etch quite soft, it needs a bit of experience to get these sort of builds to look right. I agree with Peter that Tiger is a good choice, big ship, plenty of room around the superstructure, wem etch is superb.

Mike

peterf
Visit this Community
England - South East, United Kingdom
Joined: November 23, 2007
KitMaker: 426 posts
Model Shipwrights: 424 posts
Posted: Sunday, October 19, 2008 - 08:50 PM UTC
Thanks to my friend, Guido Hopp, I have been able to sorce brass gun barrels - Lion Roar, and so I can continue with the build of the main kit.

I have therefore substituted the resin barrels - always a good idea - and cut the brass to shape as illustarted.


These are then glued in position with pva, and allowed to set by means of various propos in the horizontal position.


Also to keep these in place, I have used more pva but this time as blast bags which are shown on the particular illustration I'm following.


I apply the glue with a sharp toothpick, and again use the same to sculpt the glue into the required shape. This will take about four or five layers, maybe more.


Peter F

peterf
Visit this Community
England - South East, United Kingdom
Joined: November 23, 2007
KitMaker: 426 posts
Model Shipwrights: 424 posts
Posted: Tuesday, October 28, 2008 - 08:10 PM UTC
While that was all going on, I've added more pva to the blast bags under the main guns. No pictures of this as it is repetitive but you know the routine from previous postings.

I also picked up some cotton balls in the supermarket this week so I can add spray to the bow wave. I've done this before and know how difficult it is to get right. It's all about editing the strands to make sure they are going the right way and then glueing them in place with diluted pva. When that's dry, I add more pva just like the blast bags until there's enough. If it doesn't look right eventually, tear it off, and consider starting again. The interesting thing about this as well is that it can look real on camera but naff in real life - I continue.


So, the time has come to face the tiny reality of this kit. I took a very deep breath, and committed myself to using the pe sprue.


I guess the smallest parts are the braces to the bow breakwater, and I illustrate how I've done this. The instructions provide a template for the brace positions but rather than cut this out, I've traced this off, cut the tracing to shape, and placed it on the bow as shown.


I cut the pe with a micro chisel on the surface of a stanley blade, and then using needle point tweezers I can position the brace.


I started with the largerst brace first, and using diluted pva stuck it in place.


A note of warning here, unless you have great eyesite, you need the optivisor - look at my avatar, I'm wearing it!

OK, now that the ice is broken, and I'm in the mood it's more pe in the workschedule.

Edit Note: LOVE this workbench!~Gunny

Keep watching.

Peter F
Gunny
Visit this Community
Pennsylvania, United States
Joined: July 13, 2004
KitMaker: 6,705 posts
Model Shipwrights: 4,704 posts
Posted: Friday, October 31, 2008 - 10:06 PM UTC
Community Build Session 5 Closed~Keep Modeling!
beefy66
Visit this Community
England - North East, United Kingdom
Joined: October 22, 2007
KitMaker: 971 posts
Model Shipwrights: 645 posts
Posted: Saturday, November 01, 2008 - 01:21 AM UTC
Peter that what i call a workbench thought it was only me who managed to always work in 6 by 8 inch area even if the kit is a meter long You don,t need a magnifier you need the huble telescope for those tiny PE parts looking forward to the 15th of the month for Telford hope to catch you there shifts and Overtime looking good so far
peterf
Visit this Community
England - South East, United Kingdom
Joined: November 23, 2007
KitMaker: 426 posts
Model Shipwrights: 424 posts
Posted: Monday, November 03, 2008 - 08:23 PM UTC

Quoted Text

Peter that what i call a workbench thought it was only me who managed to always work in 6 by 8 inch area even if the kit is a meter long You don,t need a magnifier you need the huble telescope for those tiny PE parts looking forward to the 15th of the month for Telford hope to catch you there shifts and Overtime looking good so far


Yes, those small parts gave me a chill just looking at them but the method I described made it easy, and gave me confidence to face the rest of the sprue - I think I chose the hardest part first though.

And, yes, we'll be at the finewaterline.com stand to include Rob Kernaghan, Mike McCabe, Roy Allen, and Jim Baumann who also walks around taking pictures for his event report. Don't forget to be at the WEM stand at 12 for the group photo.

Cheers,

Peter F
peterf
Visit this Community
England - South East, United Kingdom
Joined: November 23, 2007
KitMaker: 426 posts
Model Shipwrights: 424 posts
Posted: Tuesday, November 18, 2008 - 12:42 AM UTC
OK, page 1 of the instructions :

There are a number of deck vents to place, and although this may not be the most exciting task of all -there are about 30 of them - they do add to the overall presence ofthe ship and are therefore important.


I have painted these with an undercoat already so it's a question of using a pencil to darken in the void, and then slice them off the sprue with a sharp balde. I also do some cleaning up of the vents as the sprue holds them well enough in place.


I locate the positions on deck with a pencil, and then drill out the locating hole. These are fixed with pva. There are two types of vent so the instructions have to be followed carefully.


Next is some work on the pe, and to finish off page 1 of the instructions, I have cut out the machine gun platforms, and then guard rails. I have use a chisel as shown, and blade depending on the type of cut required to gain a clean edge.


I've glued on the platforms with pva, and continued with the rails using a cocktail stick to achieve the correct radius. A little paint colours in the the platforms, and vents in one go and anything else I spot that needs a touch-up.


Onwards with page 2.......
beefy66
Visit this Community
England - North East, United Kingdom
Joined: October 22, 2007
KitMaker: 971 posts
Model Shipwrights: 645 posts
Posted: Tuesday, November 18, 2008 - 07:14 AM UTC
Peter sorry to have missed you on saturday but you must have been busy elswhere looking at all the bargains around.Seeing some of the small and magnificent ships on display makes me realise how much detail you are putting into your build here trully inspiring work and the bases look even better than the on display stuff on show here.
peterf
Visit this Community
England - South East, United Kingdom
Joined: November 23, 2007
KitMaker: 426 posts
Model Shipwrights: 424 posts
Posted: Tuesday, November 18, 2008 - 08:26 PM UTC
Cheers, Keith, perhaps we can all meet for a day sometime in the spring at a central venue as yearly seems to be a long wait. I'm glad you liked the stand.

Regards,

Peter F
peterf
Visit this Community
England - South East, United Kingdom
Joined: November 23, 2007
KitMaker: 426 posts
Model Shipwrights: 424 posts
Posted: Tuesday, November 18, 2008 - 08:32 PM UTC
Finishing off on this first page of instructions, I have cemented the rails to the machine gun platforms and so it's on to page 2.....

YS Masterpeices, come on - you're having a laugh - aren't you!

The angled braces under the bridge are probably the most difficult cementing, and placing, and cutting, and picking up, and seeing procedure I've ever had to do.


But, here it is complete after spending about an hour working on them...


- I'm going for a lay down in a dark room now.......