Official WWII Flattops Thread
Fyn, Denmark
Joined: May 15, 2006
KitMaker: 179 posts
Model Shipwrights: 92 posts
Posted: Monday, April 05, 2010 - 08:21 AM UTC
Hmmmm, 3 months have already passed .. and I haven't done ..... (you know what I mean)
I still have to order a couple of sets of PE, before I dare get started on the hull itself.
So instead I've decided to get started on the lifeboats (and possible the planes) since I have PE detail set C.
So this is what it's all about:

I don't really have good references on the lifeboats, so if any of you other Akagi-builders, could help me out, it would be truly appreciated
Cheers
Niels M. Frederiksen
United States
Joined: January 11, 2010
KitMaker: 22 posts
Model Shipwrights: 16 posts
Posted: Monday, April 05, 2010 - 09:26 AM UTC
Hi Keith'
The hanger deck should be be #20 standard deck grey which is very, very much like 5-N navy blue. If you are painting the flight deck Flight Deck Stain #21, the wooden flight deck would be much lighter than the hangar deck. The shutters that you are refering to were a roll up type. I have have seen a lot of pics when various ships had them up, down or somewhere in between. If I recall, it did help with ventilation and fire fighting. Hopefully Traci White will chime in here and set you on the right path concerning Essex since I'm not really a expert of any ship for that class (and possibly all ships for that matter

). Hope this helps you, Jon
Michigan, United States
Joined: June 10, 2008
KitMaker: 230 posts
Model Shipwrights: 136 posts
Posted: Monday, April 05, 2010 - 11:14 AM UTC
Here's a couple pics of ESSEX departing Hunters Point bound for the Pacific. If you look close you can see some roller doors open and some closed. When I was aboard ESSEX in the early sixties, rarley were all the doors closed in good weather. The fresh air was appreciated. Many times the doors were open about 2/3 of the way. When the weather was cooler, they might be open only a foot or so. In the winter in the north Atlantic they were closed to help keep in the warmth for the Airdales working on the planes. A lot depended on if there was someone working near a door and what they wanted for comfort. Being a snipe, in the boiler room it was always t-shirt weather.
I build quite a few ESSEX's, all CV9, CVA9 or CVS9, various times and configurations, both 1/700 and 1/350. I always open some of the roller doors, detail any visible parts of the hangar bay and place some aircraft there. Sometimes I even put some grain of rice or grain of wheat light bulbs on the bottom of the flight deck or in hidden corners to light the bays. I found some cool flight deck vehicle in 1/700, has a great mini kit for the crane. He's working on the 350 version now. I hope it's ready soon. A friend of mine even uses fibre optic lighting to make deck lights and door lights. That's a little to much for me yet.
EJ


Fair Winds and Following Seas
EJ
Utah, United States
Joined: June 25, 2008
KitMaker: 246 posts
Model Shipwrights: 221 posts
Posted: Monday, April 05, 2010 - 06:22 PM UTC
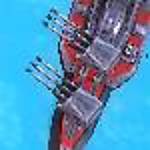
Did a few sets of guns just for fun this weekend. I think they turned out alright.

It is not the skills its the scale! Everyone just likes 1:700.
England - North East, United Kingdom
Joined: October 22, 2007
KitMaker: 971 posts
Model Shipwrights: 645 posts
Posted: Tuesday, April 06, 2010 - 04:27 AM UTC
Gents thanks for the info and photos I was sure someone would come up with the goods as usual

Illinois, United States
Joined: April 25, 2008
KitMaker: 338 posts
Model Shipwrights: 160 posts
Posted: Friday, April 09, 2010 - 11:59 PM UTC
Well I am getting started on my USS Bogue. Got my parts washed and ready to be hacked on by my hobby knife. I am only using one set of PE (Tom's Escort Carrier set) as that is all I have fund for. I haven't decided what camo pattern to use yet so I need to study some pictures before I do anything else.
Illinois, United States
Joined: April 25, 2008
KitMaker: 338 posts
Model Shipwrights: 160 posts
Posted: Saturday, April 10, 2010 - 06:18 AM UTC
Can I get some opinions from you guys? The only brand of paint that is locally available to me is model master enamel and it suits me fine but they don't offer a haze gray. I have been using light ghost gray as a substitute. Do you guys think that is close enough or would you use a different color?
Nevada, United States
Joined: September 07, 2002
KitMaker: 807 posts
Model Shipwrights: 120 posts
Posted: Monday, April 12, 2010 - 05:48 AM UTC
Anthony, that PE work on your Akagi is turning out really well! Nicely done!
Scott Espin
Always do the right thing, even when nobody is looking.
Fyn, Denmark
Joined: May 15, 2006
KitMaker: 179 posts
Model Shipwrights: 92 posts
Posted: Tuesday, April 13, 2010 - 09:30 AM UTC
Well, I just needed to do something, and get some of the bigger parts out in the open, so today I made a quick dryfit of the hull. Mostly to actually experience the actual size of the kit, but also to get the hull out of the box, and onto the building-area, where there is no excuse to get going


(sorry about the quality of the pic .. just a quick phone-snap .. will take better pictures once I progress)
Cheers
Niels M. Frederiksen
Australia
Joined: August 19, 2008
KitMaker: 85 posts
Model Shipwrights: 67 posts
Posted: Wednesday, April 14, 2010 - 03:33 AM UTC
Dear oh dear how to maintain interest when Fujimi announced a 1/700 Akagi?


#027
Louisiana, United States
Joined: April 13, 2005
KitMaker: 5,422 posts
Model Shipwrights: 5,079 posts
Posted: Wednesday, April 14, 2010 - 04:06 AM UTC
"Hark, now hear the sailors cry
Smell the sea and feel the sky
Let your soul and spirit fly into the mystic
Utah, United States
Joined: June 25, 2008
KitMaker: 246 posts
Model Shipwrights: 221 posts
Posted: Wednesday, April 14, 2010 - 07:59 AM UTC
Quoted Text
Dear oh dear how to maintain interest when Fujimi announced a 1/700 Akagi?
I'm not too worried. I really haven't been that impressed with their recent carrier offerings their Kaiyo for example is a new tooling but most of the kit looks like they left out the new part.
It is not the skills its the scale! Everyone just likes 1:700.
Australia
Joined: August 19, 2008
KitMaker: 85 posts
Model Shipwrights: 67 posts
Posted: Wednesday, April 14, 2010 - 10:52 AM UTC
Kaiyo? 'Recent' is a relative definition then. Fujimi's break-out kit was their Kongo. A kit that set the bar on both technology and value. Since then, they've released Nagato, Tone, Fuyutsuiki and 2 Ryujos. None of which are duds. I only have 1 Ryujo and the moulding looks different to that of the Kongo, possibly an outsourced project, so it is slightly inferior to Kongo but still nice. Not that Akagi would need the 'new arming parts', and all I need really is just the hull!
Illinois, United States
Joined: April 25, 2008
KitMaker: 338 posts
Model Shipwrights: 160 posts
Posted: Sunday, April 18, 2010 - 03:45 AM UTC
Here is my porgress thus far. I got the hull cleaned up and ready for further assembly. I found that there were four 'dimples' on the hull so I filled them in with some putty.

I got the hanger onto the hull but there some gaps and over laps so I am in the process of fixing those.
Nevada, United States
Joined: September 07, 2002
KitMaker: 807 posts
Model Shipwrights: 120 posts
Posted: Tuesday, April 20, 2010 - 05:37 AM UTC
Hey guys, I started up my Trumpeter 1/700 USS Hornet for this GB last night. I'm planning on building the kit straight OOB although I may add some railings. I want to focus on just having fun with a build and actually finishing it on time. LOL I'm building it as it appeared during the Doolittle raid on Japan right as the first B-25 was rolling down the flight deck for take-off. The camouflage scheme looks a little tricky so I picked up a set of Gator Masks to make the job easier.

Scott Espin
Always do the right thing, even when nobody is looking.
Illinois, United States
Joined: April 25, 2008
KitMaker: 338 posts
Model Shipwrights: 160 posts
Posted: Wednesday, April 21, 2010 - 12:07 PM UTC
I am fairly sure that I have the hull ready for painting, I have the overlaps cut away and sanded down and the gaps filled about as good as they'll get.

While the putty was drying I even got the life rafts stacked together and ready to paint.
Nevada, United States
Joined: September 07, 2002
KitMaker: 807 posts
Model Shipwrights: 120 posts
Posted: Thursday, April 22, 2010 - 04:57 AM UTC
I'm in the process of building up the hangar deck area of the Trumpeter 1/700 USS Hornet. The fit of the hangar deck is good, although I did have to slightly sand down a little at the front notch up by the forcastle deck to get it to fit properly.

Scott Espin
Always do the right thing, even when nobody is looking.
Michigan, United States
Joined: April 03, 2007
KitMaker: 960 posts
Model Shipwrights: 901 posts
Posted: Friday, April 23, 2010 - 04:59 PM UTC
I'm trying my hand at adding details that might not ever be seen;


It is not a sin to fall.......It is a sin not too get up......
Utah, United States
Joined: June 25, 2008
KitMaker: 246 posts
Model Shipwrights: 221 posts
Posted: Monday, April 26, 2010 - 06:38 AM UTC
A couple of more photos showing progress on the old 1/700 Akagi kit.


It is not the skills its the scale! Everyone just likes 1:700.
Australia
Joined: August 19, 2008
KitMaker: 85 posts
Model Shipwrights: 67 posts
Posted: Wednesday, April 28, 2010 - 03:44 AM UTC
Your Akagi is looking very good now Anthony! In comparison my build is just so slow..
I think the rough shape is mostly done for the conversion, hopefully next week will start detailing work.
Added structs from hasegawa's 2 PE set for 3-deck akagi, which lend some strength and shape to the extended hanger aft.

Yet some sanding to do to replicate the slight slopes of the flight deck.

The funnel is based off the 3-deck version, which has secondary vent pointing upwards. It was cut off then reshaped with expoxy putty. the 'tip' of the old tool akagi was shaved off and grafted on just so the PE grill will fit properly.

oh...and one of the reasons my progress has been so slow was due to this..


Utah, United States
Joined: June 25, 2008
KitMaker: 246 posts
Model Shipwrights: 221 posts
Posted: Wednesday, April 28, 2010 - 09:56 AM UTC
Jim, I think your Akagi has more work on it than mine! It will definatly look better and be more accurate for sure. Have you run into problems with the PE set not fitting right after all the modifications. I was worried to do more for fear I would not be able to get a part from Lion Roar to work.
It is not the skills its the scale! Everyone just likes 1:700.
Illinois, United States
Joined: April 25, 2008
KitMaker: 338 posts
Model Shipwrights: 160 posts
Posted: Wednesday, April 28, 2010 - 05:13 PM UTC
Wow, both Akagis are looking magnificent.
I'm afraid that I have been stalled on my Bogue. I have yet to paint even one color onto its hull, but I did have a few moments so I assembled a few of the 20mm AA guns.
Australia
Joined: August 19, 2008
KitMaker: 85 posts
Model Shipwrights: 67 posts
Posted: Wednesday, April 28, 2010 - 06:01 PM UTC
Thank you Anthony, It is certainly not yet to your level of detail yet.
Funny one of the very reason I decided to use the 3-deck hull was so that I can ultimately save time correcting the many little issues associated with the old tool, and take advantage of the better basic detail. Eg you just canot compare the AA gun platform supports between the two kits, and the boat deck etc.
I'm not anticipating too much issues with the LE set. I have in fact made compromises on accuracy in areas such as the forward hanger shape (with the LE catways wrapping around it) and the funnel cap shape so that the LE part will fit easier. Most of the set are actually sitting together with the flight deck or just below. The hull modifications are almost not affected. All the PE platforms needs to be fitted on plastic sheets anyway.
The aft hanger ended up about 3mm longer than the old tool version, which the LE deck was designed to fit. As a result, probably need to skip the last row of under-deck attrice support and trim them lengthwise.
Height of the hull in general needs to conform approximately to the old kit so that the PE supporting structs do not fall short. This is the main reason I have to replicate the slope of the flightdeck.
You may have noticed that there's not enough mating surface for the flightdeck to the hull, I will probably need to add horizontal spars to help that (not going to use the plastic template included in the set as it is for the old kit/too short.
I've had some issues with bending the aft deck smoothly. I attempted it but due to the hardless of the piece the curve is not smooth. Dont' have PE rolling tools either. I heard heating PE can prep it for easier fold so I migth do it on a spare scrap and see how it goes.
Texas, United States
Joined: September 15, 2002
KitMaker: 8,985 posts
Model Shipwrights: 3,509 posts
Posted: Wednesday, April 28, 2010 - 09:21 PM UTC
OK....Thye nightmare that is Akagi is complete. I took almost the entire 4 months I allocated for this beast. I have added three photos to the gallery, but no longer rememeber how to put them here. things hAVE CHANGED SINCE I LAST TRRIED TO DO THIS.
Those who don't learn from history are doomed to repeat it
VMI "76
Order of the Red Nose Plug
Blue Volute Bumper Spring Award
Nordrhein-Westfalen, Germany
Joined: May 26, 2008
KitMaker: 1,168 posts
Model Shipwrights: 676 posts
Posted: Wednesday, April 28, 2010 - 11:32 PM UTC
Hi, Steve!
Congrats for finishing your build.
To place the photos make sure yoiu are logged in and go to the campaign gallerie:
http://gallery.kitmaker.net/showgallery.php/cat/25013go to "Finished Photos".
Select "Upload Photos" in the top right corner.
Chose file-selection button(s) to select your photo(s). When done push "upload/submit".
That should do the trick.
Cheers,
Guido
AKA "Tailor" -VMF'06 - German Gamblers
http://www.youtube.com/channel/UCk8zhb1sc4Pe3BRLqq3d-SQ