Official Ironclads Campaign

#012
Wyoming, United States
Joined: November 07, 2003
KitMaker: 3,098 posts
Model Shipwrights: 131 posts
Posted: Sunday, November 21, 2010 - 04:14 AM UTC
Here is my first in-progress post.
I just have the basic construction done and a base coat on the base. I still have a long way to go.
How is everyone else doing?
Thanks for looking.
Harv

If any white man tries to destroy what is mine, or take what is mine, or take my lands, I will take my gun, get on my horse, and go punish him. Chief Low Dog - Oglala Sioux Chief
England - South East, United Kingdom
Joined: March 01, 2010
KitMaker: 7,078 posts
Model Shipwrights: 6,649 posts
Posted: Sunday, November 21, 2010 - 10:56 PM UTC
Good progress so far Harv
Nothing to photograph yet, except a pile of plastcard & evergreen. Hope to start cutting plastic soon.
Si
#012
Wyoming, United States
Joined: November 07, 2003
KitMaker: 3,098 posts
Model Shipwrights: 131 posts
Posted: Wednesday, November 24, 2010 - 12:20 PM UTC
Quoted Text
Good progress so far Harv
Thank you Simon. There isn't much to my project, but it is enough for me as I am not much of a "ship guy"!!
I don't have the confidence to take on a project like yours. Looking forward to seeing it from start to finish.
Harv
If any white man tries to destroy what is mine, or take what is mine, or take my lands, I will take my gun, get on my horse, and go punish him. Chief Low Dog - Oglala Sioux Chief
England - South East, United Kingdom
Joined: March 01, 2010
KitMaker: 7,078 posts
Model Shipwrights: 6,649 posts
Posted: Wednesday, November 24, 2010 - 09:23 PM UTC
Thanks Harv,
hope to start cutting plastic next weekend.
Si
England - South East, United Kingdom
Joined: March 01, 2010
KitMaker: 7,078 posts
Model Shipwrights: 6,649 posts
Posted: Sunday, December 12, 2010 - 10:18 PM UTC
Didn't quite get as far as cutting plastic, but basic hull & deck layout drawn, for maindeck & breastwork deck, whick i will copy & spraymount on to plasticard for cutting out. If family and christmas preparations allow.

Quite a few issues with this build still looking for solutions. But will be fun along the way.
Si
#012
Wyoming, United States
Joined: November 07, 2003
KitMaker: 3,098 posts
Model Shipwrights: 131 posts
Posted: Friday, December 24, 2010 - 02:22 AM UTC
Hi Simon,
Its good to see that you are off to a start. I haven't done anything with my project since my last post. I am waiting to get the paints that I need for the base coats. So I am hoping to have another in-progress photo to post here in a few days.
Harv
If any white man tries to destroy what is mine, or take what is mine, or take my lands, I will take my gun, get on my horse, and go punish him. Chief Low Dog - Oglala Sioux Chief
California, United States
Joined: December 06, 2004
KitMaker: 3,694 posts
Model Shipwrights: 167 posts
Posted: Wednesday, December 29, 2010 - 08:41 AM UTC
For those new to the group builds/campaigns in the Kit Maker Network of sites, I would suggest reading this thread which should answer a lot of questions.
For Those New to Armorama CampaignsAlthough it says "Armorama", I don't think there is anything that is specific for Armorama.
#012
Wyoming, United States
Joined: November 07, 2003
KitMaker: 3,098 posts
Model Shipwrights: 131 posts
Posted: Wednesday, December 29, 2010 - 08:43 AM UTC
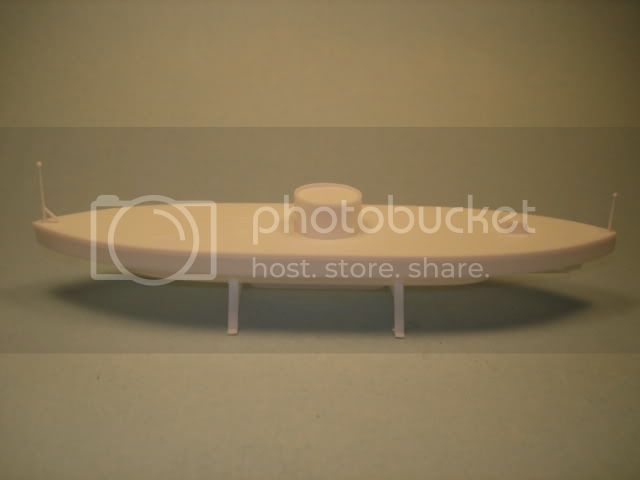
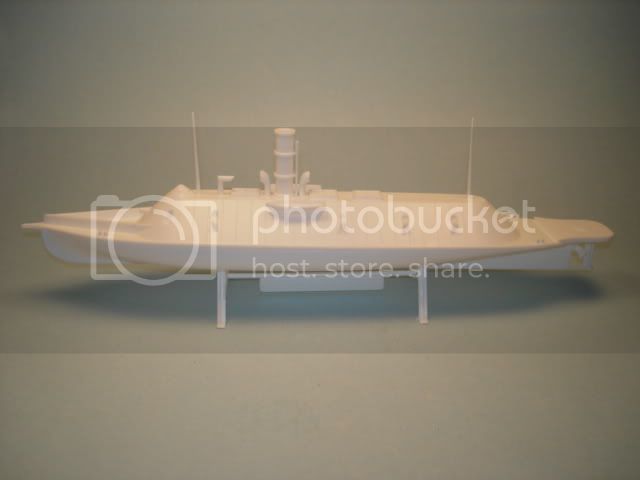
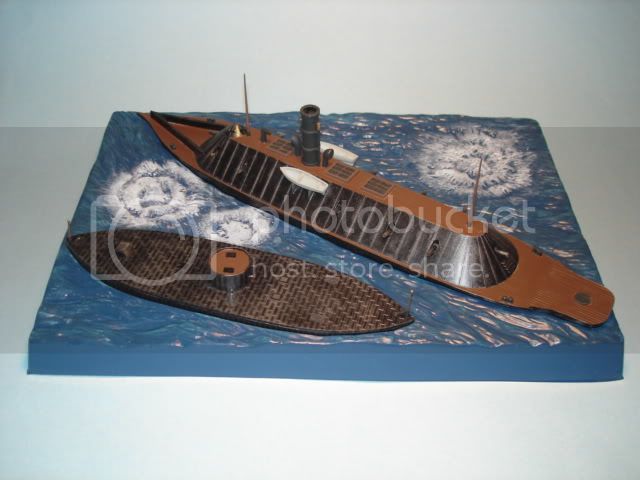
Here is my in-progress post #2.
I have all of the base colors completed. Now I just need to start dry-brushing all of those metal plates to bring out the rivet detail and to lighten the dark color up. I also need to do the same thing to the wooden areas.
How is everyone else doing?
Thanks,
Harv
If any white man tries to destroy what is mine, or take what is mine, or take my lands, I will take my gun, get on my horse, and go punish him. Chief Low Dog - Oglala Sioux Chief
England - South East, United Kingdom
Joined: March 01, 2010
KitMaker: 7,078 posts
Model Shipwrights: 6,649 posts
Posted: Wednesday, December 29, 2010 - 09:19 PM UTC
Coming on well Harv,
I hope to actually start cutting plastic this weekend
Si
Nordrhein-Westfalen, Germany
Joined: May 26, 2008
KitMaker: 1,168 posts
Model Shipwrights: 676 posts
Posted: Wednesday, December 29, 2010 - 09:34 PM UTC
Nice & Crisp!
Looking forward to further progress!
Cheers,
Guido
AKA "Tailor" -VMF'06 - German Gamblers
http://www.youtube.com/channel/UCk8zhb1sc4Pe3BRLqq3d-SQ
England - South East, United Kingdom
Joined: March 01, 2010
KitMaker: 7,078 posts
Model Shipwrights: 6,649 posts
Posted: Sunday, January 02, 2011 - 09:40 AM UTC
Well finally got started, the master drawing was copied, and three copies spray mounted onto a sheet of 30 though plasticard.

These were cut out to form the waterline plate, main deck & battery deck.

a crude box structure was then built up on the waterline plate.

next job will be to attach the main deck.
more updates soon
Si
England - South East, United Kingdom
Joined: March 01, 2010
KitMaker: 7,078 posts
Model Shipwrights: 6,649 posts
Posted: Monday, January 03, 2011 - 08:50 AM UTC
A bit more progress today.
The main deck has been fitted and structure under the battery deck have been fitted.

I added the structure under the battery deck, rather than on top of the main deck to ensure the holes for the turrets were left clear.
more soon
Si
Nordrhein-Westfalen, Germany
Joined: May 26, 2008
KitMaker: 1,168 posts
Model Shipwrights: 676 posts
Posted: Monday, January 03, 2011 - 10:37 PM UTC
Hi, Simon!
Great start!
How thick are the sheets you use for your decks?
I ask, because I think that the spaces between the deck supports are too wide. Your model may suffer from sagging deck portions between the supports.
Guido
AKA "Tailor" -VMF'06 - German Gamblers
http://www.youtube.com/channel/UCk8zhb1sc4Pe3BRLqq3d-SQ
#012
Wyoming, United States
Joined: November 07, 2003
KitMaker: 3,098 posts
Model Shipwrights: 131 posts
Posted: Tuesday, January 04, 2011 - 11:26 AM UTC
Thank you for the comments guys. I hope to get some more work done on them this coming weekend.
Glad to see you were able to get started on yours Simon. It is looking good so far. Although you are making me jealous by being able to measure, mark, cut out and scratch-build your project!!

Seriously though, it will be fun to watch all of you scratch-builders in action and see your projects develop.
Thanks again,
Harv
If any white man tries to destroy what is mine, or take what is mine, or take my lands, I will take my gun, get on my horse, and go punish him. Chief Low Dog - Oglala Sioux Chief
England - South East, United Kingdom
Joined: March 01, 2010
KitMaker: 7,078 posts
Model Shipwrights: 6,649 posts
Posted: Tuesday, January 04, 2011 - 09:25 PM UTC
Hi Guido,
Thanks for the comment. All the decks are 30 thou. & the model is 248mm long
This is a major learning curve for me, if I haven't used enough support for that thickness it will be back to the drawing board & try again
The hull feels solid... at the moment. I have added the battery deck last night

The bits of brass rod sticking out were to aid alignment.
Next job.. I hope cleaning up the rough spots & skinning.
Si
Nordrhein-Westfalen, Germany
Joined: May 26, 2008
KitMaker: 1,168 posts
Model Shipwrights: 676 posts
Posted: Tuesday, January 04, 2011 - 09:45 PM UTC
Simon-
I think the sagging will be a long term effect. You might see your model deform within a period of 12-18 months. If the secitions are too wide you'll have something like a "canning" effect, but on the horizontal plane, which is not at all desireable. The easiest way to counter that effect should be to glue on a second deck using 5 minute expoxy glue.
Good luck!
Guido
AKA "Tailor" -VMF'06 - German Gamblers
http://www.youtube.com/channel/UCk8zhb1sc4Pe3BRLqq3d-SQ
England - South East, United Kingdom
Joined: March 01, 2010
KitMaker: 7,078 posts
Model Shipwrights: 6,649 posts
Posted: Wednesday, January 05, 2011 - 09:38 PM UTC
Thanks Guido
Appreciate the Advise. as i say this is a very steep learning curve for me. I will try and work some extra suport in through the turret holes. Most of the rest of the deck is covered by superstructure down the centre line, I think I might drill through & epoxy some lengths of brass rod. certainly at the corners, will help with placement as well.
As this is my first Scratchbuild in this scale, and of this size (only completed one other) The journey is more important than the destination, because that's where the learning is.
Thanks again, and any comments / critisism / tips very welcome.
Si
England - South East, United Kingdom
Joined: March 01, 2010
KitMaker: 7,078 posts
Model Shipwrights: 6,649 posts
Posted: Sunday, January 09, 2011 - 10:49 PM UTC
Basic skining done.
A few gaps that will need a touch of milliput.
The anchor points need boxing in, hawse pipes adding & then on with the deck detailing.

Si
#012
Wyoming, United States
Joined: November 07, 2003
KitMaker: 3,098 posts
Model Shipwrights: 131 posts
Posted: Sunday, January 16, 2011 - 11:51 AM UTC
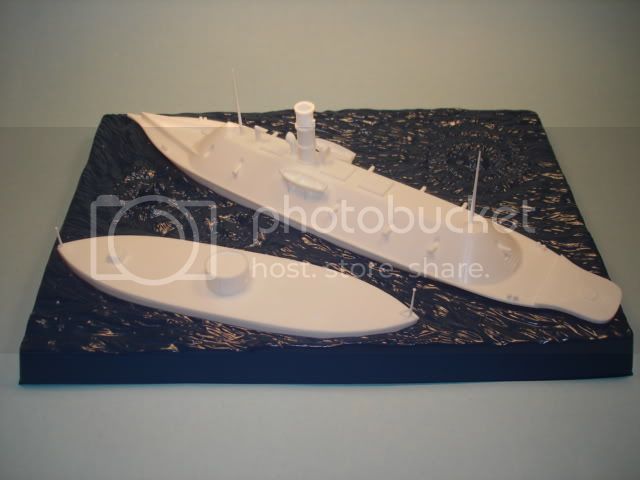
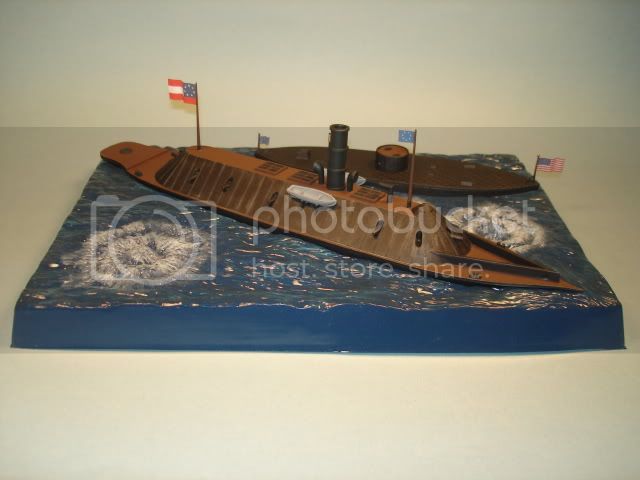
Well here is in-progress photo #3.
I have touch up painting to do and I want to depict some rust as well. I also did some work on the base. Not the best looking in the world but I guess it isn't too bad for someone who is new to this area of modeling.
Looking good Simon. Keep up the good work and thanks for keeping us posted on your progress. How is everyone else coming along?
Thanks,
Randy
If any white man tries to destroy what is mine, or take what is mine, or take my lands, I will take my gun, get on my horse, and go punish him. Chief Low Dog - Oglala Sioux Chief
England - South East, United Kingdom
Joined: March 01, 2010
KitMaker: 7,078 posts
Model Shipwrights: 6,649 posts
Posted: Sunday, January 16, 2011 - 10:03 PM UTC
Thanks Randy
Will do, didn't much "Workshop time" this weekend so no real progress.
Nice job so far on yours.
Si
#012
Wyoming, United States
Joined: November 07, 2003
KitMaker: 3,098 posts
Model Shipwrights: 131 posts
Posted: Tuesday, January 18, 2011 - 10:58 AM UTC
Thanks Simon, I appreciate the kind comment.
I did a little work on my project last night. I don't know if I will be able to tonight or not but I will see.
Don't worry about yours. We still have over nine months to go.
Randy
If any white man tries to destroy what is mine, or take what is mine, or take my lands, I will take my gun, get on my horse, and go punish him. Chief Low Dog - Oglala Sioux Chief
#012
Wyoming, United States
Joined: November 07, 2003
KitMaker: 3,098 posts
Model Shipwrights: 131 posts
Posted: Saturday, January 29, 2011 - 04:19 AM UTC
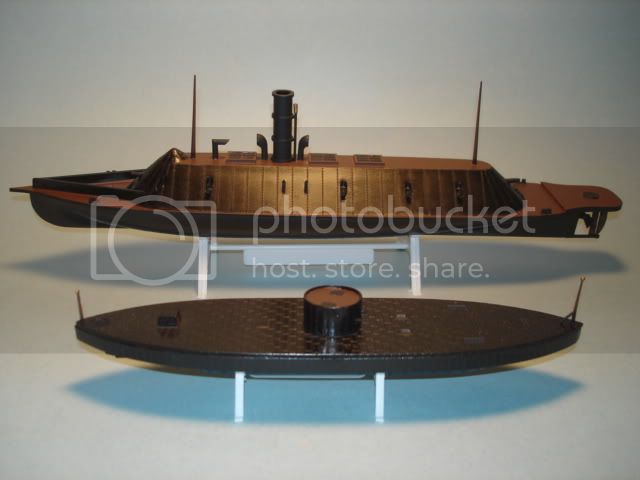
Well I am going to call my entry finished.
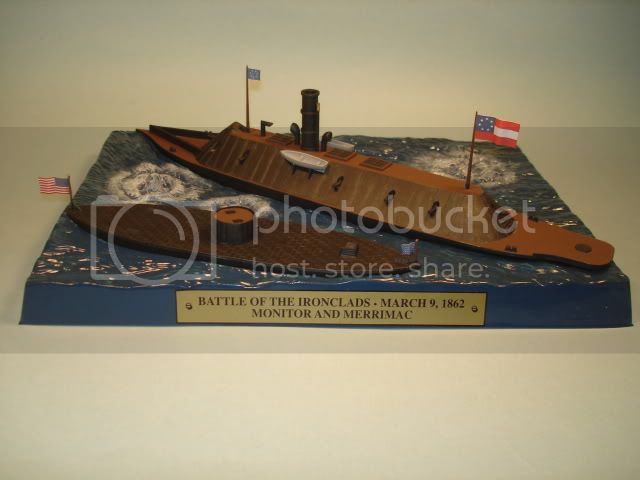
This was a pretty straight forward and easy project. I had fun with it even though I am new to the ship modeling area. I built it straight out of the box. The only thing I added that wasn't part of the kit was the flags. The decal flags that came with the kit fell apart when I tried to apply them. Plus after doing some research I learned that not all of them were correct anyway. So I made my own on the computer.
Now I can concentrate on hosting this campaign. I am looking forward to seeing more entries. Hint hint
Thanks,
Randy
If any white man tries to destroy what is mine, or take what is mine, or take my lands, I will take my gun, get on my horse, and go punish him. Chief Low Dog - Oglala Sioux Chief
England - South East, United Kingdom
Joined: March 01, 2010
KitMaker: 7,078 posts
Model Shipwrights: 6,649 posts
Posted: Sunday, January 30, 2011 - 10:05 PM UTC
Looks good Randy.
Working on detailing the decks on Thnuderer, hope to post an update next weekend.
Si
England - South East, United Kingdom
Joined: March 01, 2010
KitMaker: 7,078 posts
Model Shipwrights: 6,649 posts
Posted: Saturday, February 05, 2011 - 08:55 AM UTC
A bit more progress. Mostly detailing the fo'c's'le. Non of the drawings agree & can't find any period photographs, so it a mix of info from various drawings and a bit of creative gizmology.

some fairleads to be added, hatches, davits, vents and capstans.
Si
#012
Wyoming, United States
Joined: November 07, 2003
KitMaker: 3,098 posts
Model Shipwrights: 131 posts
Posted: Thursday, February 10, 2011 - 04:03 AM UTC
Thank you Simon. I appreciate the comment.
Your project is coming along great. I am enjoying watching it develop. Keep up the good work and I am looking forward to your next in-progress photo.
Randy
If any white man tries to destroy what is mine, or take what is mine, or take my lands, I will take my gun, get on my horse, and go punish him. Chief Low Dog - Oglala Sioux Chief