_GOTOBOTTOM
Ships by Class/Type: Battleships
Topics from the Dreadnaught era to modern day.
Hosted by Steve Joyce
HMS Repulse 1/350 Force Z 1941
JJ1973
#345
Visit this Community
Niedersachsen, Germany
Joined: August 22, 2011
KitMaker: 1,835 posts
Model Shipwrights: 1,832 posts
Posted: Sunday, August 31, 2014 - 05:35 AM UTC
This is going to be the build log of my Trumpeter HMS Repulse in 1/350 scale. It will start with some 'modeling history' since the build is well underway, I started in February 2012. Yes, I am slow, and I had to move this summer, so one adds to another. I already posted some progress photos, but eventually I was fed up with looking at my fumbled and misspelled topic title, as well as with some pictures not showing up properly. The latter my be a problem with my system, I checked my old post on a entirely different computer last week and it seemed fine, however, it is unpleasant if you can't see your posted pic's and can only guess / hope that others can. Now a new start, using photo bucket this time and starting a full build log. Let's hope it works. First post will be short to check if the pictures are as I want them to be...

All right, let's go; here is what I use. The main Trumpeter kit, of course:


and as add-ons the PE sets from WEM and Eduard, barrels from Master, a MK 1 wooden deck and other smaller add ons mainly from WEM:


References are the following:


The 'Raven and Roberts' British Battleships, Clydebank Battlecruisers by Ian Johnston, British Battleships 1919 - 1945 by R A Burt; Paint Chips from Snyder and Short, a .pdf plan from Profile Morskie amongst others.

Ok, let me first cheek if that works...
RedDuster
Visit this Community
England - South East, United Kingdom
Joined: March 01, 2010
KitMaker: 7,078 posts
Model Shipwrights: 6,649 posts
Posted: Sunday, August 31, 2014 - 06:10 AM UTC
Interesting looking build Jan, I have this one in the loft, with the master barrels, Artworx deck and the Admiralty modelworks correction set, currently awaiting the GMM etch.

Excellent references too, will be following with interest, hoping to pick up tips.

Si
JJ1973
#345
Visit this Community
Niedersachsen, Germany
Joined: August 22, 2011
KitMaker: 1,835 posts
Model Shipwrights: 1,832 posts
Posted: Sunday, August 31, 2014 - 06:14 AM UTC
Right, fair enough, that should do

Over the next weeks or so I will try to catch up with where I am at currently and provide some compressed 'updates' on what I did.

As common for Trumpeter, the hull is split horizontally. This may be very convenient if you want to do a waterline, but if you're doing a full hull, matching the halves requires some work. First step - not connected to the hull halves, was correcting the aft hawse pipe, which sits way to high up.

Prior:


After:


In addition, all portholes were drilled open. For me, that is the easier and safer solution - I use a hand drill to avoid high revolutions and melting plastic, works fine for me. And it makes the painting of the hull easier; for my first ship I tried to fill the portholes with a little black paint to give a little depth, but that failed miserably with black paint in to many areas where there should be none.

The bow section - fit is all right put requires some putty...


The problem with my Repulse was the midships area and the beam - the sides would not fit. So I had to glue some wooden 'suspensions' into place:


Putty work:


Some - I think - interesting perspectives, a comparison of the Tamiya Prince of Wales (my last subject) and the Repulse shows the difference between a battleship and a battlecruiser. The cruiser is by far sleeker and more elegant, while the battleship is bulky and almost fat - or one might say mighty


Next the shafts:


Trumpeter missed the horizontal supports, so they were made up from some plastic sheet.

To rebuild some of the hull structure I used some Tamiay tape 6 mm that was put on the first base coat:


and sprayed with several layers of primer. I am using the Mr Surfacer stuff in various grades and am very happy with it.


Here is the effect before painting:


So much for today, I hope to manage regular updates. Thanks for looking in!!

Cheers,
Jan

Littorio
Visit this Community
England - South East, United Kingdom
Joined: September 15, 2004
KitMaker: 4,728 posts
Model Shipwrights: 1,080 posts
Posted: Sunday, August 31, 2014 - 06:18 AM UTC
I'll be following along Jan. I wish Trumpeter would release the HMS Renown in 1/350, sister ship to Repluse but a very different looking ship by 1941.
JJ1973
#345
Visit this Community
Niedersachsen, Germany
Joined: August 22, 2011
KitMaker: 1,835 posts
Model Shipwrights: 1,832 posts
Posted: Sunday, August 31, 2014 - 06:22 AM UTC

Quoted Text

Interesting looking build Jan, I have this one in the loft, with the master barrels, Artworx deck and the Admiralty modelworks correction set, currently awaiting the GMM etch.

Excellent references too, will be following with interest, hoping to pick up tips.

Si


Thank you very much Simon, great to have you 'on board'!

The Trumpeter kit is actually very decent and an excellent starting point. Well yes, some things don't fit perfectly, but the overall fit is good, and so far I did not discover any problems that could not be overcome. I am enjoying the build very much!!

Jan
JJ1973
#345
Visit this Community
Niedersachsen, Germany
Joined: August 22, 2011
KitMaker: 1,835 posts
Model Shipwrights: 1,832 posts
Posted: Sunday, August 31, 2014 - 06:26 AM UTC

Quoted Text

I'll be following along Jan. I wish Trumpeter would release the HMS Renown in 1/350, sister ship to Repluse but a very different looking ship by 1941.


Thank you very much indeed! And I could not agree more - HMS Renown in her later WW II fit would be great, I would get one immediately even though I have not even finished Repulse yet...

Jan
JJ1973
#345
Visit this Community
Niedersachsen, Germany
Joined: August 22, 2011
KitMaker: 1,835 posts
Model Shipwrights: 1,832 posts
Posted: Thursday, September 04, 2014 - 05:25 AM UTC
The story continues...

This is my way for the boot topping: I paint the middle part of the hull in the color of the boot topping, i.e. black for RN vessels. The width of the boot topping for major units is somewhere around 2 m, so roughly 5.7 mm in 1/350 scale. I found a masking tape of 5.9 mm, and even 6 mm Tamiya tape is close enough, you would not see a difference - therefore I am applying a 'yellow boot topping' next, from the 6 mm or 5.9 mm tape:


This provides the basis for the final boot topping and will stay until the end of the painting of the hull. The major advantage is that you don't need to worry about parallel lines on it, which can be challenging for long and uneven hulls, and you can easily adjust its position.

Next the lower hull is painted dark red - I don't really use a reference for that color, I just don't like light red for the lower hull. So I use a mixture from Tamiya XF colors (I use Tamiya XF throughout): XF 9 / XF 7 = 4:1

The two main colors for the camouflage are RN colors 507 A and 507 C, by test painting some unused plastic part and comparison with the Snyder and Short paint chips


the mixtures are:

507 A (dark grey): XF1 / XF 50 = 1:3
507 C (light grey): XF2 / XF 66 = 4:1

Masking and painting:


...and results, prior to any touch ups:


I know it's most likely been overpainted by 1941, but I could not resist 'shining' the nicely etched WEM nameplate:


Finally shafts and props:


So much for today, I hope you like it! Next update should follow soon....

Jan

Fordboy
Visit this Community
Auckland, New Zealand
Joined: July 13, 2004
KitMaker: 2,169 posts
Model Shipwrights: 1,597 posts
Posted: Thursday, September 04, 2014 - 07:46 AM UTC
Ahoy Jan

Nice progress thus far.

Been building it since 2012 huh? I have been battling my E-Boat build off & on since circa 2006!I hang my head in shame.

But you my friend are doing well.


Keep it up.


Cheers


Sean
RedDuster
Visit this Community
England - South East, United Kingdom
Joined: March 01, 2010
KitMaker: 7,078 posts
Model Shipwrights: 6,649 posts
Posted: Friday, September 05, 2014 - 09:50 AM UTC
Superbly clean paint job Jan,

Do like the nameplate left brass, true probably not 100% accurate, but looks great.

Si
Gremlin56
Joined: October 30, 2005
KitMaker: 3,897 posts
Model Shipwrights: 3,301 posts
Posted: Friday, September 05, 2014 - 07:42 PM UTC
I missed the kick off on this build Jan, sorry. Looks magnificent, a very clean build so far,
JJ1973
#345
Visit this Community
Niedersachsen, Germany
Joined: August 22, 2011
KitMaker: 1,835 posts
Model Shipwrights: 1,832 posts
Posted: Monday, September 08, 2014 - 06:06 AM UTC
Thank you very much Sean and Si!
Julian, great to have you on board - it is not entirely a new project since I posted some pics of the ship earlier, however I decided to do a full build log and go through the history until I find some more time to go on with the real work on the ship...

But for now some more history

Next step is some wood and brass:

WEM provides the modified aft superstructure as it was installed for the Royal Families World Cruise that never happened. This replaces part of the starboard aft superstructure:


Wooden deck and adjusting it to the modified superstructure:


Some more etch work on the aft superstructure, the darker parts are from Eduard, while the golden brass is WEM. Both offer kits of very good quality, however, both with smaller errors...


Next level test-fitted:


And here one of WEM's little bugs - the forward extension of the second deck of the aft superstructure does not account for the thickness of the material, so it's too low...


But nothing that can't be easily fixed:


Still test-fitting obviously:


And finally some more etch work:


So much for now, I hope to get the next update up soon!

Jan

RussellE
#306
Visit this Community
Victoria, Australia
Joined: June 27, 2010
KitMaker: 3,959 posts
Model Shipwrights: 2,777 posts
Posted: Monday, September 08, 2014 - 09:28 AM UTC
Hi Jan!

If memory serves, I remember the original blog you had going on this one, so I'm looking forward to seeing it completed...

Don't worry about being slow-I'm just as slow

Can I ask what you use for putty?

Russ
JJ1973
#345
Visit this Community
Niedersachsen, Germany
Joined: August 22, 2011
KitMaker: 1,835 posts
Model Shipwrights: 1,832 posts
Posted: Tuesday, September 09, 2014 - 06:09 AM UTC
Hi Russel,

thanks for stopping by!! And you are absolutely correct, that's the one. I was fed up with my fumbled topic header and in addition something with posting the pics would not work properly, so I decided for a fresh new blog and do a full build log...

Putty - I don't really use one putty, it depends. For the most part it's one of three approaches. Bigger gaps I fill with Mr. White Putty, diluted with acetone and normally applied with a brush. Fitting the hull halves required some more and not only by brush... The reddish color you can see comes from the acetone dissolving the plastic a little, makes it all stick together very nicely.

Second is Mr. Surfacer, which I use as base coat and as putty - the No. 500 you can apply by brush again, and doing that in several layers (which have to dry individually) gives good results. That is normally combined with using ethyl acetate instead of glue. ethyl acetate is a clear liquid that dissolves the plastic and thus kind of 'welds' it together. If you brush it over very small gaps (less than let's say 0,1 mm) you can close those gaps by dissolving the plastic and letting it dry without pressure, than comes the Surfacer 500 brushed on and normally you are ready for sanding and polishing

Jan
RussellE
#306
Visit this Community
Victoria, Australia
Joined: June 27, 2010
KitMaker: 3,959 posts
Model Shipwrights: 2,777 posts
Posted: Tuesday, September 09, 2014 - 09:28 AM UTC
Hi Jan

great to see the Repulse survived the move. So far very nice work. Crisp and detailed

That's a really good idea about applying the putty with a brush. Certainly makes life a lot easier than trying to apply with a spatula or match stick, and keeping it in the area required without getting too thick. I'm going to try that next time around on the KGV

Russ
RedDuster
Visit this Community
England - South East, United Kingdom
Joined: March 01, 2010
KitMaker: 7,078 posts
Model Shipwrights: 6,649 posts
Posted: Friday, September 12, 2014 - 09:02 PM UTC
After superstructure looking excellent Jan.

Very tidy job on the deck fitting the modified after superstructure.

Si
Grauwolf
#084
Visit this Community
Quebec, Canada
Joined: September 14, 2005
KitMaker: 2,485 posts
Model Shipwrights: 1,157 posts
Posted: Saturday, September 13, 2014 - 07:37 AM UTC
Those wood decks do really give the ship that extra WOW.

Excellent.....keep the photos coming.

Cheers,
Joe
JJ1973
#345
Visit this Community
Niedersachsen, Germany
Joined: August 22, 2011
KitMaker: 1,835 posts
Model Shipwrights: 1,832 posts
Posted: Sunday, September 14, 2014 - 06:37 AM UTC
Thank you very much Russ, Si and Joe! Much appreciated!

A few more pictures on the way - the aft superstructure continues.


The cable reels. For those I wrap cigarette paper around a drill, add a little white glue and wrap it with brown sewing cotton. After drying you get quite solid pipes which can be cut to length with a sharp knife.


You can see one of those cable reels pretty much in the centre of the picture:


First steps with the forward superstructure:


So much for today, more soon. The next update will deal with the octuple PomPoms.

Jan
RedDuster
Visit this Community
England - South East, United Kingdom
Joined: March 01, 2010
KitMaker: 7,078 posts
Model Shipwrights: 6,649 posts
Posted: Sunday, September 14, 2014 - 08:16 AM UTC
Cracking Job Jan,

Etch work on the ladders is exceptional.

Si
JJ1973
#345
Visit this Community
Niedersachsen, Germany
Joined: August 22, 2011
KitMaker: 1,835 posts
Model Shipwrights: 1,832 posts
Posted: Sunday, September 21, 2014 - 04:57 AM UTC
Thank you, Si!

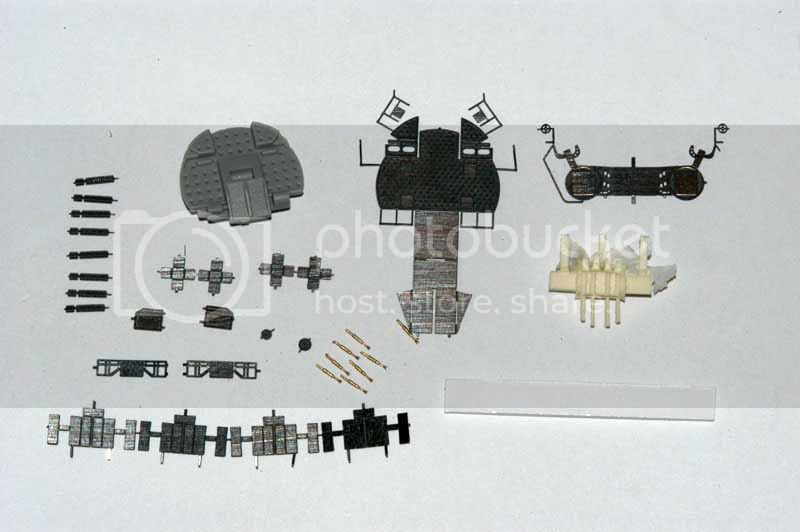
Now todays update will cover my way of doing the octuple PomPom's. Essentially, it's a weird mixture out of the original kits parts, WEM Pro set, the Eduard PE and Master barrels (and a tiny piece of plastic card).
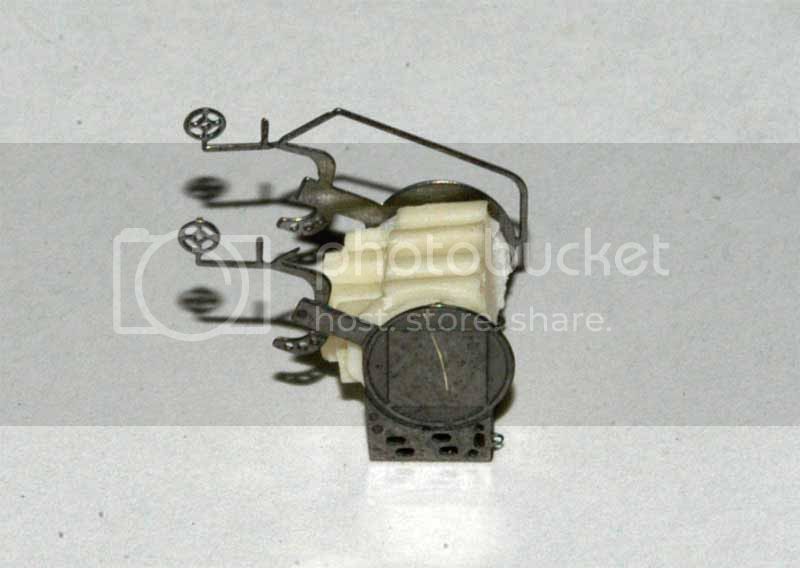
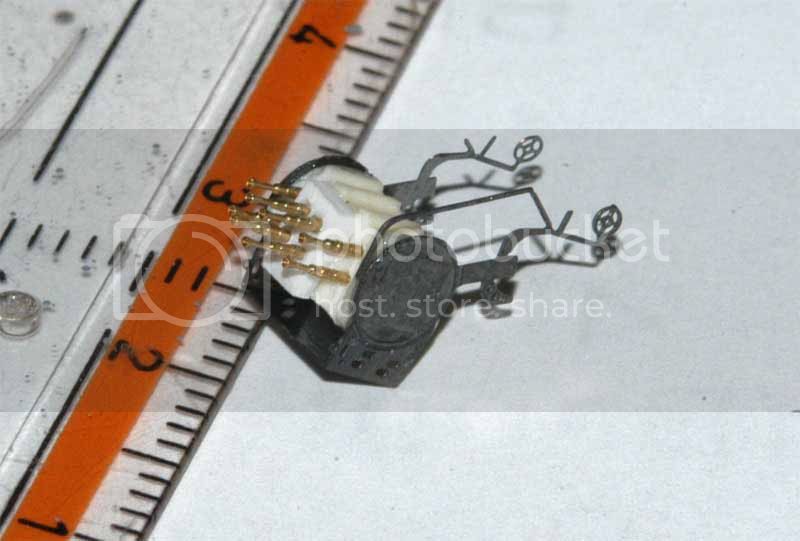
Here we go, that's what I used for one gun:


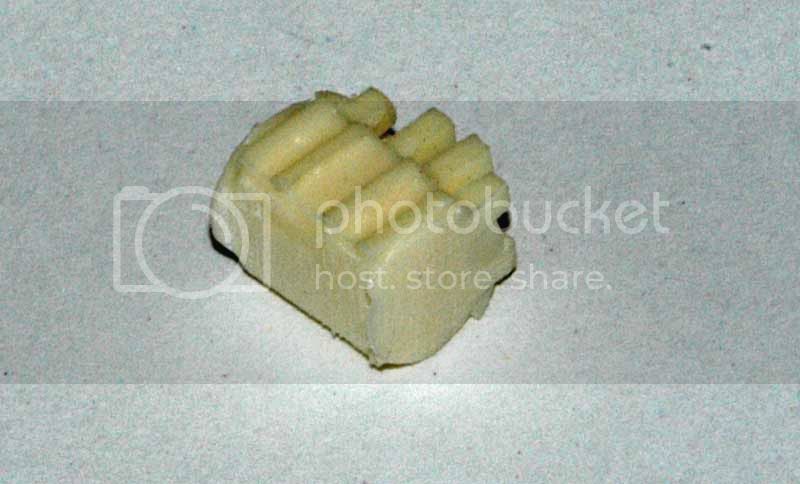
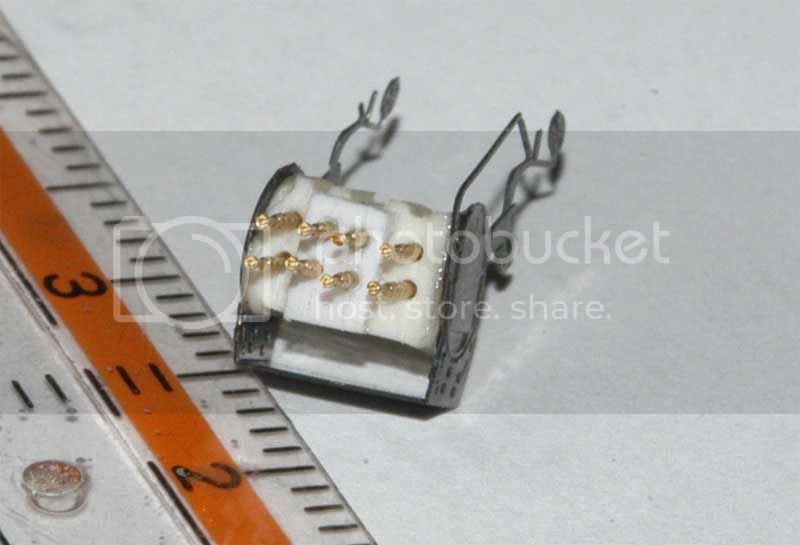
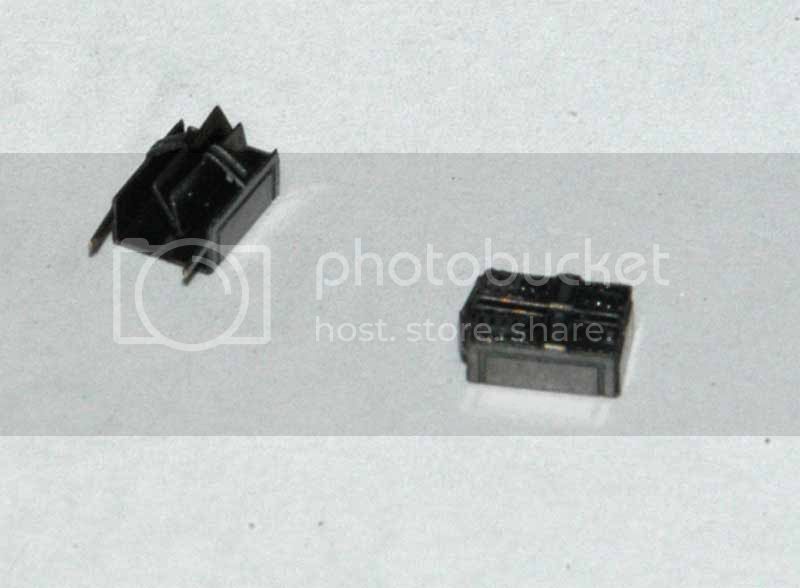
Here's what remains from the WEM pro kit, basically the gun breeches:


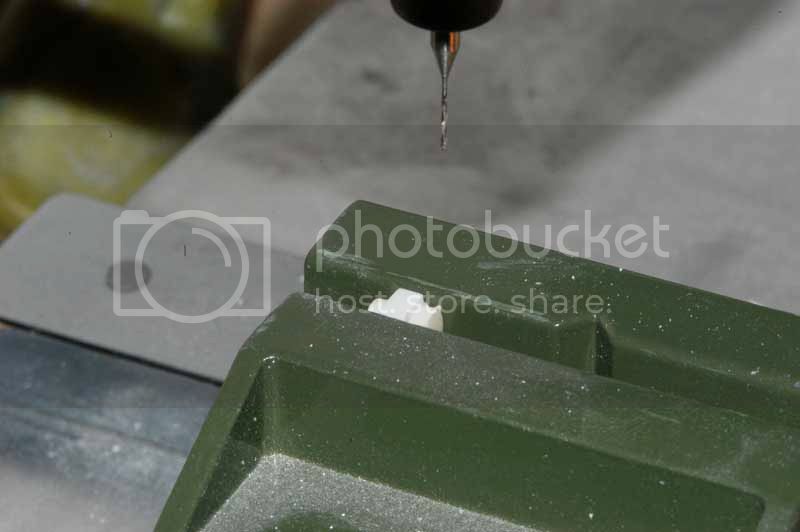
A little piece of plastic card attached to account for the different length of the barrels - ok, that part is fake... and eight 0.5 mm holes:


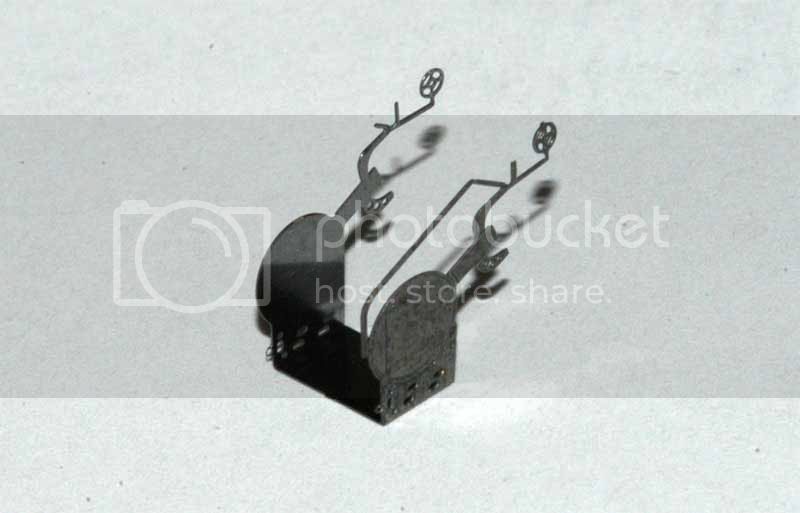
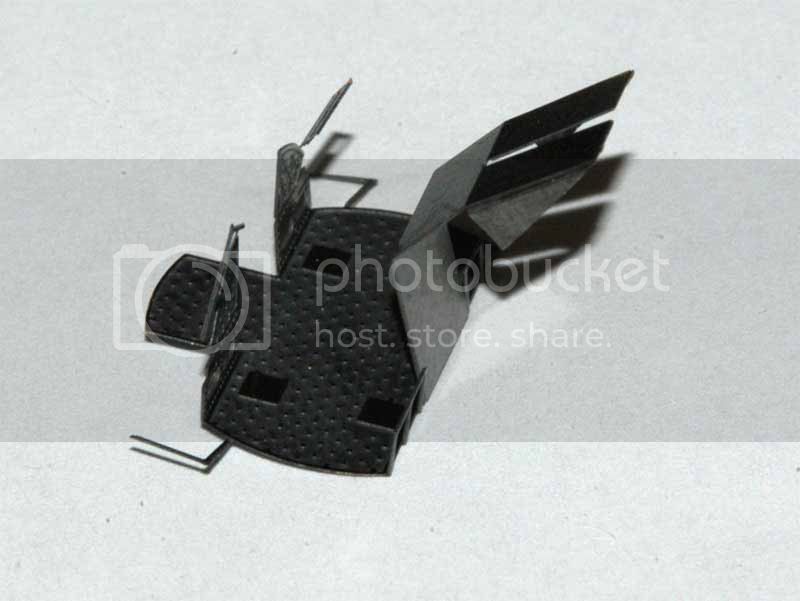
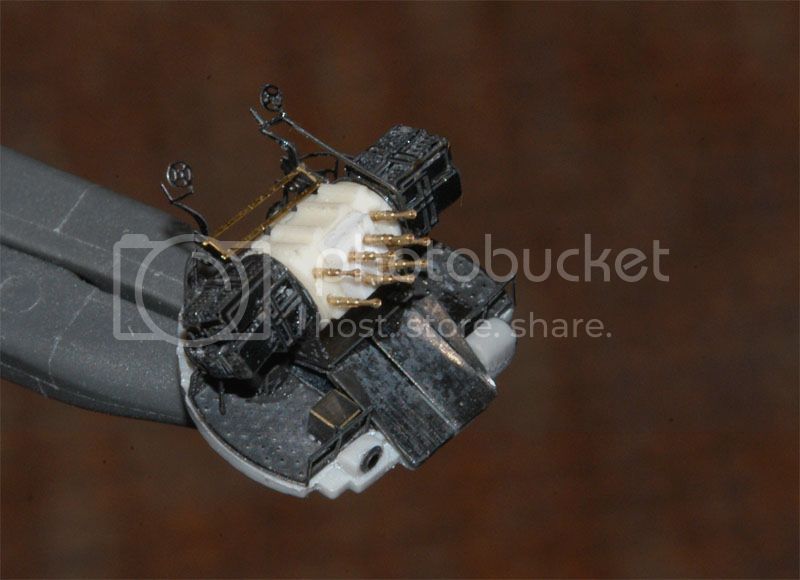
The gun cradle from Eduard


...and with the breeches:


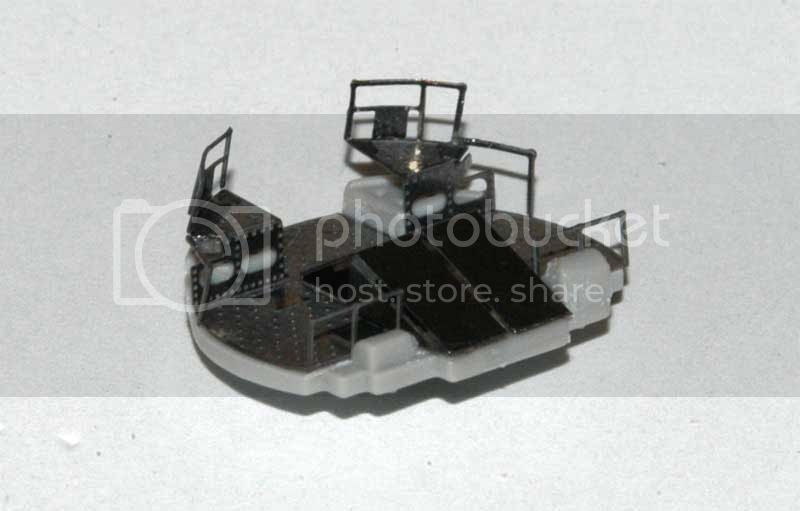
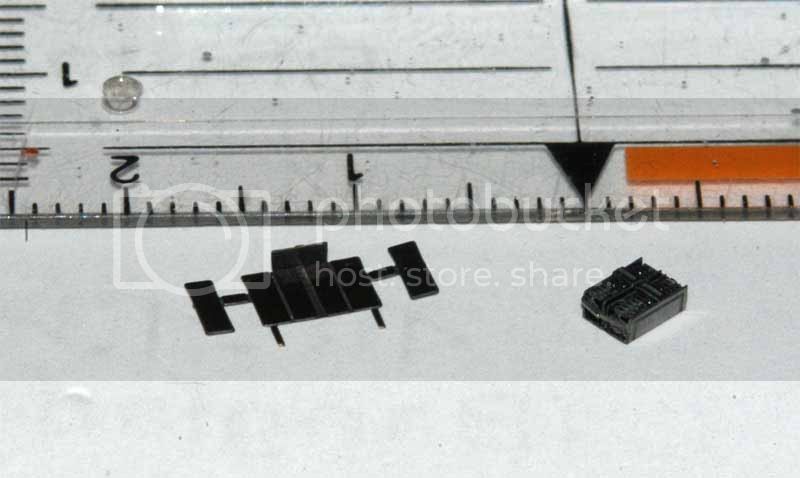
The gun base or platform is from the Trumpi kit, but modified to fit the Eduard base:


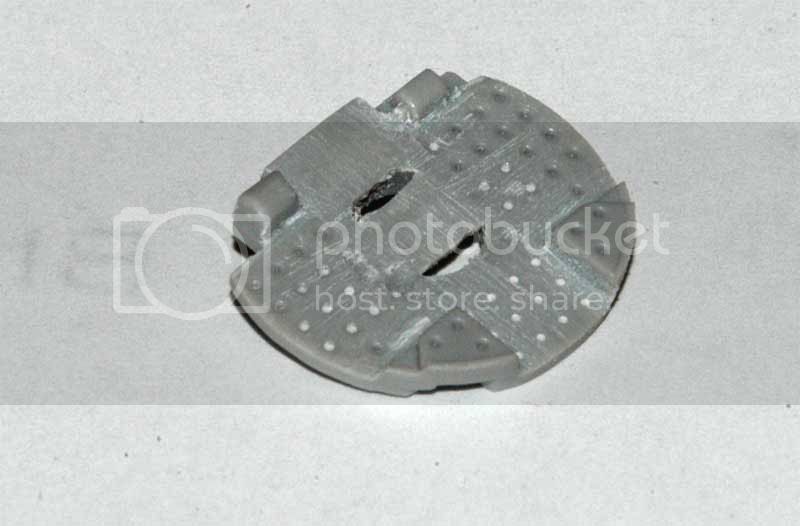
Preparation of the Eduard base as an overlay to the kit's part/


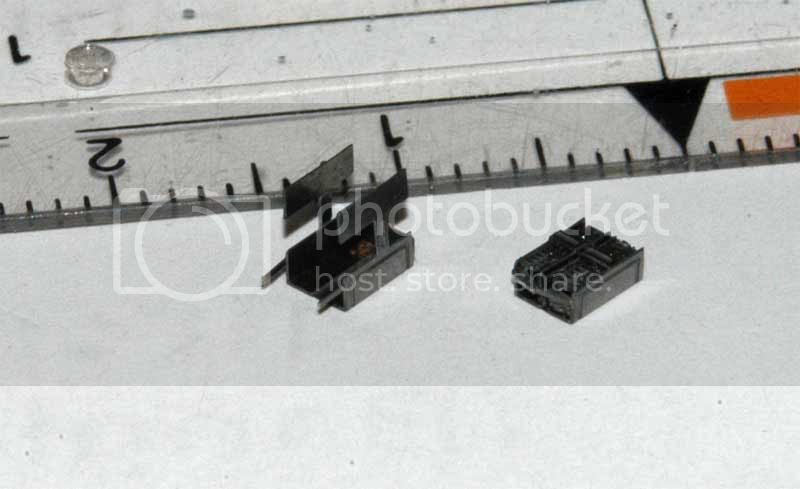
The joining of the two:
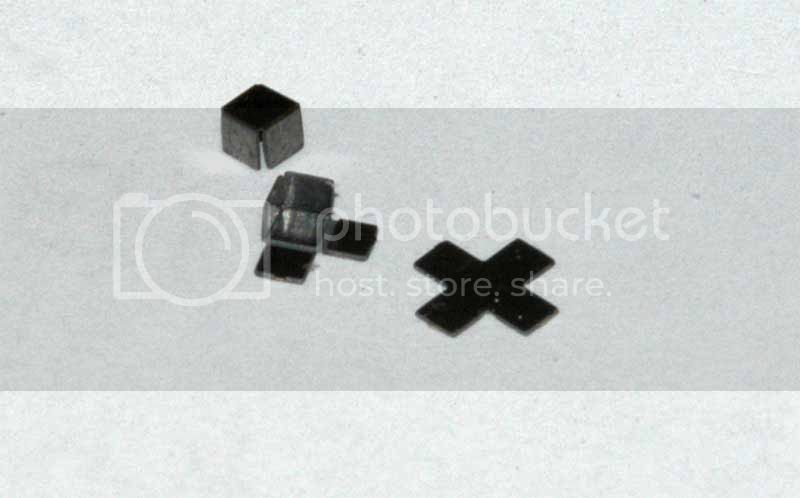
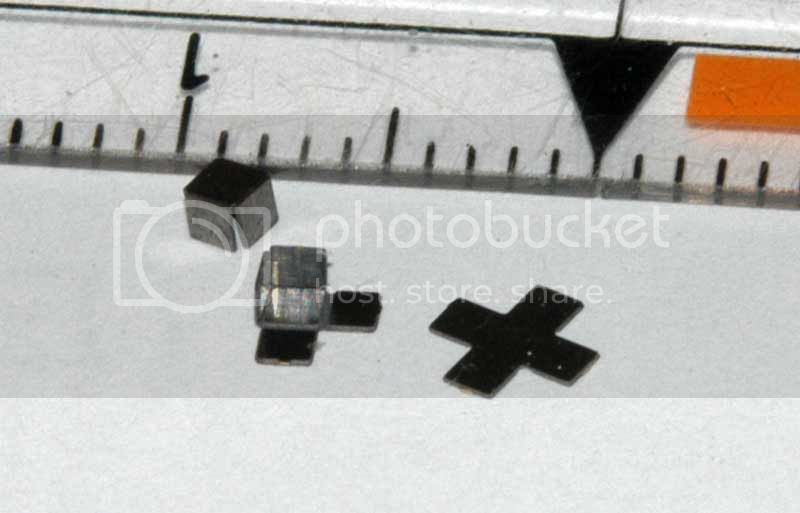
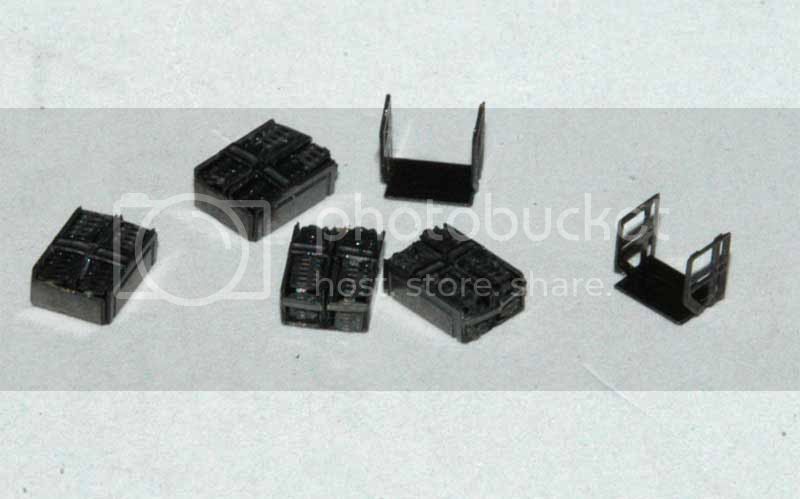


Some tiny boxes:


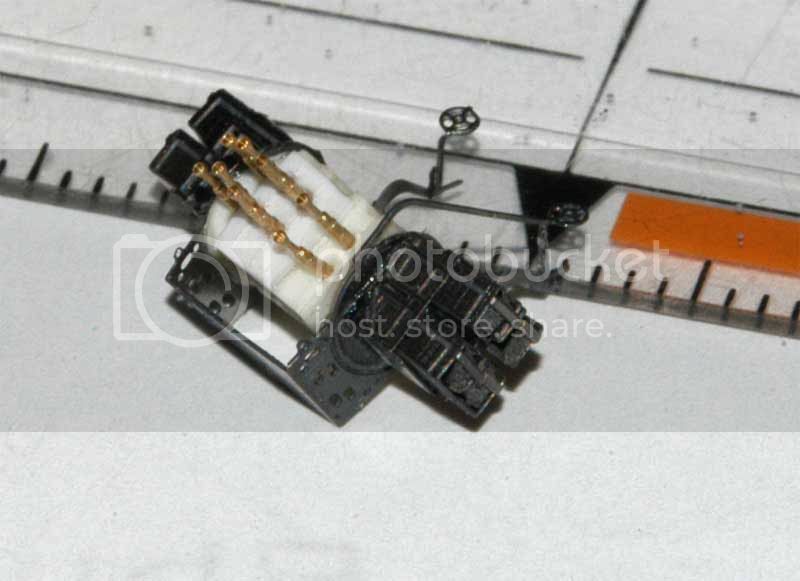
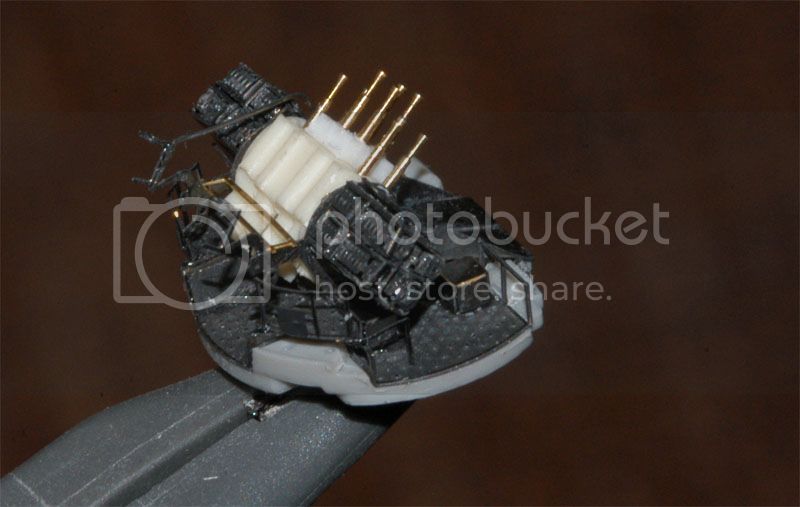
Most of the small stuff installed:


The Master barrels installed, all same length but the little fake does its job...


The ammunition boxes, four of them needed for every gun assembly:


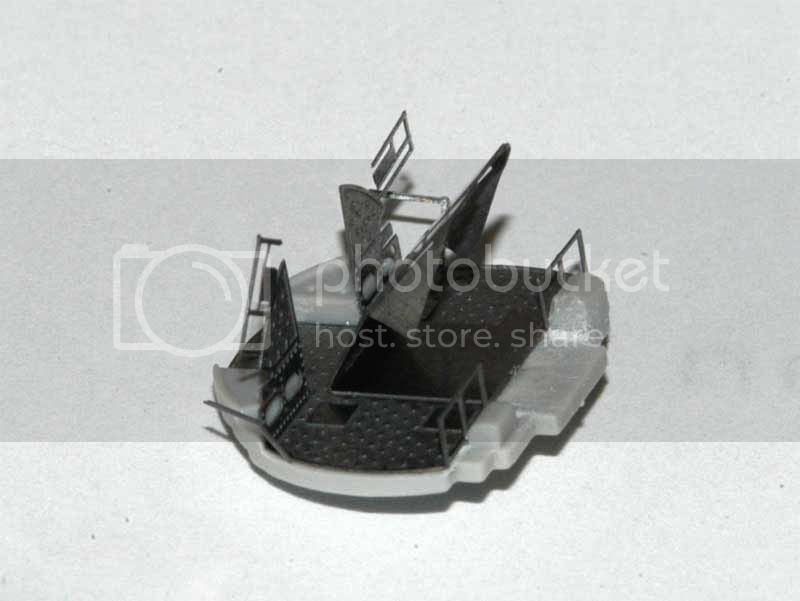
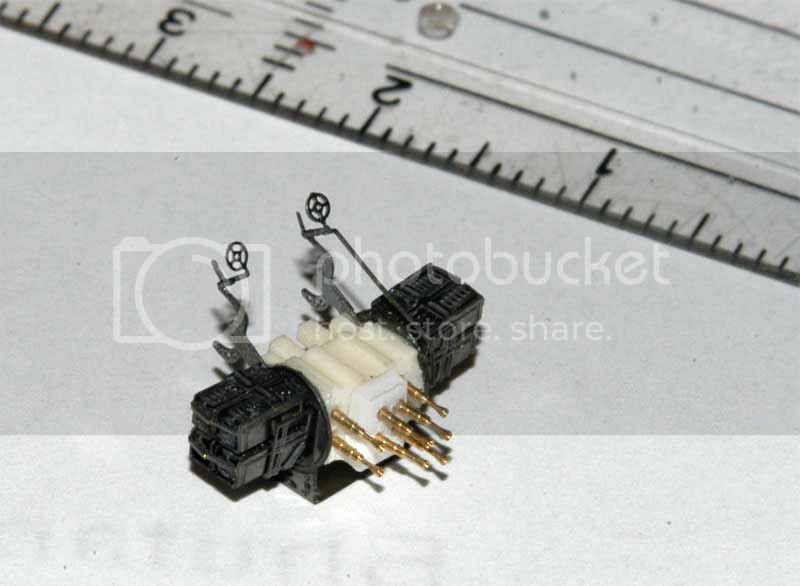
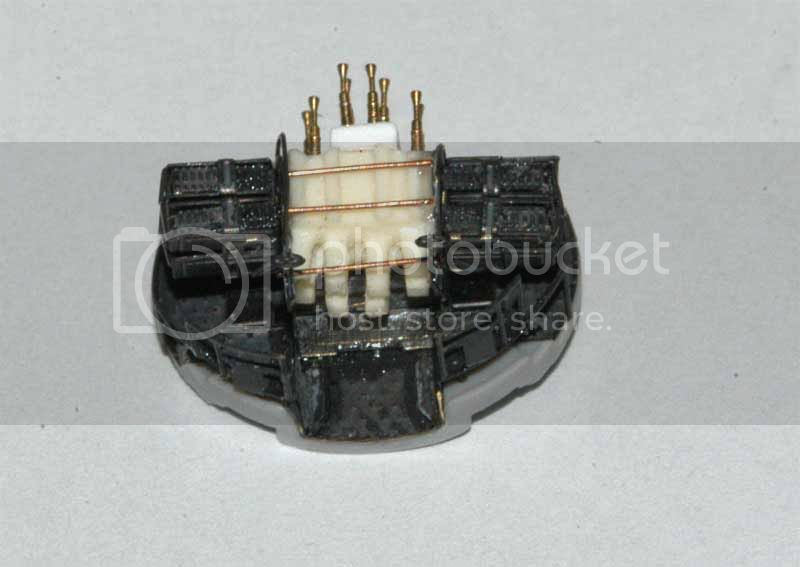
The guns without platform completed:


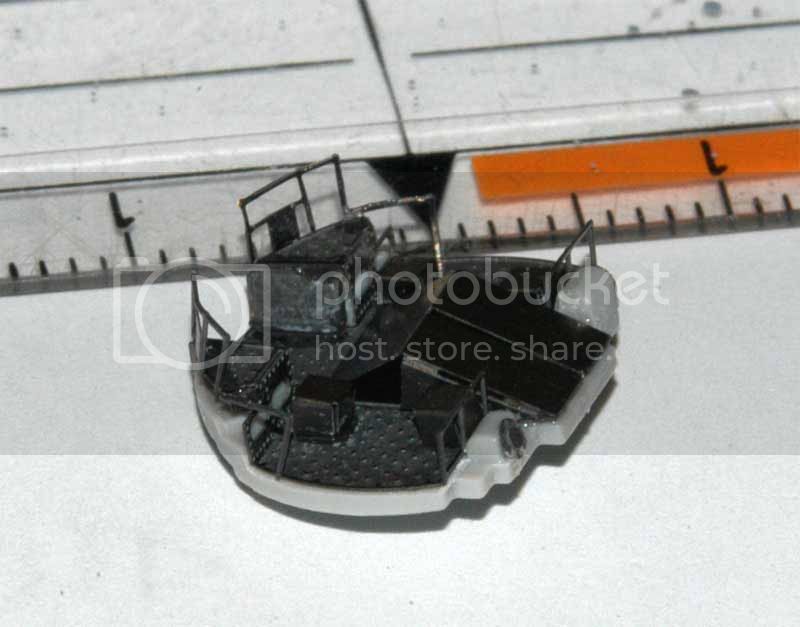
And finally all joined together:


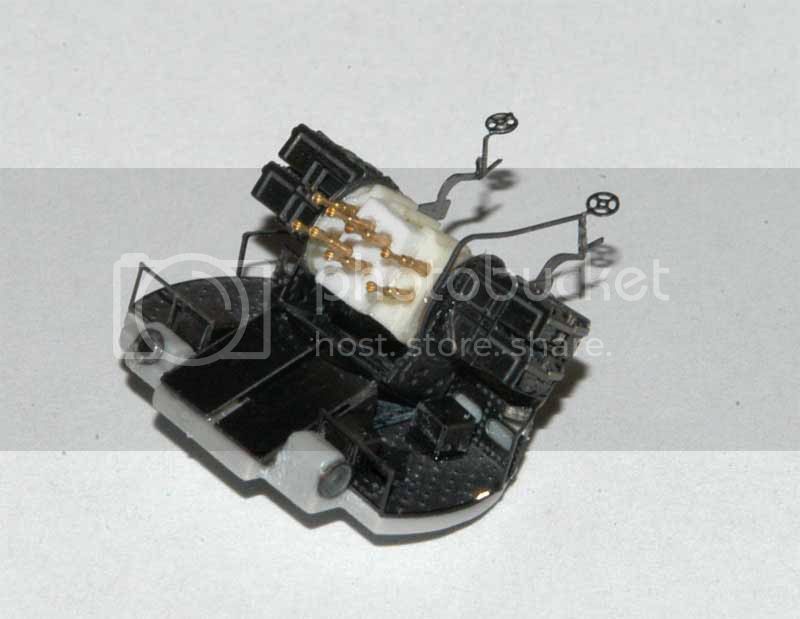
Some copper wire added:


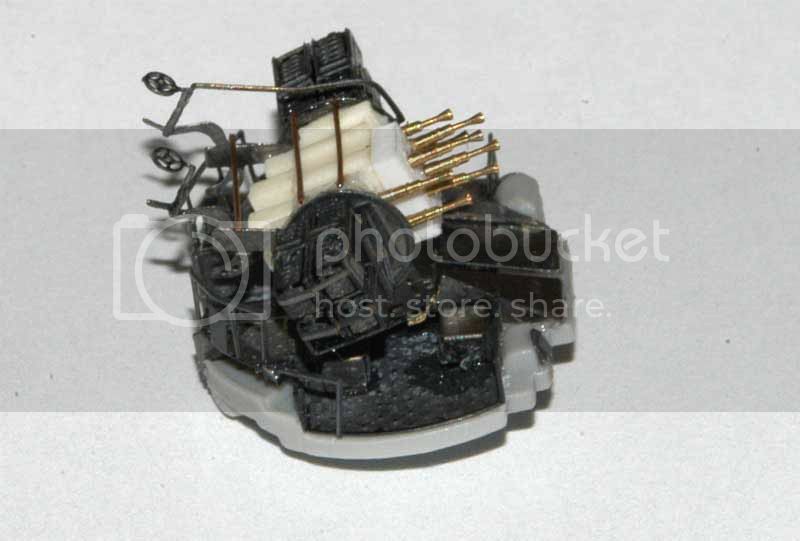
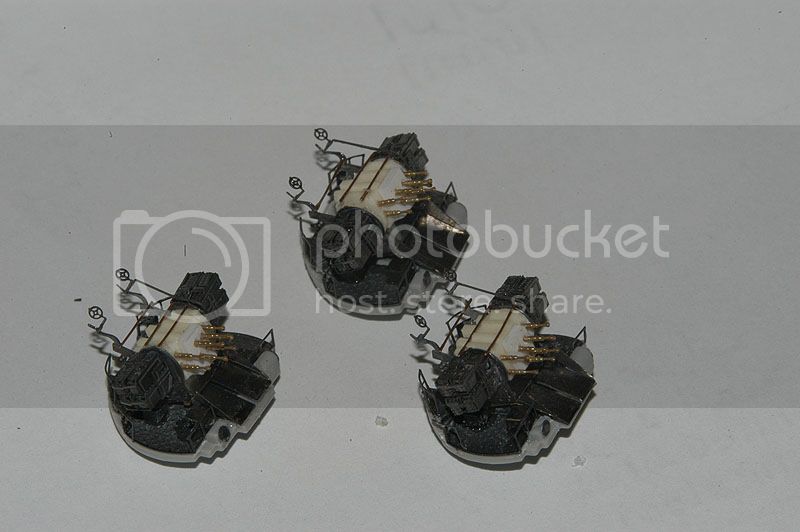
The Repulse's set of three:
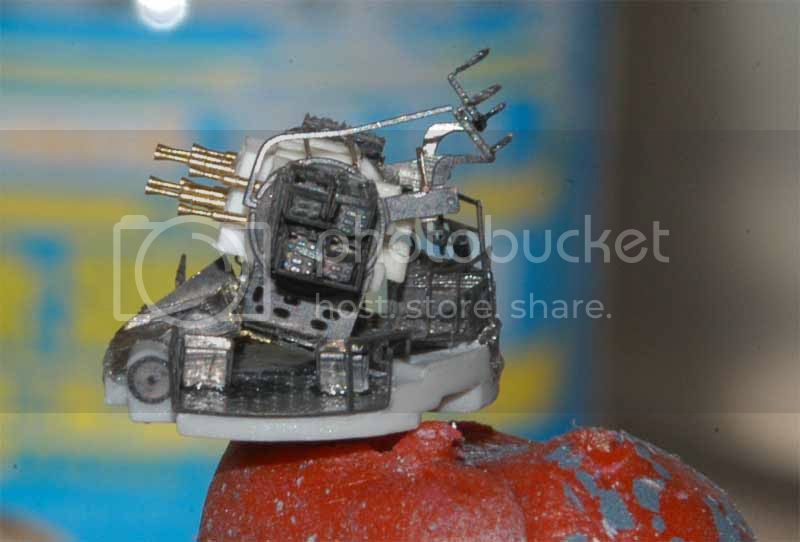
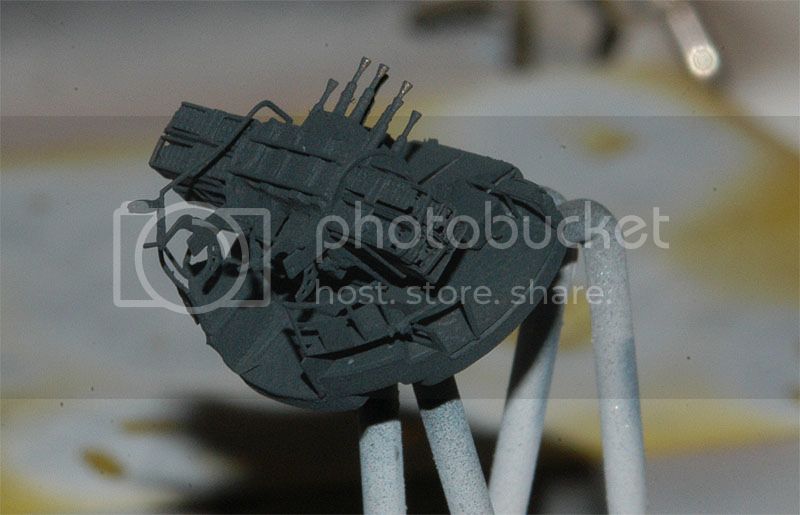


Painted in 507 a:


And one installed on the after superstructure:


Quite a lot of work, and to be honest, the first went into the trash - luckily material for four was provided (some Eduard parts I could sneak from a different kit where they would not be needed...), so I hope you like it!

Next update in a few days, thanks for looking in,

cheers,

Jan

Gremlin56
Joined: October 30, 2005
KitMaker: 3,897 posts
Model Shipwrights: 3,301 posts
Posted: Sunday, September 21, 2014 - 06:20 AM UTC
I just love the "fusion" pom-poms Jan,
excellent,
RedDuster
Visit this Community
England - South East, United Kingdom
Joined: March 01, 2010
KitMaker: 7,078 posts
Model Shipwrights: 6,649 posts
Posted: Sunday, September 21, 2014 - 10:12 AM UTC
Great job on the pompoms Jan, they look absolutely stunning

Si
LionsDen
Visit this Community
Minnesota, United States
Joined: June 28, 2013
KitMaker: 102 posts
Model Shipwrights: 38 posts
Posted: Monday, September 22, 2014 - 01:00 AM UTC
The signature of an outstanding modeler is when a weakness of the kit ends up as a strength on the finished product. This is exactly what you've done with the pom-pom Jan. Nicely done!
JJ1973
#345
Visit this Community
Niedersachsen, Germany
Joined: August 22, 2011
KitMaker: 1,835 posts
Model Shipwrights: 1,832 posts
Posted: Sunday, September 28, 2014 - 04:02 AM UTC
Thank you very much,
Julian, Si and Troy for your kind comments! That's highly appreciated and I apologize for not responding sooner - real life keeps my quite busy...

Here comes a brief update on the Repulse story, this time the .50 cal quad machine guns.

For those, a WEM kit is provided that I upgraded with Master barrels:


Again, the resin part reduced to the bare necessary and the holes for the barrels drilled out:


The four barrels inserted


And with the WEM brass parts added:


Four are needed:


...and painted:


The Oerlikons you can see in the background will be dealt with in a separate update...

These were much easier than expected, but I like them nevertheless.

Thanks for looking,

Cheers,
Jan


Fordboy
Visit this Community
Auckland, New Zealand
Joined: July 13, 2004
KitMaker: 2,169 posts
Model Shipwrights: 1,597 posts
Posted: Sunday, September 28, 2014 - 08:10 AM UTC
Ahoy Jan

Really nice work.

Please keep posting your updates.


Cheers


Sean
RedDuster
Visit this Community
England - South East, United Kingdom
Joined: March 01, 2010
KitMaker: 7,078 posts
Model Shipwrights: 6,649 posts
Posted: Sunday, September 28, 2014 - 08:10 AM UTC
No worries, Jan I have same problem too.

Great work on the quad 0.5", I bottled the master barrels on my HMS Marne build & I only had 2 to do, nice work on the 20mm too.

Si.
 _GOTOTOP