

Thank you Si!
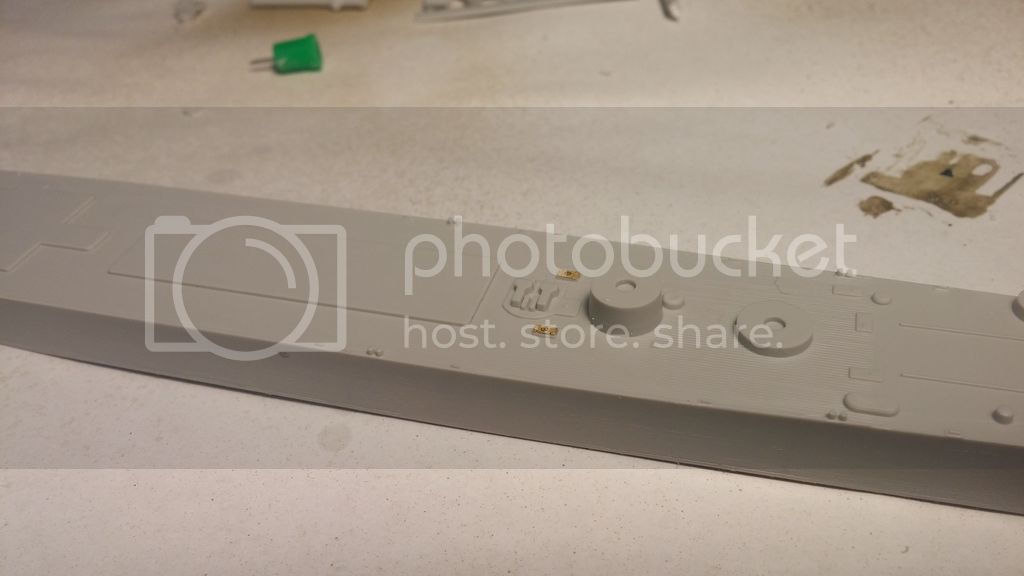
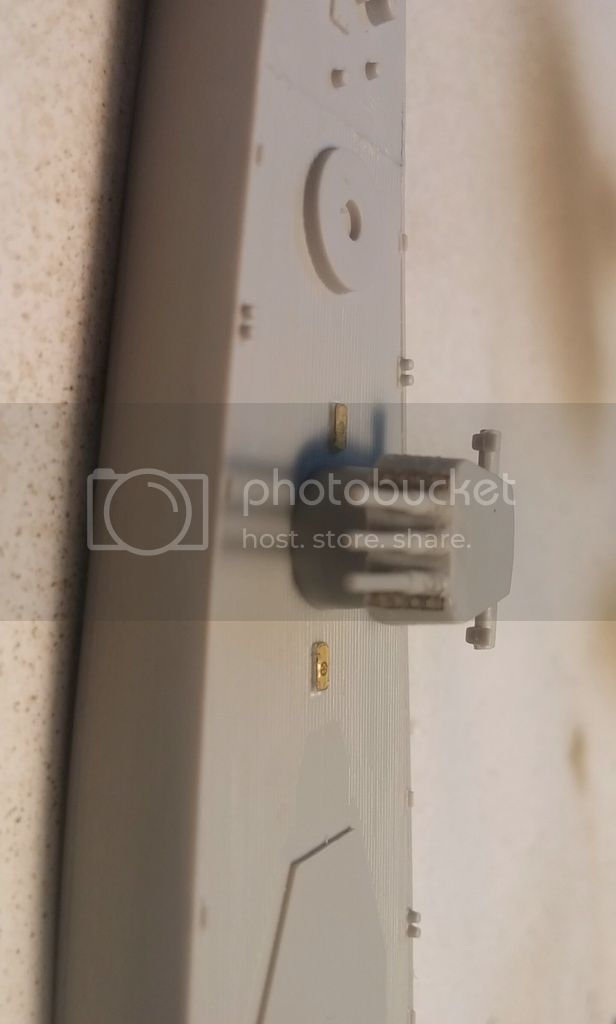
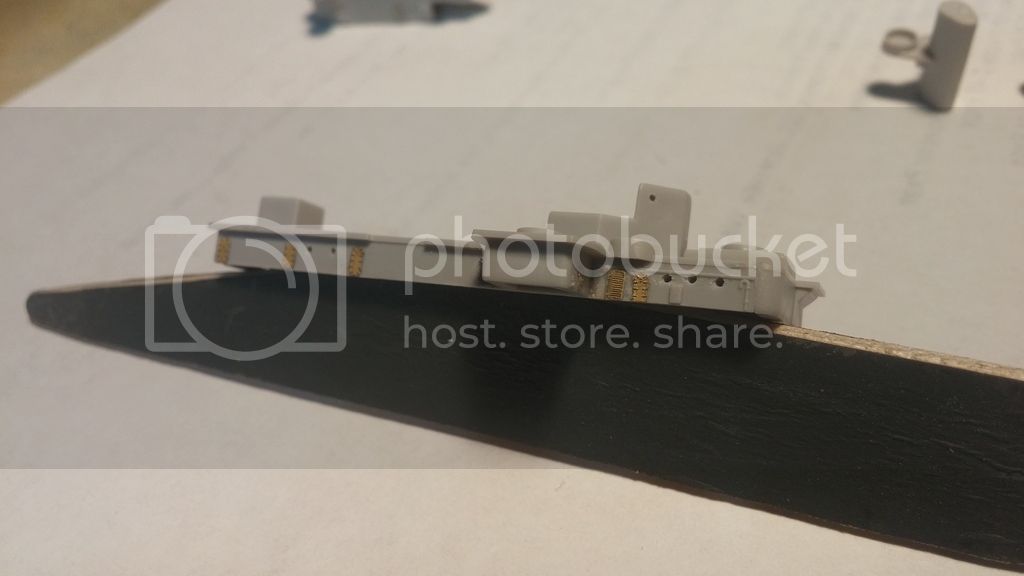
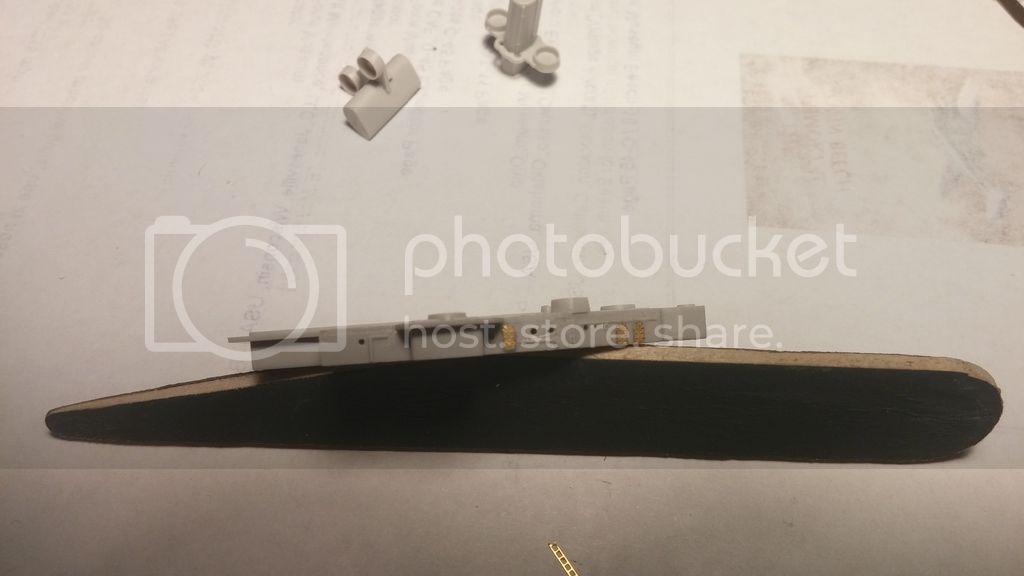
No, barrels don't go all the way through. The breeches are resin all right. Lots of fiddly parts... I am in the process of bringing up a bunch of pictures on the Belfast blog.
Cheers,
Jan


Go to modelshipwrights.com for the current dynamic site!
Campaigns
Want to be part of a group build? This is where to start, plan, and meet about them.
Want to be part of a group build? This is where to start, plan, and meet about them.
Hosted by Jim Starkweather
Official: Cruiser Campaign

JJ1973

#345

Joined: August 22, 2011
KitMaker: 1,835 posts
Model Shipwrights: 1,832 posts

Posted: Monday, January 11, 2016 - 01:37 AM UTC

RedDuster

Joined: March 01, 2010
KitMaker: 7,078 posts
Model Shipwrights: 6,649 posts

Posted: Monday, January 11, 2016 - 03:10 AM UTC
Thanks Jan,
I hope that does not show on the finished article.
Si
I hope that does not show on the finished article.
Si
JJ1973
#345
Joined: August 22, 2011
KitMaker: 1,835 posts
Model Shipwrights: 1,832 posts
Posted: Monday, January 11, 2016 - 10:03 AM UTC
Quoted Text
Thanks Jan,
I hope that does not show on the finished article.
Si
Good point Si - never thought about that.
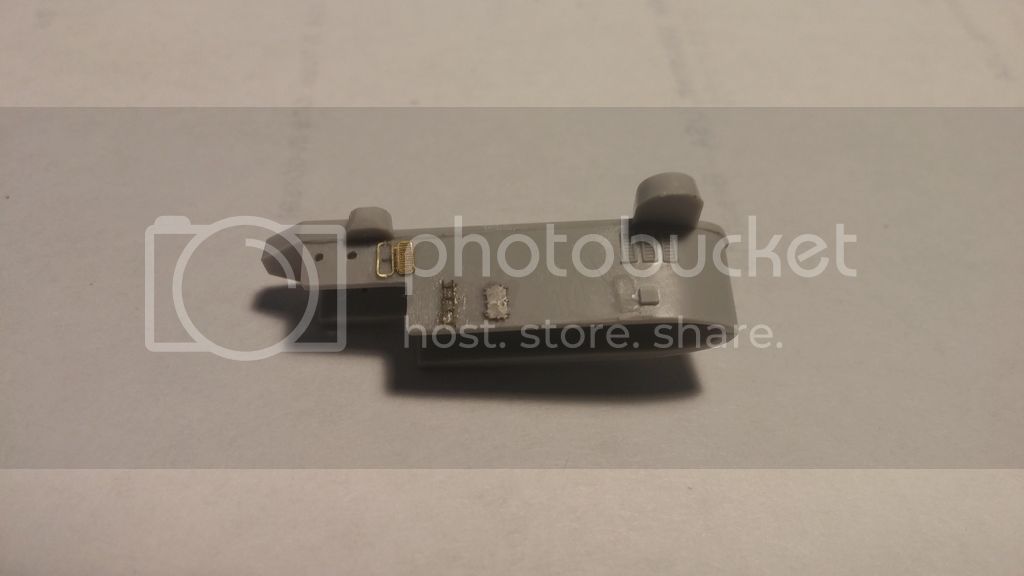
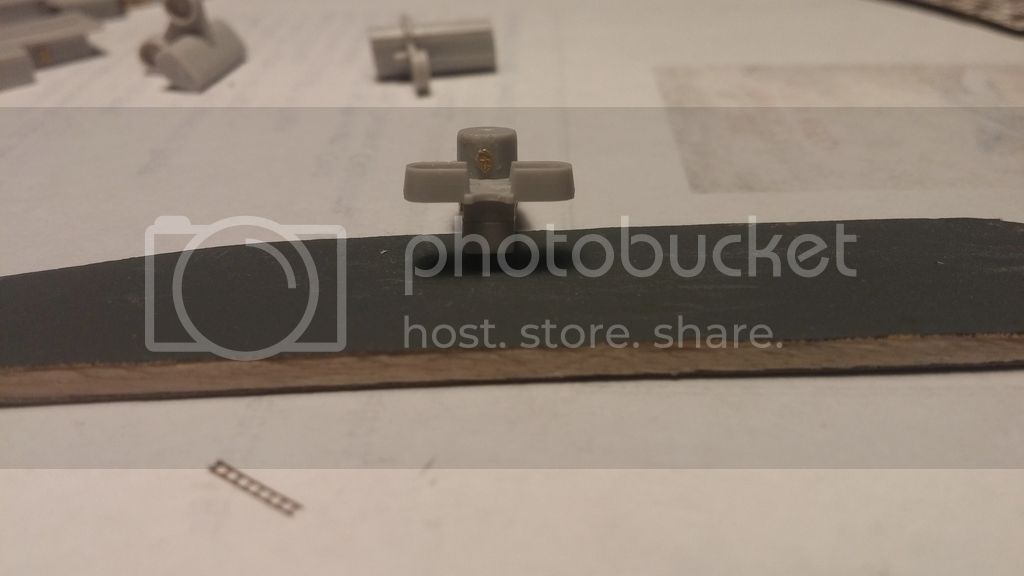
Well, I just checked. Show- no, in neither case (light or dark grey one). But, with a good light and my magnifier glasses on, knowing what to look for, yes - you can spot ist.
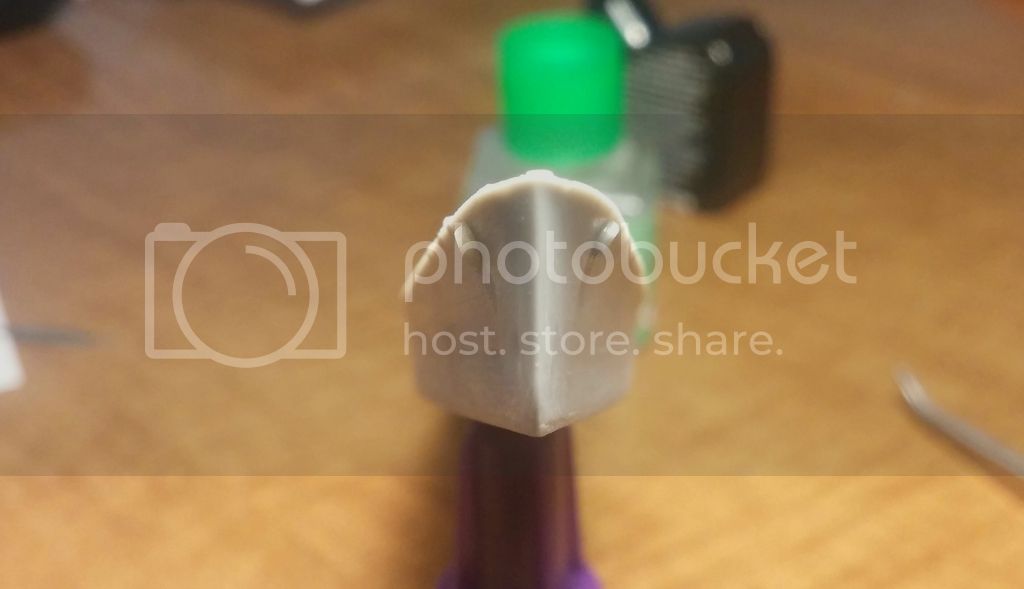
The dark one is a little easier to spot - the gold brass from inside the 'breech block' (how would you call it actually?) shines through. Good point, I will paint the inside before I bend it next time... Having those barrels go all the way through would have been a nice feature though...
Cheers,
Jan

Cosimodo
#335

Joined: September 03, 2013
KitMaker: 1,808 posts
Model Shipwrights: 871 posts

Posted: Monday, January 11, 2016 - 02:26 PM UTC
Jan and Si,
Great work on your guns. If your cruising for a fight always best to be well armed
cheers
Michael
Great work on your guns. If your cruising for a fight always best to be well armed
cheers
Michael
RedDuster
Joined: March 01, 2010
KitMaker: 7,078 posts
Model Shipwrights: 6,649 posts
Posted: Tuesday, January 12, 2016 - 12:28 AM UTC
Thanks Michael,
I pleased they are now on.
Interesting Jan, still shouldn't be too difficult to cure with some plastic or brass tube.
Reckon I am going to try and get my hands on some of those.
Cheers.
Si
I pleased they are now on.
Interesting Jan, still shouldn't be too difficult to cure with some plastic or brass tube.
Reckon I am going to try and get my hands on some of those.
Cheers.
Si

rolltide31
#377

Joined: June 27, 2010
KitMaker: 1,481 posts
Model Shipwrights: 1,332 posts

Posted: Wednesday, January 13, 2016 - 07:14 AM UTC
Si, Great work on the armament. Your Scharnhorst looks like he is ready to put some steel on target.
Jan, Thank you for bringing that company to our attention. From the sounds of it they are good quality AM kits.
Dave
Jan, Thank you for bringing that company to our attention. From the sounds of it they are good quality AM kits.
Dave
RedDuster
Joined: March 01, 2010
KitMaker: 7,078 posts
Model Shipwrights: 6,649 posts
Posted: Thursday, January 14, 2016 - 01:05 AM UTC
Thanks Dave,
She is starting to come to life now she has tooled up.
Cheers.
Si
She is starting to come to life now she has tooled up.
Cheers.
Si
MikeyBugs95
Joined: May 27, 2013
KitMaker: 2,210 posts
Model Shipwrights: 83 posts

Posted: Thursday, January 14, 2016 - 01:09 PM UTC
WOW! Great work here! I wish I saw this earlier I would've enlisted right away when I just started my 1/700 "sorta-super" detailed Cleveland build. If I can I'd like to enlist with that. It's probably 25-40% finished in the building stage.
RedDuster
Joined: March 01, 2010
KitMaker: 7,078 posts
Model Shipwrights: 6,649 posts
Posted: Thursday, January 14, 2016 - 01:27 PM UTC
Hi Michael,
That is fine, the rules of this campaign allow started builds.
You would be very welcome.
Cheers
Si
That is fine, the rules of this campaign allow started builds.
You would be very welcome.
Cheers
Si
MikeyBugs95
Joined: May 27, 2013
KitMaker: 2,210 posts
Model Shipwrights: 83 posts
Posted: Thursday, January 14, 2016 - 02:13 PM UTC
Thank you. I guess I'll pretty much just copy/paste my first post of the blog with additions here and the latest update:
I will be "sorta-super" detailing the Midship Models 1/700 USS Miami. I read somewhere that you "can't really consider a build" super detailed" without a wood deck and, well, I don't have one. But I also don't really consider this a superdetailing build either way. In terms of markings and painting, I plan on building the kit as the USS Miami CL-89 as she appeared in 1945 in Measure 22 Graded.
I will be using the Gold Medal Models USN Cruisers and Destroyers set, Tom's Modelworks Inclined Ladders, White Ensign Models Doors and Hatches and some sets from 3D Model Parts, specifically the 40mm quad and dual Bofors mounts, 20mm Oerlikons, the 5in/38 turrets and Mk37 and Mk51 directors. I have a set of Verlinden figures as well but I'm not sure if I will use them. I also had to buy another set of doors and hatches (meant for Japanese ships) because I almost ran out of usable doors from the USN set. Now onto the work so far...
Addendum: Since the original post I have also added Lionroar's Radar Set, Boat Davits and Anchors and Cable Holes set along with FStar's USN Doors and hatches. I also have a few pieces from an Alliance Modelworks Woban class tug that I'm using here. I might be forgetting a set... I will soon be adding even more to this. Below is snippets of the original post with updated details.
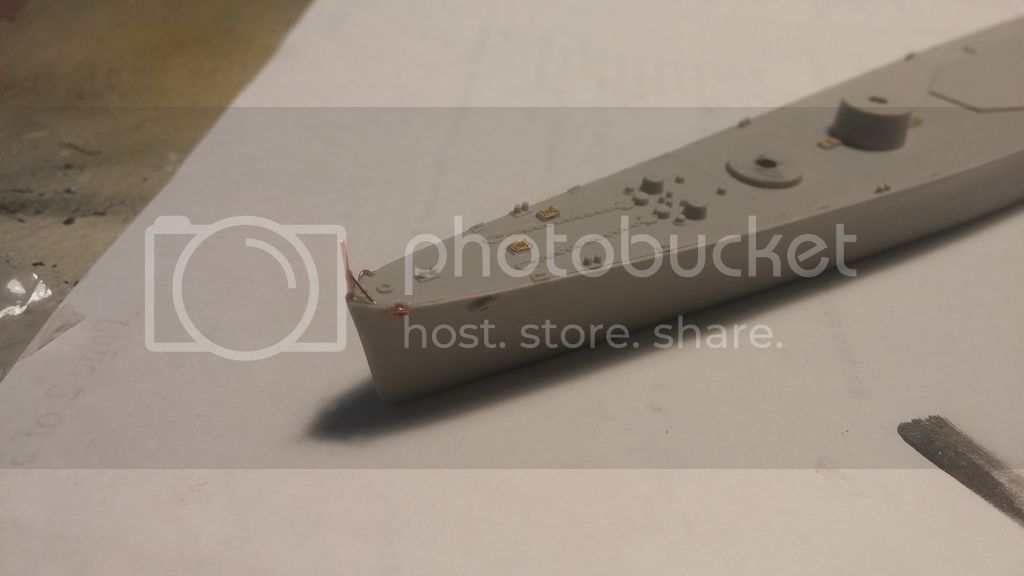
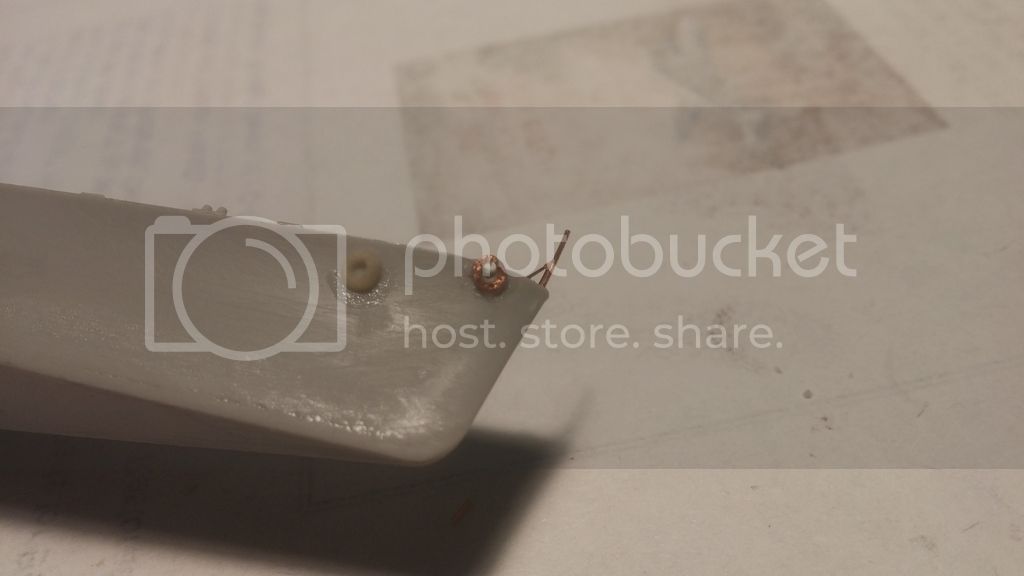
I'll let the pictures speak for themselves but here's the captionated version. I've replaced, and in some places added doors, hatches and ladders. I've also added ladders to 2 of the turrets where necessary (front for the 1 and 2 turrets and starboard side for the #2 as per some pictures) and I also cut and placed those circular extrusions on the turret sides. I plan on eventually adding some 40mm and 20mm ammo bins as well if I can find the correct placement. The 7th picture is a hawsepipe I made from a piece of sprue. I've since made a second with dental acrylic resin. I've now also made a 3D drawing an uploaded it to Shapeways. I've made cable holes on the bow from thin wire rolled around a medium-small sized drill bit and then using that bit, I drilled out the holes. I drilled out the hawsepipes holes and scraped off the molded on anchor chain. One catapult has been built along with the crane from the GMM set. The kit attachment point for the kit crane has been removed and sanded flat. On pictures of the ships I noticed a ring around the barbette for the #2 and 3 turrets. This I added along with a ladder extending from the ring to the base of the turret. I've just recently replaced asl the molded on "chocks," which were just little bumps, with the Lionroar chocks. I made the bow flagpole out of wire. Done early on was the drilling out of all visible (that I can find I mean) portholes. I tried thinning down some of the splinter shields but I haven't had much luck in doing so. I will leave them be for now. I've detailed the kit Kingfisher a little by adding wires for the struts. I also attached one funnel grill cap. A few of the 3D Model Parts parts have been assembled. But only 2 or 3. I've also cleaned up some holes and filled some dents and other small deformities. Still a long way to go.


More recent pictures with hawsepipes, kingfisher and flag pole/forecastle:


Note: none of these pictures represent the current state of the kit. The most up-to-date is the last one. But since then I drilled out the hawsepipes, removed the flagpole for safe keeping and replaced those two hatches, among other changes.
Apologies for the long post. I guess I just had a lot of catching up.
I will be "sorta-super" detailing the Midship Models 1/700 USS Miami. I read somewhere that you "can't really consider a build" super detailed" without a wood deck and, well, I don't have one.
But I also don't really consider this a superdetailing build either way. In terms of markings and painting, I plan on building the kit as the USS Miami CL-89 as she appeared in 1945 in Measure 22 Graded. I will be using the Gold Medal Models USN Cruisers and Destroyers set, Tom's Modelworks Inclined Ladders, White Ensign Models Doors and Hatches and some sets from 3D Model Parts, specifically the 40mm quad and dual Bofors mounts, 20mm Oerlikons, the 5in/38 turrets and Mk37 and Mk51 directors. I have a set of Verlinden figures as well but I'm not sure if I will use them. I also had to buy another set of doors and hatches (meant for Japanese ships) because I almost ran out of usable doors from the USN set. Now onto the work so far...
Addendum: Since the original post I have also added Lionroar's Radar Set, Boat Davits and Anchors and Cable Holes set along with FStar's USN Doors and hatches. I also have a few pieces from an Alliance Modelworks Woban class tug that I'm using here. I might be forgetting a set... I will soon be adding even more to this. Below is snippets of the original post with updated details.
I'll let the pictures speak for themselves but here's the captionated version. I've replaced, and in some places added doors, hatches and ladders. I've also added ladders to 2 of the turrets where necessary (front for the 1 and 2 turrets and starboard side for the #2 as per some pictures) and I also cut and placed those circular extrusions on the turret sides. I plan on eventually adding some 40mm and 20mm ammo bins as well if I can find the correct placement. The 7th picture is a hawsepipe I made from a piece of sprue. I've since made a second with dental acrylic resin. I've now also made a 3D drawing an uploaded it to Shapeways. I've made cable holes on the bow from thin wire rolled around a medium-small sized drill bit and then using that bit, I drilled out the holes. I drilled out the hawsepipes holes and scraped off the molded on anchor chain. One catapult has been built along with the crane from the GMM set. The kit attachment point for the kit crane has been removed and sanded flat. On pictures of the ships I noticed a ring around the barbette for the #2 and 3 turrets. This I added along with a ladder extending from the ring to the base of the turret. I've just recently replaced asl the molded on "chocks," which were just little bumps, with the Lionroar chocks. I made the bow flagpole out of wire. Done early on was the drilling out of all visible (that I can find I mean) portholes. I tried thinning down some of the splinter shields but I haven't had much luck in doing so. I will leave them be for now. I've detailed the kit Kingfisher a little by adding wires for the struts. I also attached one funnel grill cap. A few of the 3D Model Parts parts have been assembled. But only 2 or 3. I've also cleaned up some holes and filled some dents and other small deformities. Still a long way to go.
More recent pictures with hawsepipes, kingfisher and flag pole/forecastle:
Note: none of these pictures represent the current state of the kit. The most up-to-date is the last one. But since then I drilled out the hawsepipes, removed the flagpole for safe keeping and replaced those two hatches, among other changes.
Apologies for the long post. I guess I just had a lot of catching up.
RedDuster
Joined: March 01, 2010
KitMaker: 7,078 posts
Model Shipwrights: 6,649 posts
Posted: Thursday, January 14, 2016 - 02:29 PM UTC
No worries Mike,
Great looking build, very nice etch work, welcome aboard.
Could you pls nip over the Campaigns tab at the top of the page and enlist, (select the cruiser campaign, and click on the enlist button).
many thanks
Si
Great looking build, very nice etch work, welcome aboard.
Could you pls nip over the Campaigns tab at the top of the page and enlist, (select the cruiser campaign, and click on the enlist button).
many thanks
Si
MikeyBugs95
Joined: May 27, 2013
KitMaker: 2,210 posts
Model Shipwrights: 83 posts
Posted: Friday, January 15, 2016 - 01:46 AM UTC
Yep. I enlisted. I also got one of the supports for the boat davits up.
RedDuster
Joined: March 01, 2010
KitMaker: 7,078 posts
Model Shipwrights: 6,649 posts
Posted: Friday, January 15, 2016 - 03:53 AM UTC
Excellent Michael,
Properly welcome aboard.
Si
Properly welcome aboard.
Si

Cadeus
Joined: September 01, 2015
KitMaker: 144 posts
Model Shipwrights: 139 posts

Posted: Friday, January 15, 2016 - 06:39 AM UTC
Well here goes nothing. The 1/350 Academy USS Indianapolis (deluxe edition). This kit was started awhile ago and has made its way back to the bench. While im not in the realm of some of these builds i hope to do her justice. Has been a fun build so far albeit has tested my patience at times. Now on to official business.
Cadeus
Joined: September 01, 2015
KitMaker: 144 posts
Model Shipwrights: 139 posts
Posted: Friday, January 15, 2016 - 06:40 AM UTC

Cadeus
Joined: September 01, 2015
KitMaker: 144 posts
Model Shipwrights: 139 posts
Posted: Friday, January 15, 2016 - 06:49 AM UTC


There are a bunch more build photos to my facebook and anyone that wants to see can add me to there. Its a pain to add photos from my phone because at the moment its all i have. Thanks for allowing me to join this campaign.

GrantGoodale

Joined: April 26, 2015
KitMaker: 99 posts
Model Shipwrights: 99 posts

Posted: Friday, January 15, 2016 - 07:23 AM UTC
Nice work. Thanks for sharing
GrantGoodale
Joined: April 26, 2015
KitMaker: 99 posts
Model Shipwrights: 99 posts
Posted: Friday, January 15, 2016 - 07:24 AM UTC
Very nice photo-etch work. I am envious.
Cadeus
Joined: September 01, 2015
KitMaker: 144 posts
Model Shipwrights: 139 posts
Posted: Friday, January 15, 2016 - 07:29 AM UTC
My phone hides the imperfections. Thanks for the kind comments. Im still learning.
Cosimodo
#335
Joined: September 03, 2013
KitMaker: 1,808 posts
Model Shipwrights: 871 posts
Posted: Friday, January 15, 2016 - 02:15 PM UTC
Hi Norman,
Looks like a very start to the Miami. Interestingly, those main turrets look like they should house much bigger guns than 6".
cheers
Michael
Looks like a very start to the Miami. Interestingly, those main turrets look like they should house much bigger guns than 6".
cheers
Michael
MikeyBugs95
Joined: May 27, 2013
KitMaker: 2,210 posts
Model Shipwrights: 83 posts
Posted: Friday, January 15, 2016 - 09:15 PM UTC
Quoted Text
Hi Norman,
Looks like a very start to the Miami. Interestingly, those main turrets look like they should house much bigger guns than 6".
cheers
Michael
Norman's doing an Indianapolis. I'm doing the Miami. Lol

Cadeus
Joined: September 01, 2015
KitMaker: 144 posts
Model Shipwrights: 139 posts
Posted: Friday, January 15, 2016 - 09:22 PM UTC
Yes, im doing the CA-35. I live 15 minutes from indianapolis so its a special build to me. The indy had 8" guns on her. And i highly recommend this build to anyone. The fit is impressive.
RedDuster
Joined: March 01, 2010
KitMaker: 7,078 posts
Model Shipwrights: 6,649 posts
Posted: Friday, January 15, 2016 - 10:50 PM UTC
Hi Norman,
Very nice work on the Indy, looking very good indeed.
Will be looking forward to seeing her come on.
Cheers.
Si
Very nice work on the Indy, looking very good indeed.
Will be looking forward to seeing her come on.
Cheers.
Si
Cosimodo
#335
Joined: September 03, 2013
KitMaker: 1,808 posts
Model Shipwrights: 871 posts
Posted: Sunday, January 17, 2016 - 07:39 AM UTC
Quoted Text
Quoted TextHi Norman,
Looks like a very start to the Miami. Interestingly, those main turrets look like they should house much bigger guns than 6".
cheers
Michael
Norman's doing an Indianapolis. I'm doing the Miami. Lol
Apologies to you both. I obviously completely lost the thread there
cheers
Michael
Cadeus
Joined: September 01, 2015
KitMaker: 144 posts
Model Shipwrights: 139 posts
Posted: Wednesday, January 20, 2016 - 07:00 AM UTC
Small update here. Mostly painting is going on. The deck blue takes multiple coats. Indecided to go the hairy stick route and with how thin the enamel paint is im regretting it. Also mocked up the bridge assembly to see how to tackle it. And this is one amazing fitting puzzle. The fit is great but the parts are tricky. On to the two pictures i have this evening. Waiting on paint to dry.


 |

WEB HOSTING BY


Copyright ©2021 Model Shipwrights and Kitmaker Network, a subsidiary of Silver Star Enterprises
All Rights Reserved. Please read our Conditions of Use and Privacy Policy.
All Rights Reserved. Please read our Conditions of Use and Privacy Policy.