


Go to modelshipwrights.com for the current dynamic site!
Campaigns
Want to be part of a group build? This is where to start, plan, and meet about them.
Want to be part of a group build? This is where to start, plan, and meet about them.
Hosted by Jim Starkweather
Official: Silent Service Campaign

RussellE

#306

Joined: June 27, 2010
KitMaker: 3,959 posts
Model Shipwrights: 2,777 posts

Posted: Friday, April 29, 2016 - 03:01 PM UTC
What a great idea Jeff


Littorio

Joined: September 15, 2004
KitMaker: 4,728 posts
Model Shipwrights: 1,080 posts

Posted: Thursday, May 05, 2016 - 03:17 PM UTC
Some nice work going on here from all the guys.
On to my entry, it's the ICM 1/144 Typ IIB 1943 U-boat oob

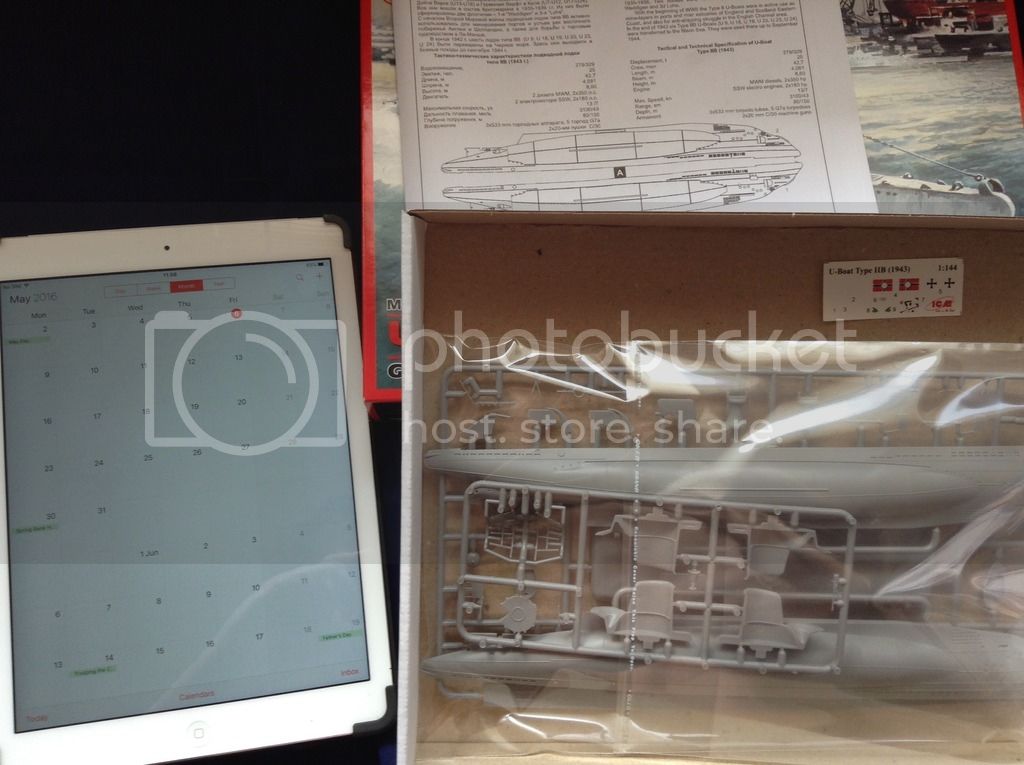
I'll start work on it tonight at my local club meet.
On to my entry, it's the ICM 1/144 Typ IIB 1943 U-boat oob


I'll start work on it tonight at my local club meet.


JJ1973
#345

Joined: August 22, 2011
KitMaker: 1,835 posts
Model Shipwrights: 1,832 posts
Posted: Saturday, May 07, 2016 - 10:23 PM UTC
Nice project, Luciano!!
Russ, thank you very much for your hint with the knife, mate!! That's really working fine - I did this to clean plastic, but for some reason have never tried it on putty, I don't know why...
The toothbrush is a nice idea, as well - might try something similar.
As for my little sub, weather was way to fair to get a big update. So I was fighting the seam line with Russ' knife method. First approach:
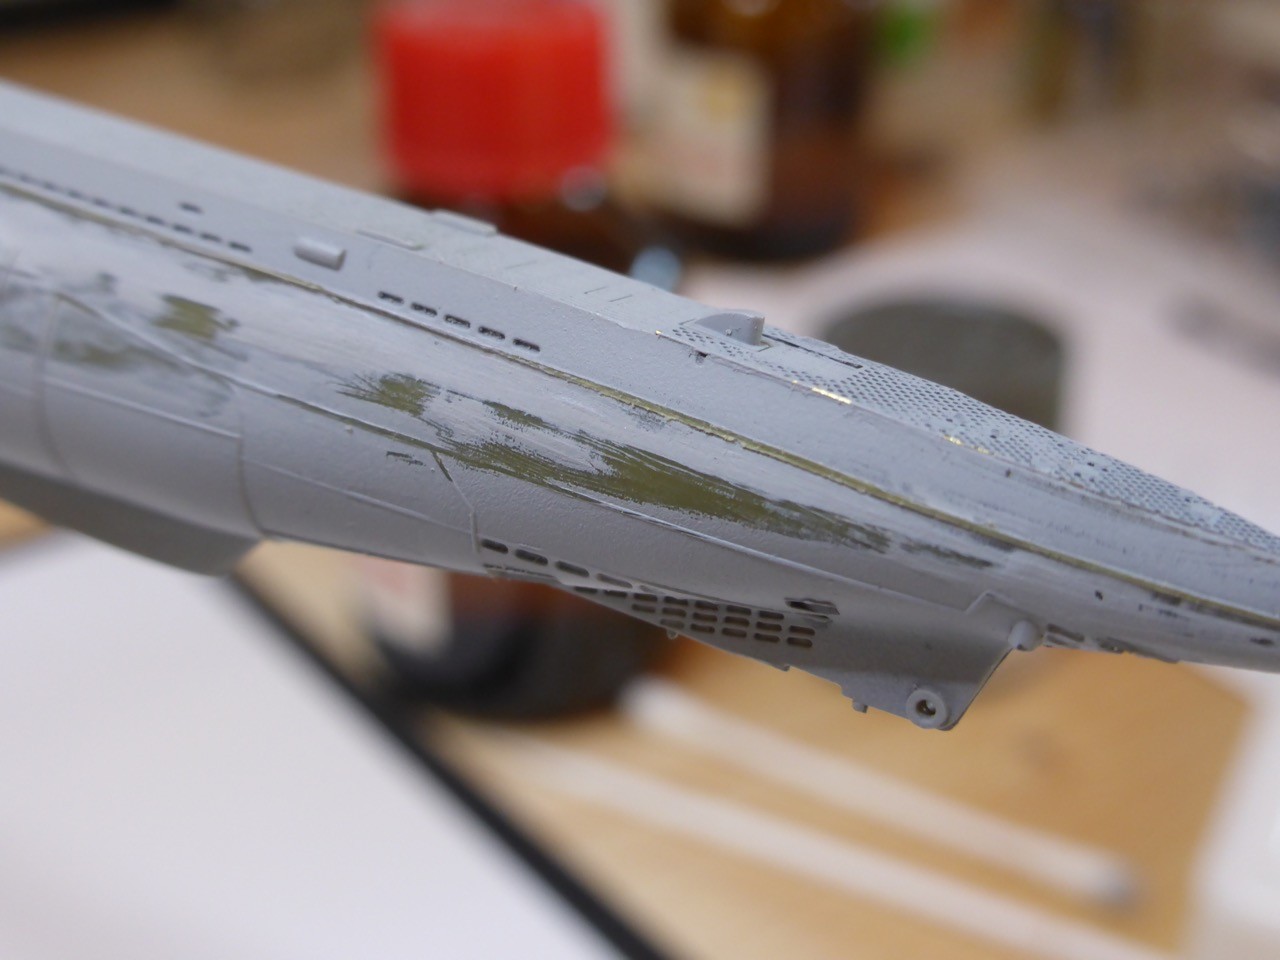
Another layer of Mr. Surfacer 500
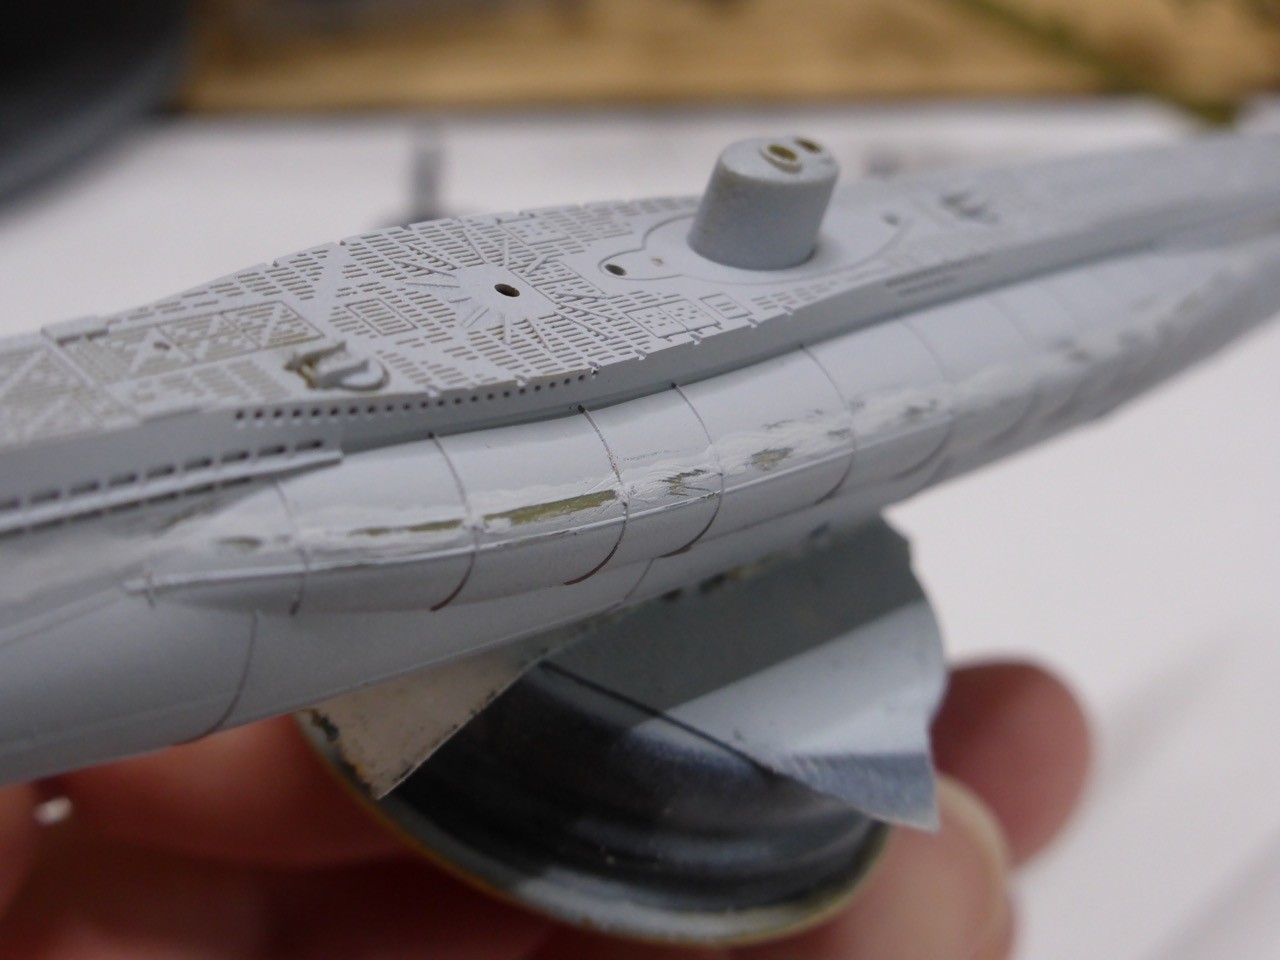
More 'knife-sanding'
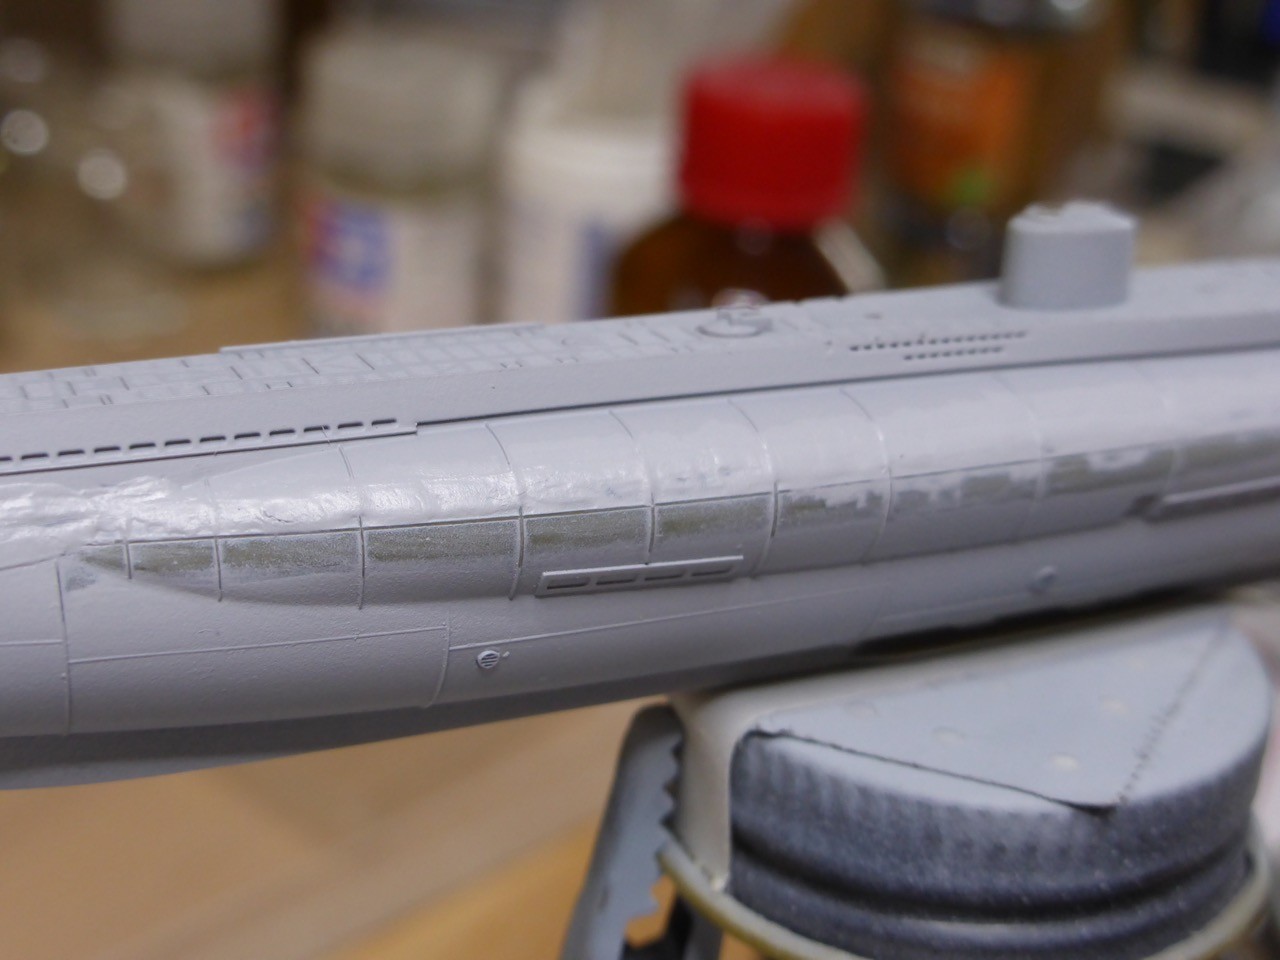
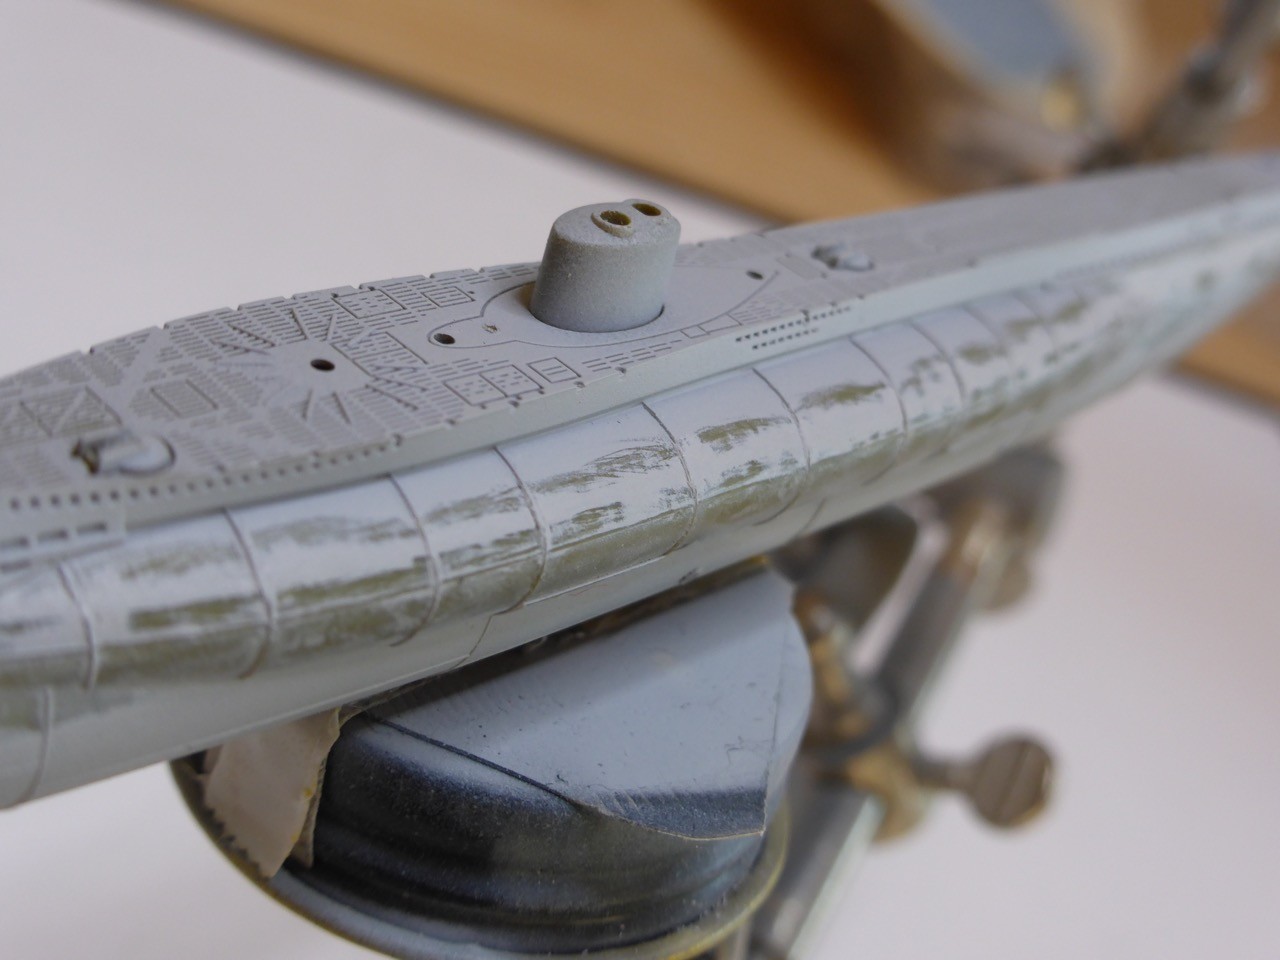
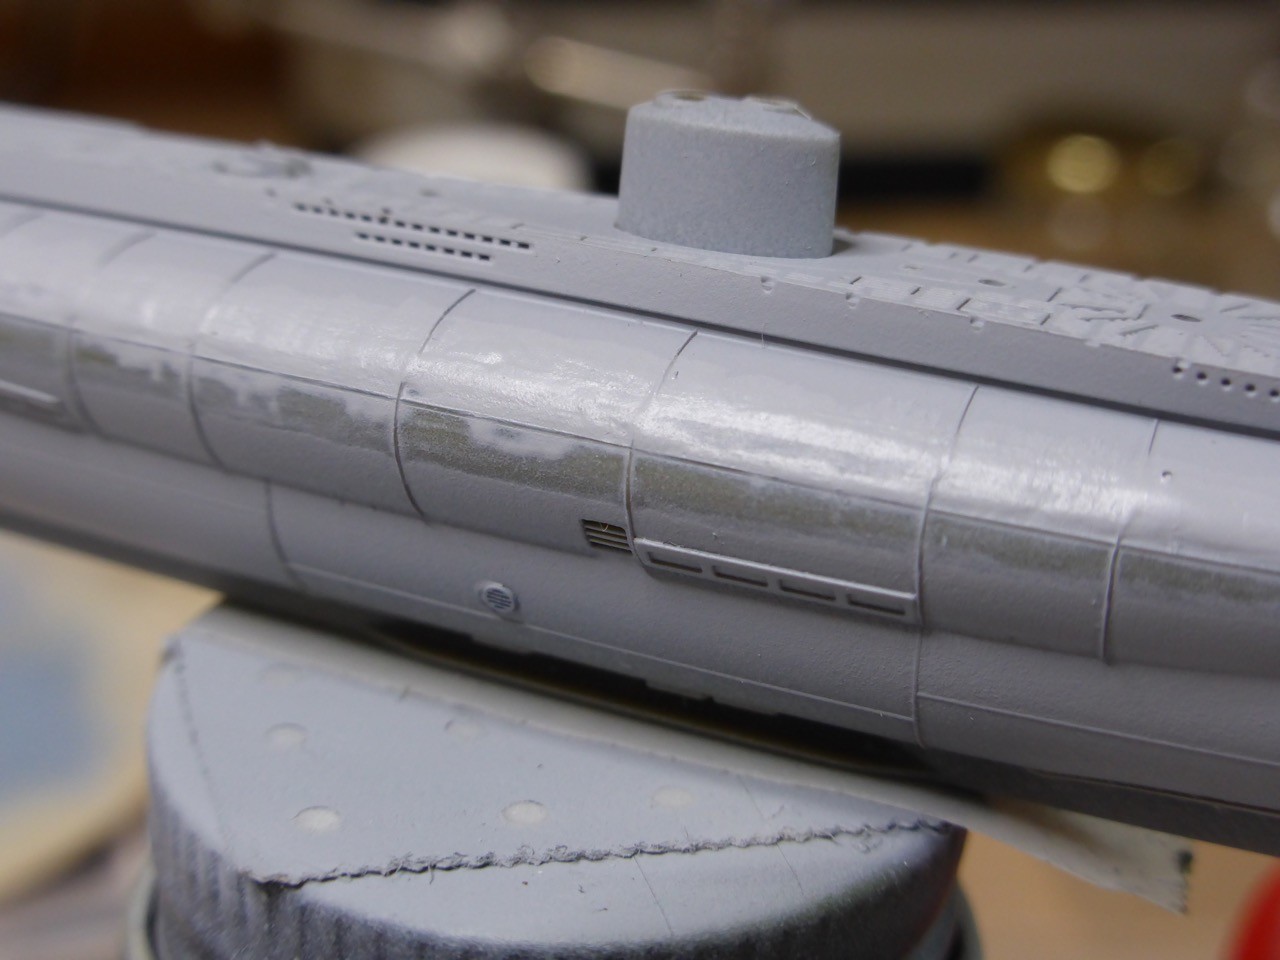
And more surfacer - one more time sanding and surfacer required at least, but I think that should do the job. Looks a little weathered - so I will probably use some washes in the end and don't do a 'museum-style'.
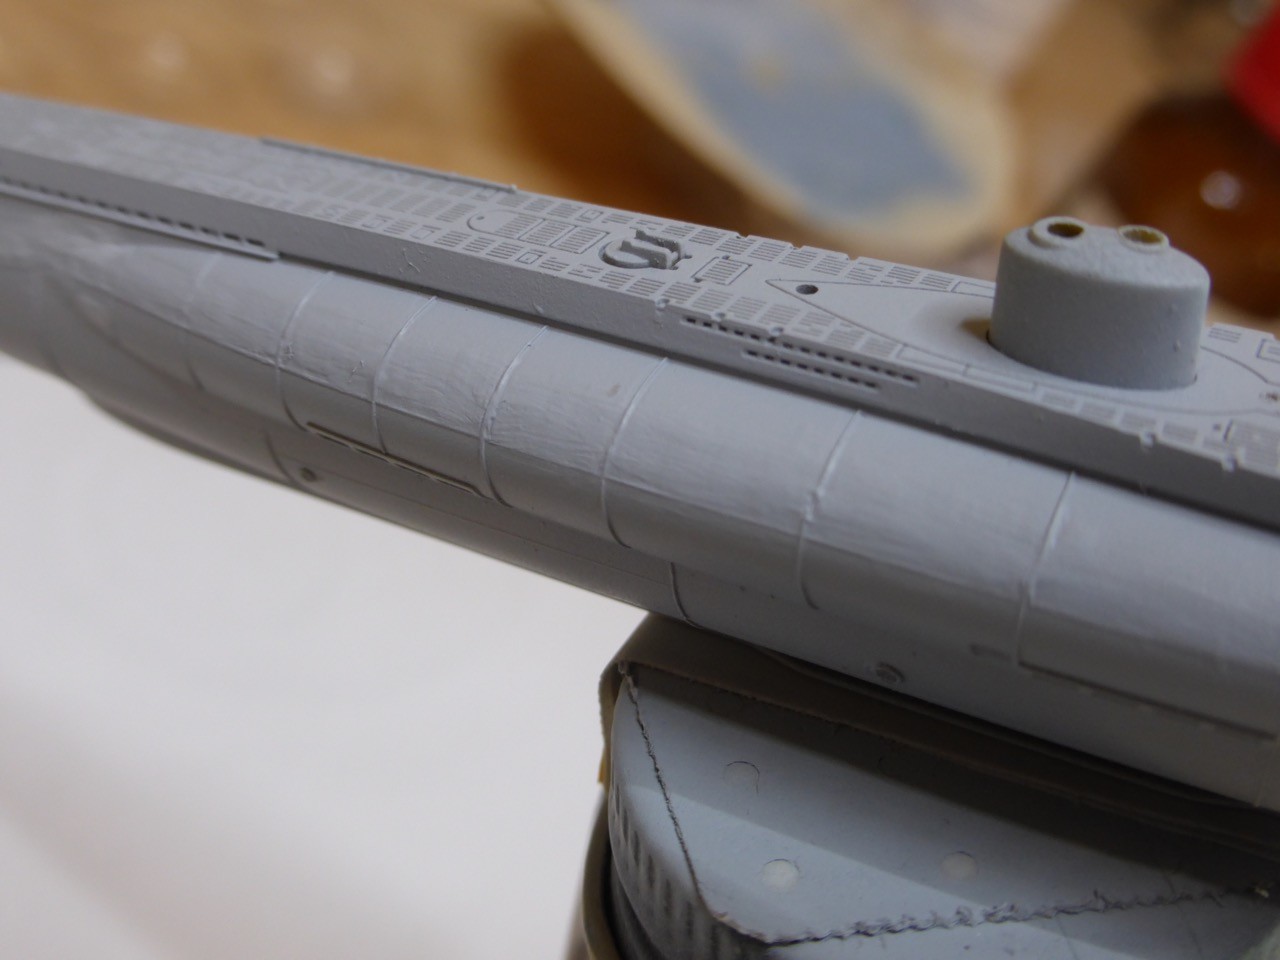
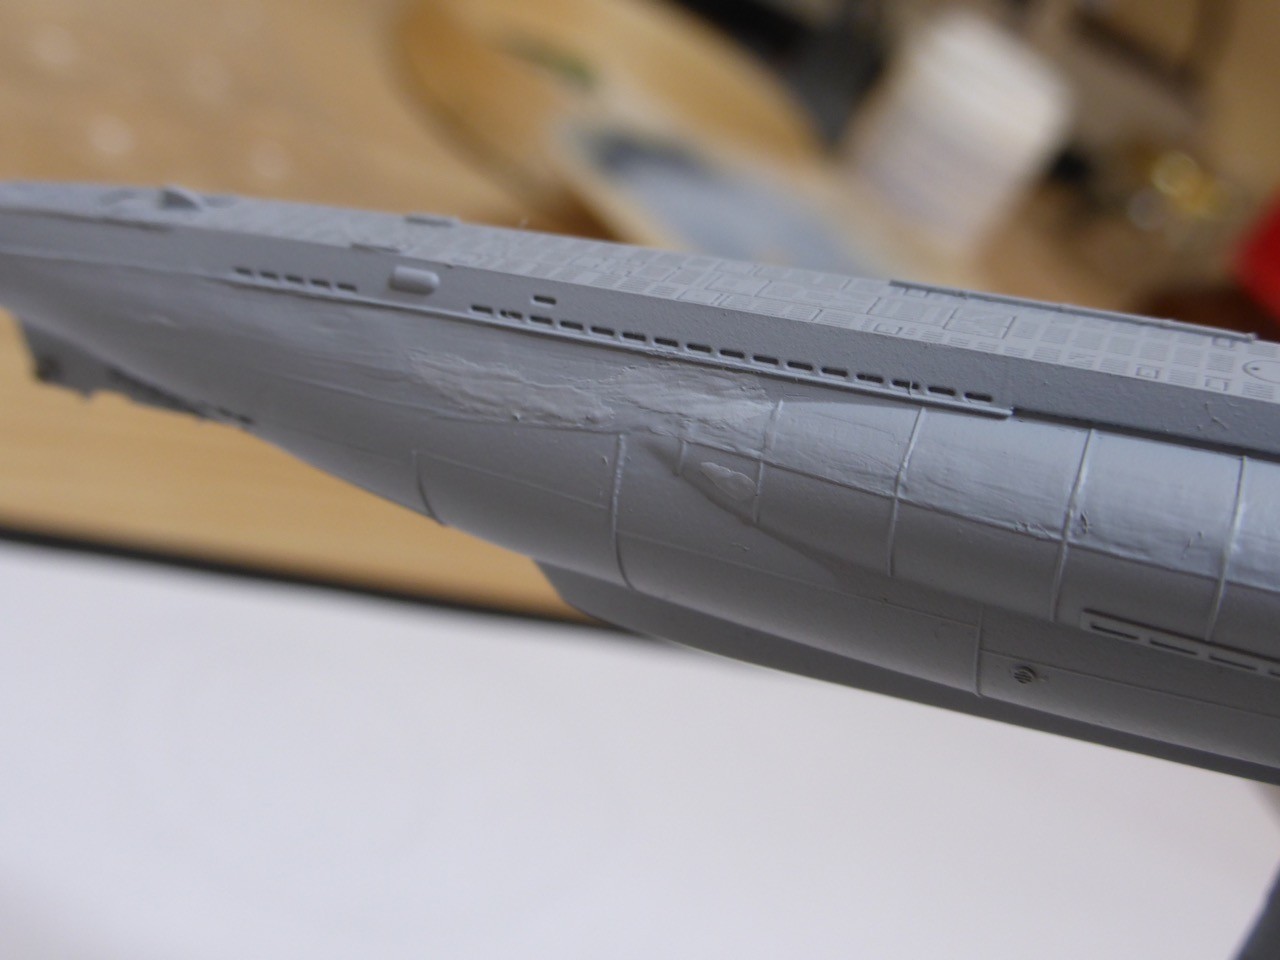
More rain coming up, forecast ist rain for the next weekend - that should help with the sub...
Cheers,
Jan
Russ, thank you very much for your hint with the knife, mate!! That's really working fine - I did this to clean plastic, but for some reason have never tried it on putty, I don't know why...
The toothbrush is a nice idea, as well - might try something similar.
As for my little sub, weather was way to fair to get a big update. So I was fighting the seam line with Russ' knife method. First approach:
Another layer of Mr. Surfacer 500
More 'knife-sanding'
And more surfacer - one more time sanding and surfacer required at least, but I think that should do the job. Looks a little weathered - so I will probably use some washes in the end and don't do a 'museum-style'.
More rain coming up, forecast ist rain for the next weekend - that should help with the sub...
Cheers,
Jan
Littorio
Joined: September 15, 2004
KitMaker: 4,728 posts
Model Shipwrights: 1,080 posts
Posted: Sunday, May 08, 2016 - 12:42 AM UTC
Thanks Jan and that's sure an interesting build you have going.
Well no progress at the club night as they had a talk on the battle of the Boyne, however this afternoon when I got home from work I made a start. So hull and conning tower put together, next stage will be clean up and filler before I get to the detail stuff. I'll be ordering some Northstar figures to give this sub a bit of life and a wood base will replace the plastic one once paint hits the hull.
He will be finished as U-23


RussellE
#306
Joined: June 27, 2010
KitMaker: 3,959 posts
Model Shipwrights: 2,777 posts
Posted: Sunday, May 08, 2016 - 02:48 AM UTC
Quoted Text
Nice project, Luciano!!
Russ, thank you very much for your hint with the knife, mate!! That's really working fine - I did this to clean plastic, but for some reason have never tried it on putty, I don't know why...
The toothbrush is a nice idea, as well - might try something similar.
As for my little sub, weather was way to fair to get a big update. So I was fighting the seam line with Russ' knife method. First approach:
Another layer of Mr. Surfacer 500
More 'knife-sanding'
And more surfacer - one more time sanding and surfacer required at least, but I think that should do the job. Looks a little weathered - so I will probably use some washes in the end and don't do a 'museum-style'.
More rain coming up, forecast ist rain for the next weekend - that should help with the sub...
Cheers,
Jan
Great progress there Jan
It's an odd thing to wish for more rain on the weekend, but if helps get more bench time, then I'm all for it 

A good start Luciano, looks like a nice little kit.

JJ1973
#345
Joined: August 22, 2011
KitMaker: 1,835 posts
Model Shipwrights: 1,832 posts
Posted: Sunday, May 08, 2016 - 09:25 AM UTC
Quoted Text
Great progress there Jan
Well...not exactly wishing for rain over the weekend
but you know what I mean! 


Littorio
Joined: September 15, 2004
KitMaker: 4,728 posts
Model Shipwrights: 1,080 posts
Posted: Thursday, May 12, 2016 - 10:07 PM UTC
A little progress, the main filler has been applied and sanded down, a few detail parts added and a little filler around the conning tower which will be left for 24 hours to set.
Two issues with the kit, the 2cm AA guns should have two hand wheels on each pedestal but you only get two total in the kit and only two are shown on the sprue layout, the other thing is there are only enough shoulder supports for one of the AA guns. Looks like ICM added the updated conning tower to the early version along with other bits but forgot the extra bits for the second AA gun with the exception of the gun and pedestal.
Two issues with the kit, the 2cm AA guns should have two hand wheels on each pedestal but you only get two total in the kit and only two are shown on the sprue layout, the other thing is there are only enough shoulder supports for one of the AA guns. Looks like ICM added the updated conning tower to the early version along with other bits but forgot the extra bits for the second AA gun with the exception of the gun and pedestal.


BoiseBlade

#523

Joined: February 28, 2014
KitMaker: 342 posts
Model Shipwrights: 38 posts

Posted: Saturday, May 14, 2016 - 09:33 AM UTC
Well I finished the inside wiring and after struggling with getting the fiber optics right I scrapped that part.
I added the bridge and its figures inside.
I closed up the main hull and I am continuing work on the Sail.
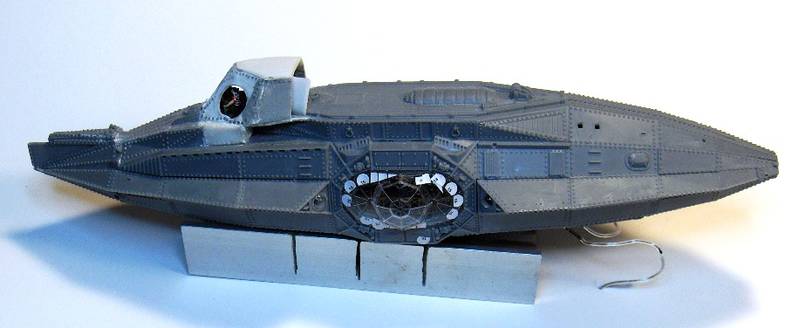
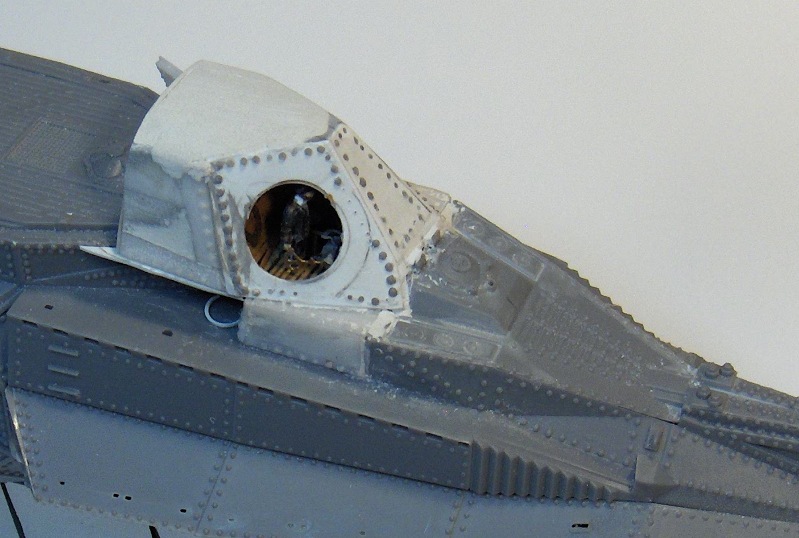
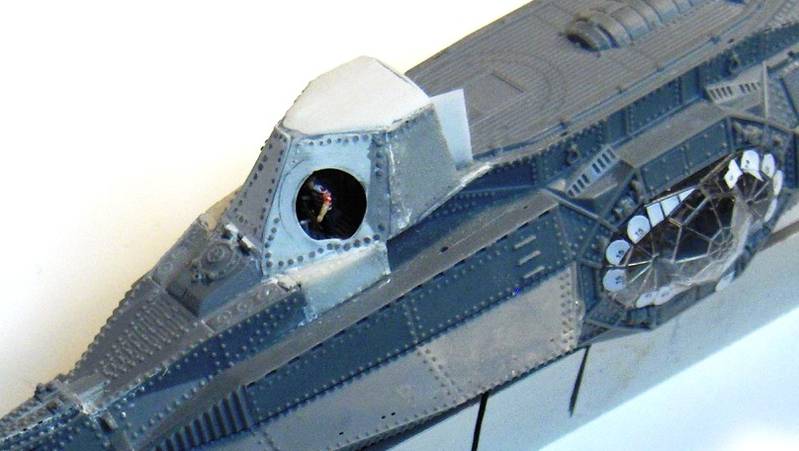
I added the bridge and its figures inside.
I closed up the main hull and I am continuing work on the Sail.
JJ1973
#345
Joined: August 22, 2011
KitMaker: 1,835 posts
Model Shipwrights: 1,832 posts
Posted: Sunday, May 15, 2016 - 10:44 PM UTC
Nice work going on, on the type II as well as on the Nautilus!! 
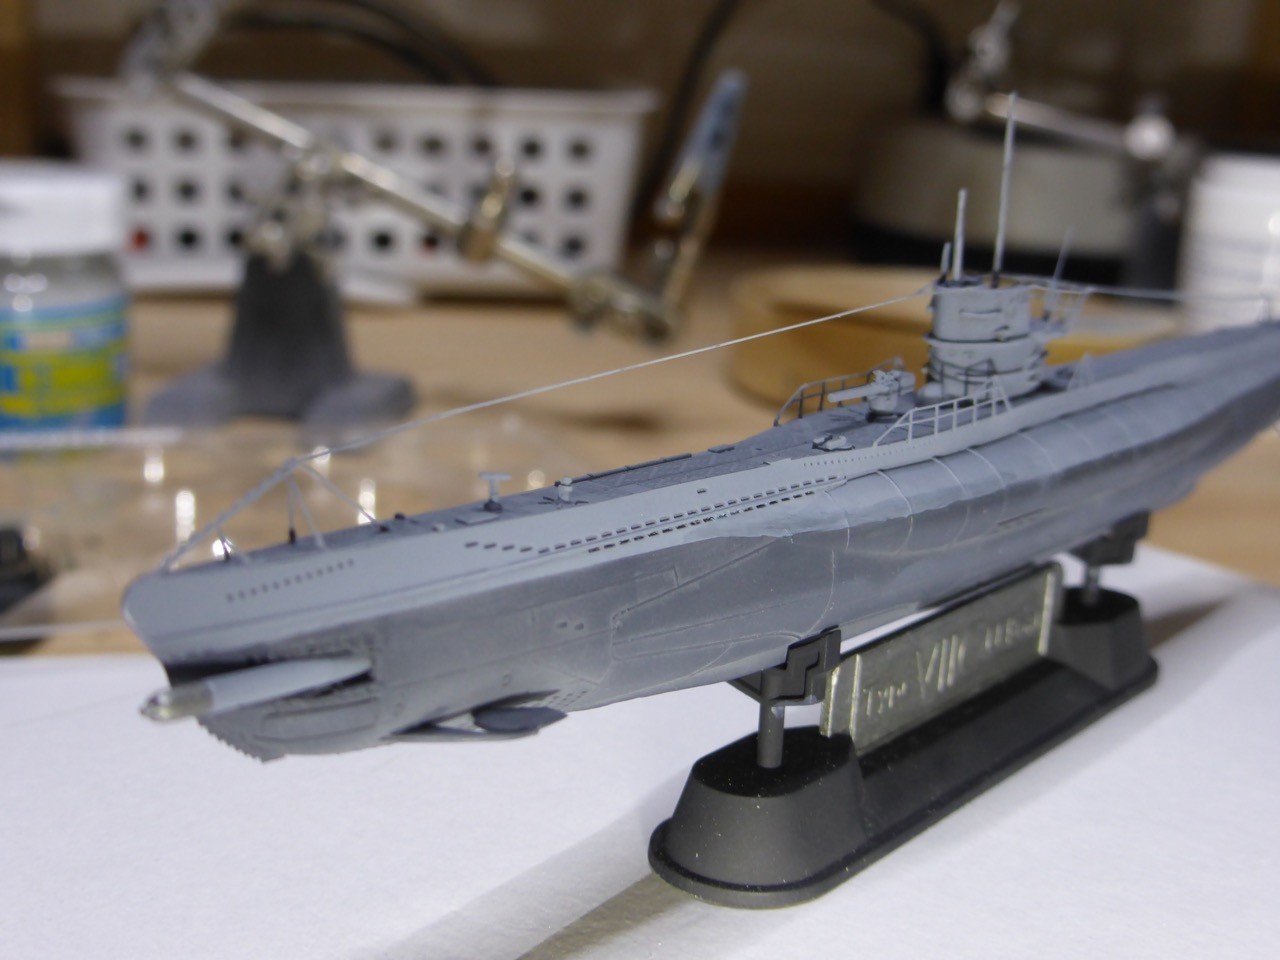
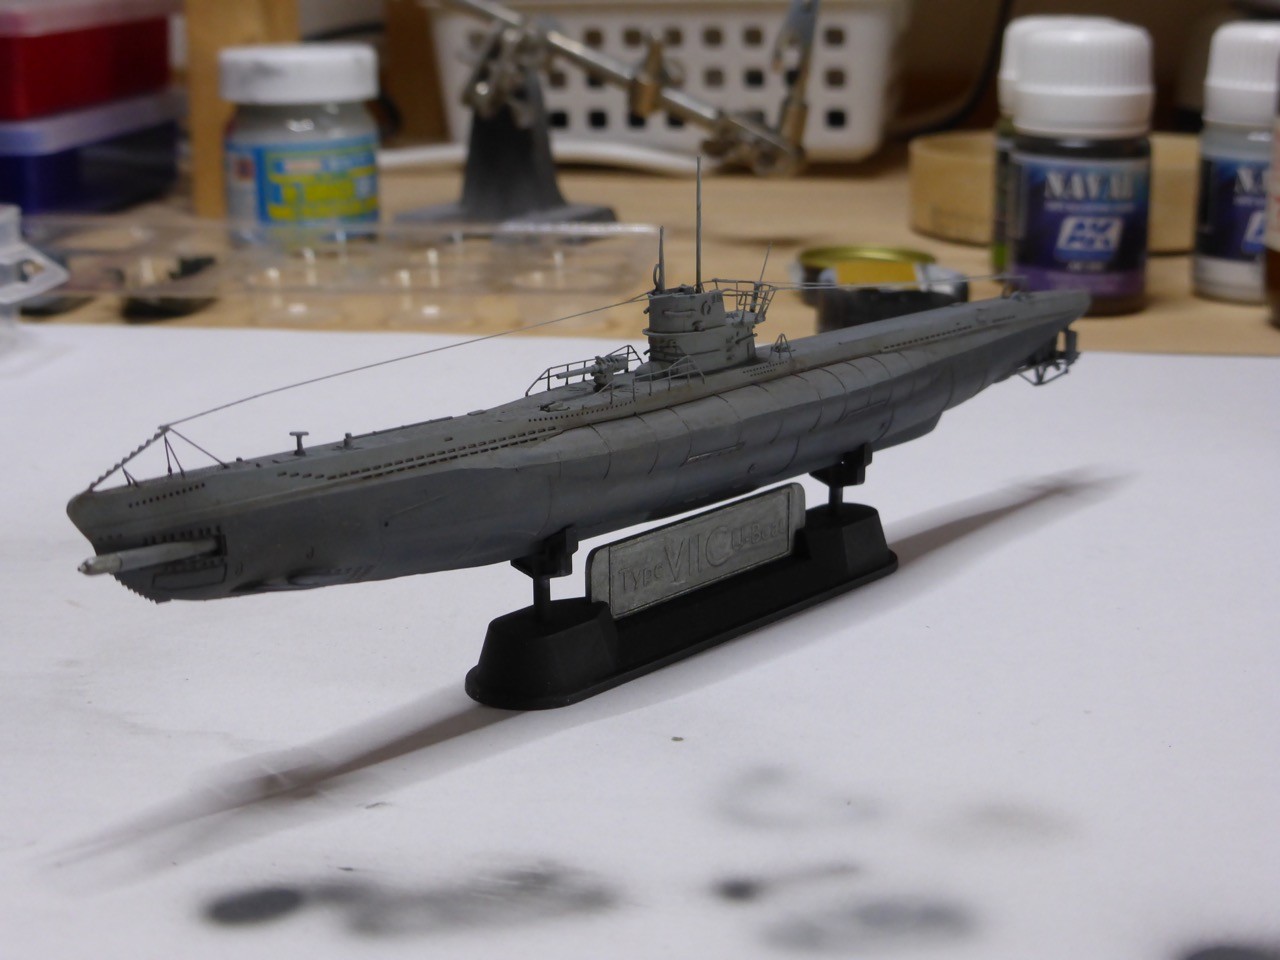
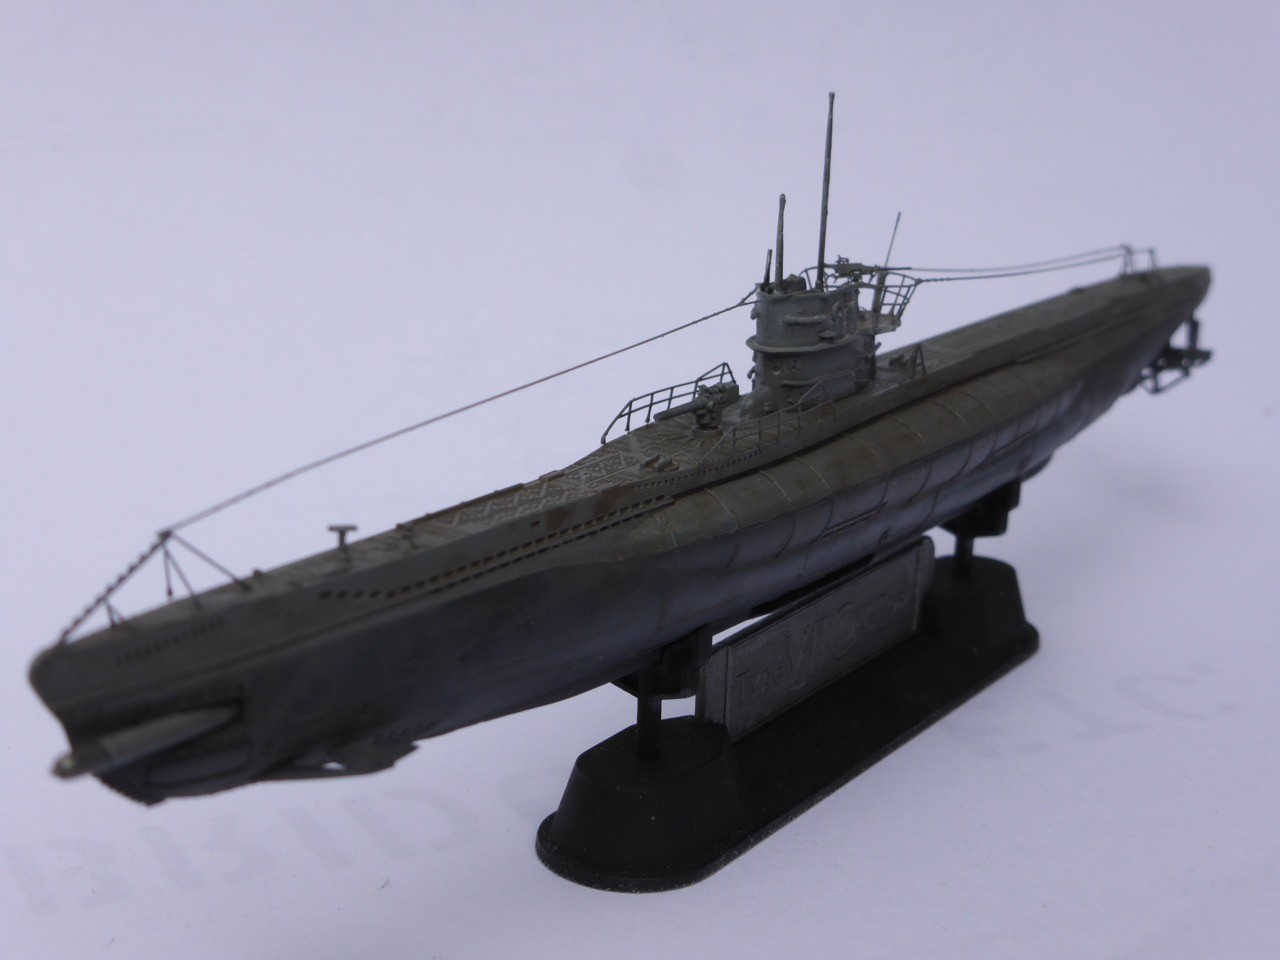
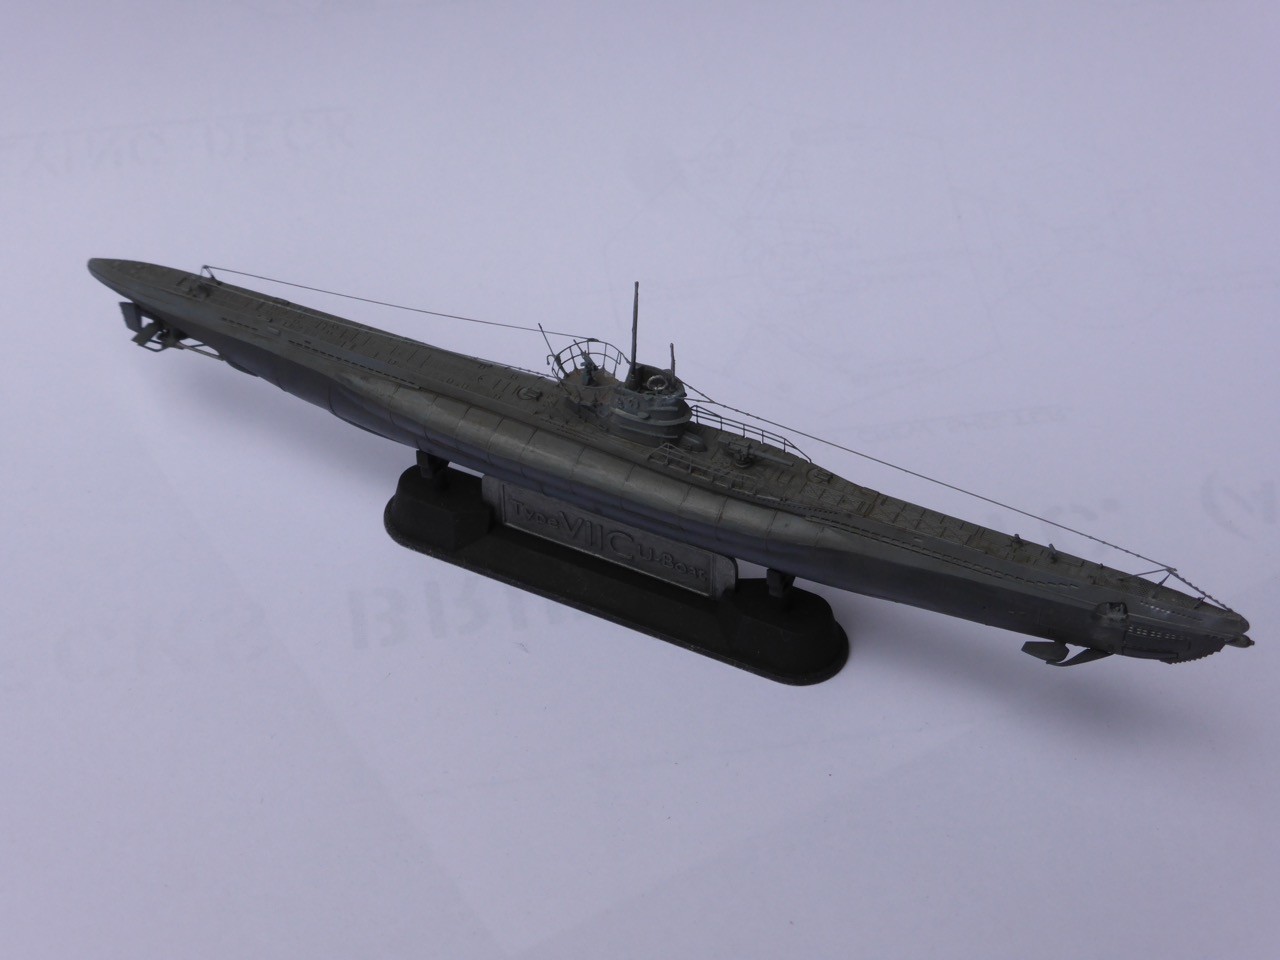
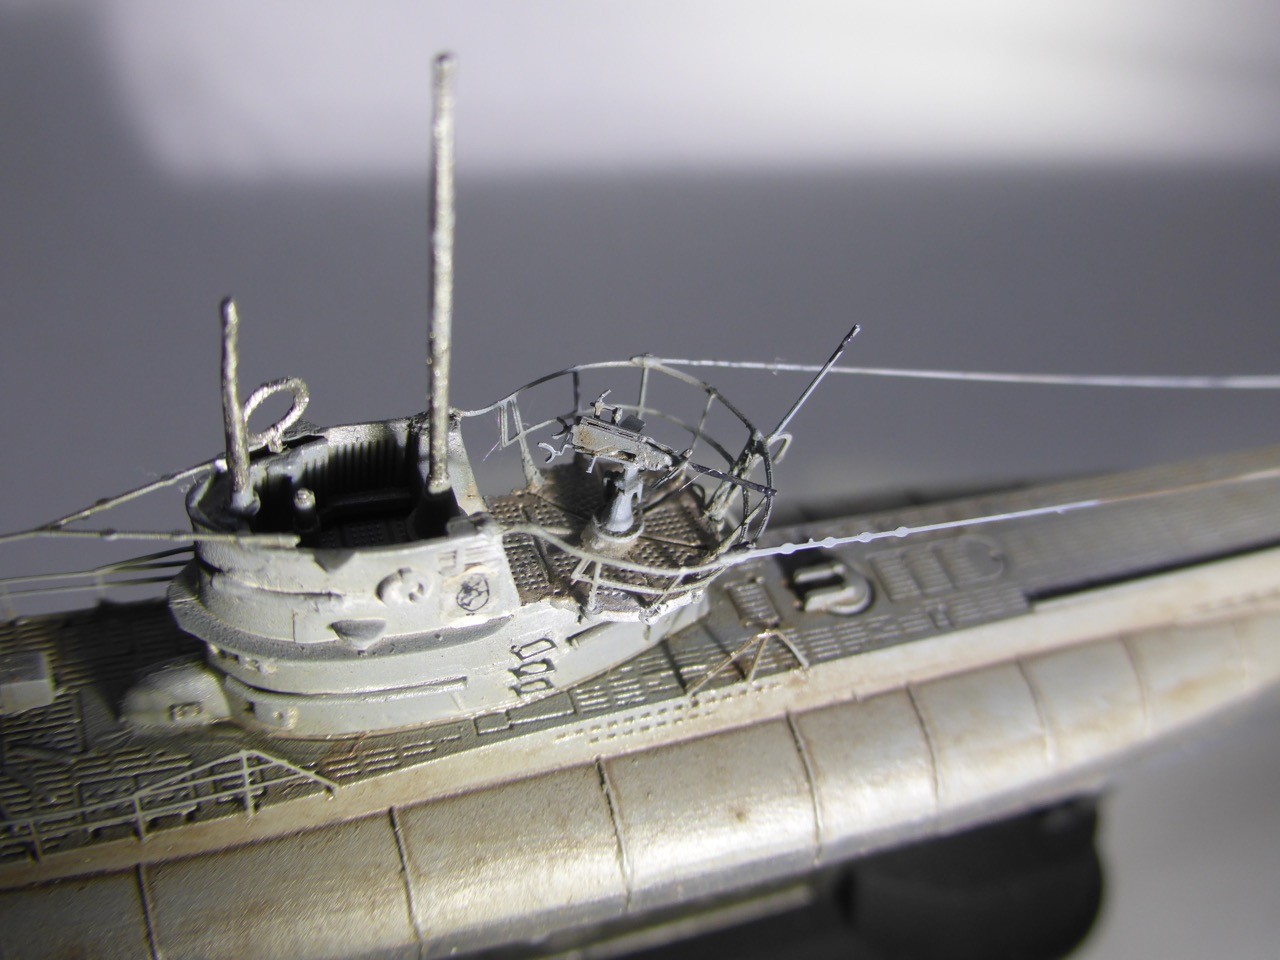
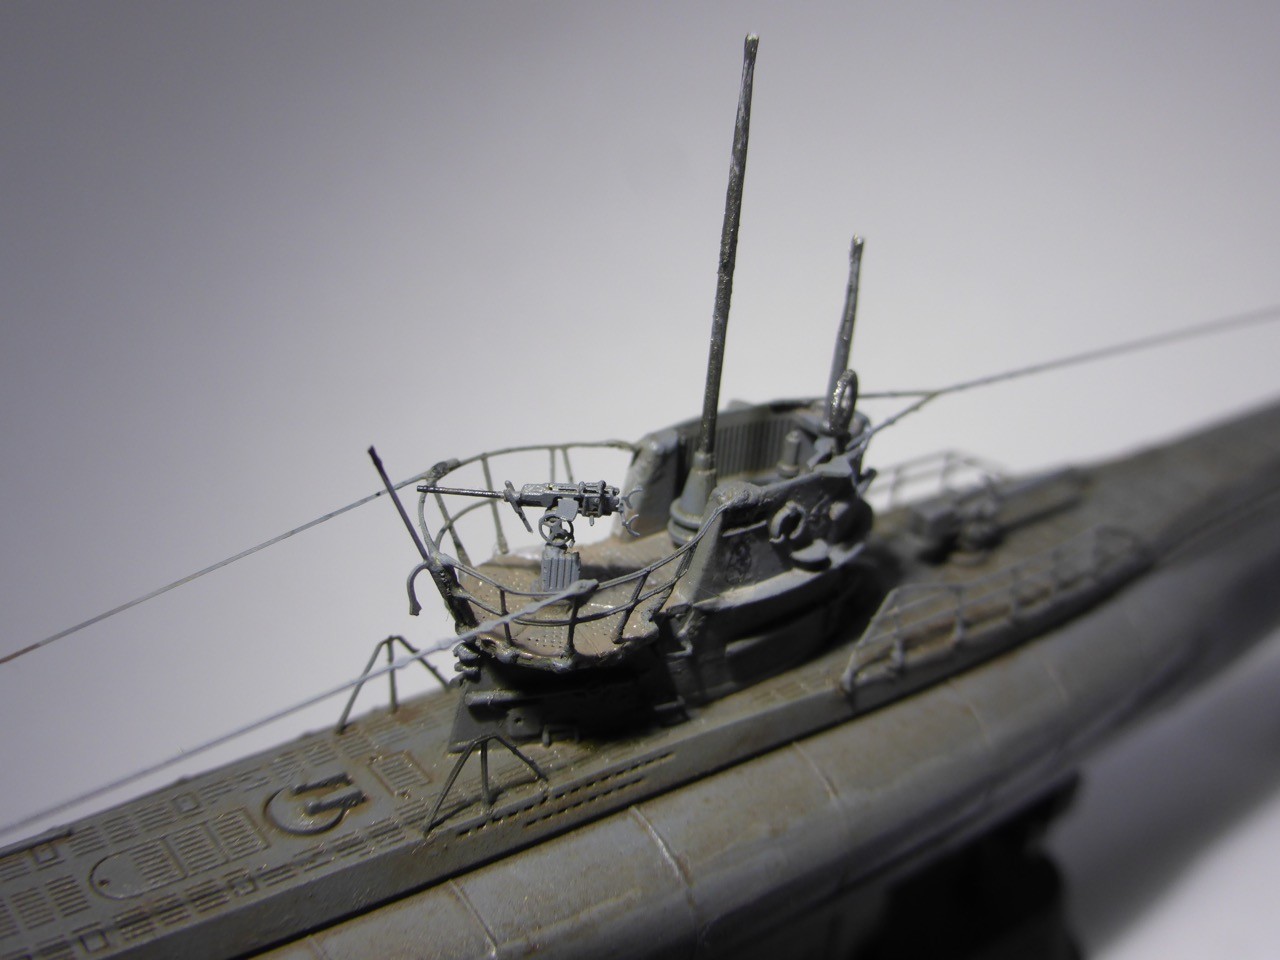
I've been struggling along with my VII C boat. I am not entirely happy - the kit requires more time than I anticipated, and parts are really tiny. And I mean REALLY tiny. Who ever has followed one of my build logs so far is probably aware that I am not afraid of tiny detail work, but here some parts put me to the edge...
But here's the story:
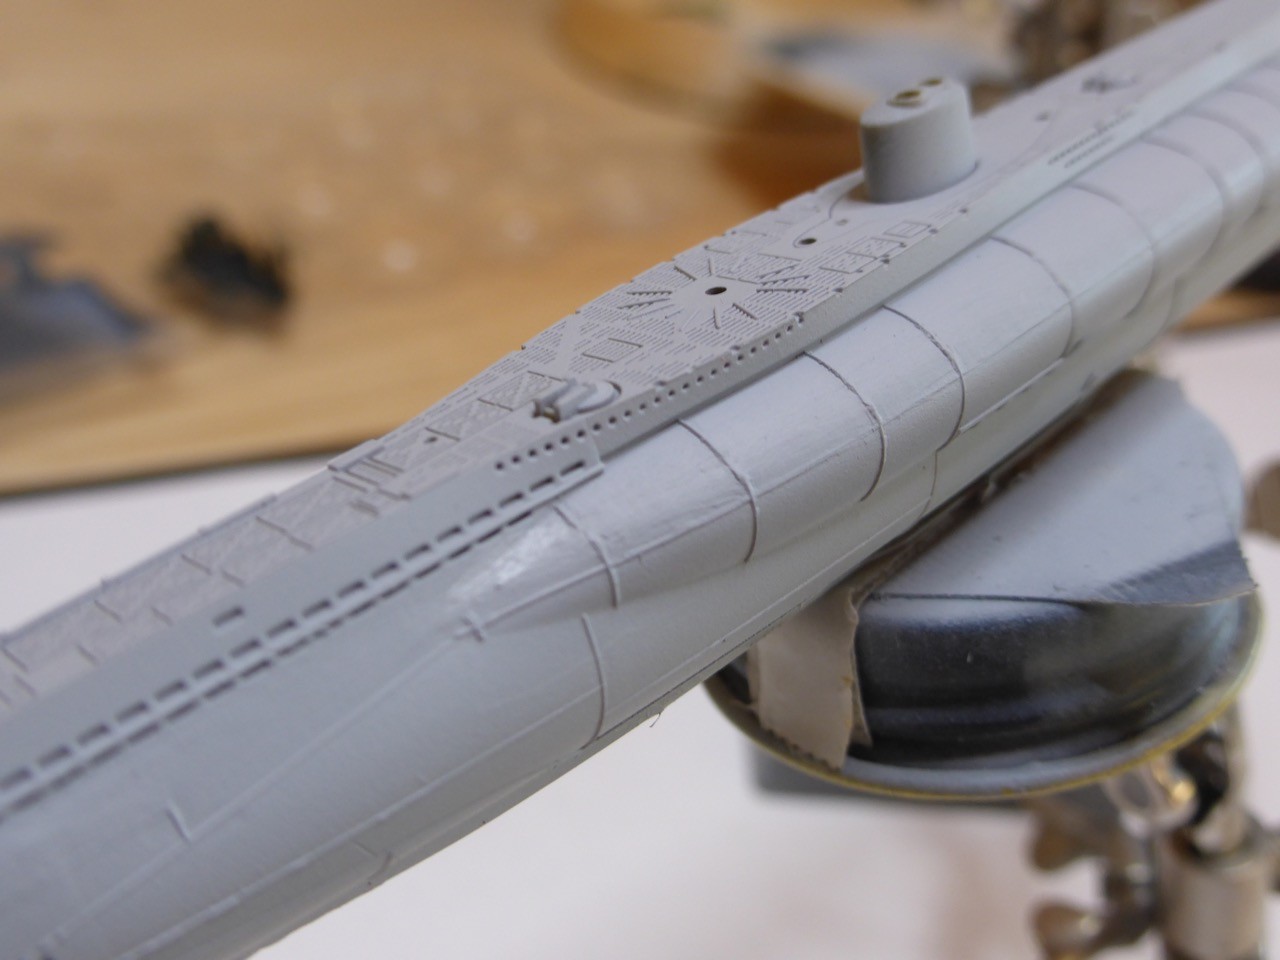
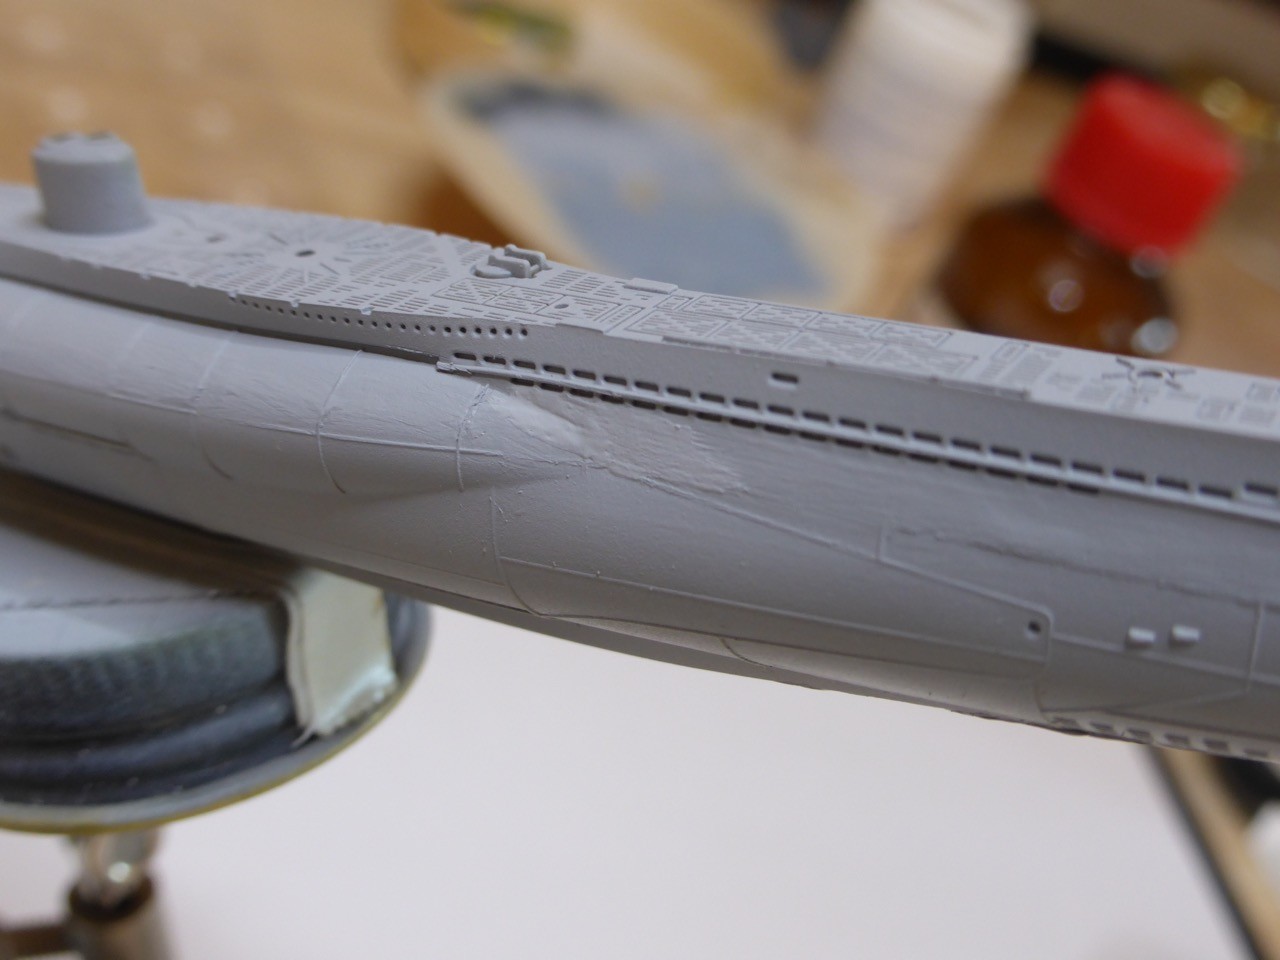
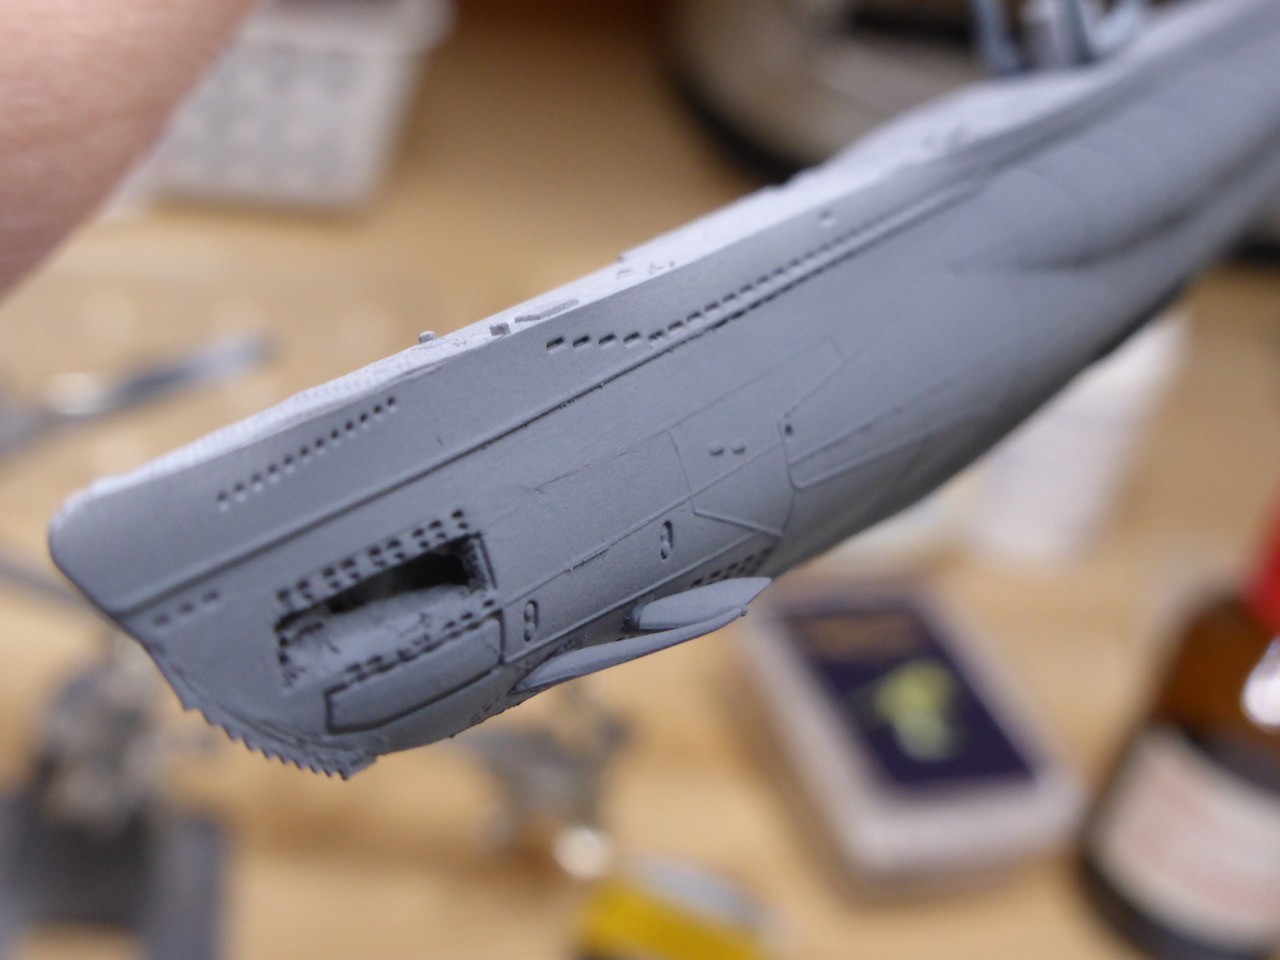
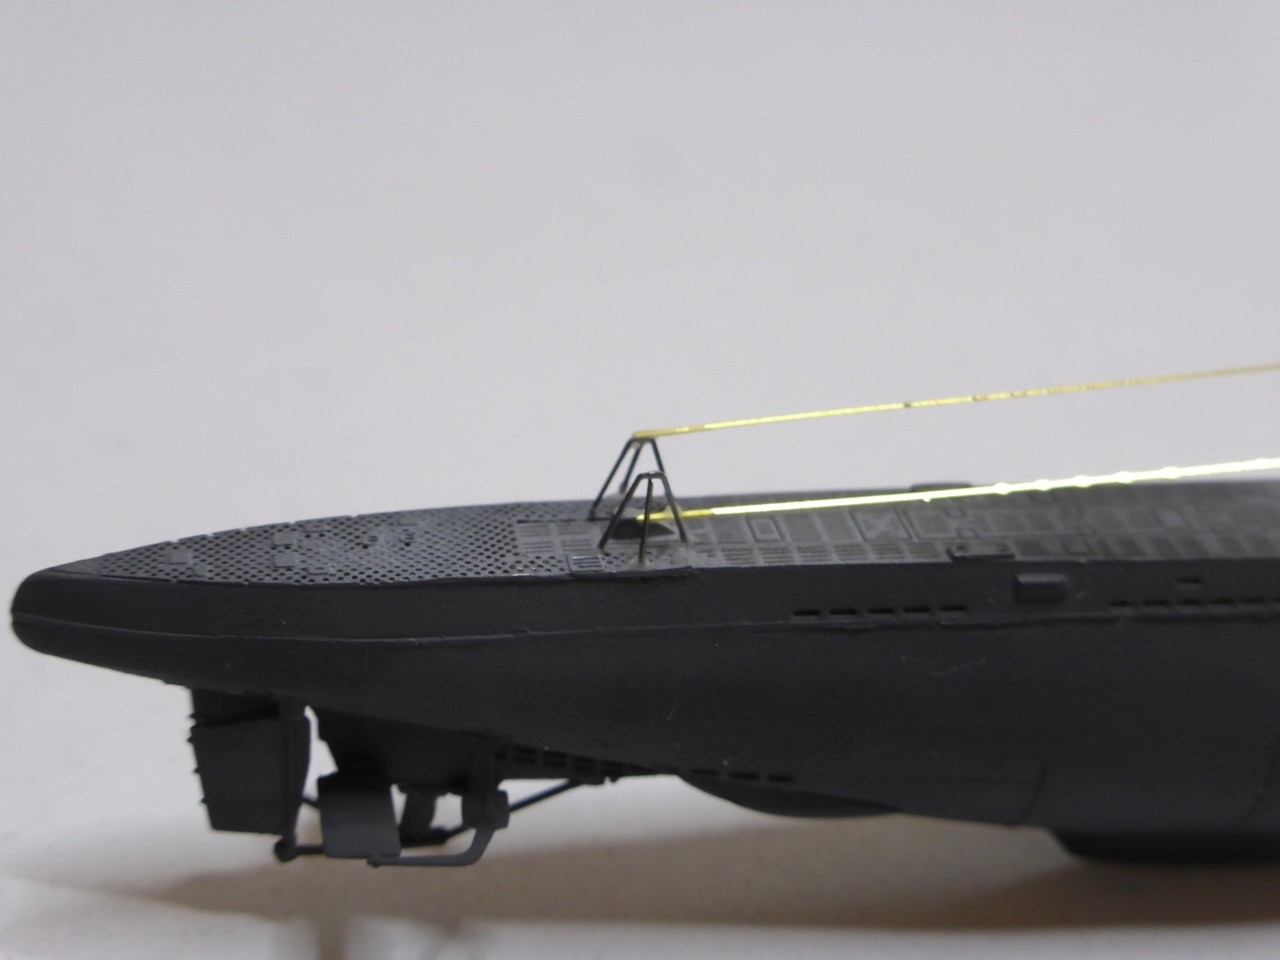
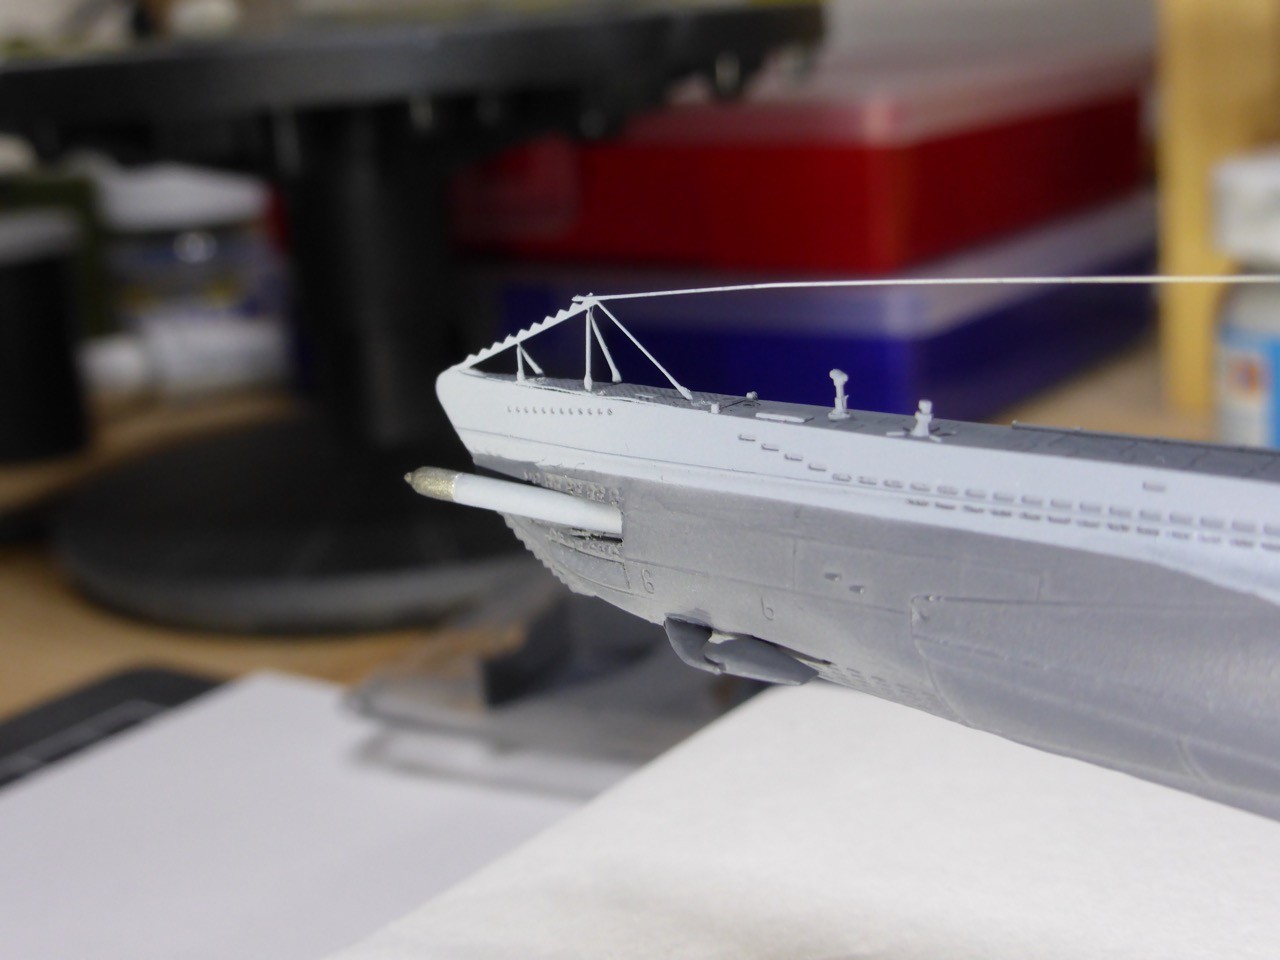
Some more surfacer and sanding / knifing, so reasonably happy with that.
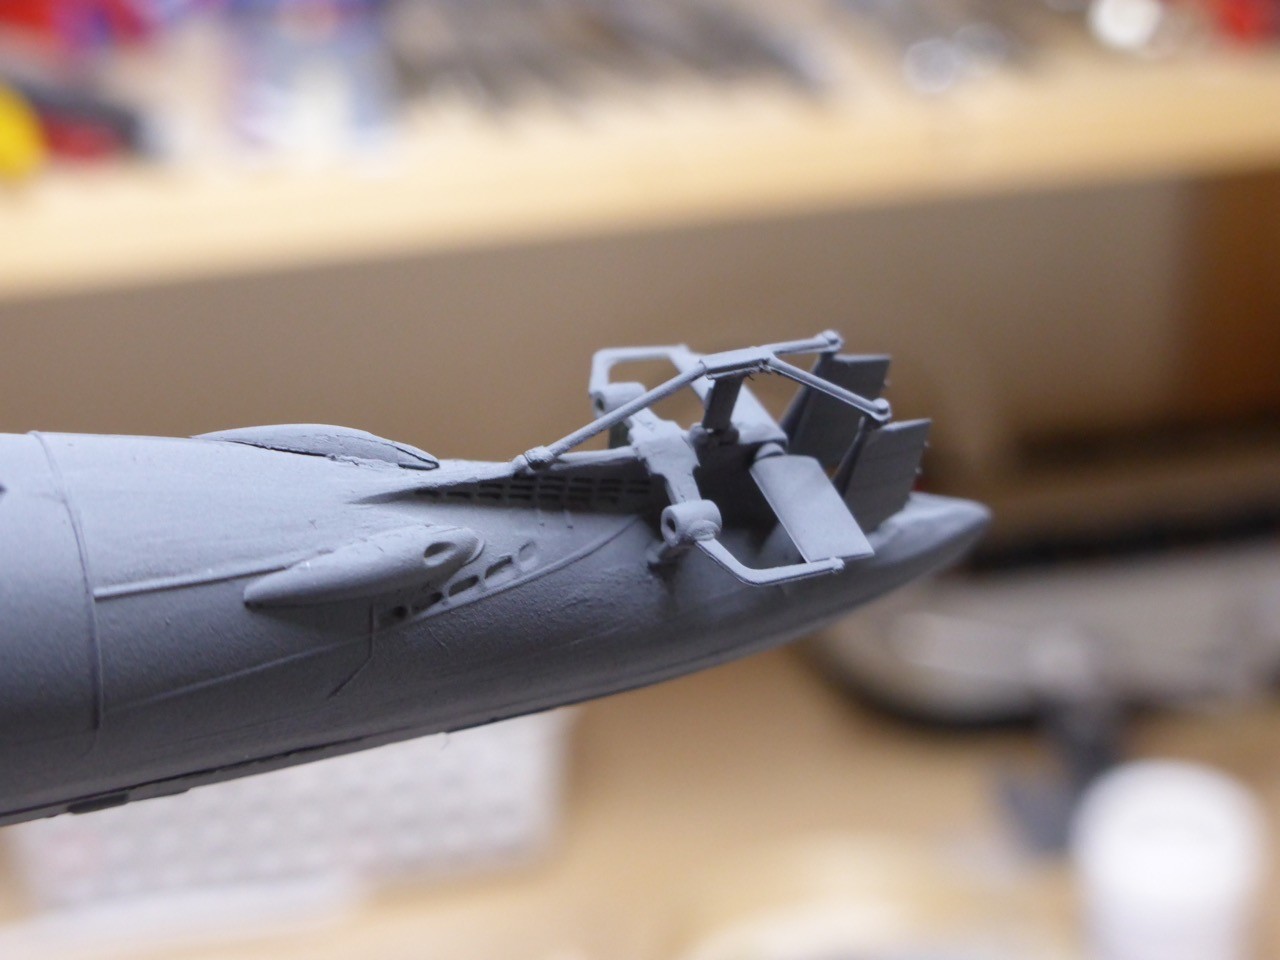
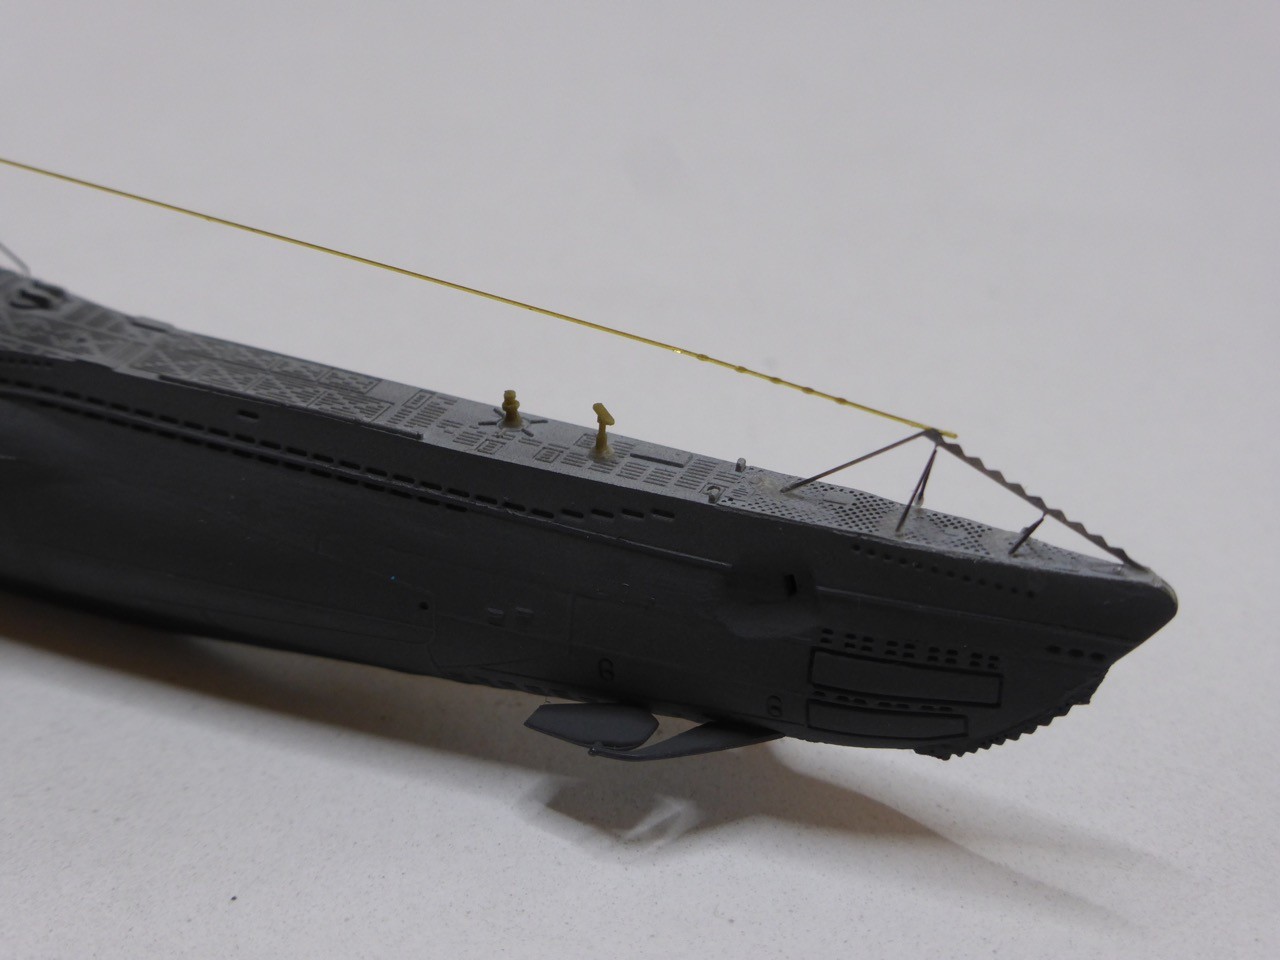
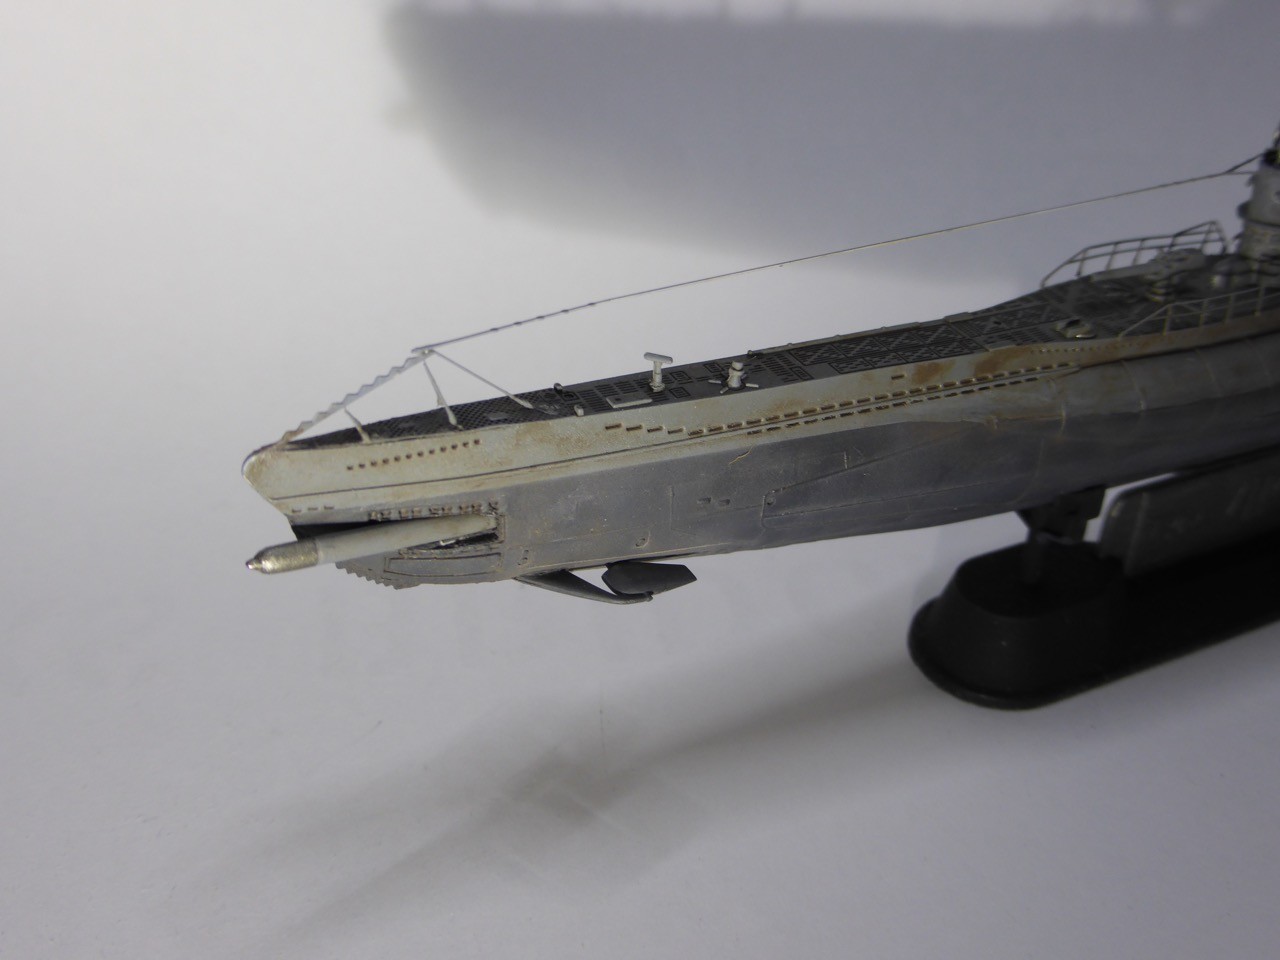
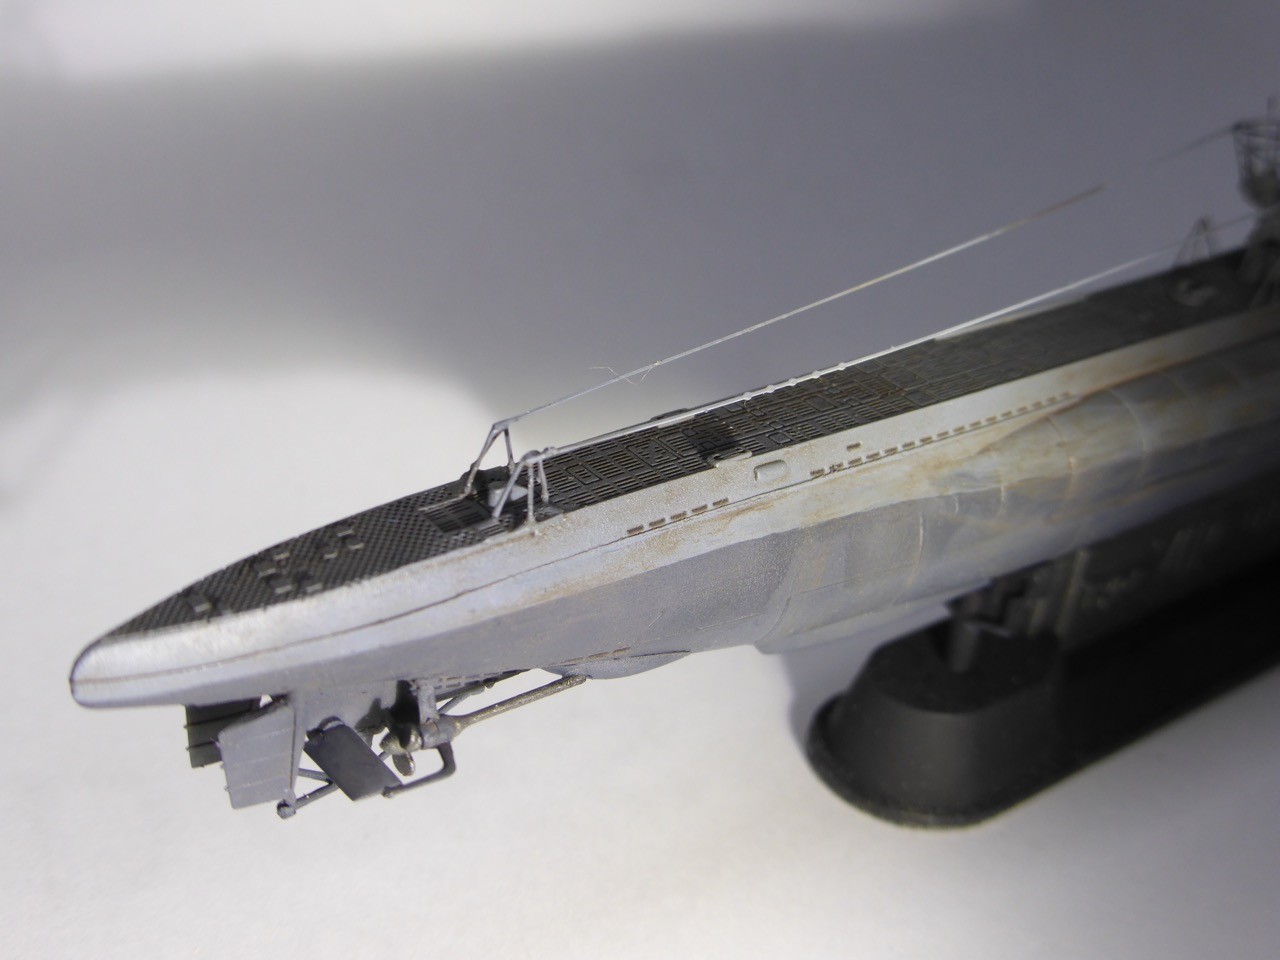
Bow flaps on:
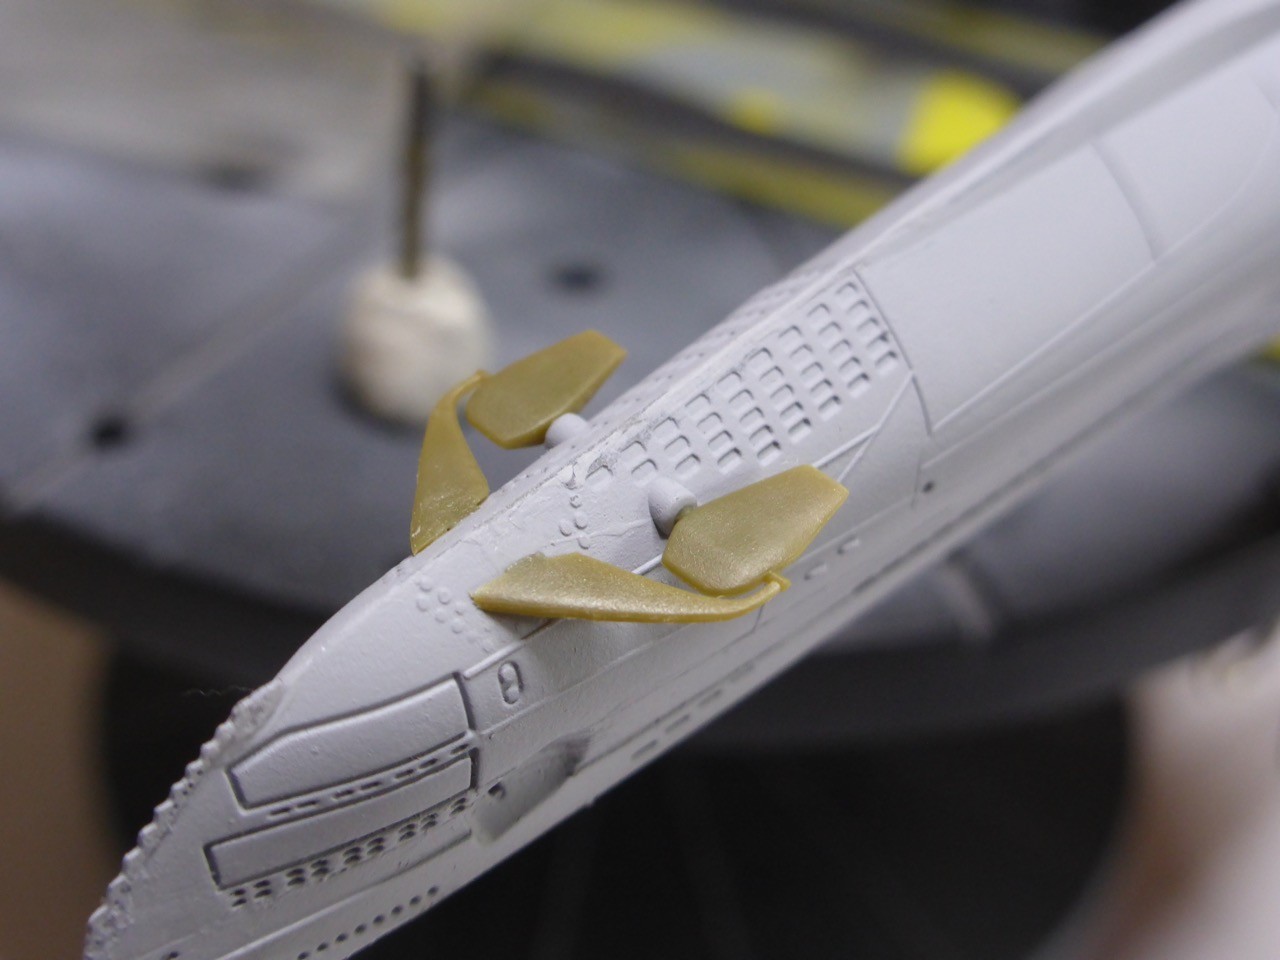
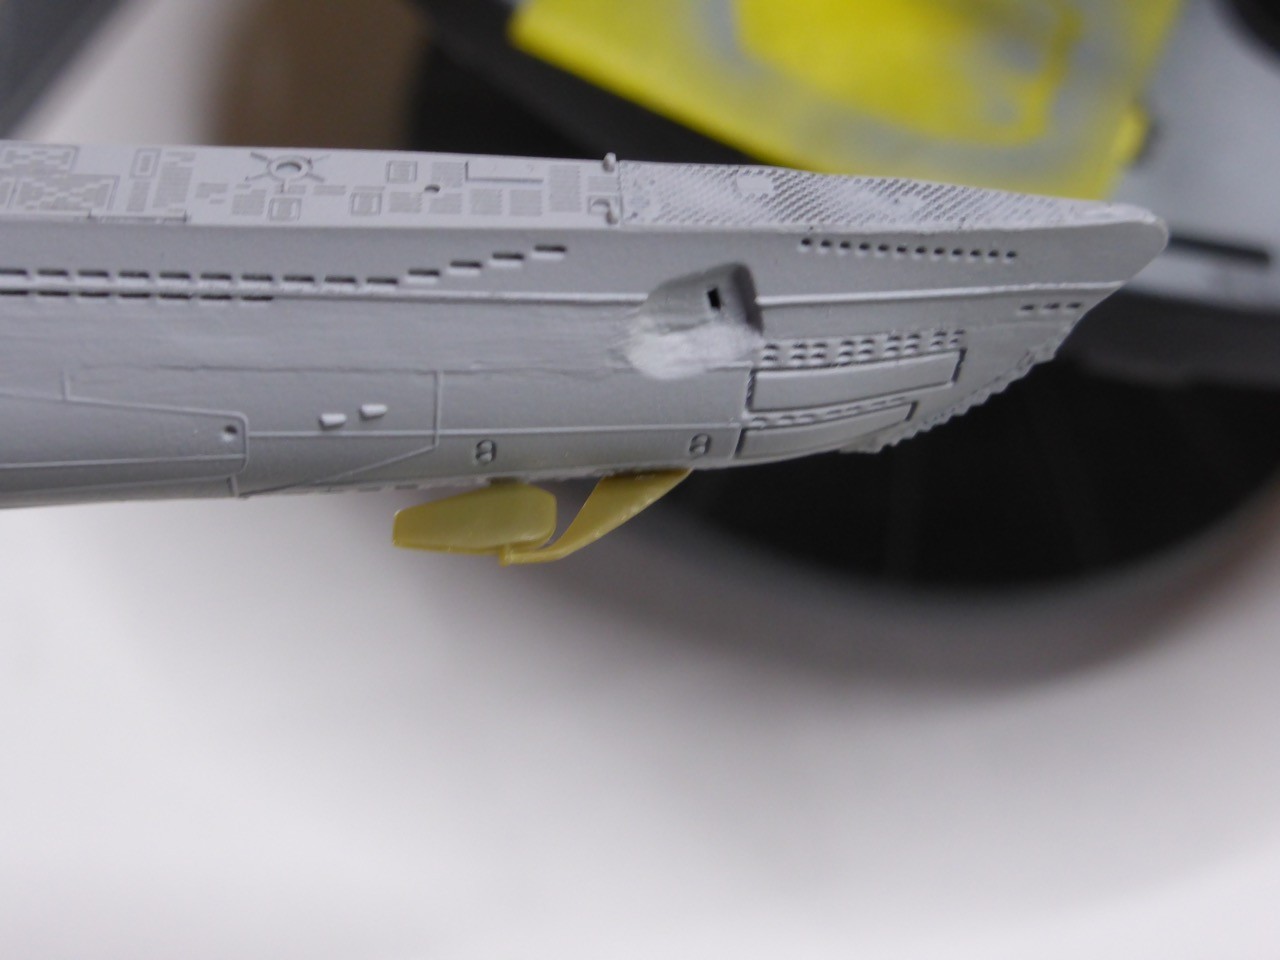
All the details with the stern rudders / flaps, shafts etc, less shafts and props, which will be installed later on.
First coast of color 'Schiffsbodenfarbe 3 / DKM 23' on,

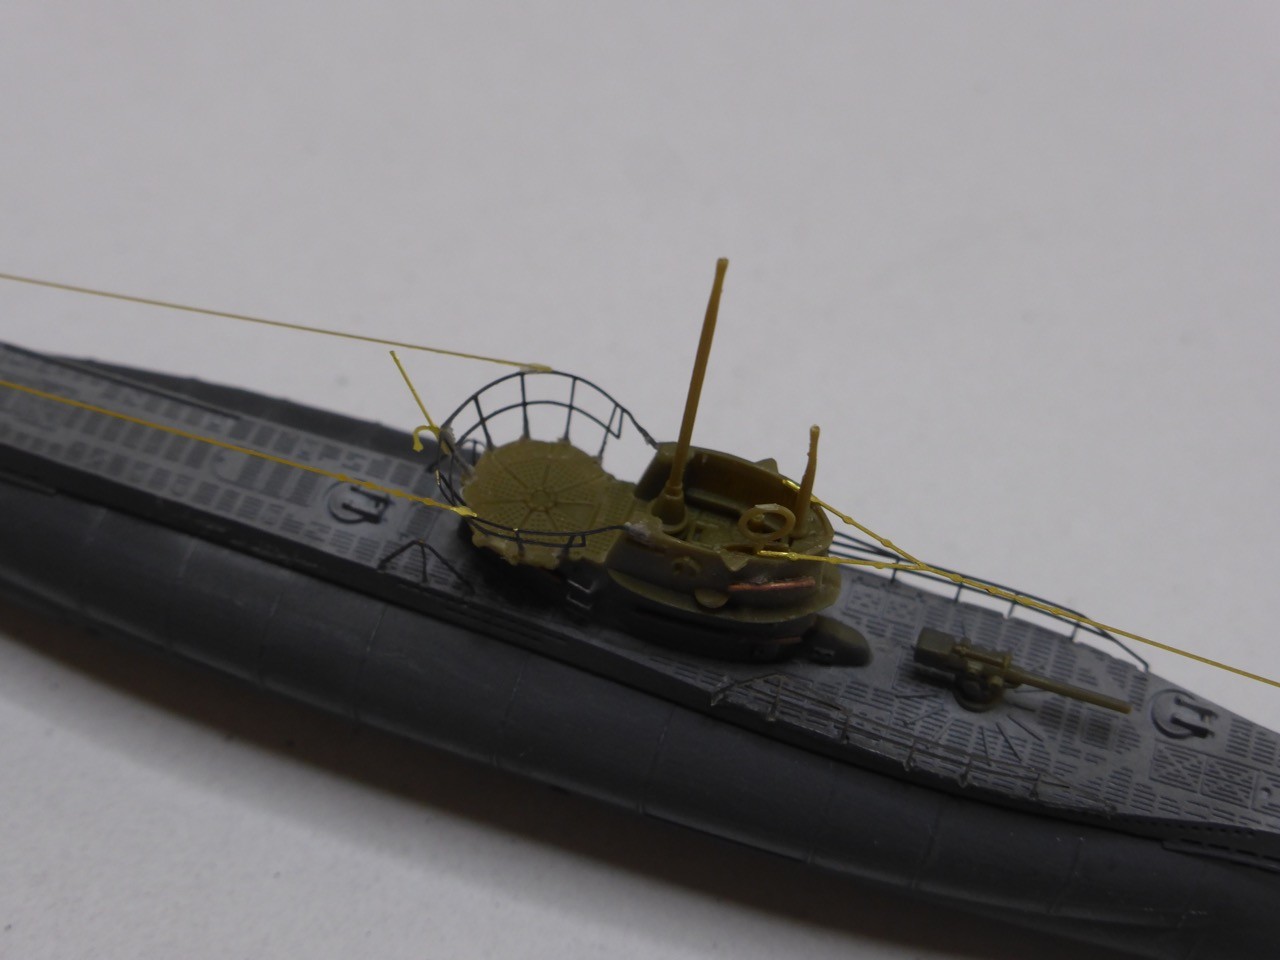
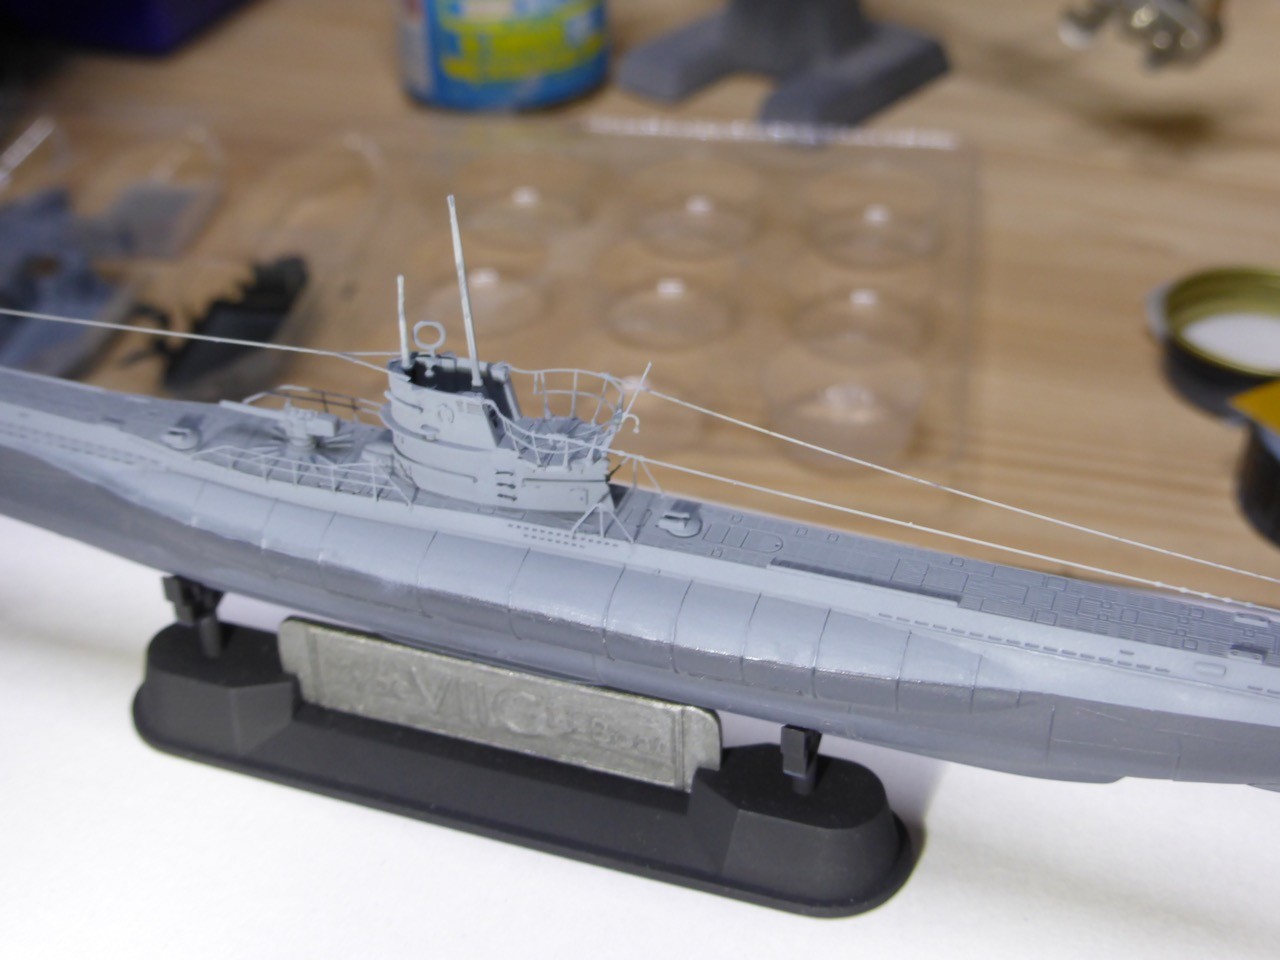
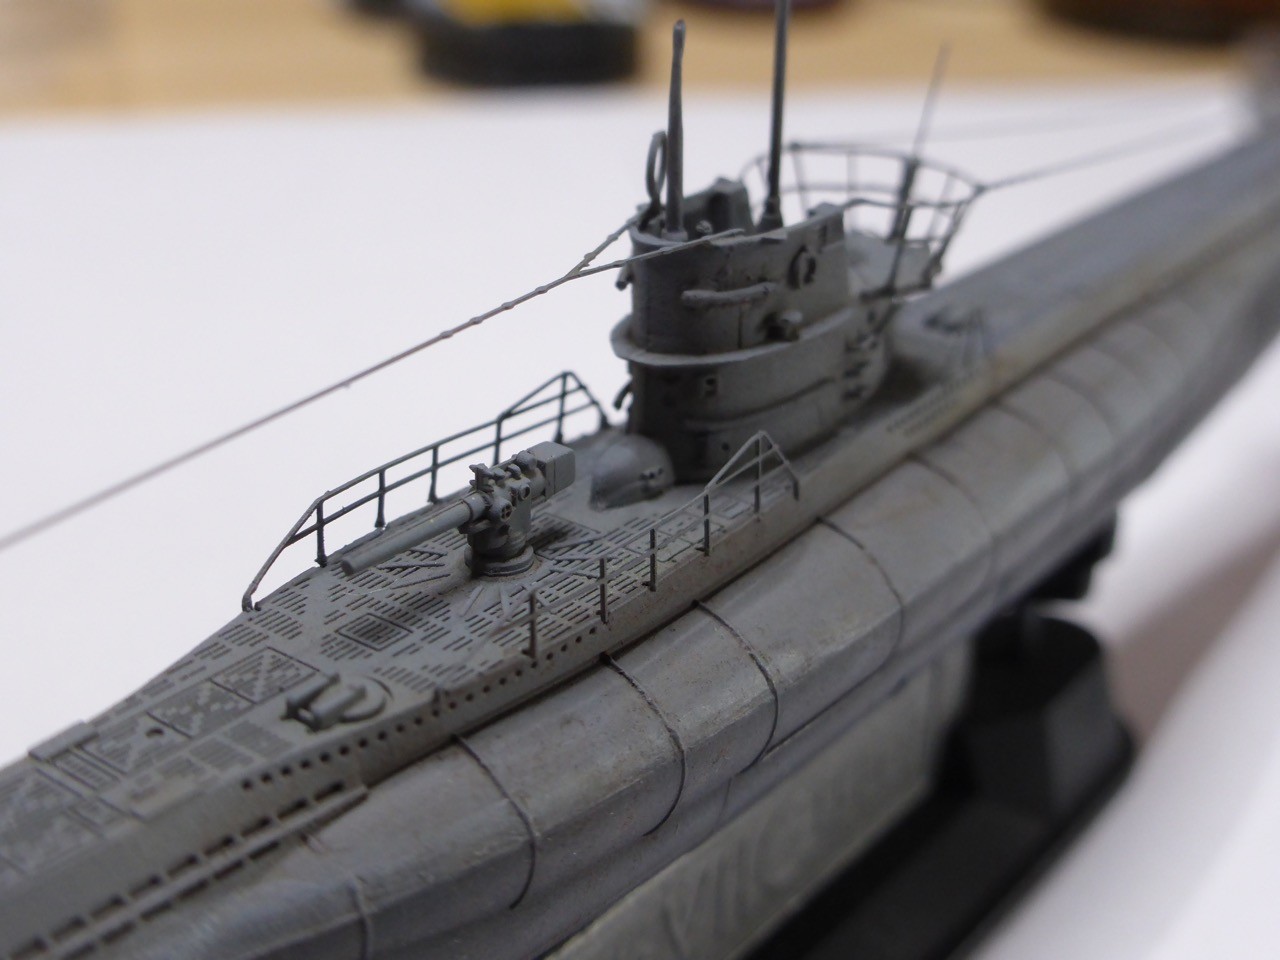
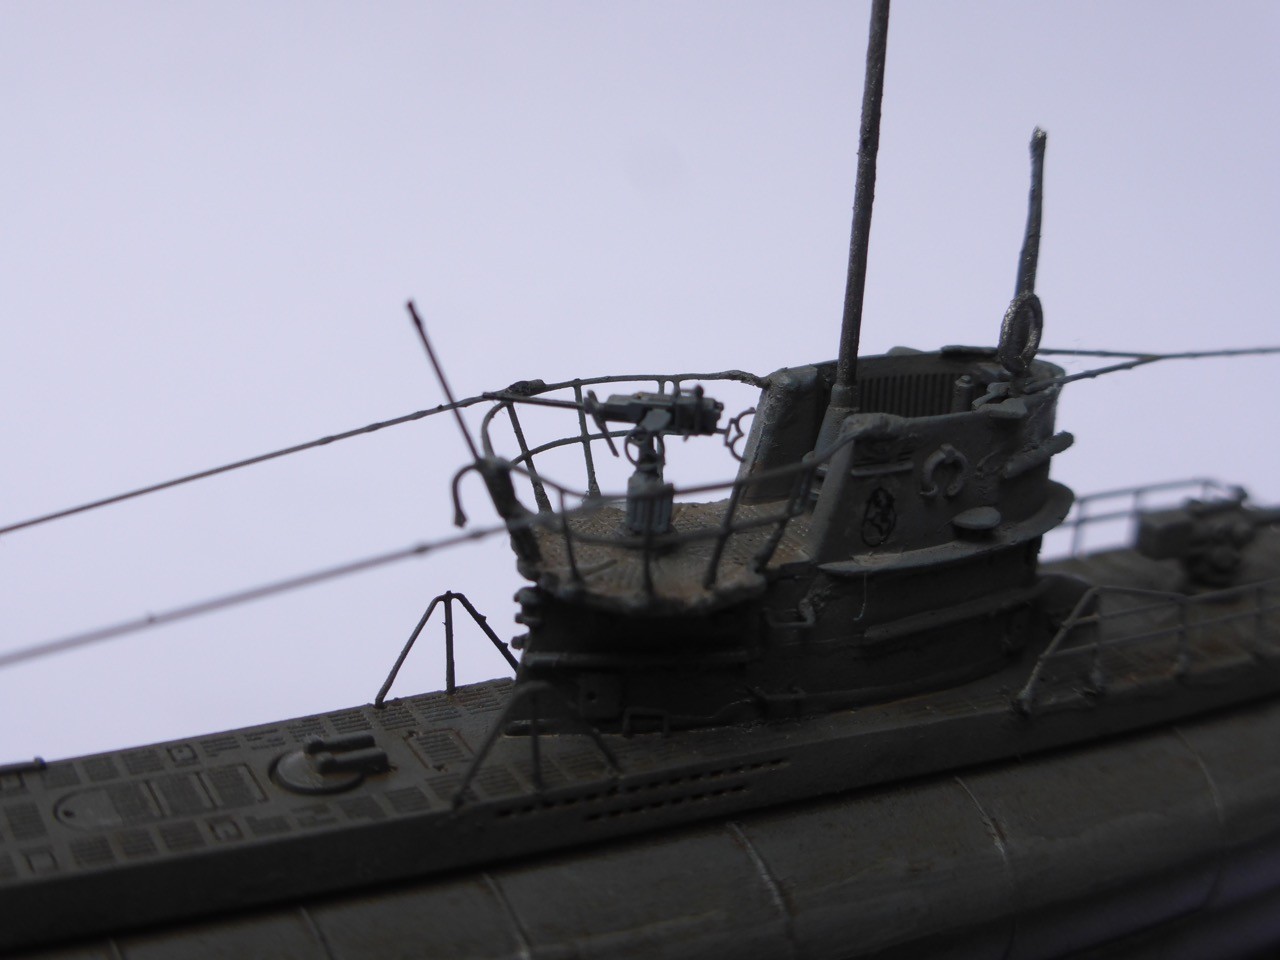
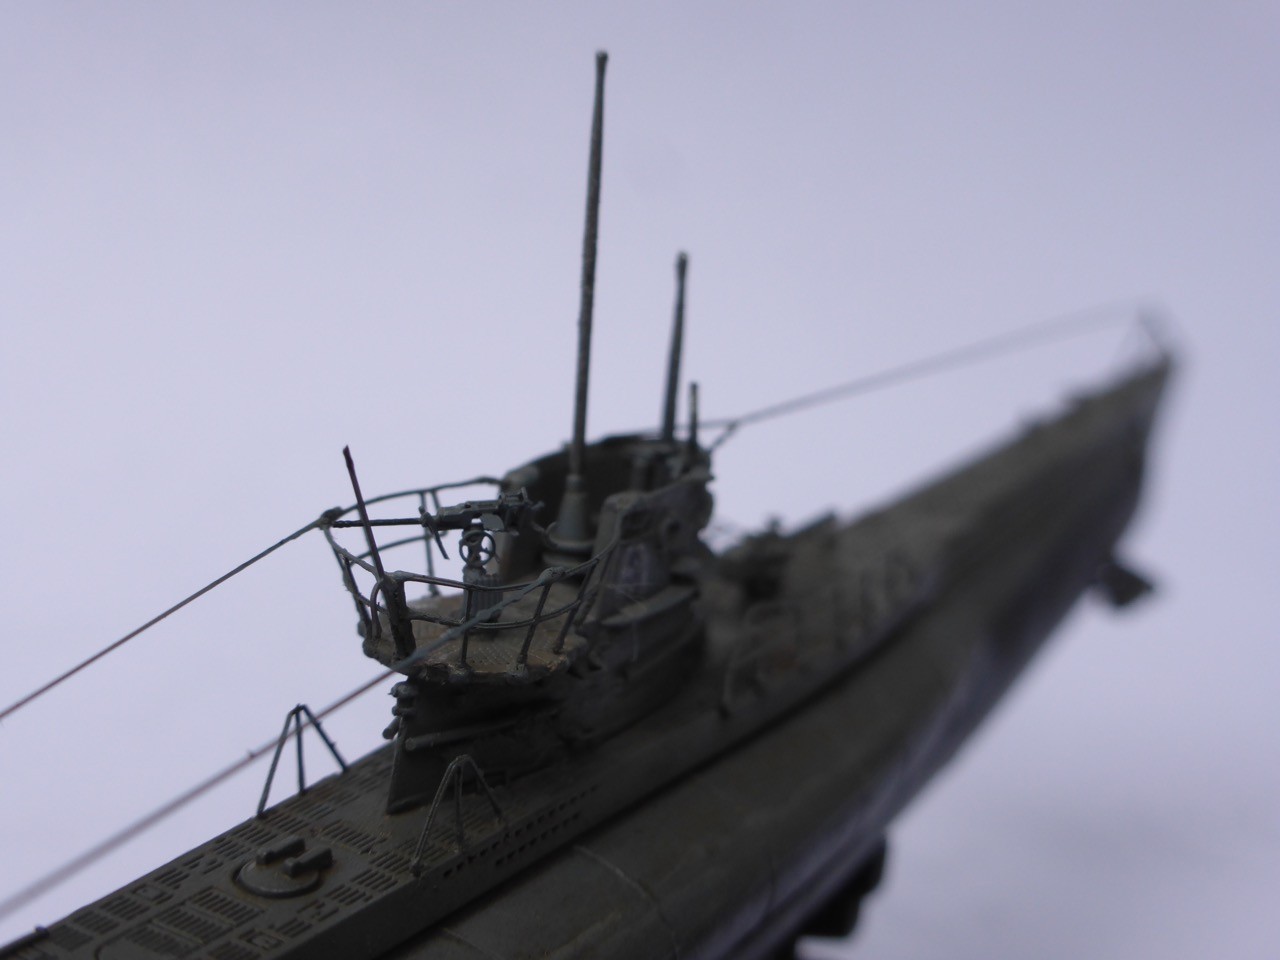
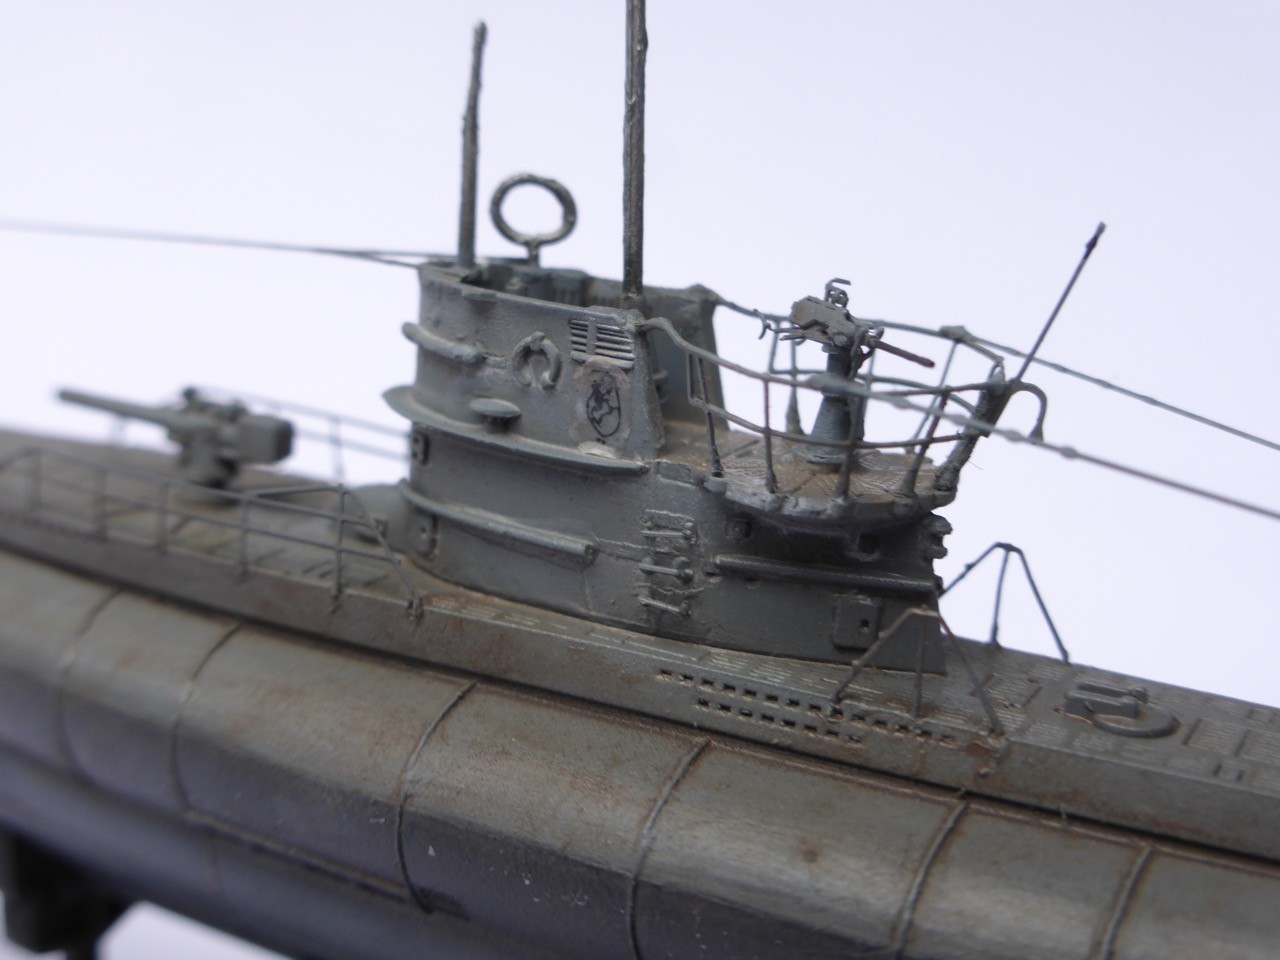
and the turret build up. That was the point where I almost gave up - or in fact, I gave up a little bit...
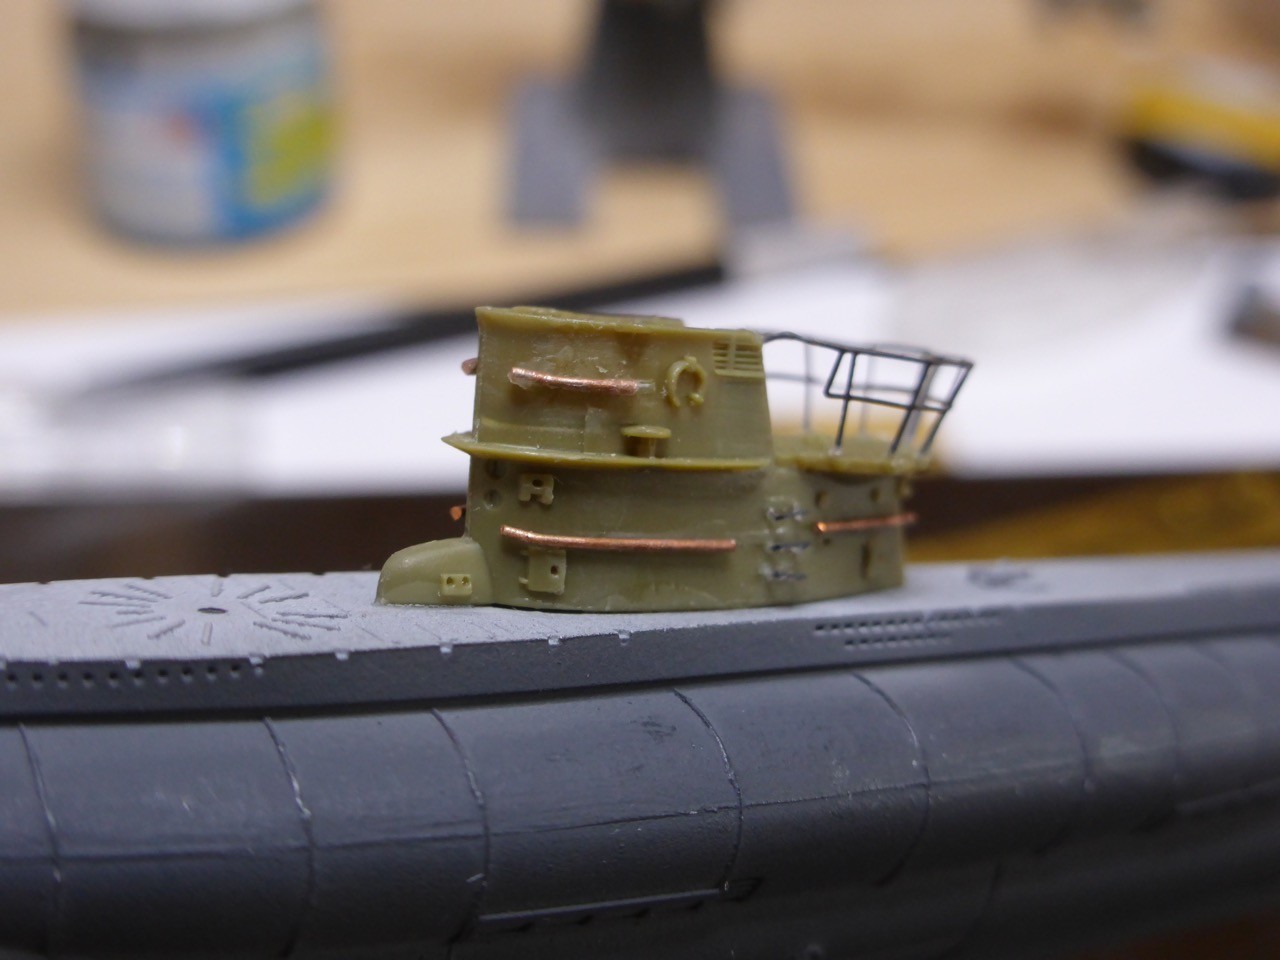
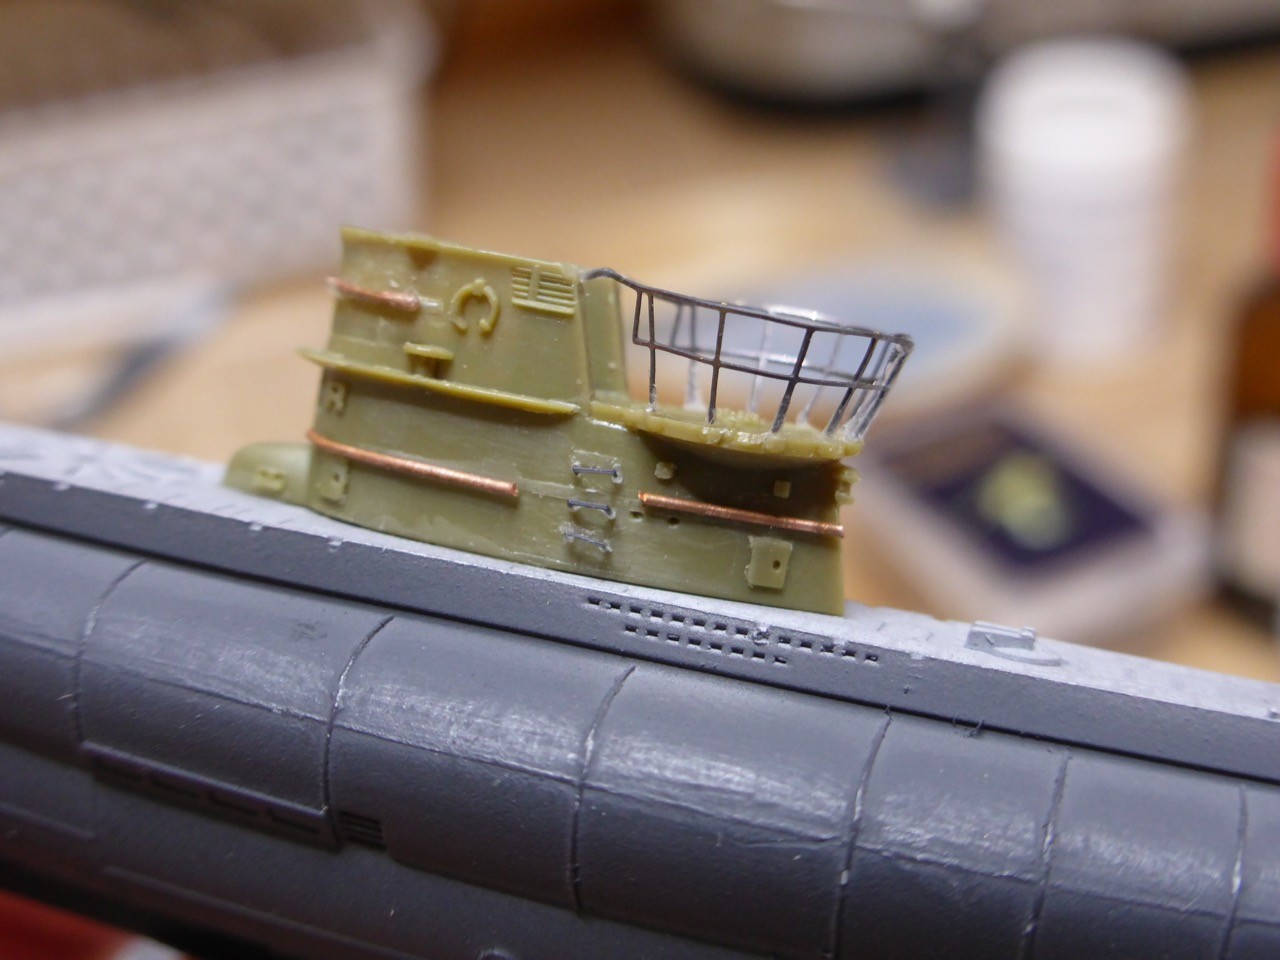
I decided to remove all the molded on details like steps and handrails and to replace them with Eduard parts. But I had to give up with the Eduard handrails - somehow I did not get them to work. Maybe it was just not my day...but when one of those escaped my tweezers and disappeared into eternity, I knew that I was one part short at least. So I decided to skip the handrails and replace them by copper wire. But honestly - the initial molded on detail looked better. But that was gone...
The little steps up worked ok, the railing around the after part of the tower was, let's say, a challenge. But again, maybe it simply wasn't my day...
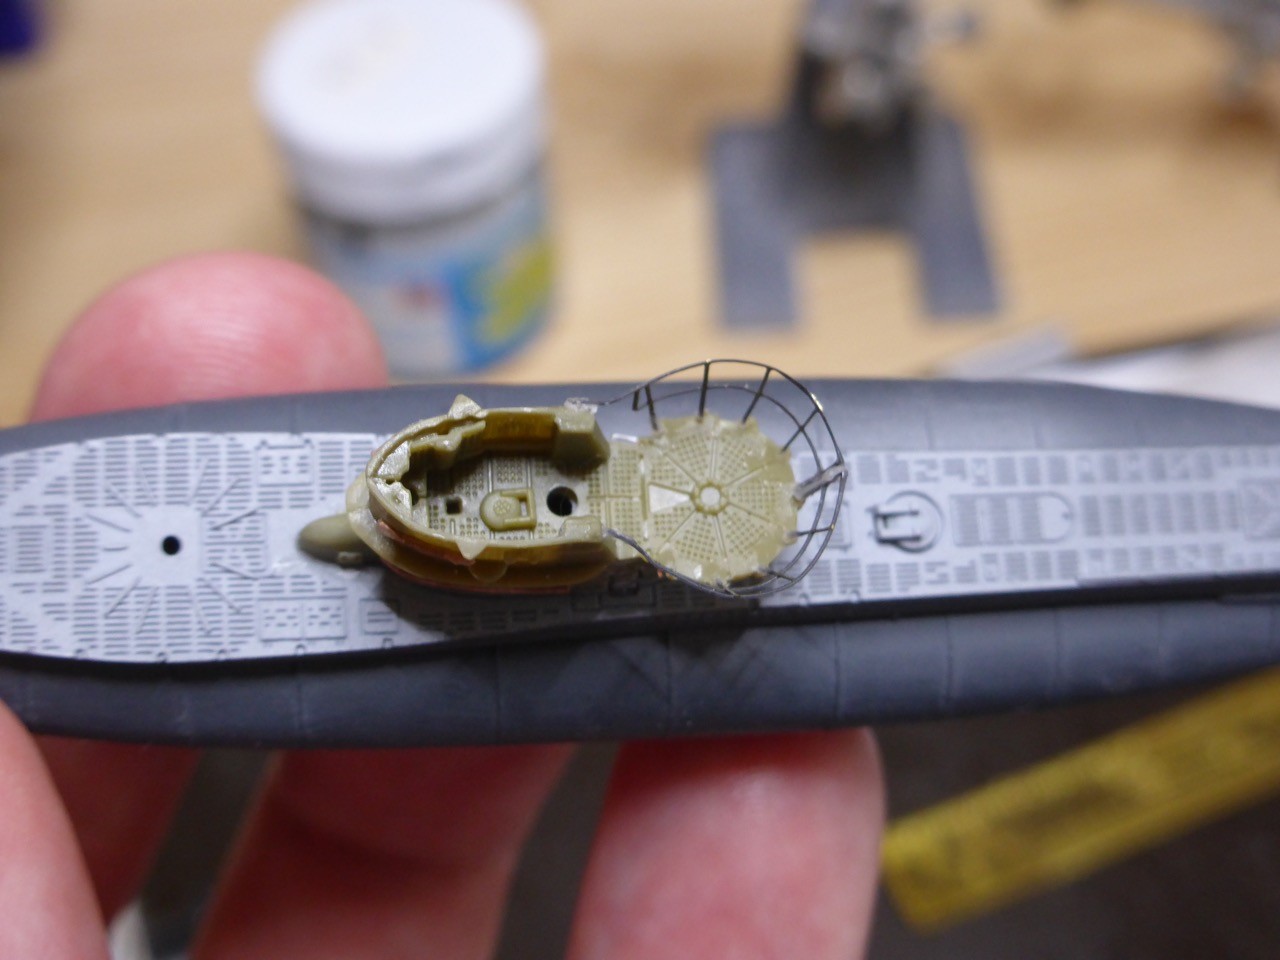
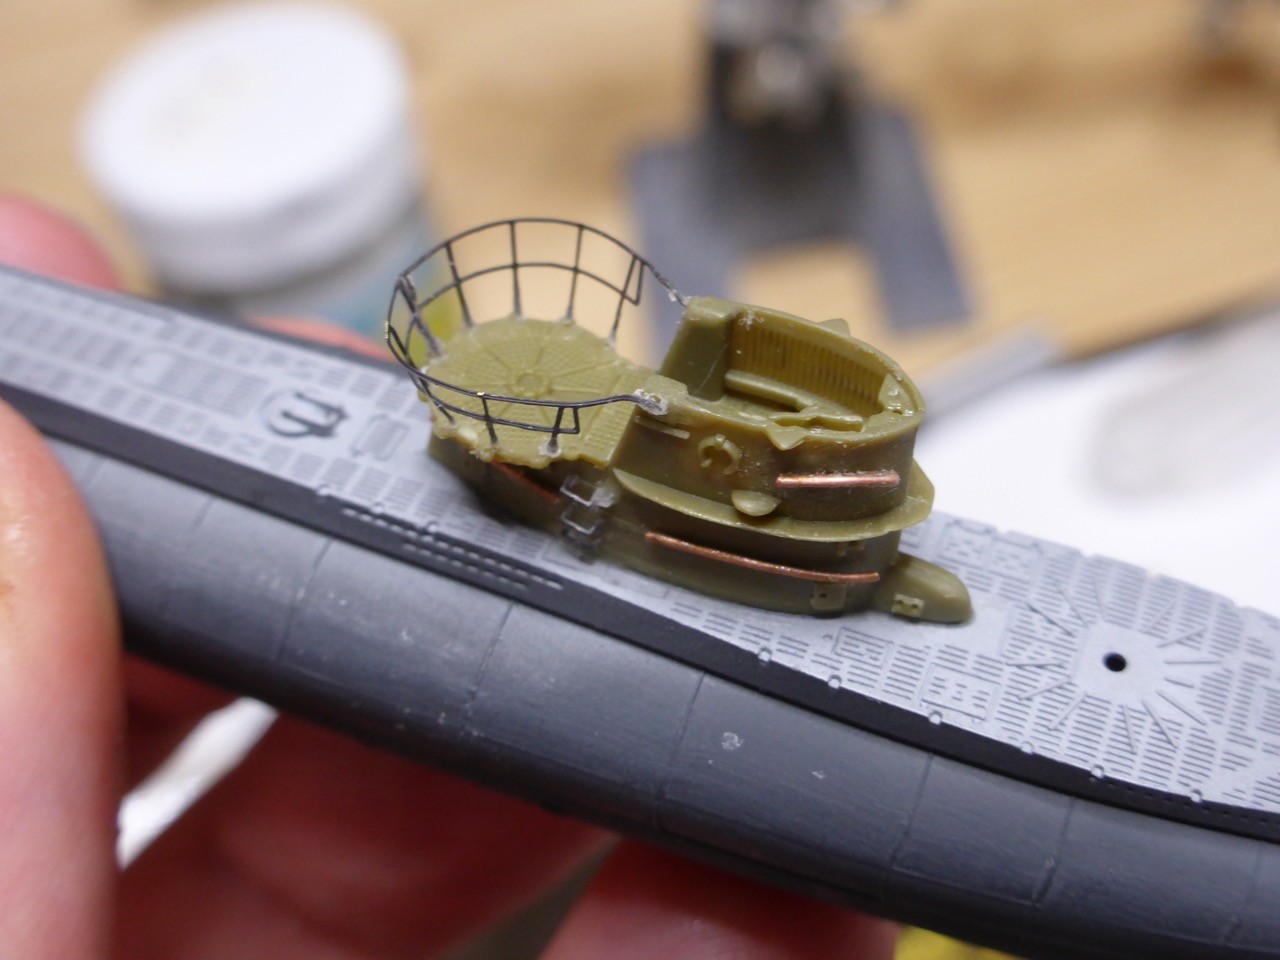
More PE work - this worked a lot better. Or maybe today was better (the turret business was yesterday).
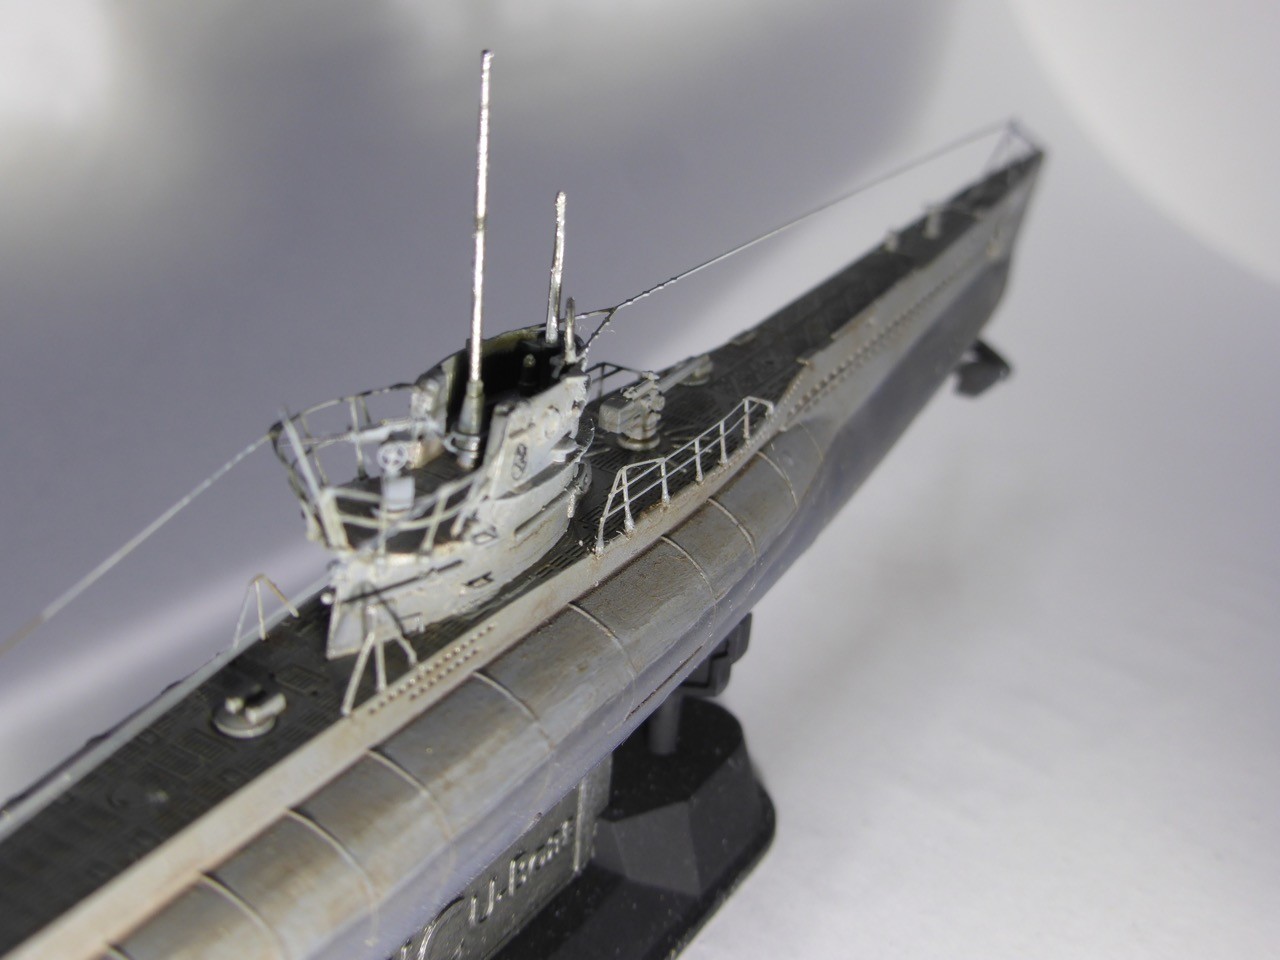
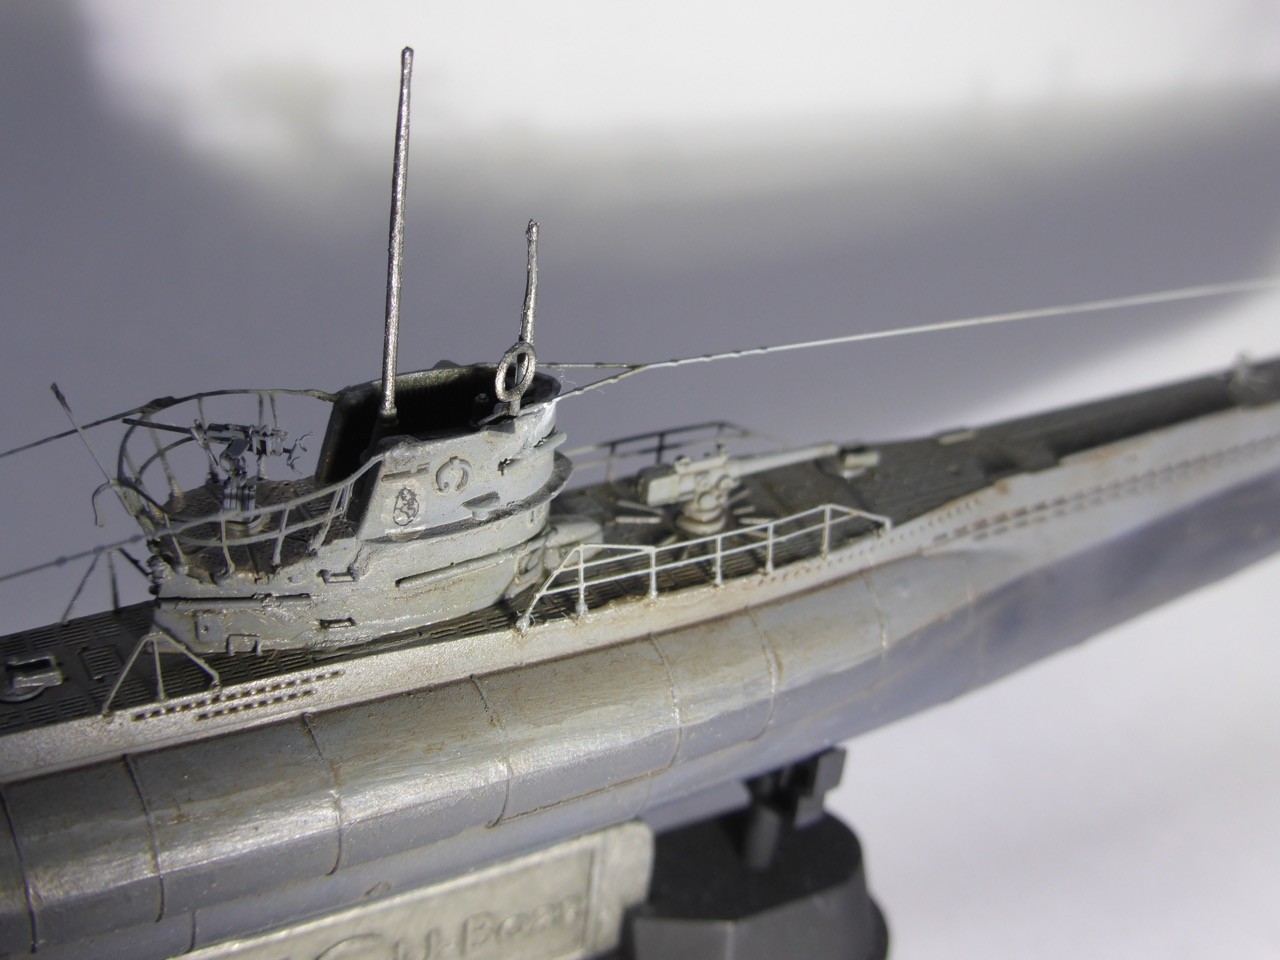
I decided to leave the 8.8cm gun as is from the kit, it looks quite ok. As for the whole kit - the detail is molded very fine and crisp, only there are quite a few fitting issues.
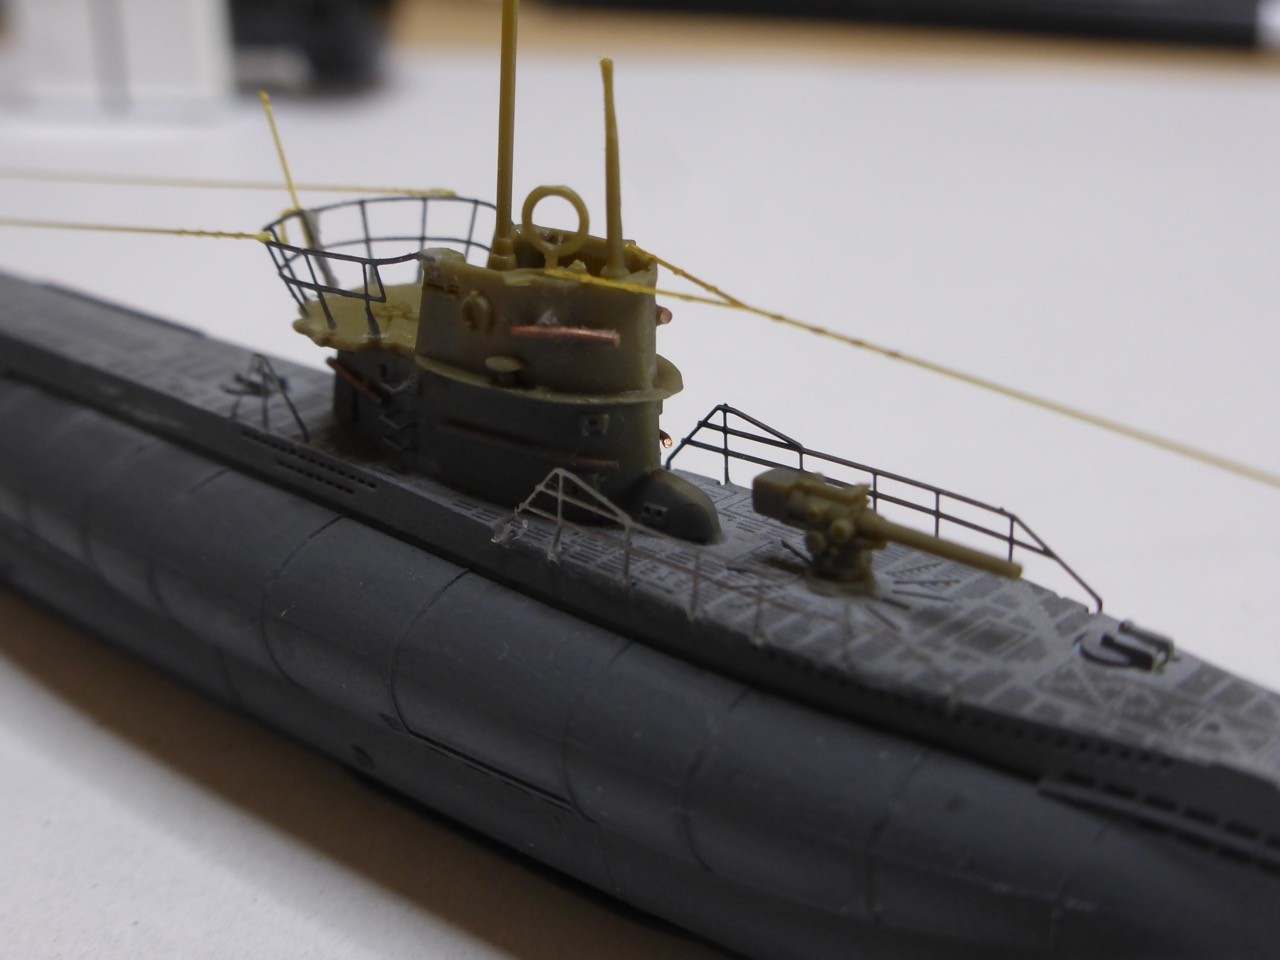
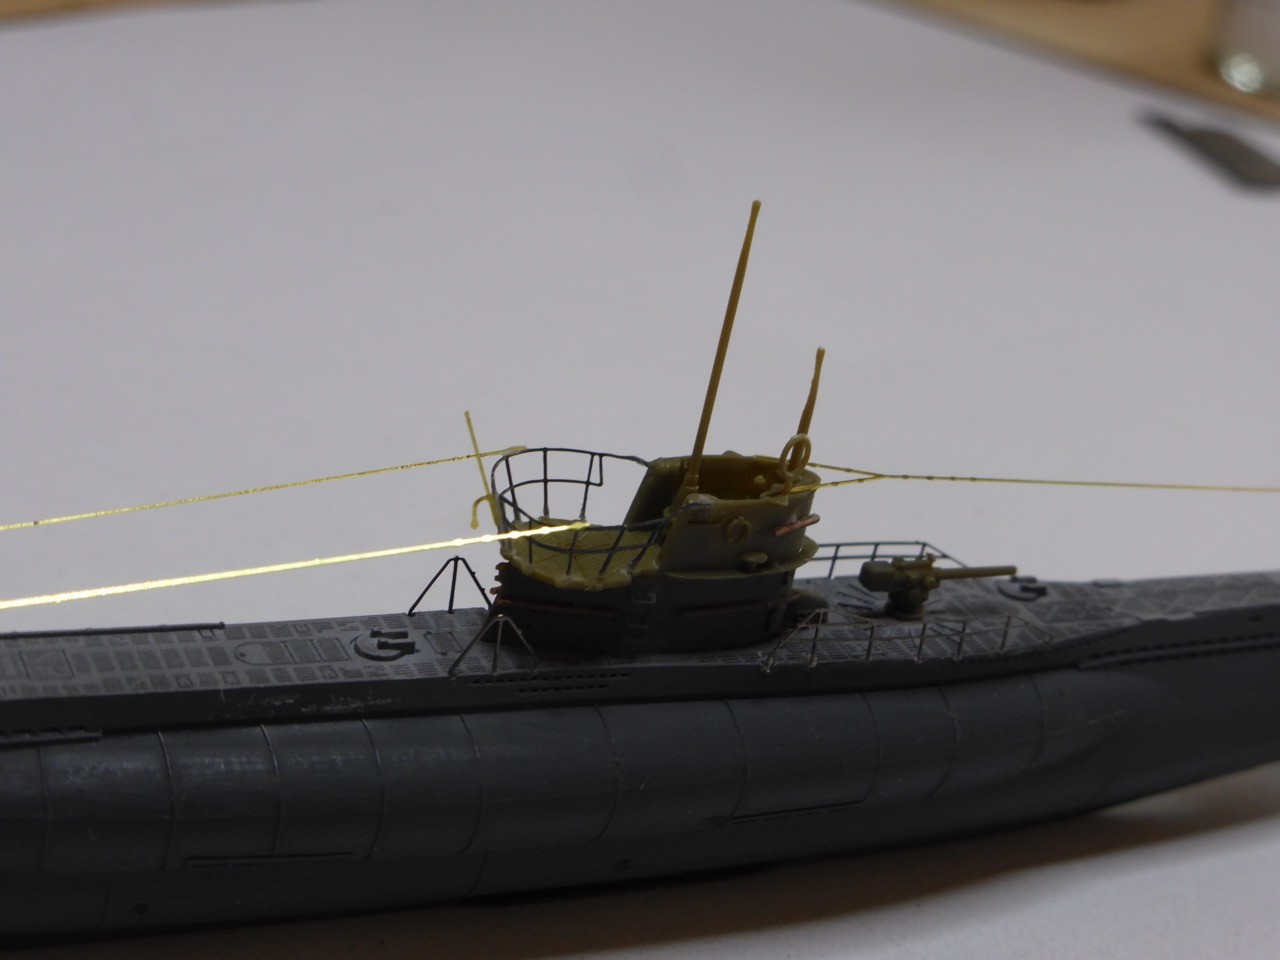
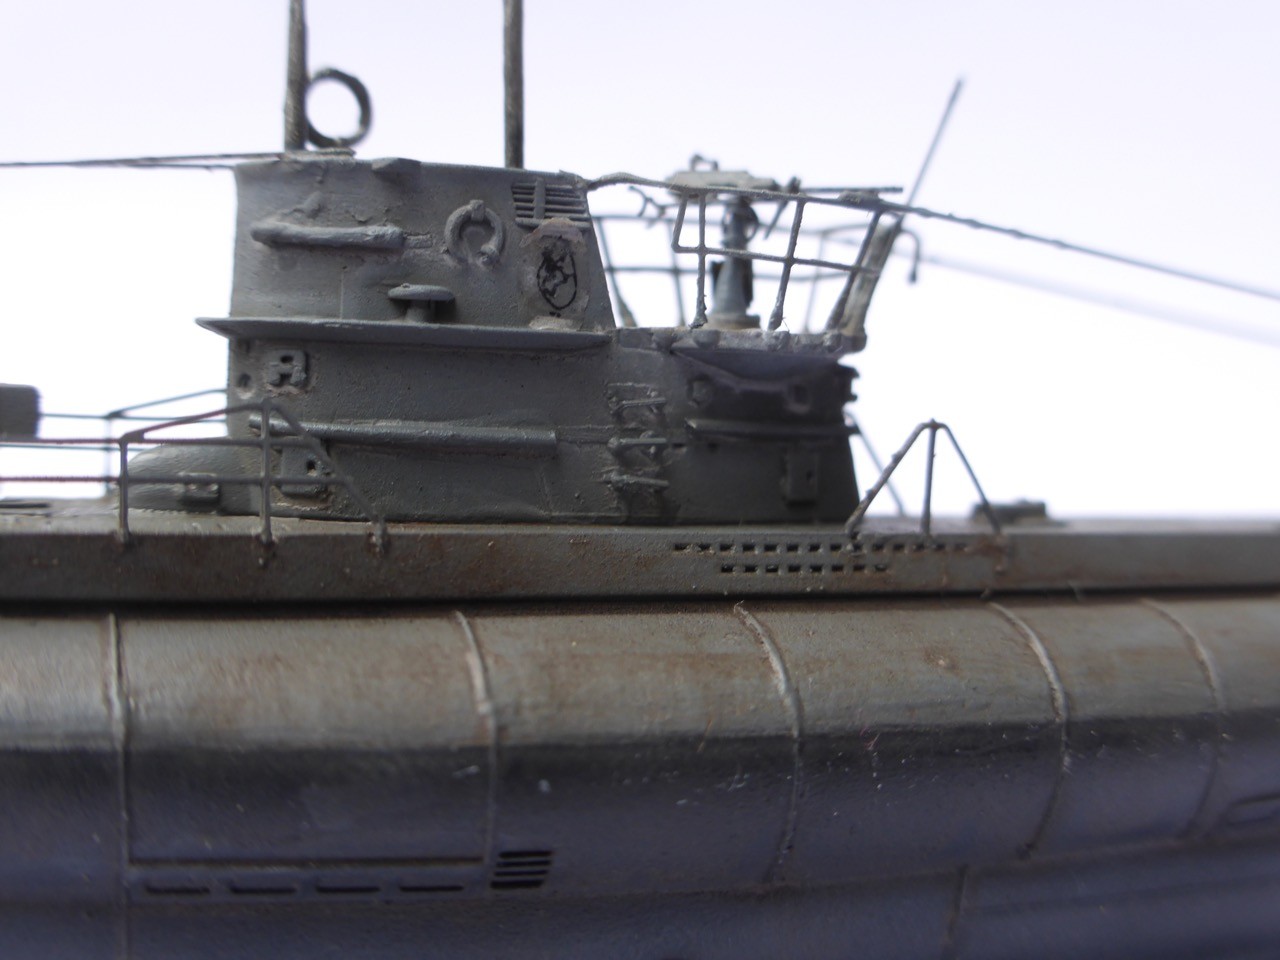
5 mm flexible tape to mask the lower hull
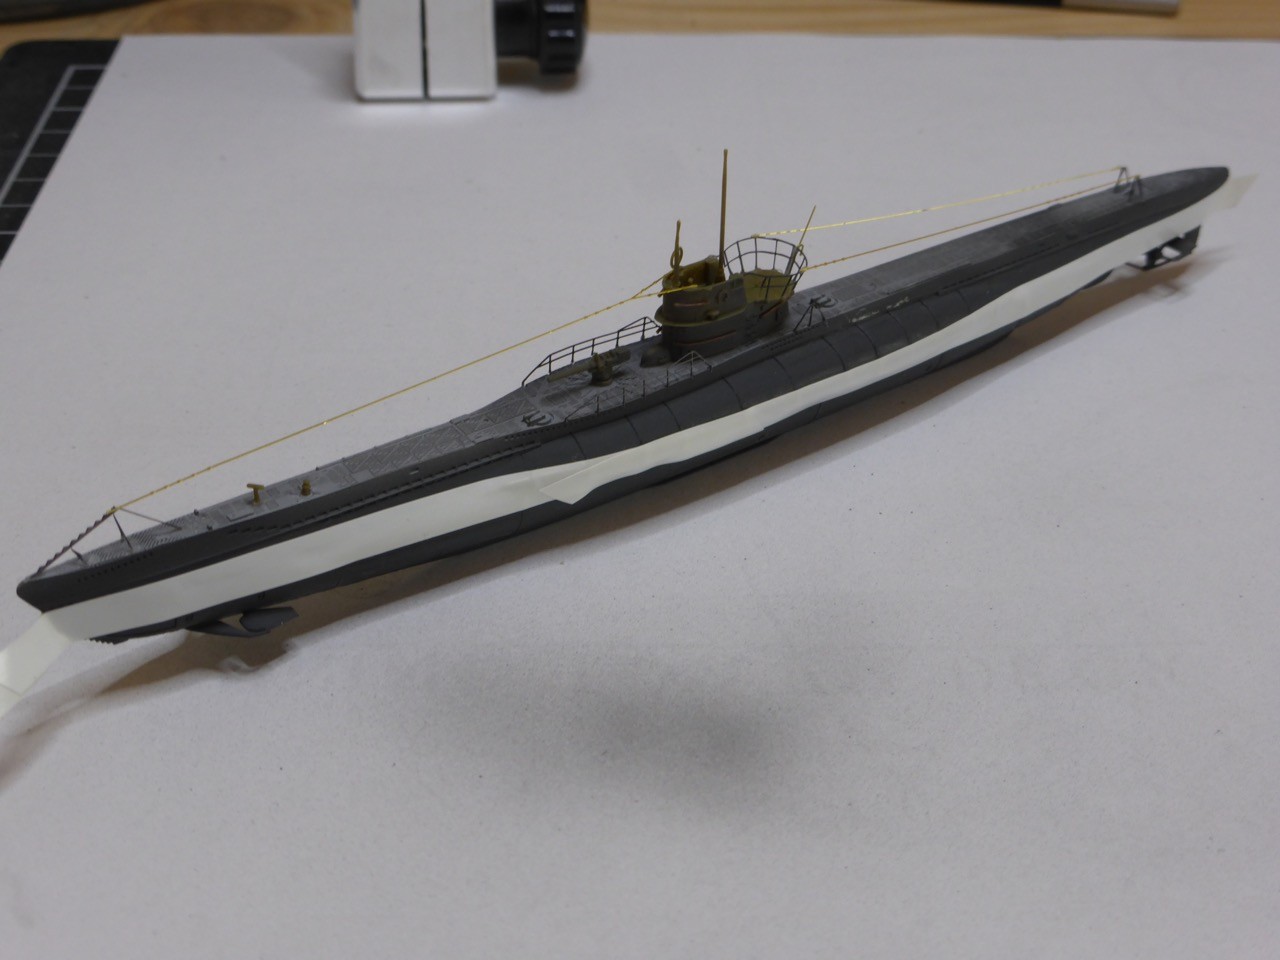
And upper hull painted 'Schlickgrau 58'.
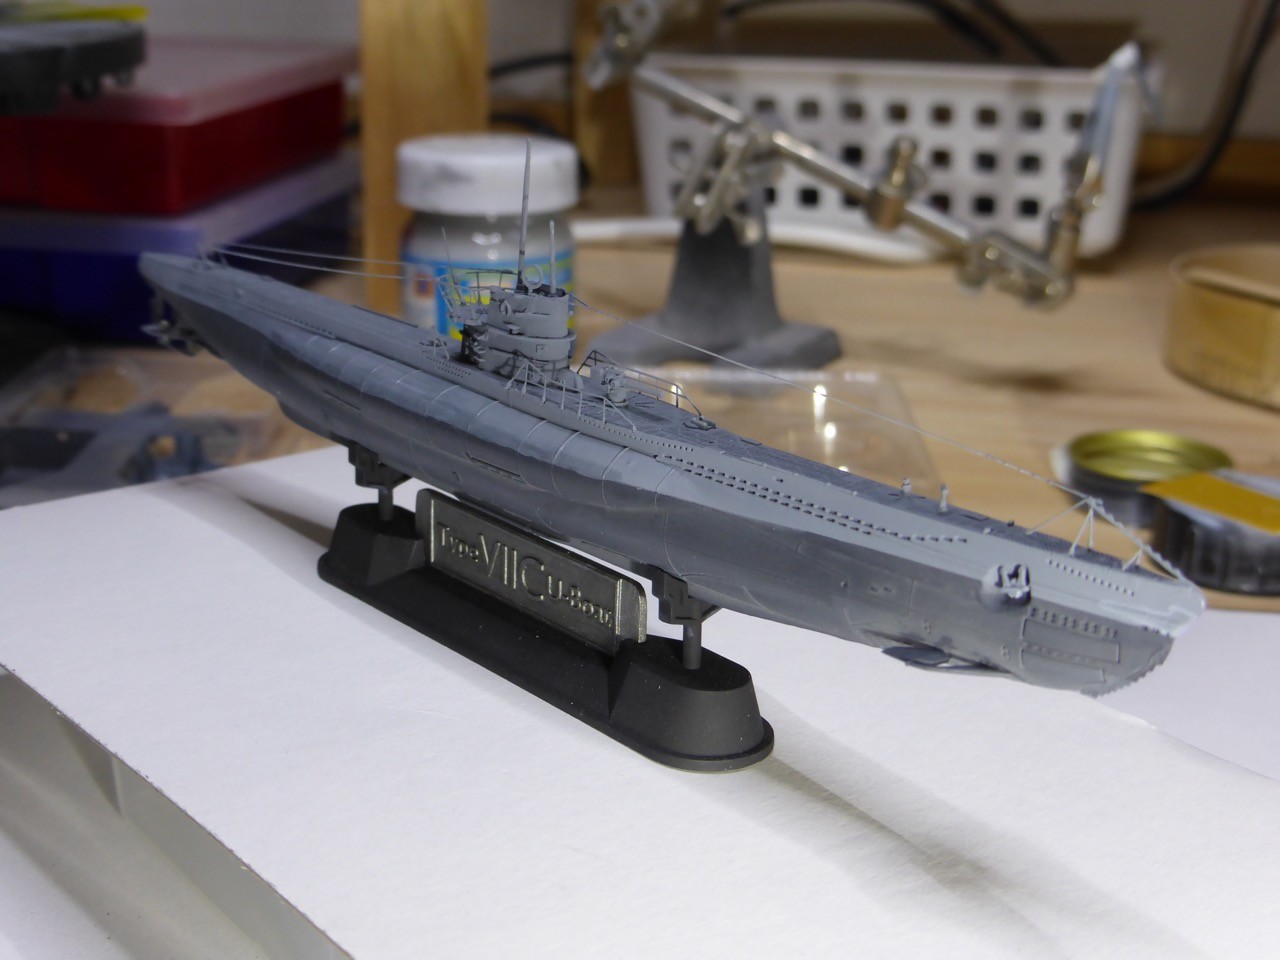
My masking wasn't even, so I had to correct a little with the hairy stick - not perfect, but will have to do. I will try my hands on weathering that one, so some of the issues should be concealed in the end.
Shafts and props on - I decided for iron props, as was common later on in the war.

Next will be the 20 mm single - I will try my hands on the Flyhawk kit for that. Decals and weathering. But that will be running a little in parallel to my next major project - Bismarck campaign is calling...
I hope with some rust and stain I will be able to turn this one into a decent sub eventually 
For now, thanks for looking and cheers,
Jan

I've been struggling along with my VII C boat. I am not entirely happy - the kit requires more time than I anticipated, and parts are really tiny. And I mean REALLY tiny. Who ever has followed one of my build logs so far is probably aware that I am not afraid of tiny detail work, but here some parts put me to the edge...
But here's the story:
Some more surfacer and sanding / knifing, so reasonably happy with that.
Bow flaps on:
All the details with the stern rudders / flaps, shafts etc, less shafts and props, which will be installed later on.
First coast of color 'Schiffsbodenfarbe 3 / DKM 23' on,
and the turret build up. That was the point where I almost gave up - or in fact, I gave up a little bit...
I decided to remove all the molded on details like steps and handrails and to replace them with Eduard parts. But I had to give up with the Eduard handrails - somehow I did not get them to work. Maybe it was just not my day...but when one of those escaped my tweezers and disappeared into eternity, I knew that I was one part short at least. So I decided to skip the handrails and replace them by copper wire. But honestly - the initial molded on detail looked better. But that was gone...
The little steps up worked ok, the railing around the after part of the tower was, let's say, a challenge. But again, maybe it simply wasn't my day...
More PE work - this worked a lot better. Or maybe today was better (the turret business was yesterday).
I decided to leave the 8.8cm gun as is from the kit, it looks quite ok. As for the whole kit - the detail is molded very fine and crisp, only there are quite a few fitting issues.
5 mm flexible tape to mask the lower hull
And upper hull painted 'Schlickgrau 58'.
My masking wasn't even, so I had to correct a little with the hairy stick - not perfect, but will have to do. I will try my hands on weathering that one, so some of the issues should be concealed in the end.
Shafts and props on - I decided for iron props, as was common later on in the war.
Next will be the 20 mm single - I will try my hands on the Flyhawk kit for that. Decals and weathering. But that will be running a little in parallel to my next major project - Bismarck campaign is calling...
I hope with some rust and stain I will be able to turn this one into a decent sub eventually
For now, thanks for looking and cheers,
Jan

RedDuster
Joined: March 01, 2010
KitMaker: 7,078 posts
Model Shipwrights: 6,649 posts

Posted: Monday, May 16, 2016 - 12:54 AM UTC
Look great Jan,
Very nice indeed.
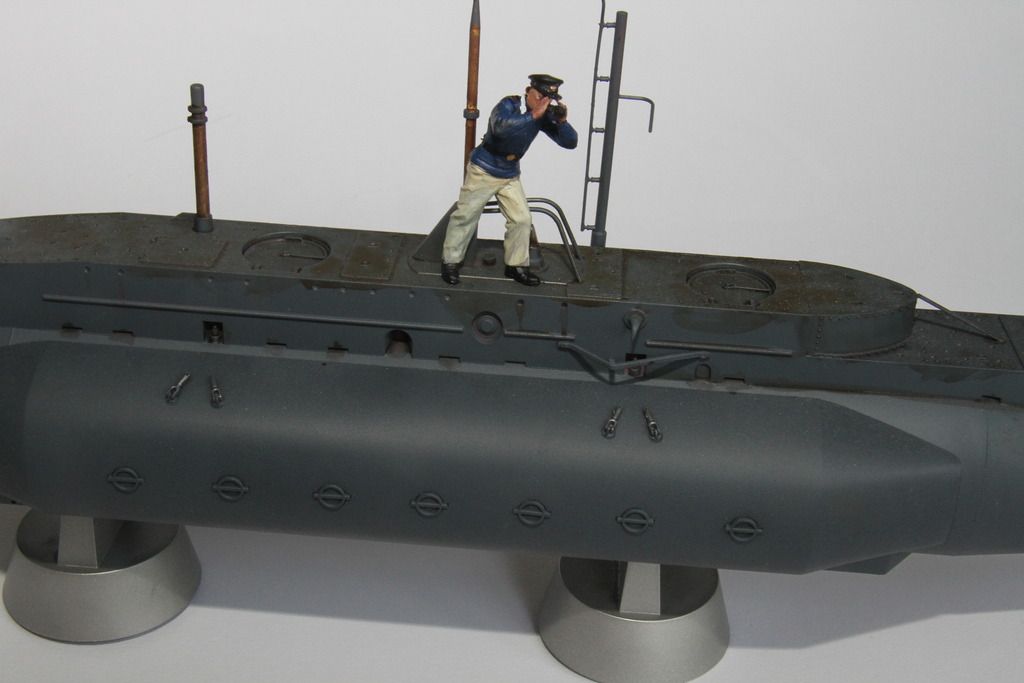
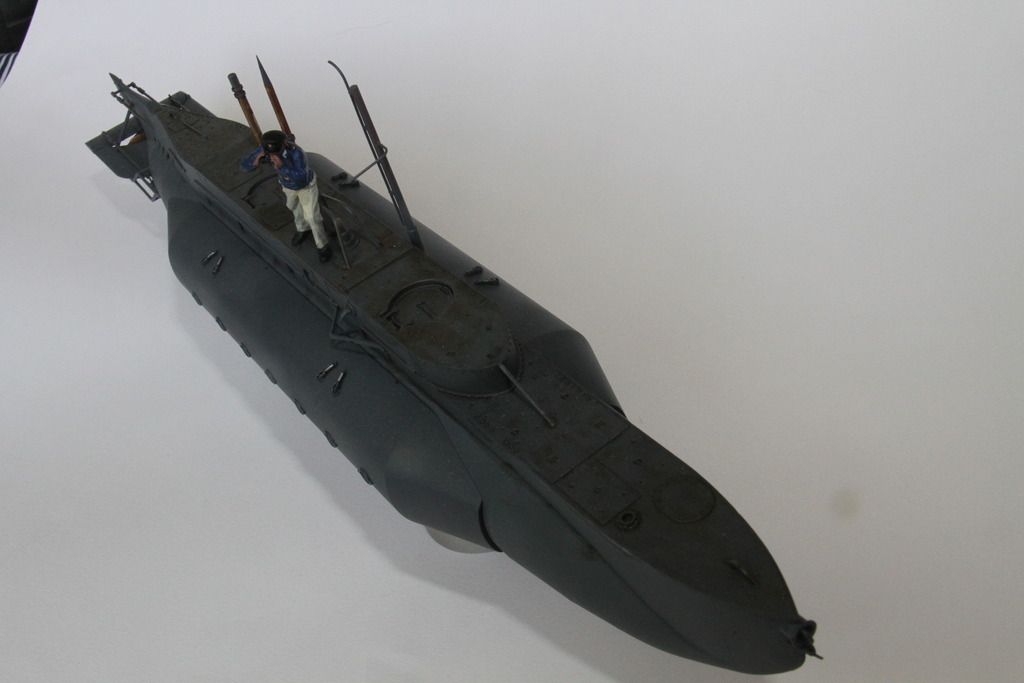
Finally found and painted a figure to give the X-Craft scale. X-Craft crews, like most serving on small vessels were not known for regulation uniform. Converted from an a Mini art British Army officer Western Desert, (Mostly with a paintbrush)

Fitted and done.
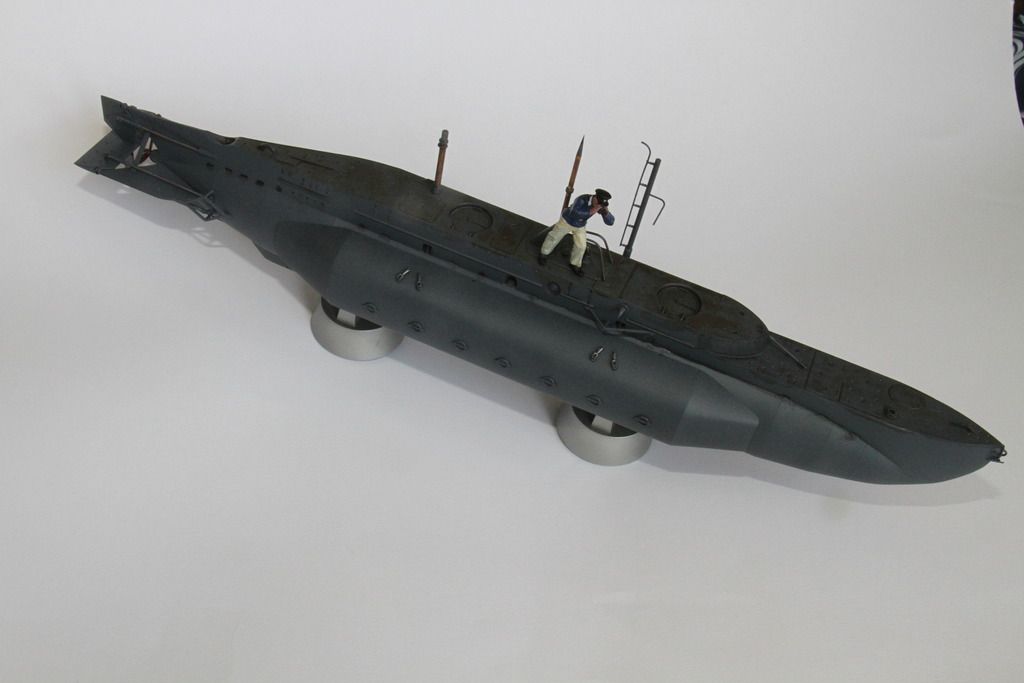
Cheers
Si
Very nice indeed.
Finally found and painted a figure to give the X-Craft scale. X-Craft crews, like most serving on small vessels were not known for regulation uniform. Converted from an a Mini art British Army officer Western Desert, (Mostly with a paintbrush)

Fitted and done.


Cheers
Si
JJ1973
#345
Joined: August 22, 2011
KitMaker: 1,835 posts
Model Shipwrights: 1,832 posts
Posted: Monday, May 16, 2016 - 09:19 AM UTC
Wow, clearing the slips there, Si!!
Two commissions during one weekend, that's a good yield there mate!! And all the yard workers getting in their mindset for the Bismarck hunt
The X-craft is looking really fine (could work for a 'sink the Tirpitz!' theme), those things were really small. Nice touch with the figure on top!
Cheers,
Jan
RedDuster
Joined: March 01, 2010
KitMaker: 7,078 posts
Model Shipwrights: 6,649 posts
Posted: Monday, May 16, 2016 - 05:27 PM UTC
Ready to rock and Roll mate.
I felt it needed a figure to give scale, just wish I was better at converting them though.
Thanks
Si
I felt it needed a figure to give scale, just wish I was better at converting them though.
Thanks
Si
Littorio
Joined: September 15, 2004
KitMaker: 4,728 posts
Model Shipwrights: 1,080 posts
Posted: Monday, May 16, 2016 - 10:46 PM UTC
Nice one Si, the figure is a nice touch as it adds a sense of scale.
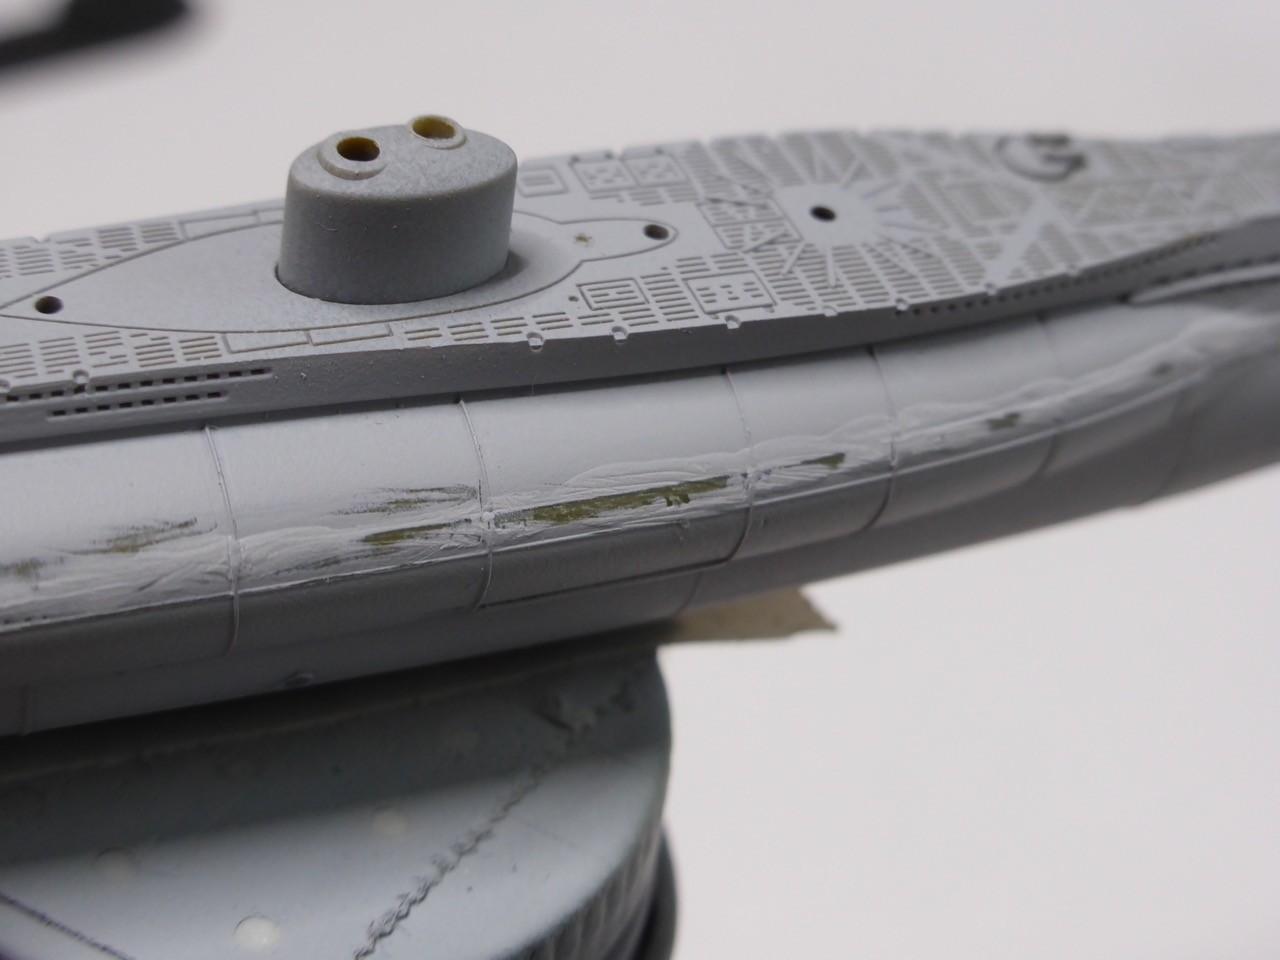
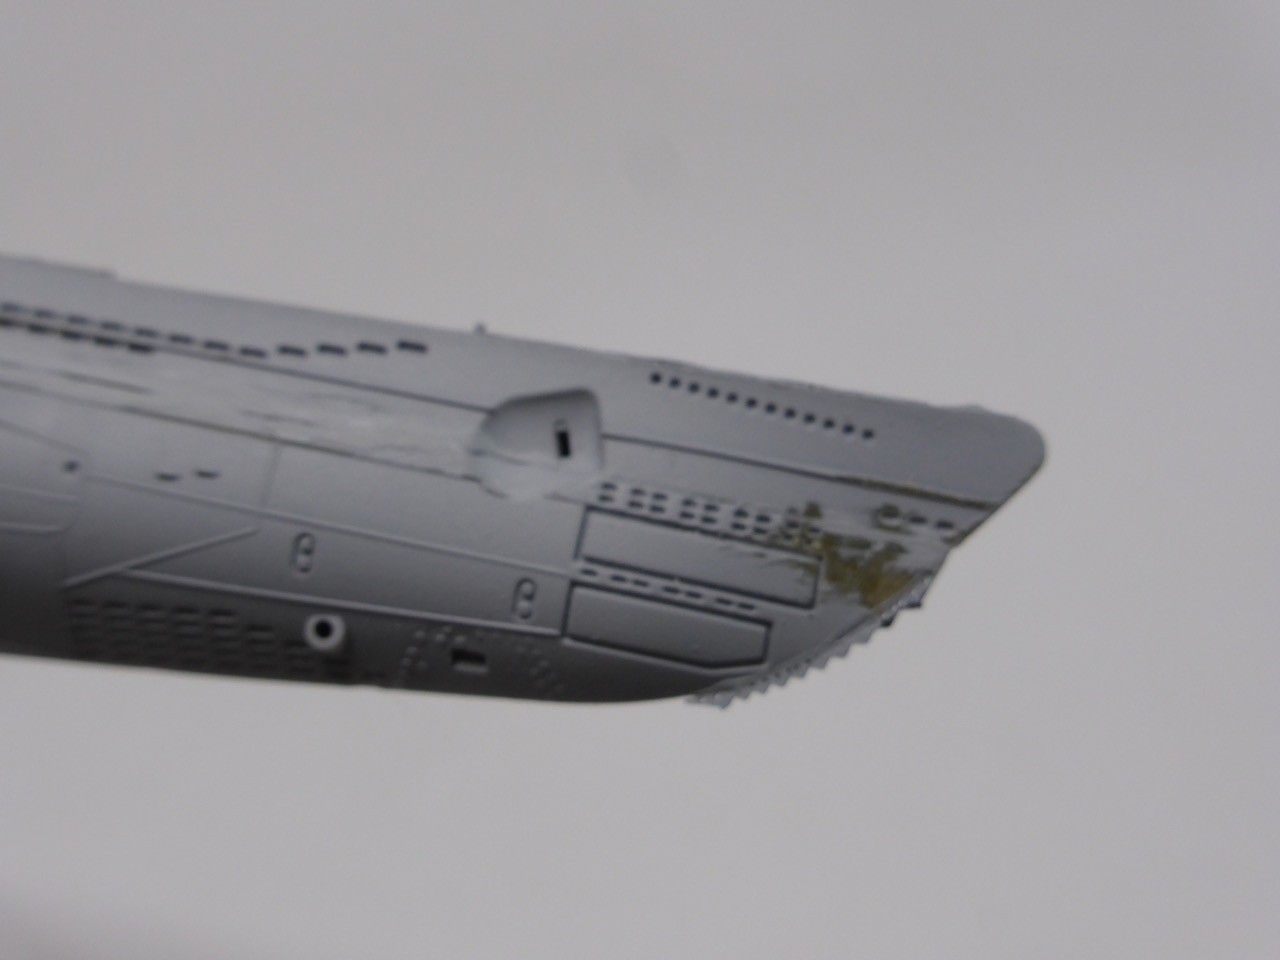
Small update on the Typ IIB, added the hand rails and other small details ready for a coat of primer.

Small update on the Typ IIB, added the hand rails and other small details ready for a coat of primer.

RedDuster
Joined: March 01, 2010
KitMaker: 7,078 posts
Model Shipwrights: 6,649 posts
Posted: Wednesday, May 18, 2016 - 12:15 AM UTC
Thanks Luciano,
Nice start on the IIb
Cheers
Si
Nice start on the IIb
Cheers
Si
JJ1973
#345
Joined: August 22, 2011
KitMaker: 1,835 posts
Model Shipwrights: 1,832 posts
Posted: Saturday, May 21, 2016 - 10:26 PM UTC
So between the start of the Bismarck campaign and my Hood build and several other things, I managed to commission my little sub.
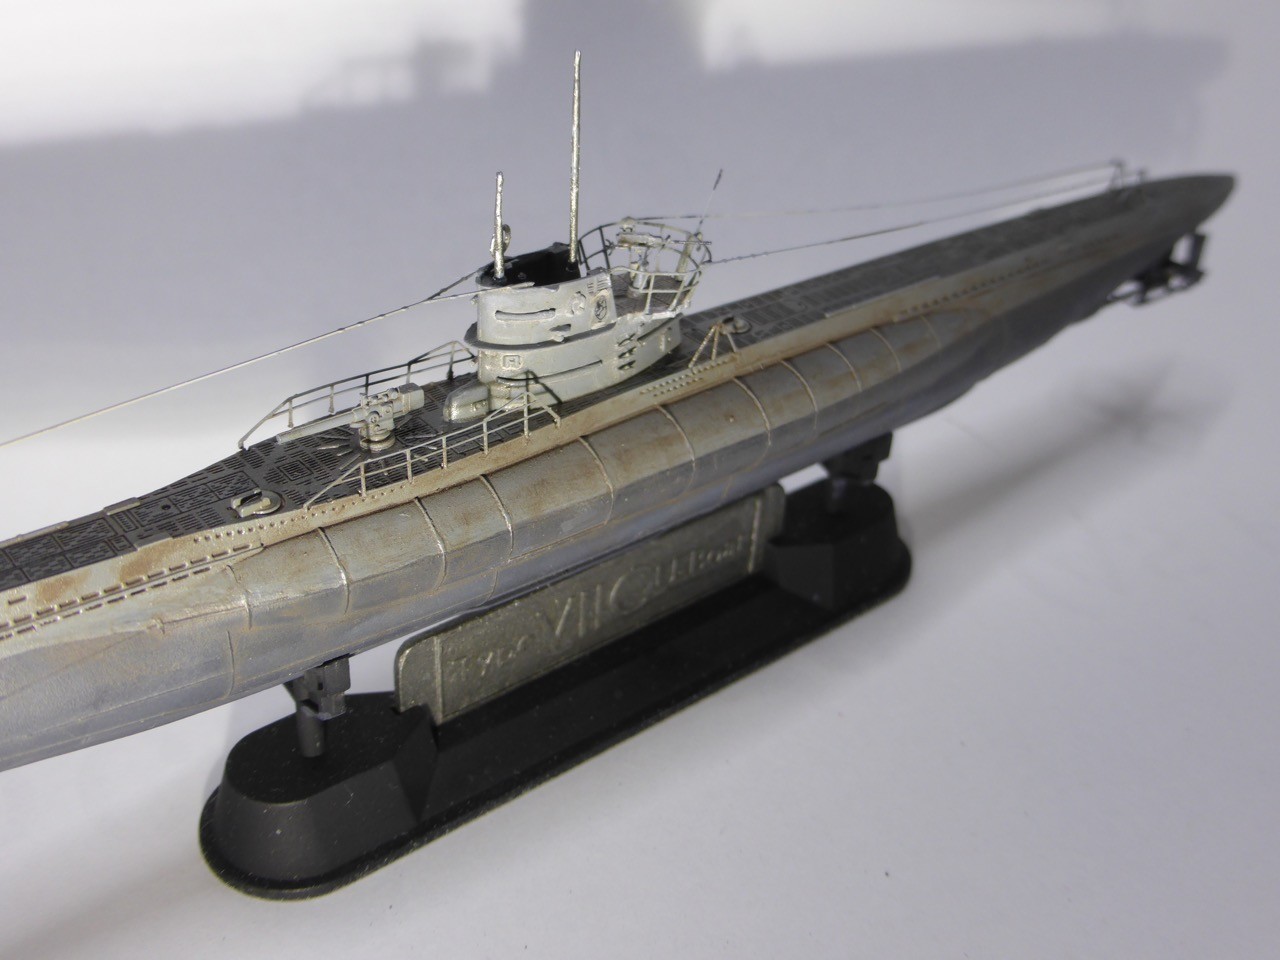
Since not everything worked out as I had planned, I decided to show a beaten sub, returning from a 'Feindfahrt'...
So here's the first weathering:

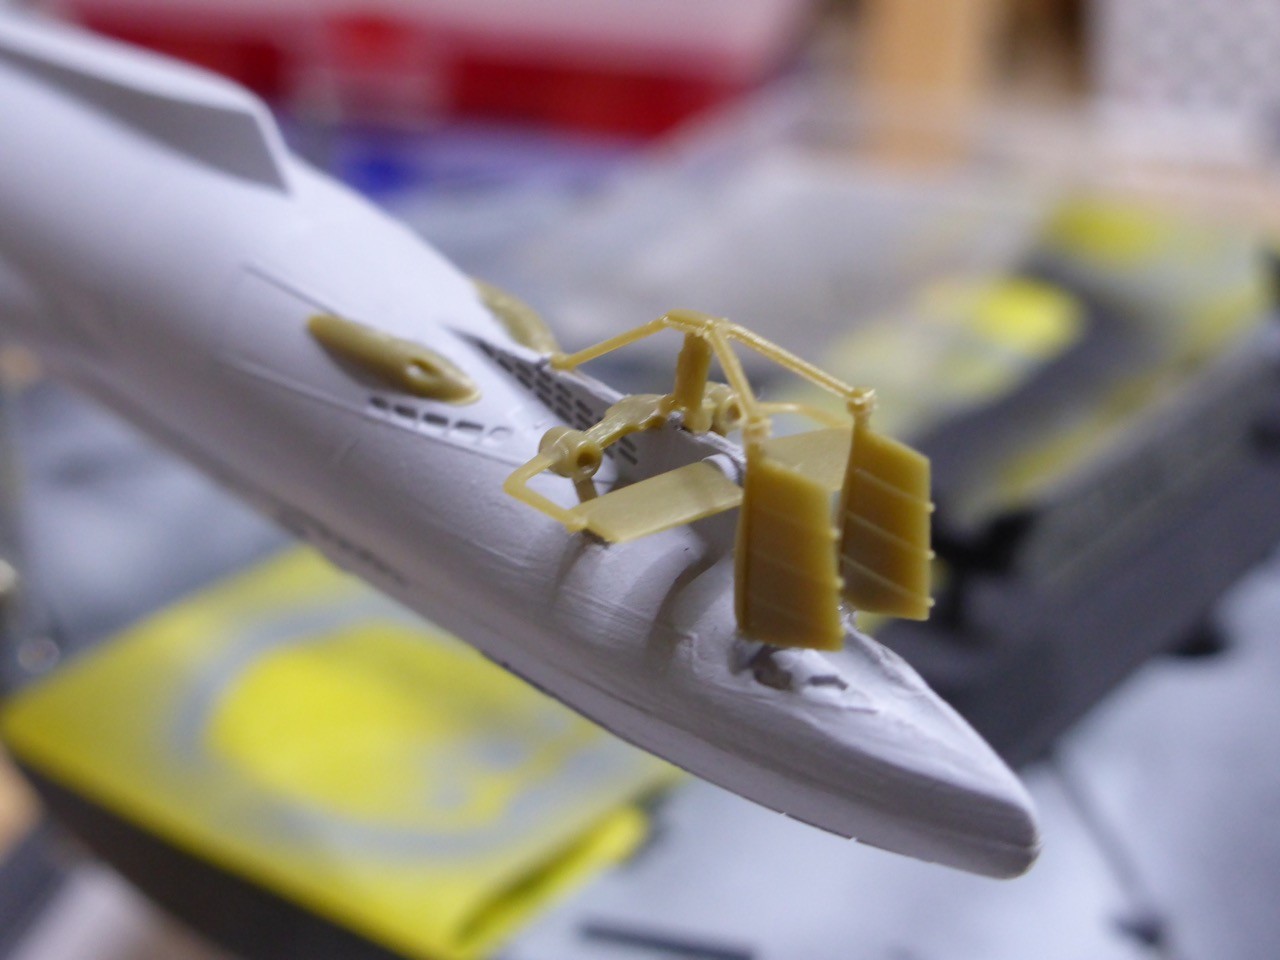
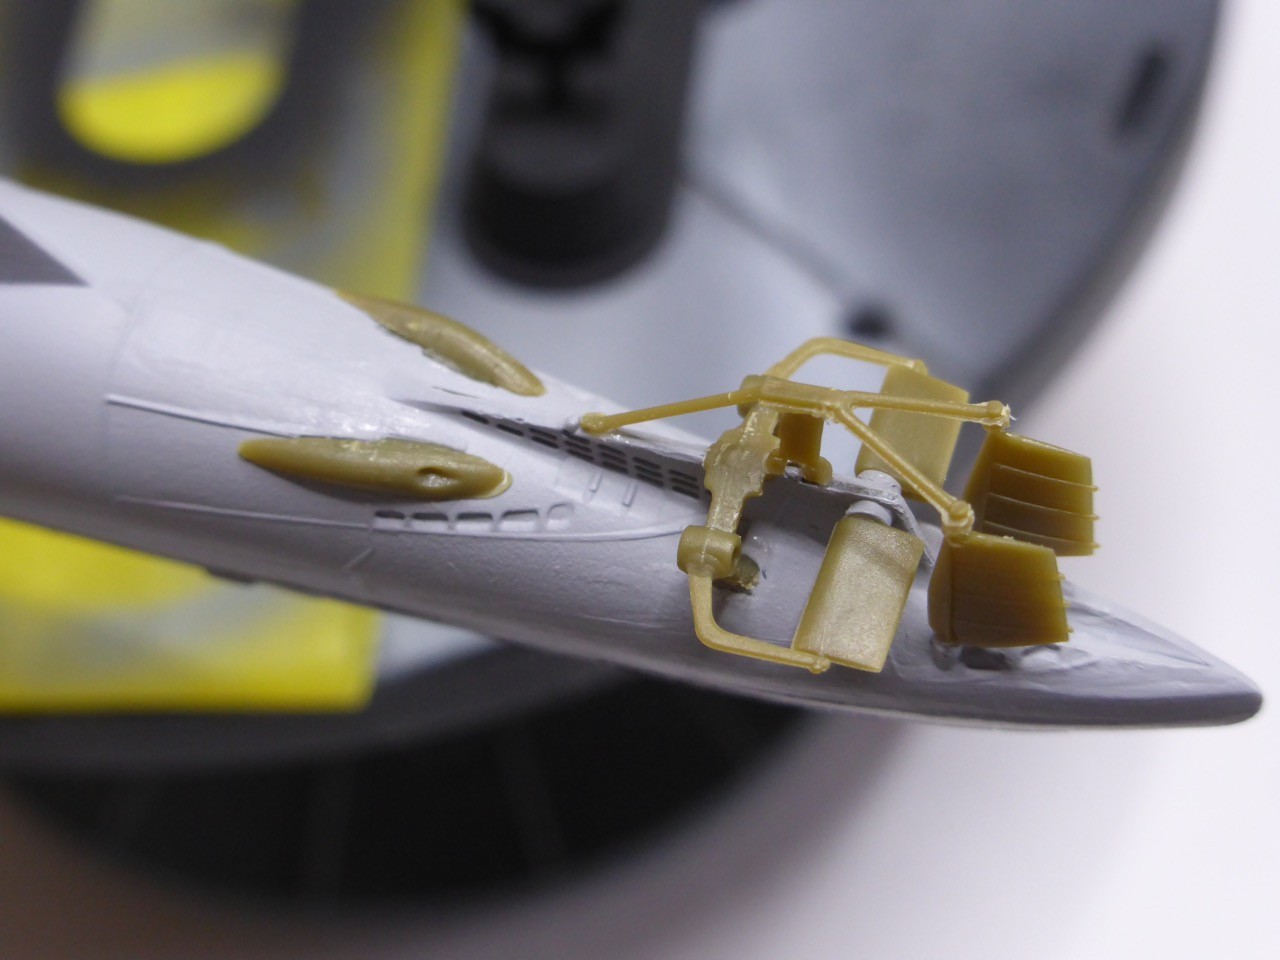
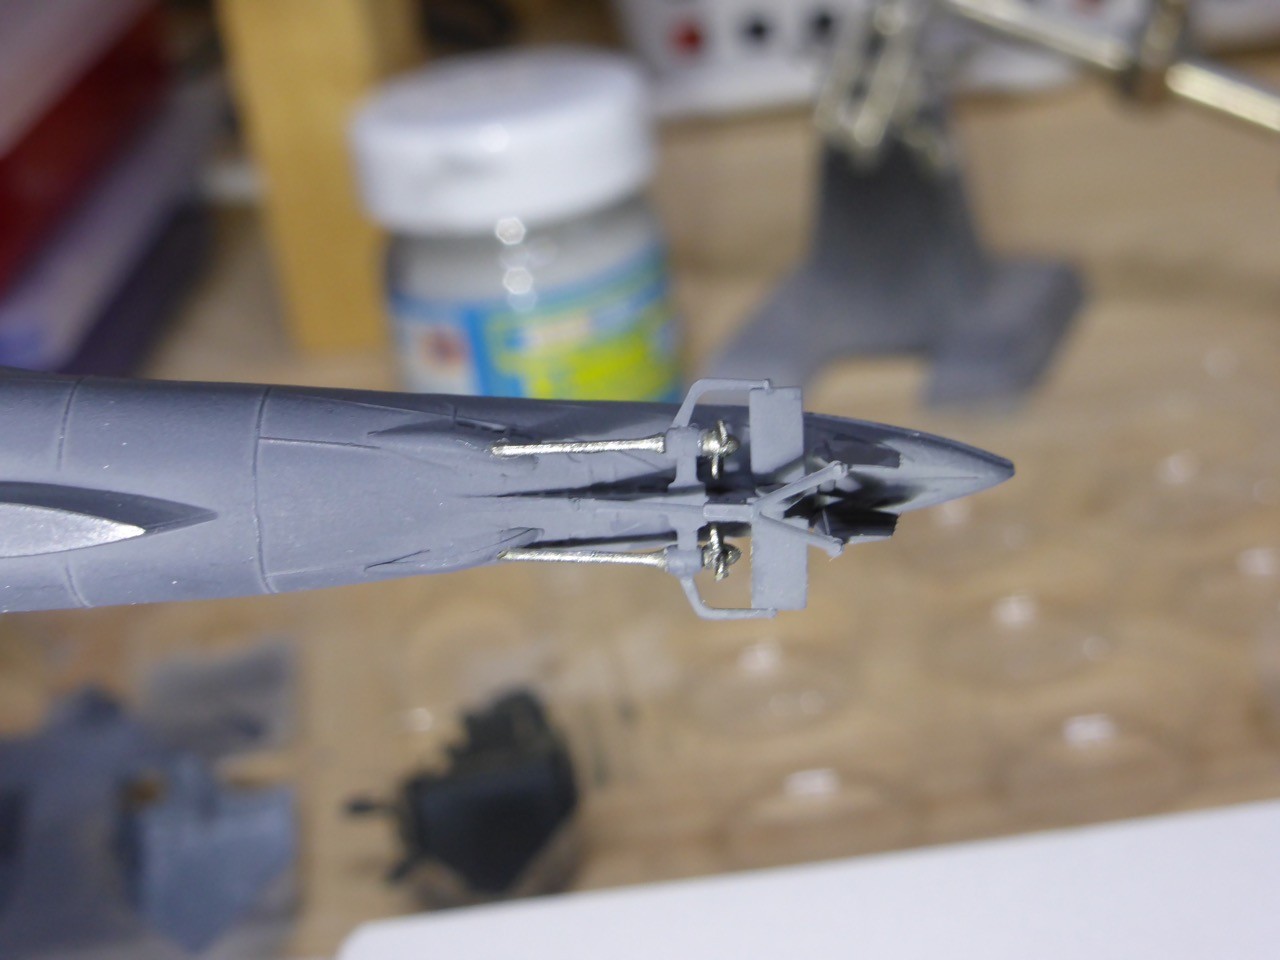
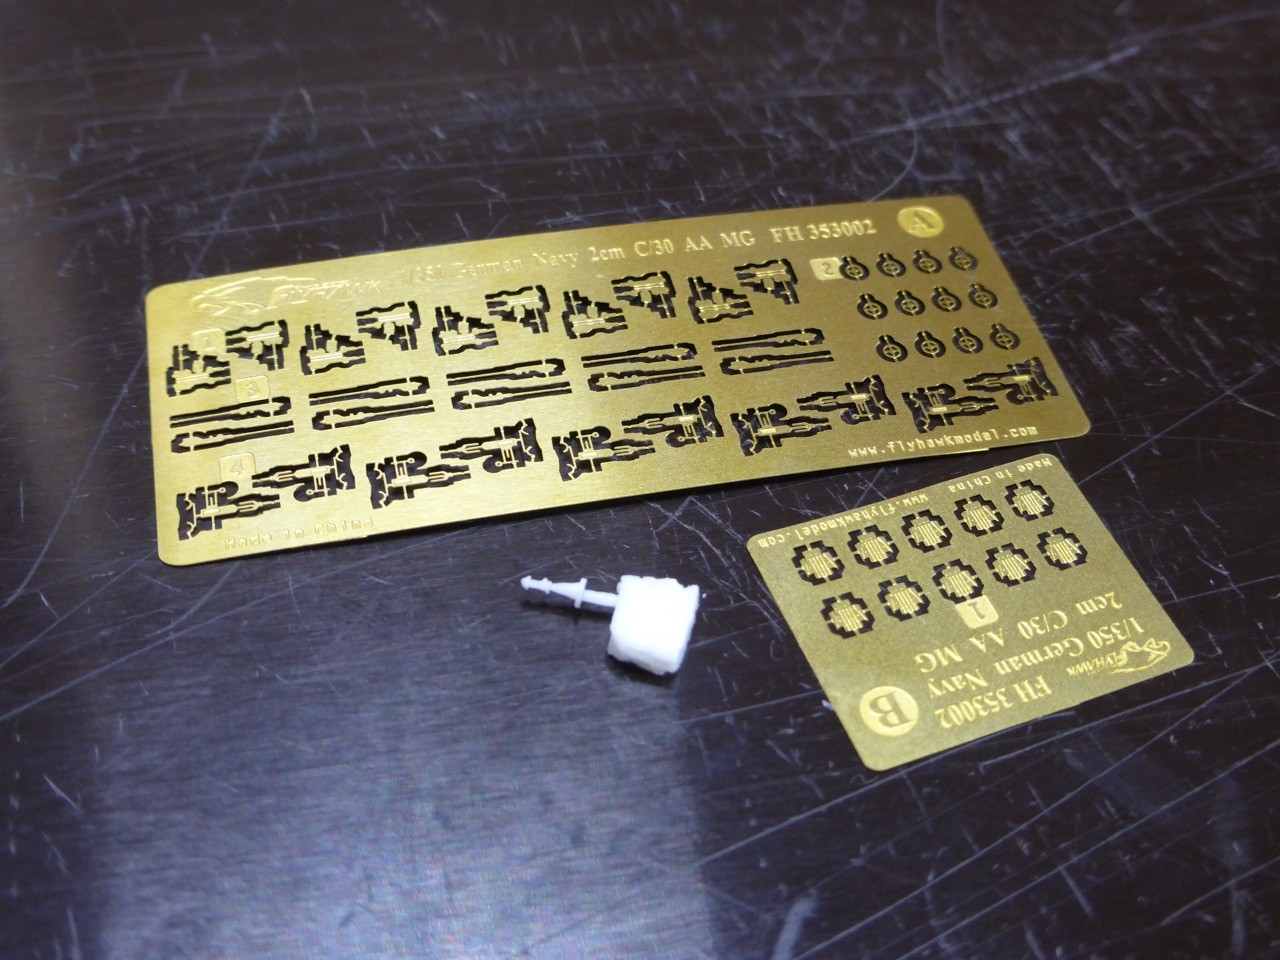
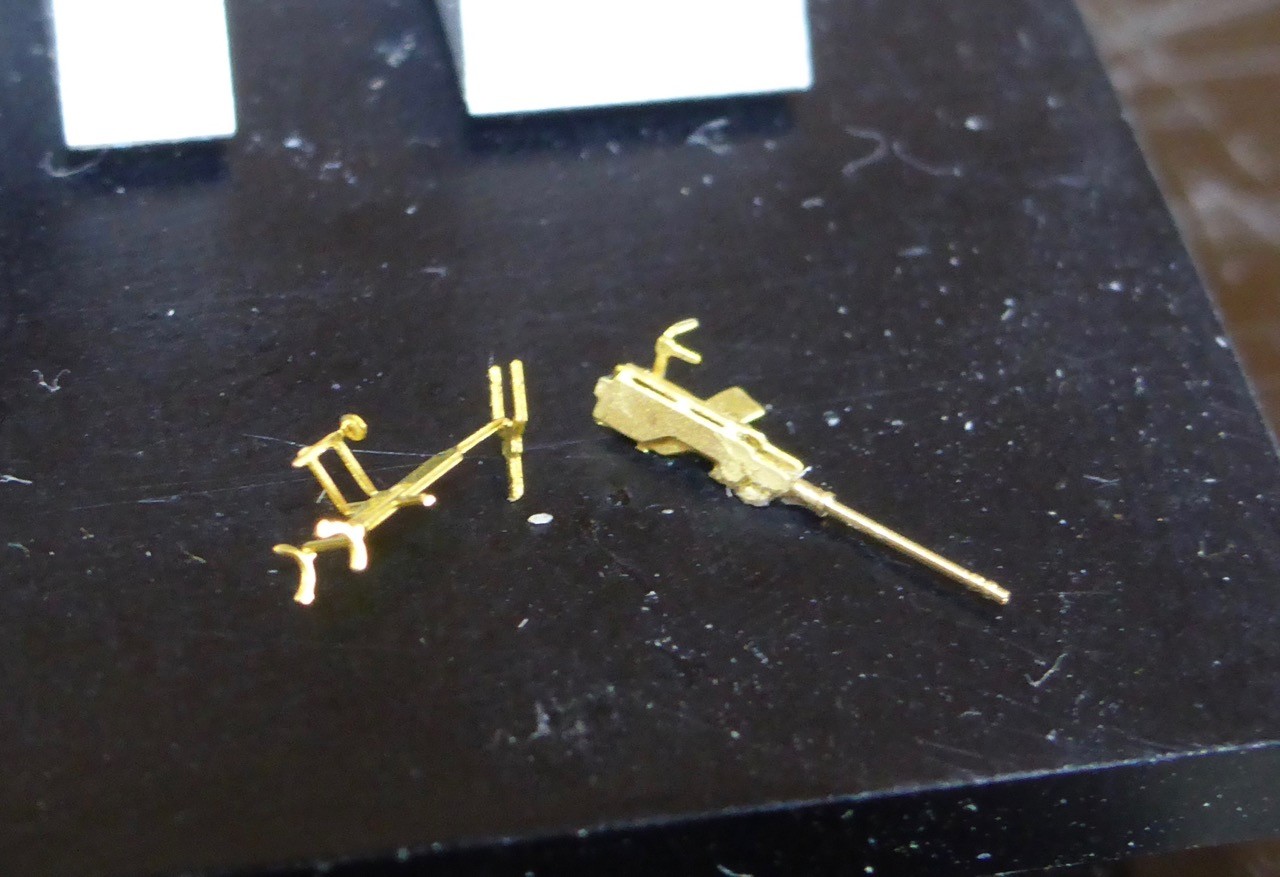
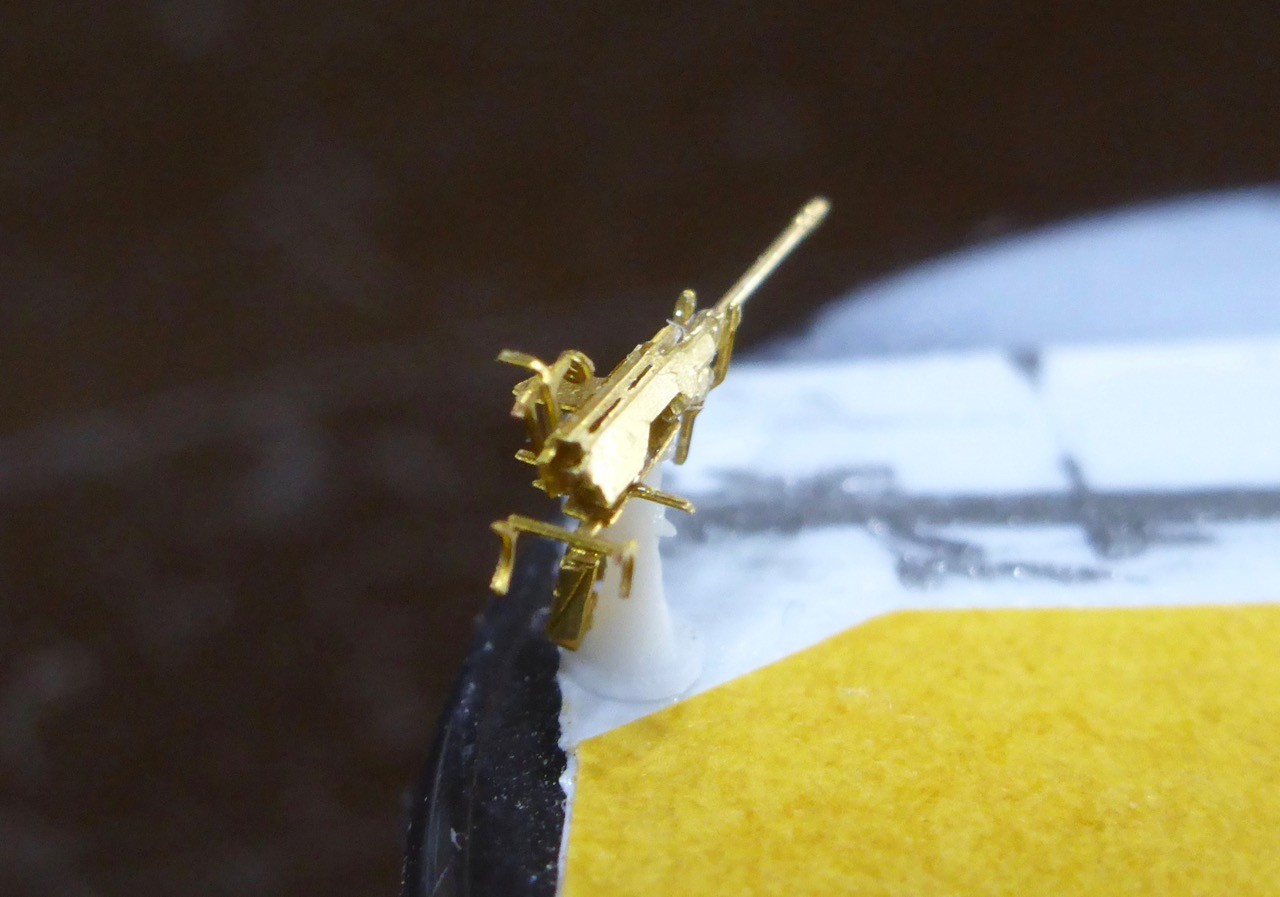
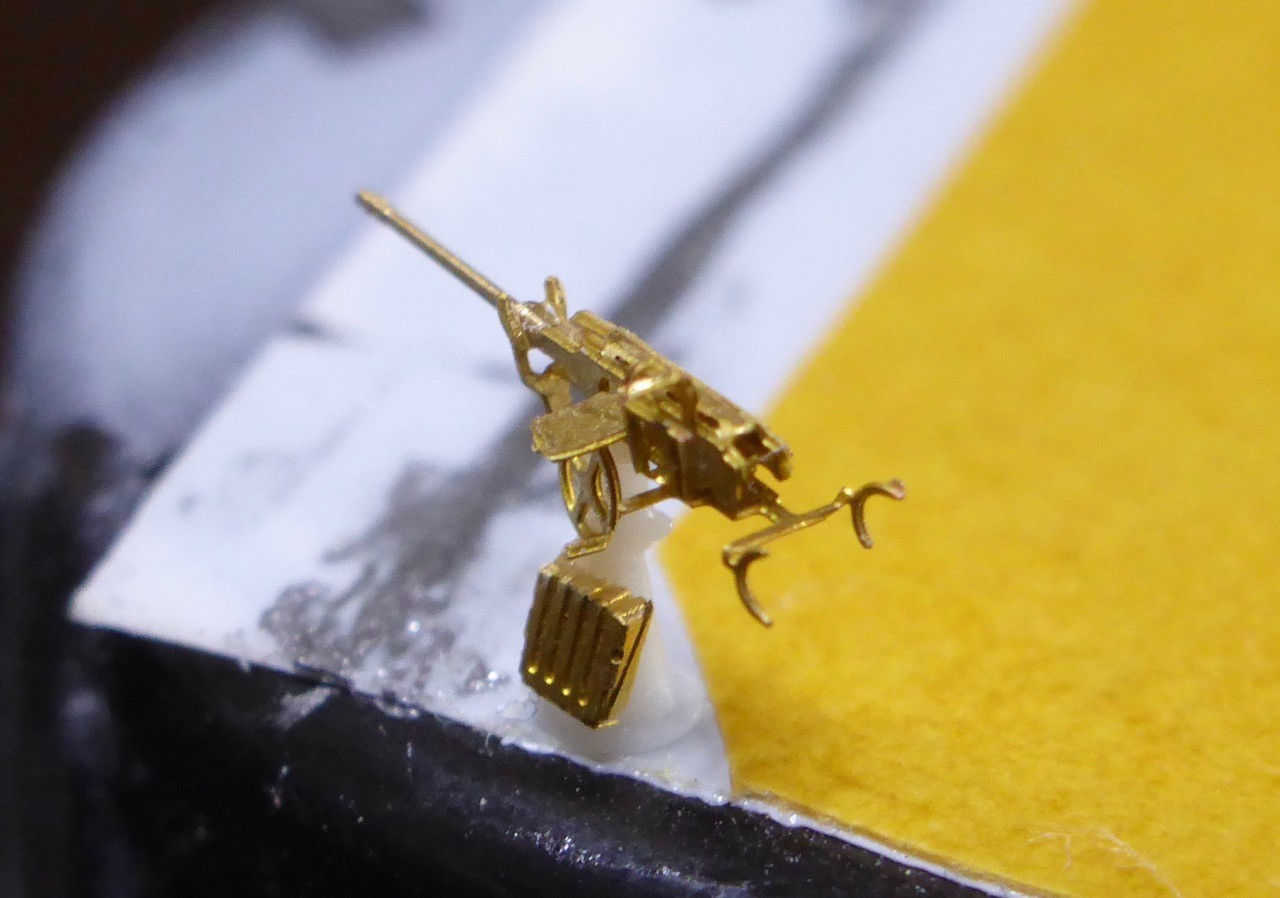
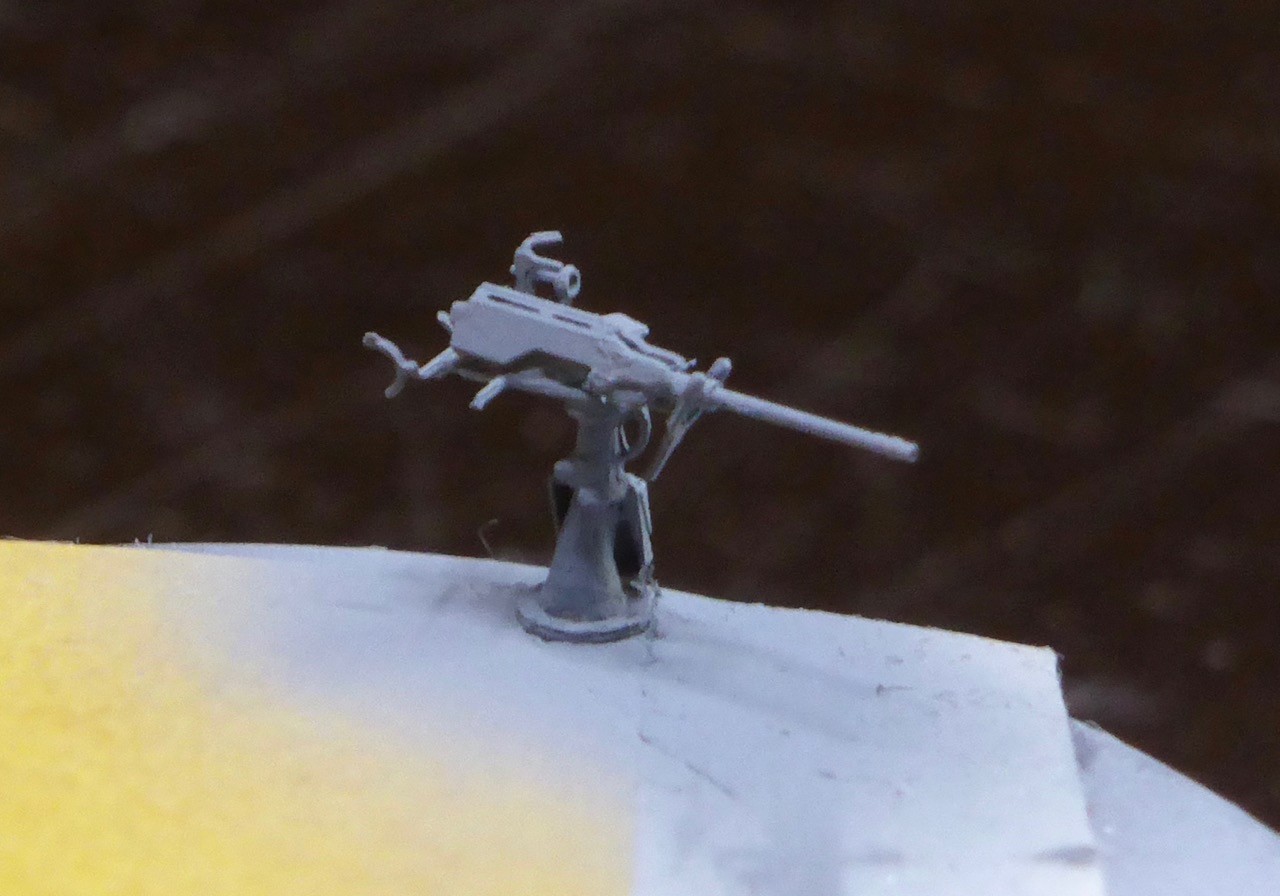
One more thing left to do, the single 20mm AA. Here I decided to try my hand on a Flyhawk set, here are the parts:
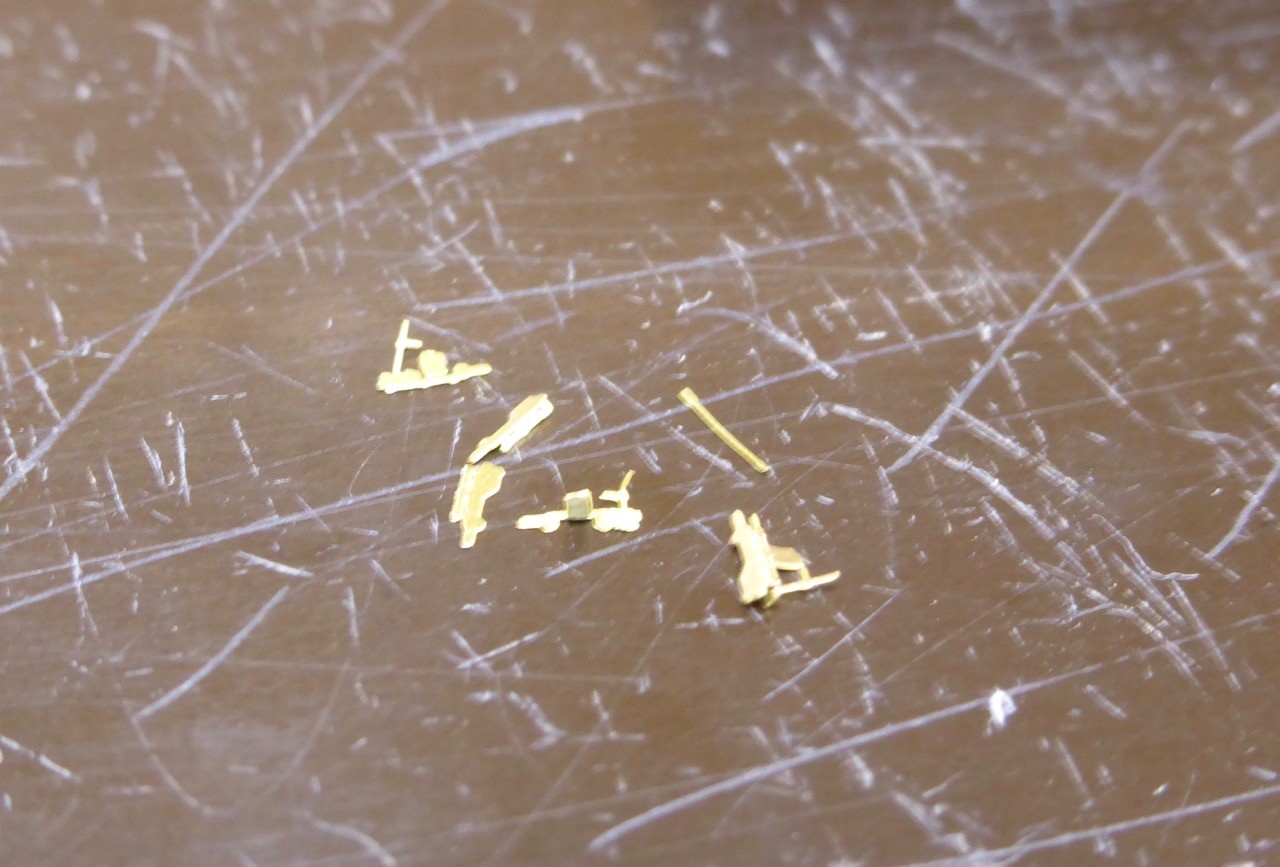
Once more, this took me longer than expected, and I ended up losing three guns - only number four was finally ok. Here's my 'pile of shame' less some parts that were caught by the carpet monster and never seen again...
I'd say Flyhawk presents a pretty nice model of the gun, but, well, it's tiny, and somehow it requires a different approach than the Master ones. That's why I broke a couple, not that the kit is bad. Once I actually got around, I think I will order some more once I start a German project.
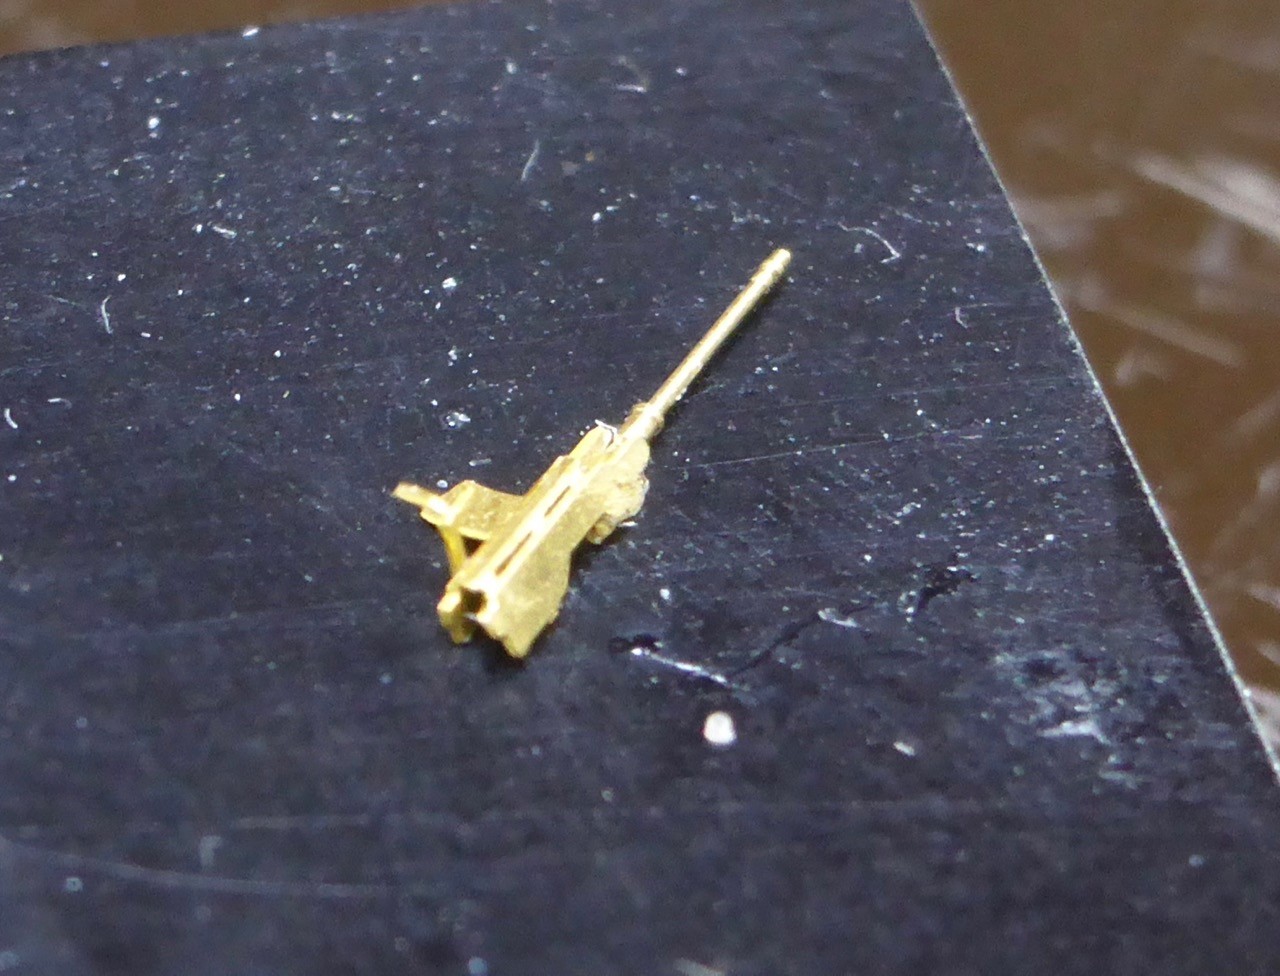
The main downside of the kit is that there are no turned barrels. I simply don't like 2-dimensional barrels, regardless how small they are. But that is easily overcome, by cutting the flat barrel part and replacing it with a Masters German 20mm early type barrel.
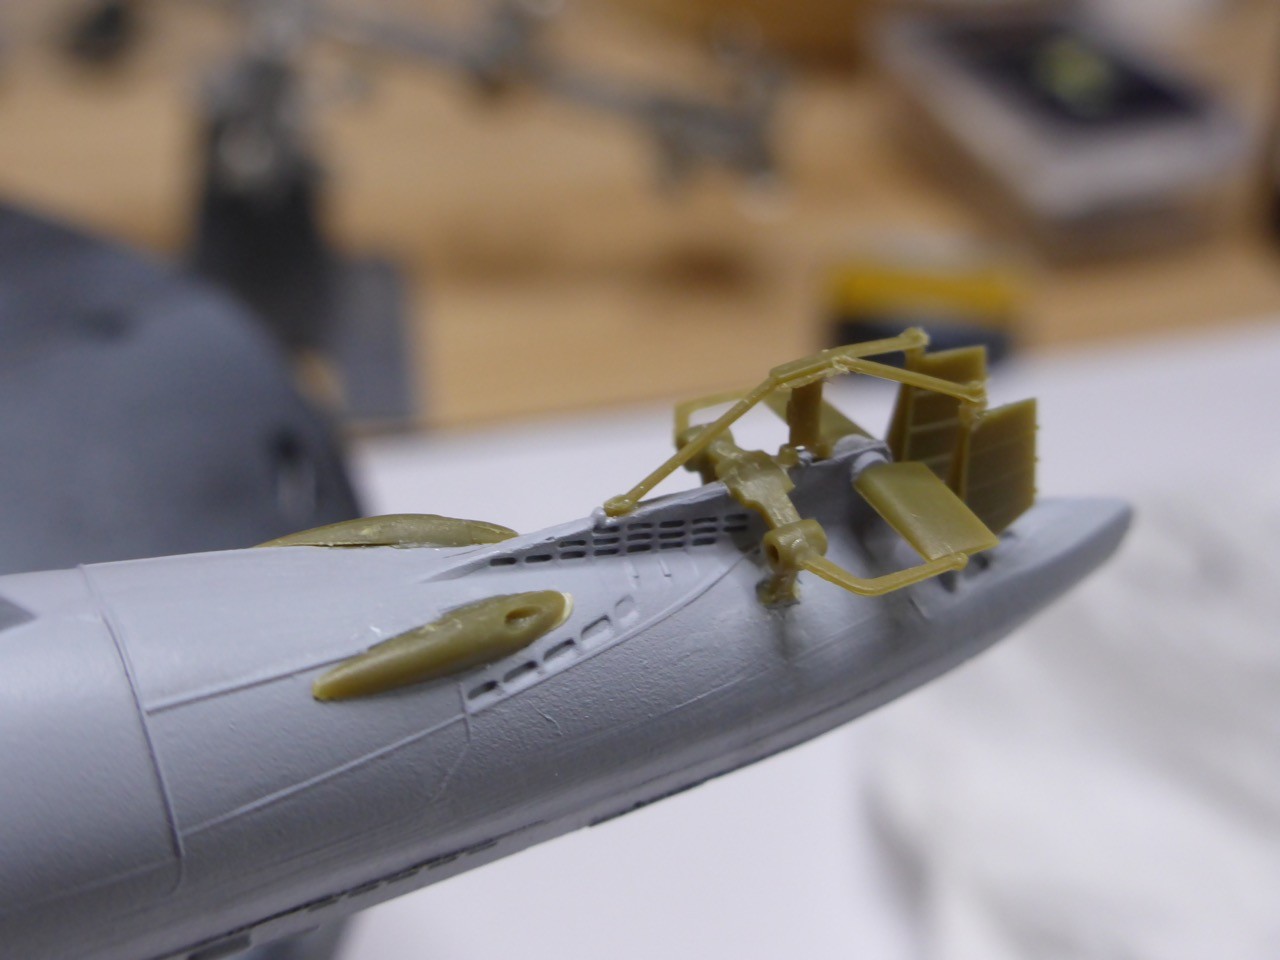
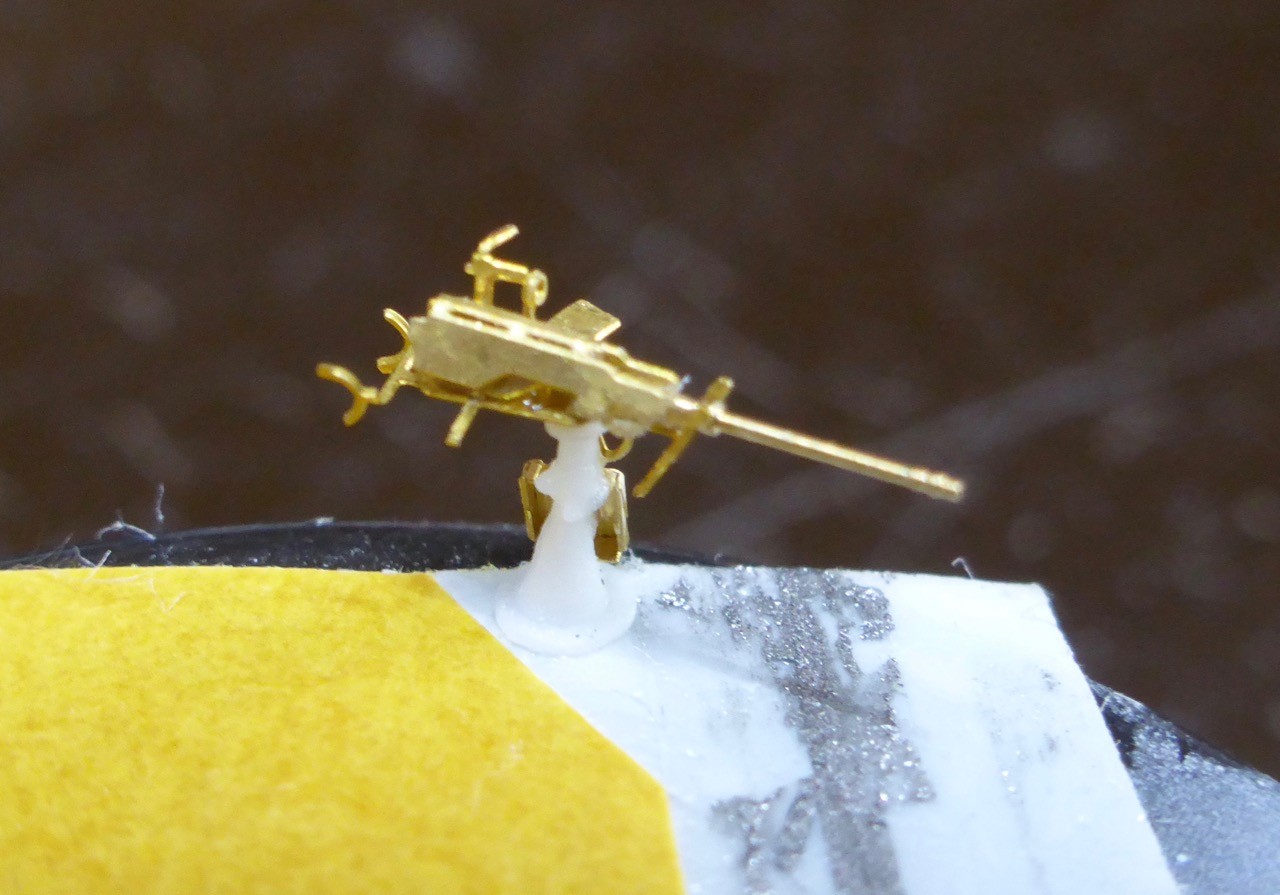
So here's the gun:
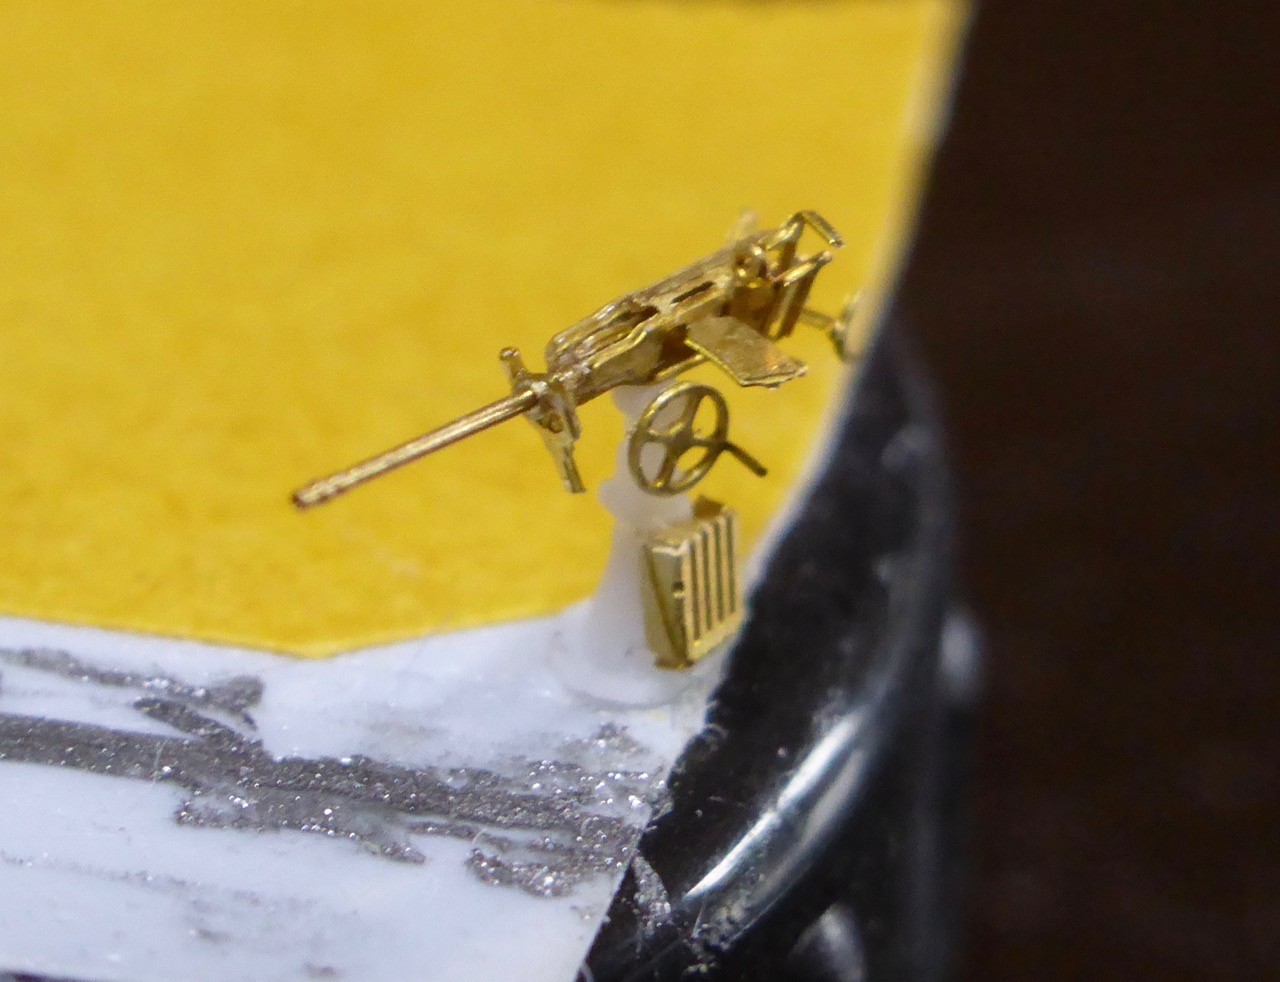
Gun and cradle:
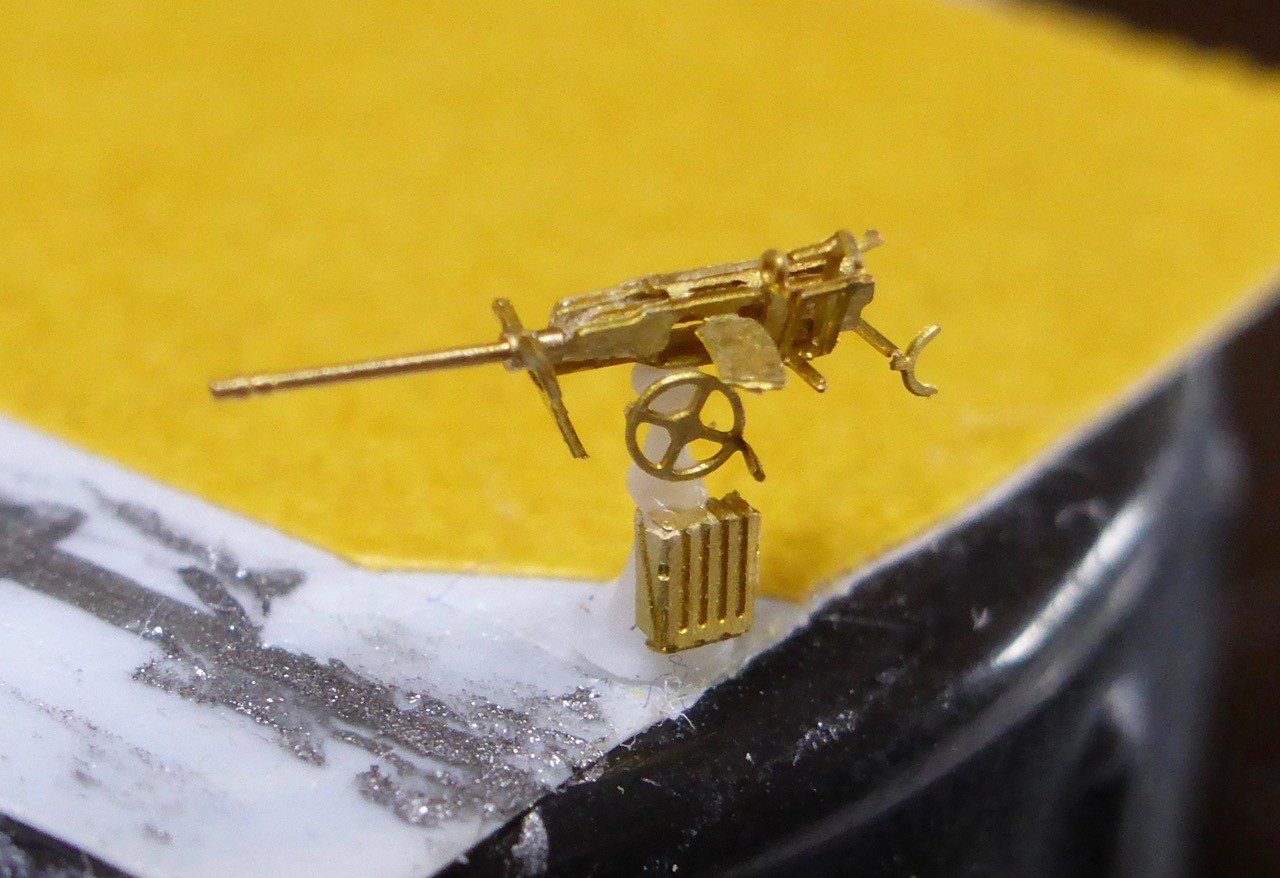
The gun mount with spare magazines, nice resin part and easier to assemble than it looks...
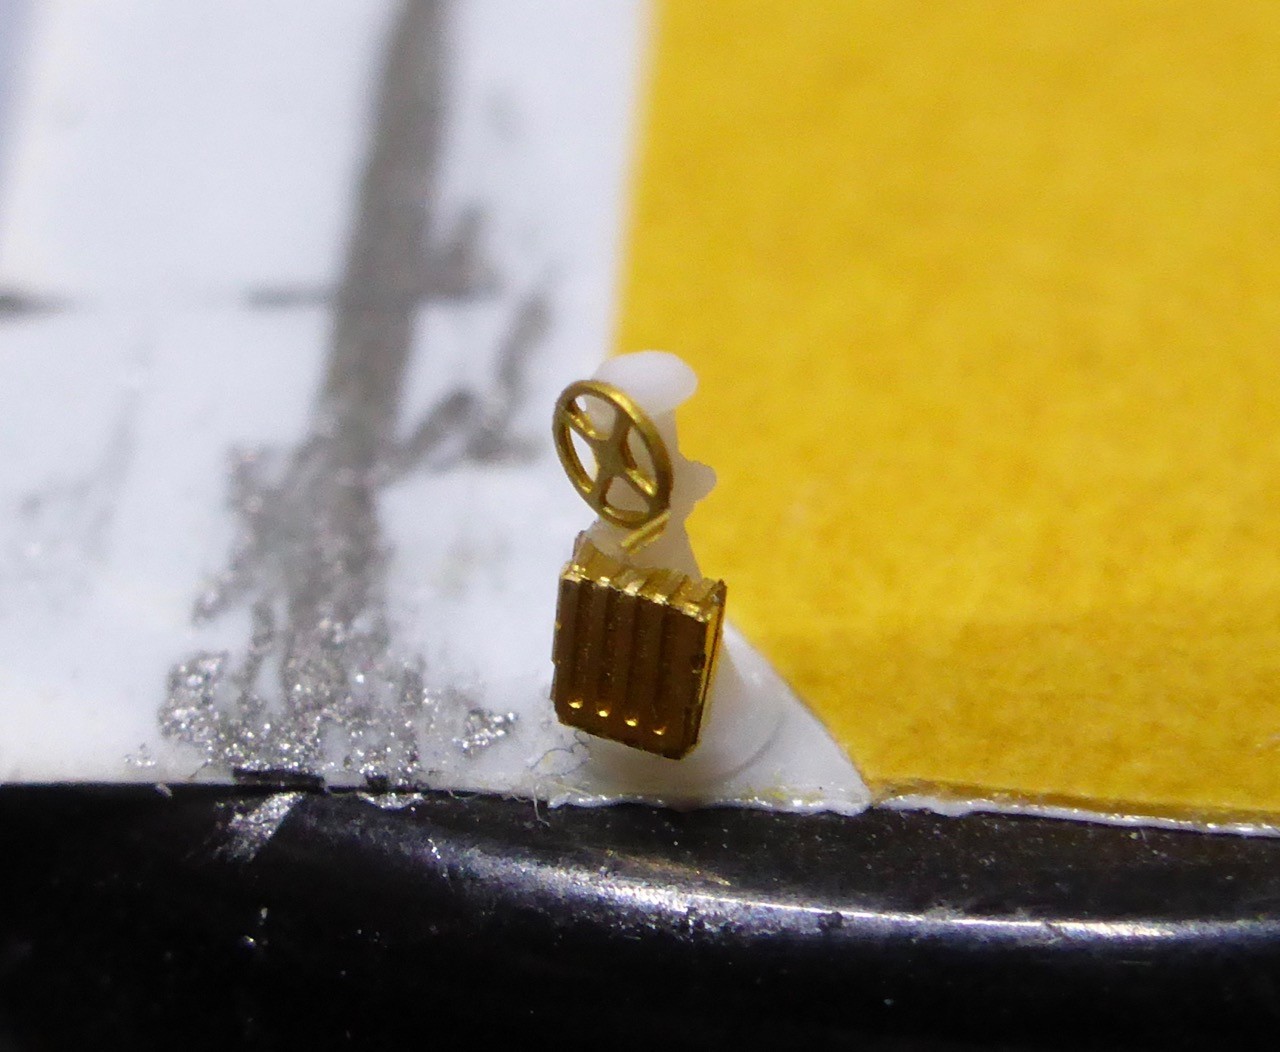
Cradle added:
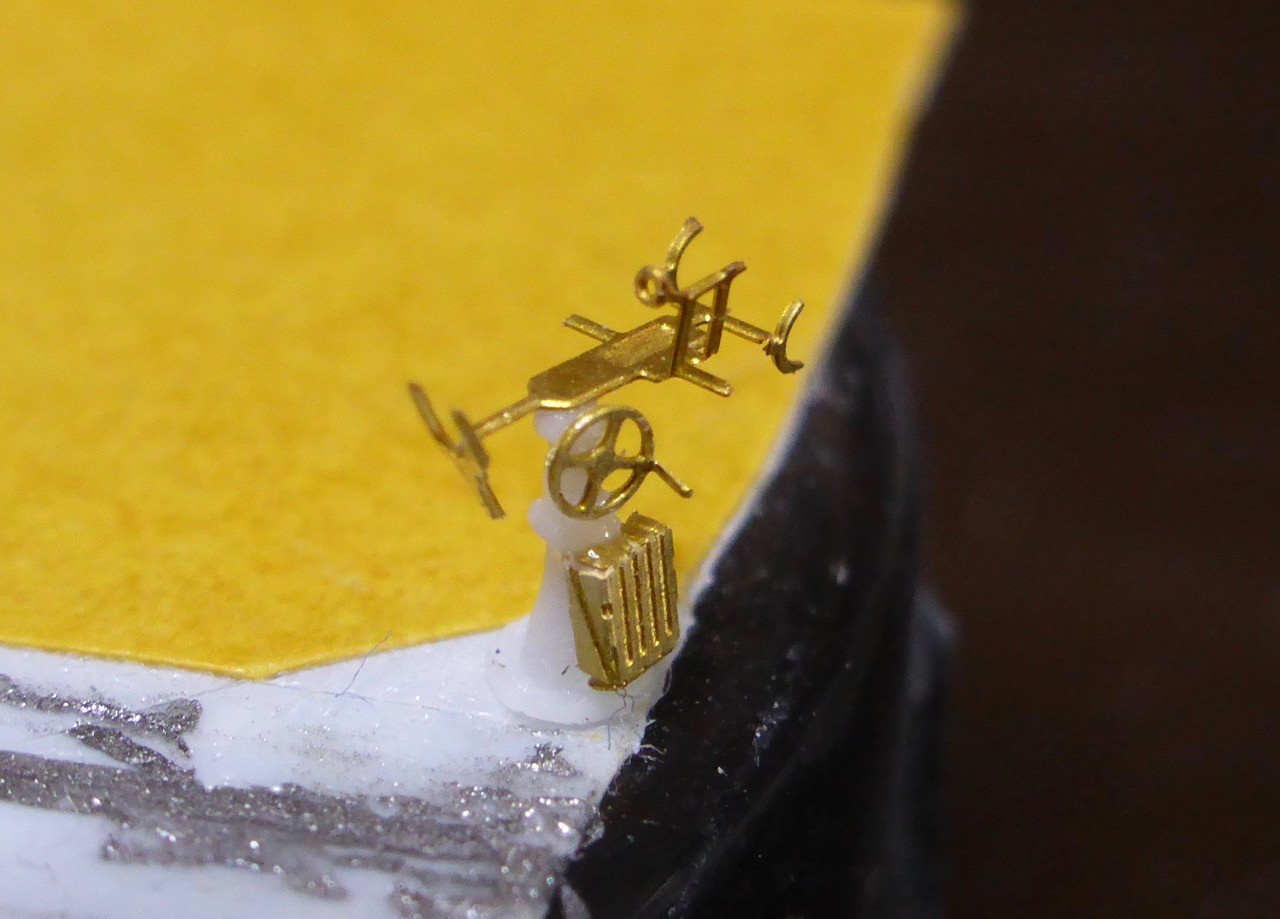
I'd say it builds into a nice gun.
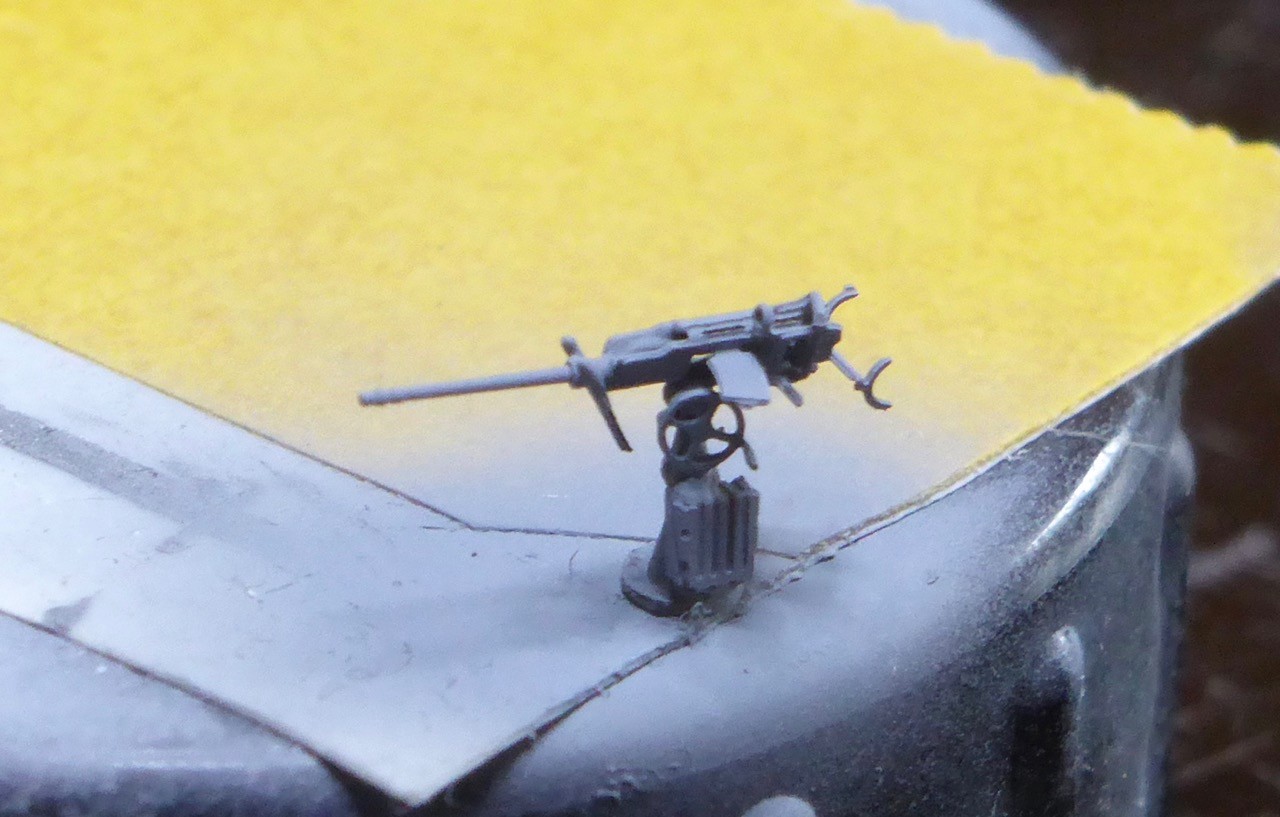
Decal added, the only one that I could fit after my unsuccessful operation to the handrails etc..
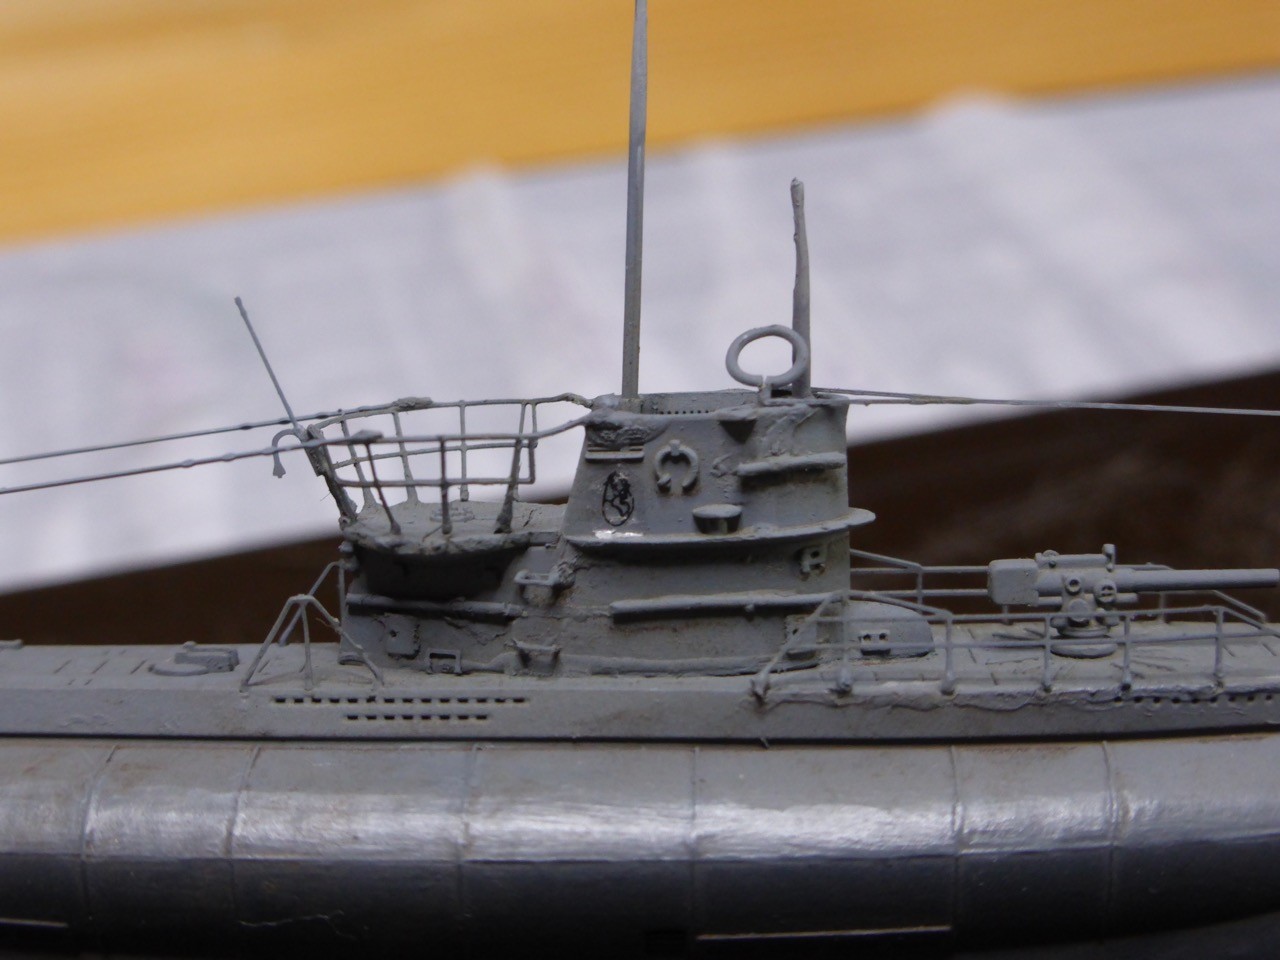
And with a little more weathering, dirt and a little salt, the 20mm barrel painted black and the periscope etc. metal, I'd call it ready!

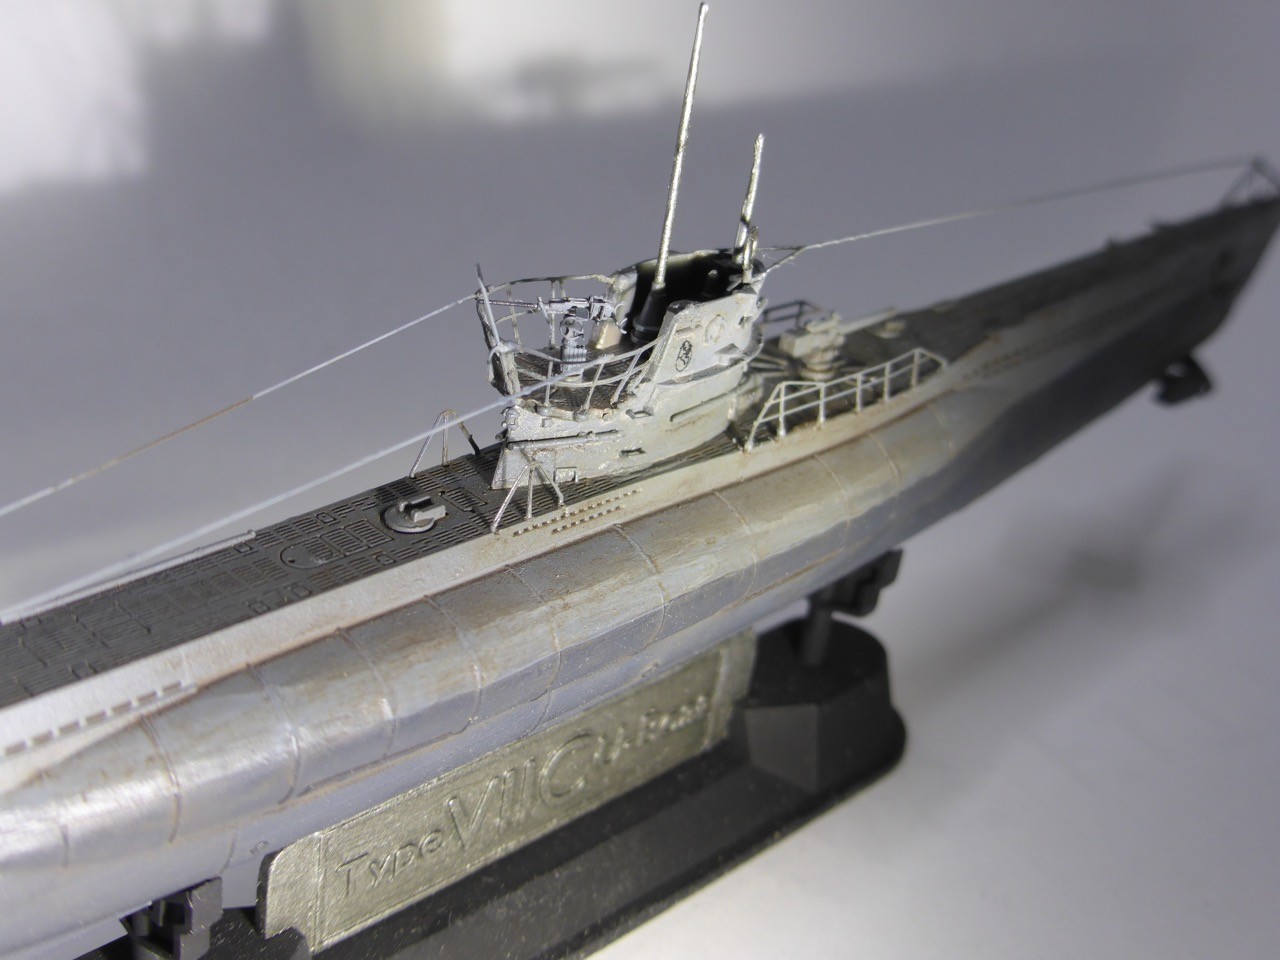
After all, this was a fun build! Despite some issues with the kit, well, in the end this made me try some new things, playing with my AK Weathering enamels that have been sitting on the shelf unused for quite some time.
I should add some more subs to my fleet, and there are some nice ones in 1/350...we shall see!
Is there actually a campaign gallery?
Thanks for looking and cheers,
Jan
Since not everything worked out as I had planned, I decided to show a beaten sub, returning from a 'Feindfahrt'...
So here's the first weathering:
One more thing left to do, the single 20mm AA. Here I decided to try my hand on a Flyhawk set, here are the parts:
Once more, this took me longer than expected, and I ended up losing three guns - only number four was finally ok. Here's my 'pile of shame' less some parts that were caught by the carpet monster and never seen again...
I'd say Flyhawk presents a pretty nice model of the gun, but, well, it's tiny, and somehow it requires a different approach than the Master ones. That's why I broke a couple, not that the kit is bad. Once I actually got around, I think I will order some more once I start a German project.
The main downside of the kit is that there are no turned barrels. I simply don't like 2-dimensional barrels, regardless how small they are. But that is easily overcome, by cutting the flat barrel part and replacing it with a Masters German 20mm early type barrel.
So here's the gun:
Gun and cradle:
The gun mount with spare magazines, nice resin part and easier to assemble than it looks...
Cradle added:
I'd say it builds into a nice gun.
Decal added, the only one that I could fit after my unsuccessful operation to the handrails etc..
And with a little more weathering, dirt and a little salt, the 20mm barrel painted black and the periscope etc. metal, I'd call it ready!
After all, this was a fun build! Despite some issues with the kit, well, in the end this made me try some new things, playing with my AK Weathering enamels that have been sitting on the shelf unused for quite some time.
I should add some more subs to my fleet, and there are some nice ones in 1/350...we shall see!
Is there actually a campaign gallery?
Thanks for looking and cheers,
Jan
RedDuster
Joined: March 01, 2010
KitMaker: 7,078 posts
Model Shipwrights: 6,649 posts
Posted: Sunday, May 22, 2016 - 02:14 AM UTC
Great job Jan,
Miniature masterpiece mate, particularly the single 20mm, really looks the part,
Cheers
Si
Miniature masterpiece mate, particularly the single 20mm, really looks the part,
Cheers
Si
JJ1973
#345
Joined: August 22, 2011
KitMaker: 1,835 posts
Model Shipwrights: 1,832 posts
Posted: Sunday, May 22, 2016 - 09:15 AM UTC
Si,
thank you very much mate!! Yep, quite happy with the 20mm - think I'll order some more - together with on of those Northstar Bridge Equipment sets, might come in handy for the Hood as well (as you prove on Repulse...). And more Big Blue Boy pom-poms, since that's something the Lion Roar kit seems falling a little short, they use the Trumpy breech and barrels as center part...
Eventually, looking at the VII C resting next to Belfast, it turned out better than I thought it would last week...
Cheers,
Jan

eMan
#298

Joined: August 08, 2002
KitMaker: 1,182 posts
Model Shipwrights: 41 posts

Posted: Monday, May 30, 2016 - 02:00 PM UTC
Started to build my entry, Bronco 1/35 German Type XXIII U-Boat Coastal Submarine.

Stoker

Joined: February 07, 2015
KitMaker: 58 posts
Model Shipwrights: 4 posts

Posted: Thursday, June 09, 2016 - 07:00 AM UTC
Hi Everybody
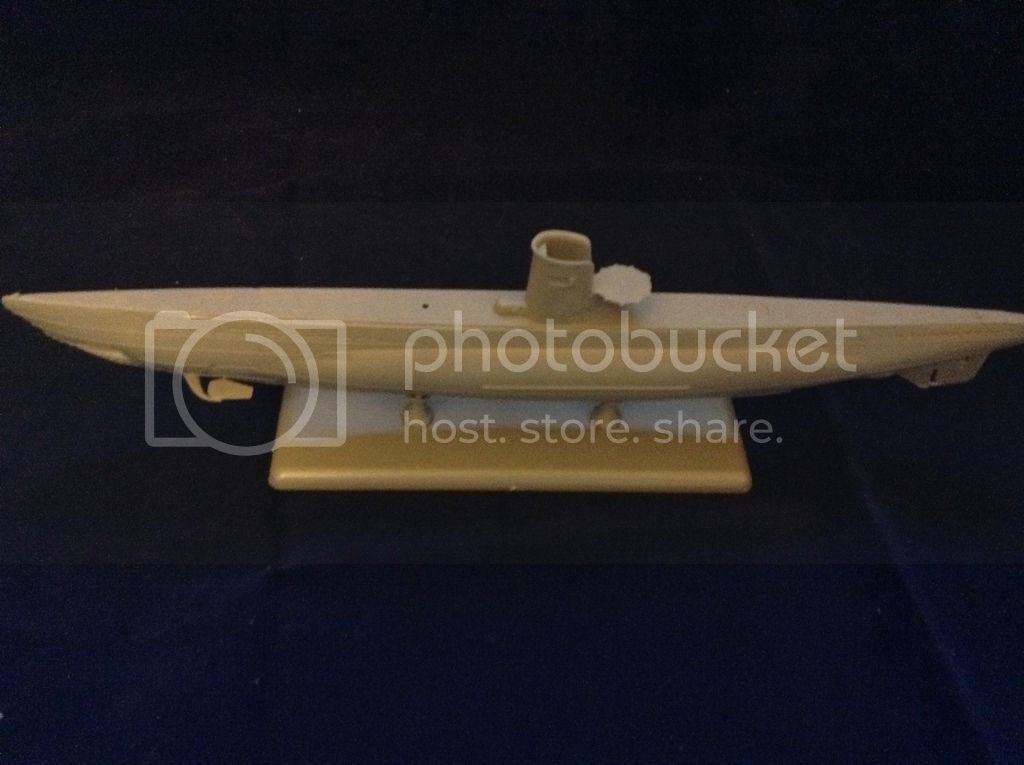
First time for me entering a ship building campaign. I picked up a Trumpeter 1/144 Type XXIII U-Boat on EBay to give it a go.

Construction looks to be fairly easy and should be a quick build.
Ron
First time for me entering a ship building campaign. I picked up a Trumpeter 1/144 Type XXIII U-Boat on EBay to give it a go.
Construction looks to be fairly easy and should be a quick build.
Ron
bill_c

Joined: January 09, 2008
KitMaker: 10,553 posts
Model Shipwrights: 306 posts
Posted: Monday, June 13, 2016 - 09:16 PM UTC
Nice U-boat.

Cosimodo
#335

Joined: September 03, 2013
KitMaker: 1,808 posts
Model Shipwrights: 871 posts

Posted: Tuesday, June 14, 2016 - 05:29 AM UTC
Hi Bill,
Is there a campaign gallery for this?
cheers
Michael
Is there a campaign gallery for this?
cheers
Michael
eMan
#298
Joined: August 08, 2002
KitMaker: 1,182 posts
Model Shipwrights: 41 posts
Posted: Tuesday, June 14, 2016 - 08:27 AM UTC
Progress update.


tatbaqui

#040

Joined: May 06, 2007
KitMaker: 2,713 posts
Model Shipwrights: 11 posts

Posted: Tuesday, June 14, 2016 - 11:11 AM UTC
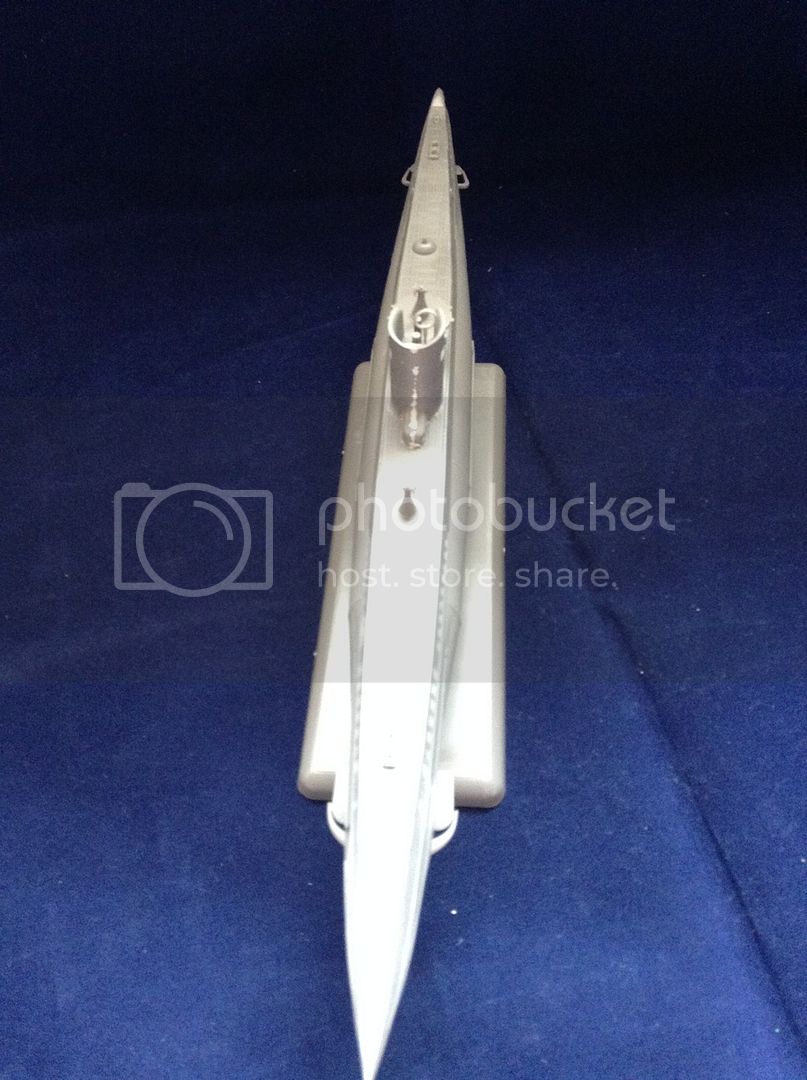
@eMan: just curious, how long does it measure from end to end? Tat
RedDuster
Joined: March 01, 2010
KitMaker: 7,078 posts
Model Shipwrights: 6,649 posts
Posted: Tuesday, June 14, 2016 - 11:54 PM UTC
Interest builds Ron and eMan.
will be following with interest.
Cheers
si
will be following with interest.
Cheers
si
Stoker
Joined: February 07, 2015
KitMaker: 58 posts
Model Shipwrights: 4 posts
Posted: Friday, June 17, 2016 - 06:05 PM UTC
Hi Everybody
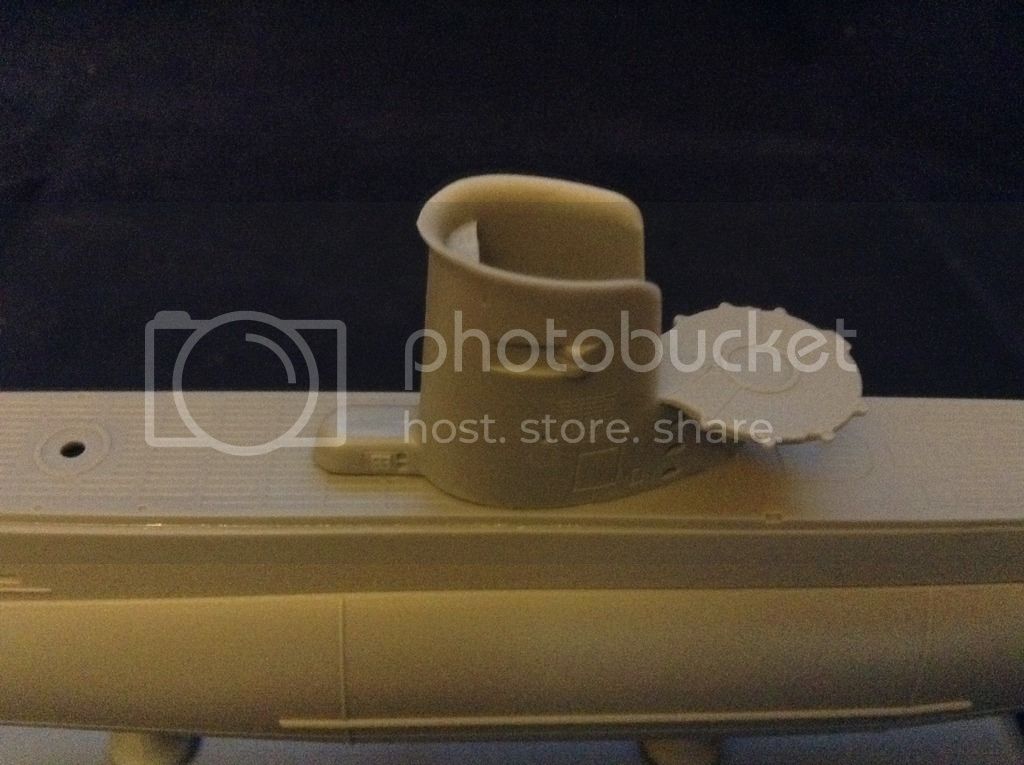
I have my little U-boat built. It took less than 2 hours to put together with no issues at all.
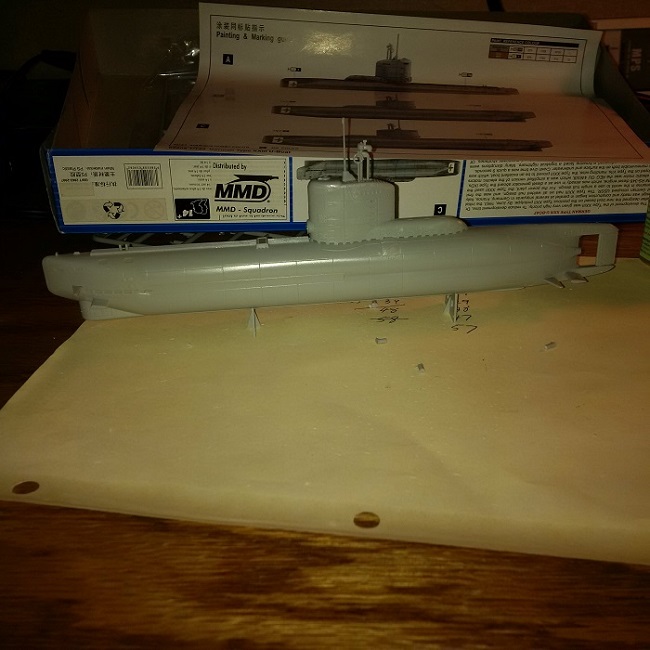
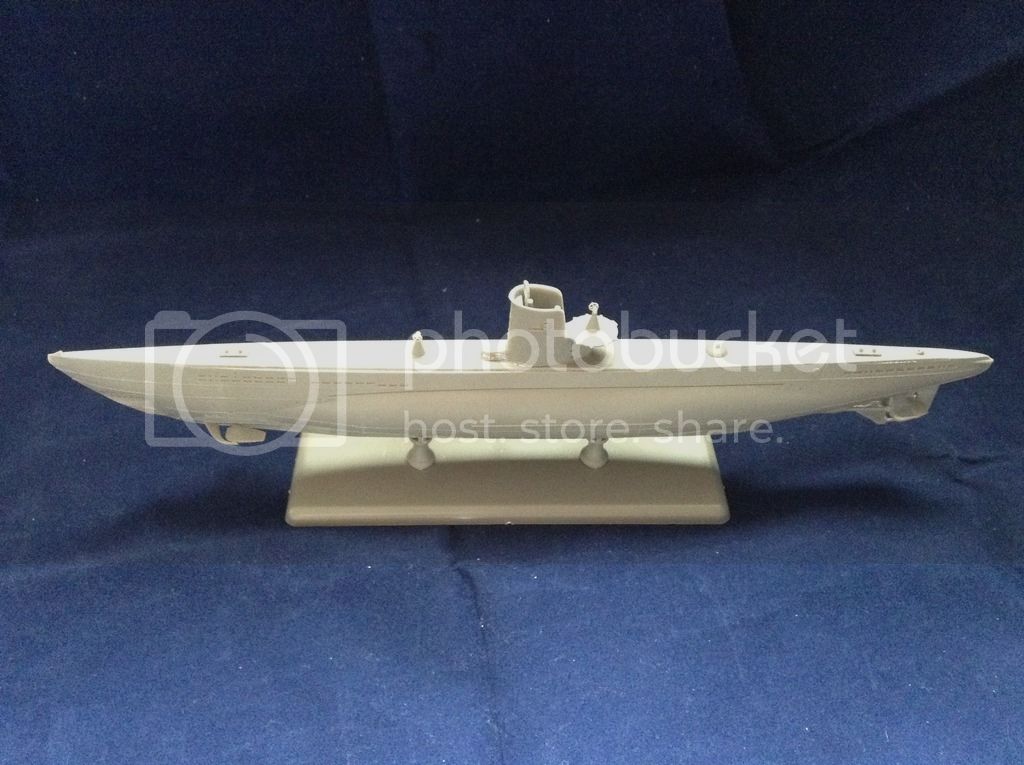
I've put a base coat of black paint on and followed it up with a coat of gray paint. I need to go back with a bit more as I didn't get the sonar dome fully covered. I tried to use the black coat to highlight the panel lines and to create shadow effects but I still haven't gotten the nack for it yet

Going to attempt to fix the paint job this weekend and give it a light wash to highlight the panel lines.
Ron
I have my little U-boat built. It took less than 2 hours to put together with no issues at all.
I've put a base coat of black paint on and followed it up with a coat of gray paint. I need to go back with a bit more as I didn't get the sonar dome fully covered. I tried to use the black coat to highlight the panel lines and to create shadow effects but I still haven't gotten the nack for it yet
Going to attempt to fix the paint job this weekend and give it a light wash to highlight the panel lines.
Ron
 |

WEB HOSTING BY


Copyright ©2021 Model Shipwrights and Kitmaker Network, a subsidiary of Silver Star Enterprises
All Rights Reserved. Please read our Conditions of Use and Privacy Policy.
All Rights Reserved. Please read our Conditions of Use and Privacy Policy.