

Thomas,
Awesome looking build, great job.
I love the comparison, she was a small tike.
BZ


Go to modelshipwrights.com for the current dynamic site!
Campaigns
Want to be part of a group build? This is where to start, plan, and meet about them.
Want to be part of a group build? This is where to start, plan, and meet about them.
Hosted by Jim Starkweather
Official: Silent Service Campaign

BoiseBlade

#523

Joined: February 28, 2014
KitMaker: 342 posts
Model Shipwrights: 38 posts

Posted: Monday, September 12, 2016 - 10:40 PM UTC

Lakota

#123
Joined: November 17, 2008
KitMaker: 1,202 posts
Model Shipwrights: 67 posts

Posted: Wednesday, September 14, 2016 - 06:04 AM UTC
Great job Thomas! I enjoyed watching your build. It makes you appreciate what brave sailors those first submariners must have been. Not that all submariners aren't also brave sailors.
Take care,
Don "Lakota"
Take care,
Don "Lakota"

Kanguroo

Joined: May 07, 2006
KitMaker: 416 posts
Model Shipwrights: 5 posts

Posted: Friday, September 16, 2016 - 08:05 PM UTC
Hi everyone,
Thomas, what a great build.
My nation bought a few of Kilo class submarines from Russia.
I'm surprised about the quantity of parts.

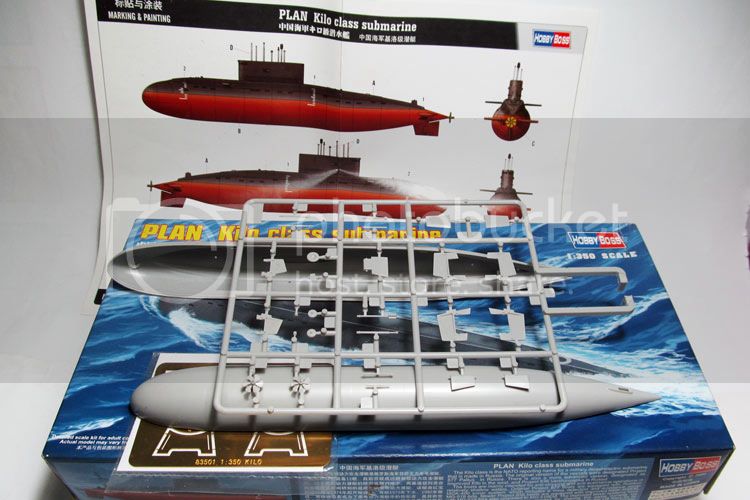
Regards,
K.
Thomas, what a great build.
My nation bought a few of Kilo class submarines from Russia.
I'm surprised about the quantity of parts.


Regards,
K.

Black_sheep

Joined: December 11, 2009
KitMaker: 823 posts
Model Shipwrights: 551 posts

Posted: Saturday, September 17, 2016 - 06:35 PM UTC
Hi mates,
first thank you very much @ Michael, Jeff, Don and Mr. K for your pleasant comments about my built. This kit indeed needed some effort and love to get some respectable results.
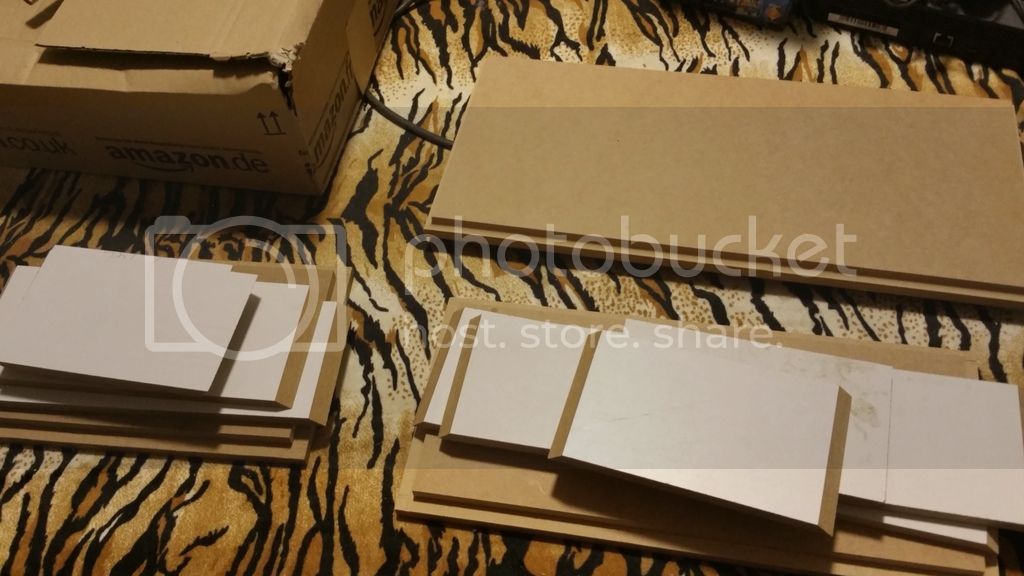
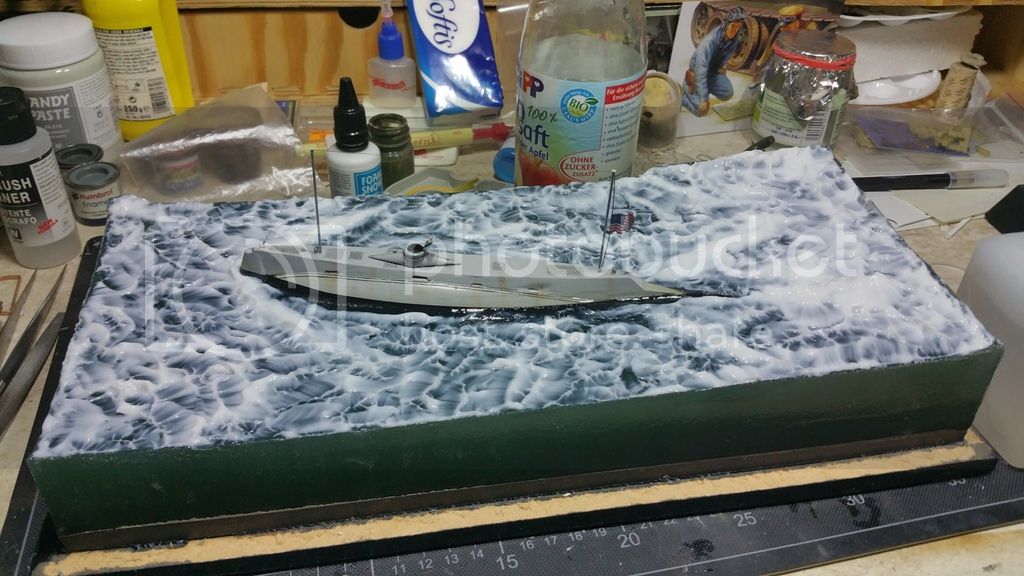
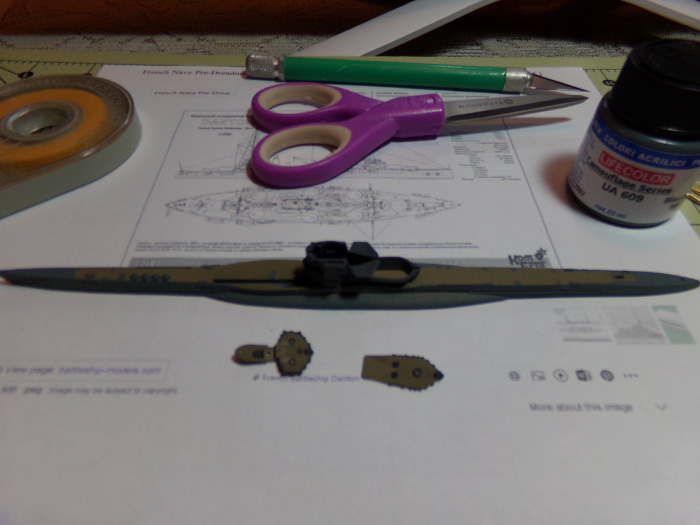
Gentlemen, it is getting serious now: I got the wooden parts from the Carpenter finally. I prepared my base and the tight outer wall for pouring in the epoxy casting. I have to fix the boat during the casting procedure as I will not have time and nerves to hold it in place again and again the whole time until everything is dry and hard. It is my first try with casting resin and I expect an respectable result or the trashbin. Wish me luck...
The wooden parts as I got them from the Carpenter (two other bases for my next Projects :-)
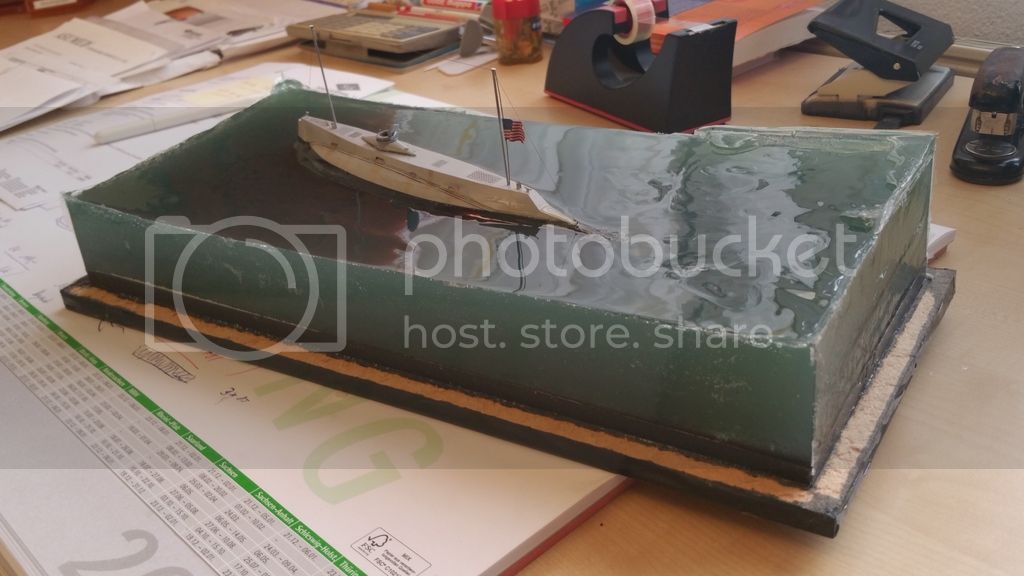
After priming the base black
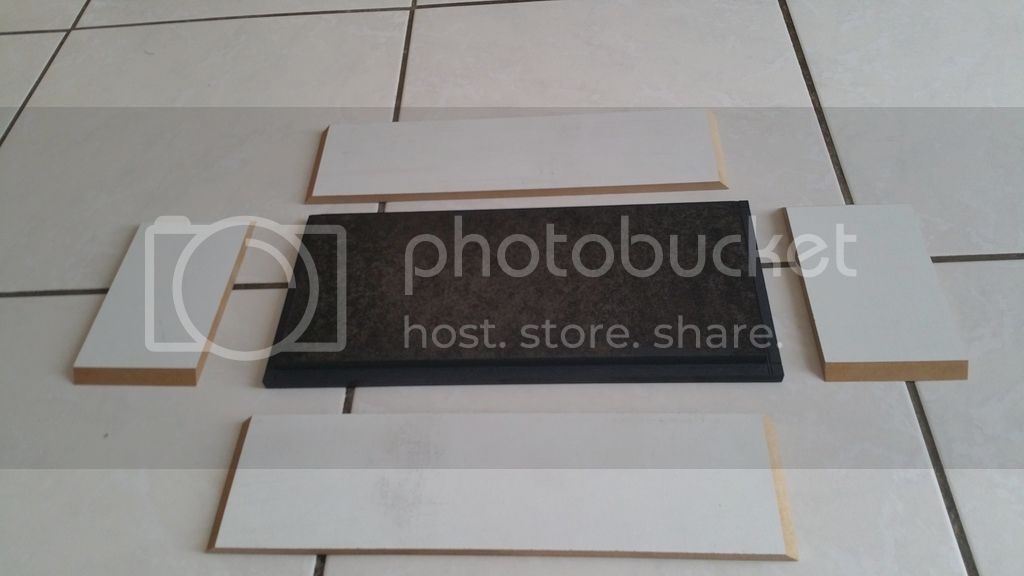
Final assembly with the gantry crane
and final Color mix test with black and blue-green vallejo Colors. What do you think? Does it look like shallow sea water?
first thank you very much @ Michael, Jeff, Don and Mr. K for your pleasant comments about my built. This kit indeed needed some effort and love to get some respectable results.
Gentlemen, it is getting serious now: I got the wooden parts from the Carpenter finally. I prepared my base and the tight outer wall for pouring in the epoxy casting. I have to fix the boat during the casting procedure as I will not have time and nerves to hold it in place again and again the whole time until everything is dry and hard. It is my first try with casting resin and I expect an respectable result or the trashbin. Wish me luck...
The wooden parts as I got them from the Carpenter (two other bases for my next Projects :-)

After priming the base black

Final assembly with the gantry crane

and final Color mix test with black and blue-green vallejo Colors. What do you think? Does it look like shallow sea water?


rolltide31
#377
Joined: June 27, 2010
KitMaker: 1,481 posts
Model Shipwrights: 1,332 posts
Posted: Sunday, September 18, 2016 - 08:41 AM UTC
Hi all,
Well I finally came to the realization that trying to build the IJN Fuso, USS Yorktown, and the IJN I400 all simultaneously was probably too much for my limited capability. Or managing skills for that matter.
So I am pulling the I400 out of this campaign and replacing it with Revell's 1/350 German Type VIIC.

Here is my start picture, with my little black belt in the background.
The parts are simple and this should be a quick build. It will give me a chance to test out my paint booth before moving back to the Z32.

here are the parts.
I was able to get the hull together and the deck. The fit was good with the exception that I set the deck a little deeper than it should have been.

Well that's it for now. Hopefully a little more during the week.
thanks
Dave
Well I finally came to the realization that trying to build the IJN Fuso, USS Yorktown, and the IJN I400 all simultaneously was probably too much for my limited capability. Or managing skills for that matter.
So I am pulling the I400 out of this campaign and replacing it with Revell's 1/350 German Type VIIC.
Here is my start picture, with my little black belt in the background.
The parts are simple and this should be a quick build. It will give me a chance to test out my paint booth before moving back to the Z32.
here are the parts.
I was able to get the hull together and the deck. The fit was good with the exception that I set the deck a little deeper than it should have been.
Well that's it for now. Hopefully a little more during the week.
thanks
Dave
rolltide31
#377
Joined: June 27, 2010
KitMaker: 1,481 posts
Model Shipwrights: 1,332 posts
Posted: Sunday, September 18, 2016 - 08:43 AM UTC
Thomas,
Love your build. It a cool little sub.
I also love the method your using to build your mold. Really interested in seeing how that works out.
Dave
Love your build. It a cool little sub.
I also love the method your using to build your mold. Really interested in seeing how that works out.
Dave
Kanguroo
Joined: May 07, 2006
KitMaker: 416 posts
Model Shipwrights: 5 posts
Posted: Monday, September 19, 2016 - 07:53 AM UTC
Thomas,
What a great method for underwater. Will watch your progress closely.
Regards,
K.
What a great method for underwater. Will watch your progress closely.
Regards,
K.
Black_sheep
Joined: December 11, 2009
KitMaker: 823 posts
Model Shipwrights: 551 posts
Posted: Monday, September 19, 2016 - 10:41 PM UTC
Hi David and Mr. K,
thanks for your comments. Here in Germany we say "don´t praise the day bevor evening thats why I still not happy until I see the final results tomorrow for my very first resin cast session.
Today it was a calm and dry evening outside at home and I had finally the courage to mix the resin and pour it into the prepared mould. After pour Component A and B of the resin together I used 2 drops of Vallejo 70.808 Blue Green and 70.905 German Grey into the mix and stir it carefully up to blend it nicely without producing bubbles.
Although the Producer of the Resin sold it to me as a Special "cold hardening" epoxy it was getting hot after about 30 Minutes. I´m glad this is a resin ship and not a plastic one. For a plastic one it will be necessary to mix more less than 500 ml for each layer (at least with this resin.
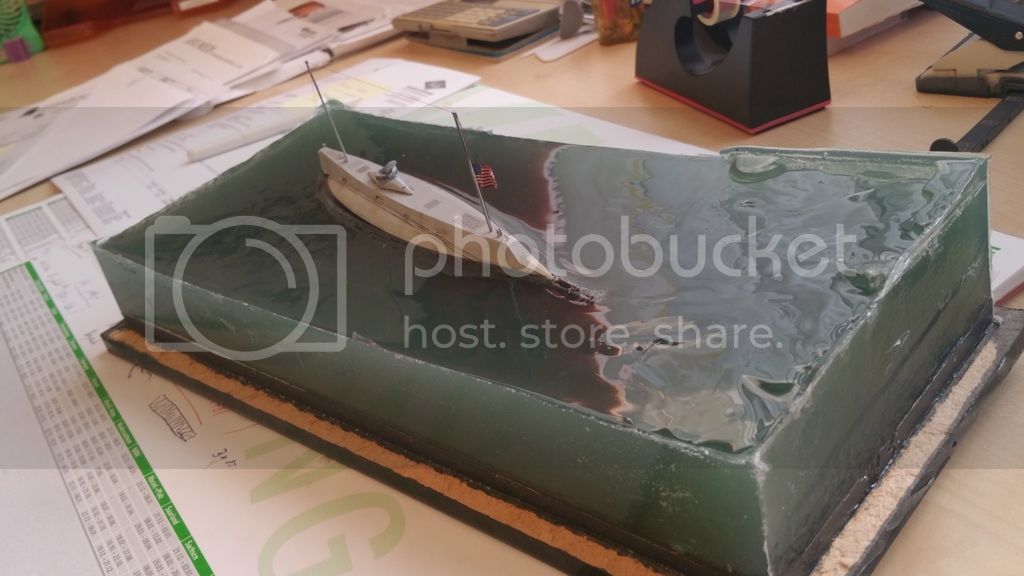
This is how it looked like right after I finished the filling process:
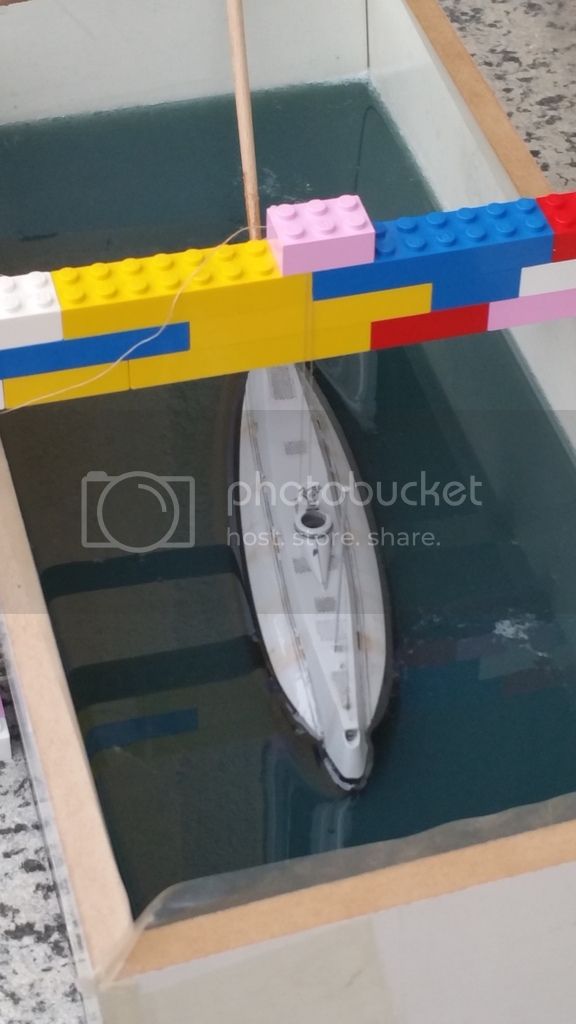
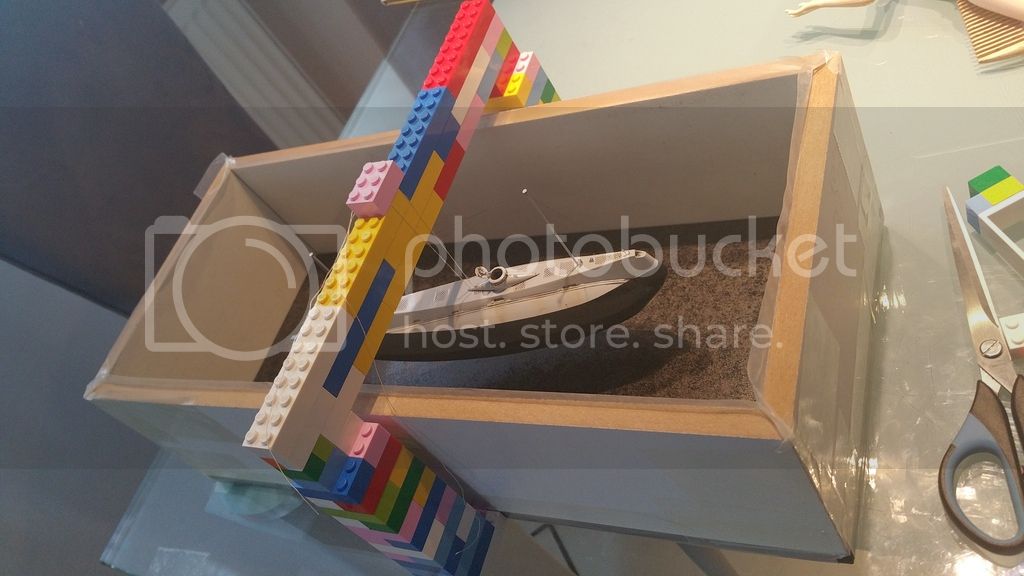
I placed the ship with a slight angle in order not to drive completely parallel to the side wall:
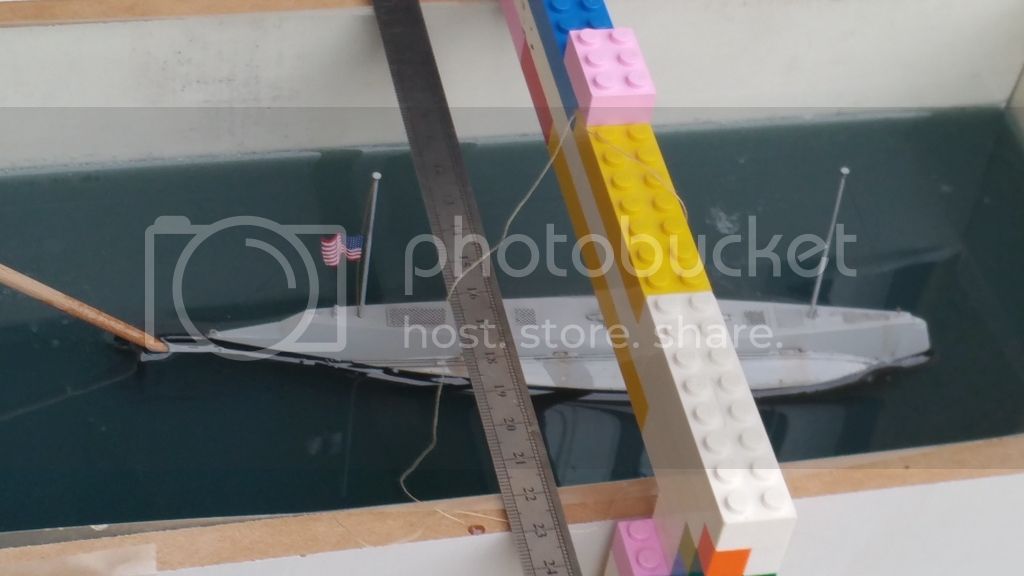
This is ho everything Looks now after about 1 hour. The resin is still very warm but the Surface is already hard:
So far everything worked well for me today. You can still see the black underside of the boat a bit through the water, exactly how I wanted it. I will let it stay for hardening out and cooling down until tomorrow. I´m curious how easy / difficult the side walls can get removed then.
Thats it for this evening!
Now for a bottle of Rum for all the dock workers!
thanks for your comments. Here in Germany we say "don´t praise the day bevor evening
thats why I still not happy until I see the final results tomorrow for my very first resin cast session.Today it was a calm and dry evening outside at home and I had finally the courage to mix the resin and pour it into the prepared mould. After pour Component A and B of the resin together I used 2 drops of Vallejo 70.808 Blue Green and 70.905 German Grey into the mix and stir it carefully up to blend it nicely without producing bubbles.
Although the Producer of the Resin sold it to me as a Special "cold hardening" epoxy it was getting hot after about 30 Minutes. I´m glad this is a resin ship and not a plastic one. For a plastic one it will be necessary to mix more less than 500 ml for each layer (at least with this resin.
This is how it looked like right after I finished the filling process:

I placed the ship with a slight angle in order not to drive completely parallel to the side wall:

This is ho everything Looks now after about 1 hour. The resin is still very warm but the Surface is already hard:


So far everything worked well for me today. You can still see the black underside of the boat a bit through the water, exactly how I wanted it. I will let it stay for hardening out and cooling down until tomorrow. I´m curious how easy / difficult the side walls can get removed then.
Thats it for this evening!
Now for a bottle of Rum for all the dock workers!

Grauwolf

#084

Joined: September 14, 2005
KitMaker: 2,485 posts
Model Shipwrights: 1,157 posts

Posted: Tuesday, September 20, 2016 - 05:13 AM UTC
Ahoy all,
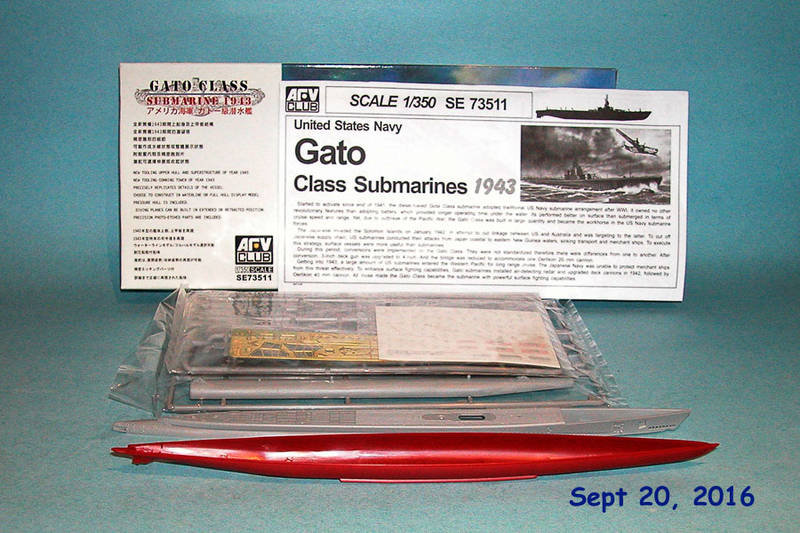
Little late to the party...nonetheless...this will be my entry
for the Silent Service Campaign.
Seeing the small size of this sub...should not be a problem
getting it completed.
Cheers,
Joe
Little late to the party...nonetheless...this will be my entry
for the Silent Service Campaign.
Seeing the small size of this sub...should not be a problem
getting it completed.
Cheers,
Joe
Black_sheep
Joined: December 11, 2009
KitMaker: 823 posts
Model Shipwrights: 551 posts
Posted: Wednesday, September 21, 2016 - 12:09 AM UTC
Gentlemen,
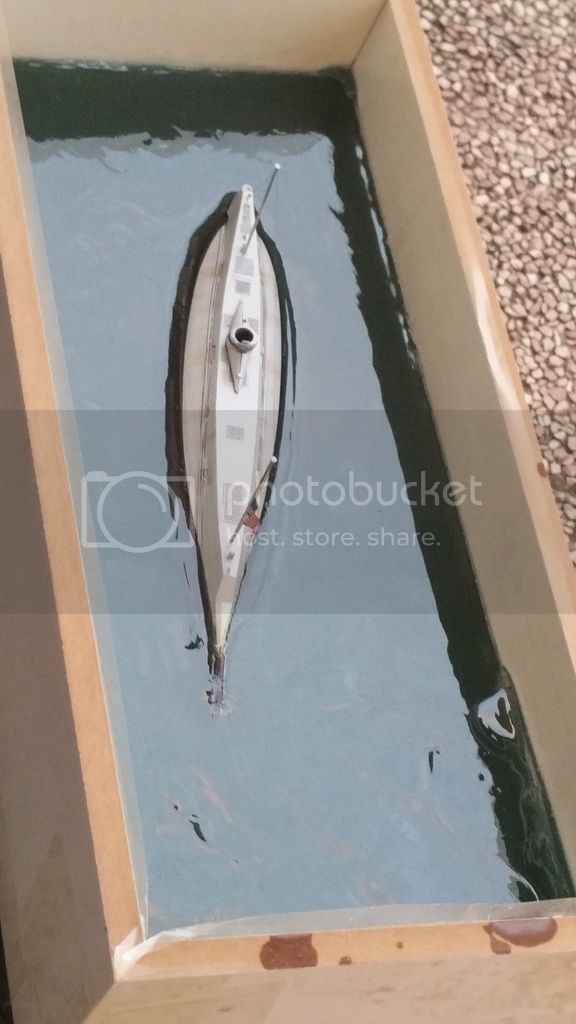
I couldn´t resist and took the dio with me to work that morning and during my breaktime I opened the sidewalls to see if everything worked out as I imagined.
The wooden Diorama base was a bid damaged during the remove of the (tight Fitting) sidewalls but nothing which can not be repaired. Some very small bubbles here and there which can not be avoided and I have to trim off some excess materal from the edges. But so far I´m satisfied.
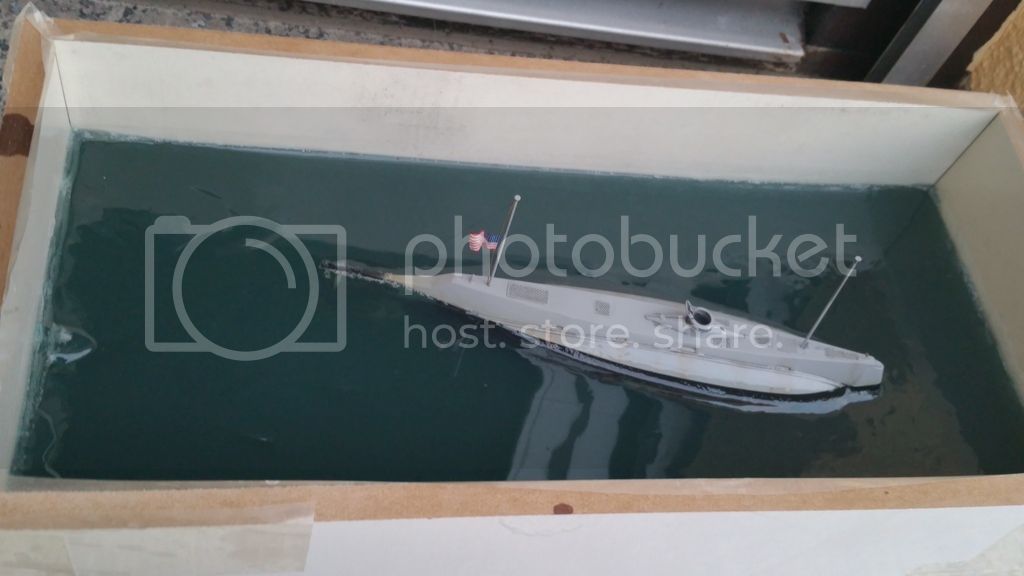
The water have the wished transluscent effect, maybe next time a bit less Color to have a better view through the water but it is still ok in my opinion:
Later this evening I bought some structure acrylic gel (I did buy the german brand LUKAS in crystal clear and another one in White) I dippled the Crystal clear onto the even surface to simulate the uneven surface of the real sea and some waves in front of the bow and the stern of the boat to simulate it is moving at full speed (whatever this was for this boat in 1900 ). It was very easy to apply and will dry out clear. When this happened I will continue with a mix of another layer clear with a bit white for more opaque water waves to give it additional depth.
I will visit my bunk now, good night altogether!
I couldn´t resist and took the dio with me to work that morning and during my breaktime I opened the sidewalls to see if everything worked out as I imagined.
The wooden Diorama base was a bid damaged during the remove of the (tight Fitting) sidewalls but nothing which can not be repaired. Some very small bubbles here and there which can not be avoided and I have to trim off some excess materal from the edges. But so far I´m satisfied.
The water have the wished transluscent effect, maybe next time a bit less Color to have a better view through the water but it is still ok in my opinion:


Later this evening I bought some structure acrylic gel (I did buy the german brand LUKAS in crystal clear and another one in White) I dippled the Crystal clear onto the even surface to simulate the uneven surface of the real sea and some waves in front of the bow and the stern of the boat to simulate it is moving at full speed (whatever this was for this boat in 1900
). It was very easy to apply and will dry out clear. When this happened I will continue with a mix of another layer clear with a bit white for more opaque water waves to give it additional depth.
I will visit my bunk now, good night altogether!

Harry_at_BFM
Vendor
Joined: February 04, 2007
KitMaker: 594 posts
Model Shipwrights: 556 posts

Posted: Wednesday, September 21, 2016 - 03:06 AM UTC
If it is okay, I think I will join in.


Black_sheep
Joined: December 11, 2009
KitMaker: 823 posts
Model Shipwrights: 551 posts
Posted: Saturday, September 24, 2016 - 11:22 AM UTC
Ahoi,
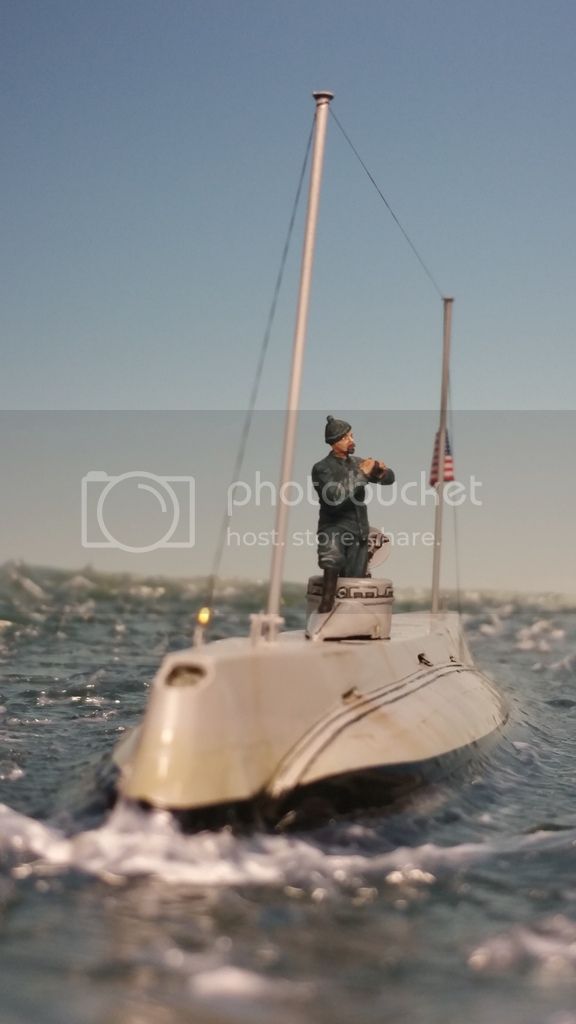
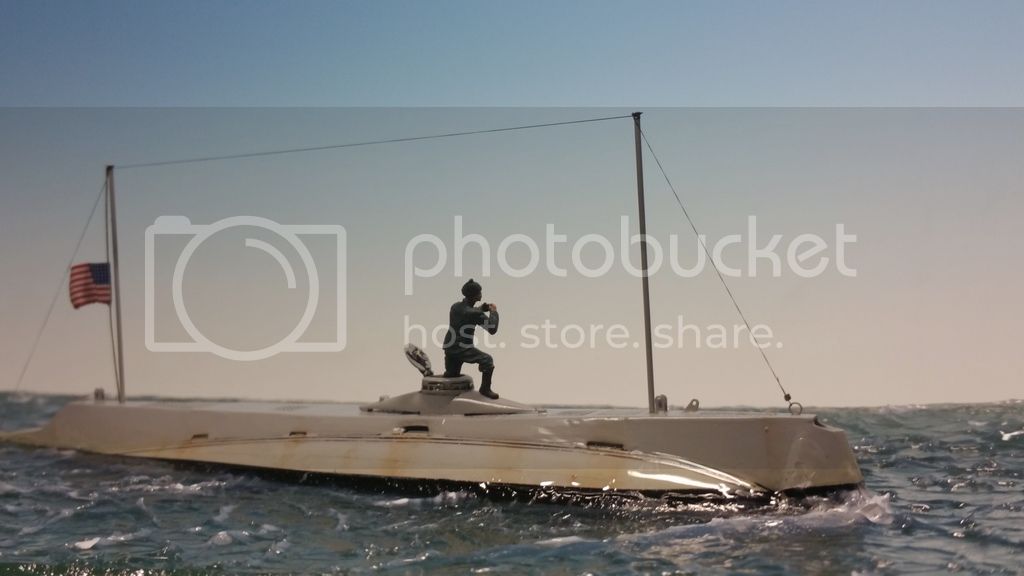
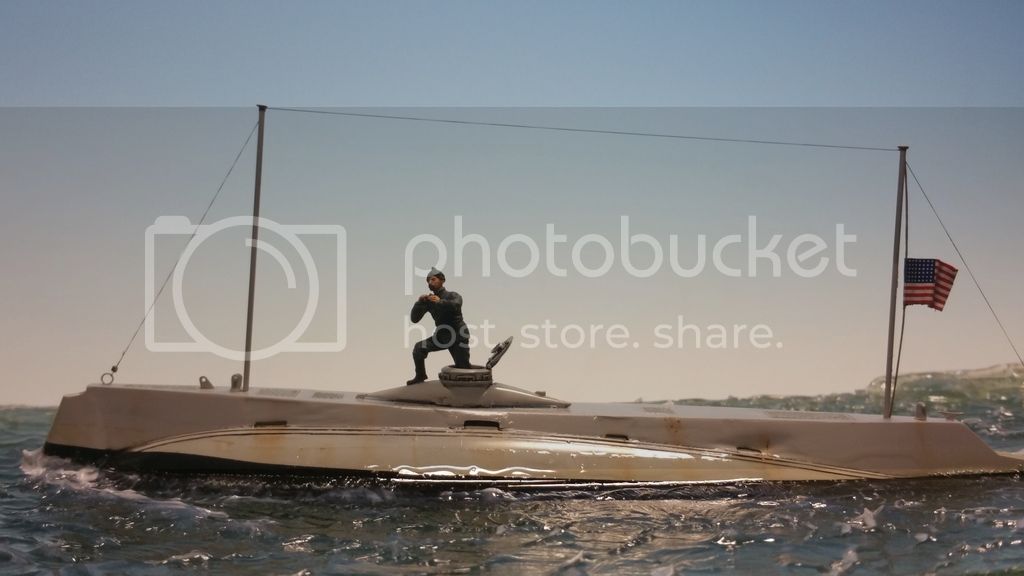
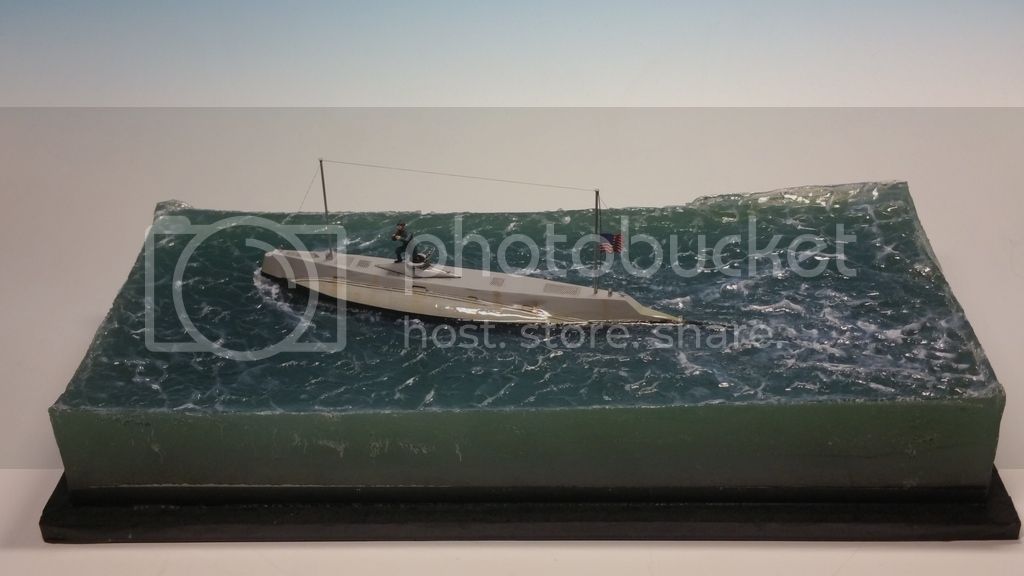
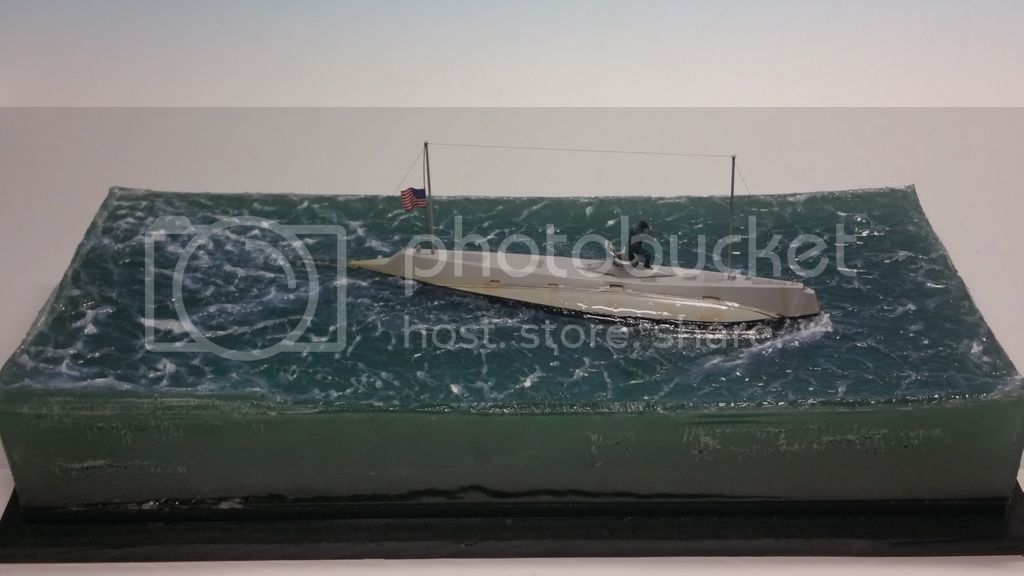
I´ve reached the end of my build, the second layer of waves is finished and there was just fixing the sailor and repair the socket´s base with color left to do.
I am very happy with the final outcome of my first try to make an ocean surface with colored resin - and now surely not the last project of this kind. I say thank you very much again for the encouraging comments of all the people who did watched my progress pictures.
Here are the final pictures of the finished Diorama which will be uploaded into the Gallery according to the campaign rules:
Thanks again for watching and your comments
Cheers
Thomas
I´ve reached the end of my build, the second layer of waves is finished and there was just fixing the sailor and repair the socket´s base with color left to do.
I am very happy with the final outcome of my first try to make an ocean surface with colored resin - and now surely not the last project of this kind. I say thank you very much again for the encouraging comments of all the people who did watched my progress pictures.
Here are the final pictures of the finished Diorama which will be uploaded into the Gallery according to the campaign rules:


Thanks again for watching and your comments
Cheers
Thomas

Cosimodo
#335

Joined: September 03, 2013
KitMaker: 1,808 posts
Model Shipwrights: 871 posts

Posted: Sunday, September 25, 2016 - 04:09 AM UTC
Great diorama Thomas!
I think the sea looks very realistic and I like the wet effect on the side of the hull.
cheers
Michael
I think the sea looks very realistic and I like the wet effect on the side of the hull.
cheers
Michael

tatbaqui
#040

Joined: May 06, 2007
KitMaker: 2,713 posts
Model Shipwrights: 11 posts

Posted: Wednesday, September 28, 2016 - 04:37 AM UTC
Very nice water effects indeed -- congrats on your finish Thomas! Tat
rolltide31
#377
Joined: June 27, 2010
KitMaker: 1,481 posts
Model Shipwrights: 1,332 posts
Posted: Wednesday, September 28, 2016 - 05:03 AM UTC
Thomas,
Your finished product looks great. I love the first picture as it adds a level of drama to the dio.
Dave
Your finished product looks great. I love the first picture as it adds a level of drama to the dio.
Dave

RedDuster

Joined: March 01, 2010
KitMaker: 7,078 posts
Model Shipwrights: 6,649 posts

Posted: Wednesday, September 28, 2016 - 04:03 PM UTC
Great build Thomas.
The water effect is excellent.
Cheers
Si
The water effect is excellent.
Cheers
Si
Black_sheep
Joined: December 11, 2009
KitMaker: 823 posts
Model Shipwrights: 551 posts
Posted: Wednesday, September 28, 2016 - 07:01 PM UTC
Thank you all for your responses to my finished build. If the audience is satisfied so am I too 
I still have a 1:72 shinkai deep diving research vessel in my stash and will cast it too in clear resin in the future, but then completely casted inside a resin block to simulate a mission at the sea bottom.
Thanks again mates and see you in a next campaign
Cheers
Thomas
I still have a 1:72 shinkai deep diving research vessel in my stash and will cast it too in clear resin in the future, but then completely casted inside a resin block to simulate a mission at the sea bottom.
Thanks again mates and see you in a next campaign
Cheers
Thomas
Harry_at_BFM
Vendor
Joined: February 04, 2007
KitMaker: 594 posts
Model Shipwrights: 556 posts
Posted: Thursday, September 29, 2016 - 07:40 AM UTC
Hi Everyone,
Did a little work on the U-boat

Did a little work on the U-boat
BoiseBlade
#523
Joined: February 28, 2014
KitMaker: 342 posts
Model Shipwrights: 38 posts
Posted: Thursday, September 29, 2016 - 09:31 PM UTC
Thomas,
Excellent build, love the display.
I actually just pick up some resin, Crystal pour medium and high Gloss Gel medium to try my hand at water. Yours looks really good. The images you provided should help me a lot.
Excellent build, love the display.
I actually just pick up some resin, Crystal pour medium and high Gloss Gel medium to try my hand at water. Yours looks really good. The images you provided should help me a lot.
Black_sheep
Joined: December 11, 2009
KitMaker: 823 posts
Model Shipwrights: 551 posts
Posted: Friday, September 30, 2016 - 12:25 AM UTC
Hi Jeff,
with a Little bit preparation, some discretely lend-leased LEGO from the kids it should be no problem at all. I did this for the first time and it was my second ship model at all.
Let us see your progress here, I´m very curious.
All the best!
Thomas
with a Little bit preparation, some discretely lend-leased LEGO from the kids it should be no problem at all. I did this for the first time and it was my second ship model at all.
Let us see your progress here, I´m very curious.
All the best!
Thomas
BoiseBlade
#523
Joined: February 28, 2014
KitMaker: 342 posts
Model Shipwrights: 38 posts
Posted: Friday, September 30, 2016 - 06:45 PM UTC
Thomas,
YOUR FIRST!!!!
Wow that was a great outcome.
I was thinking on just trying it out on a small 1/700 destroyer for a test.....Nothing as deep and think as yours.
I am not sure where I would post that.
Jeff D
YOUR FIRST!!!!
Wow that was a great outcome.
I was thinking on just trying it out on a small 1/700 destroyer for a test.....Nothing as deep and think as yours.
I am not sure where I would post that.
Jeff D
Black_sheep
Joined: December 11, 2009
KitMaker: 823 posts
Model Shipwrights: 551 posts
Posted: Saturday, October 01, 2016 - 09:38 AM UTC
Jeff,
you could open a new build blog. I would follow it for sure. A sea Diorama for a 1/700 ship shouldn´t be that difficult. I would follow your blog
Cheers
Thomas
you could open a new build blog. I would follow it for sure. A sea Diorama for a 1/700 ship shouldn´t be that difficult. I would follow your blog
Cheers
Thomas
BoiseBlade
#523
Joined: February 28, 2014
KitMaker: 342 posts
Model Shipwrights: 38 posts
Posted: Sunday, October 02, 2016 - 05:08 AM UTC
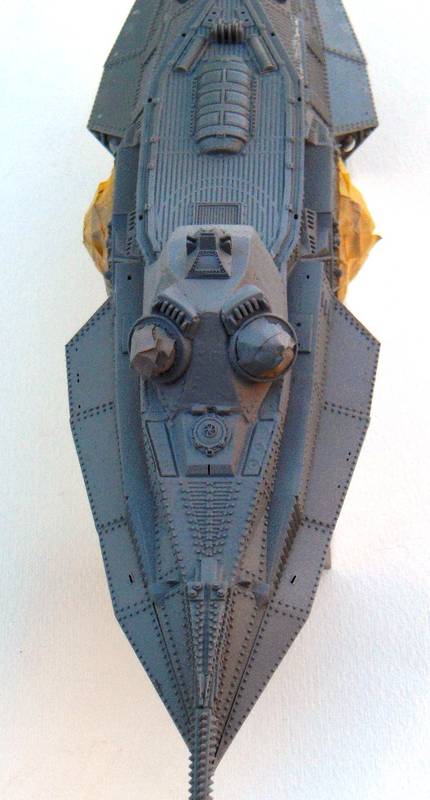
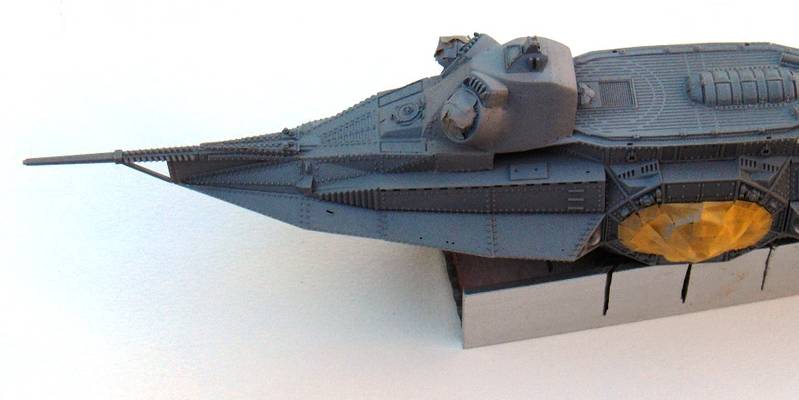
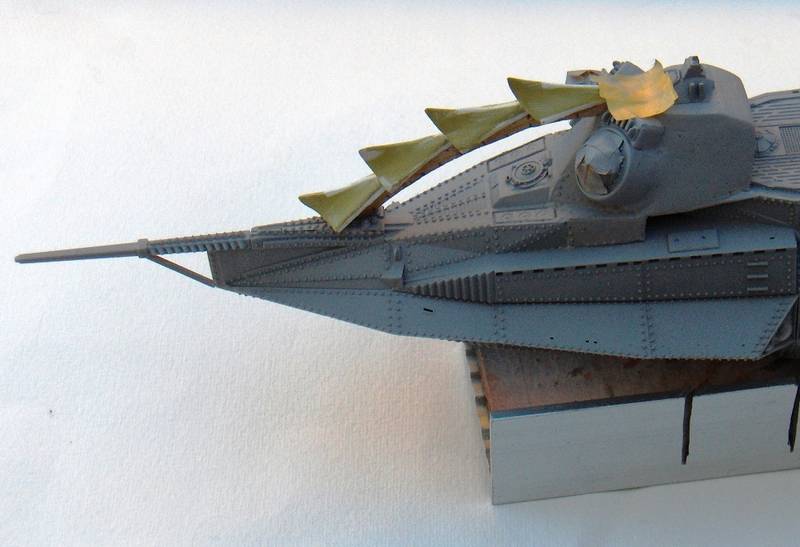
Hi All,
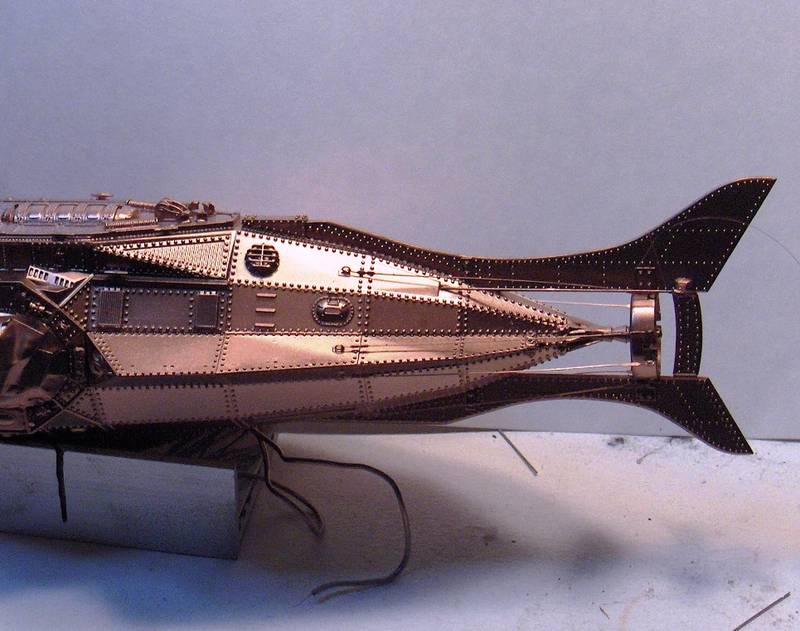
Well I said I would finis this by the end of the campaign so I started back on it. Here is where I am at not.
I still have work on Spike and tower with rivets and such.
The gray on the coning tower is just to show me where the blemishes are.
Thomas,
I actually have the ship almost done. I could just add the pics I have already taken then start from there.
This will be once I am well on my way to completing this one.
rolltide31
#377
Joined: June 27, 2010
KitMaker: 1,481 posts
Model Shipwrights: 1,332 posts
Posted: Tuesday, October 11, 2016 - 12:37 AM UTC
Hi everyone,
My Revell Type VIIC is close to being complete. I took the opportunity since this is a small kit to practice my hairy stick skills verse the airbrush. Don't think it looks to bad.
Anyway, I used Lifecolor paints for the base coat and Master Models Enamel for the drybrushing.

Here is a picture of the Type VIIC next to my USS Dace. Didn't realize the Type VIIC was so much smaller than the Gato Class.

Will continue to work this week and be finish.
Dave
My Revell Type VIIC is close to being complete. I took the opportunity since this is a small kit to practice my hairy stick skills verse the airbrush. Don't think it looks to bad.
Anyway, I used Lifecolor paints for the base coat and Master Models Enamel for the drybrushing.
Here is a picture of the Type VIIC next to my USS Dace. Didn't realize the Type VIIC was so much smaller than the Gato Class.
Will continue to work this week and be finish.
Dave
BoiseBlade
#523
Joined: February 28, 2014
KitMaker: 342 posts
Model Shipwrights: 38 posts
Posted: Sunday, October 23, 2016 - 06:28 AM UTC
OK, 1 Week left and here is where I am at.
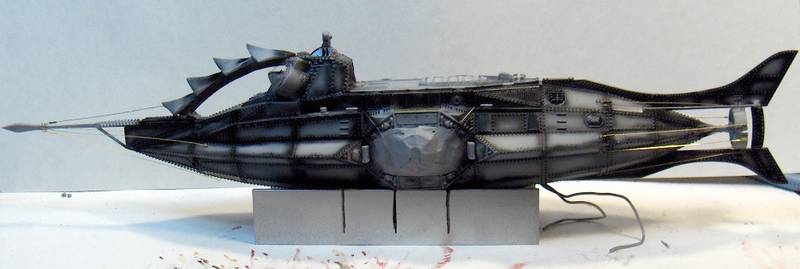
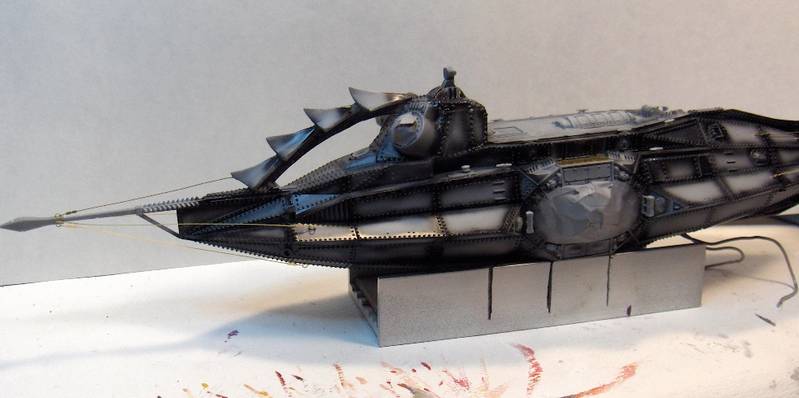
I decanted some Antique Copper for the hull color. But it really came out much brighter than I wanted. Also using it at about 8-10 psi and very light coverage it really covered up a lot of the pre-shading more than I expected. Which means washes and filters this week.
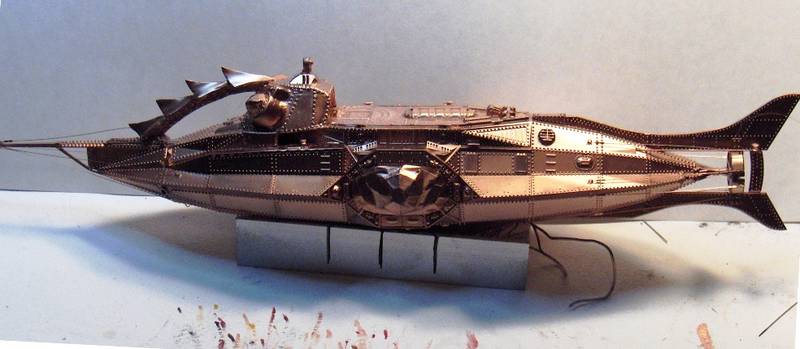
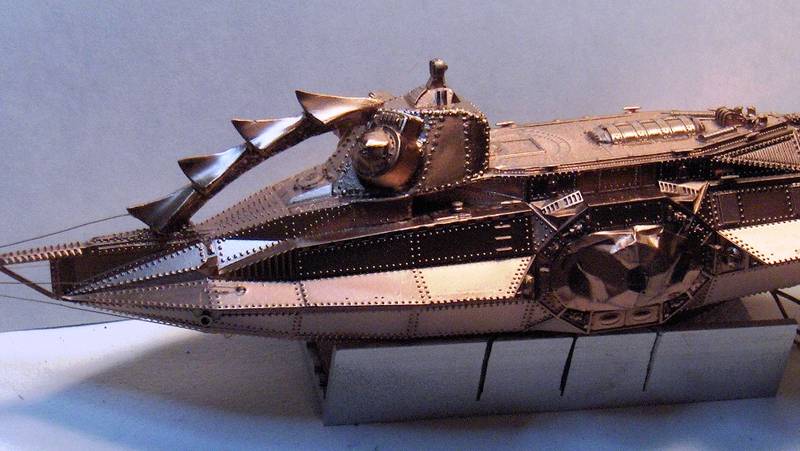
I decanted some Antique Copper for the hull color. But it really came out much brighter than I wanted. Also using it at about 8-10 psi and very light coverage it really covered up a lot of the pre-shading more than I expected. Which means washes and filters this week.
 |

WEB HOSTING BY


Copyright ©2021 Model Shipwrights and Kitmaker Network, a subsidiary of Silver Star Enterprises
All Rights Reserved. Please read our Conditions of Use and Privacy Policy.
All Rights Reserved. Please read our Conditions of Use and Privacy Policy.