

Hi Dave,
I have done this, (Not on something as quite as big as the QE), and this worked for me.
Join the Hull halves together, including any internal bulkheads stiffening), I did try to apply glue to the upper sections of the bulkheads only (worked on most of them), and fit the main deck, basically get a nice rigid structure.
Mark just below the waterline all round with masking tape.
Then carefully and slowly, with a razor saw cut just below the masking tape. Once cut all round the lower hull should just come away, trim the bulkhead flush, I used side cutters to remove the lower section of the offending bulkheads.
Sand the lower hull to the exact waterline your require. it as advisable to keep checking the you don't sand in a list.
Hope that helps.
Cheers
Si


Go to modelshipwrights.com for the current dynamic site!
Hosted by Steve Joyce
BISMARCK 1/350 Revell + Pontos.

RedDuster

Joined: March 01, 2010
KitMaker: 7,078 posts
Model Shipwrights: 6,649 posts

Posted: Monday, June 06, 2016 - 04:51 PM UTC
RedDuster
Joined: March 01, 2010
KitMaker: 7,078 posts
Model Shipwrights: 6,649 posts
Posted: Monday, June 06, 2016 - 04:53 PM UTC
Thanks Todd,
I am pleased with the fit of the deck, was very good.
A bit nervous about overspraying the wood, especially over the anchor ways, may mist another flat coat over the tape when I have it down.
Appreciate your support.
Cheers
Si
I am pleased with the fit of the deck, was very good.
A bit nervous about overspraying the wood, especially over the anchor ways, may mist another flat coat over the tape when I have it down.
Appreciate your support.
Cheers
Si

JJ1973

#345

Joined: August 22, 2011
KitMaker: 1,835 posts
Model Shipwrights: 1,832 posts

Posted: Wednesday, June 08, 2016 - 09:36 AM UTC
Looks great, Si!!
The wooden deck really makes a difference!! And the over-sprayed baltic camouflage looks good, as well! The hull already resemble a Bismarck without doubt!!
Cheers,
Jan
The wooden deck really makes a difference!! And the over-sprayed baltic camouflage looks good, as well! The hull already resemble a Bismarck without doubt!!
Cheers,
Jan
RedDuster
Joined: March 01, 2010
KitMaker: 7,078 posts
Model Shipwrights: 6,649 posts
Posted: Friday, June 10, 2016 - 12:39 PM UTC
Thanks Jan,
Always is a big part moment in a build like this, getting the deck down.
Cheers
Si
Always is a big part moment in a build like this, getting the deck down.
Cheers
Si

AussieReg

#007

Joined: June 09, 2009
KitMaker: 8,156 posts
Model Shipwrights: 154 posts
Posted: Friday, June 10, 2016 - 06:30 PM UTC
Cracking job so far Si, looking really good. I'm going to steal your technique using the foil for masking large areas as well, I just happen to have a large commercial roll that one of my clients gave me a while back so it will be put to good use.
Cheers, D
Cheers, D

RedDuster
Joined: March 01, 2010
KitMaker: 7,078 posts
Model Shipwrights: 6,649 posts
Posted: Saturday, June 11, 2016 - 02:35 AM UTC
Thanks Damian,
And please feel free, the foil method has saved me quite a bit od cash over the years.
Cheers
Si
And please feel free, the foil method has saved me quite a bit od cash over the years.
Cheers
Si
RedDuster
Joined: March 01, 2010
KitMaker: 7,078 posts
Model Shipwrights: 6,649 posts
Posted: Saturday, June 11, 2016 - 03:13 AM UTC
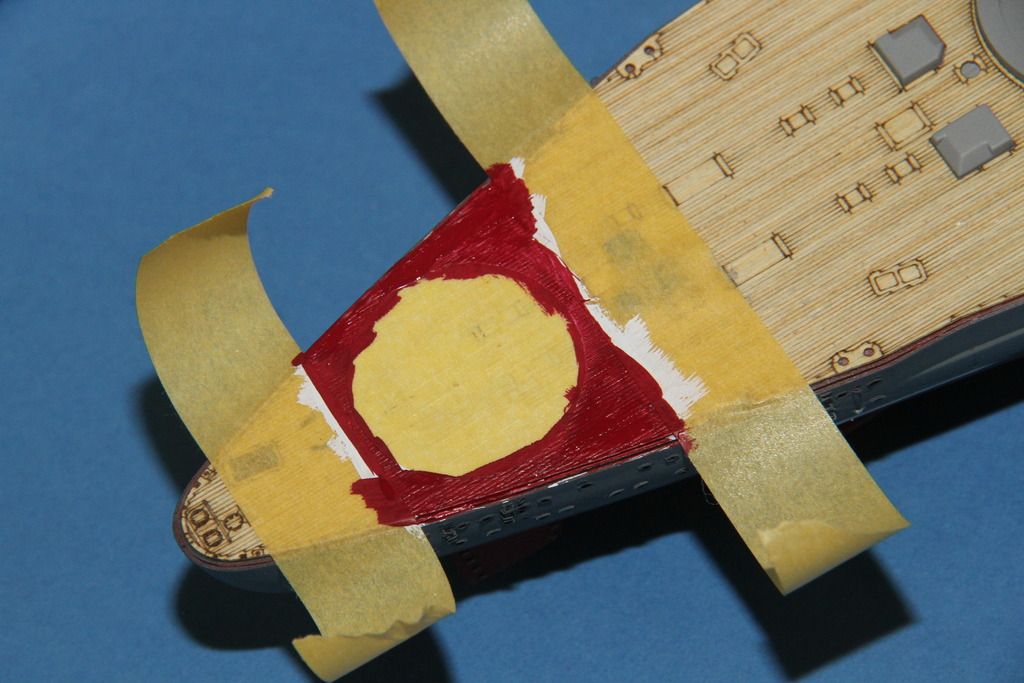
Todays job, the overpainted air recognition stripes.
Masking off, the kit masks were used to measure the strips.
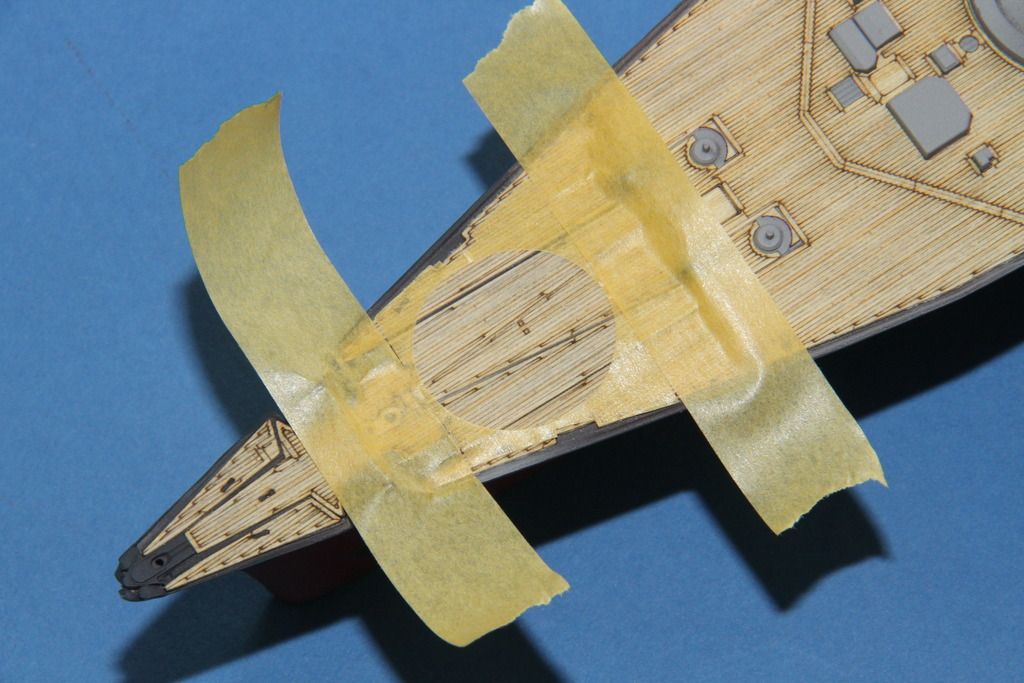
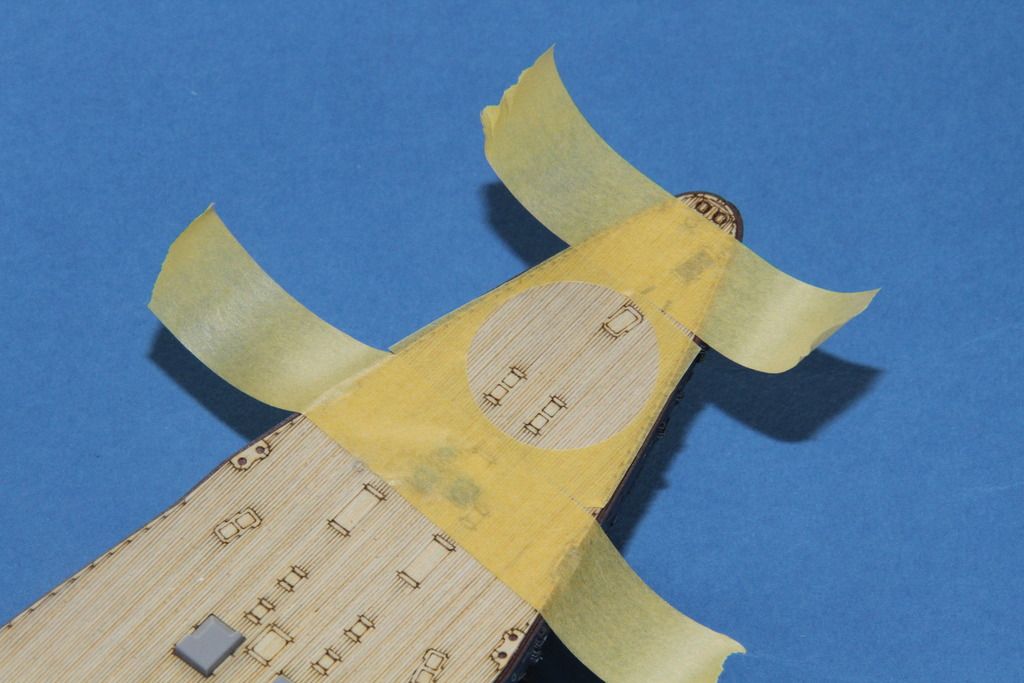
The whole trip painted white.
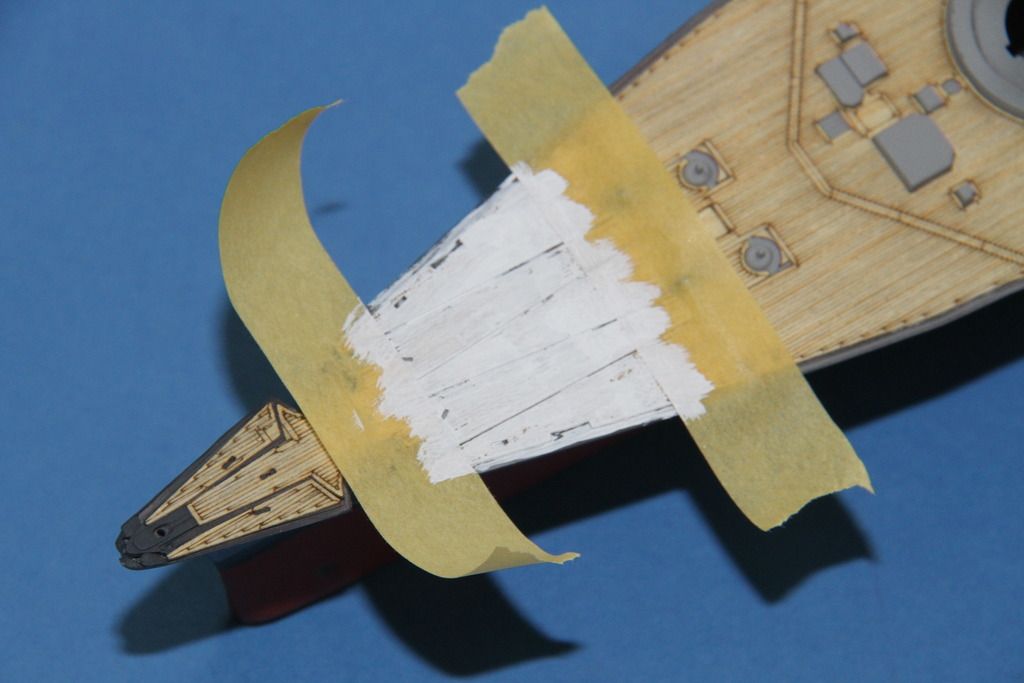
The white circle masked.
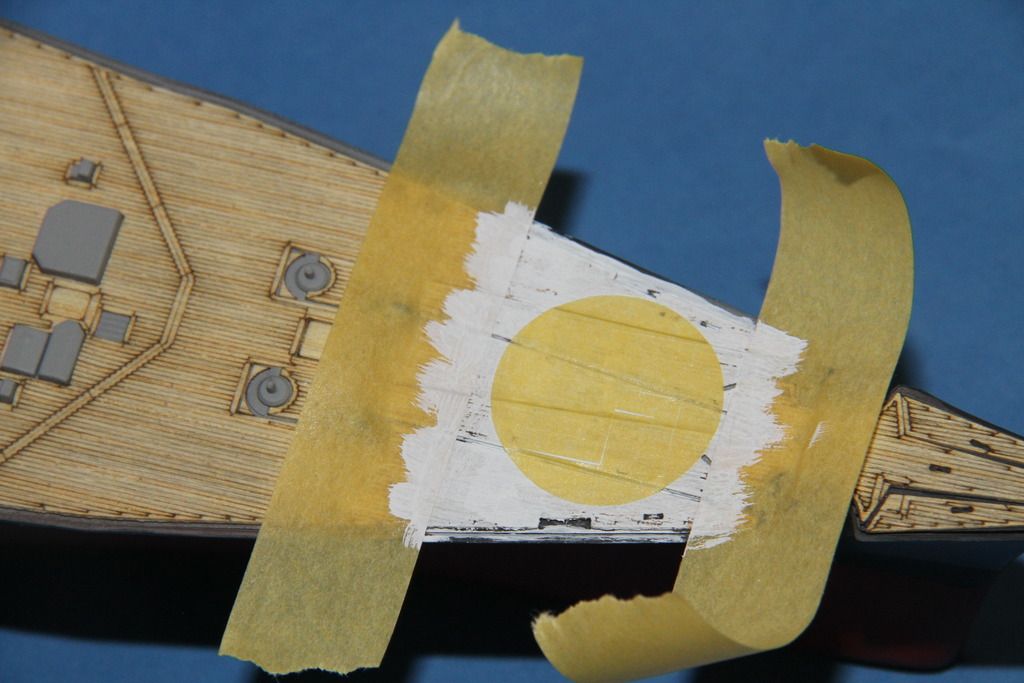
The red painted in.
mask for the swastika removed.
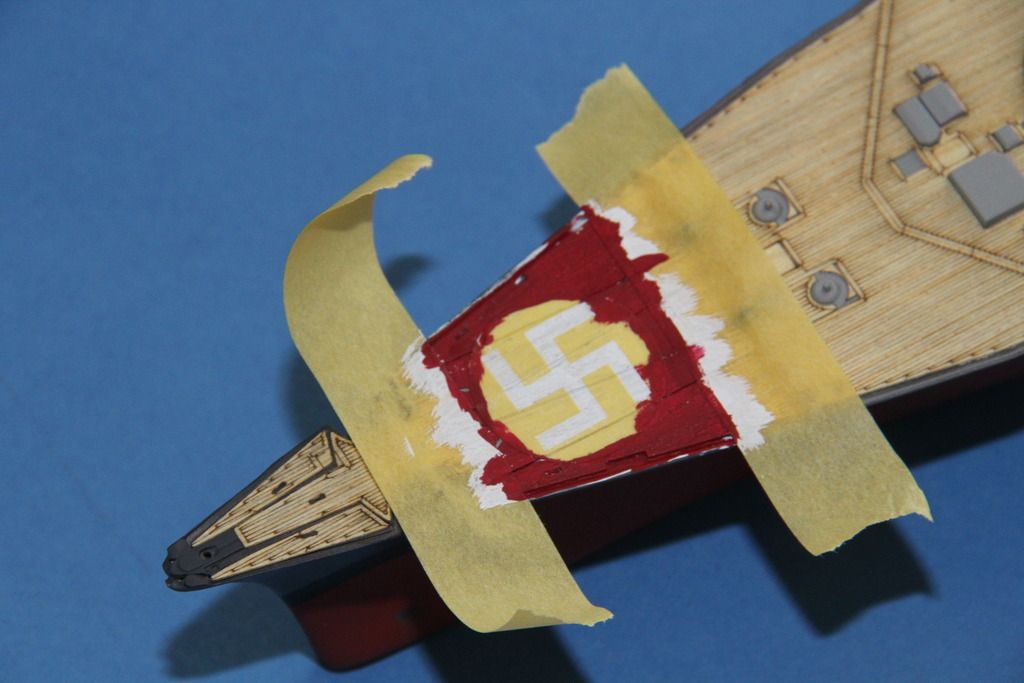
The swastika painted and the masks removed.

a bit of additional masking to protect from overspray.
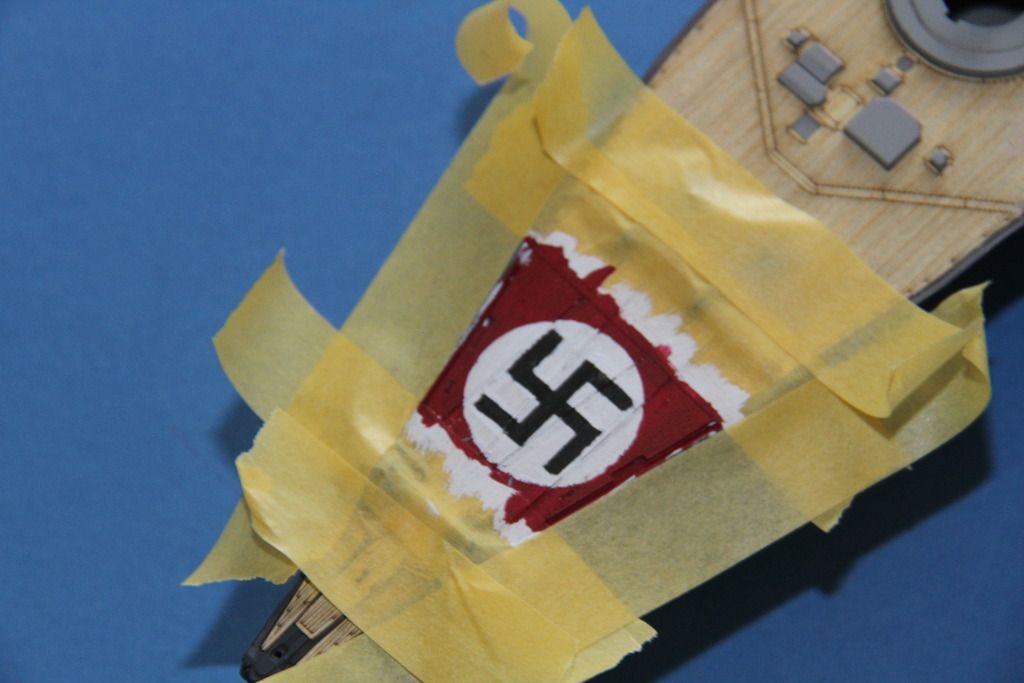
Oversprayed and masks off, bit heavy on the bow.
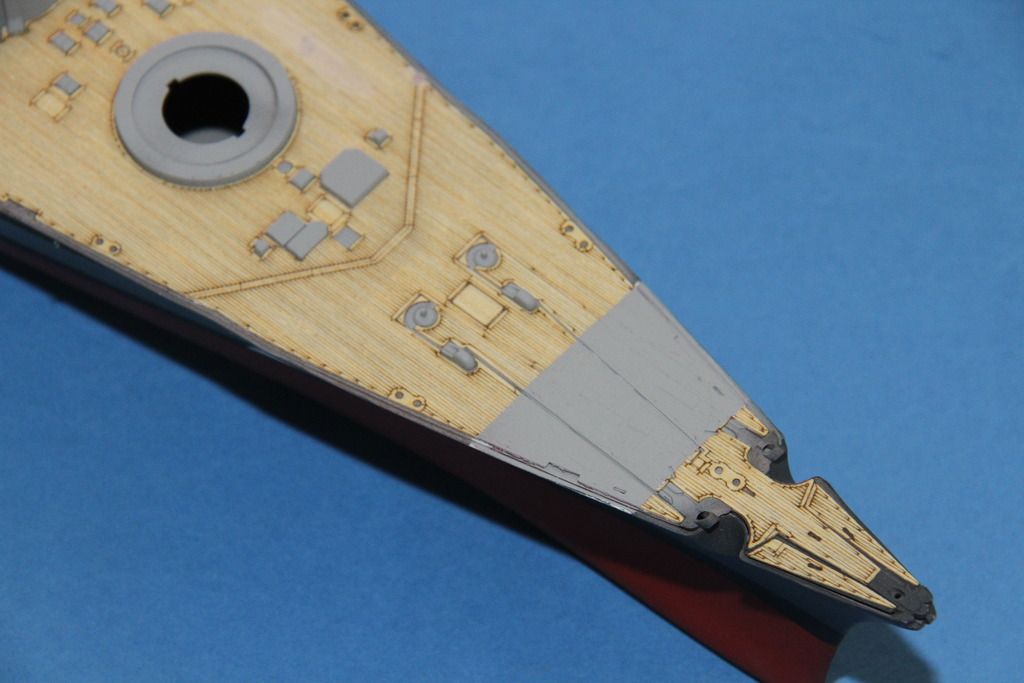
just about right on the quarterdeck.
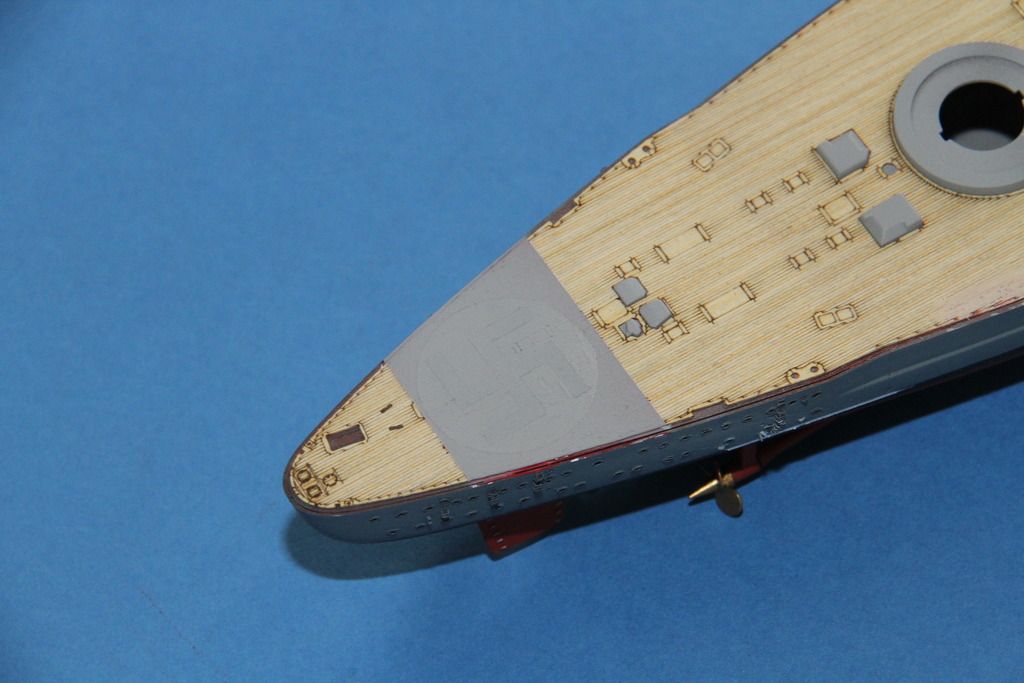
cheers
Si
Masking off, the kit masks were used to measure the strips.


The whole trip painted white.

The white circle masked.

The red painted in.

mask for the swastika removed.

The swastika painted and the masks removed.

a bit of additional masking to protect from overspray.

Oversprayed and masks off, bit heavy on the bow.

just about right on the quarterdeck.

cheers
Si
RedDuster
Joined: March 01, 2010
KitMaker: 7,078 posts
Model Shipwrights: 6,649 posts
Posted: Saturday, June 11, 2016 - 11:23 PM UTC
Today's update.
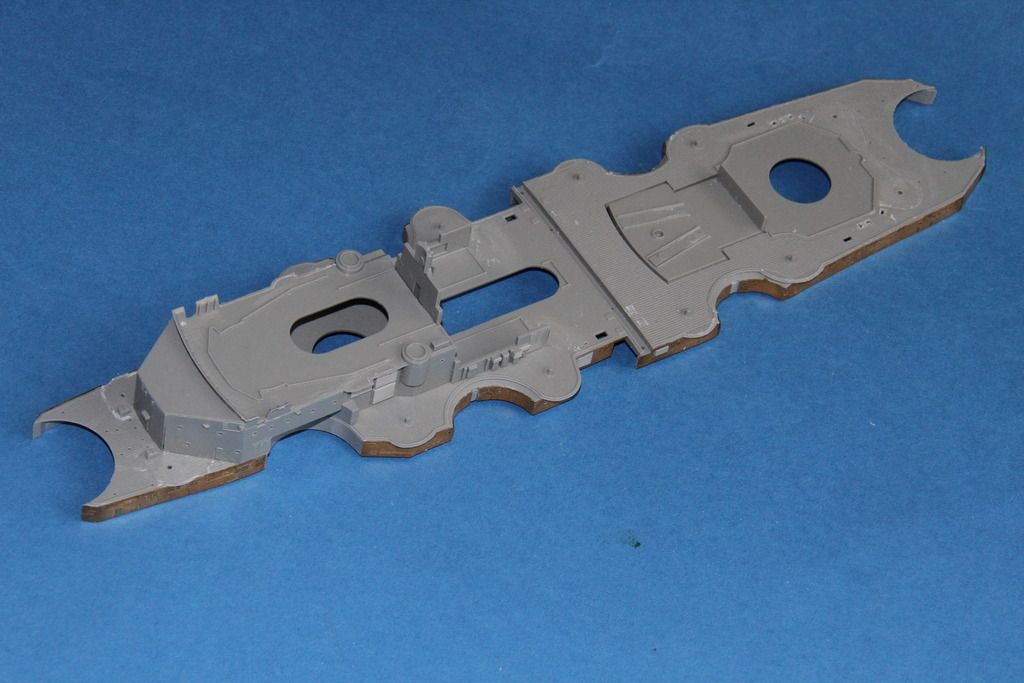
The shelterdeck removed from the sprue and test fitted. a lttle fight but good.
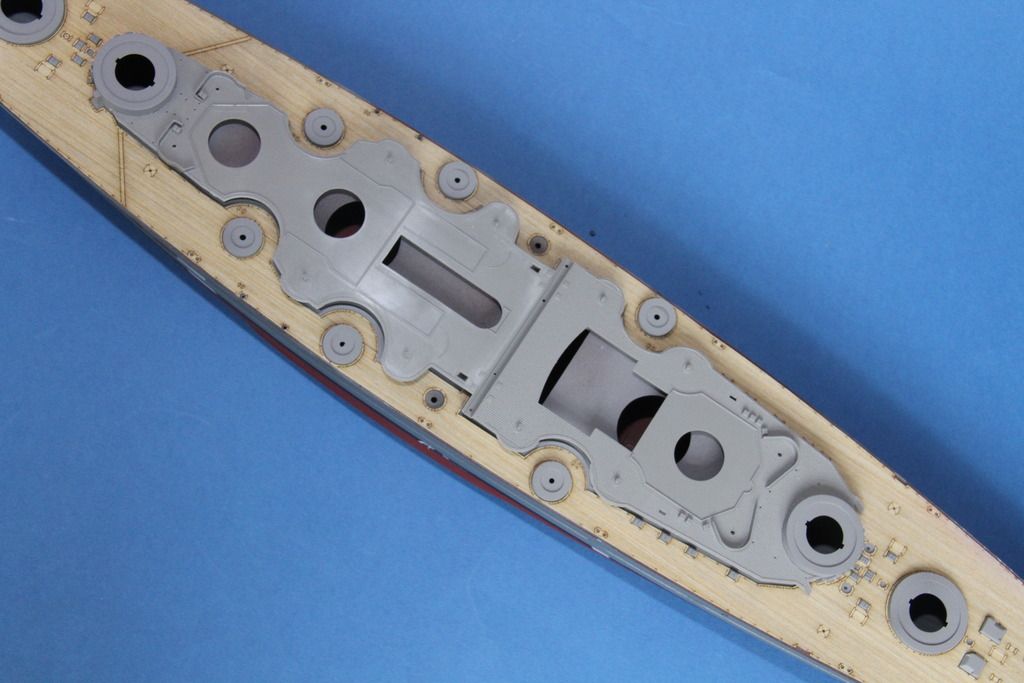
Removing the detail to allow fitting the wood decks. The forward 37mm splinte shielding.
The after ones come off too, this time along with the stowage boxes.
and cleaned up.
The shelterdeck built up and test fitted.
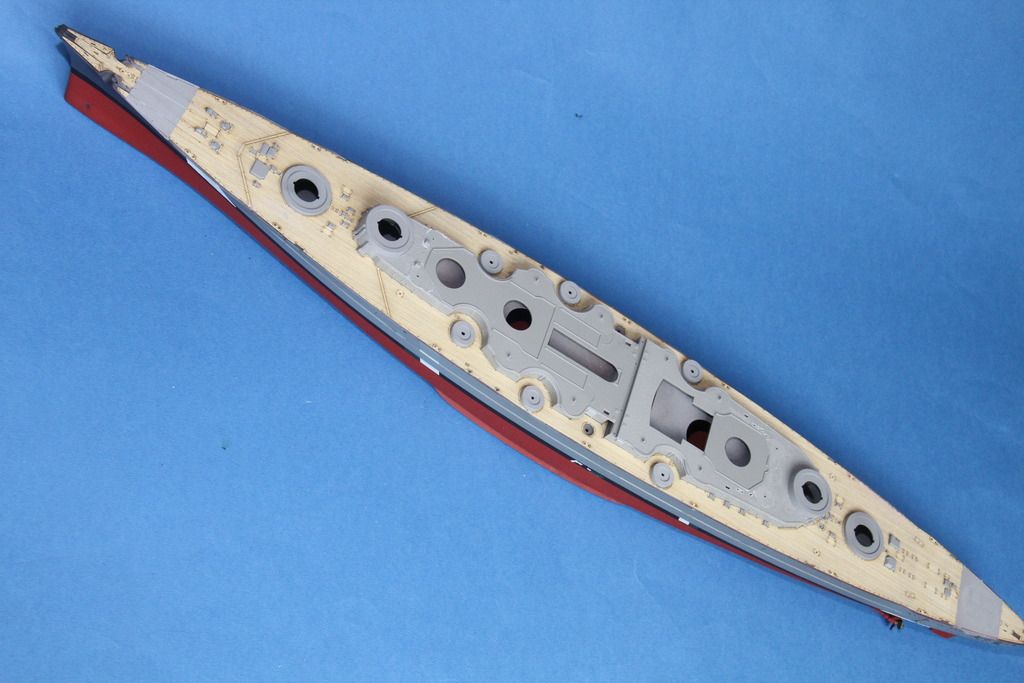
so far so good.
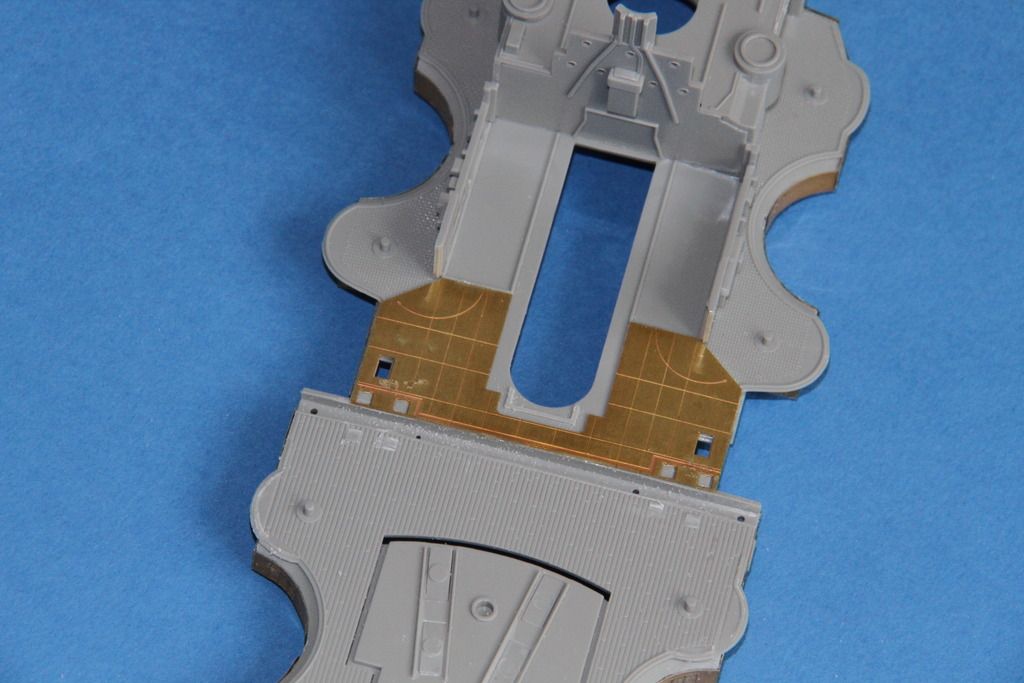
The interior hanger deck fitted.
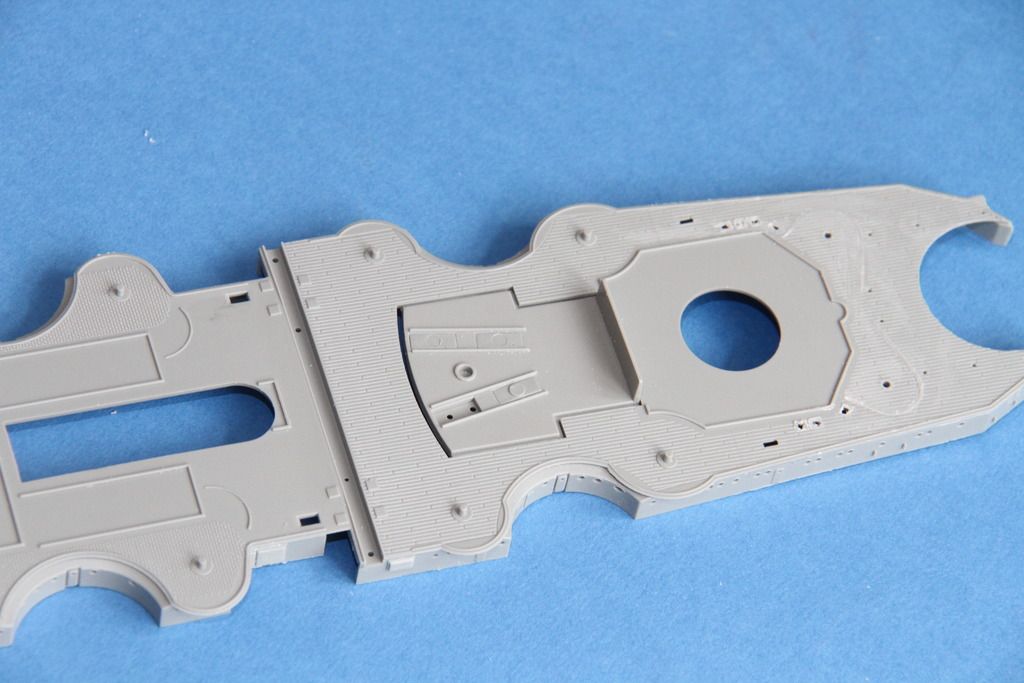
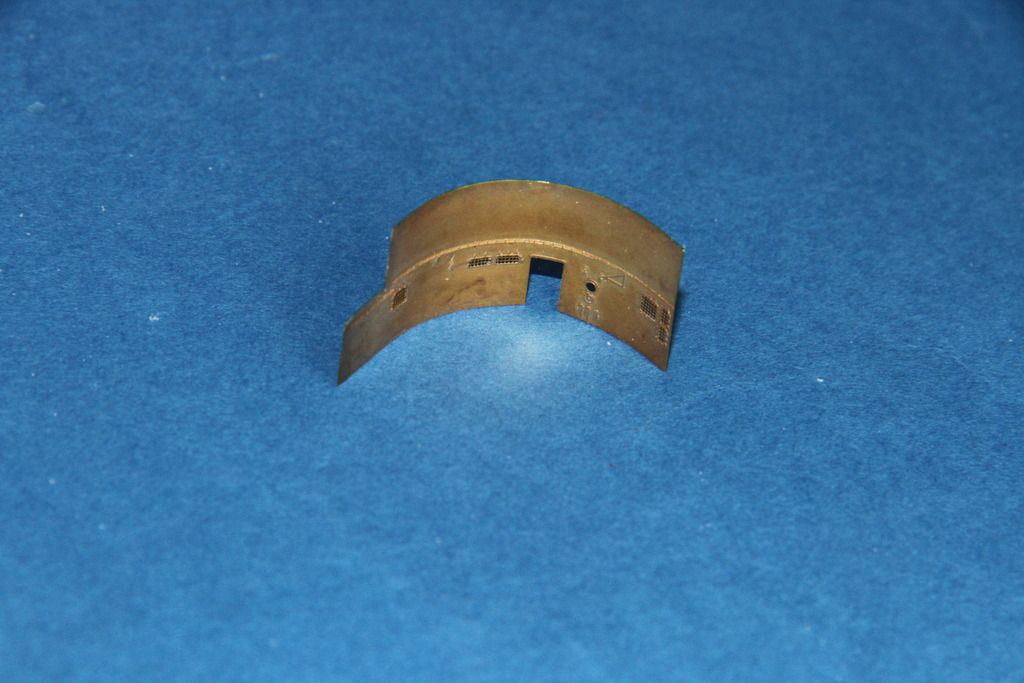
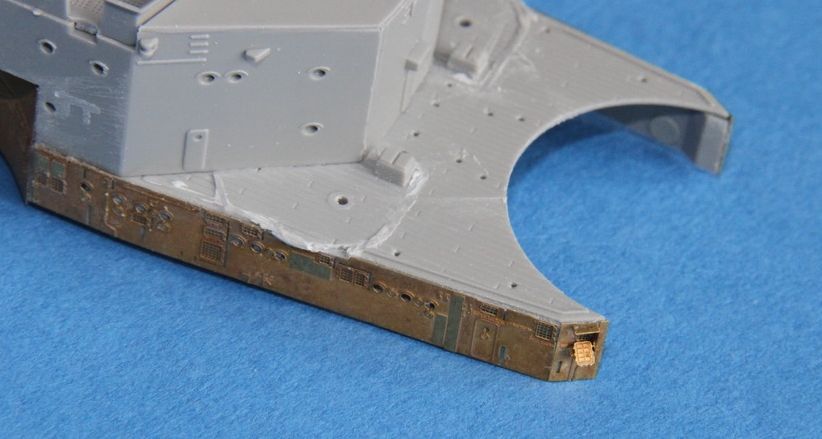
Brass cladding for the exterior bulkheads.
Part one.
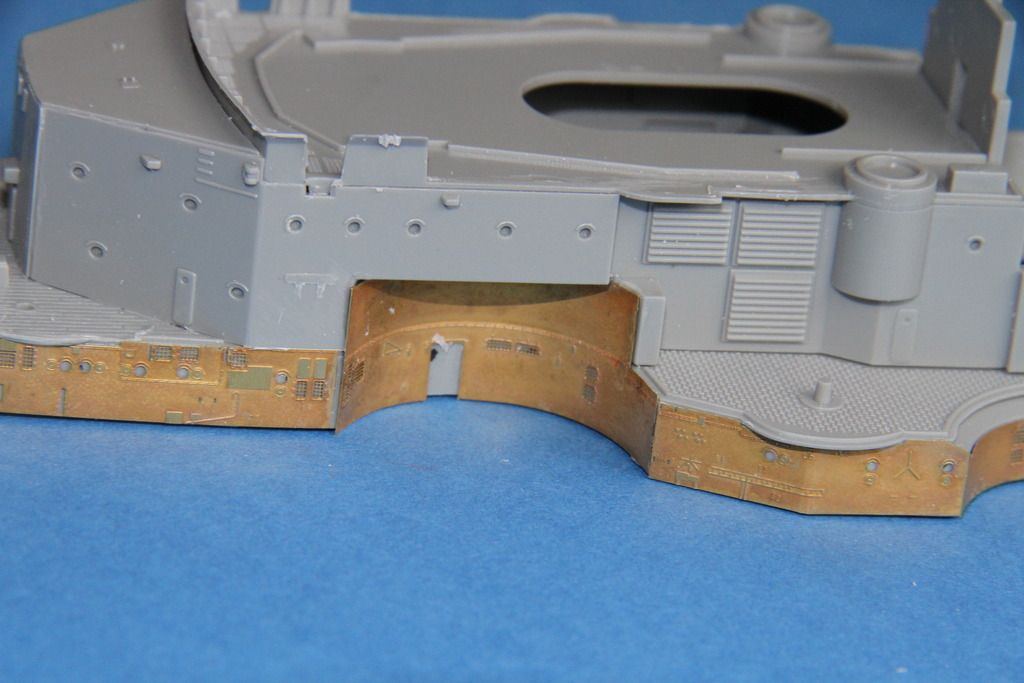
in place.
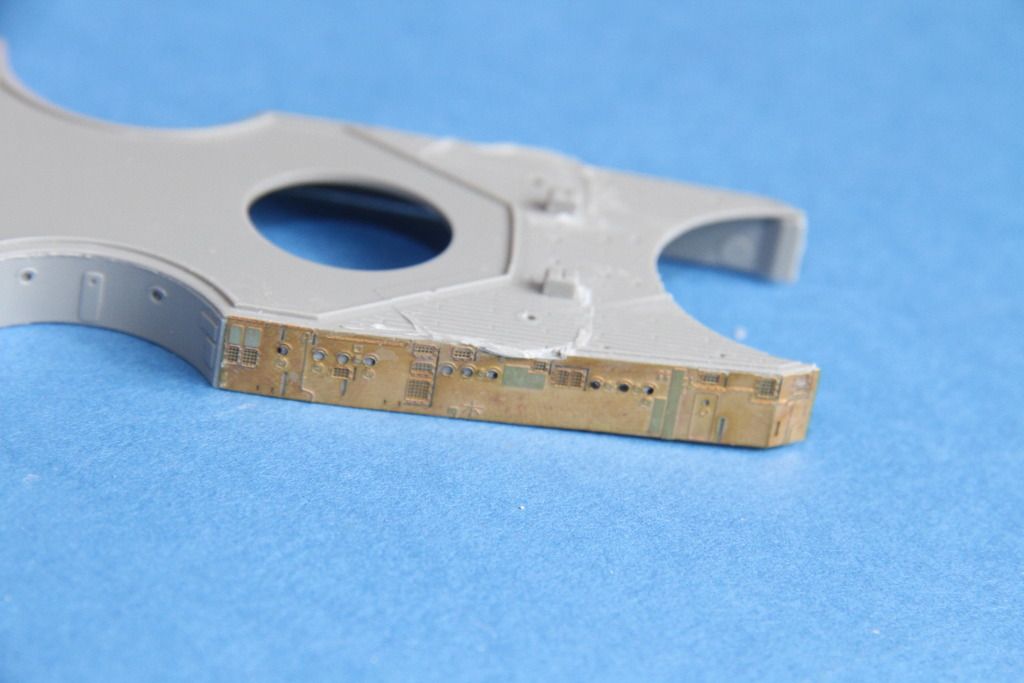
As far as got today.
The inset for stbd No.1 15cm mount goes up another dek, so that will wait until the lower bridge structure is fitted.
Cheers
Si
The shelterdeck removed from the sprue and test fitted. a lttle fight but good.

Removing the detail to allow fitting the wood decks. The forward 37mm splinte shielding.

The after ones come off too, this time along with the stowage boxes.

and cleaned up.

The shelterdeck built up and test fitted.

so far so good.
The interior hanger deck fitted.

Brass cladding for the exterior bulkheads.
Part one.

in place.

As far as got today.

The inset for stbd No.1 15cm mount goes up another dek, so that will wait until the lower bridge structure is fitted.
Cheers
Si
JJ1973
#345
Joined: August 22, 2011
KitMaker: 1,835 posts
Model Shipwrights: 1,832 posts
Posted: Sunday, June 12, 2016 - 12:13 AM UTC
Very nice work, Si!!
No I am getting the idea why you think this Bismarck would take you a while to finish...but still you are making good and fast progress!! Looks fantastic!
Cheers,
Jan
No I am getting the idea why you think this Bismarck would take you a while to finish...but still you are making good and fast progress!!
Looks fantastic!Cheers,
Jan
RedDuster
Joined: March 01, 2010
KitMaker: 7,078 posts
Model Shipwrights: 6,649 posts
Posted: Sunday, June 12, 2016 - 01:00 AM UTC
Thanks Jan,
Told you this was going to be a long build mate. These are just the cladding, there is loads of details for the vents and stuff to go on these before I can put pain on.
Thanks for the kind comment.
Cheers
Si
Told you this was going to be a long build mate. These are just the cladding, there is loads of details for the vents and stuff to go on these before I can put pain on.
Thanks for the kind comment.
Cheers
Si

Cosimodo
#335

Joined: September 03, 2013
KitMaker: 1,808 posts
Model Shipwrights: 871 posts

Posted: Sunday, June 12, 2016 - 03:16 PM UTC
Si, that brass cladding looks great. certainly easier than adding doors, vents, portholes etc individually.
On your your covering for the air recognition strips are you going to try and further wash the covering away to bring through the insignia a bit more? I think it would look better with a bit of thinning.
cheers
Michael
On your your covering for the air recognition strips are you going to try and further wash the covering away to bring through the insignia a bit more? I think it would look better with a bit of thinning.
cheers
Michael
RedDuster
Joined: March 01, 2010
KitMaker: 7,078 posts
Model Shipwrights: 6,649 posts
Posted: Sunday, June 12, 2016 - 11:30 PM UTC
Hi Michael,
Good thought, certainly on the anchor ways, the fo'c's'le can be a busy place, with cables and chain stoppers rubbing as the ship moved in the seaway.
I think I will leave the quarterdeck as is, as the markings just about show through.
Thanks for the idea.
Cheers
Si
Good thought, certainly on the anchor ways, the fo'c's'le can be a busy place, with cables and chain stoppers rubbing as the ship moved in the seaway.
I think I will leave the quarterdeck as is, as the markings just about show through.
Thanks for the idea.
Cheers
Si

RussellE
#306
Joined: June 27, 2010
KitMaker: 3,959 posts
Model Shipwrights: 2,777 posts
Posted: Monday, June 13, 2016 - 02:36 AM UTC
Wow Si, 3 for 3! I go away for one weekend and miss all these updates!
Great stuff!
Thanks for the show!
Great stuff!
Thanks for the show!

RedDuster
Joined: March 01, 2010
KitMaker: 7,078 posts
Model Shipwrights: 6,649 posts
Posted: Monday, June 13, 2016 - 11:55 AM UTC
Welcome Russ,
Like to keep things moving on, especially with a project this big and complex.
Cheers
Si.
Like to keep things moving on, especially with a project this big and complex.
Cheers
Si.

TRM5150

Joined: January 03, 2010
KitMaker: 2,159 posts
Model Shipwrights: 1,400 posts

Posted: Monday, June 13, 2016 - 04:07 PM UTC
Nicely played Si! The PE superstructure sides make a huge difference! Keep a whip on those guys at the docks my friend! 
Keep a whip on those guys at the docks my friend! RedDuster
Joined: March 01, 2010
KitMaker: 7,078 posts
Model Shipwrights: 6,649 posts
Posted: Monday, June 13, 2016 - 11:48 PM UTC
Thanks Todd,
Got them working hard, lots of detail to go on the brass skins once I have them and some deck details on.
Cheers,
Si
Got them working hard, lots of detail to go on the brass skins once I have them and some deck details on.
Cheers,
Si
RedDuster
Joined: March 01, 2010
KitMaker: 7,078 posts
Model Shipwrights: 6,649 posts
Posted: Tuesday, June 14, 2016 - 12:48 AM UTC
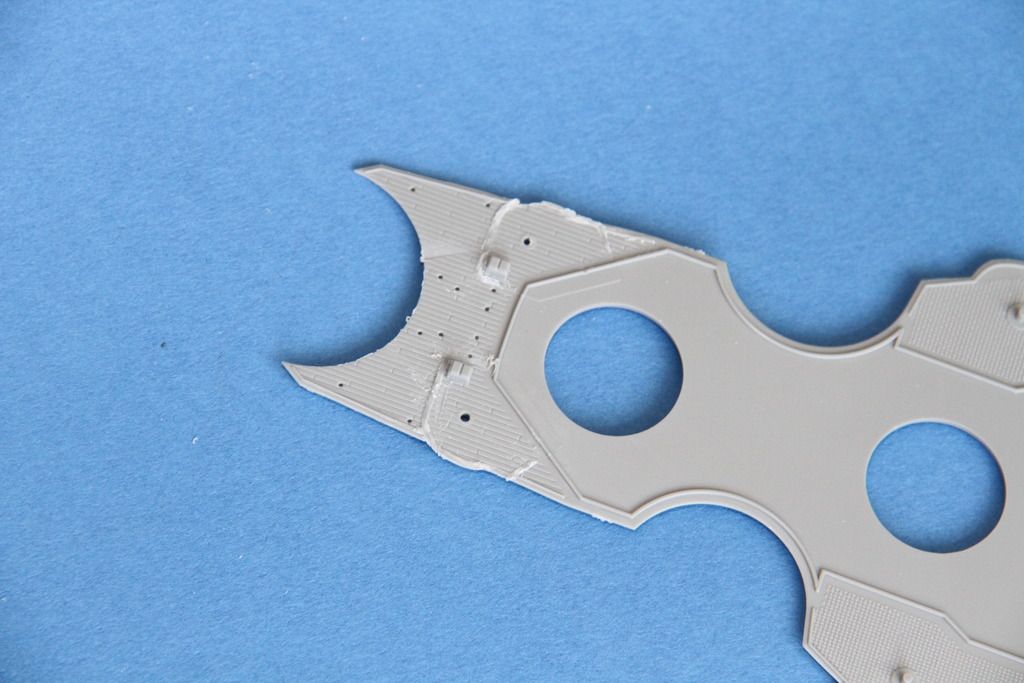
A small progress today.
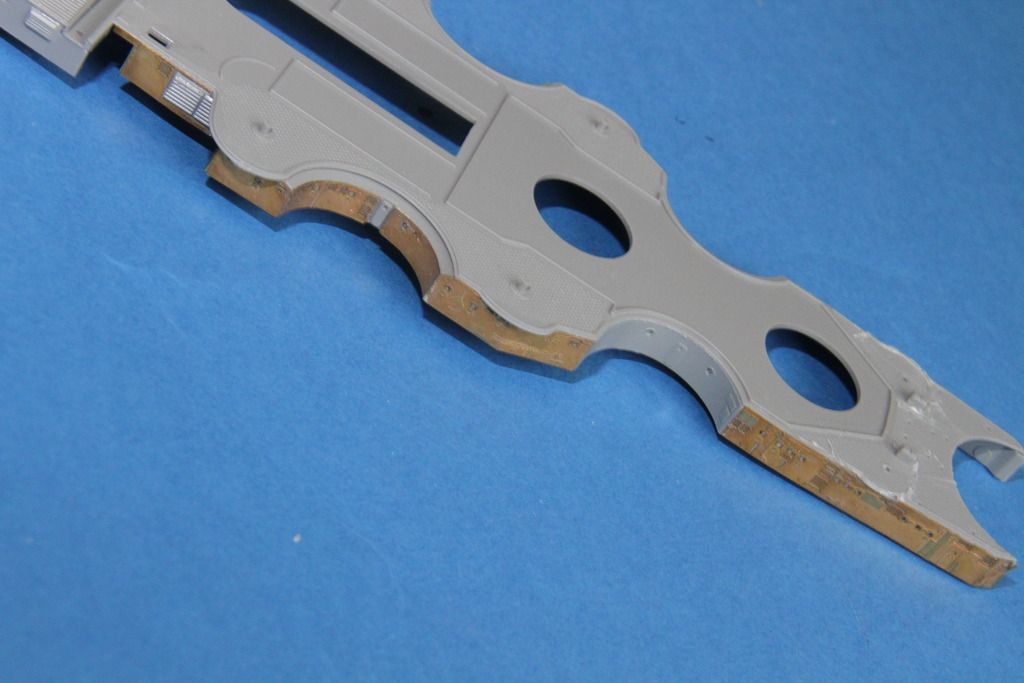
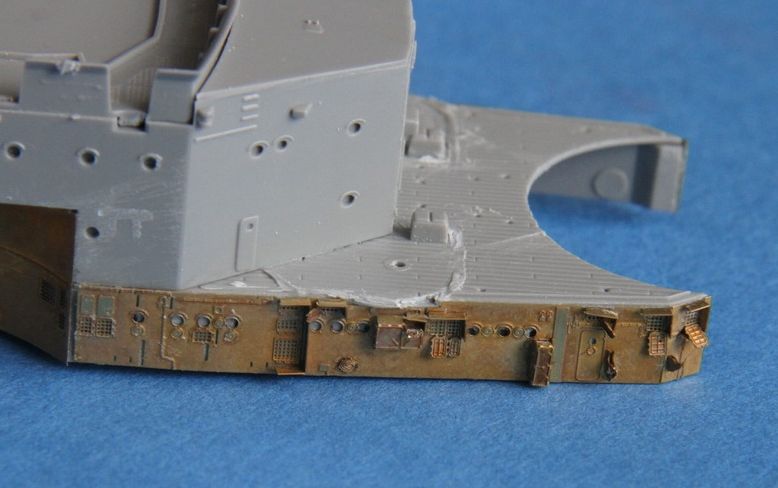
The skins all on the starboard side.
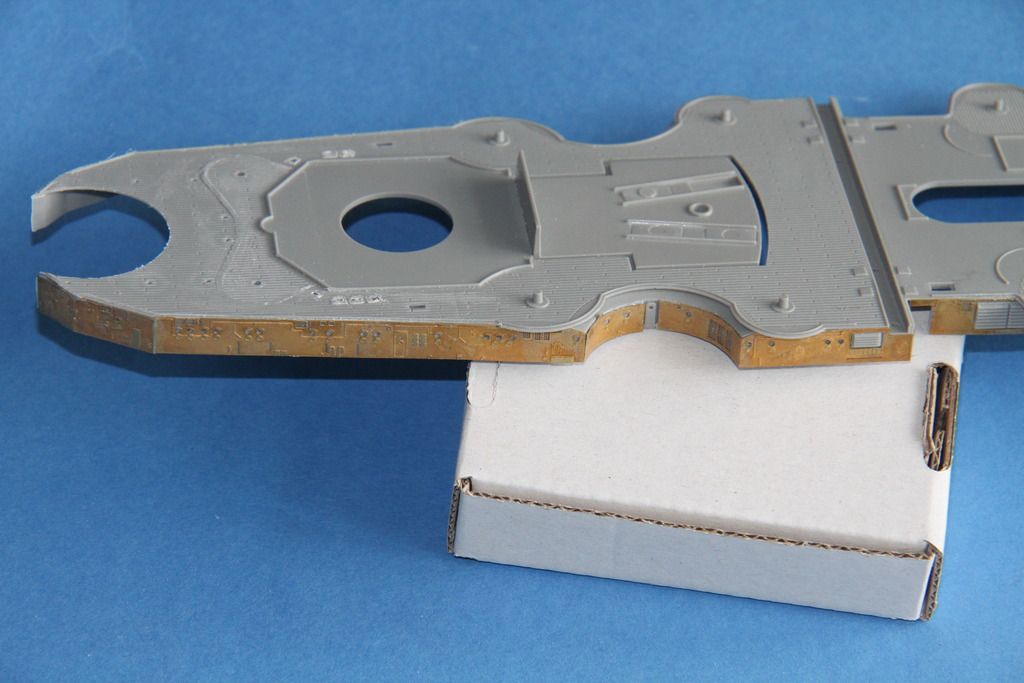
Started on the port side.
Lumps and bumps removed from the after port side.

Good thing about posting, just noticed the door just aft of the catapult that needs sanding off before I go any further.
Cheers
Si
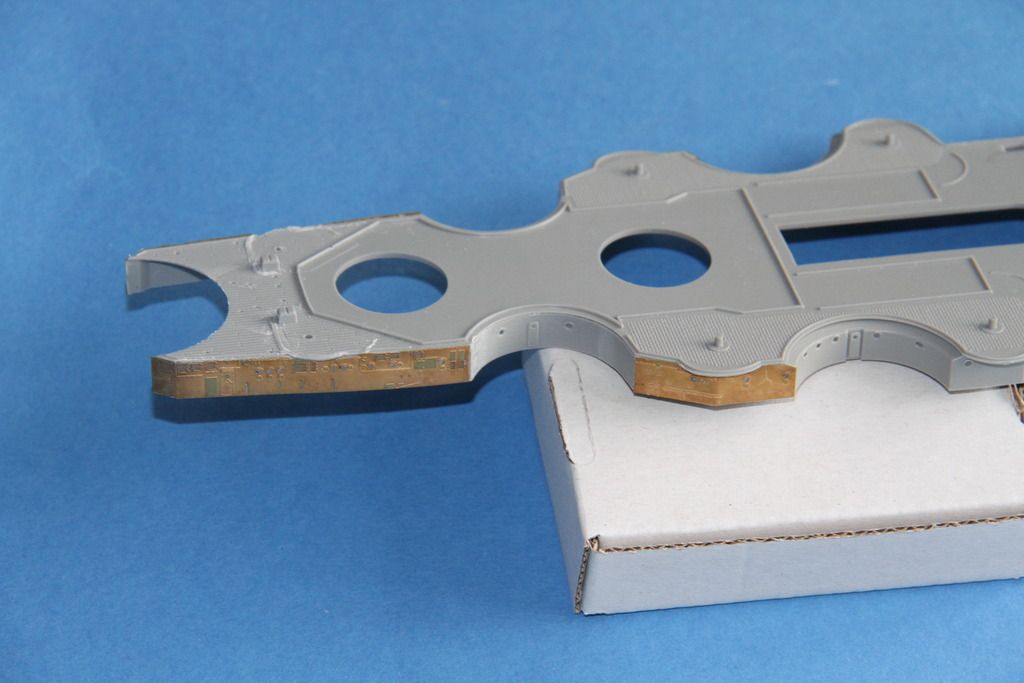
The skins all on the starboard side.

Started on the port side.

Lumps and bumps removed from the after port side.

Good thing about posting, just noticed the door just aft of the catapult that needs sanding off before I go any further.
Cheers
Si
JJ1973
#345
Joined: August 22, 2011
KitMaker: 1,835 posts
Model Shipwrights: 1,832 posts
Posted: Tuesday, June 14, 2016 - 09:26 AM UTC
The 'skin' is looking good, Si - at some areas it looks as if there is more stuff needed to be added on top, or ist that a wrong impression? But even as it it seems quite an improvement over the original parts...
Off topic - Now, YOUR Hood IS big...and I thought mine would be a fairly sized model...
Cheers,
Jan
Off topic - Now, YOUR Hood IS big...and I thought mine would be a fairly sized model...
Cheers,
Jan
RedDuster
Joined: March 01, 2010
KitMaker: 7,078 posts
Model Shipwrights: 6,649 posts
Posted: Tuesday, June 14, 2016 - 11:42 PM UTC
Hi Jan,
Yes there is, lots of lovely little bits to go on, gatches, lockers, mounts for booms, paravanes etc.
Yup the 200th is big, but at first blush it looks like they gave corrected at least some of the errors of the 1/350th kit. (Don't think Mrs Duster is impressed)
Cheers
Si
Yes there is, lots of lovely little bits to go on, gatches, lockers, mounts for booms, paravanes etc.
Yup the 200th is big, but at first blush it looks like they gave corrected at least some of the errors of the 1/350th kit. (Don't think Mrs Duster is impressed)
Cheers
Si

surfsup
Joined: May 20, 2010
KitMaker: 1,230 posts
Model Shipwrights: 1,212 posts

Posted: Friday, June 17, 2016 - 06:51 AM UTC
That is some beautiful work going on Si......Cheers Mark
RedDuster
Joined: March 01, 2010
KitMaker: 7,078 posts
Model Shipwrights: 6,649 posts
Posted: Friday, June 17, 2016 - 02:07 PM UTC
Thanks Mark,
I am loving the all the detail in the Pontos set, this is my most ambitious build yet in those terms.
Cheers
Si
I am loving the all the detail in the Pontos set, this is my most ambitious build yet in those terms.
Cheers
Si
RedDuster
Joined: March 01, 2010
KitMaker: 7,078 posts
Model Shipwrights: 6,649 posts
Posted: Saturday, June 18, 2016 - 12:59 AM UTC
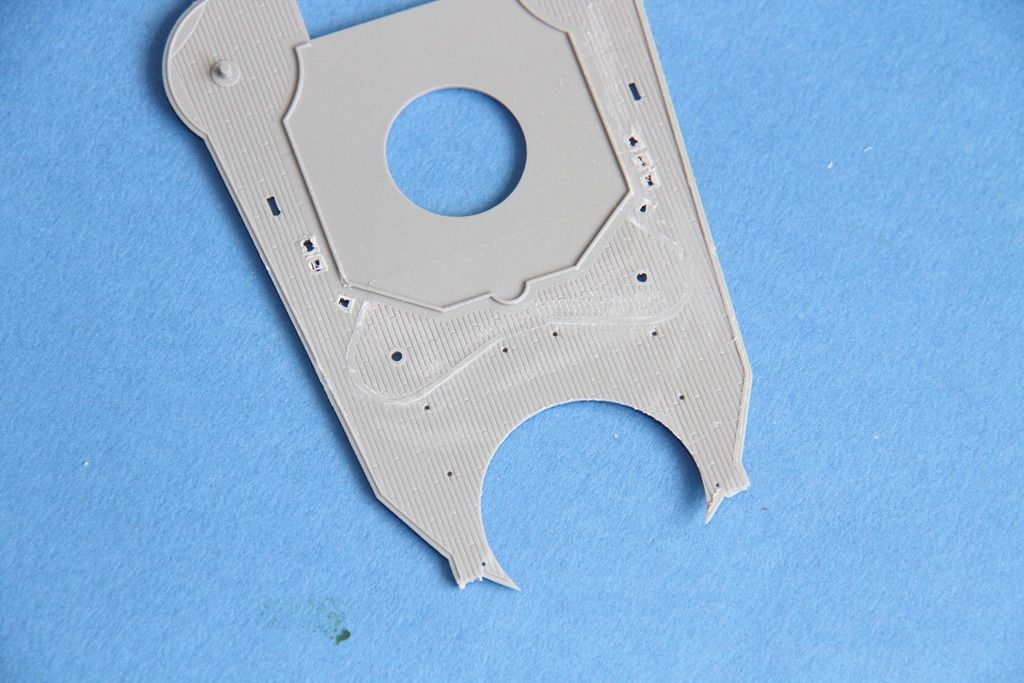
Today's progress.
Cladding on the port side completed.
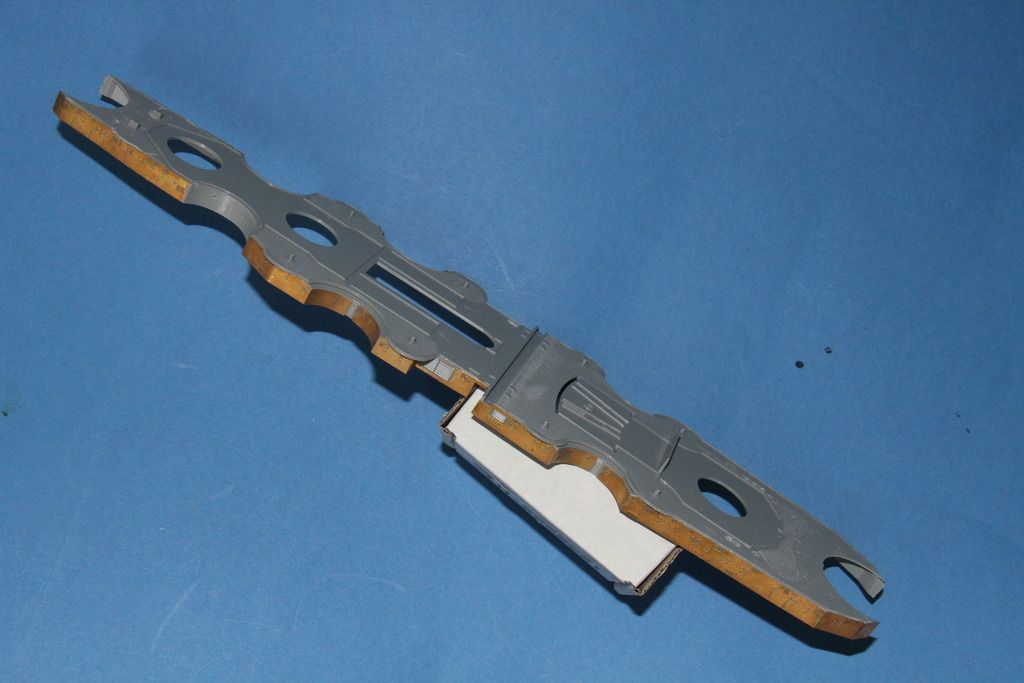
The lower forebridge components, need a few details need removing prior to assembly
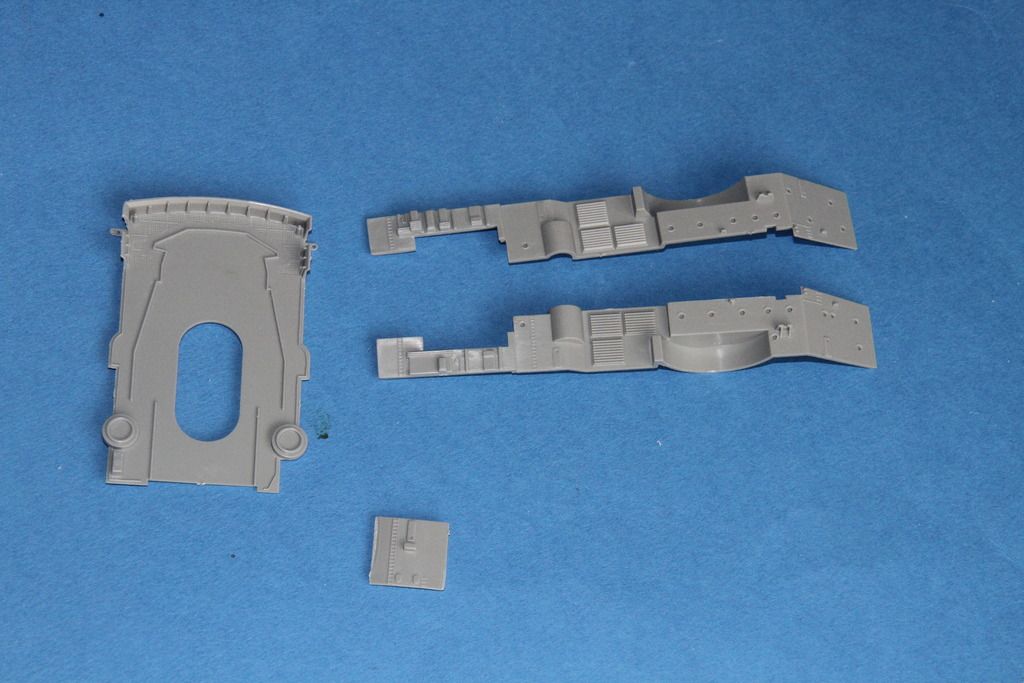
Done.
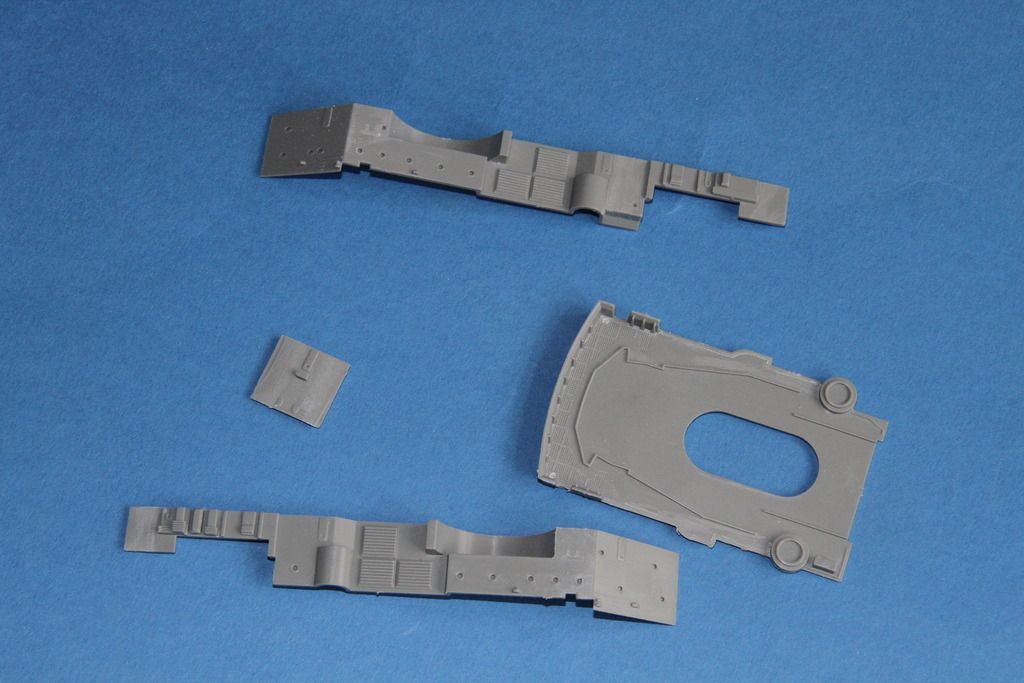
Assembled
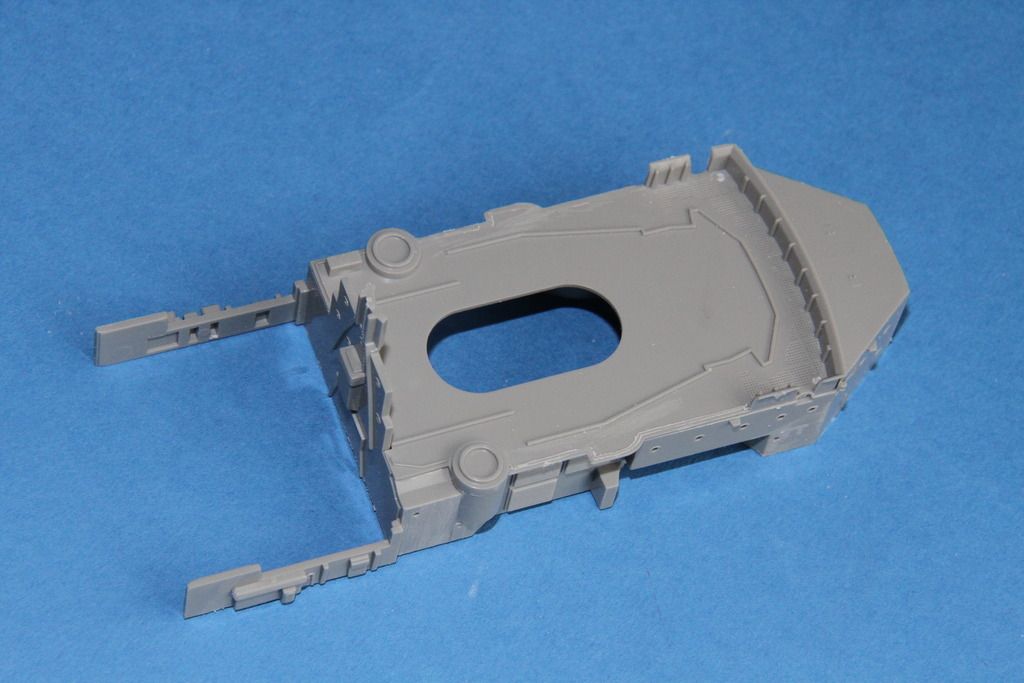
fixed in place.
The cladding that goes behind the forward 5.9" mounts bent to shape.
Fitted, needs a little bedding in.
And the catapult deck piece in as well.
More tomorrow.
Cheers
Si
Cladding on the port side completed.

The lower forebridge components, need a few details need removing prior to assembly

Done.

Assembled

fixed in place.

The cladding that goes behind the forward 5.9" mounts bent to shape.

Fitted, needs a little bedding in.

And the catapult deck piece in as well.

More tomorrow.
Cheers
Si
RedDuster
Joined: March 01, 2010
KitMaker: 7,078 posts
Model Shipwrights: 6,649 posts
Posted: Saturday, June 18, 2016 - 10:48 PM UTC
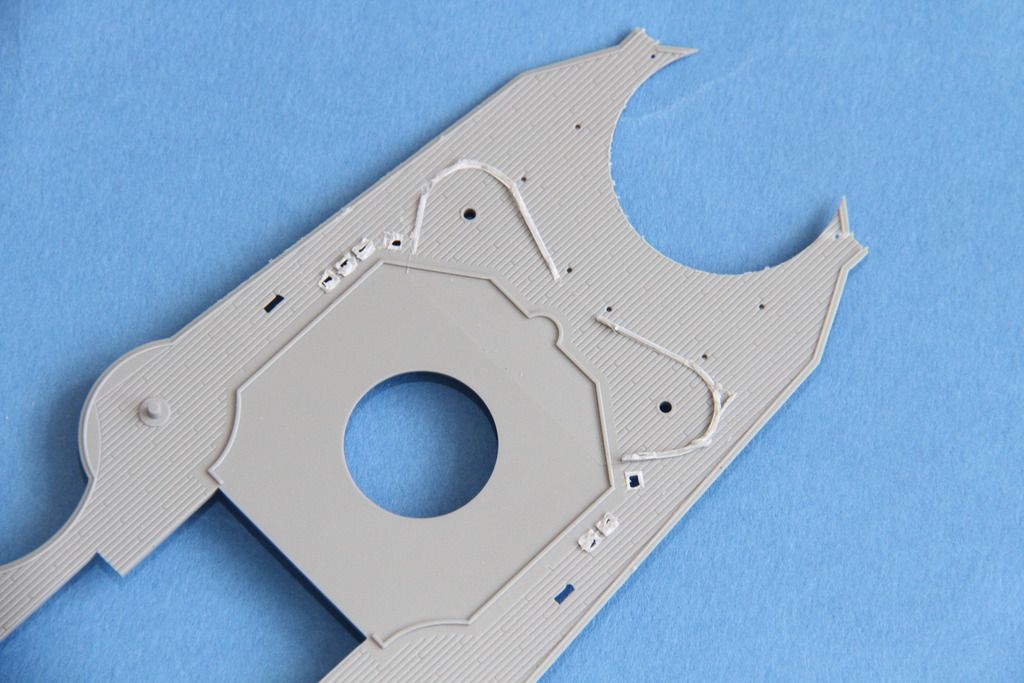
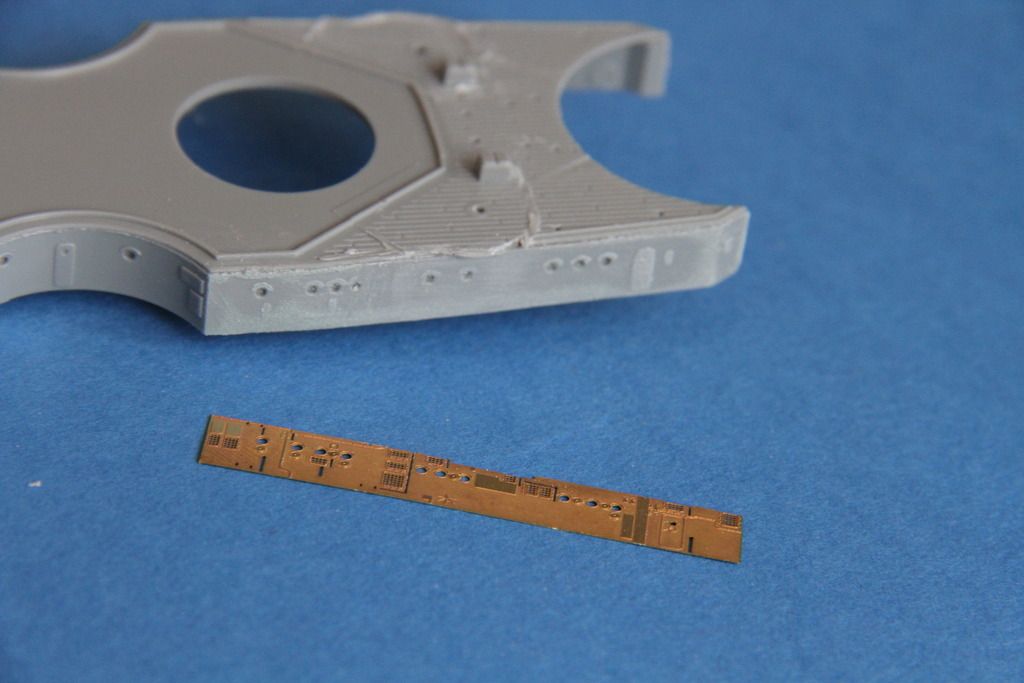
The long slog,
The detail going on the shelter deck bulkheads.
First bits on.
The first session, in need of a break.
As far as I got today.
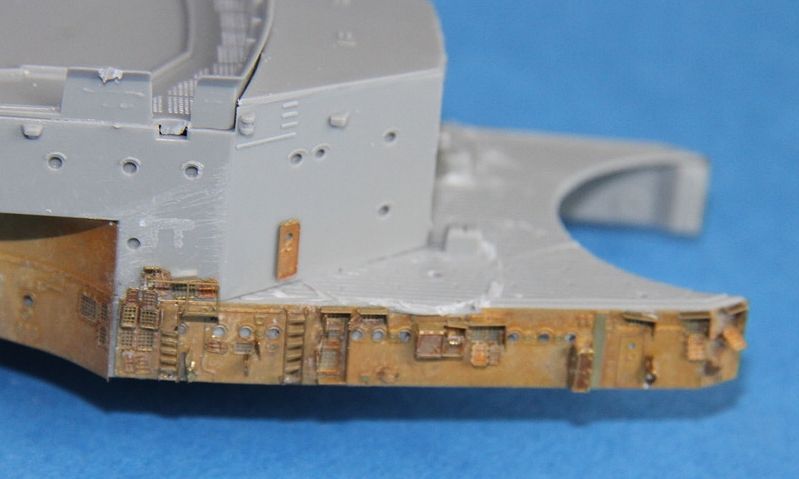
I haven't counted, but about 40 pieces to just that section,
Loads to go yet.
Cheers
Si
The detail going on the shelter deck bulkheads.
First bits on.

The first session, in need of a break.

As far as I got today.

I haven't counted, but about 40 pieces to just that section,
Loads to go yet.
Cheers
Si
JJ1973
#345
Joined: August 22, 2011
KitMaker: 1,835 posts
Model Shipwrights: 1,832 posts
Posted: Sunday, June 19, 2016 - 10:47 AM UTC
Wow Si, those first additions on the bulkhead skin - that's amazing!! Now that REALLY makes a difference!! Fantastic work!
Cheers,
Jan
Now that REALLY makes a difference!! Fantastic work! Cheers,
Jan
RedDuster
Joined: March 01, 2010
KitMaker: 7,078 posts
Model Shipwrights: 6,649 posts
Posted: Monday, June 20, 2016 - 01:11 AM UTC
Thanks Jan,
I am impressed the depth all these details add. It will take some very careful washing after airbrushing to bring it out.
It is some upgade set, this bit is going to be a labour of love, and I shall enjoy every minute
Cheers
Si
I am impressed the depth all these details add. It will take some very careful washing after airbrushing to bring it out.
It is some upgade set, this bit is going to be a labour of love, and I shall enjoy every minute
Cheers
Si
 |

WEB HOSTING BY


Copyright ©2021 Model Shipwrights and Kitmaker Network, a subsidiary of Silver Star Enterprises
All Rights Reserved. Please read our Conditions of Use and Privacy Policy.
All Rights Reserved. Please read our Conditions of Use and Privacy Policy.