

Go to modelshipwrights.com for the current dynamic site!


Hosted by Steve Joyce
HMS Warspite 1/350 with Pontos

ChurchSTSV

Joined: September 20, 2017
KitMaker: 350 posts
Model Shipwrights: 175 posts

Posted: Tuesday, November 14, 2017 - 11:53 PM UTC
Following!! I love the PE step by steps!! Great job!


TRM5150
Joined: January 03, 2010
KitMaker: 2,159 posts
Model Shipwrights: 1,400 posts

Posted: Wednesday, November 15, 2017 - 06:04 AM UTC
Great seeing this back on....looking great Si!

RedDuster

Joined: March 01, 2010
KitMaker: 7,078 posts
Model Shipwrights: 6,649 posts

Posted: Friday, November 17, 2017 - 01:17 AM UTC
Quoted Text
True that mate-those disruptive patterns can be a real challenge!
Especially when you have to mask across etch

Will get there, bit more done, will post latter today / tmrw
Cheers
Si
RedDuster
Joined: March 01, 2010
KitMaker: 7,078 posts
Model Shipwrights: 6,649 posts
Posted: Friday, November 17, 2017 - 01:18 AM UTC
Quoted Text
Following!! I love the PE step by steps!! Great job!
Thanks Charlie,
Glad you are enjoying the build.
Cheers
Si
RedDuster
Joined: March 01, 2010
KitMaker: 7,078 posts
Model Shipwrights: 6,649 posts
Posted: Friday, November 17, 2017 - 01:19 AM UTC
Quoted Text
Great seeing this back on....looking great Si!
Good to be back on this one Todd, the momentum is picking up.
Cheers
Si
RedDuster
Joined: March 01, 2010
KitMaker: 7,078 posts
Model Shipwrights: 6,649 posts
Posted: Friday, November 17, 2017 - 03:28 AM UTC
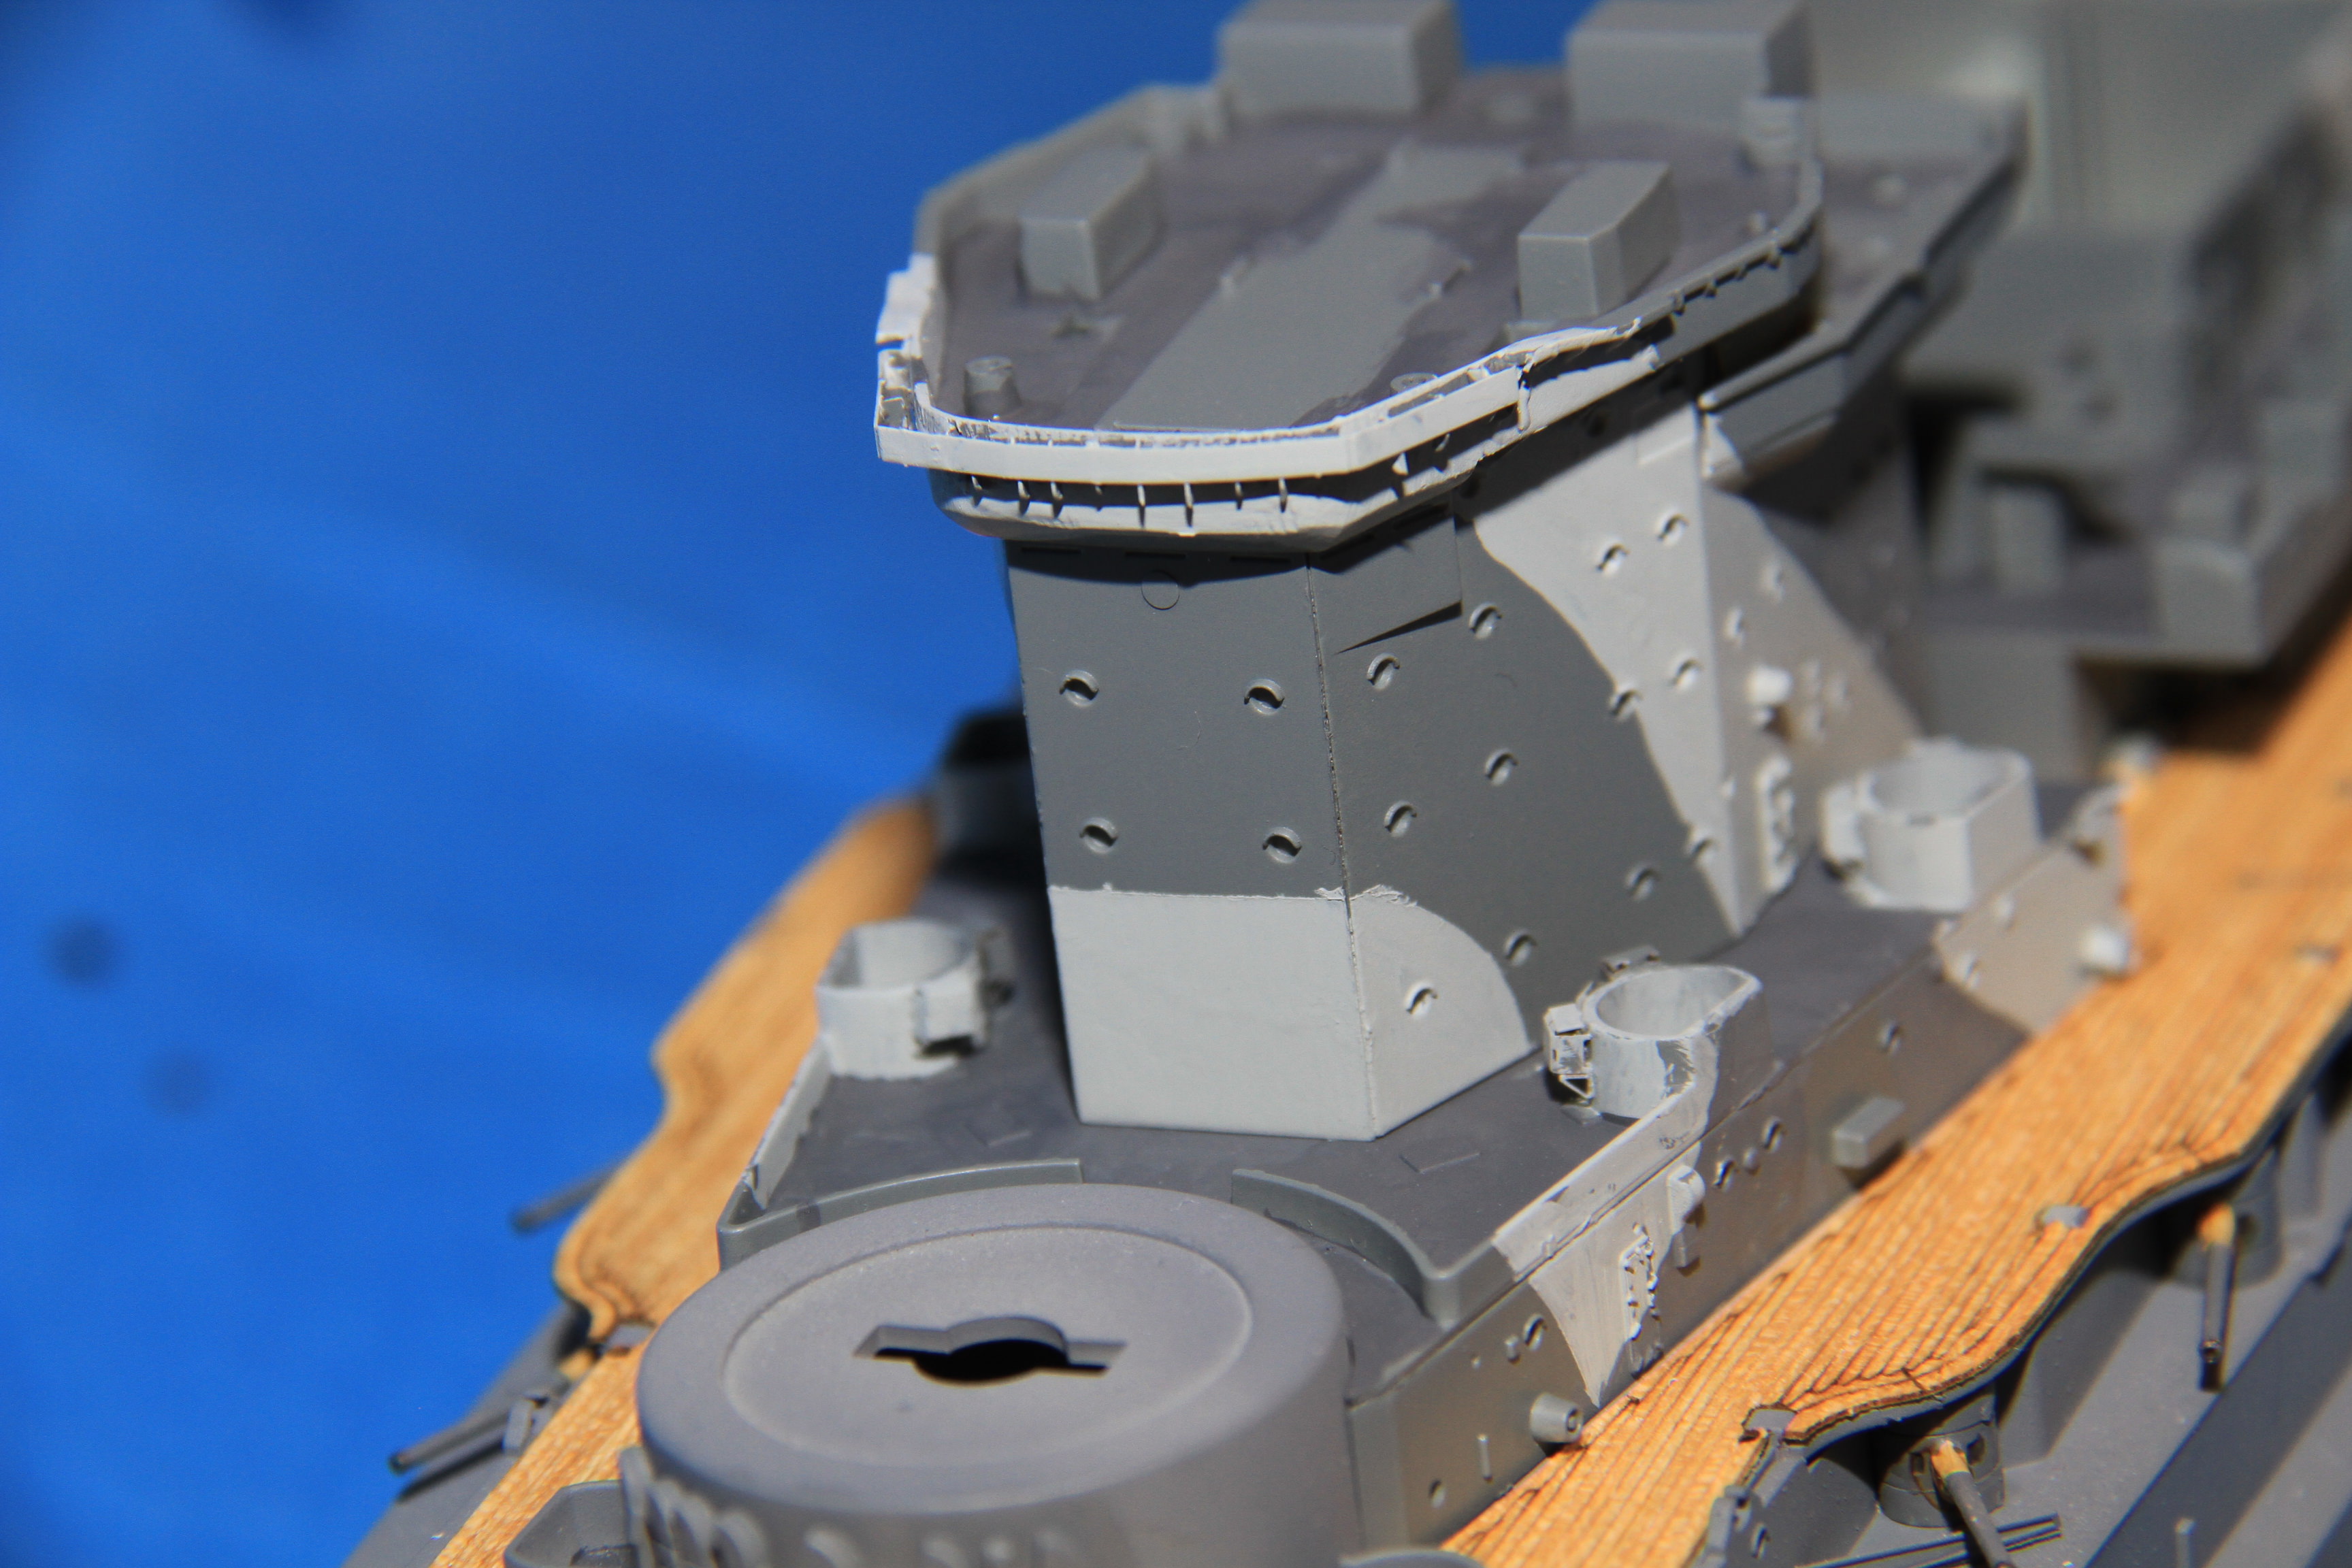
Bit of progress.
Etched detail on the rear of the bridge structure.
and on the underside of the boat deck.
All the superstructure units test fitted,
Cheers
Si
Etched detail on the rear of the bridge structure.
and on the underside of the boat deck.
All the superstructure units test fitted,
Cheers
Si

d6mst0

#453
Joined: August 28, 2016
KitMaker: 1,925 posts
Model Shipwrights: 1,298 posts

Posted: Friday, November 17, 2017 - 06:24 AM UTC
Nice work with the PE. Really like the look of the paint work on the hull. 

TimReynaga
Joined: May 03, 2006
KitMaker: 2,500 posts
Model Shipwrights: 1,830 posts

Posted: Friday, November 17, 2017 - 06:26 AM UTC
Quoted Text
Nice work with the PE. Really like the look of the paint work on the hull.
Me too! I really like the look of Warspite all dressed up in her camou!

RedDuster
Joined: March 01, 2010
KitMaker: 7,078 posts
Model Shipwrights: 6,649 posts
Posted: Friday, November 17, 2017 - 02:52 PM UTC
Quoted Text
Nice work with the PE. Really like the look of the paint work on the hull.
Thanks Mark,
for quite a simple two colour scheme it does manage to look striking.
The Pontos etch is very friendly (although the instructions for this very early set are a little on the basic side - later ones are much better)
Cheers
Si
RedDuster
Joined: March 01, 2010
KitMaker: 7,078 posts
Model Shipwrights: 6,649 posts
Posted: Friday, November 17, 2017 - 02:53 PM UTC
Quoted Text
Quoted TextNice work with the PE. Really like the look of the paint work on the hull.
Me too! I really like the look of Warspite all dressed up in her camou!
Thanks Tim,
Next job, get the upper bridge and the funnel done, then out with windy stick.
Cheers
Si

RussellE
#306

Joined: June 27, 2010
KitMaker: 3,959 posts
Model Shipwrights: 2,777 posts
Posted: Sunday, November 19, 2017 - 03:30 PM UTC
Looking good Si.
You're braver than I tackling the disruptive pattern on the hull before the superstructure
You're braver than I tackling the disruptive pattern on the hull before the superstructure

RedDuster
Joined: March 01, 2010
KitMaker: 7,078 posts
Model Shipwrights: 6,649 posts
Posted: Monday, November 20, 2017 - 02:27 AM UTC
Quoted Text
Looking good Si.
You're braver than I tackling the disruptive pattern on the hull before the superstructure
Braver may be the wrong word Russ,
I have now got the superstructure base coated, (update on the way) we shall see.
Cheers
Si
RedDuster
Joined: March 01, 2010
KitMaker: 7,078 posts
Model Shipwrights: 6,649 posts
Posted: Tuesday, November 21, 2017 - 02:16 AM UTC
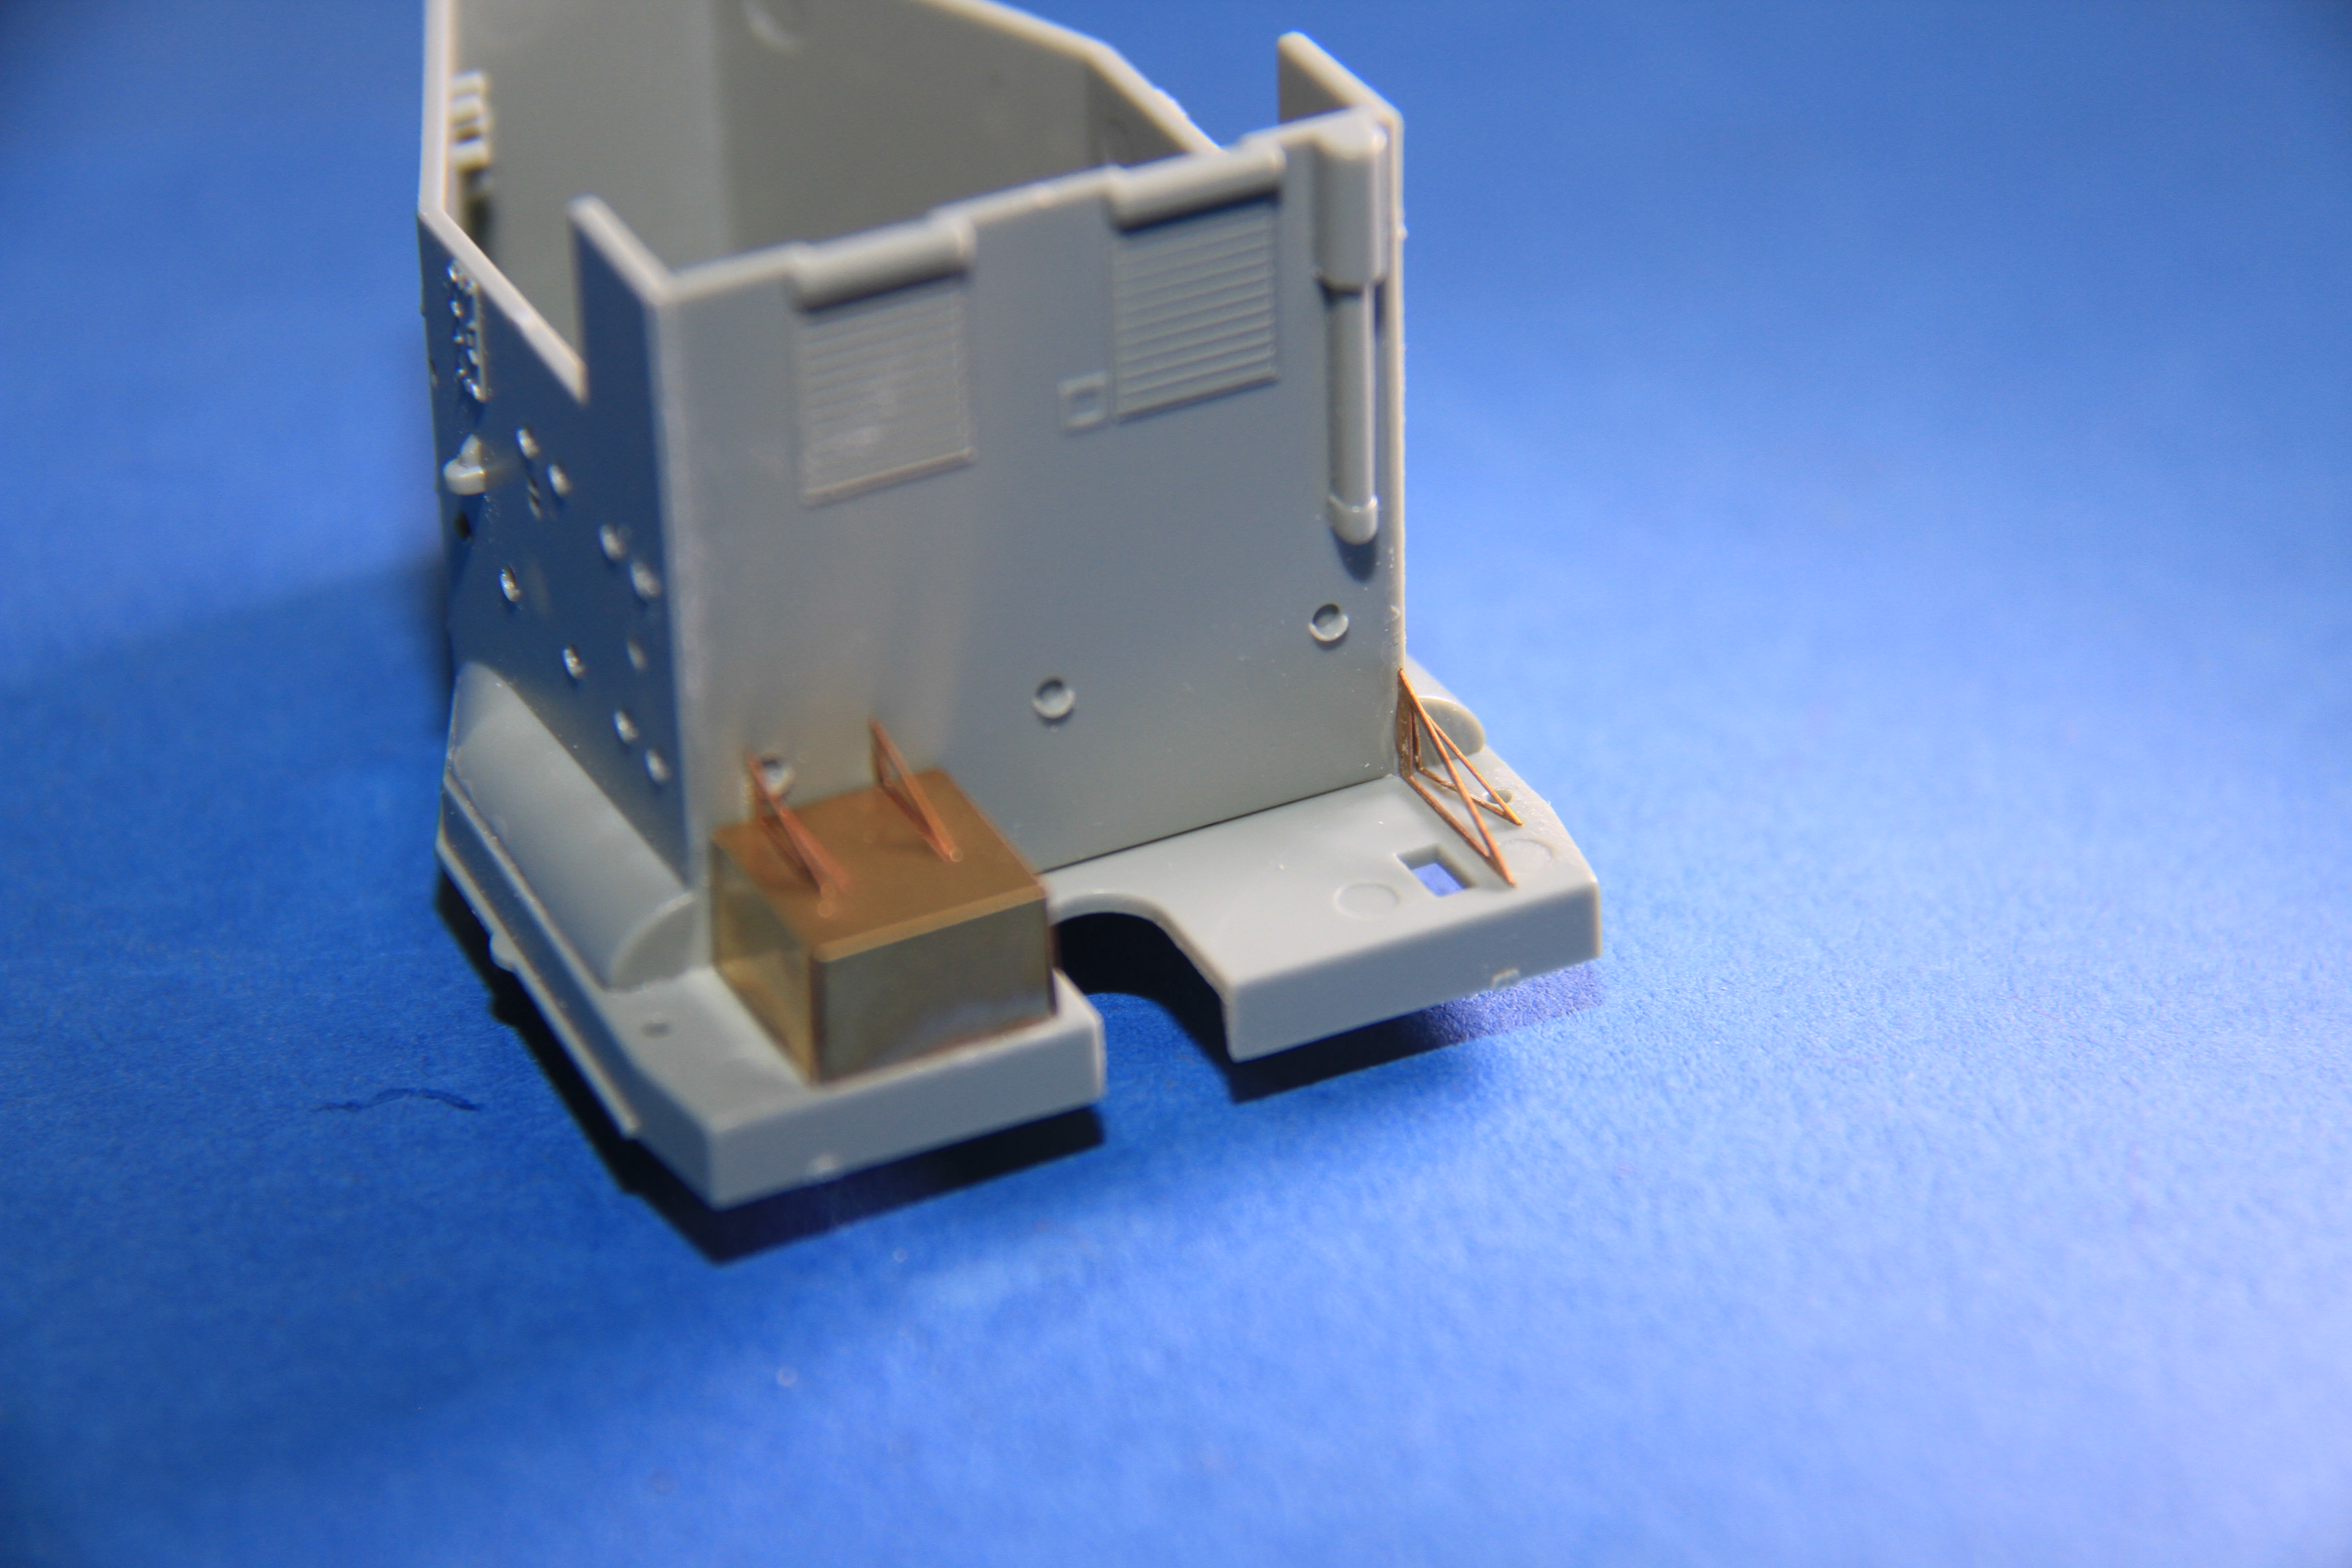
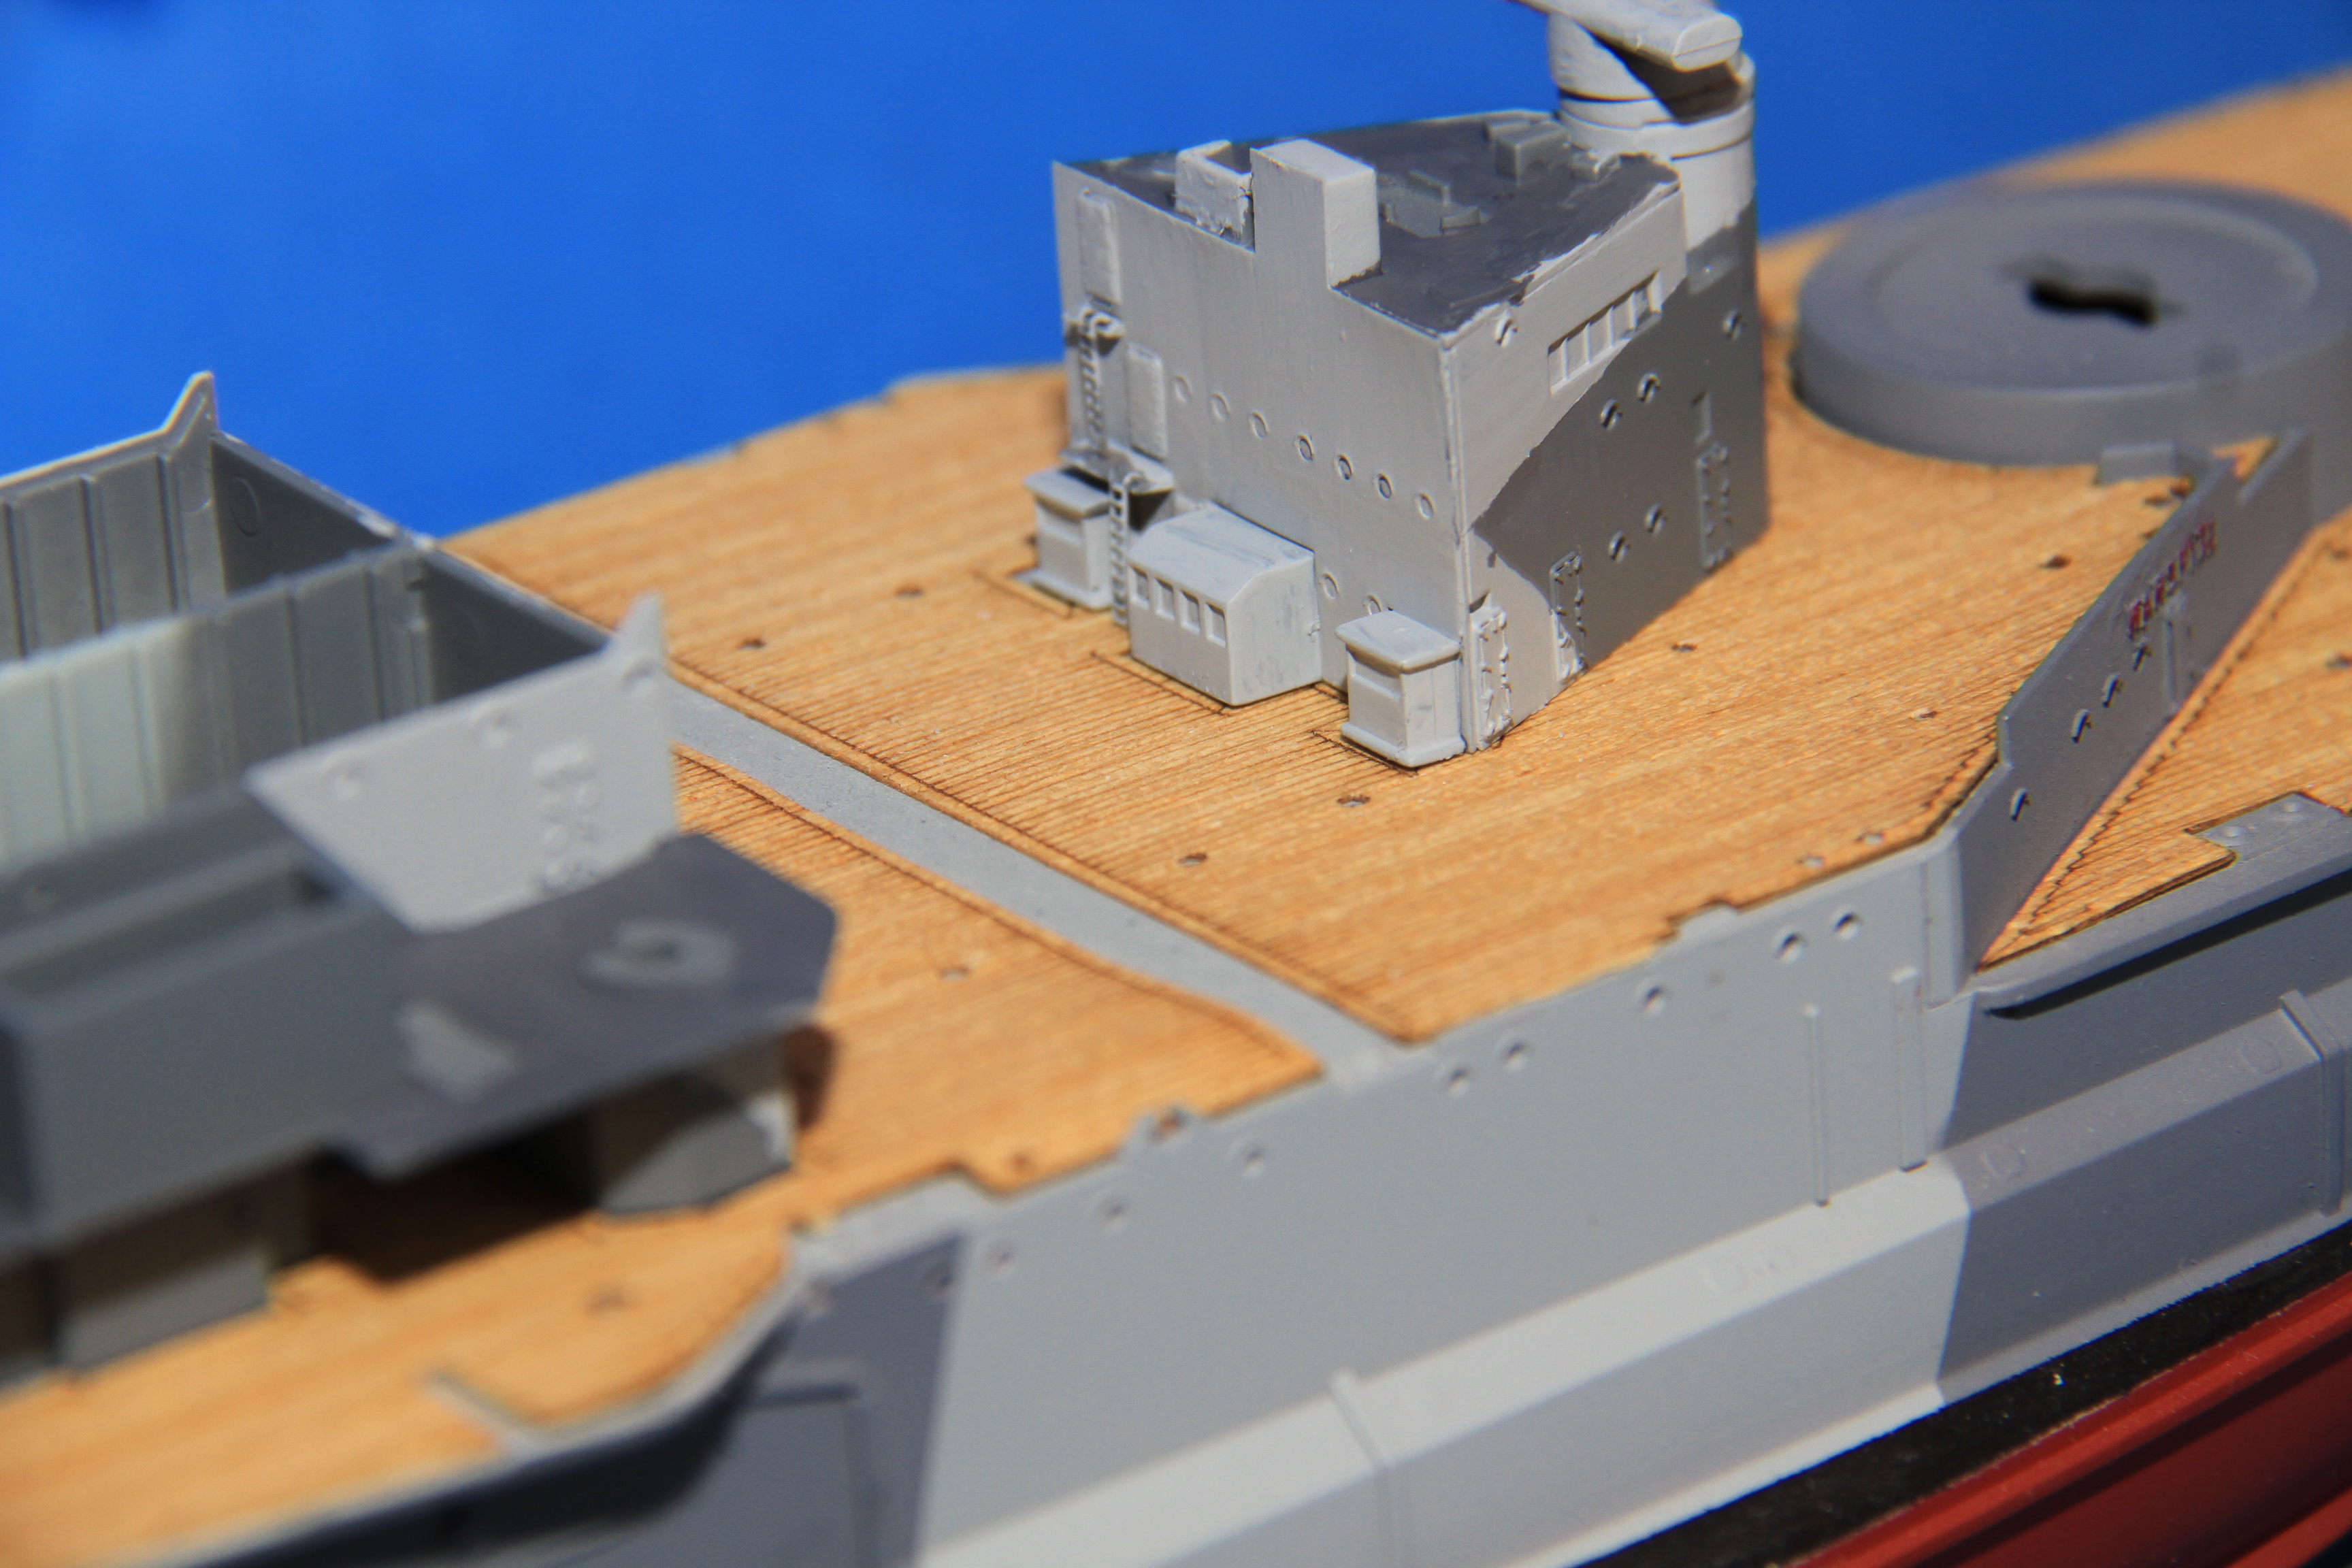
Finally, This weekend's progress.
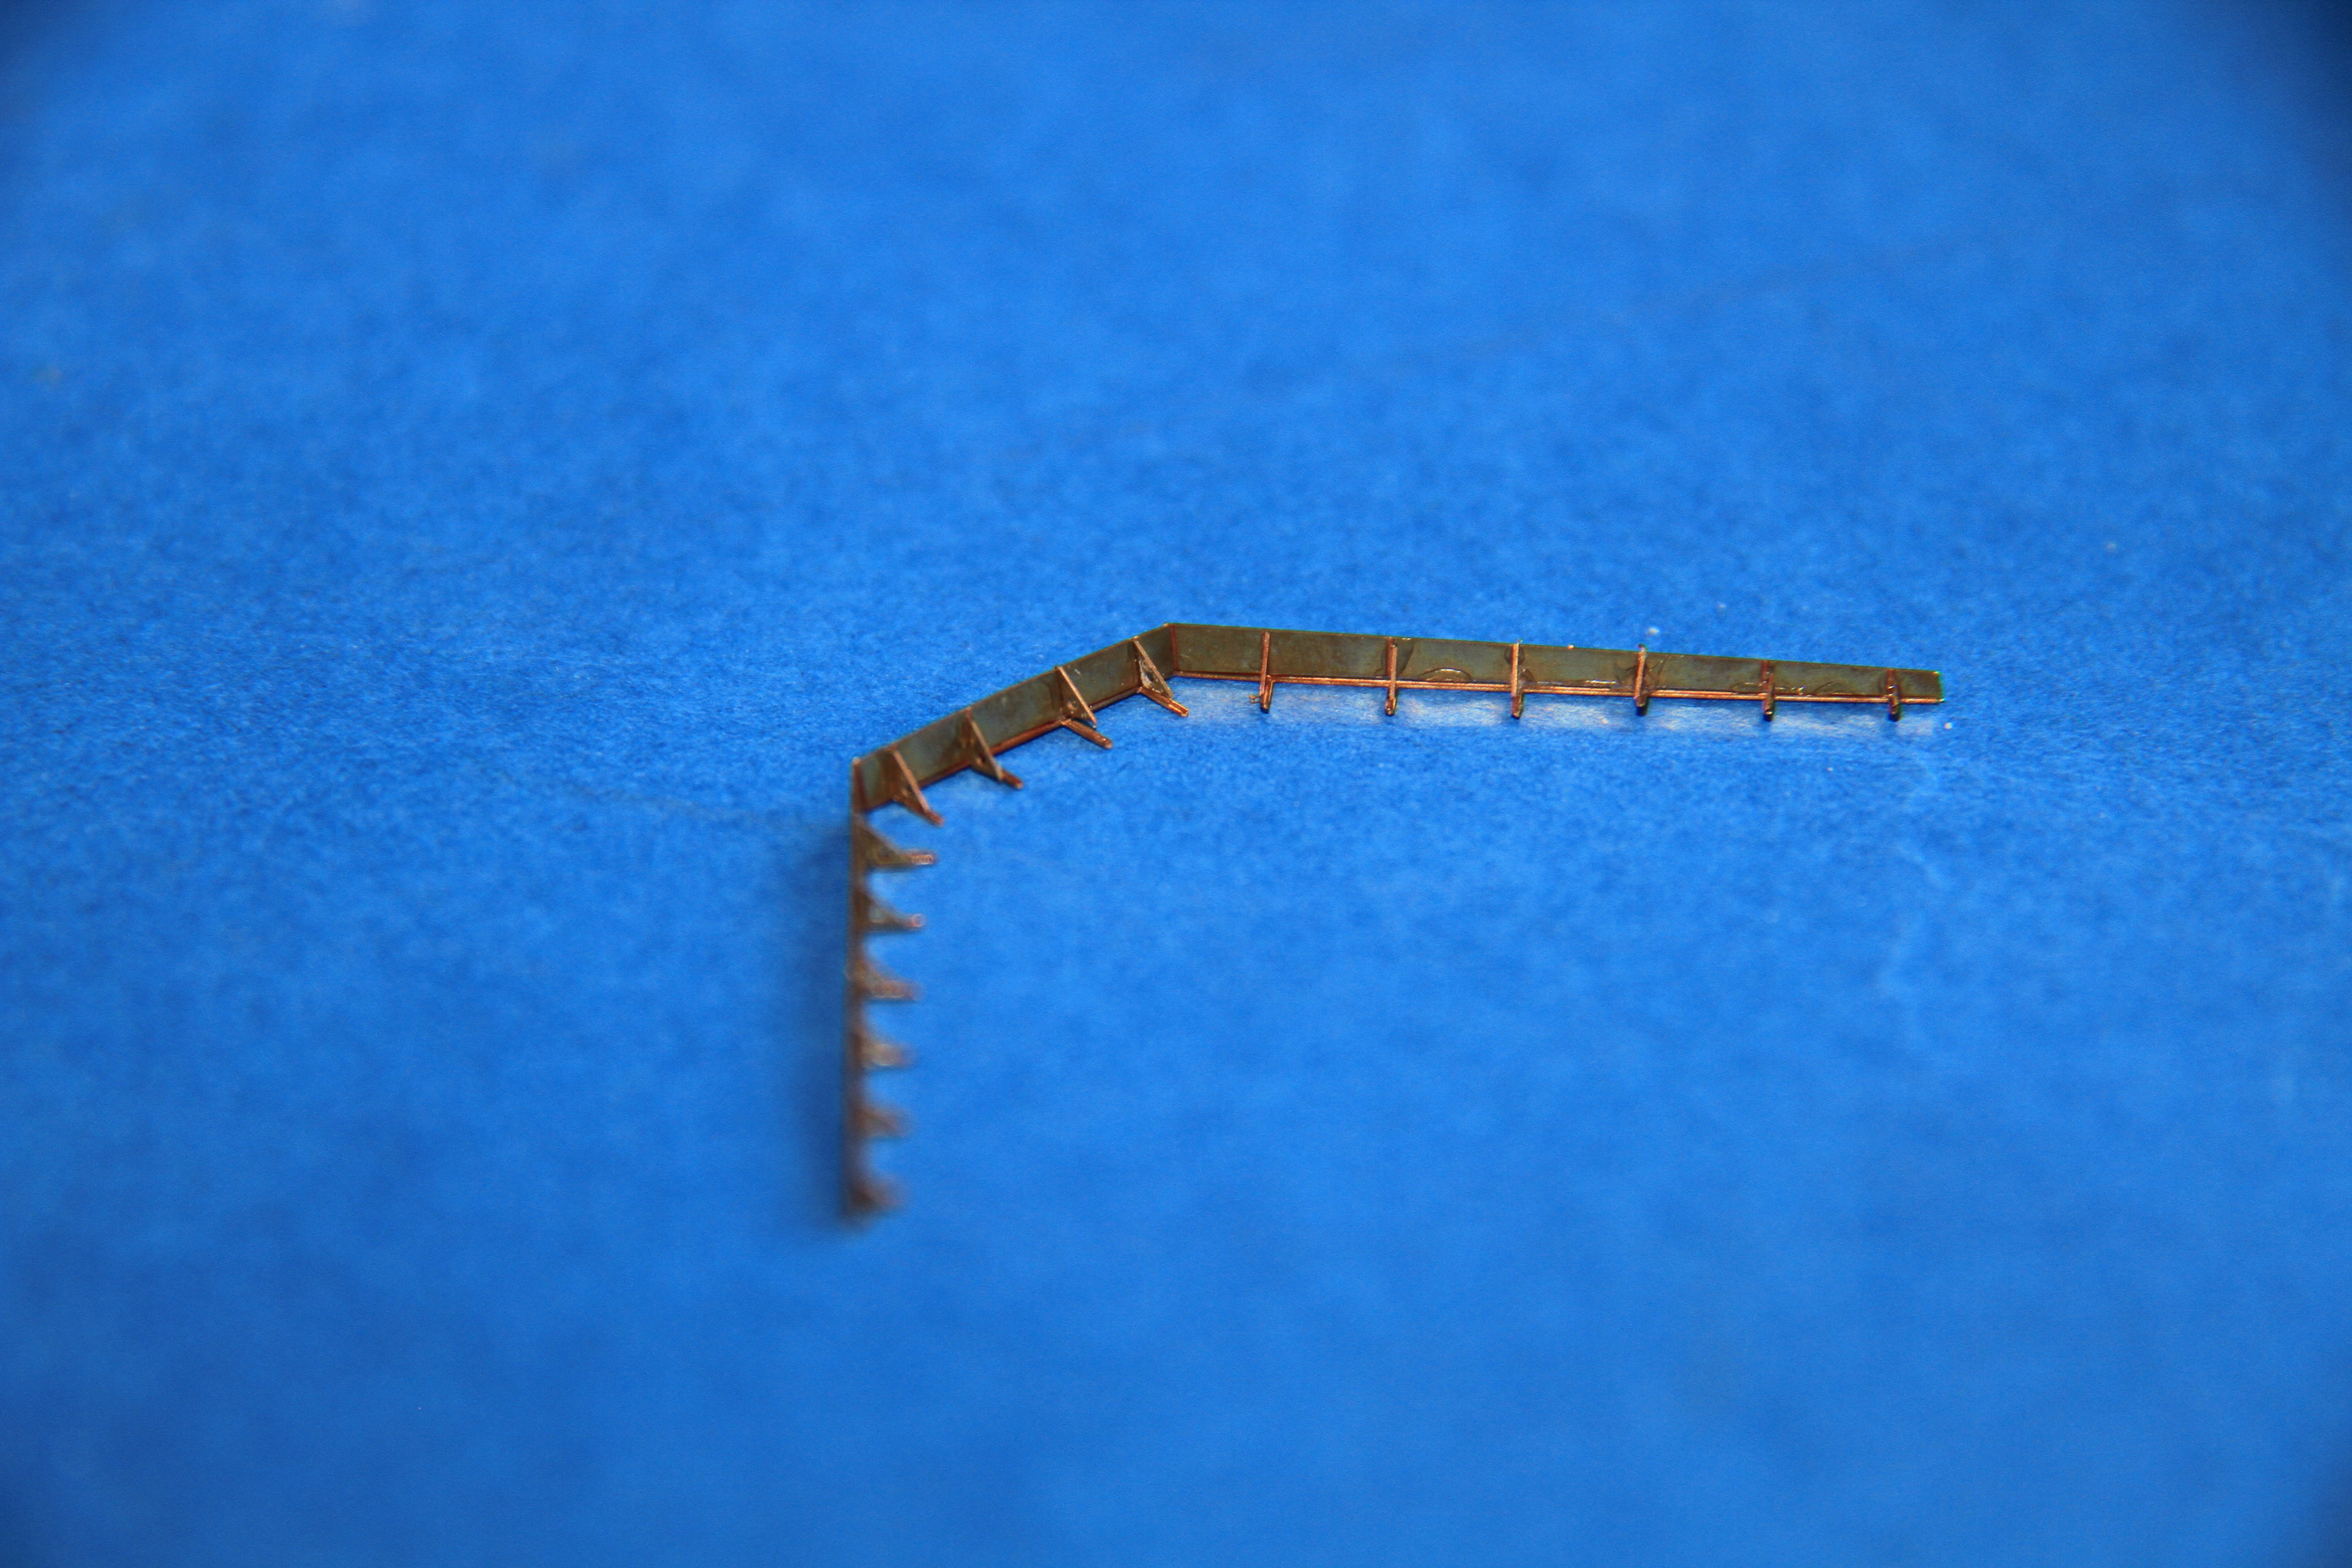
The moulded on wind deflector removed from the flag bridge.
The etched replacement assembled and awaiting bending and fitting.
In place.

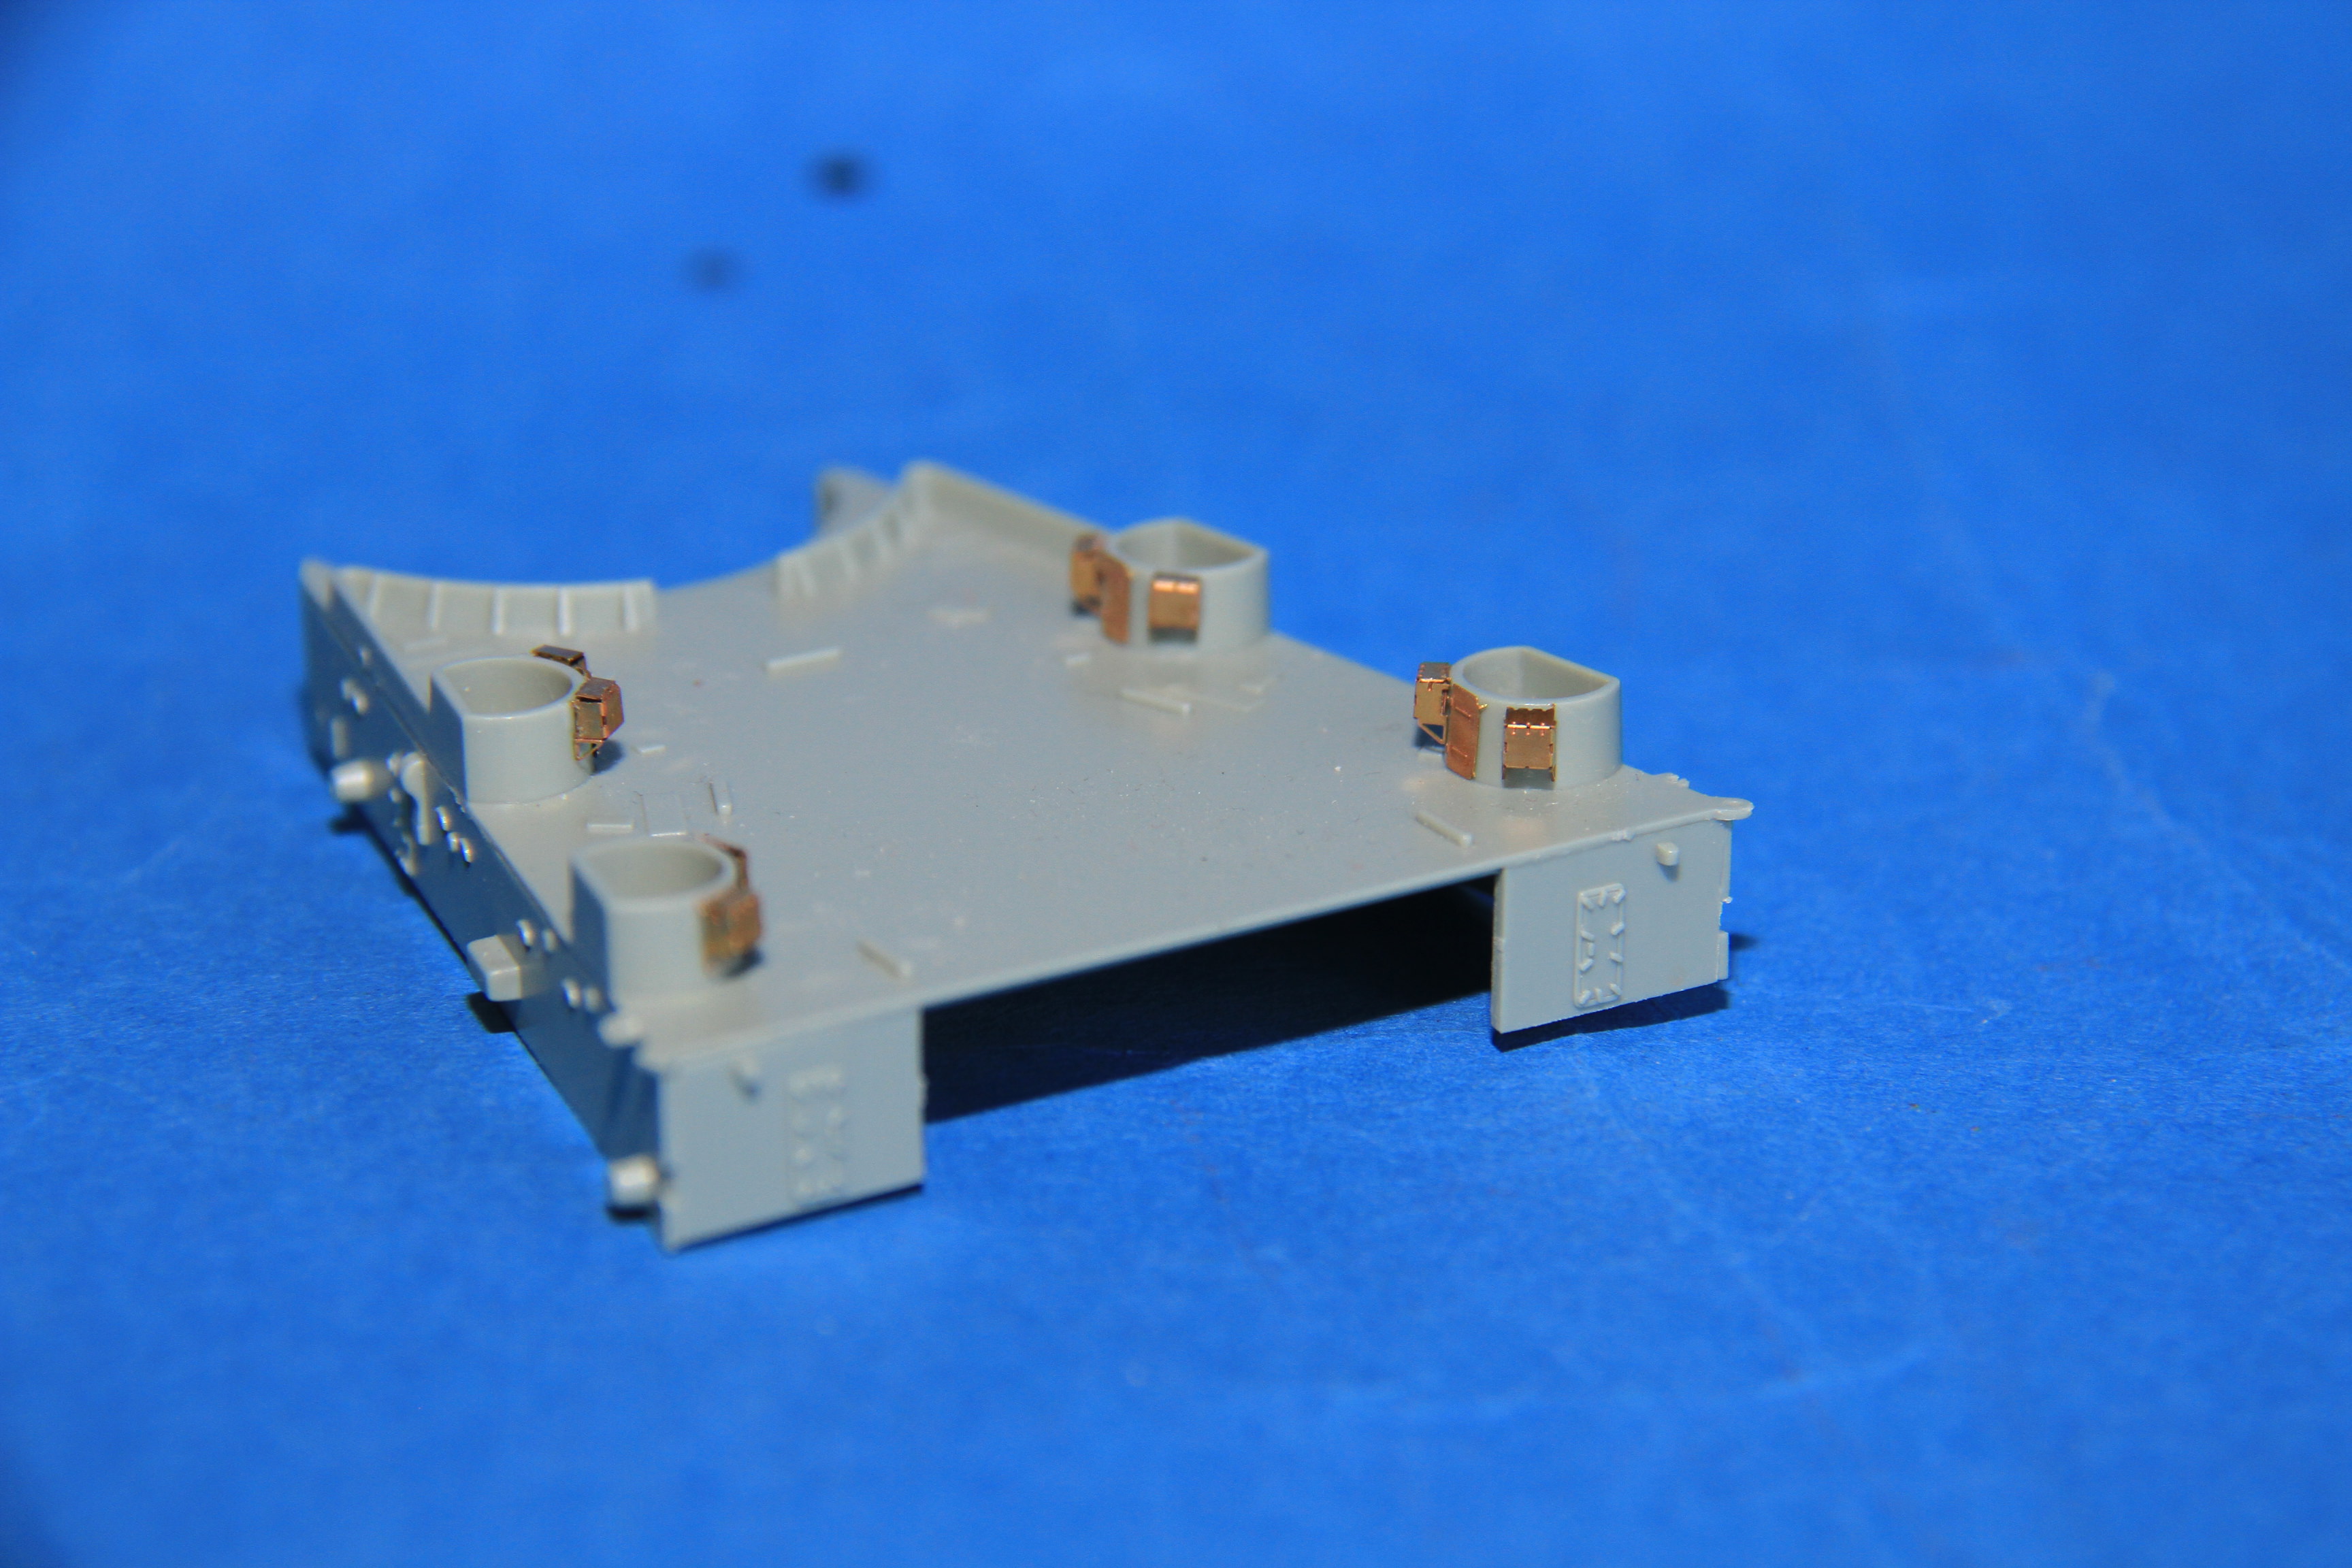
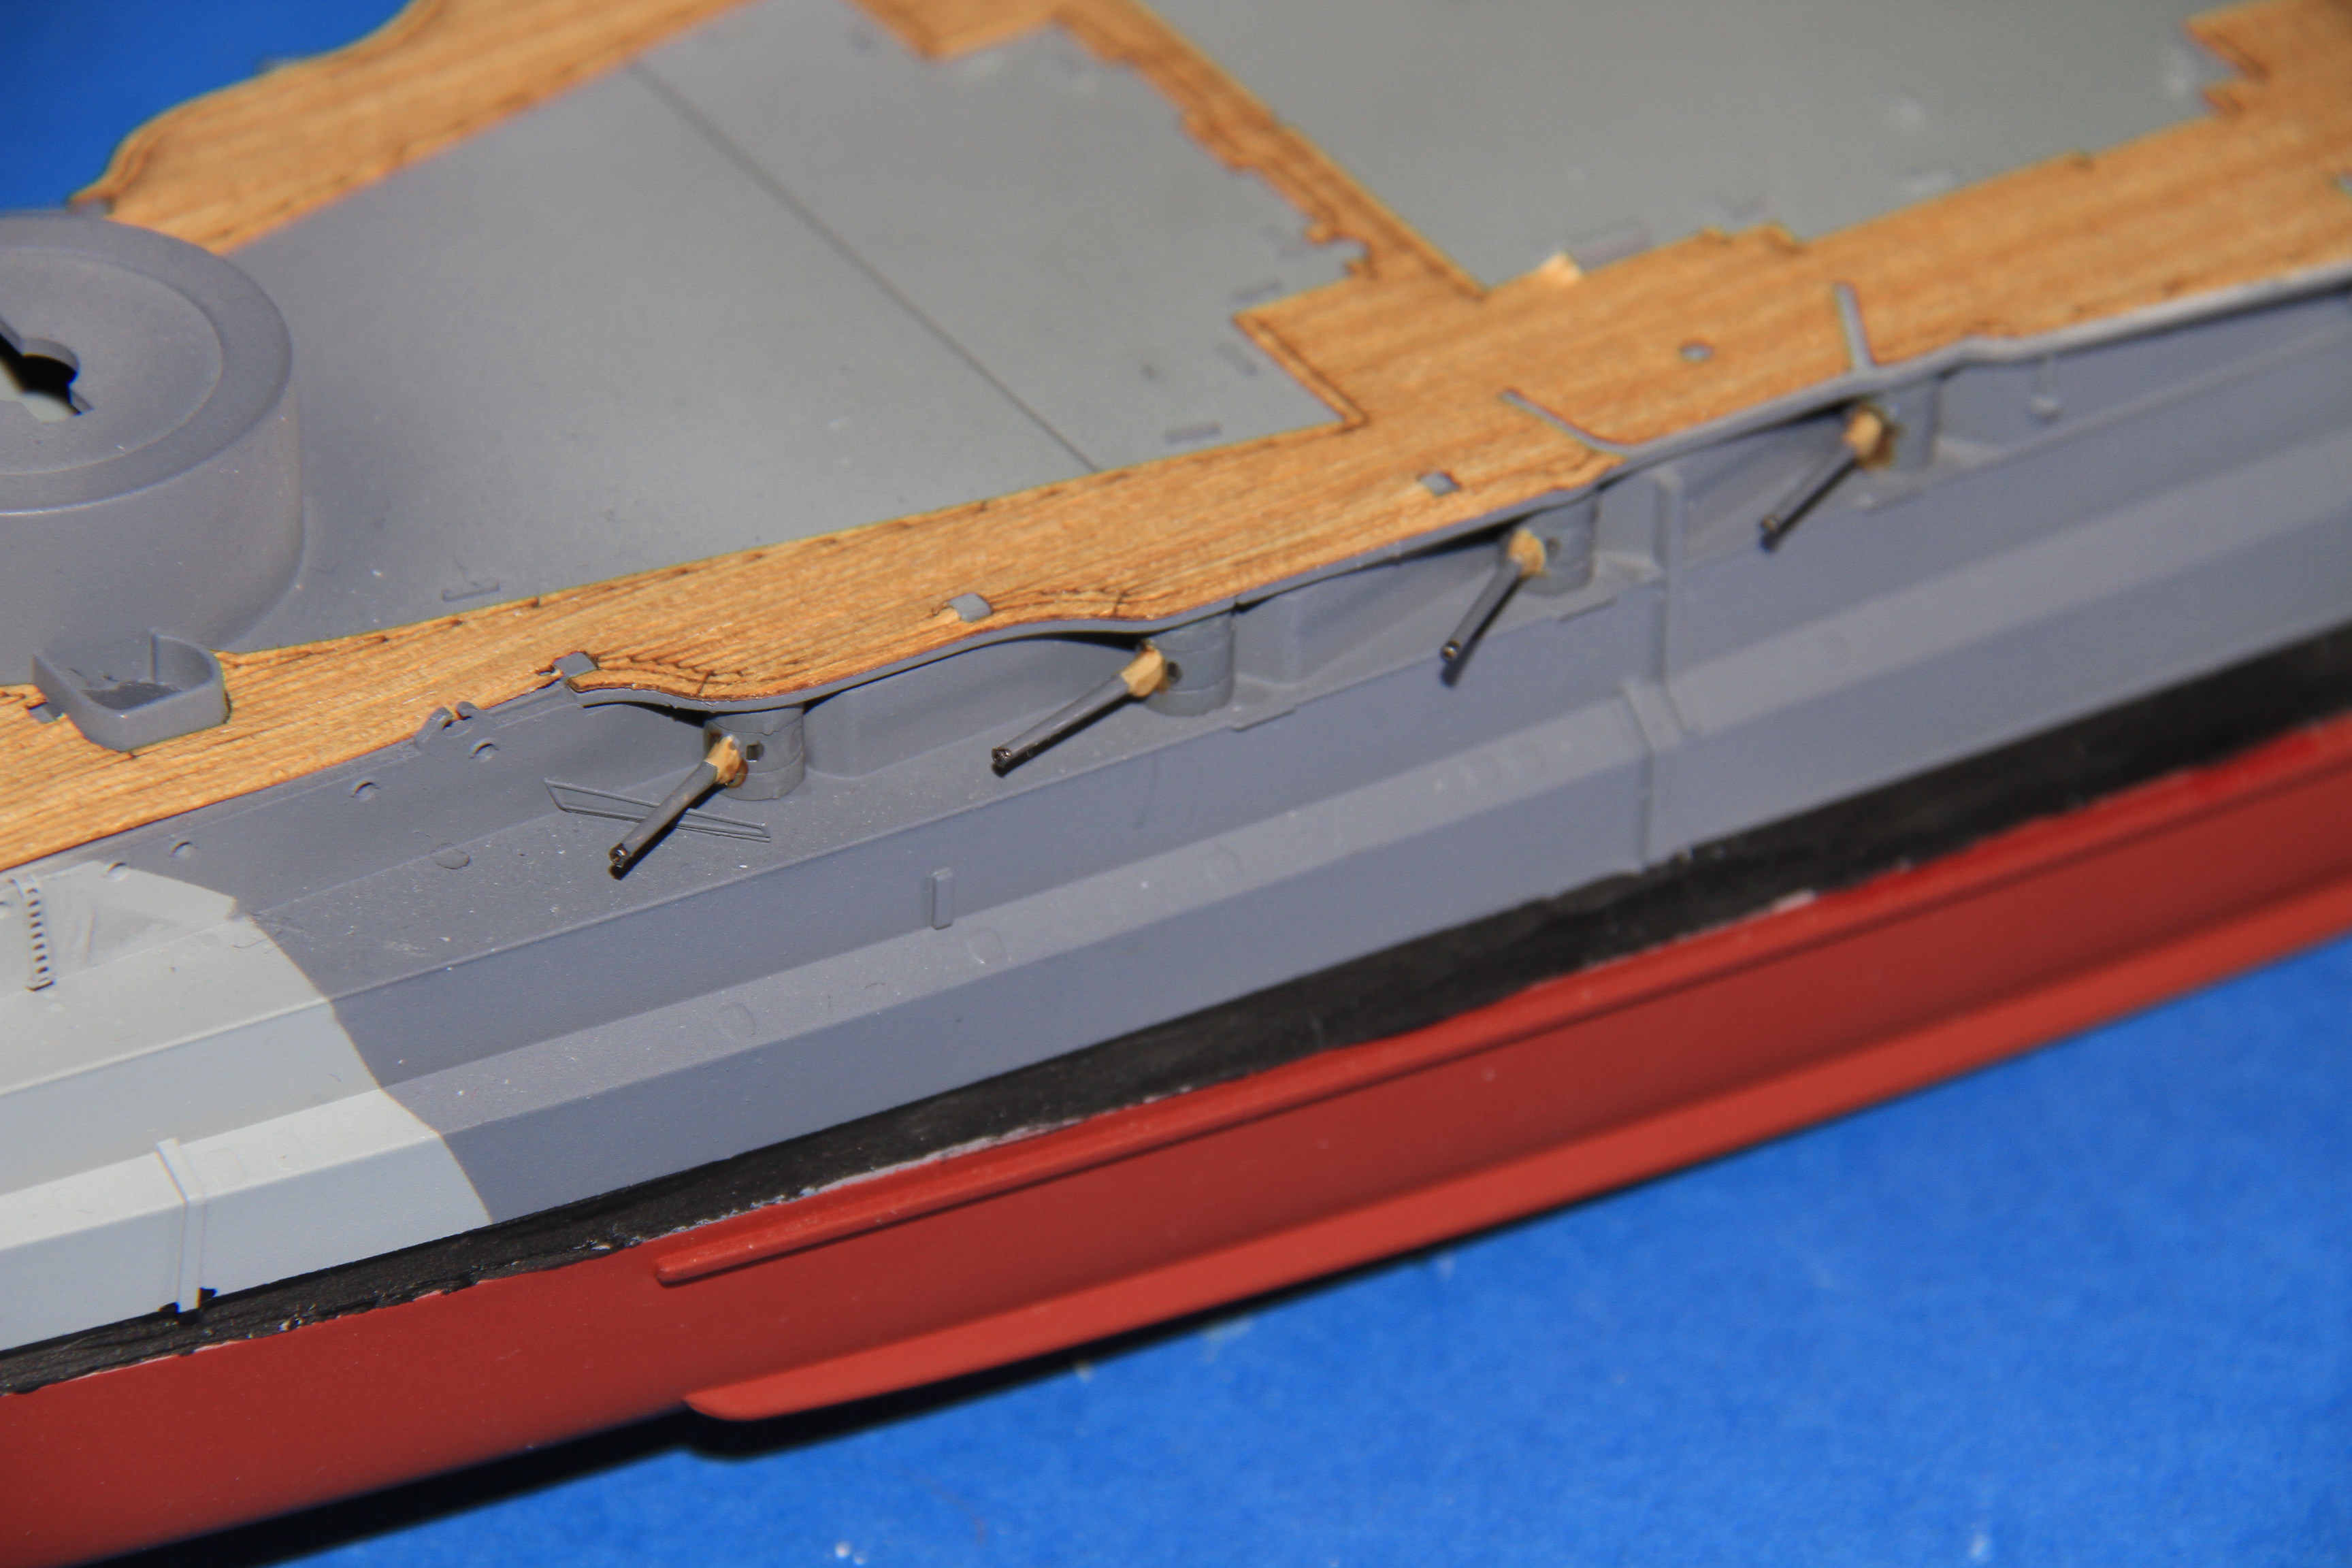
Detail added to the 20mm tubs on B gundeck.
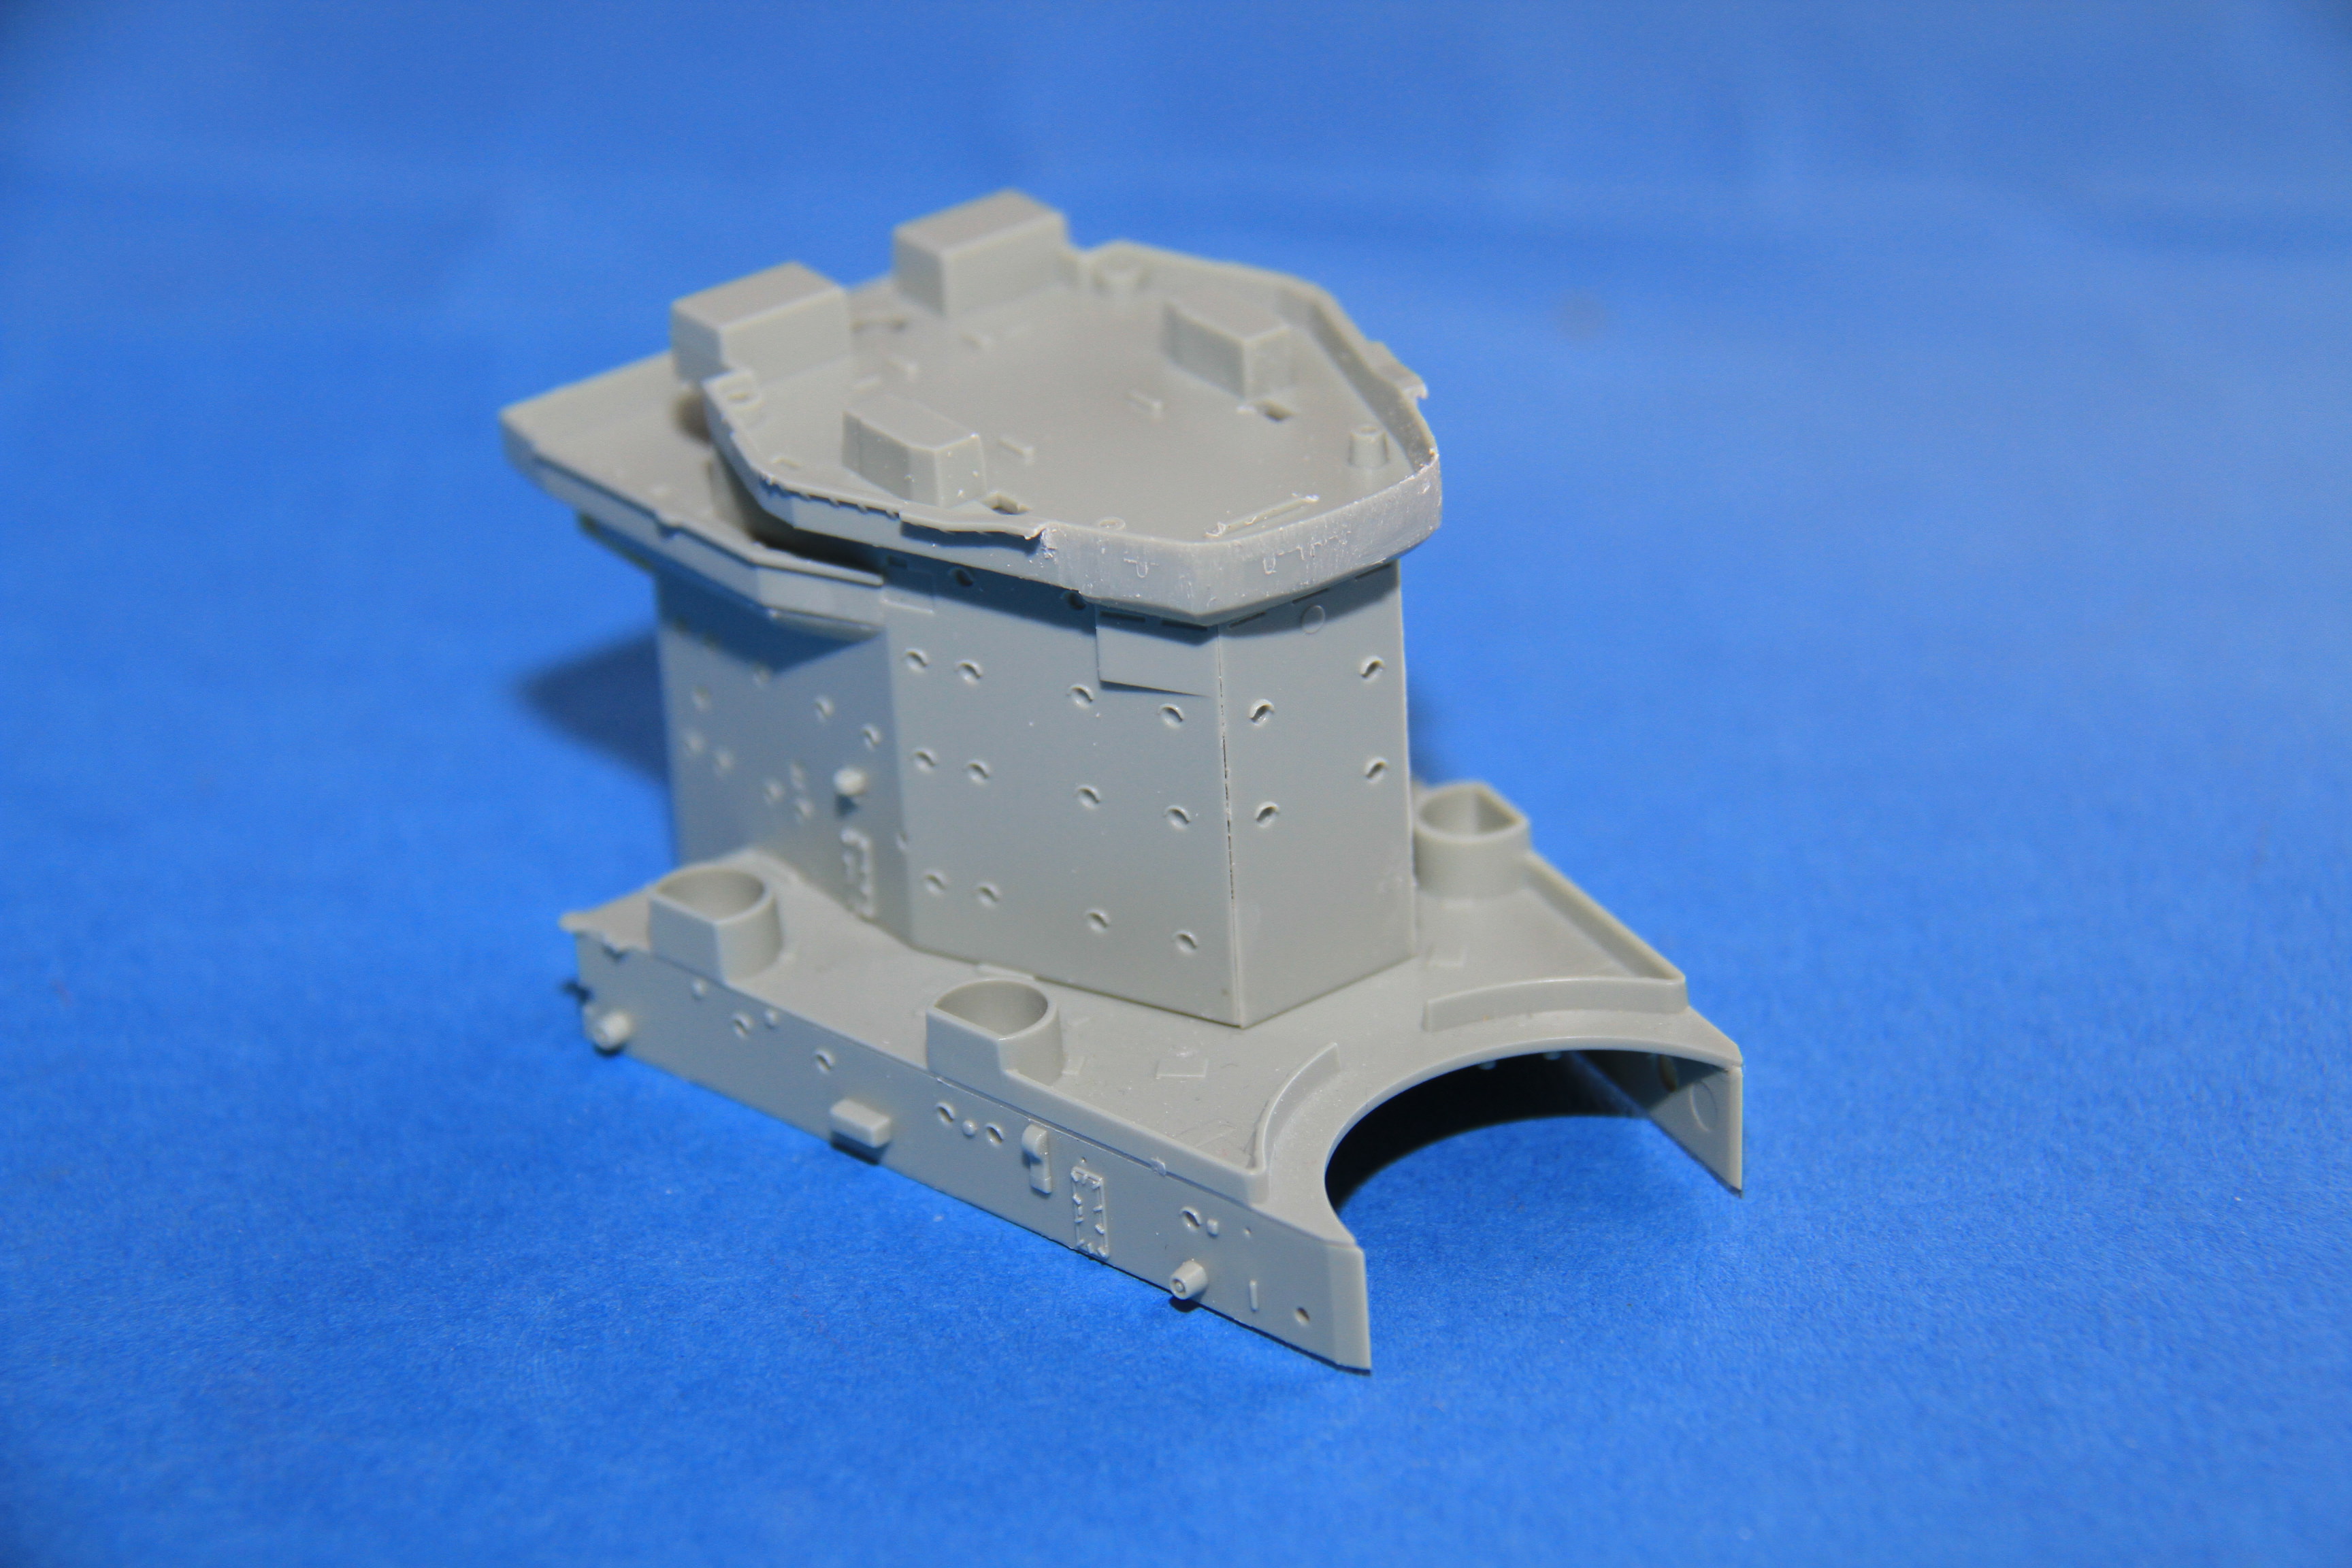
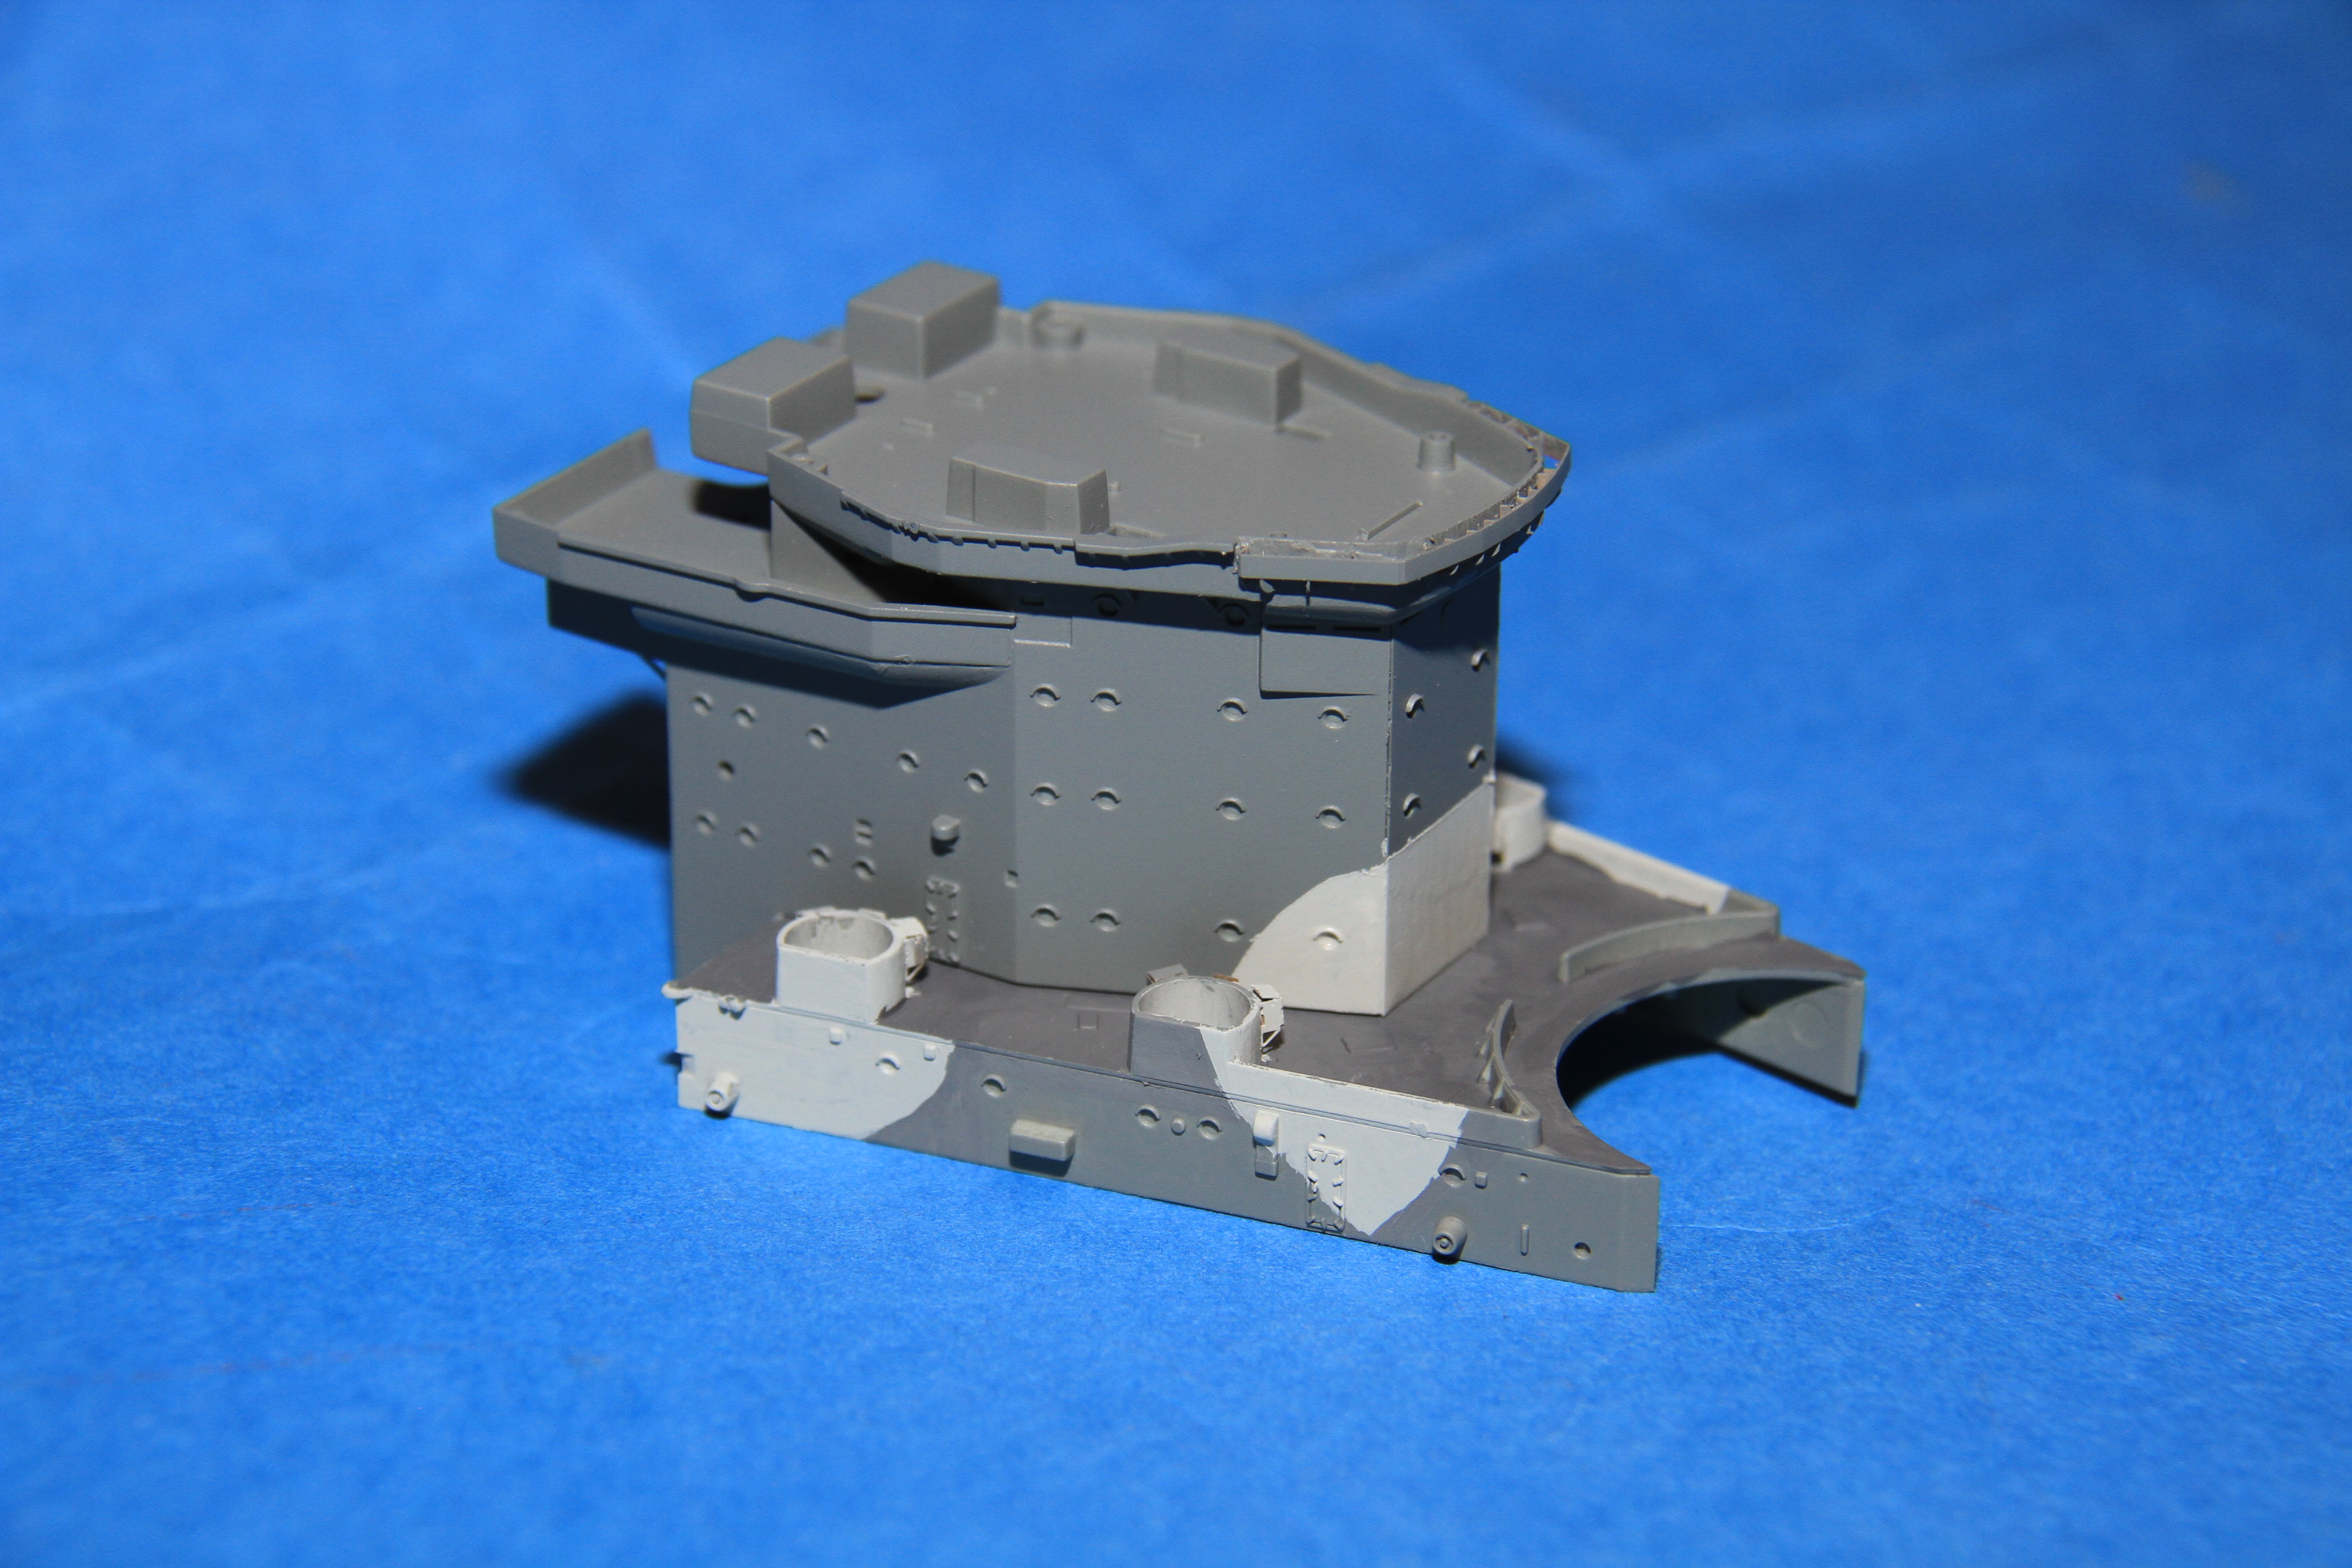
Basic assembly on the compass platform.

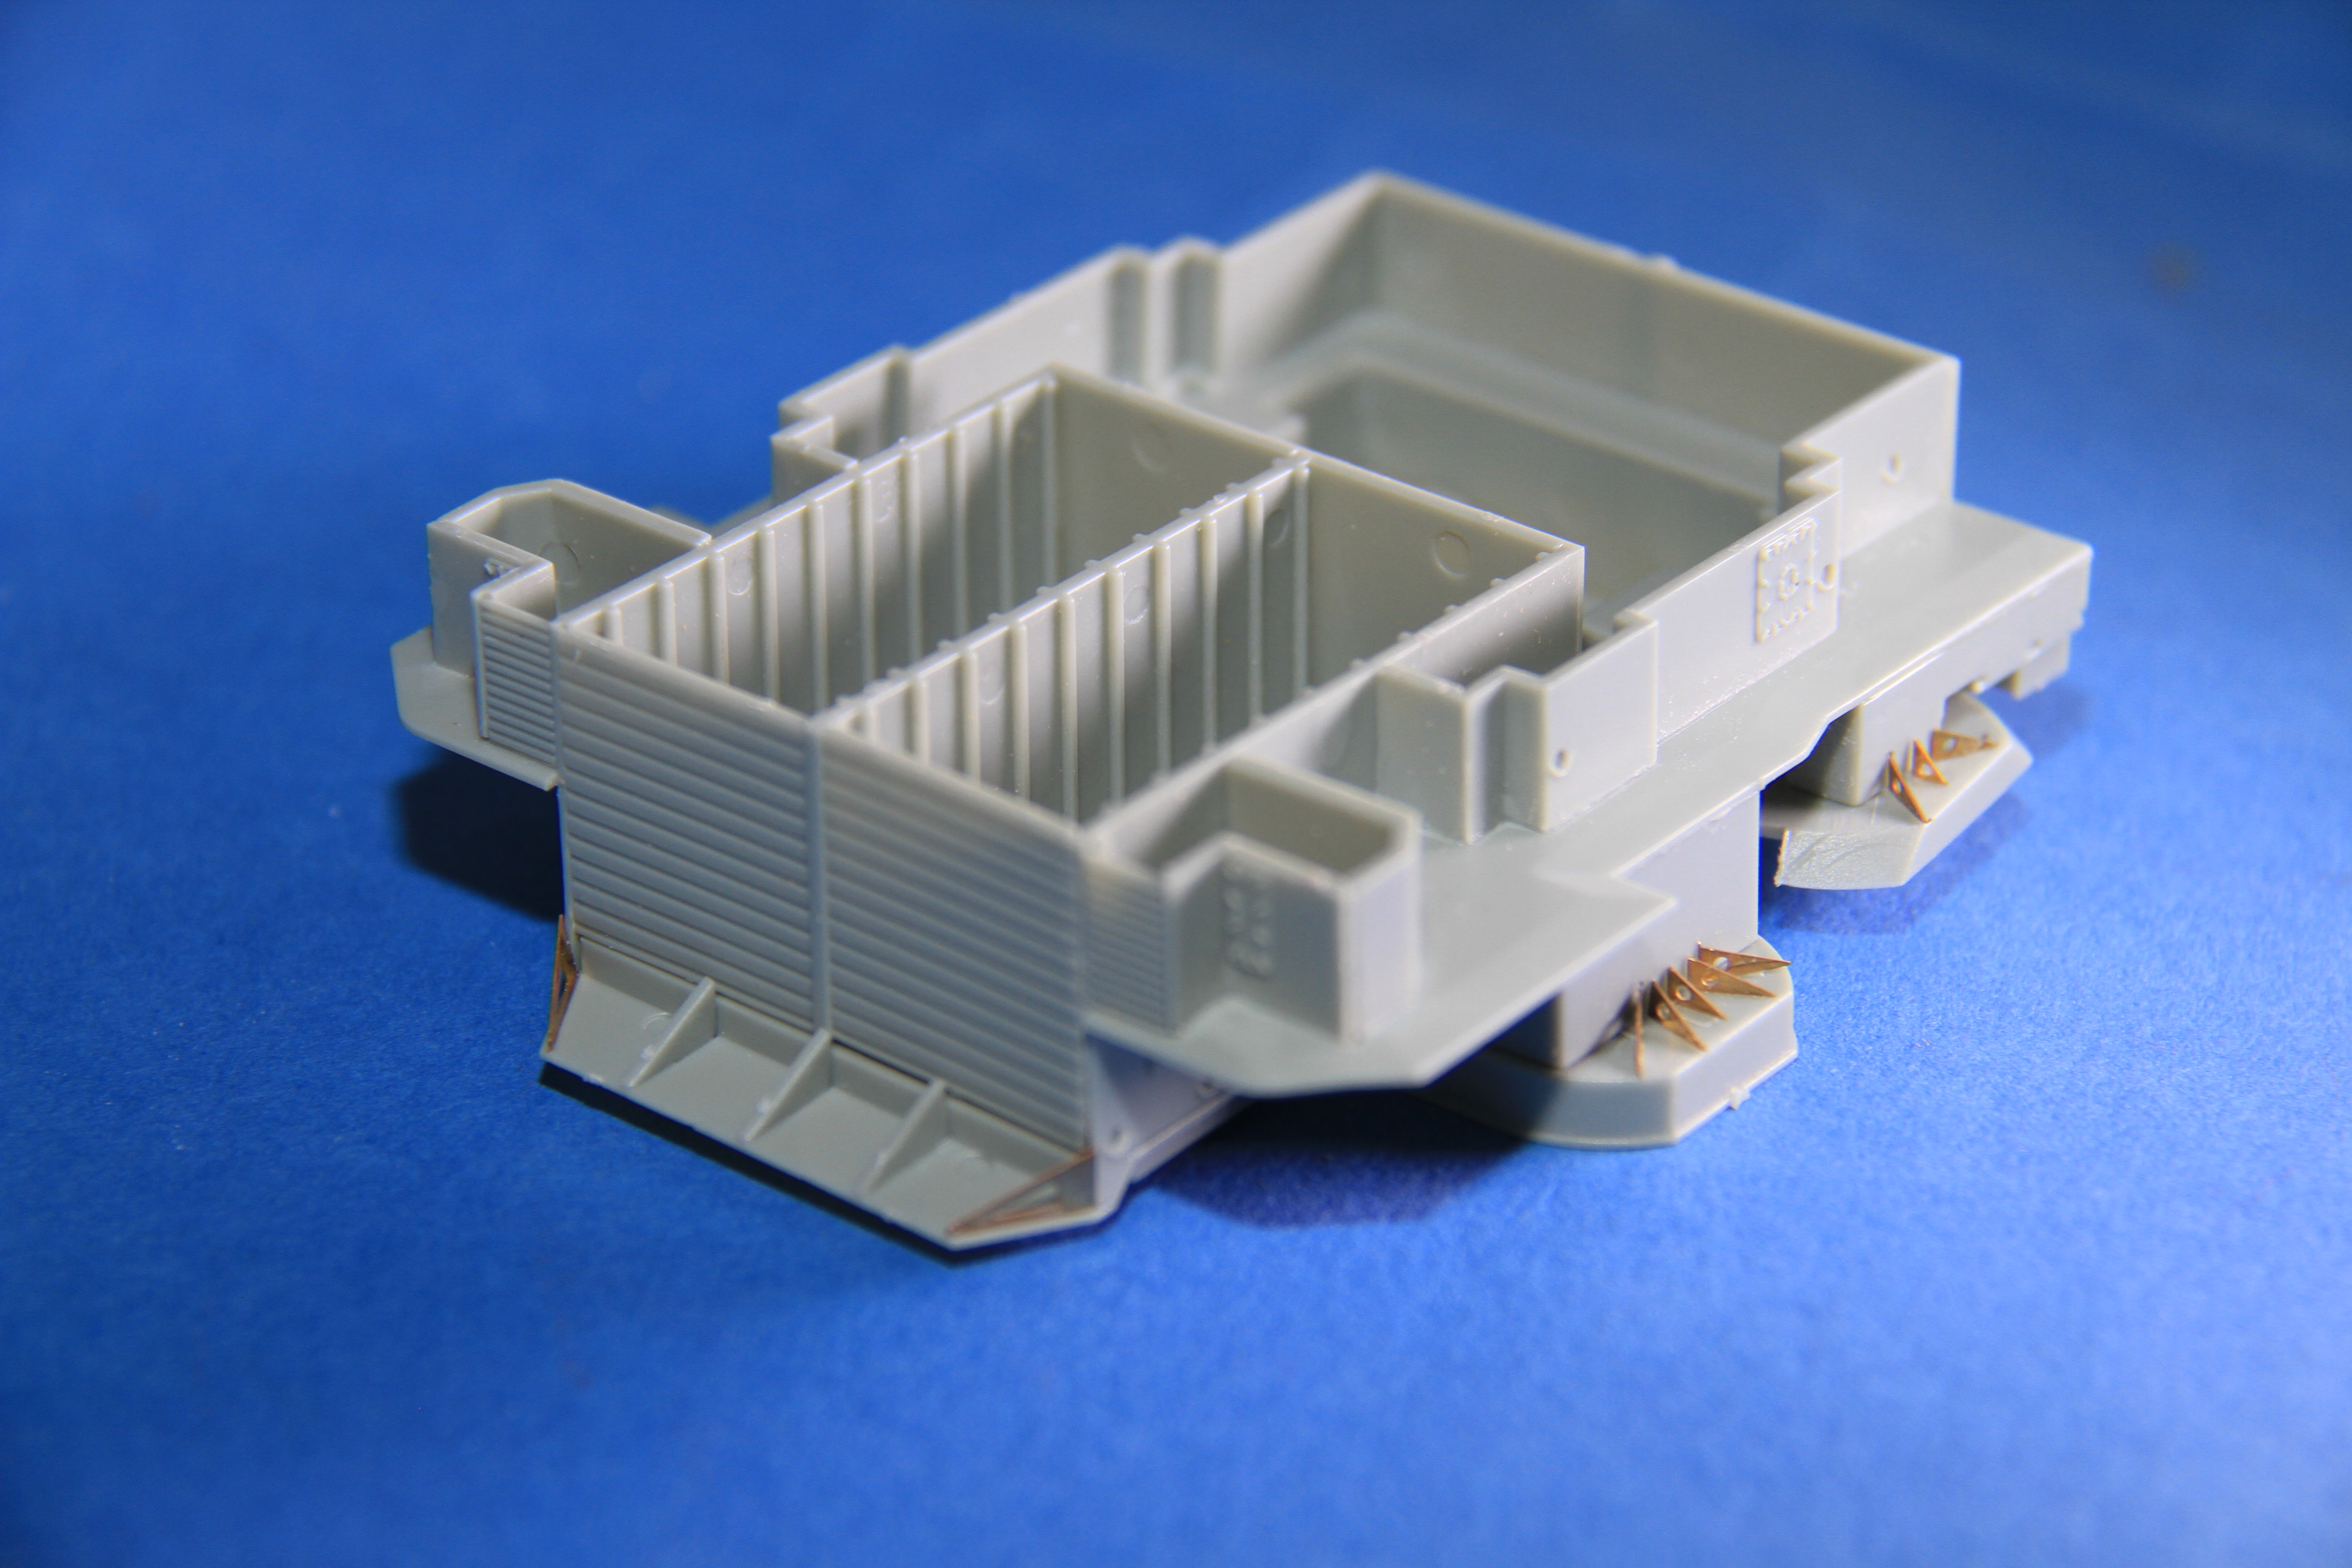
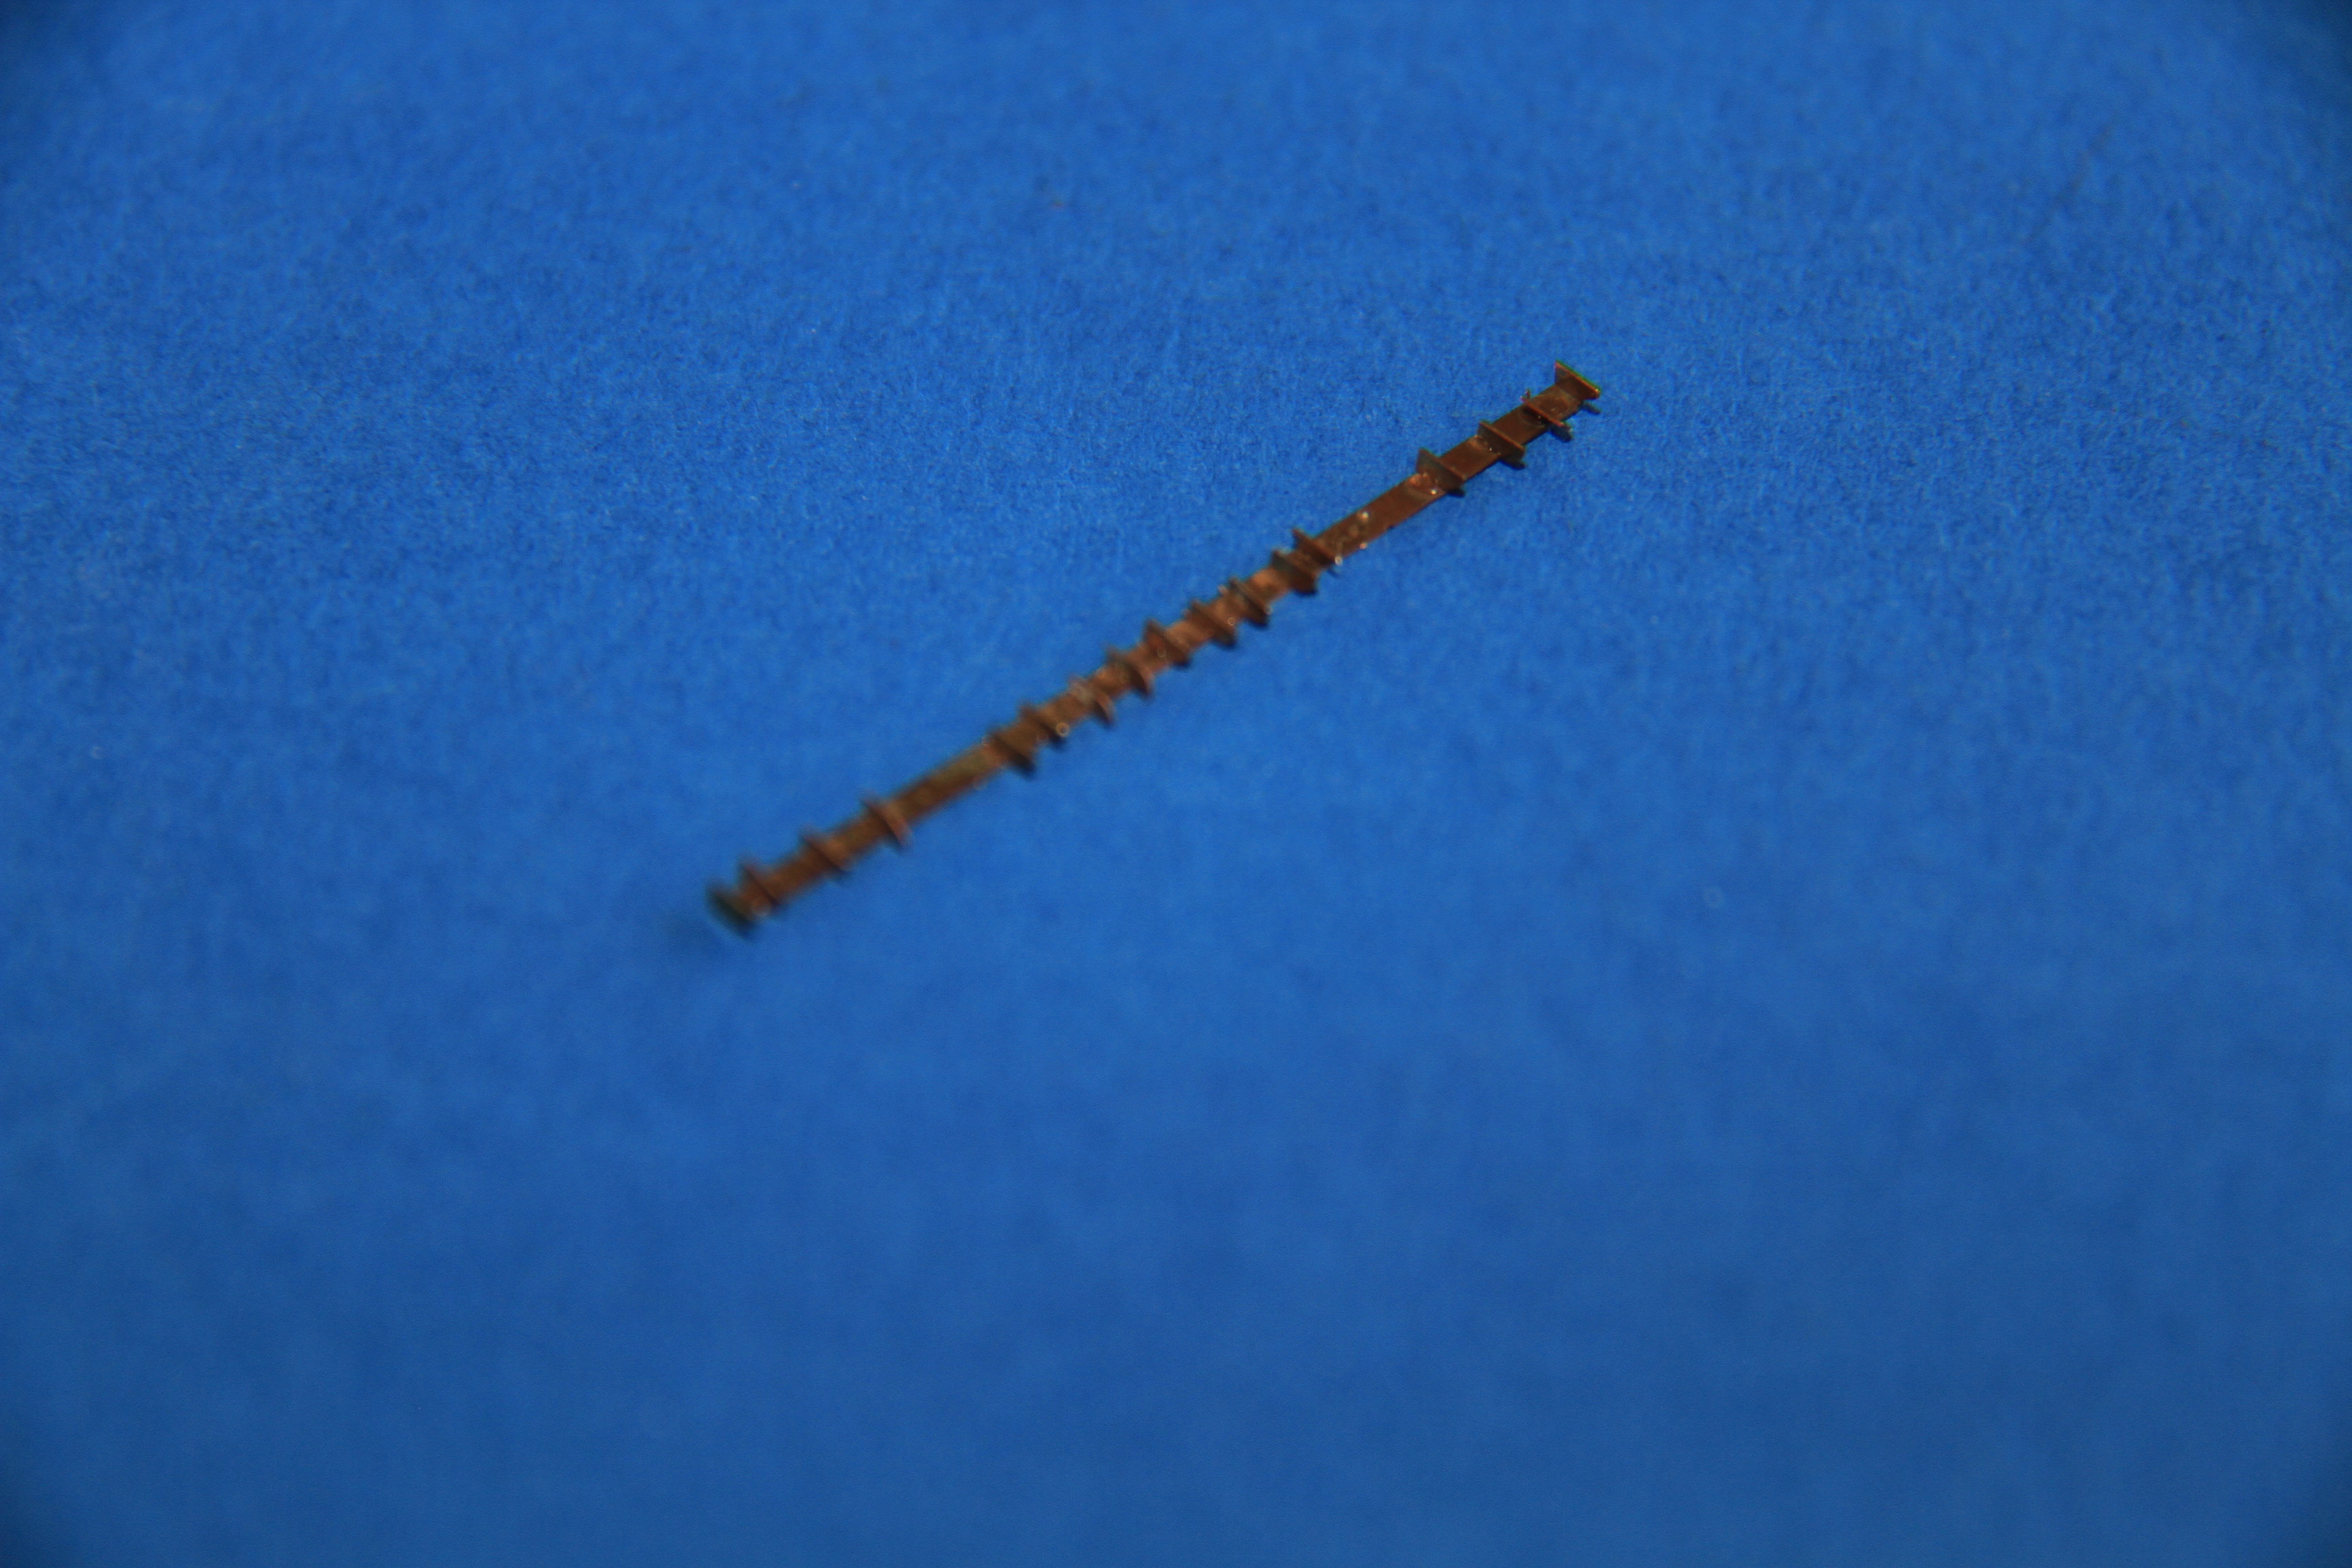
One little bit I overlooked, until a noticed some funny shaped bits on one of the sprues.
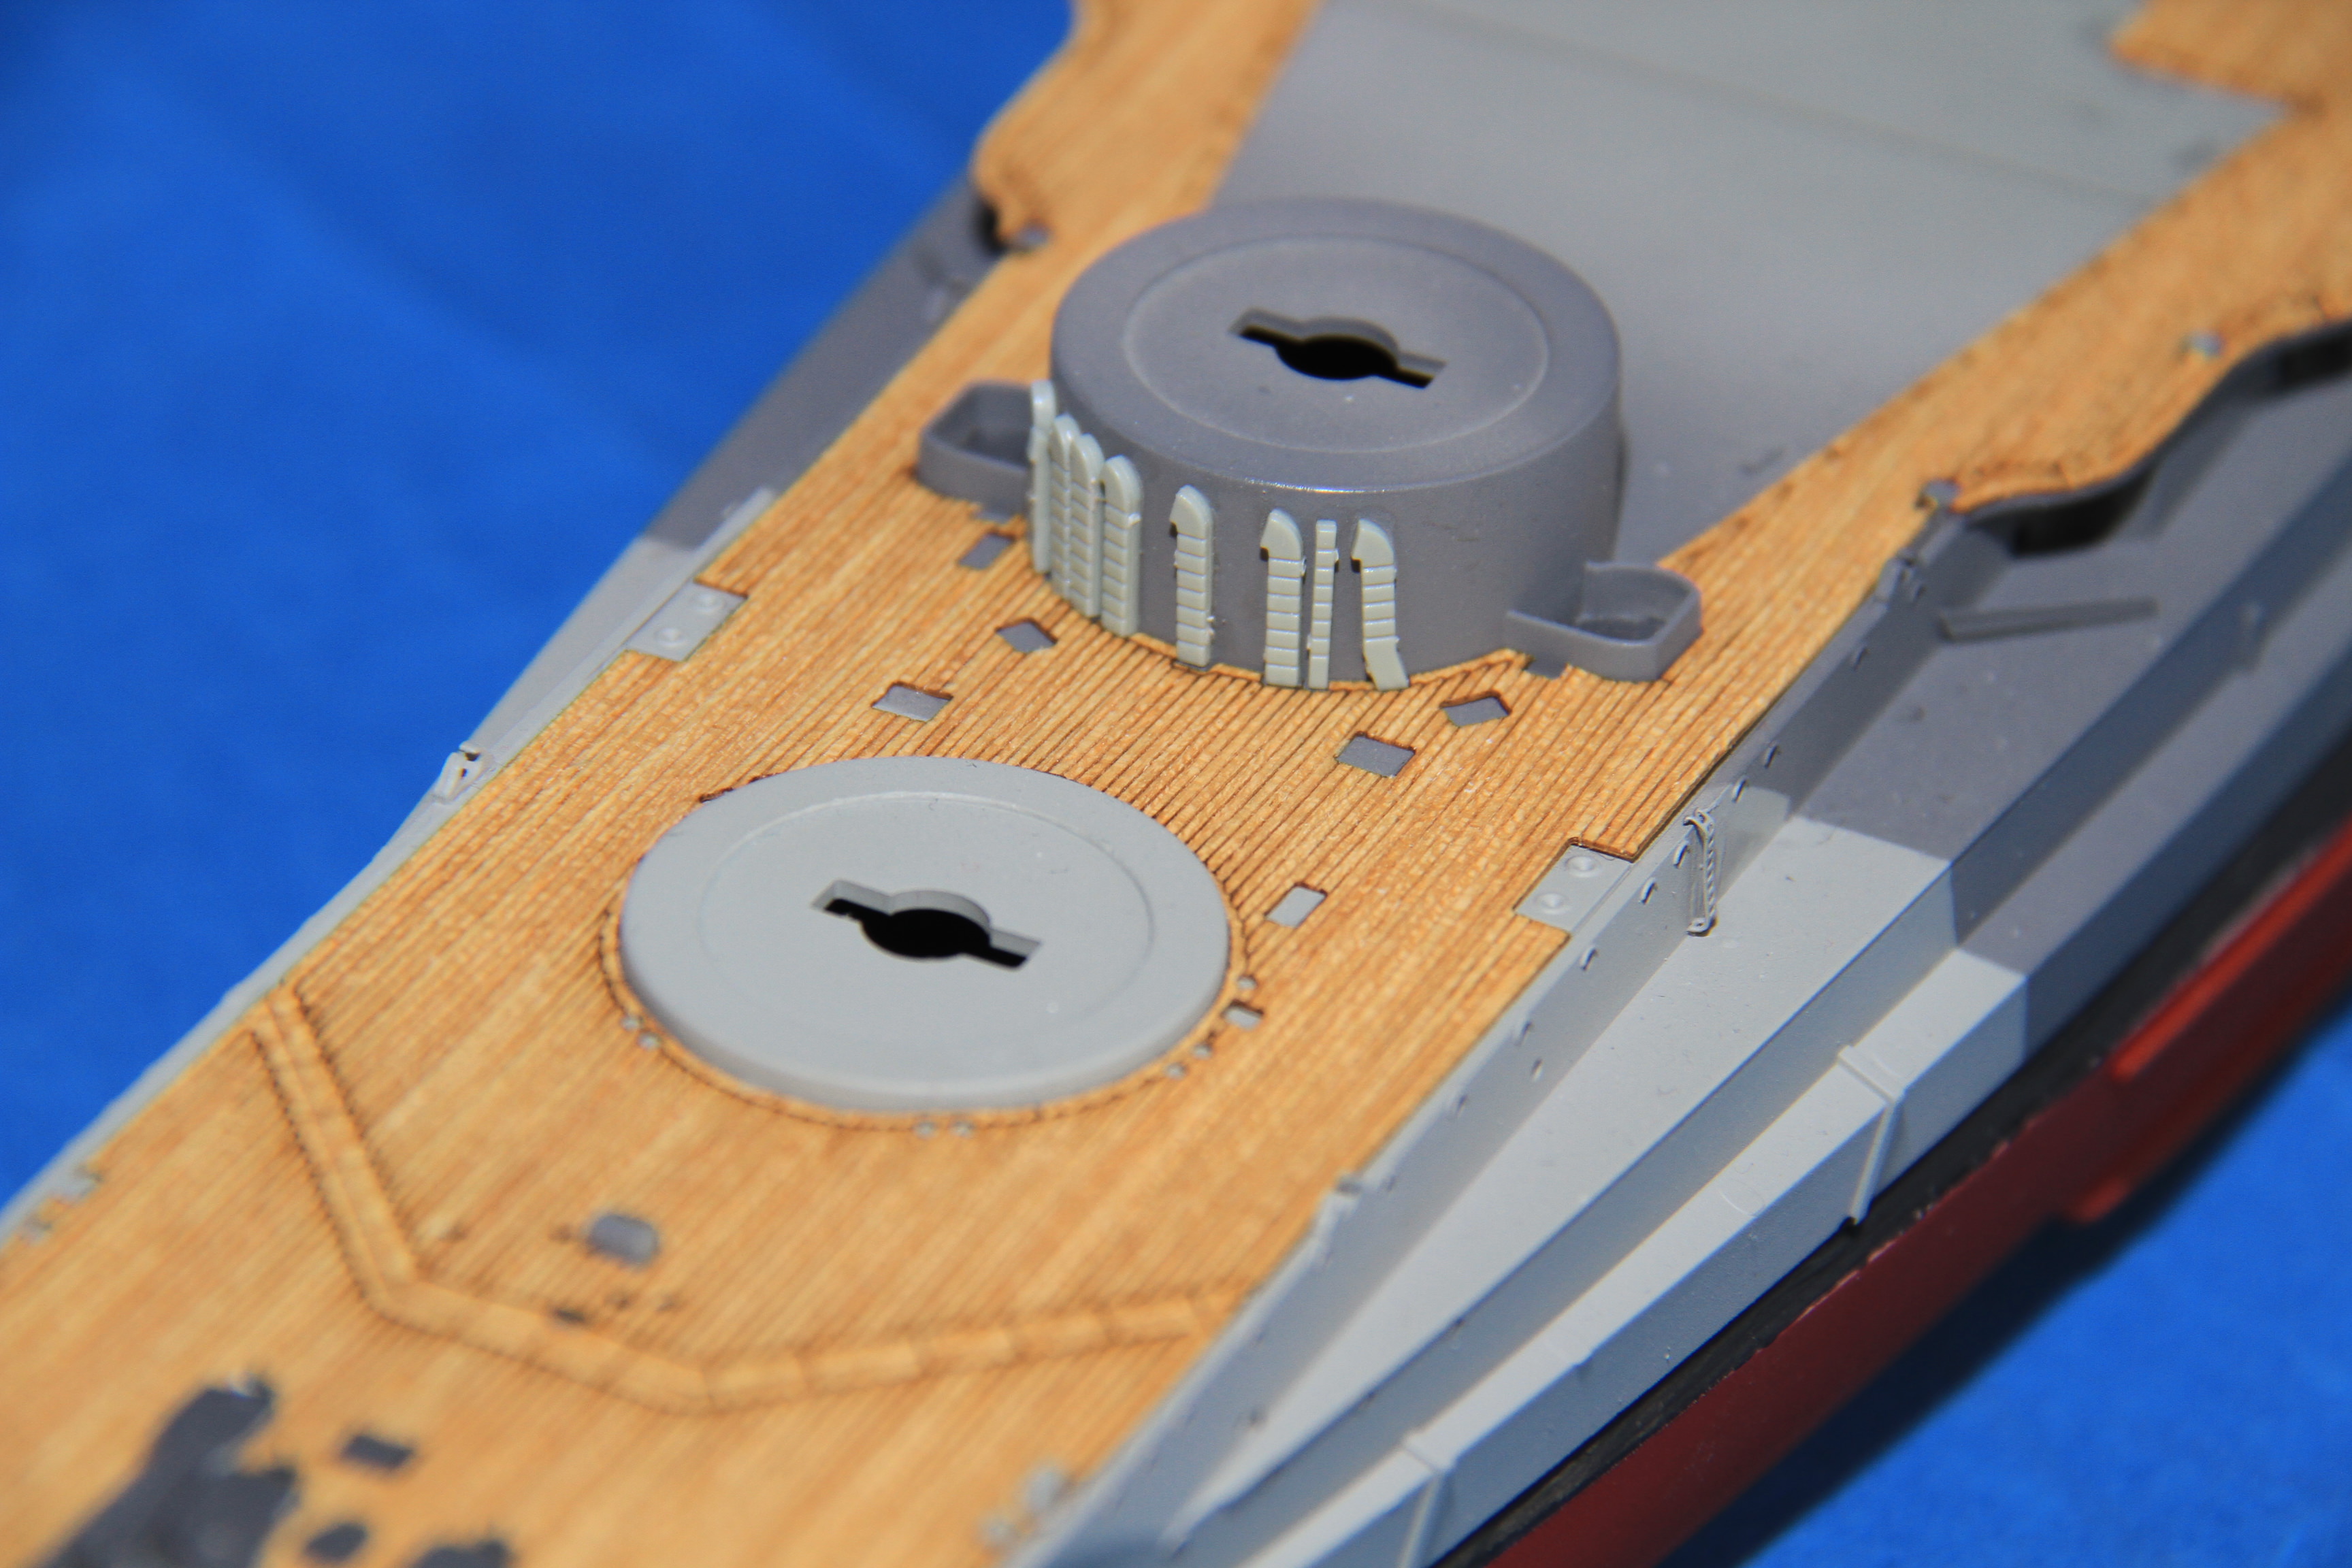
The Vents on B Barbette
The superstructure units sprayed and fitted.
The colour difference is just my bad lighting.
More soon
Si
The moulded on wind deflector removed from the flag bridge.
The etched replacement assembled and awaiting bending and fitting.
In place.
Detail added to the 20mm tubs on B gundeck.
Basic assembly on the compass platform.
One little bit I overlooked, until a noticed some funny shaped bits on one of the sprues.
The Vents on B Barbette
The superstructure units sprayed and fitted.
The colour difference is just my bad lighting.
More soon
Si
d6mst0
#453
Joined: August 28, 2016
KitMaker: 1,925 posts
Model Shipwrights: 1,298 posts
Posted: Tuesday, November 21, 2017 - 07:02 PM UTC
Those vents on the barbettes are awesome. A lot better then the flat PE versions.
RedDuster
Joined: March 01, 2010
KitMaker: 7,078 posts
Model Shipwrights: 6,649 posts
Posted: Wednesday, November 22, 2017 - 12:06 AM UTC
Quoted Text
Those vents on the barbettes are awesome. A lot better then the flat PE versions.
Thanks Mark,
They are rather nice, it is an oft overlooked feature on some kits.
Cheers
Si
RussellE
#306
Joined: June 27, 2010
KitMaker: 3,959 posts
Model Shipwrights: 2,777 posts
Posted: Thursday, November 23, 2017 - 03:41 PM UTC
Back to business as usual! Good to see Si!
RedDuster
Joined: March 01, 2010
KitMaker: 7,078 posts
Model Shipwrights: 6,649 posts
Posted: Friday, November 24, 2017 - 12:11 AM UTC
Quoted Text
Back to business as usual! Good to see Si!
Good to back in the shipyard, should be some more progress this weekend.
Cheers
Si
RedDuster
Joined: March 01, 2010
KitMaker: 7,078 posts
Model Shipwrights: 6,649 posts
Posted: Monday, November 27, 2017 - 02:23 AM UTC
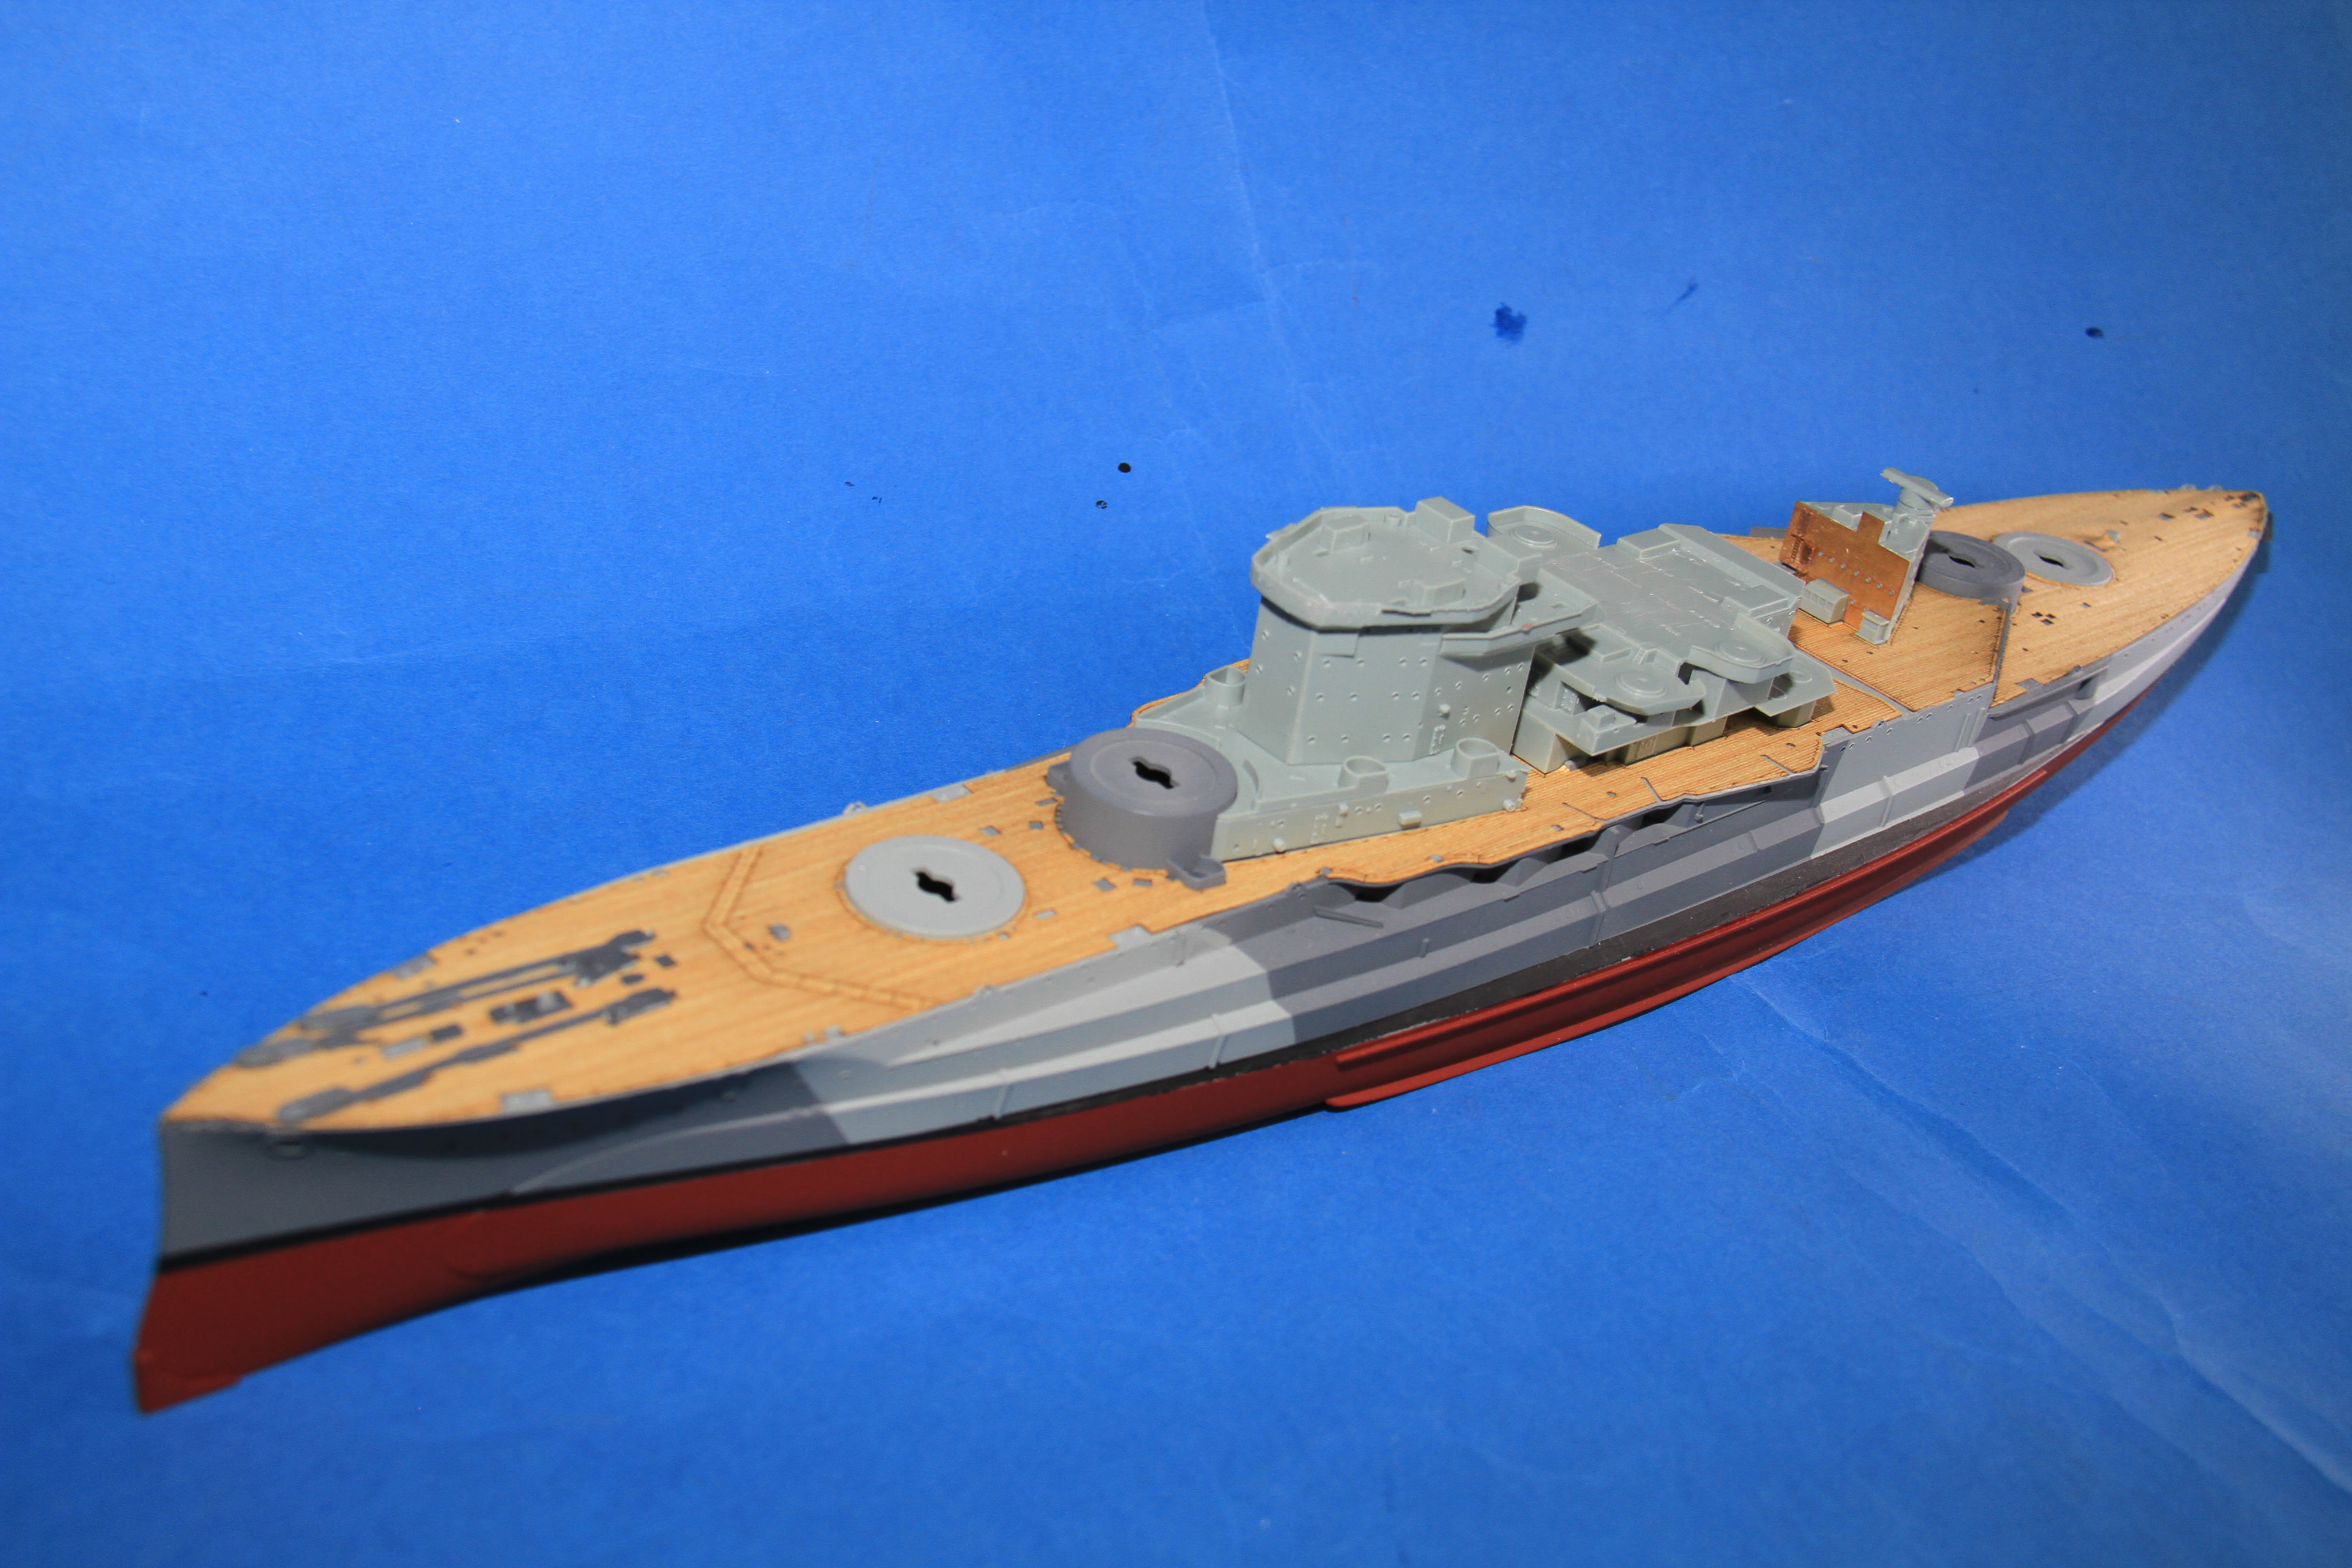
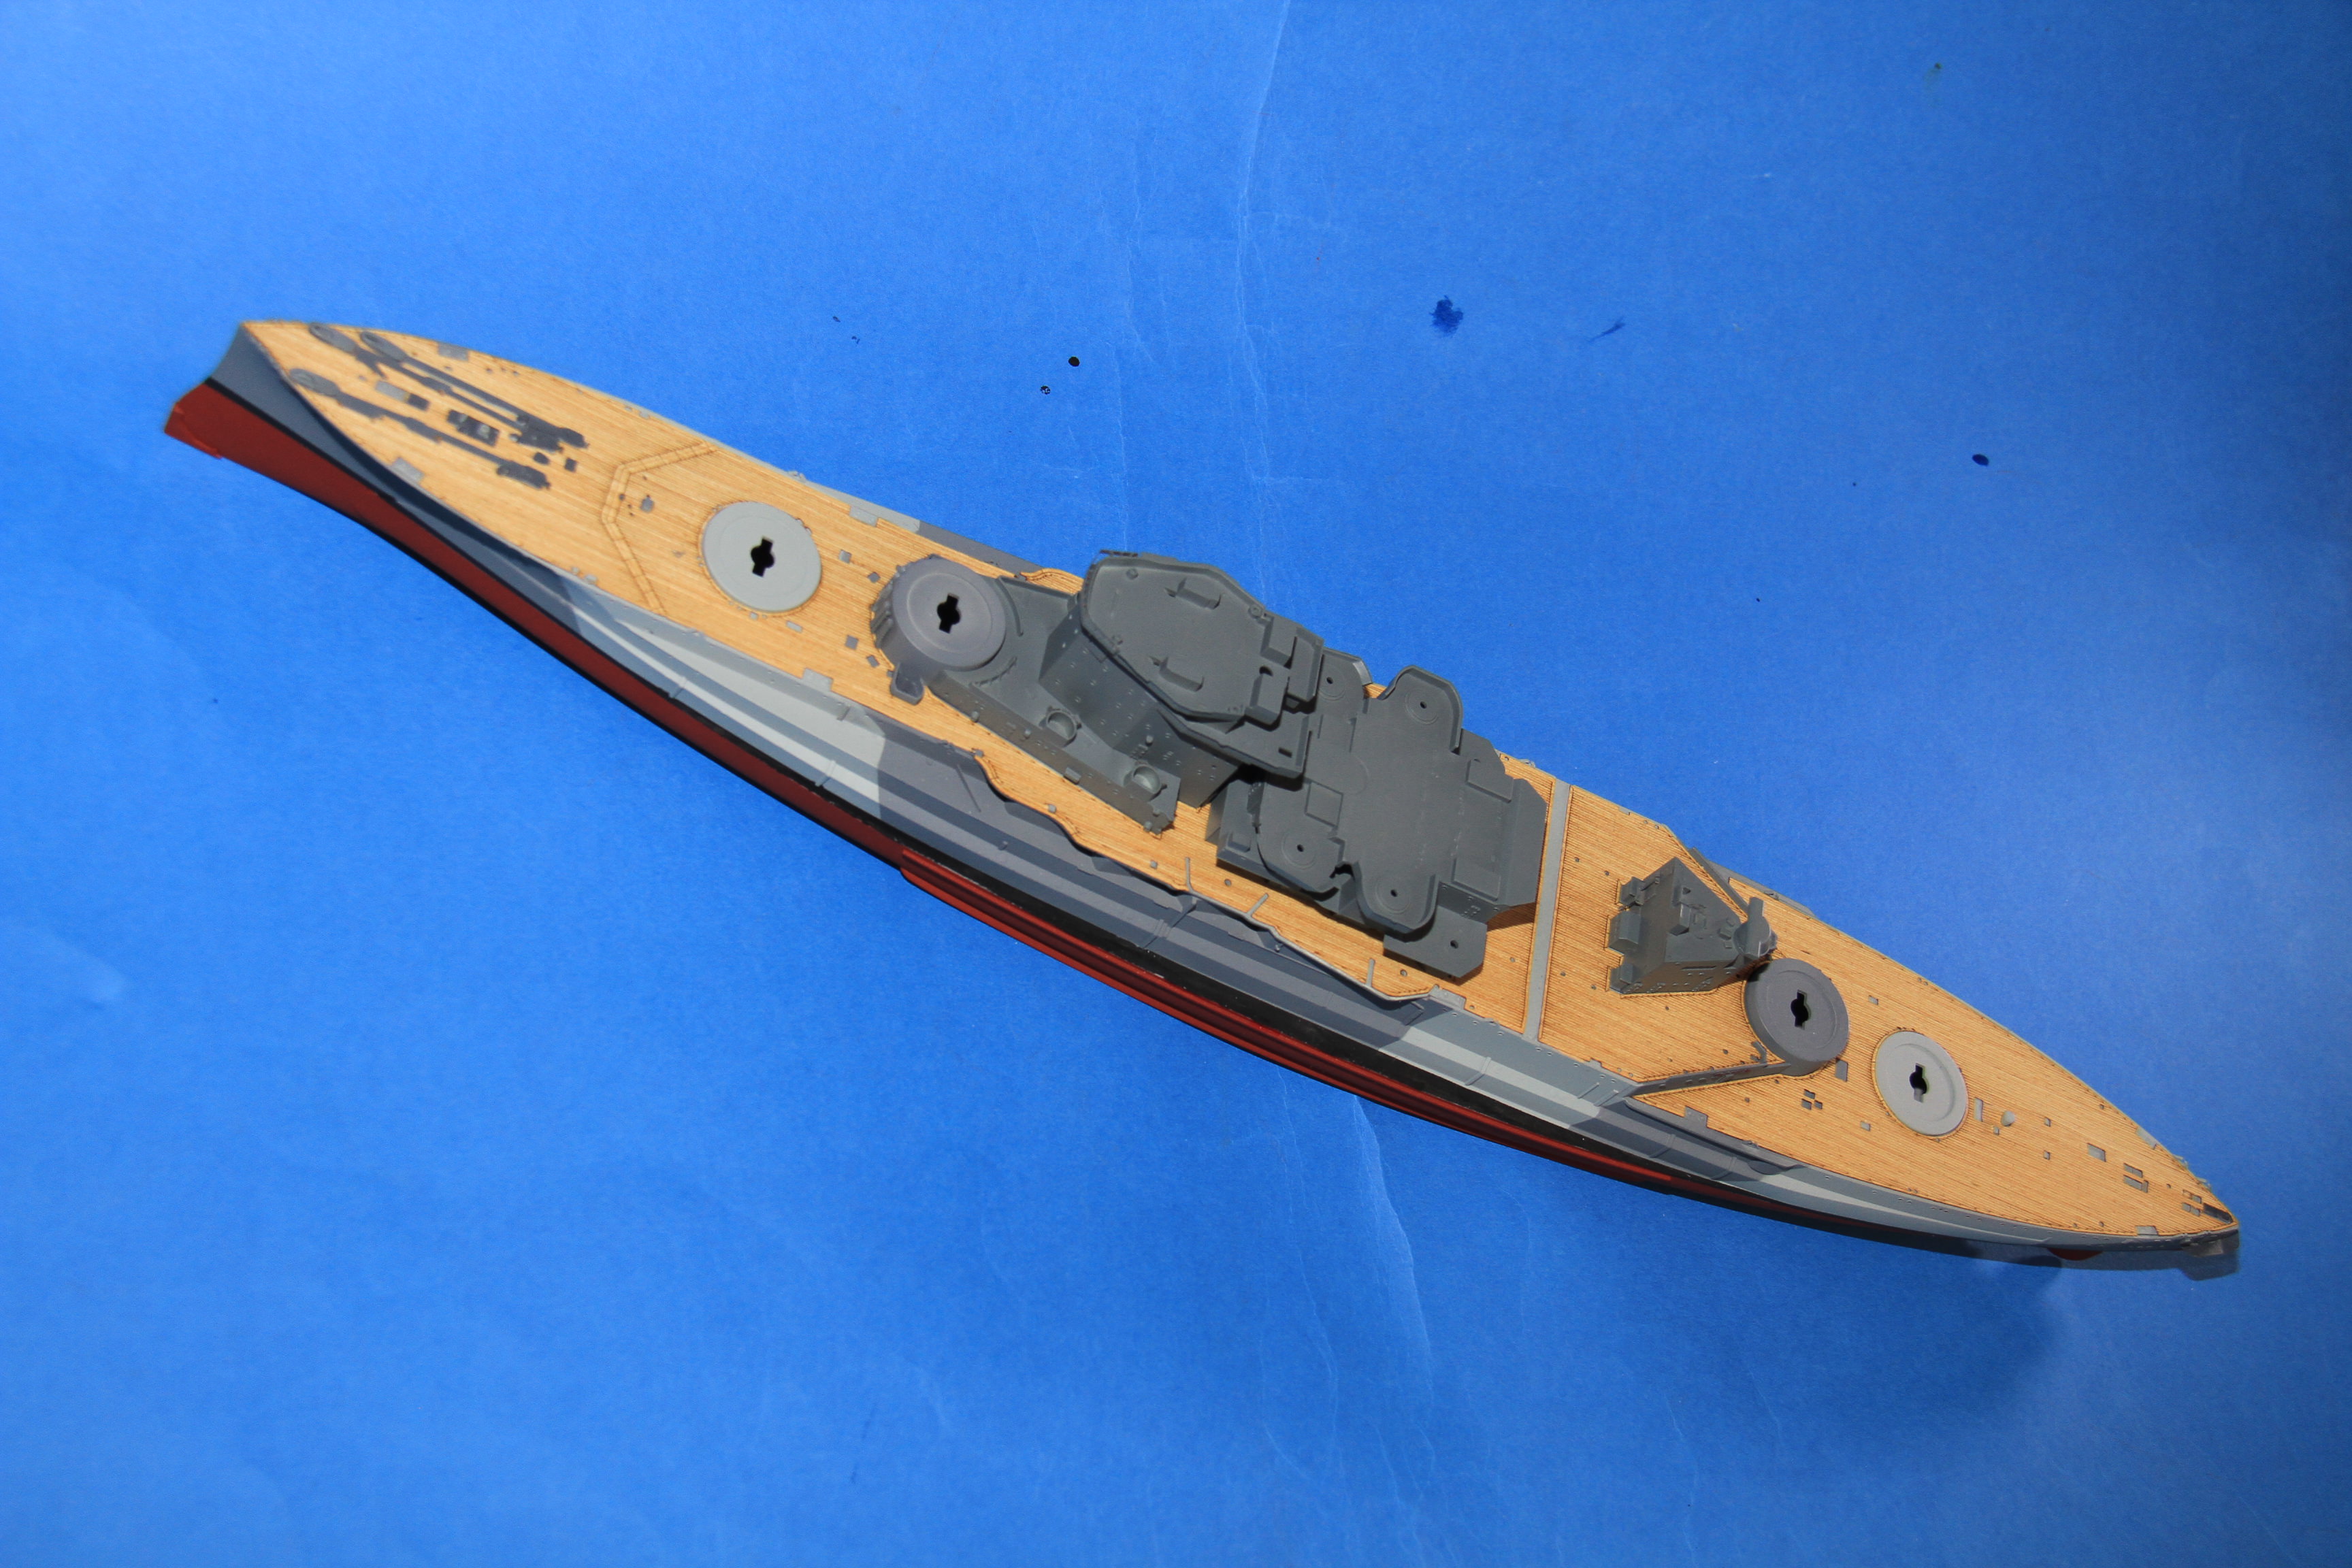
Some progress made.
Basic paint job on the 6" secondary battery,
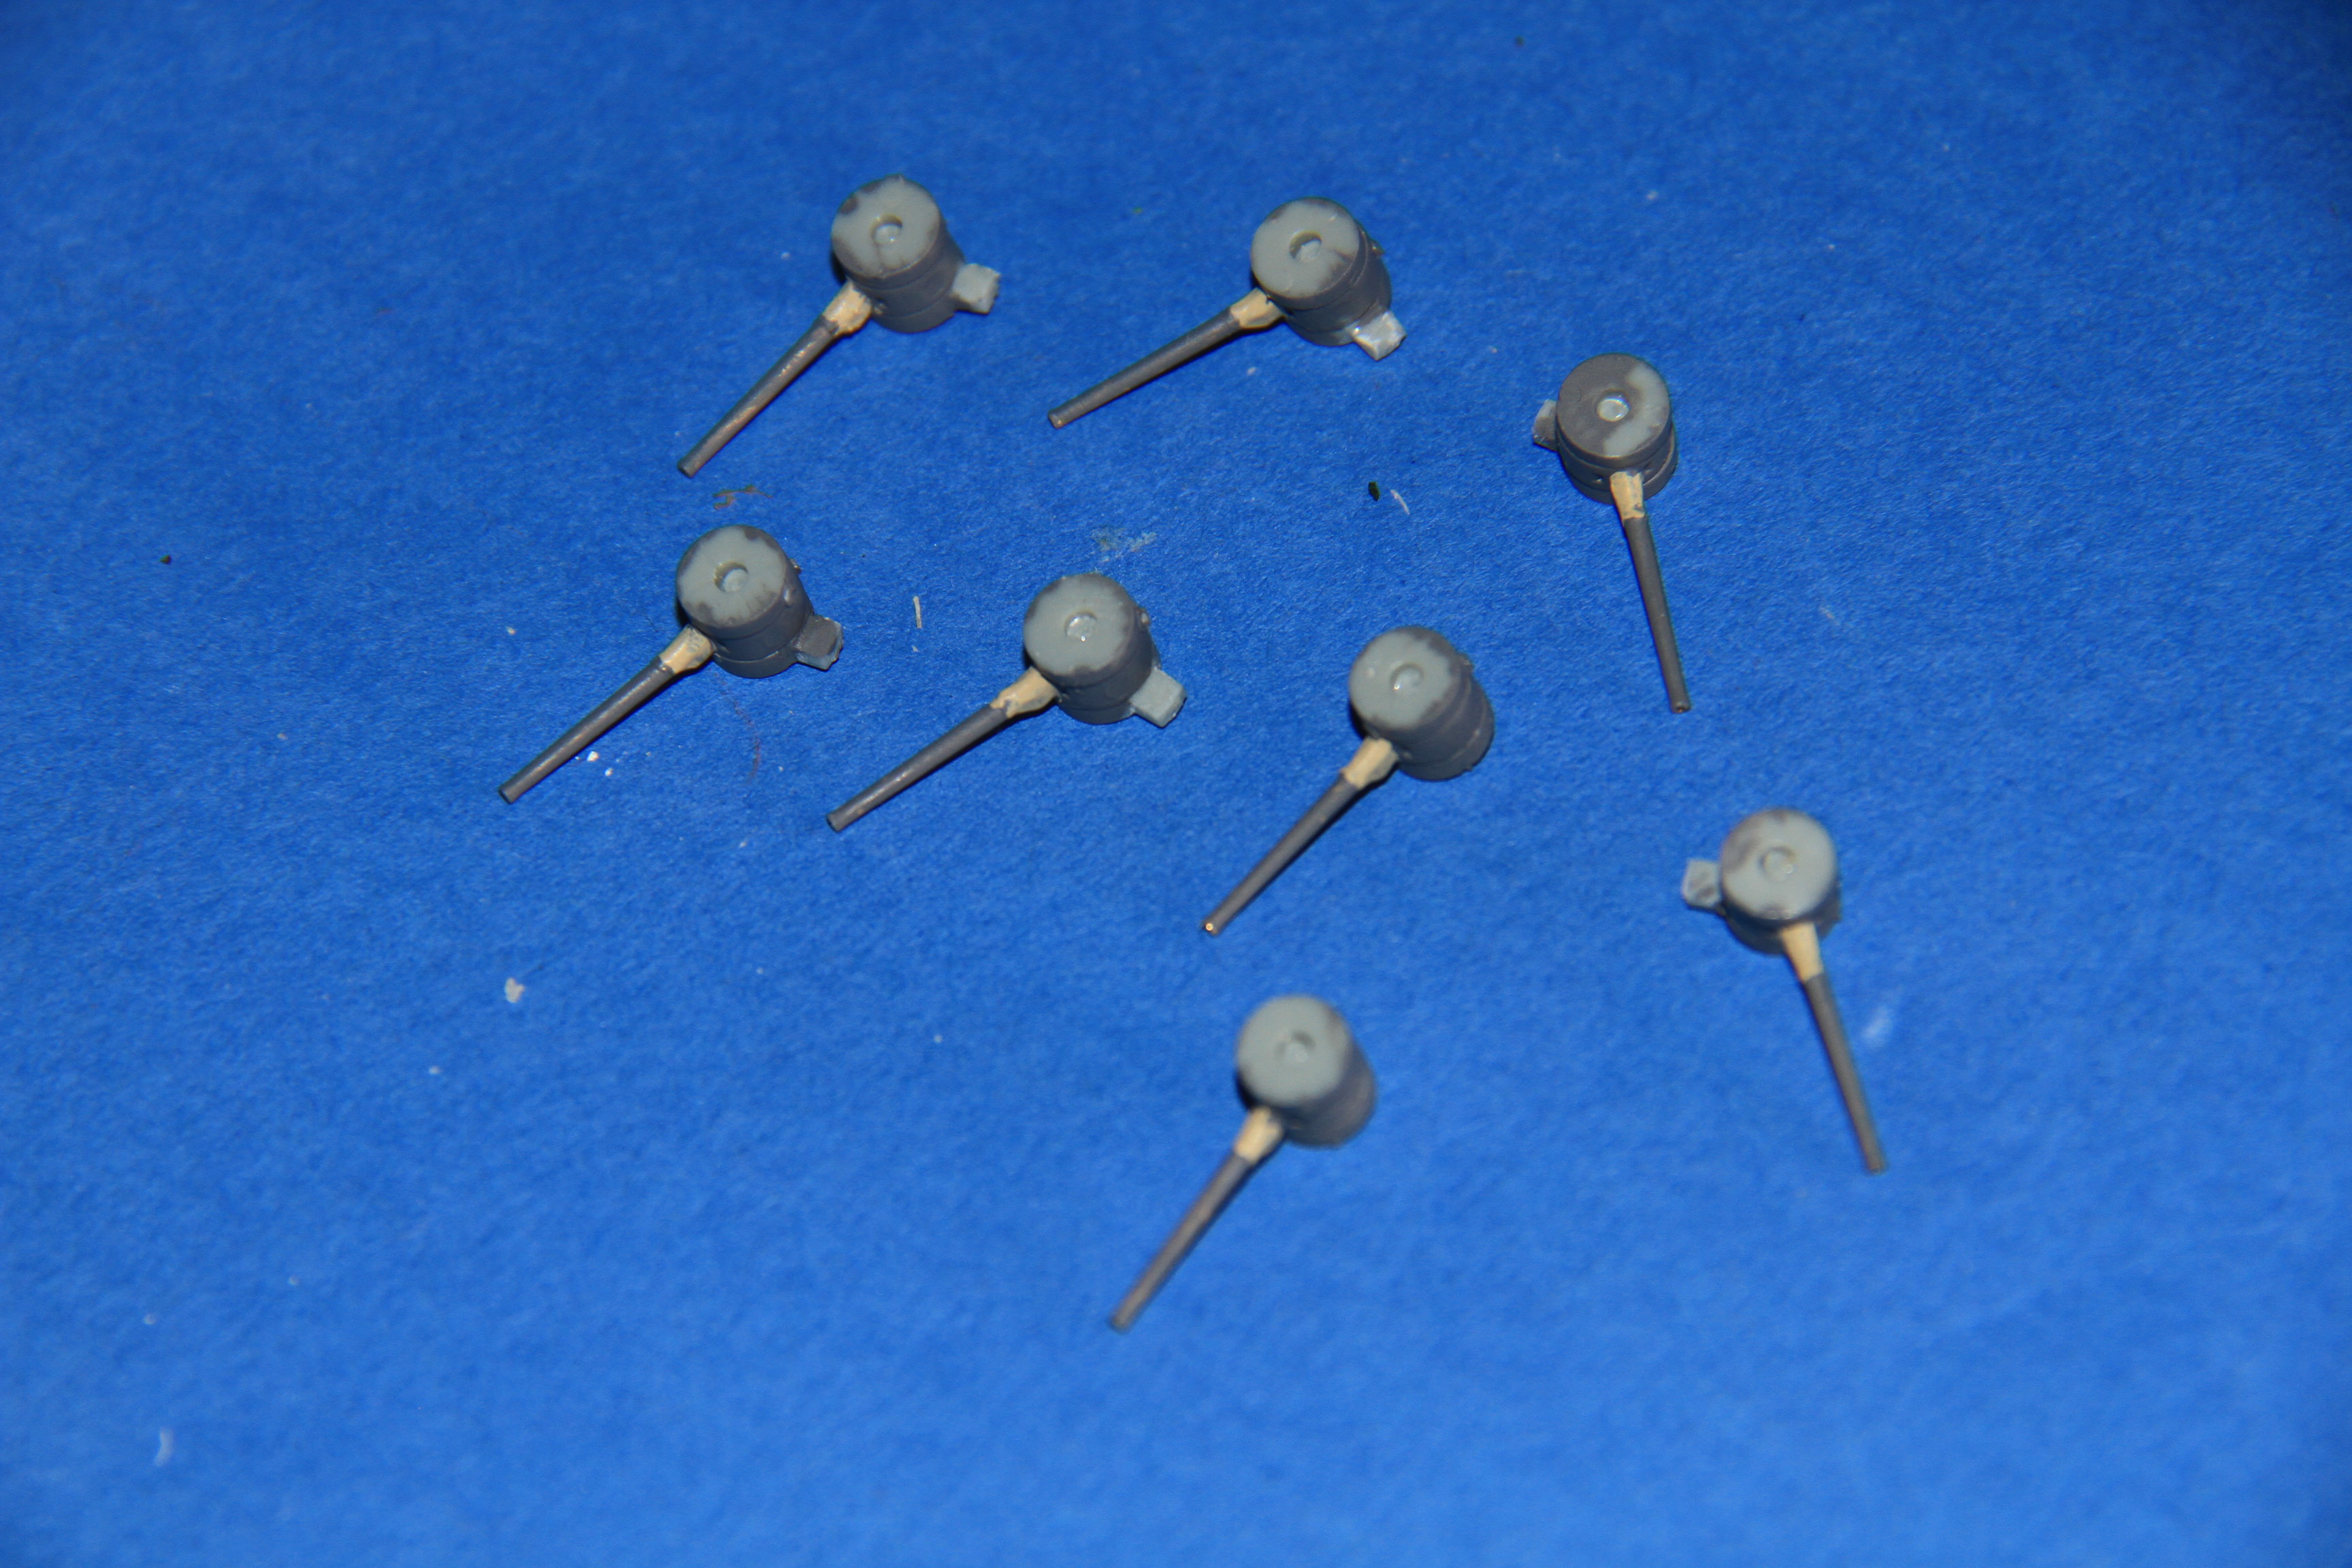
Washes applied and fitted in place.
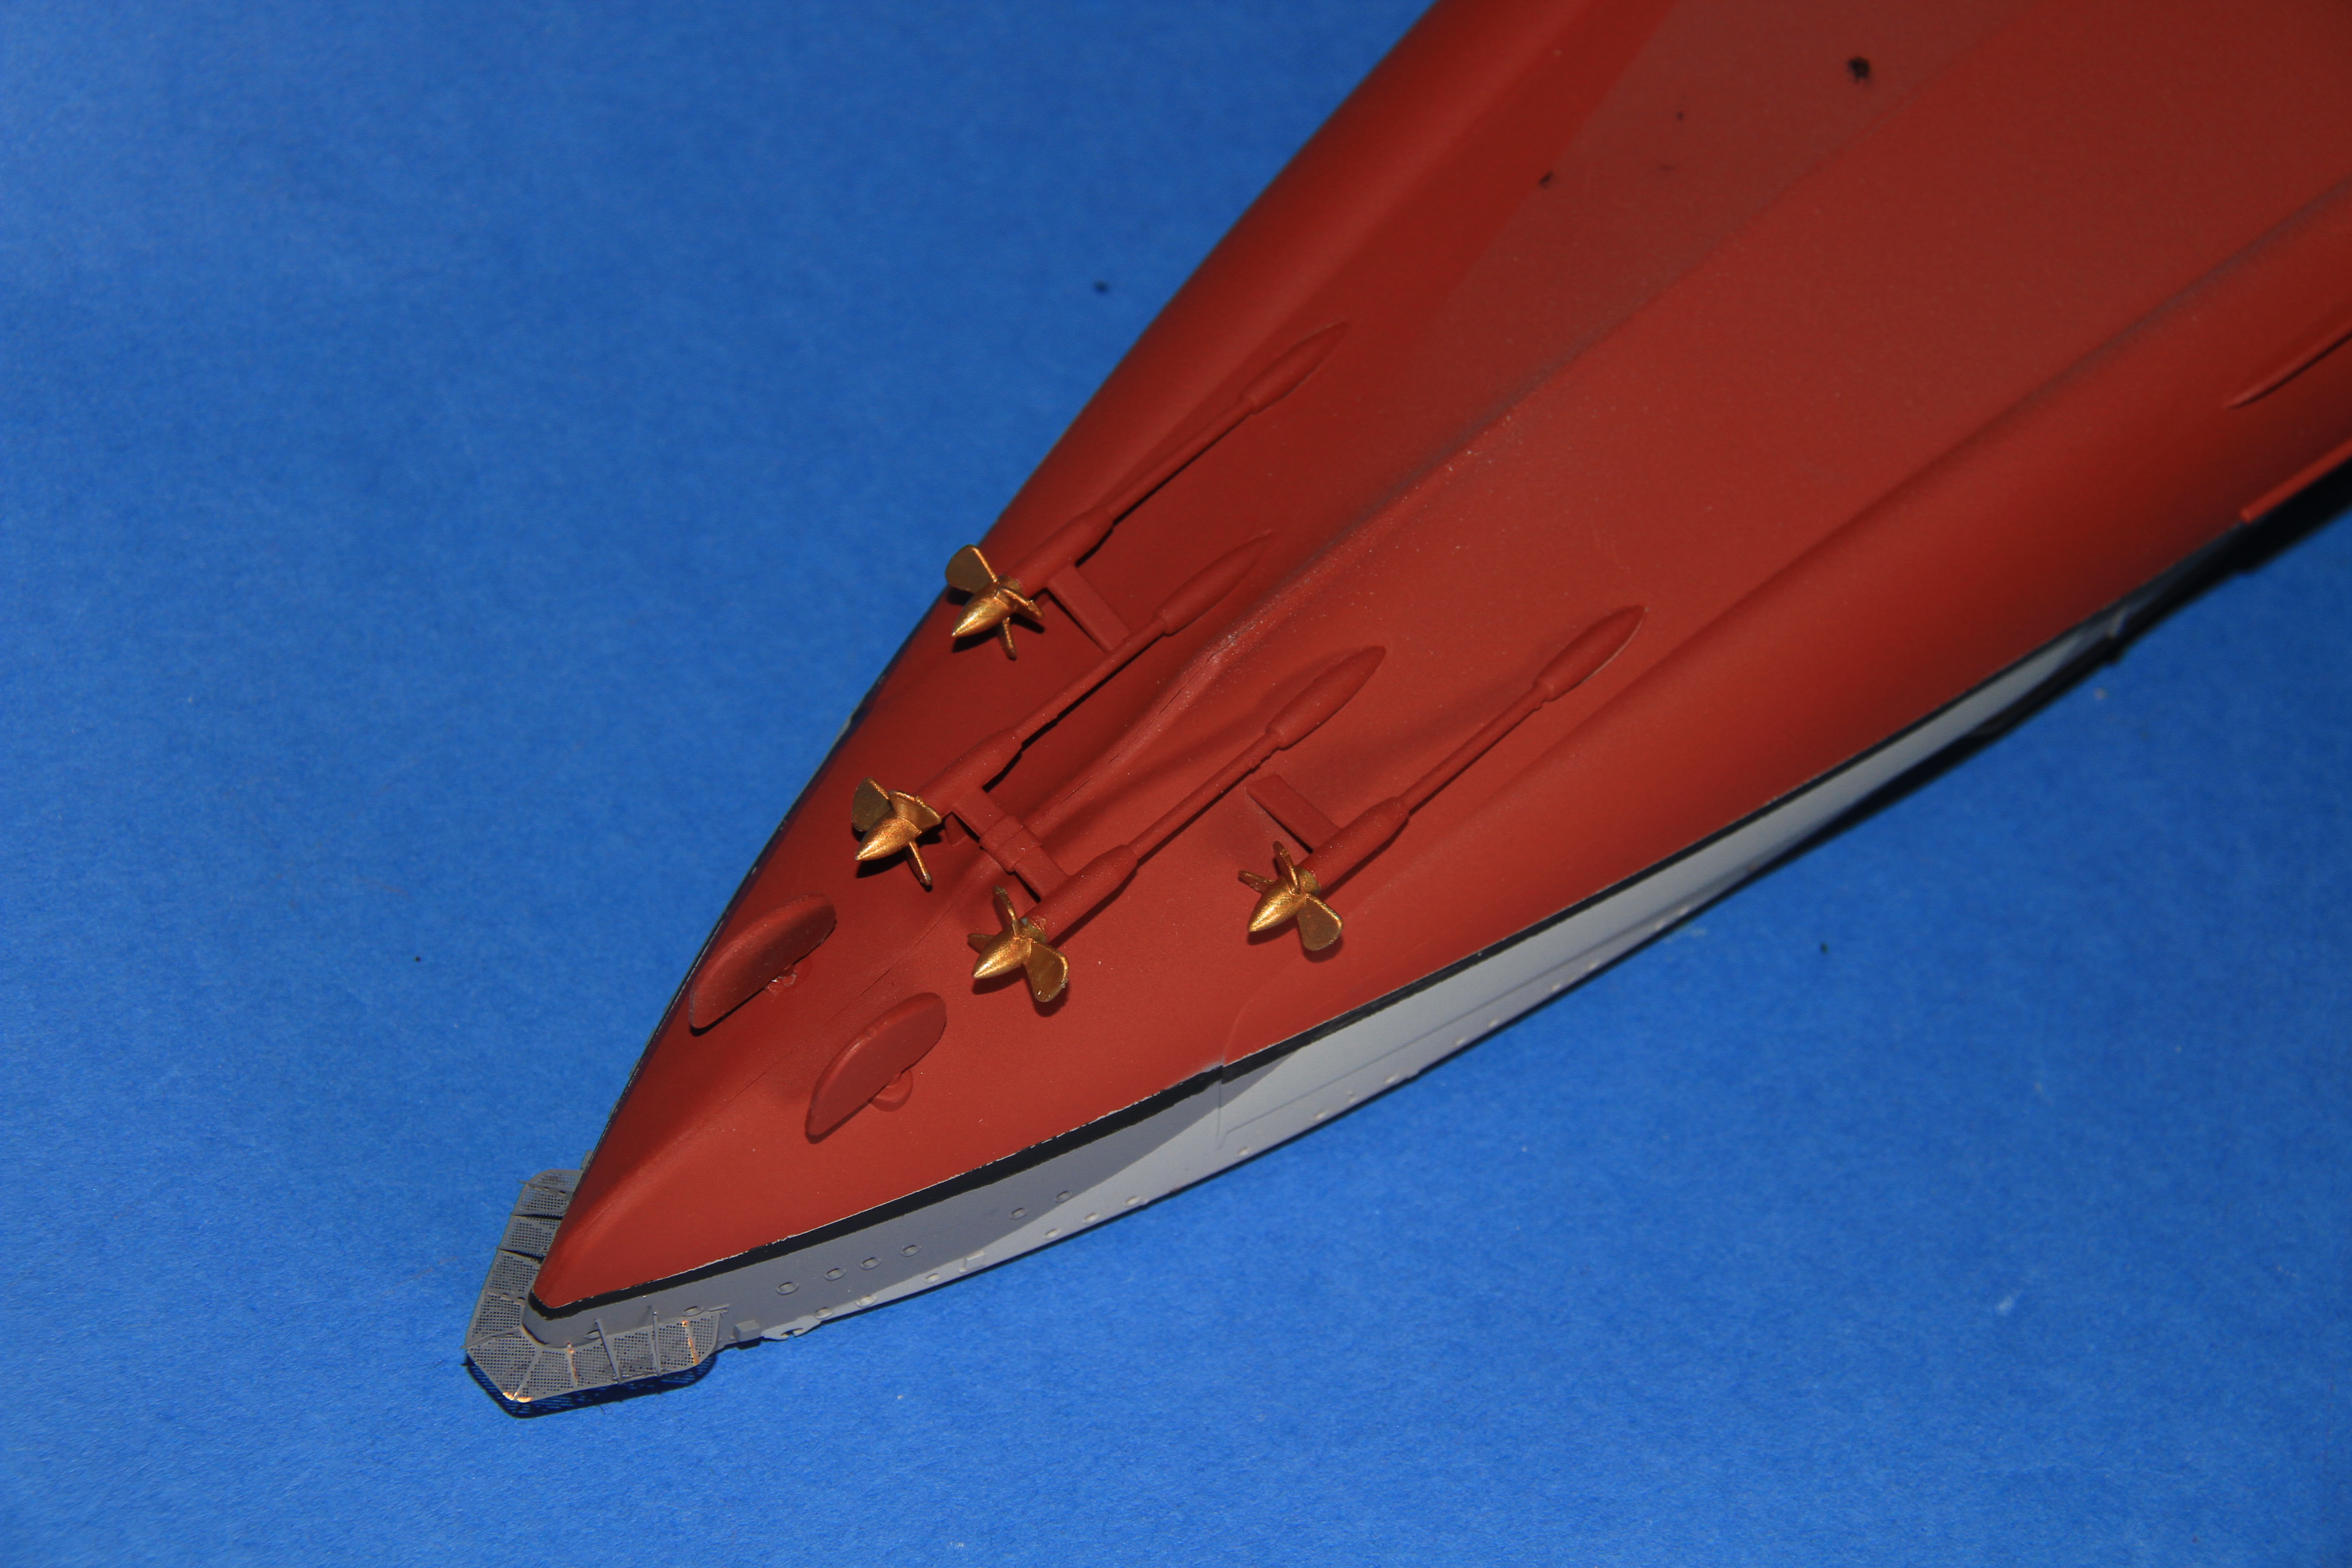
Propellers painted and fitted.
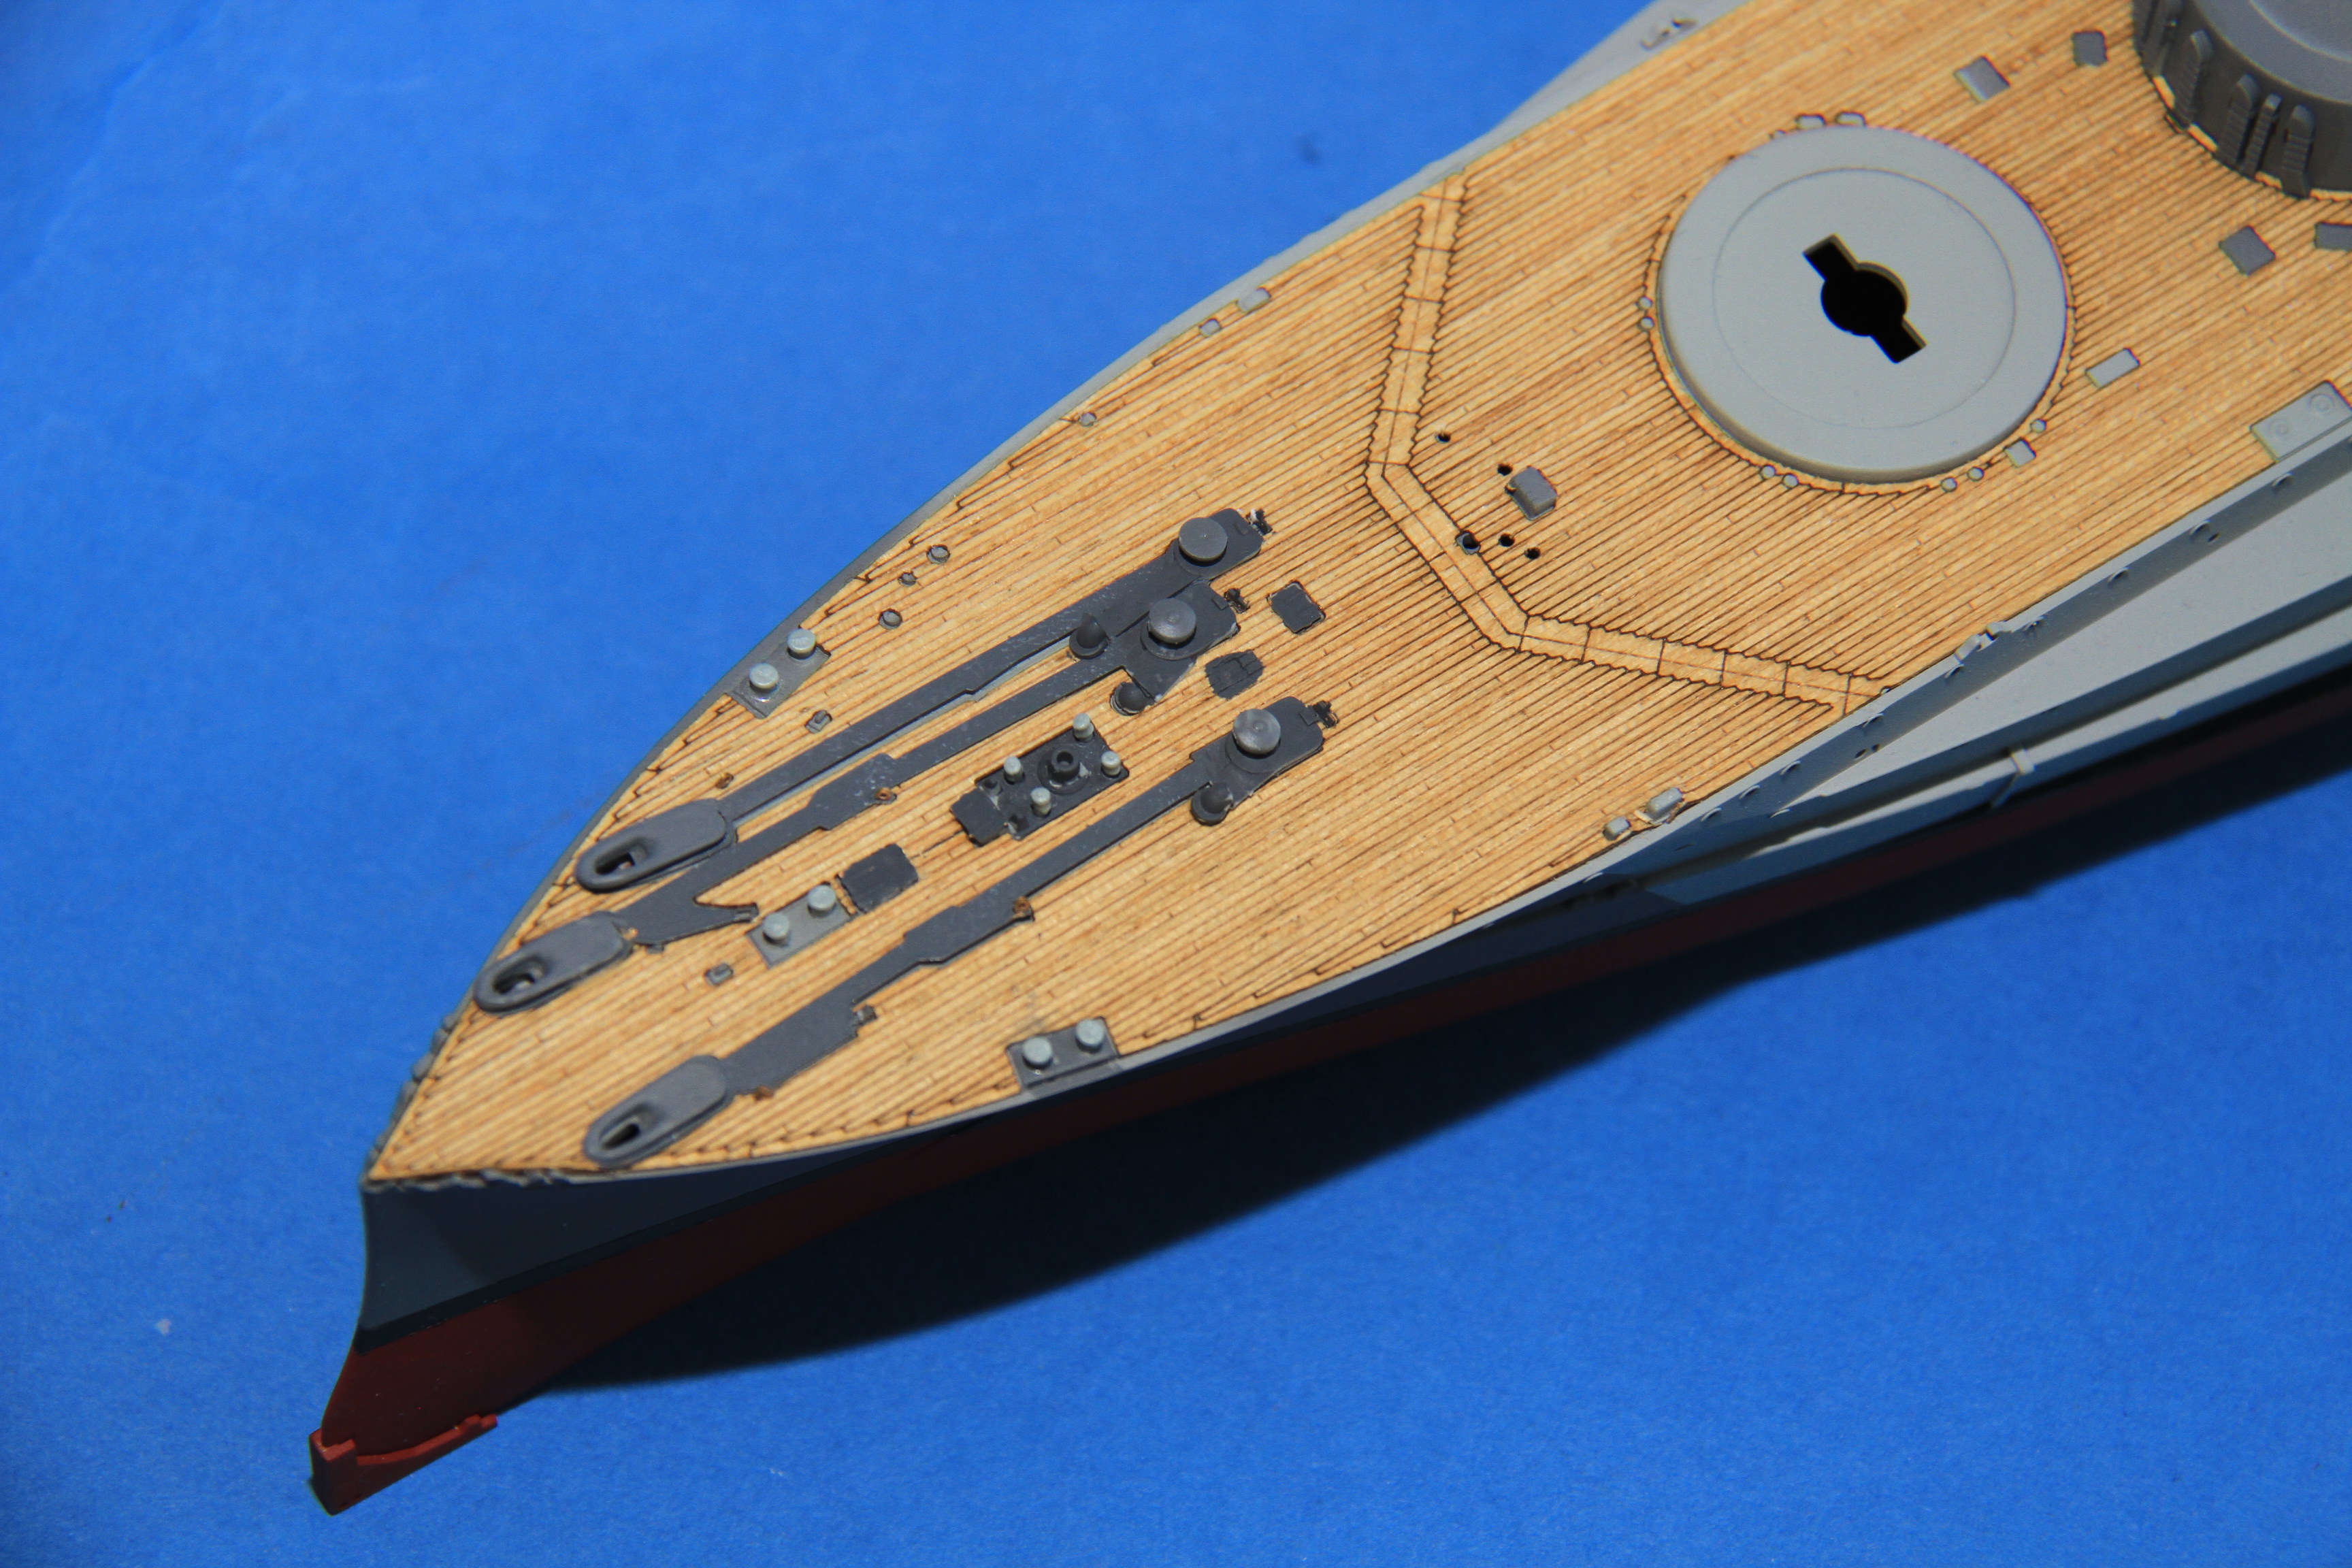
Now that's everything below the upper deck in place (except the anchors, on the fo'c's'le.
Capstans and bits in place.
paint on the details, anchor cables and capstan control wheels.
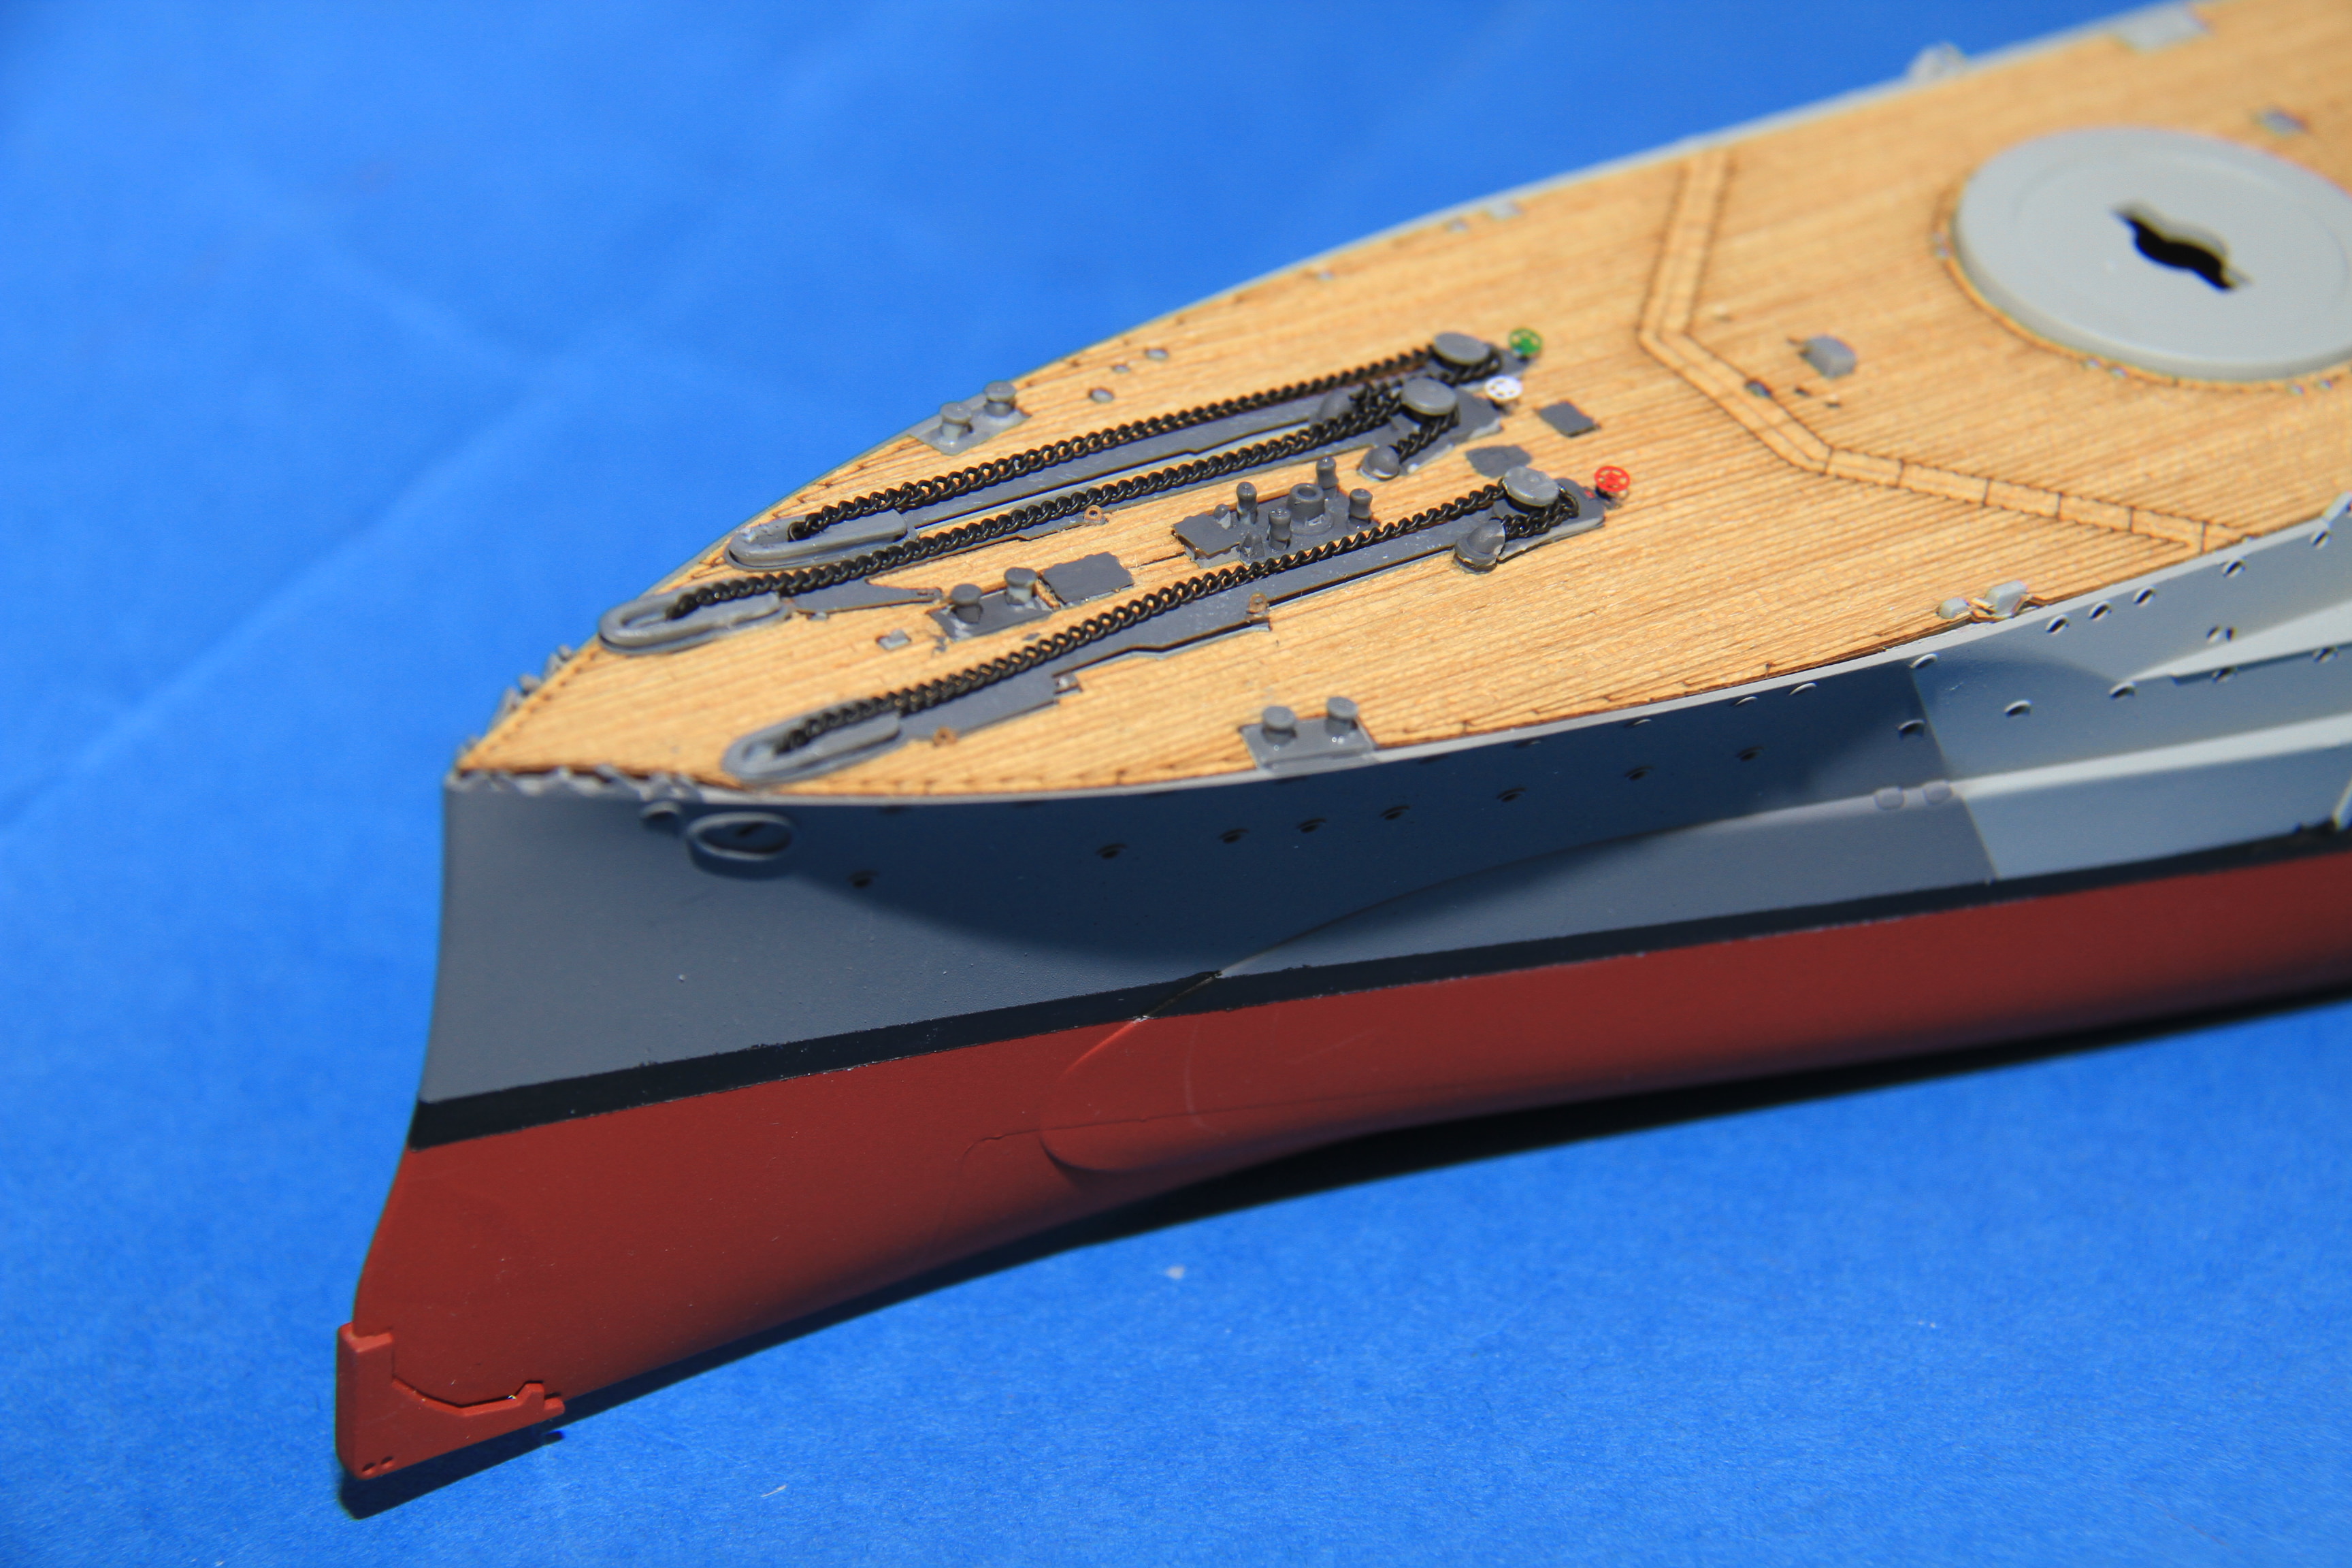
The etched breakwater assembled.
Not yet sprayed, too cold on Sunday, even having well warmed a can, not good results on a test piece.
In which case, a bit of hairy stick work to get the camo under way.
B gundeck has also been painted dark grey.
More soon.
Cheers
Si
Basic paint job on the 6" secondary battery,
Washes applied and fitted in place.
Propellers painted and fitted.
Now that's everything below the upper deck in place (except the anchors, on the fo'c's'le.
Capstans and bits in place.
paint on the details, anchor cables and capstan control wheels.
The etched breakwater assembled.
Not yet sprayed, too cold on Sunday, even having well warmed a can, not good results on a test piece.
In which case, a bit of hairy stick work to get the camo under way.
B gundeck has also been painted dark grey.
More soon.
Cheers
Si
d6mst0
#453
Joined: August 28, 2016
KitMaker: 1,925 posts
Model Shipwrights: 1,298 posts
Posted: Tuesday, November 28, 2017 - 05:03 AM UTC
Very nice work. Those props look amazing thin, are they after market?
RedDuster
Joined: March 01, 2010
KitMaker: 7,078 posts
Model Shipwrights: 6,649 posts
Posted: Wednesday, November 29, 2017 - 12:35 AM UTC
Quoted Text
Very nice work. Those props look amazing thin, are they after market?
Hi Mark,
The are, in fact, the kit props, they are very nice in shape; painted with citadel's "Retributor Armour Gold". Citadel's metallic base coats are my go to, for props and other metal bits, brush on like a dream.
cheers
Si

kpnuts

Joined: December 20, 2013
KitMaker: 1,179 posts
Model Shipwrights: 427 posts
Posted: Friday, December 01, 2017 - 11:10 PM UTC
It's a great kit and your doing a great job with it.
RedDuster
Joined: March 01, 2010
KitMaker: 7,078 posts
Model Shipwrights: 6,649 posts
Posted: Saturday, December 02, 2017 - 12:59 AM UTC
Thanks Ken,
It is a joy to build, however the pontos instructions are little challenging, this was their first release, and they have improved a lot since then. Cheers
Si
It is a joy to build, however the pontos instructions are little challenging, this was their first release, and they have improved a lot since then. Cheers
Si
kpnuts
Joined: December 20, 2013
KitMaker: 1,179 posts
Model Shipwrights: 427 posts
Posted: Saturday, December 02, 2017 - 01:58 AM UTC
When I did mine I used the dx pack I don't think those instructions were great either tbh I hate pe (I know it makes a big difference but I still hate it) you're doing great though.
RedDuster
Joined: March 01, 2010
KitMaker: 7,078 posts
Model Shipwrights: 6,649 posts
Posted: Monday, December 04, 2017 - 01:00 AM UTC
Thanks Ken,
I do enjoy working with PE, although at times it does frustrate me, that could be because I try to run before I can walk.
You are right though, particularly when you get to 1/350 or above it does make such a difference.
Cheers
Si
I do enjoy working with PE, although at times it does frustrate me, that could be because I try to run before I can walk.
You are right though, particularly when you get to 1/350 or above it does make such a difference.
Cheers
Si
RedDuster
Joined: March 01, 2010
KitMaker: 7,078 posts
Model Shipwrights: 6,649 posts
Posted: Monday, December 04, 2017 - 02:18 AM UTC
The progress for this weekend was mostly with the paintbrush.
Camo on the bridge structure.
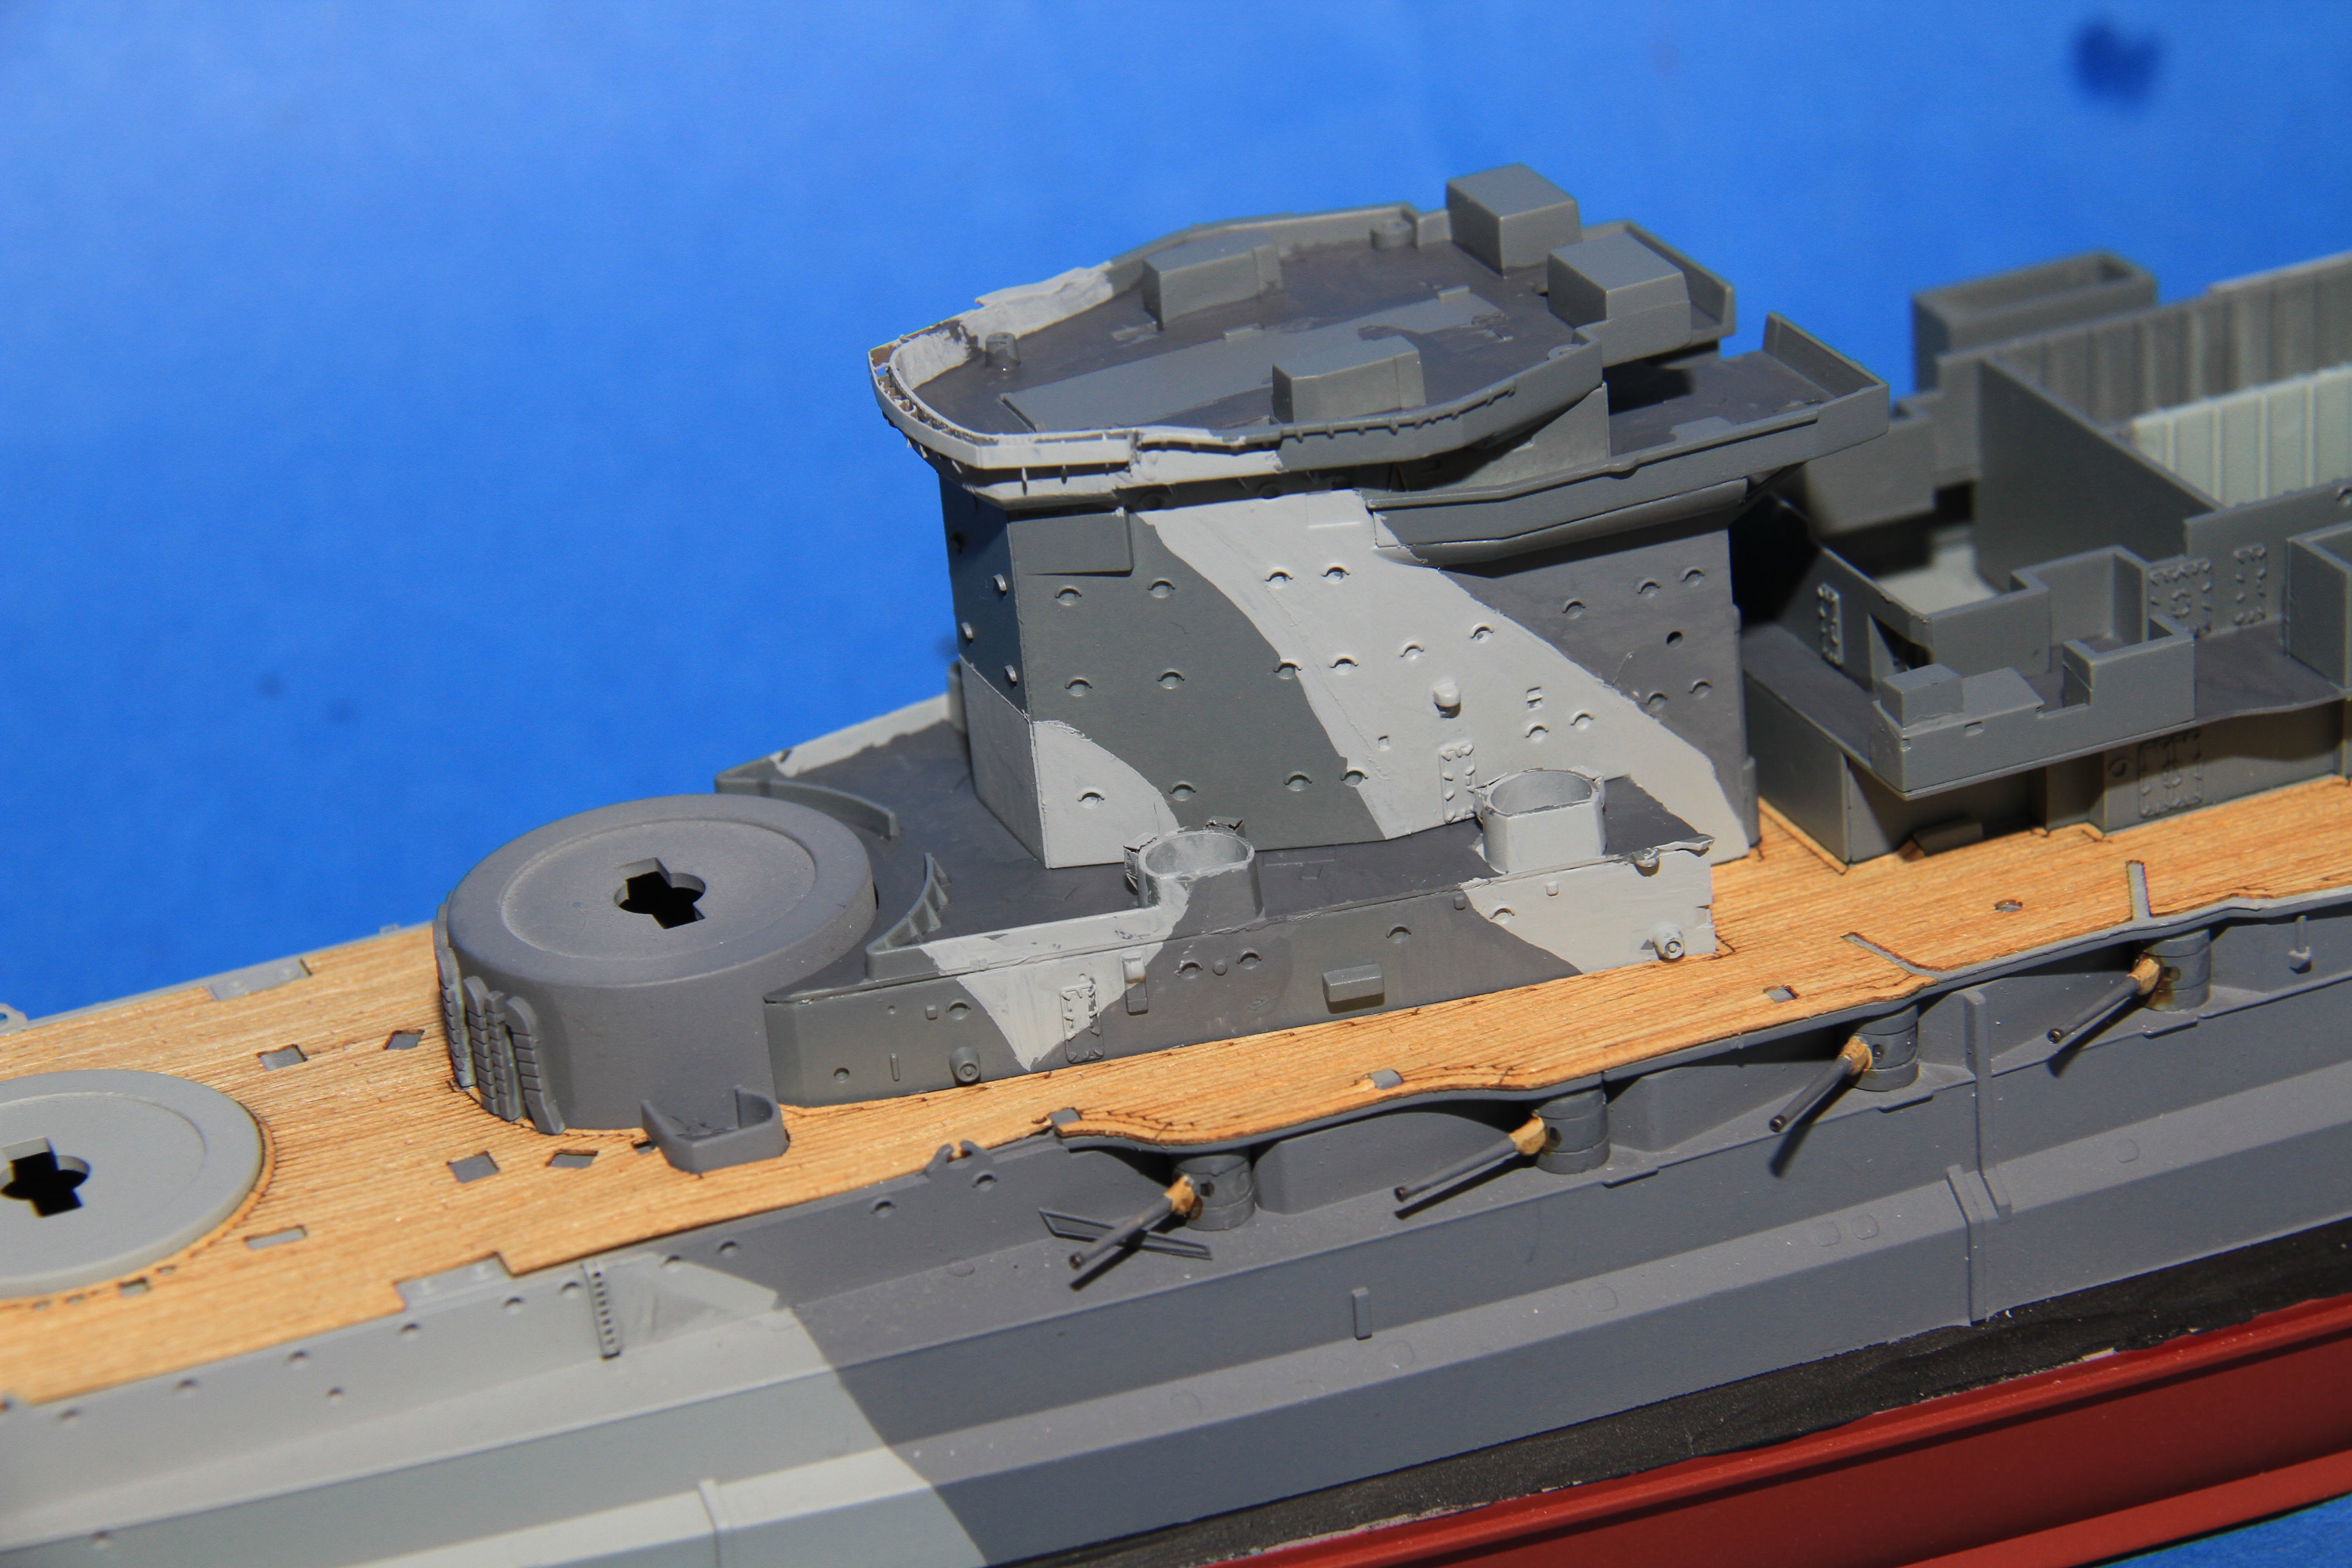
The hanger and the after superstructure.
The holes for the ladders provided by pontos were a bit narrow, so a lttle file work was need. The left side is done (looking down on the picture) but not the right.
The ladder in place, the pontos ladder fold very well, but they are fragile, fortunately will be hidden behind the after twin 4"
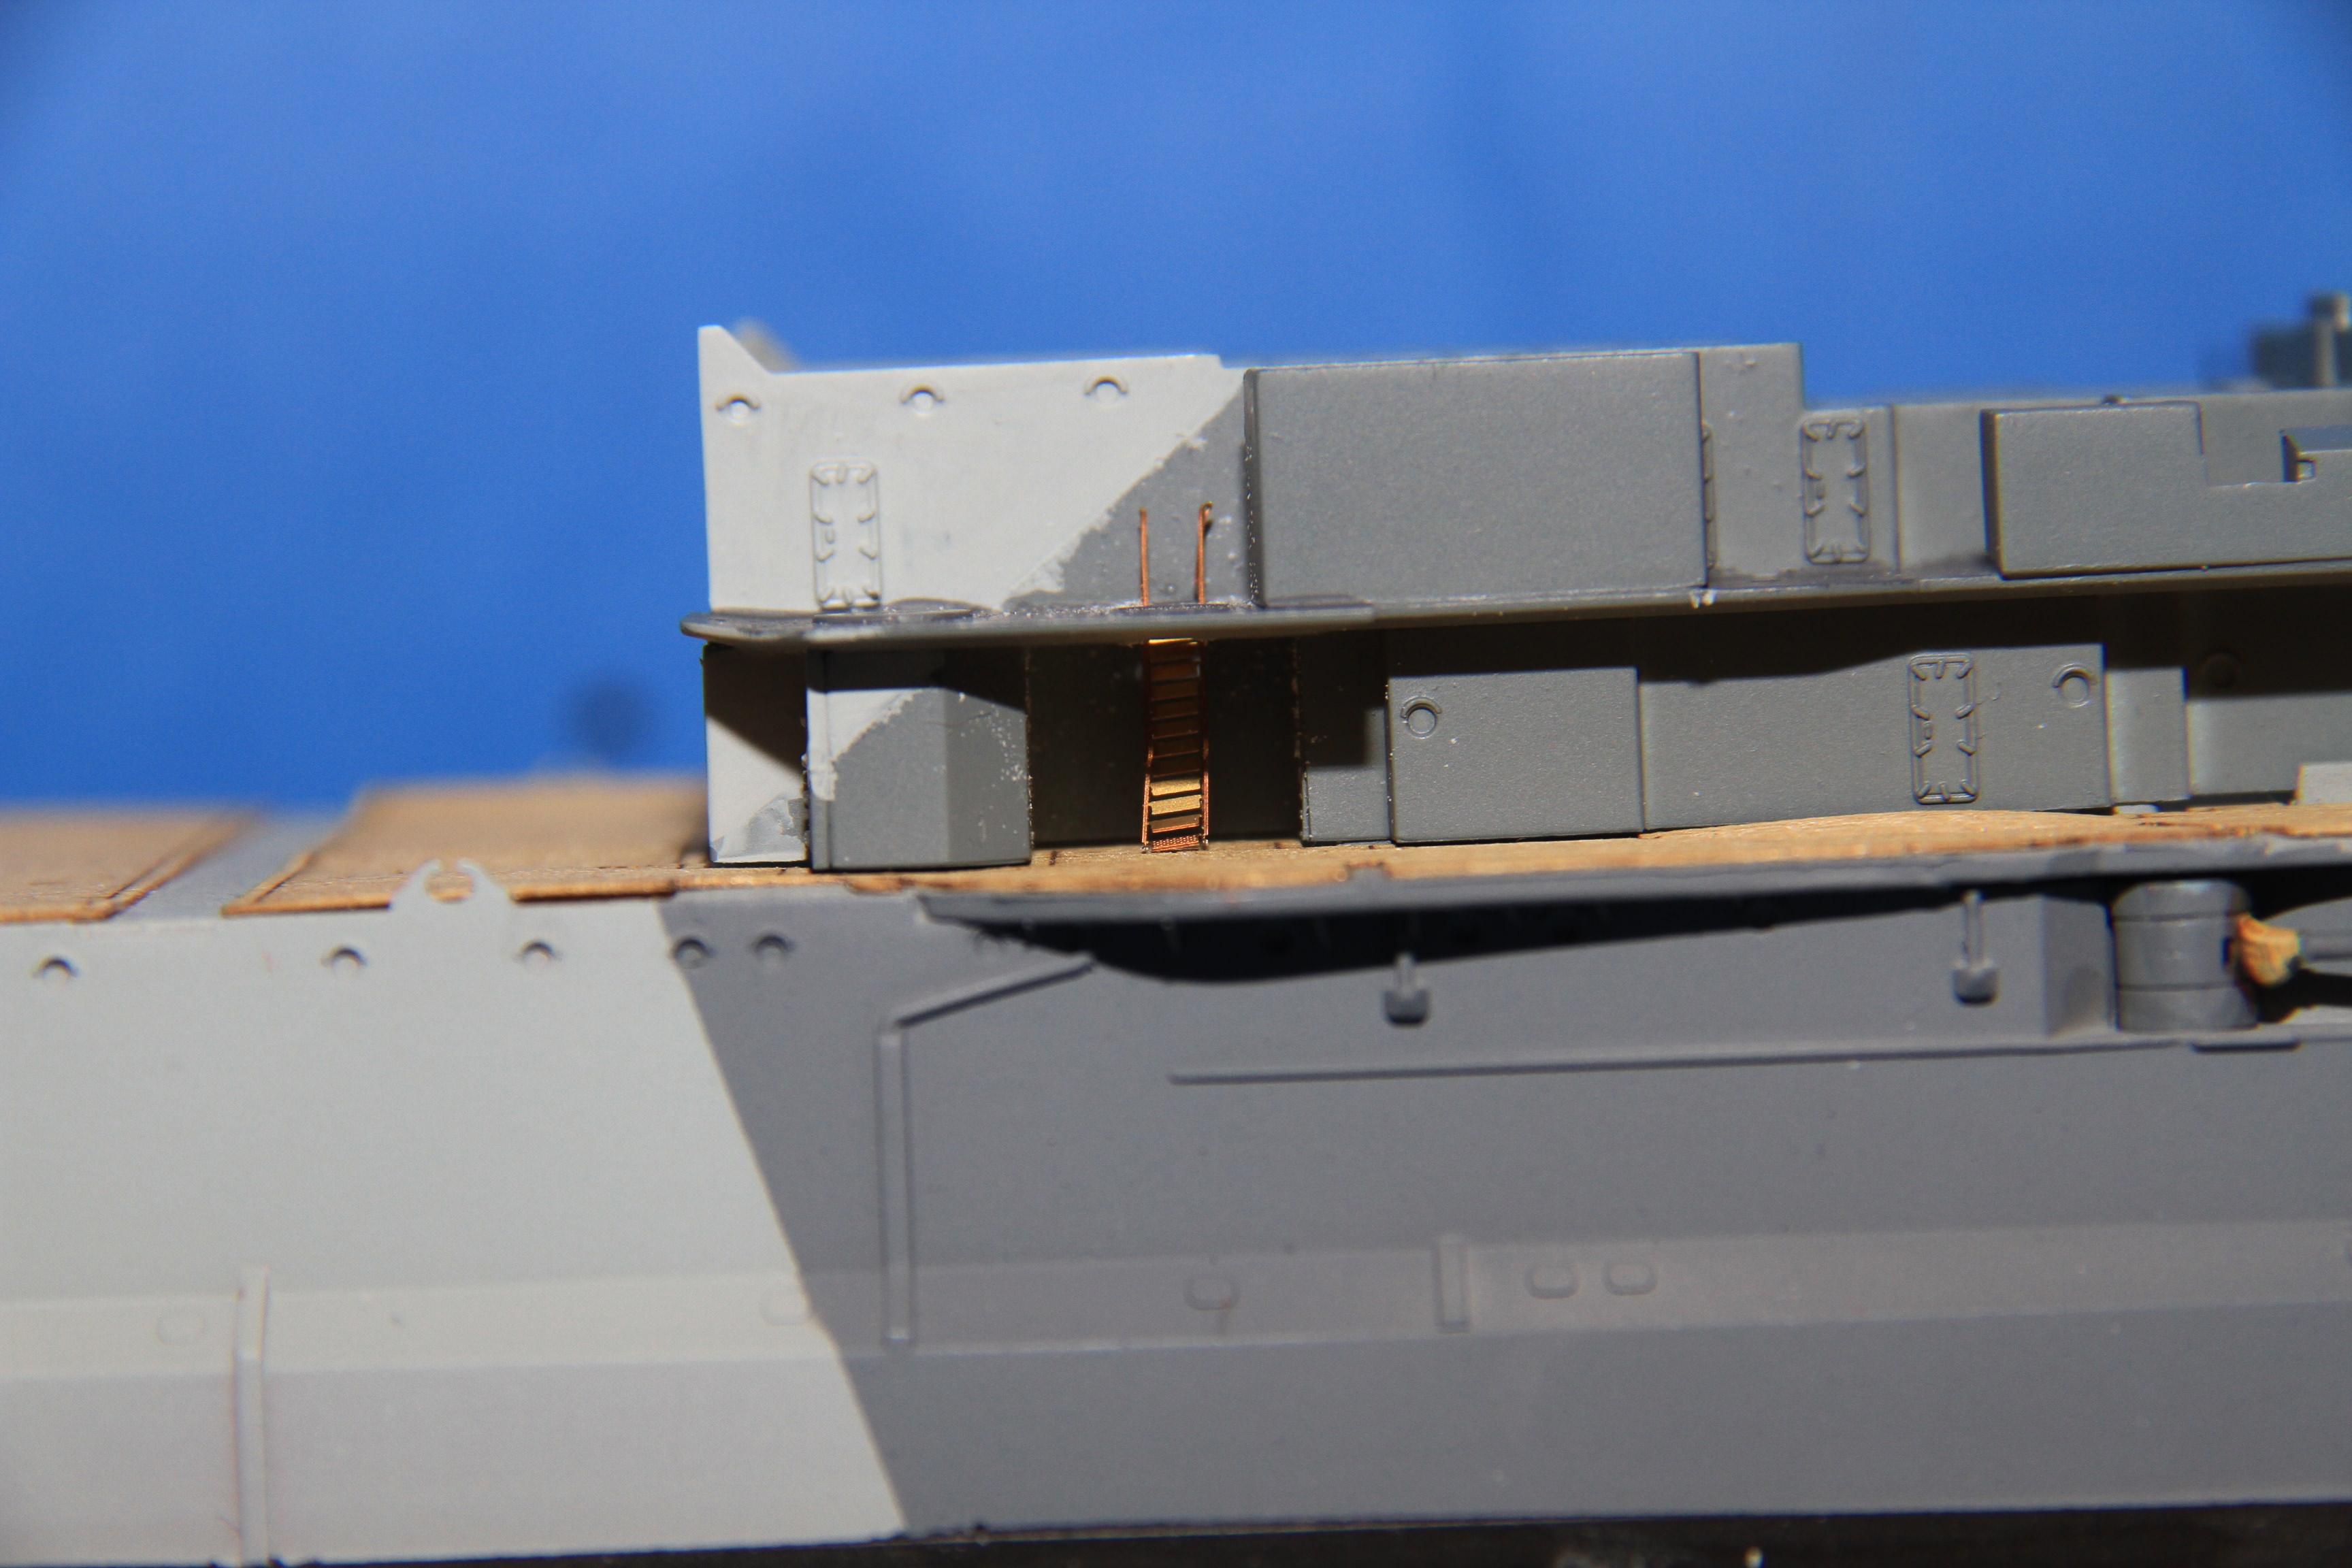
Camo needs tidying up too.
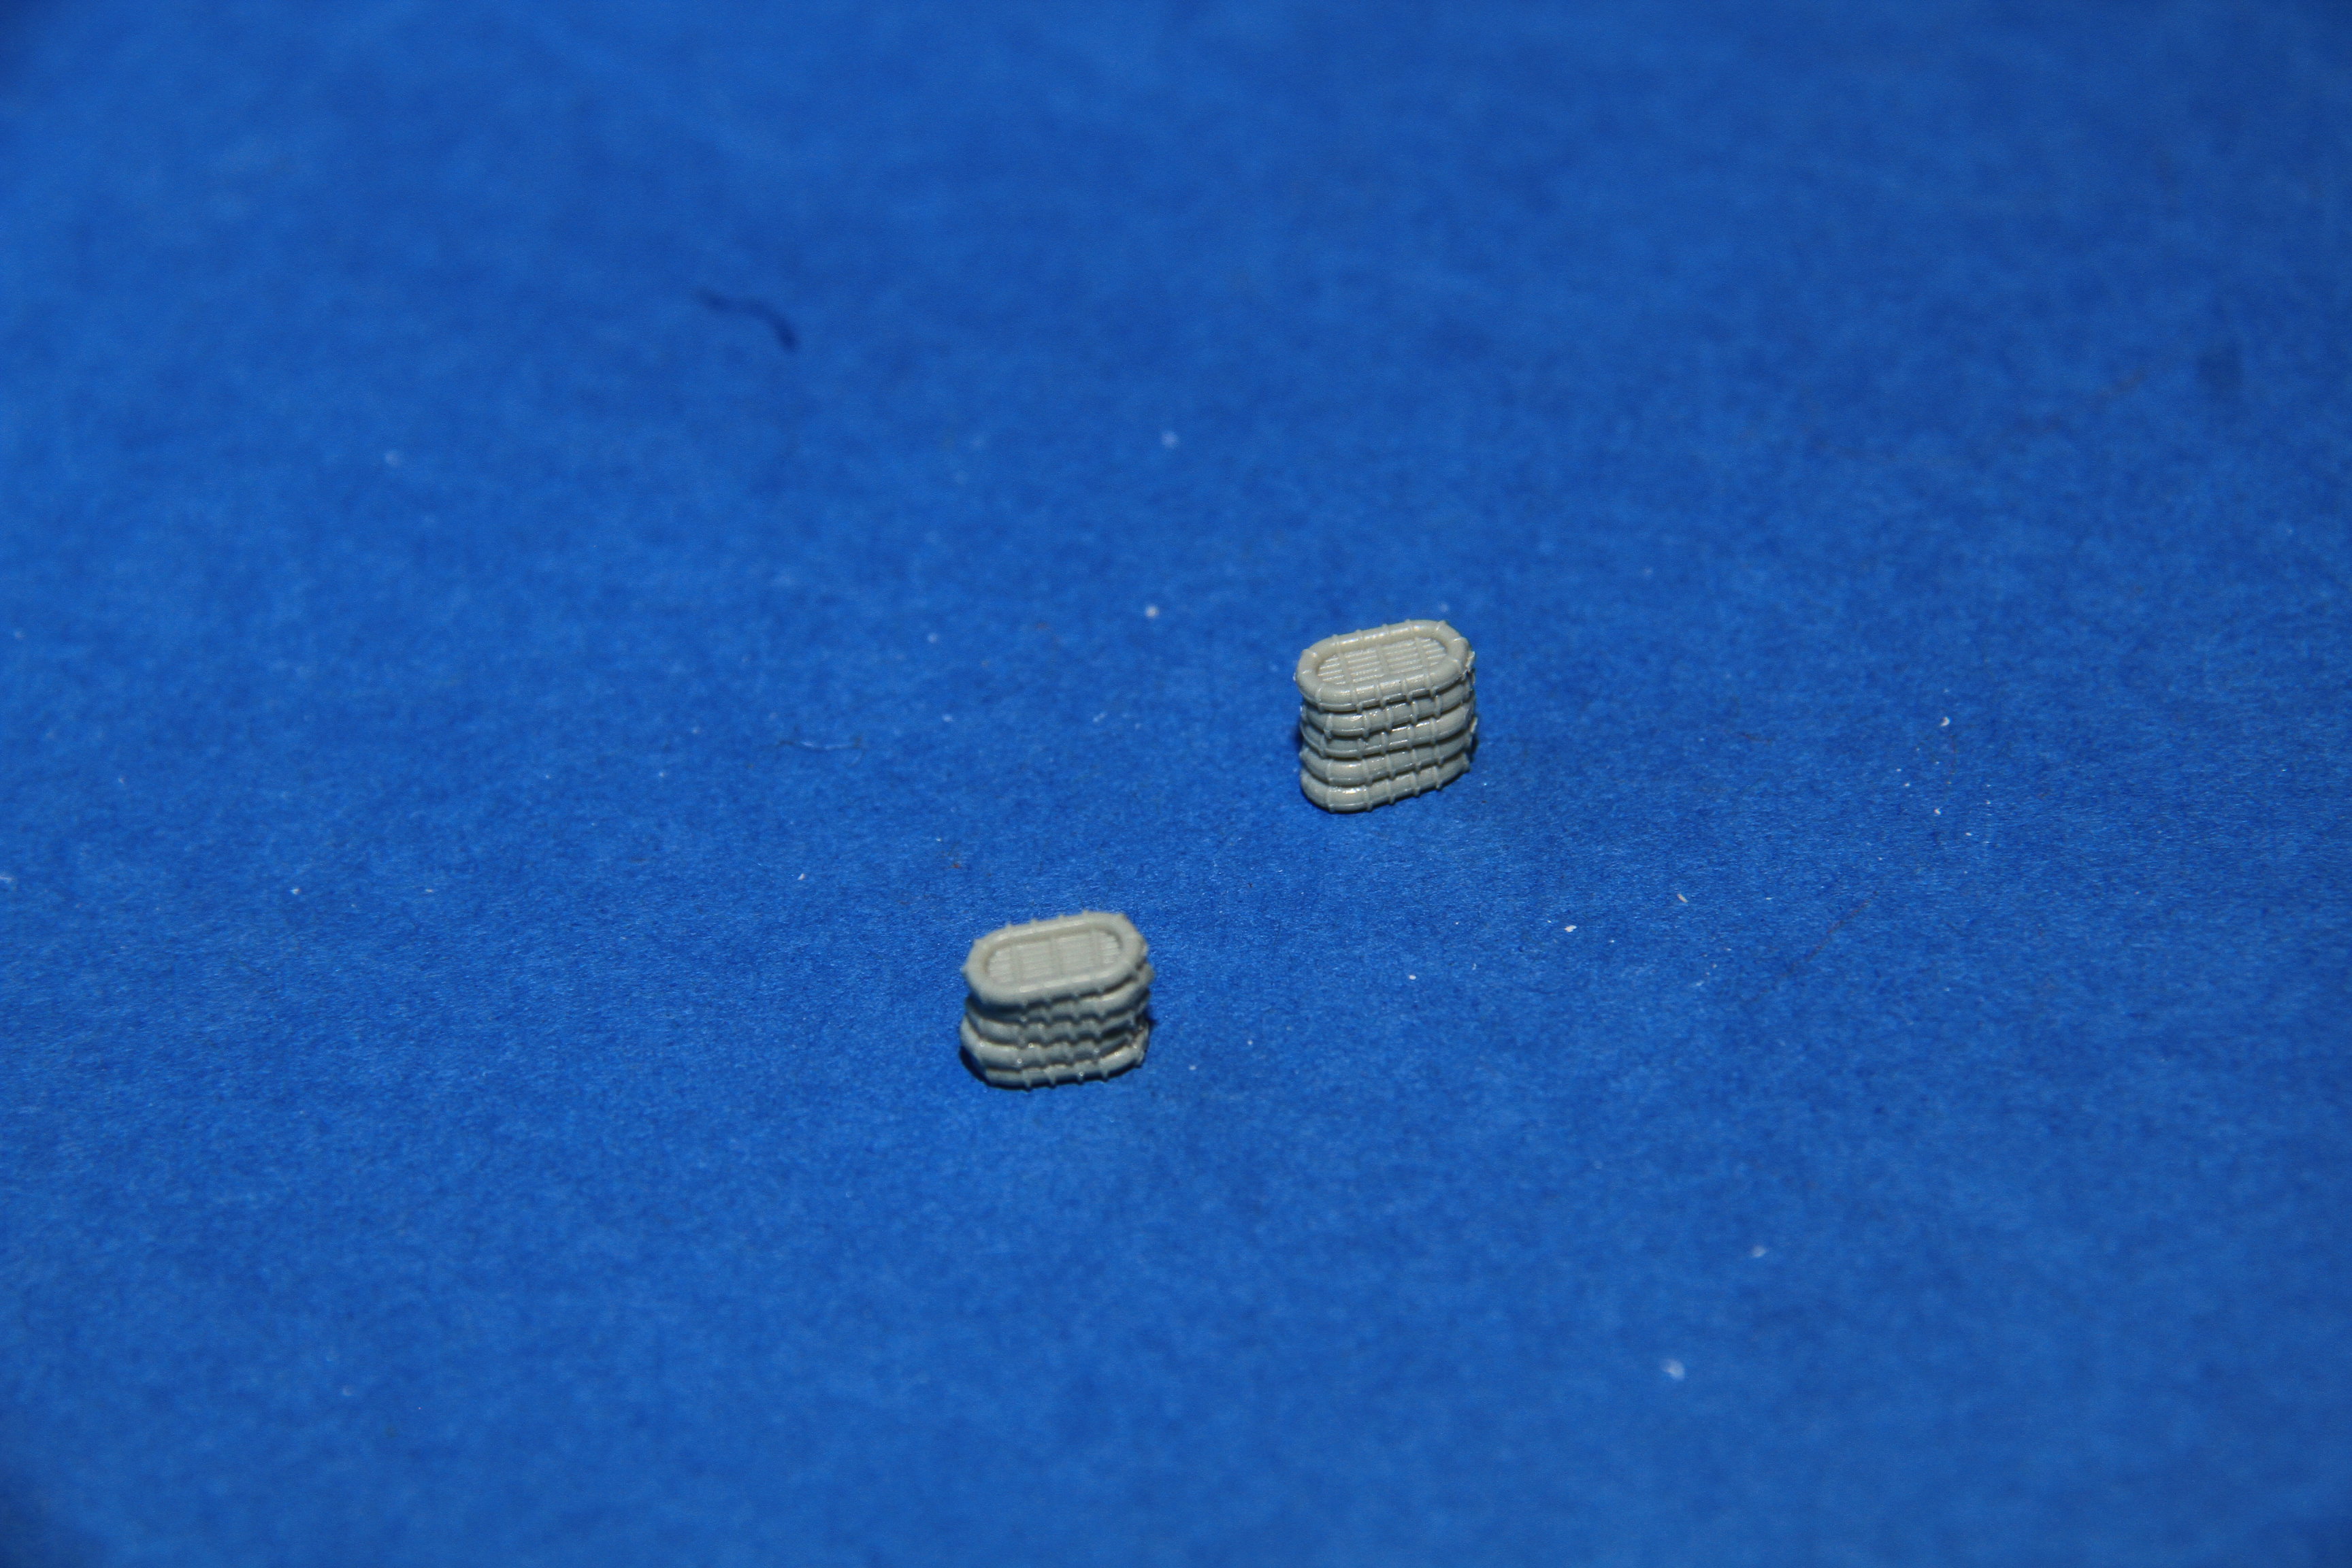
The stacks of liferafts that sit on next to the above ladders.
More soon.
Cheers
Si
Camo on the bridge structure.
The hanger and the after superstructure.
The holes for the ladders provided by pontos were a bit narrow, so a lttle file work was need. The left side is done (looking down on the picture) but not the right.
The ladder in place, the pontos ladder fold very well, but they are fragile, fortunately will be hidden behind the after twin 4"
Camo needs tidying up too.
The stacks of liferafts that sit on next to the above ladders.
More soon.
Cheers
Si
 |

WEB HOSTING BY


Copyright ©2021 Model Shipwrights and Kitmaker Network, a subsidiary of Silver Star Enterprises
All Rights Reserved. Please read our Conditions of Use and Privacy Policy.
All Rights Reserved. Please read our Conditions of Use and Privacy Policy.