

Ahoy Simon
Great build indeed I do enjoy your out of the box builds.
Cheers
Sean


Go to modelshipwrights.com for the current dynamic site!
Hosted by Steve Joyce
Battleshp Tserevich 1917 OOB build

Fordboy

Joined: July 13, 2004
KitMaker: 2,169 posts
Model Shipwrights: 1,597 posts

Posted: Monday, June 11, 2018 - 07:14 AM UTC

RedDuster

Joined: March 01, 2010
KitMaker: 7,078 posts
Model Shipwrights: 6,649 posts

Posted: Monday, June 11, 2018 - 07:25 AM UTC
Quoted Text
Si,
It amazing how just a few PE parts can make the difference to a model. Those braces will pop once they are mated up with the rest of structures and painted. Nice progress.
Mark
Thanks Mark,
The etch with the kit is quite extensive and rather decent quality, and the kit has location groves for parts like these braces.
Nice to see touches like that in the box
Cheers
Si
RedDuster
Joined: March 01, 2010
KitMaker: 7,078 posts
Model Shipwrights: 6,649 posts
Posted: Monday, June 11, 2018 - 07:28 AM UTC
Quoted Text
Ahoy Simon
Great build indeed I do enjoy your out of the box builds.
Cheers
Sean
Thanks Sean,
Always appreciate you looking in. I enjoy them too, I think it is always good to go back to basics and just concentrate on the build.
Cheers
Si
RedDuster
Joined: March 01, 2010
KitMaker: 7,078 posts
Model Shipwrights: 6,649 posts
Posted: Monday, June 18, 2018 - 08:41 AM UTC
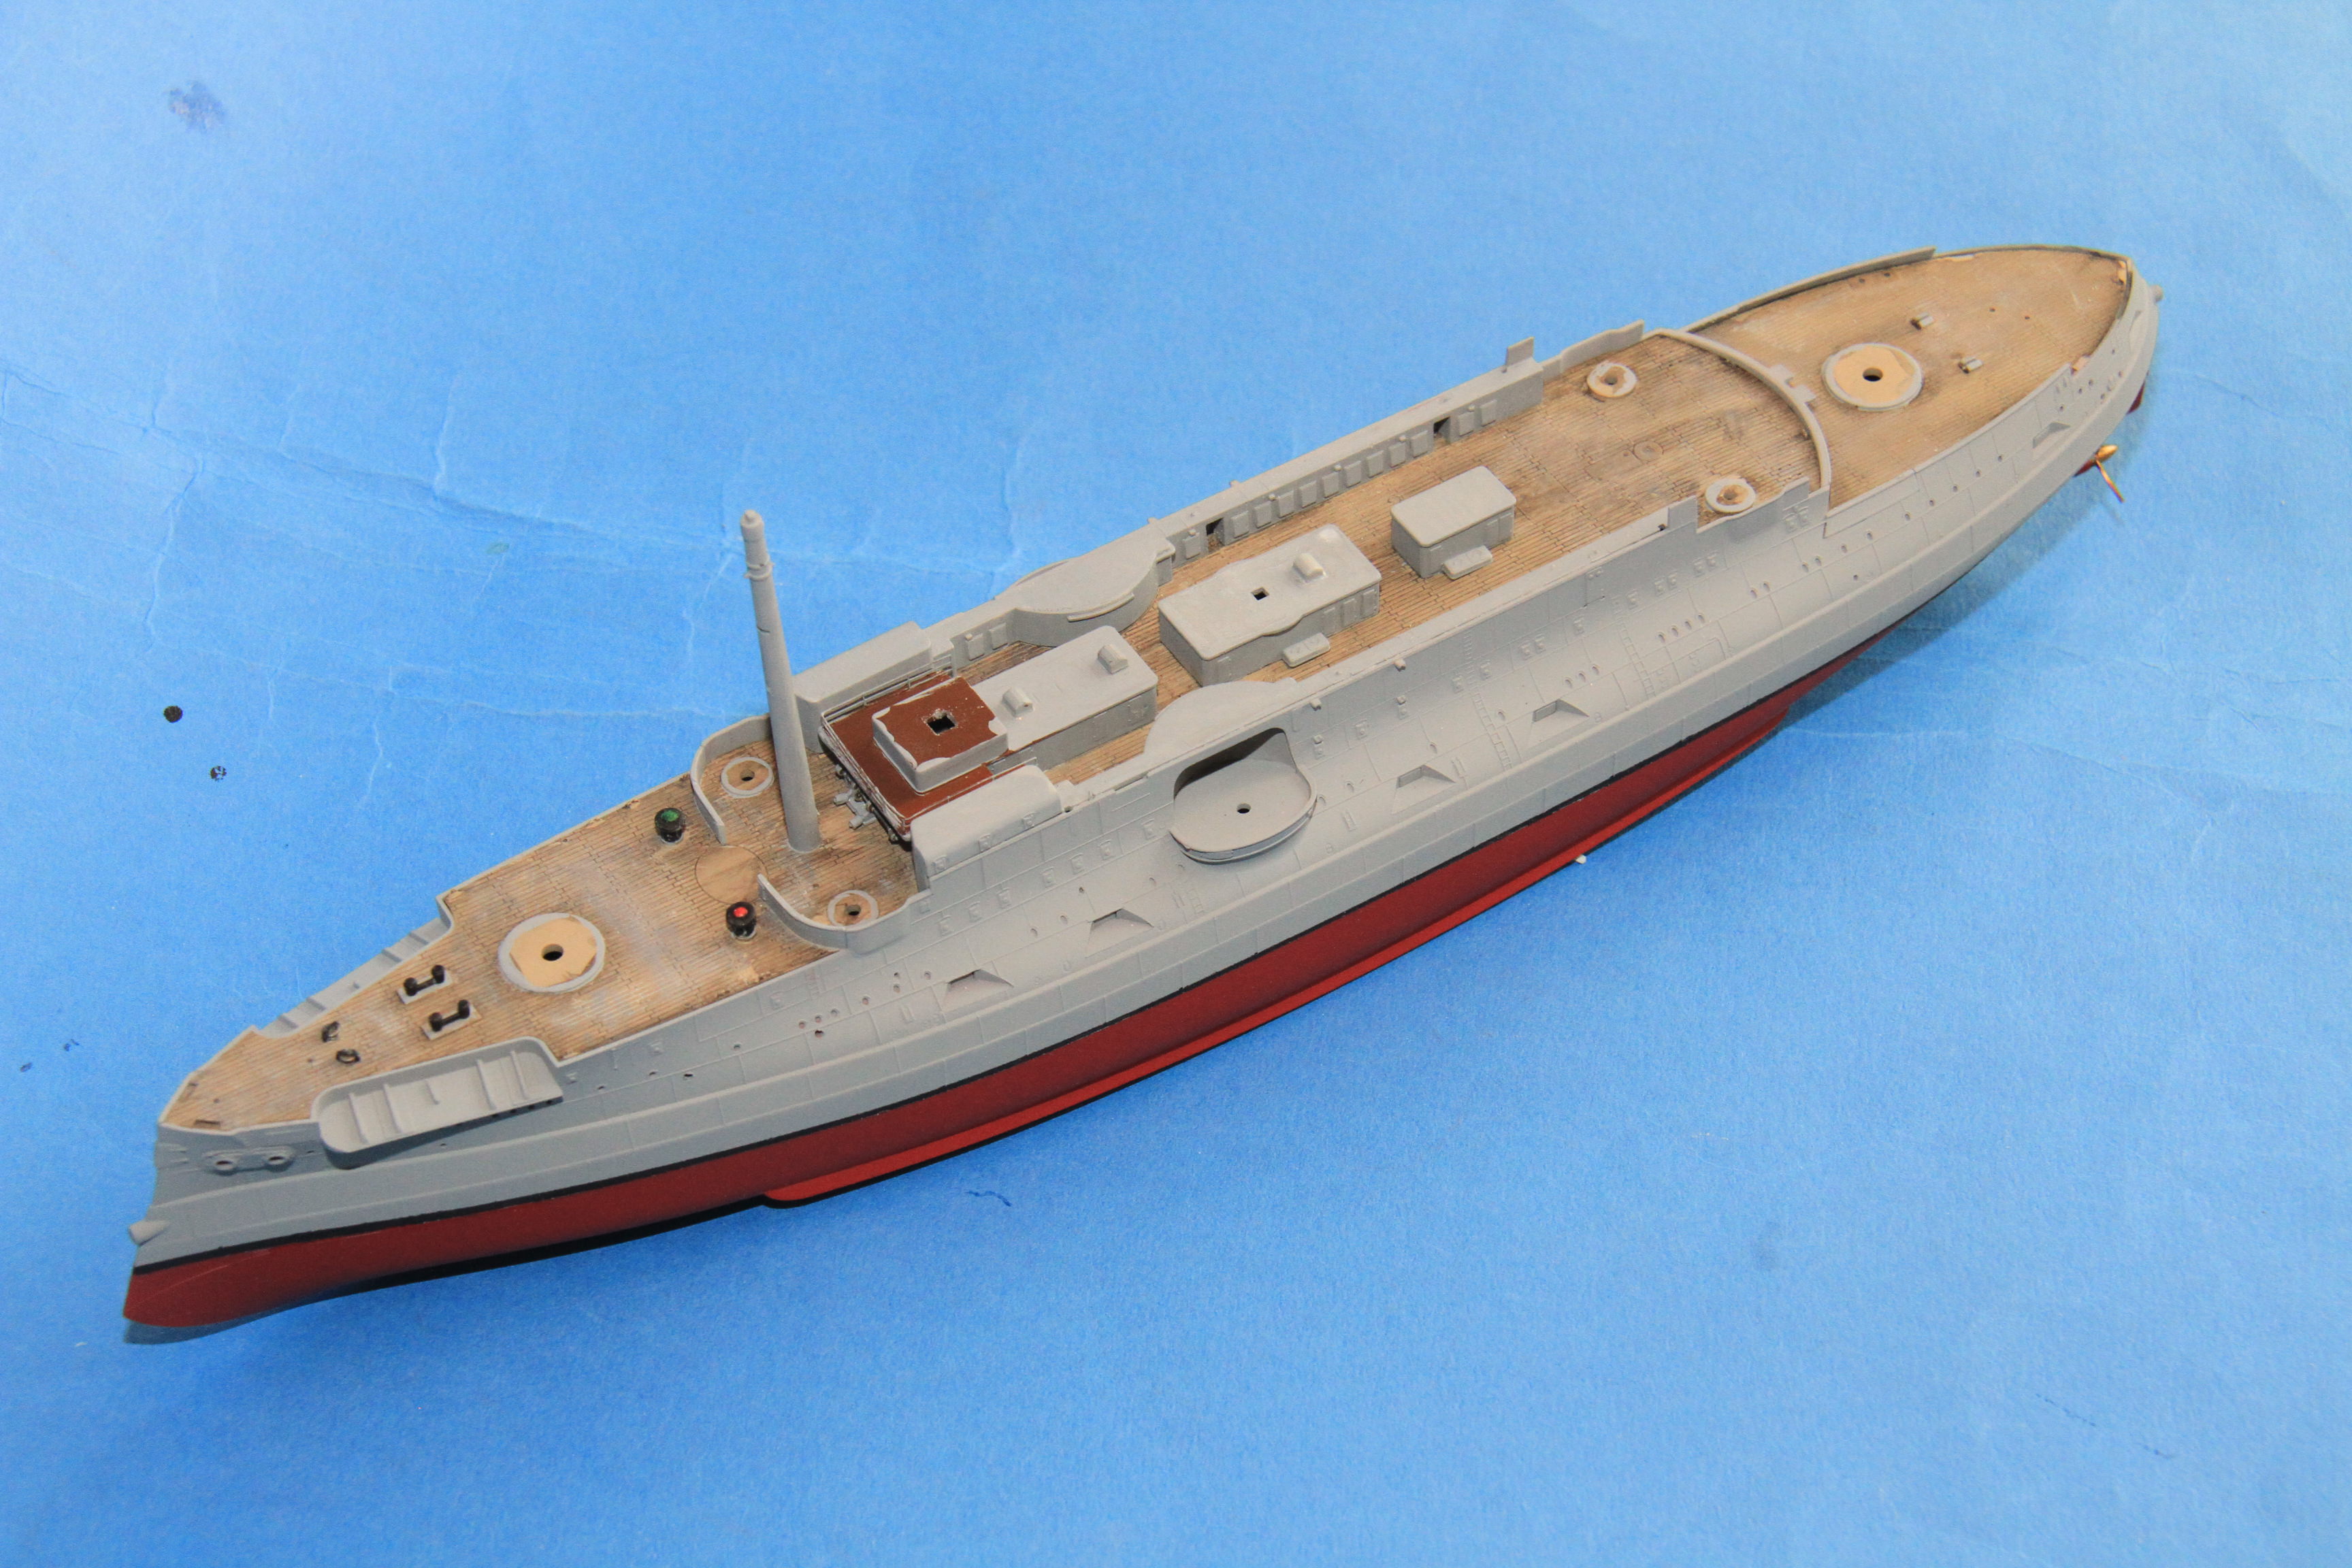
A bit more progress.
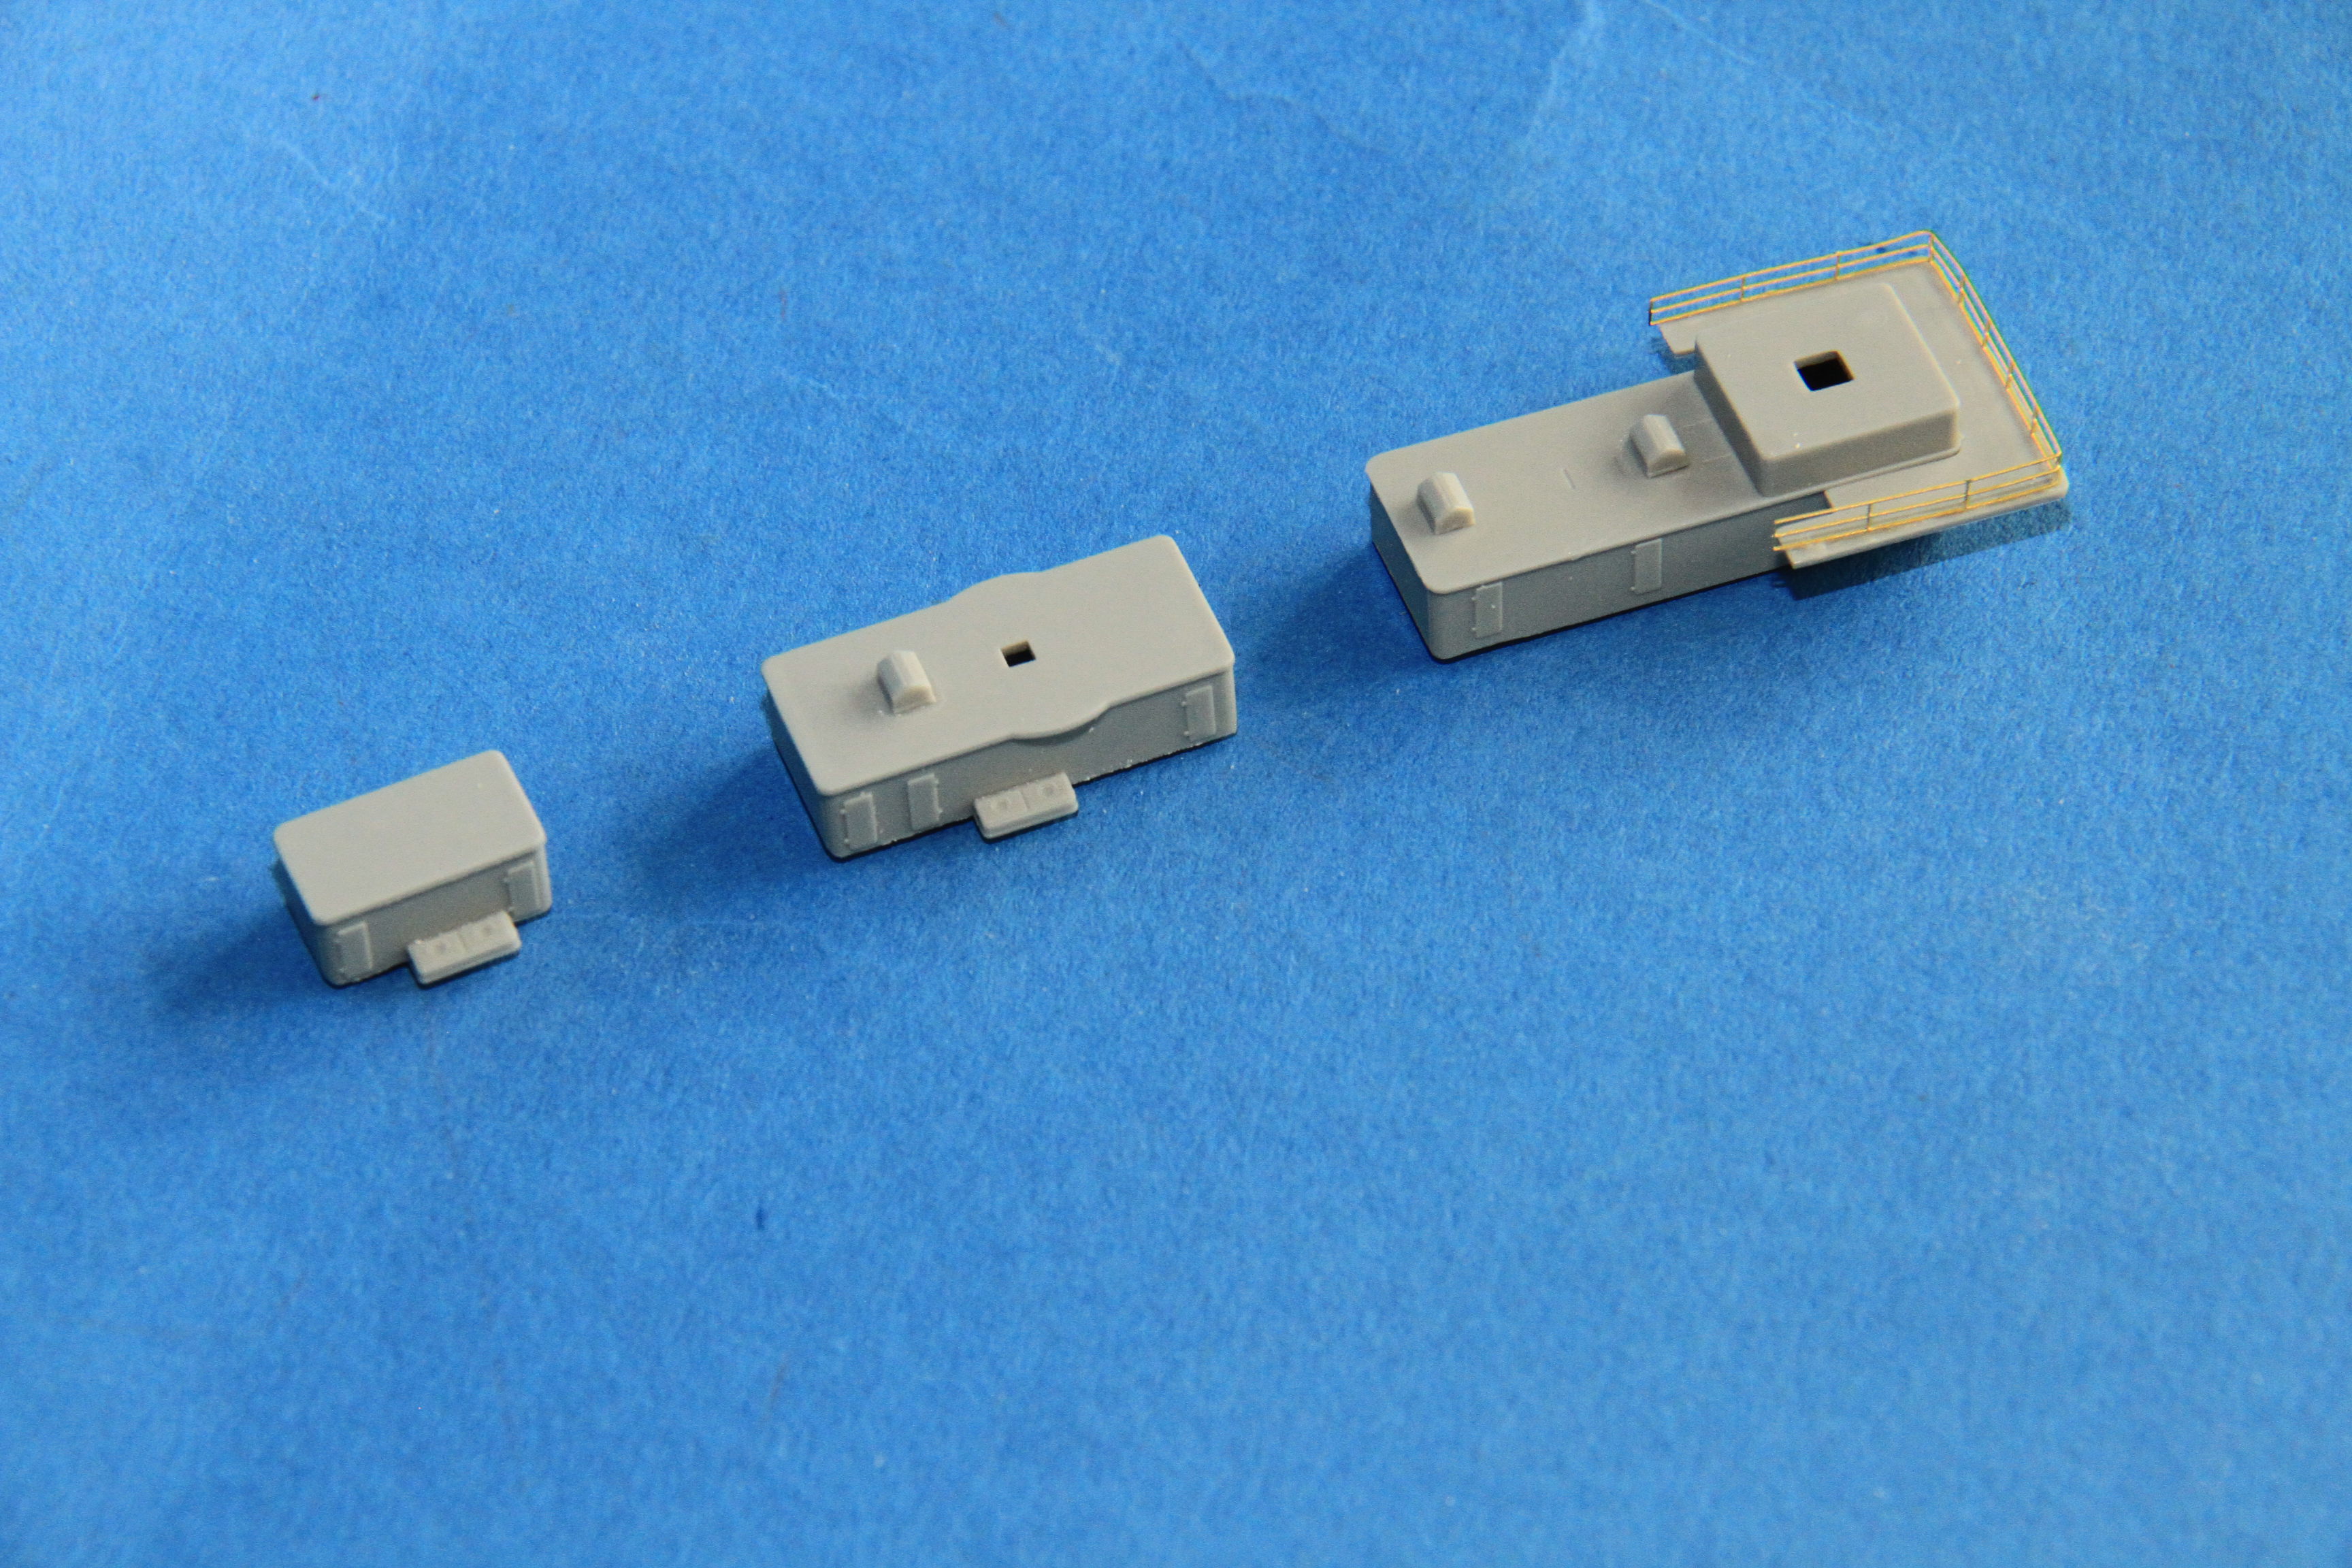
The deck houses along the upper deck ready for a coat of paint.
The first of the secondary turrets under way, the kit barrels still in place.
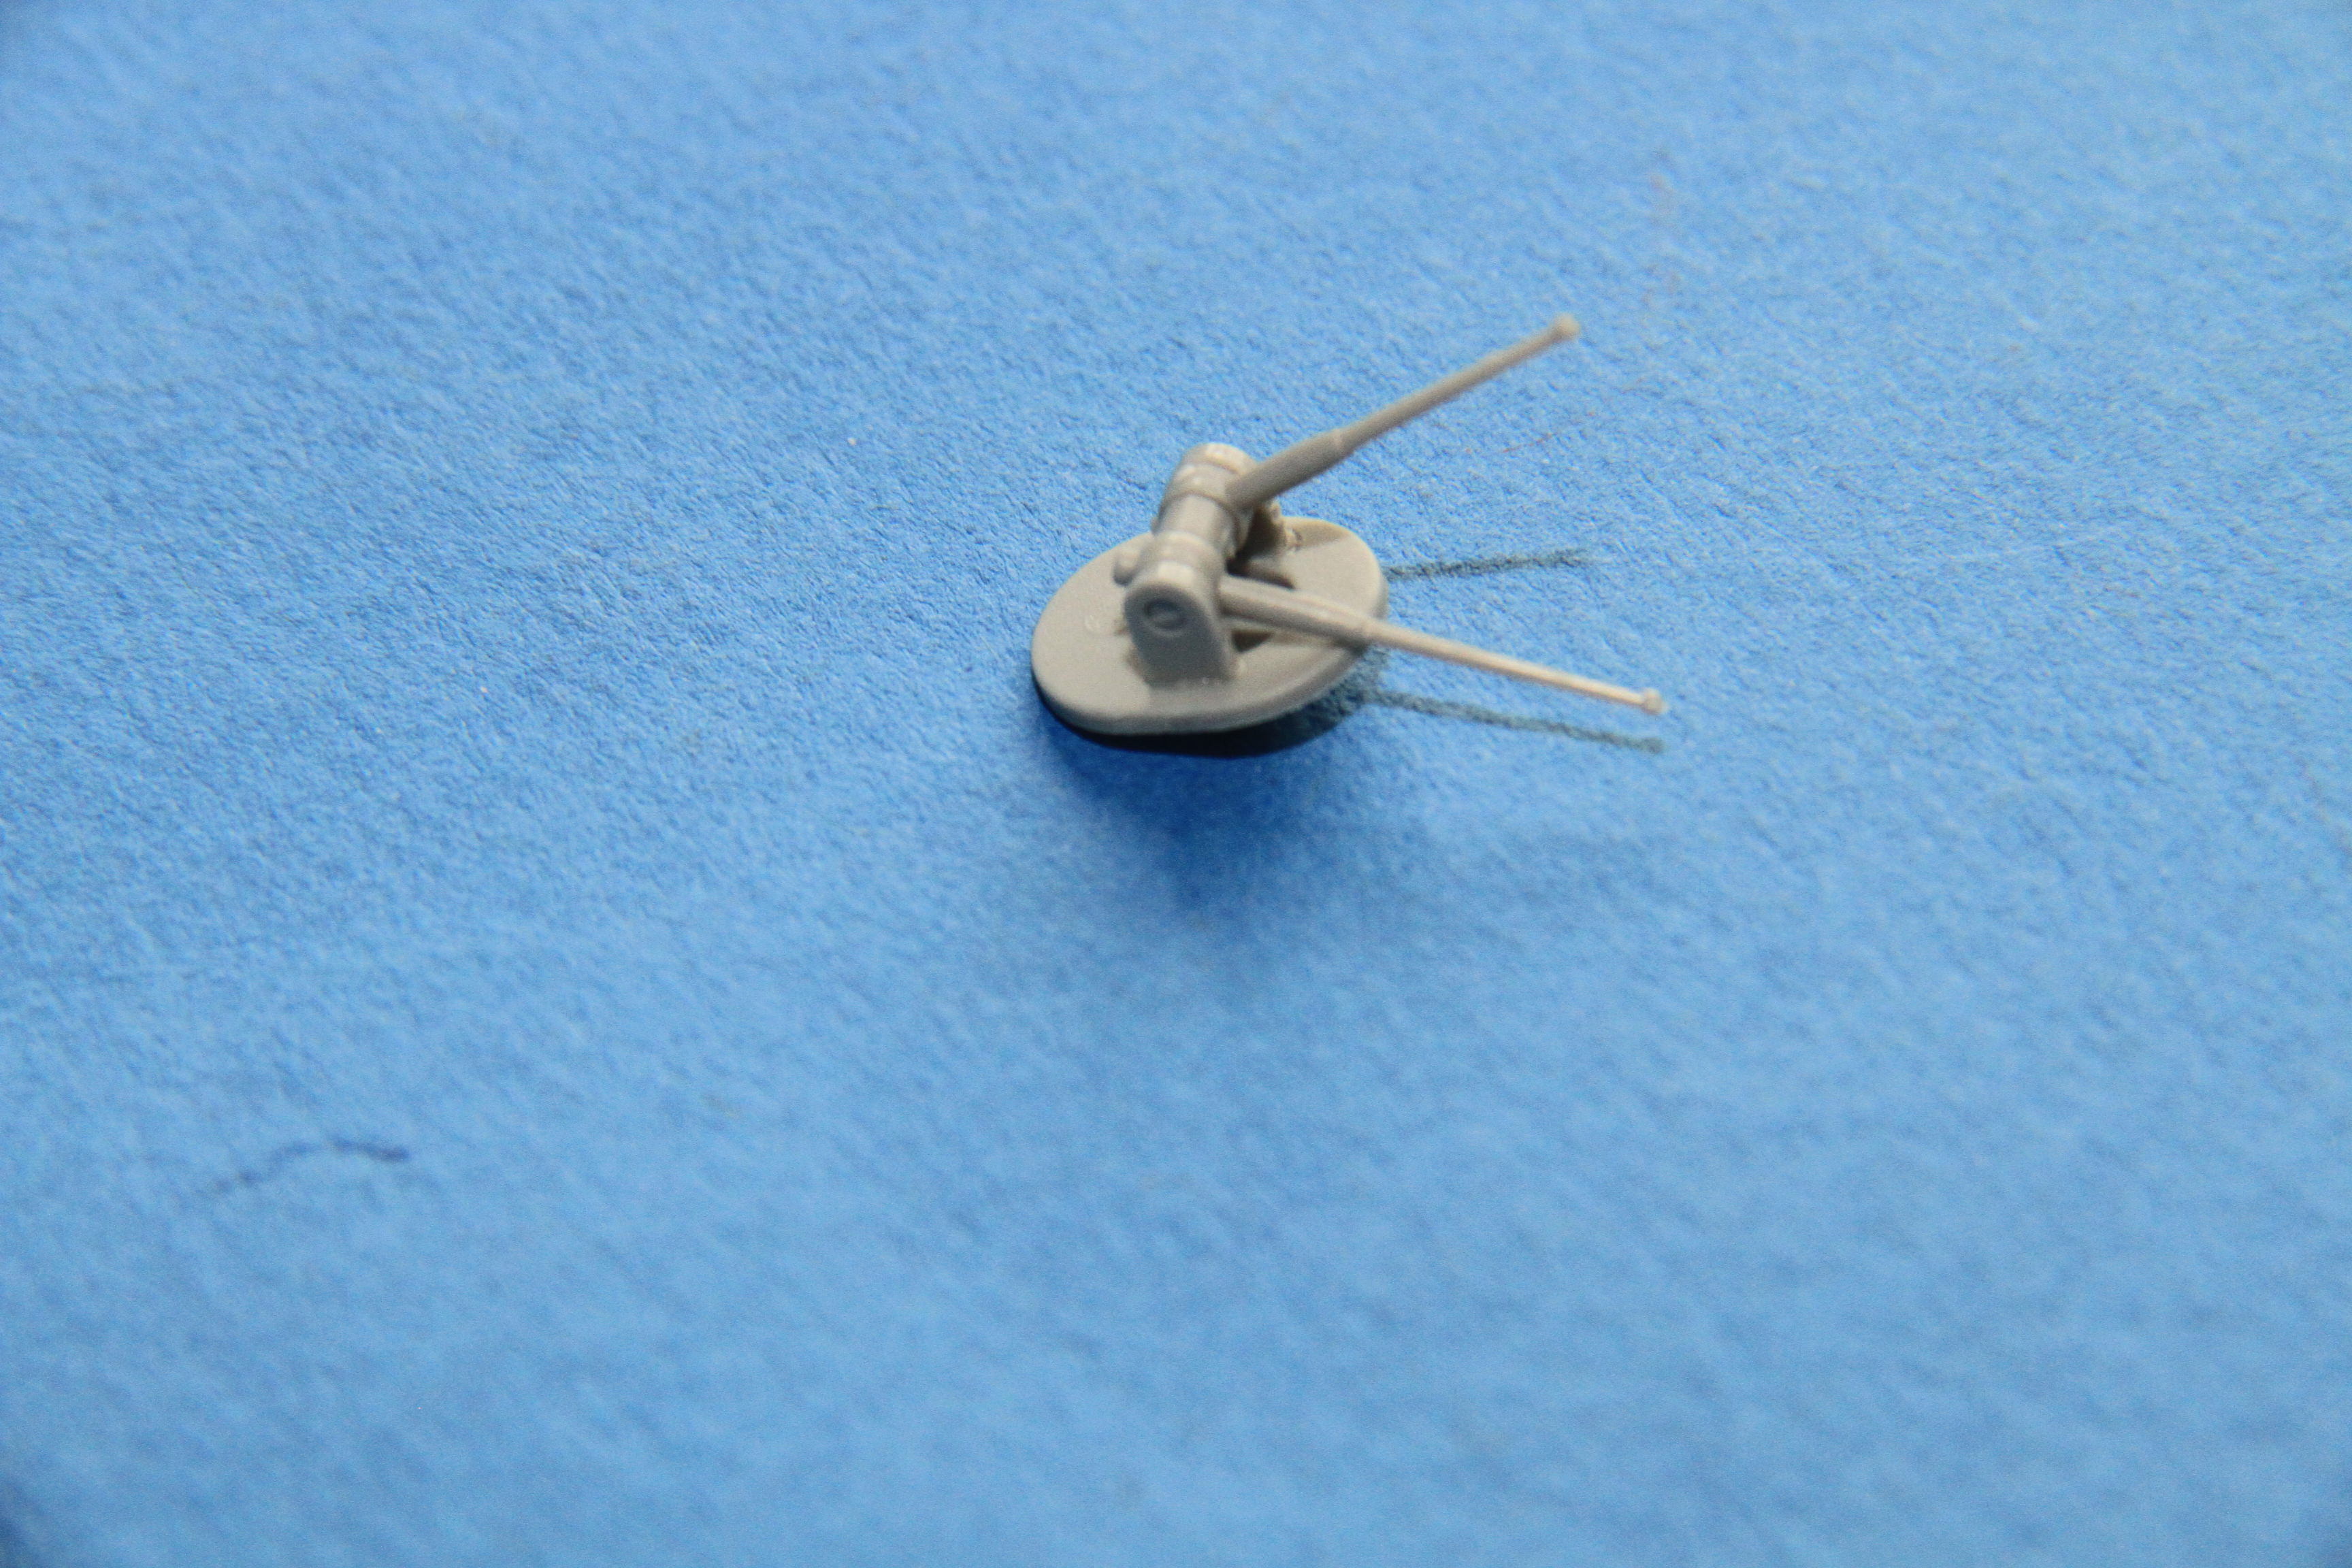
barrels removed, and drilled out to take the brass replacements.

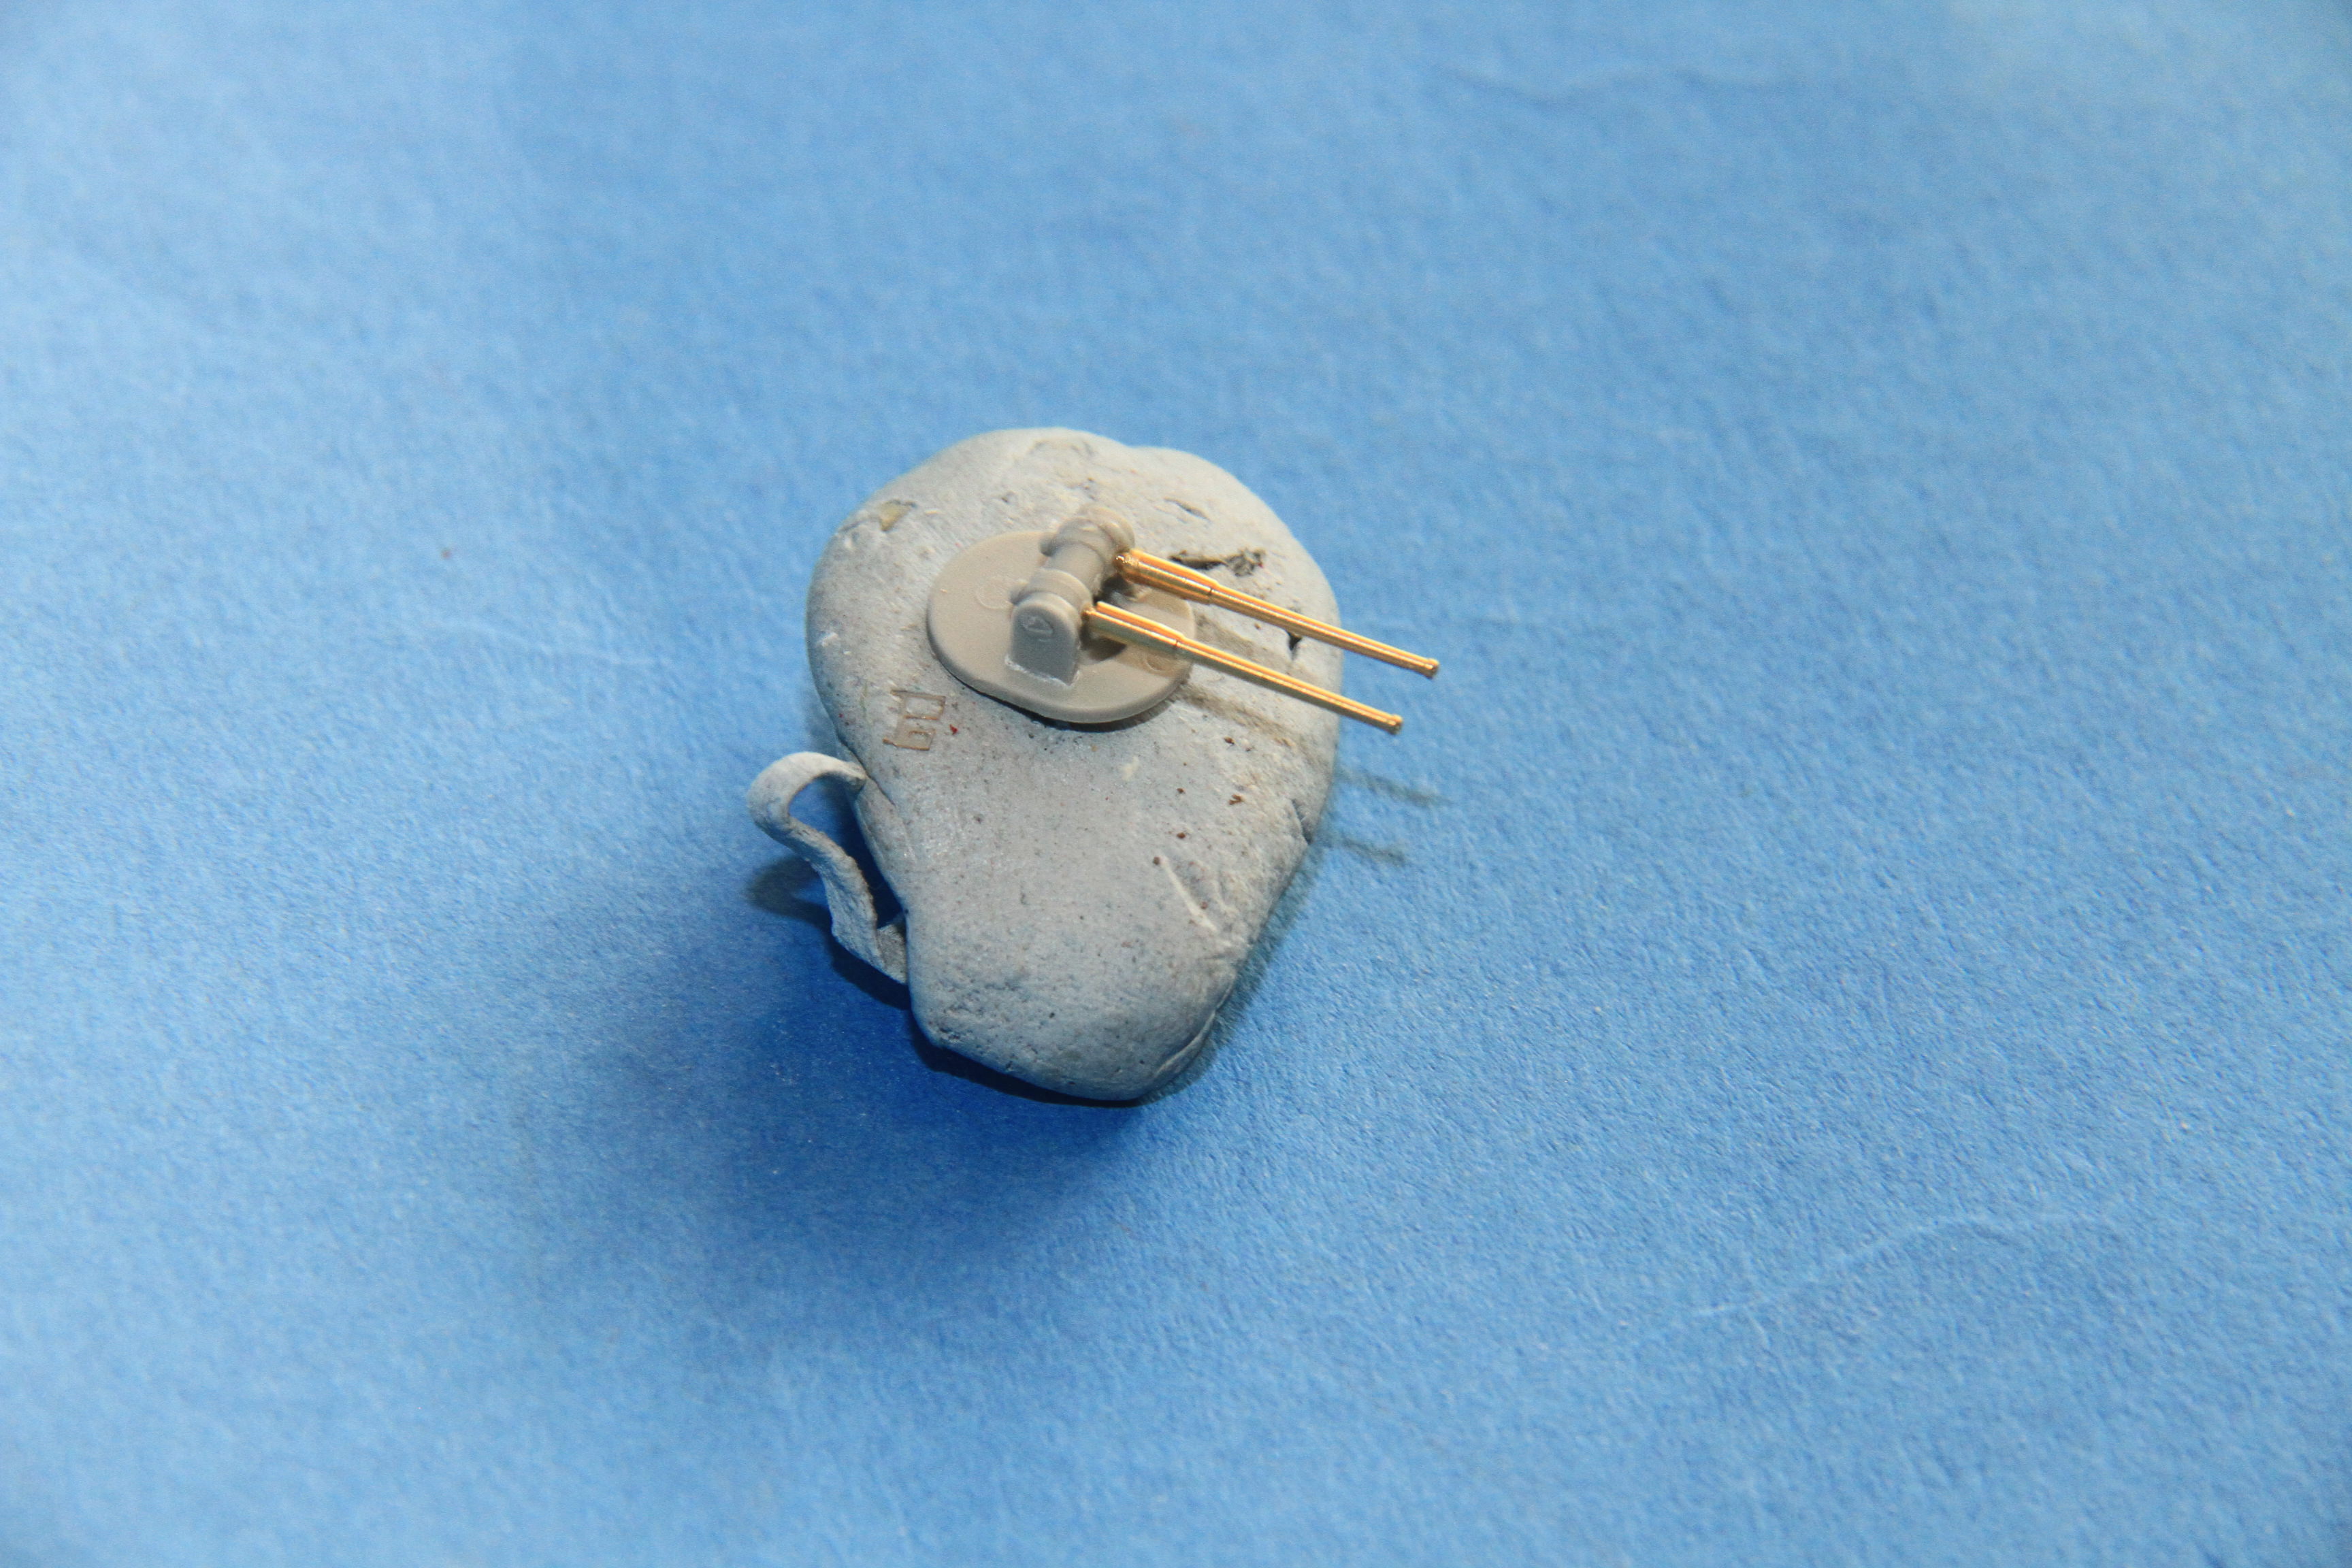
Brass barrels in place.
Two turrets assembled (well the gunhouse not only dry fitted on one) to compare the brass to the plastic.
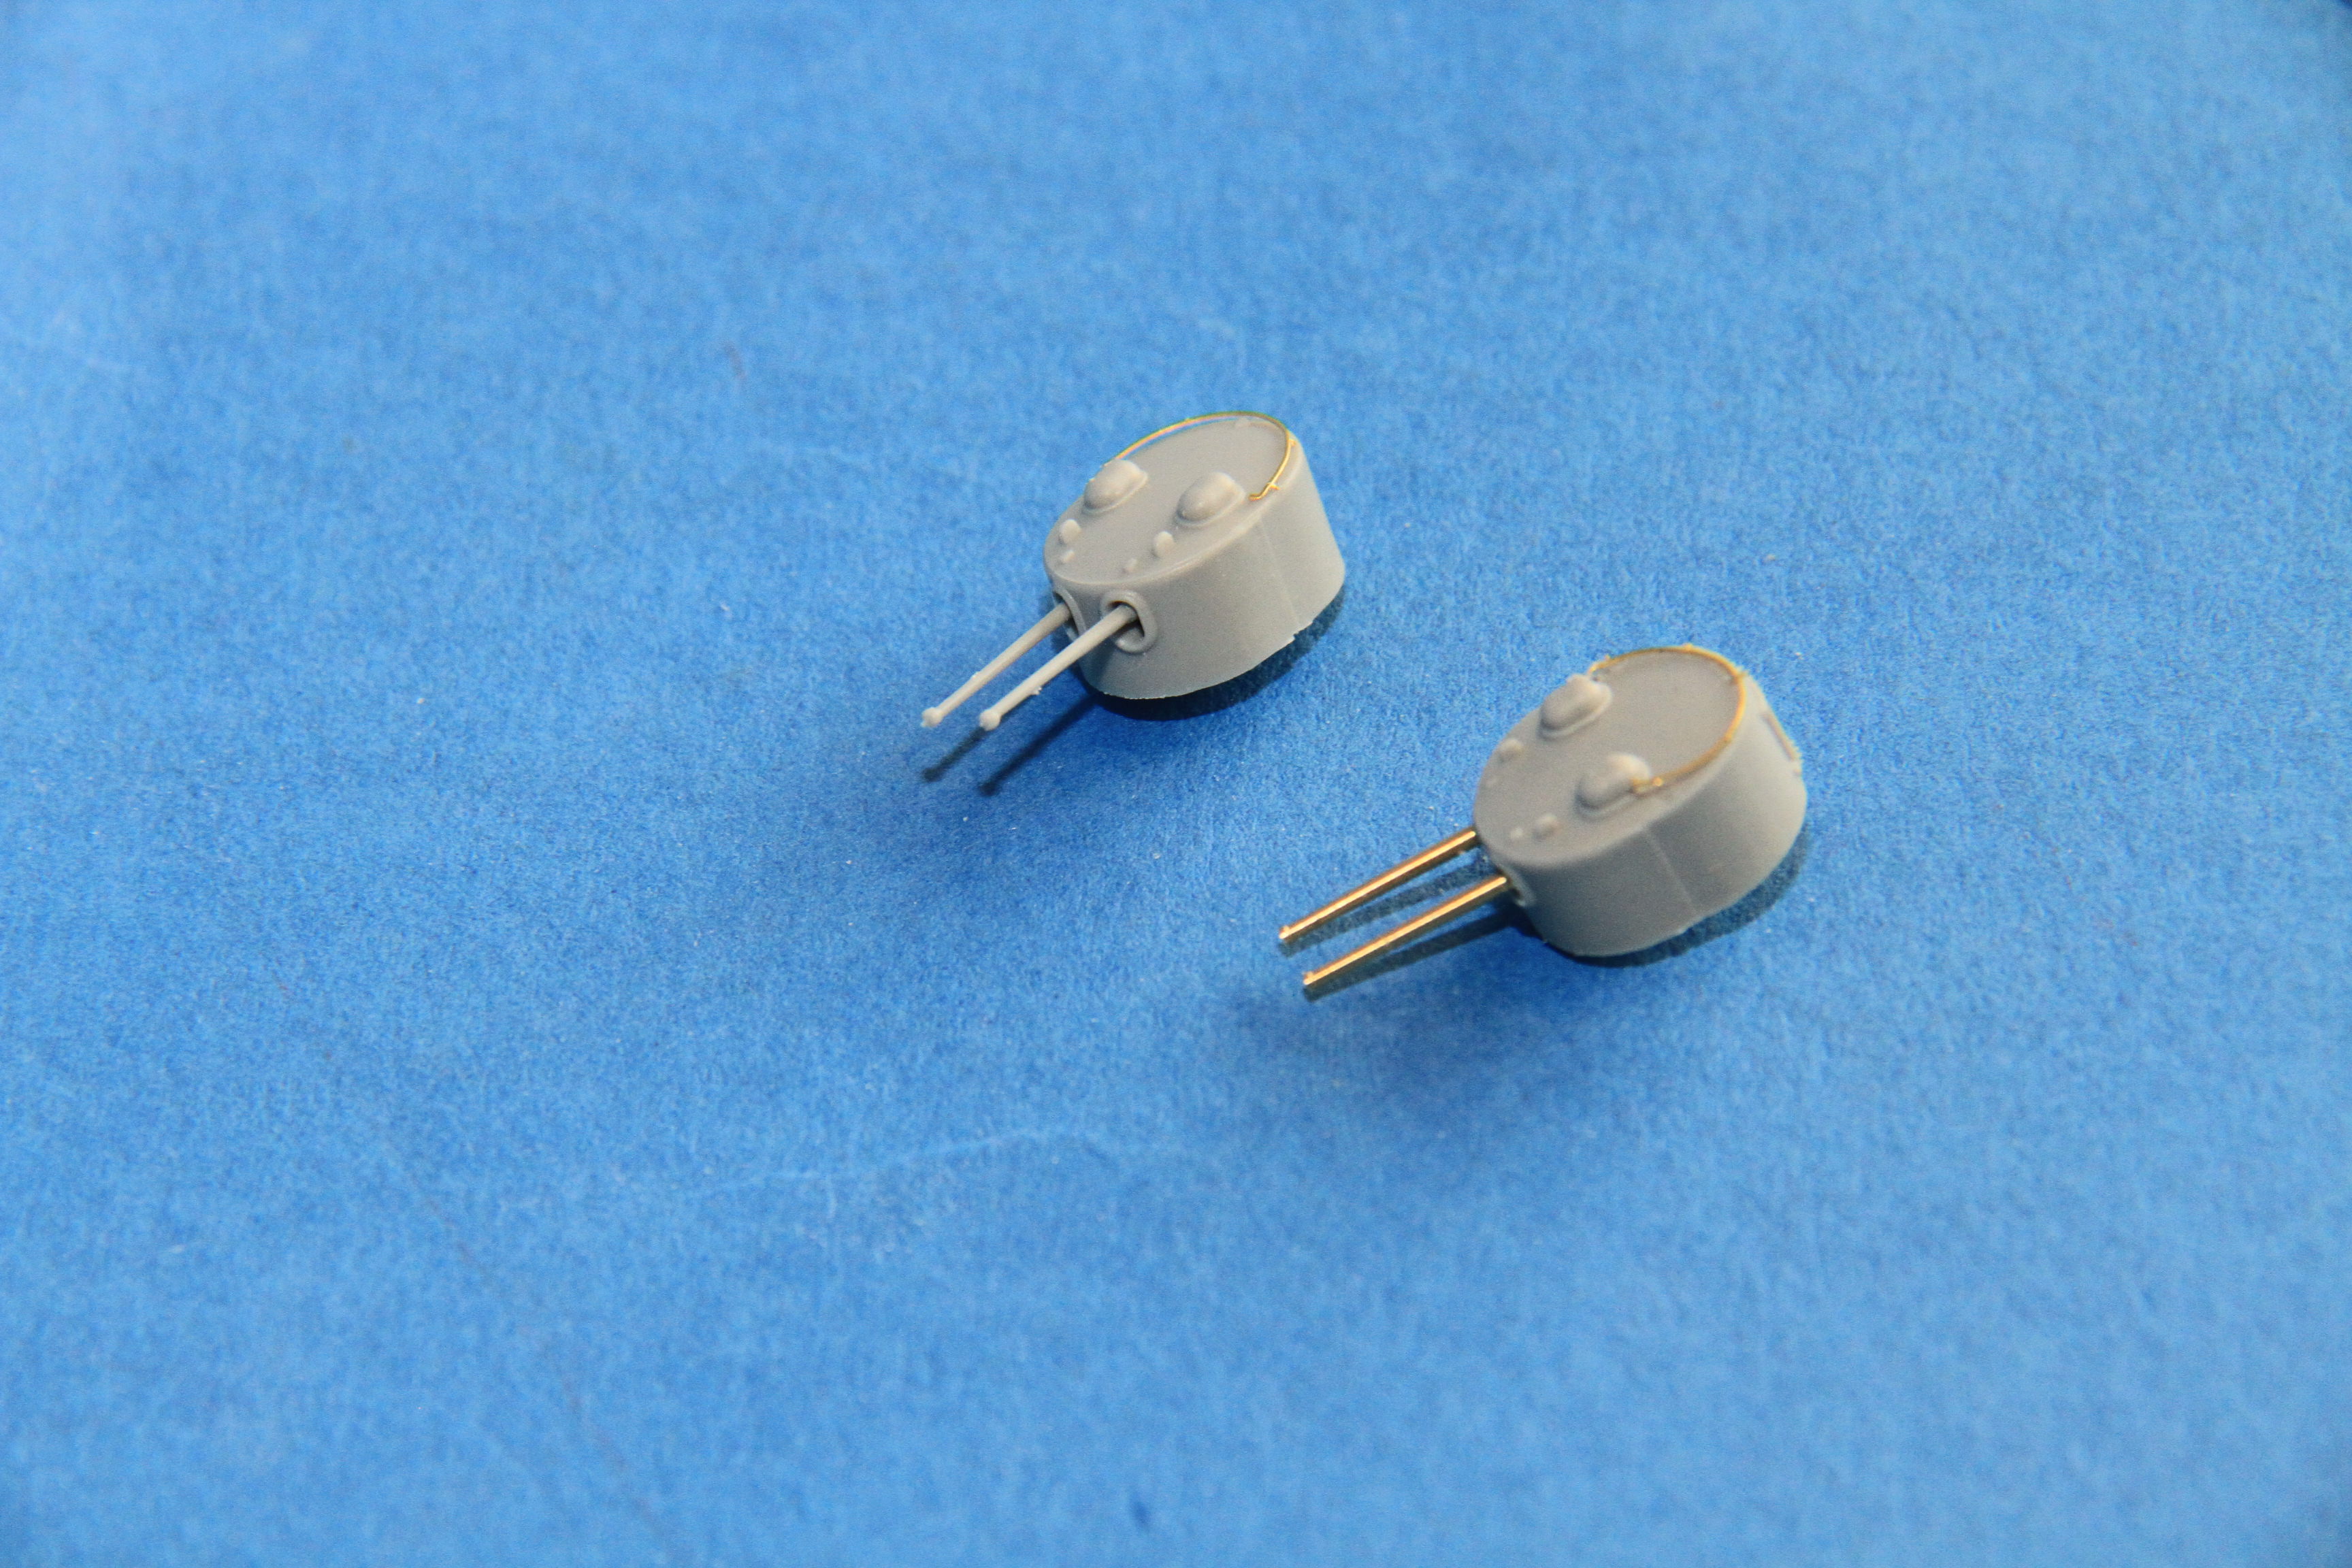
The plastic barrels to look a little skinny.
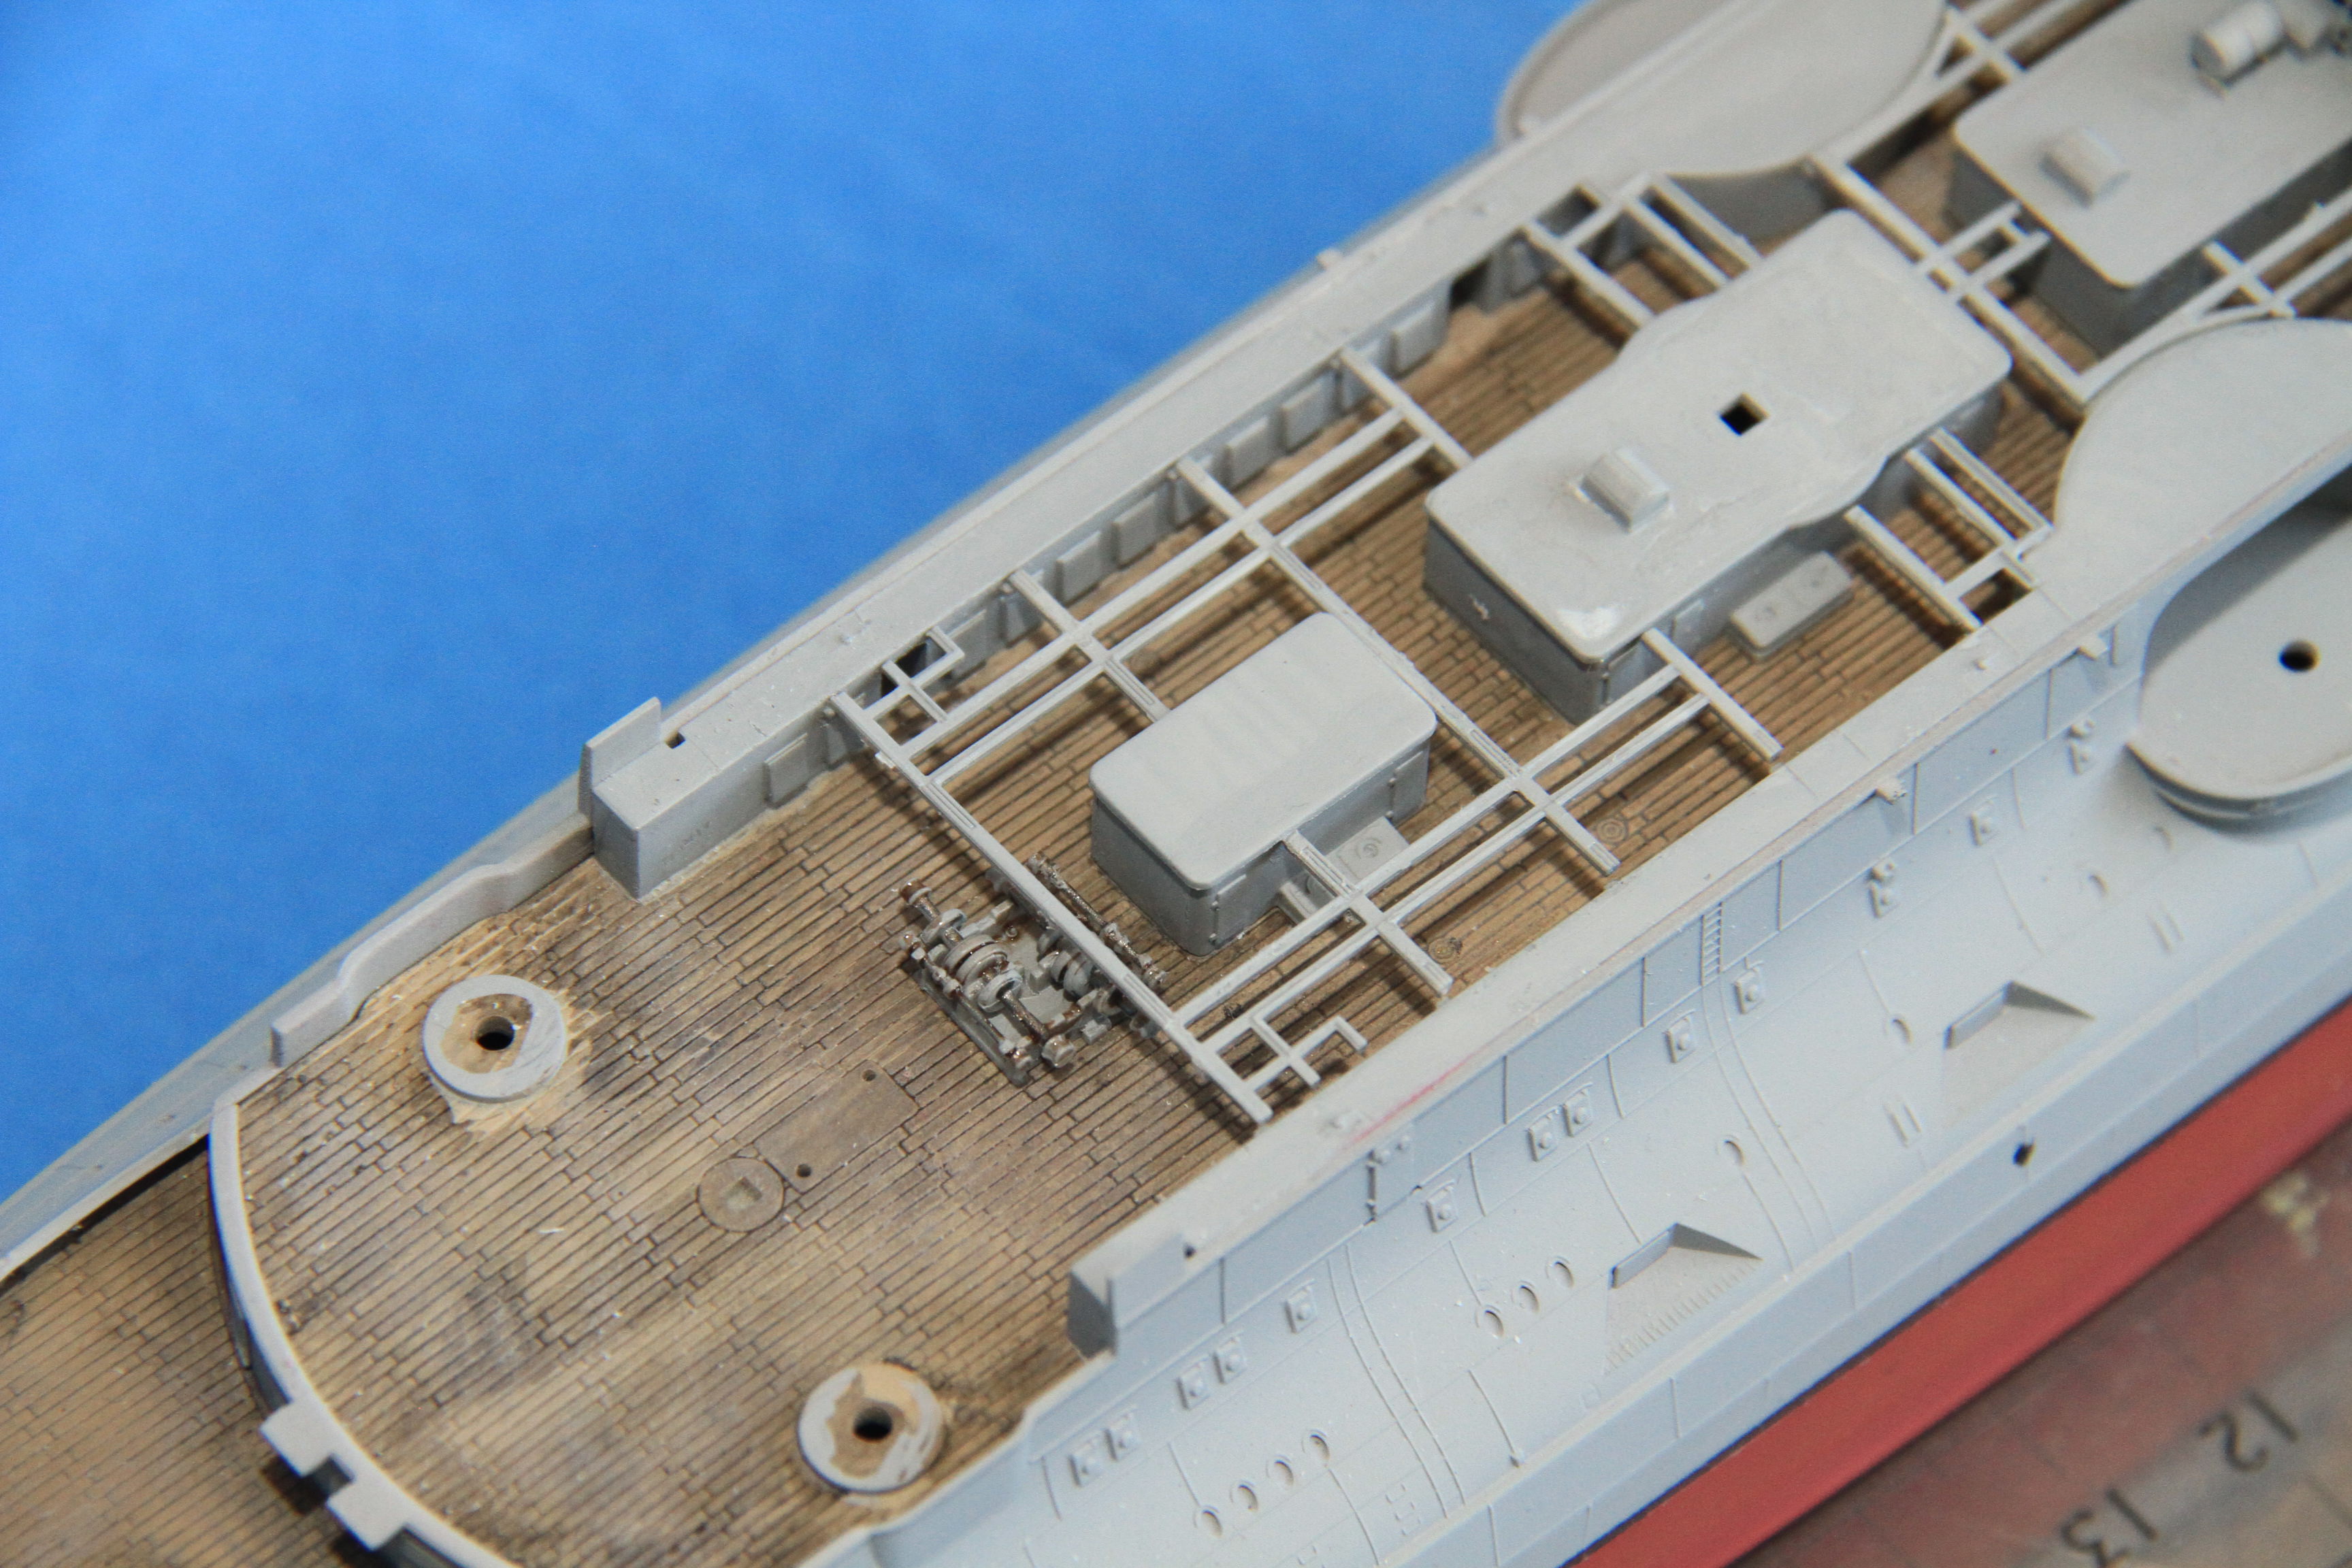
That winch panted and given an oily wash.
Fitted in place.
The deck houses fitted down.
Now as the remaining parts are test fitted in place watch the winch disappear.
and disappeared.
I had a suspected this would happen after all the effort building it!
More soon.
Cheers
Si
The deck houses along the upper deck ready for a coat of paint.
The first of the secondary turrets under way, the kit barrels still in place.
barrels removed, and drilled out to take the brass replacements.
Brass barrels in place.
Two turrets assembled (well the gunhouse not only dry fitted on one) to compare the brass to the plastic.
The plastic barrels to look a little skinny.
That winch panted and given an oily wash.
Fitted in place.
The deck houses fitted down.
Now as the remaining parts are test fitted in place watch the winch disappear.
and disappeared.
I had a suspected this would happen after all the effort building it!
More soon.
Cheers
Si

RussellE

#306

Joined: June 27, 2010
KitMaker: 3,959 posts
Model Shipwrights: 2,777 posts

Posted: Monday, June 18, 2018 - 09:30 AM UTC
Amazing how stuff can just disappear after so much effort on battlewagons init Si?
I've seen so many Yamato/Musashi builds falter and fall cos the builder got lost in details in the stern hangar deck and the kits abandoned due to apparent lack of progress!
But,that's not what happened here! In fact things are looking great and progress is rapid as always! I am looking forward to building Lord Nelson after seeing your build here!
BTW, I see you've gone and chopped off the plastic barrels and replaced with brass! I'm still too "chickenlicken" to attempt that on the KGV and have been finding all sorts of other things to do instead-Although I may have a "plan"!
I've seen so many Yamato/Musashi builds falter and fall cos the builder got lost in details in the stern hangar deck and the kits abandoned due to apparent lack of progress!
But,that's not what happened here!
In fact things are looking great and progress is rapid as always! I am looking forward to building Lord Nelson after seeing your build here! BTW, I see you've gone and chopped off the plastic barrels and replaced with brass! I'm still too "chickenlicken" to attempt that on the KGV and have been finding all sorts of other things to do instead-Although I may have a "plan"!


GazzaS
#424
Joined: April 23, 2015
KitMaker: 4,648 posts
Model Shipwrights: 249 posts

Posted: Monday, June 18, 2018 - 09:52 AM UTC
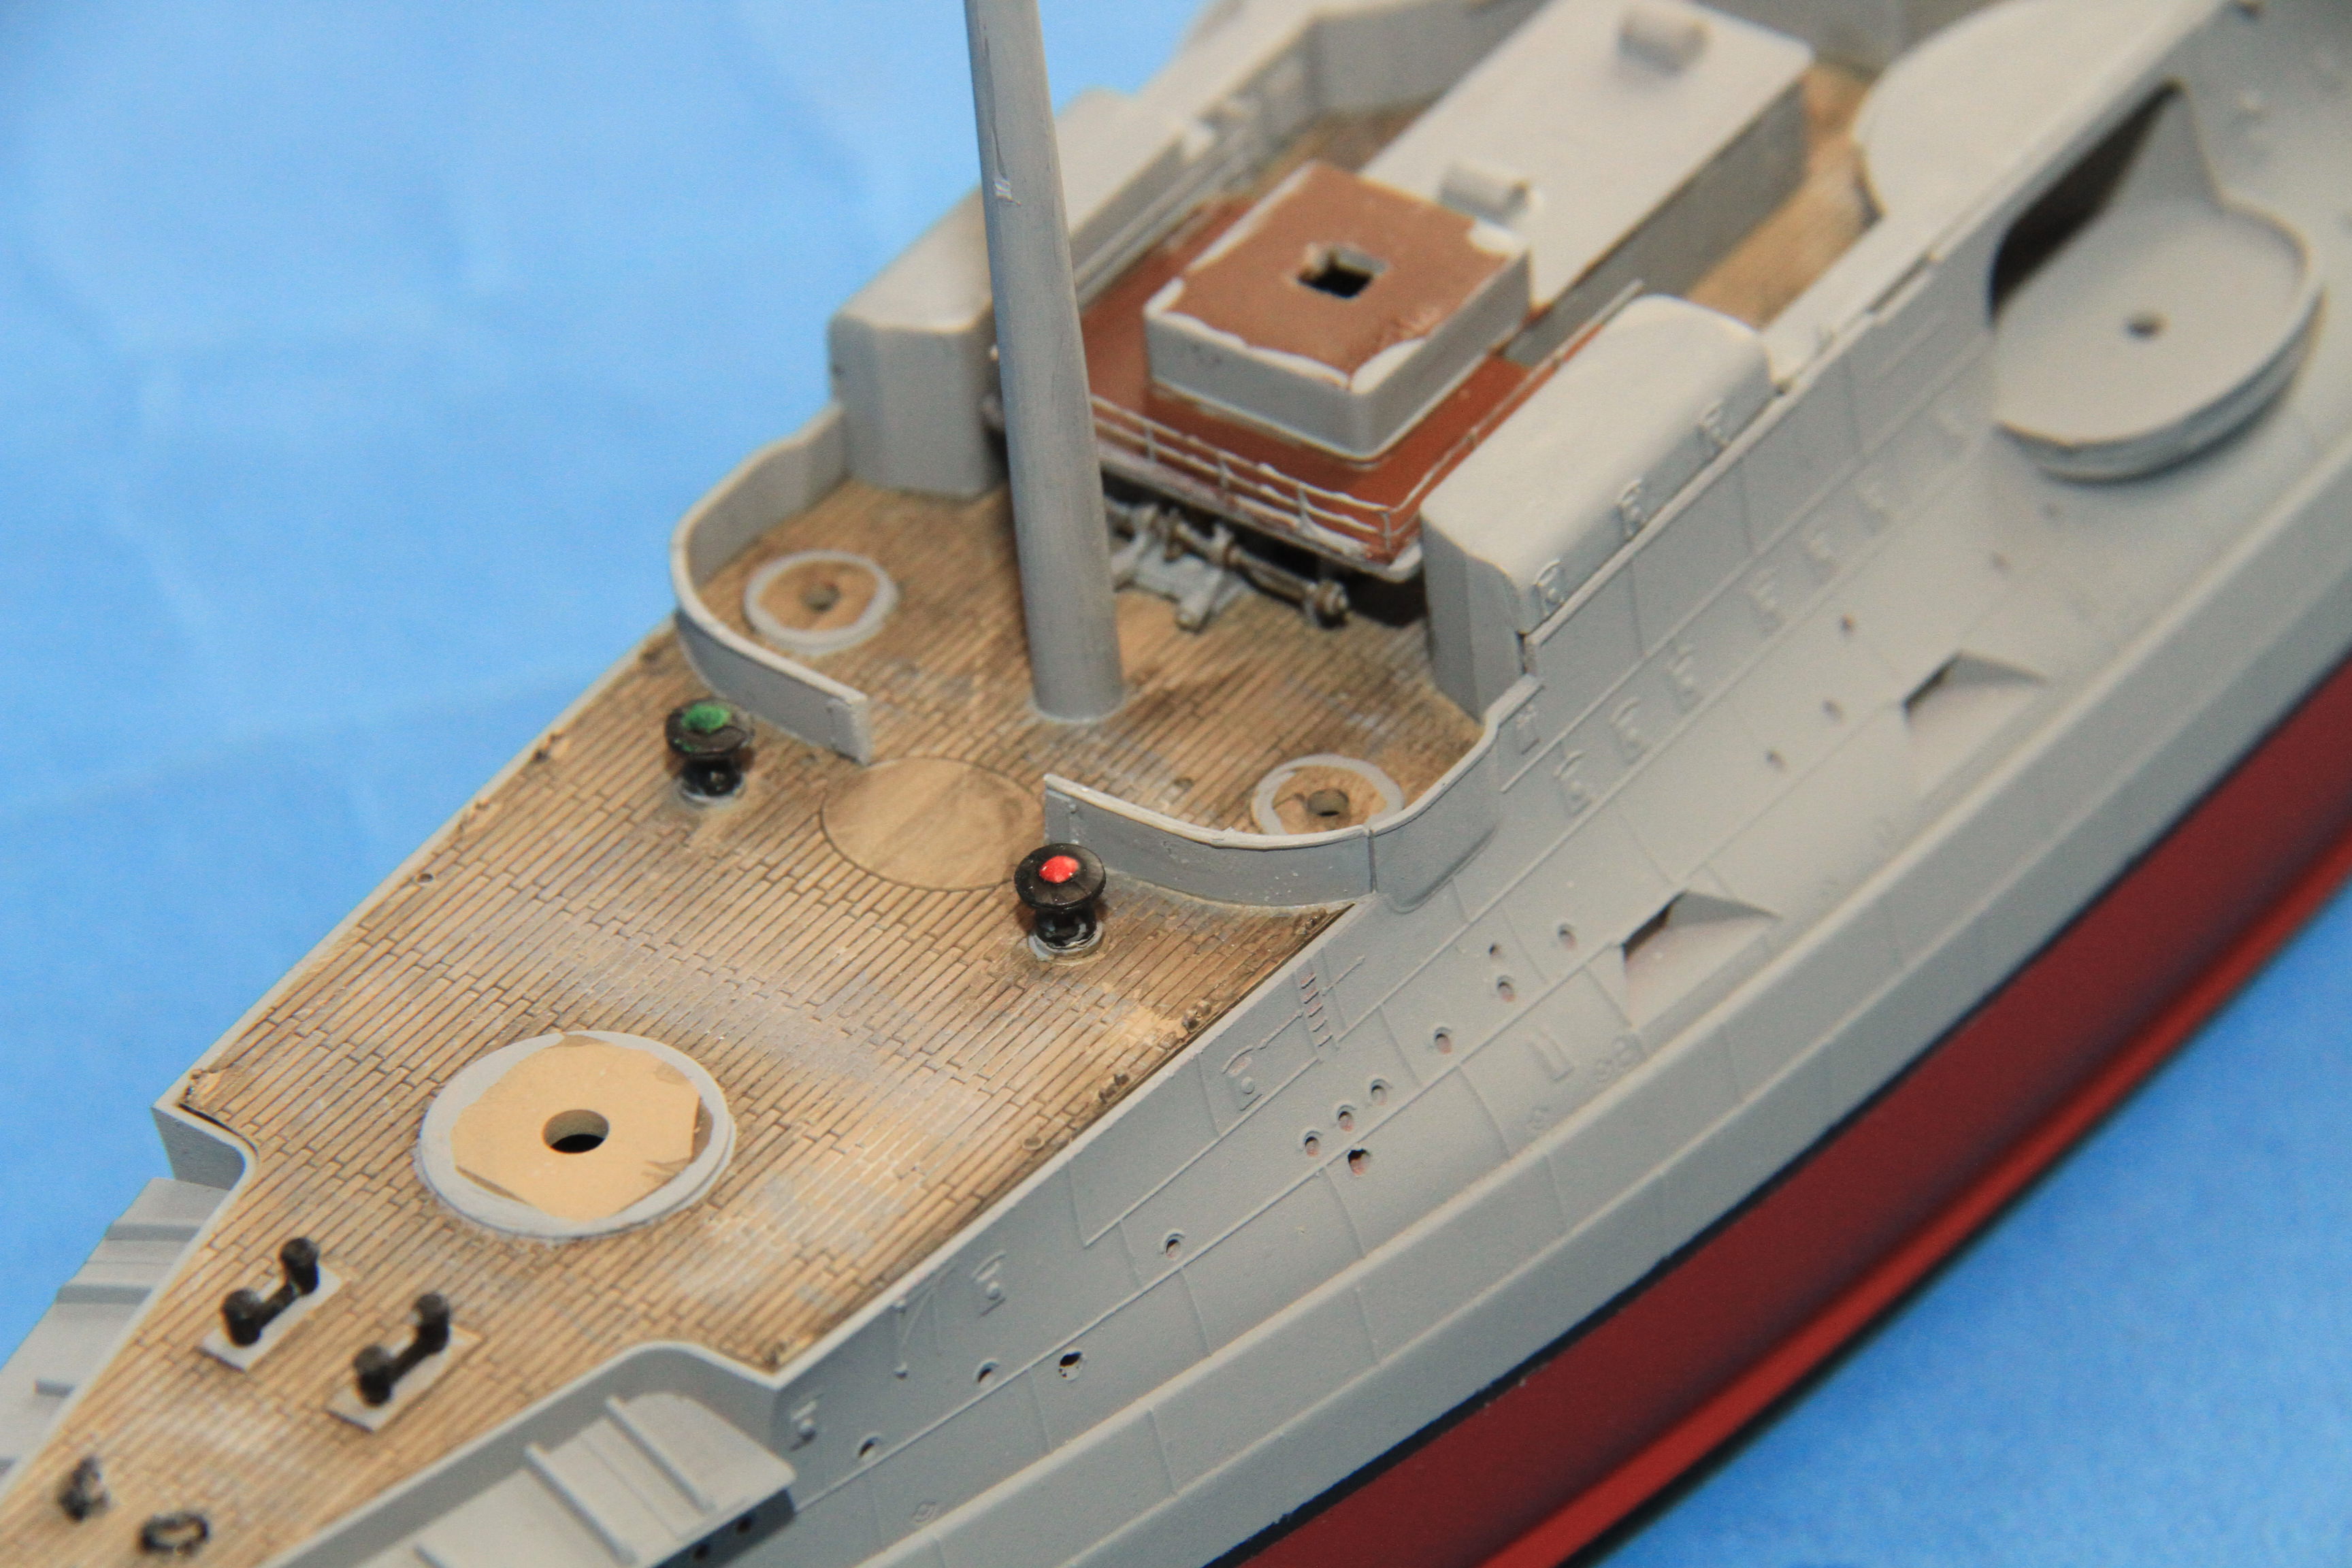
Love the look of the decking! Nice weathered appearance.
Gaz
Gaz
RedDuster
Joined: March 01, 2010
KitMaker: 7,078 posts
Model Shipwrights: 6,649 posts
Posted: Tuesday, June 19, 2018 - 07:35 AM UTC
Quoted Text
Amazing how stuff can just disappear after so much effort on battlewagons init Si?
I've seen so many Yamato/Musashi builds falter and fall cos the builder got lost in details in the stern hangar deck and the kits abandoned due to apparent lack of progress!
But,that's not what happened here!
BTW, I see you've gone and chopped off the plastic barrels and replaced with brass! I'm still too "chickenlicken" to attempt that on the KGV and have been finding all sorts of other things to do instead-Although I may have a "plan"!
Hi Russ,
Thanks for looking in mate, the winch may have disappeared, but I know it is there.
The Lord Nelson is an excellent kit, you will enjoy it, of that I am sure. I also have the Agamemnon in my stash, which I am intending to build in 1915 fit, Dardanelles campaign.
These aren't so bad fitting the brass barrels, all twin turrets. I do prefer when the brass mounts are provided.
Good luck with the plan mate.
Cheers
Si
RedDuster
Joined: March 01, 2010
KitMaker: 7,078 posts
Model Shipwrights: 6,649 posts
Posted: Tuesday, June 19, 2018 - 07:38 AM UTC
Quoted Text
Love the look of the decking! Nice weathered appearance.
Gaz
Thanks Gary,
I am quite pleased with it, a three step process, spray deck tan, wash with dark grey/black, and two dry brushes pale tan & light grey rubbed in with a bit if paper towel and the MK1 thumb.
Cheers
Si

Cosimodo
#335
Joined: September 03, 2013
KitMaker: 1,808 posts
Model Shipwrights: 871 posts

Posted: Tuesday, June 19, 2018 - 12:03 PM UTC
Good progress. I do like the shape of WW1 battleships and this one is particularly attractive.
cheers
Michael
cheers
Michael
RedDuster
Joined: March 01, 2010
KitMaker: 7,078 posts
Model Shipwrights: 6,649 posts
Posted: Wednesday, June 20, 2018 - 07:27 AM UTC
Quoted Text
Good progress. I do like the shape of WW1 battleships and this one is particularly attractive.
cheers
Michael
Thanks Michael,
I have to agree, there is a certain amount of form over function!
Cheers
Si

PorkChopper

Joined: November 16, 2009
KitMaker: 34 posts
Model Shipwrights: 7 posts
Posted: Thursday, June 28, 2018 - 02:44 PM UTC
Quoted Text
I know what you mean about doing the simple while dealing with more complex or repetitive builds. I try now to build two different types to swap between.
I've adopted this strategy. I'm not going to live long enough to build contest-worthy versions of everything in my stash. My approach is to just get most of them built OOB and on the shelf while setting aside some favorites for a more in-depth and detailed build. At the end of the day, the only "people" who are going to inspect them are my girlfriend, my Dachshund, and my African Grey parrot. None of the three will appreciate any heroism I go to in detailing.
RedDuster
Joined: March 01, 2010
KitMaker: 7,078 posts
Model Shipwrights: 6,649 posts
Posted: Friday, June 29, 2018 - 05:37 AM UTC
Quoted Text
Quoted Text
I know what you mean about doing the simple while dealing with more complex or repetitive builds. I try now to build two different types to swap between.
I've adopted this strategy. I'm not going to live long enough to build contest-worthy versions of everything in my stash. My approach is to just get most of them built OOB and on the shelf while setting aside some favorites for a more in-depth and detailed build. At the end of the day, the only "people" who are going to inspect them are my girlfriend, my Dachshund, and my African Grey parrot. None of the three will appreciate any heroism I go to in detailing.
Hi PorkChopper,
I do know what you mean, I won't say anything I build is contest worthy, a few do come out at Model shows, but on the London Modellers club stand, very really in a competition. I do like balance the detail jobs with the OOB and simple builds, so at least I finish something from time to time.
Thanks for looking in.
Cheers
Si

JJ1973
#345

Joined: August 22, 2011
KitMaker: 1,835 posts
Model Shipwrights: 1,832 posts
Posted: Sunday, July 01, 2018 - 06:03 AM UTC
Si,
nice work here, too! An OOB sometimes is a very nice break to all the PE work, and still a fine model, with some additions!
Cheers,
Jan
nice work here, too! An OOB sometimes is a very nice break to all the PE work, and still a fine model, with some additions!
Cheers,
Jan
RedDuster
Joined: March 01, 2010
KitMaker: 7,078 posts
Model Shipwrights: 6,649 posts
Posted: Tuesday, July 03, 2018 - 06:30 AM UTC
Quoted Text
Si,
nice work here, too! An OOB sometimes is a very nice break to all the PE work, and still a fine model, with some additions!
Cheers,
Jan
Thanks Jan,
Yes I do agree, I was beginning to feel a little overwhelmed by the Warspite and the Intrepid.
Need to find another different build to fill the empty slipway.
Cheers
Si
GazzaS
#424
Joined: April 23, 2015
KitMaker: 4,648 posts
Model Shipwrights: 249 posts
Posted: Tuesday, July 03, 2018 - 09:36 AM UTC
This build really makes me want to do a Borodino at Tsushima. These are without a doubt the most interesting looking of the pre-dreadnoughts though others may look more modern.
keep up the great work!
Gaz
keep up the great work!
Gaz
RedDuster
Joined: March 01, 2010
KitMaker: 7,078 posts
Model Shipwrights: 6,649 posts
Posted: Thursday, July 05, 2018 - 06:31 AM UTC
Quoted Text
This build really makes me want to do a Borodino at Tsushima. These are without a doubt the most interesting looking of the pre-dreadnoughts though others may look more modern.
keep up the great work!
Gaz
Hi Gaz,
They are interesting vessels, I am intending to build this one in 1904 fit too, quite a few changes and a colourful scheme.
There is the old Zvezda Borodino, White Ensign certainly did a good etched set for it, so did GMM and Master Model some barrels, It is not a bad kit, just need a little love.
Thanks for looking in.
Cheers
Si

joepanzer
Joined: January 21, 2004
KitMaker: 803 posts
Model Shipwrights: 19 posts

Posted: Tuesday, July 10, 2018 - 11:50 AM UTC
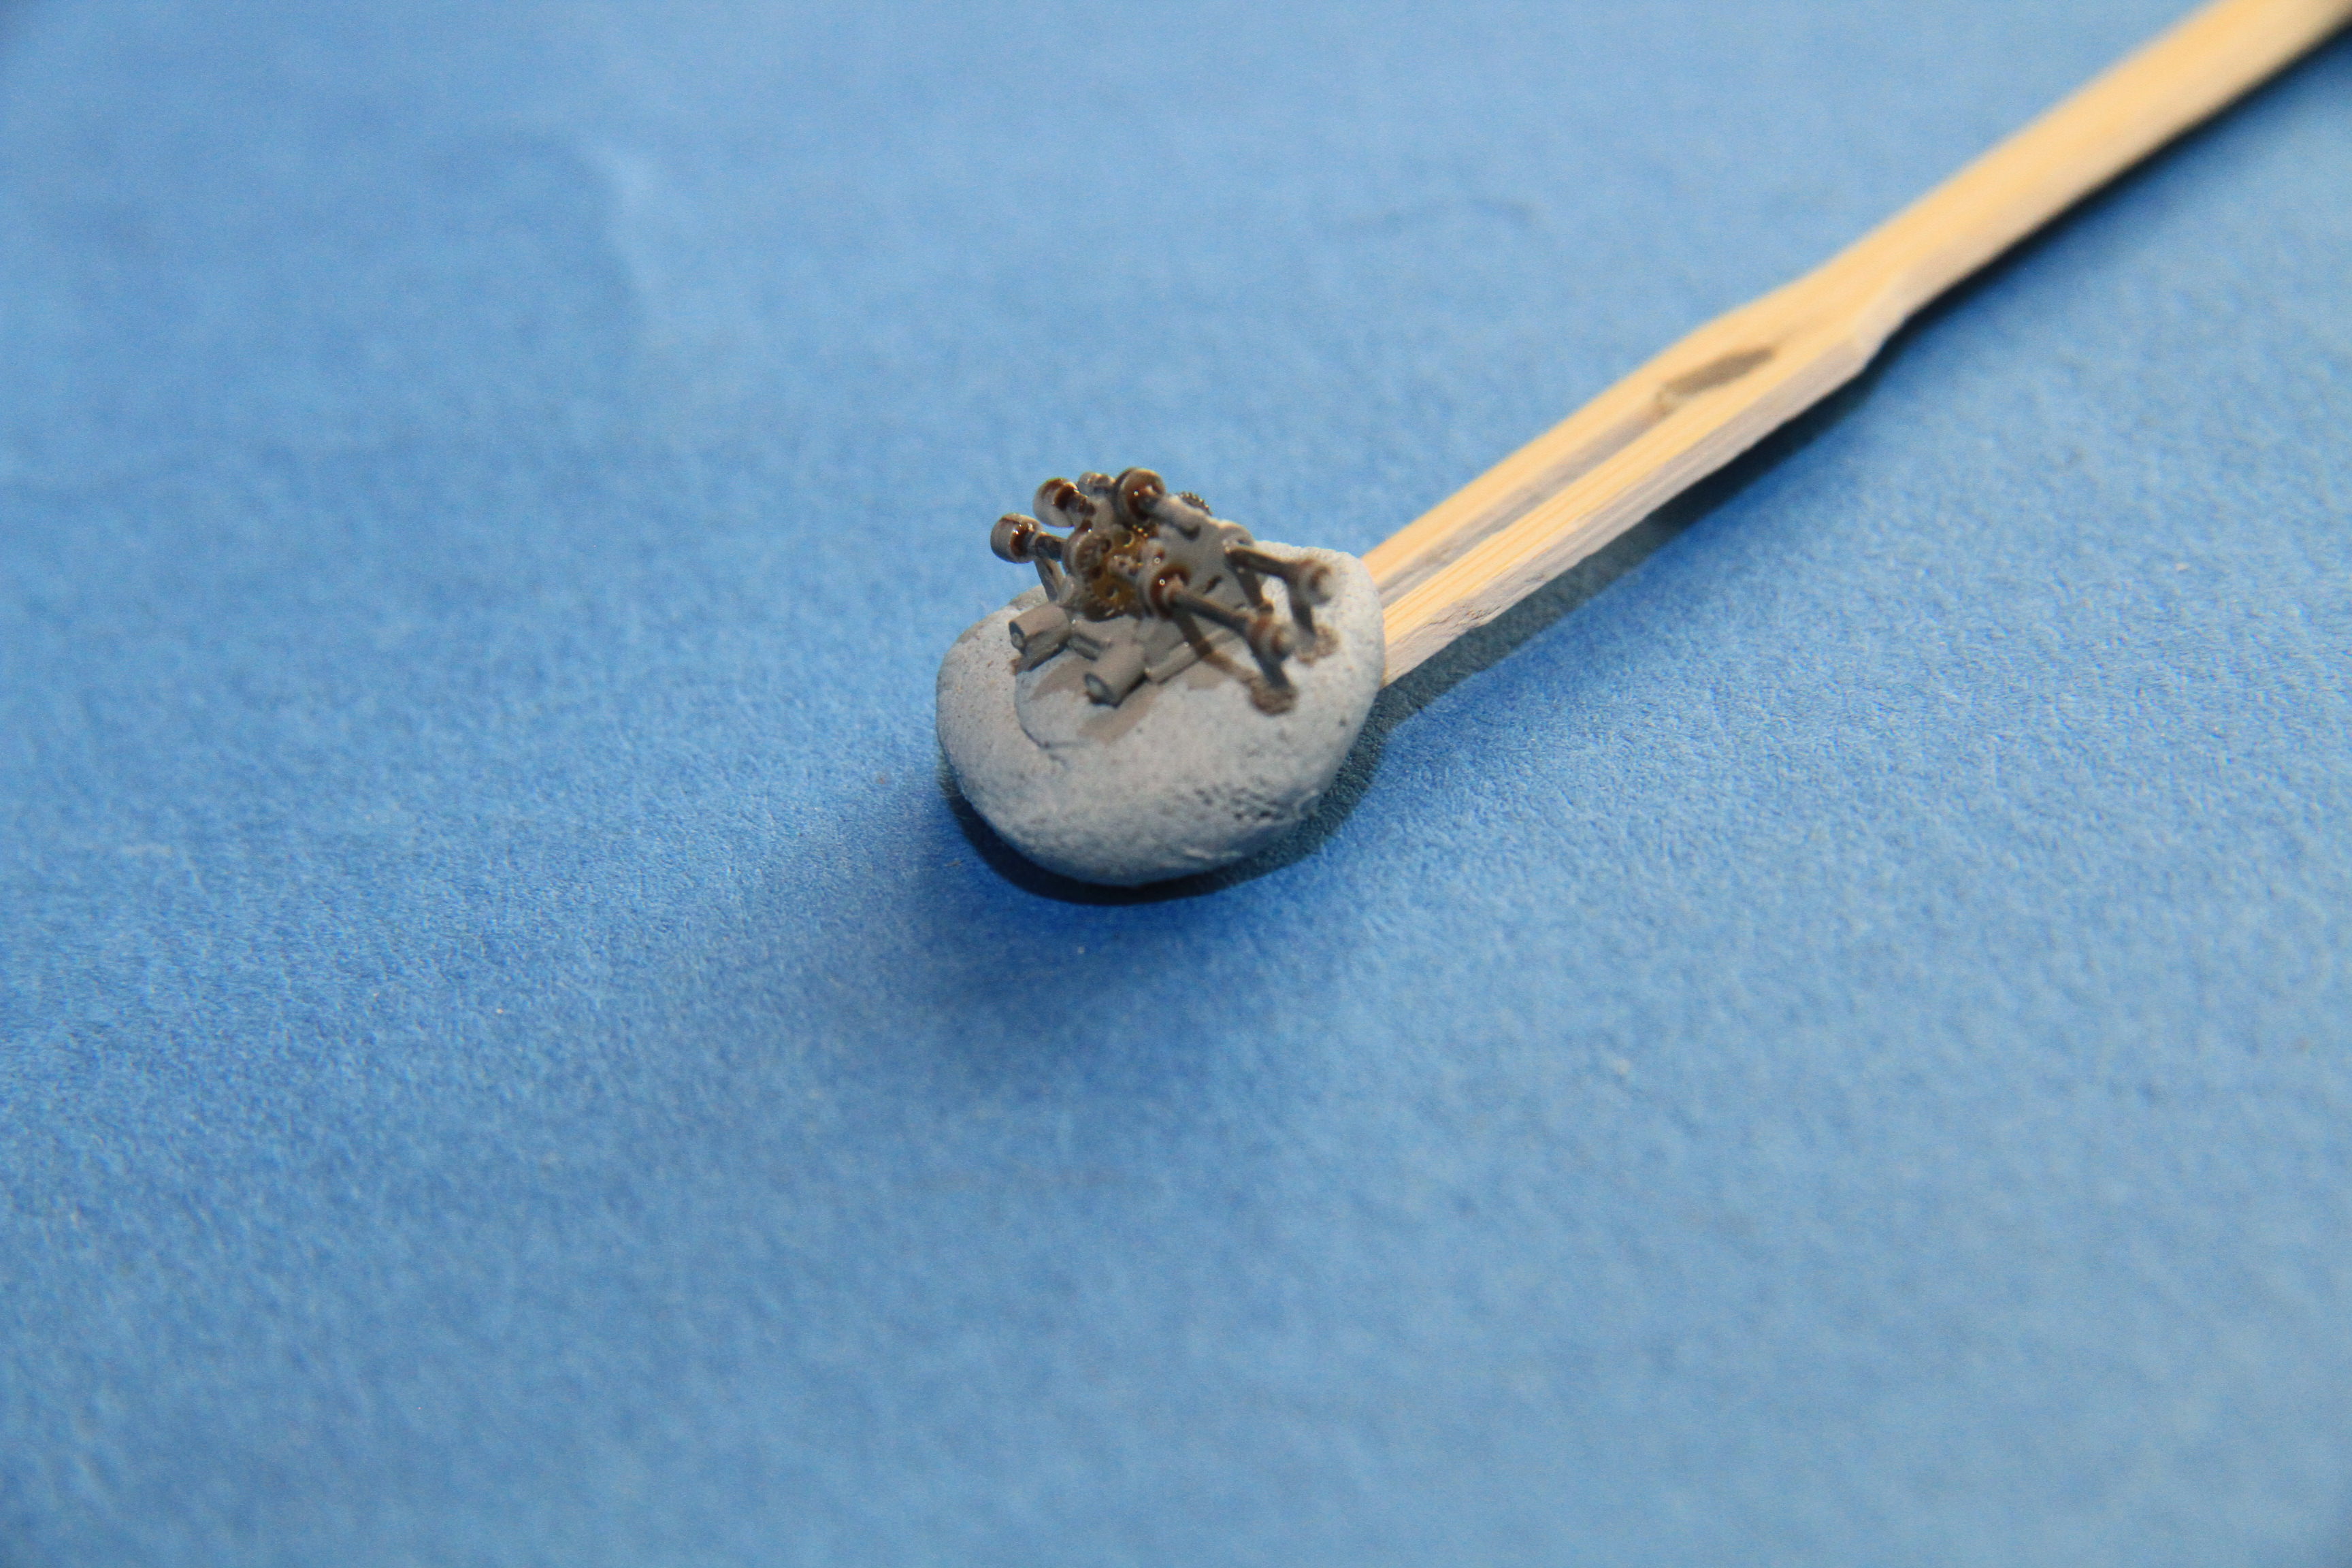
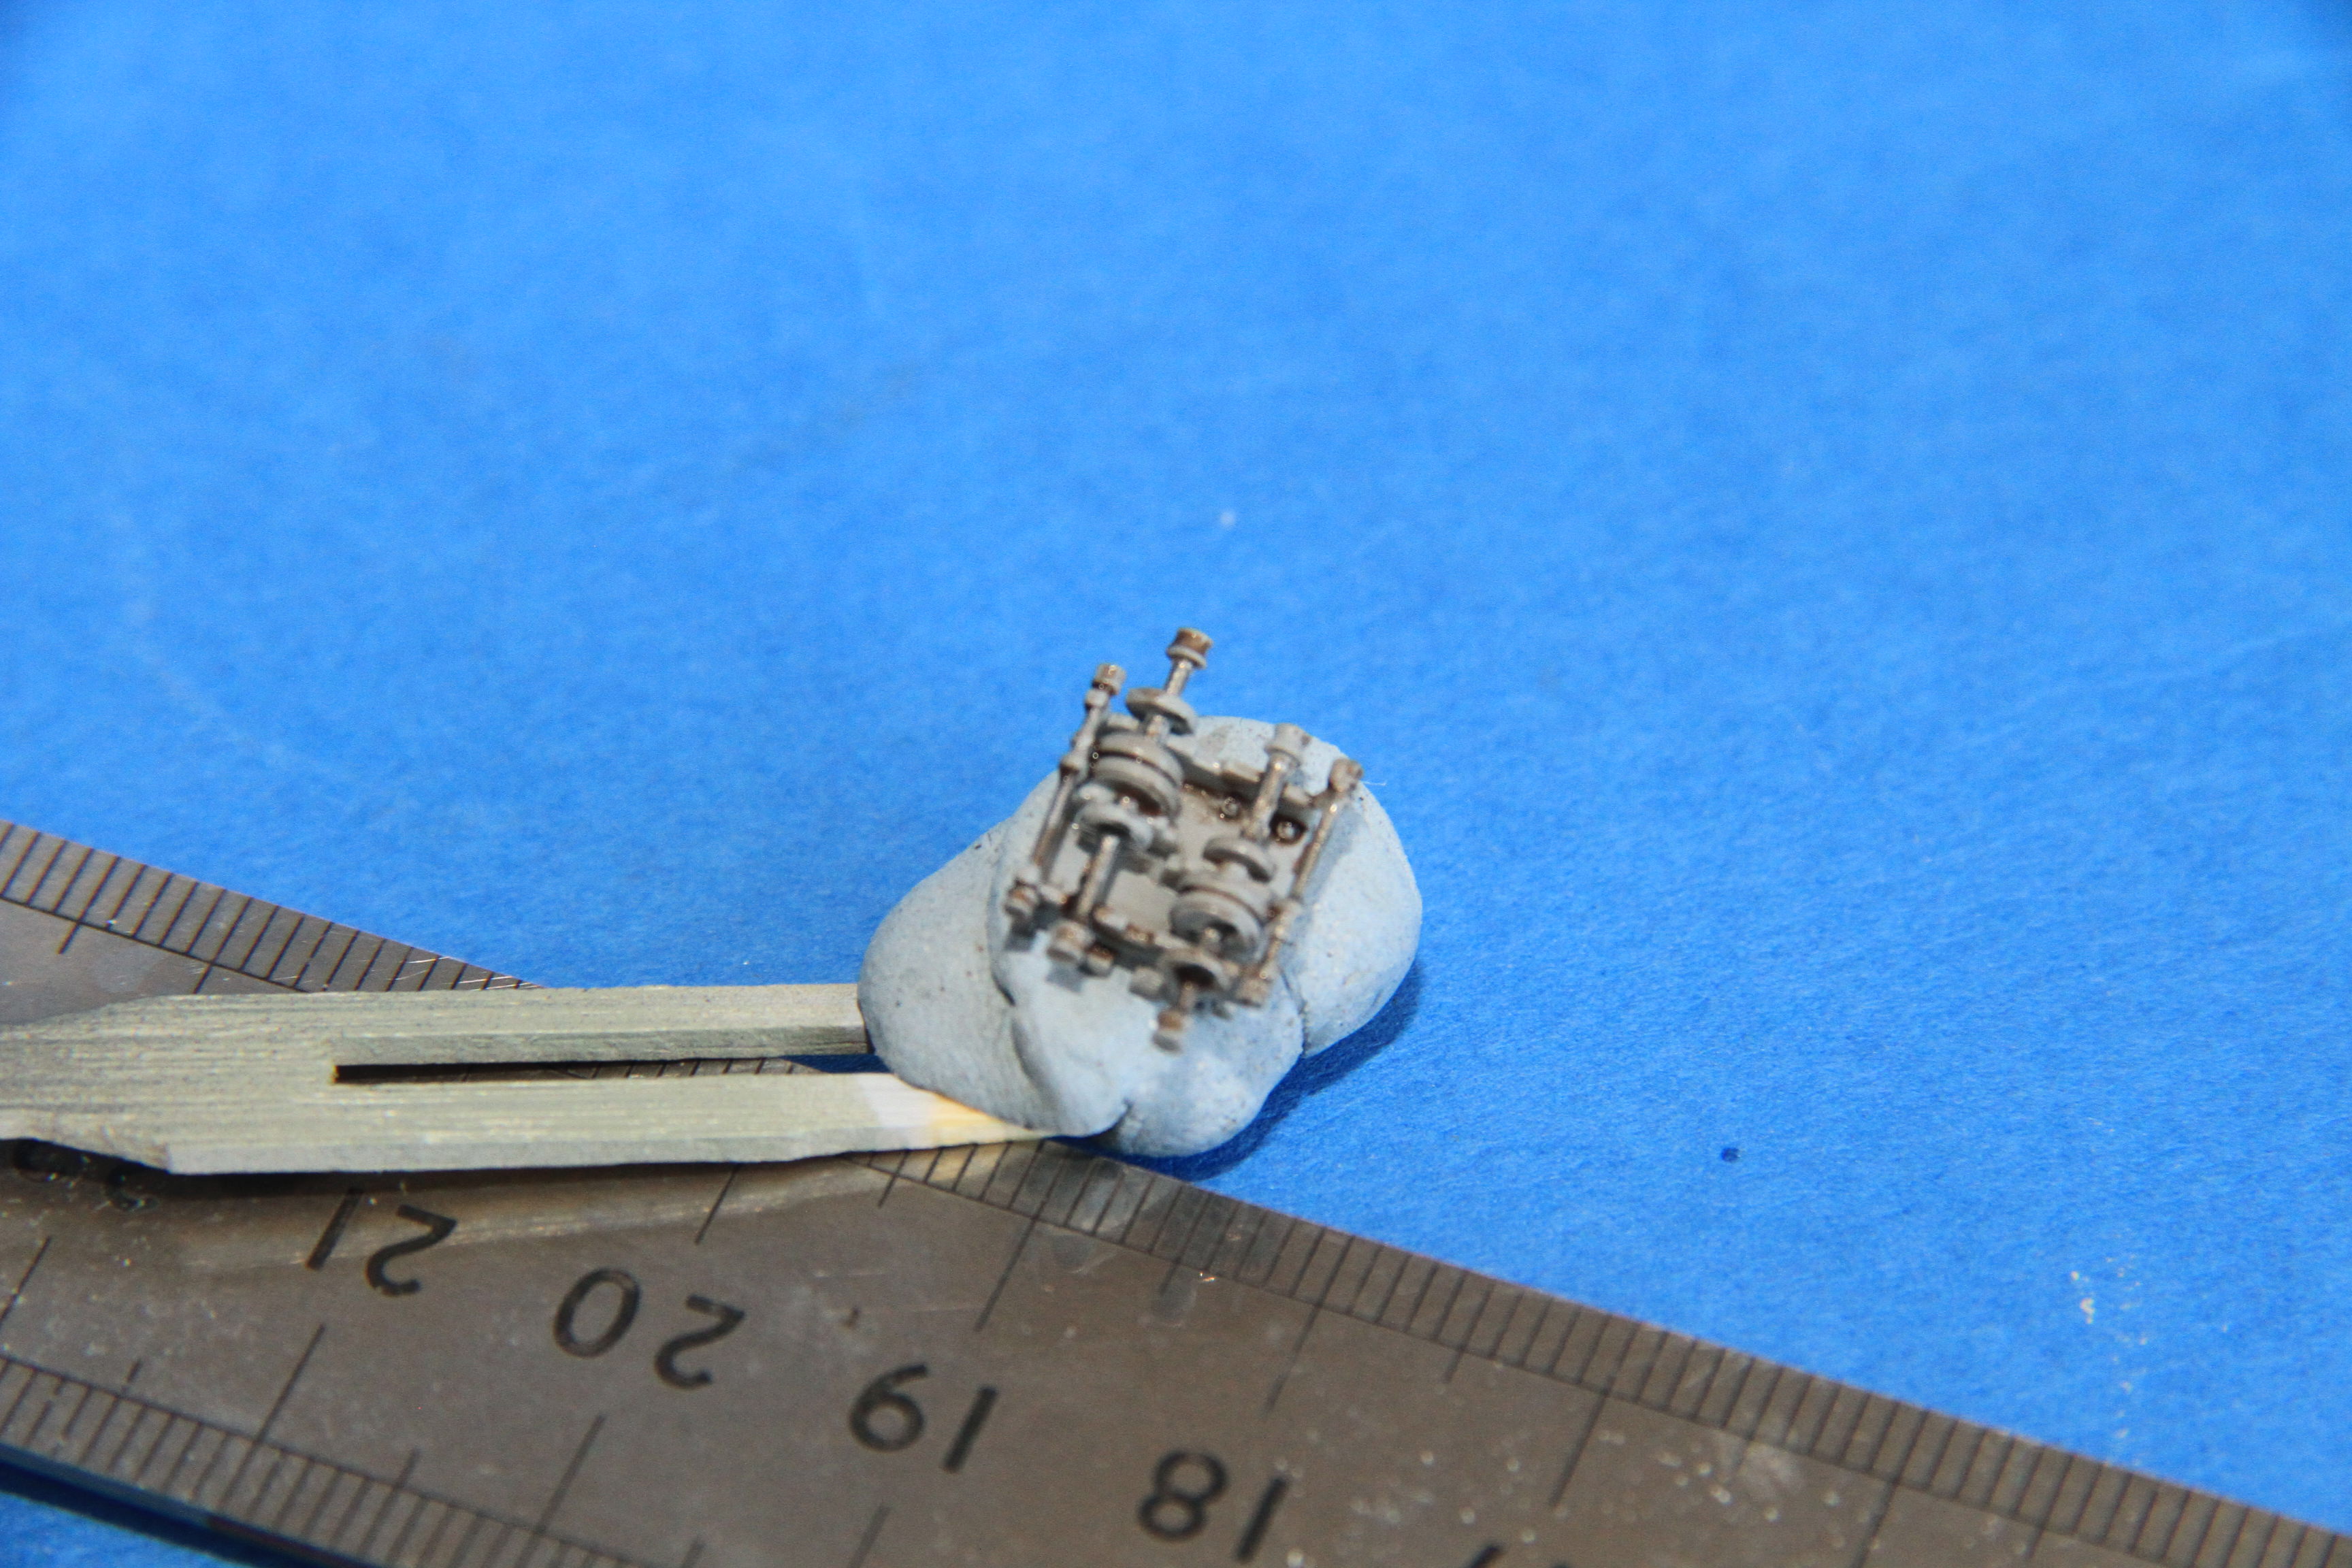
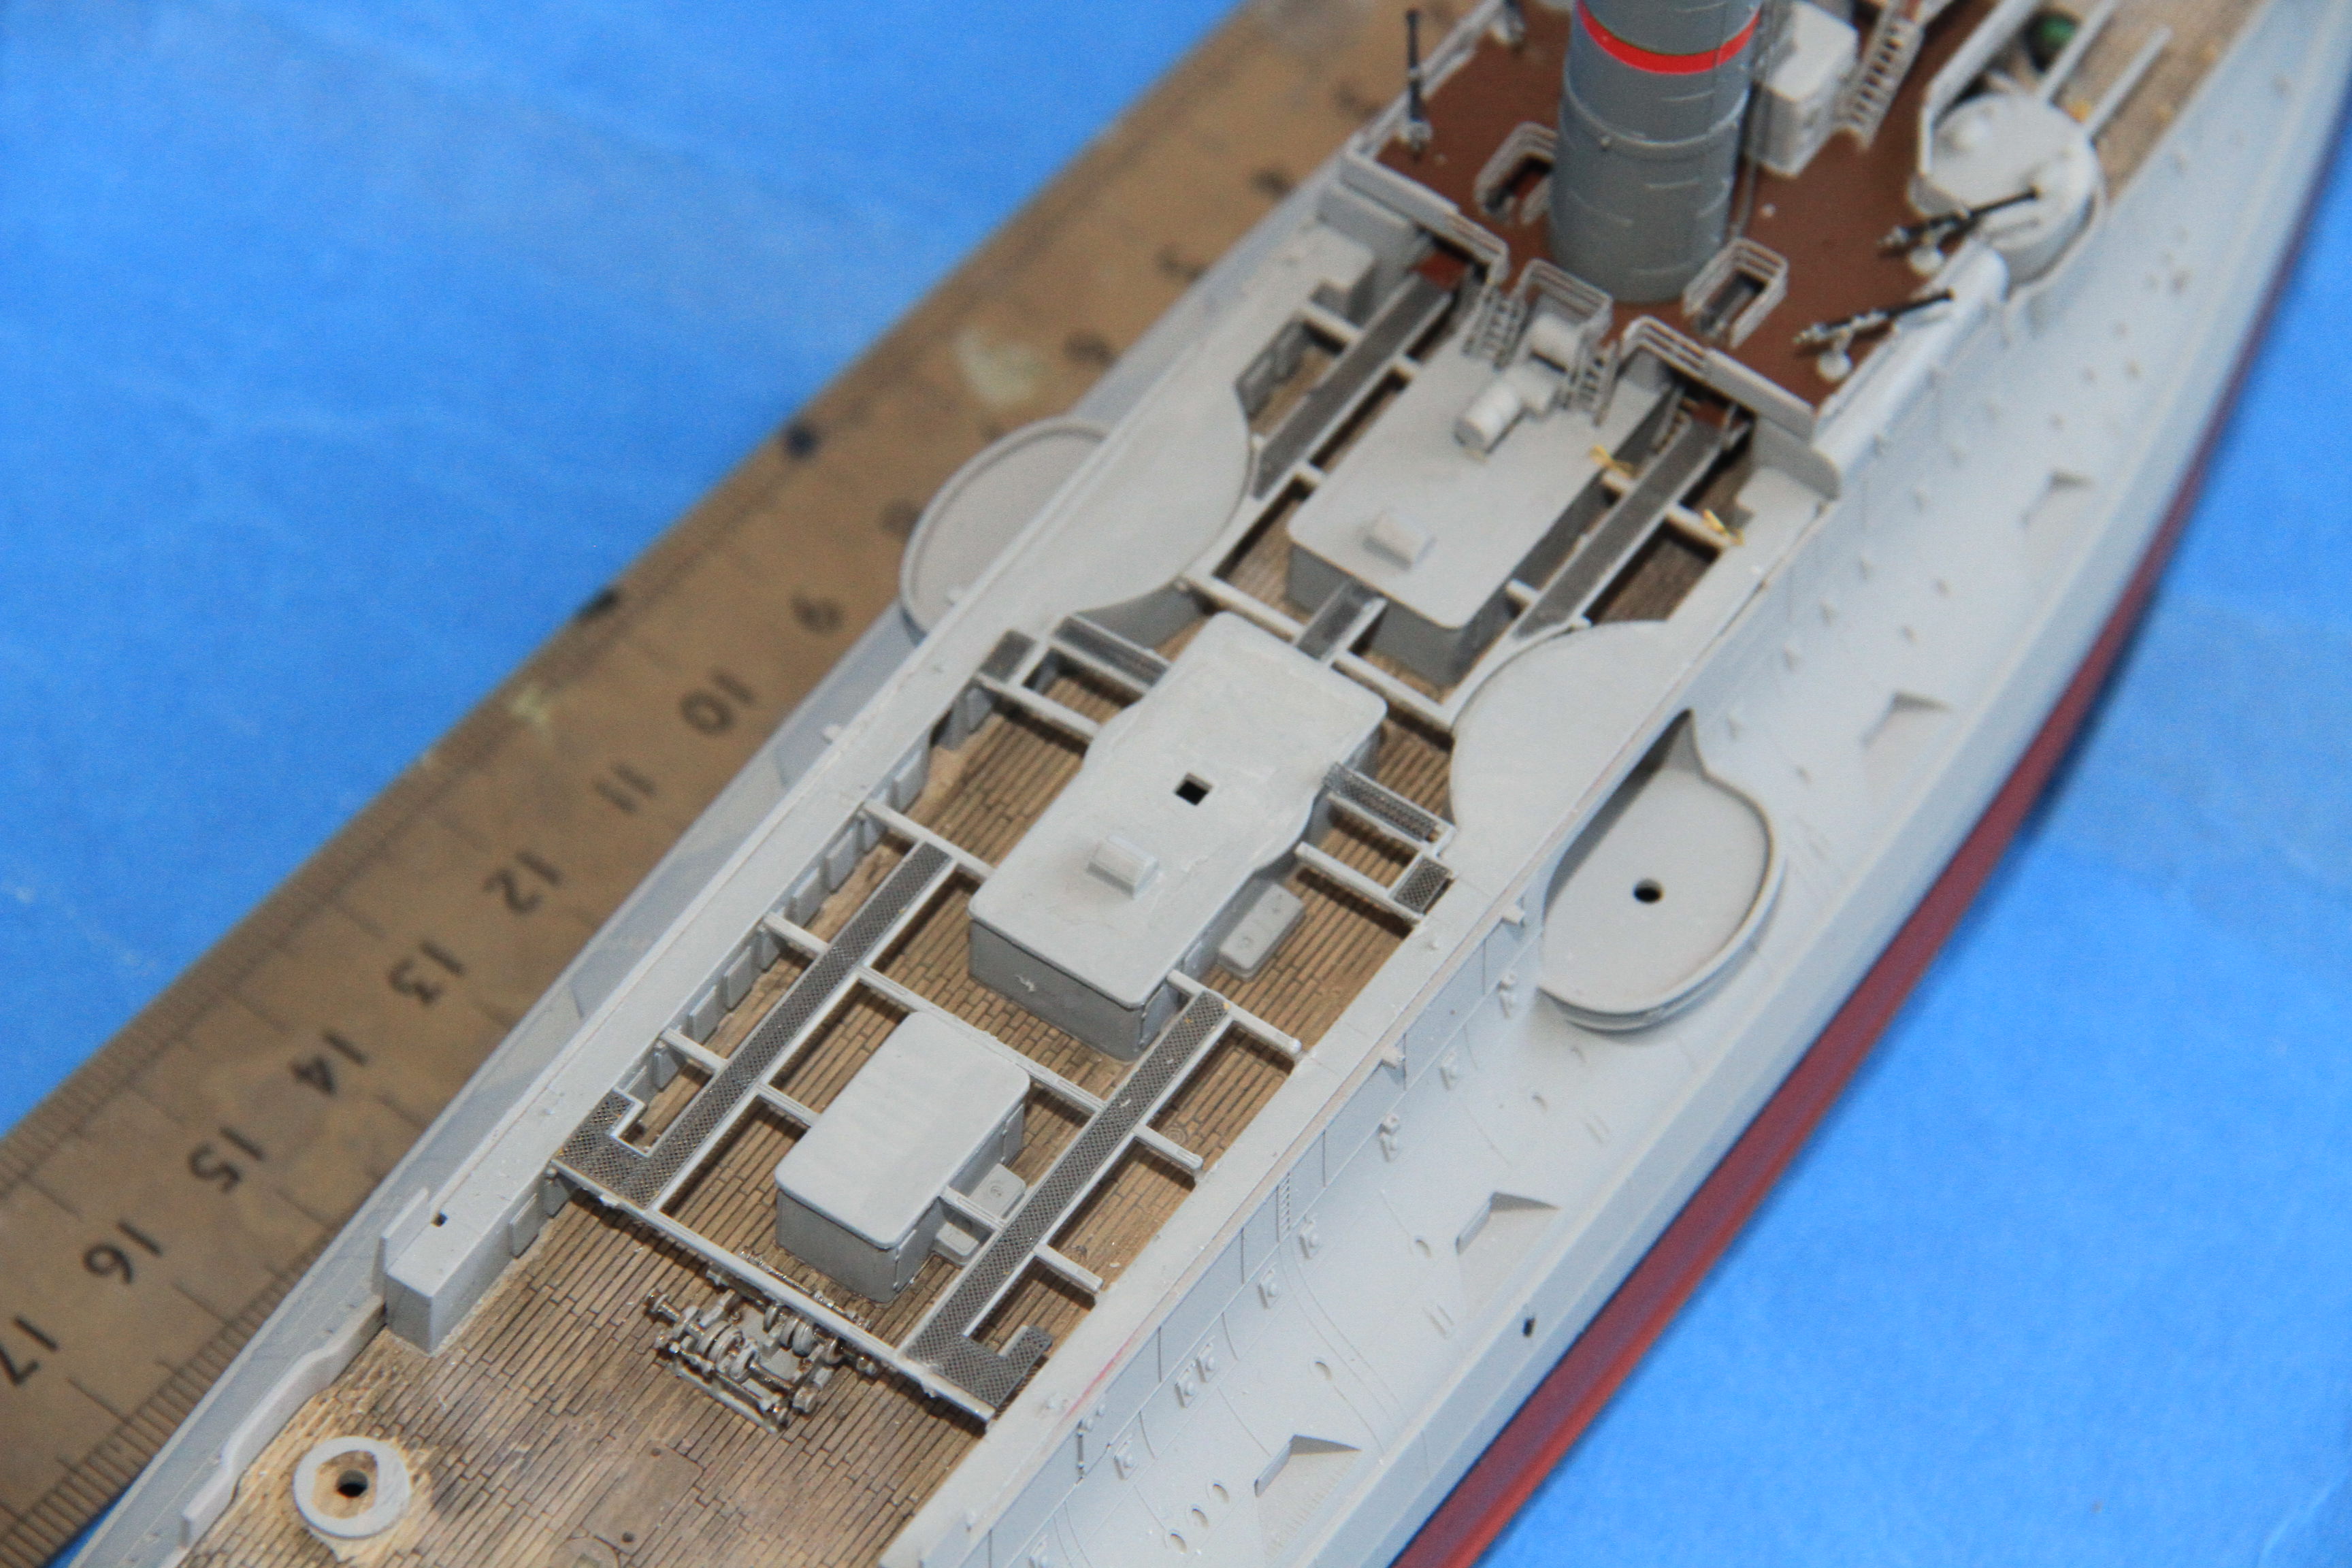
That is awesome!! I love the deck weathering. Any chance you could put an everyday object next to it to get scale?
RedDuster
Joined: March 01, 2010
KitMaker: 7,078 posts
Model Shipwrights: 6,649 posts
Posted: Friday, July 13, 2018 - 04:53 AM UTC
Thanks Joe,
Will do when I do some work on her over the weekend.
Still need to post last weekends update.
Cheers
Si
Will do when I do some work on her over the weekend.
Still need to post last weekends update.
Cheers
Si
RedDuster
Joined: March 01, 2010
KitMaker: 7,078 posts
Model Shipwrights: 6,649 posts
Posted: Friday, July 13, 2018 - 11:18 PM UTC
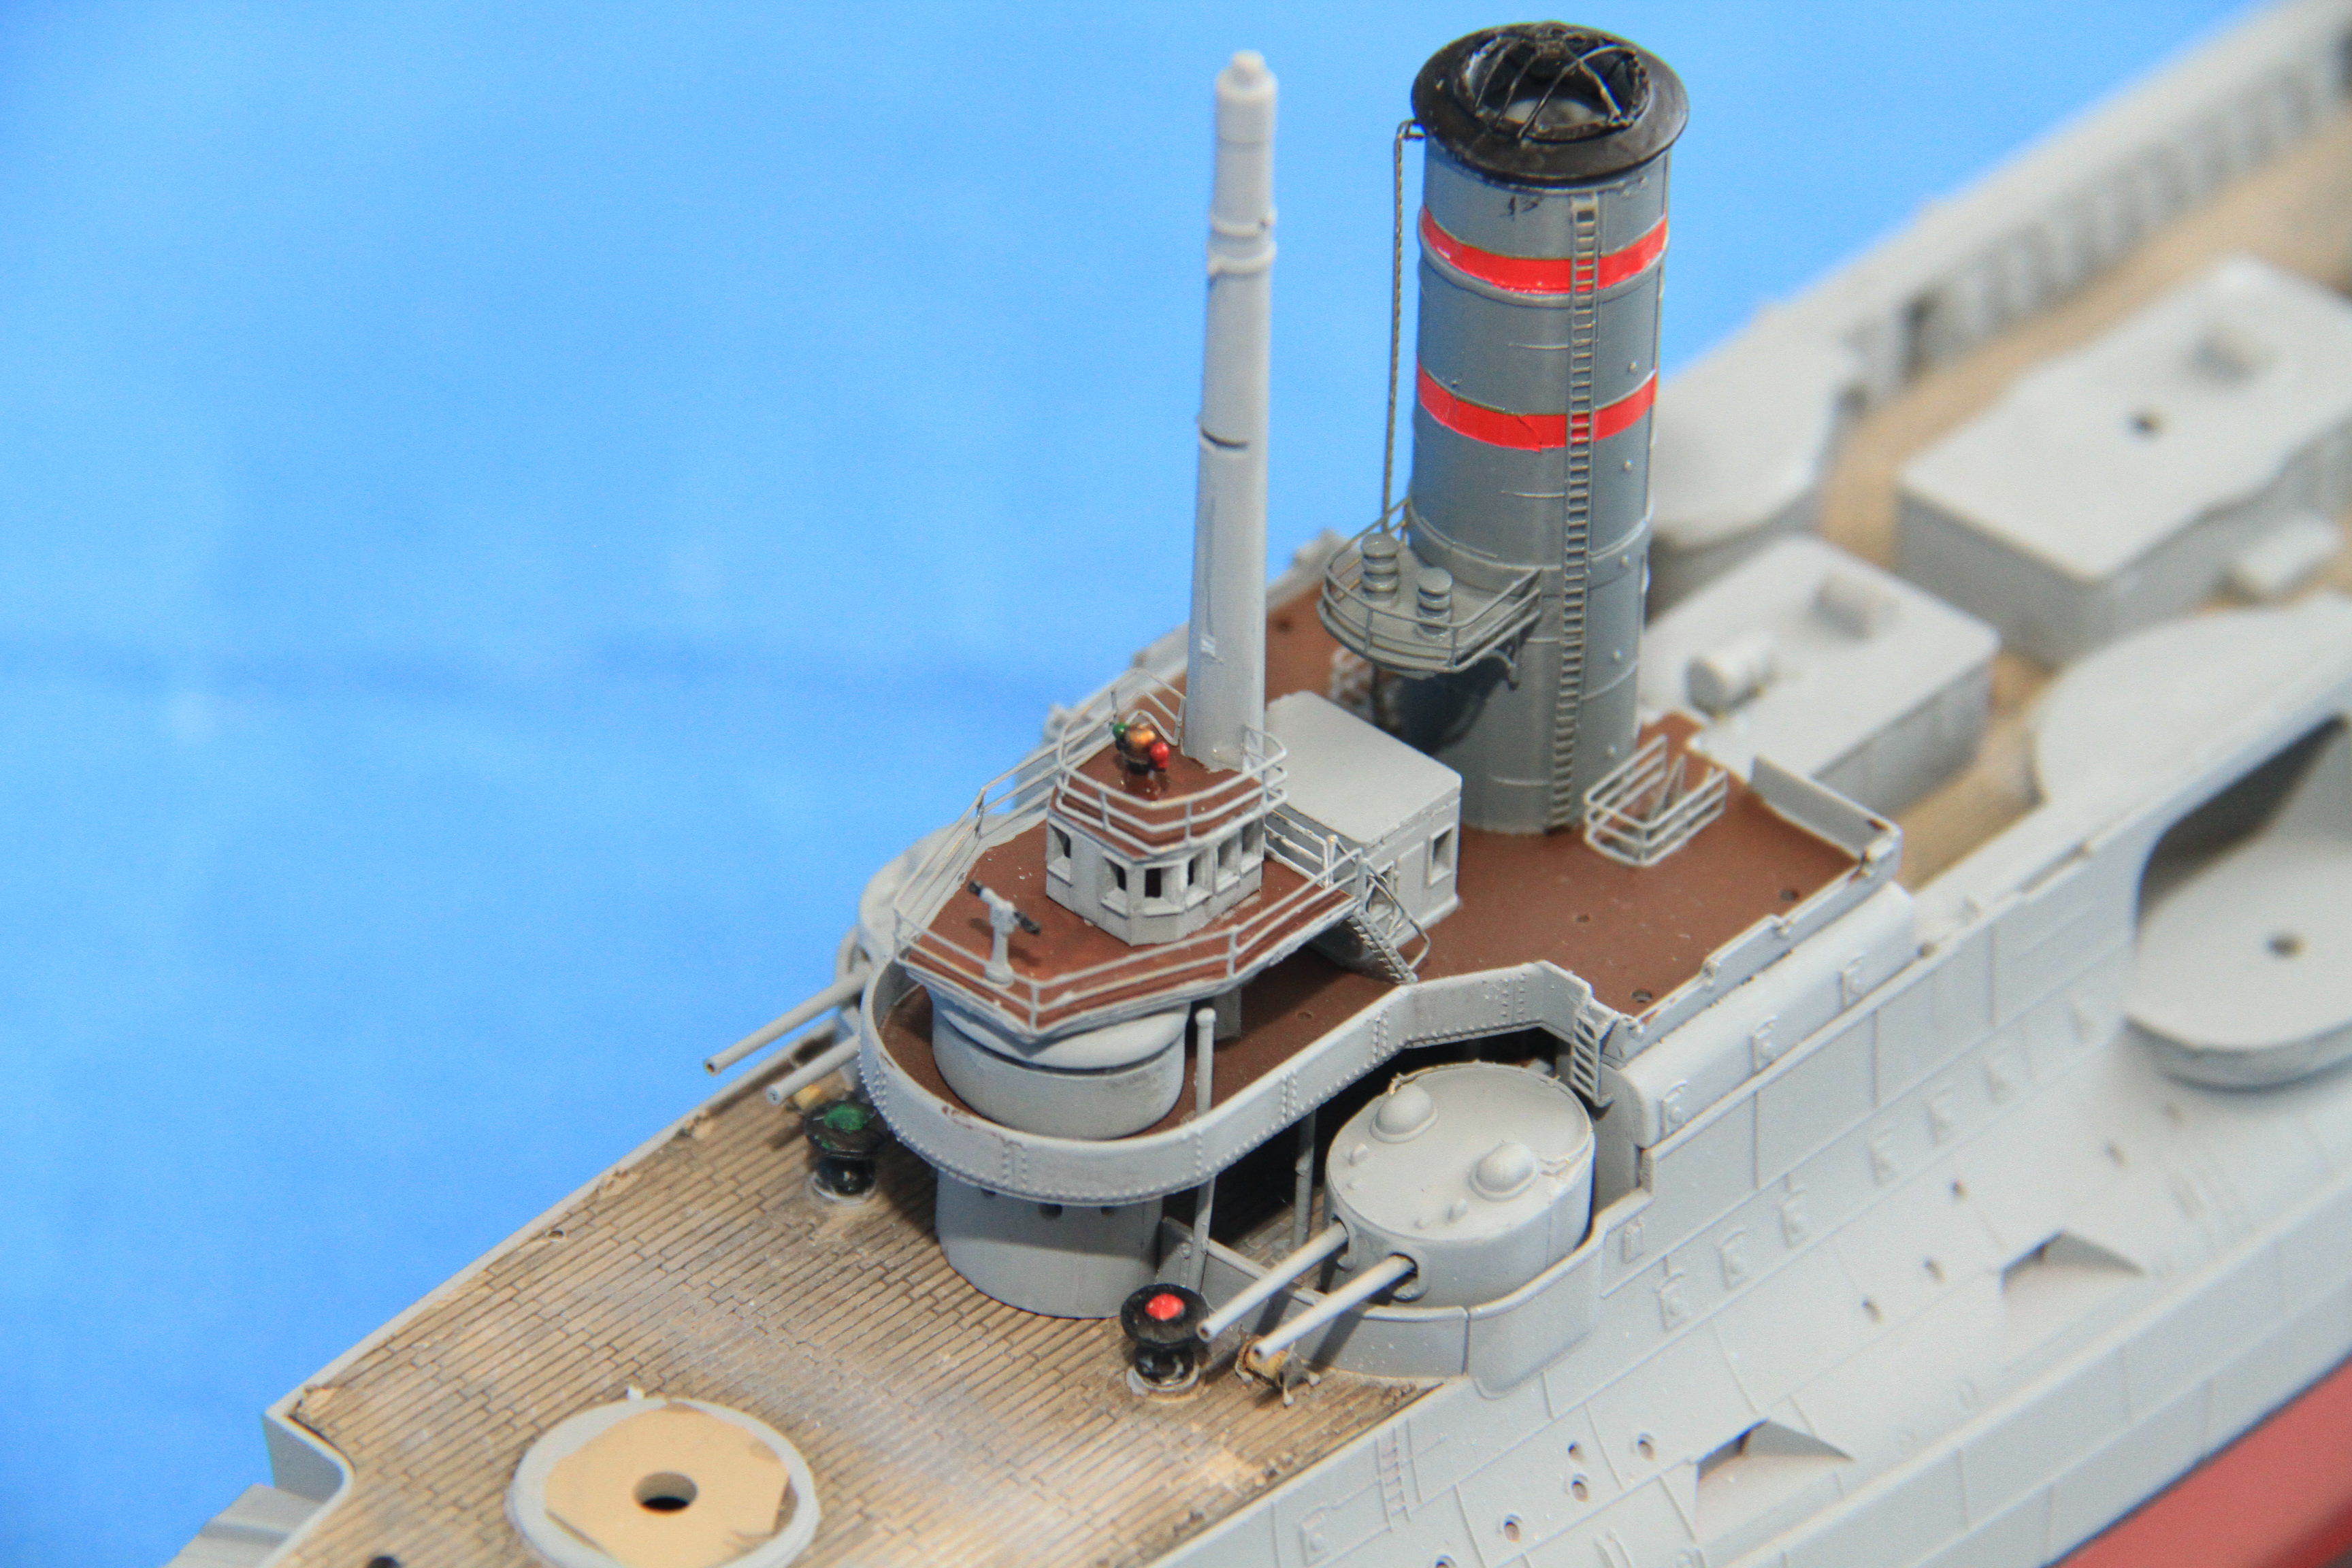
What I did last Sunday.
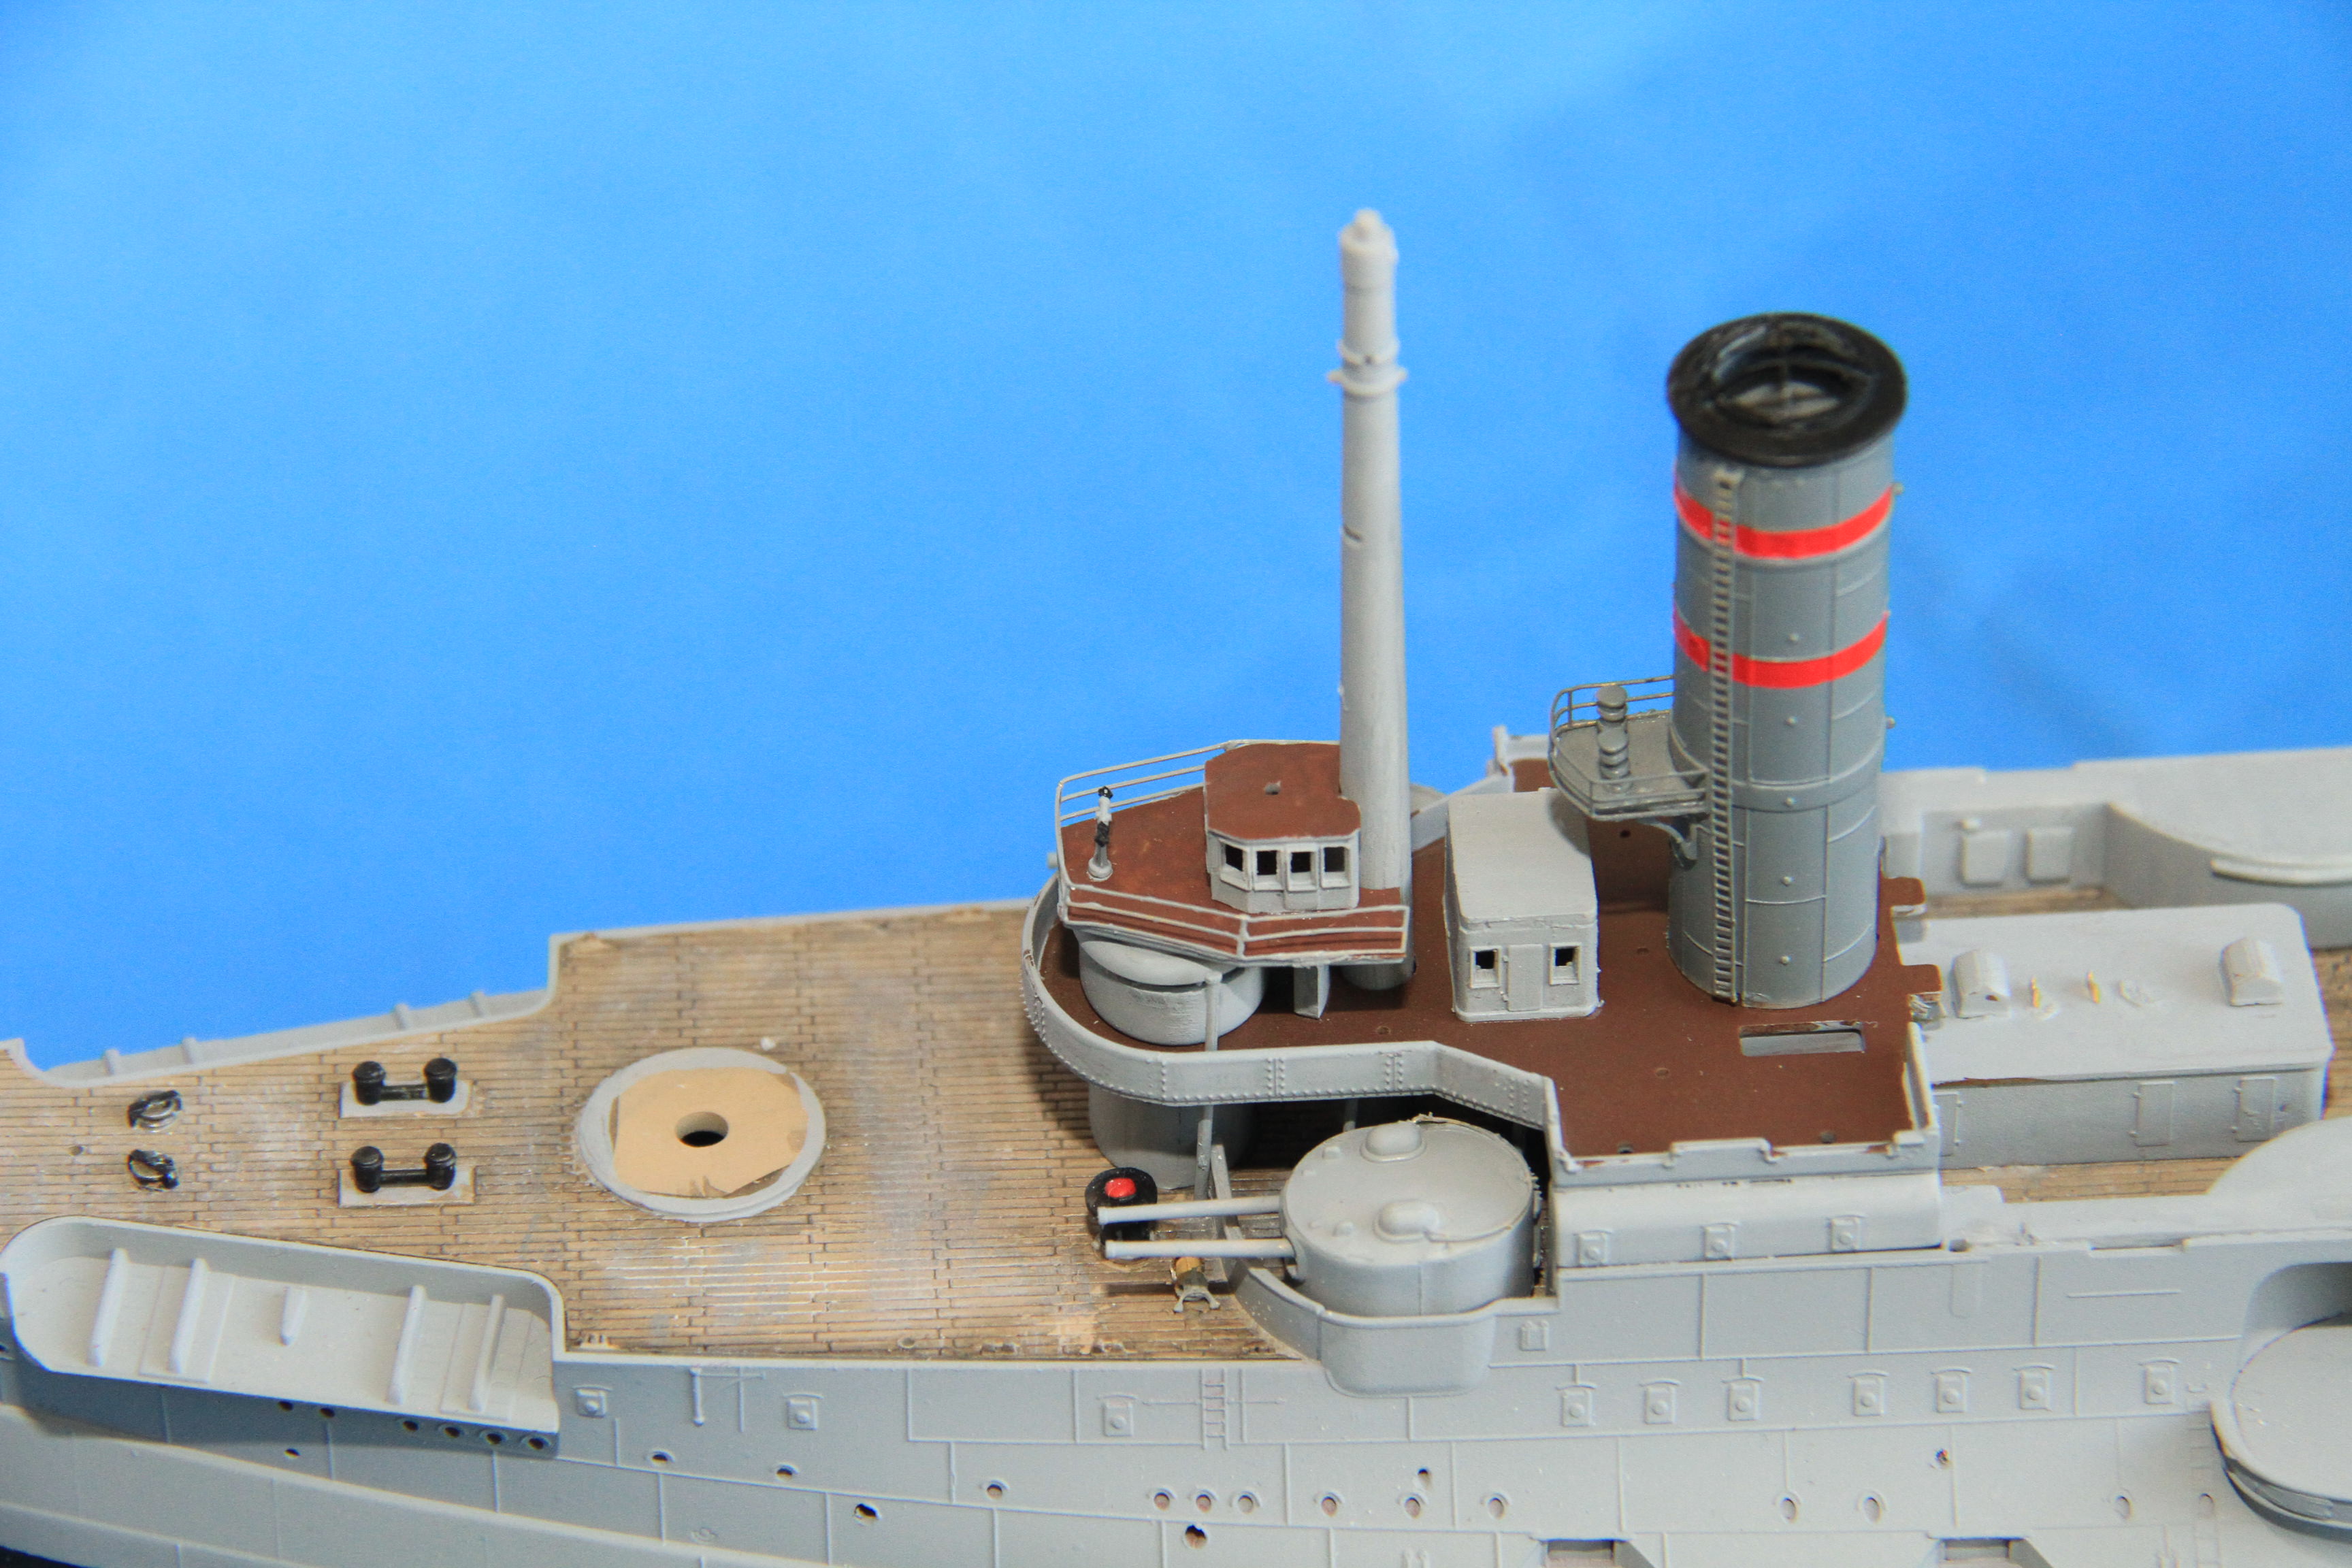
The two forward 6" mounts fitted, with a tiny cable reel in place from of the bulkhead under the barrels.
The lower bridge deck in place.
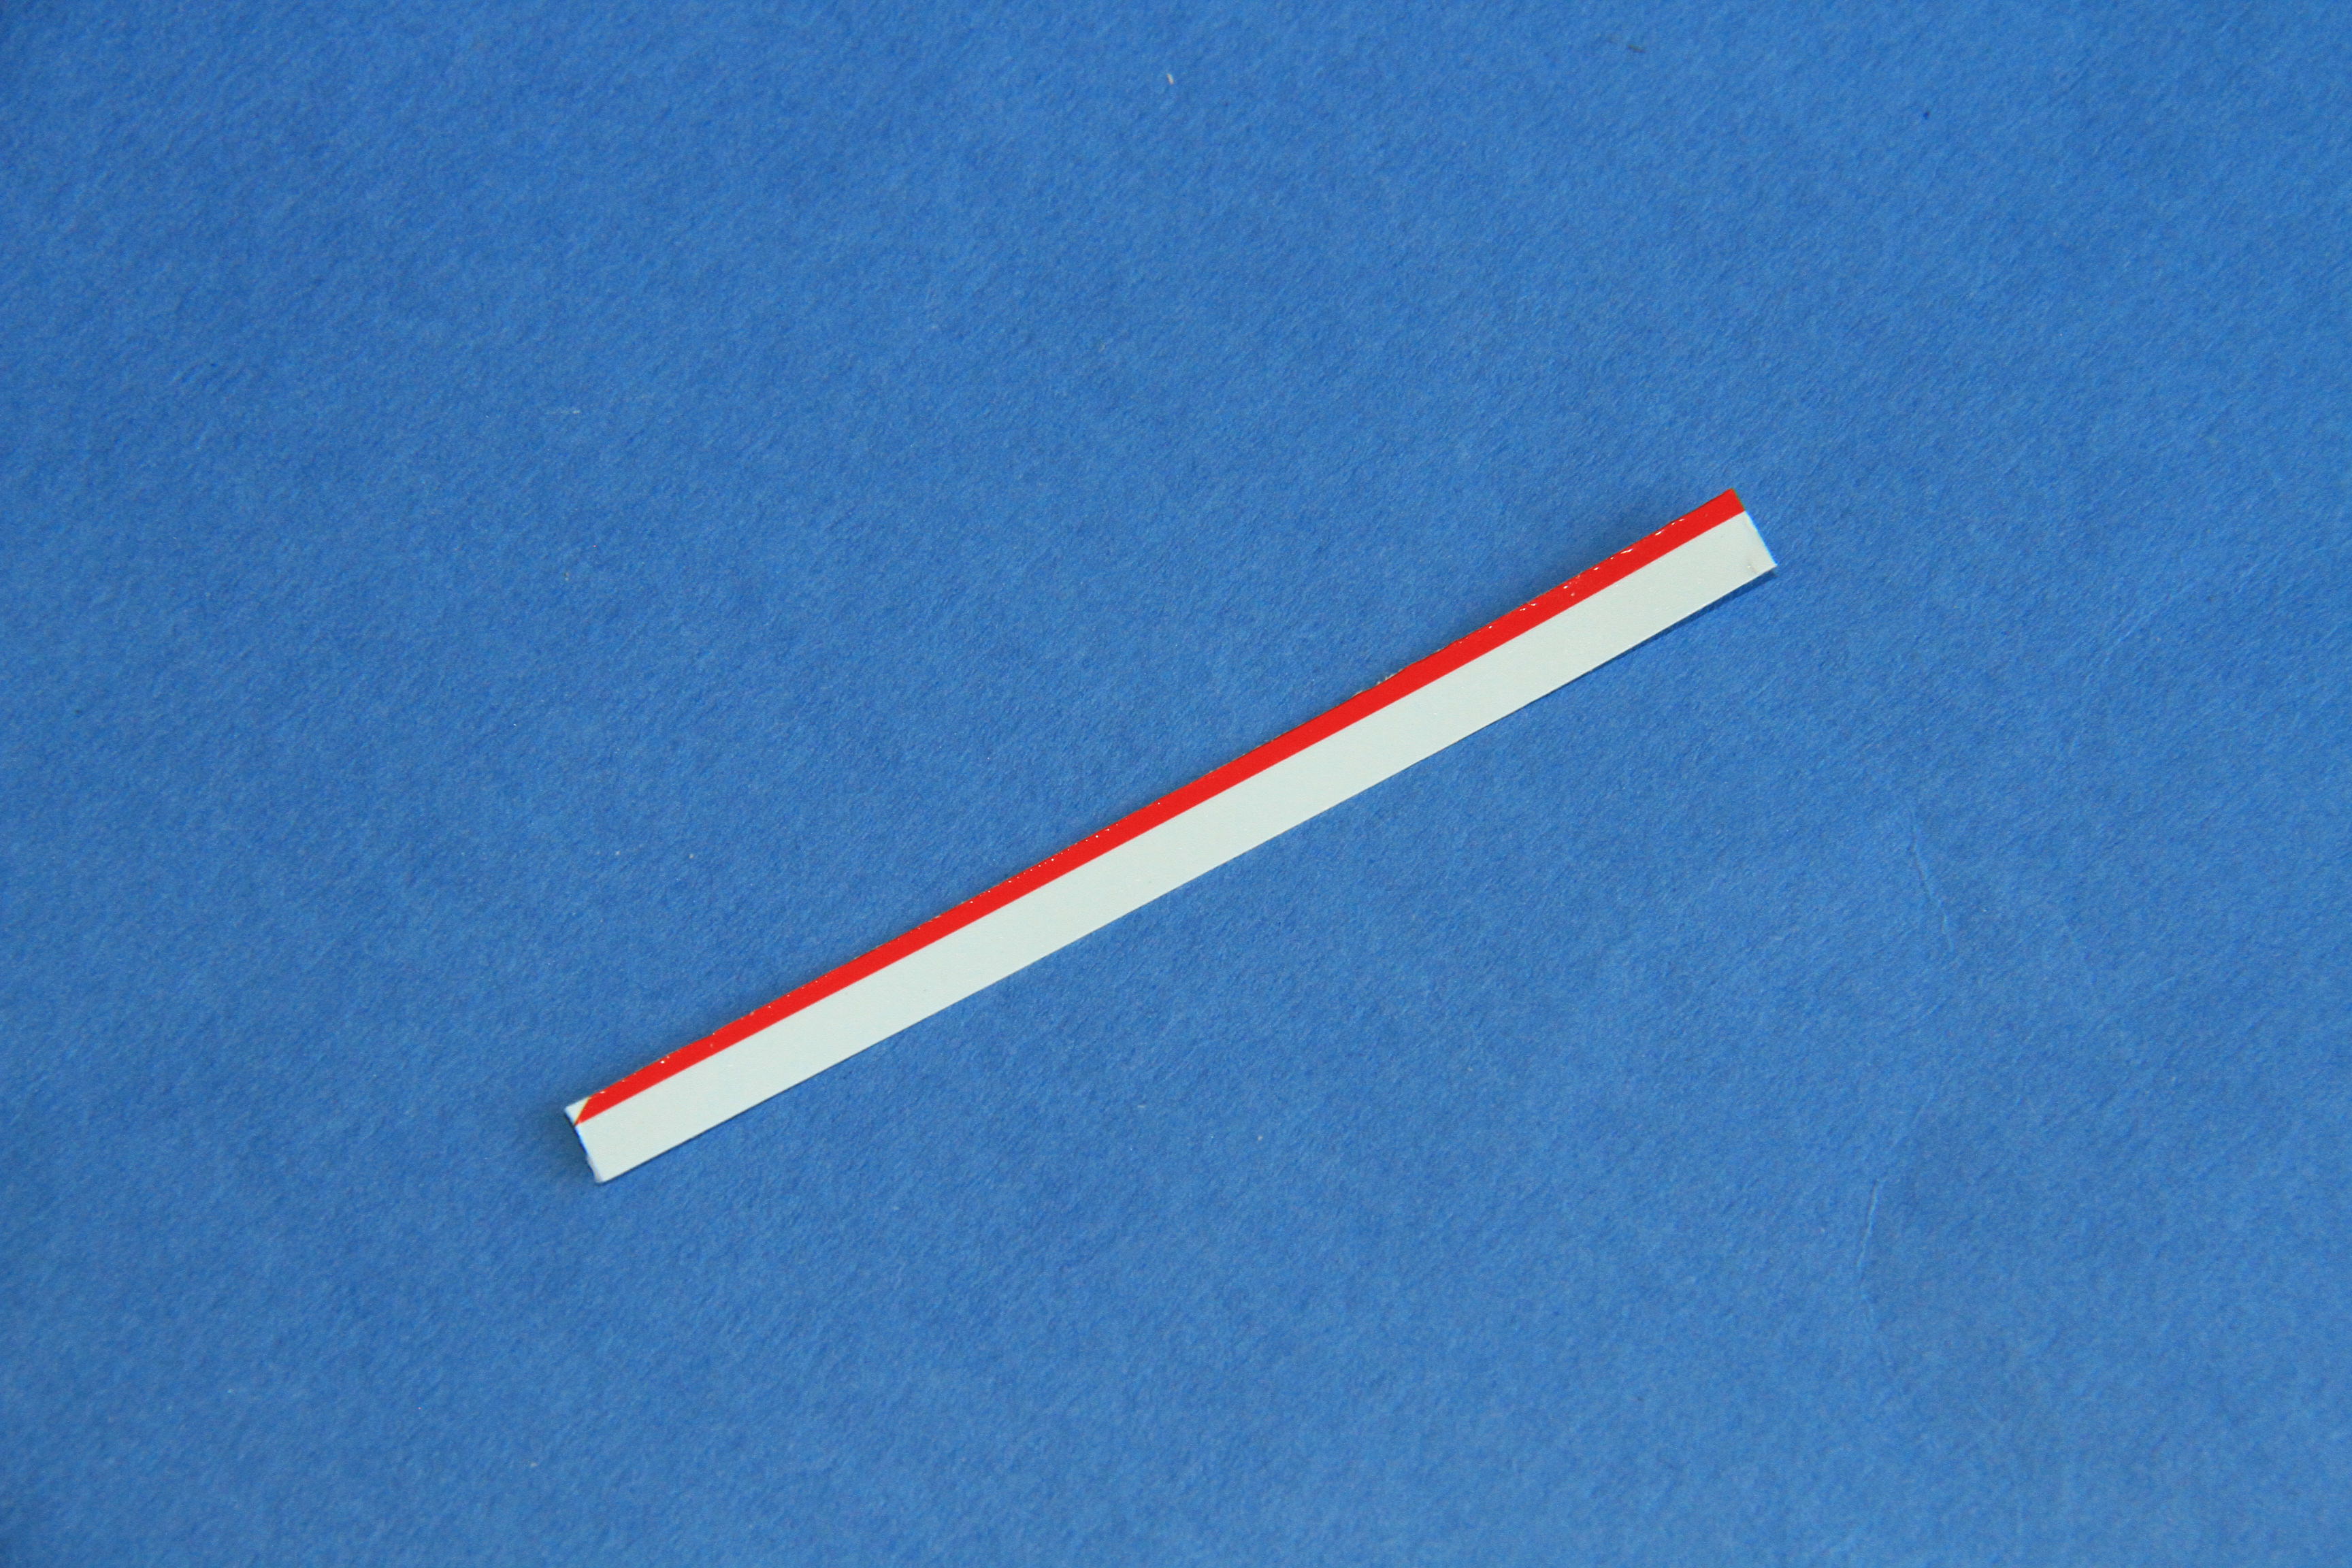
Forward funnel built, all the etch is from the kit.
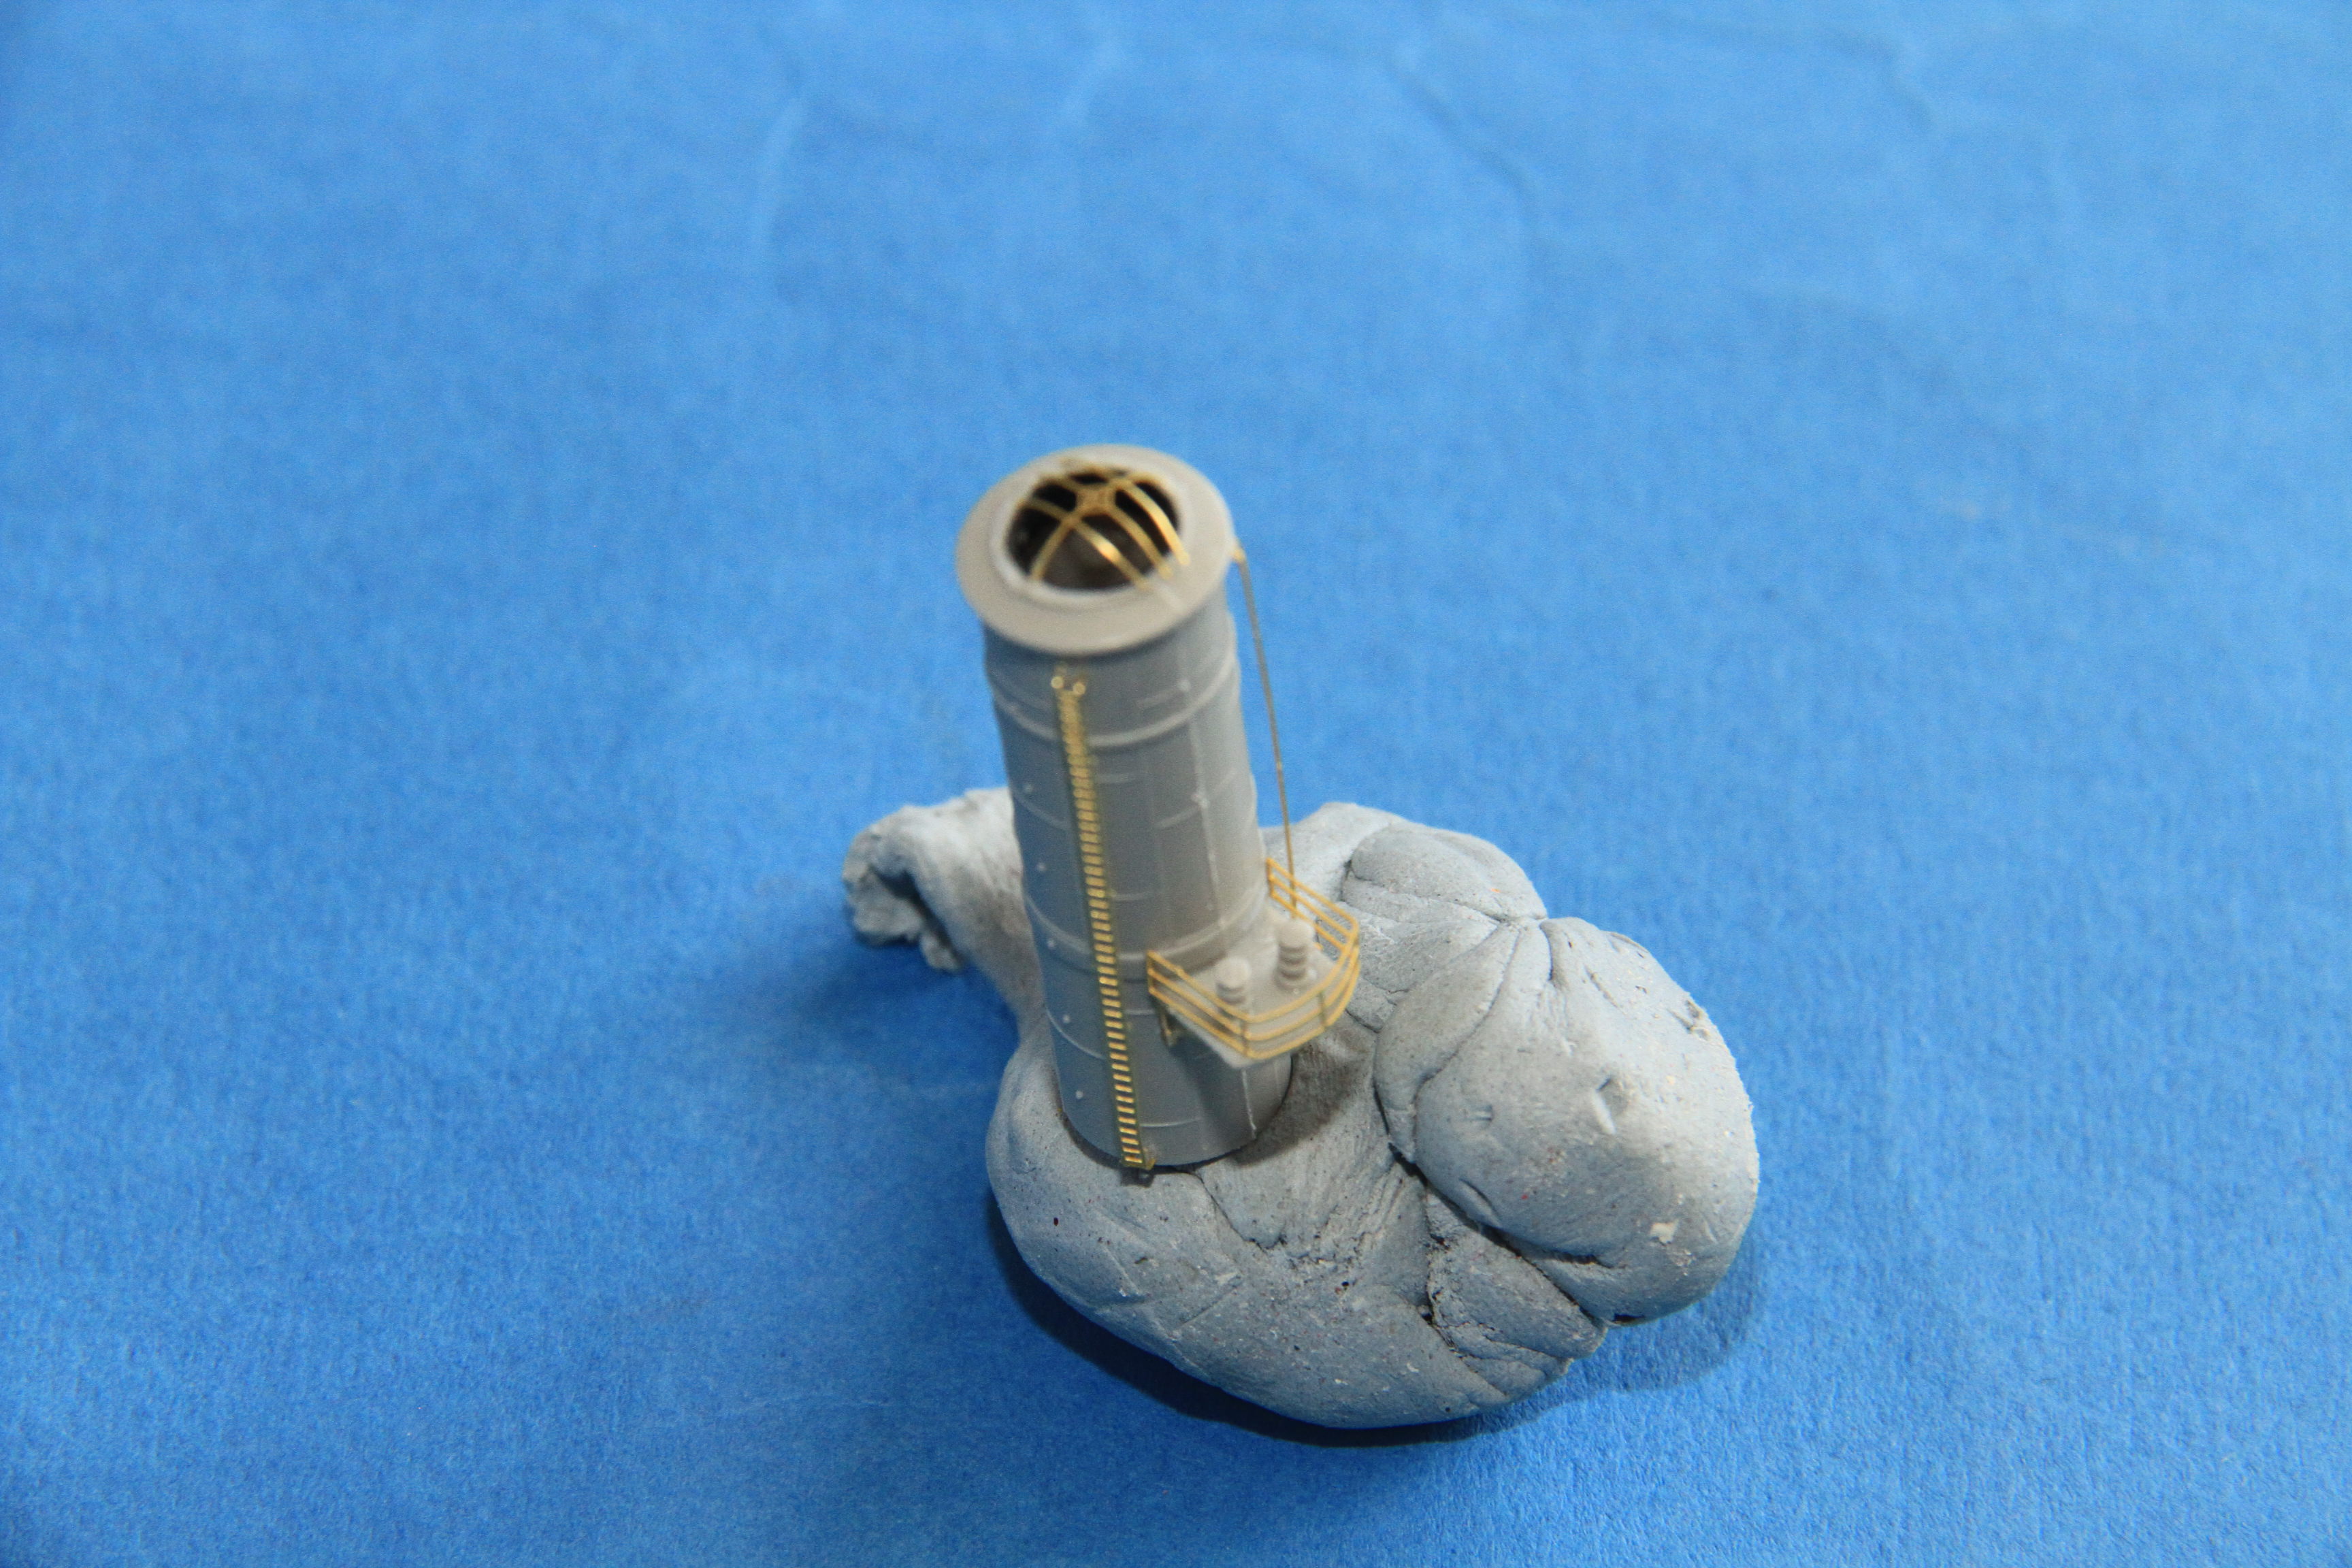
No decals are provided for the red stripes, so the spares box was raided and red strips 2mm wide cut from some Sea Harrier Anniversary scheme left overs.
painted, decaled and in place, along with the conning tower upper level.
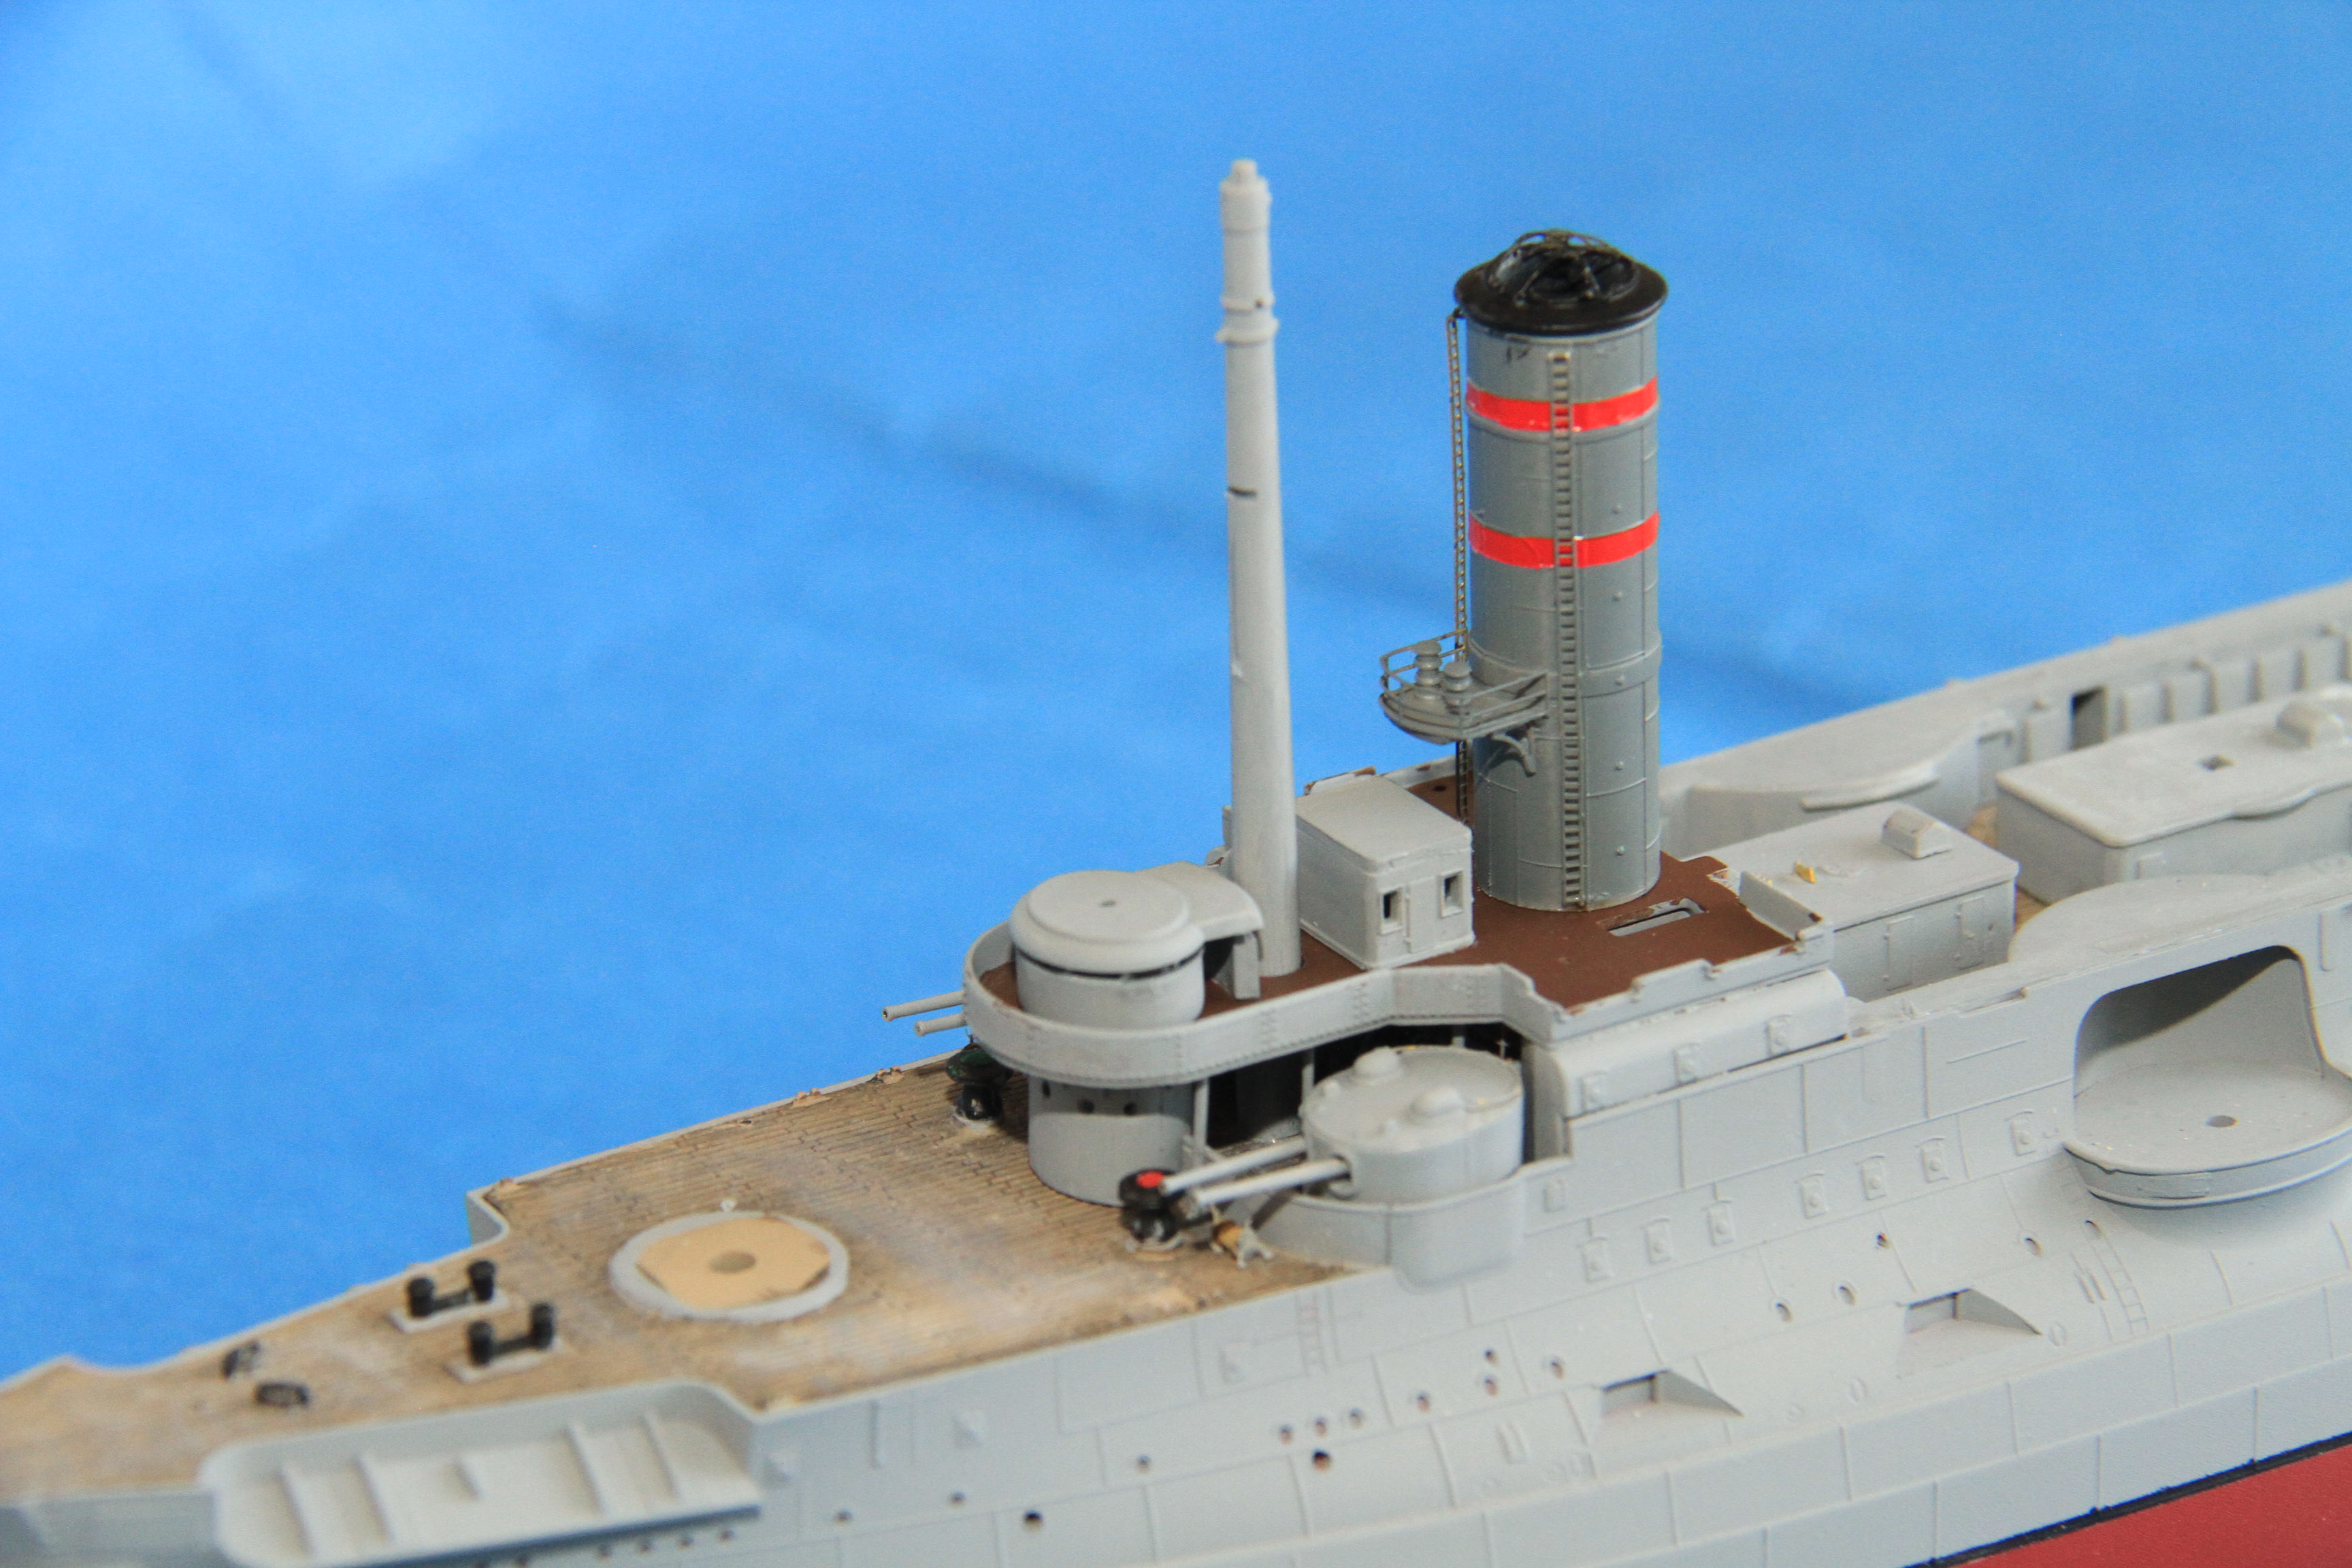
Wheelhouse in place, will glaze the windows with Krystal Klear.
More soon.
Cheers
Si
The two forward 6" mounts fitted, with a tiny cable reel in place from of the bulkhead under the barrels.
The lower bridge deck in place.
Forward funnel built, all the etch is from the kit.
No decals are provided for the red stripes, so the spares box was raided and red strips 2mm wide cut from some Sea Harrier Anniversary scheme left overs.
painted, decaled and in place, along with the conning tower upper level.
Wheelhouse in place, will glaze the windows with Krystal Klear.
More soon.
Cheers
Si
GazzaS
#424
Joined: April 23, 2015
KitMaker: 4,648 posts
Model Shipwrights: 249 posts
Posted: Saturday, July 14, 2018 - 12:56 AM UTC
Looks great, Si.
I'm trying ti imagine how fun it was to add the stripe decals without destroying those fragile ladders.
Gaz
I'm trying ti imagine how fun it was to add the stripe decals without destroying those fragile ladders.
Gaz
RedDuster
Joined: March 01, 2010
KitMaker: 7,078 posts
Model Shipwrights: 6,649 posts
Posted: Sunday, July 15, 2018 - 08:57 AM UTC
Quoted Text
Looks great, Si.
I'm trying ti imagine how fun it was to add the stripe decals without destroying those fragile ladders.
Gaz
Thanks Gaz,
It was just a matter of threading the needle, twice so to speak. I had the funnel firmly sat in on a big lump of blue tack, once I had soaked the decal stripe, just eased off the backing anf=d round the funnel with a knife point, a touch of micro sol aided it slipping under the ladders.
Cheers for looking in mate,
Si
RussellE
#306
Joined: June 27, 2010
KitMaker: 3,959 posts
Model Shipwrights: 2,777 posts
Posted: Sunday, July 15, 2018 - 09:41 AM UTC
What Gazza said: Looks tricky!
Handled nicely though
Handled nicely though
RedDuster
Joined: March 01, 2010
KitMaker: 7,078 posts
Model Shipwrights: 6,649 posts
Posted: Monday, July 16, 2018 - 07:29 AM UTC
Quoted Text
What Gazza said: Looks tricky!
Handled nicely though
I must admit I was a bit nervous, but it seemed the simplest way to get a brass to plastic join on the ladders, spray them in place and get neat red bands
For once I had a plan and it worked!

Thanks for looking in mate.
Cheers
Si
RedDuster
Joined: March 01, 2010
KitMaker: 7,078 posts
Model Shipwrights: 6,649 posts
Posted: Tuesday, July 17, 2018 - 08:08 AM UTC
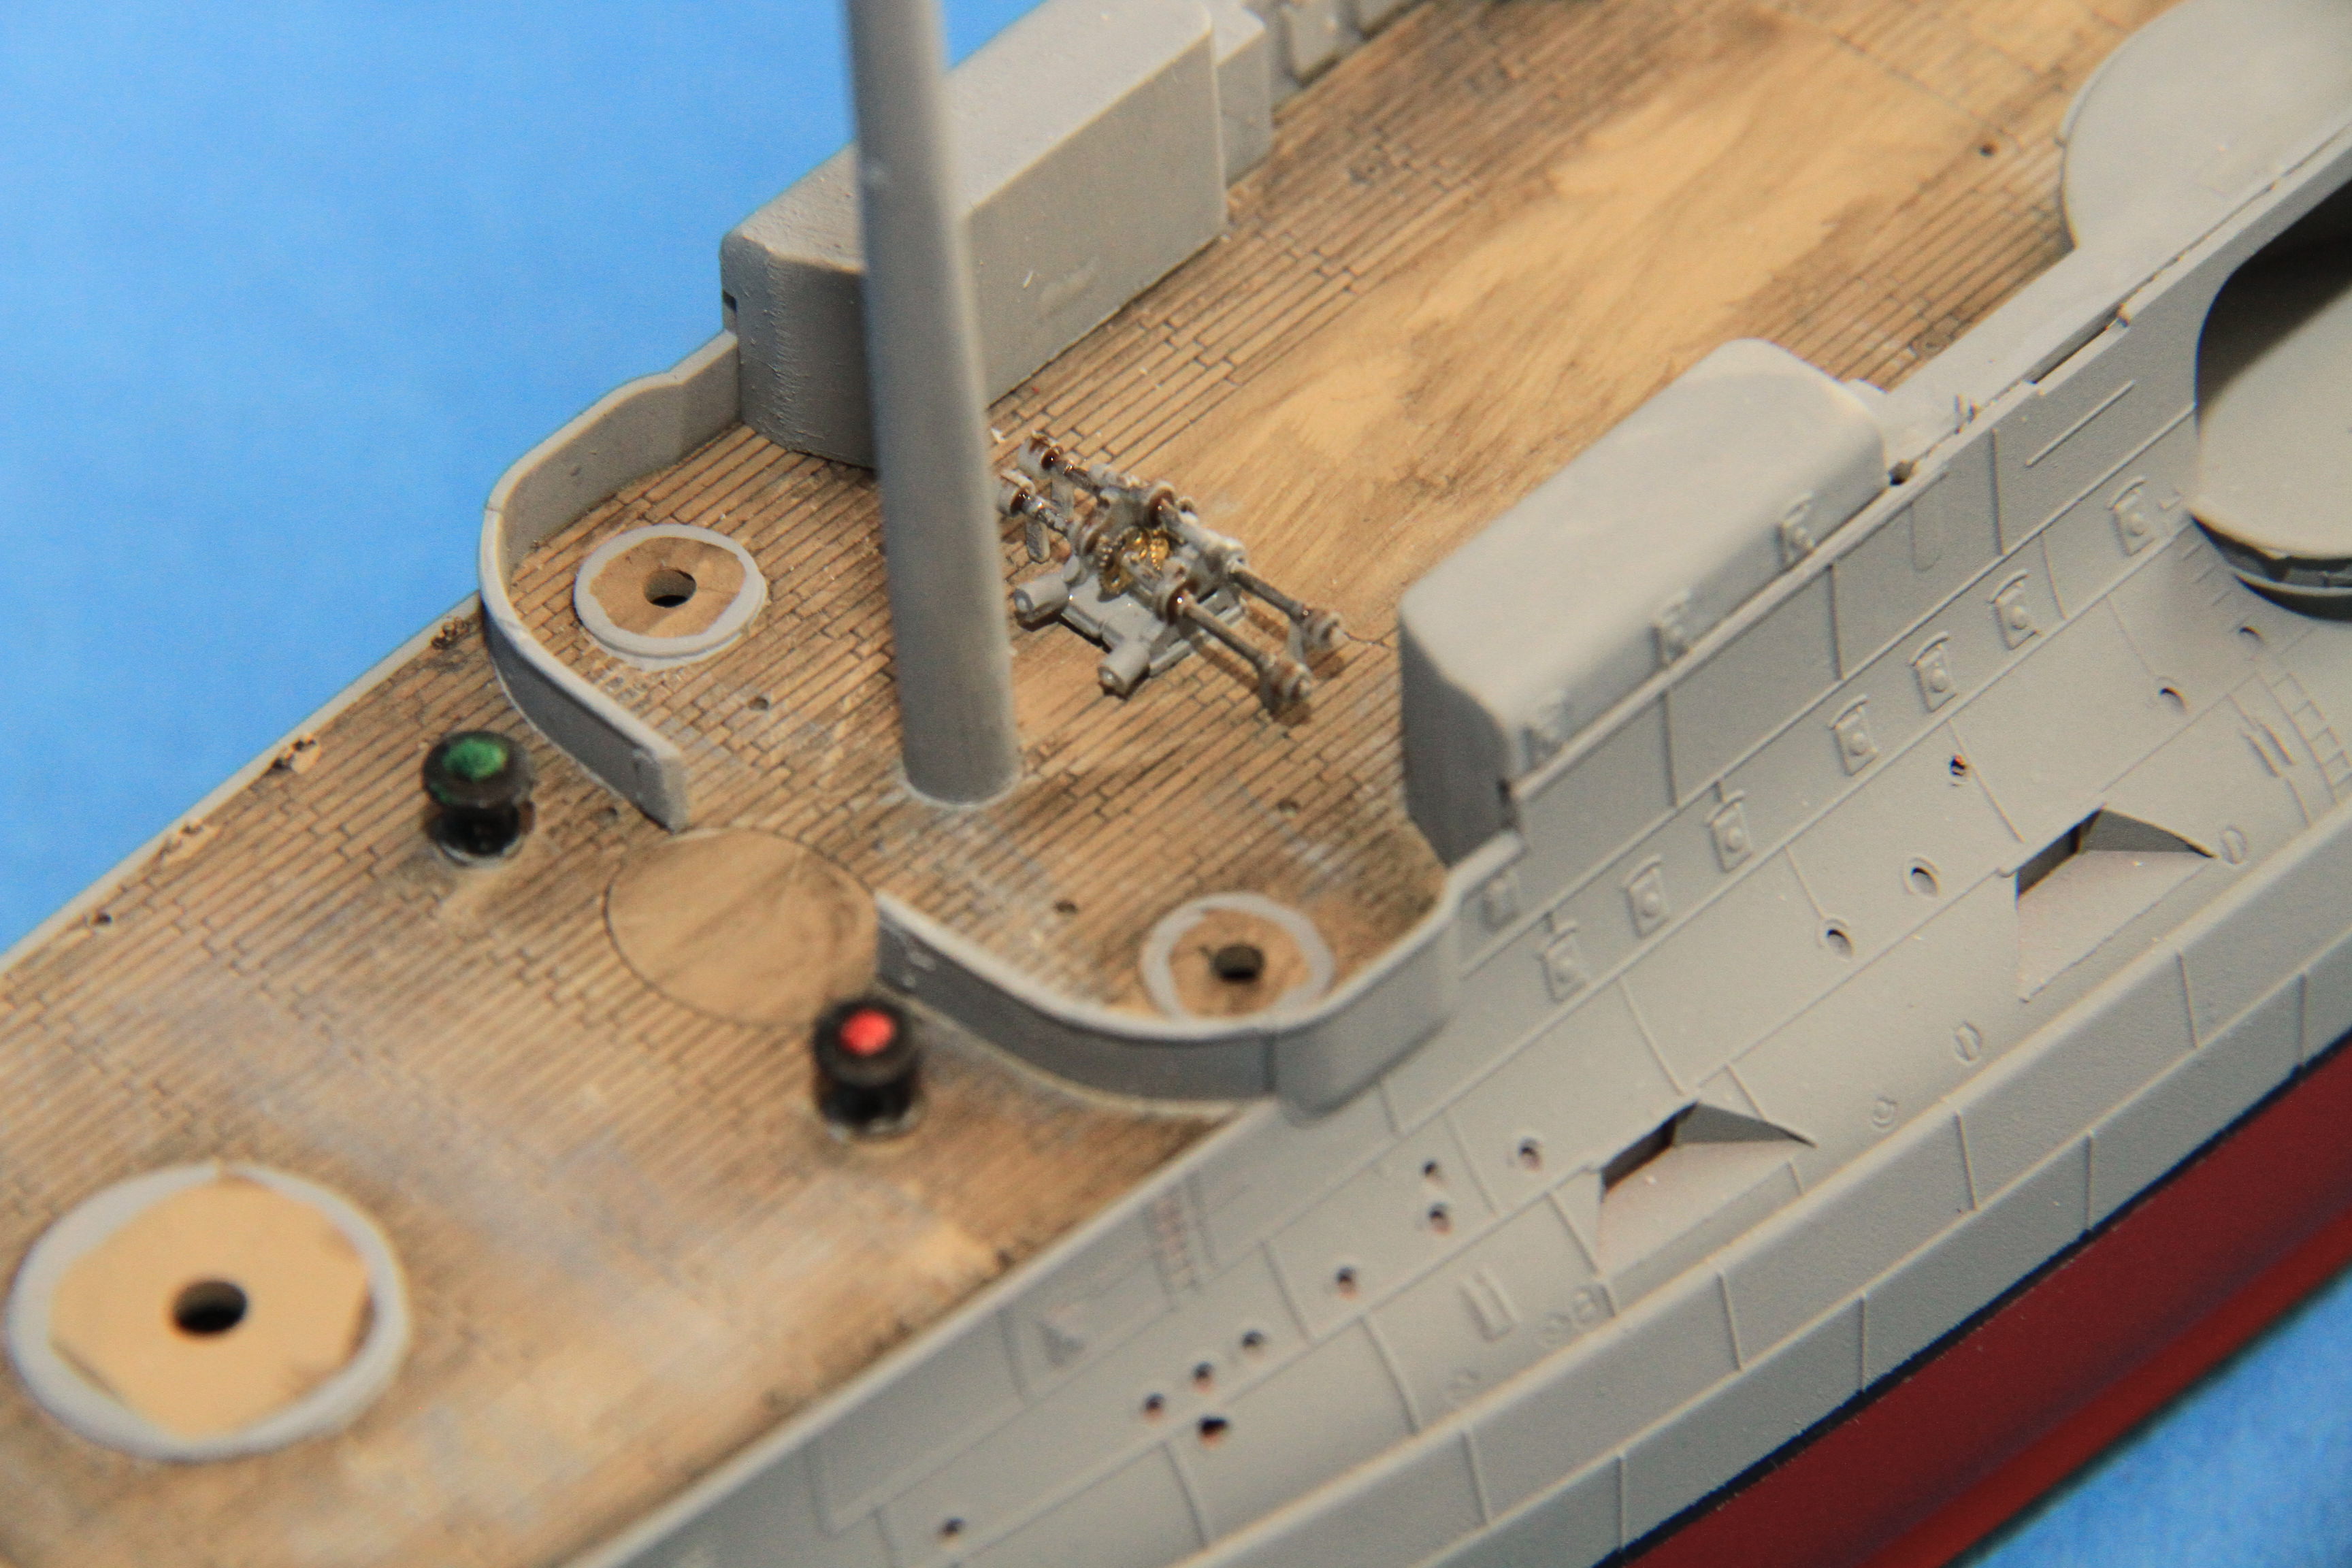
Sunday's progress.
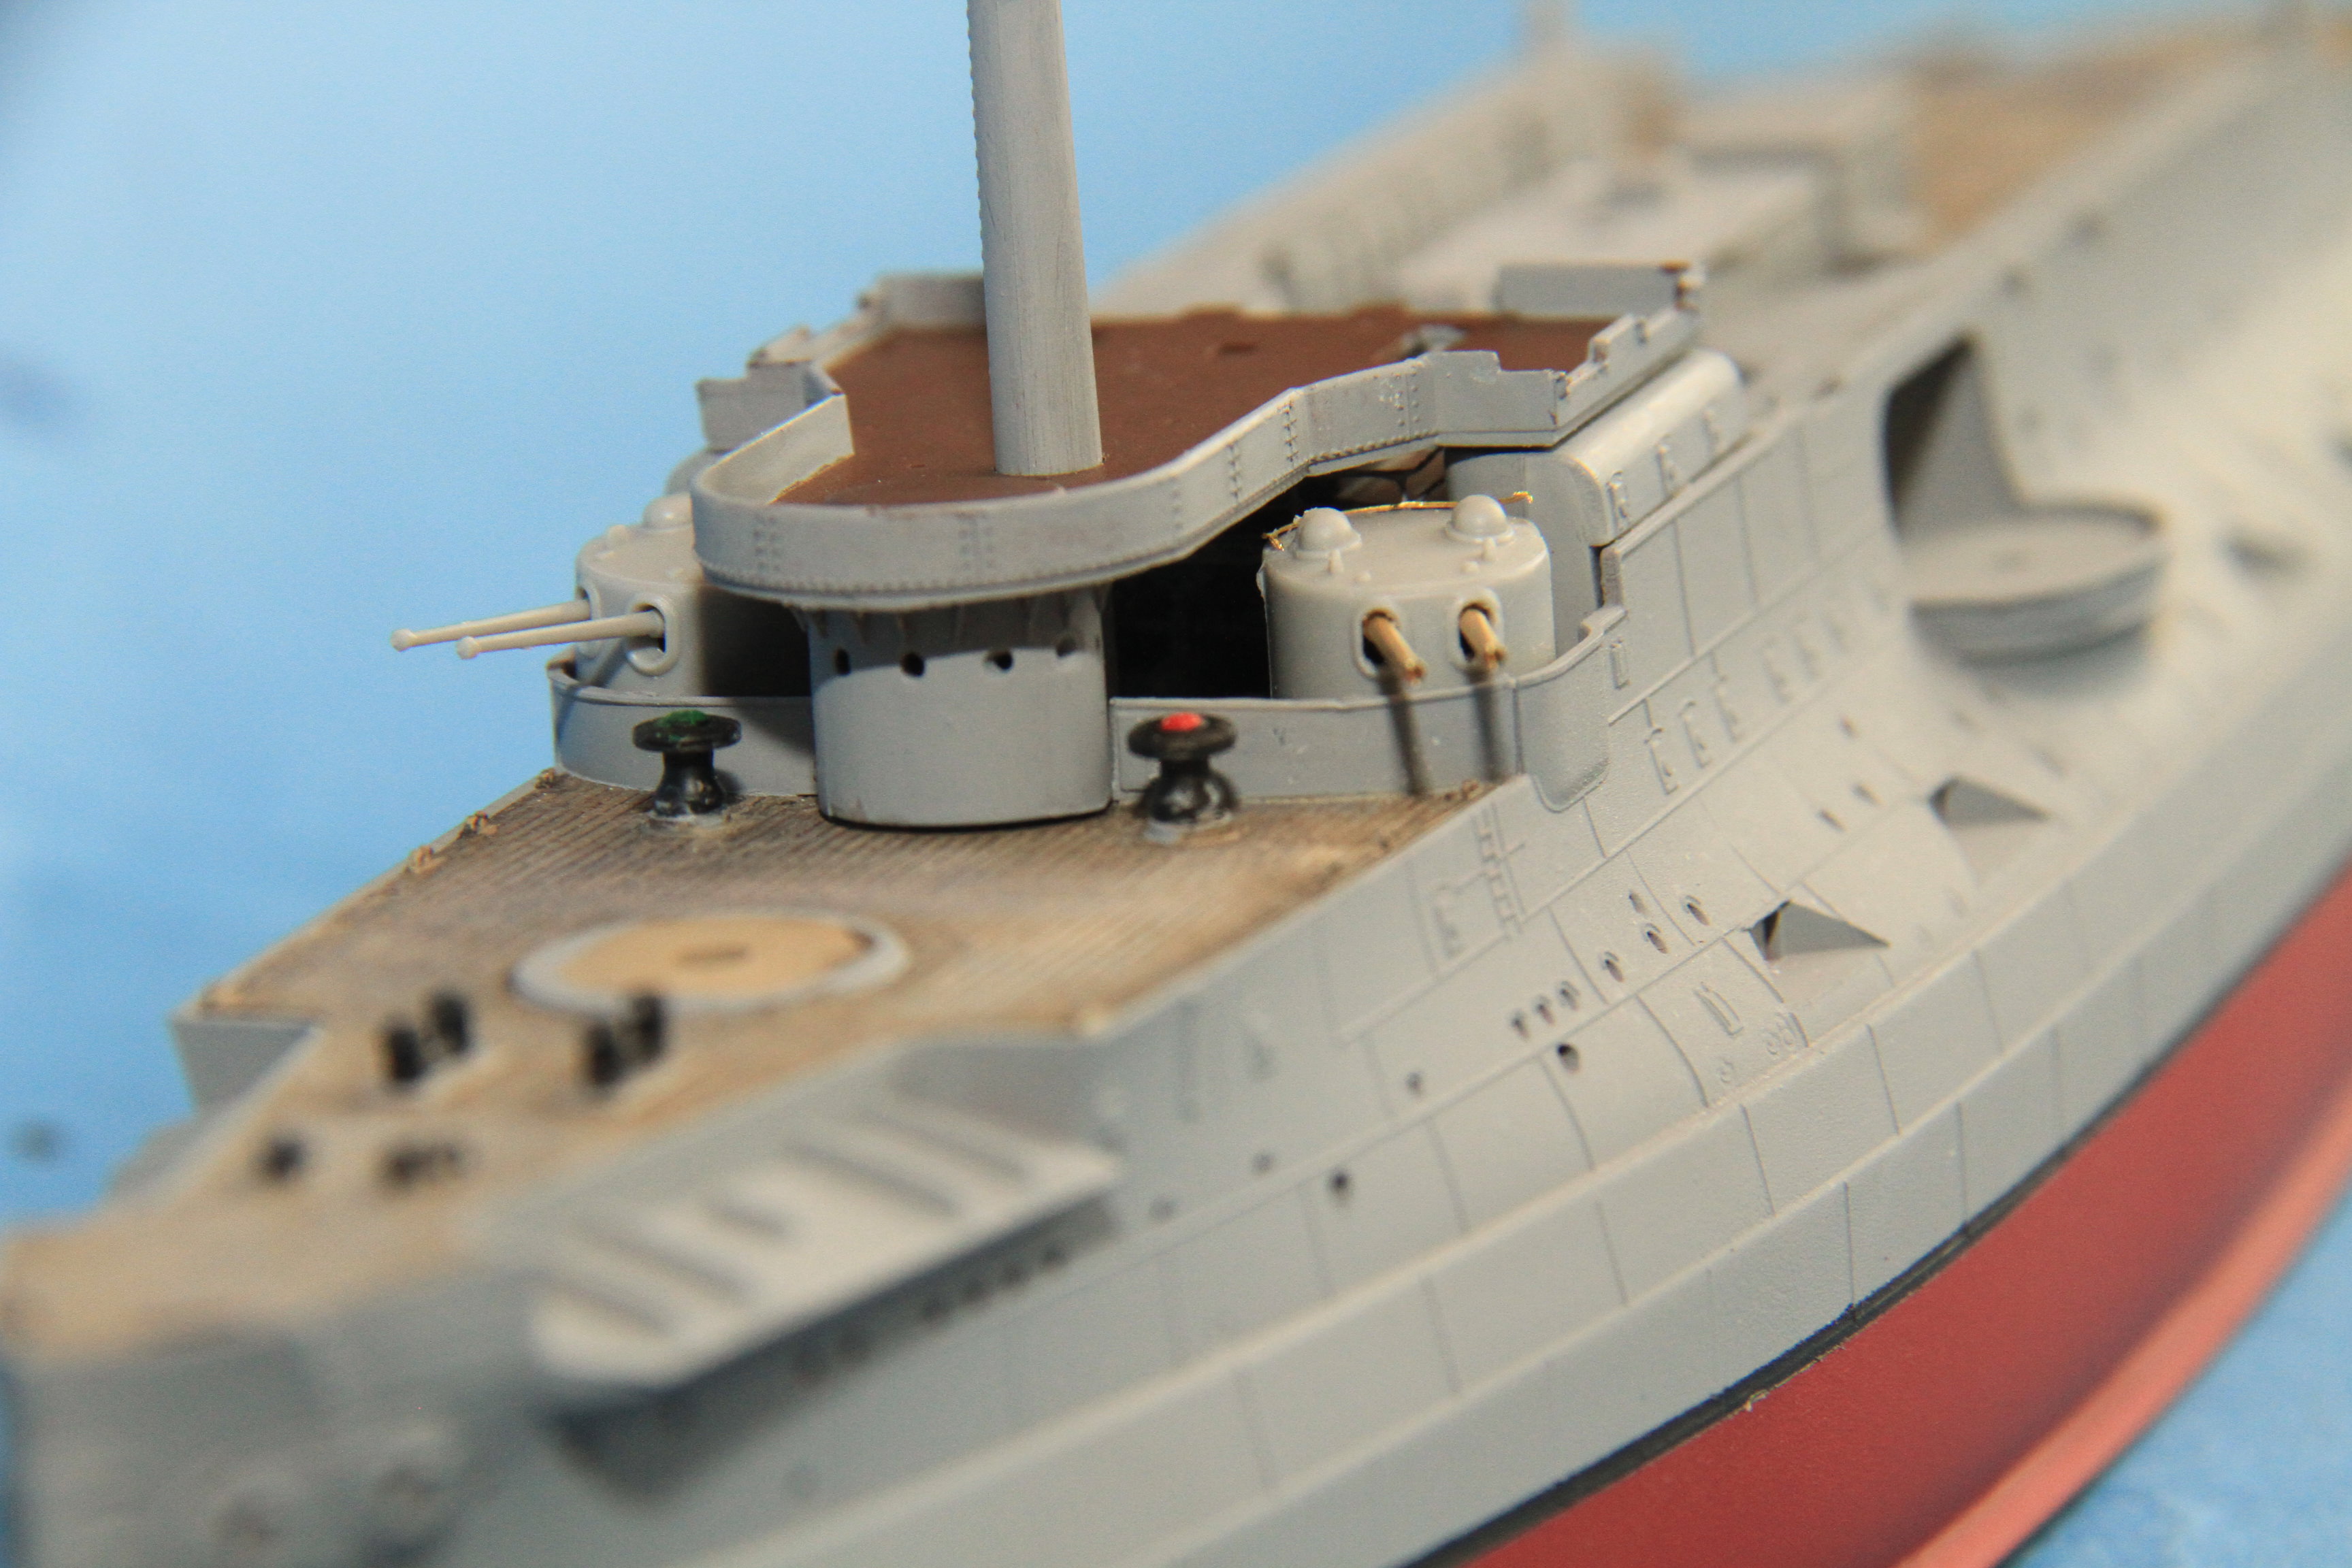
Railings, ladders and the binnacle on the upper bridge. needs a couple of voicepipes.
The 75mm guns for the lower bridge built, plastic pedestal and barrel and etched mount. (I did bottle using the brass barrels, too on display. a fraction of a mmm off centre and it would really show.)
Painted and in place, with some more ladders.
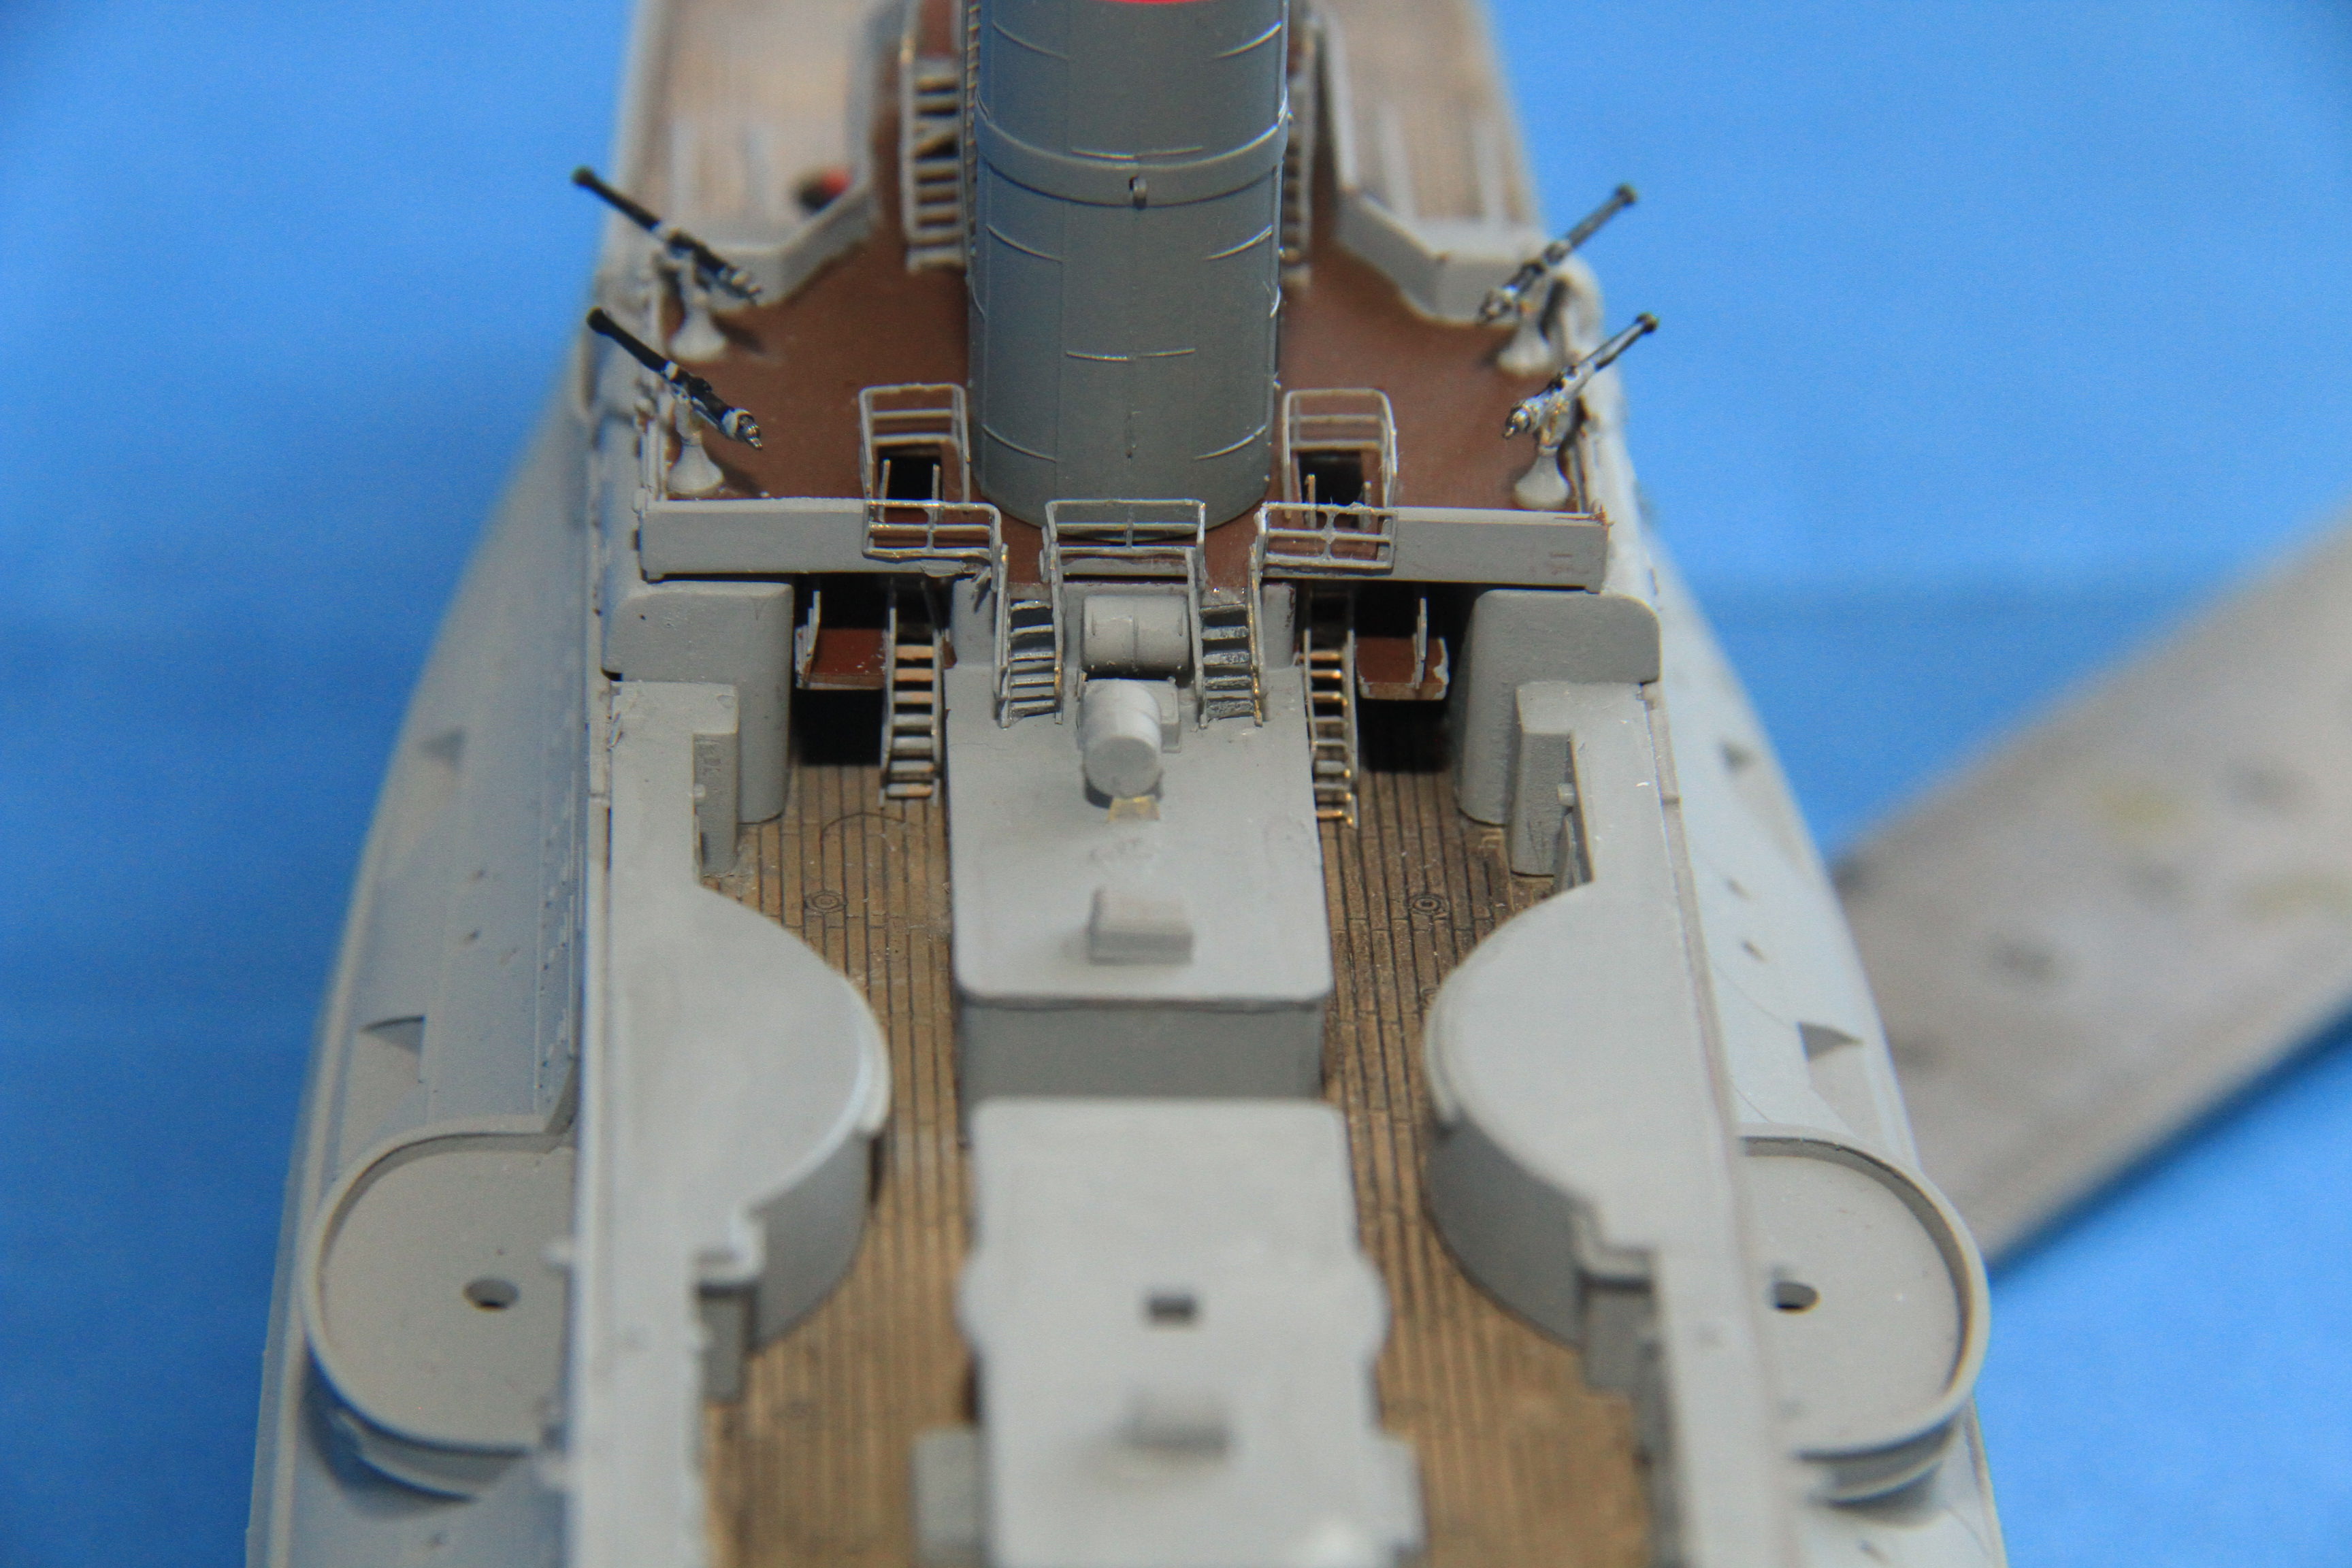
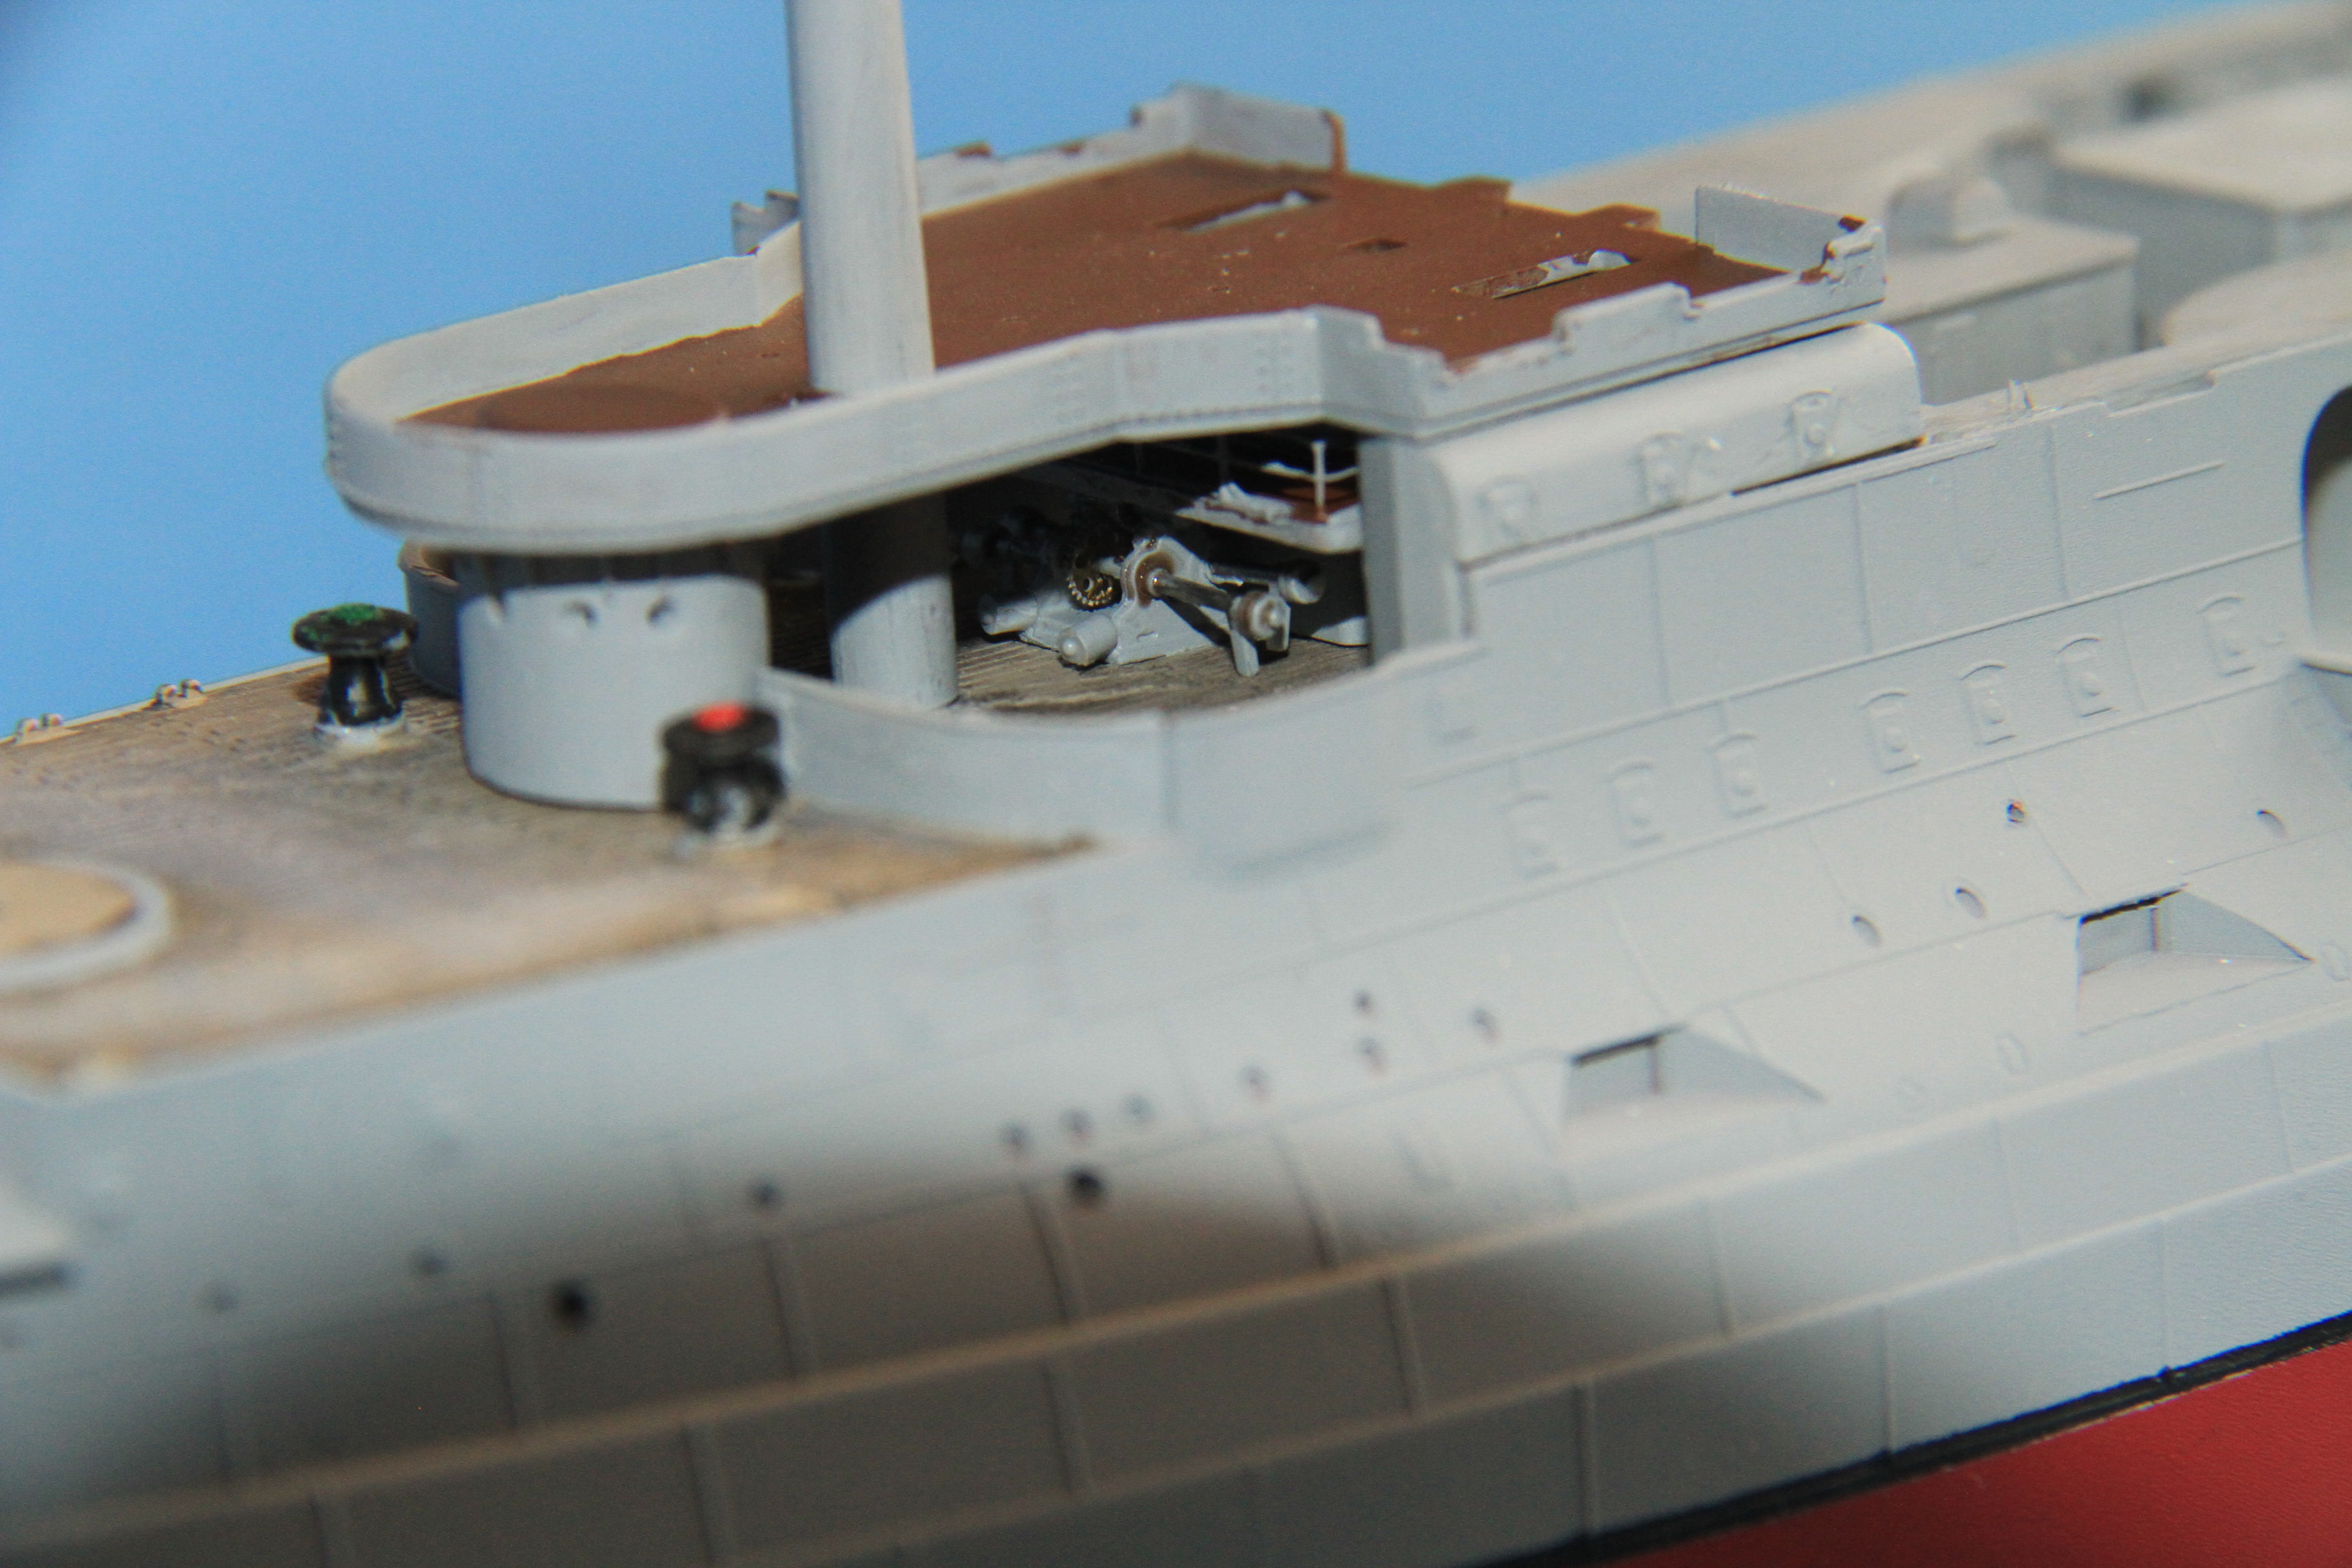
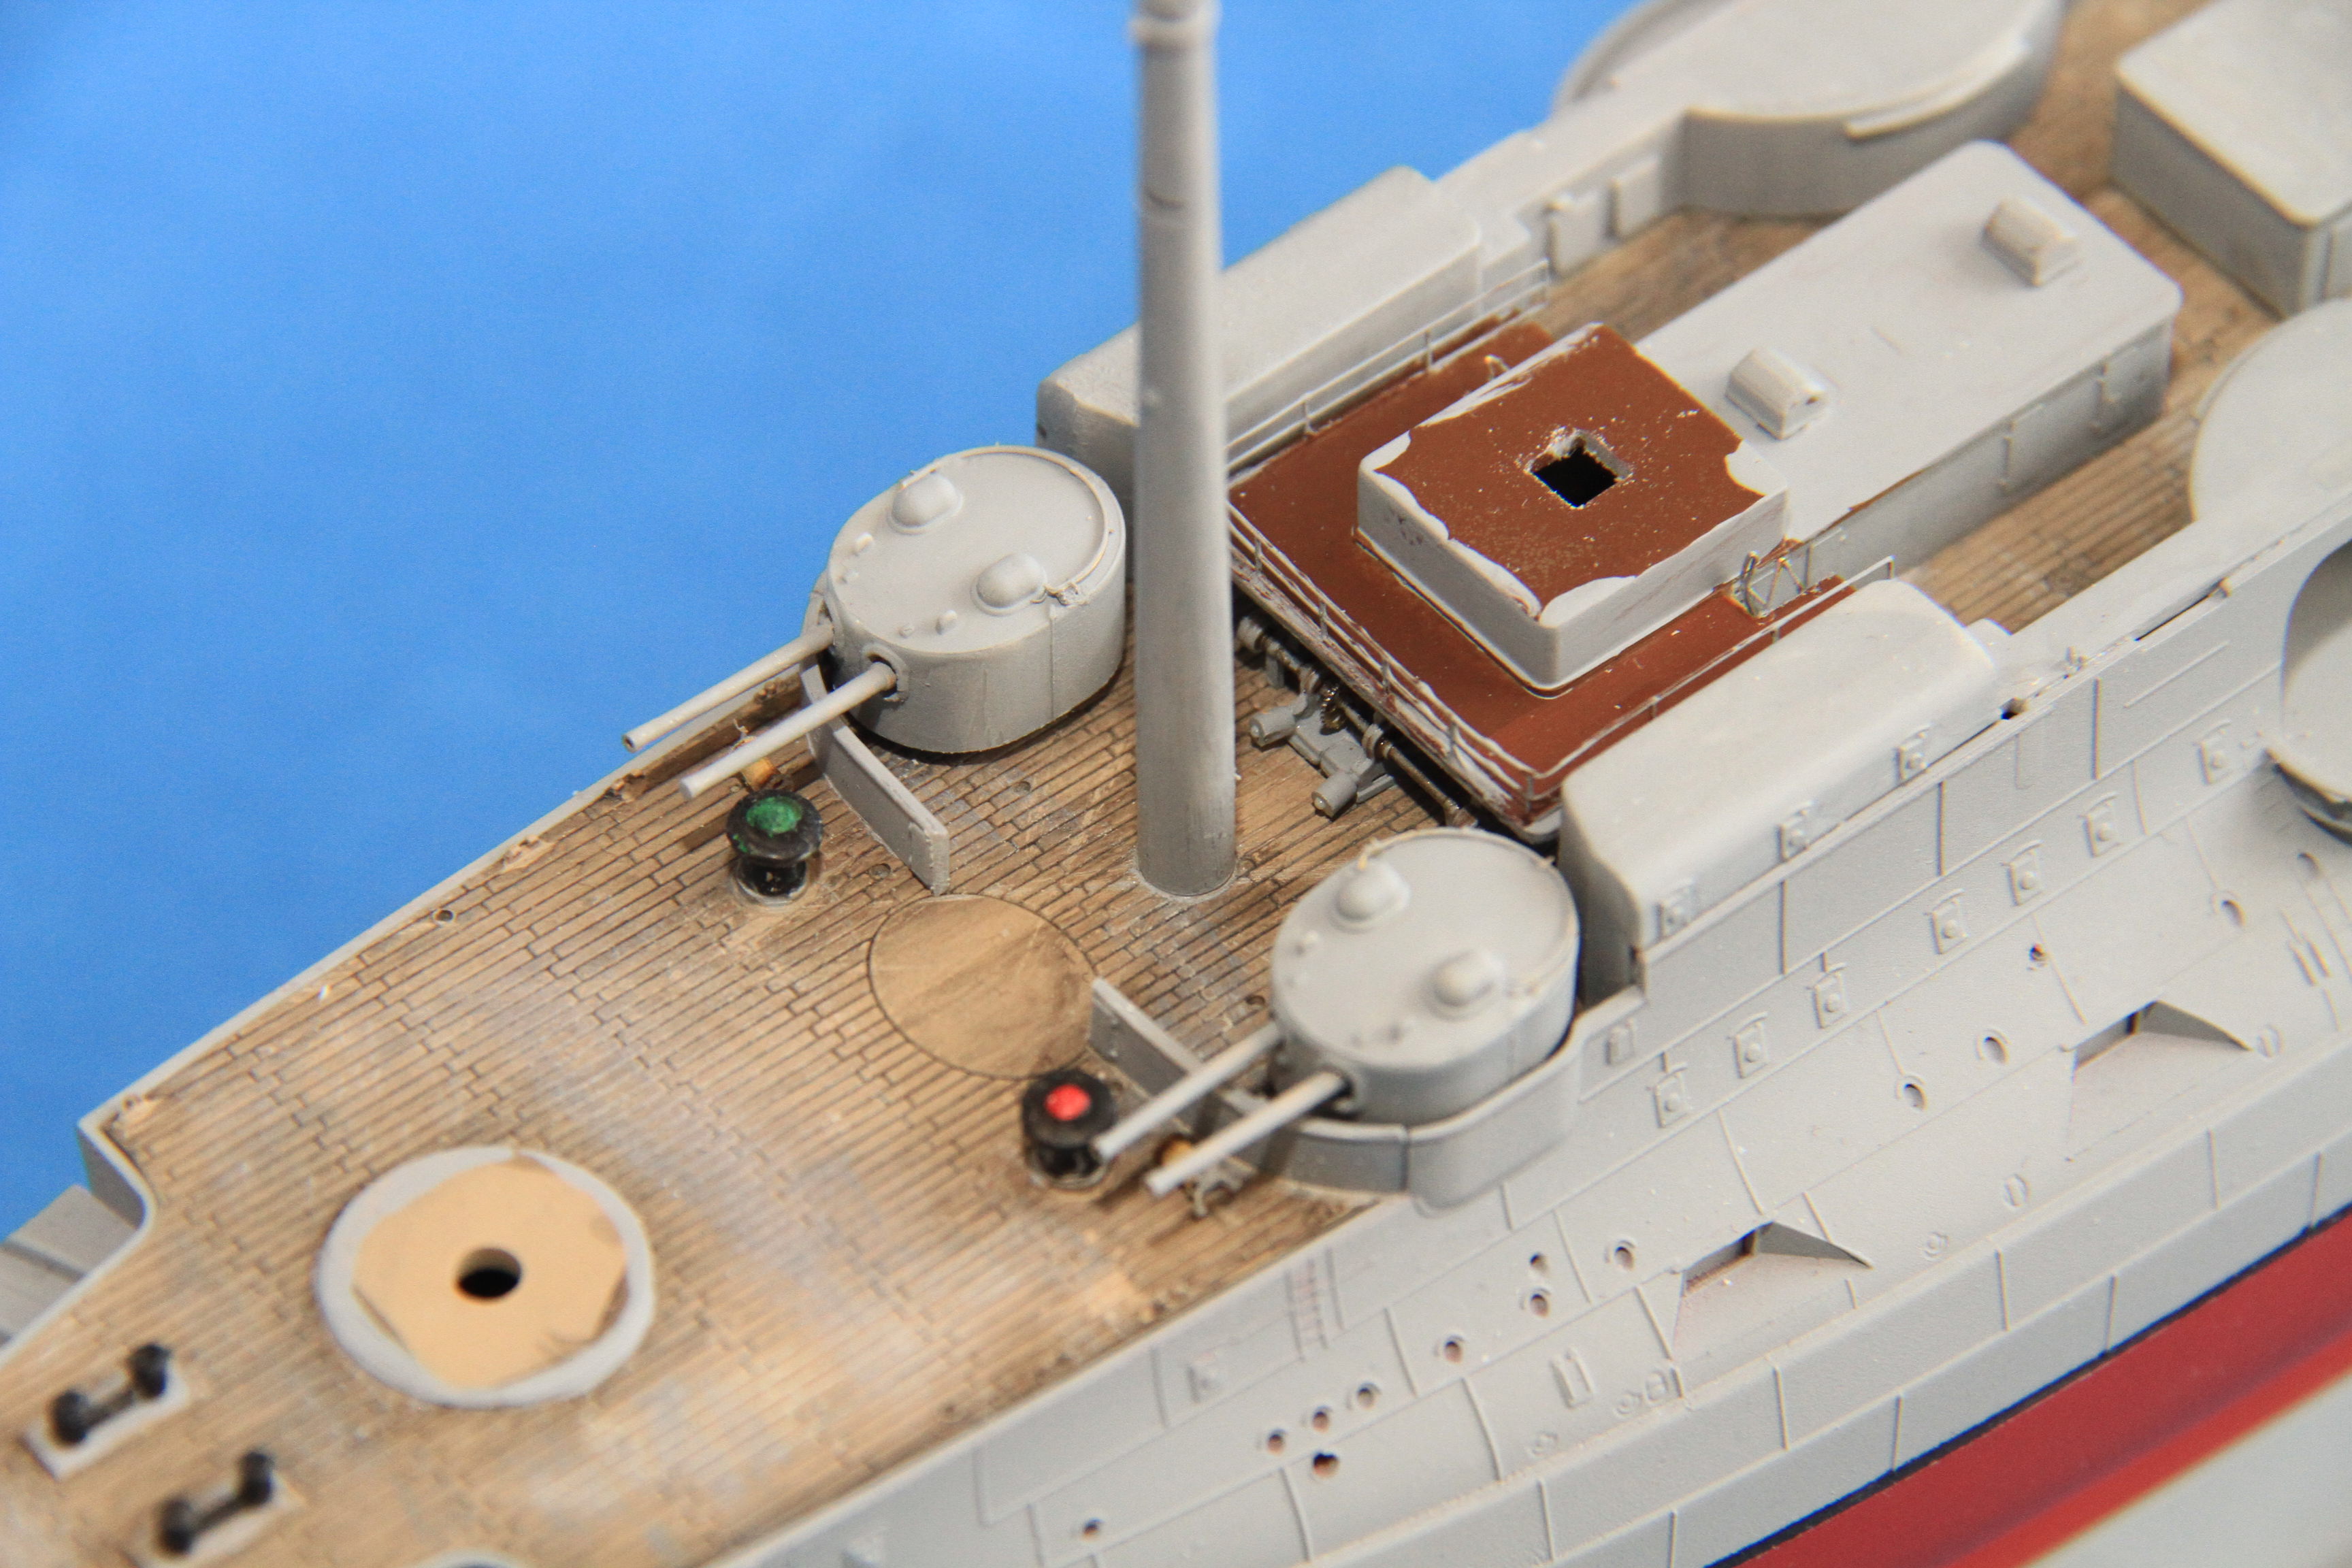
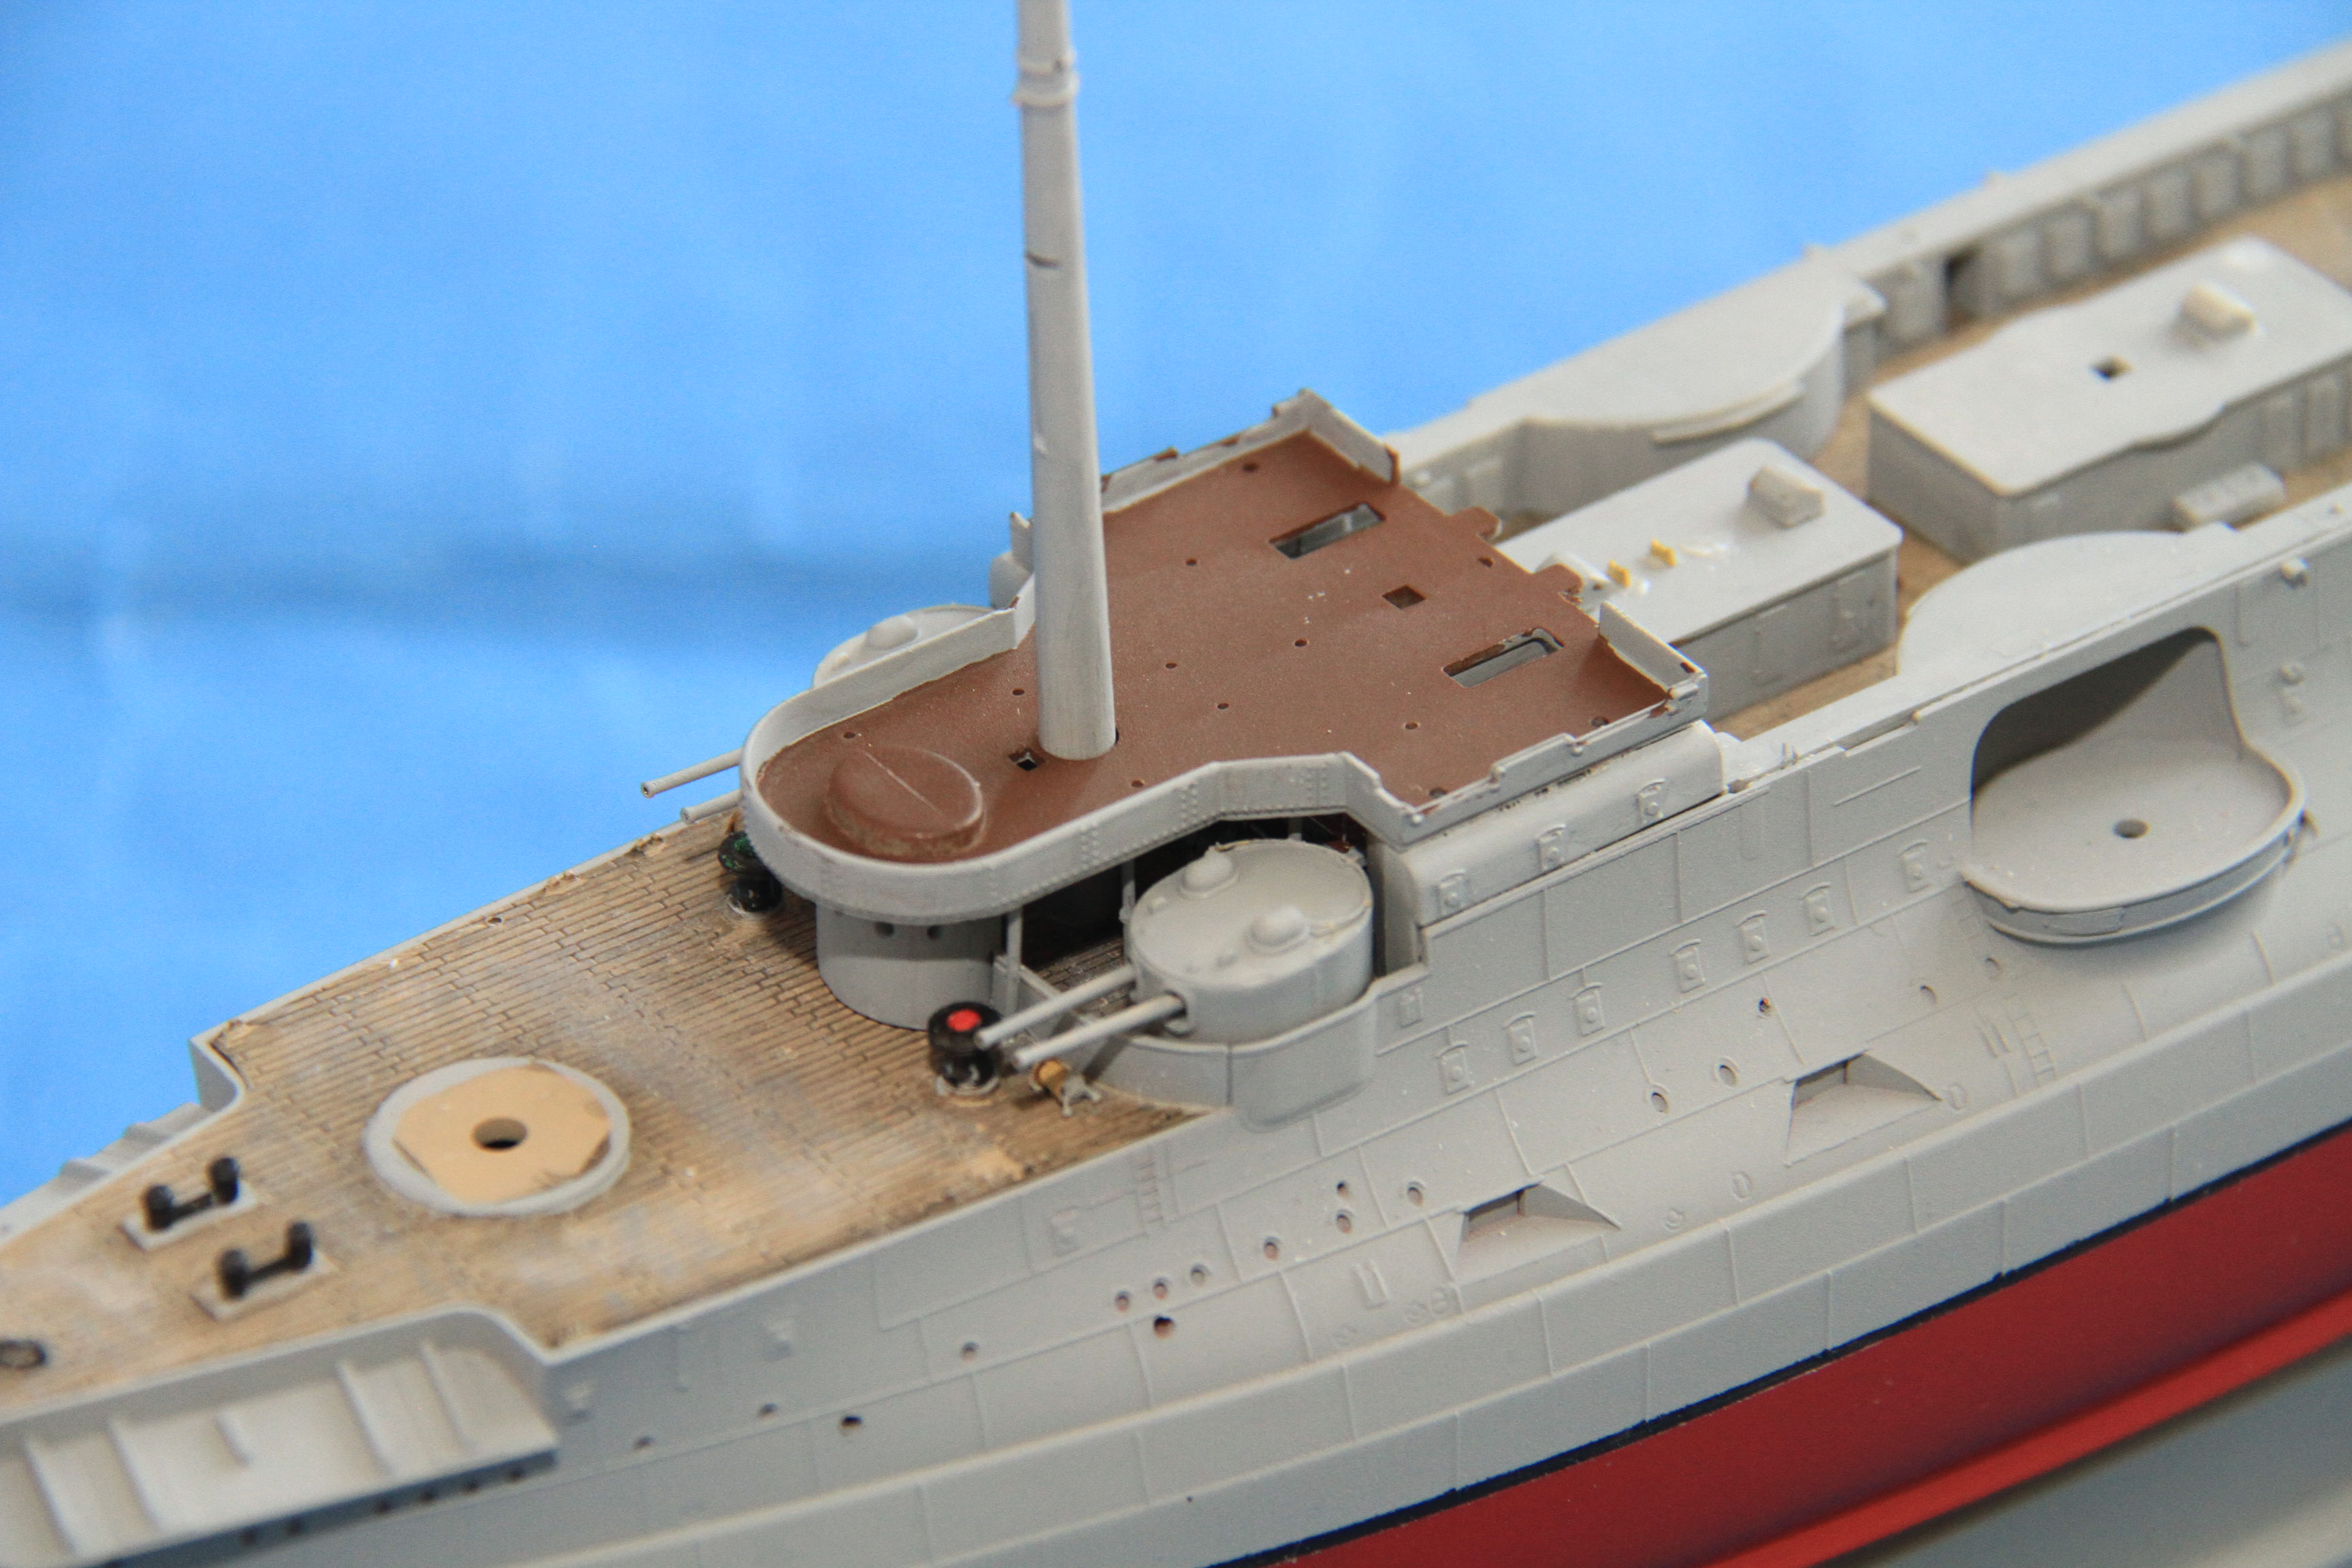
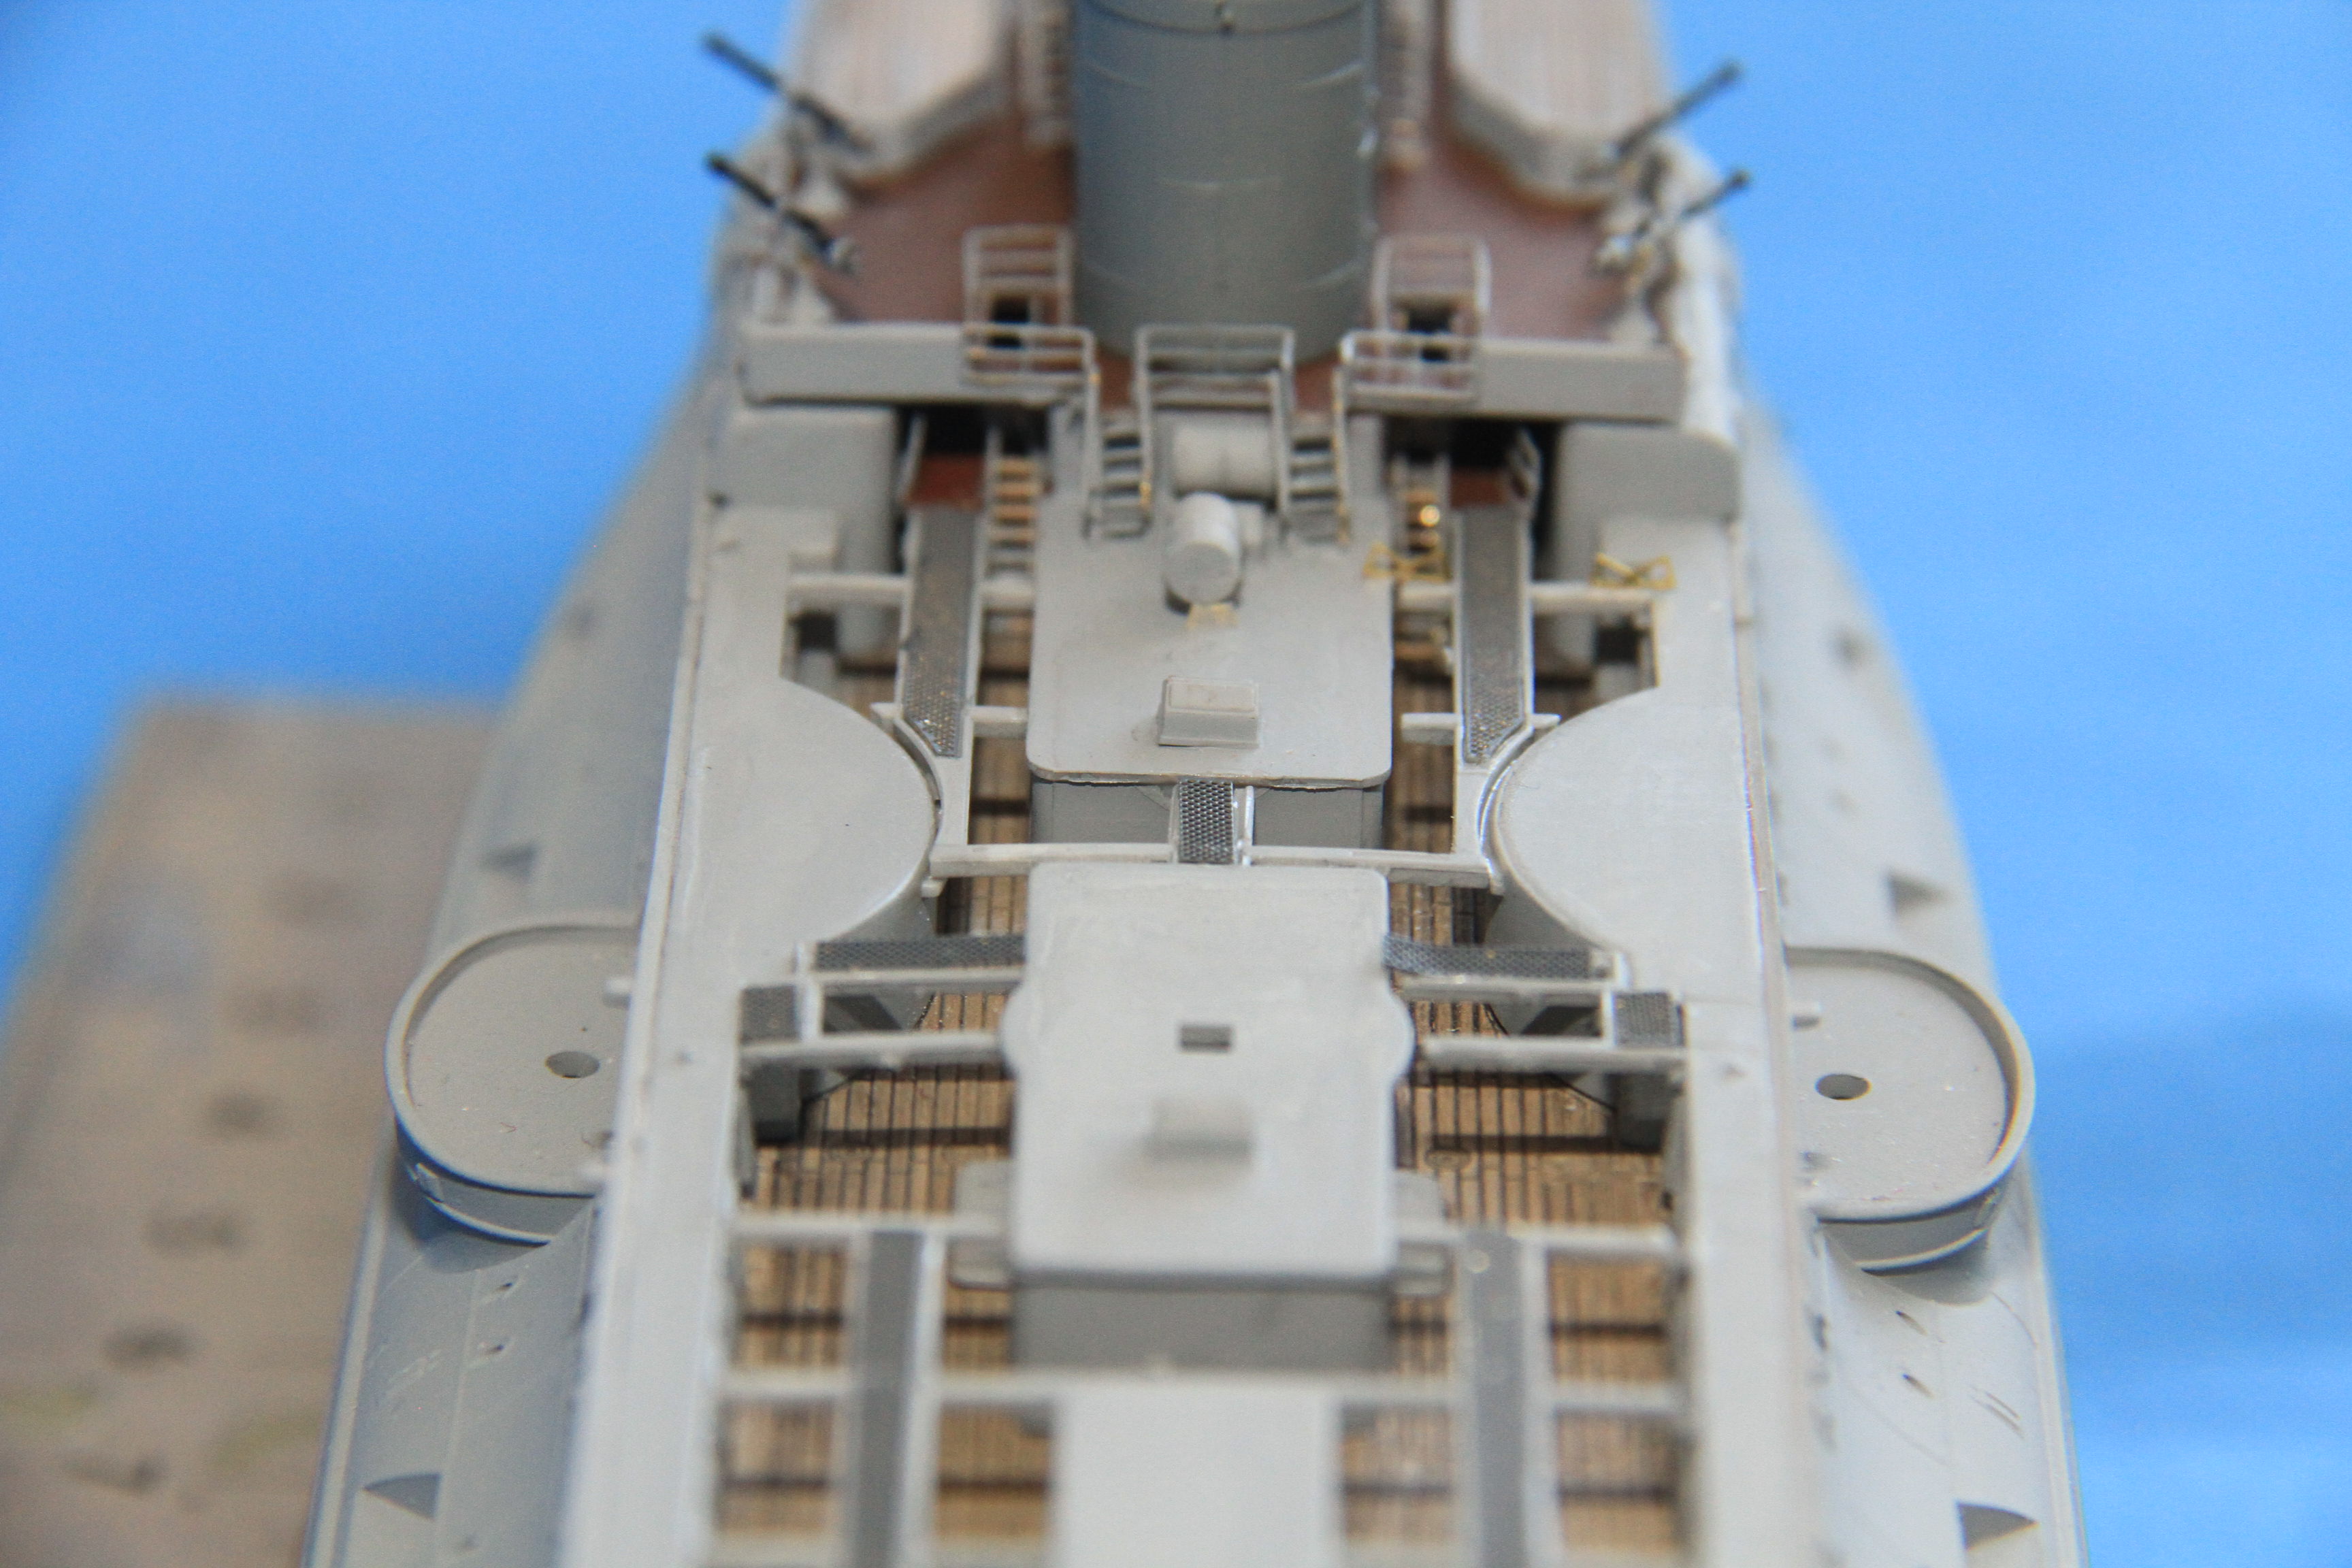
The winch that sits at the base of the mainmast.
and will likely disappear under some boats. Partially gone under the structure of the boat stowage.
The etched walkways fitted in place, they mesh nicely with deck under the lower bridge.
So far is going together nicely.
Cheers
Si
Railings, ladders and the binnacle on the upper bridge. needs a couple of voicepipes.
The 75mm guns for the lower bridge built, plastic pedestal and barrel and etched mount. (I did bottle using the brass barrels, too on display. a fraction of a mmm off centre and it would really show.)
Painted and in place, with some more ladders.
The winch that sits at the base of the mainmast.
and will likely disappear under some boats. Partially gone under the structure of the boat stowage.
The etched walkways fitted in place, they mesh nicely with deck under the lower bridge.
So far is going together nicely.
Cheers
Si
GazzaS
#424
Joined: April 23, 2015
KitMaker: 4,648 posts
Model Shipwrights: 249 posts
Posted: Tuesday, July 17, 2018 - 02:44 PM UTC
Great update, Si. Love to see these old warships come together.
Gaz
Gaz
 |

WEB HOSTING BY


Copyright ©2021 Model Shipwrights and Kitmaker Network, a subsidiary of Silver Star Enterprises
All Rights Reserved. Please read our Conditions of Use and Privacy Policy.
All Rights Reserved. Please read our Conditions of Use and Privacy Policy.