Ships by Class/Type: Battleships
Topics from the Dreadnaught era to modern day.
Hosted by Steve Joyce
Mikasa 1902 with Pontos 1/200th.
RedDuster
Visit this Community
England - South East, United Kingdom
Joined: March 01, 2010
KitMaker: 7,078 posts
Model Shipwrights: 6,649 posts
Posted: Thursday, July 02, 2020 - 07:51 AM UTC

Quoted Text

Si,

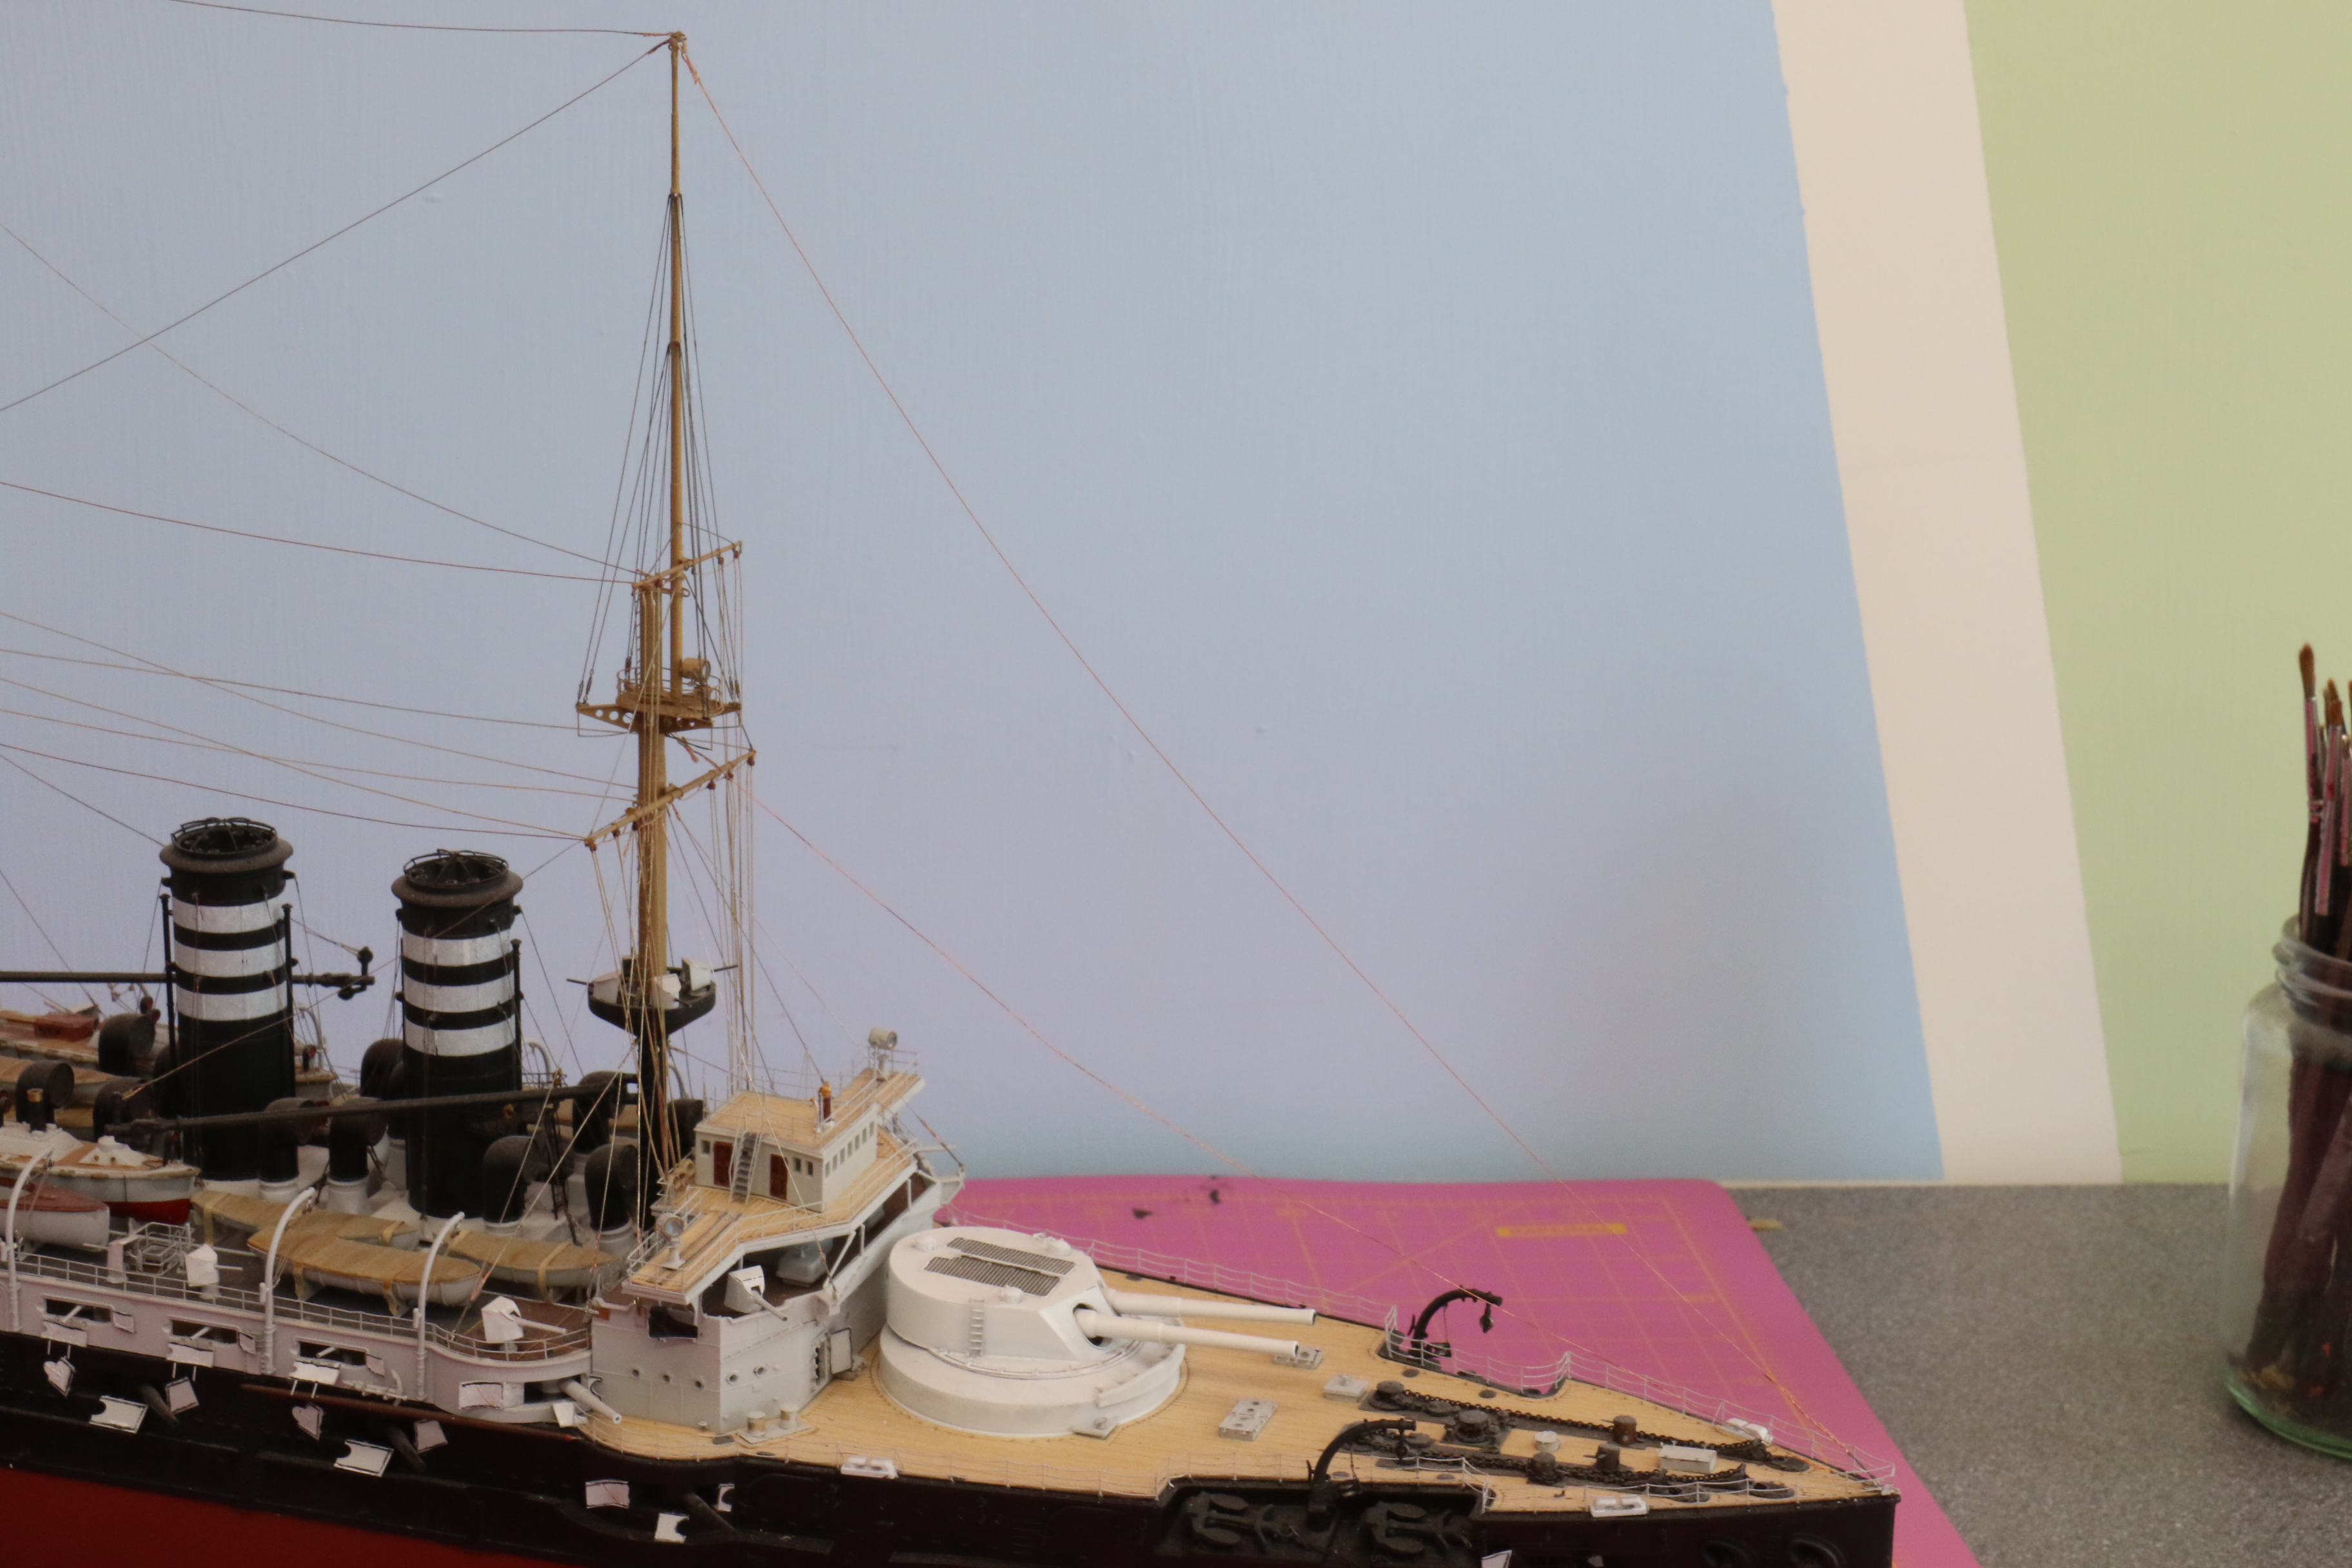
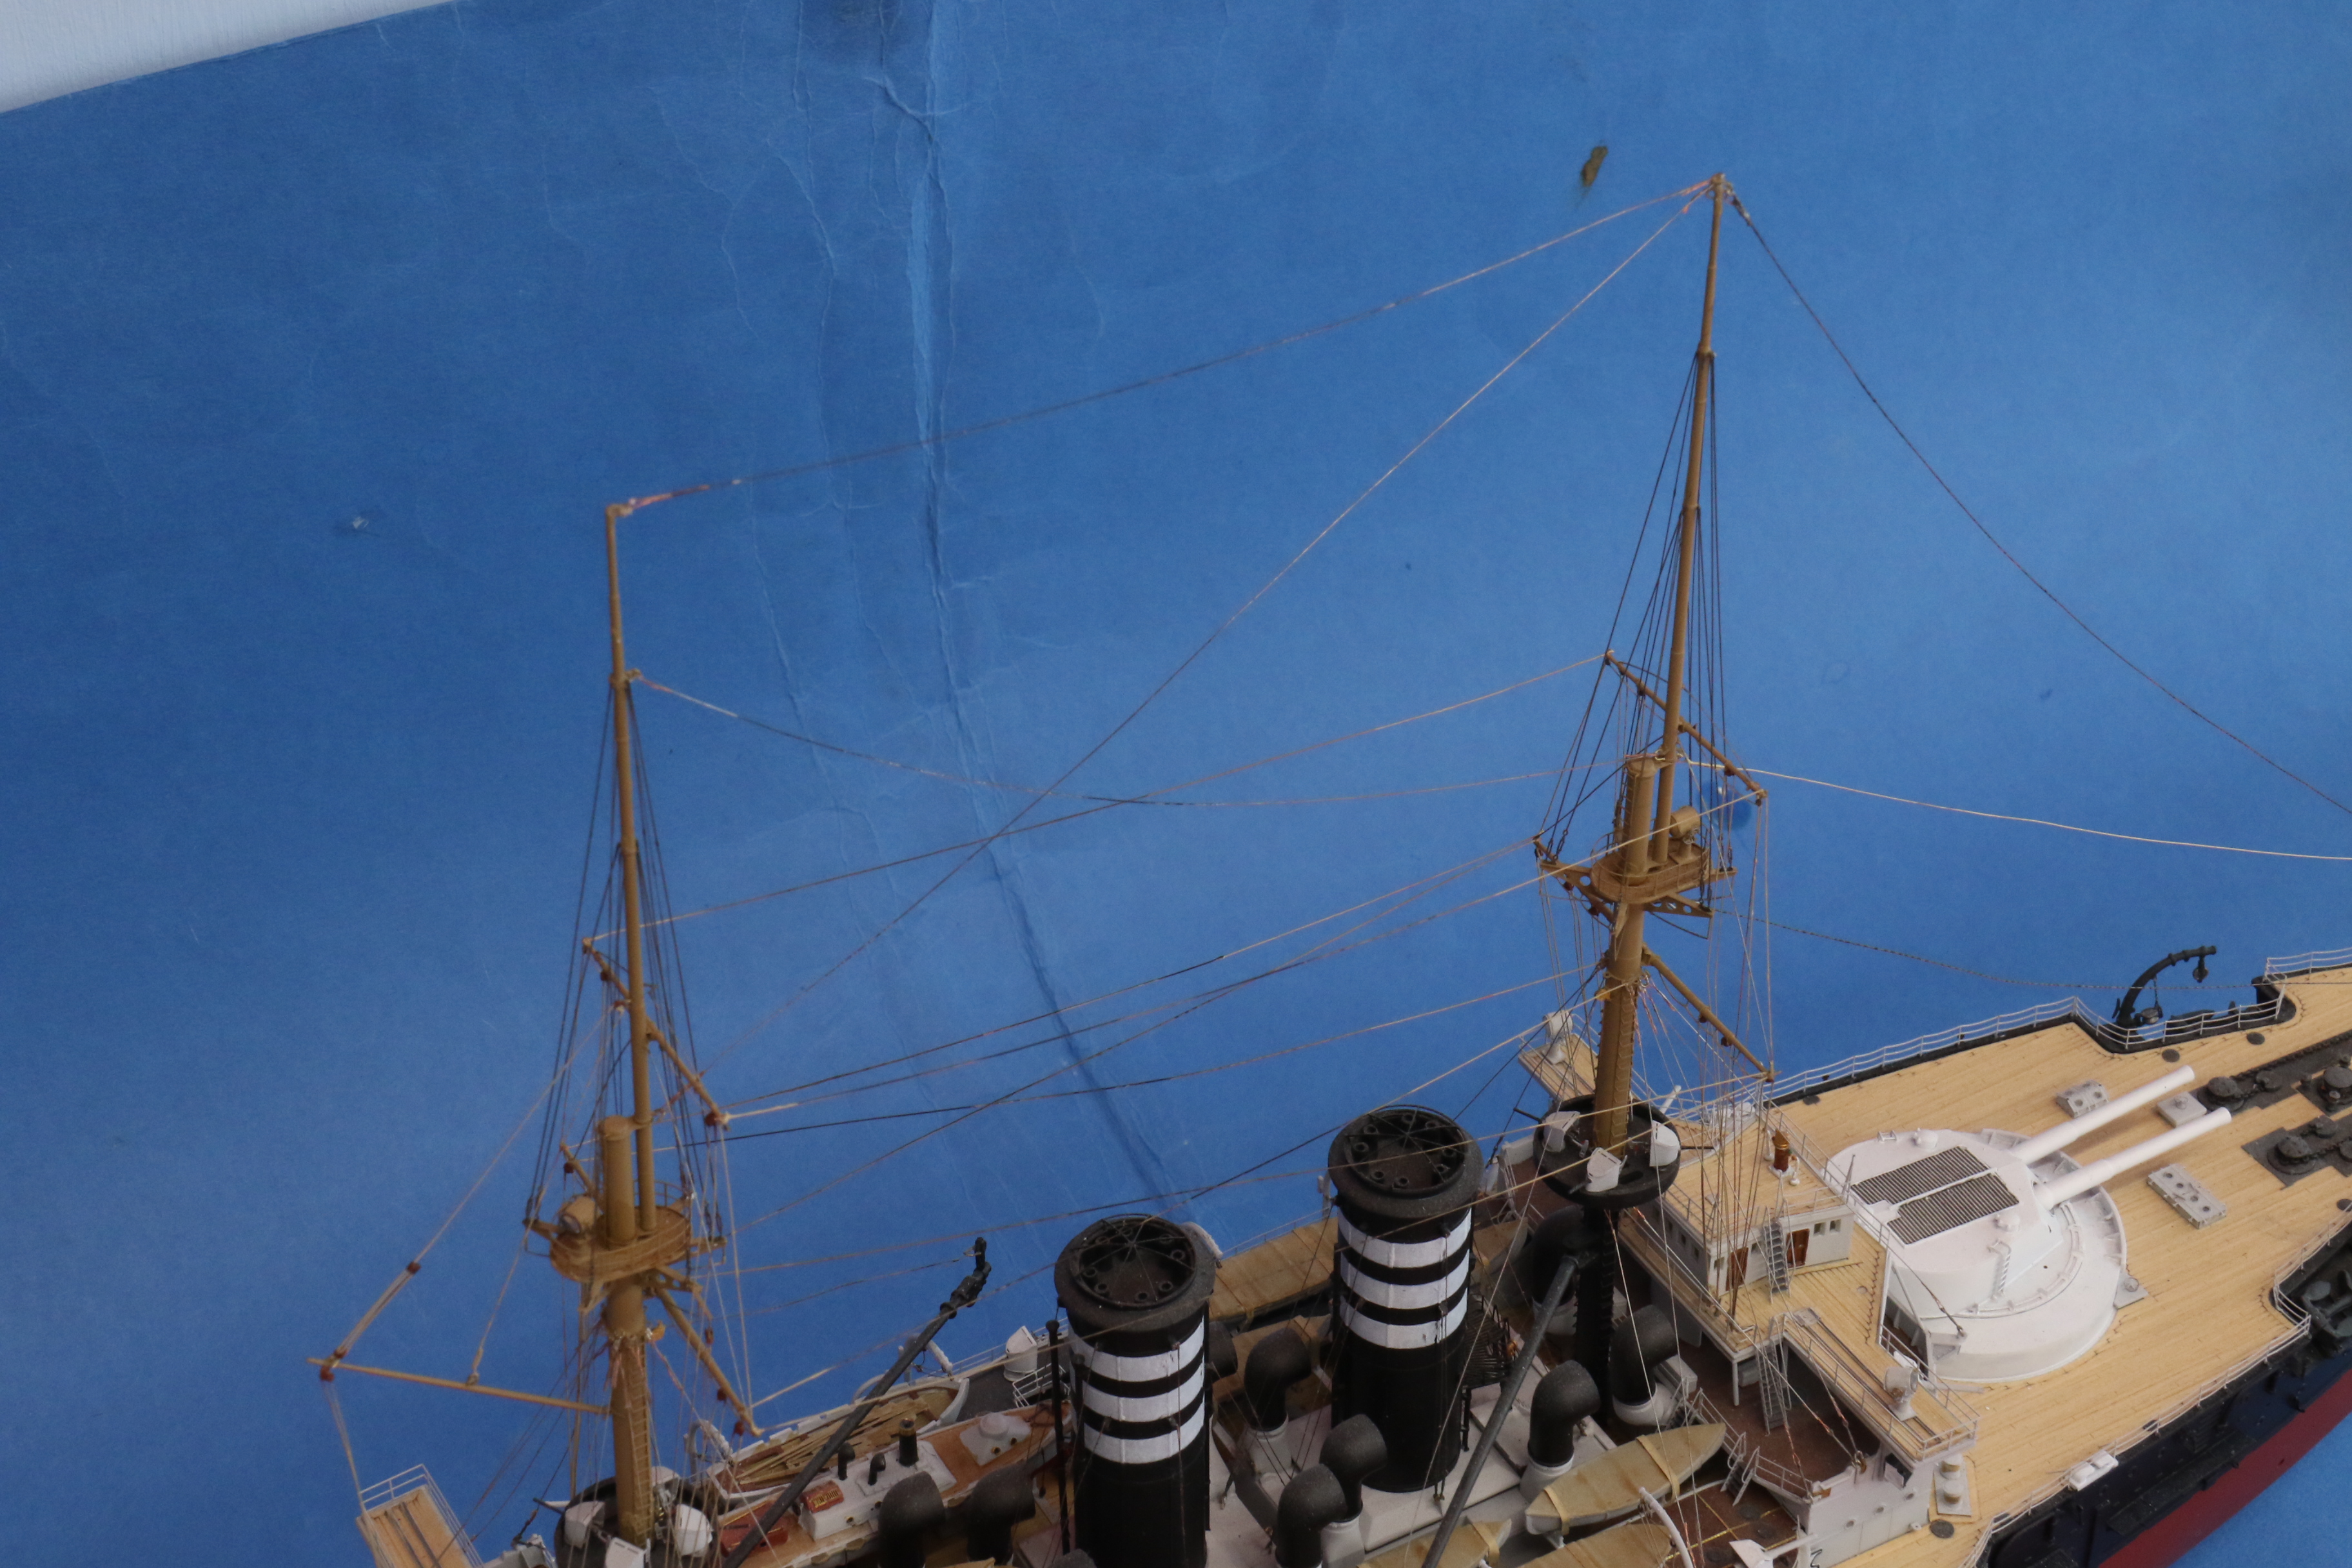
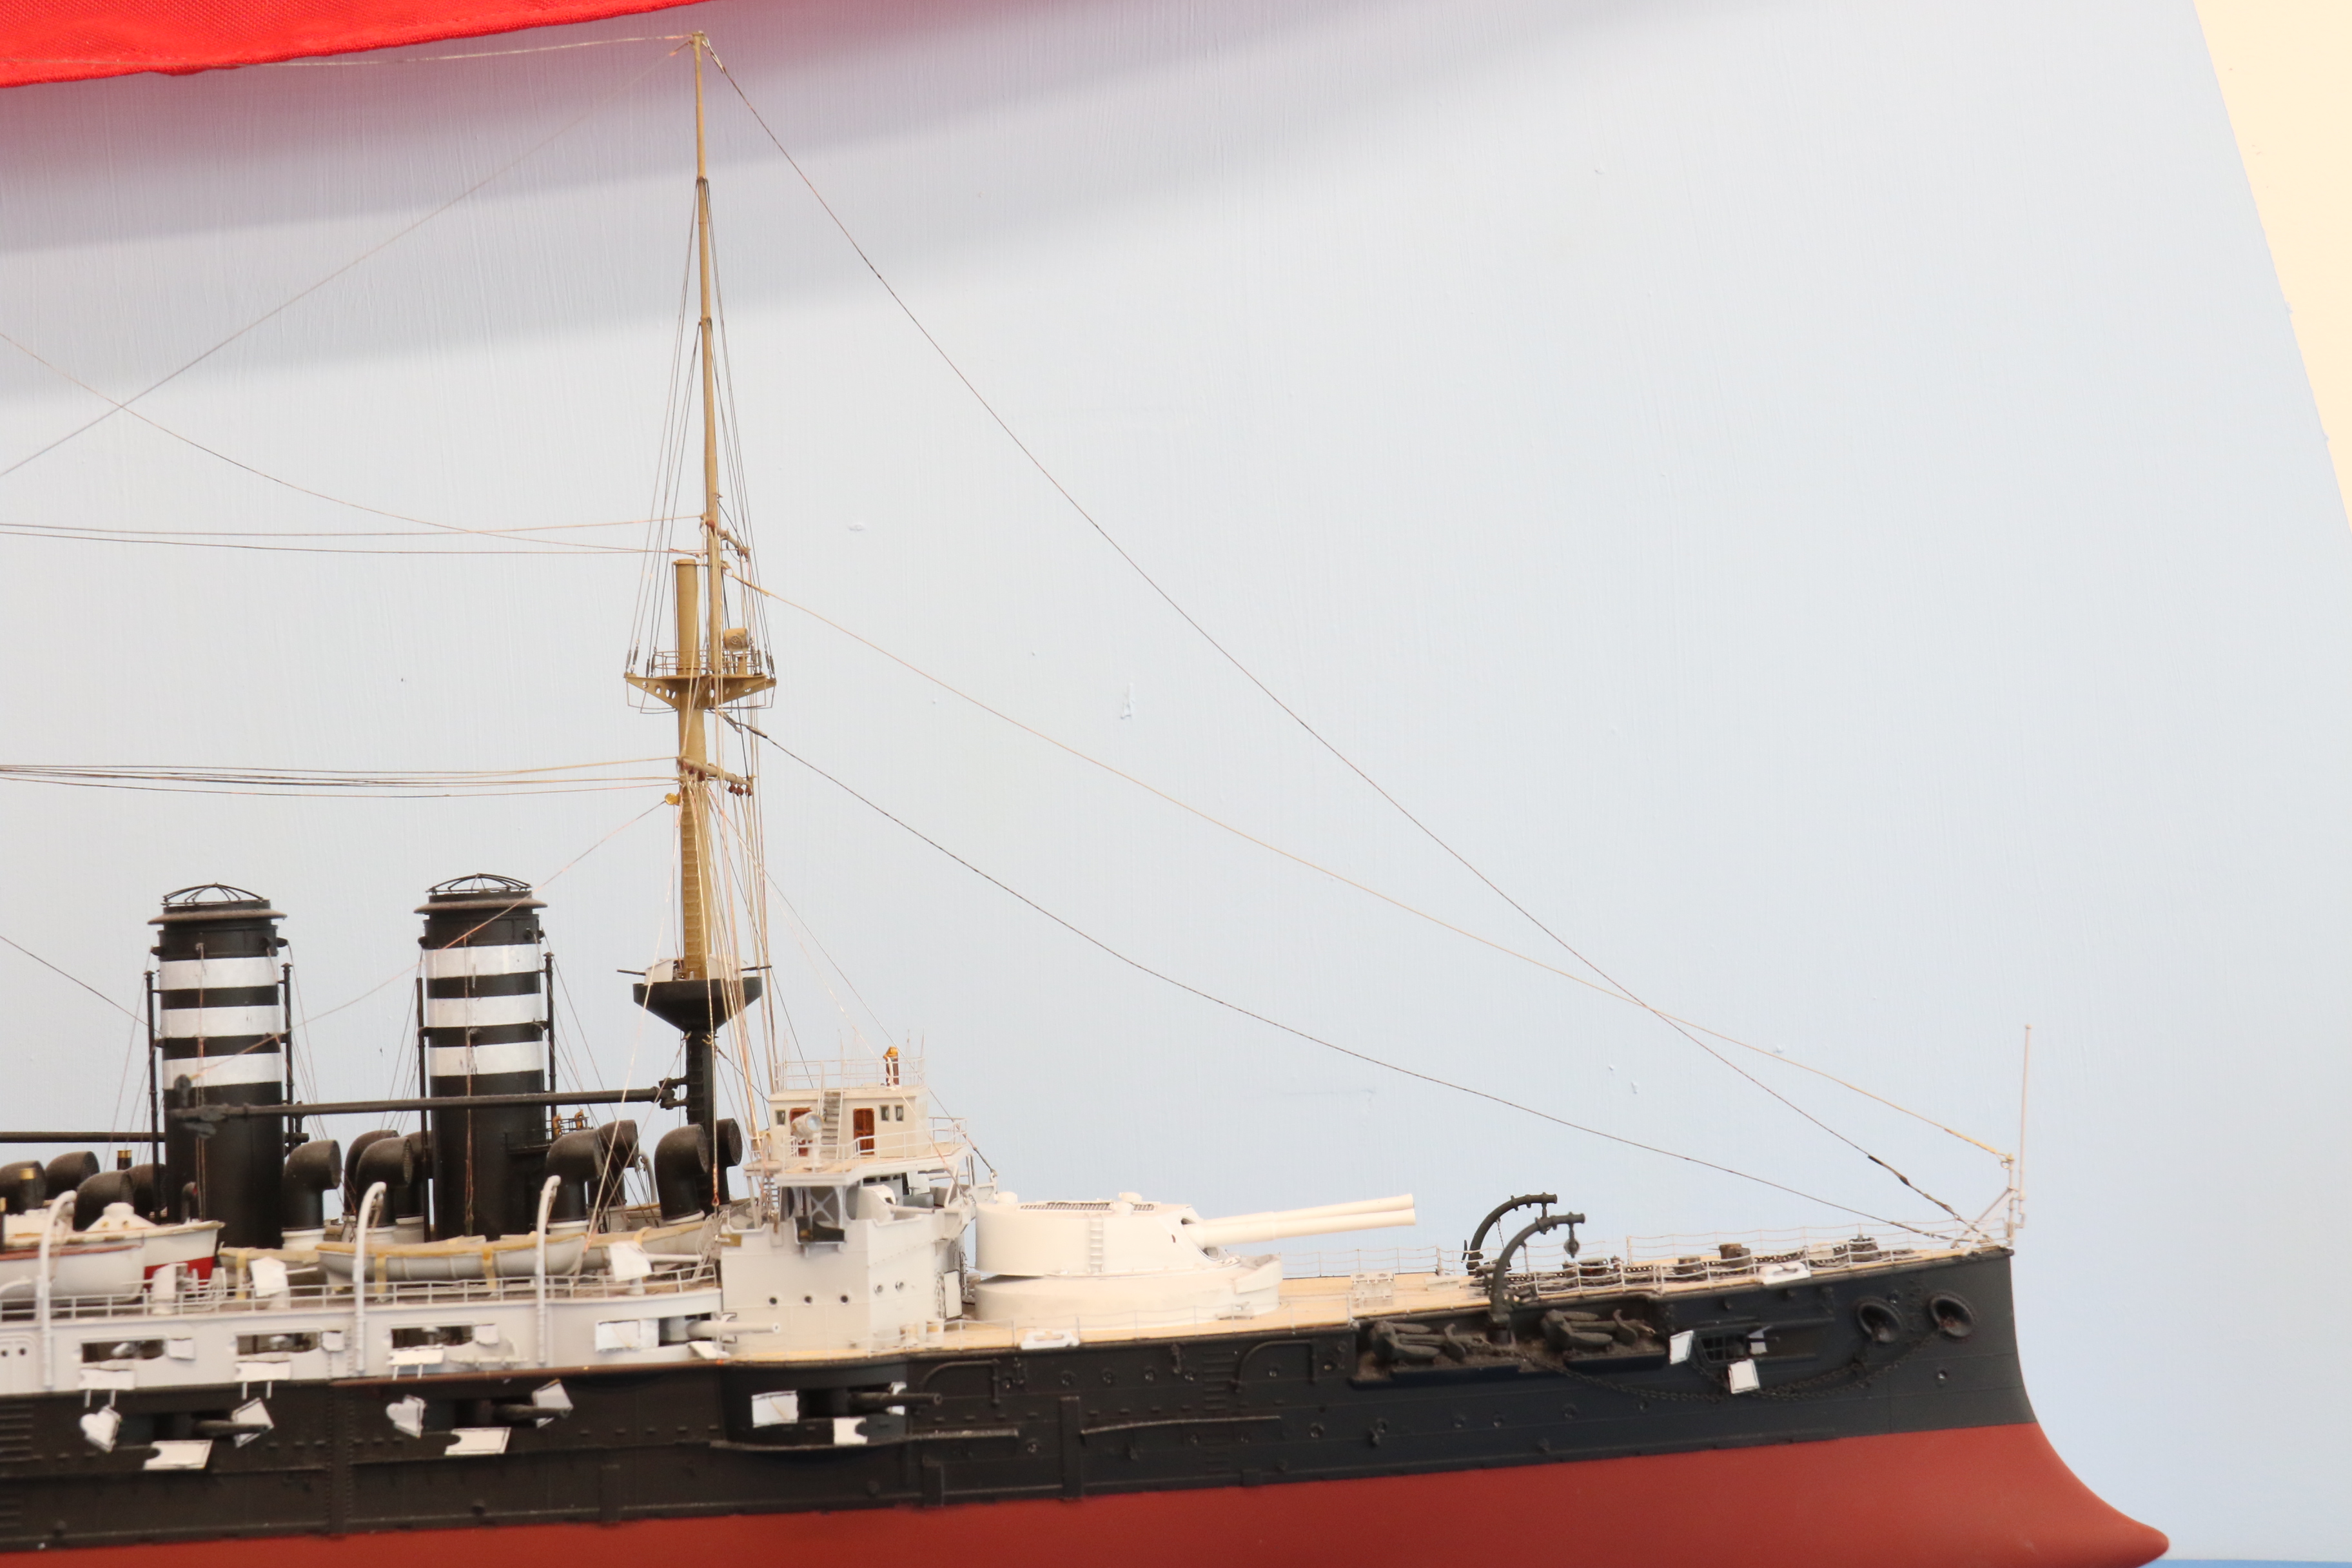
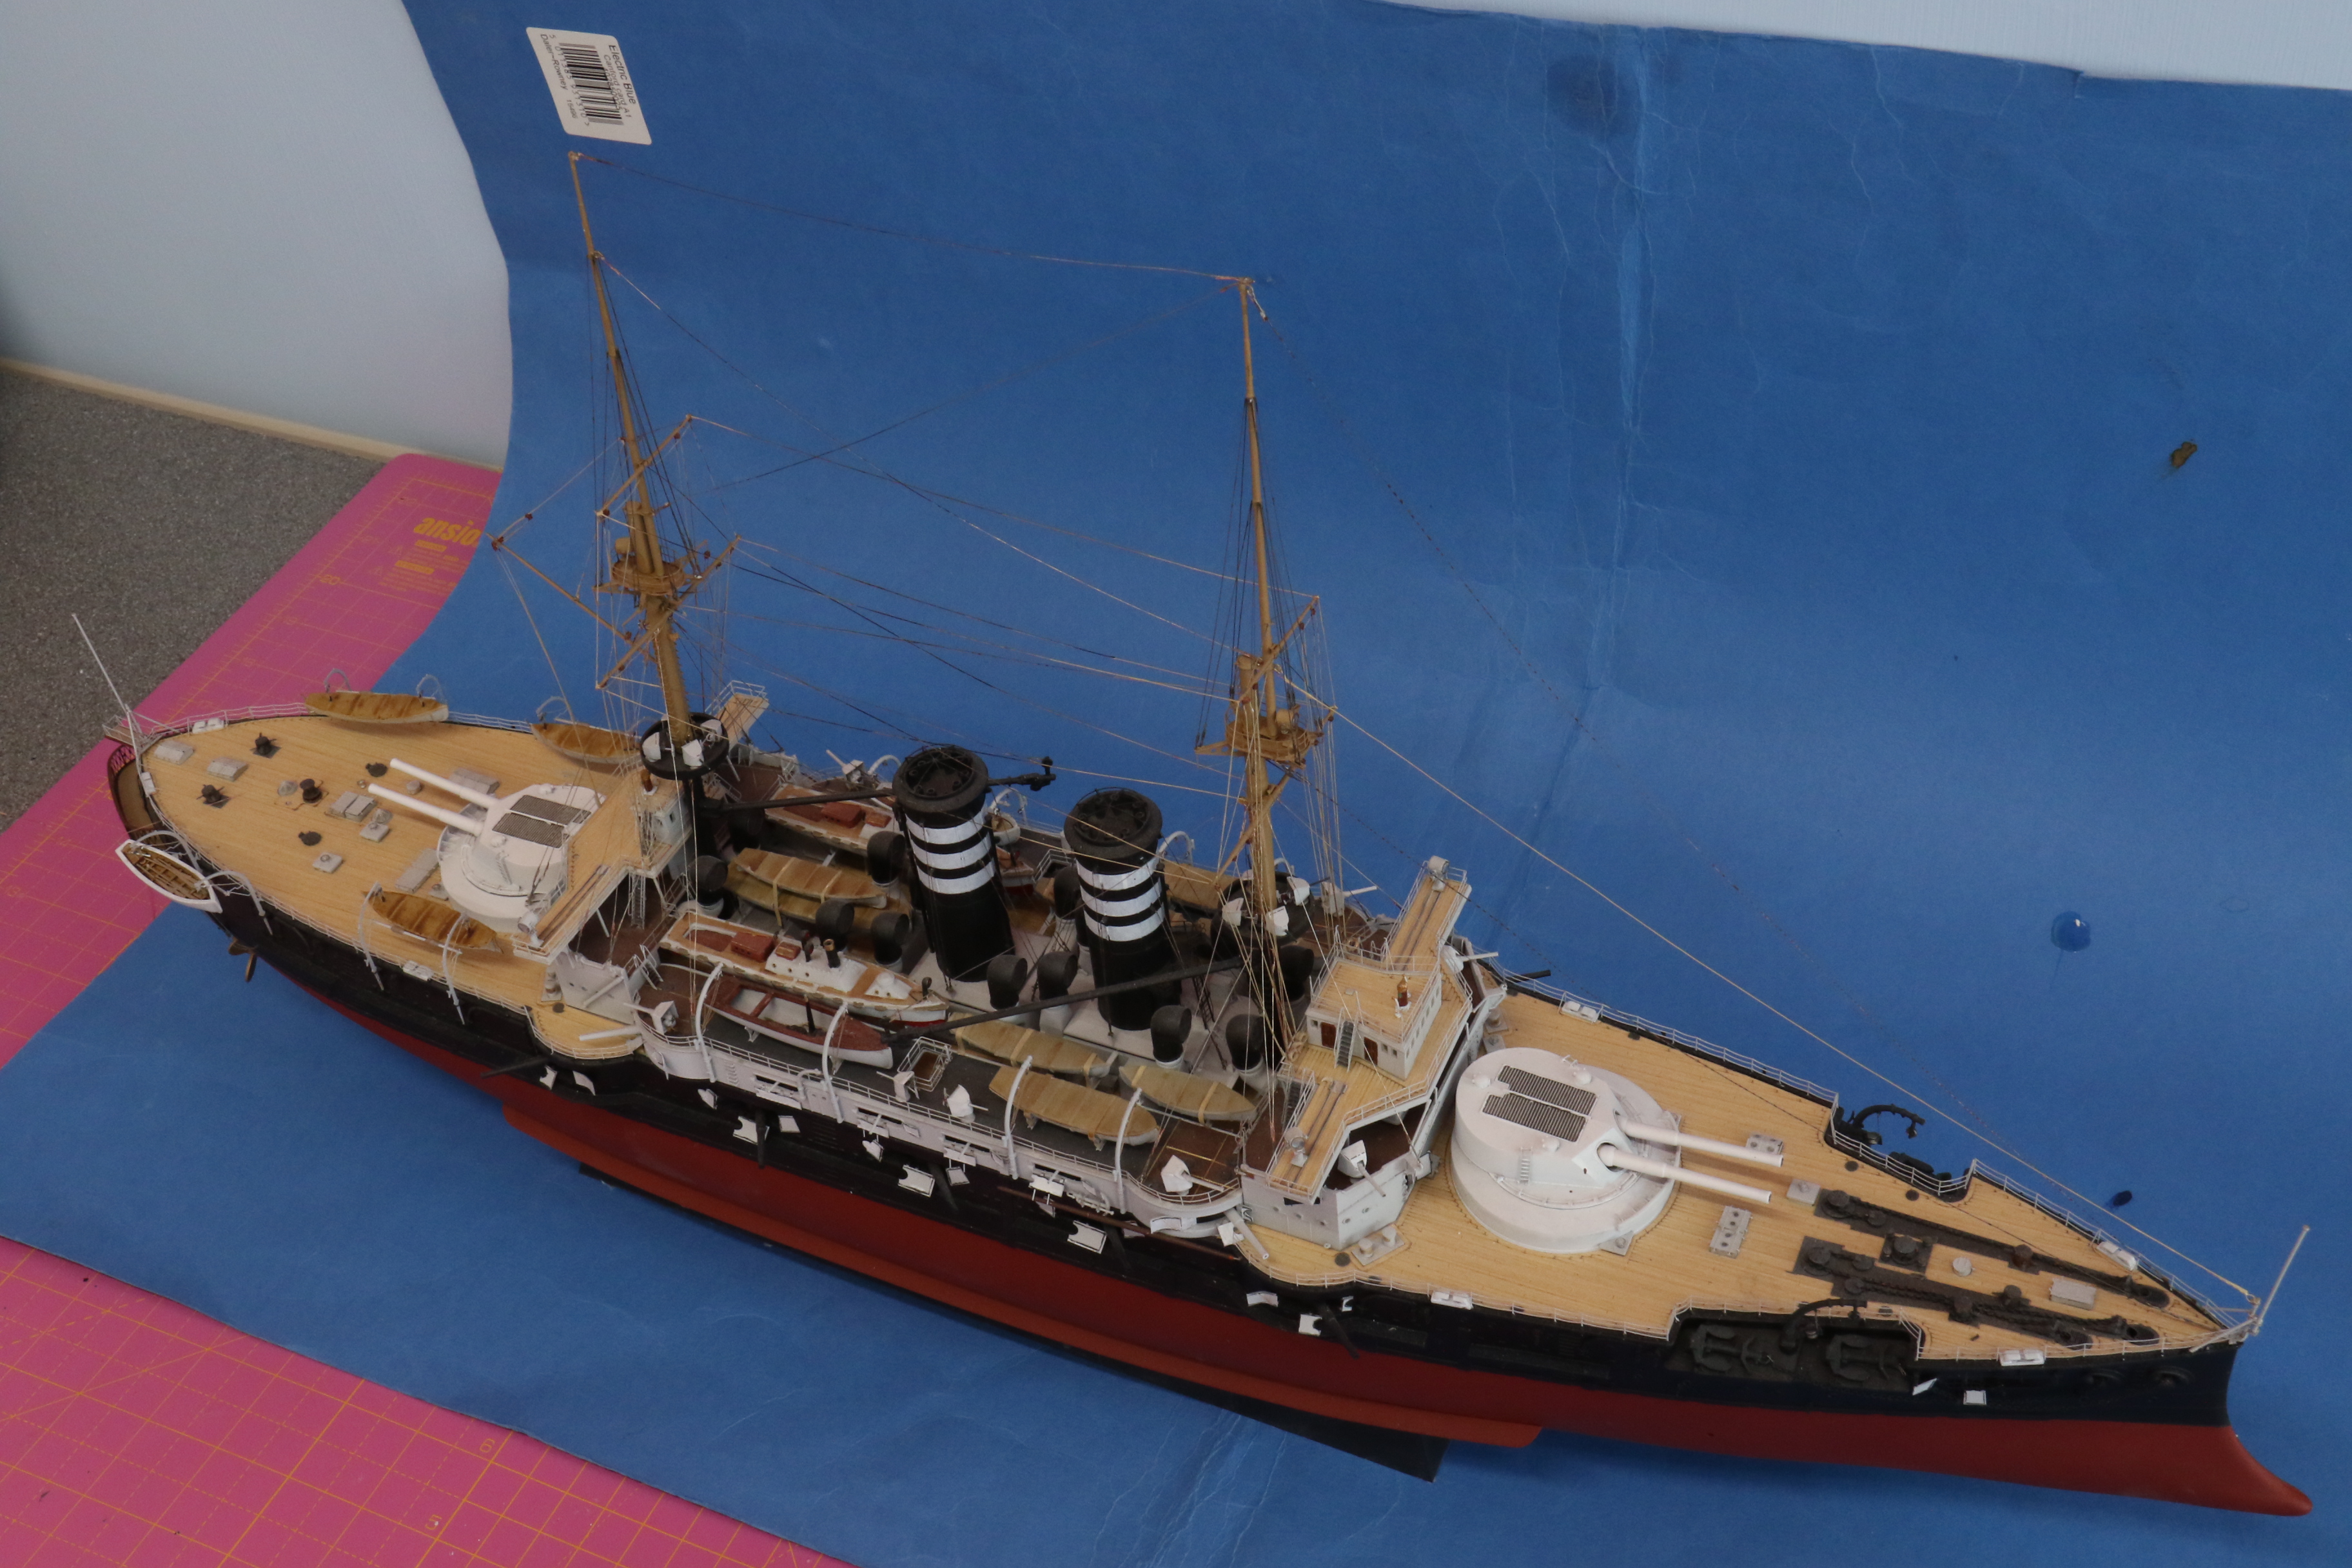
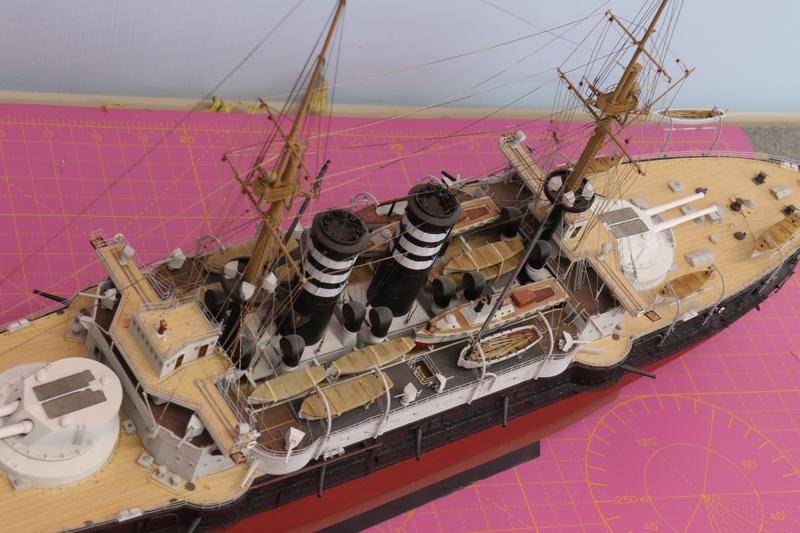
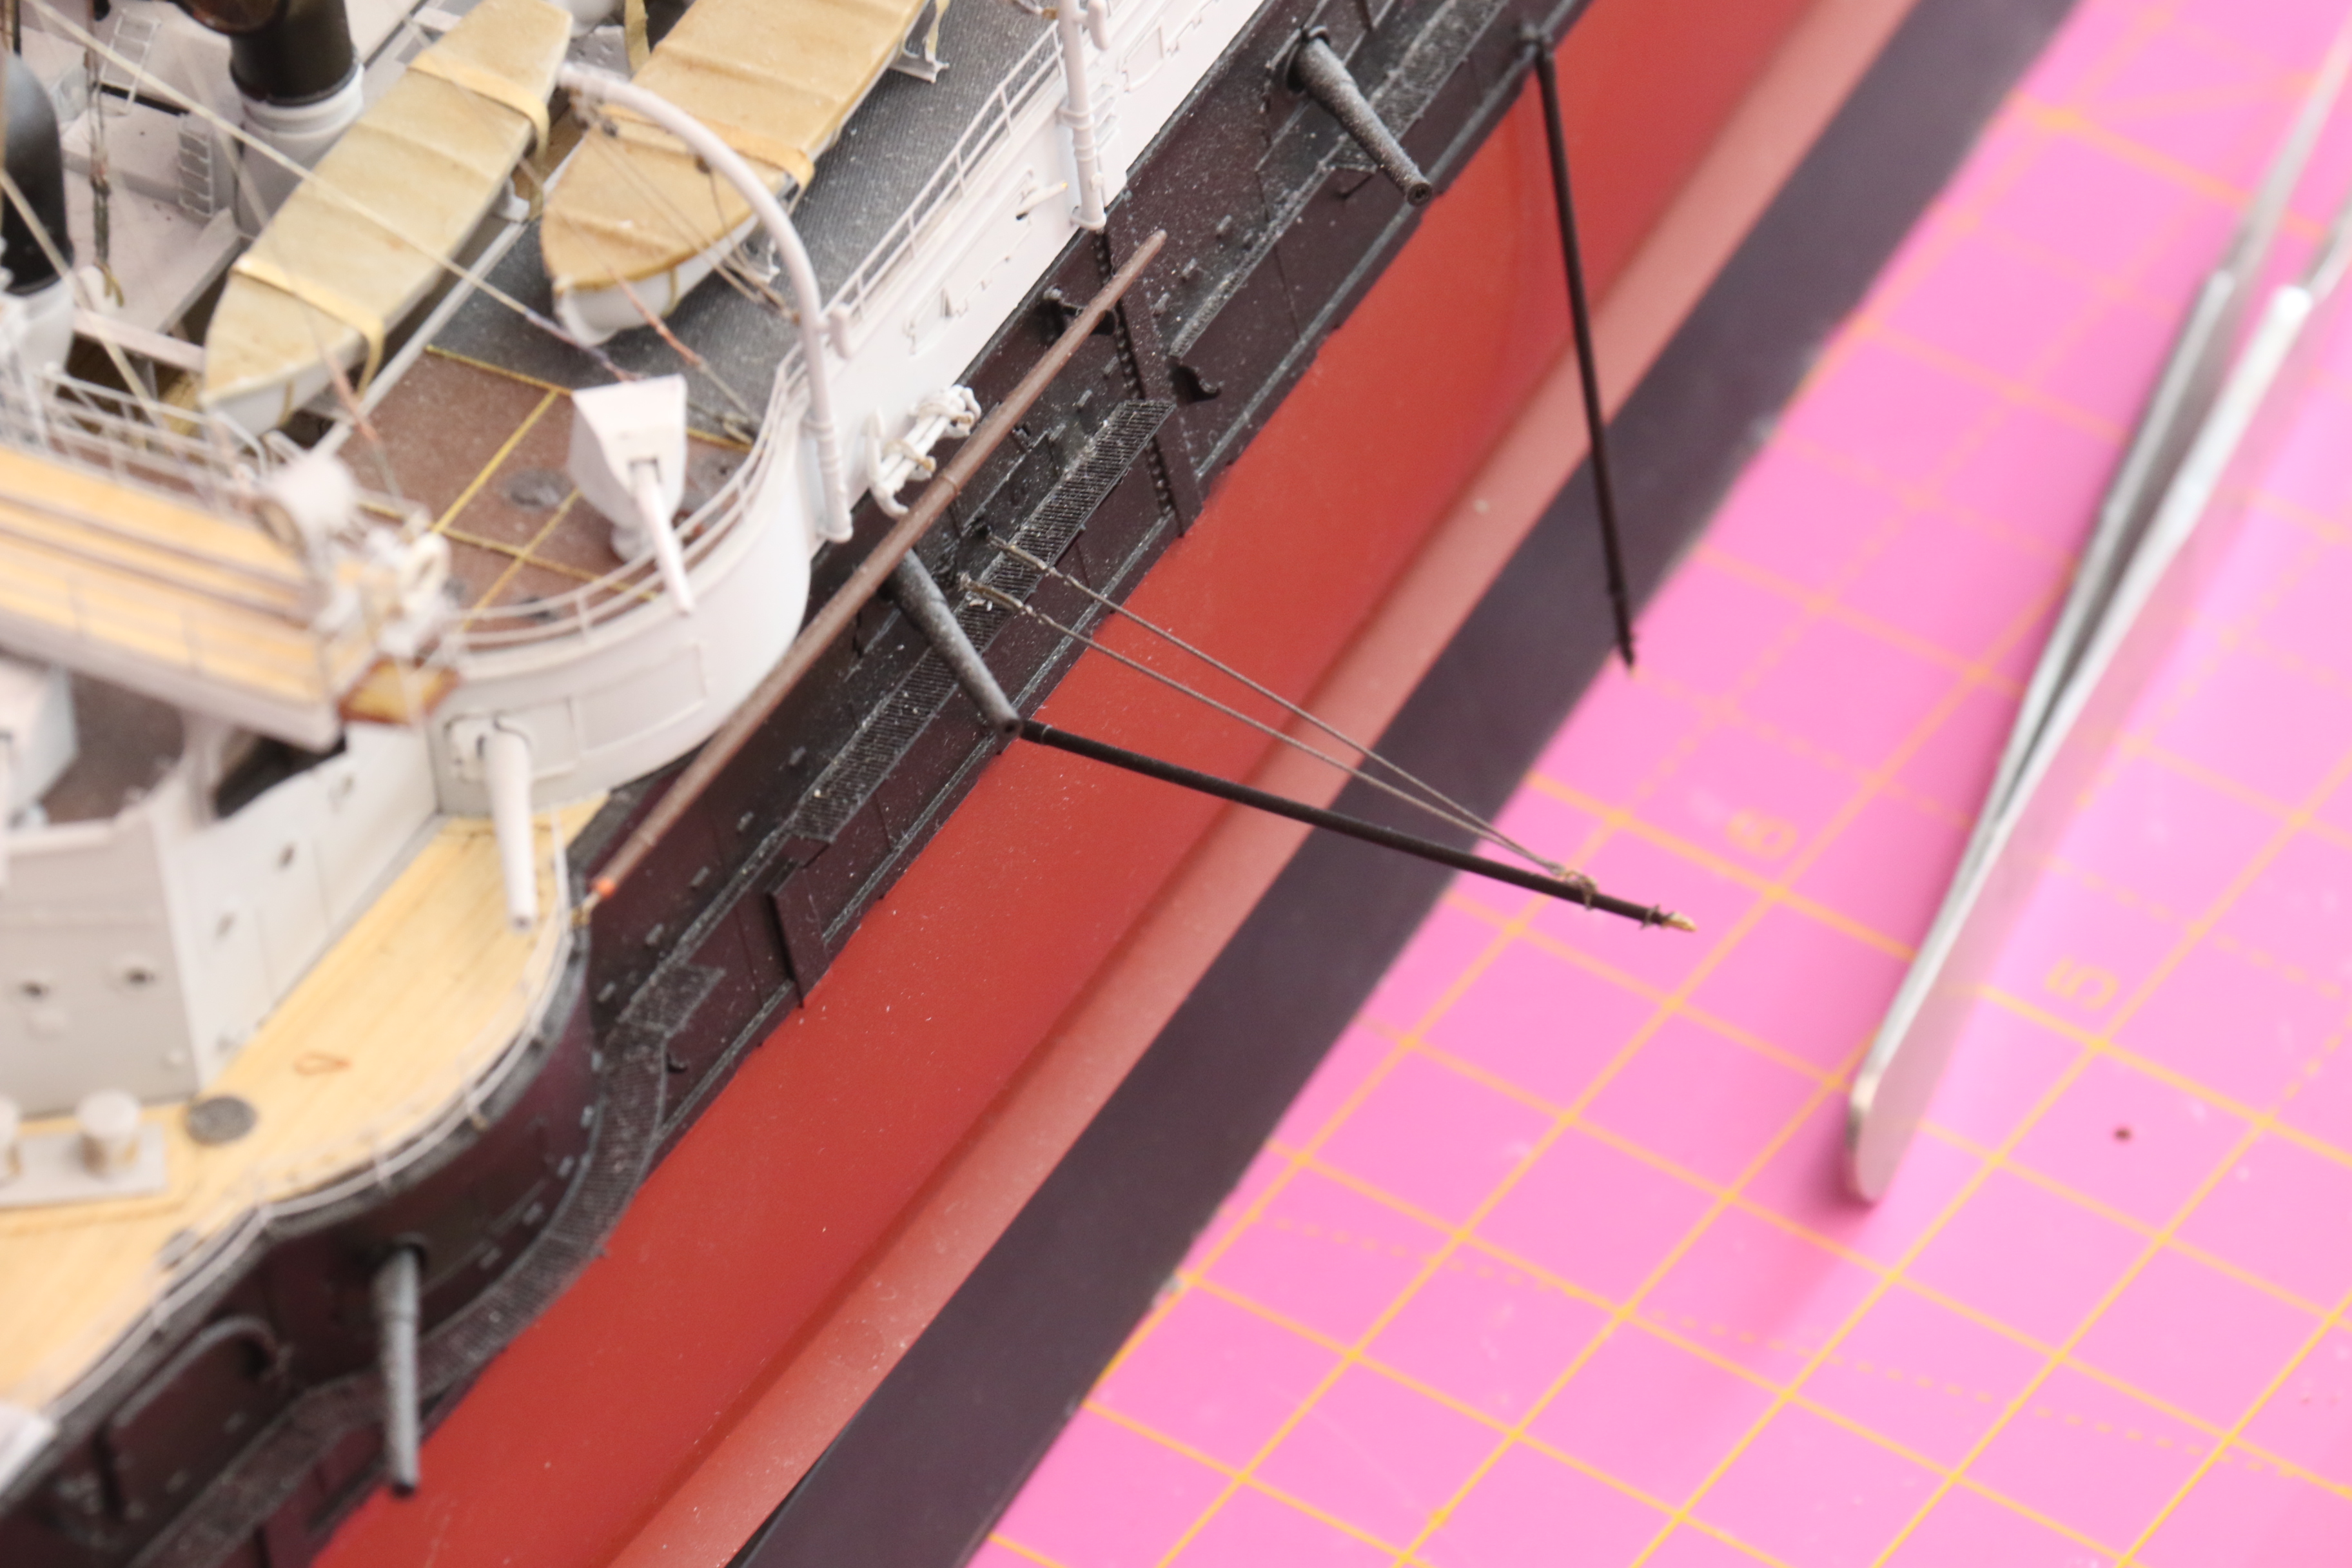
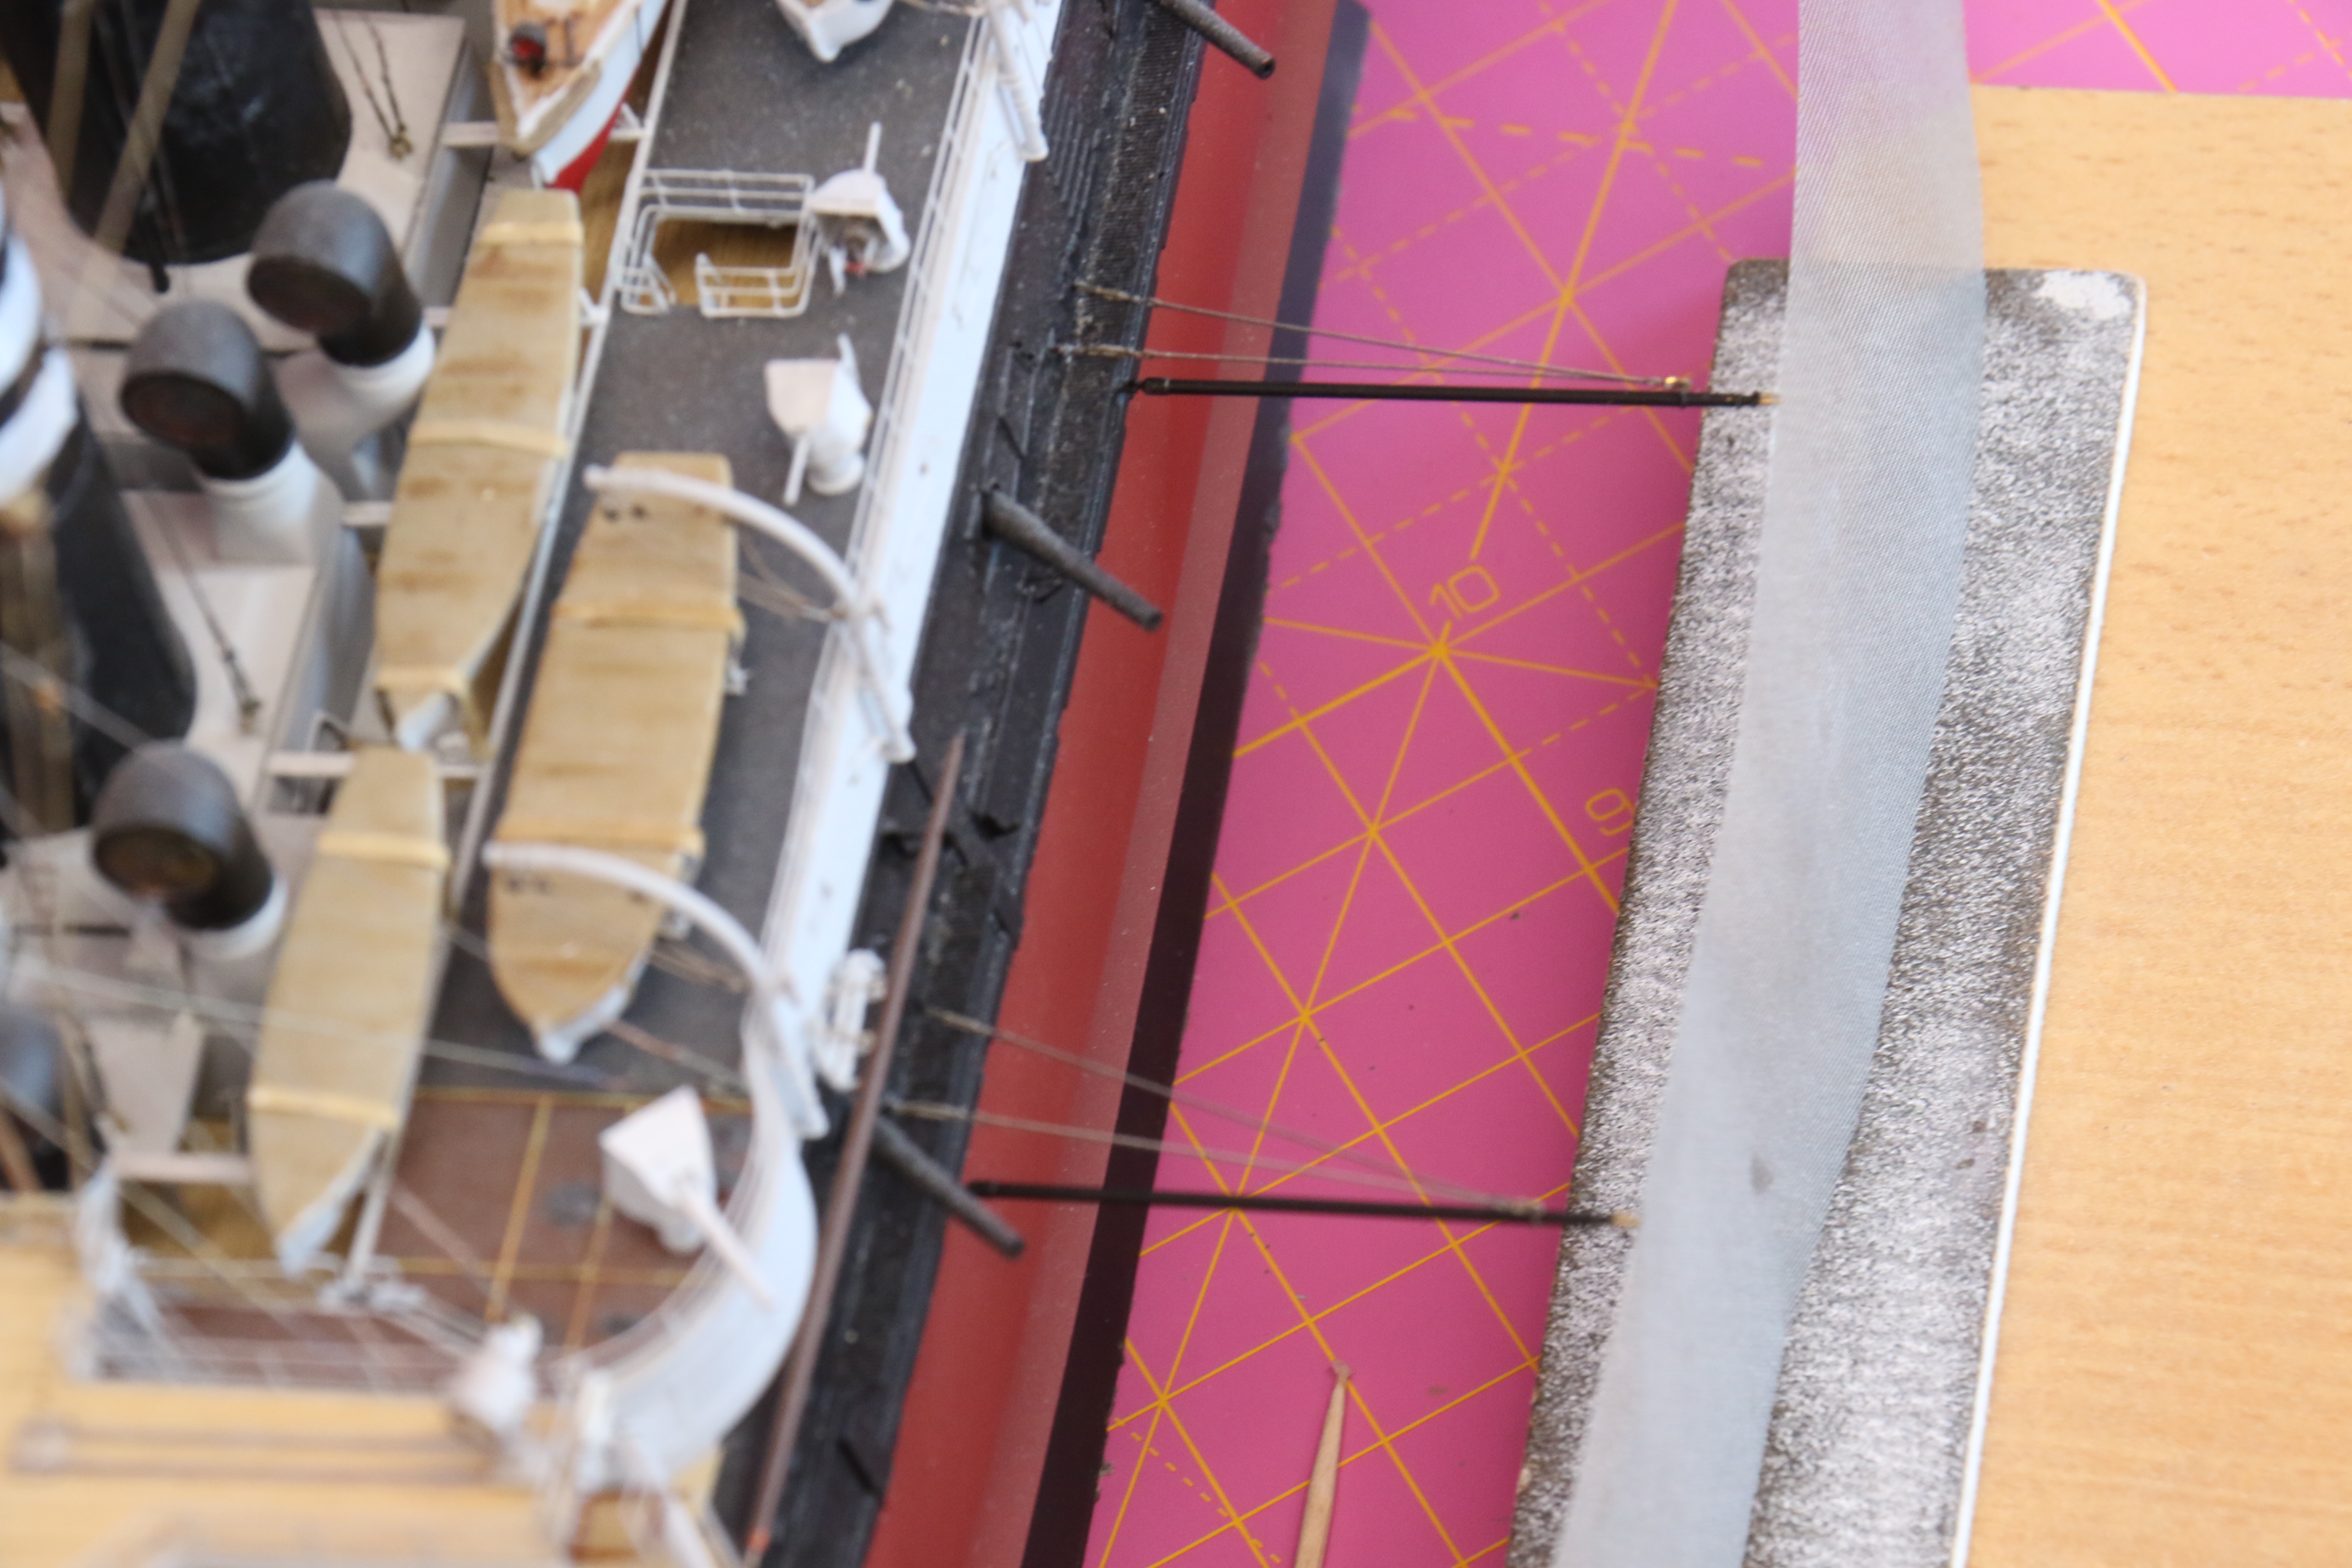
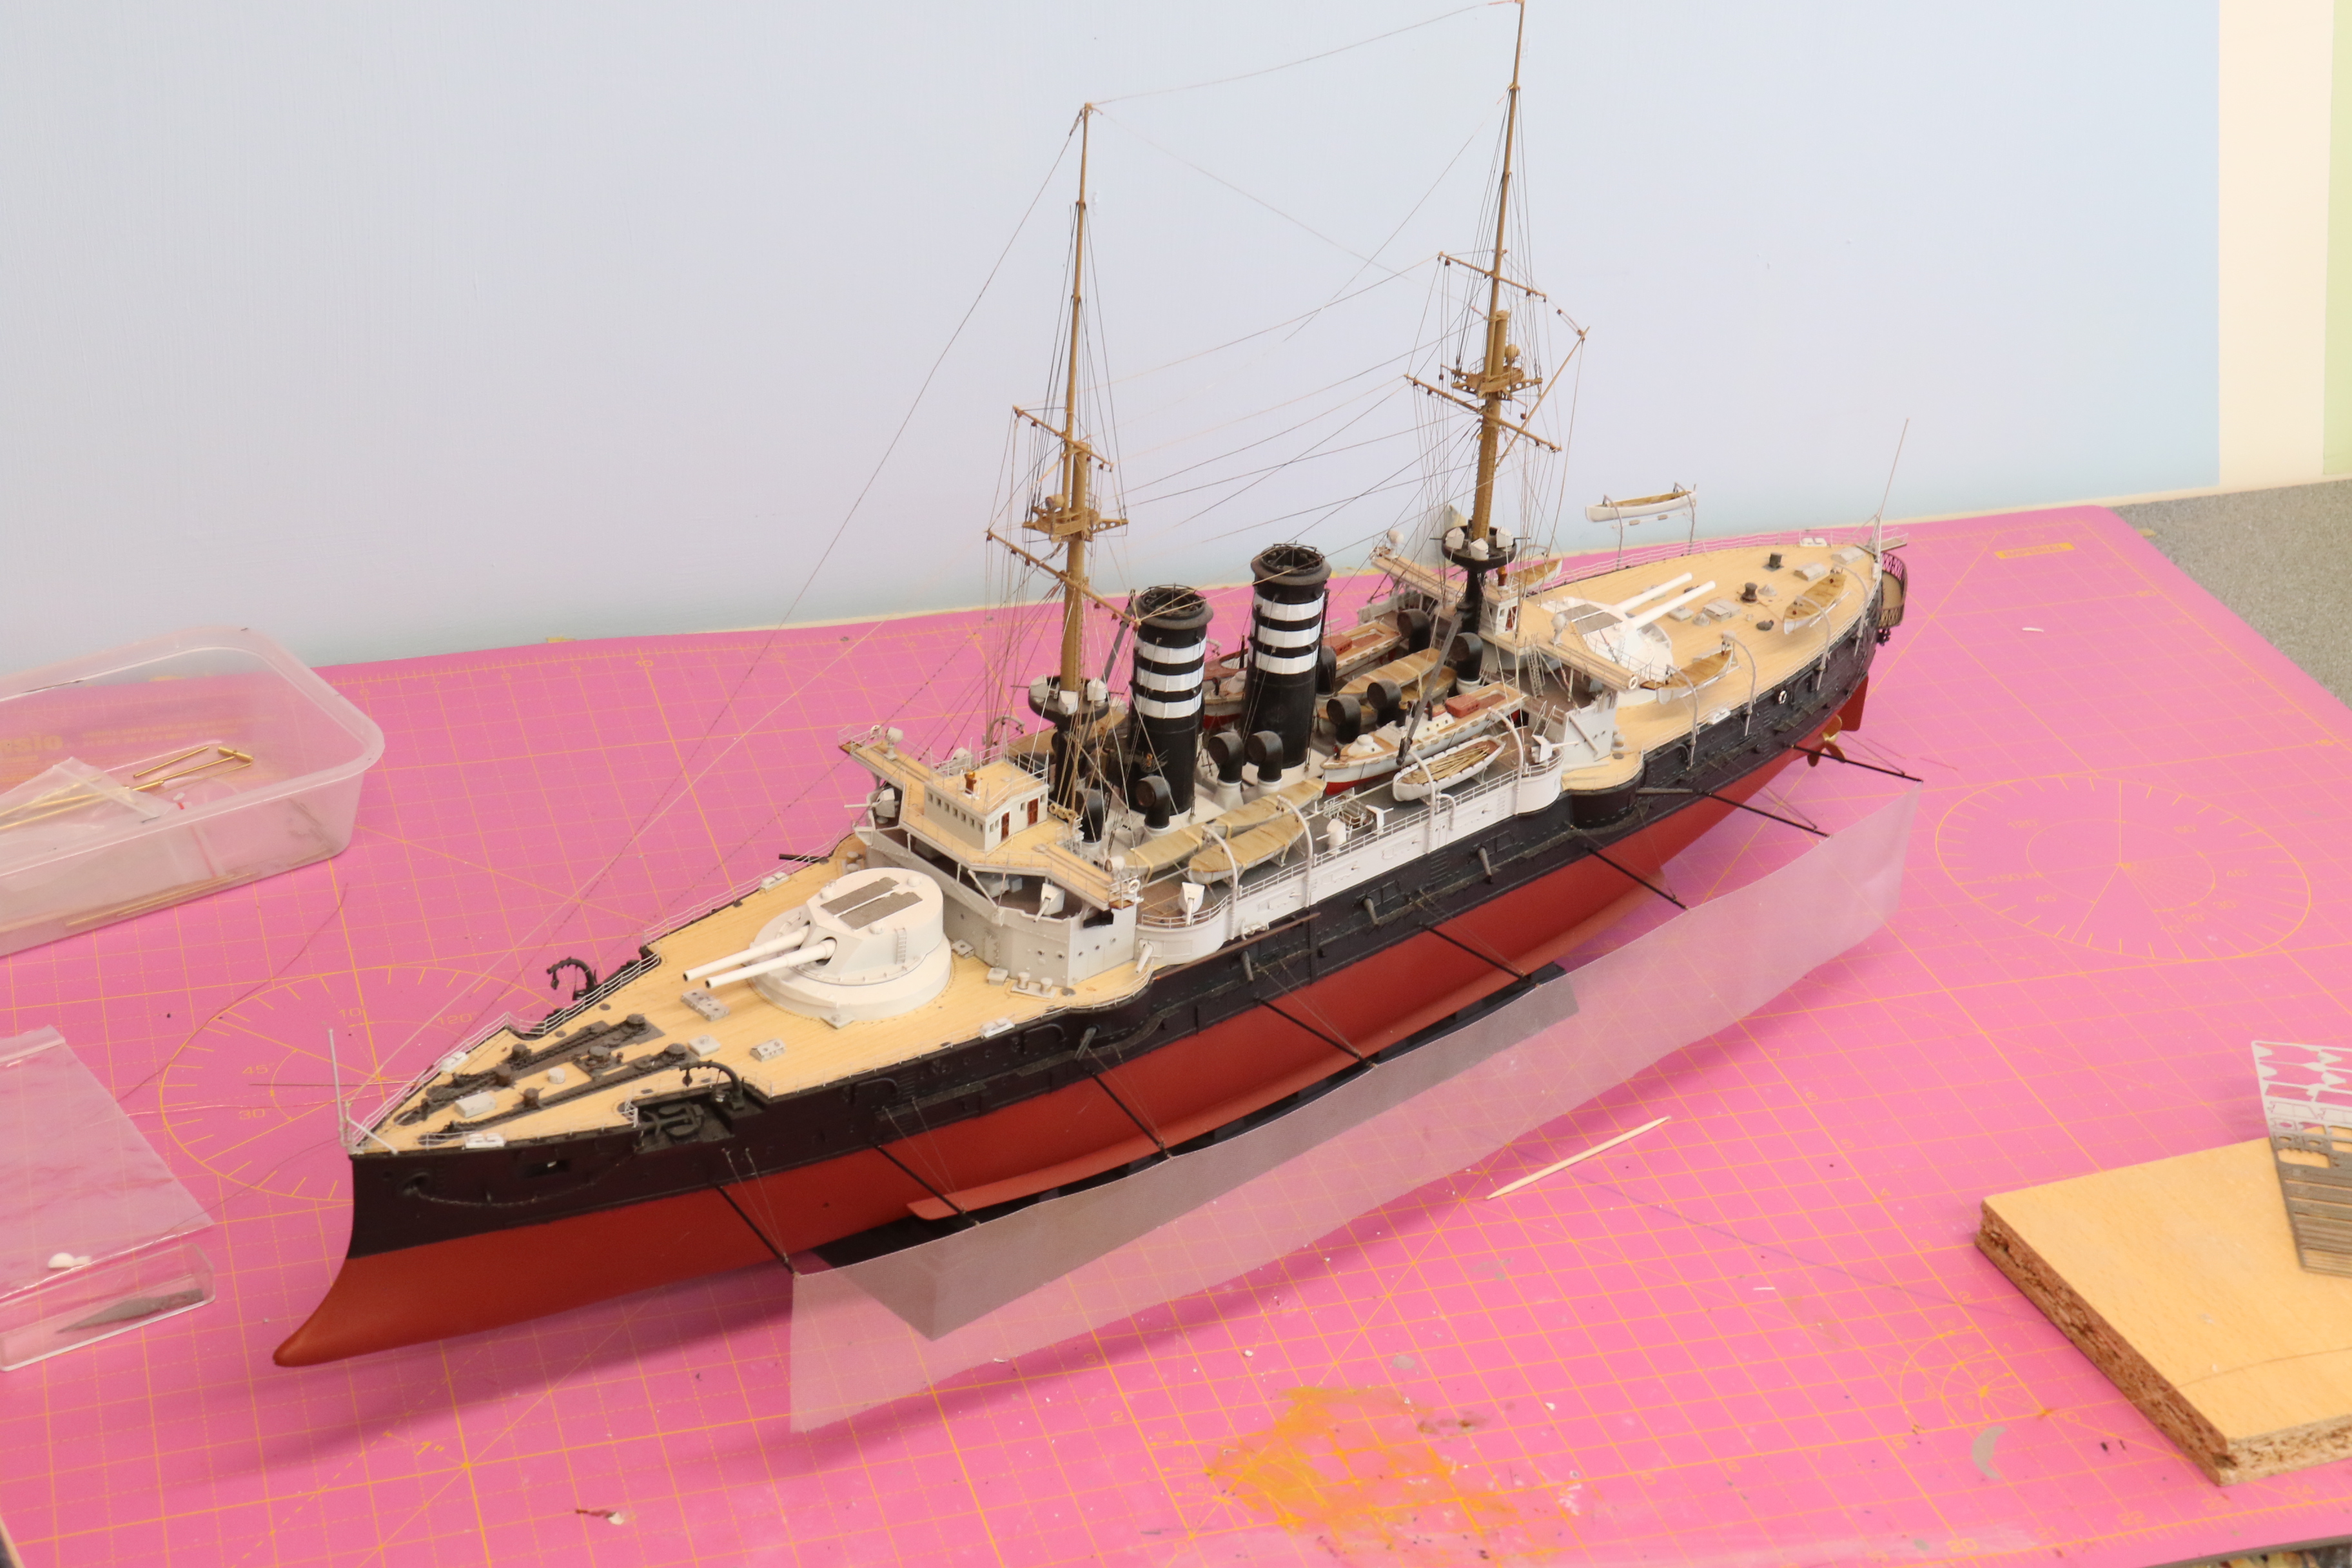
The rigging looks amazing, great work!

I can't agree more about having to plan ahead on rigging. I always try to build up and then out. Keeps me from knocking things off, which seems to be my best modeling ability.

Mark


Thanks Mark,

I do understand about knocking bits off, I am pretty good at it too.

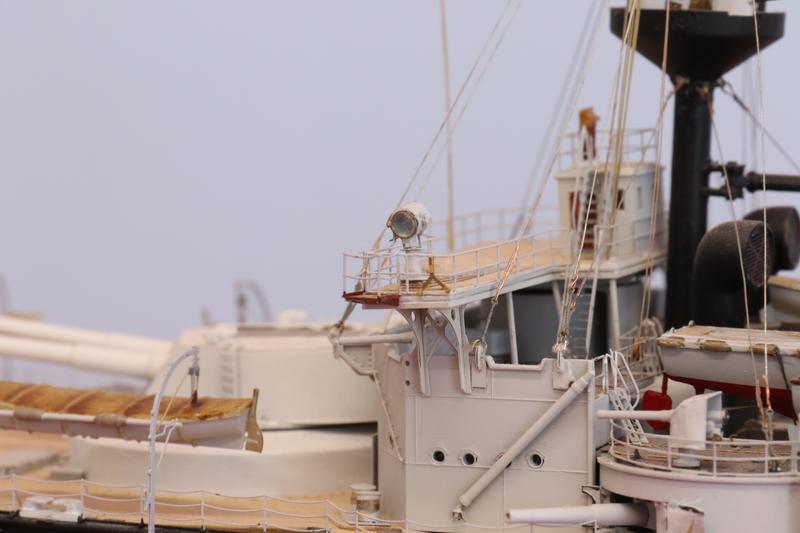
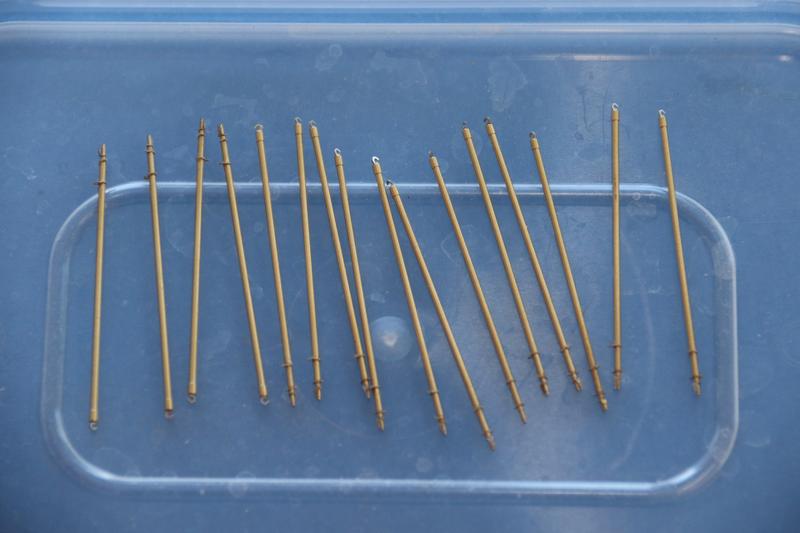
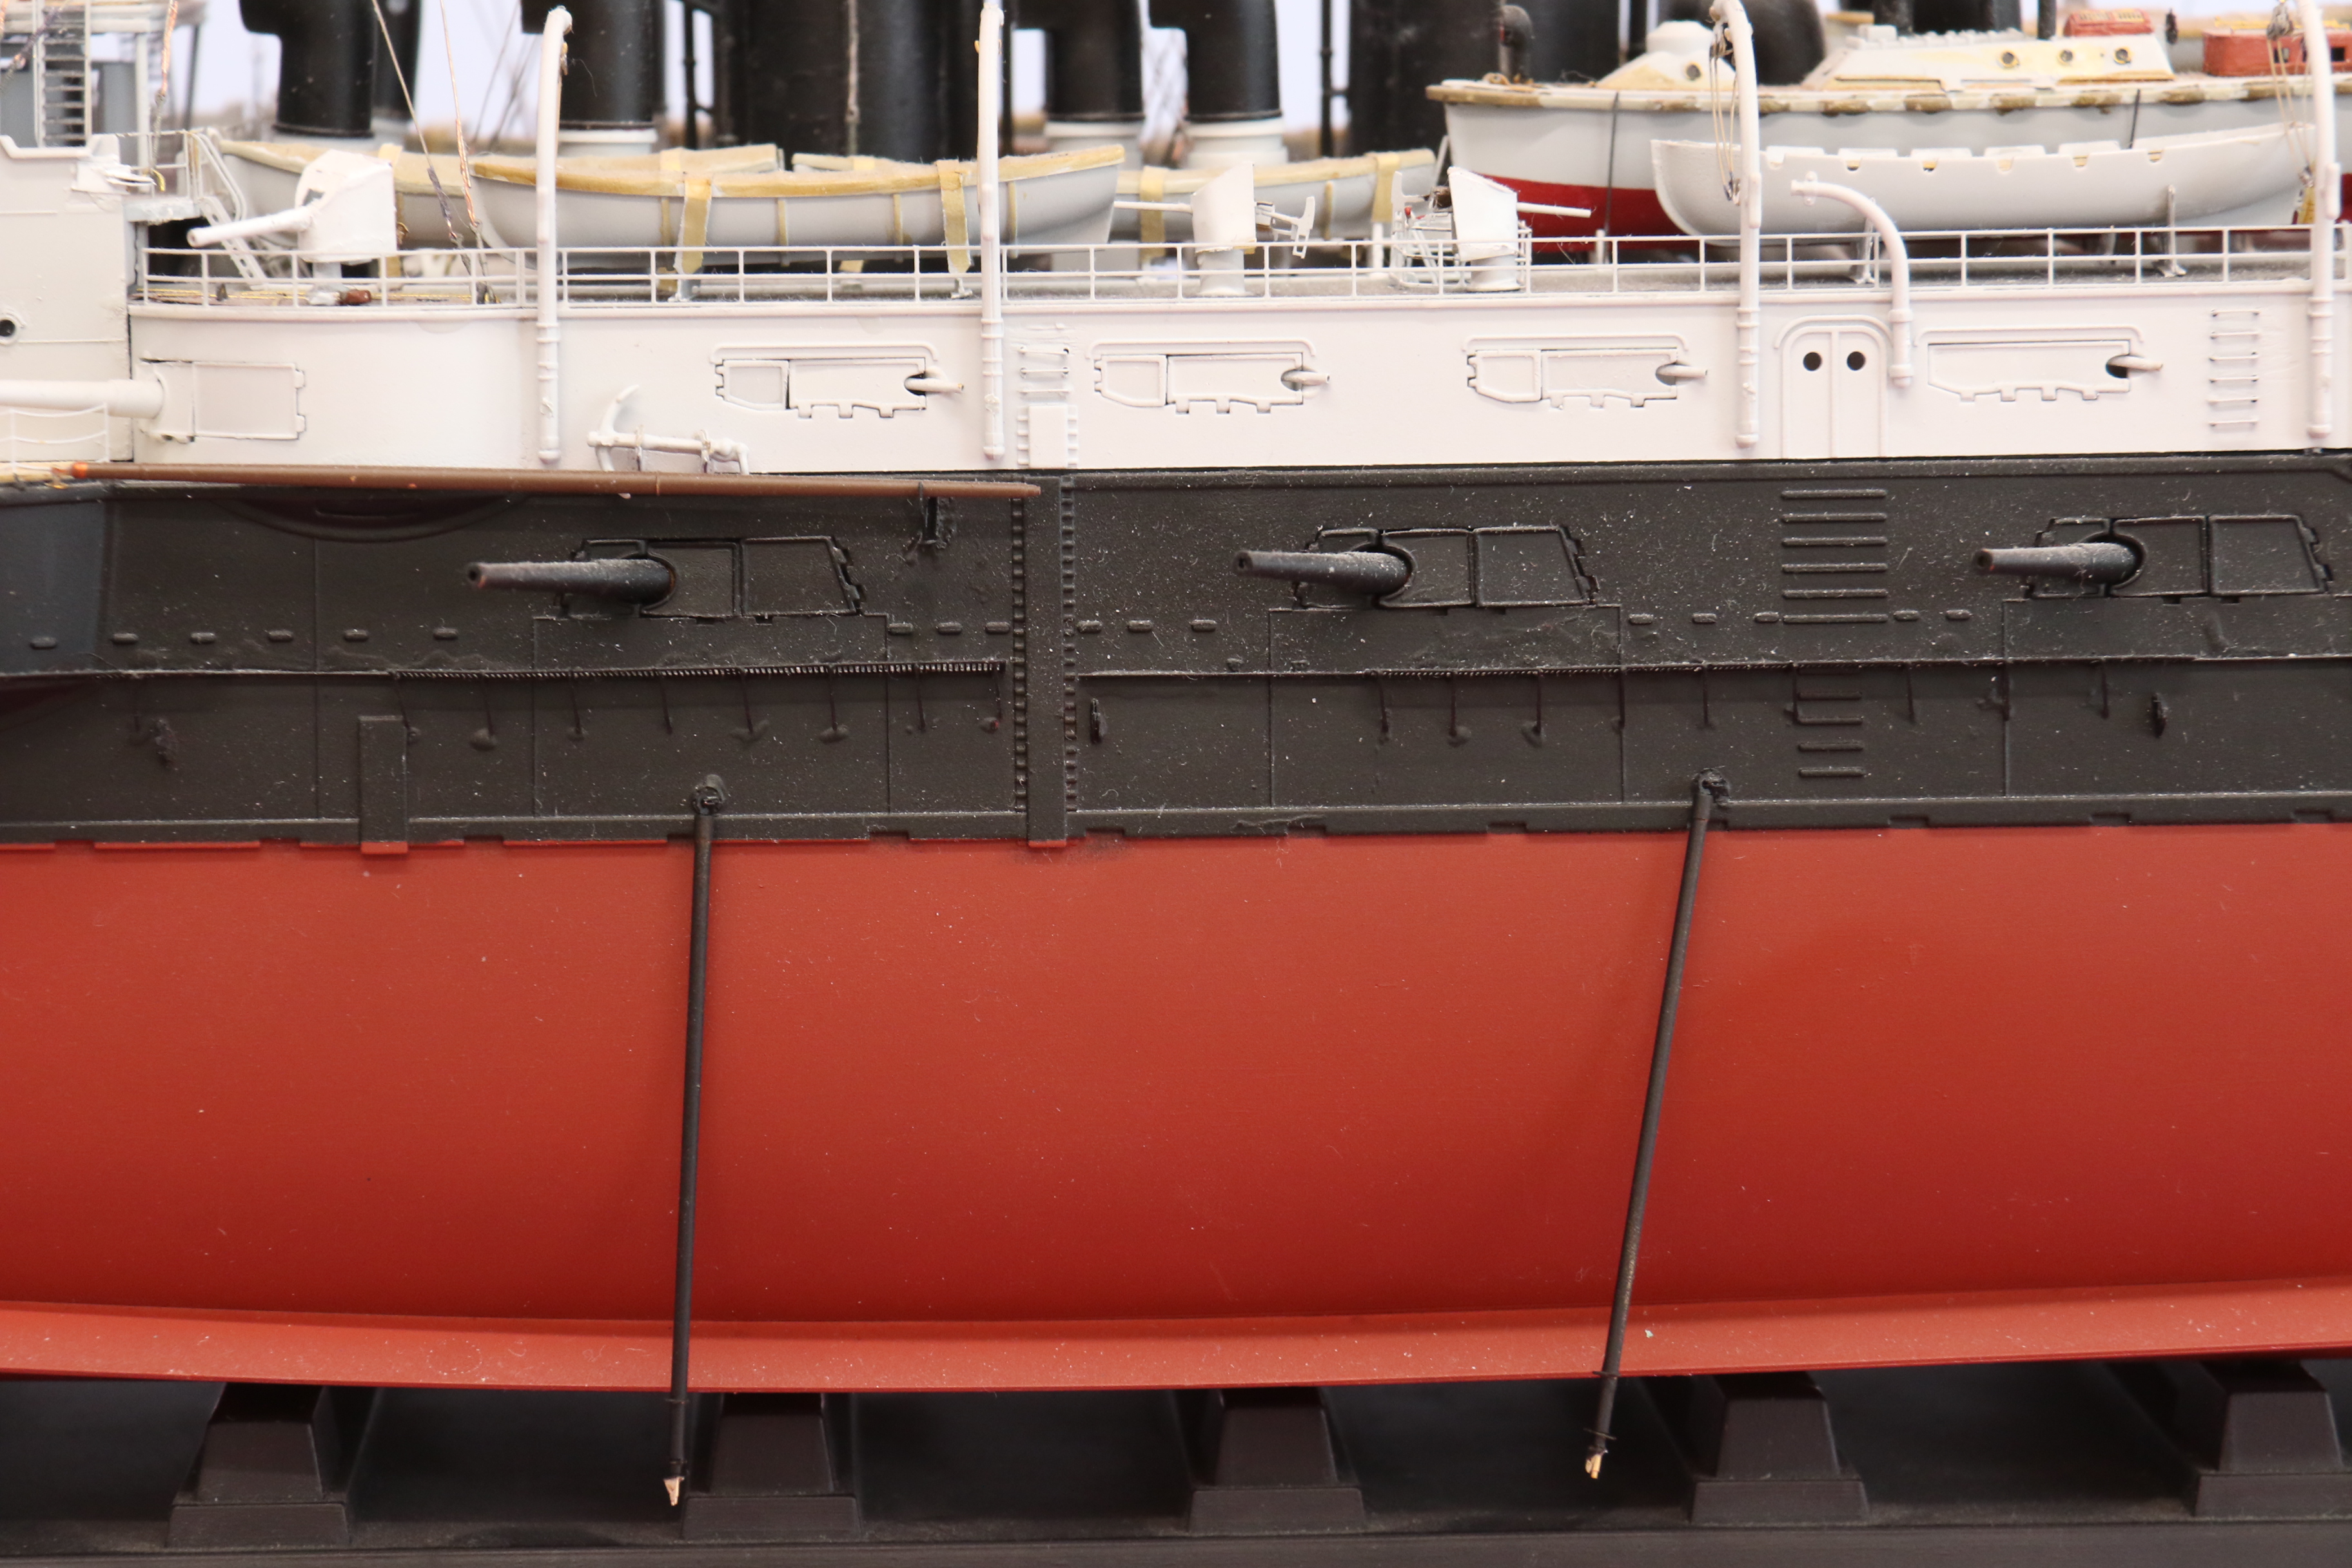
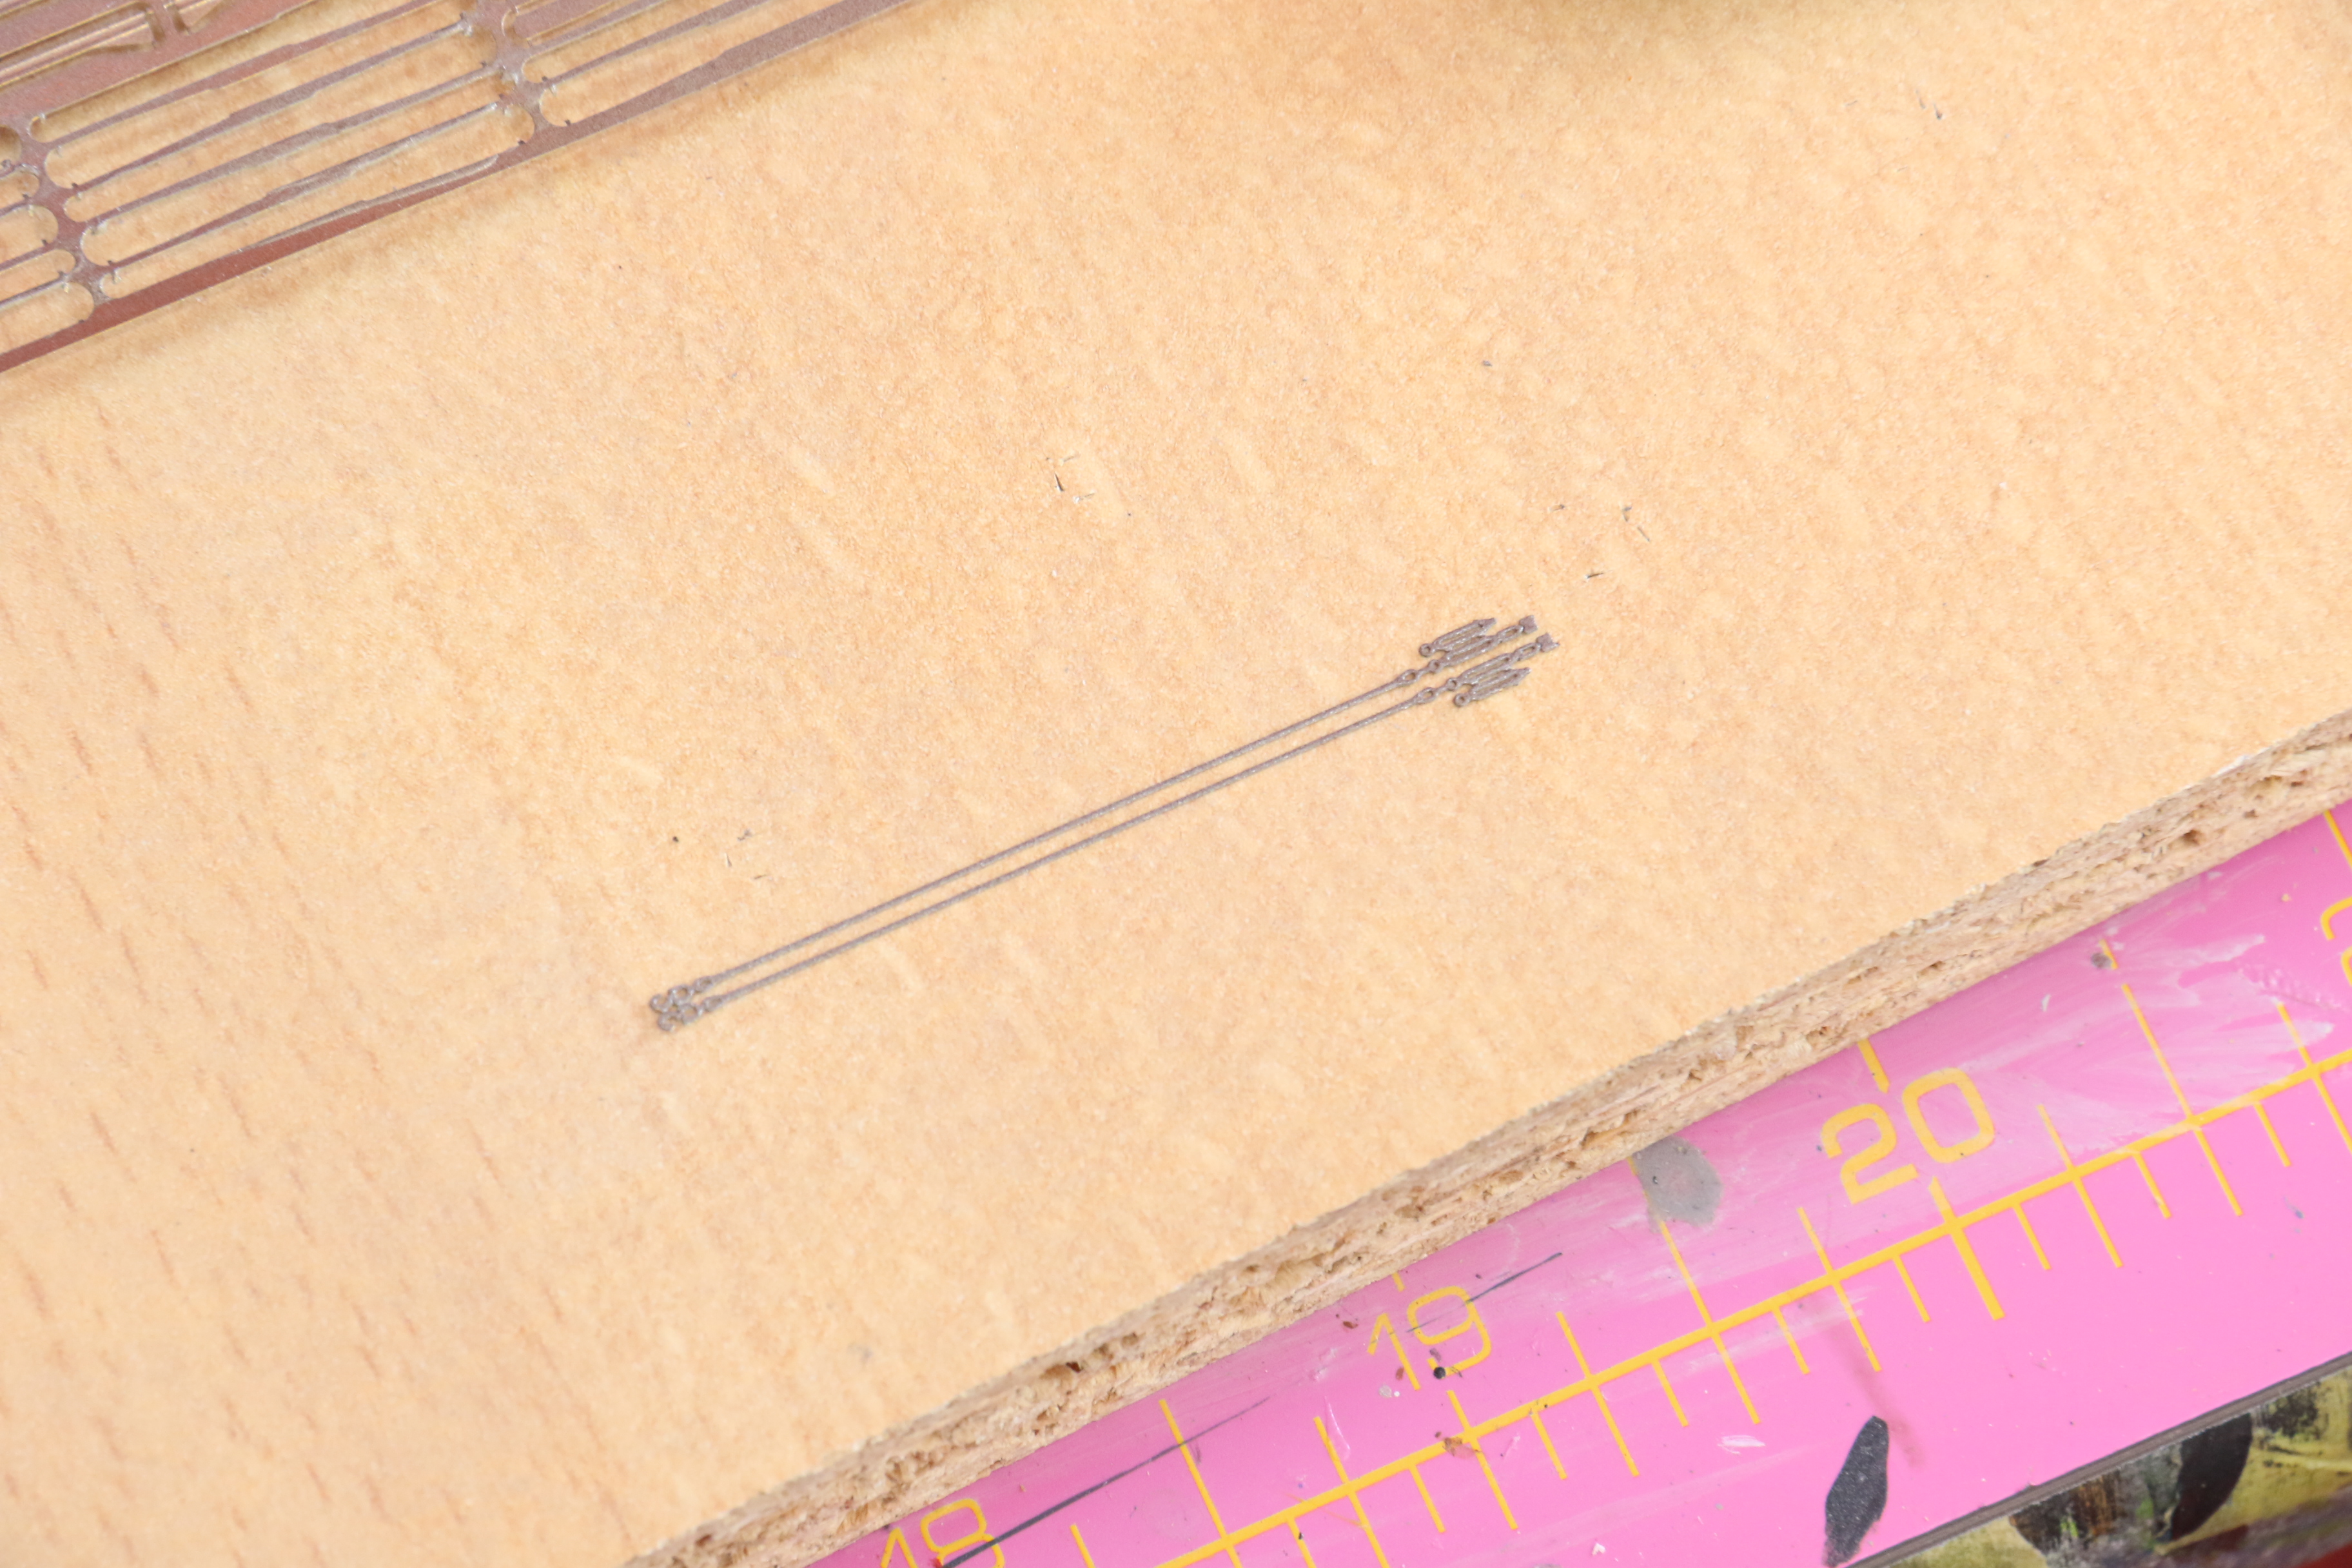
I work to the same plan basically, although this one has involved a fair bit of weaving, the larger scale does make it a bit easier.

Cheers

Si
Removed by original poster on 07/02/20 - 20:03:27 (GMT).
RussellE
#306
Visit this Community
Victoria, Australia
Joined: June 27, 2010
KitMaker: 3,959 posts
Model Shipwrights: 2,777 posts
Posted: Thursday, July 02, 2020 - 09:22 AM UTC
nice work on that rigging, Si

Yup, upwards and outwards for me too, when it comes to rigging a ship...

Butter fingers I have a-plenty otherwise
Black_sheep
Visit this Community
Bayern, Germany
Joined: December 11, 2009
KitMaker: 823 posts
Model Shipwrights: 551 posts
Posted: Friday, July 03, 2020 - 04:49 AM UTC
This ship will be your best work so far Si - at least what I´ve seen from your projects until now. I like your japanese lady very much
RedDuster
Visit this Community
England - South East, United Kingdom
Joined: March 01, 2010
KitMaker: 7,078 posts
Model Shipwrights: 6,649 posts
Posted: Friday, July 03, 2020 - 07:59 PM UTC

Quoted Text

nice work on that rigging, Si

Yup, upwards and outwards for me too, when it comes to rigging a ship...

Butter fingers I have a-plenty otherwise


Thanks Russ,

Controlling the longer lengths of wire is "fun", they do sometimes seem to have a mind of their own, especially when I am trying to weave them through the lower stays.

I know what you mean about butter fingers, more than a few times I have been hunting around boat deck for a bit if wire that has escaped from the tweezers.

Part of the fun of the hobby

cheers

Si
RedDuster
Visit this Community
England - South East, United Kingdom
Joined: March 01, 2010
KitMaker: 7,078 posts
Model Shipwrights: 6,649 posts
Posted: Friday, July 03, 2020 - 08:34 PM UTC

Quoted Text

This ship will be your best work so far Si - at least what I´ve seen from your projects until now. I like your japanese lady very much


Thank you Thomas, really appreciate you saying that.

I think the larger scale really suits the Pre-Dreadnaught and Mikasa has always been one of my favourites.

So far it has been quite a challenging build, and the most interesting challenge, will be getting the extended torpedo nets on!


Cheers

Si
RedDuster
Visit this Community
England - South East, United Kingdom
Joined: March 01, 2010
KitMaker: 7,078 posts
Model Shipwrights: 6,649 posts
Posted: Tuesday, July 14, 2020 - 07:06 AM UTC
Final push on the rigging.

The two forestays, these were the longest runs, and a little tricky.


The runs between the masts finished.


The attachment points on the foremast for the lower forestay and a line running down to the base part of the jackstaff. not sure what is was for.


All three forward lines in place.


An overview with the rigging done.


Just the extended torpedo nets to go,

More soon.

Cheers

Si


d6mst0
#453
Visit this Community
Texas, United States
Joined: August 28, 2016
KitMaker: 1,925 posts
Model Shipwrights: 1,298 posts
Posted: Tuesday, July 14, 2020 - 09:52 AM UTC
Si,

Looking sweet. Nice work with the rigging.

Mark
RedDuster
Visit this Community
England - South East, United Kingdom
Joined: March 01, 2010
KitMaker: 7,078 posts
Model Shipwrights: 6,649 posts
Posted: Wednesday, July 15, 2020 - 06:19 AM UTC

Quoted Text

Si,

Looking sweet. Nice work with the rigging.

Mark


Thanks Dave,

The longer runs were a bit tricky, demanded a slightly different approach, the end pieces that were supposed to look like they were the eye splices had to attached to the masts / deck first, then the wire fitted in between. trying to assemble and attach in one piece was proving a real pain, just would not sit where I wanted to.

Now the real fun is beginning, the extended torpedo nets.

McRunty
#491
Visit this Community
Missouri, United States
Joined: April 06, 2016
KitMaker: 602 posts
Model Shipwrights: 349 posts
Posted: Wednesday, July 15, 2020 - 12:52 PM UTC
That rigging would leave me a gibbering wreck

Stunning work as always Si!
RedDuster
Visit this Community
England - South East, United Kingdom
Joined: March 01, 2010
KitMaker: 7,078 posts
Model Shipwrights: 6,649 posts
Posted: Thursday, July 16, 2020 - 06:42 AM UTC

Quoted Text

That rigging would leave me a gibbering wreck

Stunning work as always Si!


It didn't do a lot for what's left of my sanity Rory

One the upside, rigging in this scale was a useful learning process for the build that will be replacing this one on the slipway. (which will be bigger)

Thanks for looking in mate.

Cheers

Si
GazzaS
#424
Visit this Community
Queensland, Australia
Joined: April 23, 2015
KitMaker: 4,648 posts
Model Shipwrights: 249 posts
Posted: Thursday, July 16, 2020 - 02:31 PM UTC
Great job on that rigging, Si!
RussellE
#306
Visit this Community
Victoria, Australia
Joined: June 27, 2010
KitMaker: 3,959 posts
Model Shipwrights: 2,777 posts
Posted: Friday, July 17, 2020 - 12:26 AM UTC
Sweet job on the rigging, Si!

Now for the most delicate part: the torpedo nets!
RedDuster
Visit this Community
England - South East, United Kingdom
Joined: March 01, 2010
KitMaker: 7,078 posts
Model Shipwrights: 6,649 posts
Posted: Saturday, July 18, 2020 - 06:35 AM UTC

Quoted Text

Great job on that rigging, Si!


Thanks Gaz,

It was a challenge, but I have learned quite a lot from it.

Appreciate you looking in.

Cheers

Si
RedDuster
Visit this Community
England - South East, United Kingdom
Joined: March 01, 2010
KitMaker: 7,078 posts
Model Shipwrights: 6,649 posts
Posted: Saturday, July 18, 2020 - 06:43 AM UTC

Quoted Text

Sweet job on the rigging, Si!

Now for the most delicate part: the torpedo nets!


Thanks Russ,

I think those forestays ate reaching the limit of copper wire, might need to look for a new material for one or two upcoming projects br />
The structure for the nets is quite well designed, with etched support rigging, and the nets are a snug fit on the end of the booms.

But first a few bits I had overlooked.

Cheers

Si
RussellE
#306
Visit this Community
Victoria, Australia
Joined: June 27, 2010
KitMaker: 3,959 posts
Model Shipwrights: 2,777 posts
Posted: Saturday, July 18, 2020 - 03:22 PM UTC

Quoted Text


Quoted Text

Sweet job on the rigging, Si!

Now for the most delicate part: the torpedo nets!


Thanks Russ,

I think those forestays ate reaching the limit of copper wire, might need to look for a new material for one or two upcoming projects br />
The structure for the nets is quite well designed, with etched support rigging, and the nets are a snug fit on the end of the booms.

But first a few bits I had overlooked.

Cheers

Si


You're braver than I, Si... I've always chickened out on torpedo nets, or anything to do with them
RedDuster
Visit this Community
England - South East, United Kingdom
Joined: March 01, 2010
KitMaker: 7,078 posts
Model Shipwrights: 6,649 posts
Posted: Saturday, July 18, 2020 - 09:22 PM UTC

Quoted Text


Quoted Text


Quoted Text

Sweet job on the rigging, Si!

Now for the most delicate part: the torpedo nets!


Thanks Russ,

I think those forestays ate reaching the limit of copper wire, might need to look for a new material for one or two upcoming projects br />
The structure for the nets is quite well designed, with etched support rigging, and the nets are a snug fit on the end of the booms.

But first a few bits I had overlooked.

Cheers

Si


You're braver than I, Si... I've always chickened out on torpedo nets, or anything to do with them


There is the old sayimg Mate,

"There is a fine line between bravery & stupidity".

Once I have got all these little bits and peices in place we will find out which side of it I am on.

Cheers

Si
RedDuster
Visit this Community
England - South East, United Kingdom
Joined: March 01, 2010
KitMaker: 7,078 posts
Model Shipwrights: 6,649 posts
Posted: Saturday, July 18, 2020 - 09:24 PM UTC

Quoted Text


Quoted Text


Quoted Text

Sweet job on the rigging, Si!

Now for the most delicate part: the torpedo nets!


Thanks Russ,

I think those forestays ate reaching the limit of copper wire, might need to look for a new material for one or two upcoming projects br />
The structure for the nets is quite well designed, with etched support rigging, and the nets are a snug fit on the end of the booms.

But first a few bits I had overlooked.

Cheers

Si


You're braver than I, Si... I've always chickened out on torpedo nets, or anything to do with them


There is the old saying Mate,

"There is a fine line between bravery & stupidity".

Once I have got all these little bits and peices in place we will find out which side of it I am on.

Cheers

Si
RedDuster
Visit this Community
England - South East, United Kingdom
Joined: March 01, 2010
KitMaker: 7,078 posts
Model Shipwrights: 6,649 posts
Posted: Monday, July 20, 2020 - 06:29 AM UTC
The bits and pieces.

Night lifebuoy.

one rack folded, the other just off the fret.


painted, a resin lifebuoy fitted, put in place.


The folding platforms on the end of the bridgewings.


Painted and fitted, along with a lifebuoy.


All four in place


The beginnings of the nets, well the booms anyway.

All 16 built, each one consists of one turned brass and four etched parts.


sprayed black.


More by the end of the week.

I hope

Cheers

Si
d6mst0
#453
Visit this Community
Texas, United States
Joined: August 28, 2016
KitMaker: 1,925 posts
Model Shipwrights: 1,298 posts
Posted: Monday, July 20, 2020 - 10:05 AM UTC
Si,

Looking good. I am really interested to see how you tackle the torpedo nets.

Mark
RedDuster
Visit this Community
England - South East, United Kingdom
Joined: March 01, 2010
KitMaker: 7,078 posts
Model Shipwrights: 6,649 posts
Posted: Tuesday, July 21, 2020 - 05:50 AM UTC

Quoted Text

Si,

Looking good. I am really interested to see how you tackle the torpedo nets.

Mark


Thanks Mark,

working on the slowly but surely. I got the 4th boom from fwd in place and at the right height, using a slower setting glue got the 5th boom approximately in place, and supporting the net from below fitted it onto the ends of the 4th & 5th booms, let those cure, with their etched stay in place, and then worked fwd and aft with the remaining six booms.

Seems to be working so far.

Will post some pics when it is all done.

Cheers

Si
RedDuster
Visit this Community
England - South East, United Kingdom
Joined: March 01, 2010
KitMaker: 7,078 posts
Model Shipwrights: 6,649 posts
Posted: Thursday, July 23, 2020 - 08:09 AM UTC
Getting on with the nets.

Checking the booms will hook on to their mounts.


an etched stay for the boom, pre-painted and ready for folding.


The first boom rigged and in place.


The net supported from below and attached to the first boom, (No.4 on the port side), No.5 boom was then carefully slotted into place, a dab of cyno added at each end, and the rigging fitted.


All the port side booms fitted, and the rigging under way.


The port side done.


I have started on the starboard side, but no photographs yet.

Hope to have that done over the next day or so.

With a bit of luck, will be commissioning over the weekend.

Might even lay the keel on something bigger.

Cheers

Si
d6mst0
#453
Visit this Community
Texas, United States
Joined: August 28, 2016
KitMaker: 1,925 posts
Model Shipwrights: 1,298 posts
Posted: Friday, July 24, 2020 - 12:35 AM UTC
Si,

Great job installing those booms and stays. You think installing those stays were easier at 200 scale than say at 350?
You should are going to have to be careful now handling the ship.

Mark
RedDuster
Visit this Community
England - South East, United Kingdom
Joined: March 01, 2010
KitMaker: 7,078 posts
Model Shipwrights: 6,649 posts
Posted: Friday, July 24, 2020 - 09:11 AM UTC

Quoted Text

Si,

Great job installing those booms and stays. You think installing those stays were easier at 200 scale than say at 350?
You should are going to have to be careful now handling the ship.

Mark


Thanks Mark,

The stays, there are pros and cons, they are less fragile, but the longer runs do make them a bit tricky, especially as there are no positive locations on the ship's side.

Thanks for looking in Mate.

Cheers

Si
RussellE
#306
Visit this Community
Victoria, Australia
Joined: June 27, 2010
KitMaker: 3,959 posts
Model Shipwrights: 2,777 posts
Posted: Sunday, July 26, 2020 - 12:53 PM UTC
Si, fantastic start on the booms, mate!

Top notch, stuff!