


Go to modelshipwrights.com for the current dynamic site!
Campaigns
Want to be part of a group build? This is where to start, plan, and meet about them.
Want to be part of a group build? This is where to start, plan, and meet about them.
Hosted by Jim Starkweather
Official Campaign: Dive 3

TRM5150

Joined: January 03, 2010
KitMaker: 2,159 posts
Model Shipwrights: 1,400 posts

Posted: Monday, February 04, 2013 - 03:31 PM UTC
Nice one Warren!! She looks great!

warreni

Joined: August 14, 2007
KitMaker: 5,926 posts
Model Shipwrights: 2,624 posts

Posted: Monday, February 04, 2013 - 05:09 PM UTC
Thanks for that Todd.
I am always learning with these little boats.
Cheers mate
Warren
I am always learning with these little boats.
Cheers mate
Warren

JMartine
Joined: October 18, 2007
KitMaker: 1,698 posts
Model Shipwrights: 1,514 posts

Posted: Friday, February 08, 2013 - 11:43 AM UTC
Keith First off the gate! Looks good, you are a building machine, almost finished your build by the time I catch up reading the thread, cheers. Same here; have been out of the workshop for months
PS Love the camo paint job
Jim A I think my campaign finishing record is worse than yours Thats is one huge kit (both actually, the Seawolf or Skipjack), 1:144? Look forward to the build(s)
Warren Nice mini-stash I have found that Lucky Models has the best prices for AFV club models by far; when in sale, they are about 25% of MSRP (compared to USA dollars). Great start! .. and finish! Hey, Im catching up with the full thread today as we are buried in snow here in the NE USA.
Javier Hows the quality on those Flagman kits? Looks like decent detail from here.
Dave That is a blast from the past!
Stefan Look forward to the water/dio
IronOwl Welcome to the Light Side !
.. and a lot of great builds! Well, I have to go and shovel almost half a meter of snow (just the path to the car, well, where I think the car is as it buried in snow). Will get some workbench work done this weekend,
Cheers all
Jim A I think my campaign finishing record is worse than yours
Thats is one huge kit (both actually, the Seawolf or Skipjack), 1:144? Look forward to the build(s)Warren Nice mini-stash I have found that Lucky Models has the best prices for AFV club models by far; when in sale, they are about 25% of MSRP (compared to USA dollars). Great start! .. and finish! Hey, Im catching up with the full thread today as we are buried in snow here in the NE USA.
Javier Hows the quality on those Flagman kits? Looks like decent detail from here.
Dave That is a blast from the past!
Stefan Look forward to the water/dio
IronOwl Welcome to the Light Side !
.. and a lot of great builds! Well, I have to go and shovel almost half a meter of snow (just the path to the car, well, where I think the car is as it buried in snow). Will get some workbench work done this weekend,
Cheers all
TRM5150
Joined: January 03, 2010
KitMaker: 2,159 posts
Model Shipwrights: 1,400 posts
Posted: Friday, February 08, 2013 - 01:05 PM UTC
Stay warm James!! North of you in Central MA...Snowing crazy out there!! Be safe!!
warreni
Joined: August 14, 2007
KitMaker: 5,926 posts
Model Shipwrights: 2,624 posts
Posted: Friday, February 08, 2013 - 01:12 PM UTC
James, sometimes I wish it snowed here, but then again I hate it when it gets below about 15C so it wouldn't be a good thing.
You and Todd keep warm!
Cheers
Warren
You and Todd keep warm!
Cheers
Warren
TRM5150
Joined: January 03, 2010
KitMaker: 2,159 posts
Model Shipwrights: 1,400 posts
Posted: Friday, February 08, 2013 - 03:16 PM UTC
Thanks Warren!! Getting slowly buried here at the moment and more to come! 8 inches down with huge drifts from the high winds...looking at around a possible 24 inches to 30+ inches before it's over! I have a client in from your neck of the woods...Brisbane? Real eye opener for him!
warreni
Joined: August 14, 2007
KitMaker: 5,926 posts
Model Shipwrights: 2,624 posts
Posted: Friday, February 08, 2013 - 03:56 PM UTC
Quoted Text
Thanks Warren!! Getting slowly buried here at the moment and more to come! 8 inches down with huge drifts from the high winds...looking at around a possible 24 inches to 30+ inches before it's over! I have a client in from your neck of the woods...Brisbane? Real eye opener for him!
lol.. He might never have seen snow before.
TRM5150
Joined: January 03, 2010
KitMaker: 2,159 posts
Model Shipwrights: 1,400 posts
Posted: Friday, February 08, 2013 - 04:38 PM UTC
Never asked but I would presume! The year before last a couple of clients from Queensland that never seen the white stuff came up to my little corner of the world...spend the week flanked by a 14 inch and 21 inch storms! Little kids in a candy store!! LOL!!!

North4003

Joined: August 01, 2012
KitMaker: 960 posts
Model Shipwrights: 58 posts

Posted: Sunday, February 10, 2013 - 05:48 PM UTC
I'v gotten this far on the Class 33G. Fit has been fairly good.


Dangeroo

#023

Joined: March 13, 2009
KitMaker: 2,058 posts
Model Shipwrights: 163 posts
Posted: Thursday, February 14, 2013 - 09:27 AM UTC
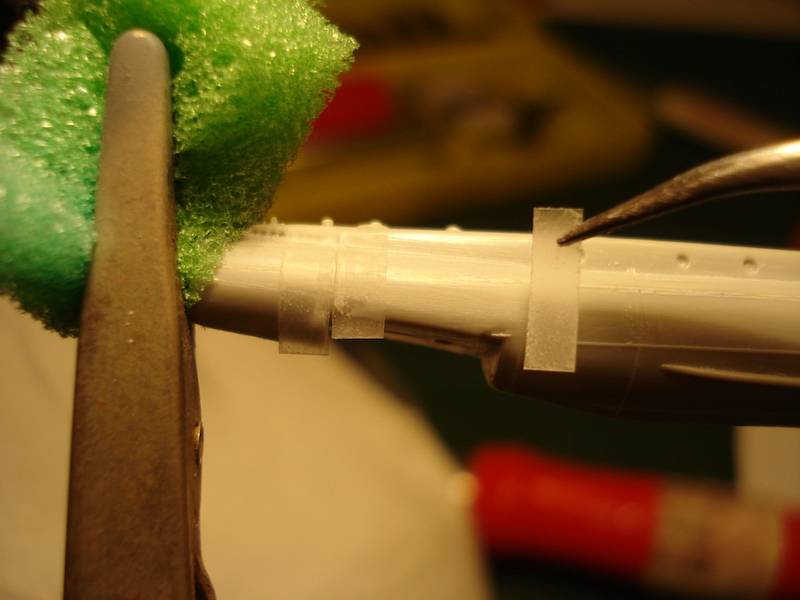
Okay guys, I've made a little progress on my Gato. Problem was, to get a smooth transition between upper and lower hull I had to sand down the raised detail... My solution to getting it back was with scotch tape and Mr. Surfacer 500:
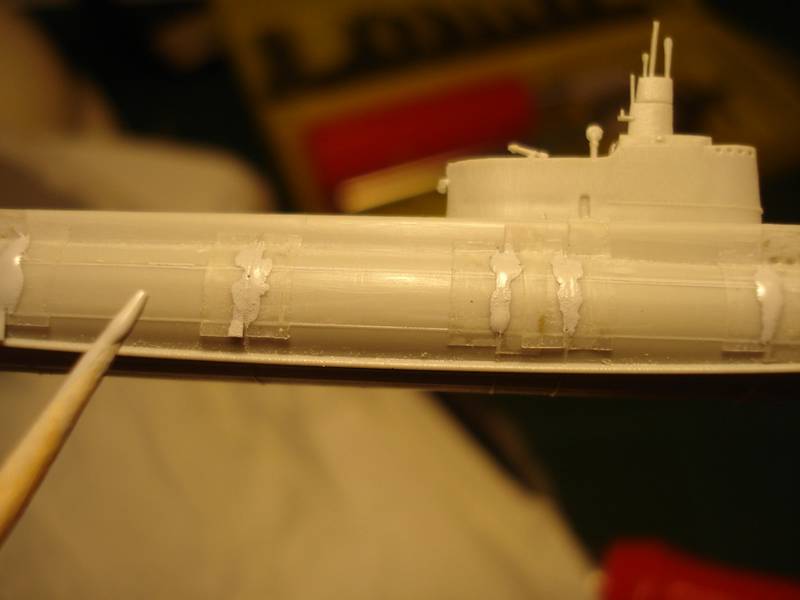
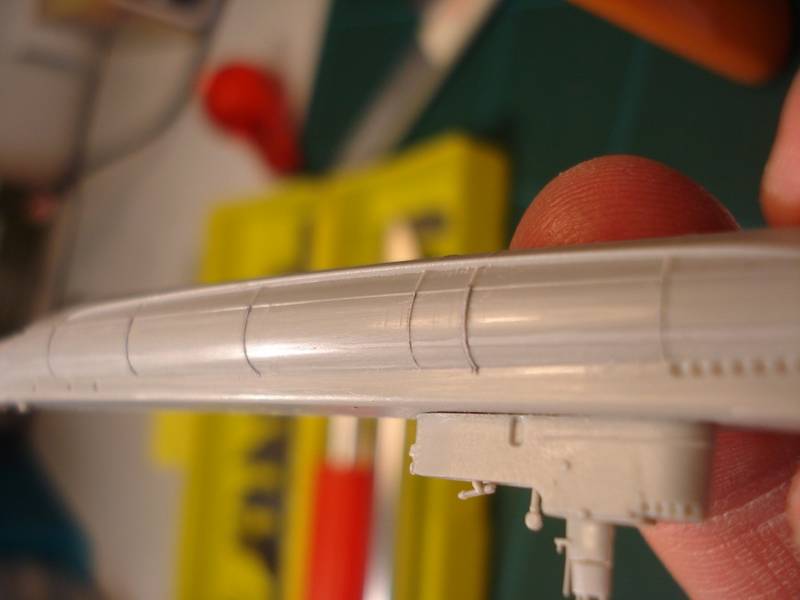
Now all I have to find out is what it looks like painted. Looks much larger in the photos though...
Keep up the good work guys!
Cheers!
Stefan
Now all I have to find out is what it looks like painted. Looks much larger in the photos though...
Keep up the good work guys!
Cheers!
Stefan

grayghost666
#021
Joined: August 02, 2007
KitMaker: 2,458 posts
Model Shipwrights: 1,423 posts
KitMaker: 2,458 posts
Model Shipwrights: 1,423 posts
Posted: Thursday, February 14, 2013 - 04:15 PM UTC
Hello All,

It looks like everyone is having fun while I had my lower leg cut off and had about 10 lbs of tumors removed from my body.
I now have a nice new left wooded peg leg just below my knee, It will go great with my eye patch over my left eye.
I have a great view of the Alps and my Suite is nice and on the top floor with it's own sun deck, pool and large with the hospital stuff in a open room, Then down the hall, I have a sitting room/big screen (150 inches TV), Study with work bench,computer desk, work desk, tv, and music system. Futher down the hall is the restroom/shower and dining room with attached kitchen. I have 12 Medicial Personnel/Attendents on duty every 8 hours around the clock
Now on to the campaign,
They are letting me have my modeling itrms back, Under supervision, So I have 3 kits I will be working on:
1)DKM TYPE XXIII U-BOAT 1:144
2)K-19 SOVIET NUCLEAR SUBMARINE 1:350
3)U-99 GERMAN SUBMARINE 1:125
I will post some Photo's when I am allowed to use the camera, If I am good at rehab.
Keep up the good work everyone, I have been watching you builds,
Cheers,
Bruce
Somewhere in the Alps


Tailor

Joined: May 26, 2008
KitMaker: 1,168 posts
Model Shipwrights: 676 posts

Posted: Thursday, February 14, 2013 - 06:46 PM UTC
Hang in there, Bruce!
Guido
Guido
warreni
Joined: August 14, 2007
KitMaker: 5,926 posts
Model Shipwrights: 2,624 posts
Posted: Thursday, February 14, 2013 - 07:02 PM UTC
Get better soon Bruce,
Best wishes
Warren
Best wishes
Warren
TRM5150
Joined: January 03, 2010
KitMaker: 2,159 posts
Model Shipwrights: 1,400 posts
Posted: Thursday, February 14, 2013 - 11:42 PM UTC
Nice fix Stefan! Surfacer is a great trick. Been known to use putty before but at this scale that is sweet!!
Best wish out to you Bruce!
Best wish out to you Bruce!
Tailor
Joined: May 26, 2008
KitMaker: 1,168 posts
Model Shipwrights: 676 posts
Posted: Friday, February 15, 2013 - 12:00 AM UTC
Looking really good, Stefan!
Cheers,
Guido
Cheers,
Guido

russamotto

Joined: December 14, 2007
KitMaker: 3,389 posts
Model Shipwrights: 151 posts

Posted: Saturday, February 16, 2013 - 01:18 PM UTC
I started my Gato build a while ago, but am now just finally getting some photos posted.
Fitting the pressure hull

Small nylon piece to allow the rudder to move
Somehow I got carried away and didn't take any pictures of the middle of the build.
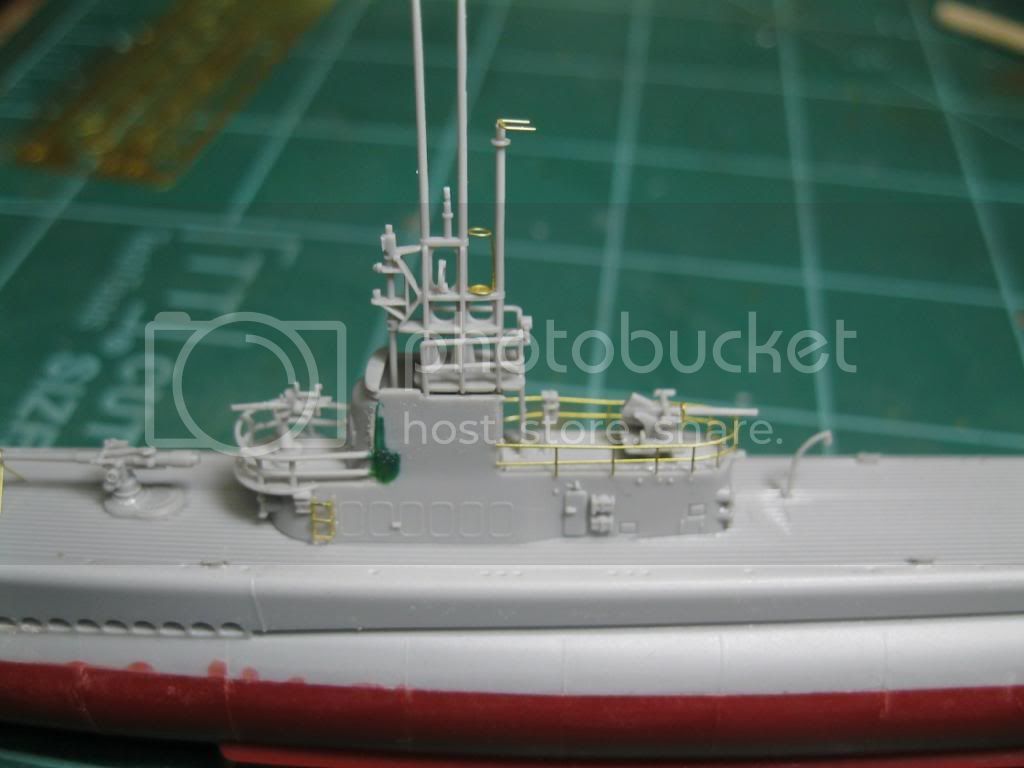
It isn't indicated in the instructions, but there is etch for the railing around the 20mm mount. I lost the small radar mount and will need to scratch one. I also lost one of the sights on the 40mm gun.
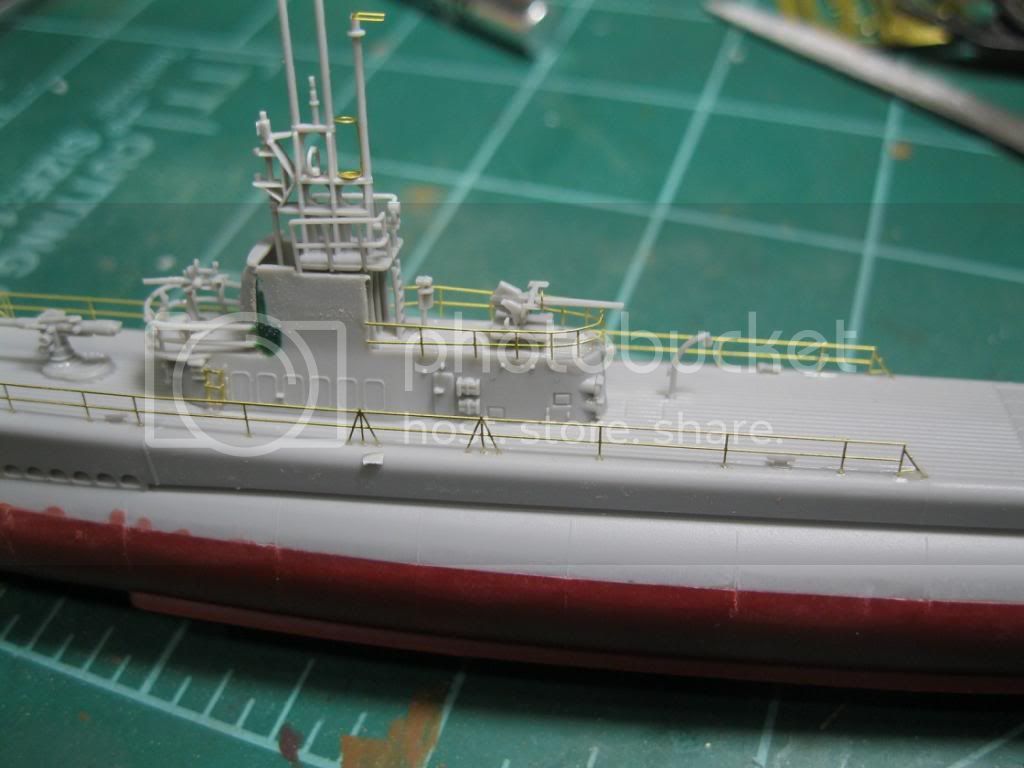
Side railings on. This is a whole new adventure in etch for me. I hope to get it painted and then I'll do the rigging.
Fitting the pressure hull
Small nylon piece to allow the rudder to move
Somehow I got carried away and didn't take any pictures of the middle of the build.
It isn't indicated in the instructions, but there is etch for the railing around the 20mm mount. I lost the small radar mount and will need to scratch one. I also lost one of the sights on the 40mm gun.
Side railings on. This is a whole new adventure in etch for me. I hope to get it painted and then I'll do the rigging.

Naseby

Joined: October 15, 2010
KitMaker: 825 posts
Model Shipwrights: 97 posts

Posted: Sunday, February 17, 2013 - 03:56 AM UTC
Good luck Bruce, I hope You will get better and will join us soon with Your build.
I started with the paint this week and got the basic done, now its time for some weathering. The hull red and grey were airbrushed, the deckwood was painted with a brush.
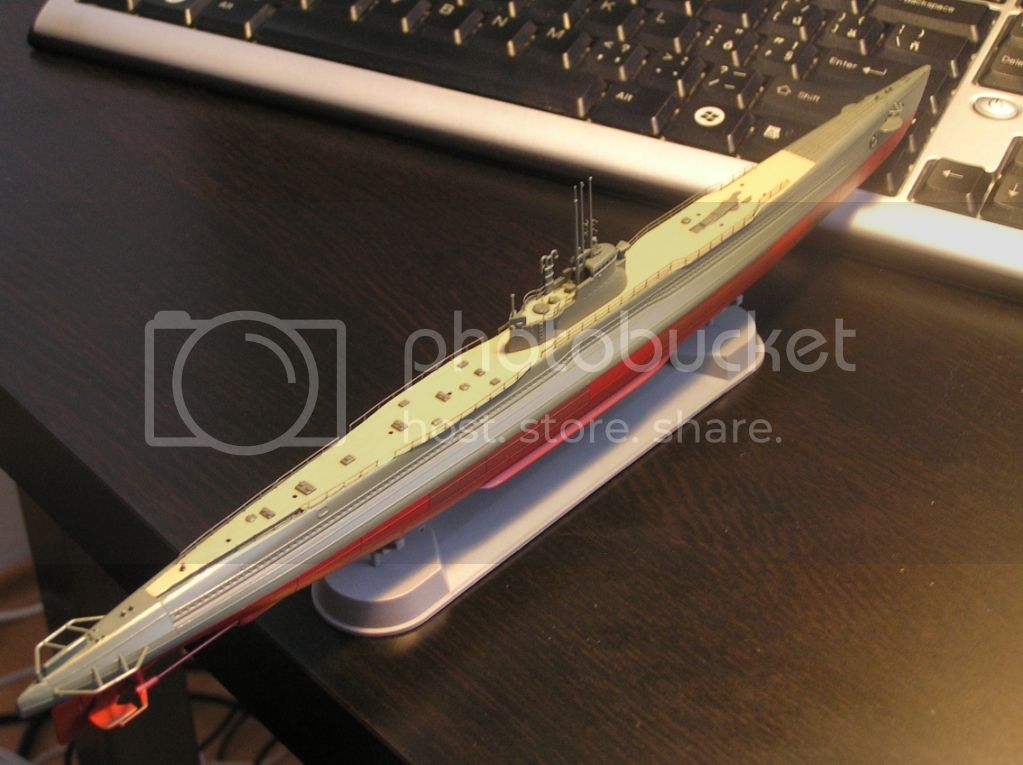
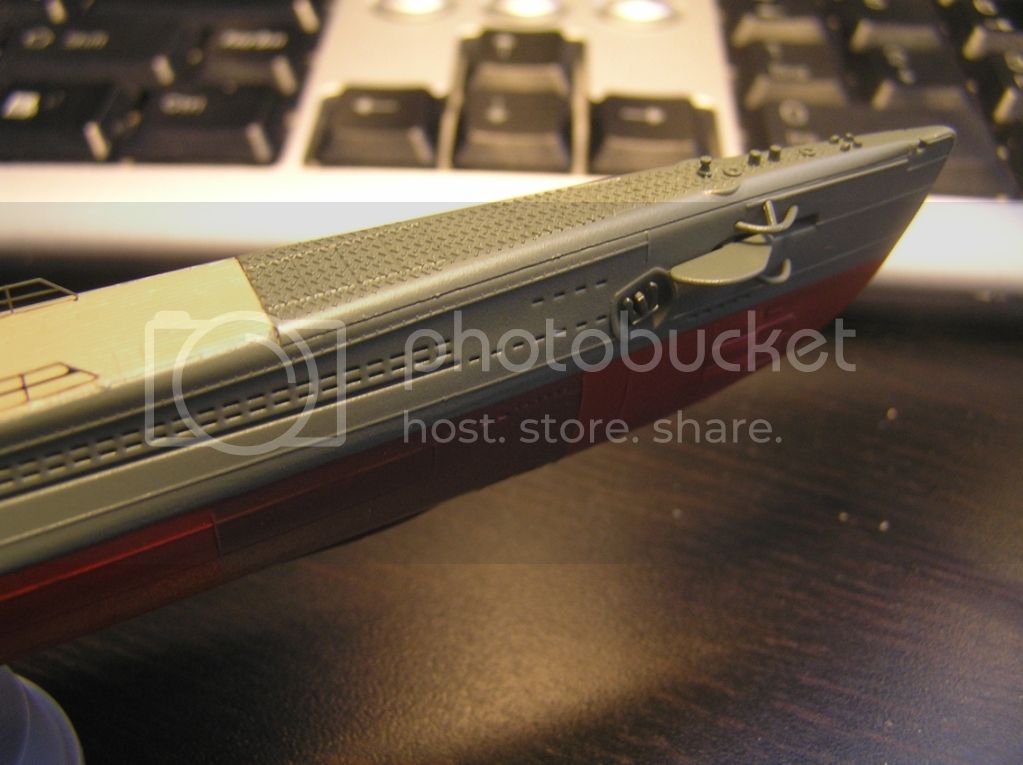
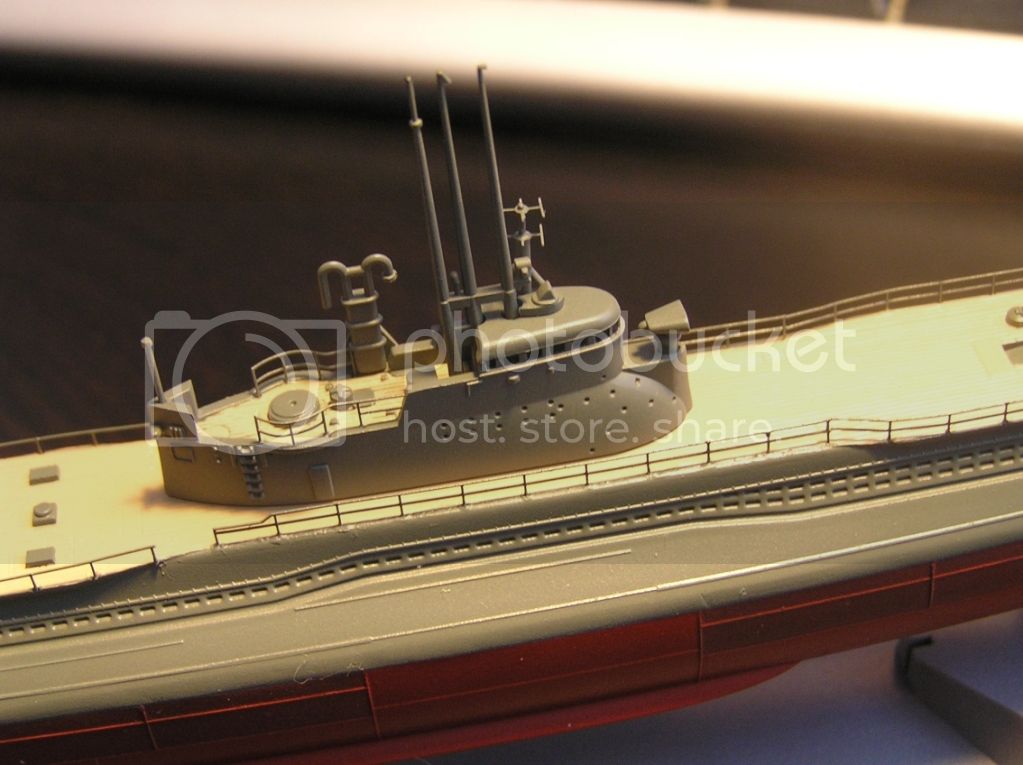
I started with the paint this week and got the basic done, now its time for some weathering. The hull red and grey were airbrushed, the deckwood was painted with a brush.

JMartine
Joined: October 18, 2007
KitMaker: 1,698 posts
Model Shipwrights: 1,514 posts
Posted: Sunday, February 17, 2013 - 08:58 AM UTC
Bruce Best wishes Bruce, and get better! Always admired your resiliency and positive thinking, you are a true inspiration to many!
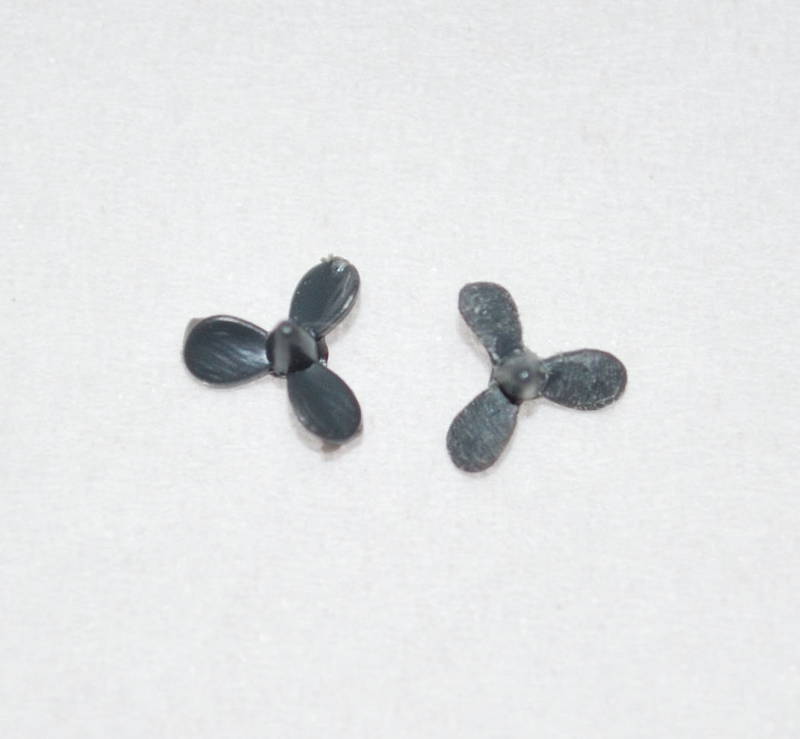
Russ Gato looks good; how is the fit? The propeller looks thick, or are my eyes off?
Naseby nice clean build, look forward to the weathering.
Russ Gato looks good; how is the fit? The propeller looks thick, or are my eyes off?
Naseby nice clean build, look forward to the weathering.
russamotto
Joined: December 14, 2007
KitMaker: 3,389 posts
Model Shipwrights: 151 posts
Posted: Sunday, February 17, 2013 - 12:15 PM UTC
Thanks, James. Fit was pretty good. There were a couple of parts, like on the sail, where it required some fixing. The lower and upper hull parts have a very slight join seam that is visible. I've been trying to clean it up without losing detail.

FJHueso

#156

Joined: February 29, 2004
KitMaker: 119 posts
Model Shipwrights: 25 posts

Posted: Friday, February 22, 2013 - 08:22 AM UTC
First of all, my best wishes, Bruce.
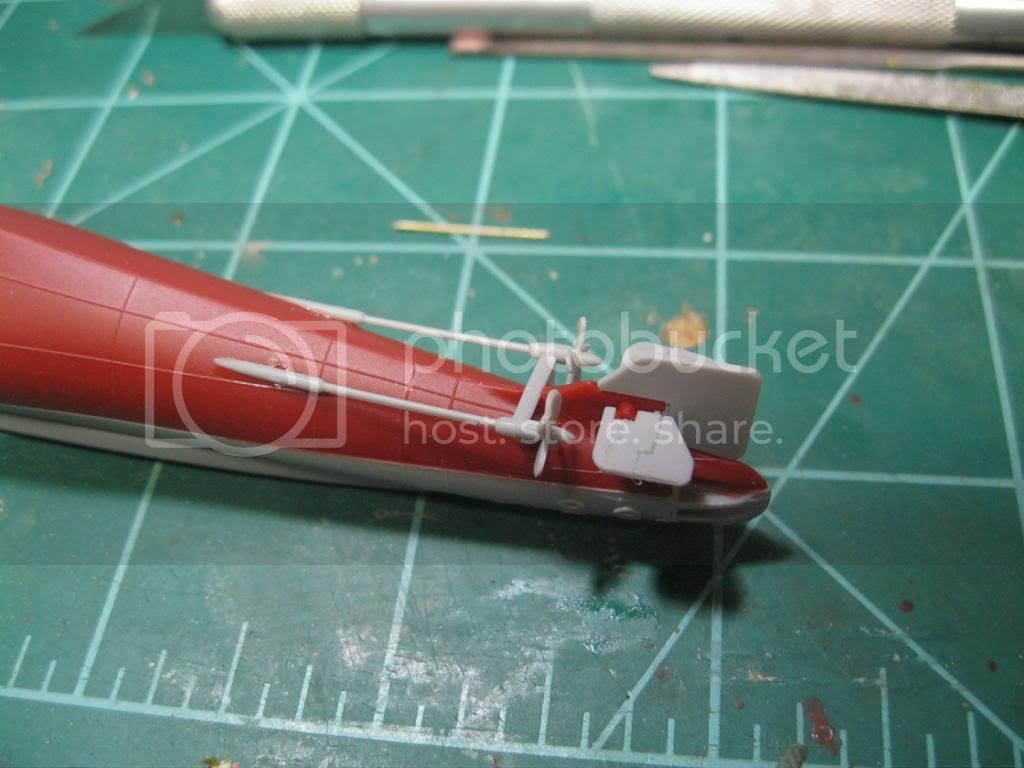
After that: New progress report! after some distractions (Other projects, a family, a job, such little things...) I can post something new. Basically, the results of my struggle wthe diving planes, rudders, and so on. BTW, i discovered toooo late the bow planes have the wrong profile! Now, I must figure how to make the guardrails, the antennae and other such details.
First the propellers, before and after, then the stern tube door (neraly buried when installed),
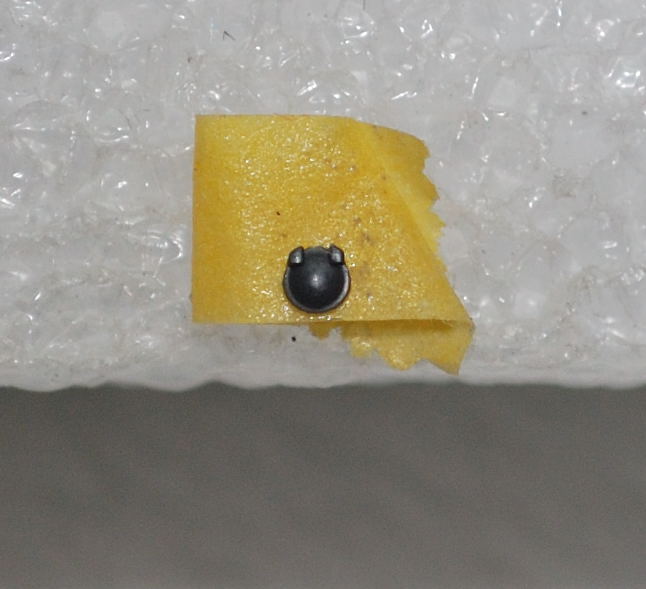
Next the stern planes and rudders.
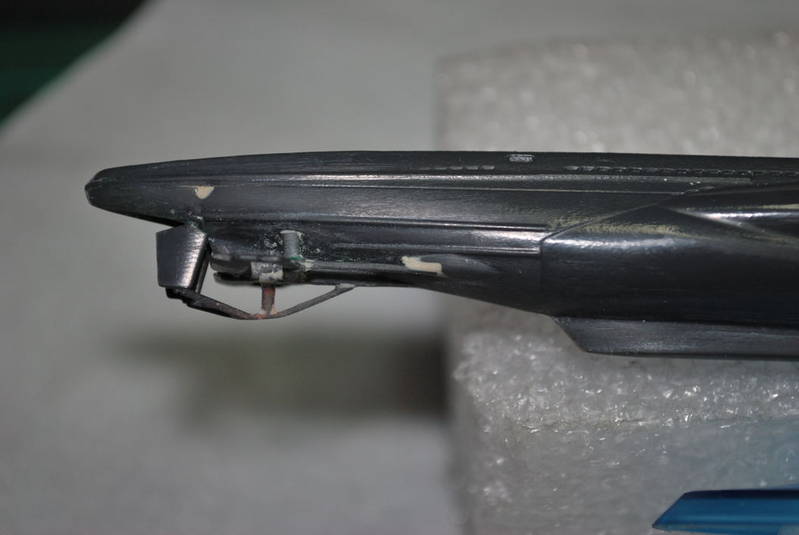
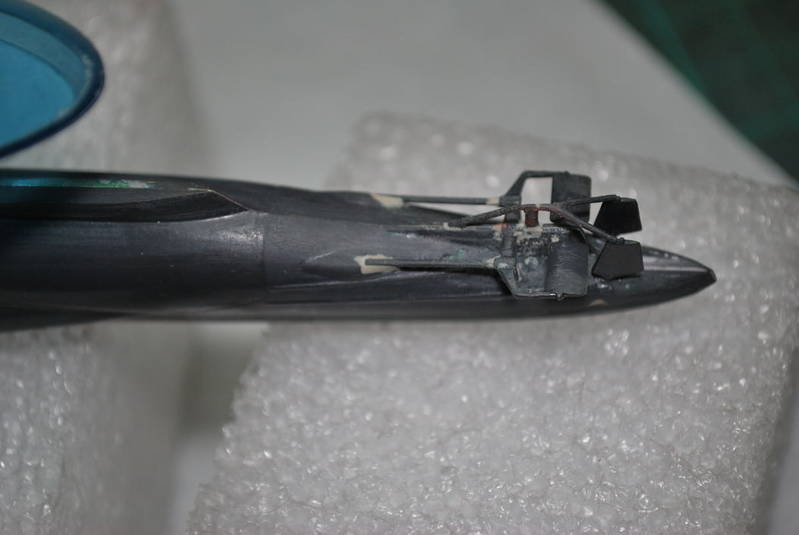
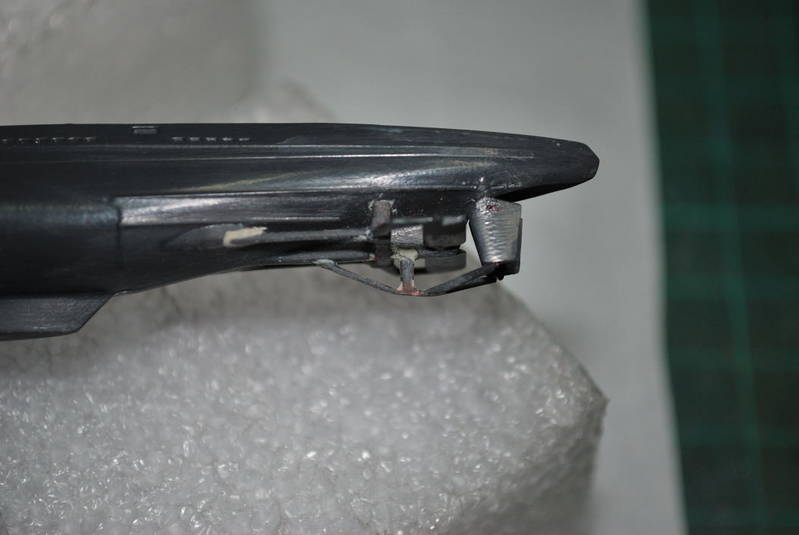
And finnaly, the bow where I had to rescribe the lower starboard door:
After that: New progress report! after some distractions (Other projects, a family, a job, such little things...) I can post something new. Basically, the results of my struggle wthe diving planes, rudders, and so on. BTW, i discovered toooo late the bow planes have the wrong profile! Now, I must figure how to make the guardrails, the antennae and other such details.
First the propellers, before and after, then the stern tube door (neraly buried when installed),
Next the stern planes and rudders.
And finnaly, the bow where I had to rescribe the lower starboard door:
goldenpony

Joined: July 03, 2007
KitMaker: 3,529 posts
Model Shipwrights: 2,419 posts
Posted: Thursday, February 28, 2013 - 02:09 AM UTC
Nice work everyone. If I can get some warmer weather I do plan to work on the Skipjack. I plan to build the Scorpion. I even plan to do a review of that monster.
Burce - You a tuff guy, hang in there. Plenty of us have been praying for you my friend!
Burce - You a tuff guy, hang in there. Plenty of us have been praying for you my friend!

IronOwl
Joined: January 07, 2013
KitMaker: 572 posts
Model Shipwrights: 80 posts

Posted: Sunday, March 03, 2013 - 12:23 PM UTC
Well ive some what got my build done just the decals and paint. first Nautical build for me so i went small will post pictures of the uss balao soon 

vdejarnette
Joined: February 25, 2013
KitMaker: 209 posts
Model Shipwrights: 6 posts

Posted: Tuesday, March 05, 2013 - 02:30 AM UTC
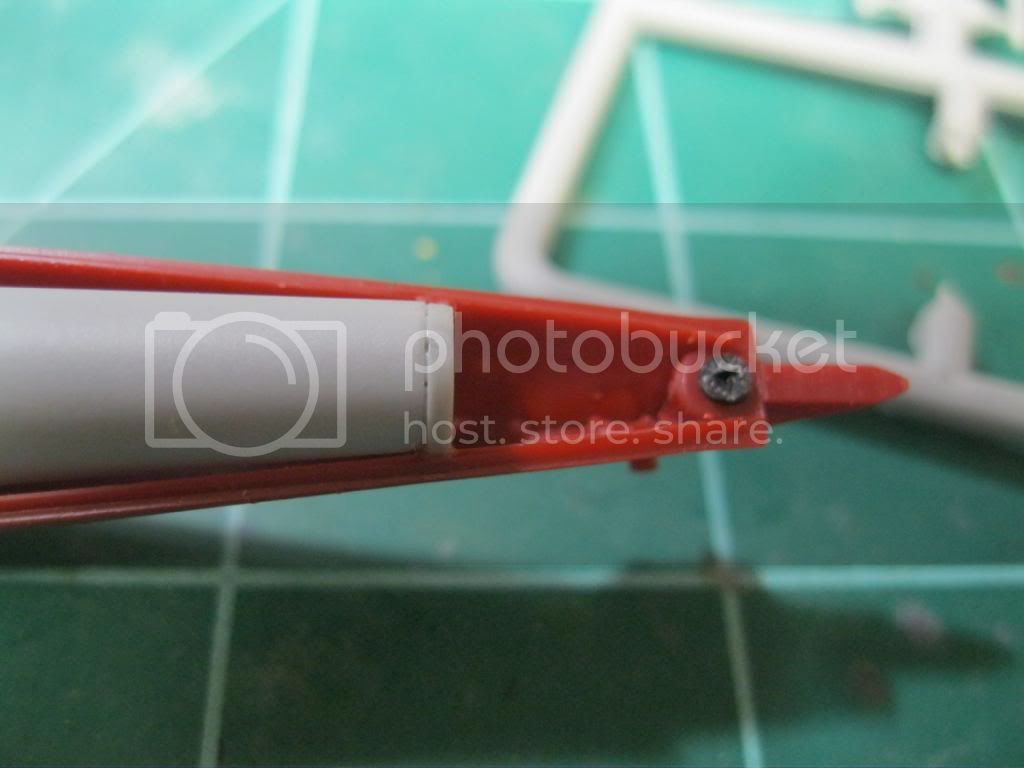
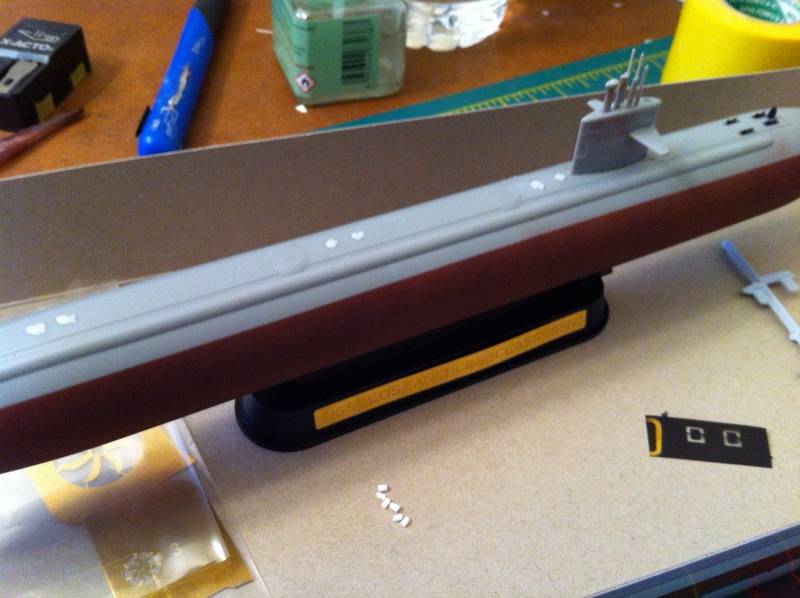
Here is my campaign entry, the Hobbyboss 3 in 1 USS Los Angeles Class Sub (1/350) built as the USS Chicago (I like the bull on the nose).
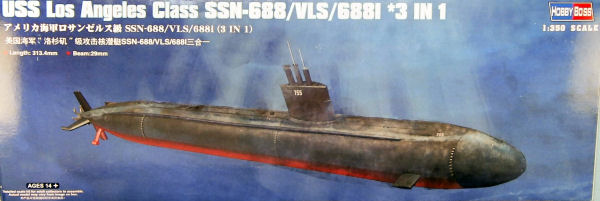
I bought this kit towards the end of last year after liking the first sub I did, the 1/180 Revell USS Lionfish. One problem was, TOO BIG! I am currently apartment dwelling and if I wanted to do any more I would need to move down a scale. 1/700 just seemed too tiny to detail without major frustration so I decided to try 1/350 and I think I will stick with it.
I started this a few weeks ago while waiting for the paint to dry on another build. The main construction was complete in a couple hours. It then sat on the shelf until this weekend when I masked and airbrushed the bottom of the hull with Tamiya Hull Red.
I also sprayed the little fiddly pieces that go on the top of the hull prior to attaching them with a can of Tamiya semi-gloss black I had almost finished. It will get an overall dull coat at the end so the shine doesn't matter at this point.
the photoetch screw seemed unnecessarily complicated to form so I stuck with using the plastic screw provided. Sprayed it with Testors gold enamel from a can and then with a couple layers of Testors Dullcote.
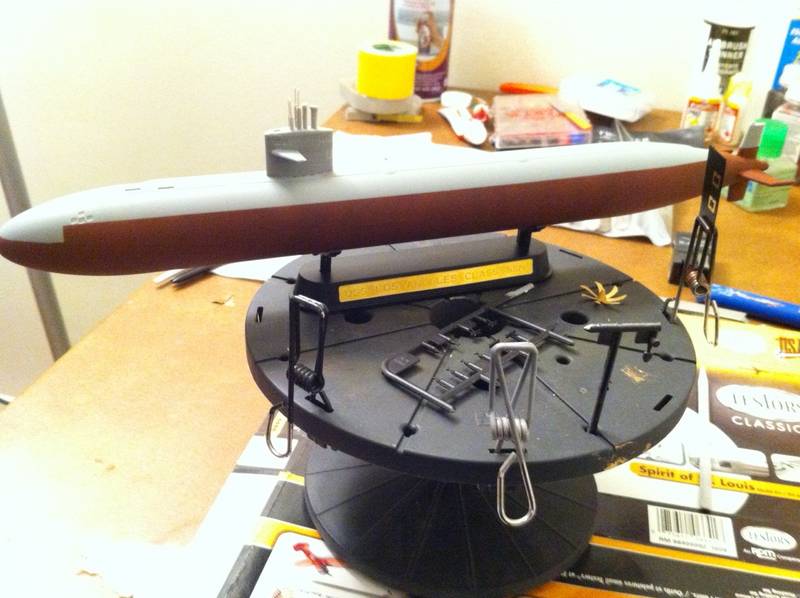
This campaign entry is the second nautical build ever for me, so I am still working on getting my lines straight. Knowing this I chose something clean and modern. The Lionfish I did last had a raised line down the hull demarcating where the paint line should be. No such luck on this kit, but they came out looking quite good in my opinion. I know the photo is a tad blurry. I am going to start taking pictures with my digital camera in the future because my phone is just not cutting it.
I bought this kit towards the end of last year after liking the first sub I did, the 1/180 Revell USS Lionfish. One problem was, TOO BIG! I am currently apartment dwelling and if I wanted to do any more I would need to move down a scale. 1/700 just seemed too tiny to detail without major frustration so I decided to try 1/350 and I think I will stick with it.
I started this a few weeks ago while waiting for the paint to dry on another build. The main construction was complete in a couple hours. It then sat on the shelf until this weekend when I masked and airbrushed the bottom of the hull with Tamiya Hull Red.
I also sprayed the little fiddly pieces that go on the top of the hull prior to attaching them with a can of Tamiya semi-gloss black I had almost finished. It will get an overall dull coat at the end so the shine doesn't matter at this point.
the photoetch screw seemed unnecessarily complicated to form so I stuck with using the plastic screw provided. Sprayed it with Testors gold enamel from a can and then with a couple layers of Testors Dullcote.
This campaign entry is the second nautical build ever for me, so I am still working on getting my lines straight. Knowing this I chose something clean and modern. The Lionfish I did last had a raised line down the hull demarcating where the paint line should be. No such luck on this kit, but they came out looking quite good in my opinion. I know the photo is a tad blurry. I am going to start taking pictures with my digital camera in the future because my phone is just not cutting it.
TRM5150
Joined: January 03, 2010
KitMaker: 2,159 posts
Model Shipwrights: 1,400 posts
Posted: Tuesday, March 05, 2013 - 10:55 PM UTC
Great job Van! SOmetime the PE can get a bit frustrating. Best to be happy with you build then worked up over a tiny piece of metal. It's done for the "more realistic to scale" effect...again, you have done a nice job here!!
vdejarnette
Joined: February 25, 2013
KitMaker: 209 posts
Model Shipwrights: 6 posts
Posted: Thursday, March 07, 2013 - 02:38 AM UTC
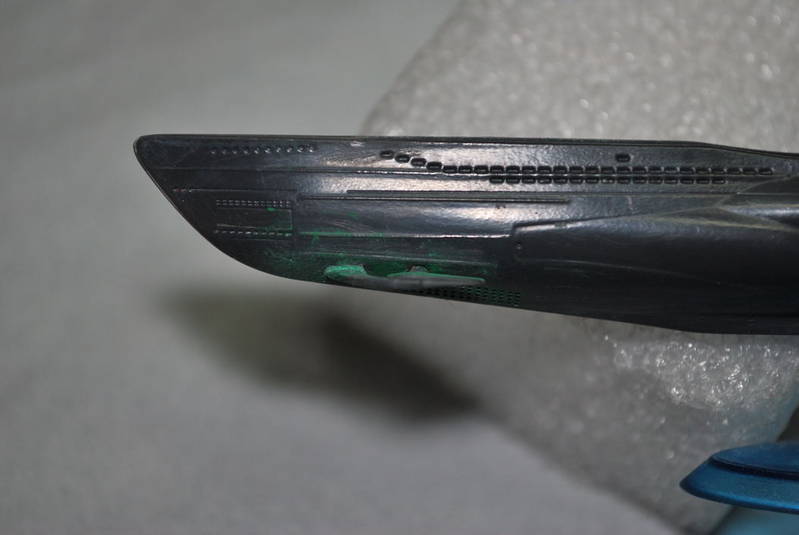
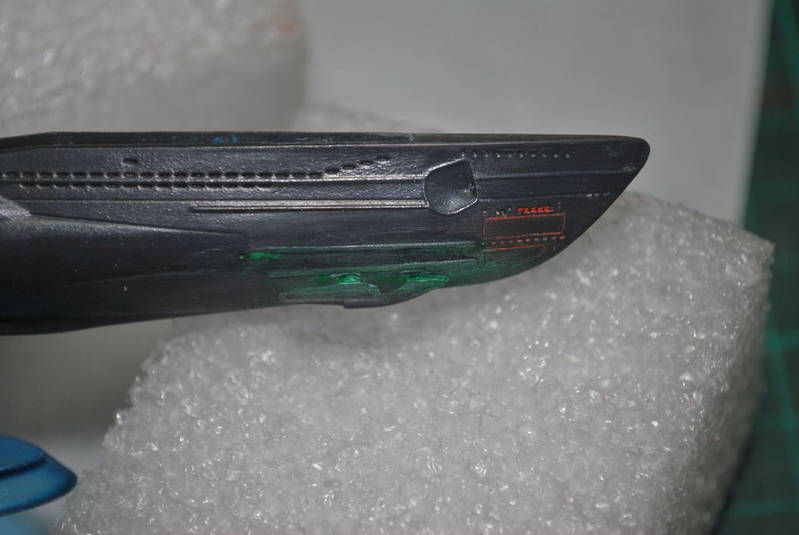
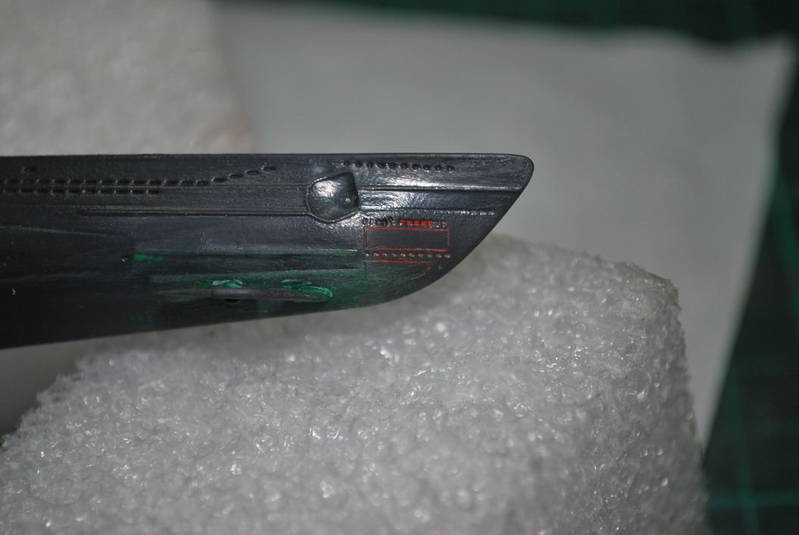
I masked and painted the nose mixing tamiya flat black and hull red 1:1 per the painting guide, waited a day and then sealed it with a couple coats of dullcote last night. After removing the tape I noticed that despite sealing the hull red coat there are still spots where the paint has been scratched. I have noticed working with acrylics is very frustrating for this reason if you do not add a layer of primer first. There also appears to be a hair sitting on top of the brown nose section that I did not see this morning when taking the picture. Hopefully that comes right off but we will see later. 
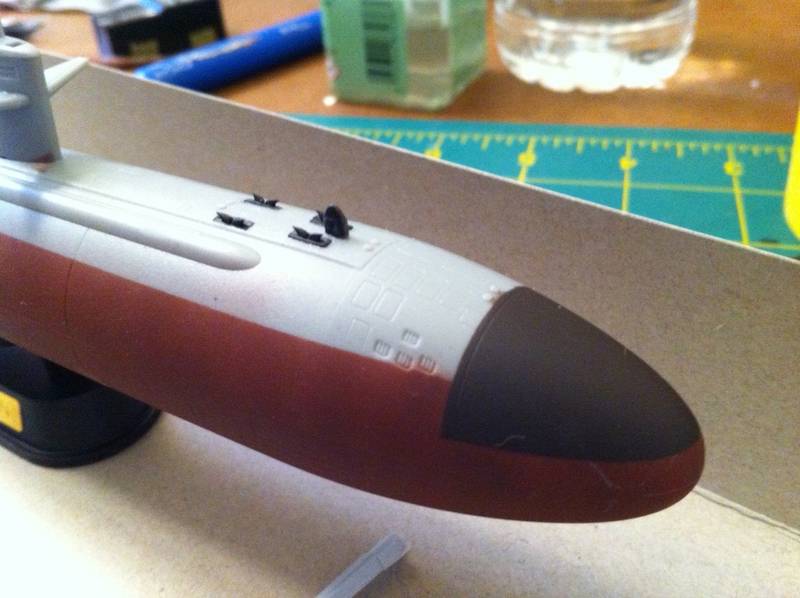
Also ran into the first negative strike against this kit. There are 6 tie downs aft of the sail that should have been molded integrally with the top of the hull but for some reason Hobbyboss decided to make you glue them in yourself. This is not a problem by itself, but the 6 tie downs are so small and so poorly molded as to be totally unusable. One was bent inside the box, one was lost during detachment from the sprue, and I broke two fighting with them. After getting the first two in and being completely unhappy with the results, I decided to just fill the holes with mr surfacer.
Looking through my spare box and finding nothing, I decided to cut off some locator pits for a spare 1/25 car suspension and I will glue those on and file them roughly to shape. It can't look any worse than using the pieces HobbyBoss gave me. So much for being quick and easy.
 |

WEB HOSTING BY


Copyright ©2021 Model Shipwrights and Kitmaker Network, a subsidiary of Silver Star Enterprises
All Rights Reserved. Please read our Conditions of Use and Privacy Policy.
All Rights Reserved. Please read our Conditions of Use and Privacy Policy.