Campaigns
Want to be part of a group build? This is where to start, plan, and meet about them.
Official Campaign: Dive 3
FJHueso
#156
Visit this Community
Madrid, Spain / España
Joined: February 29, 2004
KitMaker: 119 posts
Model Shipwrights: 25 posts
Posted: Monday, May 20, 2013 - 02:11 AM UTC
As you authorized (even encouraged) silly questions: Where is the campaign gallery?

(From Madrid with storms... )
smithrp
Visit this Community
Alberta, Canada
Joined: November 28, 2009
KitMaker: 79 posts
Model Shipwrights: 56 posts
Posted: Monday, May 20, 2013 - 04:07 AM UTC
I can't find it either???
FJHueso
#156
Visit this Community
Madrid, Spain / España
Joined: February 29, 2004
KitMaker: 119 posts
Model Shipwrights: 25 posts
Posted: Monday, May 20, 2013 - 06:27 AM UTC
Silly question, indeed! Finally I got it!
Robert, use this link : http://gallery.kitmaker.net/showgallery.php/cat/28060

Photos uploaded and ready, Sir!
smithrp
Visit this Community
Alberta, Canada
Joined: November 28, 2009
KitMaker: 79 posts
Model Shipwrights: 56 posts
Posted: Tuesday, May 21, 2013 - 12:14 PM UTC
Thanks Javier For helping me out here. I couldn't for the life of me figure out how to do this. Where did you find this link??? Thanks again. Bob
FJHueso
#156
Visit this Community
Madrid, Spain / España
Joined: February 29, 2004
KitMaker: 119 posts
Model Shipwrights: 25 posts
Posted: Wednesday, May 22, 2013 - 01:24 AM UTC
I could tell you about a saga of searching and finding... but reality is prosaic, usually: Peeking tru the galleries...
grayghost666
#021
Joined: August 02, 2007
KitMaker: 2,458 posts
Model Shipwrights: 1,423 posts
Posted: Wednesday, May 22, 2013 - 03:23 PM UTC
Hello All,
If you notice about the photo gallery, It starts with MSW campaign: the what campaign it is. So if you look for MSW in the campaign page you should find your campaign.
I try to make it as easy as I can.
Cheers,
Bruce
RedDuster
Visit this Community
England - South East, United Kingdom
Joined: March 01, 2010
KitMaker: 7,078 posts
Model Shipwrights: 6,649 posts
Posted: Sunday, June 02, 2013 - 04:08 AM UTC
Thought I was done with building on this campaign, and just down to looking in and enjoying everybody else's handywork... However found this in the LHS, and just had to have add it as a second build.


a bit cruder than the biber in moulding but looks buildable. The interior sprayed white.


The kit basically contains 2 torpedos one standard and one with a cockpit, both tail sections assembled.


There is very little cockpit beyond a seat and 3 dials, a little creative gizmology has been added, not much because I doubt there was much in their, can't finad any pics though.


Bulk of the assembly completed, ready for spraying.


This a basic and slight crude kit, but so far straight forward, (with a little fettling) and enjoyable to build.

So far

Si
North4003
Visit this Community
England - West Midlands, United Kingdom
Joined: August 01, 2012
KitMaker: 960 posts
Model Shipwrights: 58 posts
Posted: Wednesday, June 05, 2013 - 01:31 AM UTC
Has a campaign ribbon for Dive III been designed?
grayghost666
#021
Joined: August 02, 2007
KitMaker: 2,458 posts
Model Shipwrights: 1,423 posts
Posted: Wednesday, June 05, 2013 - 08:16 AM UTC
Hello Brett,
Yes there is a ribbon for Dive 3. I could not get it to post, So Jeremy is doing it for me.
It should be up by this weekend as he is/was during his finals for collages classes and was a bit busy for them.
Thanks for reminding me to check in with him about the ribbon status.
Cheers,
Bruce
warreni
Visit this Community
South Australia, Australia
Joined: August 14, 2007
KitMaker: 5,926 posts
Model Shipwrights: 2,624 posts
Posted: Friday, June 07, 2013 - 09:13 AM UTC
Greetings everyone.
Even though I have already submitted a few sinky things for this campaign I thought you all may be interested to see what appeared in my letter box yesterday..

Yes, amazingly, a new Royal Australian Navy boat! I may just have to give it a go after I go as far as I can with my CV-14.
Cheers all
Warren
grayghost666
#021
Joined: August 02, 2007
KitMaker: 2,458 posts
Model Shipwrights: 1,423 posts
Posted: Saturday, June 08, 2013 - 12:06 PM UTC
Hello All,
The ribbon is up if you want to take at look at it on the campaign page.
Cheers,
Bruce
Dangeroo
#023
Visit this Community
Zurich, Switzerland
Joined: March 13, 2009
KitMaker: 2,058 posts
Model Shipwrights: 163 posts
Posted: Sunday, June 09, 2013 - 01:02 AM UTC
Gentlemen, magnificient campaign, and the Ribbon is superb! Bruce, glad you made it back, hope you are well again!

Recently returned from vacation, I have renewed my effort and did a second try for water.

Fist the piece of styrofoam of which I cut the basic wave shapes:


This was then covered with aluminum foil again. Then for a wooden base into which I inserted the backed styrofoam:


Then fill in the gaps:


And yesterday I painted the whole thing with oil paints. These are still drying. Here's a test fit with the sub:


Now the hard part will be getting the gap between water and sub filled in convincingly... Hope the paint will be dry before the end of the campaign, particularly since I will be away again the last 10 days of the month...

Cheers!
Stefan
RedDuster
Visit this Community
England - South East, United Kingdom
Joined: March 01, 2010
KitMaker: 7,078 posts
Model Shipwrights: 6,649 posts
Posted: Sunday, June 09, 2013 - 05:44 AM UTC
A coat of primer and then on with the filling and filing.


It is going to be quite a job to get a clean finish certainly for the metal sections on the torpedo.

doesn't look much progress, but quite a bit of blood sweat & sanding.

Si
Grauwolf
#084
Visit this Community
Quebec, Canada
Joined: September 14, 2005
KitMaker: 2,485 posts
Model Shipwrights: 1,157 posts
Posted: Friday, June 14, 2013 - 03:54 PM UTC
Ahoy fellow submariners,

A little late starting up, but I should be able to pull
it off on time.

So here is my entry for the DDD3 campaign.

The Revell Type VII-D in 1:350 scale.


More to follow,
Cheers,
Joe
RedDuster
Visit this Community
England - South East, United Kingdom
Joined: March 01, 2010
KitMaker: 7,078 posts
Model Shipwrights: 6,649 posts
Posted: Sunday, June 16, 2013 - 07:59 AM UTC
Nice looking build Joe, good luck with it.

Paint job on both parts of the Neger goes on, the manned section is sprayed grey, and the torpedo black, this is the colour for the warhead and makes a great basecoat got the metallic section.


Torpedo painted and canopy added to the to the manned section.


The props and tail added to the manned section.


The little monster finished, The etch for the cradle for the torpedo were a real pig, even annealed they did not want to bend. I broke both of the bottom sections. still finally got them together.


Not an easy kit, mostly due to over thick etch and poor fit. but in the end it was quite an enjoyable and satisfying build. I am looking out for the Marder, and the U model trailer to go with it.

A couple of pics added to the gallery.

Si
Grauwolf
#084
Visit this Community
Quebec, Canada
Joined: September 14, 2005
KitMaker: 2,485 posts
Model Shipwrights: 1,157 posts
Posted: Sunday, June 16, 2013 - 12:06 PM UTC
Hi Simon,

Nice build....I am tempted to do one as a future project.

And here a progress shot of the VII-D....managed to assemble
the hull today.....quite a nice fit and great hull detail.


Cheers,
Joe
Dangeroo
#023
Visit this Community
Zurich, Switzerland
Joined: March 13, 2009
KitMaker: 2,058 posts
Model Shipwrights: 163 posts
Posted: Monday, June 17, 2013 - 07:53 AM UTC
Submarine warfare continues! Great work gentlemen!

Finally the paint has dried. Here's my progress: Weathering of the boat with pastels and then I glued it in its place in the water and closed the gaps with clear silicone (thanks for the tip, Kevin!).


Now I have to wait for this to dry, then it's a coat of future and some white wave tops and that should be it. Unfortunately I'm away the rest of the month, so I won't be able to finish in time. Bruce, do you think we/I could get an additional week in June?

Cheers and keep the progress coming!

Stefan
grayghost666
#021
Joined: August 02, 2007
KitMaker: 2,458 posts
Model Shipwrights: 1,423 posts
Posted: Monday, June 17, 2013 - 05:30 PM UTC
If more ask, then I will extend 2 weeks.
TRM5150
Visit this Community
Massachusetts, United States
Joined: January 03, 2010
KitMaker: 2,159 posts
Model Shipwrights: 1,400 posts
Posted: Monday, June 17, 2013 - 10:32 PM UTC
Hey fellas,

Been out straight with many projects and of course life but finally getting around to giving mine a go! Not sure if I will make the deadline, but going to give it my best shot!!

My USS Maryland - SSBM-738


I posted the box-shot a while back but figured it needed a little refresher. This is where I stand after the other night getting things underway.


I plan on displaying her closed up so I have the first of the many of the water tight doors in place. There is some filling that needs to be done, but nothing too bad.


Also, I began a complete sanding of the entire hull. The bulk head ribbing/weld line molds that are on the boat are not quite what is seen on the real deal. Sanding and then some light weld lines will be added and this will be in good shape I think!

I have not been chiming in on much as this went along but wanted to say great job guys!!! Some really nice work has been done on all the entrants!!! Keep it up!!
grayghost666
#021
Joined: August 02, 2007
KitMaker: 2,458 posts
Model Shipwrights: 1,423 posts
Posted: Tuesday, June 18, 2013 - 12:54 PM UTC
2 week extention only. no more then that. I will change the dates.
Frigate
Visit this Community
West Virginia, United States
Joined: April 22, 2006
KitMaker: 500 posts
Model Shipwrights: 205 posts
Posted: Thursday, June 20, 2013 - 06:14 AM UTC
Bruce,
A huge Thank you for the 2 week extension ! I'm getting very close, but running out of time. Hopefully, attached is a photo of the U-673 in her current condition. I still have final weathering,finish, scopes to install, and finish the base. But she is in the works ! Thanks guys.....Bruce :
Plus as you can see,the keel blocks are still in work !


strongarden
Visit this Community
Florida, United States
Joined: May 14, 2012
KitMaker: 730 posts
Model Shipwrights: 11 posts
Posted: Thursday, June 20, 2013 - 06:28 AM UTC
Finally able to get back into this thing! Thanks for the extension Bruce, I def can use it.

- Keith, Stefan - Like how you guys floated your boats. Causes me to go ahead and try something similar...

- Van, Cam - Nice job on those 'modern' boats.

- Keith, Simon - Really interesting subjects, reminds us of the madness being conceived back then...

- Robert, Russ - Great weathering on those two subs!

- Joe, Warren, Bruce, Javier, Todd, Lapman, and...me -
We gotta get going here! Looking forward to what "surfaces"

Some basic beginings- This kit is fun to build, in spite of its age. Not too much in the way of details, but did add some rudimentary hull lines. I posted this awhile back...


2 pc deck could be a problem with fitting, simple fix.


Added crude deck supports after fiddling around and dryfitting.


Almost ready for primer! wooHOO!


The visitor. Did you say Das Boot or Das Hund?


Hope to have this one painted this weekend and start weathering next week. Cheers
Dave
Tailor
Visit this Community
Nordrhein-Westfalen, Germany
Joined: May 26, 2008
KitMaker: 1,168 posts
Model Shipwrights: 676 posts
Posted: Thursday, June 20, 2013 - 07:03 AM UTC
Das Boot und der Hund...
TRM5150
Visit this Community
Massachusetts, United States
Joined: January 03, 2010
KitMaker: 2,159 posts
Model Shipwrights: 1,400 posts
Posted: Sunday, June 23, 2013 - 03:12 AM UTC
No real "shock and Awe" here but an update just the same. I have been sanding down a lot of the surface details on this one only in preparation for adding others. You will need to excuse the bench top pics just going with the flow at the minute.


As you can see I sanded as far as my hands would take it, leaving a small filling session...well small may not be the correct word for this.


After covering everything on the main hull I went after popping the bay doors on all the silos...I decided to add a couple of styrene strips to the interior to keep these lined up.


Even with lining these up properly there is a small gap at the bottom hinge side. I will take care of this with some filler and tackle the recessed molded weld lines too.


I am in for a nice sanding session a bit later but should all come together quickly!!

Thanks for swinging in!
strongarden
Visit this Community
Florida, United States
Joined: May 14, 2012
KitMaker: 730 posts
Model Shipwrights: 11 posts
Posted: Sunday, June 23, 2013 - 06:51 AM UTC
Guido- I know the image of the dog was off topic, but he likes to visit the bench when I'm in there!

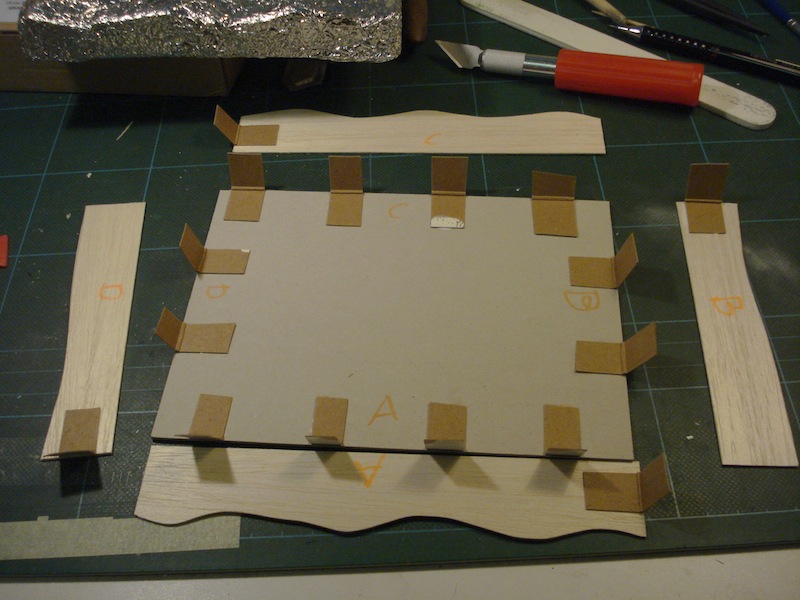
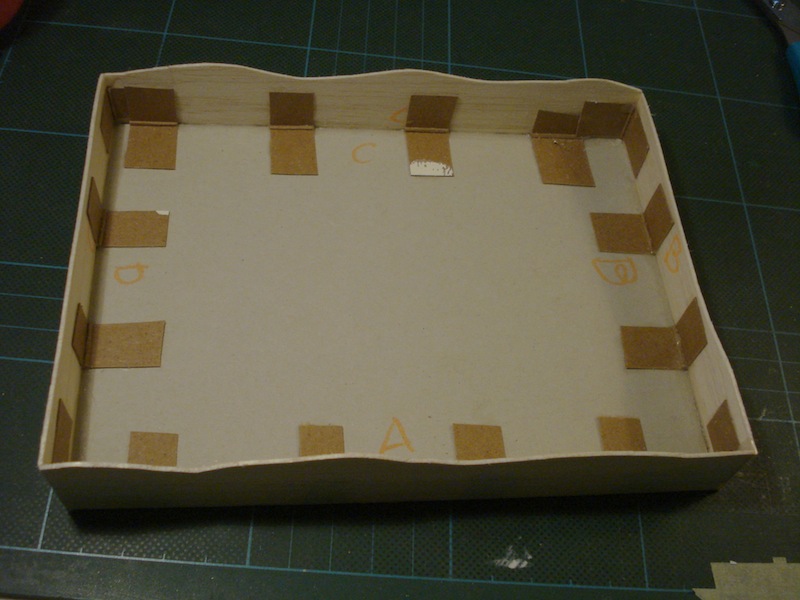
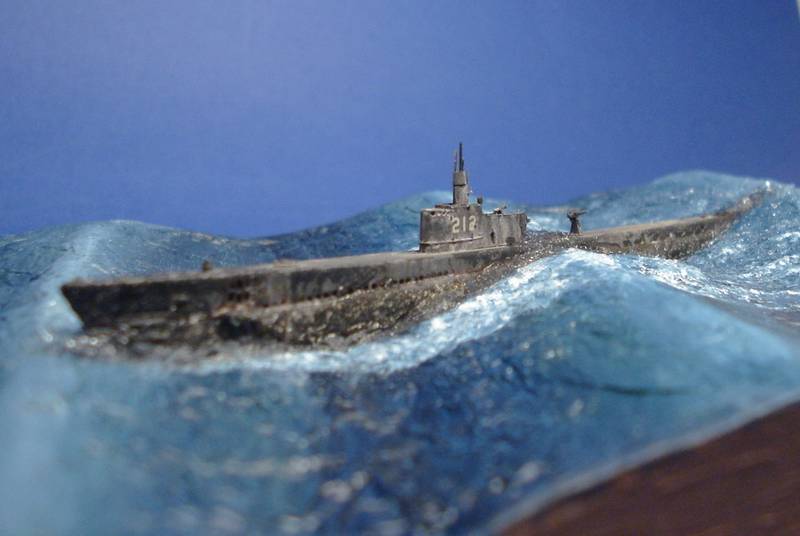
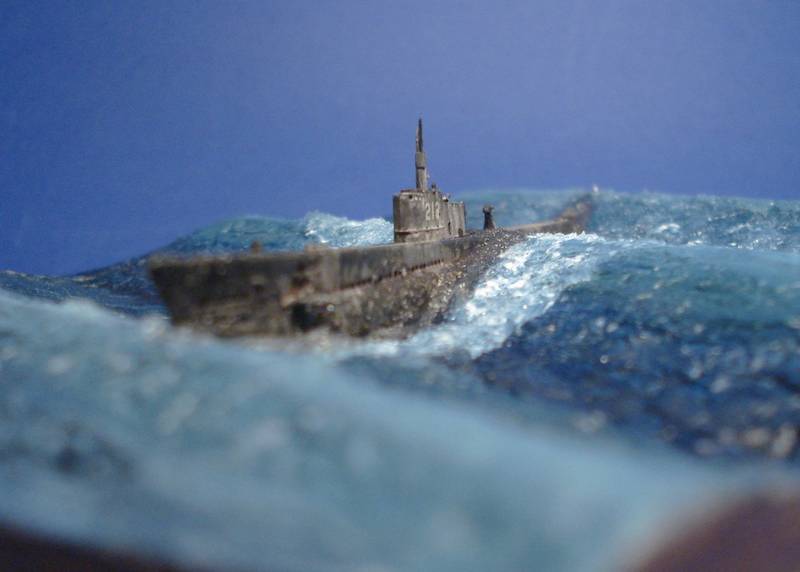
Stefan, Bruce- Love the diffrent ways guys are mounting their respective boats!

Todd - I can appreciate what you're dealing with:

Against proper judgement I primed my hull w/ an older can of Testors Gray Primer. I set it outside in the sun, shook the can appropriately, etc. Initially I got off a nice result, only covering small areas of spot putty on the bow and the stern.

But naturally unused/old paint cures incompletely, having lost the correct balance of chemical properties or whatever. Everyone on here knows this and one other simple fact: Crappy effort in, equally offending crap out.
The resulting product: a tacky, incomplete finish, a little lost time sanding it back down and lightly scraping here and there, and finally clean-up. What's annoying is I actually dug around and have a fresher can of this same primer!
No matter, I'm going with Tamiya now, which allows the scribed hull panel lines to show through.

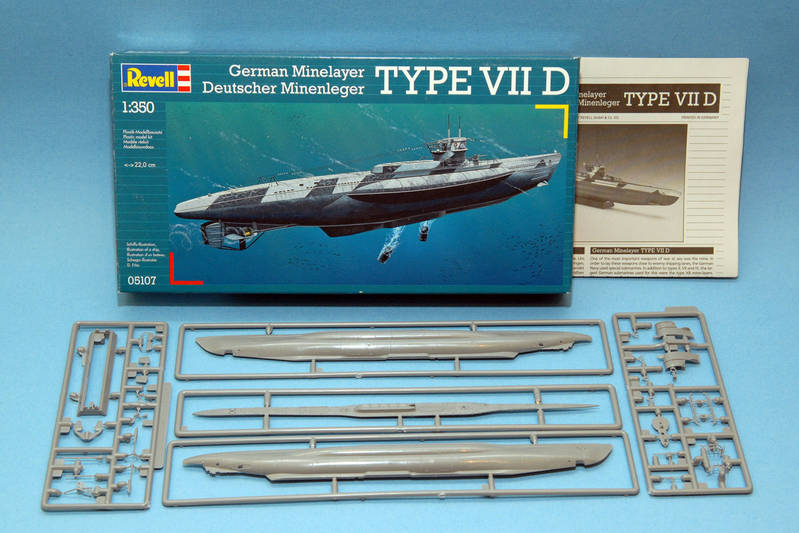
Todd- Thanks for sharing, that's what makes this site great. Learning and trudging onward. I'm trying to use up the scores of the enormous amount of materials collected over the years, and the cheap, old, but venerable Revell U99 is a way for me to do that after getting back into the hobby.

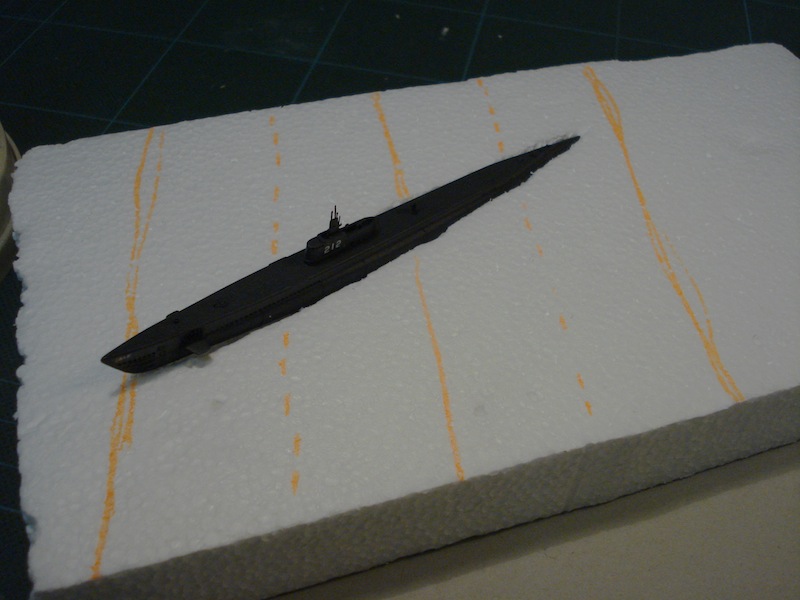
After sanding, awaiting a respray w/ Tamiya.


Resprayed w/ Tamiya, and the offending spray on the right!


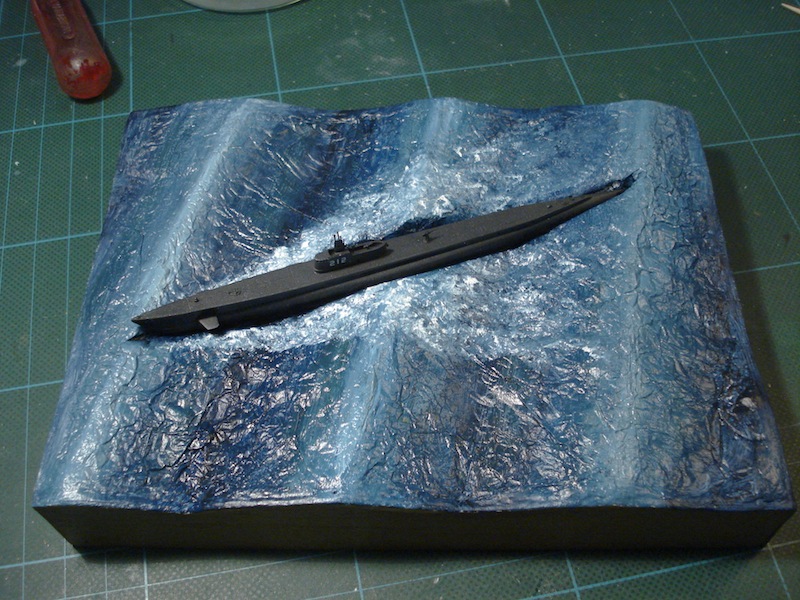
For ease of handling, I attached a stick of wood which also will become the base.


Cheers Dave