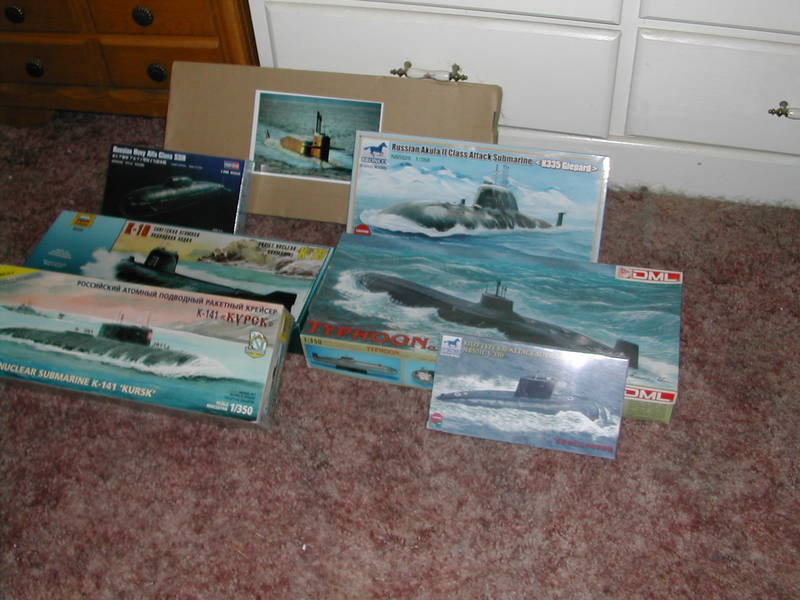
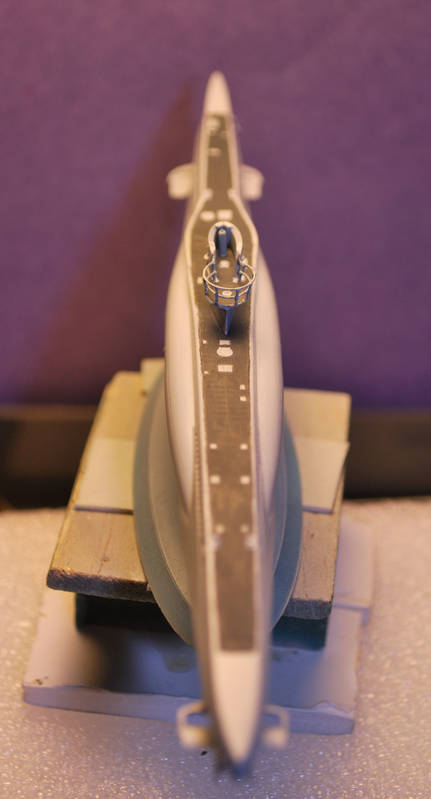
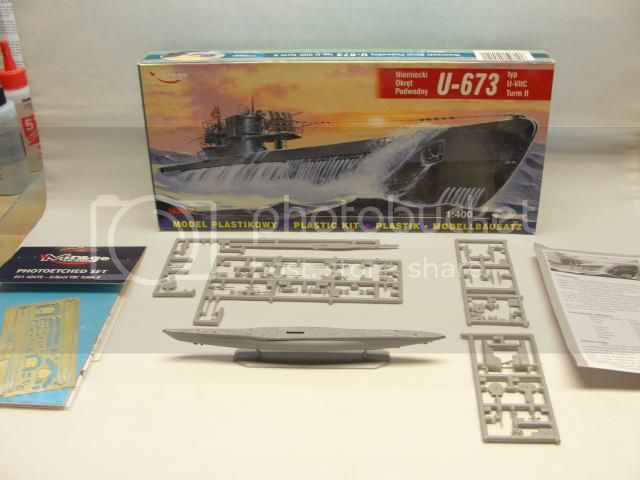
Campaigns
Want to be part of a group build? This is where to start, plan, and meet about them.
Official Campaign: Dive 3
blaster76
Visit this Community
Texas, United States
Joined: September 15, 2002
KitMaker: 8,985 posts
Model Shipwrights: 3,509 posts
Posted: Thursday, April 18, 2013 - 07:25 AM UTC
[img][img]

OK these are the kits I have yet to build in the stash. I am working on the Delta 4 (paint and small parts left to do. )Probably by June I'll have a couple more completed as well. Unless I get distracted by putting together the Starship Enterprise with lighting kit....lol

As usual the members of this community are outstanding people. Thank you guys for helping me "figure" this "complicated" procedure out
beefy66
Visit this Community
England - North East, United Kingdom
Joined: October 22, 2007
KitMaker: 971 posts
Model Shipwrights: 645 posts
Posted: Saturday, April 20, 2013 - 06:03 AM UTC
Steve nice collection you have to build
Simon Biber looks good in that camo
Jan great water effect
Well this is my second build for this campaign and have been trying something new for a water effect to make it look as though it has just come to the surface


RedDuster
Visit this Community
England - South East, United Kingdom
Joined: March 01, 2010
KitMaker: 7,078 posts
Model Shipwrights: 6,649 posts
Posted: Sunday, April 21, 2013 - 05:17 AM UTC
Thanks Keith,

The trailer arived through the post yesterday, I will start on the diorama plan shortly, will post over on the general forum on the site. Got a few other things to finish first.

Si
vdejarnette
Visit this Community
Maryland, United States
Joined: February 25, 2013
KitMaker: 209 posts
Model Shipwrights: 6 posts
Posted: Monday, April 22, 2013 - 10:22 AM UTC
Finally got around to taking some good pictures.

The USS Chicago from HobbyBoss (1/350)


Tailor
Visit this Community
Nordrhein-Westfalen, Germany
Joined: May 26, 2008
KitMaker: 1,168 posts
Model Shipwrights: 676 posts
Posted: Monday, April 22, 2013 - 04:27 PM UTC
Nice work, boyz!
Cam
#275
Visit this Community
Alberta, Canada
Joined: March 01, 2006
KitMaker: 174 posts
Model Shipwrights: 13 posts
Posted: Wednesday, April 24, 2013 - 10:30 AM UTC
I hate the white cheat stripes on Russian subs. The sides are ok but the nose will have to be redone.

Philippus
Visit this Community
England - South East, United Kingdom
Joined: March 13, 2007
KitMaker: 182 posts
Model Shipwrights: 6 posts
Posted: Friday, April 26, 2013 - 07:43 AM UTC
Hi All,

Some great builds so far!

I have never built a maritime model before but have thought about it for a while and then I see this campaign which sucked me in as I love submarines.

So I go down to the LHS and pick up this kit:


I get home and open it up and realise how tiny these subs are at 1/700! and then the next thing that strikes me is there is no bottom to them so they can be modeled in the water. Ah right, so that's what the waterline series stamp means!

I am dreading trying to make a water base for it! I have no idea where to start! Oh well at least there are two subs in the box so I have two tries!

Should I make a separate build thread or just use this thread?

Thanks,
Philip.

Frigate
Visit this Community
West Virginia, United States
Joined: April 22, 2006
KitMaker: 500 posts
Model Shipwrights: 205 posts
Posted: Monday, April 29, 2013 - 03:56 PM UTC
Gentlemen,
I can not believe I almost missed a "Dive" campaign ! I have been away from this site for a while (playing with 1/144th scale Aircraft), and darn near missed another Sub campaign.
Obviously, I'll have to dive into the stash and see what I can finish quickly.
Also a question for the group. I notice some have the Dive banner on their signature blocks, where's the url for this one ? I went back through the thread and could not find mention of it. I would appreciate any info on this.
I also notice some Great builds going on, so I need to get my butt in gear and see what I can do. Take Care.......................Bruce
Dangeroo
#023
Visit this Community
Zurich, Switzerland
Joined: March 13, 2009
KitMaker: 2,058 posts
Model Shipwrights: 163 posts
Posted: Monday, April 29, 2013 - 07:49 PM UTC
Gentlemen! Some great progress here! I finally got around to painting my Gato, next I have to find a base to put it on, together with my first try at water...

Keith, what is your method for water? It's the effect I want to achieve.

Van, nice job on the chicago, I think I have orange hobby's Chicago in the stash, at least the bull looks familiar.

Bruce, copy the following link into your profile (URL for signature image) and you're a go: http://gallery.kitmaker.net/data/500/Dive_campaign.jpg

Cheers!
Stefan
Frigate
Visit this Community
West Virginia, United States
Joined: April 22, 2006
KitMaker: 500 posts
Model Shipwrights: 205 posts
Posted: Tuesday, April 30, 2013 - 12:50 AM UTC
Stephan,
Thank you, the link worked like a champ. Now I just have to dive into my stash and decide which boat and scale I want to get into. There is definitely some extremely nice work being accomplished for this version of the Dive group.

I'll get back with pics when I decide which to go with. Take Care.....Bruce
dcook11
Visit this Community
Georgia, United States
Joined: November 28, 2012
KitMaker: 216 posts
Model Shipwrights: 84 posts
Posted: Tuesday, April 30, 2013 - 01:21 AM UTC
Kevin_H,
I would like to know more about how you created the water and display case. Model looks great. Nice weathering.
beefy66
Visit this Community
England - North East, United Kingdom
Joined: October 22, 2007
KitMaker: 971 posts
Model Shipwrights: 645 posts
Posted: Tuesday, April 30, 2013 - 04:08 AM UTC
Hey guy,s just getting myself sorted from a great weekend away in Perth for the Scottish Nationals and got 2 firsts with my builds for this campaign well pleased with myself and surprised
beefy66
Visit this Community
England - North East, United Kingdom
Joined: October 22, 2007
KitMaker: 971 posts
Model Shipwrights: 645 posts
Posted: Tuesday, April 30, 2013 - 04:22 AM UTC
Stefan for the water base on my type 11b I make up a hollowed box for the sides then add a base block inside from MDF this then gets filled with building insulation foam the kind that comes in big sheets that will fill in the cavitiy of a house wall. This is then cut and shaped using a dremel cutting disc then the shape for the hull is carved out the ship or sub is then set in place using cheap clear silicone sealer it looks white at first but then goes clear after dring for a couple of days. This is then painted over using humbrol enamel blue and green paints mixed and blended to give the darker sea colour,when this has dryed I then dry brush with humbrol white to get the wave highlights. The water effect for running off the hull sides is done with Gator glue stippled on and then when dry dry brush with white again then the whole of the sea is given different washes of green and blues when dry and to finnish the whole effect off this is then sprayed with automotive clear laqure to get the shine effect hope this helps
Tailor
Visit this Community
Nordrhein-Westfalen, Germany
Joined: May 26, 2008
KitMaker: 1,168 posts
Model Shipwrights: 676 posts
Posted: Tuesday, April 30, 2013 - 06:40 PM UTC
Congrats, Keith!
FJHueso
#156
Visit this Community
Madrid, Spain / España
Joined: February 29, 2004
KitMaker: 119 posts
Model Shipwrights: 25 posts
Posted: Thursday, May 02, 2013 - 09:24 AM UTC
After a couple of weeks dealing (and losing) with something like a set of rails, I gave up (At least, not after finishing a sort of Wintergarten rails, not soo bad if you look it with benevolent eyes...

I've finished, I expect, the painting of deck and hatches, maybe with some license, but trying to break the monotony of colours.

Now, for the bottom. (Not of my hopes, but that of the boat, of course!)

Regards


Frigate
Visit this Community
West Virginia, United States
Joined: April 22, 2006
KitMaker: 500 posts
Model Shipwrights: 205 posts
Posted: Sunday, May 05, 2013 - 01:41 AM UTC
Shipmates,
I thought it was about time to add my start photo before I forgot. This is the Mirage 1/400 scale U-673. She is a Type VII with an interesting twist. She was modified as one of the "Flak Boats" in an effort to combat the pressure from Allied Air Power over the Bay of Biscay. The really interesting mod was the forward gun position. One can only imagine what that did to the submerged acoustics and maneuverability.

Besides which,being from West Virginia, I could not pass up on a Sub with a "Front Porch" as well as a "Back Porch" !!!

We'll see how she comes out. But as is normal, Mirage did a tremendous job with both the molding and the PE Sheet.

Take Care....................Bruce

[/URL]/img]
Kevin_H
Visit this Community
United States
Joined: March 21, 2013
KitMaker: 10 posts
Model Shipwrights: 10 posts
Posted: Monday, May 06, 2013 - 04:48 AM UTC

Quoted Text

Kevin_H,
I would like to know more about how you created the water and display case. Model looks great. Nice weathering.


Sorry I almost missed this.

For the water I used crumpeled up kitchen foil, glued it to the top of the case. Masked and painted. Then I built up some of the waves with silicon caulk (also used for the periscope wake) and painted with white. Covered it all with about 6 coats of Future floor wax.

Keith, fantastic build. The water looks great!!!
Dangeroo
#023
Visit this Community
Zurich, Switzerland
Joined: March 13, 2009
KitMaker: 2,058 posts
Model Shipwrights: 163 posts
Posted: Monday, May 06, 2013 - 07:40 AM UTC
Gentlemen, I finally managed to get on with my build. This is the first time I try my hand at water and I documented my progress, so that you may learn from my mistakes. Hopefully...

Started with some leftover Styrofoam packaging material, cut to shape and the hole for the Gato cut out:


Then some waves:


Then some aluminum foil for the smaller waves:


wrapped around the plate:


Then I added a "floor" from carton and made an edge from acrylic putty.


The result was this, and this is where it stands now:


I'm quite happy with the effect so far, however I'm not happy with the edge and the gap between "water" and sub is too large. I will try to get better material and give it another go.

Cheers!
Stefan
Kevin_H
Visit this Community
United States
Joined: March 21, 2013
KitMaker: 10 posts
Model Shipwrights: 10 posts
Posted: Monday, May 06, 2013 - 07:57 AM UTC

Quoted Text

Gentlemen, I finally managed to get on with my build. This is the first time I try my hand at water and I documented my progress, so that you may learn from my mistakes. Hopefully...

Started with some leftover Styrofoam packaging material, cut to shape and the hole for the Gato cut out:


Then some waves:


Then some aluminum foil for the smaller waves:


wrapped around the plate:


Then I added a "floor" from carton and made an edge from acrylic putty.


The result was this, and this is where it stands now:


I'm quite happy with the effect so far, however I'm not happy with the edge and the gap between "water" and sub is too large. I will try to get better material and give it another go.

Cheers!
Stefan


Looking great, you can use clear silicon to fill in the gaps between the hull and the water.
Cam
#275
Visit this Community
Alberta, Canada
Joined: March 01, 2006
KitMaker: 174 posts
Model Shipwrights: 13 posts
Posted: Tuesday, May 07, 2013 - 02:08 PM UTC
Repainted the bow of my Yasen class SSN and finished it off. It's not perfect but better then the first try.


Now on to the Surcouf
eMan
#298
Visit this Community
Hong Kong S.A.R. / 繁體
Joined: August 08, 2002
KitMaker: 1,182 posts
Model Shipwrights: 41 posts
Posted: Thursday, May 09, 2013 - 08:08 PM UTC
Getting start, I am going to build Revell 1/72 U-Boot VIIC with CMK interior set.