Campaigns
Want to be part of a group build? This is where to start, plan, and meet about them.
Official: Battle of the Atlantic 75th Anniv
JJ1973
#345
Visit this Community
Niedersachsen, Germany
Joined: August 22, 2011
KitMaker: 1,835 posts
Model Shipwrights: 1,832 posts
Posted: Sunday, March 08, 2015 - 12:40 AM UTC
Si,

here as well, very nice work on the Jupiter. And a very nice variety of shades of grey on this one

Michael,

the rigging is excellent! Great to see your progress after the initial problems with your build, I like it very much!!

Jan
RedDuster
Visit this Community
England - South East, United Kingdom
Joined: March 01, 2010
KitMaker: 7,078 posts
Model Shipwrights: 6,649 posts
Posted: Sunday, March 08, 2015 - 12:55 AM UTC
Thanks Jan,

She is coming on, matching the scheme is getting fun across more components go on.

Cheers.

Si
SGTJKJ
#041
Visit this Community
Kobenhavn, Denmark
Joined: July 20, 2006
KitMaker: 10,069 posts
Model Shipwrights: 228 posts
Posted: Sunday, March 08, 2015 - 04:46 PM UTC
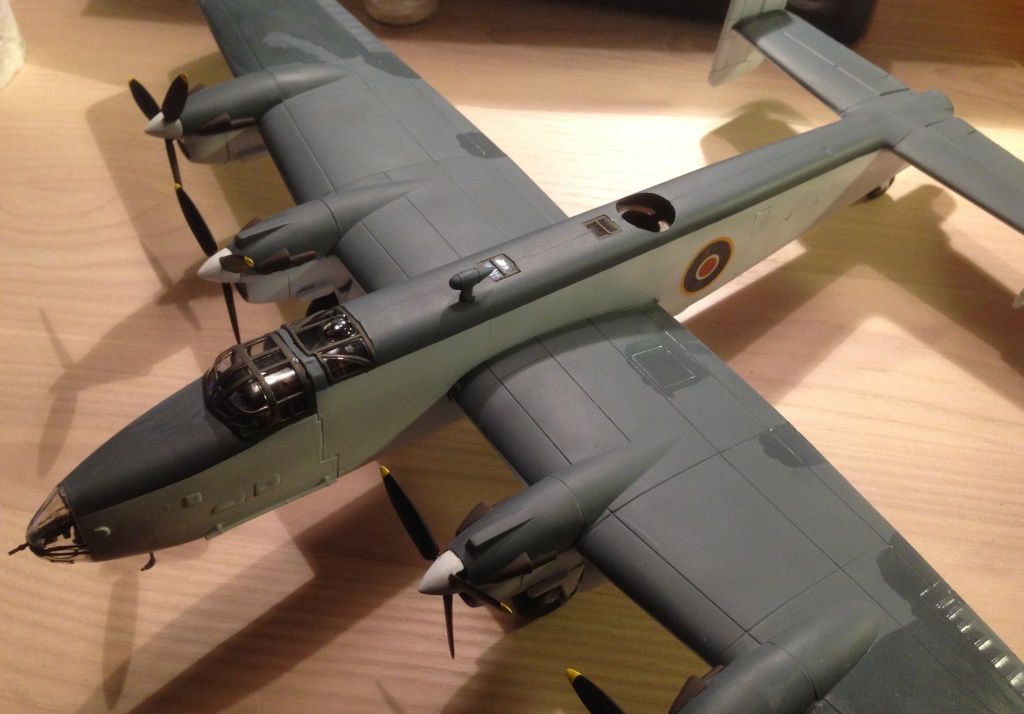
Air cover for the convoys is slowly taking shape. More to follow soon.


TRM5150
Visit this Community
Massachusetts, United States
Joined: January 03, 2010
KitMaker: 2,159 posts
Model Shipwrights: 1,400 posts
Posted: Sunday, March 08, 2015 - 05:23 PM UTC
That bird is really shaping up nicely Jesper!! The paint looks great!
RedDuster
Visit this Community
England - South East, United Kingdom
Joined: March 01, 2010
KitMaker: 7,078 posts
Model Shipwrights: 6,649 posts
Posted: Monday, March 09, 2015 - 12:58 AM UTC
Nice paint job Jesper, coming on really well.

Si
SGTJKJ
#041
Visit this Community
Kobenhavn, Denmark
Joined: July 20, 2006
KitMaker: 10,069 posts
Model Shipwrights: 228 posts
Posted: Monday, March 09, 2015 - 01:44 AM UTC
Thanks, guys. Appreciate it.

More to follow soon
phantom_phanatic309
#372
Visit this Community
United Kingdom
Joined: March 10, 2010
KitMaker: 2,568 posts
Model Shipwrights: 220 posts
Posted: Wednesday, March 11, 2015 - 03:20 AM UTC
Jesper, your Halifax is looking good. Coastal Command colours are much nicer than the more sinister looking Bomber Command black. It looks like it goes together with little fuss too, looking forward to making a start on mine in the near future.

I did some work on the fiddly bits for my frigate earlier tonight. Mainly the 3" pop guns, hedgehog and a few other bits. Also did a web trawl for the HMS Bentinck and found a set of photo's here http://www.navsource.org/archives/06/052.htm which has helped in regards to it's weapons fit. It looks like the extra 40mm tubs were not fitted and maybe had the 1.1" quad along with the 20mm's. It is possible bofors could have been fitted at a later date, but certainly not at the time she still wore the USN cammo. I've also just started reading the kindle edition of Donald Collingwoods 'Captain class frigates' so I'm hoping to get some more information from that.

So a simple build has become a research project. That's what happens once you start doing some digging around.
Cosimodo
#335
Visit this Community
Auckland, New Zealand
Joined: September 03, 2013
KitMaker: 1,808 posts
Model Shipwrights: 871 posts
Posted: Wednesday, March 11, 2015 - 04:32 AM UTC

Quoted Text


So a simple build has become a research project. That's what happens once you start doing some digging around.


Hi Stephen,
I'm in full agreement with that statement. If only we could build without looking at the reference material. Sounds simple in principle....

cheers

Michael
phantom_phanatic309
#372
Visit this Community
United Kingdom
Joined: March 10, 2010
KitMaker: 2,568 posts
Model Shipwrights: 220 posts
Posted: Wednesday, March 11, 2015 - 05:06 AM UTC
I'm trying to build more OOB these days as I found I had projects being delayed by just this kind of research, followed by endless searches for AM parts to make corrections. This kit makes it a little easier to do that as Pit-Road supply a generous amount of spare parts on the sprue. So just a case of working out what I need and where it should go, which I think I now have a better idea about.
TimReynaga
Staff MemberAssociate Editor
MODEL SHIPWRIGHTS
Visit this Community
California, United States
Joined: May 03, 2006
KitMaker: 2,500 posts
Model Shipwrights: 1,830 posts
Posted: Wednesday, March 11, 2015 - 05:28 AM UTC

Quoted Text

I'm trying to build more OOB these days as I found I had projects being delayed by just this kind of research, followed by endless searches for AM parts to make corrections...


Stephen, I agree completely! Although I also have a tendency to go banannas with research and improvement, it is also sometimes satisfying to just build out of the box and actually finish something!

SGTJKJ
#041
Visit this Community
Kobenhavn, Denmark
Joined: July 20, 2006
KitMaker: 10,069 posts
Model Shipwrights: 228 posts
Posted: Wednesday, March 11, 2015 - 06:22 PM UTC

Quoted Text

Jesper, your Halifax is looking good. Coastal Command colours are much nicer than the more sinister looking Bomber Command black. It looks like it goes together with little fuss too, looking forward to making a start on mine in the near future.


Yes, Bomber commands colors are more sinister, but I really missed painting the waving brown and green on the top. Luckily I have a few more of these in the stash, so I can try that scheme as well.
The kit goes together really well, but be careful on the attaching the front part of the fuselage and the bomb doors. I was too quick and it shows that the fits are not perfect - especially when painted white

Overall it is a great and fun kit, but obviously not up to todays standard detail wise. I am sure it will be a joy to build yours.
RedDuster
Visit this Community
England - South East, United Kingdom
Joined: March 01, 2010
KitMaker: 7,078 posts
Model Shipwrights: 6,649 posts
Posted: Saturday, March 14, 2015 - 02:52 AM UTC
A very quick update, real life is getting in the way of workshop time.

The DCT and HAC in place.


and the camo on the splinter padding around the pompom platform and searchlight platform.


proper update before too long (I hope)

Si
SGTJKJ
#041
Visit this Community
Kobenhavn, Denmark
Joined: July 20, 2006
KitMaker: 10,069 posts
Model Shipwrights: 228 posts
Posted: Sunday, March 15, 2015 - 01:57 PM UTC
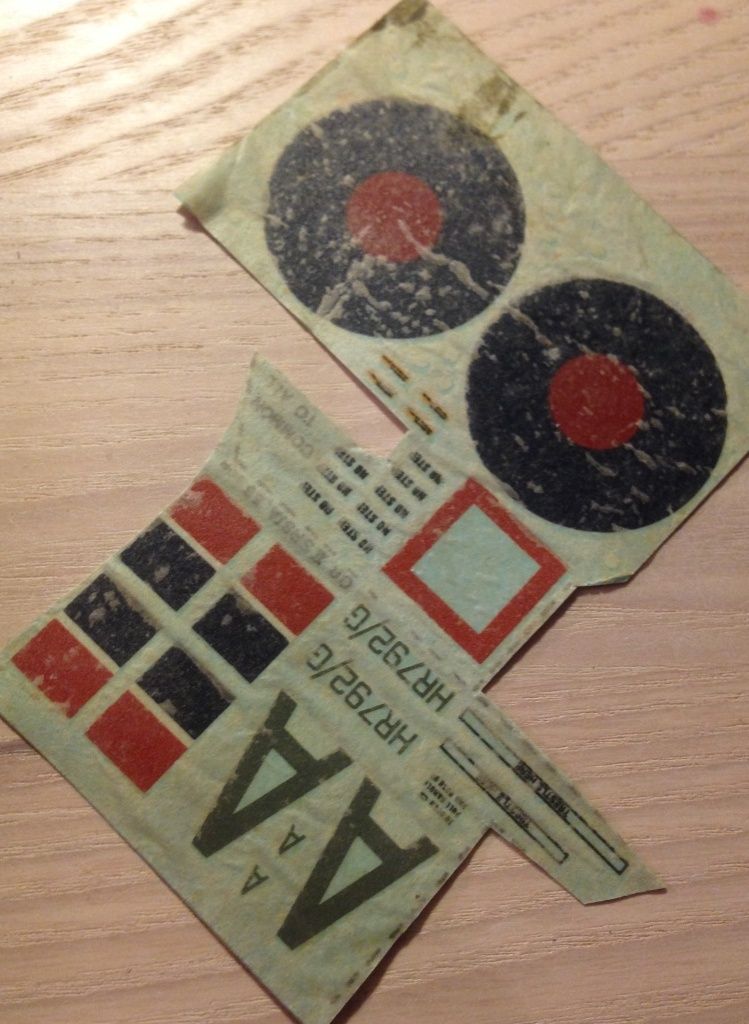
I have gotten around to decalling. The decals were really old and have sucked the moisture over the years. The decals were stuck completely to the over paper.

I had to suck them in water including the cover paper, apply them to the Halifax and then gently rub the soaked cover paper of the ecals. Took several rounds pr. decal. Thankfully Matchbox decals are very strong.

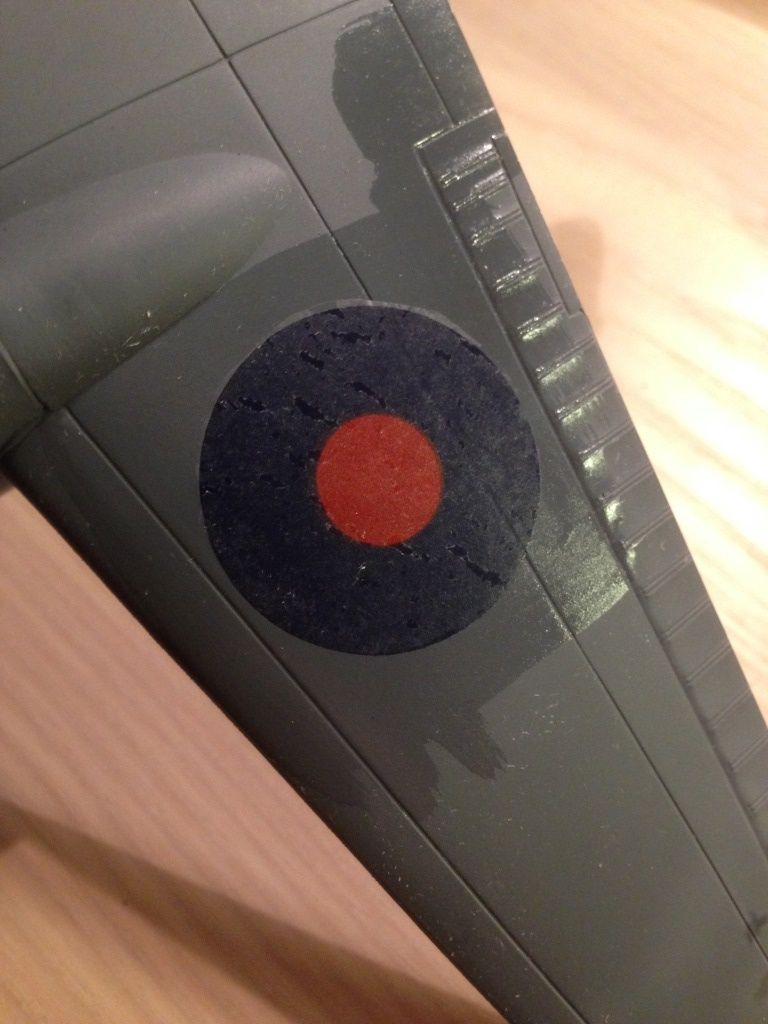
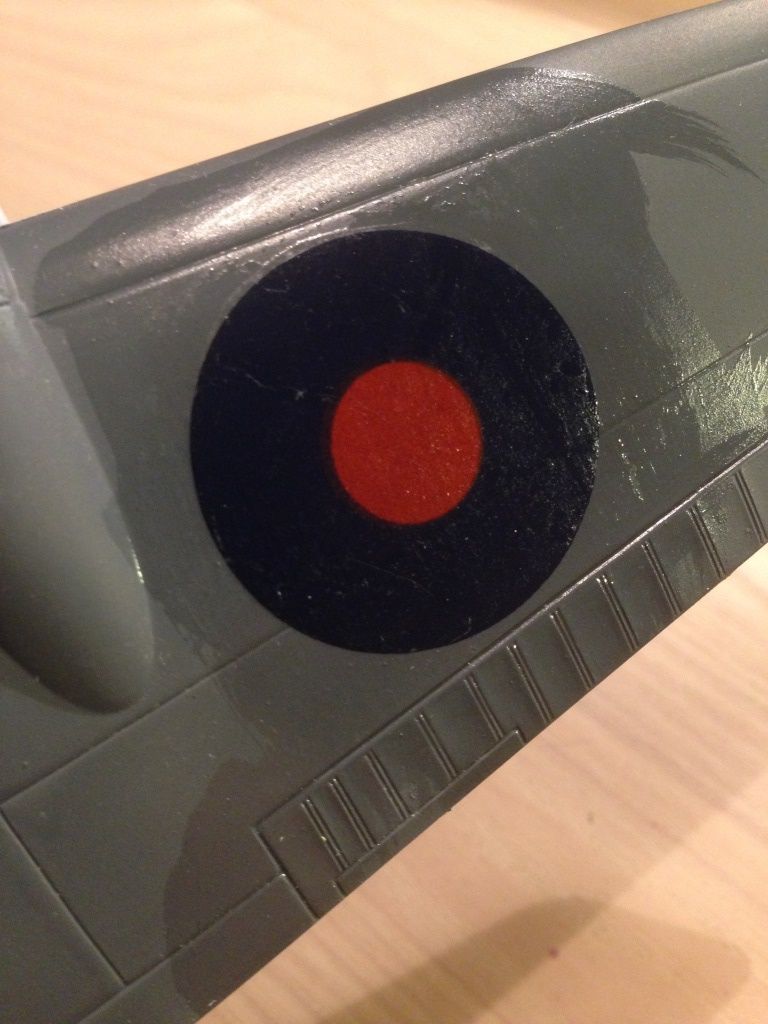
After that I "polished" the surface with decal setting solution. Still it did not look good, but a brush applied gloss varnish fixed the problem. Now the decals actually look decent, but it was a lot of work.

First inspection of the decals - this is never gonna work...


Test on the side roundels. This might work, but wil be a lot of work.


Even with the decal applied and cleaned of cover paper the surface looks funky...


A coat of gloss varnish solved that.


Done with decalling - next light weathering

Cosimodo
#335
Visit this Community
Auckland, New Zealand
Joined: September 03, 2013
KitMaker: 1,808 posts
Model Shipwrights: 871 posts
Posted: Monday, March 16, 2015 - 04:17 AM UTC
Jesper the Halifax is looking great. You could have the decals for that natural weathered look but you have done a great job to recover them.

cheers

Michael
phantom_phanatic309
#372
Visit this Community
United Kingdom
Joined: March 10, 2010
KitMaker: 2,568 posts
Model Shipwrights: 220 posts
Posted: Monday, March 16, 2015 - 04:38 AM UTC
Jesper, the Halibag is looking even better with some markings. Pity I did not know about your decal issues before as I have a couple of sets from the Revell reissue that came in a job-lot of spare decals I got on ebay a while ago. I would have happily donated a sheet for your build.
TRM5150
Visit this Community
Massachusetts, United States
Joined: January 03, 2010
KitMaker: 2,159 posts
Model Shipwrights: 1,400 posts
Posted: Monday, March 16, 2015 - 06:44 AM UTC
Si, great update even as little as you say it was! Good lick with that "life stuff"...seems to eat into a lot of bench time for a lot of us!!

Awesome save on the decs Jesper!! Well played!!
Cosimodo
#335
Visit this Community
Auckland, New Zealand
Joined: September 03, 2013
KitMaker: 1,808 posts
Model Shipwrights: 871 posts
Posted: Monday, March 16, 2015 - 02:19 PM UTC
As Achilles heads for the homeward stretch there were a couple of key elements for the build that were unusable from the parts provided, anchors and the quad Vickers.

The anchor issue was resolved by the North Star set for Admiralty anchors. They definitely look the part and have saved some scratch building.

And in situ


The quad Vickers was a bit more problematic. I had known from the start that the kit parts would need replacing and I had them on order from WEM but with their untimely demise more innovative action was required.
A bit of research into what I was trying to build and a set of Master barrels for Vickers and the set for Oerlikon 20mm and I was ready to go.

Ingredidents as follows, 4 barrels, a 20mm gun carriage, 20mm base and a 1.5mm x 0.25mm strip of evergreen.

Apologies for the photo quality. Anyway strip the gun sight but set aside for later. Stick the gun carriage to a strip of evergreen (you only need about 3.5mm length but keep it longer, much easier to handle). Make sure it goes on straight! I fixed this one up. The small bar across the top is for the dual gunsights.

The reason for evergreen is of course to have something to stick the Vickers barrels to.

Then onto the production line. Stick the swivel base on something you can handle without having to directly touch the guns since they are very fragile.

Glue the barrels set on an angle to the base

Scavenge three extra ammo cans and a second gun sight from the oerlikon set and you have pretty passable rendtion of a Vickers 50 cal quad set up.


Hope this was useful to you

cheers

Michael
SGTJKJ
#041
Visit this Community
Kobenhavn, Denmark
Joined: July 20, 2006
KitMaker: 10,069 posts
Model Shipwrights: 228 posts
Posted: Monday, March 16, 2015 - 05:56 PM UTC
Thanks for the comments, guys. Weathering is progressing. Plan to have it done soon.

Stephen, I have another Halifax matchbox issue kit. So I might take you up on your word.

Michael, fantastic work on the PE. The details are mind blowing!
RedDuster
Visit this Community
England - South East, United Kingdom
Joined: March 01, 2010
KitMaker: 7,078 posts
Model Shipwrights: 6,649 posts
Posted: Monday, March 16, 2015 - 07:31 PM UTC
Great bit of creative work on the quad 0.5" Michael.

Might pinch that method when I need some, if you don't mind.

Great job.

Si
Aurora-7
#360
Visit this Community
Connecticut, United States
Joined: June 18, 2003
KitMaker: 1,020 posts
Model Shipwrights: 630 posts
Posted: Monday, March 16, 2015 - 09:23 PM UTC

Quoted Text

Great bit of creative work on the quad 0.5" Michael.


Indeed. It worked great.
phantom_phanatic309
#372
Visit this Community
United Kingdom
Joined: March 10, 2010
KitMaker: 2,568 posts
Model Shipwrights: 220 posts
Posted: Tuesday, March 17, 2015 - 03:15 AM UTC
Michael, great work on those quad vickers. That must have required the skills of a surgeon at that size! I know how you feel about the loss of WEM, they were great supplier for all those extra parts. I just hope the new owner will continue to provide the same when they are up and running.

Simon, the Jupiter is coming along nicely. The splinter padding really adds a nice touch.

Jesper, this sheets yours if you want it. I believe all but MP-L are different to the original issue so you might have to see if the PDF version of Revells instructions are still available online somewhere. They'll save you a lot of bother trying to rescue those matchbox sheets.


A brief update on my build.
I think all the major assembles are now done and I'll start getting some paint on over the next couple of nights. The hedgehog needed some trimming to fit under the B-turret overhang as it was too tall to fit properly. In reality I probably should have glued the hatch shut, but I like the idea of showing the weapon deployed.


I believe the photo of Bentinck shows the ship as it was delivered to the RN, from what I understand the ships were refitted and sometimes repainted once they reached Belfast (along with modifications to the weaponry and DC stowage, they also gutted the galley and removed such luxuries as the ice-cream machine and dish washers!). As I have three in the box, I'll be building it in this guise as I plan of building the second Buckley as one of the refitted Captains while the third will be finished as one of the USN over-gunned types seen in the latter stages of the Pacific. That's the plan, we'll see if turns out that way.

I think every single one of the DE's is listed here and there are lots of interesting photographs to get inspiration from. http://www.navsource.org/archives/06idx.htm
SGTJKJ
#041
Visit this Community
Kobenhavn, Denmark
Joined: July 20, 2006
KitMaker: 10,069 posts
Model Shipwrights: 228 posts
Posted: Wednesday, March 18, 2015 - 01:19 PM UTC

Quoted Text


Jesper, this sheets yours if you want it. I believe all but MP-L are different to the original issue so you might have to see if the PDF version of Revells instructions are still available online somewhere. They'll save you a lot of bother trying to rescue those matchbox sheets.


That would be awesome! I will PM you. You are a champ!
SGTJKJ
#041
Visit this Community
Kobenhavn, Denmark
Joined: July 20, 2006
KitMaker: 10,069 posts
Model Shipwrights: 228 posts
Posted: Wednesday, March 18, 2015 - 01:23 PM UTC
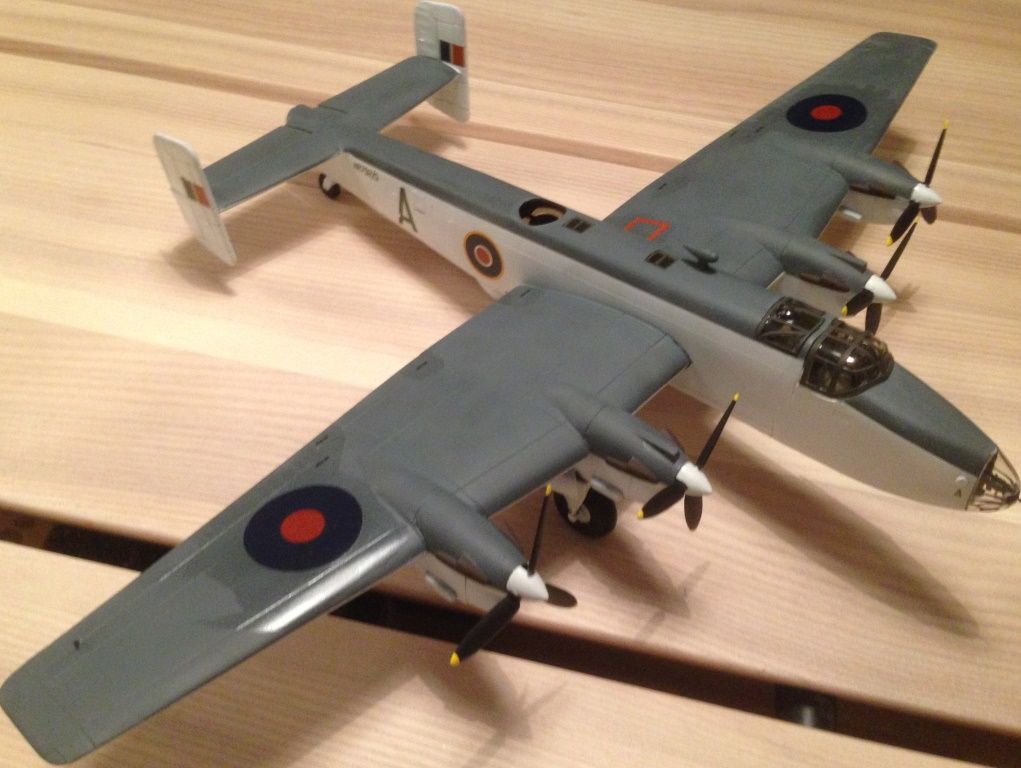
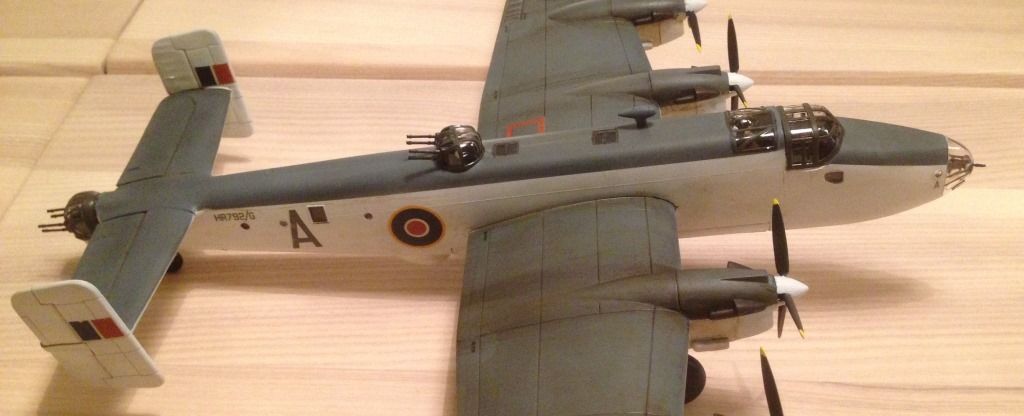
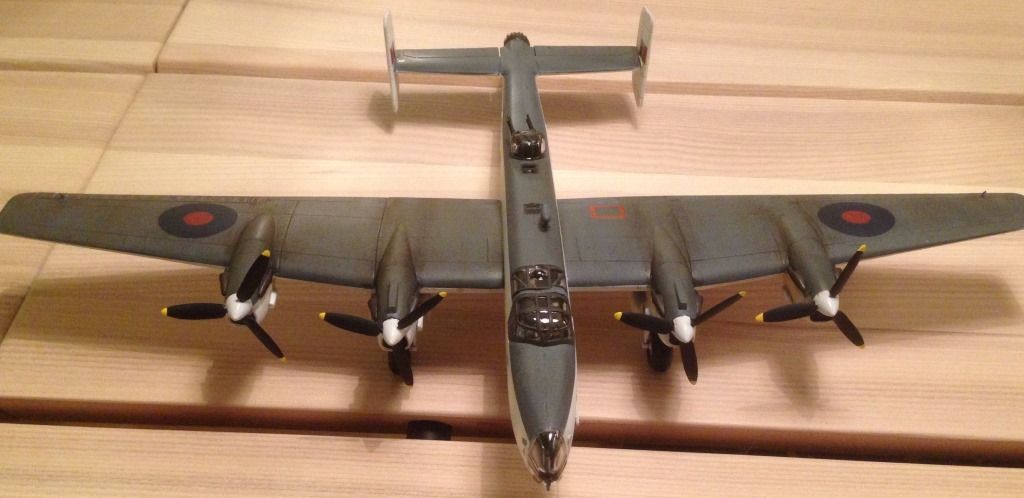
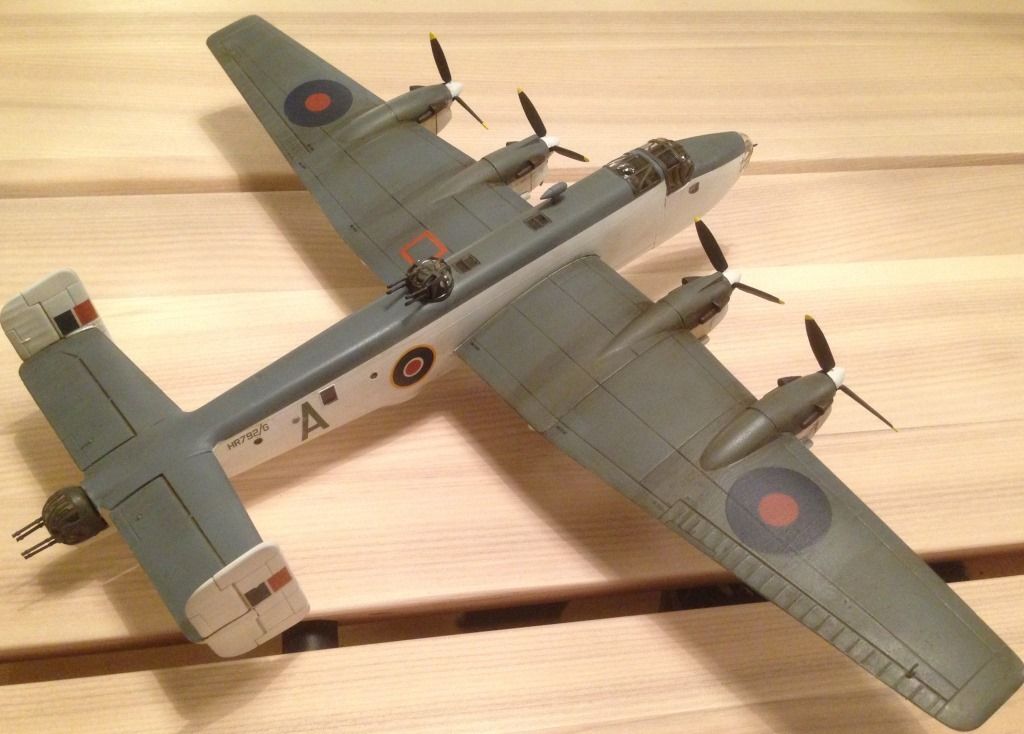
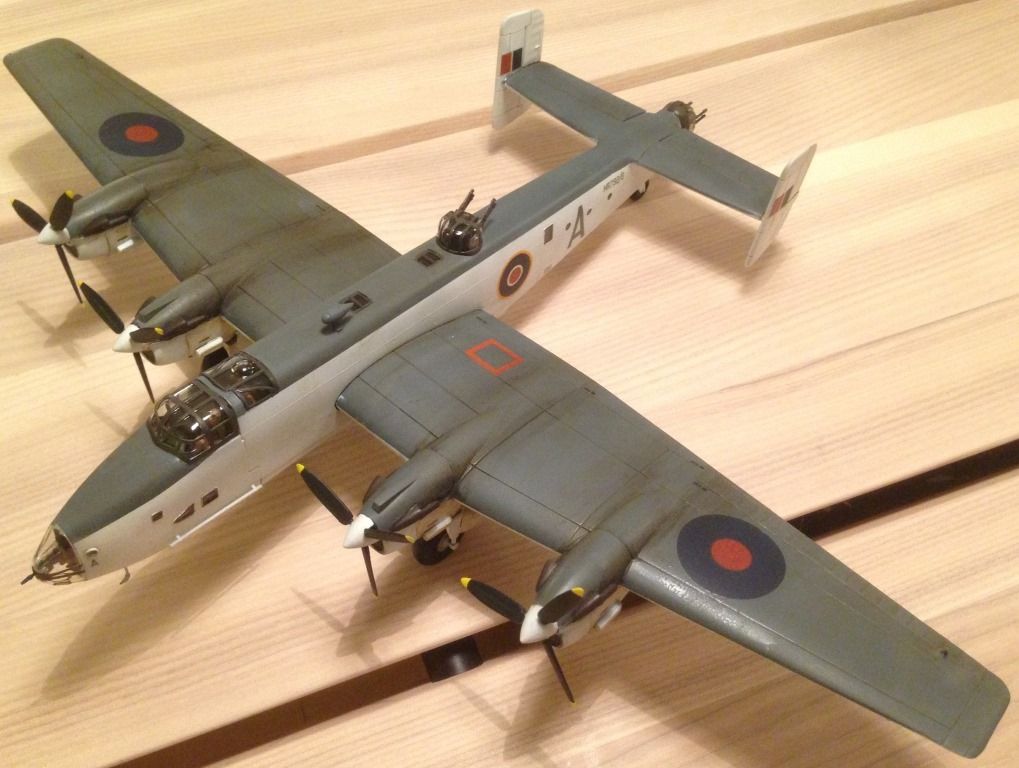
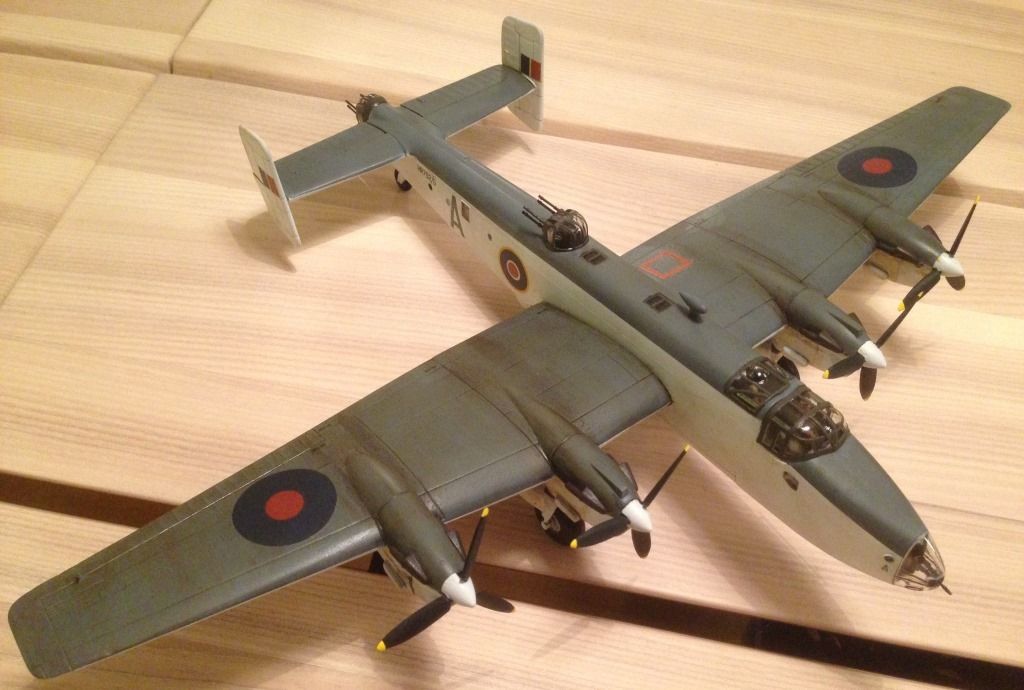
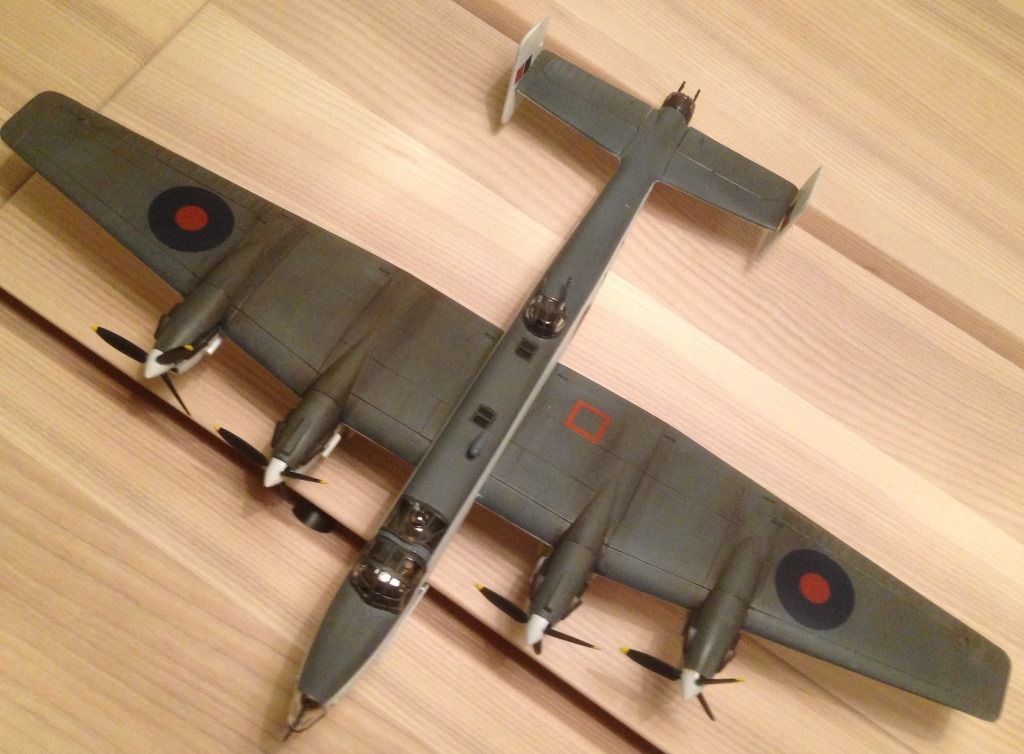
I have now finished my Halifax in Coastal Command colors. A nice and enjoyable build although the fit around the noce section and the bomb bay doors could be better. I will pay more attention to those areas in the future on my next builds of this plane.

Look out U-boots! We can see you night and day


SGTJKJ
#041
Visit this Community
Kobenhavn, Denmark
Joined: July 20, 2006
KitMaker: 10,069 posts
Model Shipwrights: 228 posts
Posted: Wednesday, March 18, 2015 - 01:30 PM UTC
I cannot find the campaign folder for this one to upload my pictures. But found the battleship and layte gulf folders.

Could anybody point me in the right direction?
SGTJKJ
#041
Visit this Community
Kobenhavn, Denmark
Joined: July 20, 2006
KitMaker: 10,069 posts
Model Shipwrights: 228 posts
Posted: Sunday, March 22, 2015 - 06:07 PM UTC

Quoted Text

I cannot find the campaign folder for this one to upload my pictures. But found the battleship and layte gulf folders.

Could anybody point me in the right direction?


Anybody that can help?