

Ahoy Michael
Snap hahaha I am also attempting to finish the painting of my house this summer.
Like my E-Boat build its a continuing & ongoing saga.
Great work on your build.
Cheers
Sean


Go to modelshipwrights.com for the current dynamic site!
Campaigns
Want to be part of a group build? This is where to start, plan, and meet about them.
Want to be part of a group build? This is where to start, plan, and meet about them.
Hosted by Jim Starkweather
Official: Battle of the Atlantic 75th Anniv

Fordboy

Joined: July 13, 2004
KitMaker: 2,169 posts
Model Shipwrights: 1,597 posts

Posted: Thursday, January 29, 2015 - 02:14 AM UTC

RedDuster

Joined: March 01, 2010
KitMaker: 7,078 posts
Model Shipwrights: 6,649 posts

Posted: Monday, February 02, 2015 - 03:10 AM UTC
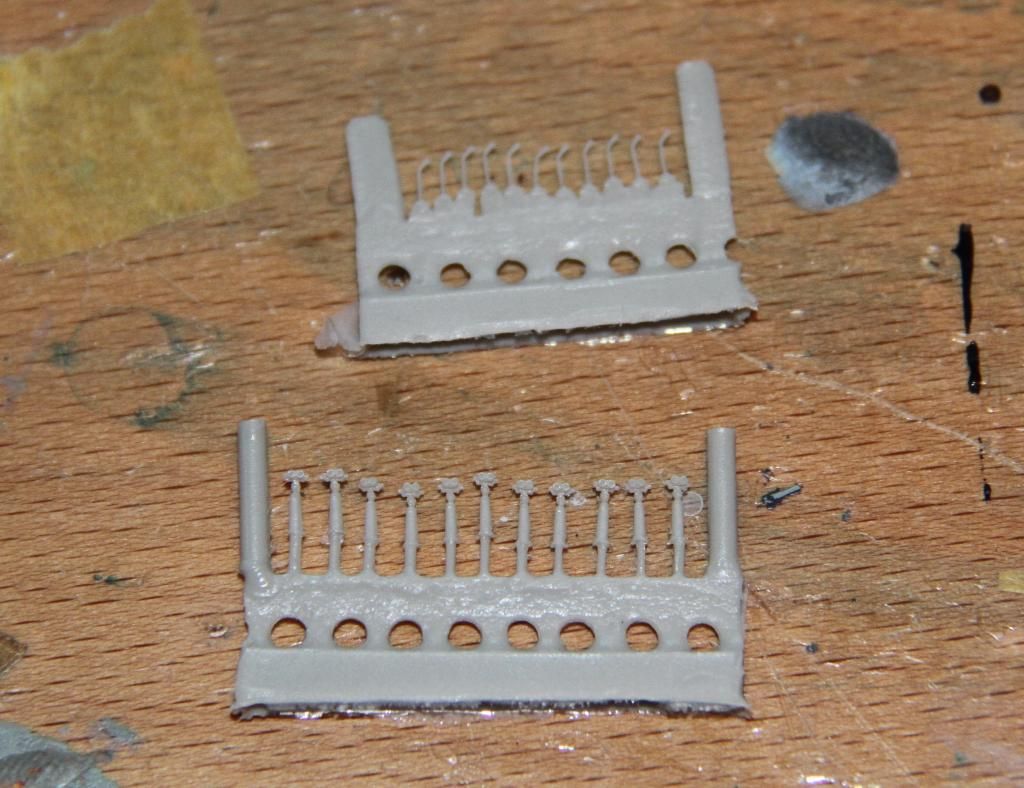
On with the torpedo tubes,
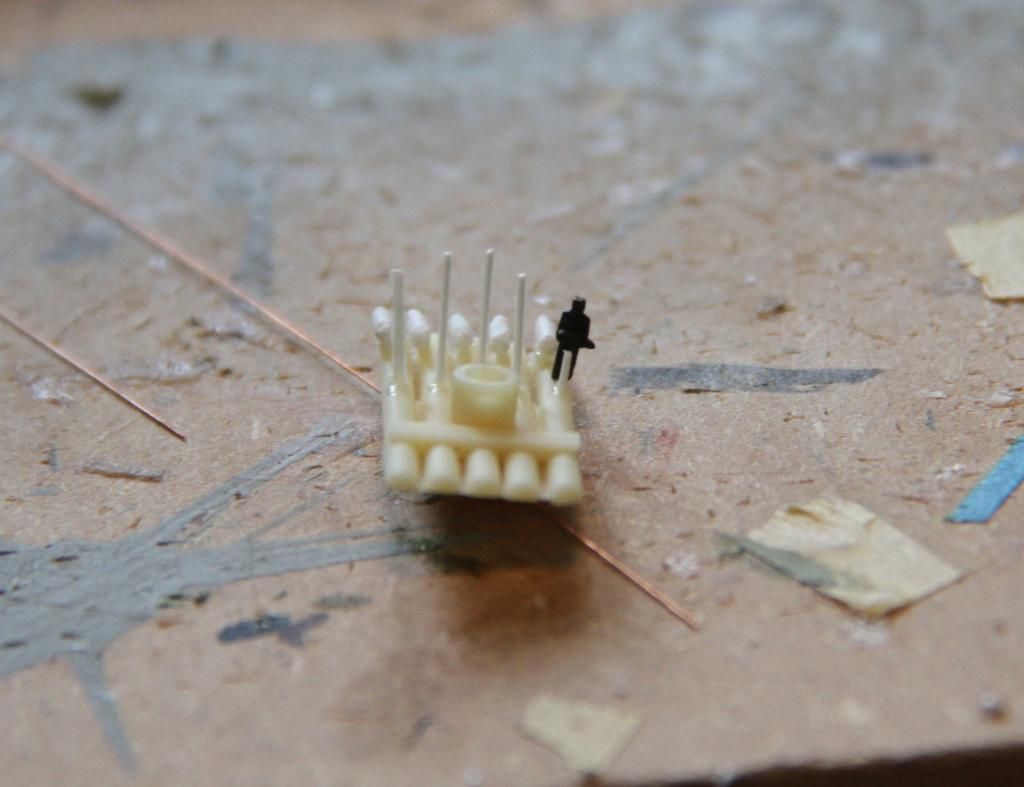
to make fitting the valve spindles easy I made them oversize,
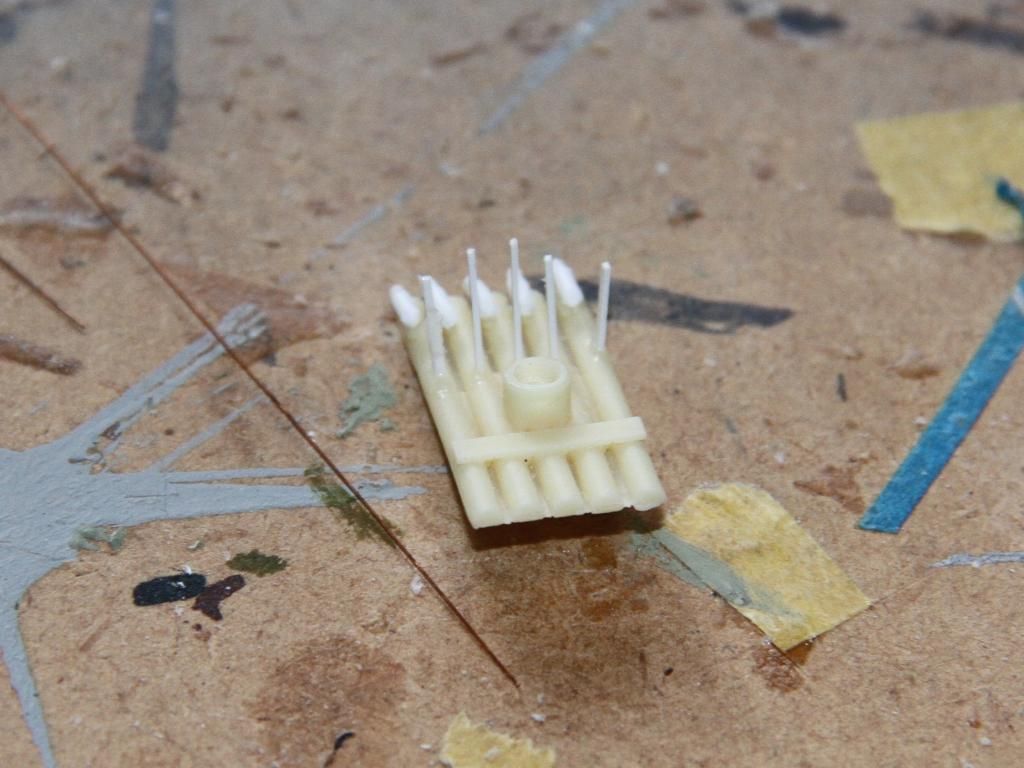
Using a 1/350th figure to get the length about right I cut the spindles to length.
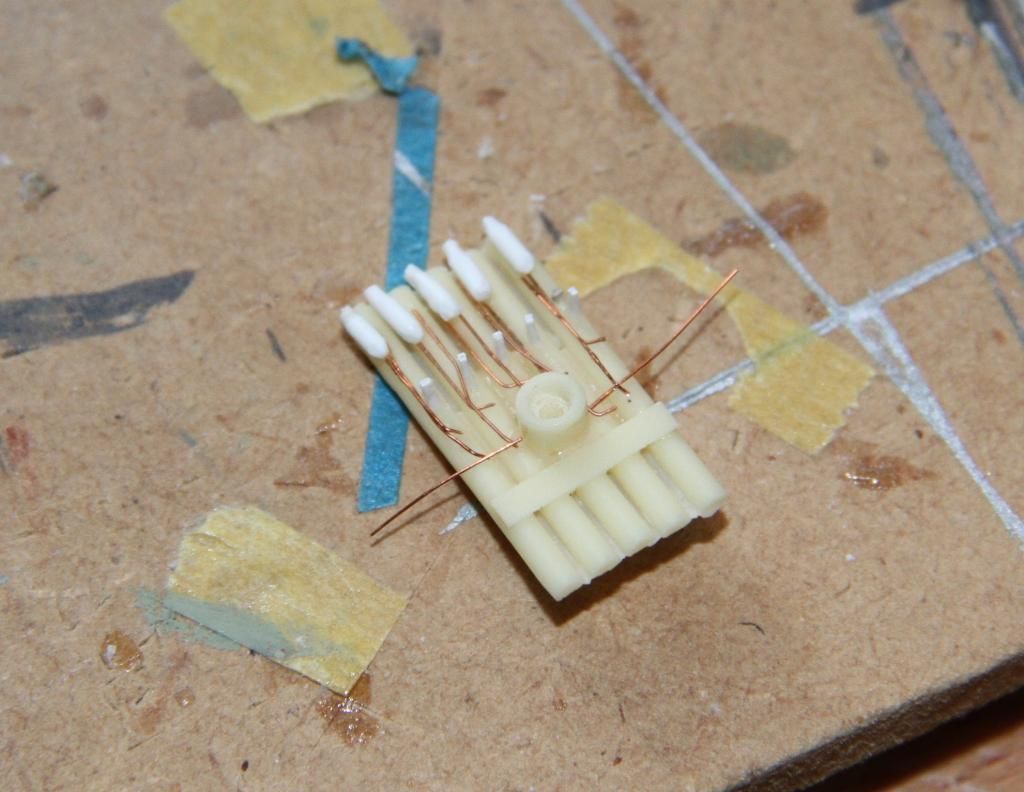
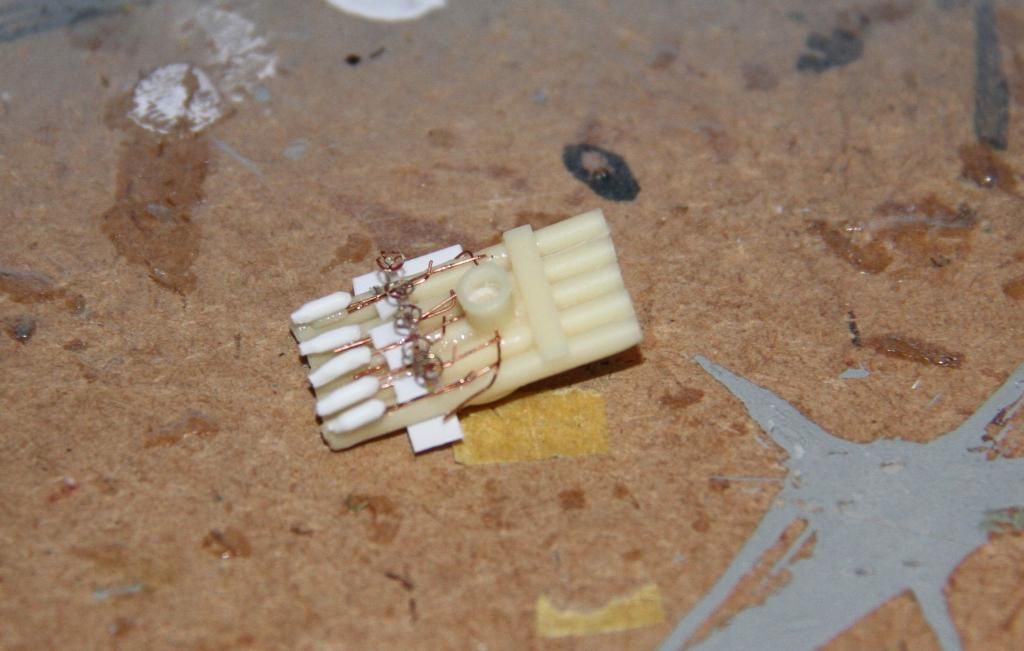
The plumbing, not 100%, but does the job.
The valve wheels and the platforms fitted, the etched wheels are a bit oversize, but the final effect works.
Si
to make fitting the valve spindles easy I made them oversize,

Using a 1/350th figure to get the length about right I cut the spindles to length.

The plumbing, not 100%, but does the job.

The valve wheels and the platforms fitted, the etched wheels are a bit oversize, but the final effect works.

Si

Cosimodo

#335
Joined: September 03, 2013
KitMaker: 1,808 posts
Model Shipwrights: 871 posts

Posted: Monday, February 02, 2015 - 04:57 AM UTC
Hi Simon,
The launchers are looking good. I though about the plumbing and wheels but didn't have anything to scale. I might have to rethink that.
cheers
Michael
The launchers are looking good. I though about the plumbing and wheels but didn't have anything to scale. I might have to rethink that.
cheers
Michael
RedDuster
Joined: March 01, 2010
KitMaker: 7,078 posts
Model Shipwrights: 6,649 posts
Posted: Tuesday, February 03, 2015 - 02:50 AM UTC
Thanks Michael,
As the valve wheels are quite prominent, I thought better overscale than not at all. It is close to the original, but there is a bit of creative gizmology.
Always worth a try, good luck with whatever you decide to do with Ajax's tubes.
Si
As the valve wheels are quite prominent, I thought better overscale than not at all. It is close to the original, but there is a bit of creative gizmology.
Always worth a try, good luck with whatever you decide to do with Ajax's tubes.
Si

phantom_phanatic309
#372

Joined: March 10, 2010
KitMaker: 2,568 posts
Model Shipwrights: 220 posts

Posted: Tuesday, February 10, 2015 - 04:50 AM UTC
Simon, awesome work on those torpedo tubes. Don't think I could have had the patience to do that work!
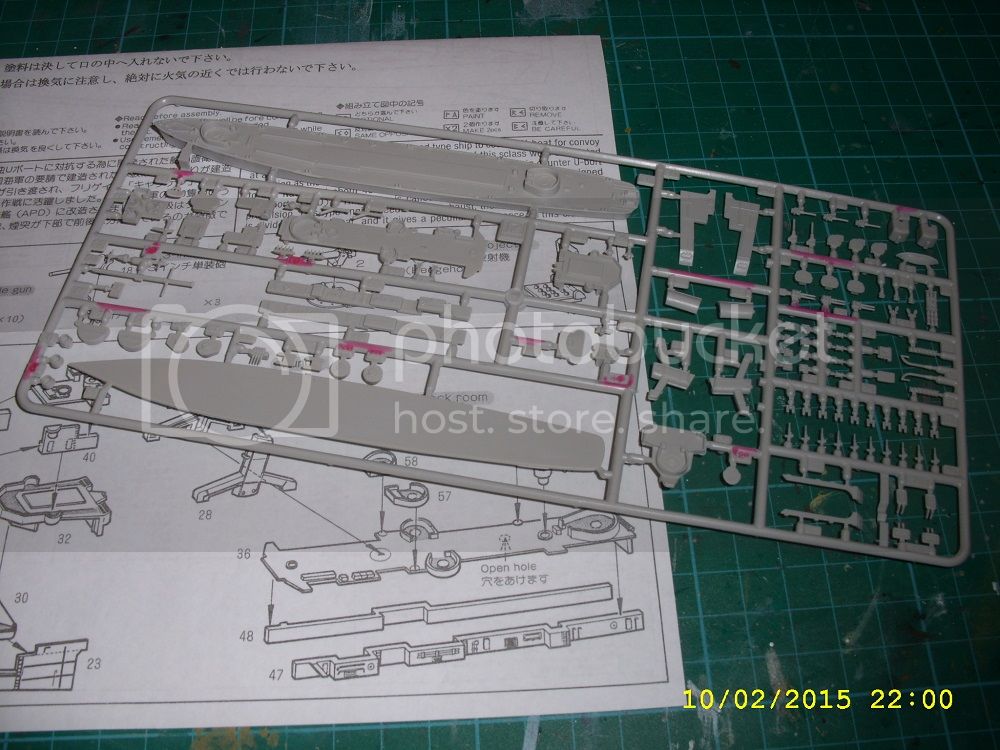
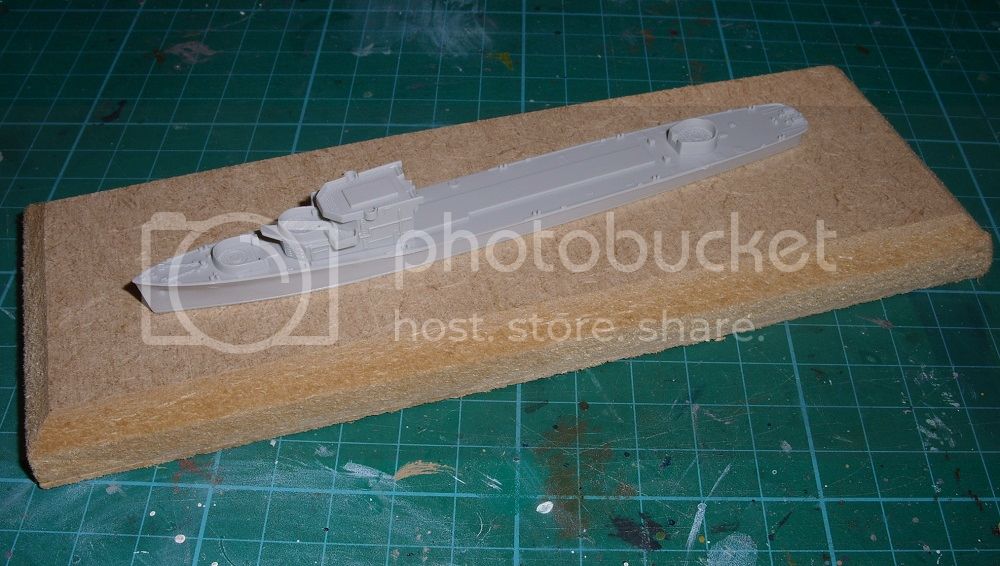
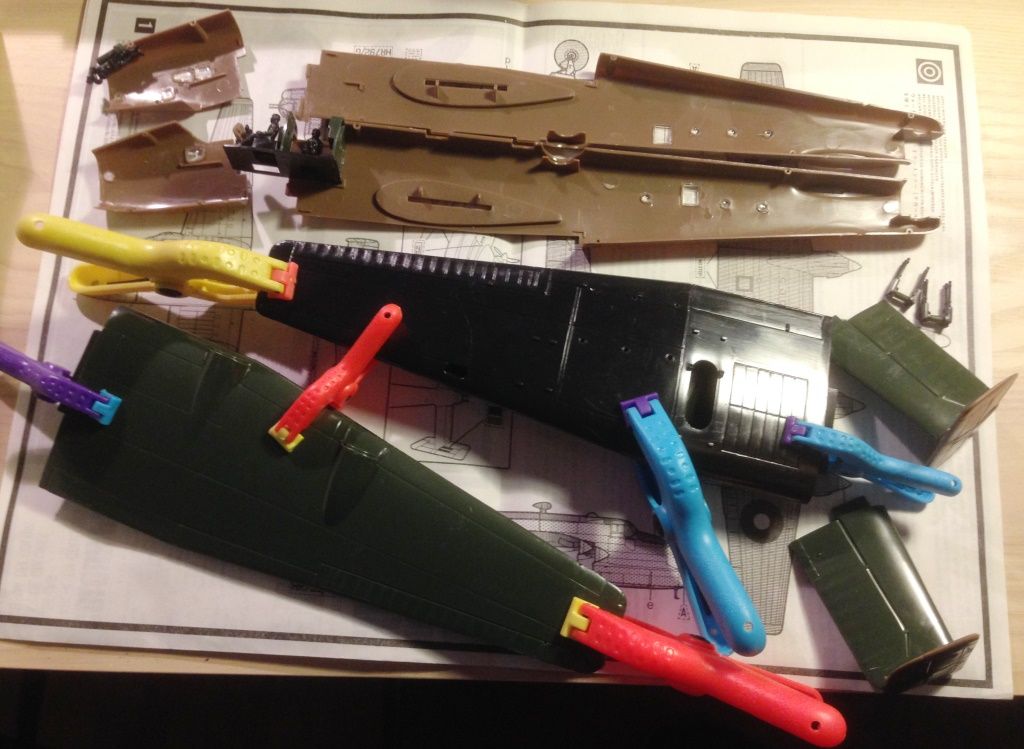
With one campaign project almost finished I thought it was about time I started my entry. I'll be sticking with my original plan of building a Pit-Road 1/700 Buckley DE as an RN Captain-class frigate.
First step was to work out the un-needed parts and mark them out with a red pen. That's about half of the kit's fiddly bits that will go into spares. No doubt I can find some uses for those in the future.
Assembly of the hull and bridge structure was quick and fit of parts was faultless. I also found a small MDF base when I was up in the loft over the weekend that she fits onto nicely.
I'll probably be painting it as the HMS Bentick as seen in the Warship Camouflage book. Most of the conversion work will be based on a PDF copy of WEM's 1/350 conversion set for the Trumpy kit. Most of it will be pretty simple and mostly be adaptions of kit parts at this scale.
With one campaign project almost finished I thought it was about time I started my entry. I'll be sticking with my original plan of building a Pit-Road 1/700 Buckley DE as an RN Captain-class frigate.
First step was to work out the un-needed parts and mark them out with a red pen. That's about half of the kit's fiddly bits that will go into spares. No doubt I can find some uses for those in the future.

Assembly of the hull and bridge structure was quick and fit of parts was faultless. I also found a small MDF base when I was up in the loft over the weekend that she fits onto nicely.

I'll probably be painting it as the HMS Bentick as seen in the Warship Camouflage book. Most of the conversion work will be based on a PDF copy of WEM's 1/350 conversion set for the Trumpy kit. Most of it will be pretty simple and mostly be adaptions of kit parts at this scale.


TRM5150

Joined: January 03, 2010
KitMaker: 2,159 posts
Model Shipwrights: 1,400 posts

Posted: Tuesday, February 10, 2015 - 05:02 AM UTC
Nice beginning there Stephen!! Coming together quickly!!
phantom_phanatic309
#372
Joined: March 10, 2010
KitMaker: 2,568 posts
Model Shipwrights: 220 posts
Posted: Tuesday, February 10, 2015 - 05:43 AM UTC
Thanks. I do like these little destroyer kits, they usually build up quickly and need hardly any display space.

SGTJKJ

#041

Joined: July 20, 2006
KitMaker: 10,069 posts
Model Shipwrights: 228 posts

Posted: Tuesday, February 10, 2015 - 01:03 PM UTC
Nice choice, Stephen. Some nice camouflage schemes and good choice.
Looking forward to see more
Looking forward to see more

RedDuster
Joined: March 01, 2010
KitMaker: 7,078 posts
Model Shipwrights: 6,649 posts
Posted: Wednesday, February 11, 2015 - 01:26 AM UTC
Nice work Stephen, and nice choice. I do have a soft spot for the Captains
Si.
Si.
RedDuster
Joined: March 01, 2010
KitMaker: 7,078 posts
Model Shipwrights: 6,649 posts
Posted: Saturday, February 14, 2015 - 03:54 AM UTC
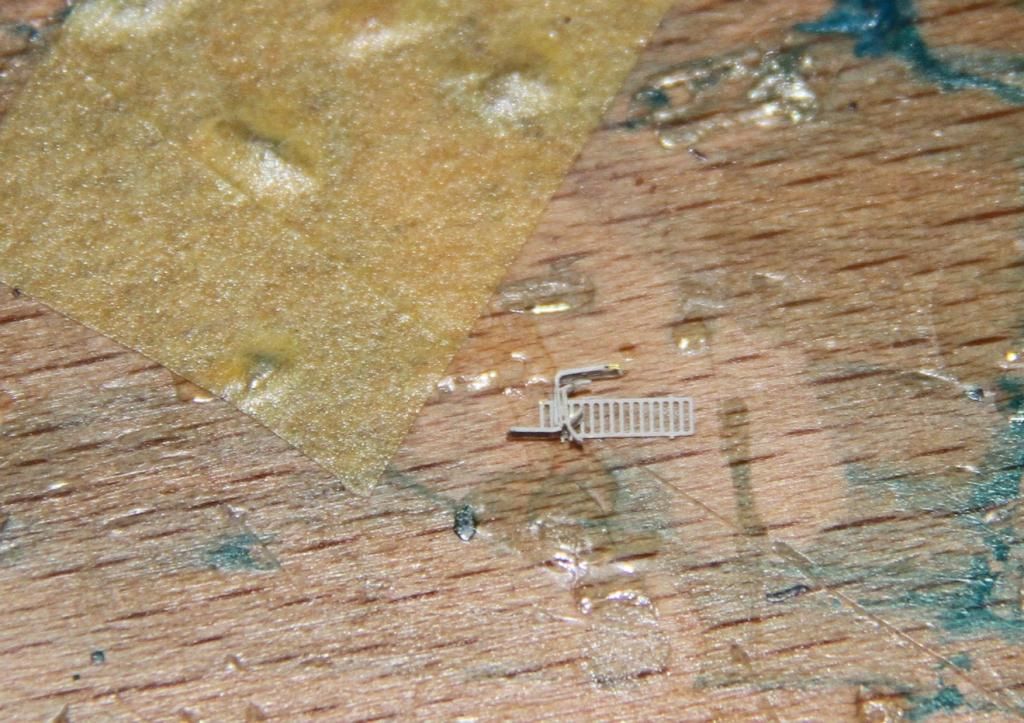
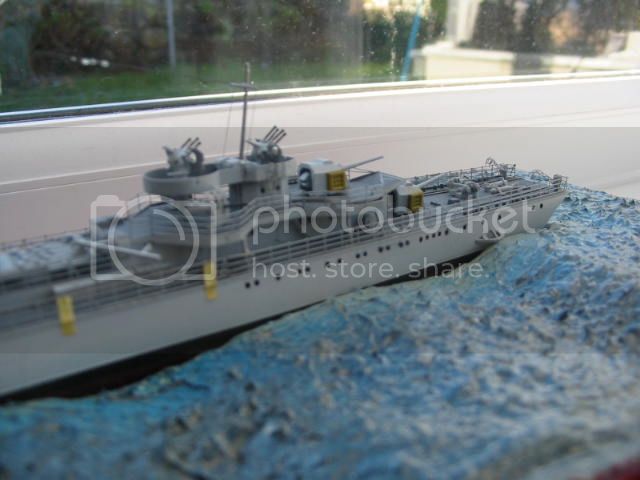
As there is no specific after market RN bridge detail a bit of creative gizmology was needed, and this set seemed a good idea.
Voicepipes and binocular pedestals.
Making the Captain's chair. Some etched lounger and sunbed parts from the GMM QM2 set.
The chair in place along with a chart table, (At least that what I think the drawing in Langtree's book is showing.)
Voicepipes and binoculars in place.
More soon.
Si

Voicepipes and binocular pedestals.

Making the Captain's chair. Some etched lounger and sunbed parts from the GMM QM2 set.

The chair in place along with a chart table, (At least that what I think the drawing in Langtree's book is showing.)

Voicepipes and binoculars in place.

More soon.
Si
RedDuster
Joined: March 01, 2010
KitMaker: 7,078 posts
Model Shipwrights: 6,649 posts
Posted: Sunday, February 15, 2015 - 03:09 AM UTC
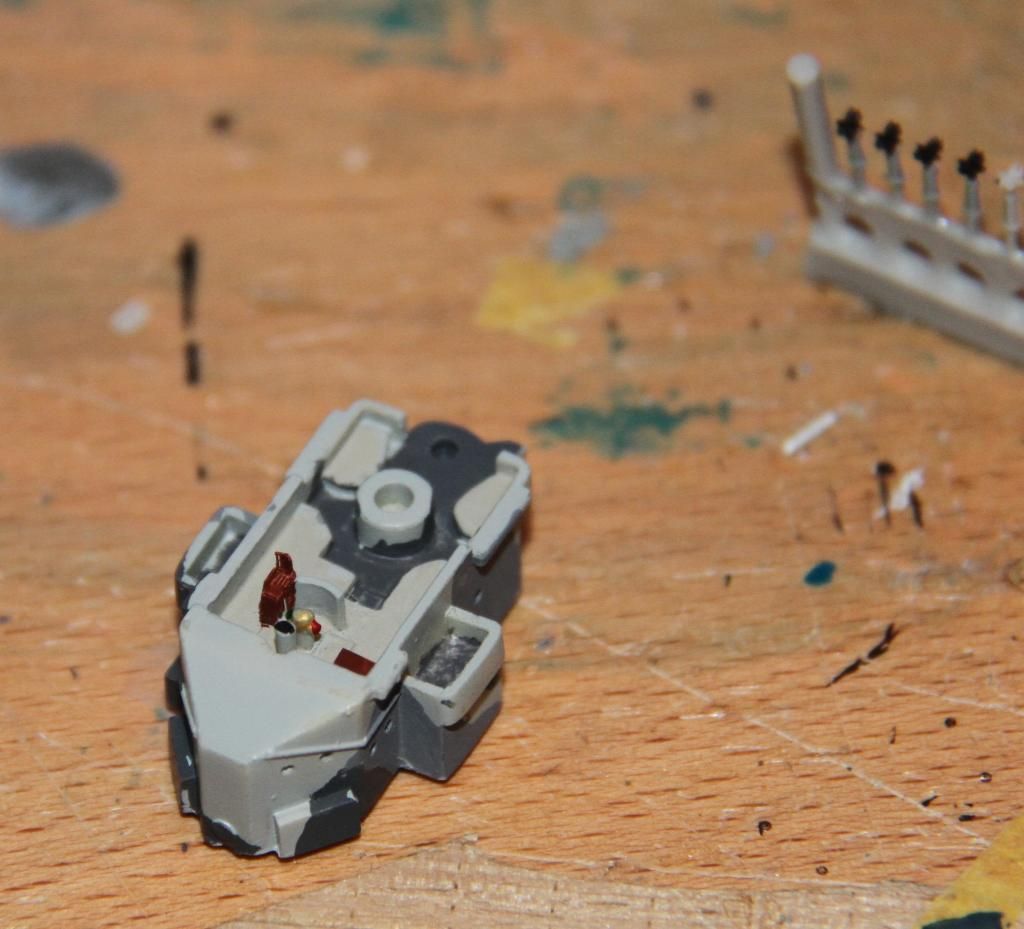
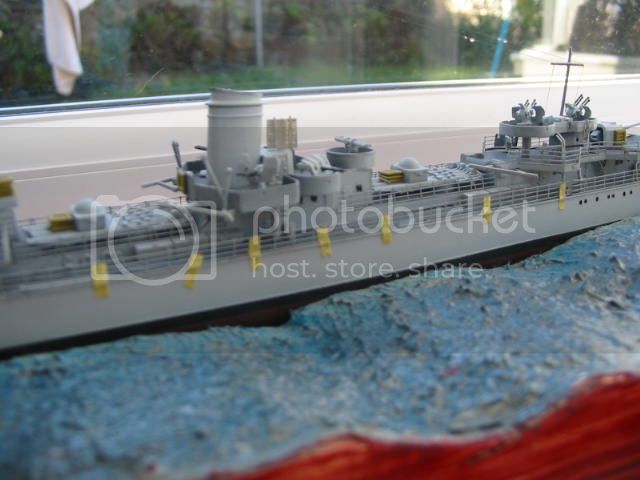
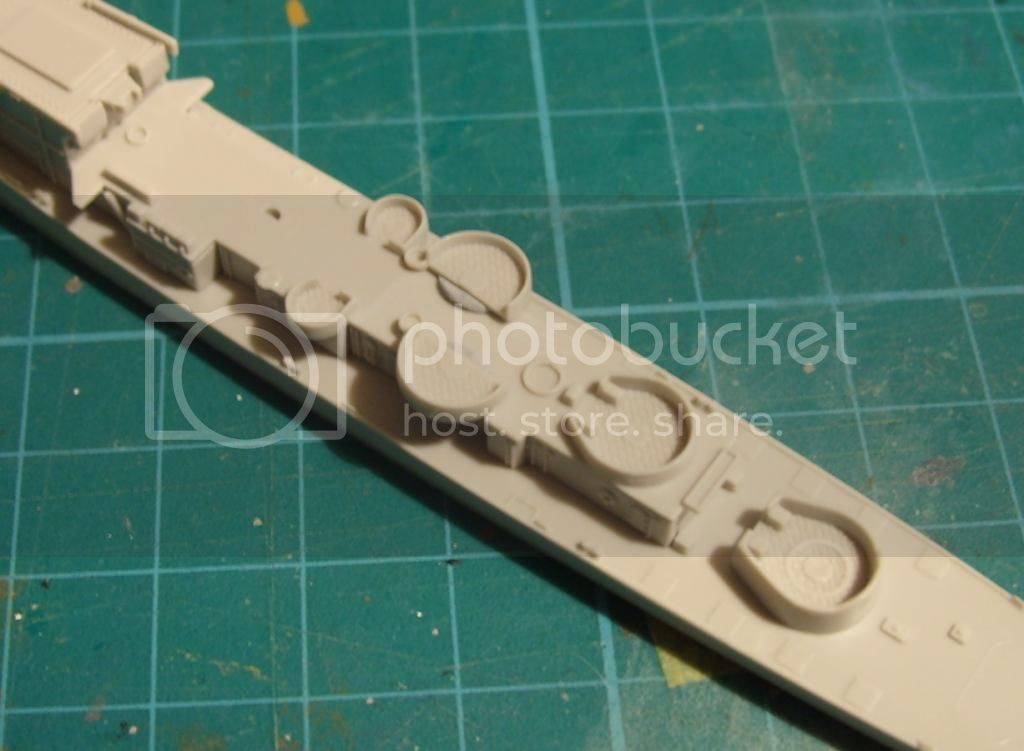
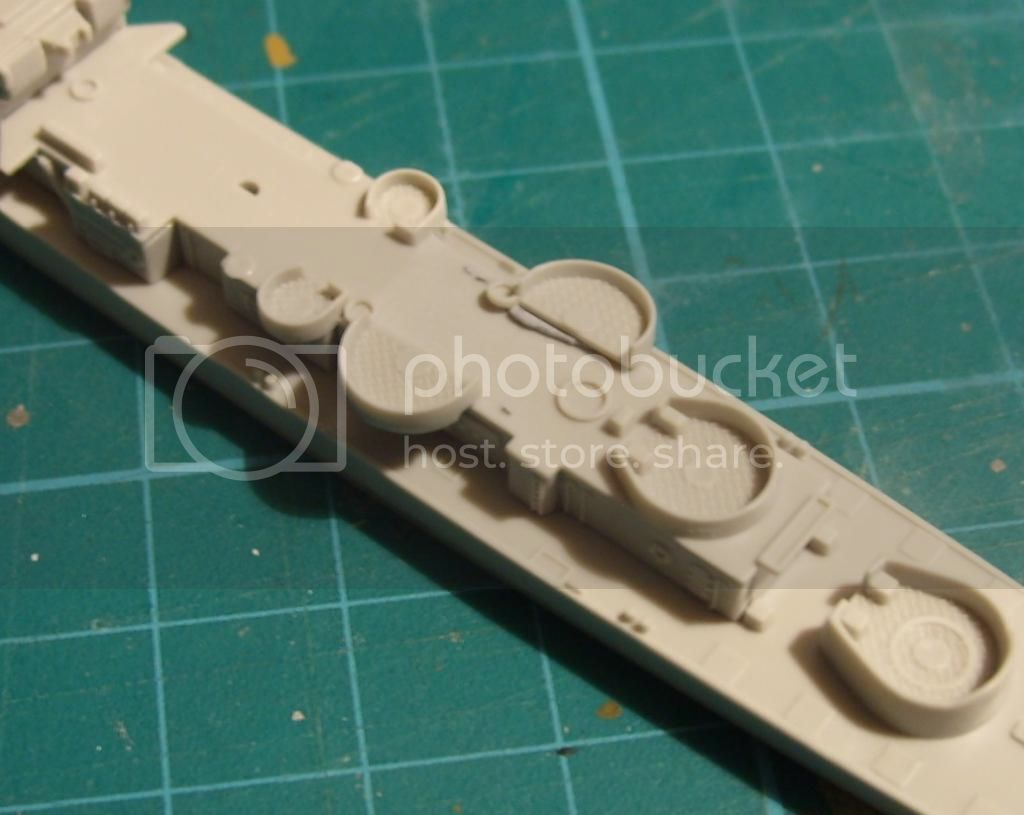
As well as the tubes and the bridge the 4" needed a bit of work.
The basic part.
The shape s good, but bland, so some detail added.
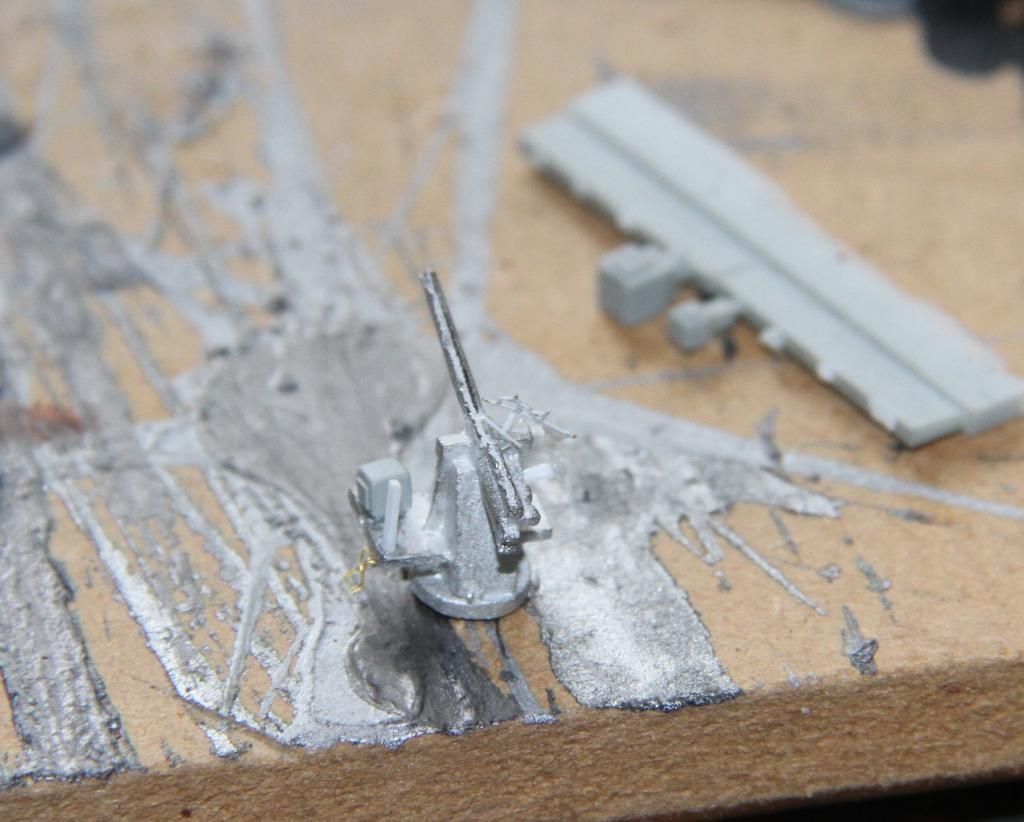
Base coated TS81.
A few final details added to the tubes, and again a coat of TS81.
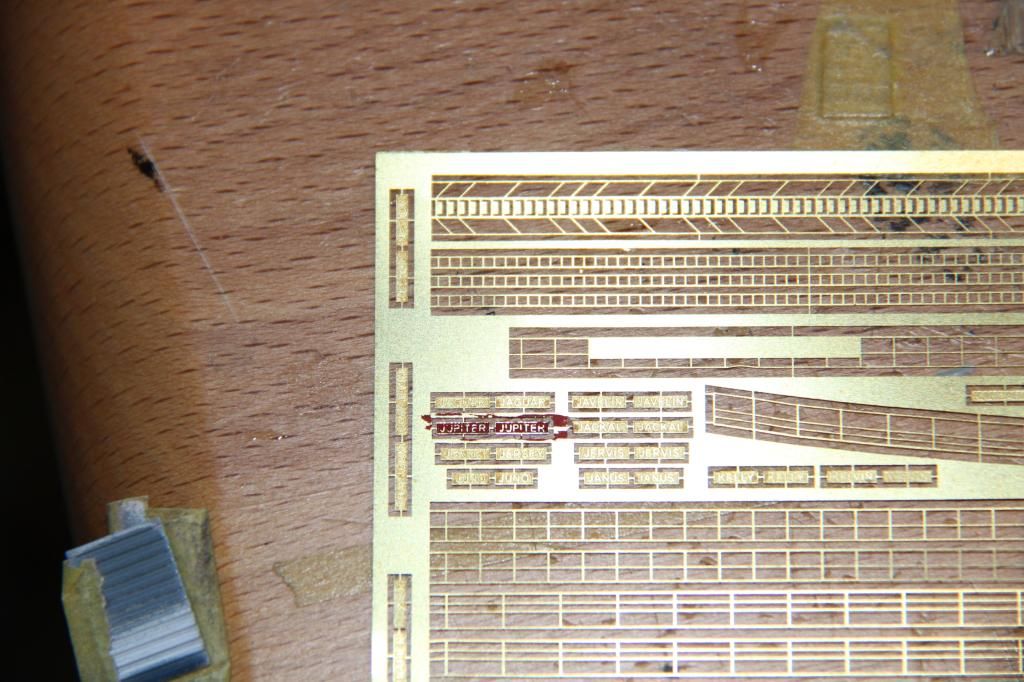
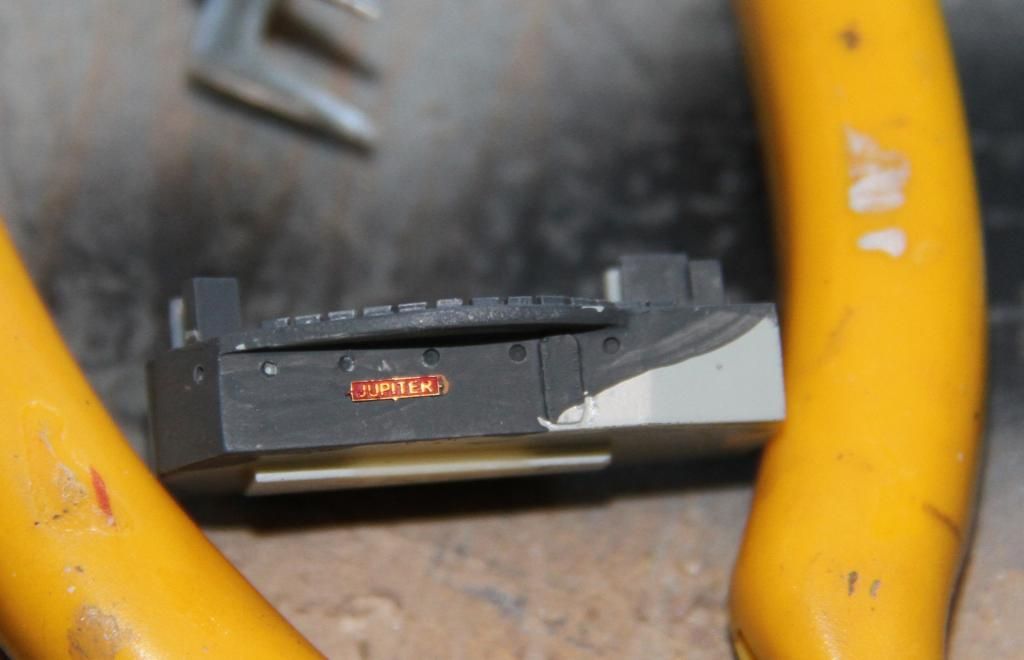
The etched fret provides the name plates for all 24 J,K and N class, I gave the Jupiter's a coat of red and after letting it dry scraped the paint off the raised detail.
and attached them to the after superstructure.
The Bridge and after superstructure glued down.
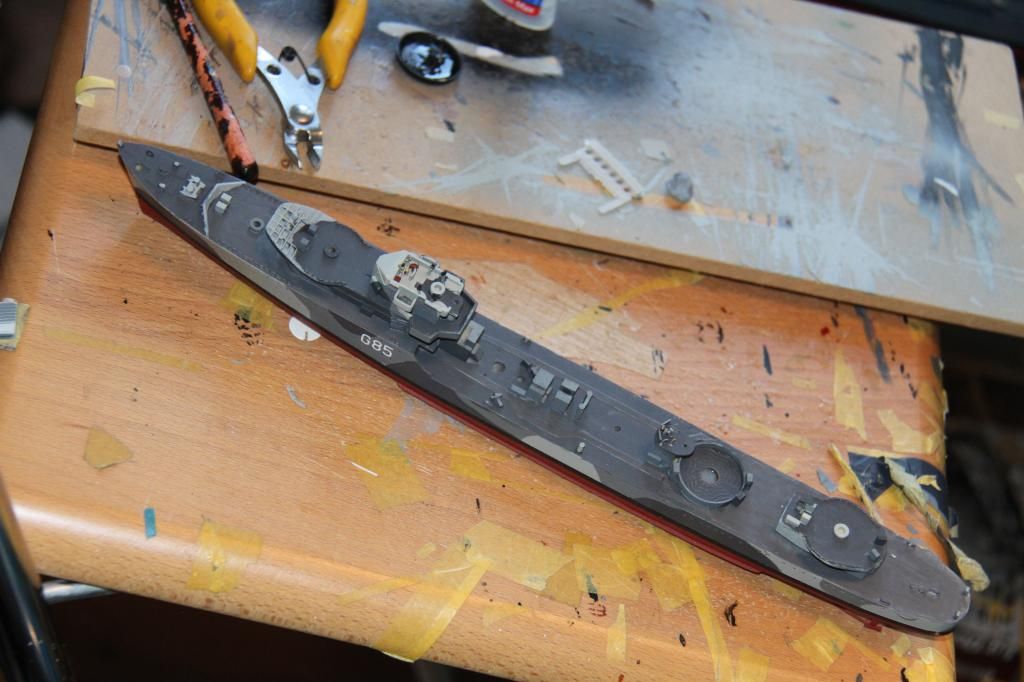
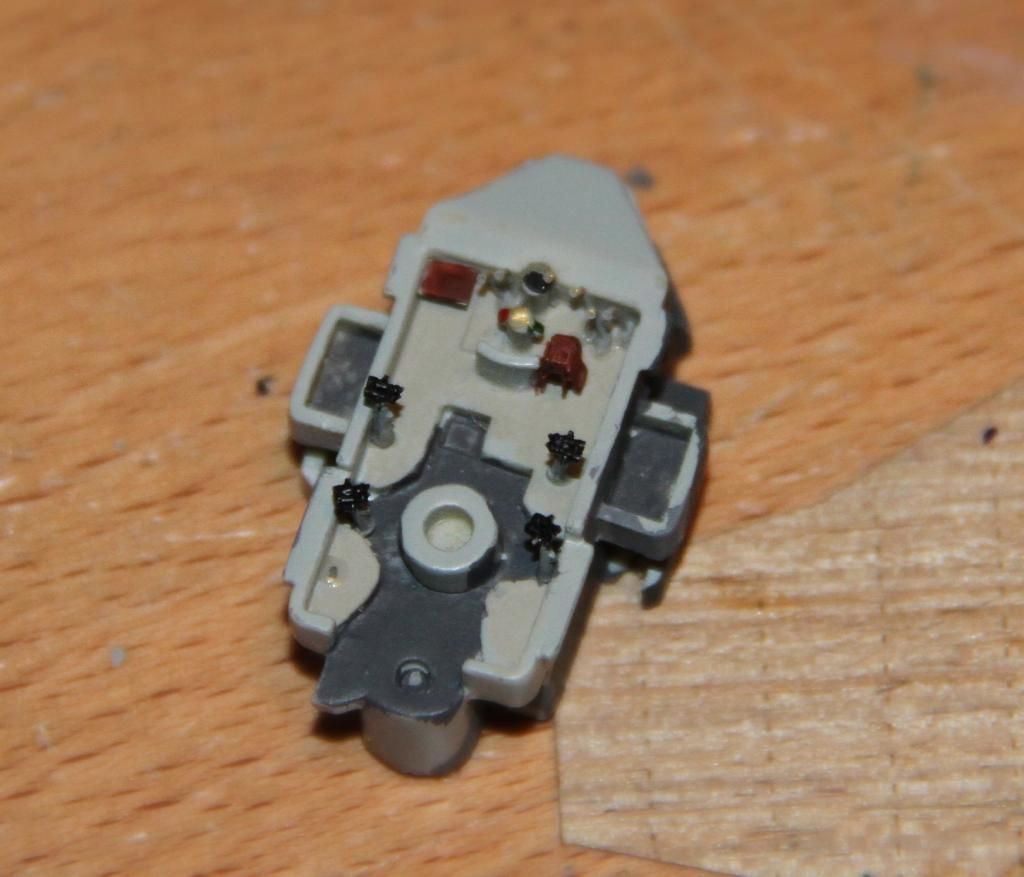
detail painting on the 4" and tubes done.
The gun, along with it's treadplate, the tubs and the funnel all in place.

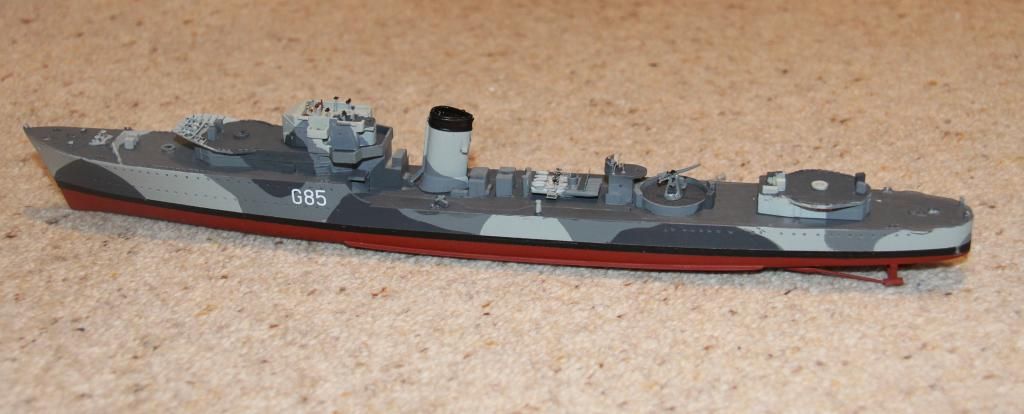
pompom deck and boats and stuff next.
Si
The basic part.

The shape s good, but bland, so some detail added.

Base coated TS81.

A few final details added to the tubes, and again a coat of TS81.

The etched fret provides the name plates for all 24 J,K and N class, I gave the Jupiter's a coat of red and after letting it dry scraped the paint off the raised detail.

and attached them to the after superstructure.

The Bridge and after superstructure glued down.

detail painting on the 4" and tubes done.

The gun, along with it's treadplate, the tubs and the funnel all in place.


pompom deck and boats and stuff next.
Si
TRM5150
Joined: January 03, 2010
KitMaker: 2,159 posts
Model Shipwrights: 1,400 posts
Posted: Sunday, February 15, 2015 - 04:17 AM UTC
Some great detailing in the bridge Si! Nice work on the gun and Torps too! You mentioned "inspiration" on my Intrepid thread...all these build in here and the battleship campaign are exactly that for me right now!!
Keep it going fellas!
Keep it going fellas!
SGTJKJ
#041
Joined: July 20, 2006
KitMaker: 10,069 posts
Model Shipwrights: 228 posts
Posted: Sunday, February 15, 2015 - 12:50 PM UTC
Looking great, Simon. This is really coming together nice with the cmouflage and the details.
SGTJKJ
#041
Joined: July 20, 2006
KitMaker: 10,069 posts
Model Shipwrights: 228 posts
Posted: Sunday, February 15, 2015 - 07:40 PM UTC
Work has finally started on my coastal command Halifax. Slow progess, but at least I have gotten started now.
More to follow
More to follow

RedDuster
Joined: March 01, 2010
KitMaker: 7,078 posts
Model Shipwrights: 6,649 posts
Posted: Tuesday, February 17, 2015 - 12:52 AM UTC
Thanks Todd,
That is one of the great things about this site, we learn from, and spark off each other.
Thanks Jesper,
Great start on the Halifax,
Si
That is one of the great things about this site, we learn from, and spark off each other.
Thanks Jesper,
Great start on the Halifax,
Si
TRM5150
Joined: January 03, 2010
KitMaker: 2,159 posts
Model Shipwrights: 1,400 posts
Posted: Tuesday, February 17, 2015 - 02:28 AM UTC
Nice seeing those wings going together Jesper! No rushing in model building...slow and steady!! 
SGTJKJ
#041
Joined: July 20, 2006
KitMaker: 10,069 posts
Model Shipwrights: 228 posts
Posted: Tuesday, February 17, 2015 - 12:49 PM UTC
Thanks for the encouragement, Guys. Todd, It will be a slow and steady build.

beefy66

Joined: October 22, 2007
KitMaker: 971 posts
Model Shipwrights: 645 posts

Posted: Friday, February 20, 2015 - 06:44 PM UTC
Simon your detailing is amazing as usual
Jesper nice start on your build there looking forward to seeing that one done.
I have finally got back to doing the Z25 got up enough courage to attempt the main deck railings
Keith
Jesper nice start on your build there looking forward to seeing that one done.
I have finally got back to doing the Z25 got up enough courage to attempt the main deck railings
Keith
TRM5150
Joined: January 03, 2010
KitMaker: 2,159 posts
Model Shipwrights: 1,400 posts
Posted: Friday, February 20, 2015 - 09:34 PM UTC
Nice work there Kieth! Great seeing the railing going on!!
RedDuster
Joined: March 01, 2010
KitMaker: 7,078 posts
Model Shipwrights: 6,649 posts
Posted: Saturday, February 21, 2015 - 03:26 AM UTC
Thanks Keith, nice work on the railings, really coming together.
Si
Si

ltb073
Joined: March 08, 2010
KitMaker: 3,662 posts
Model Shipwrights: 45 posts

Posted: Saturday, February 21, 2015 - 07:29 PM UTC
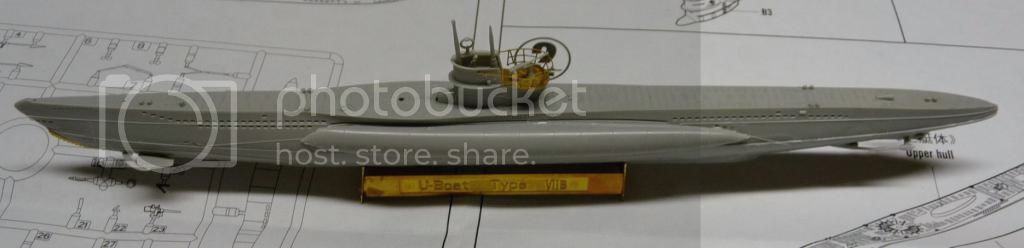
Hi Guys Im usually over on the Armor side of things but when I see Battle of the Atlantic I automatically think of U-boat. So here we go my 1st foray into 1/350 scale of a Hobby Boss U-boat

Started it yesterday and this is what it is currently looking like

Started it yesterday and this is what it is currently looking like


TRM5150
Joined: January 03, 2010
KitMaker: 2,159 posts
Model Shipwrights: 1,400 posts
Posted: Saturday, February 21, 2015 - 07:34 PM UTC
Hi Sal!! Welcome to the wetter side of things around here!! Fine looking job for a days work!! The VII B's and C's are amongst my favorites! Keep up the great work! 
Fine looking job for a days work!! The VII B's and C's are amongst my favorites! Keep up the great work! RedDuster
Joined: March 01, 2010
KitMaker: 7,078 posts
Model Shipwrights: 6,649 posts
Posted: Sunday, February 22, 2015 - 04:46 AM UTC
Hi Sal,
Nice choice, do like the early boats, good work so far.
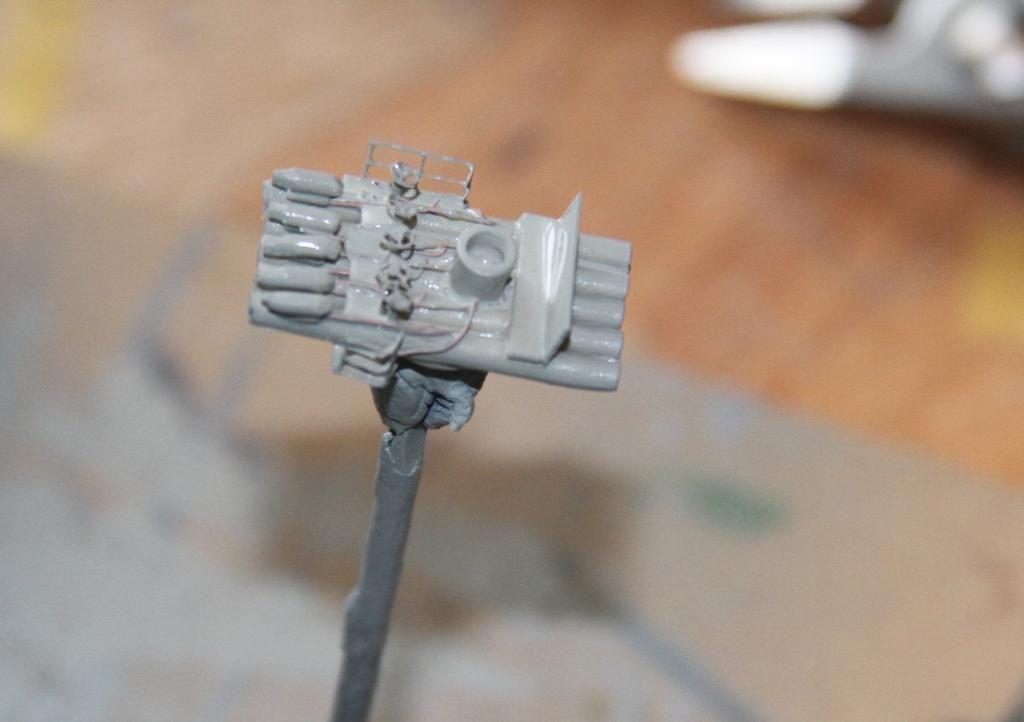
Lots of bits and pieces on Jupiter.
Firstly a shot I missed from last weekend, the after steering position / searchlight platform, voicepipes and a wheel from an old fret added.
The supports for the pompom deck are a bit off, they will need a little fettling.

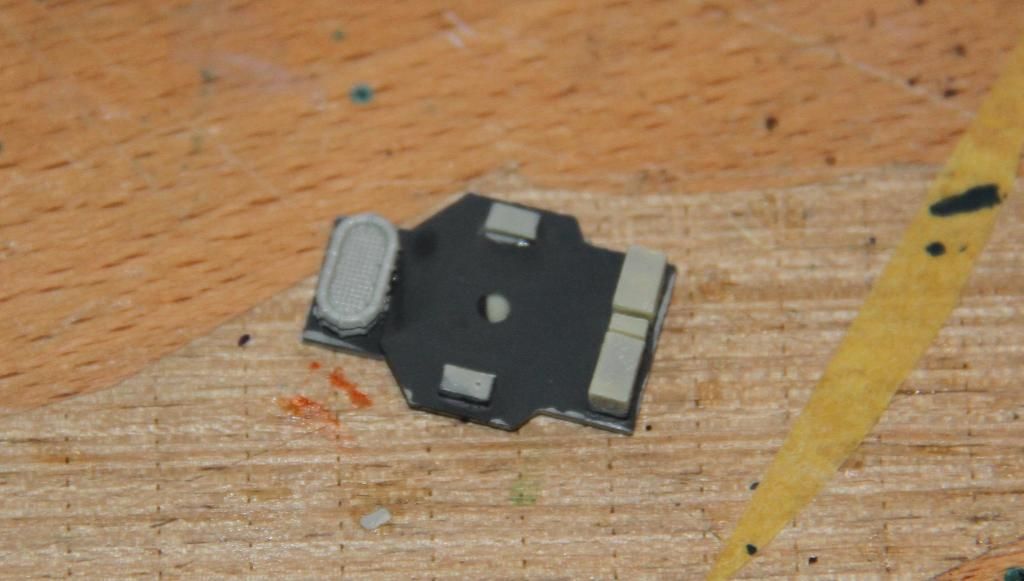
TTje pompom platform painted, strangely one of the two liferafts is moulded in place, and a second needs adding.
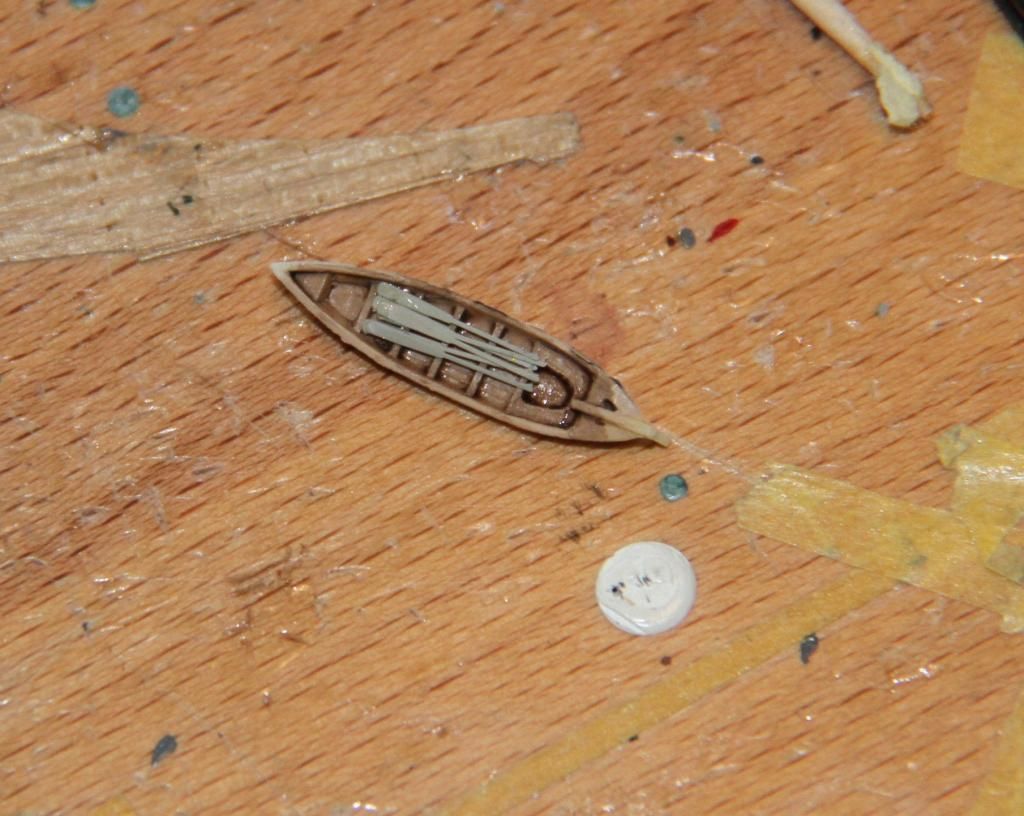
Work on the boats started, the cutter's interior given a coat of light wood.
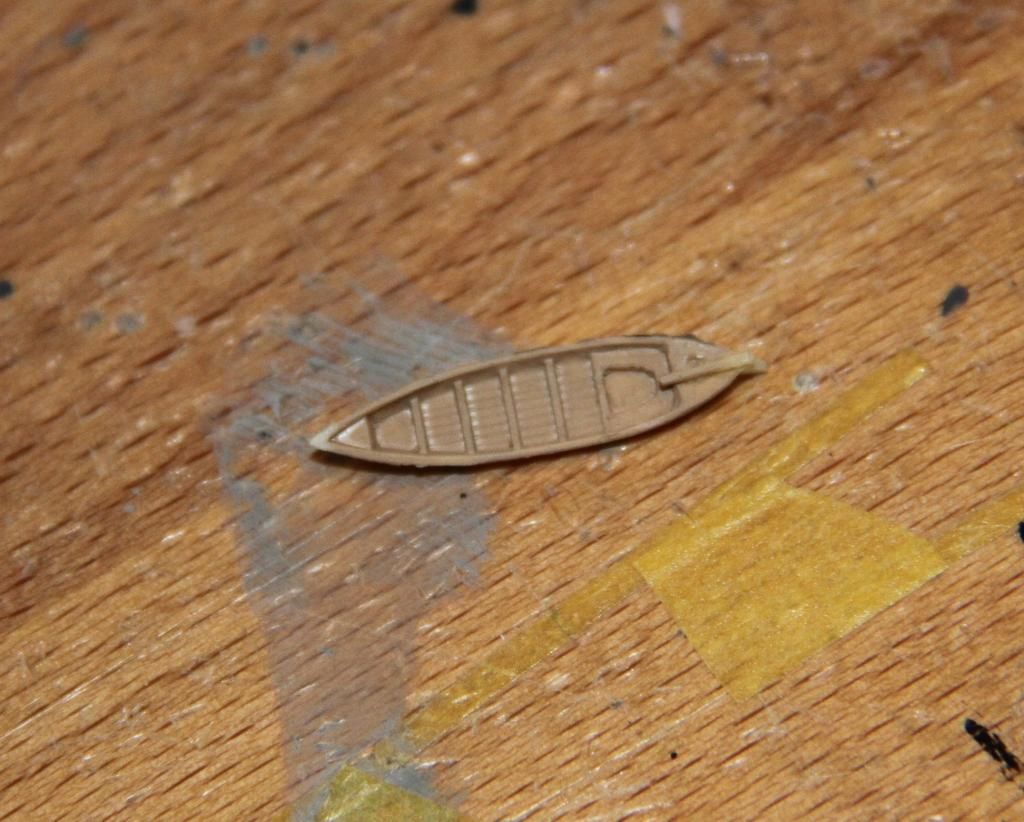
washed and some left over oars added.
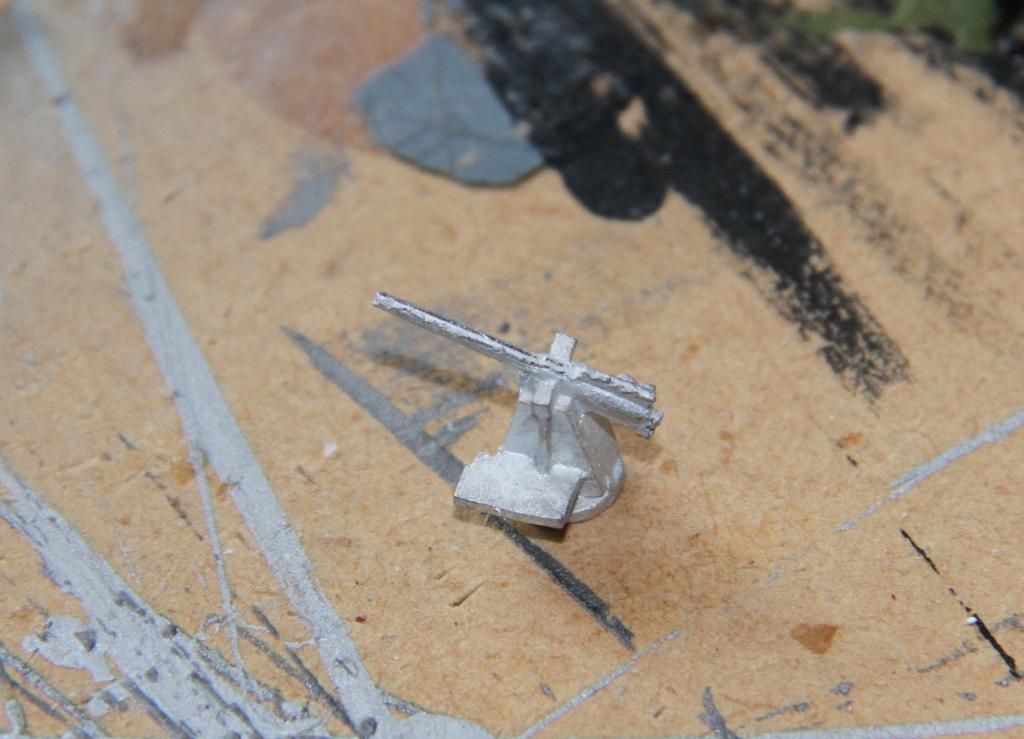
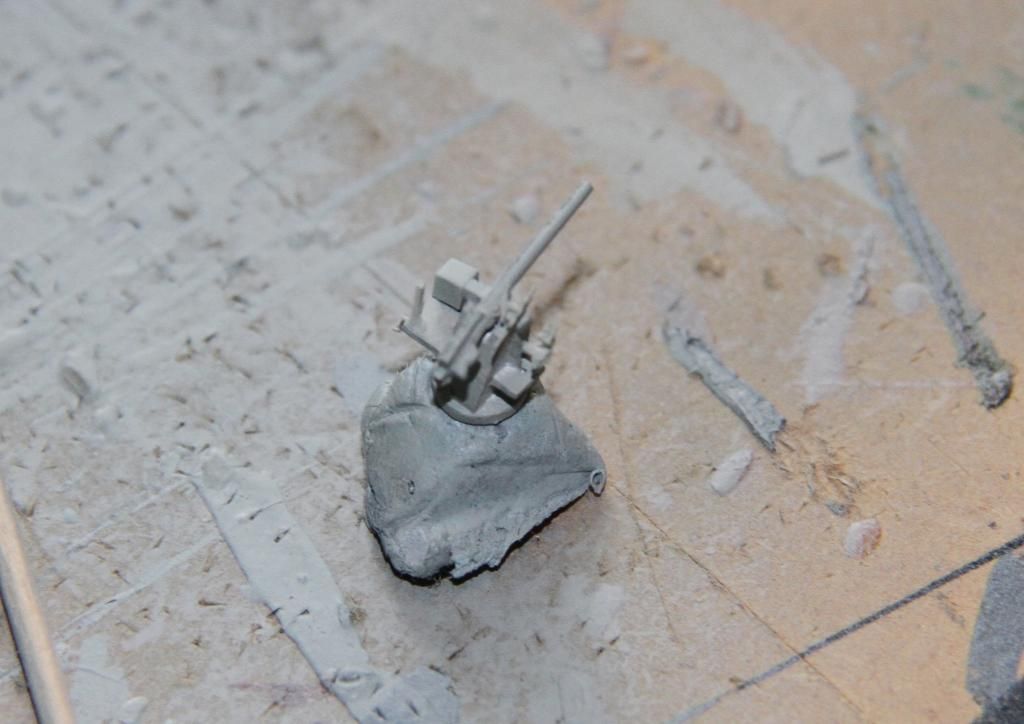
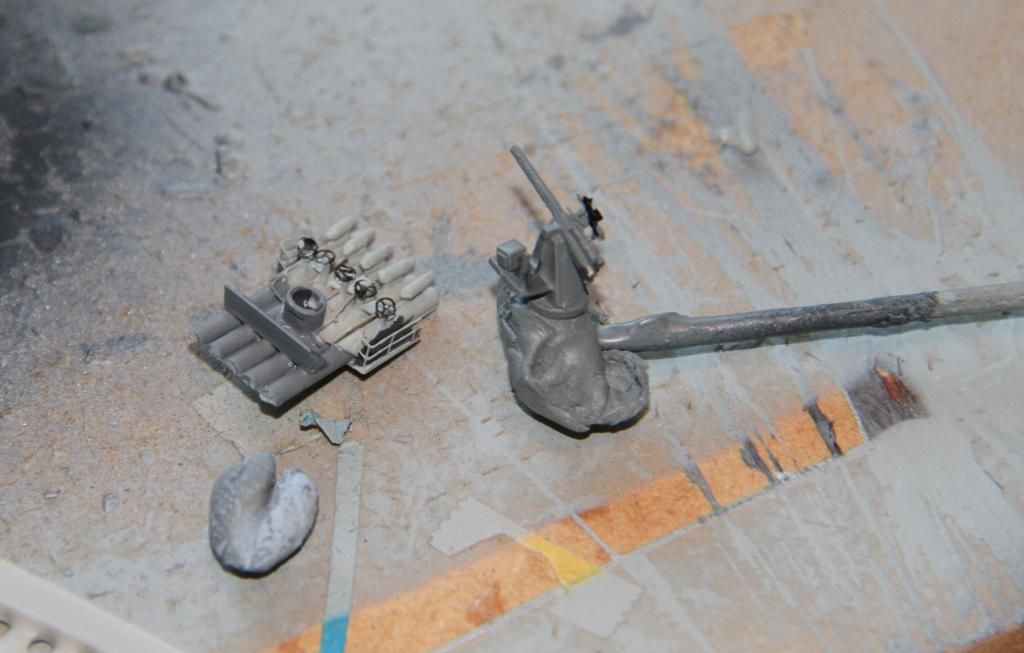
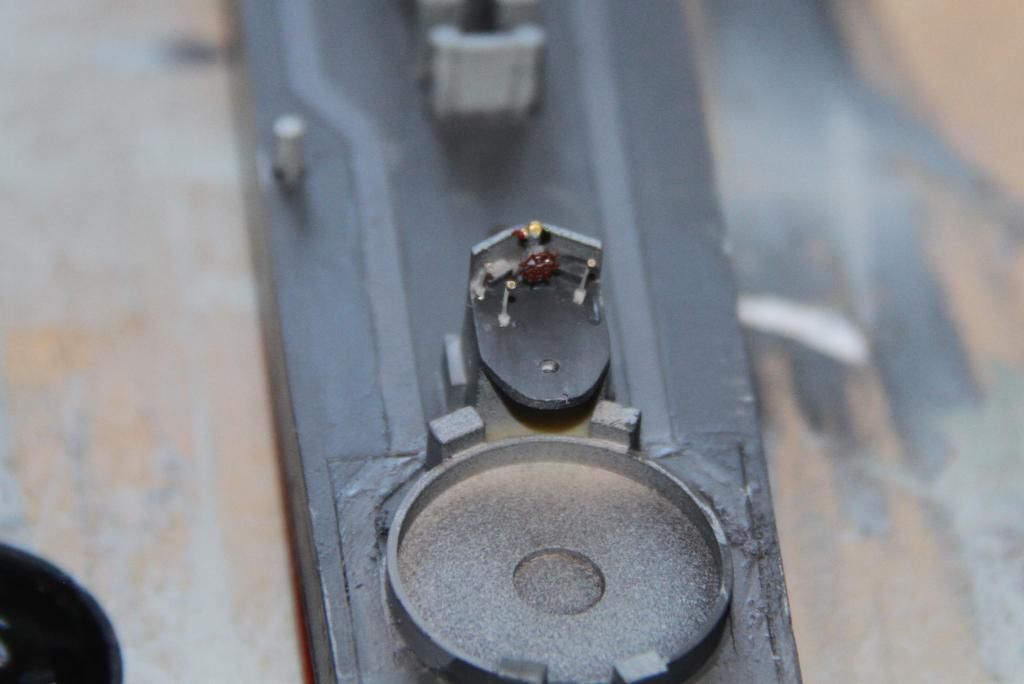
finally the 4.7" guns and gunhouses cleaned up.
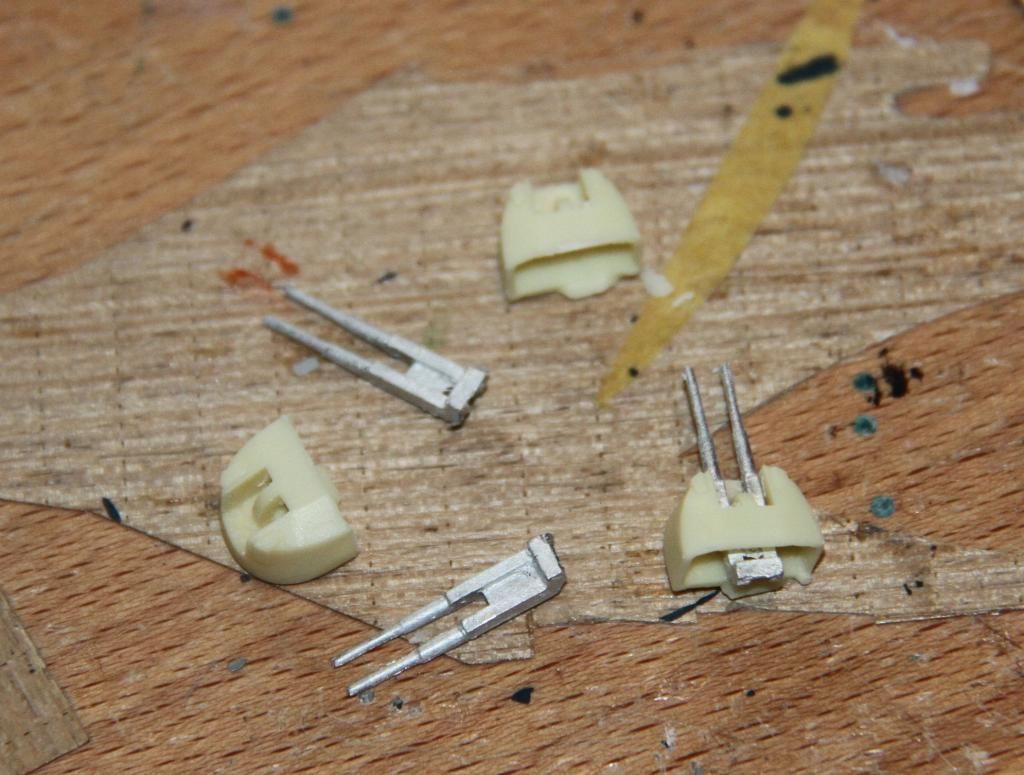
will need a little detail adding I think, another dig through the refrences.
More soon.
Si
Nice choice, do like the early boats, good work so far.
Lots of bits and pieces on Jupiter.
Firstly a shot I missed from last weekend, the after steering position / searchlight platform, voicepipes and a wheel from an old fret added.

The supports for the pompom deck are a bit off, they will need a little fettling.

TTje pompom platform painted, strangely one of the two liferafts is moulded in place, and a second needs adding.

Work on the boats started, the cutter's interior given a coat of light wood.

washed and some left over oars added.

finally the 4.7" guns and gunhouses cleaned up.

will need a little detail adding I think, another dig through the refrences.
More soon.
Si
phantom_phanatic309
#372
Joined: March 10, 2010
KitMaker: 2,568 posts
Model Shipwrights: 220 posts
Posted: Monday, February 23, 2015 - 02:45 AM UTC
Some great builds going on.
Did a little more work on my frigate, but hit a stumbling block. The profile of the Bentick shows an extra pair of staggered Bofors pits in place of the torpedo tubes. I'm not sure which way they should go on which side (if that makes sense) and photo's are not very clear.
Should they be this way....
...or this way?
The bow is towards the top of the pictures if that helps to orient the model. Any help would be appreciated.
Did a little more work on my frigate, but hit a stumbling block. The profile of the Bentick shows an extra pair of staggered Bofors pits in place of the torpedo tubes. I'm not sure which way they should go on which side (if that makes sense) and photo's are not very clear.
Should they be this way....

...or this way?

The bow is towards the top of the pictures if that helps to orient the model. Any help would be appreciated.
RedDuster
Joined: March 01, 2010
KitMaker: 7,078 posts
Model Shipwrights: 6,649 posts
Posted: Tuesday, February 24, 2015 - 01:13 AM UTC
Hi Stephen,
I have had a quick whizz through all my references and I am not certain, mainly because the only clear views I have are of the port side, there does a look quite a gap between the 20mm tub and the bofors tub on that side, so I would reckon that is the aftermost of the two. (for the starboard tub to be aft of that it would almost be hard up against the old tub that used to house the US quad 1.1".
One thing I have learned building ship models, sometimes you just have make the best guess you can.
Whichever way you go with you will be unlucky if you are proved wrong.
Cheers
Si
 |

WEB HOSTING BY


Copyright ©2021 Model Shipwrights and Kitmaker Network, a subsidiary of Silver Star Enterprises
All Rights Reserved. Please read our Conditions of Use and Privacy Policy.
All Rights Reserved. Please read our Conditions of Use and Privacy Policy.