

Keith, your Z25 is a nice clean build. The water looks fantastic.
Ernest


Go to modelshipwrights.com for the current dynamic site!
Campaigns
Want to be part of a group build? This is where to start, plan, and meet about them.
Want to be part of a group build? This is where to start, plan, and meet about them.
Hosted by Jim Starkweather
Official: Battle of the Atlantic 75th Anniv

greif8

Joined: January 17, 2006
KitMaker: 673 posts
Model Shipwrights: 36 posts

Posted: Monday, December 15, 2014 - 01:53 PM UTC

beefy66

Joined: October 22, 2007
KitMaker: 971 posts
Model Shipwrights: 645 posts

Posted: Tuesday, December 16, 2014 - 07:14 PM UTC
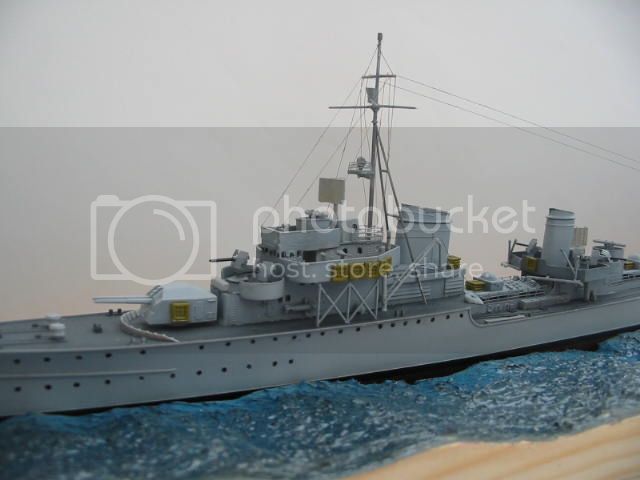
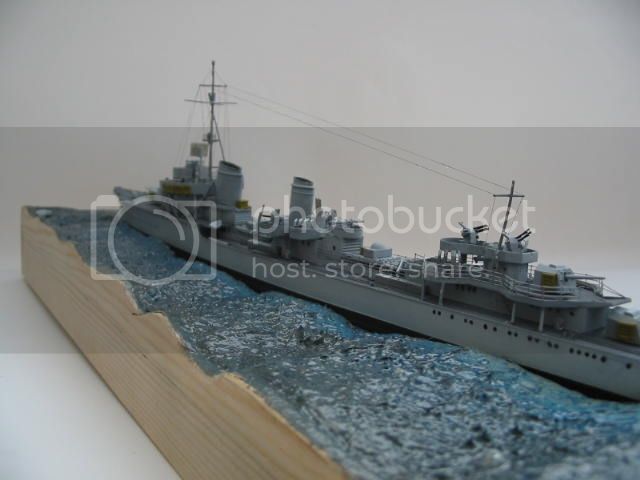
Thanks for the kind words of encouragement with this build Guys here is another small update have been adding some rigging using some fine copper wire and fine thread thanks for the tip Simon 
Ohh and my eyes must be getting bad because I have had to start using these magnifiers that my friends so called say make me look like Rick Moranis from Honey I shrunk the Kids
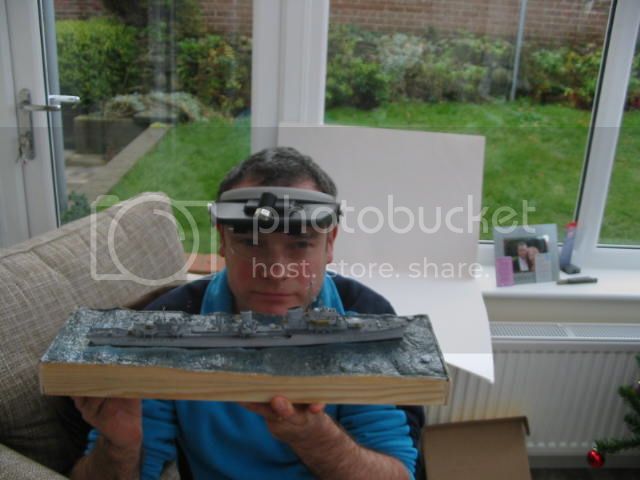
Ohh and my eyes must be getting bad because I have had to start using these magnifiers that my friends so called say make me look like Rick Moranis from Honey I shrunk the Kids
greif8
Joined: January 17, 2006
KitMaker: 673 posts
Model Shipwrights: 36 posts
Posted: Tuesday, December 16, 2014 - 08:56 PM UTC
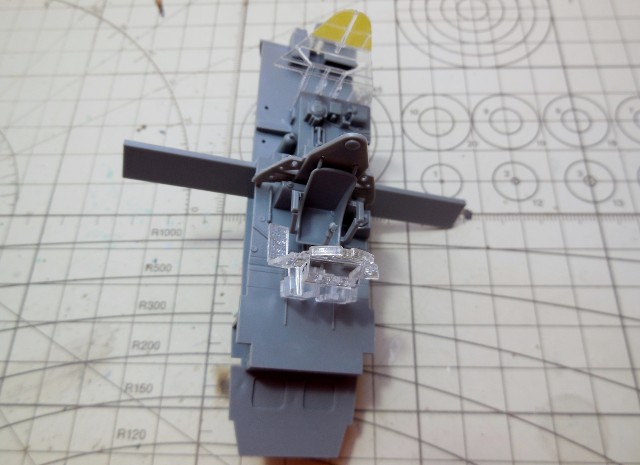
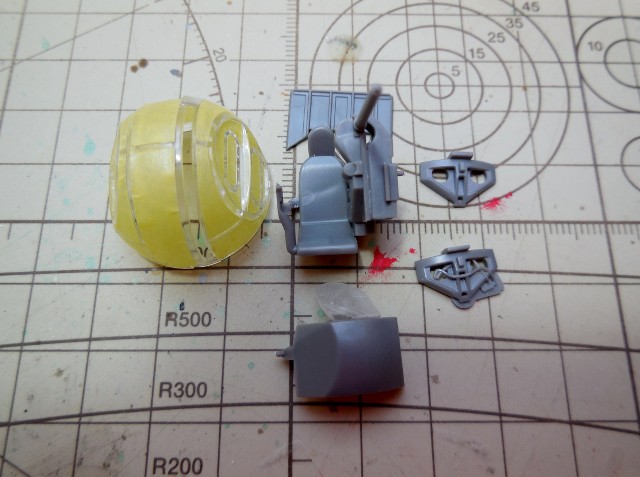
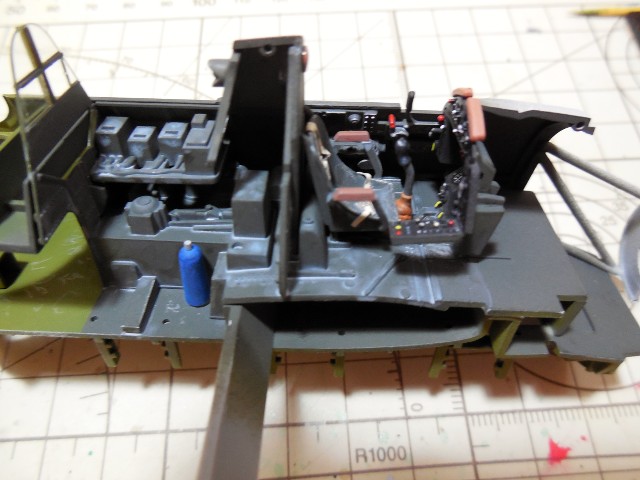
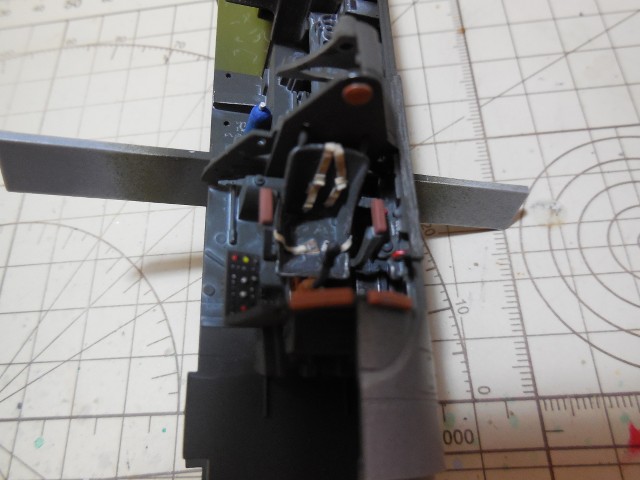
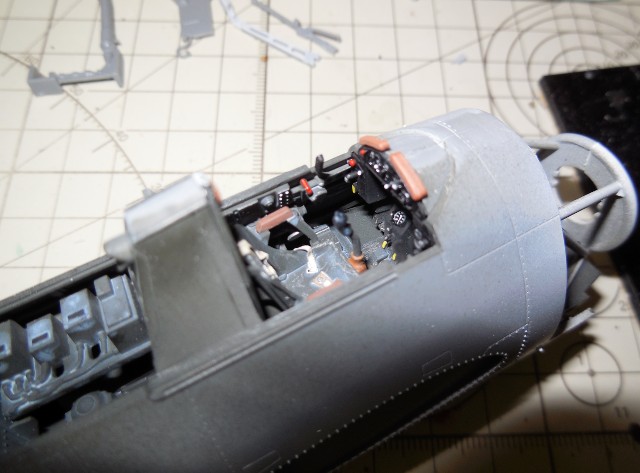
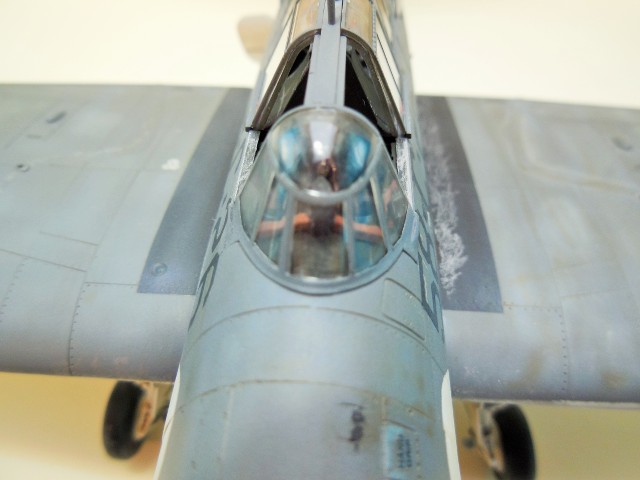
Hi guys, got started on the Avenger yesterday. Attached are two photos of the cockpit after basic assembly. Painting should be fun given the two tone nature of the pit.
Keith your Z25 continues to impress.
Ernest

Cosimodo

#335

Joined: September 03, 2013
KitMaker: 1,808 posts
Model Shipwrights: 871 posts

Posted: Wednesday, December 17, 2014 - 05:01 AM UTC
Keith,
Looking great in its base. A very sleek looking destroyer.
And the rigging looks very effective.
Ernest,
Looking forward to your build on the Avenger. It is one of the few planes I have built - an RNZAF version.
Have a great Xmas all and I hope I can get the Achilles off the rocks and make some progress in the New Year.
cheers
Michael
greif8
Joined: January 17, 2006
KitMaker: 673 posts
Model Shipwrights: 36 posts
Posted: Wednesday, December 17, 2014 - 10:39 AM UTC
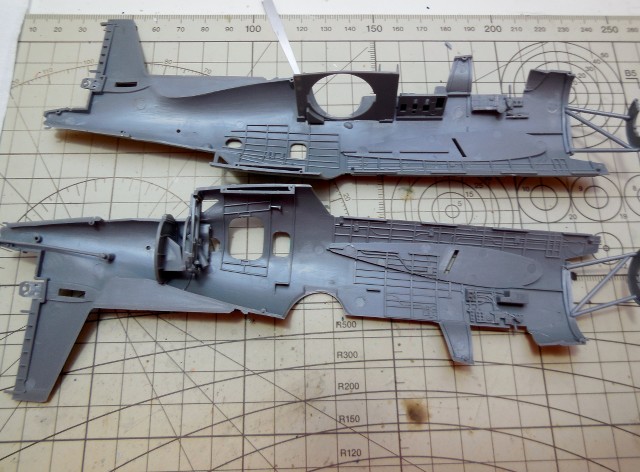
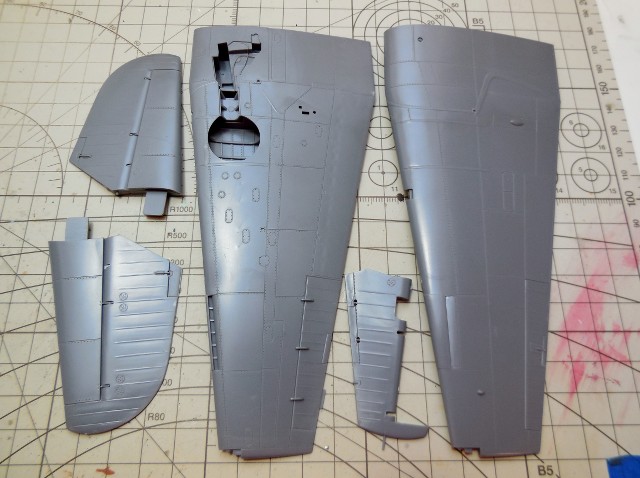
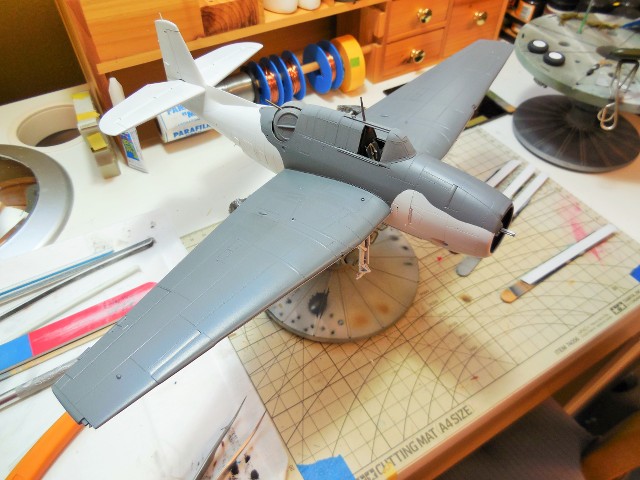
Made some more progress on the build last night. The wings, tail planes and rudder are complete. And the fuselage sides are also finished. I plan to build the engine and turret today after work.
greif8
Joined: January 17, 2006
KitMaker: 673 posts
Model Shipwrights: 36 posts
Posted: Thursday, December 18, 2014 - 10:41 AM UTC
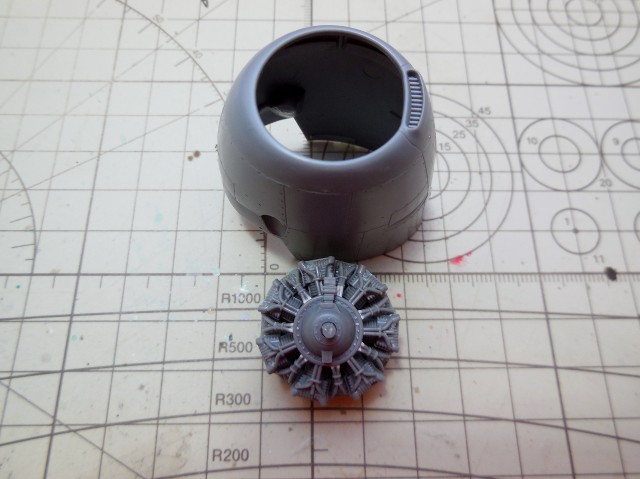
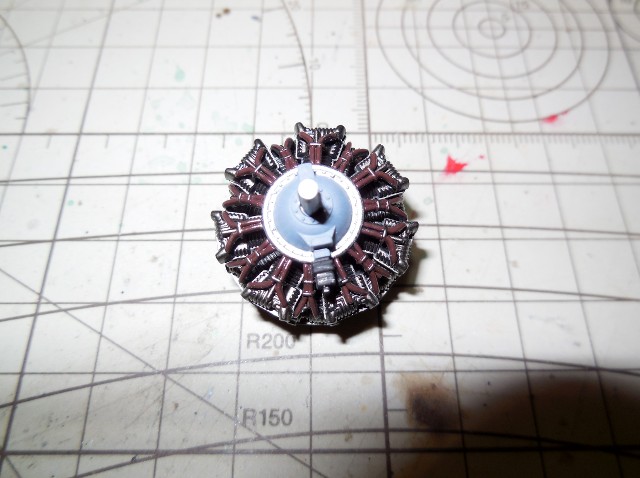
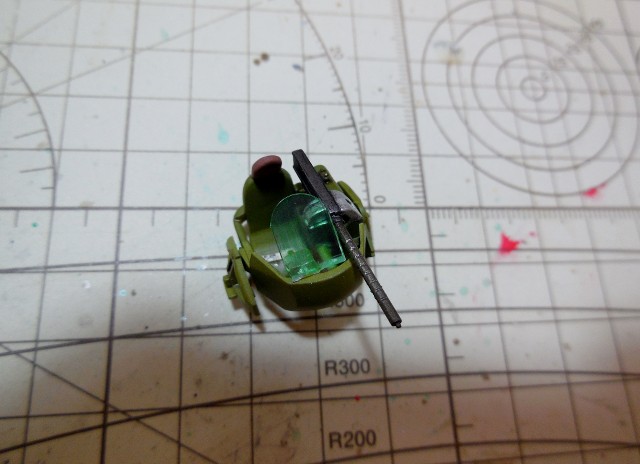
More mundane construction to post. The engine, and cowling are assembled, and the turret is partly finished waiting for painting.
beefy66
Joined: October 22, 2007
KitMaker: 971 posts
Model Shipwrights: 645 posts
Posted: Thursday, December 18, 2014 - 02:44 PM UTC
Looking a very clean build there so far Ernest looking forward to more on your build
Keith
Keith
greif8
Joined: January 17, 2006
KitMaker: 673 posts
Model Shipwrights: 36 posts
Posted: Thursday, December 18, 2014 - 09:54 PM UTC
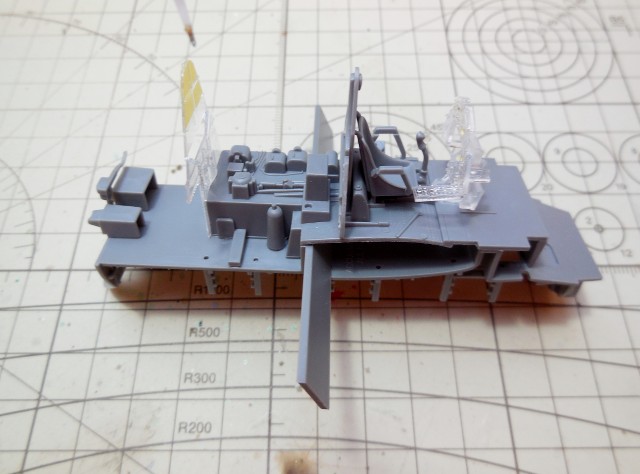
Thanks for the kind words Keith. I was off work today and spent several hours at the bench, getting a lot of things done with the build. Following are a few photos of the progress.
Ernest

Ernest
greif8
Joined: January 17, 2006
KitMaker: 673 posts
Model Shipwrights: 36 posts
Posted: Sunday, December 21, 2014 - 08:03 PM UTC
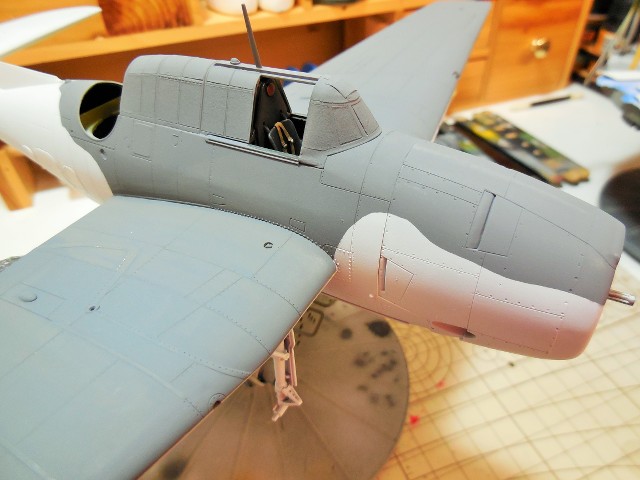
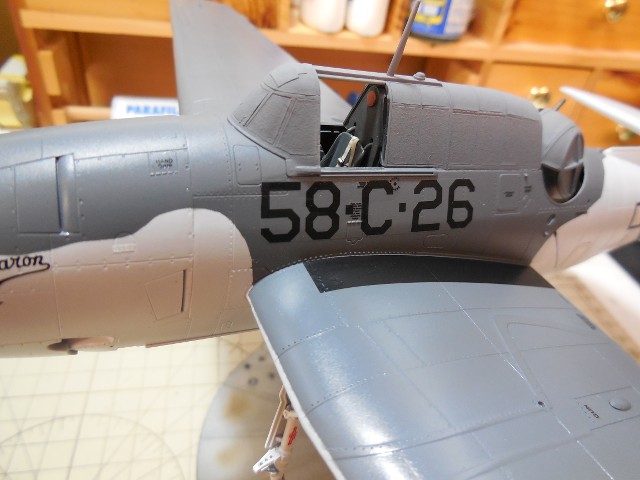
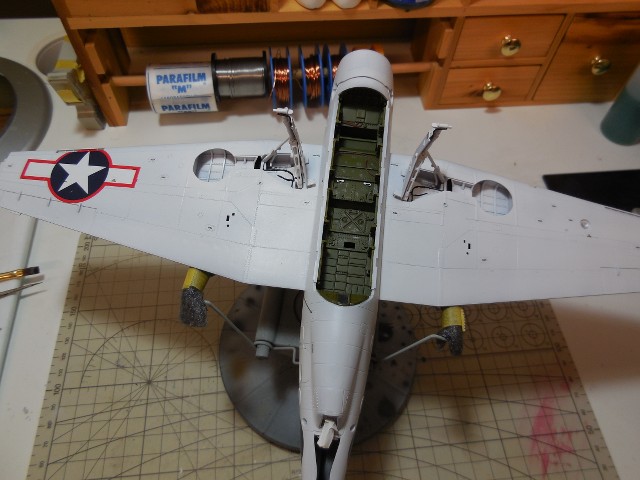
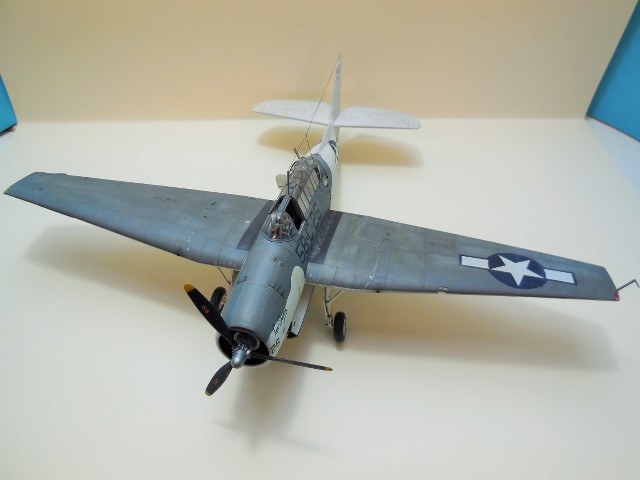
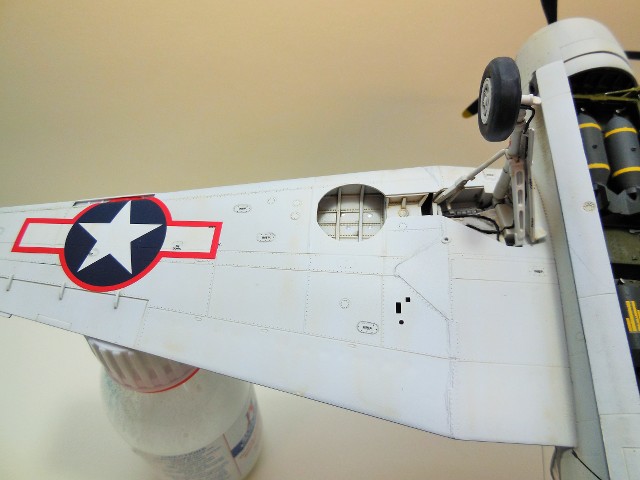
Hi guys, I accomplished a lot on the build over the past couple of days, finishing all the general construction. The fit of the wings and tailplane were excellent and only a very small amount if filler was needed in a couple of places. I don't normally construct the undercarriage until near the end of a build, but in this case I modified the brake line with a small scratch build and had to put the landing gear in place to make sure I got the part built right. I sprayed the plane with Alclad II white primer and it went down very smoothly; and since the primary color of the aircraft I am representing is white I managed to kill two birds with one stone. The Dark Gull Grey is Tamiya's XF-54. Both colors went on very smoothly and I debated whether to gloss coat the bird, but decided to do so in the end. The gloss coat is Alclad's Aqua Gloss, the first time I have used it. It did a good job covering smoothly; I wanted a satin finish and managed to get one. Decals will go on next, followed by weathering.
Ernest

Ernest

Aurora-7
#360

Joined: June 18, 2003
KitMaker: 1,020 posts
Model Shipwrights: 630 posts

Posted: Sunday, December 21, 2014 - 09:31 PM UTC
Keith,
Your display looks beautiful. Love how the water came out and the Zerstorer looks great in the waves!
Ernest,
Your Avenger is coming along nicely. Really like the work you've done in the cockpit.
Si, your Halifax is looking nice with it's paintjob so far. Look forward to seeing more of it.
Working for a university, I'll get from Christmas Eve to New Years day off - time to get some significant work done and post images. I feel so far behind and I was the one who wanted to start this campaign!


RedDuster

Joined: March 01, 2010
KitMaker: 7,078 posts
Model Shipwrights: 6,649 posts

Posted: Tuesday, December 23, 2014 - 12:34 AM UTC
Great job Keith, rigging and sea are superb, very effective.
Hi Ernst coming on well, watching with interest.
Not much progress on the Halibag for a while, hope to get back to it after Christmas.
Si
Hi Ernst coming on well, watching with interest.
Not much progress on the Halibag for a while, hope to get back to it after Christmas.
Si
greif8
Joined: January 17, 2006
KitMaker: 673 posts
Model Shipwrights: 36 posts
Posted: Tuesday, December 23, 2014 - 02:05 PM UTC
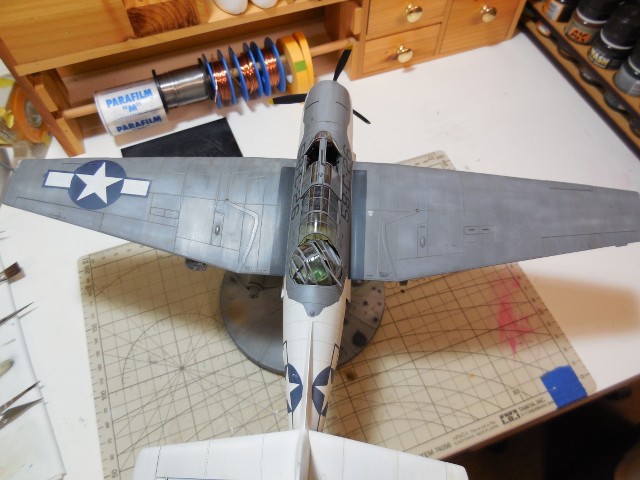
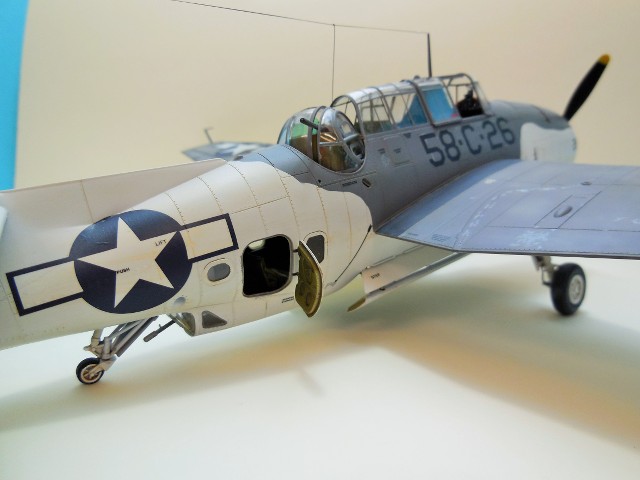
Thanks for the kind comments guys. I have been getting to spend a lot of time at the bench; so I'm progressing much more rapidly on this build then normal. The following photos show the plane decaled and than with about 75% of the weathering complete. I am trying out a line of weathering medium from True Earth to replicate the splotchy fading that carrier aircraft often exhibited and for the pin wash that I'll get to today. I airbrushed the medium, which is a water based glaze onto the aircraft, laying down the fading first followed by general weathering. It turned out ok, but like all new techniques I need to practice to improve the process. Unfortunately, the weathering does not show up well in the photos; I will see if I can take some better shots when I have finished the builds.

beefy66
Joined: October 22, 2007
KitMaker: 971 posts
Model Shipwrights: 645 posts
Posted: Tuesday, December 23, 2014 - 02:19 PM UTC
Wow Ernest very impressive build and speed there looking real nice.
Keith
Keith
Vista85

Joined: January 03, 2014
KitMaker: 118 posts
Model Shipwrights: 7 posts

Posted: Tuesday, December 23, 2014 - 02:43 PM UTC
really well done Keith, nice details on your ship!
Ernest superfast work on your Avenger, i'm very interested at wheatering phase
So, it's time to start my Z-class destroyer....
Happy Christmas at all!
Ernest superfast work on your Avenger, i'm very interested at wheatering phase
So, it's time to start my Z-class destroyer....
Happy Christmas at all!
greif8
Joined: January 17, 2006
KitMaker: 673 posts
Model Shipwrights: 36 posts
Posted: Wednesday, December 24, 2014 - 02:37 PM UTC
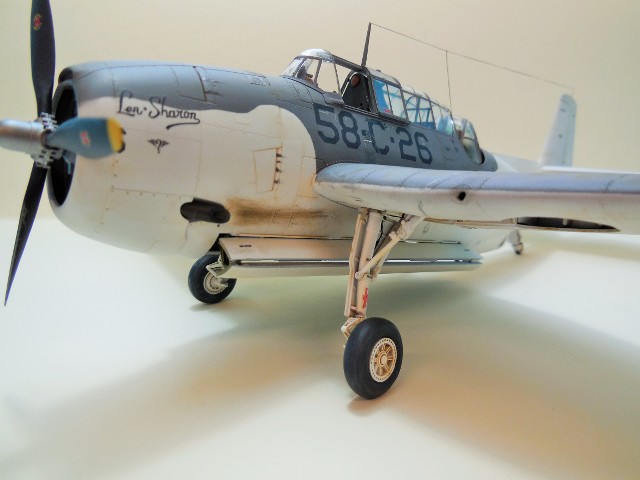
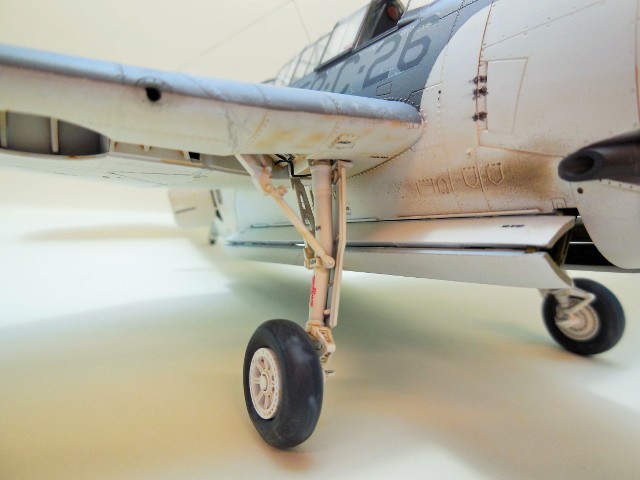
Thank you for the nice words Dario and Keith, this build has gone well. And this one is a wrap! I opted for a very light panel wash, as the first one I did with a darker color overpowered the white, so I redid it. Overall I am satisfied with the weathering, the True Earth finishing products worked well at representing the splotchy faded effect that I was after. The rest of the weathering was done with a combination of Tamiya weathering agents and AK Interactive finishing products. I wanted to achieve a well worn, but not ready for the scrape yard look and got close.
I don't normally build as fast as I did on this aircraft. I have had a lot of time off since 16 Dec, and this will continue until 28 Feb as I am on what is known in the U.S. Military as Terminal Leave prior to retiring on 01 Mar. I plan to get several build in during that time!
Ernest


I don't normally build as fast as I did on this aircraft. I have had a lot of time off since 16 Dec, and this will continue until 28 Feb as I am on what is known in the U.S. Military as Terminal Leave prior to retiring on 01 Mar. I plan to get several build in during that time!
Ernest
Cosimodo
#335
Joined: September 03, 2013
KitMaker: 1,808 posts
Model Shipwrights: 871 posts
Posted: Thursday, December 25, 2014 - 02:27 AM UTC
Fantastic looking Avenger Ernest!
Since you've got time on your hands I look forward to seeing more great builds.
Cheers
Michael
Since you've got time on your hands I look forward to seeing more great builds.
Cheers
Michael
beefy66
Joined: October 22, 2007
KitMaker: 971 posts
Model Shipwrights: 645 posts
Posted: Friday, December 26, 2014 - 05:47 PM UTC
Looks great there Ernest
Thank you for the kind words gent,s hope Santa was good to you all
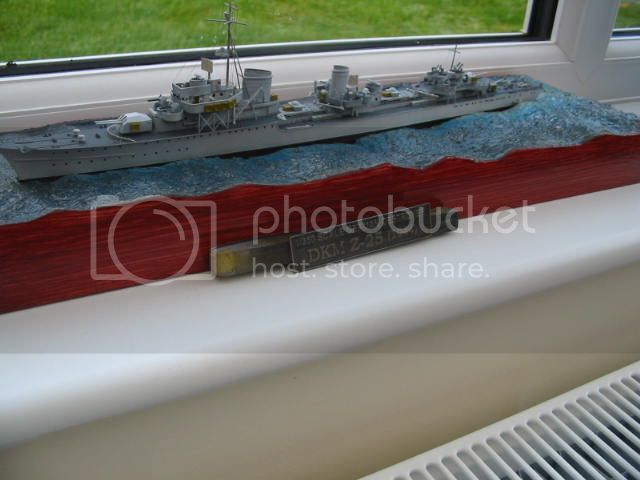
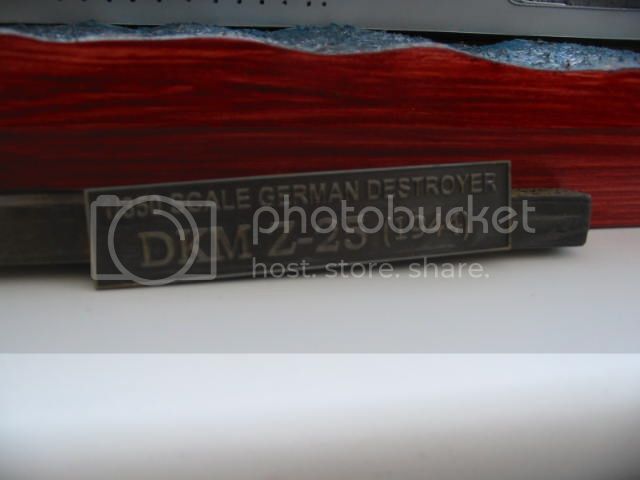
I have done a little more work with the Base I gave it a Mahogany stain varnish and painted up the name plate using Mr Hobby matalic paints
Keith
Thank you for the kind words gent,s hope Santa was good to you all
I have done a little more work with the Base I gave it a Mahogany stain varnish and painted up the name plate using Mr Hobby matalic paints
Keith
greif8
Joined: January 17, 2006
KitMaker: 673 posts
Model Shipwrights: 36 posts
Posted: Saturday, December 27, 2014 - 01:20 PM UTC
The stain looks beautiful Keith and it combines well with the water.
Ernest
Ernest
RedDuster
Joined: March 01, 2010
KitMaker: 7,078 posts
Model Shipwrights: 6,649 posts
Posted: Sunday, December 28, 2014 - 02:03 AM UTC
Really nice job Keith.
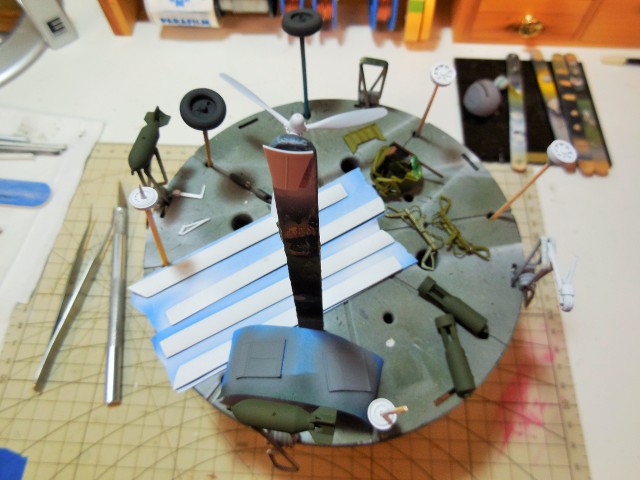
Bit more progress on the Halibag.
All the masking off, the turrets fitted and the small portholes cleared out and refilled with clear, still not dry at this time.
parts for the undercarriage all painted.
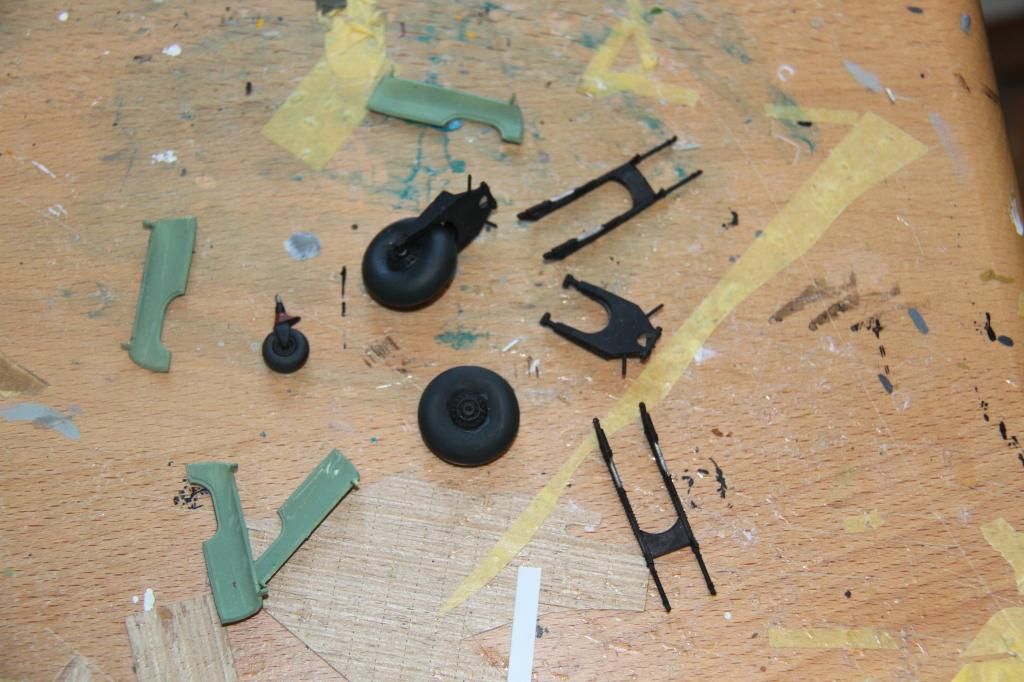
Main undercarriage fitted.
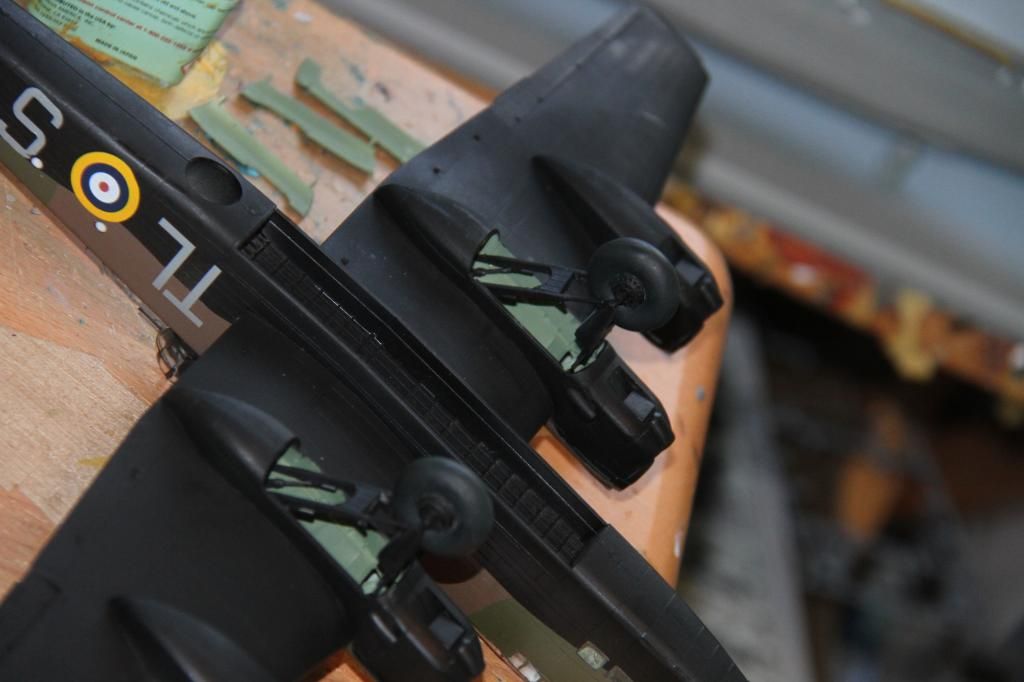
Si
Bit more progress on the Halibag.
All the masking off, the turrets fitted and the small portholes cleared out and refilled with clear, still not dry at this time.

parts for the undercarriage all painted.

Main undercarriage fitted.

Si
RedDuster
Joined: March 01, 2010
KitMaker: 7,078 posts
Model Shipwrights: 6,649 posts
Posted: Saturday, January 03, 2015 - 03:32 AM UTC
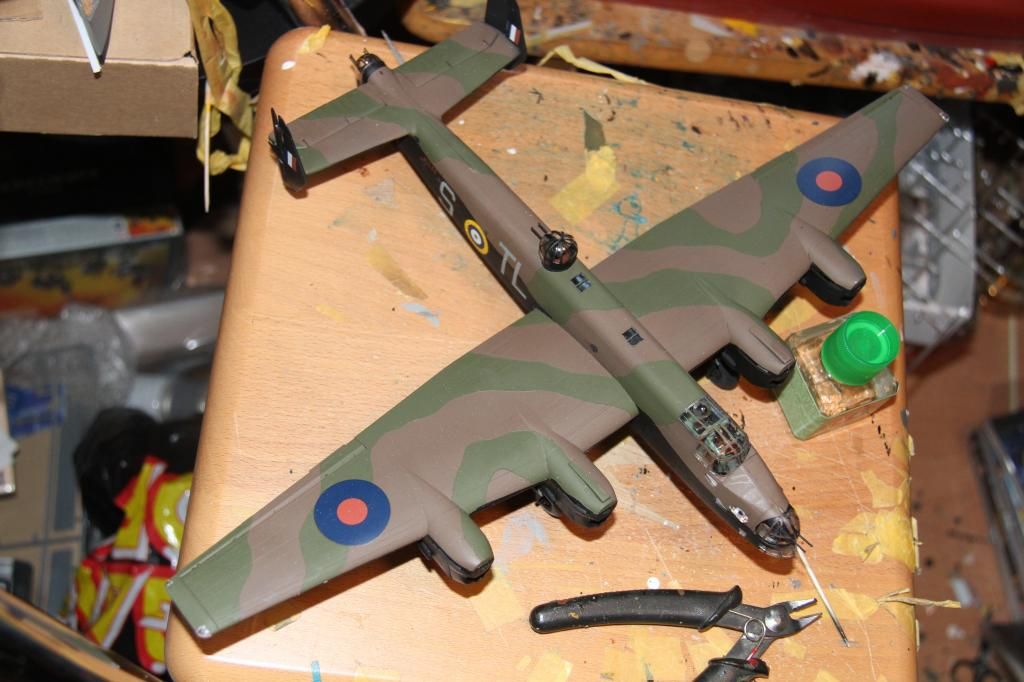
Onward and upward, tail wheel also fitted and sat on her undercart for the first time
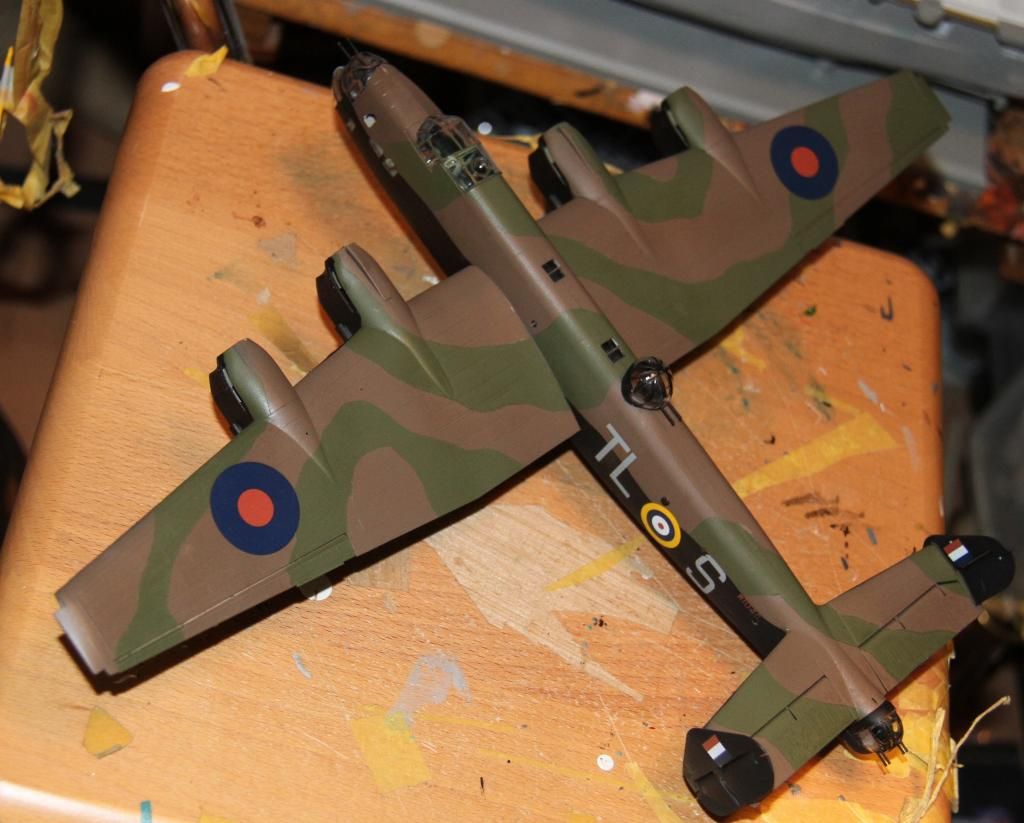
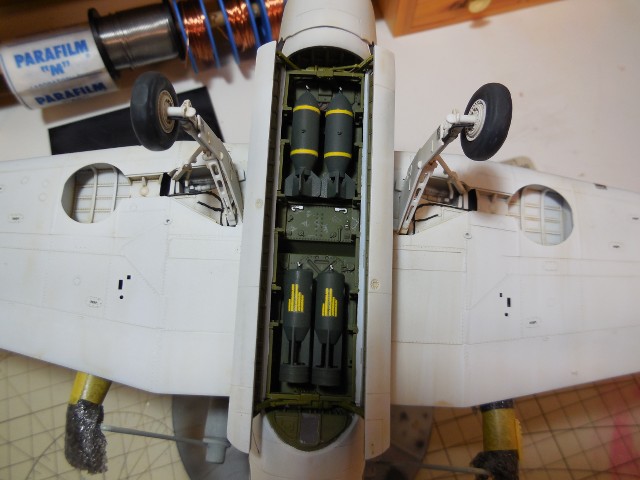
back upside down and fitting the bomb doors, one side done, they did need quite a bit of fettling to fit. Each door needs cutting in two, down the an engraved line two thirds of the way aft, but they still need the be filled back a bit to ft.
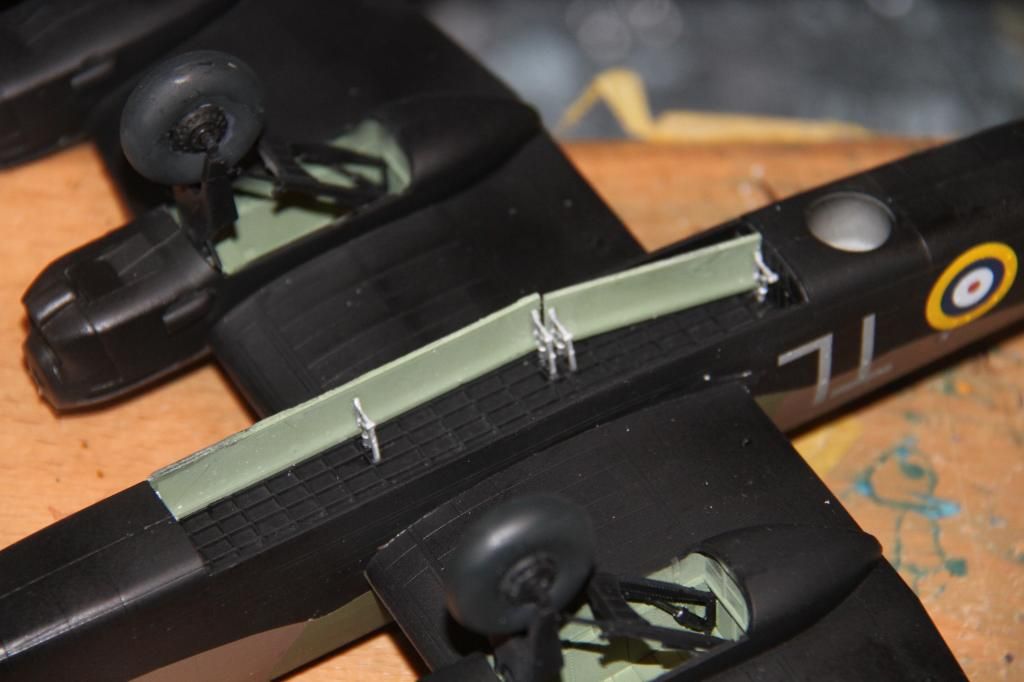
Both sides fitted with the mines test fitted still on their mould plugs.
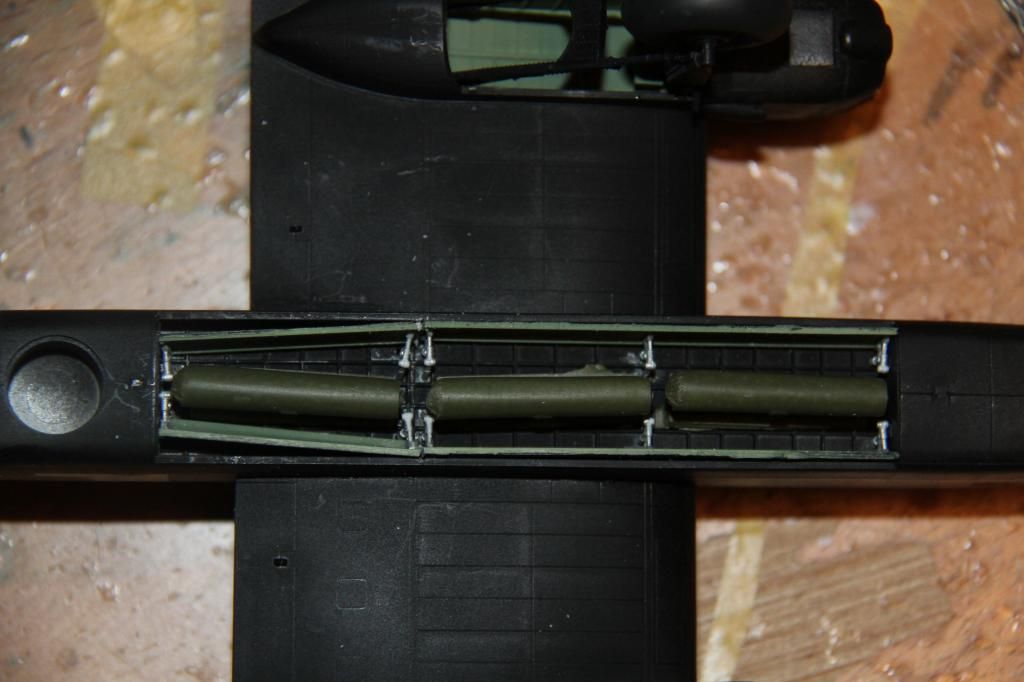
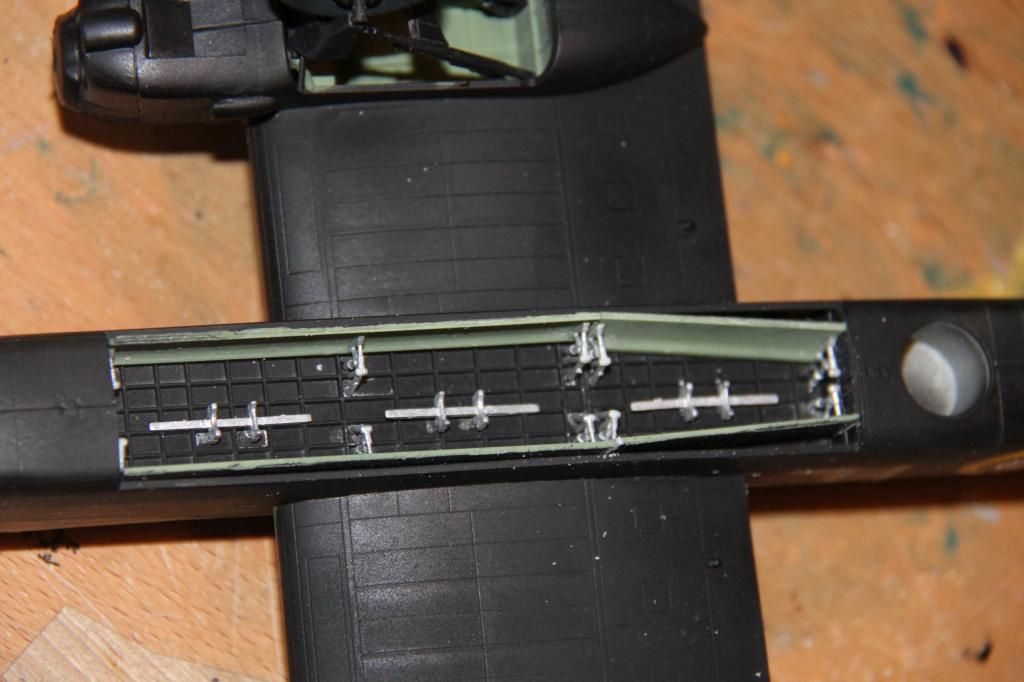
I have used the kit bomb carriers, they are a bit small, but will be invisible under the mines, they did need a slot cutting in their mountings so they would fit on the bomb bay centre line.
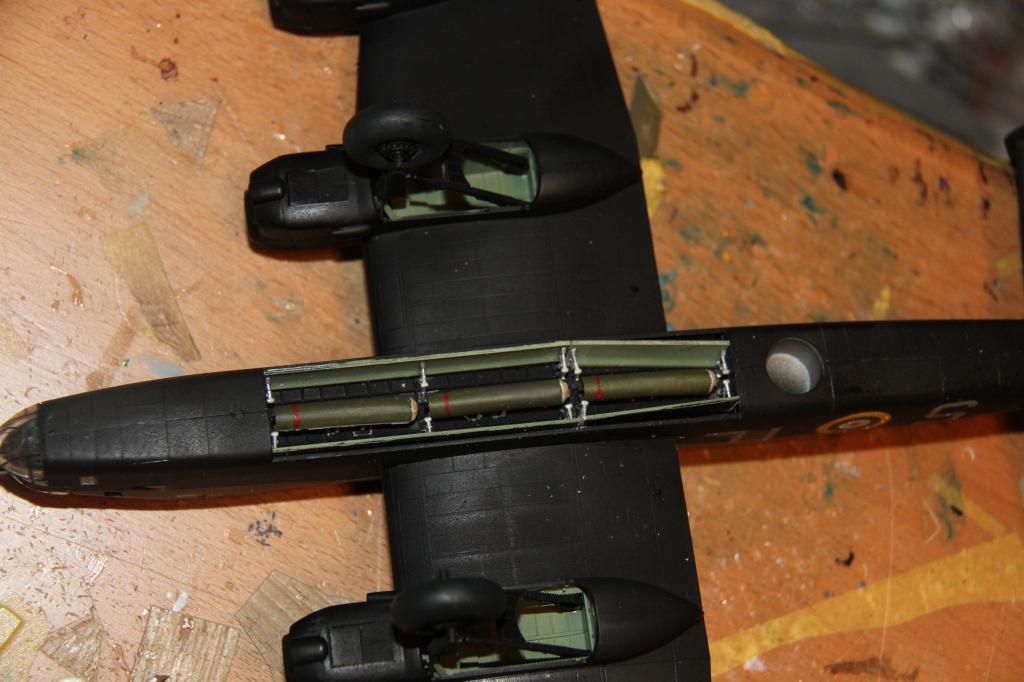
and the mines in place.
more soon.
Si

back upside down and fitting the bomb doors, one side done, they did need quite a bit of fettling to fit. Each door needs cutting in two, down the an engraved line two thirds of the way aft, but they still need the be filled back a bit to ft.

Both sides fitted with the mines test fitted still on their mould plugs.

I have used the kit bomb carriers, they are a bit small, but will be invisible under the mines, they did need a slot cutting in their mountings so they would fit on the bomb bay centre line.

and the mines in place.

more soon.
Si
greif8
Joined: January 17, 2006
KitMaker: 673 posts
Model Shipwrights: 36 posts
Posted: Saturday, January 03, 2015 - 04:16 PM UTC
Your Halifax is looking for nice thus far Simon.
RedDuster
Joined: March 01, 2010
KitMaker: 7,078 posts
Model Shipwrights: 6,649 posts
Posted: Sunday, January 04, 2015 - 01:39 AM UTC
Thanks Ernest,
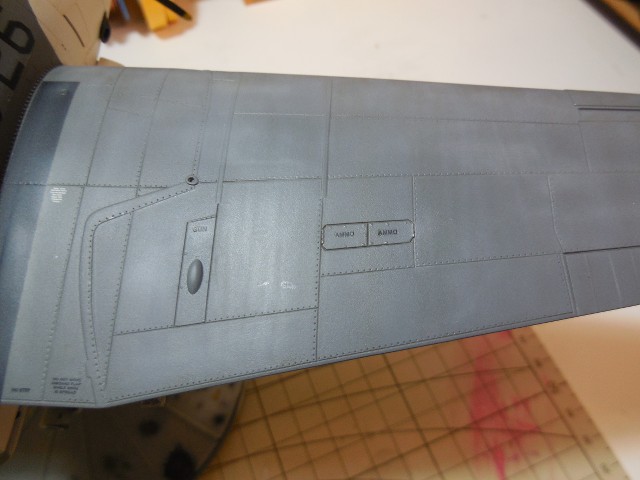
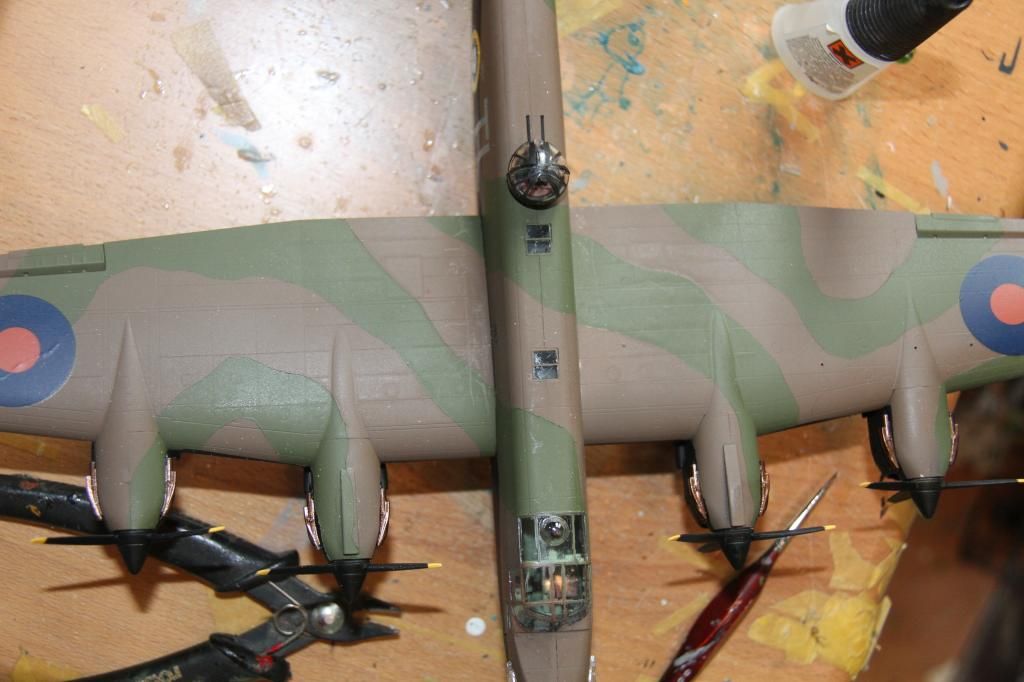
bit more progress, Wingtip lights and transparent side blisters added to the nose, the white around the blister is Krystal clear, which should dry that way.
Undercart doors on as well.
Just props and exhausts and few odds and sods to go.
Si
bit more progress, Wingtip lights and transparent side blisters added to the nose, the white around the blister is Krystal clear, which should dry that way.

Undercart doors on as well.

Just props and exhausts and few odds and sods to go.
Si
greif8
Joined: January 17, 2006
KitMaker: 673 posts
Model Shipwrights: 36 posts
Posted: Monday, January 05, 2015 - 01:16 PM UTC
Great work Simon, the paint job is very pleasing to the eye. It looks very smooth!
Ernest
Ernest
RedDuster
Joined: March 01, 2010
KitMaker: 7,078 posts
Model Shipwrights: 6,649 posts
Posted: Monday, January 05, 2015 - 05:28 PM UTC
Thanks Ernest,
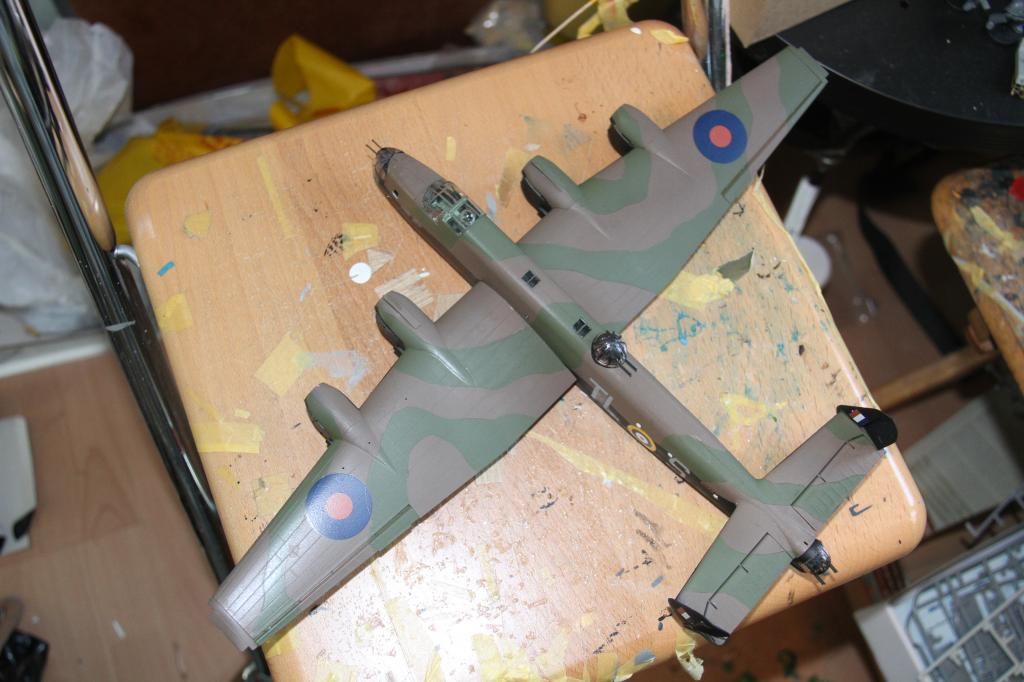
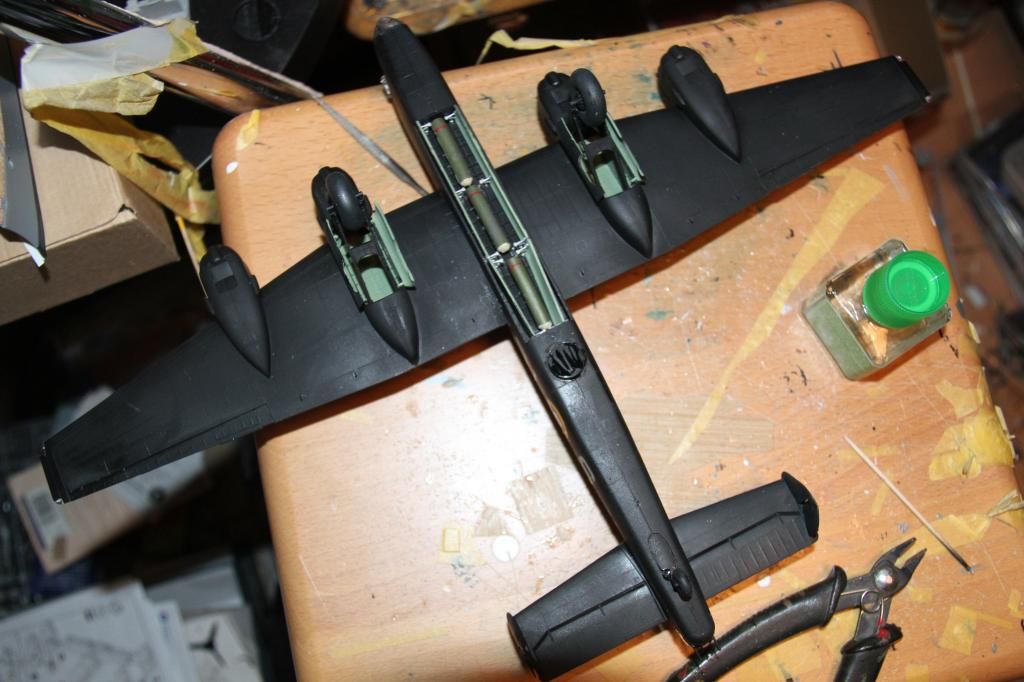
good old Tamiya Rattle cans for the upper surfaces and citadel "Chaos Black" for the underside, again sprayed straight out of the can.
Si
good old Tamiya Rattle cans for the upper surfaces and citadel "Chaos Black" for the underside, again sprayed straight out of the can.
Si
RedDuster
Joined: March 01, 2010
KitMaker: 7,078 posts
Model Shipwrights: 6,649 posts
Posted: Tuesday, January 06, 2015 - 10:37 PM UTC
Nearly there,
Props and exhausts on.
A few fragile bits fitted and just need a coat of paint and the job is done.
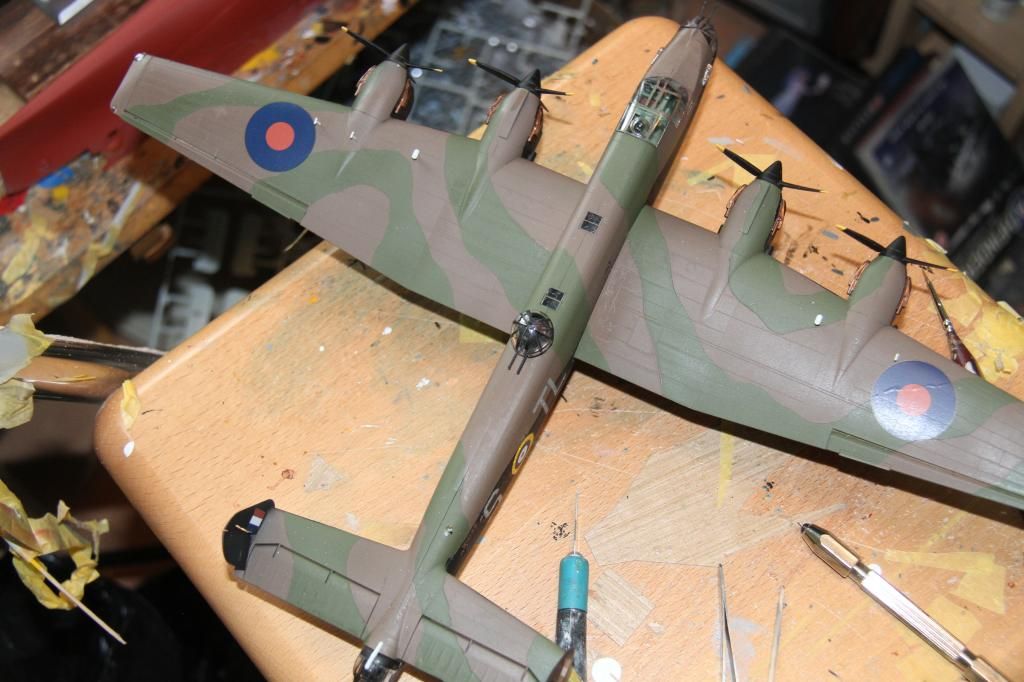
Then it is one with a ship, don't know which one yet, but will either be very early, or very late war.
Si
Props and exhausts on.

A few fragile bits fitted and just need a coat of paint and the job is done.

Then it is one with a ship, don't know which one yet, but will either be very early, or very late war.
Si
 |

WEB HOSTING BY


Copyright ©2021 Model Shipwrights and Kitmaker Network, a subsidiary of Silver Star Enterprises
All Rights Reserved. Please read our Conditions of Use and Privacy Policy.
All Rights Reserved. Please read our Conditions of Use and Privacy Policy.