

Looking very sharp in its base Keith. I wish I had the nous to do that.
cheers
Michael


Go to modelshipwrights.com for the current dynamic site!
Campaigns
Want to be part of a group build? This is where to start, plan, and meet about them.
Want to be part of a group build? This is where to start, plan, and meet about them.
Hosted by Jim Starkweather
Official: Battle of the Atlantic 75th Anniv

Cosimodo

#335

Joined: September 03, 2013
KitMaker: 1,808 posts
Model Shipwrights: 871 posts

Posted: Wednesday, October 29, 2014 - 12:14 PM UTC
Cosimodo
#335
Joined: September 03, 2013
KitMaker: 1,808 posts
Model Shipwrights: 871 posts
Posted: Wednesday, October 29, 2014 - 06:53 PM UTC
27 - 29 October 1939 HMS Achilles met up with HM Cruisers Exeter and Cumberland to begin a joint patrol in the South Atlantic working there way up the coast of South America.
Some small progress.
Added the screws
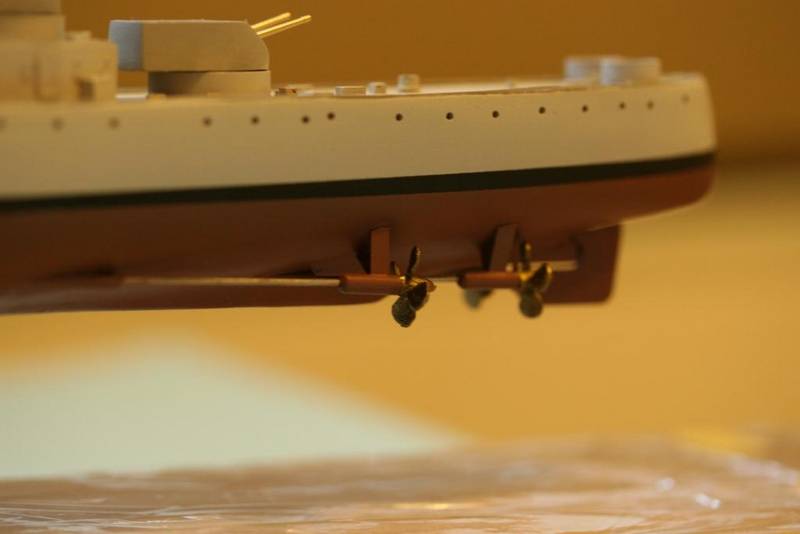
Posed the turrets with their Master barrels (the ship now sits on a base)

And almost managed to flatten the gun deck. Thanks to Bill for the suggestion! Once it is glued in place it should be fine.
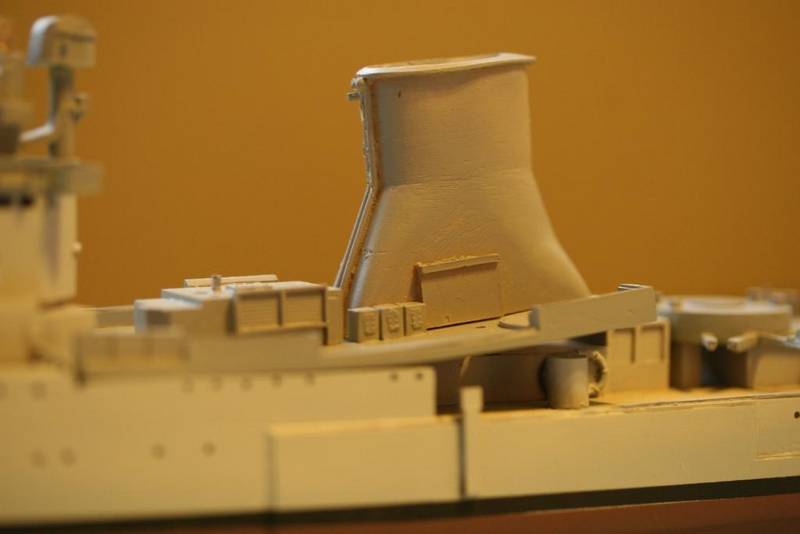
Next up is some weathering on the hull.
cheers
Michael
Some small progress.
Added the screws
Posed the turrets with their Master barrels (the ship now sits on a base)
And almost managed to flatten the gun deck. Thanks to Bill for the suggestion! Once it is glued in place it should be fine.
Next up is some weathering on the hull.
cheers
Michael

md72
#439

Joined: November 05, 2005
KitMaker: 4,950 posts
Model Shipwrights: 248 posts

Posted: Friday, October 31, 2014 - 07:01 PM UTC
OK, I'm off. Academy 1/72 F4F-4 Wildcat in Atlantic markings.
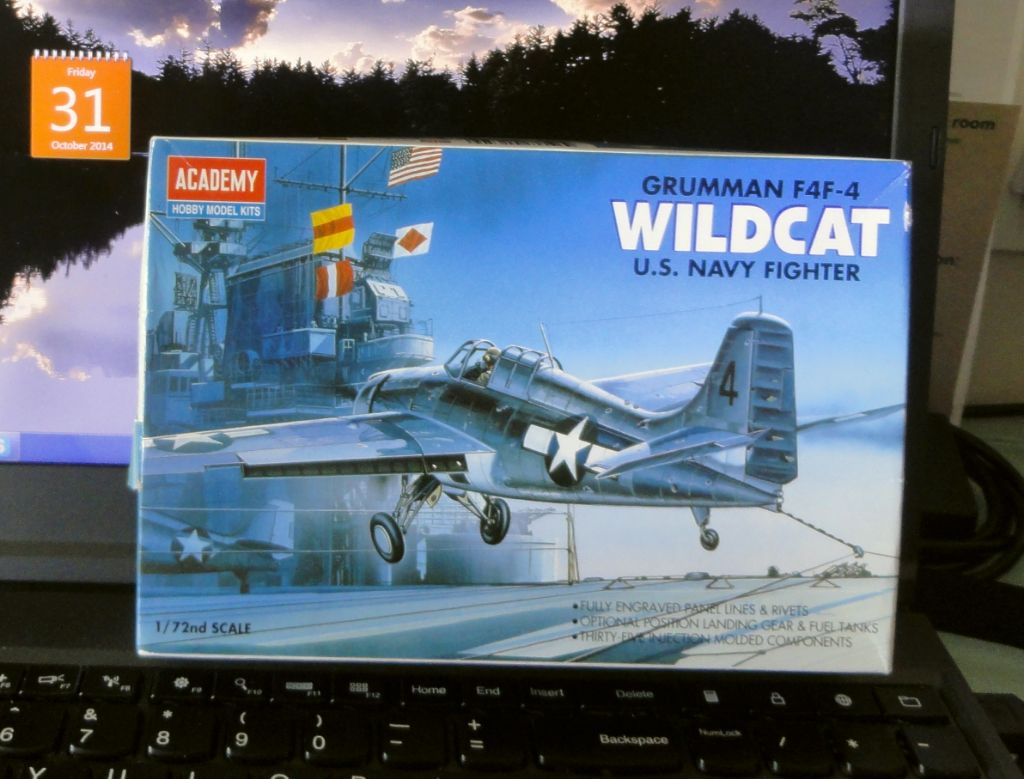
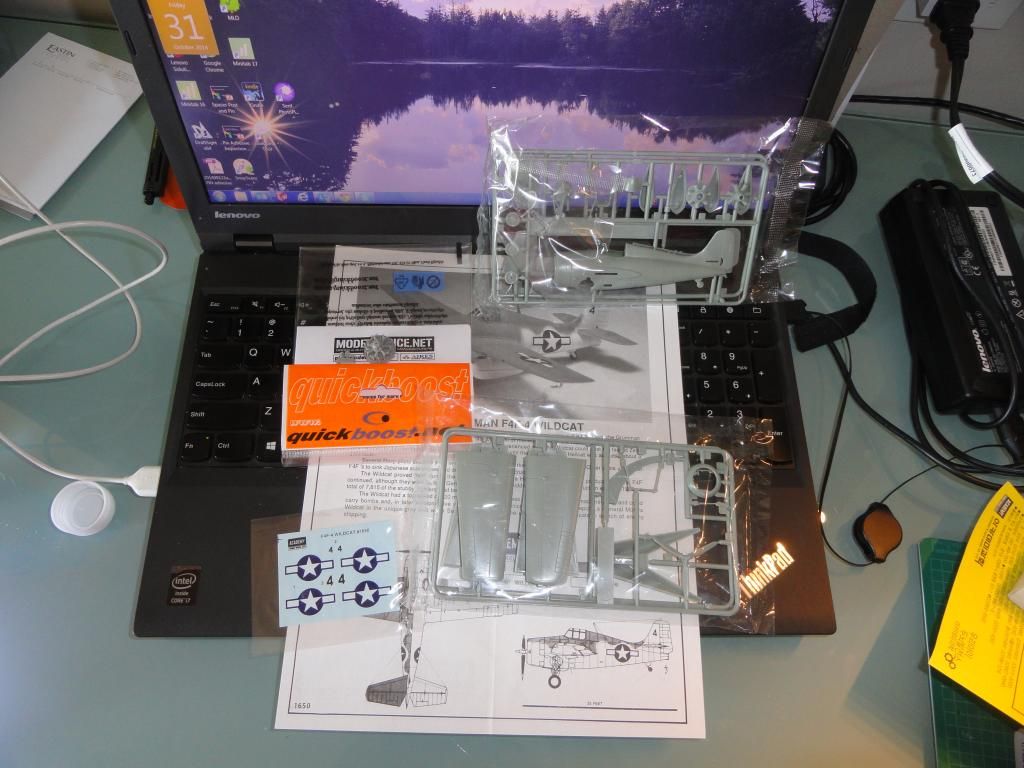
Splurged on the Quickboost engine. Hope I have most of the right stuff over here to get good and started.


Splurged on the Quickboost engine. Hope I have most of the right stuff over here to get good and started.


Fordboy
Joined: July 13, 2004
KitMaker: 2,169 posts
Model Shipwrights: 1,597 posts

Posted: Monday, November 03, 2014 - 08:48 AM UTC
Ahoy Michael
The word "mouthwatering" comes to mind.
Great effort thus far.
Cheers
Sean
The word "mouthwatering" comes to mind.
Great effort thus far.
Cheers
Sean

beefy66

Joined: October 22, 2007
KitMaker: 971 posts
Model Shipwrights: 645 posts

Posted: Monday, November 03, 2014 - 10:03 PM UTC
Cheers Michael the Achilles is coming along at a nice pace to
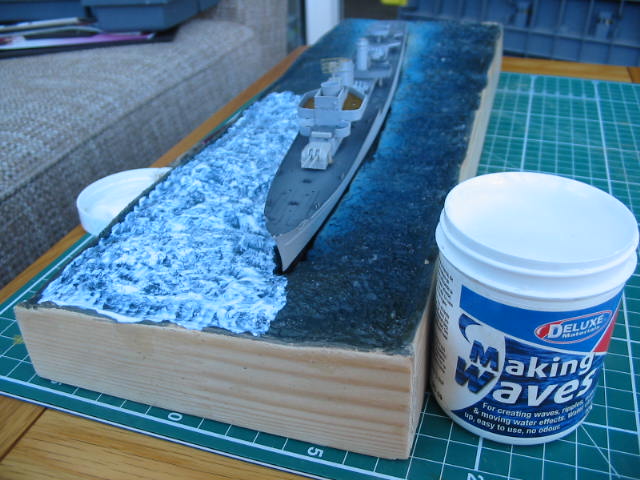
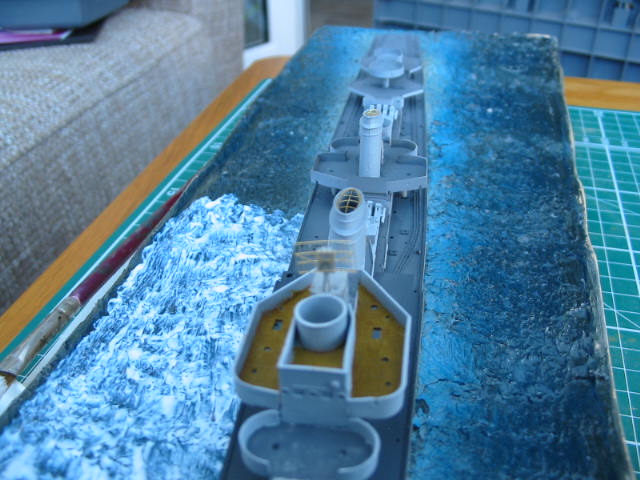
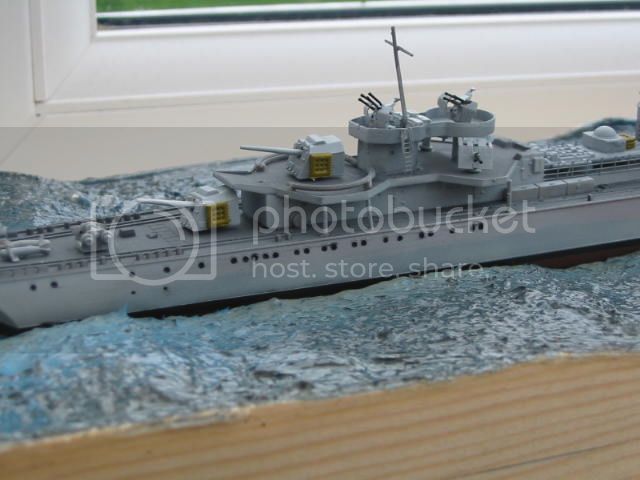
A bit better for taking some photos this week I have been adding a couple of layers of Deluxe materials making waves this stuff drys clear and hard so gives you a good shine to your water effect also added some of the PE from the kit aerials and funnel tops
Keith
A bit better for taking some photos this week I have been adding a couple of layers of Deluxe materials making waves this stuff drys clear and hard so gives you a good shine to your water effect also added some of the PE from the kit aerials and funnel tops
Keith
beefy66
Joined: October 22, 2007
KitMaker: 971 posts
Model Shipwrights: 645 posts
Posted: Tuesday, November 04, 2014 - 10:49 PM UTC
Another small update all main weapons built up and ready for paint
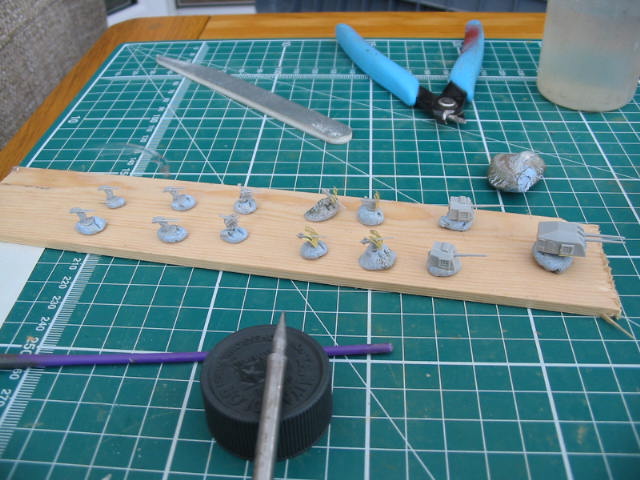
Keith
Keith

RedDuster

Joined: March 01, 2010
KitMaker: 7,078 posts
Model Shipwrights: 6,649 posts

Posted: Sunday, November 09, 2014 - 01:25 AM UTC
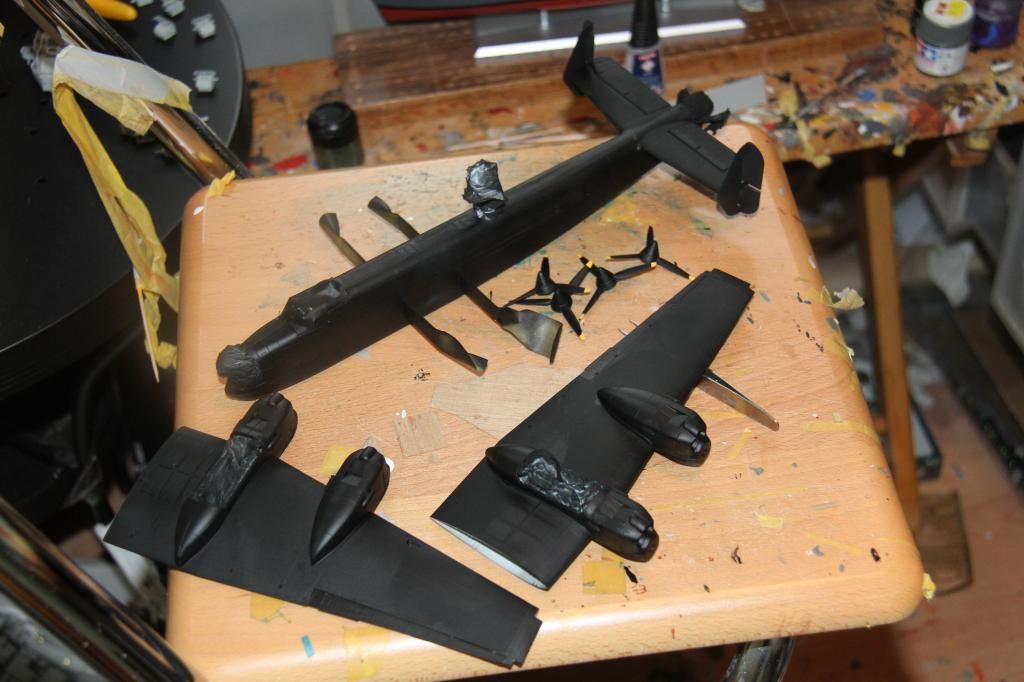
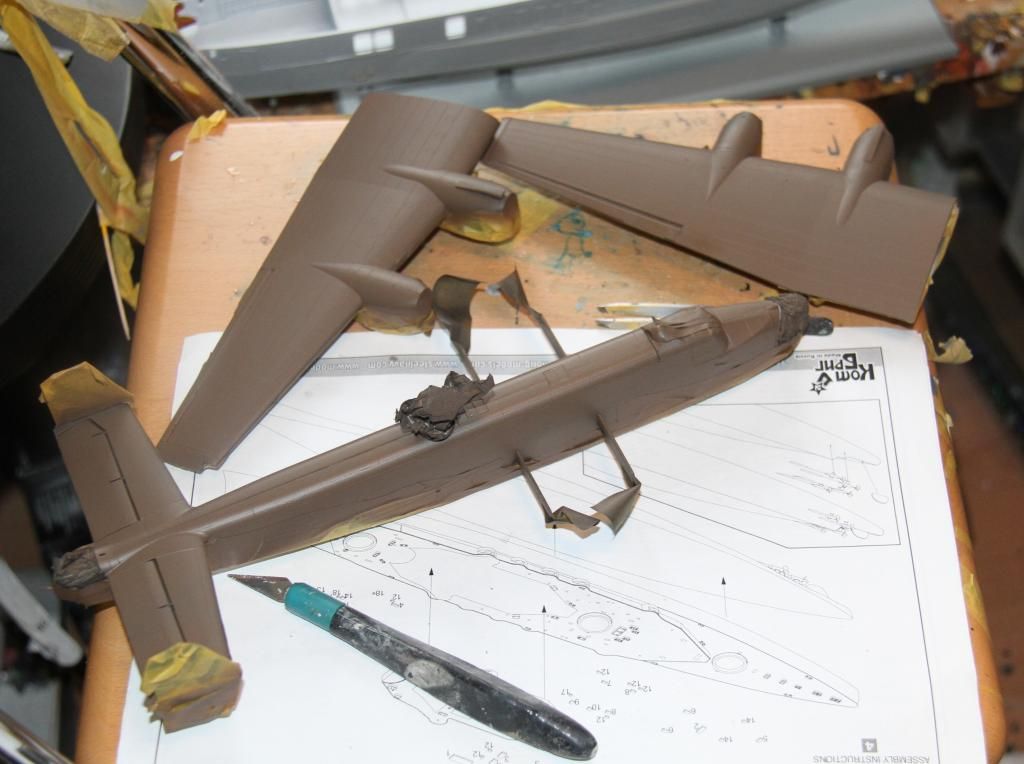
A bit more progress on the Halibag masking on the fuselage done. Did not like the new yellow eduard masks as much as the old vinyl ones, gave up on the coxkpit and the turrets, will hand pain the frames.
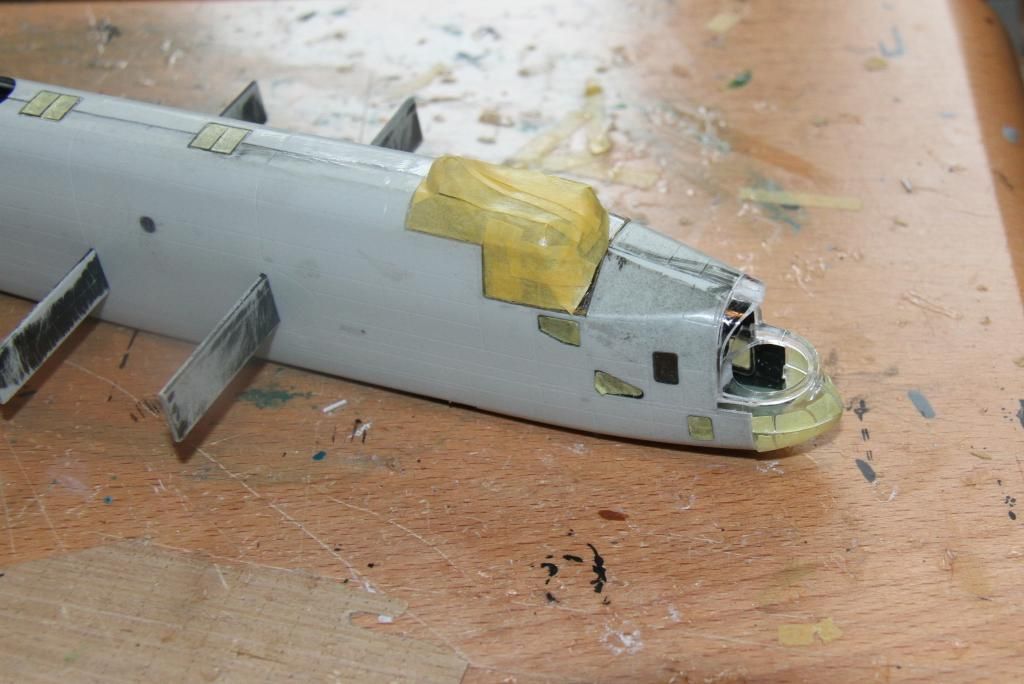
sprayed citadel chaos black.
Si

sprayed citadel chaos black.

Si
Vista85

Joined: January 03, 2014
KitMaker: 118 posts
Model Shipwrights: 7 posts

Posted: Thursday, November 13, 2014 - 01:55 AM UTC
Really well done guys, nice progress with your works!
beefy66
Joined: October 22, 2007
KitMaker: 971 posts
Model Shipwrights: 645 posts
Posted: Saturday, November 15, 2014 - 03:30 PM UTC
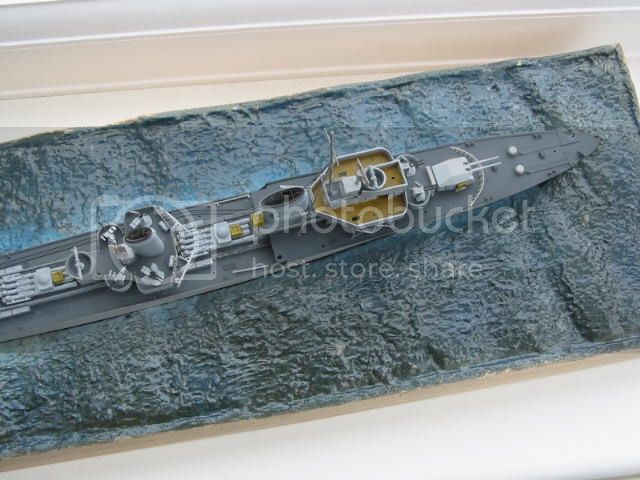
OK first attempt at doing 1/350 railings worked with PE before on amour models but this is my first with ships at this scale hope my hands stop shacking for the rest of them :banghead:
RedDuster
Joined: March 01, 2010
KitMaker: 7,078 posts
Model Shipwrights: 6,649 posts
Posted: Saturday, November 15, 2014 - 03:47 PM UTC
Tidy start on the railings Keith.
Keep going like that and it will look great.
Si
Keep going like that and it will look great.
Si
RedDuster
Joined: March 01, 2010
KitMaker: 7,078 posts
Model Shipwrights: 6,649 posts
Posted: Monday, November 17, 2014 - 02:07 AM UTC
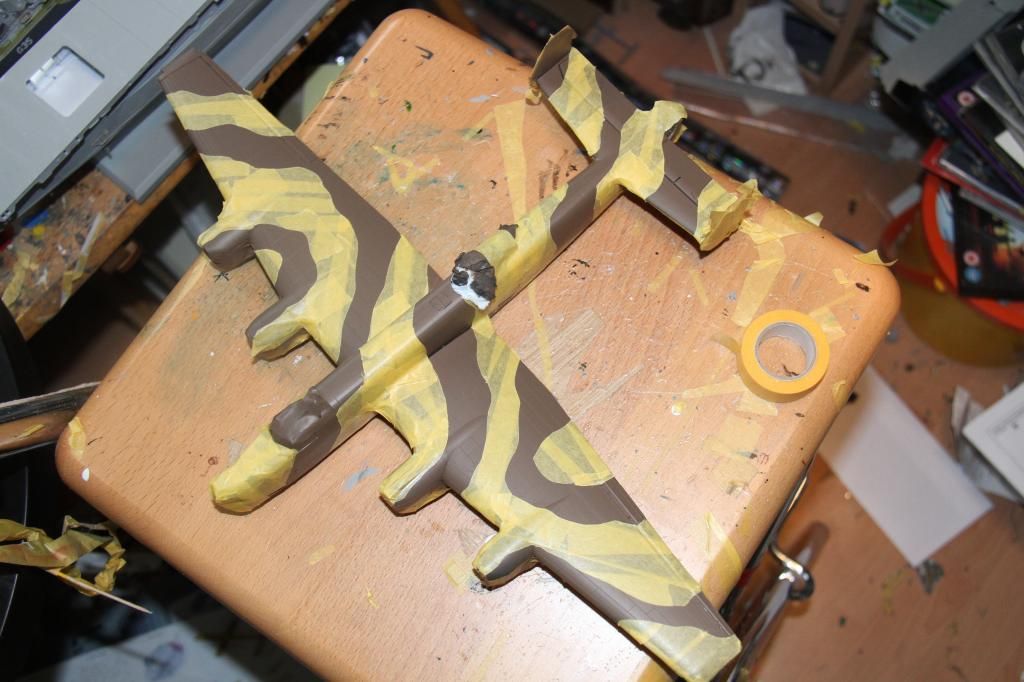
On with the dreaded masking, the night black masked off.
and the upper surfaces shot with Tamiya dark earth.
more masking soon.
Si

and the upper surfaces shot with Tamiya dark earth.

more masking soon.
Si

Shipshape
Joined: November 23, 2014
KitMaker: 12 posts
Model Shipwrights: 11 posts

Posted: Sunday, November 23, 2014 - 03:18 AM UTC
Really enjoying your build. On this side of the pond we do not get to see many of the wonderful aircraft that served Britain during WWII.
Rick
Rick
Removed by original poster on 11/23/14 - 22:33:44 (GMT).
RedDuster
Joined: March 01, 2010
KitMaker: 7,078 posts
Model Shipwrights: 6,649 posts
Posted: Sunday, November 23, 2014 - 03:48 AM UTC
Thanks Rick,
I am having fun with this.
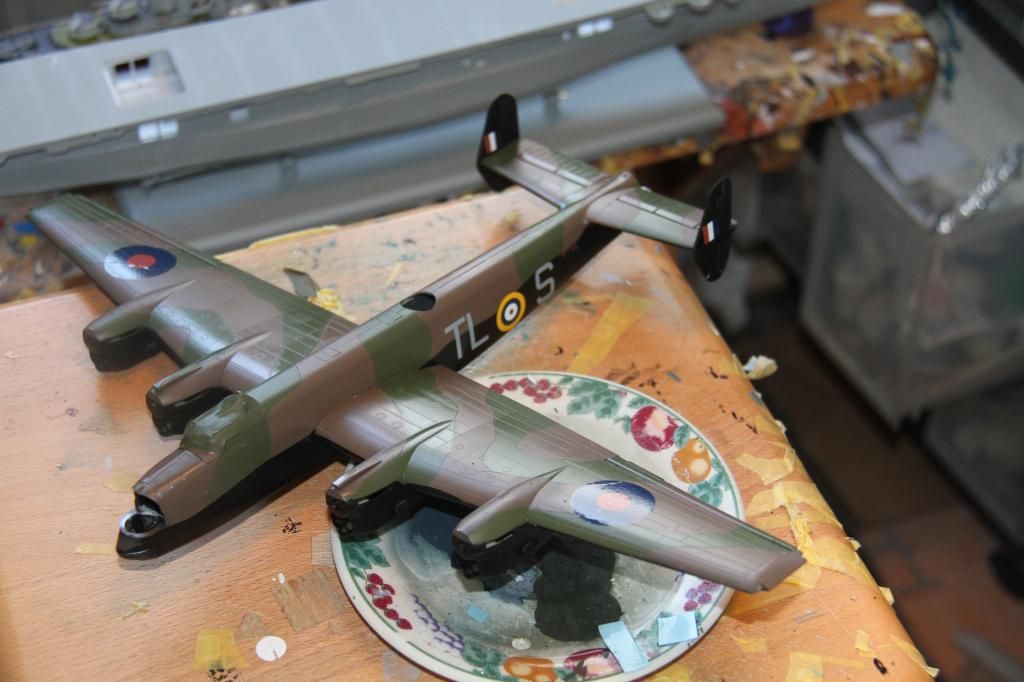
The Halifax was second fiddle to the Lancaster, but the story of this attack on the Tirpitz, and this particular aircraft, The wreck of which is in the RAF Museum at Hendon, not many miles from where I live.
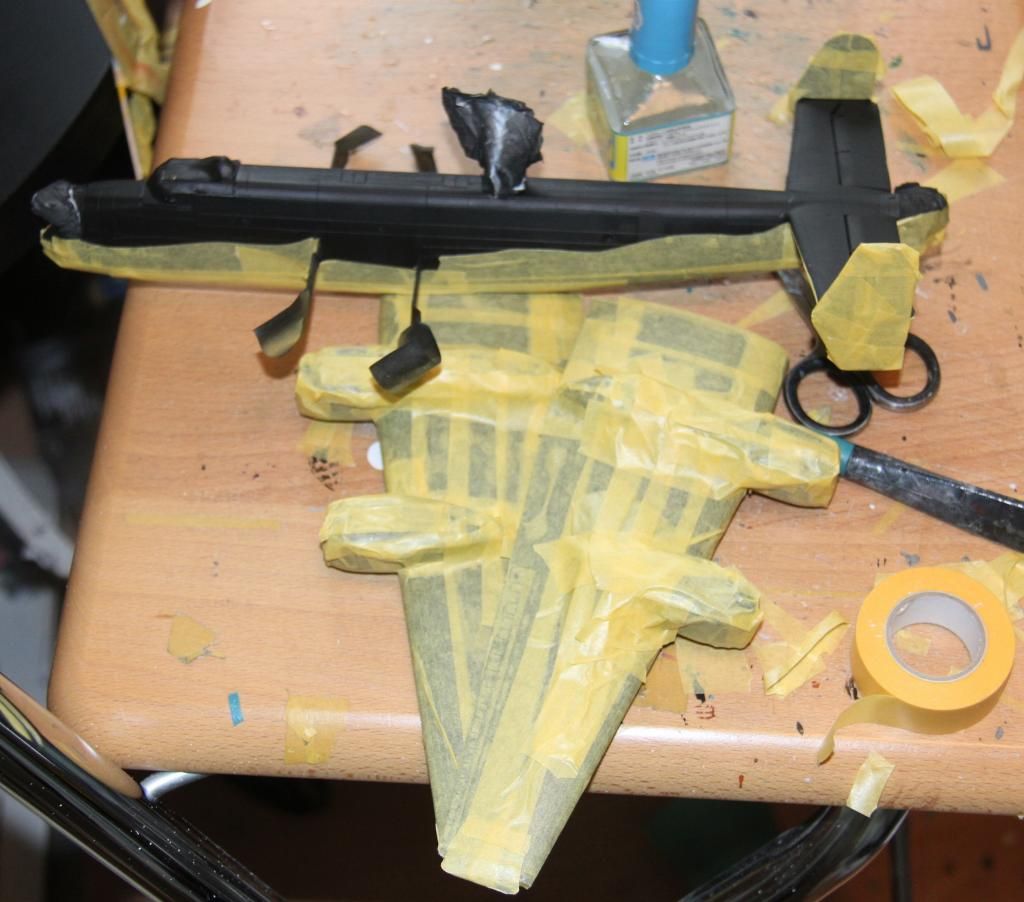
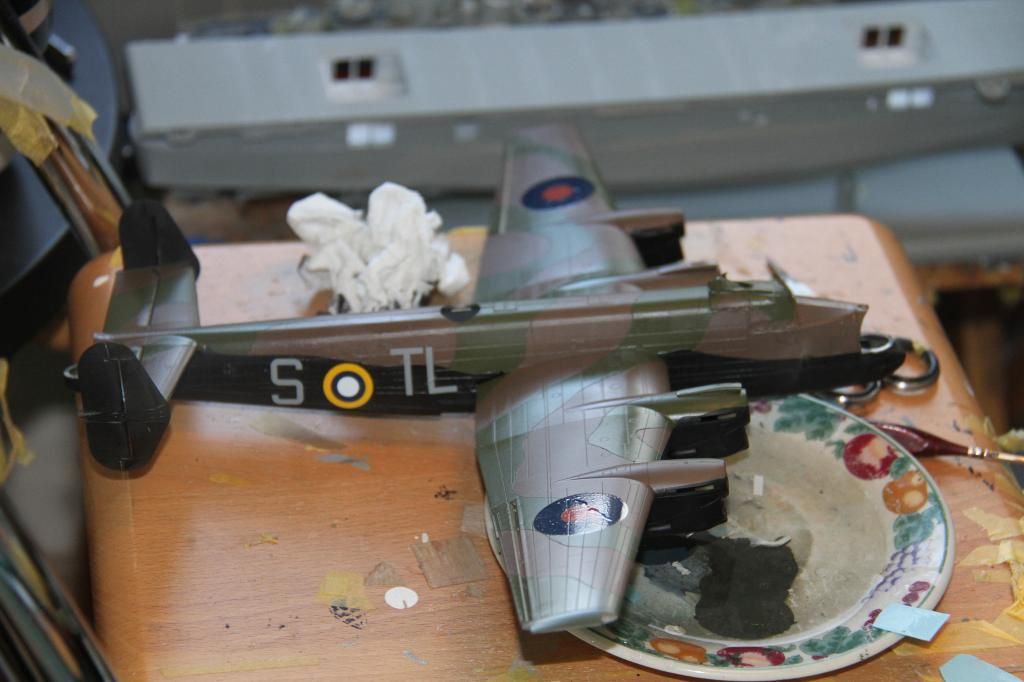
Finally, the last of the masking, The wings are held in place with tape to make sure the camo matches up.
sprayed dark green.
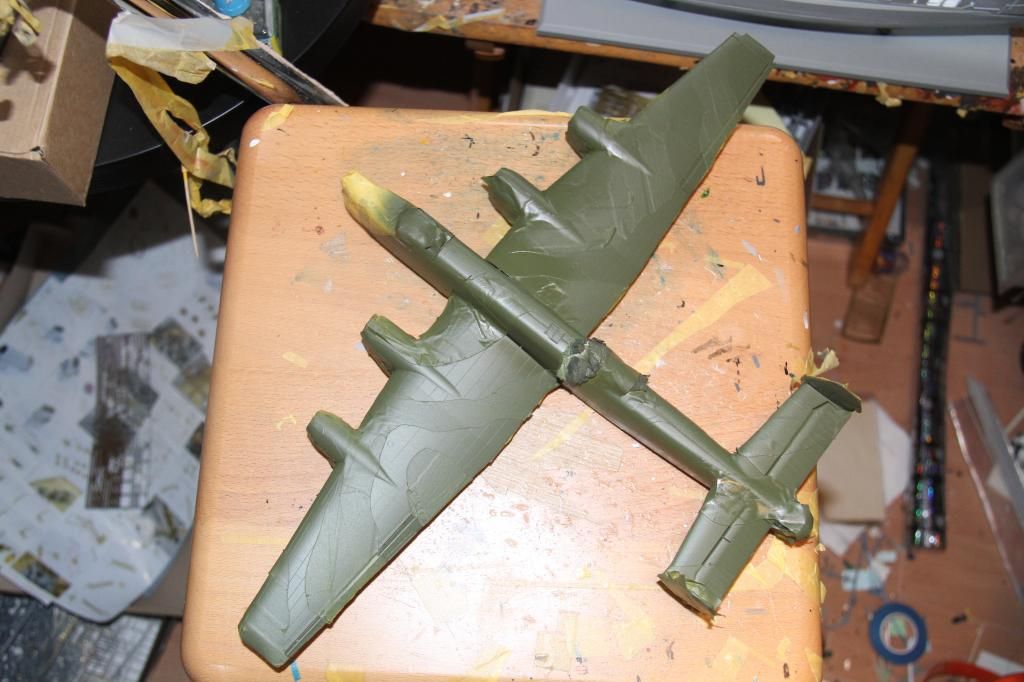
The tape off, next time I will leave the fins separate, why did I not think of that! And the wings glued in place. The transparencies remain masked as next a spray of gloss clear, decals and a spray of matt, the matt would frost clear components if I unmasked them.
At last it looks like A Halifax.
Si
I am having fun with this.
The Halifax was second fiddle to the Lancaster, but the story of this attack on the Tirpitz, and this particular aircraft, The wreck of which is in the RAF Museum at Hendon, not many miles from where I live.
Finally, the last of the masking, The wings are held in place with tape to make sure the camo matches up.

sprayed dark green.

The tape off, next time I will leave the fins separate, why did I not think of that! And the wings glued in place. The transparencies remain masked as next a spray of gloss clear, decals and a spray of matt, the matt would frost clear components if I unmasked them.

At last it looks like A Halifax.
Si
Removed by original poster on 11/23/14 - 22:57:14 (GMT).
Shipshape
Joined: November 23, 2014
KitMaker: 12 posts
Model Shipwrights: 11 posts
Posted: Sunday, November 23, 2014 - 03:58 AM UTC

Was wondering if this fits here or else where. I do understand when I throw my hat into the ring, I need to post a date/time w/subject. I just want to make sure this is the right Campaign to do so. Thank you.
Rick
Shipshape
Joined: November 23, 2014
KitMaker: 12 posts
Model Shipwrights: 11 posts
Posted: Sunday, November 23, 2014 - 05:00 AM UTC
Quoted Text
I understand the comment about Halifax not as popular as the Lancaster, but I have always liked the lines of this aircraft and from what I understand was a robust design. Your painting of this bird is most excellent.Thanks Rick,
I am having fun with this.
The Halifax was second fiddle to the Lancaster, but the story of this attack on the Tirpitz, and this particular aircraft, The wreck of which is in the RAF Museum at Hendon, not many miles from where I live.
Finally, the last of the masking, The wings are held in place with tape to make sure the camo matches up.
sprayed dark green.
The tape off, next time I will leave the fins separate, why did I not think of that! And the wings glued in place. The transparencies remain masked as next a spray of gloss clear, decals and a spray of matt, the matt would frost clear components if I unmasked them.
At last it looks like A Halifax.
Si
I also have always been a big fan of British WWII camo.
Rick
Shipshape
Joined: November 23, 2014
KitMaker: 12 posts
Model Shipwrights: 11 posts
Posted: Sunday, November 23, 2014 - 05:03 AM UTC
Also not too take up space, I believe the DKM Gnieisenau might be better suited in the Battleship Campaign. Though I also guess I could throw in a Combat Models Big Vac Attack VIIC. I would do this, but I do not have the rest of the material to build this most huge vacu-formed sub!
Rick
Rick
RedDuster
Joined: March 01, 2010
KitMaker: 7,078 posts
Model Shipwrights: 6,649 posts
Posted: Monday, November 24, 2014 - 03:19 AM UTC
Thanks Rick,
She is a rugged bird, masking is not my favourite part of the build, but in this case it was worth it.
Si
She is a rugged bird, masking is not my favourite part of the build, but in this case it was worth it.
Si
beefy66
Joined: October 22, 2007
KitMaker: 971 posts
Model Shipwrights: 645 posts
Posted: Tuesday, November 25, 2014 - 04:41 PM UTC
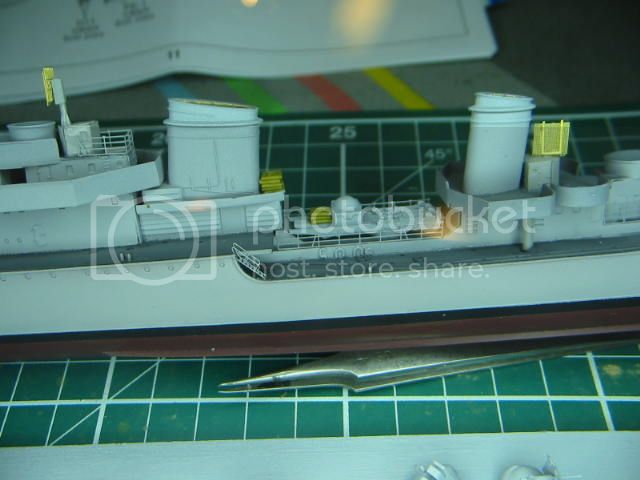
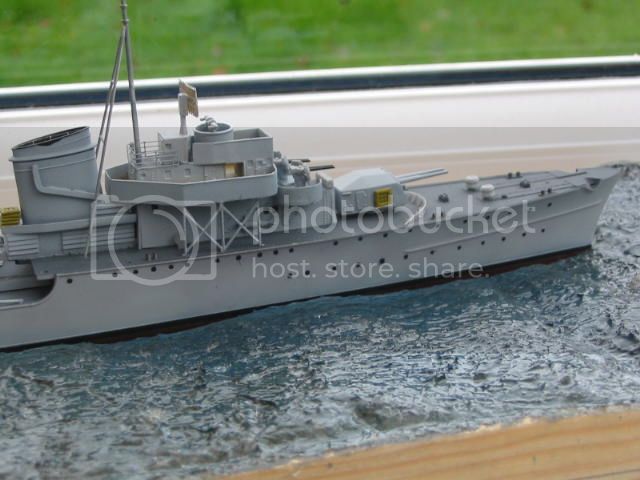
Simon Camo painting coming along a treat there small update on the Z25 have painted the bridge deck using oils added some more of the PE ladders and rails and more guns hope to get more done soon.
Keith
Keith
Fordboy
Joined: July 13, 2004
KitMaker: 2,169 posts
Model Shipwrights: 1,597 posts
Posted: Tuesday, November 25, 2014 - 11:15 PM UTC
Ahoy Keith
That is looking real good thus far.
The water effect looks very good indeed.
Cheers
Sean
That is looking real good thus far.
The water effect looks very good indeed.
Cheers
Sean
beefy66
Joined: October 22, 2007
KitMaker: 971 posts
Model Shipwrights: 645 posts
Posted: Wednesday, November 26, 2014 - 01:48 PM UTC
Thanks Sean this is only the basic sea part of the build still have to add the wake when I,am happy with the build of the ship and then can set her into the base for good.
Keith
Keith
RedDuster
Joined: March 01, 2010
KitMaker: 7,078 posts
Model Shipwrights: 6,649 posts
Posted: Sunday, November 30, 2014 - 01:32 AM UTC
Looking good Keith, your sea is very effective.
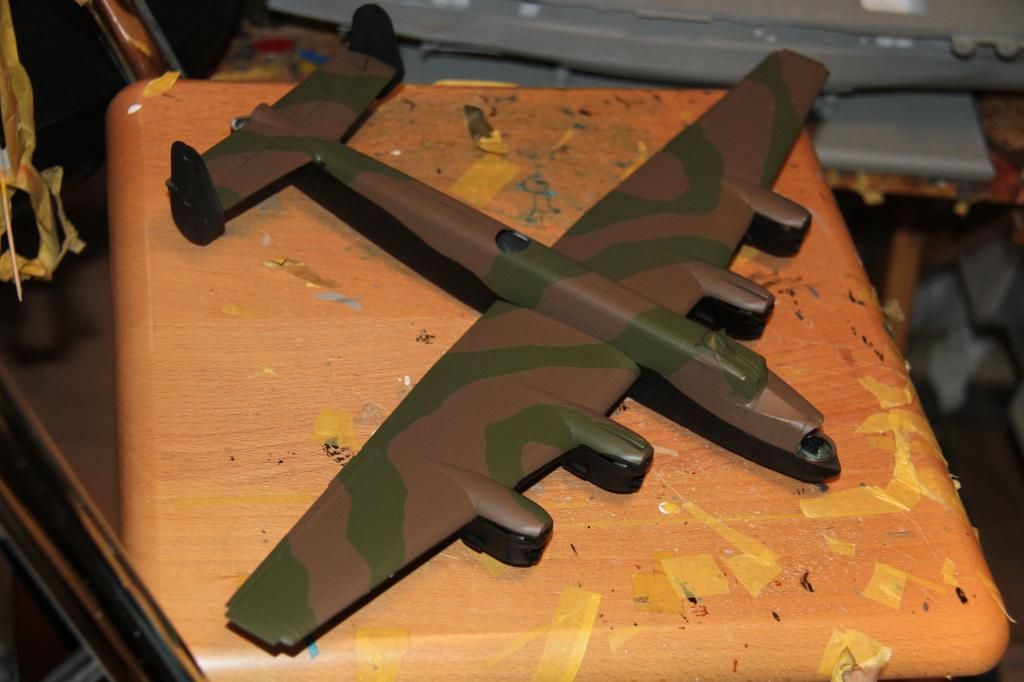
The Halibag has been glossed and the decaling under way.
and done.
next touch up a few bits of the paint work, matt down and back to building.
Si
The Halibag has been glossed and the decaling under way.

and done.

next touch up a few bits of the paint work, matt down and back to building.
Si

greif8

Joined: January 17, 2006
KitMaker: 673 posts
Model Shipwrights: 36 posts

Posted: Sunday, December 14, 2014 - 07:48 PM UTC
Hi guys, I'm making a later start on this campaign due to work, but have a lot of vacation coming up very soon so should be making some rapid progress over the next several days. I'll be building Accurate Miniatures TBF-1c Avenger representing an aircraft that flew off the USS Block Island circa the spring of 1944. I plan to build OOB with maybe a bit of scratch building. There are already a lot of sweet builds going on in this campaign and I will do my best to uphold the high standards . Following are a couple of pre-build photos.
Ernest


Ernest
greif8
Joined: January 17, 2006
KitMaker: 673 posts
Model Shipwrights: 36 posts
Posted: Monday, December 15, 2014 - 01:52 PM UTC
Simon, that is one very nice looking Lanc!
Quoted Text
Looking good Keith, your sea is very effective.
The Halibag has been glossed and the decaling under way.
and done.
next touch up a few bits of the paint work, matt down and back to building.
Si
 |

WEB HOSTING BY


Copyright ©2021 Model Shipwrights and Kitmaker Network, a subsidiary of Silver Star Enterprises
All Rights Reserved. Please read our Conditions of Use and Privacy Policy.
All Rights Reserved. Please read our Conditions of Use and Privacy Policy.