

It's finally time to launch the official build thread for the 75th Anniversary of the Battle of the Atlantic.
I can't wait to see everyones projects underway. I'll be posting my initial images of the ORP Blyskawica in a few hours (Morning time of the 1st on the US East Coast).
See you all at sea!


Go to modelshipwrights.com for the current dynamic site!
Campaigns
Want to be part of a group build? This is where to start, plan, and meet about them.
Want to be part of a group build? This is where to start, plan, and meet about them.
Hosted by Jim Starkweather
Official: Battle of the Atlantic 75th Anniv

Aurora-7

#360

Joined: June 18, 2003
KitMaker: 1,020 posts
Model Shipwrights: 630 posts

Posted: Sunday, August 31, 2014 - 02:55 PM UTC


JoeOsborne
Joined: October 08, 2013
KitMaker: 111 posts
Model Shipwrights: 2 posts

Posted: Monday, September 01, 2014 - 02:54 AM UTC
Hello Folks,
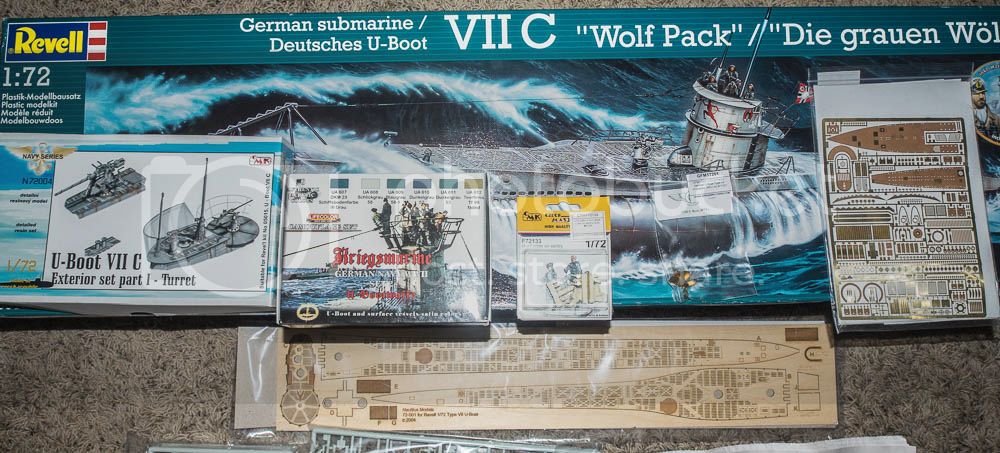
I'll be entering this campaign with Eric Topp's U-552 using Revell's fine 1/72 scale VIIC U-boat. In addition to the kit I plan on using the following:
Eduard Photoetch
Nautilus wooden deck
G-Factor props
Lifecolor Kriegsmarine paint set#2
CMK Turret
CMK sentries
Overall photo
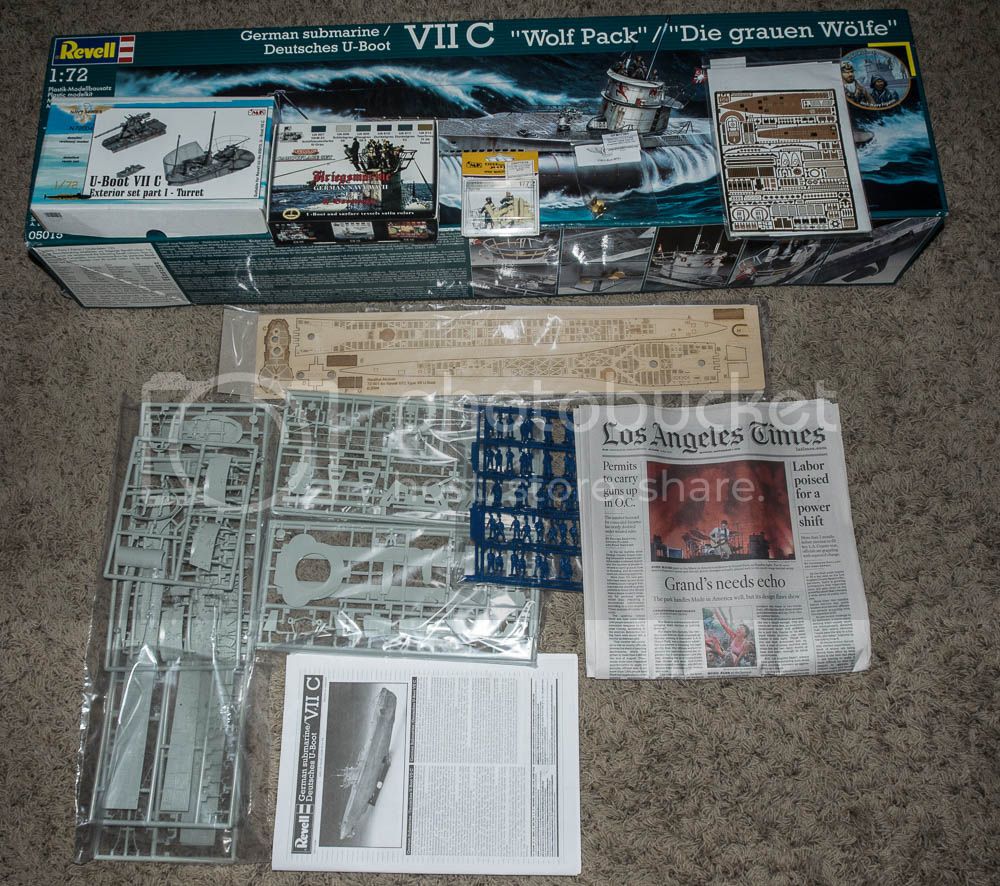
Closeup of AM.
Good luck to all, and good hunting!
Joe Osborne
I'll be entering this campaign with Eric Topp's U-552 using Revell's fine 1/72 scale VIIC U-boat. In addition to the kit I plan on using the following:
Eduard Photoetch
Nautilus wooden deck
G-Factor props
Lifecolor Kriegsmarine paint set#2
CMK Turret
CMK sentries
Overall photo
Closeup of AM.
Good luck to all, and good hunting!
Joe Osborne
Aurora-7
#360
Joined: June 18, 2003
KitMaker: 1,020 posts
Model Shipwrights: 630 posts
Posted: Monday, September 01, 2014 - 09:18 AM UTC
Here's my build. A Mirage 1/400 ORP 'Grom' that I plan to build as the Blyskawica, a polish destroyer that served under the Polish flag with a Polish crew in Royal Navy service.
I'm using a 1/400 Mirage PE set meant for their ORP Mazur kit.
I may end up getting some brass barrels for the canon as well.

I'm using a 1/400 Mirage PE set meant for their ORP Mazur kit.
I may end up getting some brass barrels for the canon as well.

RedDuster

Joined: March 01, 2010
KitMaker: 7,078 posts
Model Shipwrights: 6,649 posts

Posted: Tuesday, September 02, 2014 - 09:43 AM UTC
My entry for this campaign, first one anyway.
Handley Page Halifax BII W1048 TL - S, damaged by Flak 27th April 1942 in an attack on the Tirpitz, crash landed on a frozen lake in Norway.
The Kit.
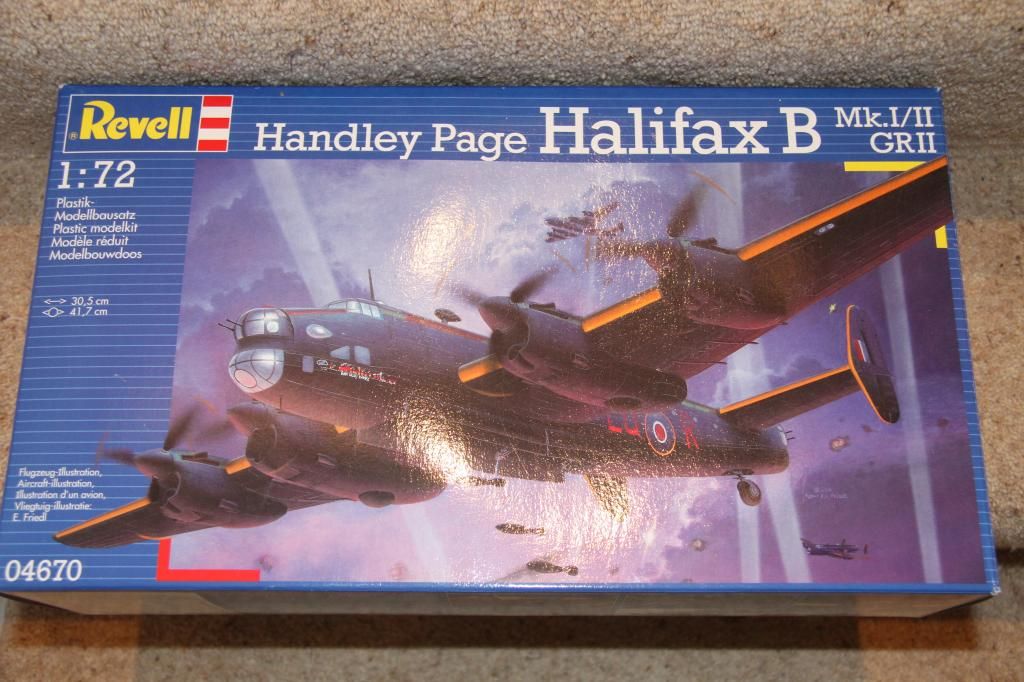
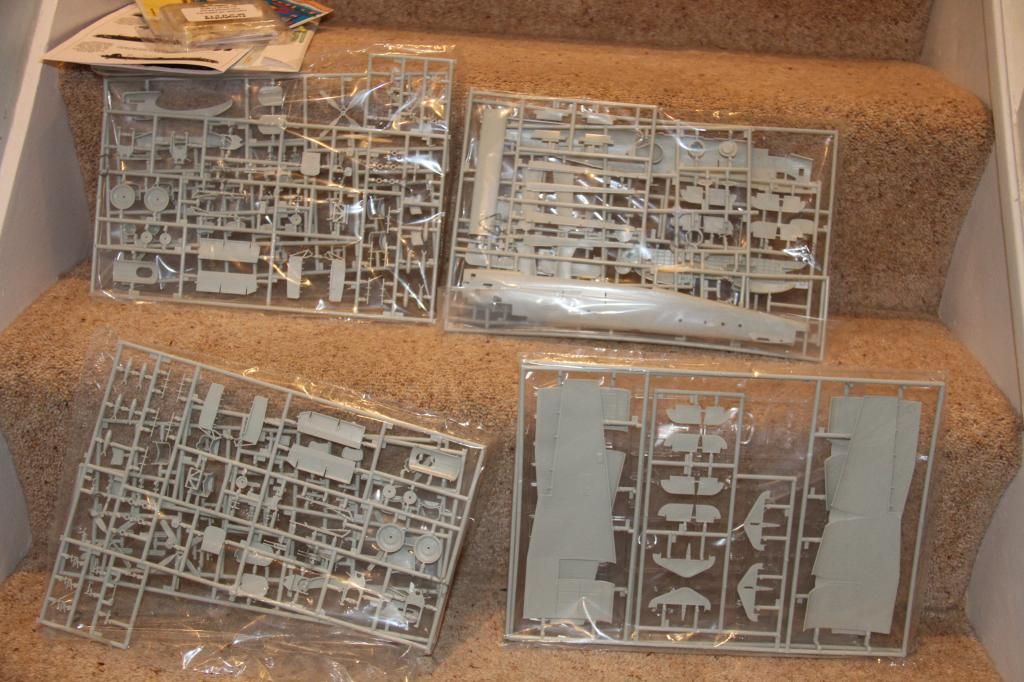
and the add ons.
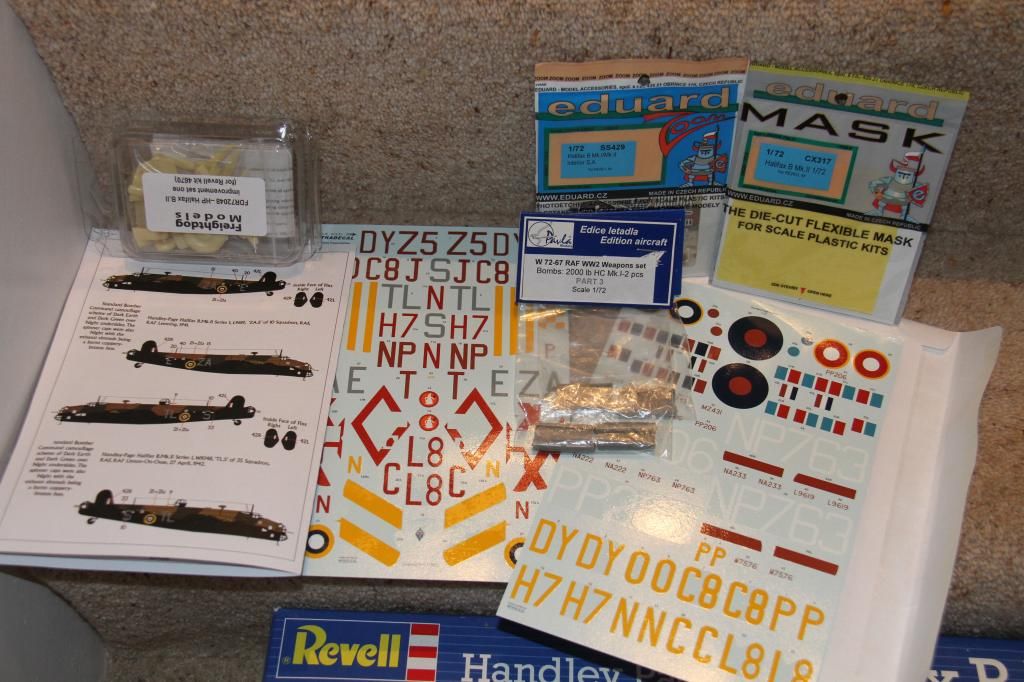
Xtradecals, eduard etch & masks, freightdog improvement set, & Palva 2000lb light case bombs (These ae a near look alike for the 1600lb parachute mines carried in this raid.
Si
Aurora-7
#360
Joined: June 18, 2003
KitMaker: 1,020 posts
Model Shipwrights: 630 posts
Posted: Friday, September 05, 2014 - 08:21 AM UTC
Probably won't post progress pics here until October because I want to put my efforts into a Polish 7PT for an armor show in my area at the end of this month.
RedDuster
Joined: March 01, 2010
KitMaker: 7,078 posts
Model Shipwrights: 6,649 posts
Posted: Saturday, September 06, 2014 - 08:49 AM UTC
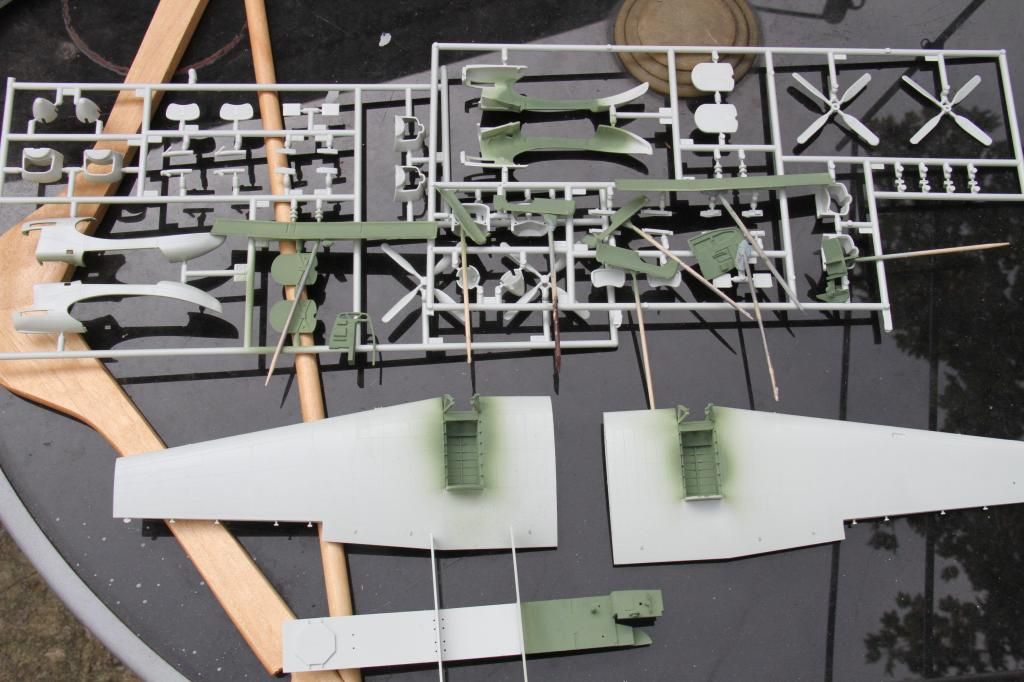
Got the Halifax underway.
First job test fit the major components. The big issue here is if the wings are a solid fir on the spars, then I build & pain the wings and fuselage as sub assemblies, and make masking (not my favourite job) a lot easier.
Looks pretty good.
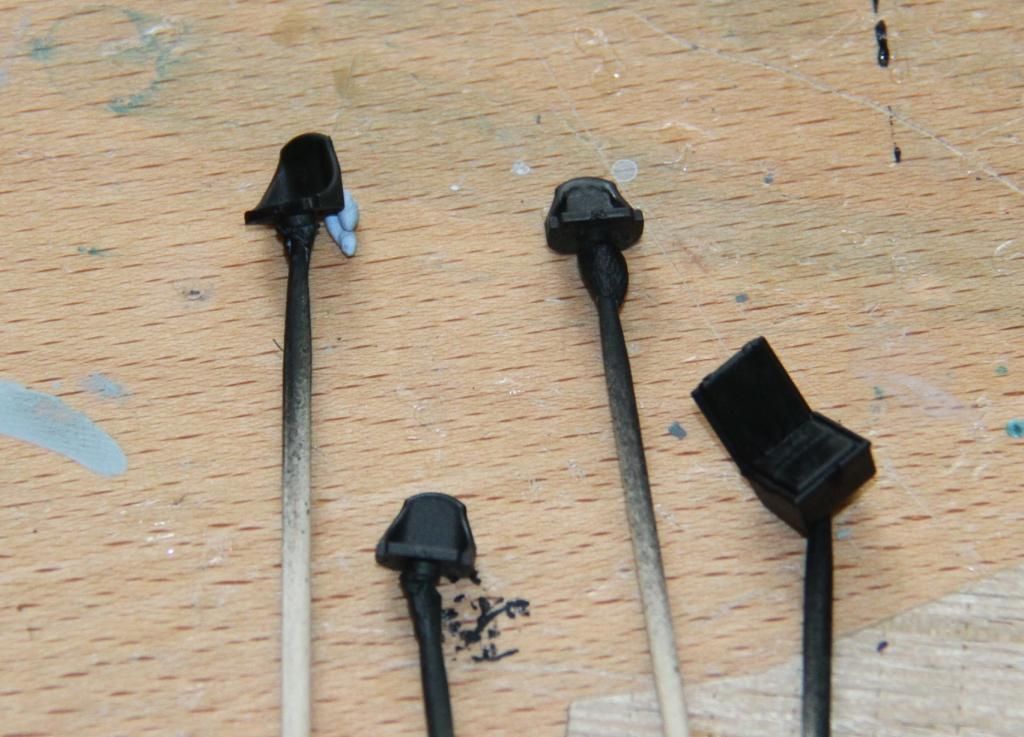
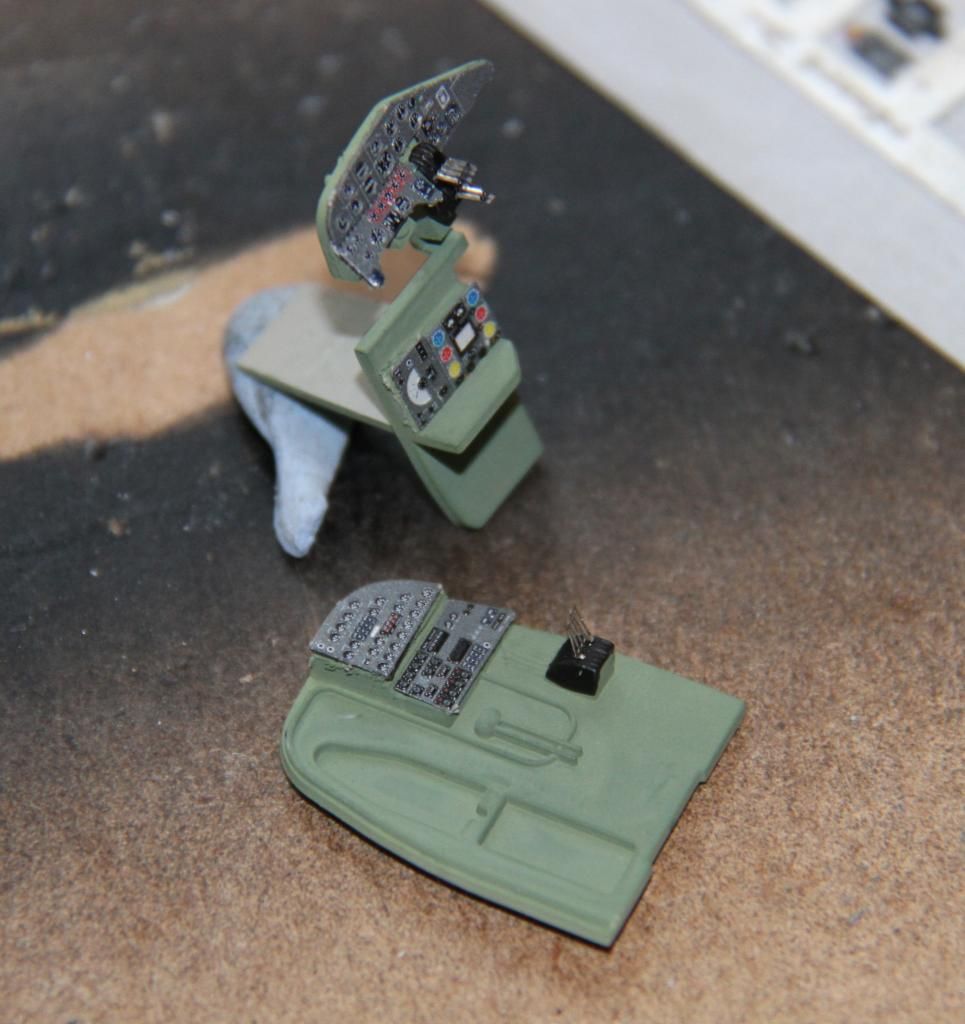
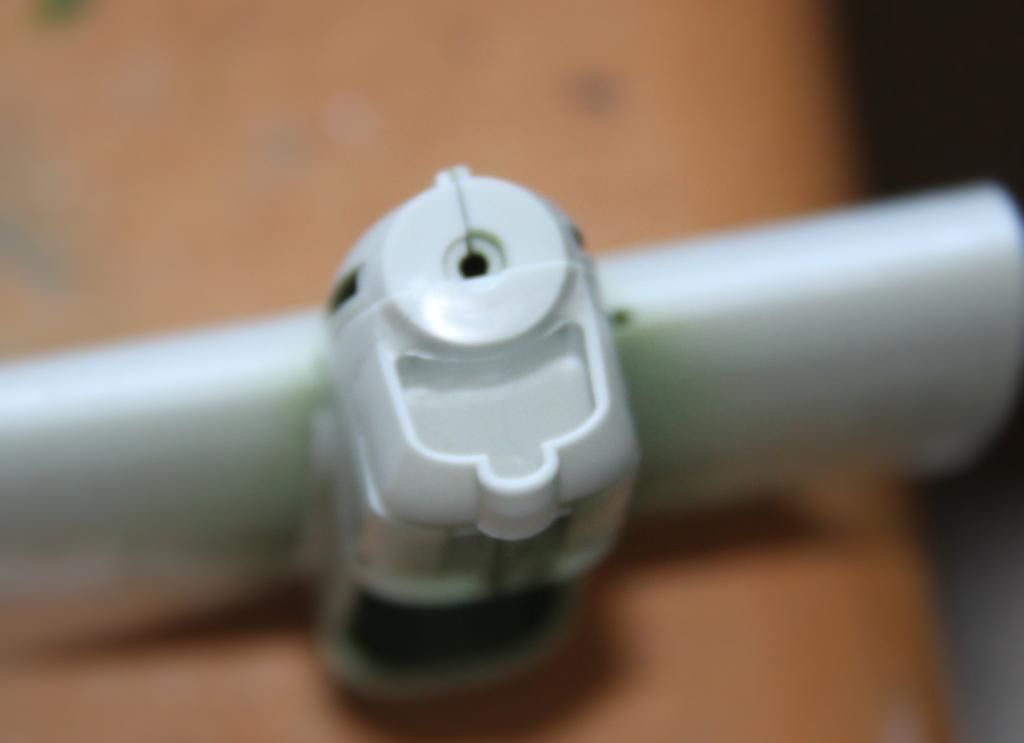
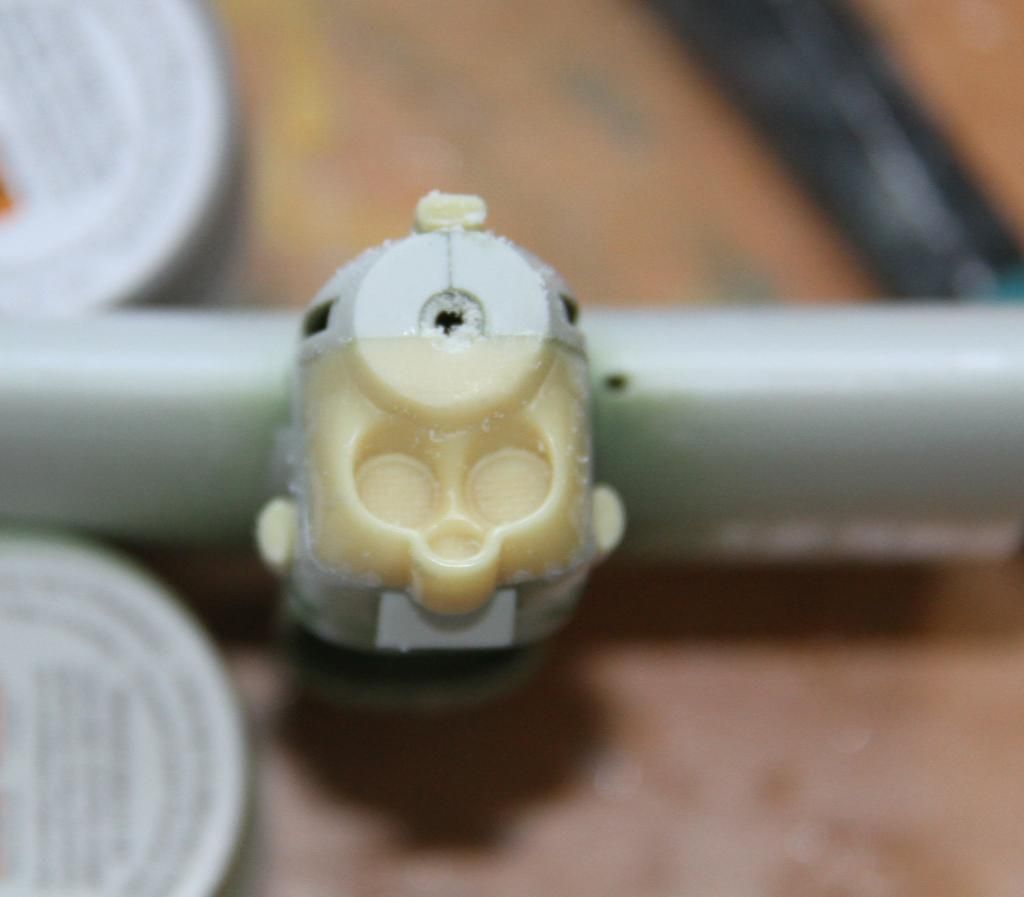
The moulded on rudder pedals removed.
replacement etched pedals fitted.
A bit more destruction needed, the moulded on details on the instrument panel, and bulkheads. Before.
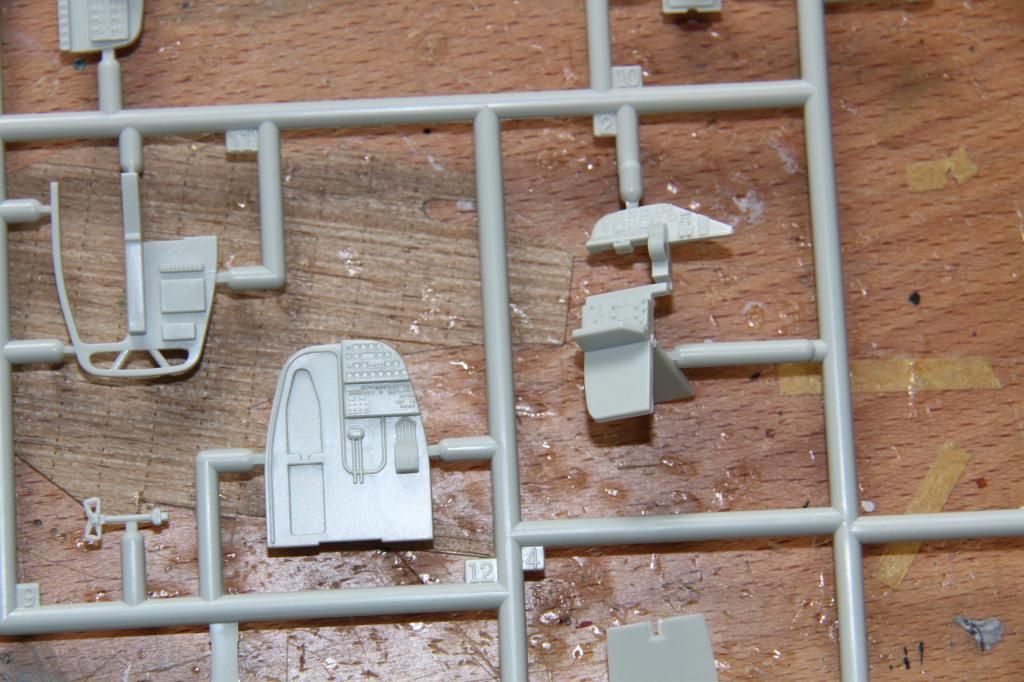
And after.
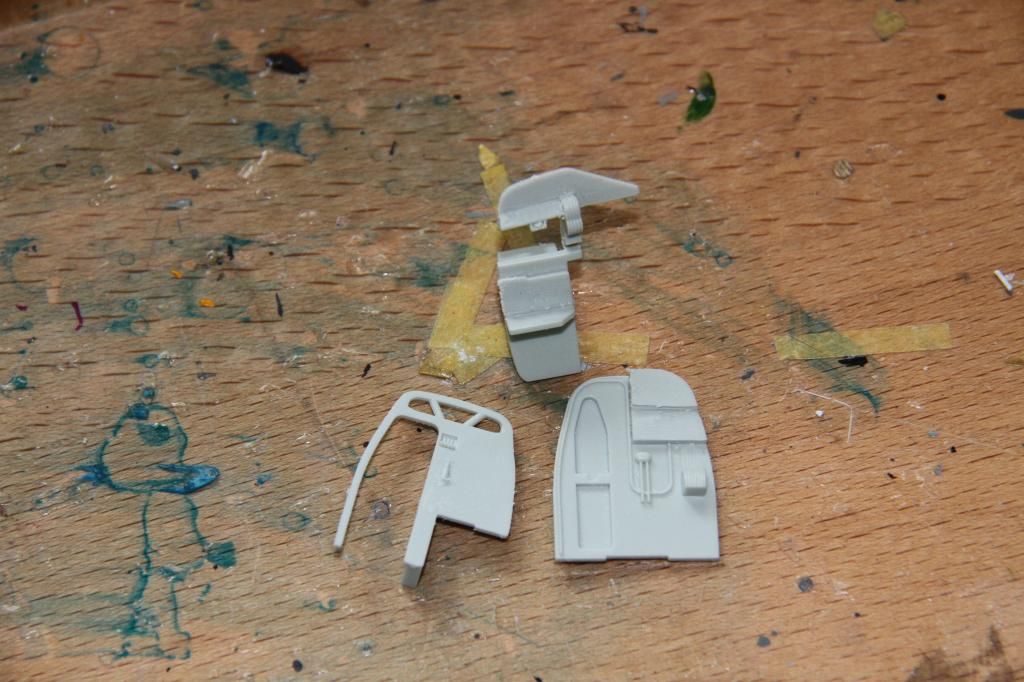
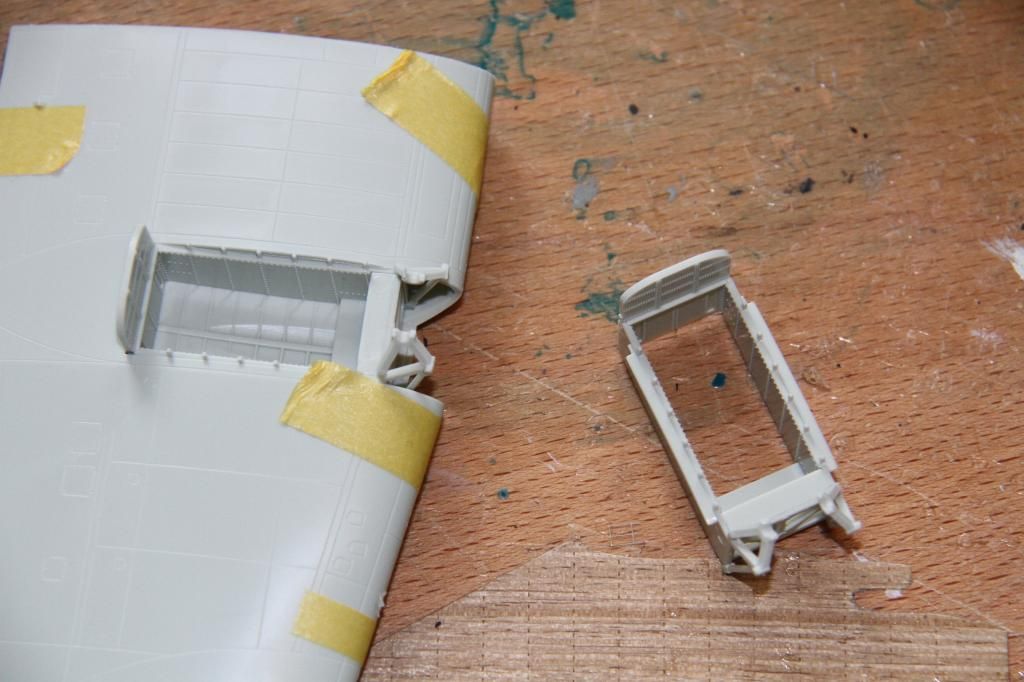
A bit of a departure from the normal construction, the undercarriage bays, and wings. these can then be sprayed at the same time as the relevant bits of the cockpit.
More soon.
Si
First job test fit the major components. The big issue here is if the wings are a solid fir on the spars, then I build & pain the wings and fuselage as sub assemblies, and make masking (not my favourite job) a lot easier.

Looks pretty good.
The moulded on rudder pedals removed.

replacement etched pedals fitted.

A bit more destruction needed, the moulded on details on the instrument panel, and bulkheads. Before.

And after.

A bit of a departure from the normal construction, the undercarriage bays, and wings. these can then be sprayed at the same time as the relevant bits of the cockpit.

More soon.
Si
bill_c

Joined: January 09, 2008
KitMaker: 10,553 posts
Model Shipwrights: 306 posts

Posted: Sunday, September 07, 2014 - 10:34 AM UTC
Joe, I'm debating building my Type VII or my Type IX, so we'll have at least two U-boats.
JoeOsborne
Joined: October 08, 2013
KitMaker: 111 posts
Model Shipwrights: 2 posts
Posted: Monday, September 08, 2014 - 01:25 AM UTC
Quoted Text
Joe, I'm building with the my Type VII or my Type IX, so we'll have at least two U-boats.
Awesome. Right now I'm slowly working my way through opening the free flooding vents.
Joe
Aurora-7
#360
Joined: June 18, 2003
KitMaker: 1,020 posts
Model Shipwrights: 630 posts
Posted: Thursday, September 11, 2014 - 01:50 AM UTC
Quoted Text
Got the Halifax underway.
More soon.
Si
Awesome to see an aircraft for this campaign underway.
Bill, quite the delima in choosing a Type VII or Type IX - the work horse or the more capable subsequent design.
The IX is more impressive looking but I lean towards the VII because it was there from the very begining to the very end.
And yet I do hope we see a IX build for the sake of a bit of diversity.
RedDuster
Joined: March 01, 2010
KitMaker: 7,078 posts
Model Shipwrights: 6,649 posts
Posted: Thursday, September 11, 2014 - 09:41 AM UTC
Thanks Michael,
There is much debate but little solid evidence on the interior colours of the Halifax. My take based on what photographic evidence I could find.
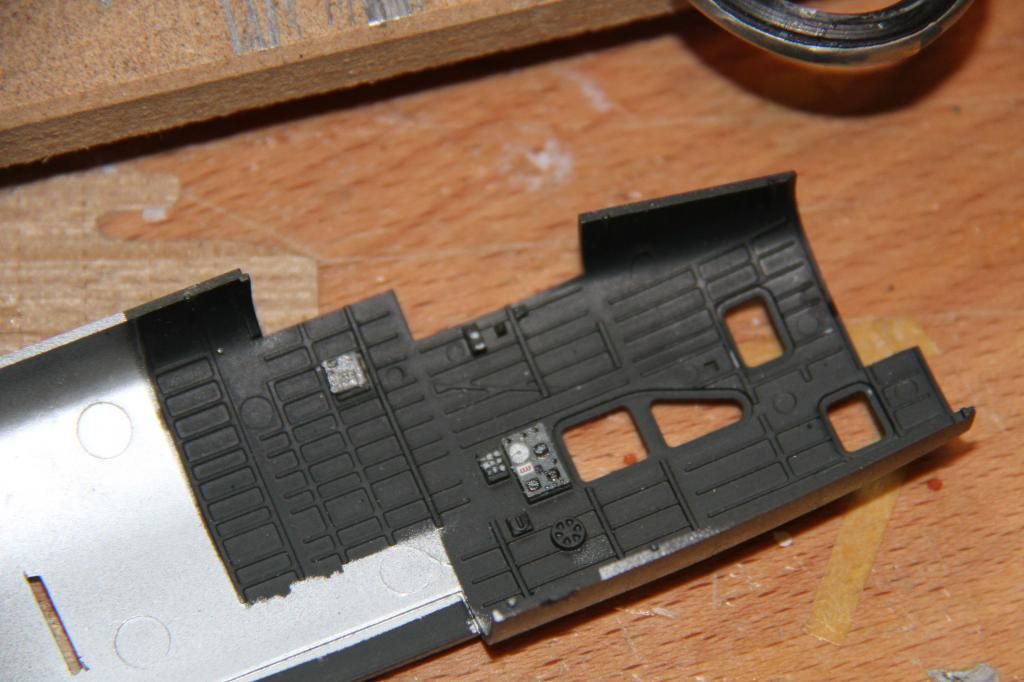
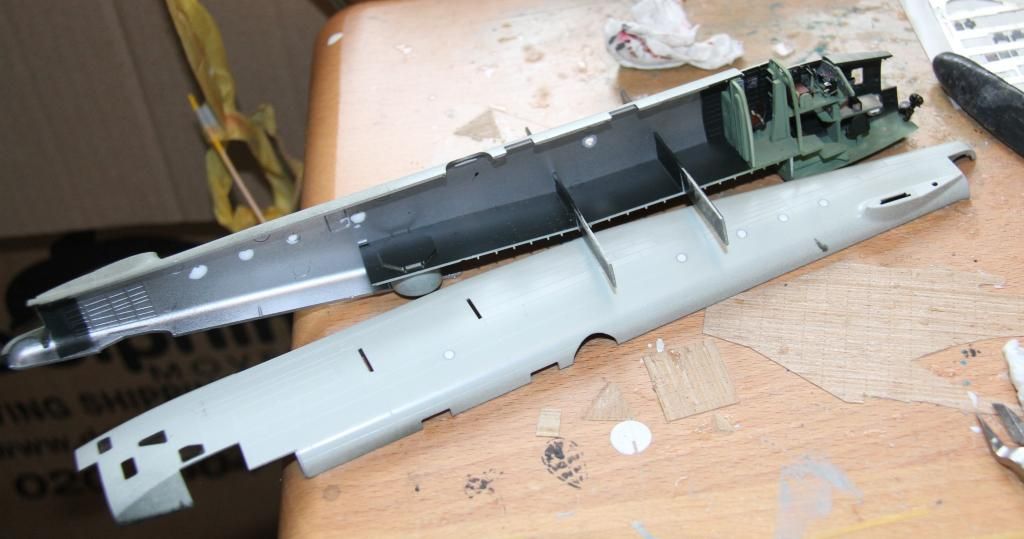
The interior grey green bits.
The fuselage halves sprayed Tamiya "Nato Black" which is a slightly off black.
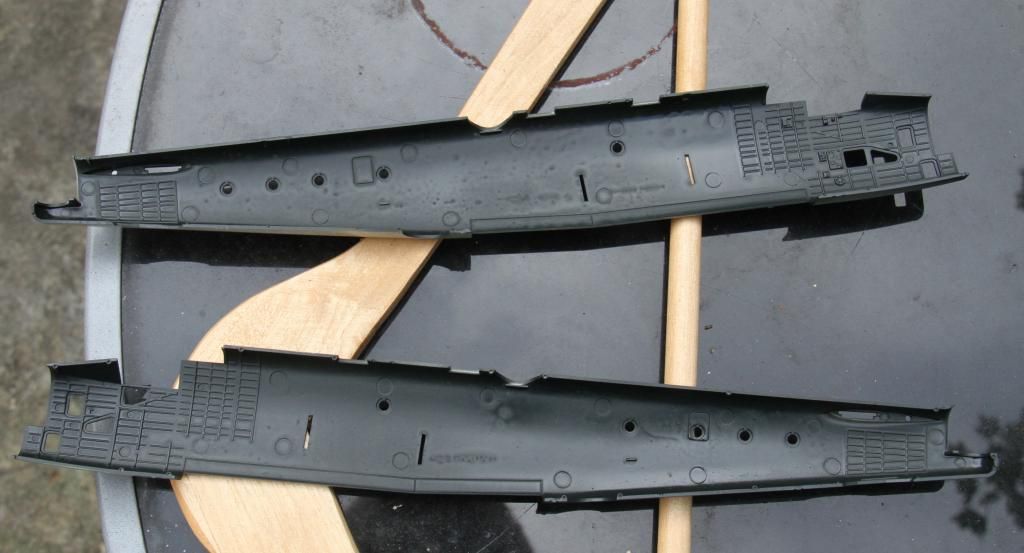
The mid section of the fuselage was unpainted, so sprayed airframe silver, and the floor aft of the cockpit also given a coat of Nato black.
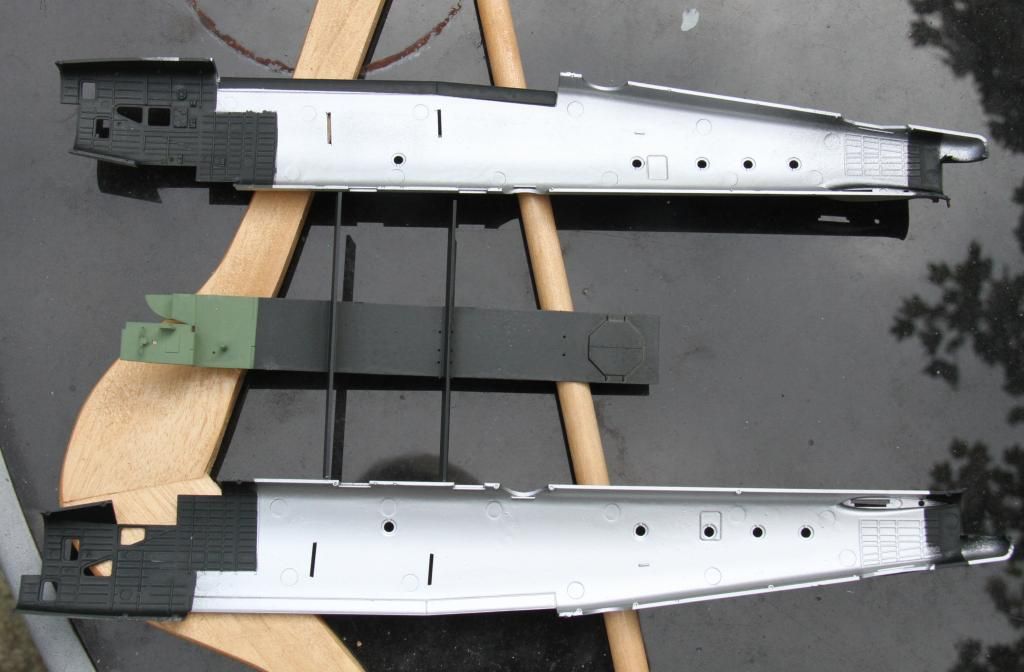
Anybody spot the deliberate mistake.
Si
There is much debate but little solid evidence on the interior colours of the Halifax. My take based on what photographic evidence I could find.
The interior grey green bits.

The fuselage halves sprayed Tamiya "Nato Black" which is a slightly off black.

The mid section of the fuselage was unpainted, so sprayed airframe silver, and the floor aft of the cockpit also given a coat of Nato black.

Anybody spot the deliberate mistake.
Si
RedDuster
Joined: March 01, 2010
KitMaker: 7,078 posts
Model Shipwrights: 6,649 posts
Posted: Sunday, September 14, 2014 - 07:49 AM UTC
A bit more progress.
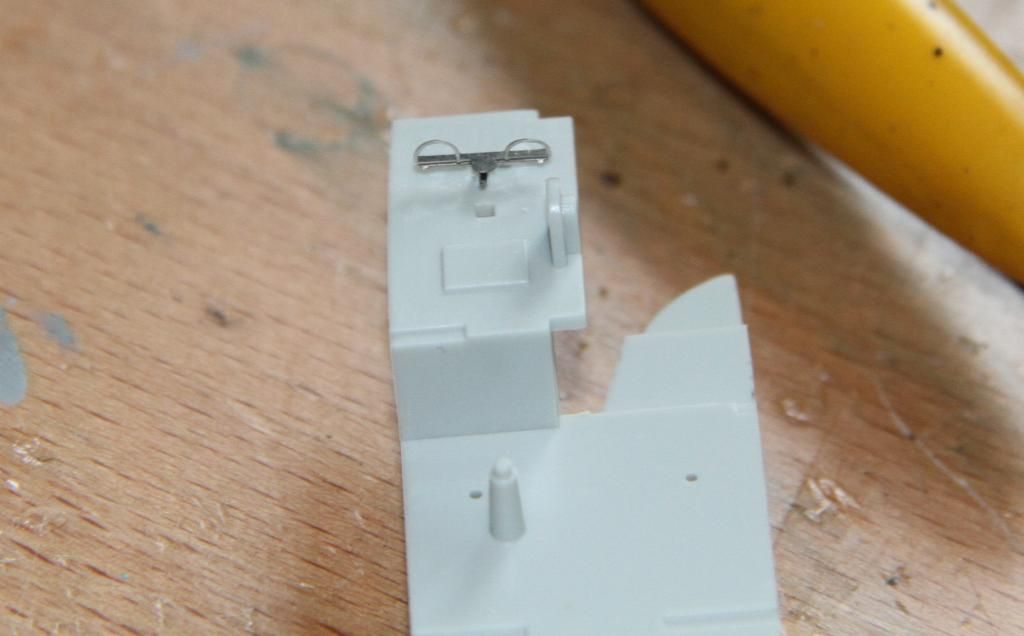
The crew seats sprayed Tamiya NATO black.
Eduard etch fitted to the instrument panel, W/Op & Flight Engineers positions.
Crew seats painting finished & adding etched seatbelts,
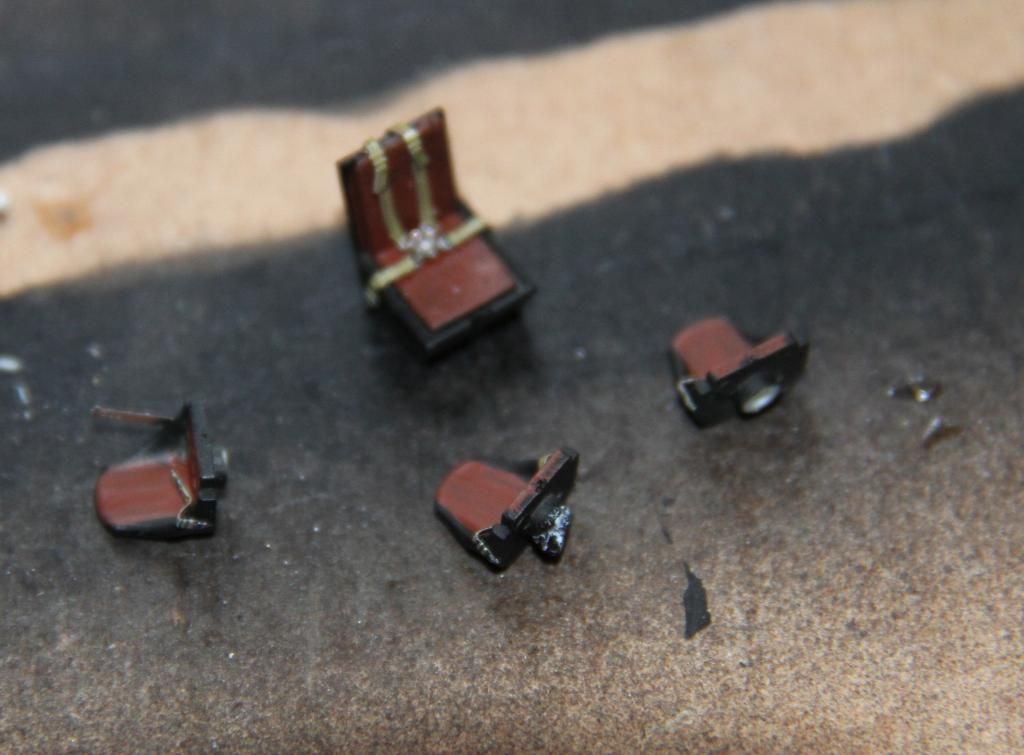
started to add detail to the cockpit walls.
Si
The crew seats sprayed Tamiya NATO black.

Eduard etch fitted to the instrument panel, W/Op & Flight Engineers positions.

Crew seats painting finished & adding etched seatbelts,

started to add detail to the cockpit walls.

Si

Cosimodo
#335

Joined: September 03, 2013
KitMaker: 1,808 posts
Model Shipwrights: 871 posts

Posted: Sunday, September 14, 2014 - 12:13 PM UTC
Hi Simon,
Looking great. At your build rate it should be airborne soon!
Cheers
Michael
Looking great. At your build rate it should be airborne soon!
Cheers
Michael
Aurora-7
#360
Joined: June 18, 2003
KitMaker: 1,020 posts
Model Shipwrights: 630 posts
Posted: Monday, September 15, 2014 - 04:57 AM UTC
Si, what's the finish for this aircraft for it's time of service? Still the standard RAF camouflage pattern or the light gray Coastal Command scheme?
RedDuster
Joined: March 01, 2010
KitMaker: 7,078 posts
Model Shipwrights: 6,649 posts
Posted: Monday, September 15, 2014 - 06:38 AM UTC
Hi Guys,
I am planning more than one build for this thread, so this one will be quick.
She will be in standard Bomber Command camo, Black underside, with dark green over dark earth, A1 roundels on the fuselage & B type on the upper wing and Medium sea grey code letters.
Si
I am planning more than one build for this thread, so this one will be quick.
She will be in standard Bomber Command camo, Black underside, with dark green over dark earth, A1 roundels on the fuselage & B type on the upper wing and Medium sea grey code letters.
Si
RedDuster
Joined: March 01, 2010
KitMaker: 7,078 posts
Model Shipwrights: 6,649 posts
Posted: Saturday, September 20, 2014 - 09:51 AM UTC
A bit more progress,
The lower deck in the forward compartment, the bomb sight, bomb aimer and navigator's seats in place.
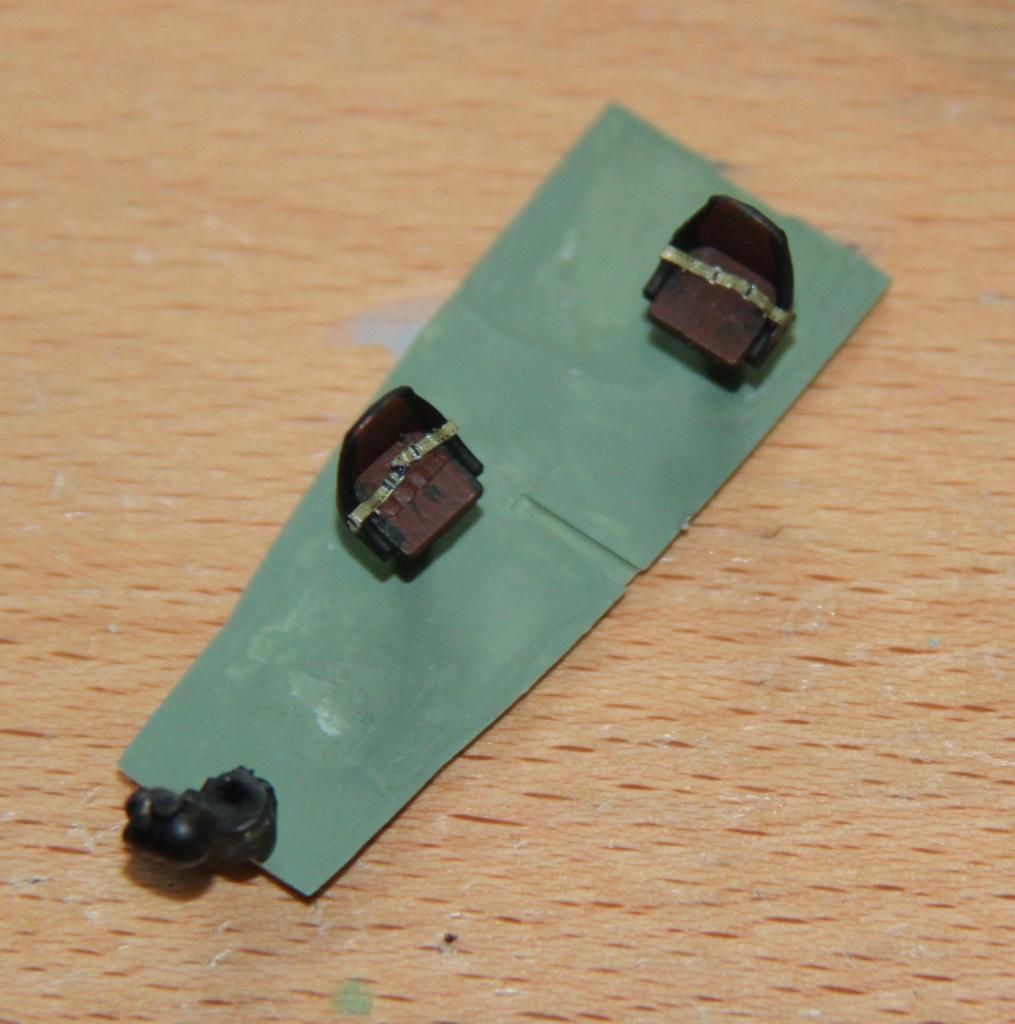
Fuselage interior done, the smaller circular window filled with krystal Klear,
close up on the cockpit.
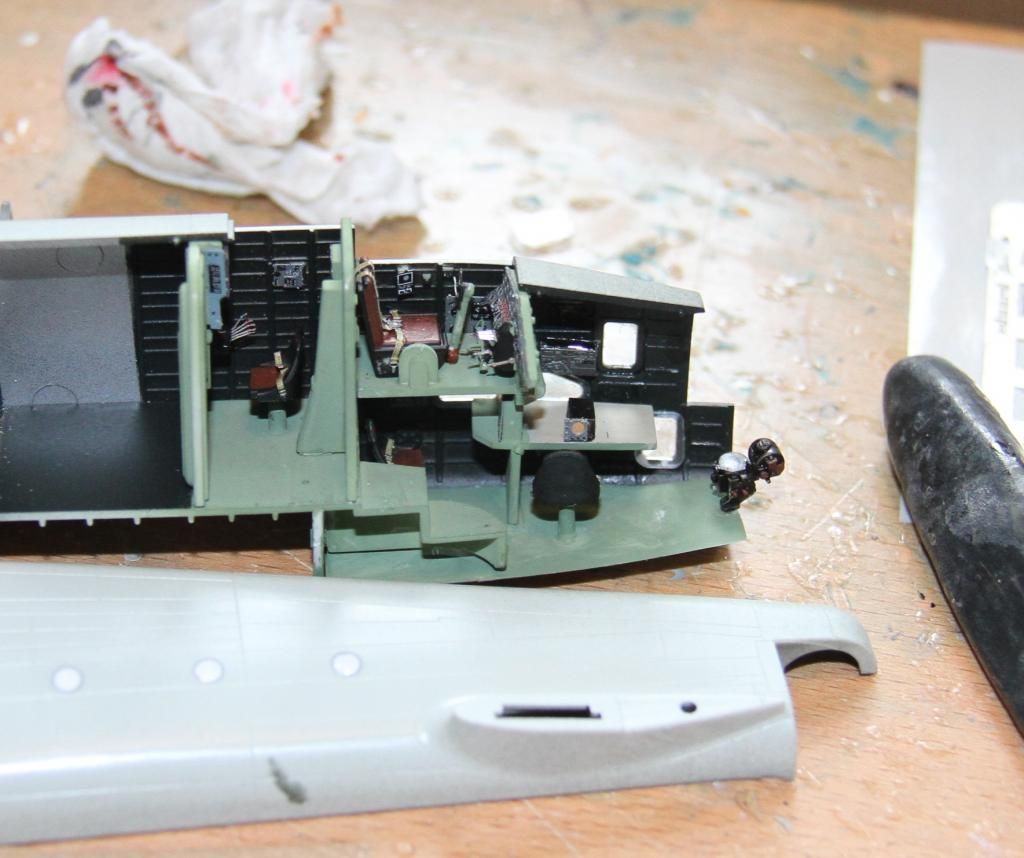
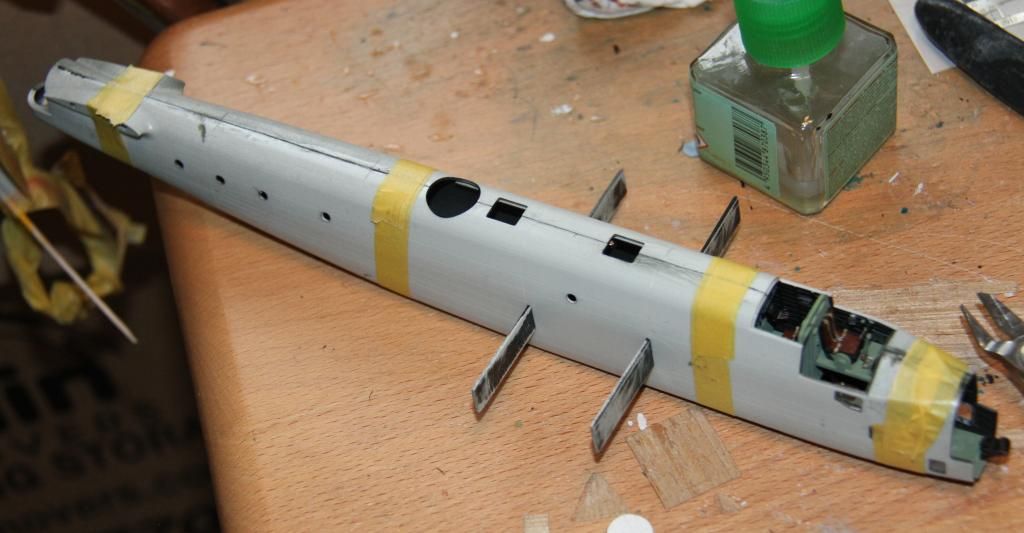
The fuselage joined halves joined and taped together to dry. Next job, the nose glazing, mainly to protect the bomb sight.
Si
The lower deck in the forward compartment, the bomb sight, bomb aimer and navigator's seats in place.

Fuselage interior done, the smaller circular window filled with krystal Klear,

close up on the cockpit.

The fuselage joined halves joined and taped together to dry. Next job, the nose glazing, mainly to protect the bomb sight.
Si
RedDuster
Joined: March 01, 2010
KitMaker: 7,078 posts
Model Shipwrights: 6,649 posts
Posted: Sunday, September 21, 2014 - 10:52 AM UTC
The photo I missed from my last post.
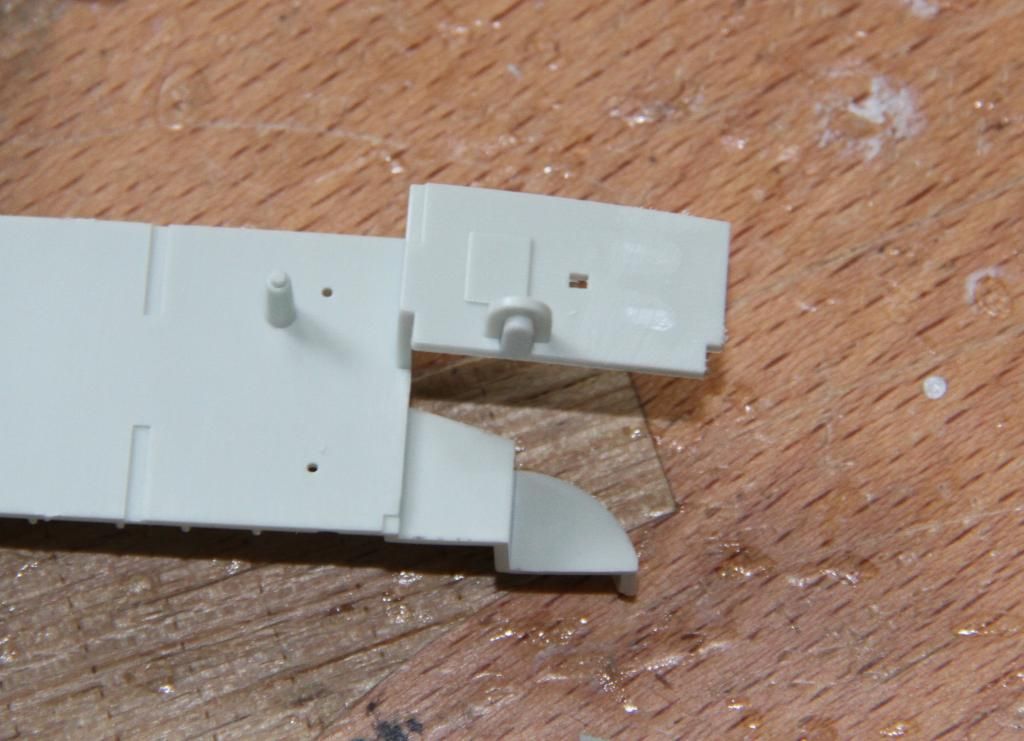
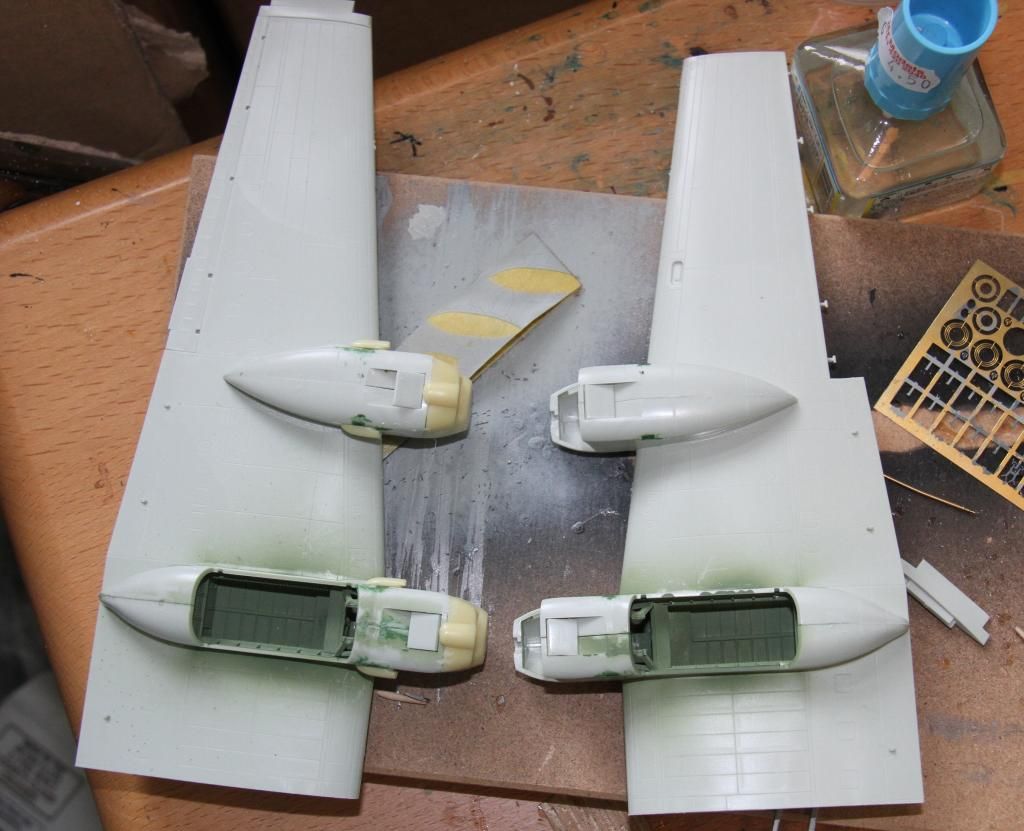
taking a break from the fuselage to get the wings ready the stbd inner nacelle fitted.
the wheel wells are O.T.B. and looks good, just needs a dry brush & wash to bring the detail out.
The biggest issue with the kit is the shape of the radiators, way too square, the kit parts test fitted.
The freightdog resin parts in place, not 100%, only new nacelles would solve that, but a vast improvement.
Si

taking a break from the fuselage to get the wings ready the stbd inner nacelle fitted.

the wheel wells are O.T.B. and looks good, just needs a dry brush & wash to bring the detail out.
The biggest issue with the kit is the shape of the radiators, way too square, the kit parts test fitted.

The freightdog resin parts in place, not 100%, only new nacelles would solve that, but a vast improvement.

Si

beefy66

Joined: October 22, 2007
KitMaker: 971 posts
Model Shipwrights: 645 posts

Posted: Wednesday, September 24, 2014 - 08:28 PM UTC
Nice change for you there Simon looking good so far OK need some clarification on my choice for this campaign will it be OK for me to do the trumpeter Z25 Zerstorer as info I have is saying this ship operated in the North Atlantic with Sharnhost and Prinz Eugen.
If it is OK to go ahead the will post my start photos of build at weekend when I have some time off coming up.
Keith
If it is OK to go ahead the will post my start photos of build at weekend when I have some time off coming up.
Keith
RedDuster
Joined: March 01, 2010
KitMaker: 7,078 posts
Model Shipwrights: 6,649 posts
Posted: Thursday, September 25, 2014 - 07:25 AM UTC
Thanks Keith,
From memory she did take part in the Channel Dash, so even if briefly she did operate certainly on the edge of the Atlantic.
Si
From memory she did take part in the Channel Dash, so even if briefly she did operate certainly on the edge of the Atlantic.
Si

RussellE
#306

Joined: June 27, 2010
KitMaker: 3,959 posts
Model Shipwrights: 2,777 posts
Posted: Thursday, September 25, 2014 - 10:26 AM UTC
Great start Si!
As usual, your pace is impressive!
As usual, your pace is impressive!


md72
#439
Joined: November 05, 2005
KitMaker: 4,950 posts
Model Shipwrights: 248 posts

Posted: Thursday, September 25, 2014 - 12:50 PM UTC
Oh great. Another campaign I forgot about. I'm already a month behind and 12,000 miles away from my stash.

RedDuster
Joined: March 01, 2010
KitMaker: 7,078 posts
Model Shipwrights: 6,649 posts
Posted: Friday, September 26, 2014 - 08:08 AM UTC
Thanks Russell,
Short sharp bursts of high intensity building just make it look that way
but still a long way to go on this one, three more of those engines to do, let alone three turrets, lots and lots of masking, etc, etc
Si
Short sharp bursts of high intensity building just make it look that way
but still a long way to go on this one, three more of those engines to do, let alone three turrets, lots and lots of masking, etc, etc
Si
beefy66
Joined: October 22, 2007
KitMaker: 971 posts
Model Shipwrights: 645 posts
Posted: Saturday, September 27, 2014 - 02:16 AM UTC
Simon thanks for that reminder  I have been reading through the rules fully this time and the channel dash is part of the campaign so here goes this is my attempt at Z25 Zerstrore. Sorry but no news papers but hope the phone display will do after all we are in the modern times and the last time I read a paper I was delivering them about 35 years ago


OK time to get cracking see If I can get some of my mojo back on track with this one.
Keith
I have been reading through the rules fully this time and the channel dash is part of the campaign so here goes this is my attempt at Z25 Zerstrore. Sorry but no news papers but hope the phone display will do after all we are in the modern times and the last time I read a paper I was delivering them about 35 years ago OK time to get cracking see If I can get some of my mojo back on track with this one.
Keith
Cosimodo
#335
Joined: September 03, 2013
KitMaker: 1,808 posts
Model Shipwrights: 871 posts
Posted: Saturday, September 27, 2014 - 01:22 PM UTC
Thanks Michael for organising this campaign. It was a great build up with the weekly updates.
OK, I am in for the Early Years, or to be exact, right at the start.
"At 6.14 am on 13 December, 1939, the first naval battle of WWII began off the mouth of the River Plate (Punta del Este), on the East Coast of South America. On the British side were the cruisers HMS AJAX, EXETER and ACHILLES and the other consisted of the German Armoured Cruiser, ADMIRAL GRAF SPEE." Torpedo Bay Navy Museum, NZ
I going to have a go at building HMS Achilles (NZ Division) using Iron Shipwrights kit, HMS Ajax. They were both Leander class light cruisers, so I don't think there is anything in it but the name.

The hull and superstructure come already formed. The casting is pretty good with not much to clean up.


Not too many bits and some fine photoetch and brass rods complete the box.

I think everything is there so it will be OOB. I am hoping this will be pretty straight forward!
cheers
Michael
OK, I am in for the Early Years, or to be exact, right at the start.
"At 6.14 am on 13 December, 1939, the first naval battle of WWII began off the mouth of the River Plate (Punta del Este), on the East Coast of South America. On the British side were the cruisers HMS AJAX, EXETER and ACHILLES and the other consisted of the German Armoured Cruiser, ADMIRAL GRAF SPEE." Torpedo Bay Navy Museum, NZ
I going to have a go at building HMS Achilles (NZ Division) using Iron Shipwrights kit, HMS Ajax. They were both Leander class light cruisers, so I don't think there is anything in it but the name.
The hull and superstructure come already formed. The casting is pretty good with not much to clean up.
Not too many bits and some fine photoetch and brass rods complete the box.
I think everything is there so it will be OOB. I am hoping this will be pretty straight forward!
cheers
Michael
RedDuster
Joined: March 01, 2010
KitMaker: 7,078 posts
Model Shipwrights: 6,649 posts
Posted: Saturday, September 27, 2014 - 08:32 PM UTC
No problem Keith, have that kit in the stash and that was the timescale I was planning. Will be watching for tips.
Interesting kit Michael, which colour scheme?
Si
Interesting kit Michael, which colour scheme?
Si
RedDuster
Joined: March 01, 2010
KitMaker: 7,078 posts
Model Shipwrights: 6,649 posts
Posted: Sunday, September 28, 2014 - 07:52 AM UTC
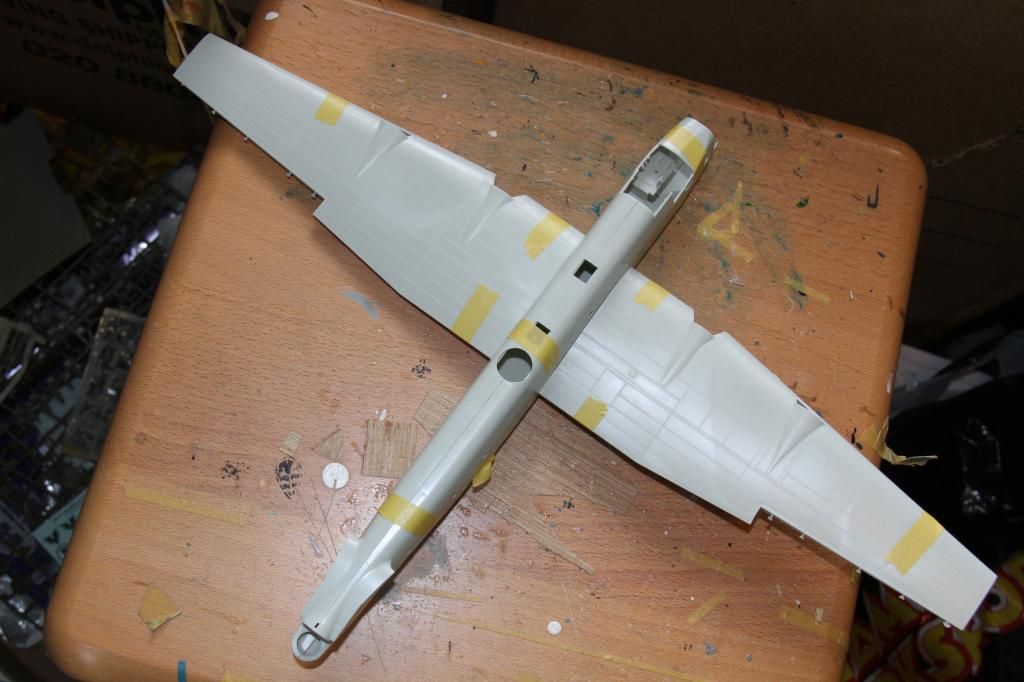
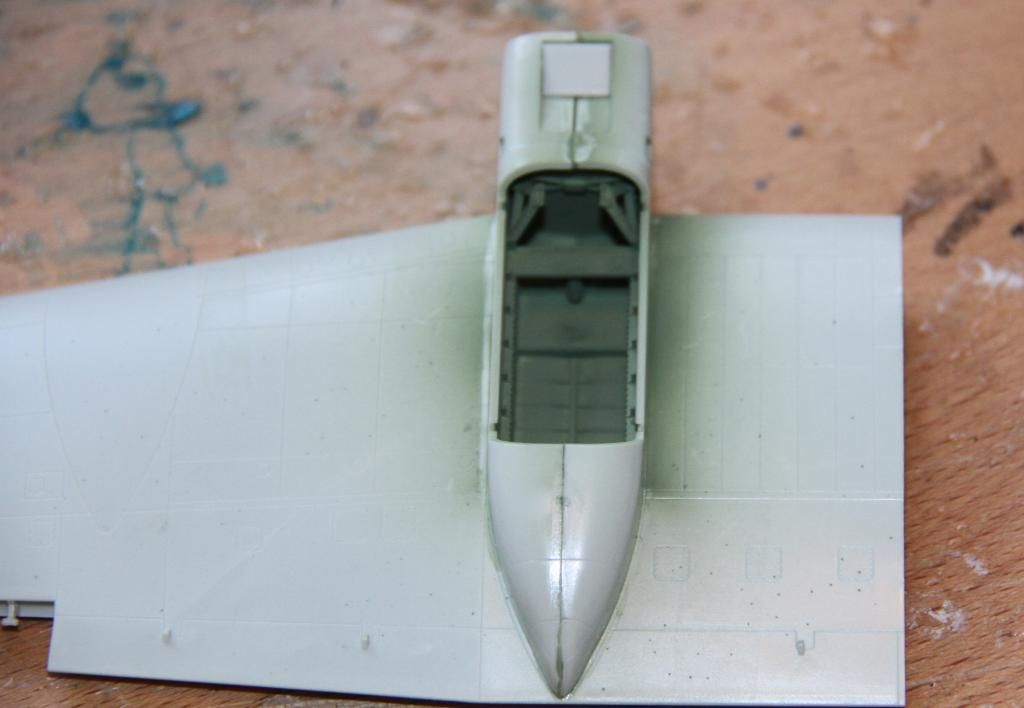
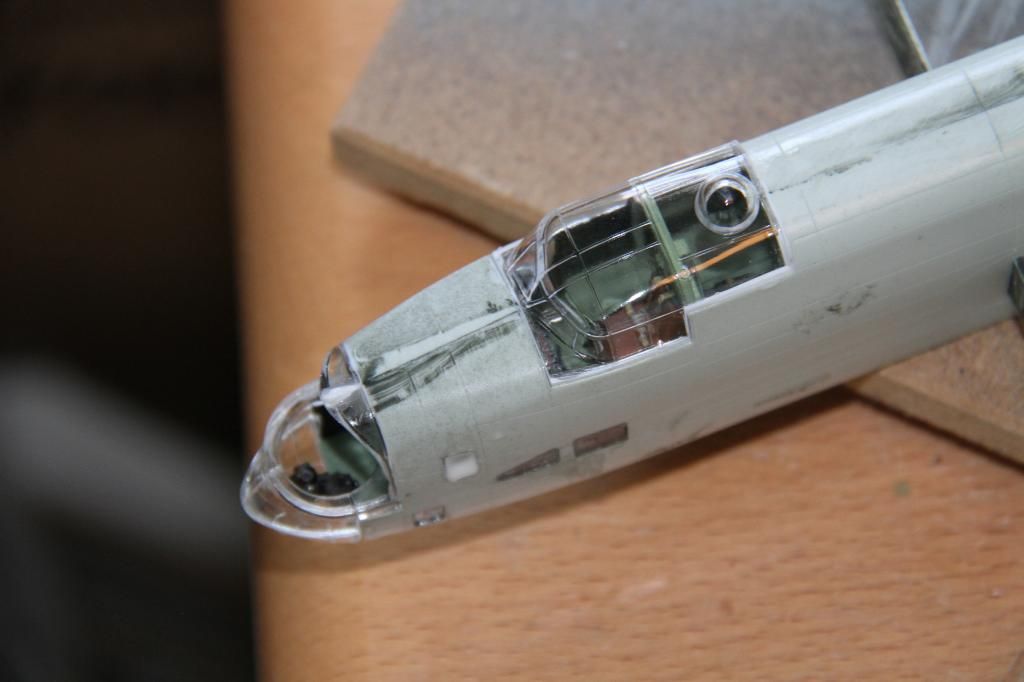
The nose and cockpit glazing in place, the window just behind where the front turret will go has been filled with Krsytal Klear as a mask, the blistered windows that will finally go there will be added after painting.
Although a recent kit, it has the old style method of trapping "T" shaped lugs moulded into the wing between the aileron halves. As I did not want movable ailerons, the end of the "T's" were cut off so the completed ailerons could be slipped into place.
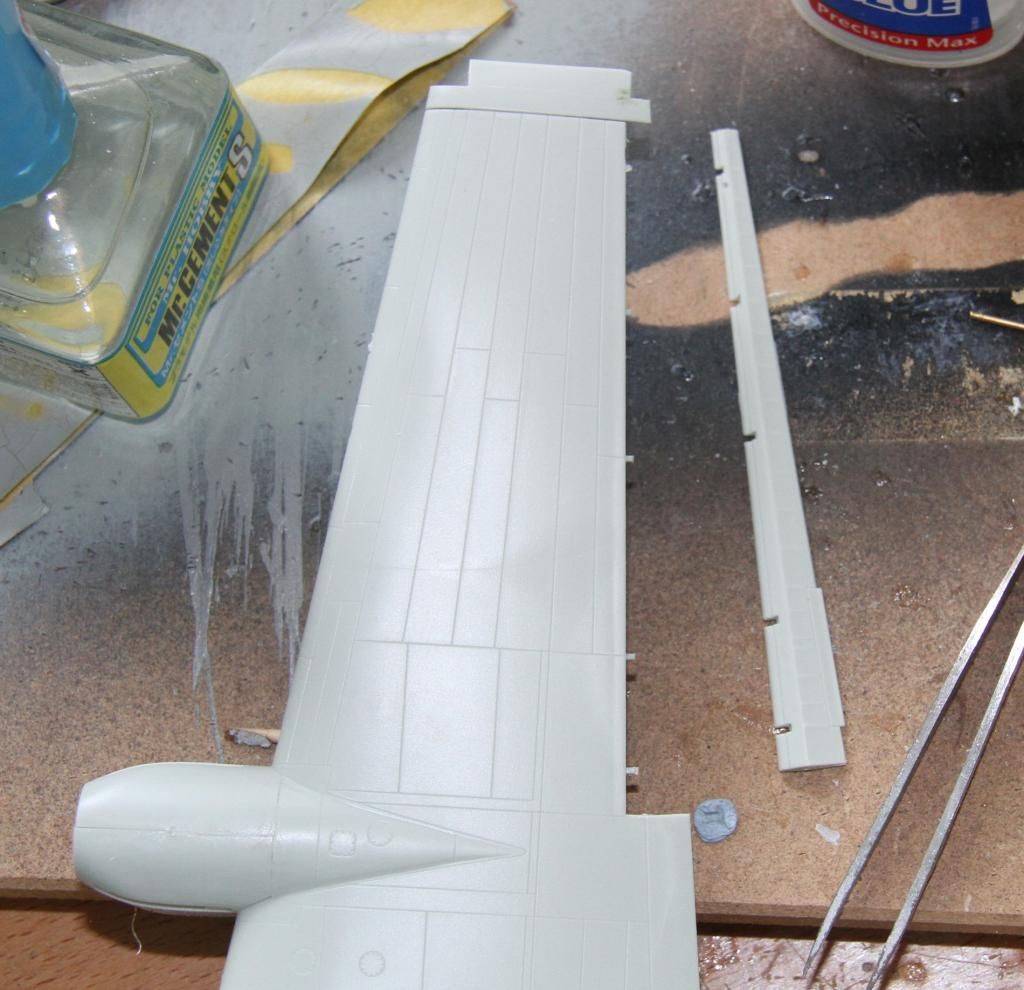
One wing all but ready for painting, the other ready for Resin.
Si

Although a recent kit, it has the old style method of trapping "T" shaped lugs moulded into the wing between the aileron halves. As I did not want movable ailerons, the end of the "T's" were cut off so the completed ailerons could be slipped into place.

One wing all but ready for painting, the other ready for Resin.

Si
 |

WEB HOSTING BY


Copyright ©2021 Model Shipwrights and Kitmaker Network, a subsidiary of Silver Star Enterprises
All Rights Reserved. Please read our Conditions of Use and Privacy Policy.
All Rights Reserved. Please read our Conditions of Use and Privacy Policy.