

Very nice Tim
Great to see the first mast in place, the rigging looks excellent, certainly seaman like.
Keep up the good work,
cheers
Si


Go to modelshipwrights.com for the current dynamic site!
Ships by Class/Type: Sailing Vessels
This forum is for sailing ships both civilian and military of any era.
This forum is for sailing ships both civilian and military of any era.
Hosted by Jim Starkweather
Pyro Chinese War Junk build

RedDuster

Joined: March 01, 2010
KitMaker: 7,078 posts
Model Shipwrights: 6,649 posts

Posted: Tuesday, April 10, 2018 - 12:45 PM UTC

TimReynaga

Joined: May 03, 2006
KitMaker: 2,500 posts
Model Shipwrights: 1,830 posts

Posted: Tuesday, April 10, 2018 - 05:44 PM UTC
Thanks guys. The rigging process is always when sailing ship models really start to come alive!
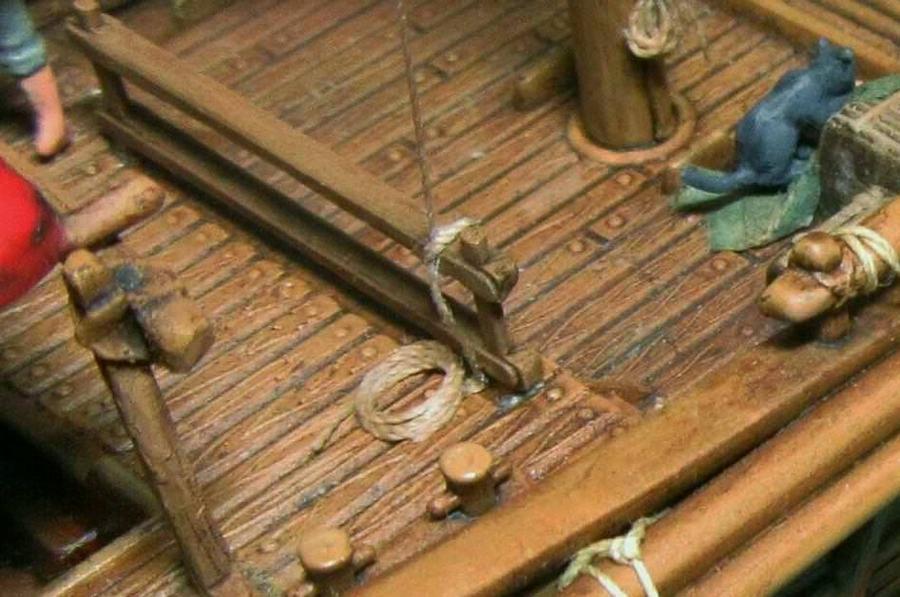
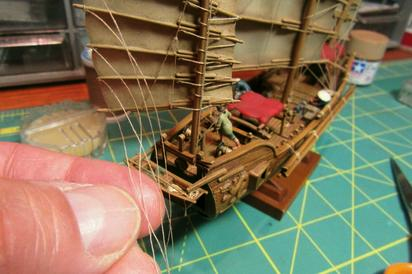
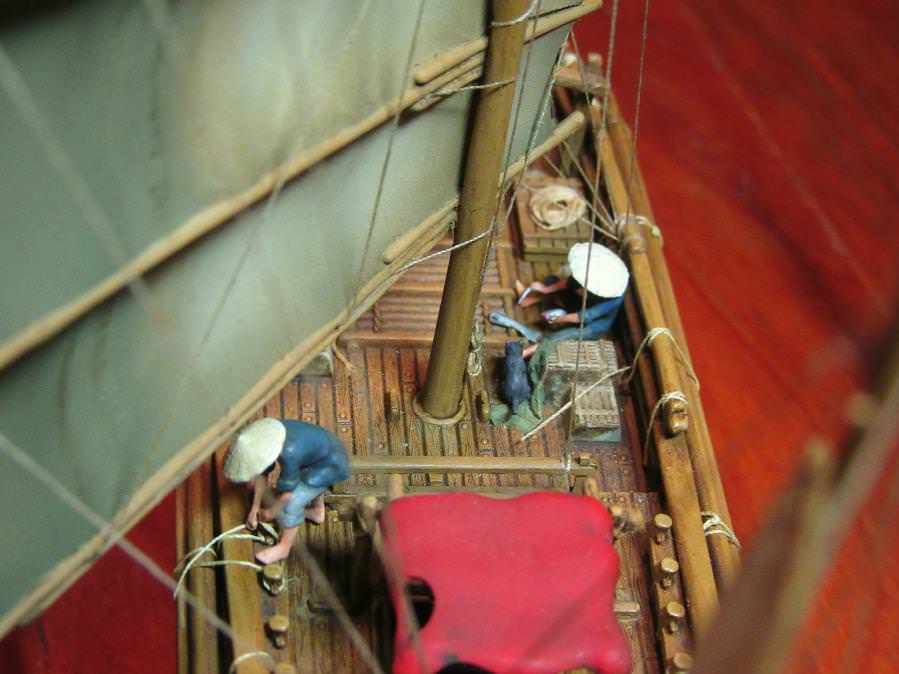
The sheets, attached to the outer ends of the battens to adjust the sail angle to the wind, came next.
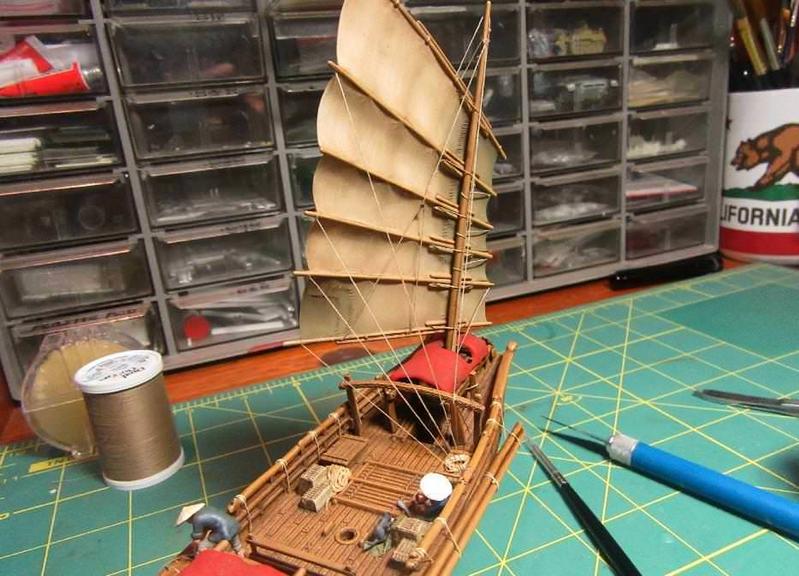
Since they worked together I would have thought the sheets would have been attached to a single control line via a series of blocks and pulleys for handier use. Rigging diagrams usually show this arrangement, and old pictures of operating junks sometimes do as well but they often show the lines tied off individually, too. I followed that seemingly awkward arrangement and tied the sheets off at the side rail next to the cook.
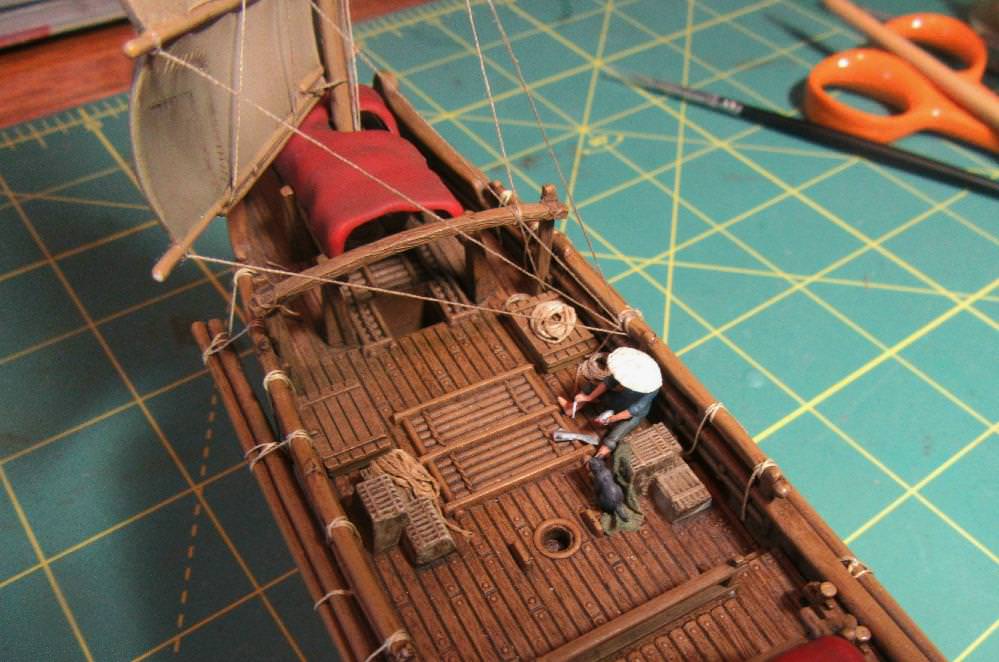
A coil of thread on the deck below the rail represents the excess line from the sheets.
The sheets, attached to the outer ends of the battens to adjust the sail angle to the wind, came next.
Since they worked together I would have thought the sheets would have been attached to a single control line via a series of blocks and pulleys for handier use. Rigging diagrams usually show this arrangement, and old pictures of operating junks sometimes do as well but they often show the lines tied off individually, too. I followed that seemingly awkward arrangement and tied the sheets off at the side rail next to the cook.
A coil of thread on the deck below the rail represents the excess line from the sheets.


YellowHammer

#513
Joined: March 28, 2006
KitMaker: 554 posts
Model Shipwrights: 219 posts

Posted: Tuesday, April 10, 2018 - 06:57 PM UTC
Excellent work Tim. Your eye for detail is amazing. I'm soaking this up like a sponge. Keep it coming.
John
John
TimReynaga
Joined: May 03, 2006
KitMaker: 2,500 posts
Model Shipwrights: 1,830 posts
Posted: Saturday, April 14, 2018 - 06:04 AM UTC
Thanks John.
Just a small update today; I had initially placed a coil of heavy thread under the winch near the anchors to represent natural fiber hawser.
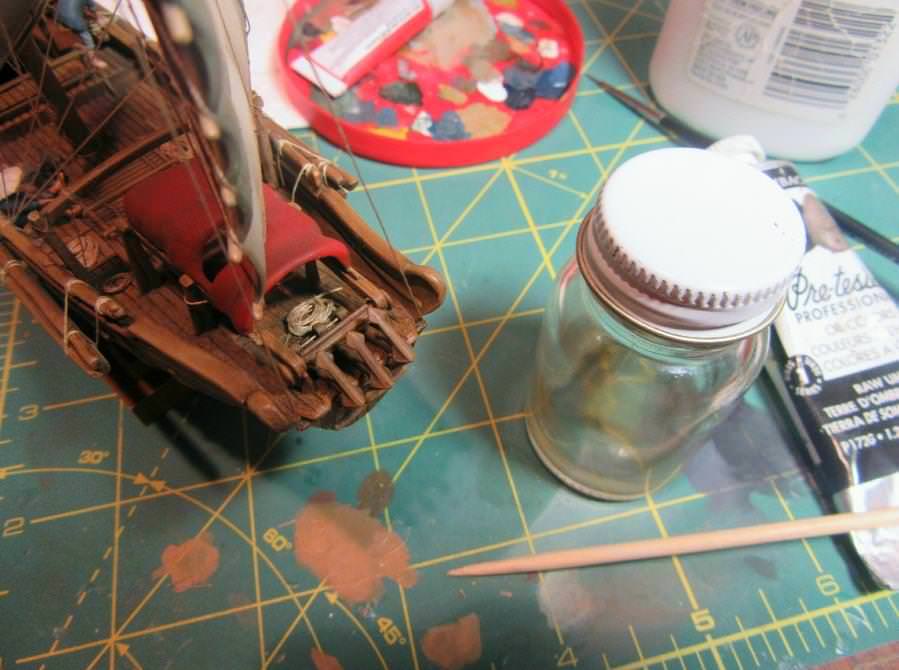
Upon later inspection it seemed a little weak to hold those heavy anchors, so I added a pile of chain there as well.
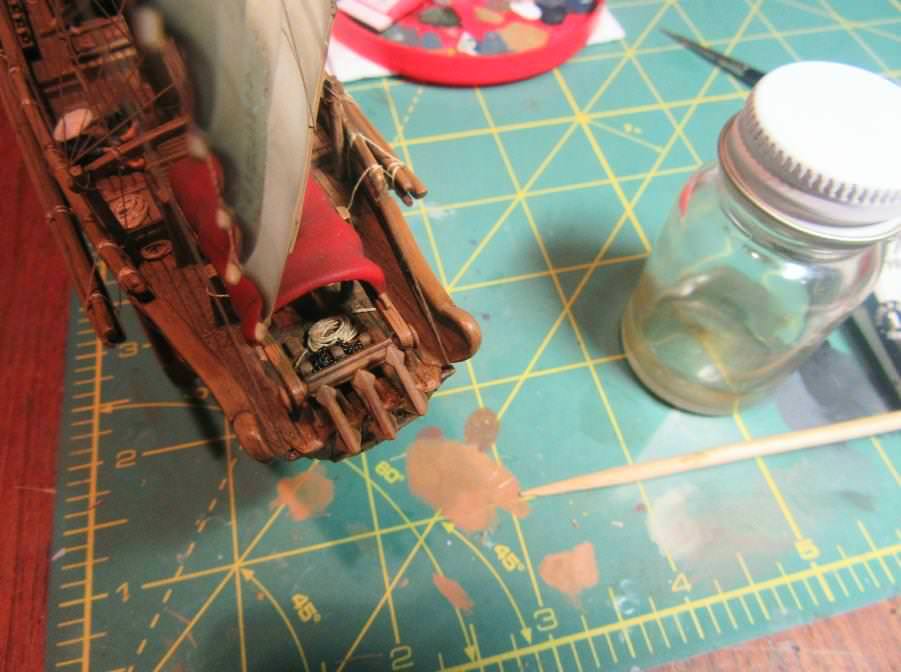
It isnt much and it is hard to see down in there, but the chain does add just a bit to the busy-ness on deck.
Just a small update today; I had initially placed a coil of heavy thread under the winch near the anchors to represent natural fiber hawser.
Upon later inspection it seemed a little weak to hold those heavy anchors, so I added a pile of chain there as well.
It isnt much and it is hard to see down in there, but the chain does add just a bit to the busy-ness on deck.
TimReynaga
Joined: May 03, 2006
KitMaker: 2,500 posts
Model Shipwrights: 1,830 posts
Posted: Saturday, April 14, 2018 - 09:19 PM UTC
Quoted Text
Tim,
Ok, I have an odd question that is a bit out in left field. Is there a way to save the entire Topic off as something like a PDF at one go? I have done some page by page, but that is a hassle. I could save the link, but after the PB image fiasco I don't really trust that for the long term.
This article, and your other one on the Pinta would be candidates as I found both informative, and full of excellent tips that can be used for a lot more than ships.
Thank you for both the journey and any possible answers....
Bob
Hi Bob,
I heard back from Armorama Managing Editor Carlos Martin heres his advice:
Quoted Text
The best I have found is using software like this: http://www.weenysoft.com/free-html-to-pdf-converter.html
And type the url of all the pages you want. As they are equal except for the page number, it should be quite straightforward.
As far as I know there is no way to show all messages of a thread without paging...
Good luck with it. If it doesnt work for you, let me know and Ill investigate further.


bwiber
Joined: August 03, 2008
KitMaker: 436 posts
Model Shipwrights: 31 posts
Posted: Saturday, April 14, 2018 - 10:32 PM UTC
Quoted Text
Quoted TextTim,
Ok, I have an odd question that is a bit out in left field. Is there a way to save the entire Topic off as something like a PDF at one go? I have done some page by page, but that is a hassle. I could save the link, but after the PB image fiasco I don't really trust that for the long term.
This article, and your other one on the Pinta would be candidates as I found both informative, and full of excellent tips that can be used for a lot more than ships.
Thank you for both the journey and any possible answers....
Bob
Hi Bob,
I heard back from Armorama Managing Editor Carlos Martin heres his advice:Quoted TextThe best I have found is using software like this: http://www.weenysoft.com/free-html-to-pdf-converter.html
And type the url of all the pages you want. As they are equal except for the page number, it should be quite straightforward.
As far as I know there is no way to show all messages of a thread without paging...
Good luck with it. If it doesnt work for you, let me know and Ill investigate further.
Thank you both for the information. Will give it a try and get back to you with the results....
You know, I don't know that I have seen a build that has been so interesting and amazing in a long time. I now know than I thought possible about the construction and rigging of Junks, as well about taking an old kit and making it into one that can compete with the most modern. Even without the captain's cabin this is an amazing build, details everywhere. The thing that is really nice is that they all fit, the make sense for the ship, its crew and the work it is engaged in.
Thank you for sharing.... Bob
UPDATE:
Tim,
Please give my thanks to Carlos for his suggestion, it works nicely. They even have another little program that will take the individual PDF files and merge them into one if you want.
It took me a whole 5 minutes to work through the process the first time, and it worked perfectly. Now I have your Pyro Pinta thread as both individual PDFs and as a merged file. What can I say? I sometimes get carried away.
Thank you both for your help, it is much appreciated.
Bob
TimReynaga
Joined: May 03, 2006
KitMaker: 2,500 posts
Model Shipwrights: 1,830 posts
Posted: Tuesday, April 17, 2018 - 10:12 AM UTC
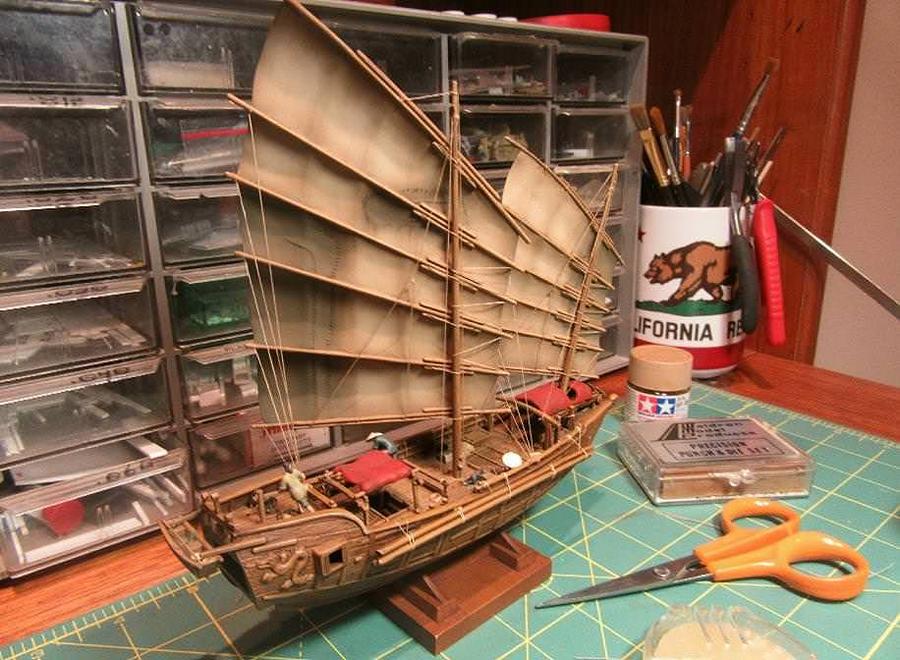
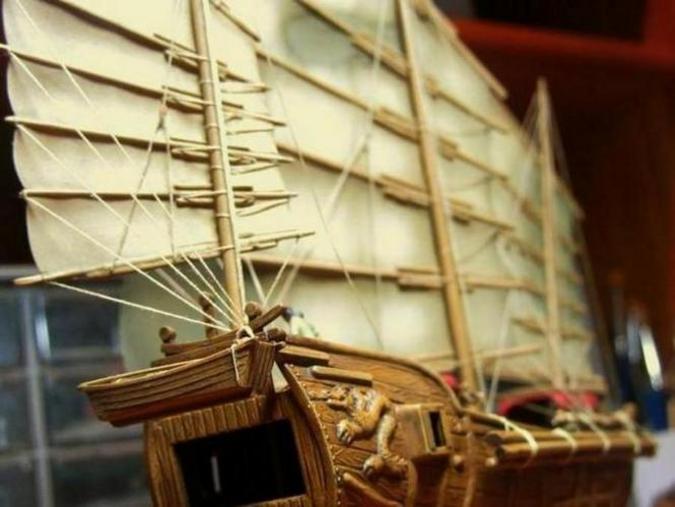
After touching up the little shiny spots left by the super glue securing the rigging on the foresails, I installed the mainmast and its associated rigging.
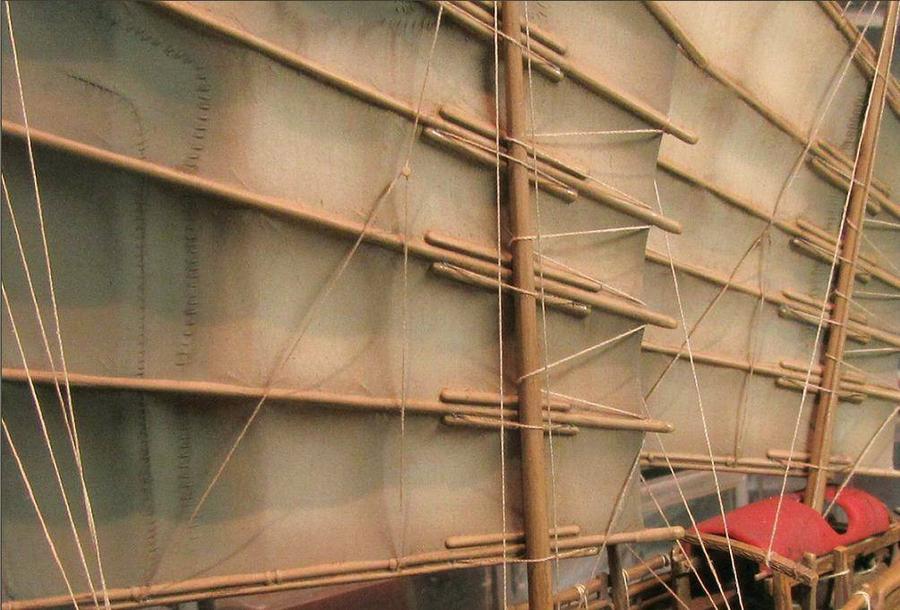
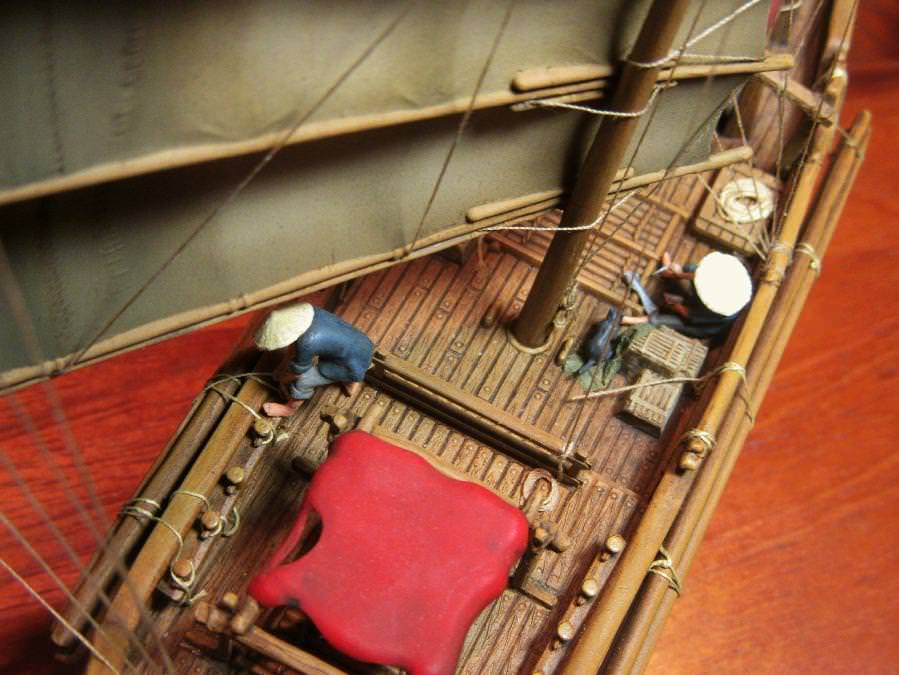
The rig arrangements on the mainsails were virtually the same as the foresails.
The topping lift was tied off at the rail just abaft the mainmast...
...and the sheets were tied off at the poop deck rail next to the helmswoman. This time, instead of tying up the excess lines in a coil hung from the rail, I tied them off in a hank as with the halyard line on the side of the mainmast.
Next up: the mizzen.

Hederstierna

#247

Joined: January 03, 2008
KitMaker: 1,102 posts
Model Shipwrights: 65 posts

Posted: Tuesday, April 17, 2018 - 11:04 AM UTC
What an excellent job on such a "basic"kit. It's been great following this build, and your eye for detail is first rate.
Thank you very much for a great log.
Jacob
Thank you very much for a great log.
Jacob

kpnuts

Joined: December 20, 2013
KitMaker: 1,179 posts
Model Shipwrights: 427 posts
Posted: Tuesday, April 17, 2018 - 11:16 AM UTC
Well I'm totally blown away by this build it is nothing short of outstanding. Some incredible modelling skills displayed there.

JClapp
#259
Joined: October 23, 2011
KitMaker: 2,265 posts
Model Shipwrights: 104 posts

Posted: Tuesday, April 17, 2018 - 08:26 PM UTC
The rigging looks amazingly realistic and effective.
She is hard on the wind, and you can really feel the sails pulling, every sheet is taught! I love it
She is hard on the wind, and you can really feel the sails pulling, every sheet is taught! I love it

YellowHammer
#513
Joined: March 28, 2006
KitMaker: 554 posts
Model Shipwrights: 219 posts
Posted: Tuesday, April 17, 2018 - 08:50 PM UTC
Tim,
The main mast looks great. The rigging looks spot on. You've really got the touch. It's really going to be a busy deck when you add the mizzen. I'm glad I went with the felucca on my build. It only has two masts. The Ertl Chinese Junk kit has 5 masts. I think I need much more practice before I tackle that. Keep the blog coming. I'm learning so much.
Thanks
John

RussellE
#306

Joined: June 27, 2010
KitMaker: 3,959 posts
Model Shipwrights: 2,777 posts
Posted: Wednesday, April 18, 2018 - 05:35 PM UTC
Tim, you just keep raising the bar! 

RedDuster
Joined: March 01, 2010
KitMaker: 7,078 posts
Model Shipwrights: 6,649 posts
Posted: Wednesday, April 18, 2018 - 11:12 PM UTC
Hi Tim,
what the other guys said, outstanding build, the rigging looks great, and all the minutia of a working boat really bring it to life.
Cheers
Si
what the other guys said, outstanding build, the rigging looks great, and all the minutia of a working boat really bring it to life.
Cheers
Si
TimReynaga
Joined: May 03, 2006
KitMaker: 2,500 posts
Model Shipwrights: 1,830 posts
Posted: Thursday, April 19, 2018 - 07:36 AM UTC
Thanks guys your kind comments are most appreciated!
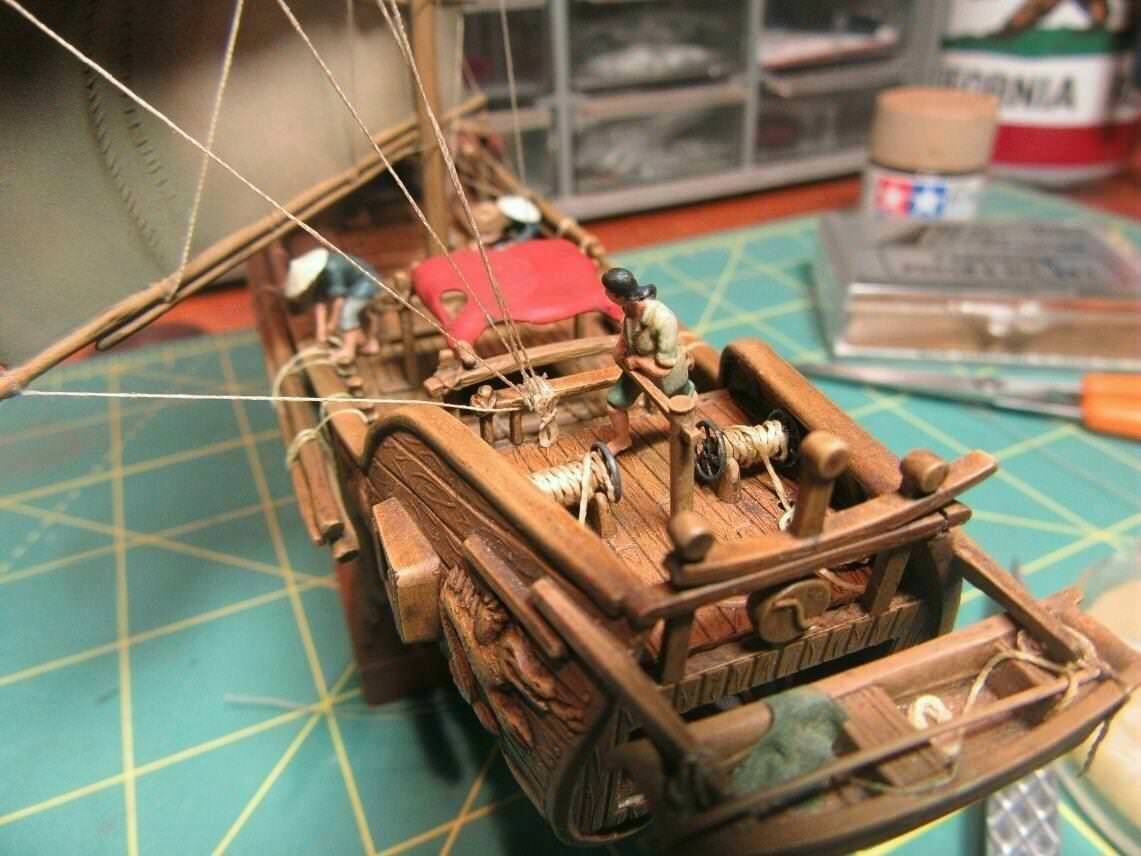
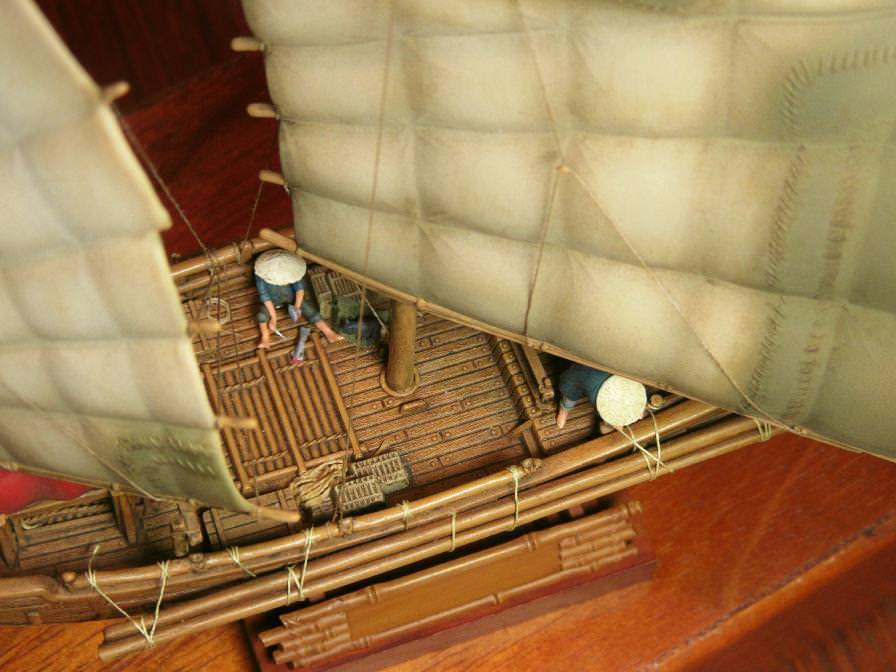
Last was the weisong, or what we in the West would call the mizzen.
As with the larger sails, the sheet lines were tied first to the ends of the battens, and then secured to the rail. In this case the luff hauling parrel and halyard line ends were coiled on the mast and on the outside of the stern rail too.
TimReynaga
Joined: May 03, 2006
KitMaker: 2,500 posts
Model Shipwrights: 1,830 posts
Posted: Friday, April 20, 2018 - 07:00 AM UTC
Having knocked it off while handling the model during subsequent construction (doh!) Ive now reattached the rudder.
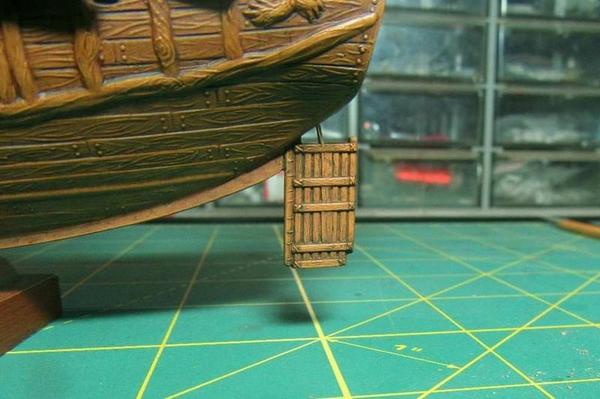
The Chinese (who actually invented the centerline rudder when Europeans were still using side mounted steerboards) developed a wide variety of rudder design variations, but a common feature of Chinese rudders was their ability to be raised and lowered for adjustment while at sea. This was the purpose of the cables attached to each of them in the drawing below:
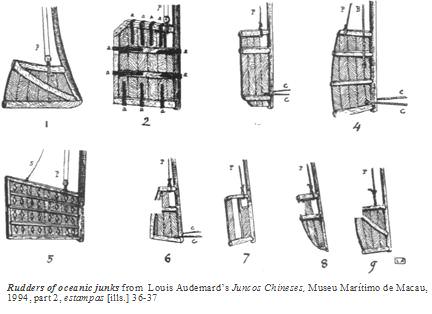
Some of the larger junks had cables from the rudder running all the way under the hull to winches at the bow (rudders 3, 4, and 6 above), and others had a simpler arrangement with only the dule (rudder adjusting cables) leading up to winches on deck aft. For my humble fishing junk, I opted for the latter with the natural fiber cables attached to the rudder and up through .059 inch grommets punched from .015 inch plastic sheet.
Amusingly, the Chinese referred to the stern of junks as the pigu (buttocks) of the ship.
The Chinese (who actually invented the centerline rudder when Europeans were still using side mounted steerboards) developed a wide variety of rudder design variations, but a common feature of Chinese rudders was their ability to be raised and lowered for adjustment while at sea. This was the purpose of the cables attached to each of them in the drawing below:
Some of the larger junks had cables from the rudder running all the way under the hull to winches at the bow (rudders 3, 4, and 6 above), and others had a simpler arrangement with only the dule (rudder adjusting cables) leading up to winches on deck aft. For my humble fishing junk, I opted for the latter with the natural fiber cables attached to the rudder and up through .059 inch grommets punched from .015 inch plastic sheet.
Amusingly, the Chinese referred to the stern of junks as the pigu (buttocks) of the ship.
YellowHammer
#513
Joined: March 28, 2006
KitMaker: 554 posts
Model Shipwrights: 219 posts
Posted: Friday, April 20, 2018 - 09:38 AM UTC
Tim,
The rudder cables look great. Will they extend through the cabin as well? You're in the home stretch now. It's really coming together.
A side note question for you. I'm still plugging away on my felucca build. I've been painting the hull. I used Tamiya rattle can dark yellow as the base coat and various brand acrylics. Painting all the scroll work on the rails has been kicking my butt. I'm about ready to do the oil wash to bring out the wood grain and weather the boat. My question concerns the Tamiya paint. The can calls it Acrylic Enamel paint. I was going to use paint thinner to dilute the oil paint for the wash. Will the oil wash attack the Tamiya paint?
Thanks for any info you might have and keep it up. You're teaching this old dog some new tricks.
John
TimReynaga
Joined: May 03, 2006
KitMaker: 2,500 posts
Model Shipwrights: 1,830 posts
Posted: Friday, April 20, 2018 - 11:17 PM UTC
Quoted Text
Tim,
The rudder cables look great. Will they extend through the cabin as well? You're in the home stretch now. It's really coming together.
A side note question for you. I'm still plugging away on my felucca build. I've been painting the hull. I used Tamiya rattle can dark yellow as the base coat and various brand acrylics. Painting all the scroll work on the rails has been kicking my butt. I'm about ready to do the oil wash to bring out the wood grain and weather the boat. My question concerns the Tamiya paint. The can calls it Acrylic Enamel paint. I was going to use paint thinner to dilute the oil paint for the wash. Will the oil wash attack the Tamiya paint?
Thanks for any info you might have and keep it up. You're teaching this old dog some new tricks.
John
Hi John,
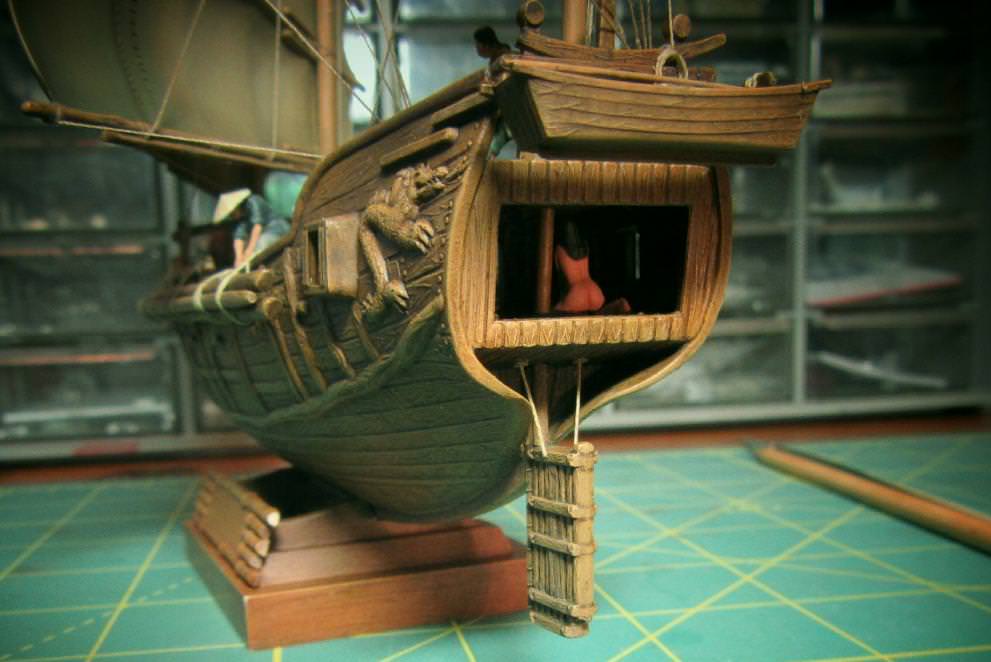
You are right, the rudder cables would have extended up through the cabin to connect with the reels topside, but I didnt show this so as not to disrupt the action in there... perhaps the crew secured the cables to the cabin deck and at the reels and just tucked the slack lines out of the way when not in use?
I havent a clue about the Tamiya rattle can paints and oil wash; Id spray some on a wreck model and try it out there before risking the felucca. Good luck with it.
TimReynaga
Joined: May 03, 2006
KitMaker: 2,500 posts
Model Shipwrights: 1,830 posts
Posted: Friday, April 20, 2018 - 11:17 PM UTC
As for the junk, the rudder cables and a few minor adjustments to the rigging basically finish things up!
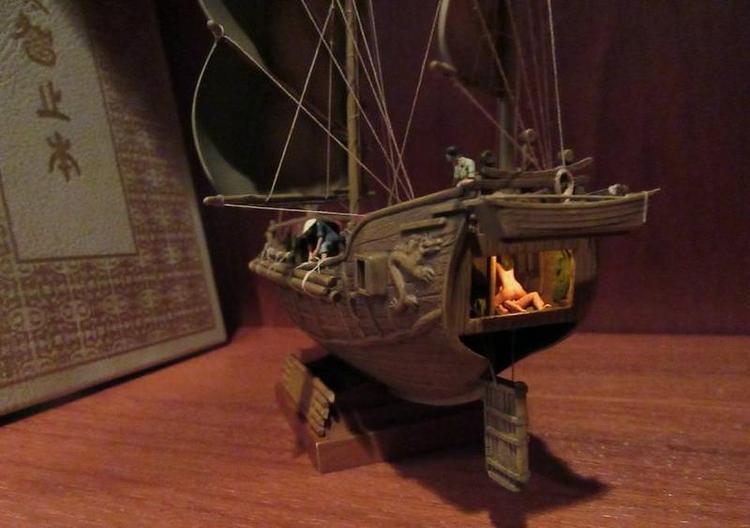
Here she is on the display shelf Ill post some better pictures soon.
Here she is on the display shelf Ill post some better pictures soon.
bwiber
Joined: August 03, 2008
KitMaker: 436 posts
Model Shipwrights: 31 posts
Posted: Saturday, April 21, 2018 - 12:50 AM UTC
Tim,
Probably on of the best, if not the best, build log I have read on the site.... and that includes armor which is my prime interest. I do love the combination of your modeling how to and the how and why of the ship itself. Definitely a working ship, and a build to be proud of.
Thanks for the voyage...
Bob
TimReynaga
Joined: May 03, 2006
KitMaker: 2,500 posts
Model Shipwrights: 1,830 posts
Posted: Saturday, April 21, 2018 - 09:13 PM UTC
Thanks, Bob. Despite being bogged down a time or two with what I really had intended to be a quick build, the voyage with this old classic has been great fun!
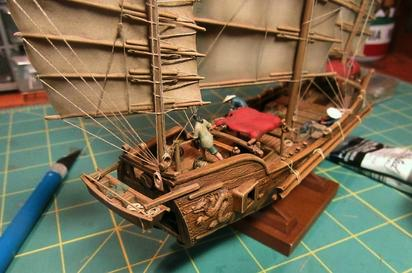
Here are some pics of the completed junk showing the activity on deck:

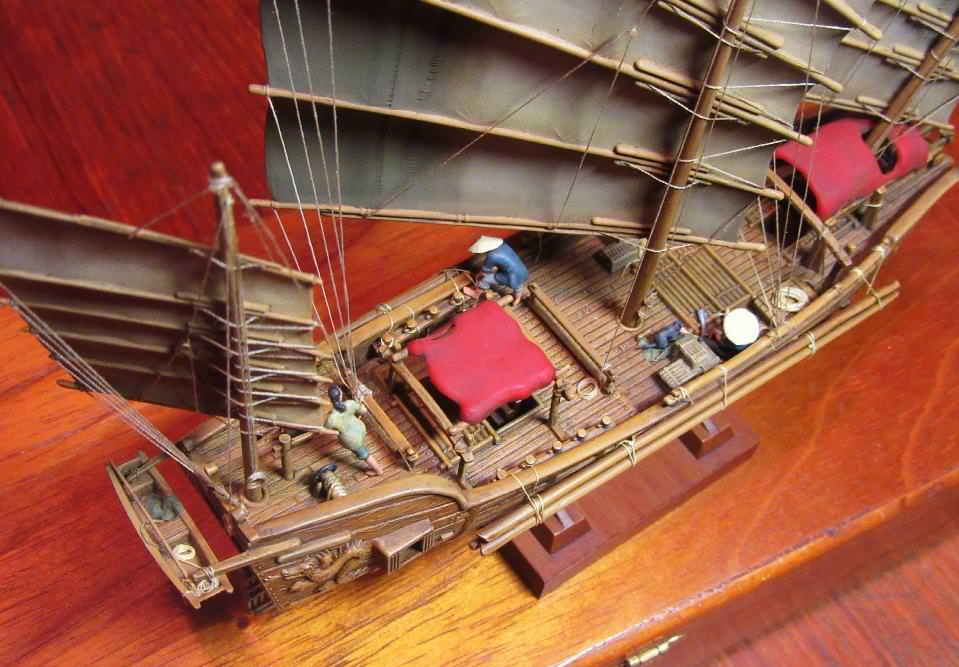
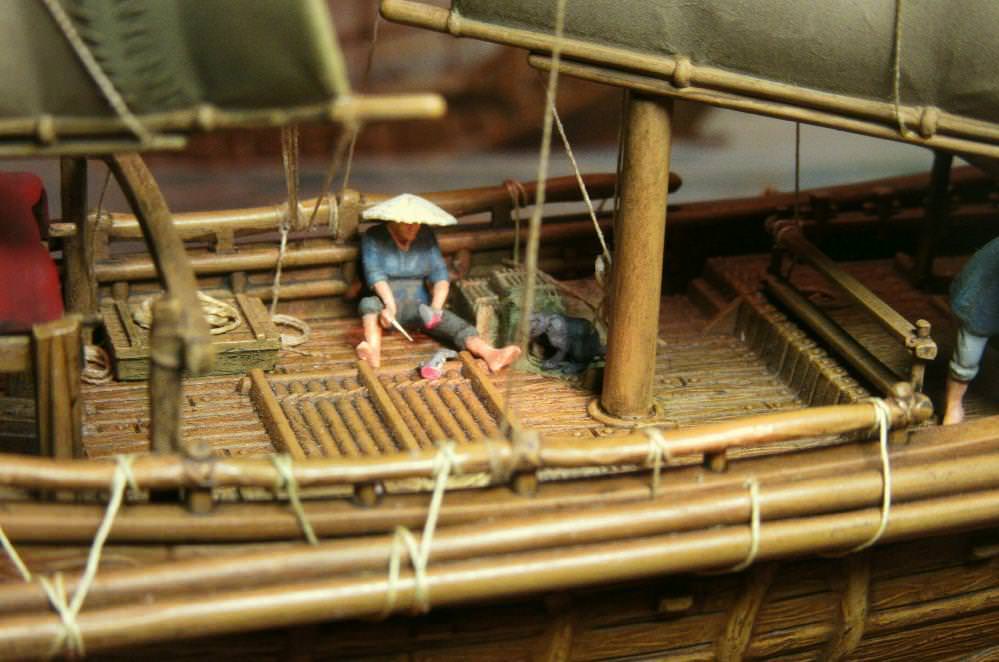
Pyros 1966 model kit is still quite good in its own right, but I really lucked out with the Preiser model railroad figures nothing brings a model to life like people!

Here are some pics of the completed junk showing the activity on deck:
Pyros 1966 model kit is still quite good in its own right, but I really lucked out with the Preiser model railroad figures nothing brings a model to life like people!

JJ1973
#345

Joined: August 22, 2011
KitMaker: 1,835 posts
Model Shipwrights: 1,832 posts
Posted: Saturday, April 21, 2018 - 11:09 PM UTC
Hi Tim!
Just joining in time to see you finishing this little jewel! What a fantastic build you did, and a great build log, that was absolutely fun to watch the entire time.
Congratulations on finishing your build and thanks for sharing this wonderful build log. It's always amazing to watch you bringing plastic to life!!
Cheers,
Jan

Fordboy

Joined: July 13, 2004
KitMaker: 2,169 posts
Model Shipwrights: 1,597 posts

Posted: Sunday, April 22, 2018 - 12:49 AM UTC
Ahoy Tim
What a superb build indeed.
Well done!
I loved your build story I really learnt a lot from it.
Cheers
Sean
What a superb build indeed.
Well done!
I loved your build story I really learnt a lot from it.
Cheers
Sean
kpnuts
Joined: December 20, 2013
KitMaker: 1,179 posts
Model Shipwrights: 427 posts
Posted: Sunday, April 22, 2018 - 01:33 AM UTC
That is plaine outstanding
YellowHammer
#513
Joined: March 28, 2006
KitMaker: 554 posts
Model Shipwrights: 219 posts
Posted: Sunday, April 22, 2018 - 02:20 AM UTC
Tim.
Outstanding build and blog. It's been a pleasure following your work. Till next time.
John
Outstanding build and blog. It's been a pleasure following your work. Till next time.
John
RussellE
#306
Joined: June 27, 2010
KitMaker: 3,959 posts
Model Shipwrights: 2,777 posts
Posted: Sunday, April 22, 2018 - 03:57 PM UTC
Congratulations on a fine commissioning Tim!
It's been a pleasure watching you bring this kit to life!
Especially enjoyed the cheeky scene in going on below decks!
Look forward to seeing what you do next!
It's been a pleasure watching you bring this kit to life!
Especially enjoyed the cheeky scene in going on below decks!
Look forward to seeing what you do next!
 |

WEB HOSTING BY


Copyright ©2021 Model Shipwrights and Kitmaker Network, a subsidiary of Silver Star Enterprises
All Rights Reserved. Please read our Conditions of Use and Privacy Policy.
All Rights Reserved. Please read our Conditions of Use and Privacy Policy.