Ships by Class/Type: Destroyers
This forum covers all types of destroyers from all eras.
1/200 Nichimo Hatsuzuki build
TimReynaga
Staff MemberAssociate Editor
MODEL SHIPWRIGHTS
Visit this Community
California, United States
Joined: May 03, 2006
KitMaker: 2,500 posts
Model Shipwrights: 1,830 posts
Posted: Wednesday, September 23, 2020 - 01:02 AM UTC

Quoted Text

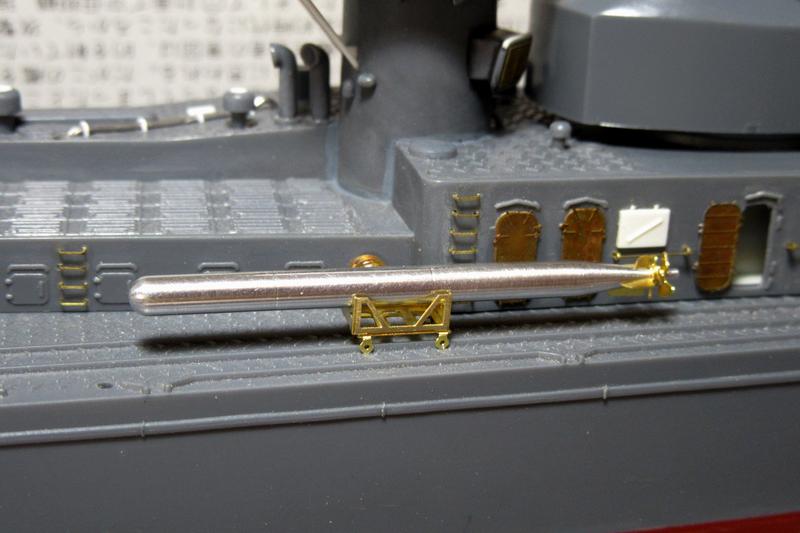
Tim, your attention to detail is always so impressive!

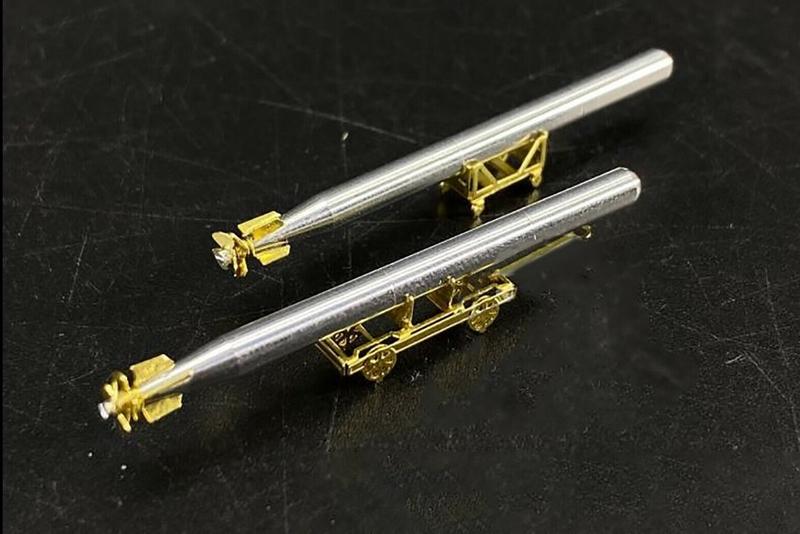
Surely this will take centre place in your "fleet"display when completed!


Quoted Text

Ok, I’m going to go and bury all my models in the backyard now. Tim, how the heck do you drill holes that small? I’ve broken dozens, maybe hundreds of steel, tungsten and hardened brass drill bits in my sixty years of modeling. I’ve used pin vices, variable speed drills, even tiny drill presses, but I couldn’t get consistent holes like you’ve done. Show us your secret. Do you have a secret NASA titanium set of tiny drill bits and a sub miniature electric drill?
VR, Russ


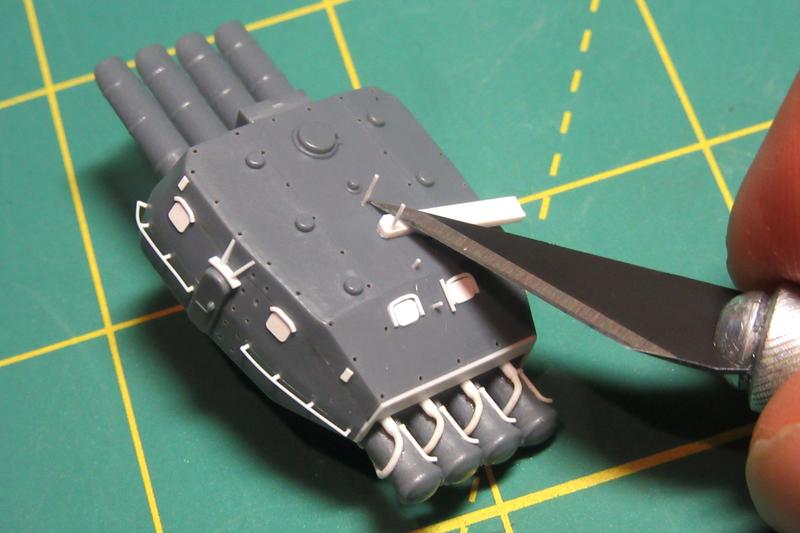
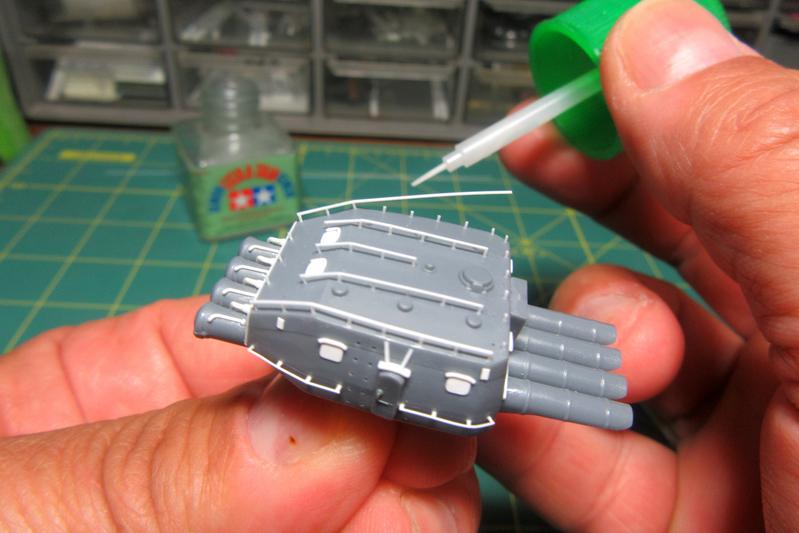
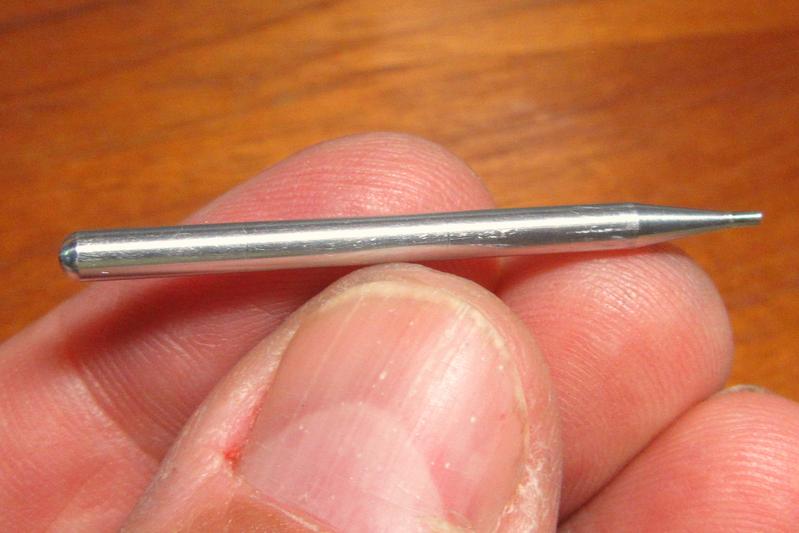
Russ, I find when drilling holes, it pays to "spot" them prior to drilling them with some sort of sharp pointer, that way you get the location exactly where you want it when you position the drill...


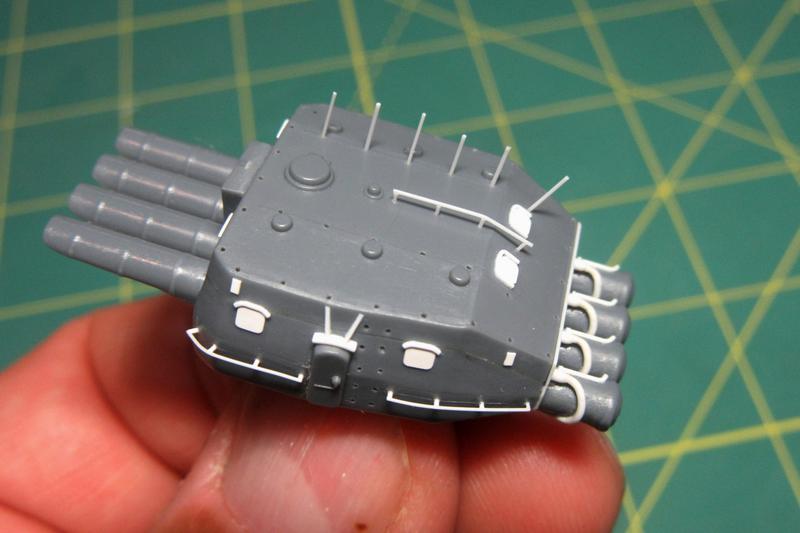
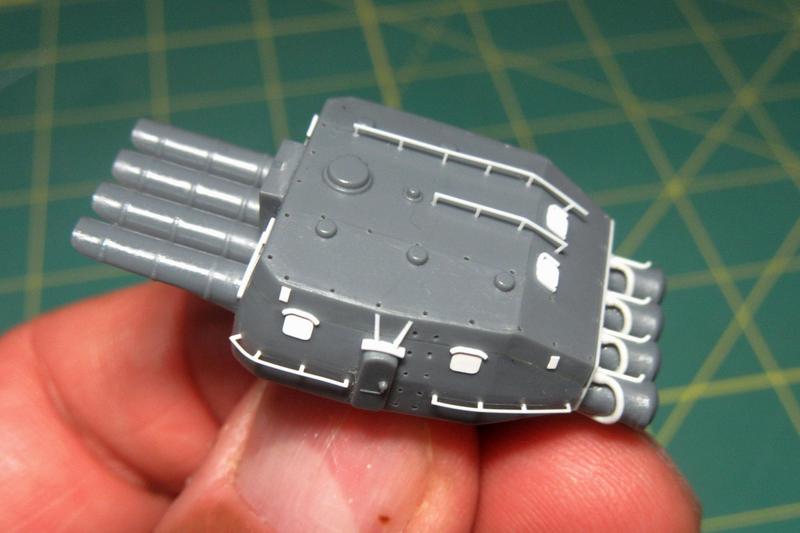
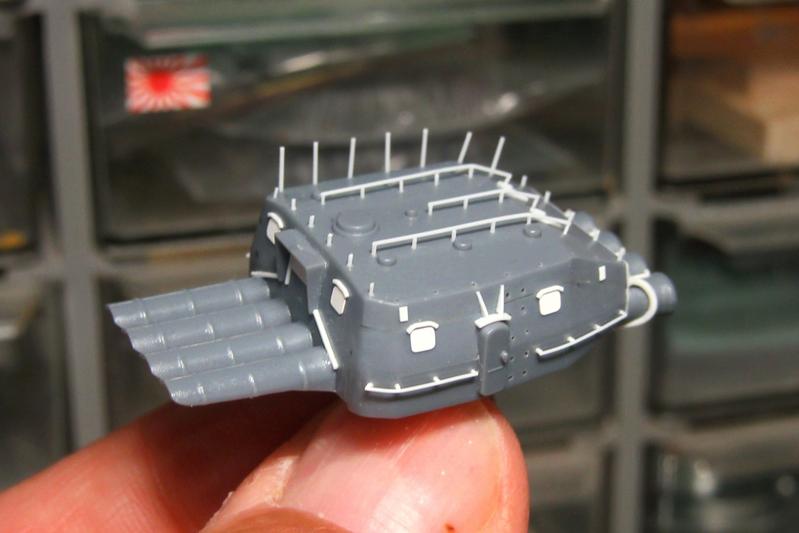
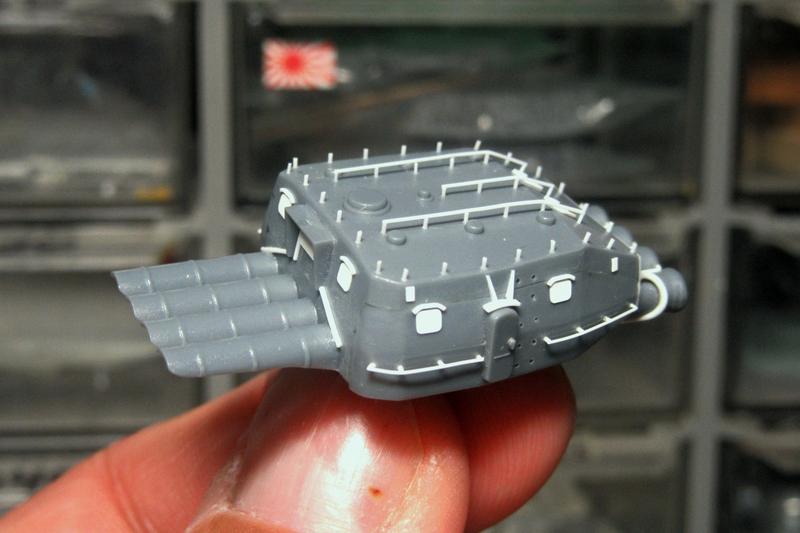
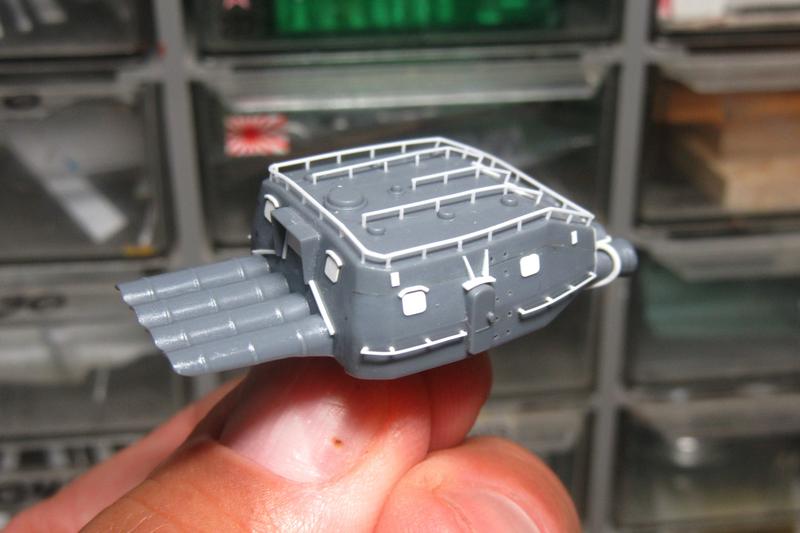
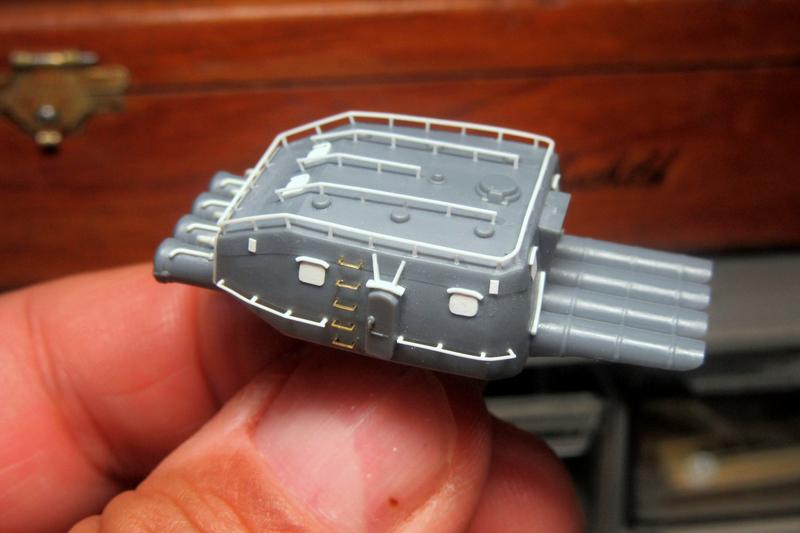
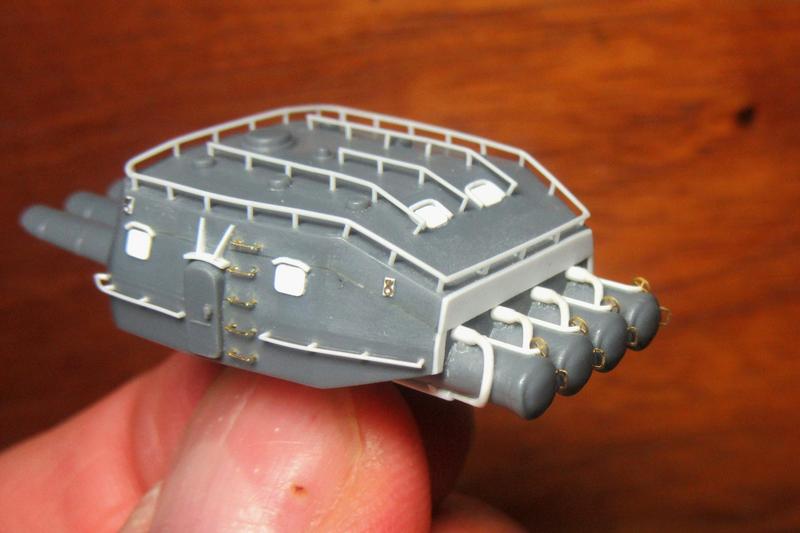
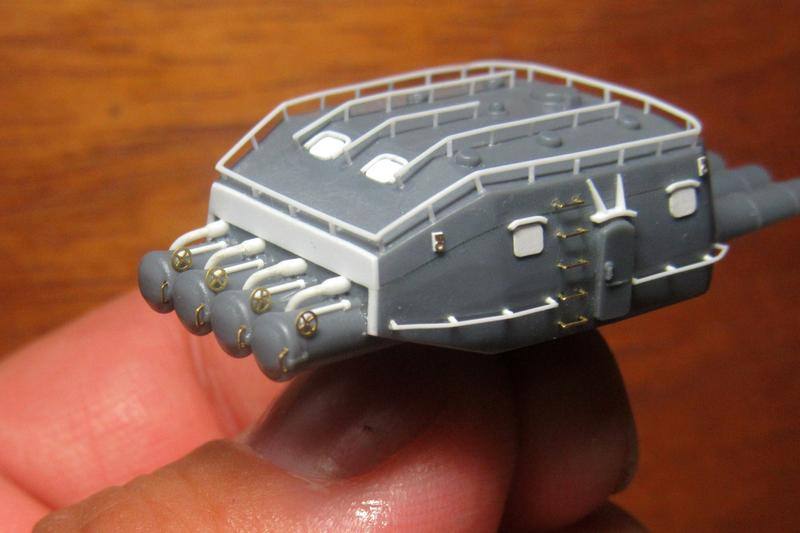
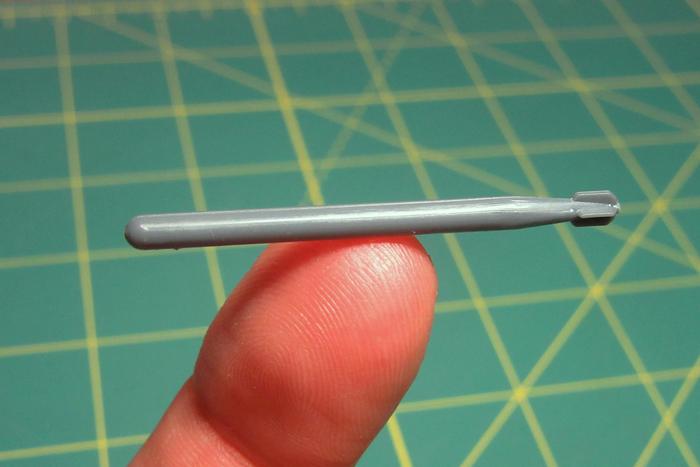
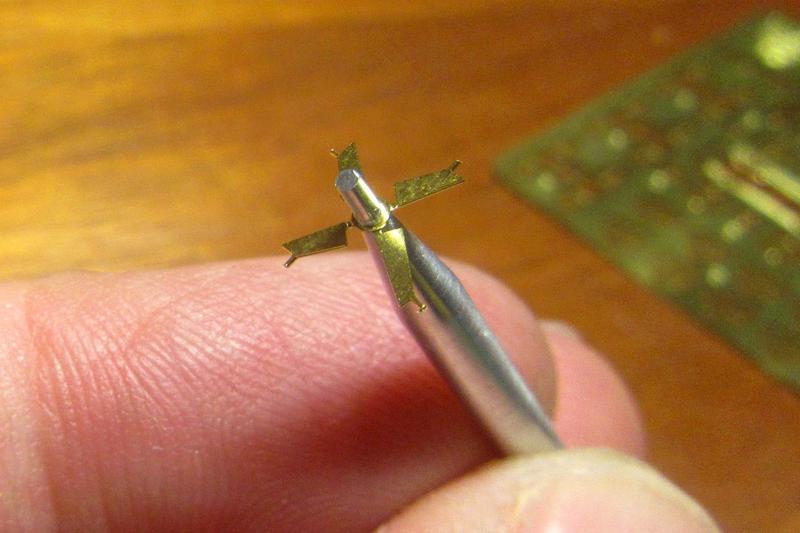
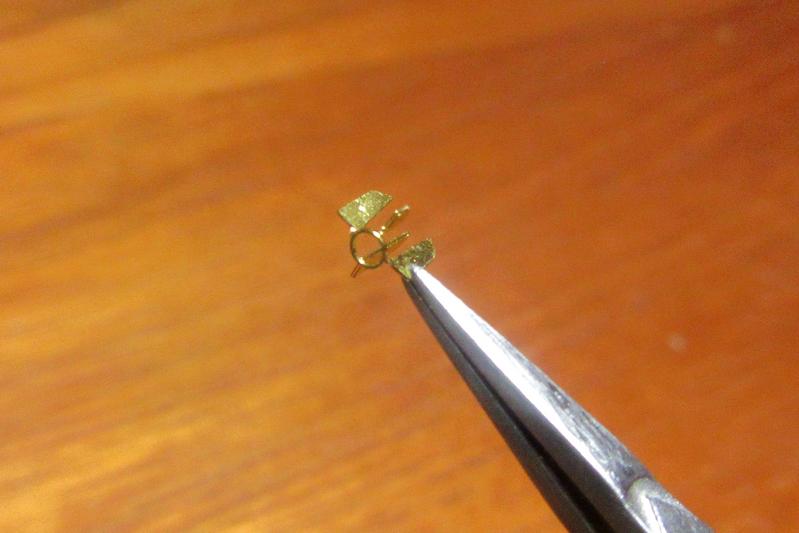
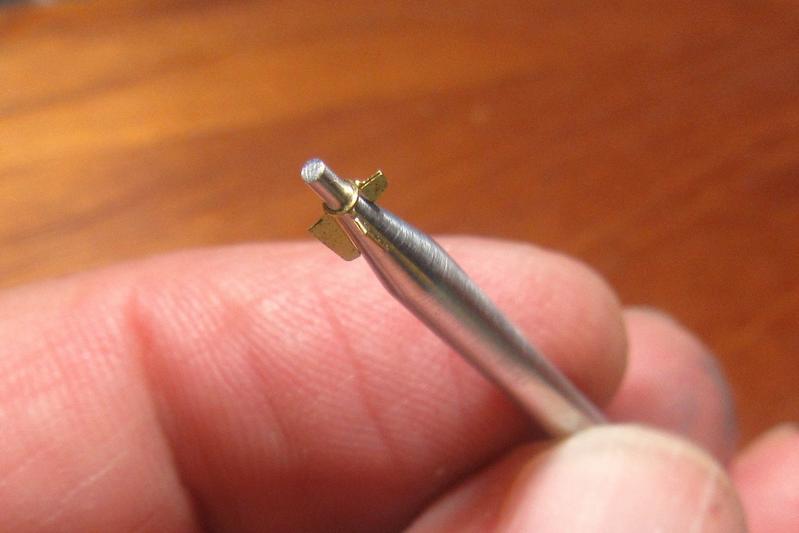
Thanks Russ - that is exactly what I do. I start by making a small starter hole with the tip of a No. 11 X-acto blade. Then I simply hand twist out the holes with a No. 80 drill bit set into my X-acto knife handle. There are no special tricks or tools, just slow and methodical work.


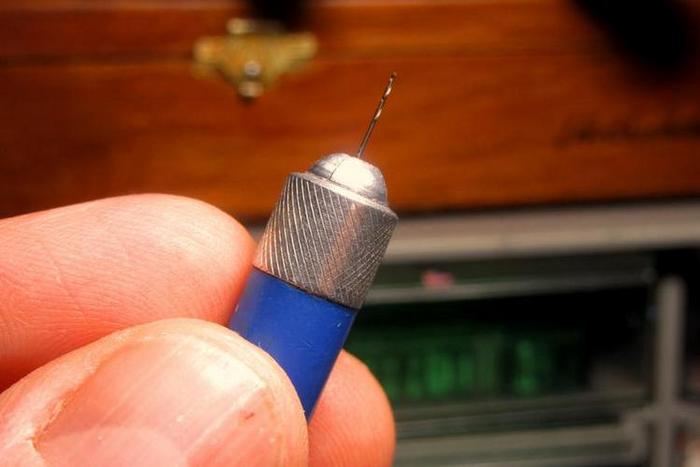
By the way... I bought six of the fragile No. 80 bits for this project, and I'm now down to just two...

Kevlar06
Visit this Community
Washington, United States
Joined: March 15, 2009
KitMaker: 3,670 posts
Model Shipwrights: 173 posts
Posted: Wednesday, September 23, 2020 - 04:47 AM UTC
Tim, Russ,
I spot mine too, using a needle chucked in a pin vise. But I feel a bit better now, knowing that Tim goes through a few bits too. Still, such neat work as Tim does is pretty incredible to watch. If someone would come up with an “unbreakable” drill bit, they could make a killing. Ok, I’ll go dig up my models now.
VR, Russ
timmyp
Visit this Community
Virginia, United States
Joined: May 18, 2008
KitMaker: 496 posts
Model Shipwrights: 404 posts
Posted: Wednesday, September 23, 2020 - 10:26 AM UTC

Quoted Text

Mark, Gary, and John, thanks!

In addition to the side rails, Japanese torpedo launchers had short safety rails on their tops as well.

The rails are visible in this image of a launcher aboard Shiranui. Not only were there rails along the edges, but there were three rows of them in the center too.


After drilling out the 43 top stanchion locator holes, the safety rails were installed in the same way as the handrails on the sides. These things were crowded in there pretty closely, so my construction sequence was to build them up beginning with the center groups in an effort to minimize damage while working on rails along the outer edges.


For these slightly taller vertical safety rails I used a thicker .020” tool to help cut the stanchions to uniform heights.


Finally, the rails were secured to the tops of the stanchions with careful applications of Tamiya Extra Thin cement.


Yes, yes, but will these little gems actually launch a torpedo??

Tim
TimReynaga
Staff MemberAssociate Editor
MODEL SHIPWRIGHTS
Visit this Community
California, United States
Joined: May 03, 2006
KitMaker: 2,500 posts
Model Shipwrights: 1,830 posts
Posted: Thursday, September 24, 2020 - 02:44 AM UTC

Quoted Text

Yes, yes, but will these little gems actually launch a torpedo??


I'm workin' on it!

TimReynaga
Staff MemberAssociate Editor
MODEL SHIPWRIGHTS
Visit this Community
California, United States
Joined: May 03, 2006
KitMaker: 2,500 posts
Model Shipwrights: 1,830 posts
Posted: Friday, September 25, 2020 - 04:41 PM UTC
After the center rail groups were in place, it was the same drill again for the rails along the outer edges.


GazzaS
#424
Visit this Community
Queensland, Australia
Joined: April 23, 2015
KitMaker: 4,648 posts
Model Shipwrights: 249 posts
Posted: Saturday, September 26, 2020 - 12:12 PM UTC
That really adds a lot of interesting detail to an often overlooked part. Sweet!
d6mst0
#453
Visit this Community
Texas, United States
Joined: August 28, 2016
KitMaker: 1,925 posts
Model Shipwrights: 1,298 posts
Posted: Sunday, September 27, 2020 - 01:03 AM UTC
Tim,

Very nice work with the installation of the rails. That piece really is much improved from when it first came out of the box.

Mark
TimReynaga
Staff MemberAssociate Editor
MODEL SHIPWRIGHTS
Visit this Community
California, United States
Joined: May 03, 2006
KitMaker: 2,500 posts
Model Shipwrights: 1,830 posts
Posted: Sunday, September 27, 2020 - 03:05 AM UTC
Gary and Mark, thanks!


One of the challenges of these busy assemblies is avoiding damaging the delicate structures when handling the part as I add other details; I just noticed on the last pic that I've managed to knock off the rainguard over one of the vision ports.

d6mst0
#453
Visit this Community
Texas, United States
Joined: August 28, 2016
KitMaker: 1,925 posts
Model Shipwrights: 1,298 posts
Posted: Sunday, September 27, 2020 - 09:11 AM UTC
Tim,

I first was going to say can he add anything more to the torpedo mount and thought no he can't add anymore. Then I noticed the ladder on the side by the door haven't been installed, so yes he can...LOL.

Mark
TimReynaga
Staff MemberAssociate Editor
MODEL SHIPWRIGHTS
Visit this Community
California, United States
Joined: May 03, 2006
KitMaker: 2,500 posts
Model Shipwrights: 1,830 posts
Posted: Sunday, September 27, 2020 - 12:32 PM UTC

Quoted Text

Tim,

I first was going to say can he add anything more to the torpedo mount and thought no he can't add anymore. Then I noticed the ladder on the side by the door haven't been installed, so yes he can...LOL.

Mark


Mark, you are right!


The ten etched brass side handgrabs have now been added using AKA Model (set PD3503) 1/350 etched brass ladder steps.

YellowHammer
#513
Visit this Community
Alabama, United States
Joined: March 28, 2006
KitMaker: 554 posts
Model Shipwrights: 219 posts
Posted: Sunday, September 27, 2020 - 02:40 PM UTC
Tim,
Wow! Now you're going to have to finish this build so you'll have a proper display base for that torpedo mount!
John
RussellE
#306
Visit this Community
Victoria, Australia
Joined: June 27, 2010
KitMaker: 3,959 posts
Model Shipwrights: 2,777 posts
Posted: Monday, September 28, 2020 - 11:22 PM UTC
Wow Tim
rolltide31
#377
Visit this Community
Texas, United States
Joined: June 27, 2010
KitMaker: 1,481 posts
Model Shipwrights: 1,332 posts
Posted: Tuesday, September 29, 2020 - 03:16 AM UTC
Tim,

Just now catching up, real life events have kept me from visiting. WOW! Just WOW! Amazing work and attention to detail. I am looking forward to seeing some make up applied to your work of art.

Truly inspiring work!

David
RedDuster
Visit this Community
England - South East, United Kingdom
Joined: March 01, 2010
KitMaker: 7,078 posts
Model Shipwrights: 6,649 posts
Posted: Tuesday, September 29, 2020 - 04:17 AM UTC
Excellent job on the TTs Tim,

The handrails look superb, as does all the other scratchbuilt details.

Cheers

Si
TimReynaga
Staff MemberAssociate Editor
MODEL SHIPWRIGHTS
Visit this Community
California, United States
Joined: May 03, 2006
KitMaker: 2,500 posts
Model Shipwrights: 1,830 posts
Posted: Tuesday, September 29, 2020 - 02:06 PM UTC
Thank you gentlemen, you are kind as always!


Finishing up construction of the launcher, I added four tie down rings from .005 inch strip with North Star etched brass tightening screws and eye bolts (set 350070). These flip-up rings were tie points for lines to secure the 18-ton launcher in a neutral position when it wasn’t in use.


I also added four hand wheels from North Star etched brass 1.2mm fly-wheels (350081) as well as handgrabs on the tube hatches aft from North Star 1/350 ladder steps type 1 (350016).

Next up: the main guns!
d6mst0
#453
Visit this Community
Texas, United States
Joined: August 28, 2016
KitMaker: 1,925 posts
Model Shipwrights: 1,298 posts
Posted: Wednesday, September 30, 2020 - 04:45 AM UTC
Tim,

Sweet! Adding those PE pieces was a great idea.

Mark
GazzaS
#424
Visit this Community
Queensland, Australia
Joined: April 23, 2015
KitMaker: 4,648 posts
Model Shipwrights: 249 posts
Posted: Wednesday, September 30, 2020 - 05:30 PM UTC
That is one amazing torpedo launcher, Tim! I imagine trying to bend those tiny little handles must have been a chore.
TimReynaga
Staff MemberAssociate Editor
MODEL SHIPWRIGHTS
Visit this Community
California, United States
Joined: May 03, 2006
KitMaker: 2,500 posts
Model Shipwrights: 1,830 posts
Posted: Saturday, October 03, 2020 - 03:51 AM UTC
Mark and Gary, thanks! The etch bits were a challenge to handle, but they do add a bit of finesse to the launcher.

Before moving on to the main guns, I thought it would be fun to play with the torpedoes just a bit more.

The original plan had been to upgrade the nice little molded plastic torpedo part provided by Nichimo...


– but then I discovered Chuanyu of China’s cool six-pack of 1/200 scale multimedia Japanese weapons.

Consisting of turned aluminum bodies with etched brass fins, propellers, and two types of transport trollies, these simple kits assemble into beautiful little torpedoes.


Chuanyu doesn’t identify (at least in English) the torpedoes as Japanese, but at 29.5 scale feet they are dimensionally accurate for Type 93s. Also, the distinctive Imperial Navy-style shipboard destroyer and land/aircraft carrier transport trolleys are dead giveaways as to their Japanese identity.

Assembly is straightforward, if fiddly. The four fins come as a single unit designed to be mounted to the tail of the torpedo and twisted into shape.


An oddity of this kit is that three of the etched fins are of the same dimensions, and the fourth is a little longer. This is partly correct (the bottom fin was actually a little longer than the side fins), but the top fins on the Type 93s were shorter in length than the other three. Correcting this small error was simply a matter of trimming down the errant fin to match the abbreviated top fins characteristic of the Japanese “Long Lance” shipboard torpedoes.


These unusual fin arrangements are evident on the preserved example at the U.S. Naval Academy.


The addition of its etched brass counterrotating propellers completed assembly.

Set on its shipboard trolley and mounted aboard Hatsuzuki, the tiny Long Lance looks ready to take on the U.S. Navy!
GazzaS
#424
Visit this Community
Queensland, Australia
Joined: April 23, 2015
KitMaker: 4,648 posts
Model Shipwrights: 249 posts
Posted: Saturday, October 03, 2020 - 08:24 AM UTC
Excellent little torpedoes.
d6mst0
#453
Visit this Community
Texas, United States
Joined: August 28, 2016
KitMaker: 1,925 posts
Model Shipwrights: 1,298 posts
Posted: Saturday, October 03, 2020 - 08:50 AM UTC

Quoted Text

Excellent little torpedoes.


Ditto!

Mark
Kevlar06
Visit this Community
Washington, United States
Joined: March 15, 2009
KitMaker: 3,670 posts
Model Shipwrights: 173 posts
Posted: Saturday, October 03, 2020 - 10:34 AM UTC

Quoted Text


Quoted Text

Excellent little torpedoes.


Ditto!

Mark


Naw...I don’t think they’re that good— with all the exceptional work Tim has done elsewhere, I’d have expected to see those counter rotating props motorized— or at least spin when you blow on them.... I think Tim let us down— could’ve been better (tongue in check of course!)
VR, Russ
TimReynaga
Staff MemberAssociate Editor
MODEL SHIPWRIGHTS
Visit this Community
California, United States
Joined: May 03, 2006
KitMaker: 2,500 posts
Model Shipwrights: 1,830 posts
Posted: Saturday, October 03, 2020 - 12:07 PM UTC

Quoted Text

... I’d have expected to see those counter rotating props motorized — or at least spin when you blow on them....


Who says they don't?!

Kevlar06
Visit this Community
Washington, United States
Joined: March 15, 2009
KitMaker: 3,670 posts
Model Shipwrights: 173 posts
Posted: Saturday, October 03, 2020 - 01:43 PM UTC

Quoted Text


Quoted Text

... I’d have expected to see those counter rotating props motorized — or at least spin when you blow on them....


Who says they don't?!


I wouldn’t doubt it!
VR, Russ
RussellE
#306
Visit this Community
Victoria, Australia
Joined: June 27, 2010
KitMaker: 3,959 posts
Model Shipwrights: 2,777 posts
Posted: Saturday, October 03, 2020 - 10:08 PM UTC

Quoted Text

Set on its shipboard trolley and mounted aboard Hatsuzuki, the tiny Long Lance looks ready to take on the U.S. Navy!


They look too good to paint, Tim
TimReynaga
Staff MemberAssociate Editor
MODEL SHIPWRIGHTS
Visit this Community
California, United States
Joined: May 03, 2006
KitMaker: 2,500 posts
Model Shipwrights: 1,830 posts
Posted: Sunday, October 04, 2020 - 02:47 AM UTC

Quoted Text


Quoted Text

Set on its shipboard trolley and mounted aboard Hatsuzuki, the tiny Long Lance looks ready to take on the U.S. Navy!


They look too good to paint, Tim


I know what you mean, Russ - I always find it to be a bit of a shame to throw gray paint (or in this case, gray, silver, and black) over all those lovely gleaming metal parts!