

You are a brave man Si.. Keep up the great work. But what has it got to do with the Enterprise?
Cheers
Warren


Go to modelshipwrights.com for the current dynamic site!
Campaigns
Want to be part of a group build? This is where to start, plan, and meet about them.
Want to be part of a group build? This is where to start, plan, and meet about them.
Hosted by Jim Starkweather
Official Thread: Enterprise Campaign

warreni

Joined: August 14, 2007
KitMaker: 5,926 posts
Model Shipwrights: 2,624 posts

Posted: Monday, May 06, 2013 - 02:44 PM UTC

JClapp

#259

Joined: October 23, 2011
KitMaker: 2,265 posts
Model Shipwrights: 104 posts

Posted: Monday, May 06, 2013 - 03:19 PM UTC
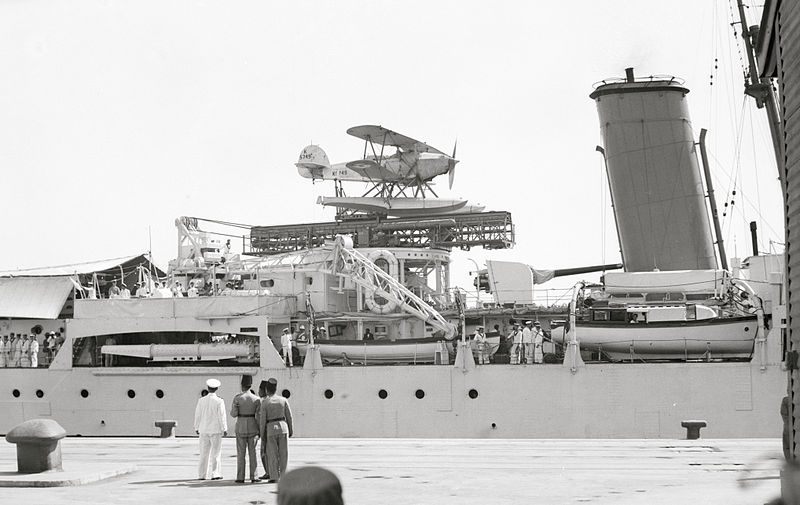
HMS Enterprise was a WWII cruiser that carried that Osprey on a catapult, Wiki has this charming photo

warreni
Joined: August 14, 2007
KitMaker: 5,926 posts
Model Shipwrights: 2,624 posts
Posted: Monday, May 06, 2013 - 04:44 PM UTC
Thanks for that Jonathan. You learn something everyday.
Cheers
Warren
Cheers
Warren

RedDuster

Joined: March 01, 2010
KitMaker: 7,078 posts
Model Shipwrights: 6,649 posts

Posted: Tuesday, May 07, 2013 - 08:31 AM UTC
That is one of my favourite pics of HMS Enterprise's Oeprey Jonathan.
Warren, I think this one passes the line between bravery and insanity. (But worth it)
I have promised myself no more 1/72nd Biplanes.
Si
Warren, I think this one passes the line between bravery and insanity. (But worth it)
I have promised myself no more 1/72nd Biplanes.
Si

TheDiggs
Joined: April 25, 2008
KitMaker: 338 posts
Model Shipwrights: 160 posts

Posted: Tuesday, May 07, 2013 - 11:57 PM UTC
Finally getting started on my Enterprise C.

JClapp
#259
Joined: October 23, 2011
KitMaker: 2,265 posts
Model Shipwrights: 104 posts
Posted: Wednesday, May 08, 2013 - 08:58 PM UTC
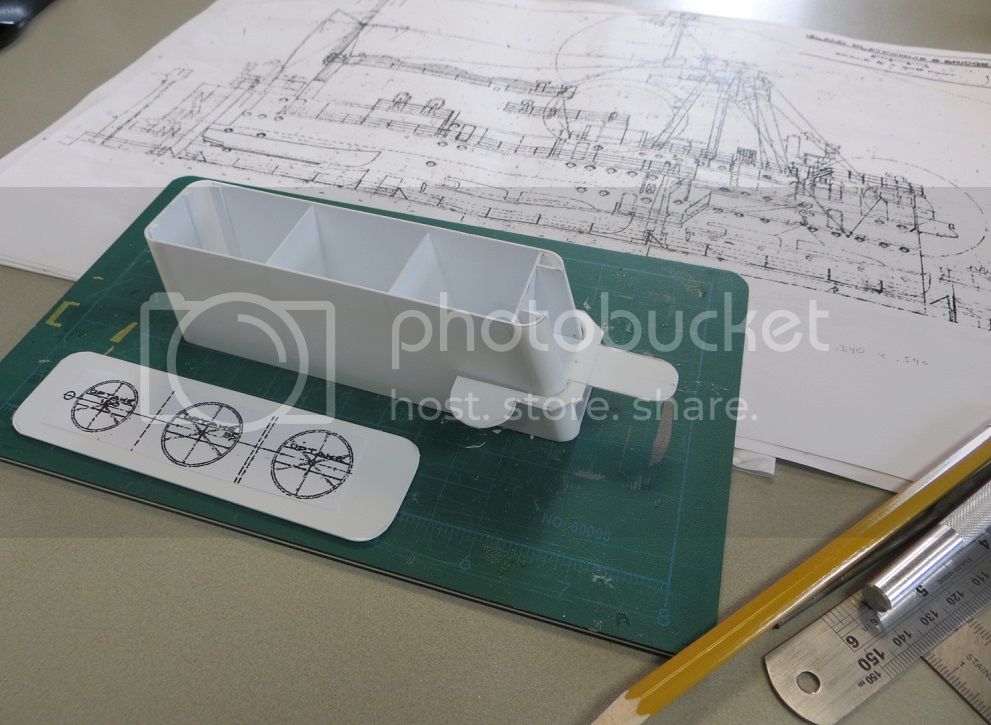
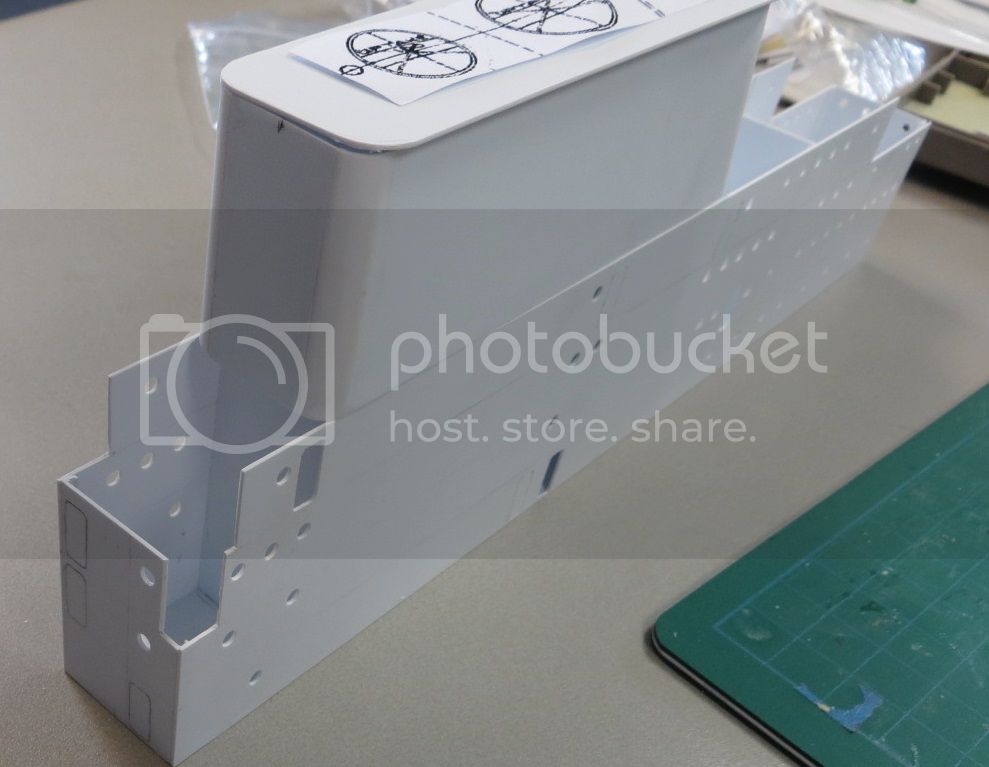
so it begins.
sides and ends of basic island structure made, all portholes located and drilled.
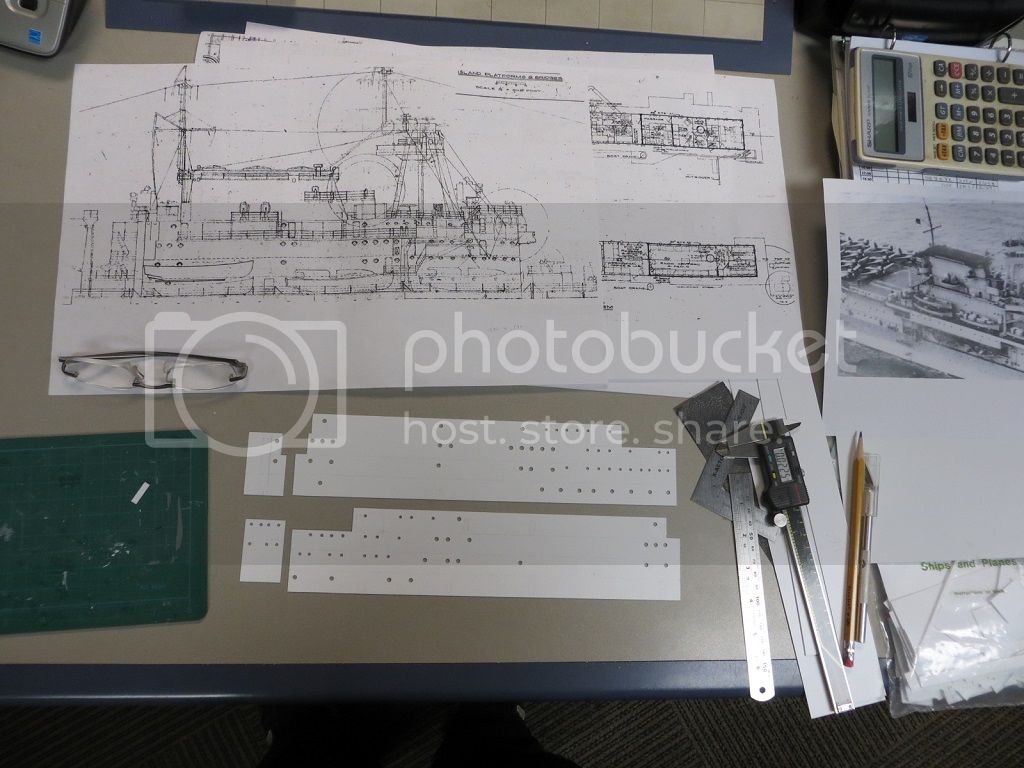
sides and ends of basic island structure made, all portholes located and drilled.

MichaelSatin
Joined: January 19, 2008
KitMaker: 3,909 posts
Model Shipwrights: 255 posts

Posted: Thursday, May 09, 2013 - 12:45 AM UTC
Nice start Johnathan, this is going to be very impressive!
Michael
Michael

windysean
Joined: September 11, 2009
KitMaker: 1,917 posts
Model Shipwrights: 54 posts

Posted: Thursday, May 09, 2013 - 01:04 AM UTC
Quoted Text
Nice start Johnathan, this is going to be very impressive!
Michael
Ditto!
-Sean
RedDuster
Joined: March 01, 2010
KitMaker: 7,078 posts
Model Shipwrights: 6,649 posts
Posted: Saturday, May 11, 2013 - 05:37 AM UTC
Great start Jonathan,
Disaster struck the Osprey, Dropped the damned thing on the way to the temporary work bench.

Damage wasn't fatal, repairs under way.

Struts attached to the floats and jigged.

Still hanging in there, but I must admit I will be glad when this one is done.
Si
Disaster struck the Osprey, Dropped the damned thing on the way to the temporary work bench.

Damage wasn't fatal, repairs under way.

Struts attached to the floats and jigged.

Still hanging in there, but I must admit I will be glad when this one is done.
Si
JClapp
#259
Joined: October 23, 2011
KitMaker: 2,265 posts
Model Shipwrights: 104 posts
Posted: Saturday, May 11, 2013 - 07:04 AM UTC
dropped, Oh no! I hate when that happens! good to see it was salvageable. writing off a nearly complete model is heartbreaking.
Those brass rod stays look really good, I might go that route if I ever get up the nerve to build a biplane.
I located and scribed on all the hatches, 21 of them. That actually took quite a while. Ive rubbed pencil lead into the scribe lines so they can be seen.
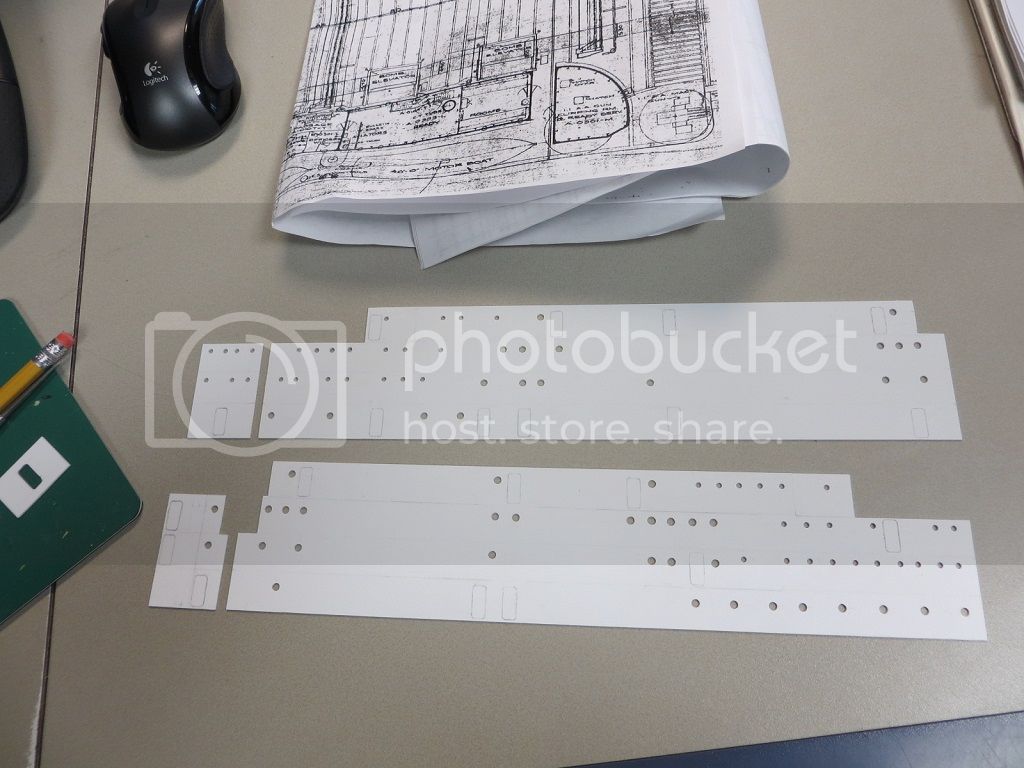
I thought I might cut a number of them open and build a few interiors. That would add alot of work, so Im putting off assembling this part for a while.
Today I bought a piece of 1/2" plastic tubing which I will quarter lenghtwise in the band saw to make the corners of the uptake enclosure.
Those brass rod stays look really good, I might go that route if I ever get up the nerve to build a biplane.
I located and scribed on all the hatches, 21 of them. That actually took quite a while. Ive rubbed pencil lead into the scribe lines so they can be seen.
I thought I might cut a number of them open and build a few interiors. That would add alot of work, so Im putting off assembling this part for a while.
Today I bought a piece of 1/2" plastic tubing which I will quarter lenghtwise in the band saw to make the corners of the uptake enclosure.
JClapp
#259
Joined: October 23, 2011
KitMaker: 2,265 posts
Model Shipwrights: 104 posts
Posted: Sunday, May 12, 2013 - 08:08 AM UTC
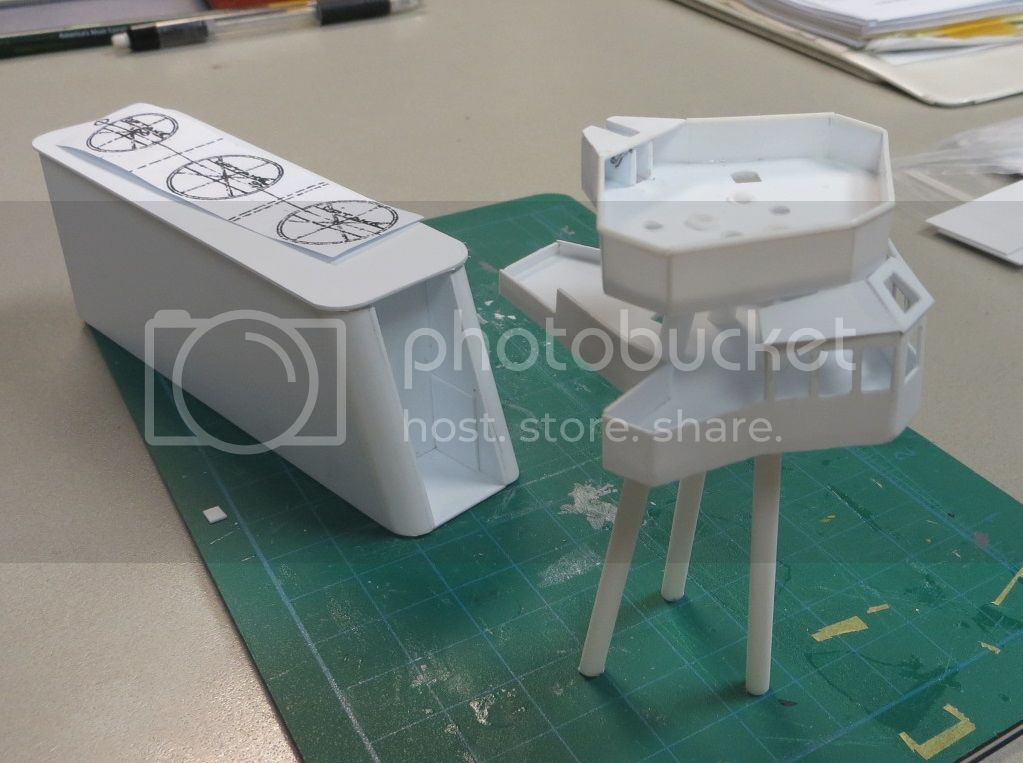
quartered 1/2" tubing just right for the round corners of the uptake enclosure.
Complete structure, with a start on one of the many platforms. I guess there will be more than six feet of handrail when this is all done.
One of my favorite places on this ship is that little alcove on the forward end of the uptake on that upper platform.
Complete structure, with a start on one of the many platforms. I guess there will be more than six feet of handrail when this is all done.
One of my favorite places on this ship is that little alcove on the forward end of the uptake on that upper platform.
RedDuster
Joined: March 01, 2010
KitMaker: 7,078 posts
Model Shipwrights: 6,649 posts
Posted: Monday, May 13, 2013 - 08:48 AM UTC
Coming on well Jonathan, very tidy bit of scratchbuilding.
Thanks for your kind support over the mishap. I must admit I not usually good at repairs, but I have invest to much blood, sweat, tears and bad language into that little floatplane to give up at this point.
Si
Thanks for your kind support over the mishap. I must admit I not usually good at repairs, but I have invest to much blood, sweat, tears and bad language into that little floatplane to give up at this point.
Si
JClapp
#259
Joined: October 23, 2011
KitMaker: 2,265 posts
Model Shipwrights: 104 posts
Posted: Monday, May 13, 2013 - 09:01 AM UTC
There should be special club for people who have finished an A-model airplane kit.... 
If we were to run an A-model campaign (as if anyone would join) the award ribbon could be a bandage with blood soaking through.
If we were to run an A-model campaign (as if anyone would join) the award ribbon could be a bandage with blood soaking through.

beefy66

Joined: October 22, 2007
KitMaker: 971 posts
Model Shipwrights: 645 posts

Posted: Tuesday, May 14, 2013 - 10:50 PM UTC
Hello Gent,s I have been following some of the great builds here I was not going to join in at first but just love whatching what others are doing. But on a recent trip to Scotland I won this little kit of CV65 1/1100 scale in a raffle and thought i would join in and get some more practice at some waterline models so here I go build should be quick  for my speed any way will be removing the line detail from the decks and painting them as decals are very poor as this is ment to be a bath time toy as it has a small battery motor but I will not be using this


for my speed any way will be removing the line detail from the decks and painting them as decals are very poor as this is ment to be a bath time toy as it has a small battery motor but I will not be using this JClapp
#259
Joined: October 23, 2011
KitMaker: 2,265 posts
Model Shipwrights: 104 posts
Posted: Wednesday, May 15, 2013 - 07:37 AM UTC
Hoy Keith, that is a lovely kit you have found there. I like tiny scales, that is the first 1/1100 scale kit Ive ever seen!
Your build looks good so far, Id like a closer look at the deck details you are improving. It an interesting challenge to make a good looking model starting with somewhat crude, toy like beginnings. This is very like what Simon is doing with that Amodel bi-plane.
good to see another Enterprise rising in this campaign.
beefy66
Joined: October 22, 2007
KitMaker: 971 posts
Model Shipwrights: 645 posts
Posted: Wednesday, May 15, 2013 - 10:14 PM UTC
Jonathan not sure about the photo showing much detail but this is were I,am at started to sand down most of the lines as mouldings a bit on the thick side will scride the lines and then reduse the moulded lines more and rescribe

JClapp
#259
Joined: October 23, 2011
KitMaker: 2,265 posts
Model Shipwrights: 104 posts
Posted: Thursday, May 16, 2013 - 12:03 AM UTC
oh boy, yeah, at 1:1100 those deck features are probobly about six feet high 
JClapp
#259
Joined: October 23, 2011
KitMaker: 2,265 posts
Model Shipwrights: 104 posts
Posted: Thursday, May 23, 2013 - 09:25 PM UTC
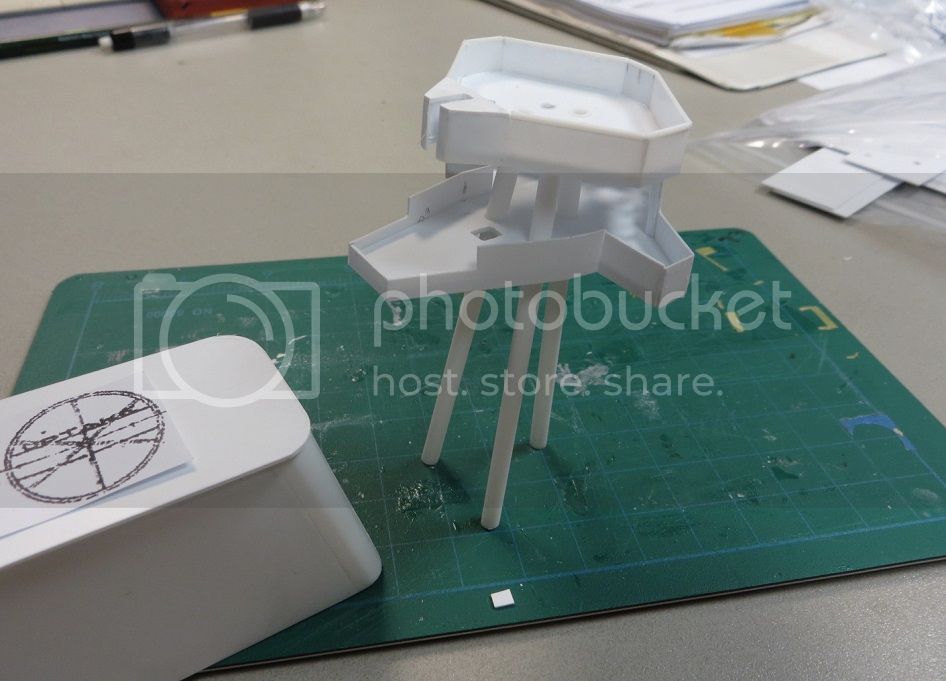
It took me a week to put the tripod mast together, still alot of detail and clean up to do, but I think it looks OK.
beefy66
Joined: October 22, 2007
KitMaker: 971 posts
Model Shipwrights: 645 posts
Posted: Friday, May 24, 2013 - 01:36 AM UTC
Fantastic scratch building Jonathan slowly and painfully re scribing the deck lines on my build 
Keith
Keith
windysean
Joined: September 11, 2009
KitMaker: 1,917 posts
Model Shipwrights: 54 posts
Posted: Friday, May 24, 2013 - 03:57 AM UTC
Quoted Text
It took me a week to put the tripod mast together, still alot of detail and clean up to do, but I think it looks OK.
...OK he says. HA! big understatement. That's some excellent scratchbuilding, Jonathan! Can't wait to see more.
-Sean H.

JClapp
#259
Joined: October 23, 2011
KitMaker: 2,265 posts
Model Shipwrights: 104 posts
Posted: Friday, May 24, 2013 - 05:18 AM UTC
Thanks gents. here's another pic of this piece.
RedDuster
Joined: March 01, 2010
KitMaker: 7,078 posts
Model Shipwrights: 6,649 posts
Posted: Friday, May 24, 2013 - 07:50 PM UTC
Outstanding piece of scratchbuilding Jonathan.
A model campaign, great idea, after this experience I would sign up.... Not
Si
A model campaign, great idea, after this experience I would sign up.... Not
Si
MichaelSatin
Joined: January 19, 2008
KitMaker: 3,909 posts
Model Shipwrights: 255 posts
Posted: Saturday, May 25, 2013 - 02:00 AM UTC
That's great work Jonathan!
Keep at it Keith, I'm sure it will be worth it!
Si, your last comment doesn't sound so good. More trouble?
Michael
Keep at it Keith, I'm sure it will be worth it!
Si, your last comment doesn't sound so good. More trouble?
Michael
beefy66
Joined: October 22, 2007
KitMaker: 971 posts
Model Shipwrights: 645 posts
Posted: Saturday, May 25, 2013 - 03:10 AM UTC
Simon hope that you have not had the dreaded DROPPSY again you know we all have it at times
You know we start these little projects off thinking that they are going to be quick and we are not going to do much detail to them but this little Kit has me getting more grey hairs this is going to be a waterline build and yet I,am still mucking about trying to sand down seam lines in 1/1100 scale think I,am going nuts
You know we start these little projects off thinking that they are going to be quick and we are not going to do much detail to them but this little
Kit has me getting more grey hairs this is going to be a waterline build and yet I,am still mucking about trying to sand down seam lines in 1/1100 scale think I,am going nuts JClapp
#259
Joined: October 23, 2011
KitMaker: 2,265 posts
Model Shipwrights: 104 posts
Posted: Saturday, June 01, 2013 - 06:36 AM UTC
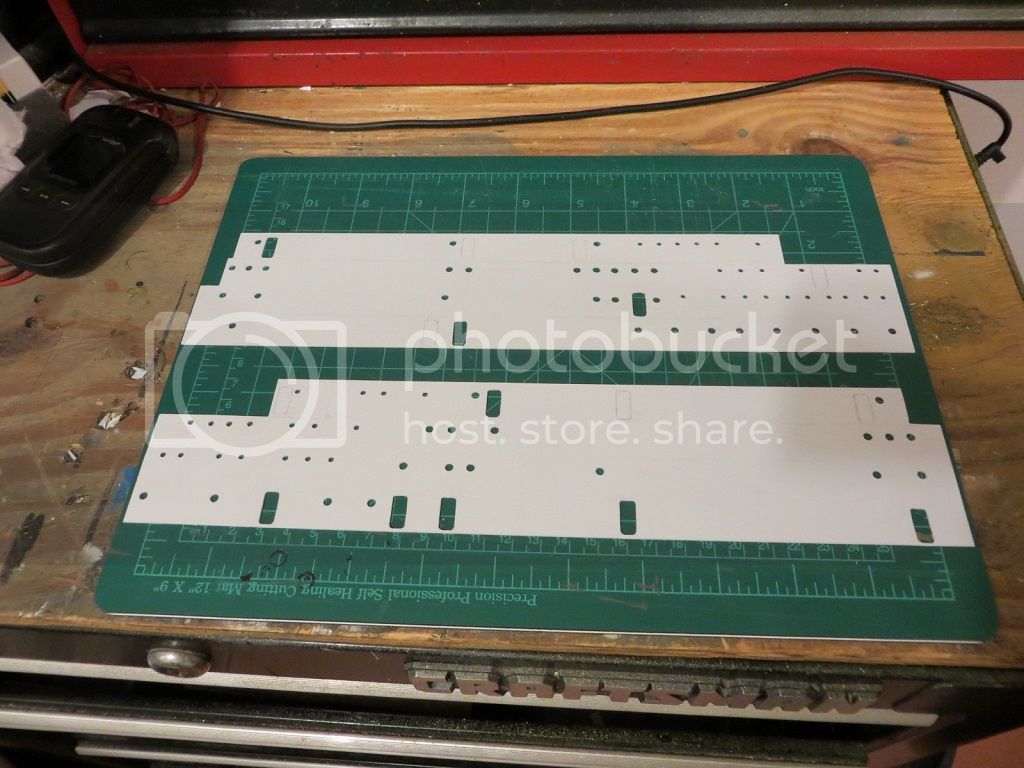
At first I had planned to build this solid, no interior, but Ive been studying pictures, and certain hatches are invariable shown open. All the ones at flight deck level, in particular, and that one on the top deck abaft the pilot house, which in fact leads to the W.C.
That done, I can start erecting.
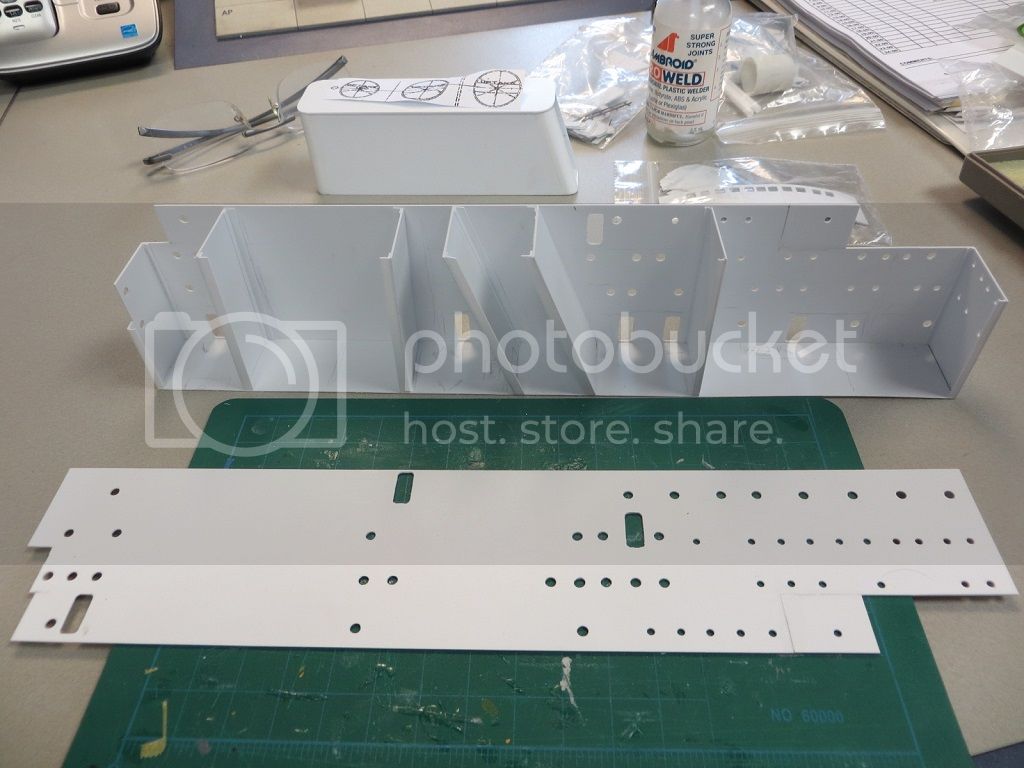
In 1/144 scale an open door invites a peak in, so each open hatch requires at least a rudimentary interior. I am resisting the urge so far to make a complete detailed interior, though probably I will make the outboard side sheet removable.
All the vertical partitions are in, and Ill put decks across as appropriate. Also the entire interior will need to be painted.
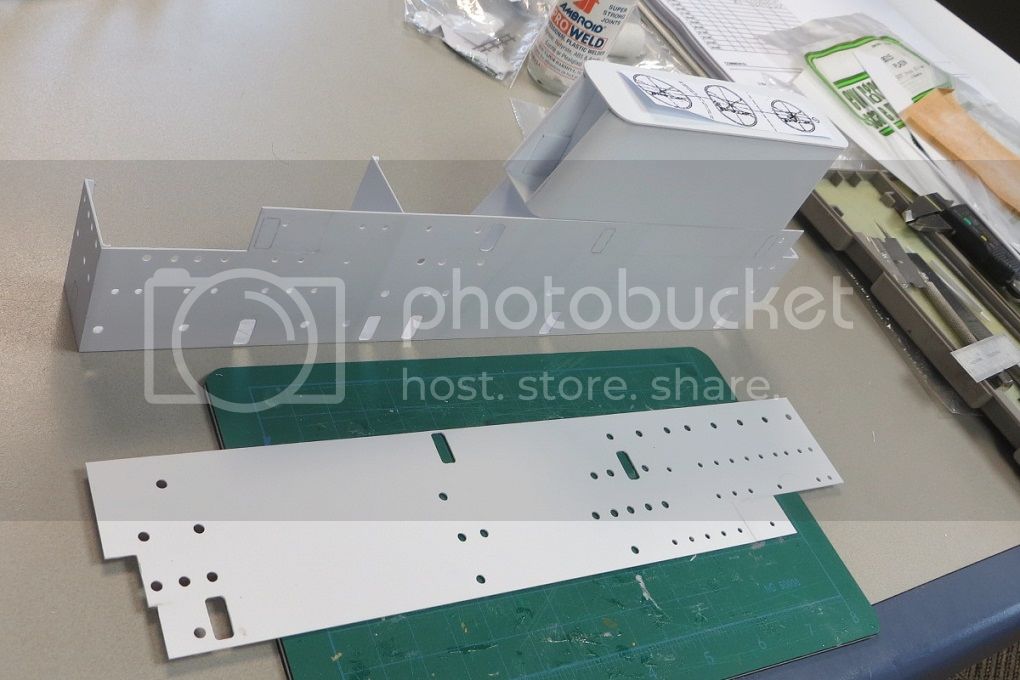
Its interesting that the forward uptake is angled back, and a course of rooms occupies the increasingly narrow space between the two uptake spaces.
Also of interest, a notch was formed in the aft corner of the flag bridge deck, to allow the boat crane to swing a bit farther forward.
That done, I can start erecting.
In 1/144 scale an open door invites a peak in, so each open hatch requires at least a rudimentary interior. I am resisting the urge so far to make a complete detailed interior, though probably I will make the outboard side sheet removable.
All the vertical partitions are in, and Ill put decks across as appropriate. Also the entire interior will need to be painted.
Its interesting that the forward uptake is angled back, and a course of rooms occupies the increasingly narrow space between the two uptake spaces.
Also of interest, a notch was formed in the aft corner of the flag bridge deck, to allow the boat crane to swing a bit farther forward.
 |

WEB HOSTING BY


Copyright ©2021 Model Shipwrights and Kitmaker Network, a subsidiary of Silver Star Enterprises
All Rights Reserved. Please read our Conditions of Use and Privacy Policy.
All Rights Reserved. Please read our Conditions of Use and Privacy Policy.