

Thanks for posting these pics Al, I also received this kit in the mail last week.
I think I might wait a while before starting it, and copy the great work you guys are doing in updating the kit. I'm assuming I can use the "bonus" dinghy on my S-100?
Pricewise, I think this kit is an absolute bargain, it cost my £40 from China, and retails for around £55 in the UK. The Italeri X-craft is rumoured to be £100!!
Thamks again for posting
Nige


Go to modelshipwrights.com for the current dynamic site!
Hosted by Jim Starkweather
Building Bronco's Big Type XXIII Sub

gloucesternige

Joined: January 13, 2012
KitMaker: 307 posts
Model Shipwrights: 17 posts

Posted: Sunday, March 31, 2013 - 10:40 PM UTC

TAFFY3

Joined: January 21, 2008
KitMaker: 2,531 posts
Model Shipwrights: 1,244 posts

Posted: Monday, April 01, 2013 - 01:00 AM UTC
Welcome aboard, Nigel. I don't see any reason the dinghy couldn't be used on the S-boote. It might even have been "liberated" from a somewhat less than vigilant U-boat supply depot. 
 Al
Al
AlTAFFY3
Joined: January 21, 2008
KitMaker: 2,531 posts
Model Shipwrights: 1,244 posts
Posted: Monday, April 01, 2013 - 05:44 AM UTC
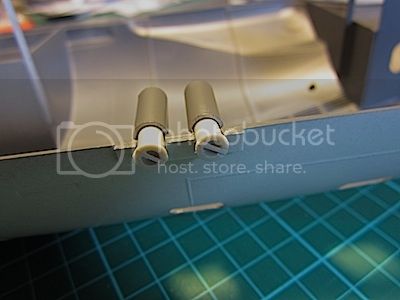
I found a drawing that showed a couple of what look to be some kind of vents that go up from the hull to project above the deck inside the top of the sail, aft of the Snorkel. Deciding to add them, I made them by layering telescoping sections of different diameters of tubing one over the other.
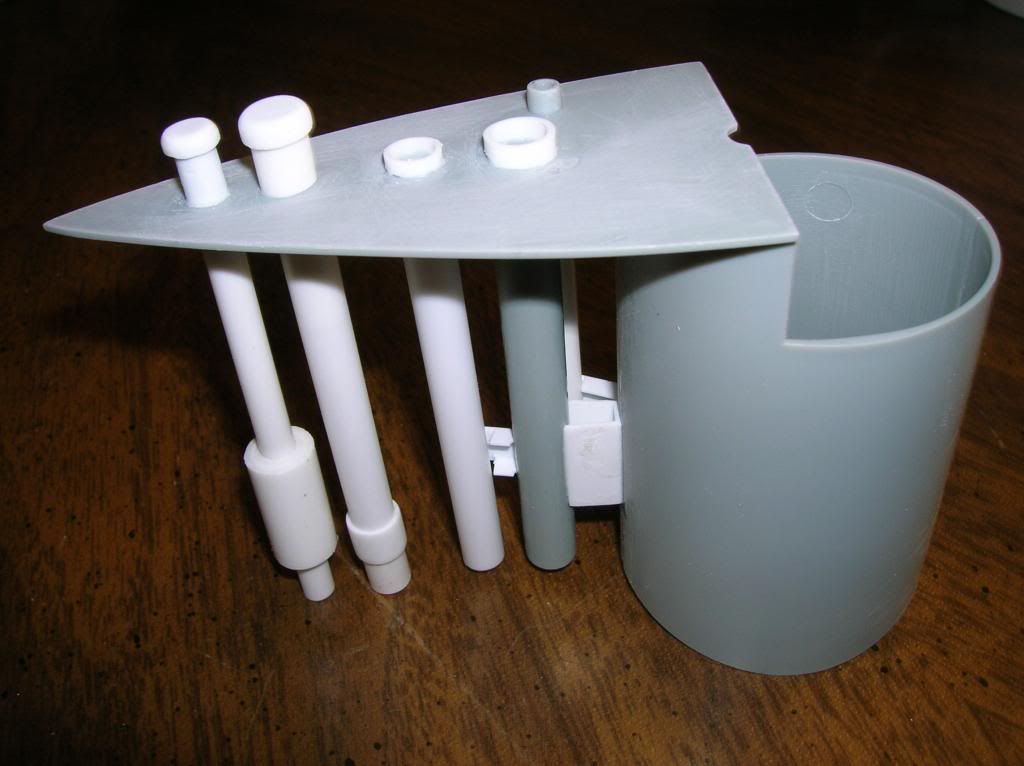
The thicker section of the aft-most pipe should be tapered, both top and bottom. Since it will barely be visible once the sail is completed, I didn't bother. I just wanted to give the impression of there being something in there if you look through the various small openings in the sides of the sail. Al
The thicker section of the aft-most pipe should be tapered, both top and bottom. Since it will barely be visible once the sail is completed, I didn't bother. I just wanted to give the impression of there being something in there if you look through the various small openings in the sides of the sail.
AlGotrek58

Joined: January 11, 2009
KitMaker: 673 posts
Model Shipwrights: 386 posts
Posted: Monday, April 01, 2013 - 06:50 AM UTC
Hi Al,
as I told you, There's a little bit more inside the tower - not only Schnorchel and periscope...there's a little bit more inside the tower - not only Schnorchel and periscope...
The left tube is the "Diesel-Abluftmast" or the upper part of the exhaust pipe, connected to the silencer and the next tube is the "Diesel-Zuluftmast" or air-intake for the engine. While diving in snorkel-modus, exhaust and fresh air will go through the "Schnorchel-Mast"
You will find the explaining drawings on page 78/79 of "Vom Original zum Modell".
Michael
TAFFY3
Joined: January 21, 2008
KitMaker: 2,531 posts
Model Shipwrights: 1,244 posts
Posted: Monday, April 01, 2013 - 07:04 AM UTC
Hello Michael, I found a small drawing in Rossler's book on the Type XXIII, but it was hard to make out details, and I don't read German. I'm still waiting on the "Vom Original Zum Modell" book. Al
Al
RussellE

#306

Joined: June 27, 2010
KitMaker: 3,959 posts
Model Shipwrights: 2,777 posts

Posted: Monday, April 01, 2013 - 05:57 PM UTC
Hi Al
great build so far. What scale is this baby?
great build so far. What scale is this baby?

TAFFY3
Joined: January 21, 2008
KitMaker: 2,531 posts
Model Shipwrights: 1,244 posts
Posted: Tuesday, April 02, 2013 - 01:11 AM UTC
Hello Russell, the 'beast' is in 1/35 scale and measures about 39" long. That doesn't really describe it though. A Revell 1/72 Type VII will fit inside this hull, conning tower and all. She is massive. Al
AlTAFFY3
Joined: January 21, 2008
KitMaker: 2,531 posts
Model Shipwrights: 1,244 posts
Posted: Tuesday, April 02, 2013 - 03:45 AM UTC
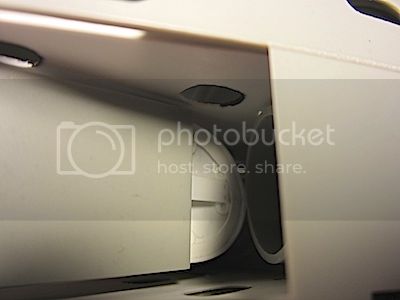
I was raised to believe in "Waste not, want not". So, rather than 'waste' a perfectly good torpedo by hiding it in the tube. I decided to use just the warhead which is all that can be seen. I glued it to some plastic tubing instead of the torpedo body, adding a spacer disc cut from plastic sheet at the rear.

Sorry about the blurry photo, but you get the idea. Here's the 'torpedo' loaded in its tube.

Still waiting for my reference to arrive. I found to my chagrin that I had ordered the wrong book, so I had to re-order it from a different supplier. I'm really beginning to worry about the state of my mind. OOOOOHHH, LOOK! A SQUIRREL! Uh, what was I saying? Oh, never mind. Al
Sorry about the blurry photo, but you get the idea. Here's the 'torpedo' loaded in its tube.
Still waiting for my reference to arrive. I found to my chagrin that I had ordered the wrong book, so I had to re-order it from a different supplier. I'm really beginning to worry about the state of my mind. OOOOOHHH, LOOK! A SQUIRREL! Uh, what was I saying? Oh, never mind.
AlGotrek58
Joined: January 11, 2009
KitMaker: 673 posts
Model Shipwrights: 386 posts
Posted: Tuesday, April 02, 2013 - 05:00 AM UTC
Hi Al,
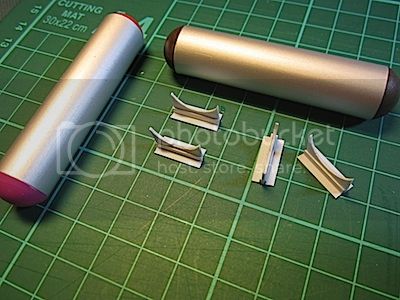
here's my solution for the tubes:
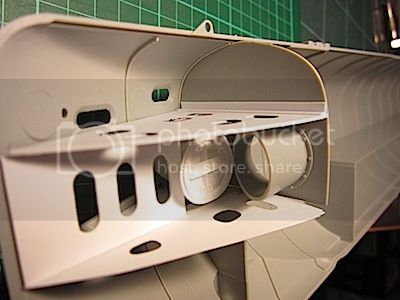
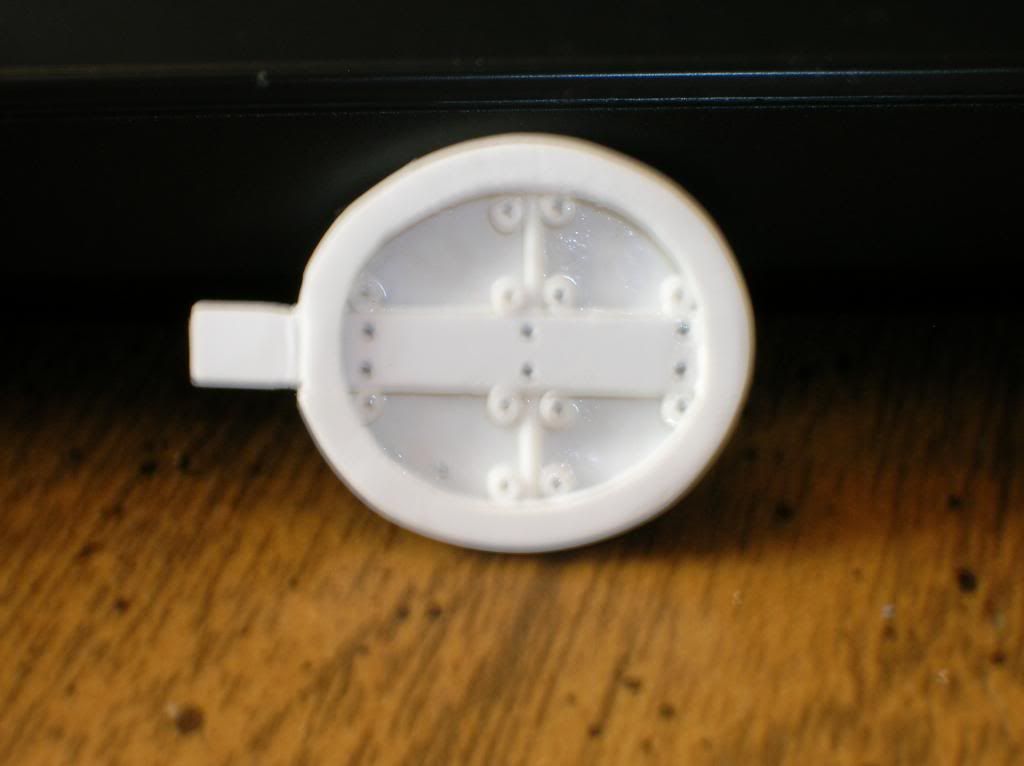
Not yet glued - and a deck for the 2 pressure tanks, not really visible, but I know, they are inside...
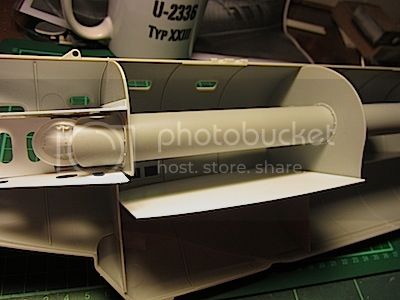
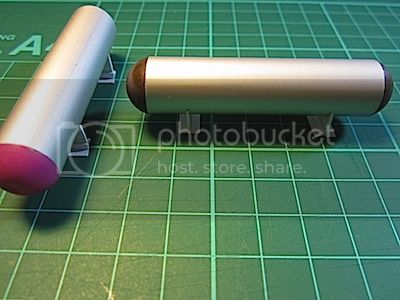
And a last pic with closed hull halfs:
Michael
here's my solution for the tubes:
Not yet glued - and a deck for the 2 pressure tanks, not really visible, but I know, they are inside...
And a last pic with closed hull halfs:
Michael
gloucesternige
Joined: January 13, 2012
KitMaker: 307 posts
Model Shipwrights: 17 posts
Posted: Tuesday, April 02, 2013 - 05:53 AM UTC
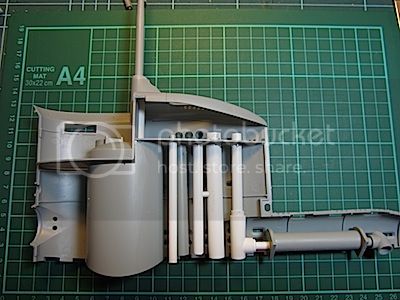
For those who are wondering just how big this kit is, here's a pic of her next to a 1/35 Schnellboot hull halve. Like Al said... she's BIG!!

TAFFY3
Joined: January 21, 2008
KitMaker: 2,531 posts
Model Shipwrights: 1,244 posts
Posted: Tuesday, April 02, 2013 - 06:50 AM UTC
Hello Michael, Great work, I especially like the outer tube doors. It's a big improvement. Al
AlTAFFY3
Joined: January 21, 2008
KitMaker: 2,531 posts
Model Shipwrights: 1,244 posts
Posted: Thursday, April 04, 2013 - 05:15 AM UTC
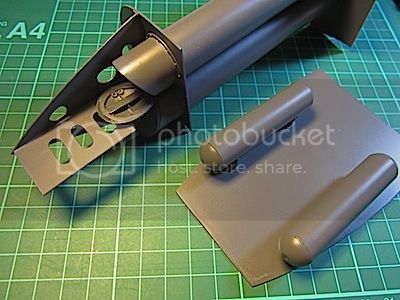
Managed to accomplish a little more. Removing parts from their sprues and cleaning up the attachment points. The handrails that go on the outside of the sail were particularly delicate. They had numerous attachment points that were nerve wracking to clean up. I somehow did it without breaking them. Also, following Michael's lead I scratched together the outer torpedo tube door.
I apologize for the poor picture quality, after numerous attempts, this was the best pic that I could get. I only made one door as only one would be visible, and this one will be half hidden by the opened hull door. One of the trials of adding detail is figuring out what will be visible and what won't. I'm sure everyone has a story about the scratch-built detail that can't be seen after the model is complete. We've all said it, "Well, at least I know that it's in there." Al
I apologize for the poor picture quality, after numerous attempts, this was the best pic that I could get. I only made one door as only one would be visible, and this one will be half hidden by the opened hull door. One of the trials of adding detail is figuring out what will be visible and what won't. I'm sure everyone has a story about the scratch-built detail that can't be seen after the model is complete. We've all said it, "Well, at least I know that it's in there."
AlGotrek58
Joined: January 11, 2009
KitMaker: 673 posts
Model Shipwrights: 386 posts
Posted: Thursday, April 04, 2013 - 07:34 AM UTC
Hello Al.
nice tube door!
And some more details, again not really visible - the pressure tanks:
Michael
nice tube door!
And some more details, again not really visible
- the pressure tanks: Michael
TAFFY3
Joined: January 21, 2008
KitMaker: 2,531 posts
Model Shipwrights: 1,244 posts
Posted: Thursday, April 04, 2013 - 11:00 AM UTC
Thanks Michael, you're doing some nice work with those tanks. Al
AlLeelan
Joined: November 07, 2012
KitMaker: 5 posts
Model Shipwrights: 5 posts
Posted: Friday, April 05, 2013 - 11:04 AM UTC
I've just started this kit myself. You example is something to shoot for!
Looking ahead, there is not much about the boat's running lights. I thought about wiring them up just because. But what color were they? There appears to be one light forward and aft in the port and starboard light housing. All the instructions say about them is "Clear". That can't be right.
- Leelan
TAFFY3
Joined: January 21, 2008
KitMaker: 2,531 posts
Model Shipwrights: 1,244 posts
Posted: Saturday, April 06, 2013 - 01:43 AM UTC
Hello Leland, I think the instructions are trying to tell us that the outer covers (parts D4) stay clear, except for the frame around the edge. The lights themselves (parts D1) should be tinted their respective colors, red & green. What I don't know is why there are two lights in each housing. Should both be tinted? I wonder if the one in the front on each side should remain clear? Is there a navigational reason to have two different lights in the same housing, or is it just a case of German redundancy to have two of the same light in each housing?. Al
Al
TimReynaga
Joined: May 03, 2006
KitMaker: 2,500 posts
Model Shipwrights: 1,830 posts
Posted: Saturday, April 06, 2013 - 02:38 AM UTC
Al,
I've been enjoying your build of this magnificent beast - things are looking good! I usually work in much smaller scales, but you are tempting me to try something new on my next build. This sub is gonna be impressive!
regards,
Tim

I've been enjoying your build of this magnificent beast - things are looking good! I usually work in much smaller scales, but you are tempting me to try something new on my next build. This sub is gonna be impressive!
regards,
Tim

TAFFY3
Joined: January 21, 2008
KitMaker: 2,531 posts
Model Shipwrights: 1,244 posts
Posted: Saturday, April 06, 2013 - 04:37 AM UTC
Hi Tim, Glad to have you along. Considering what you've done with Olympia, I'd love to see what you could do with this beast. Al
Al
AlanL

Joined: August 12, 2005
KitMaker: 14,499 posts
Model Shipwrights: 1,919 posts
Posted: Saturday, April 06, 2013 - 08:37 AM UTC
Hi Al and Michael,
Impressive work.
Alan
Impressive work.
Alan

RedDuster

Joined: March 01, 2010
KitMaker: 7,078 posts
Model Shipwrights: 6,649 posts

Posted: Sunday, April 07, 2013 - 06:21 AM UTC
Al & Michael, couple of great builds coming on,
really impressive.
I so have to get one of these!
Si
really impressive.
I so have to get one of these!
Si
Gotrek58
Joined: January 11, 2009
KitMaker: 673 posts
Model Shipwrights: 386 posts
Posted: Thursday, April 11, 2013 - 10:43 AM UTC
Pressure tanks etc. and the first paint:
The bollards and her bottom section

Finally some sail tubing
Michael
The bollards and her bottom section
Finally some sail tubing
Michael

surfsup
Joined: May 20, 2010
KitMaker: 1,230 posts
Model Shipwrights: 1,212 posts

Posted: Thursday, April 11, 2013 - 08:32 PM UTC
That is some really nice work you have done.....Cheers mark
Leelan
Joined: November 07, 2012
KitMaker: 5 posts
Model Shipwrights: 5 posts
Posted: Sunday, April 14, 2013 - 03:38 AM UTC
Al --- and Michael! (I just noticed there were two builds in the thread.) Great work! Keep it up and share more.
Love your progress!
There is on bit of the instructions that did not come with the kit.

Though Jeff LaRue on the Subcommittee forum says:
Too bad your book isn't written in English. I'm sure it would tell us something.
- Leelan
Love your progress!
There is on bit of the instructions that did not come with the kit.
Though Jeff LaRue on the Subcommittee forum says:
Quoted Text
The port navigation light is red and the starboard one is green.
The XXIII also uses a removable 360-degree white light that was mounted on the extended periscope when anchored.
Too bad your book isn't written in English. I'm sure it would tell us something.
- Leelan
Leelan
Joined: November 07, 2012
KitMaker: 5 posts
Model Shipwrights: 5 posts
Posted: Sunday, April 14, 2013 - 03:46 AM UTC
I am sure other people have noticed. But with the magnets installed you can't open both tube doors at the same time.
I had to remove them. Broke one hinge when I did it. So I replaced that hinge with a metal rod. I'm finagling an opening and closing mechanism at present. When I have pictures I will either start another thread or just share what I have that is different here --- with your permission, of course, Al.
-Leelan
TAFFY3
Joined: January 21, 2008
KitMaker: 2,531 posts
Model Shipwrights: 1,244 posts
Posted: Sunday, April 14, 2013 - 03:54 AM UTC
Hello Leelan, Feel free to join us with your build, the more the merrier, and thanks for that info on the navigation lights. Al
Al |

WEB HOSTING BY


Copyright ©2021 Model Shipwrights and Kitmaker Network, a subsidiary of Silver Star Enterprises
All Rights Reserved. Please read our Conditions of Use and Privacy Policy.
All Rights Reserved. Please read our Conditions of Use and Privacy Policy.