Ships by Class/Type
For discussions on ships by class and type.
HMS Belfast 1942 Trumpeter 1/350
JJ1973
#345
Visit this Community
Niedersachsen, Germany
Joined: August 22, 2011
KitMaker: 1,835 posts
Model Shipwrights: 1,832 posts
Posted: Sunday, September 13, 2015 - 09:17 AM UTC
Gentlemen,

thank you so much for all your kind comments that's highly motivating and most appreciated!!!

Dave and Si, you - and all others - are most welcome 'pinching my ideas', that's nothing but a great honor to me!! And, not to forget, I took my initial inspiration for those twins by pinching Todds ideas from his HMS ROBERTS build.

I hope to find some more time now than over the last couple of weeks and be able to report some more progress here soon!!

Cheers ,

Jan
RussellE
#306
Visit this Community
Victoria, Australia
Joined: June 27, 2010
KitMaker: 3,959 posts
Model Shipwrights: 2,777 posts
Posted: Sunday, September 13, 2015 - 03:05 PM UTC
Looking good, Jan
JJ1973
#345
Visit this Community
Niedersachsen, Germany
Joined: August 22, 2011
KitMaker: 1,835 posts
Model Shipwrights: 1,832 posts
Posted: Saturday, September 19, 2015 - 11:55 PM UTC
Thank you very much, Russ!! Looking forward to an update on your Prinz !!

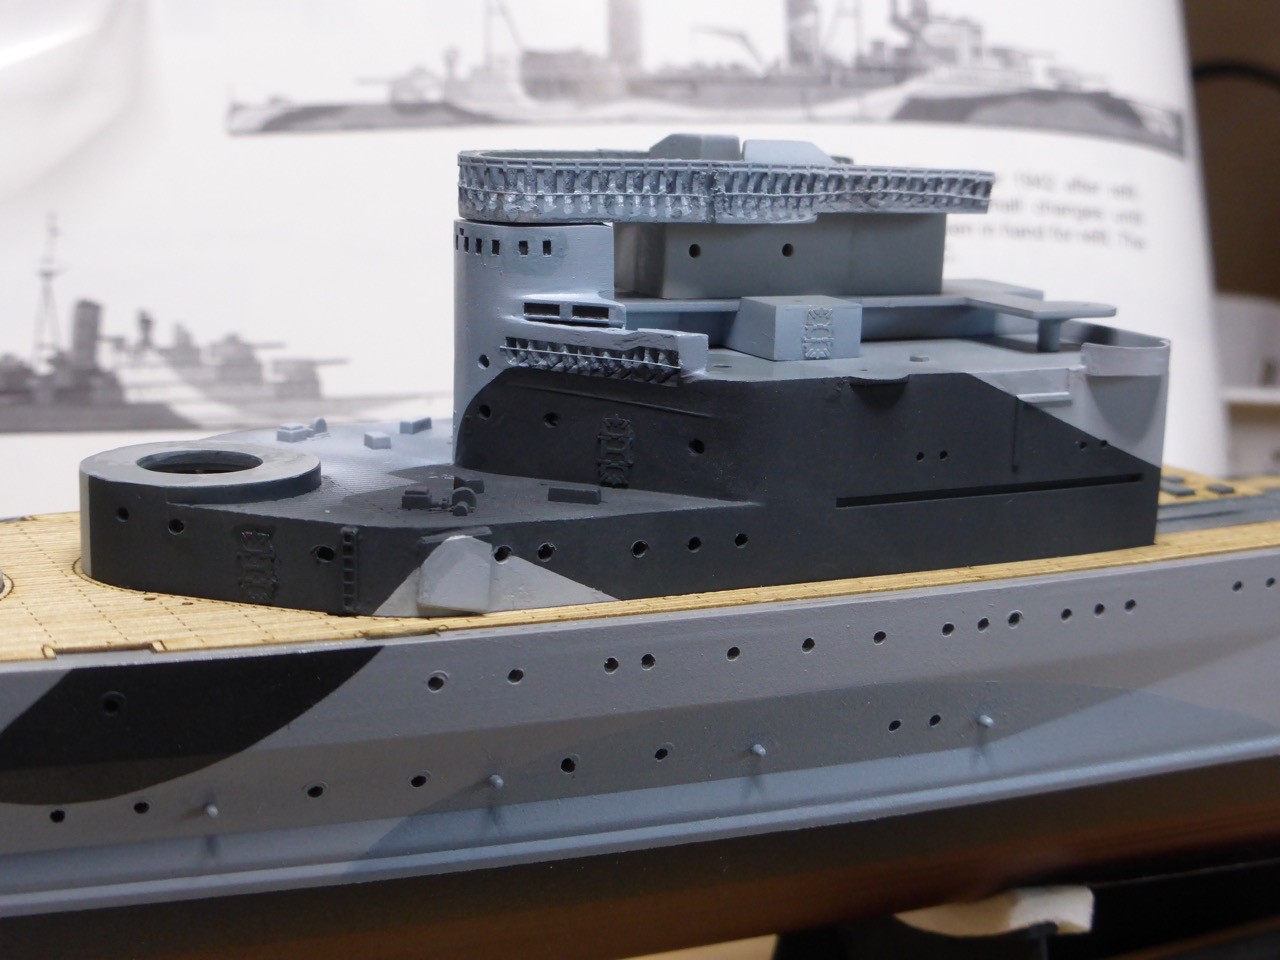
So here comes the longer story on my Belfast

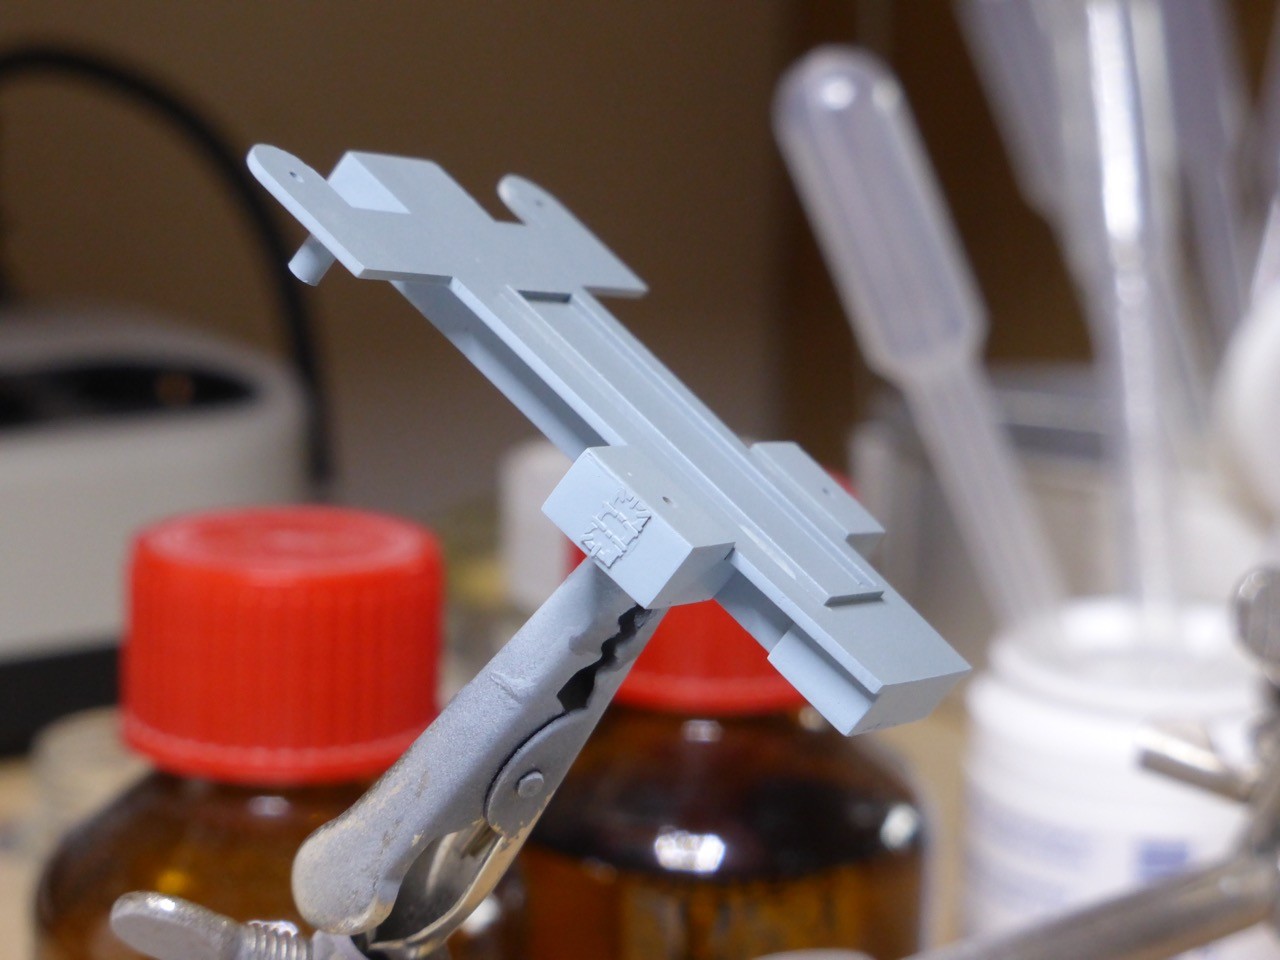
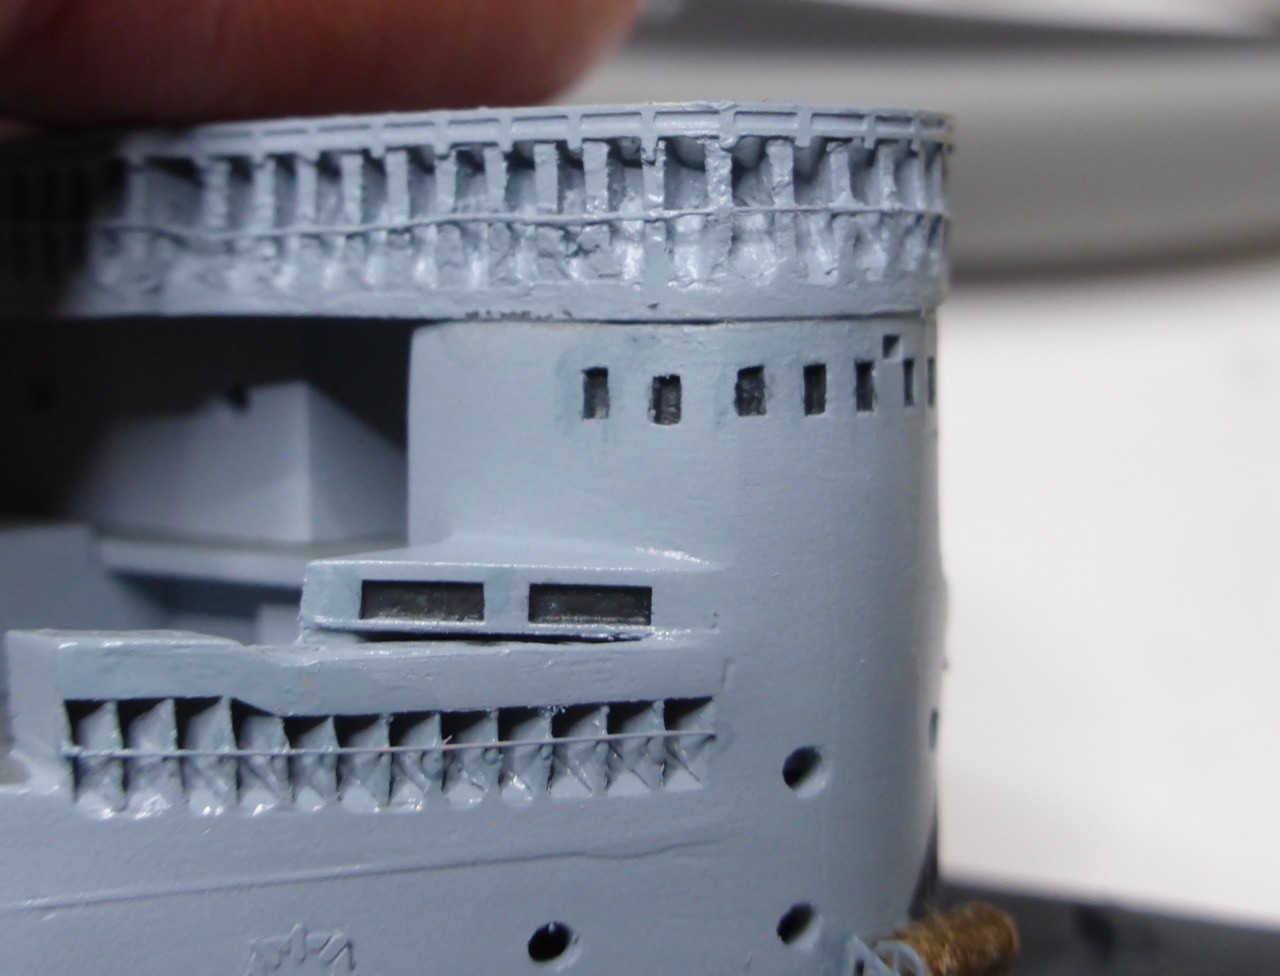
Some 'general painting' to hit areas that may be concealed later on. Not meant to be the final layer in any case.


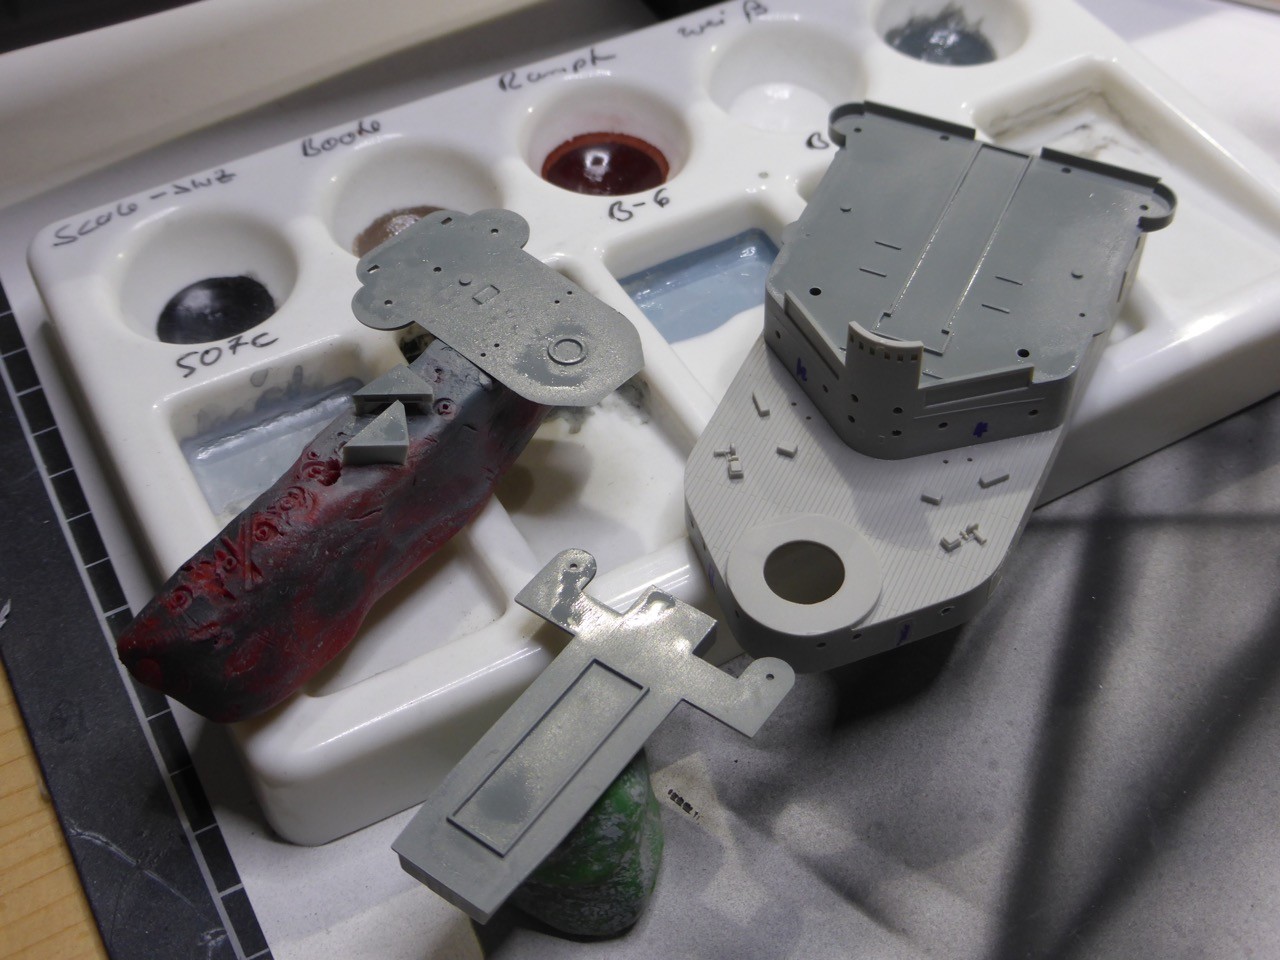
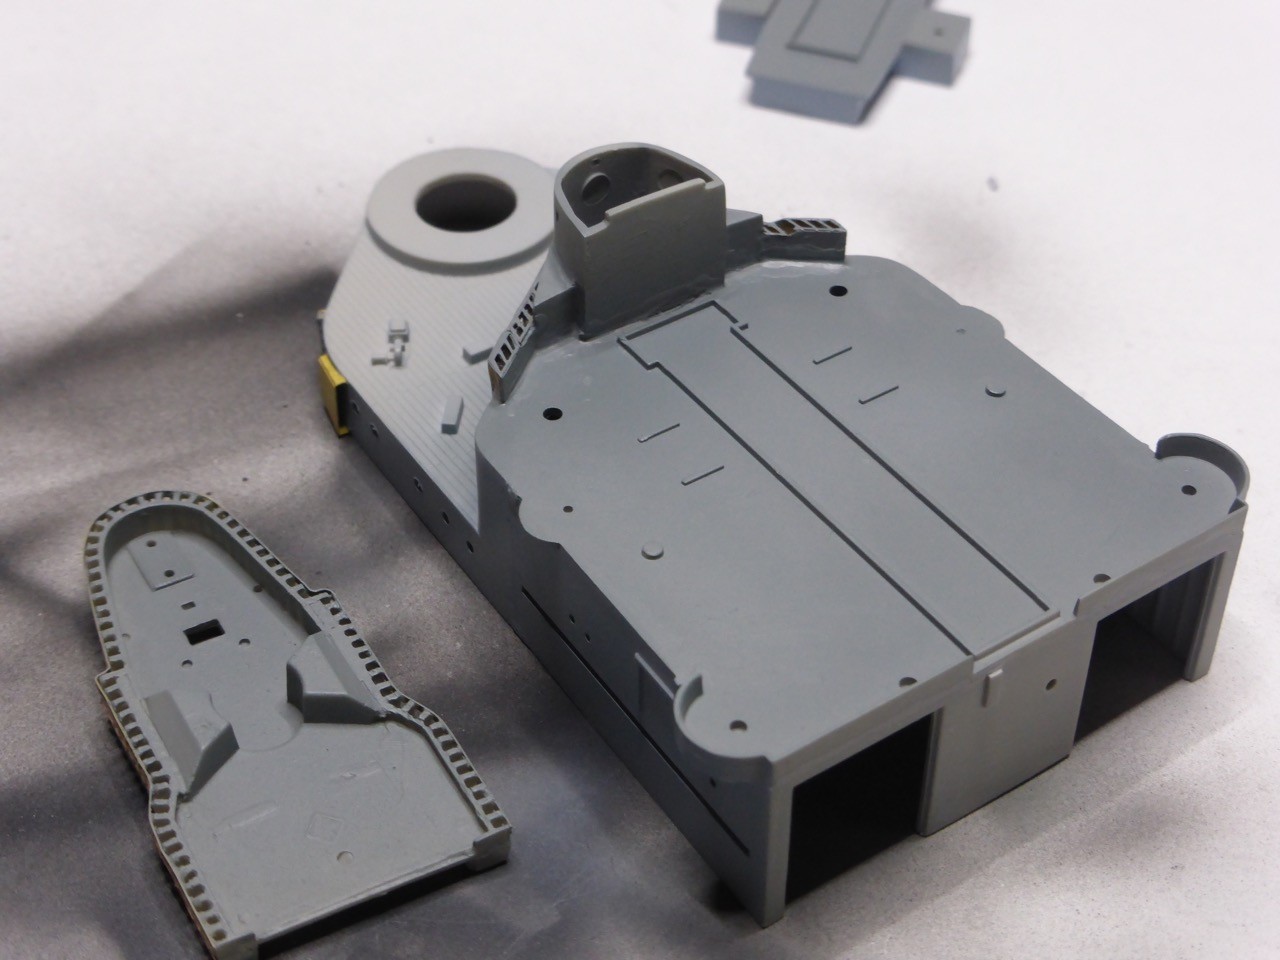
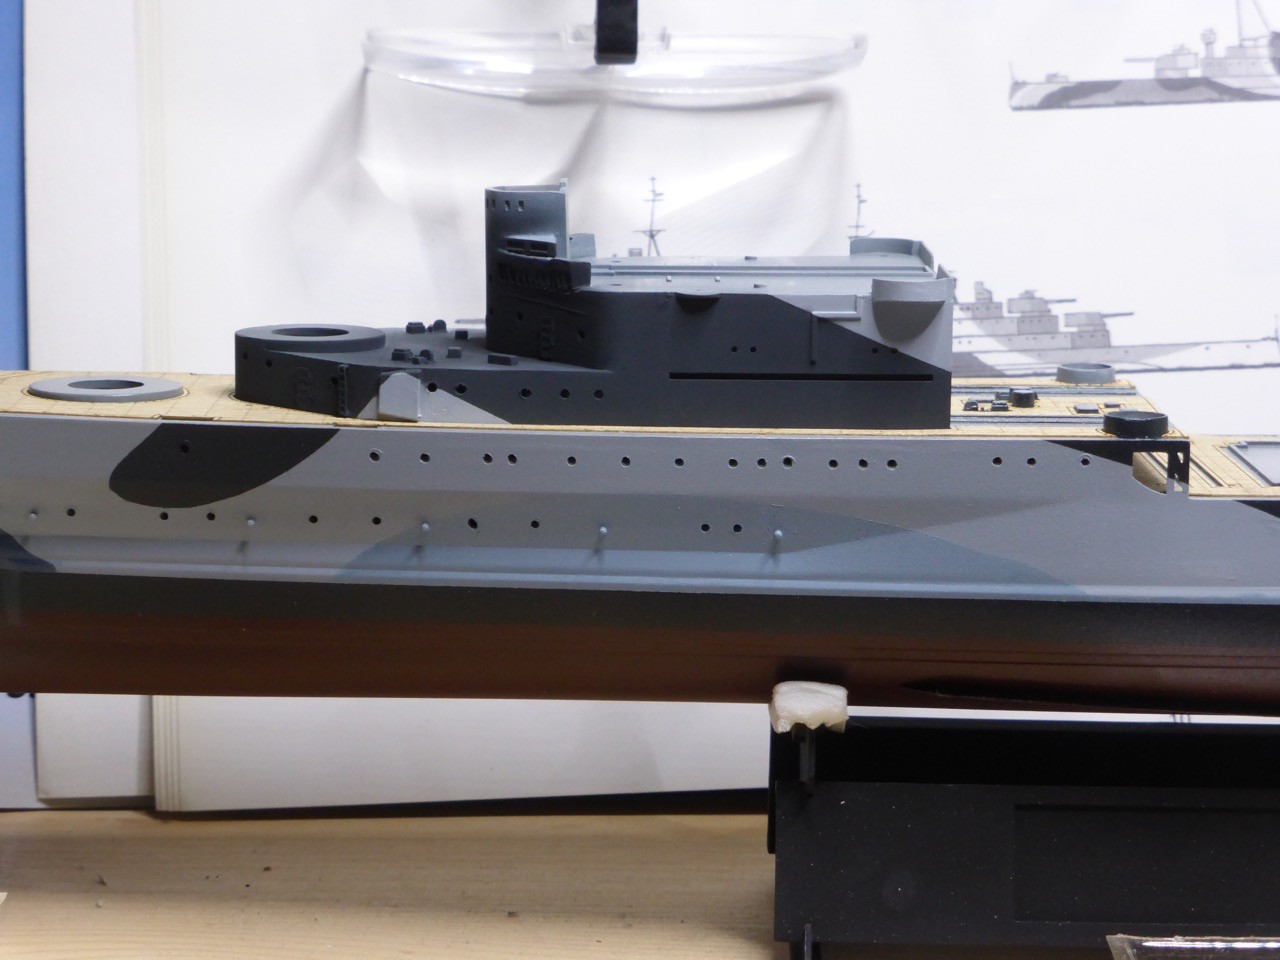
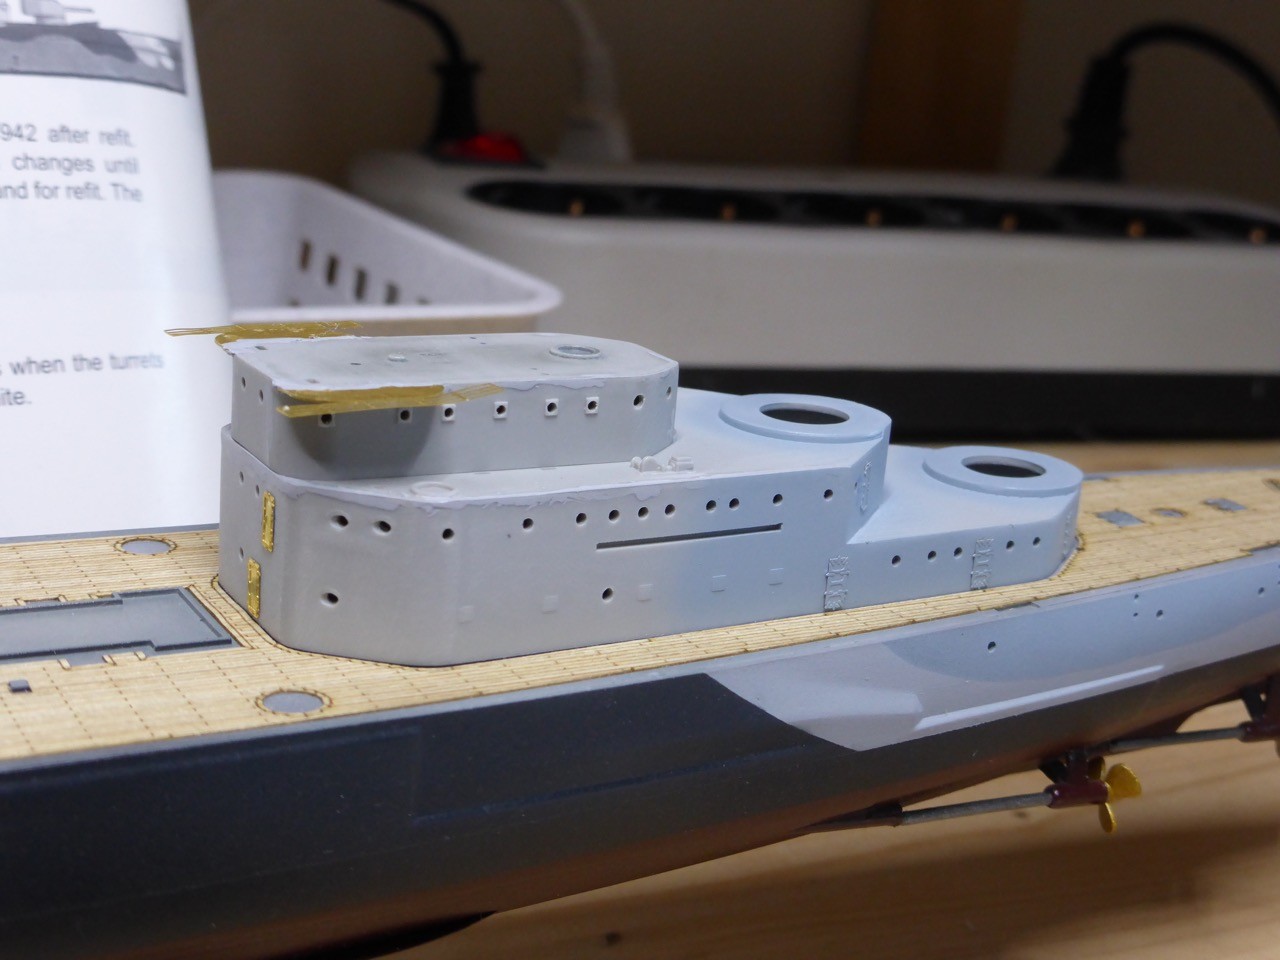
I started happily with the kit's part, the should-be deflectors and fitting the round bridge. Quite an interesting structure. Some sanding done - waste of effort, but I did not know that than...


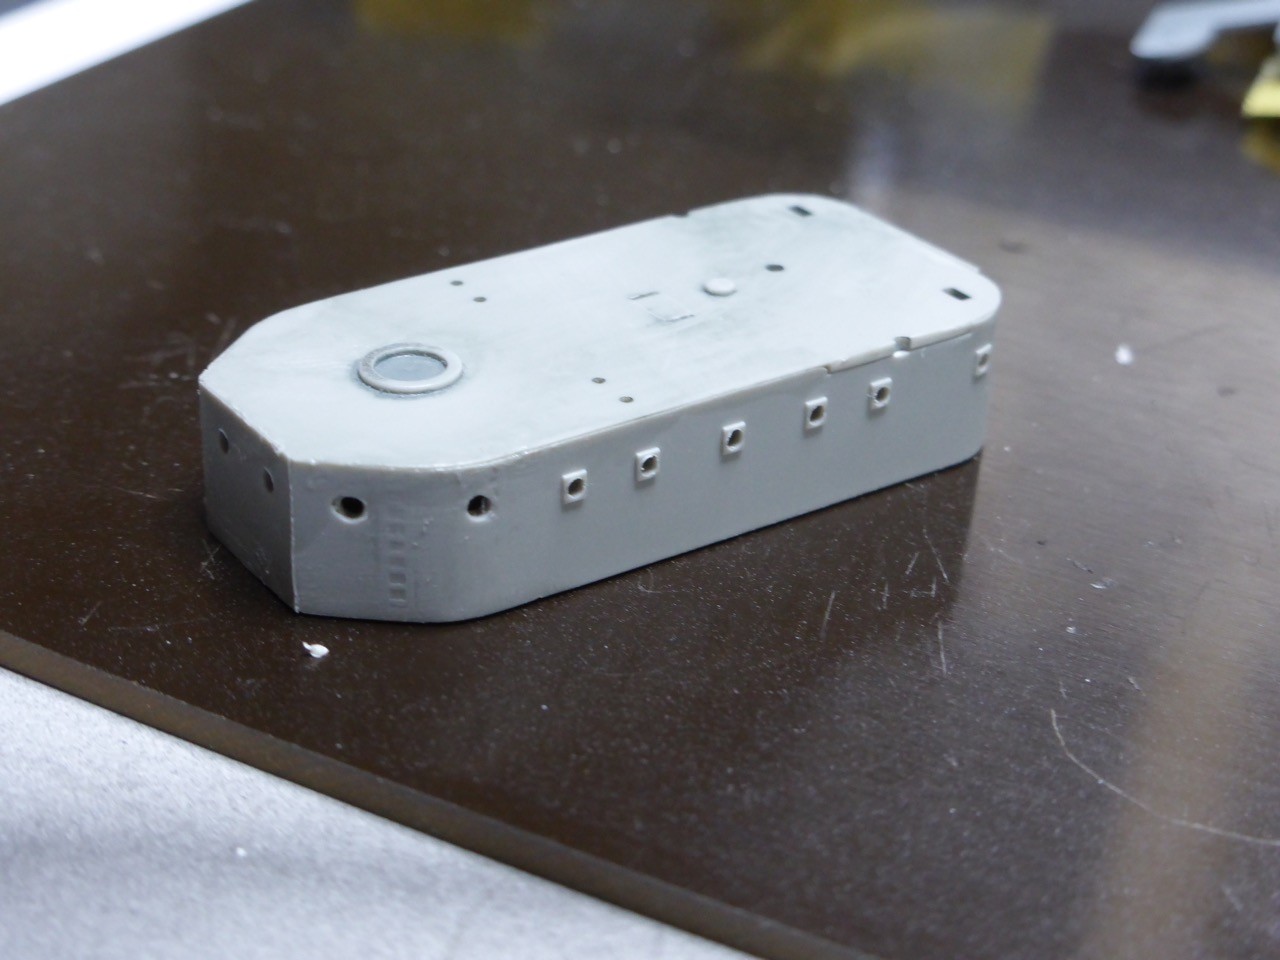
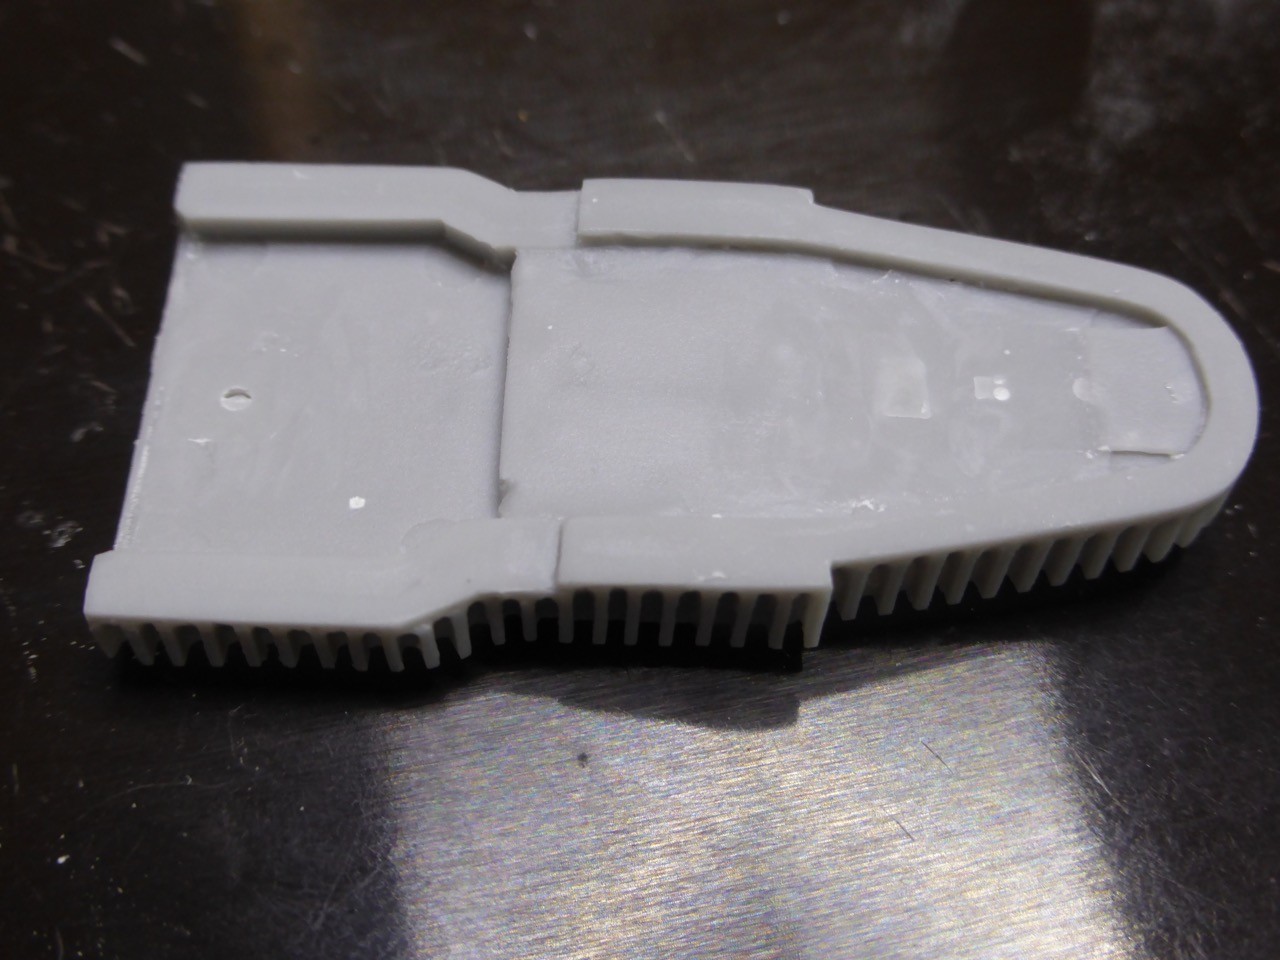
The resin replacement part from WEM needs some sanding and some extra work to make it fit


A little more sanding and fitting needed, but it looks not to bad.


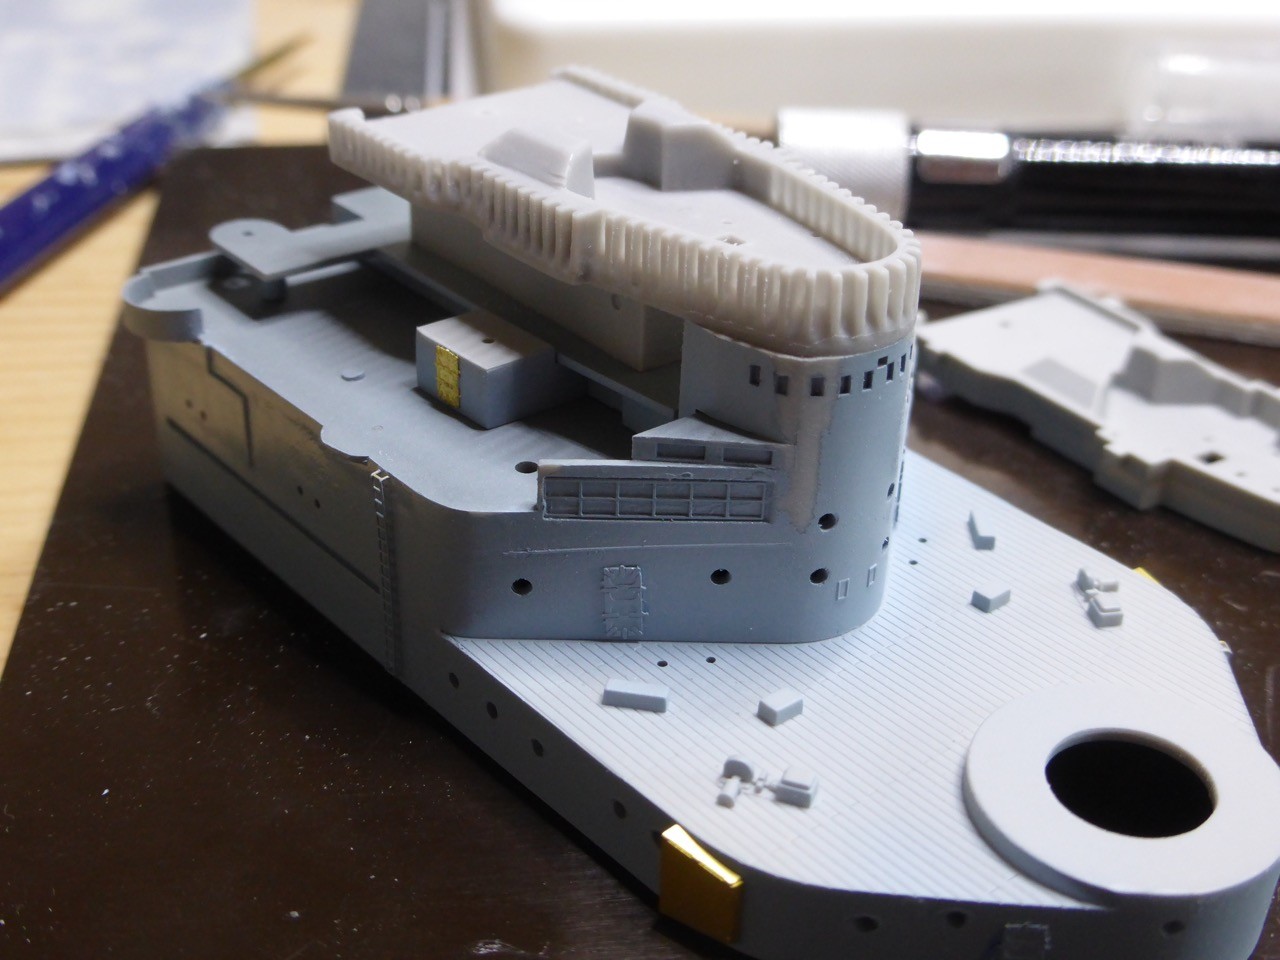
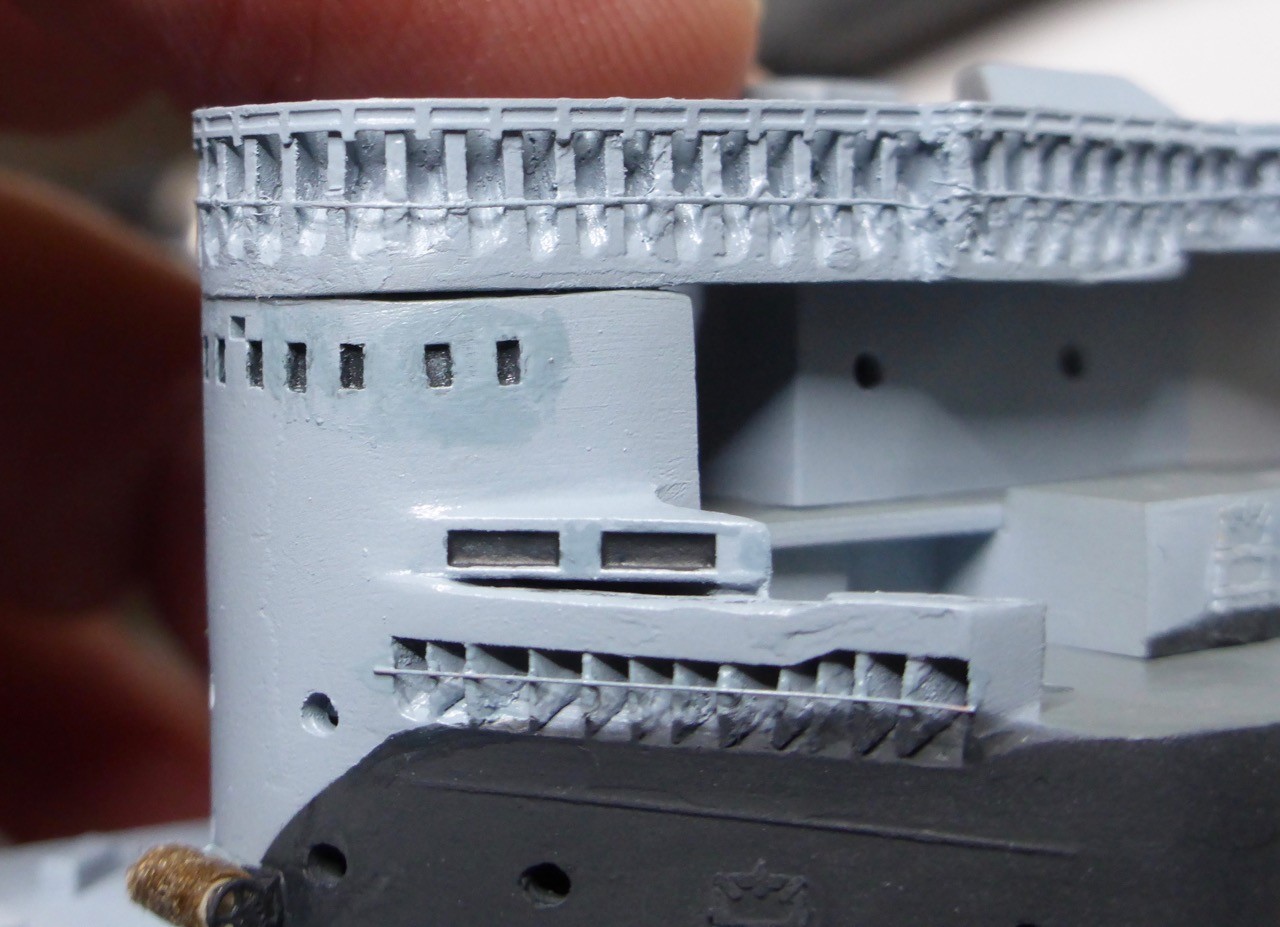
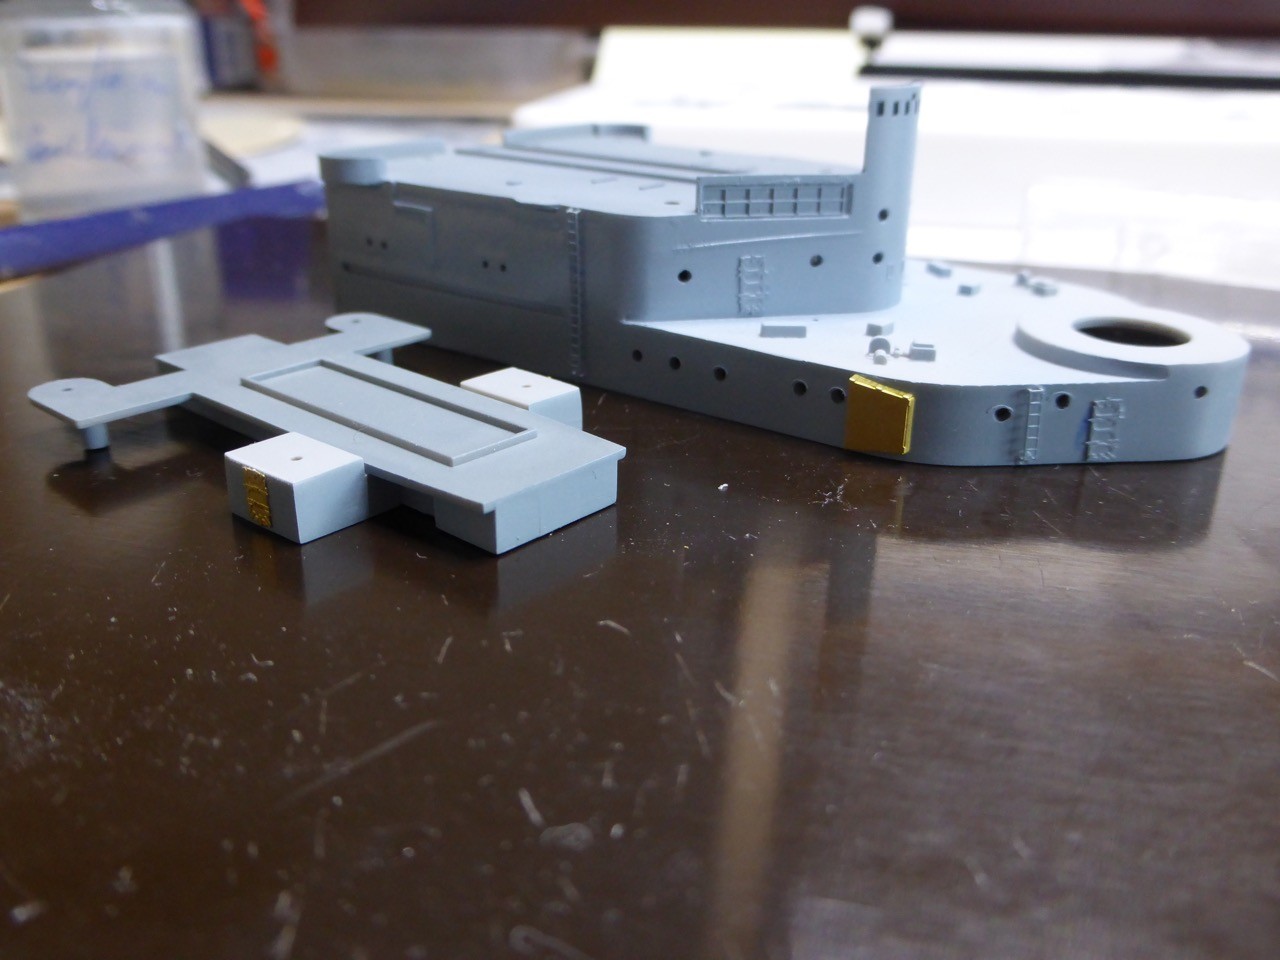
While I'm still not 100% sure how to go about the funnels, I never had any intentions to use the kit's bridge. But here - just to show the differences - I put the WEM and the Trumpi bridge on for comparison:


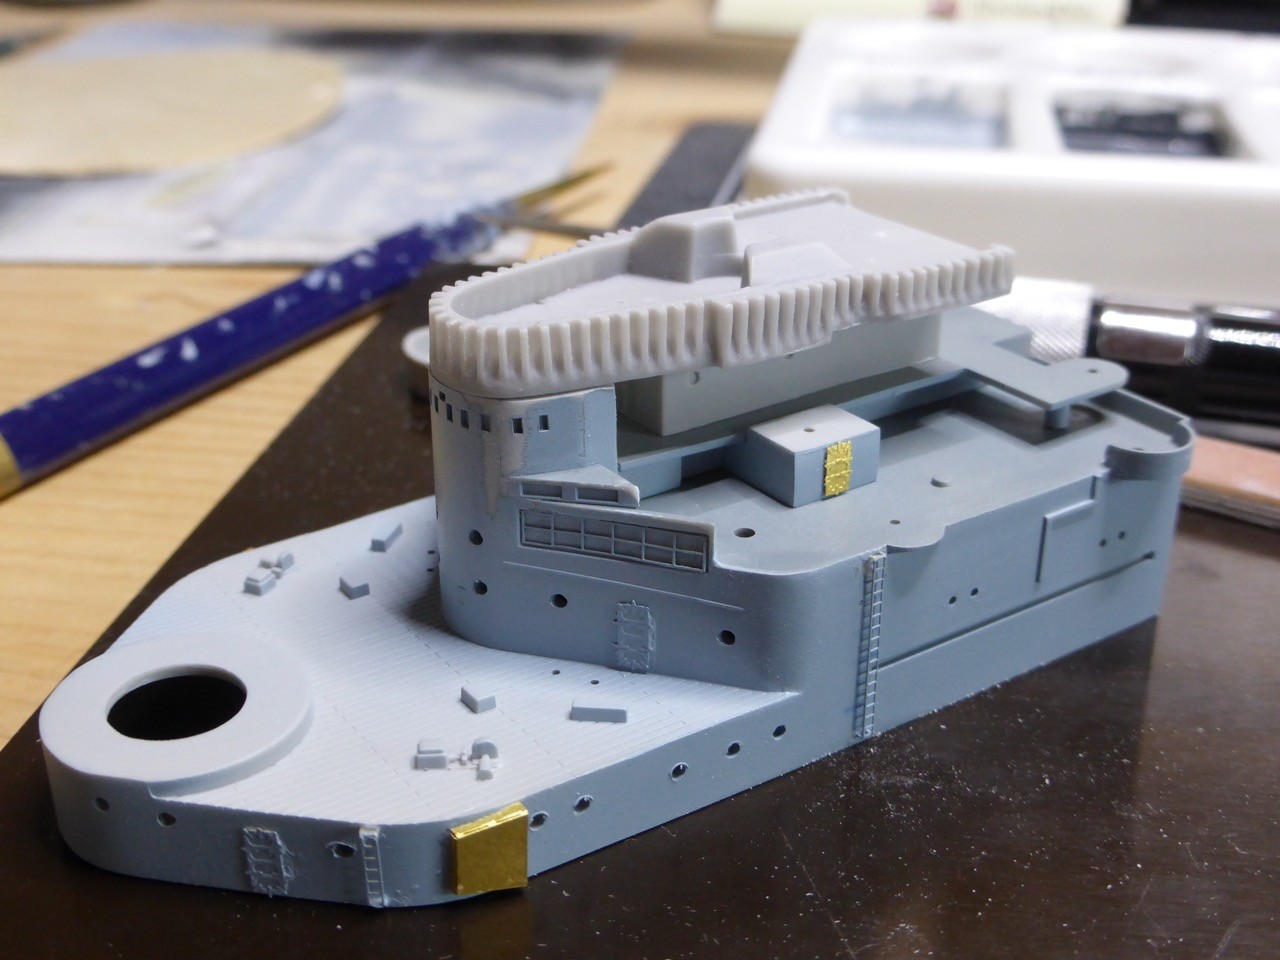
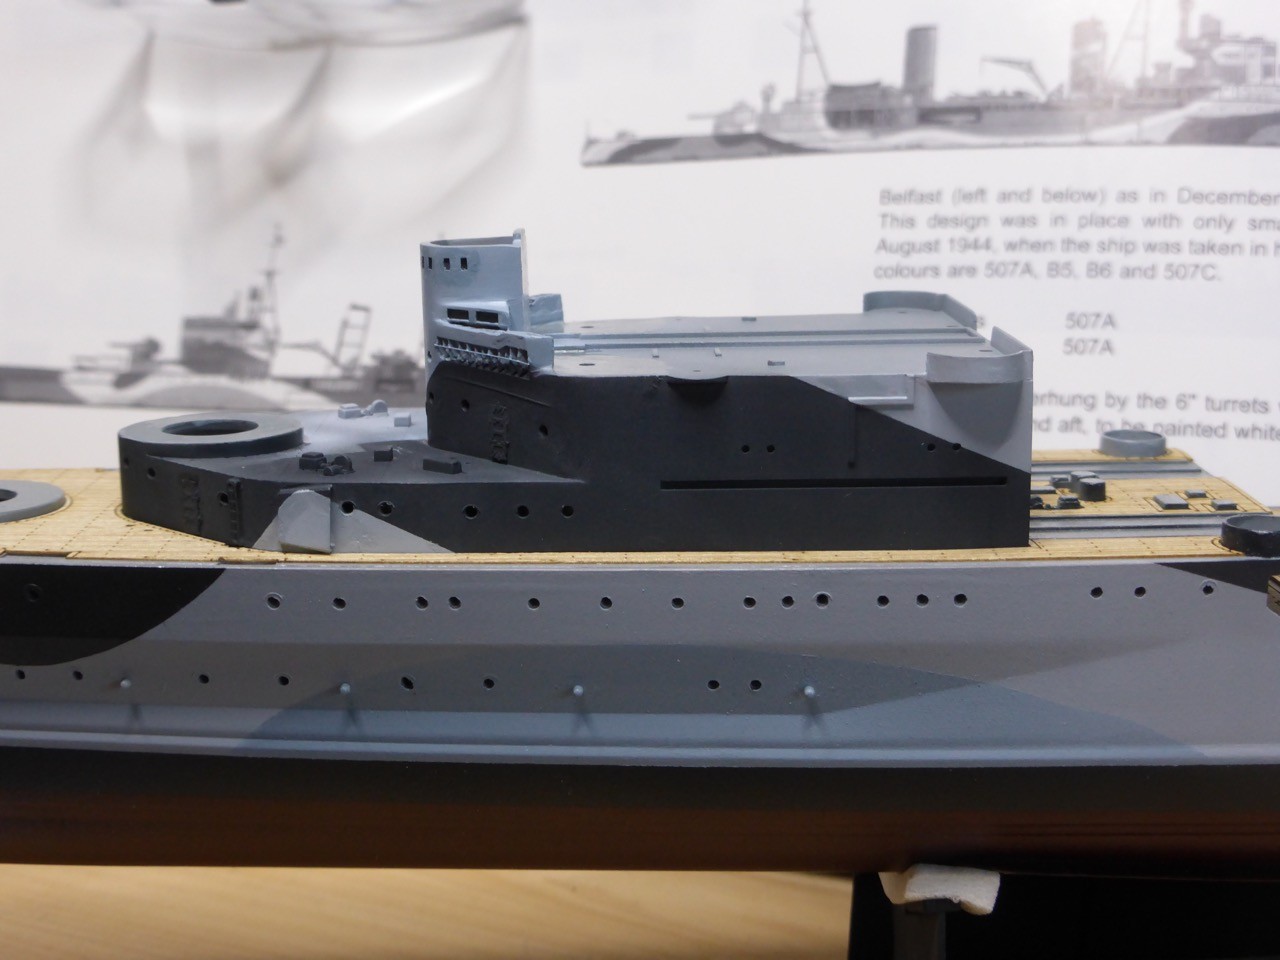
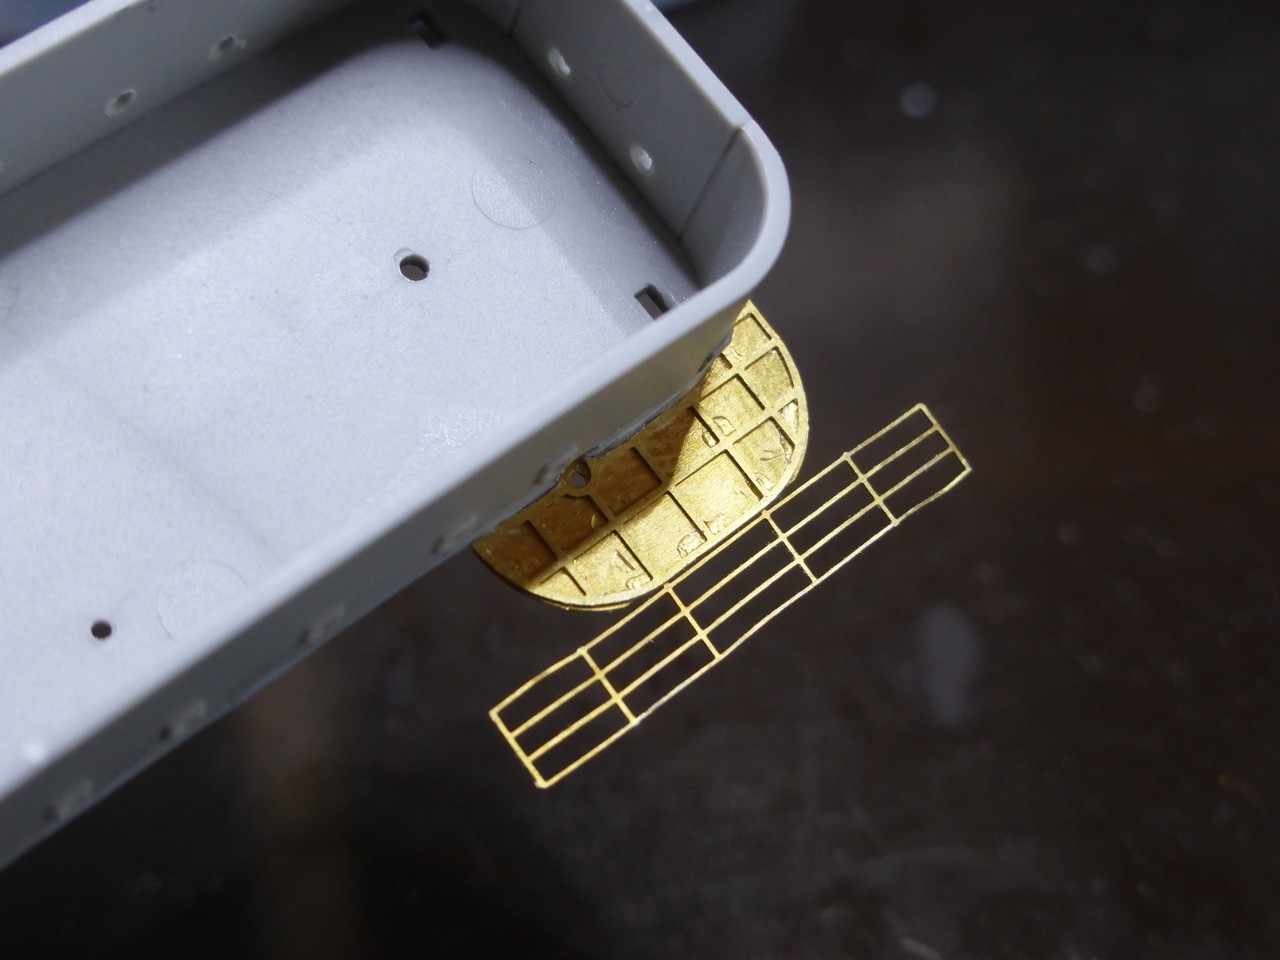
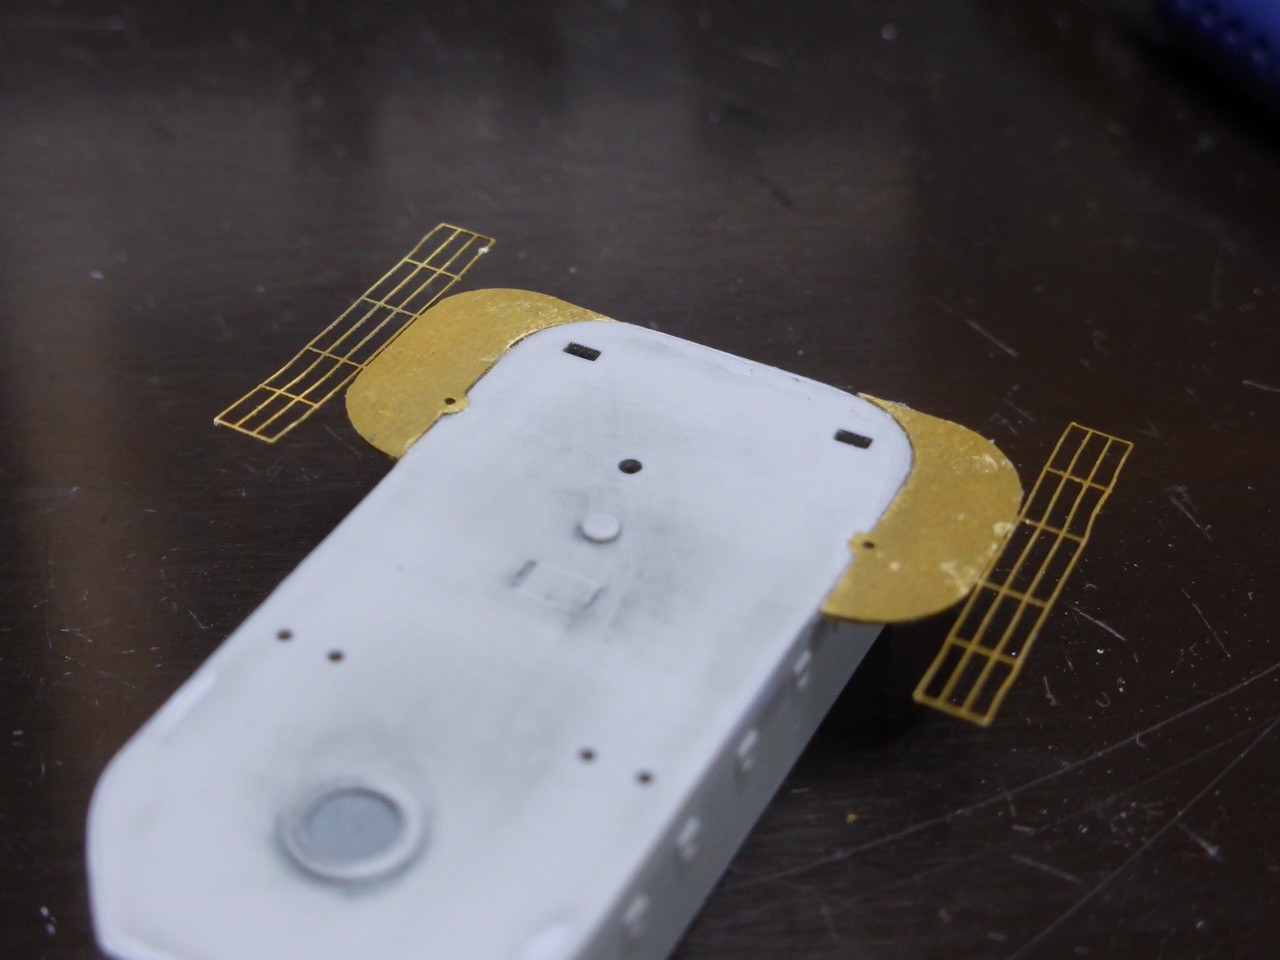
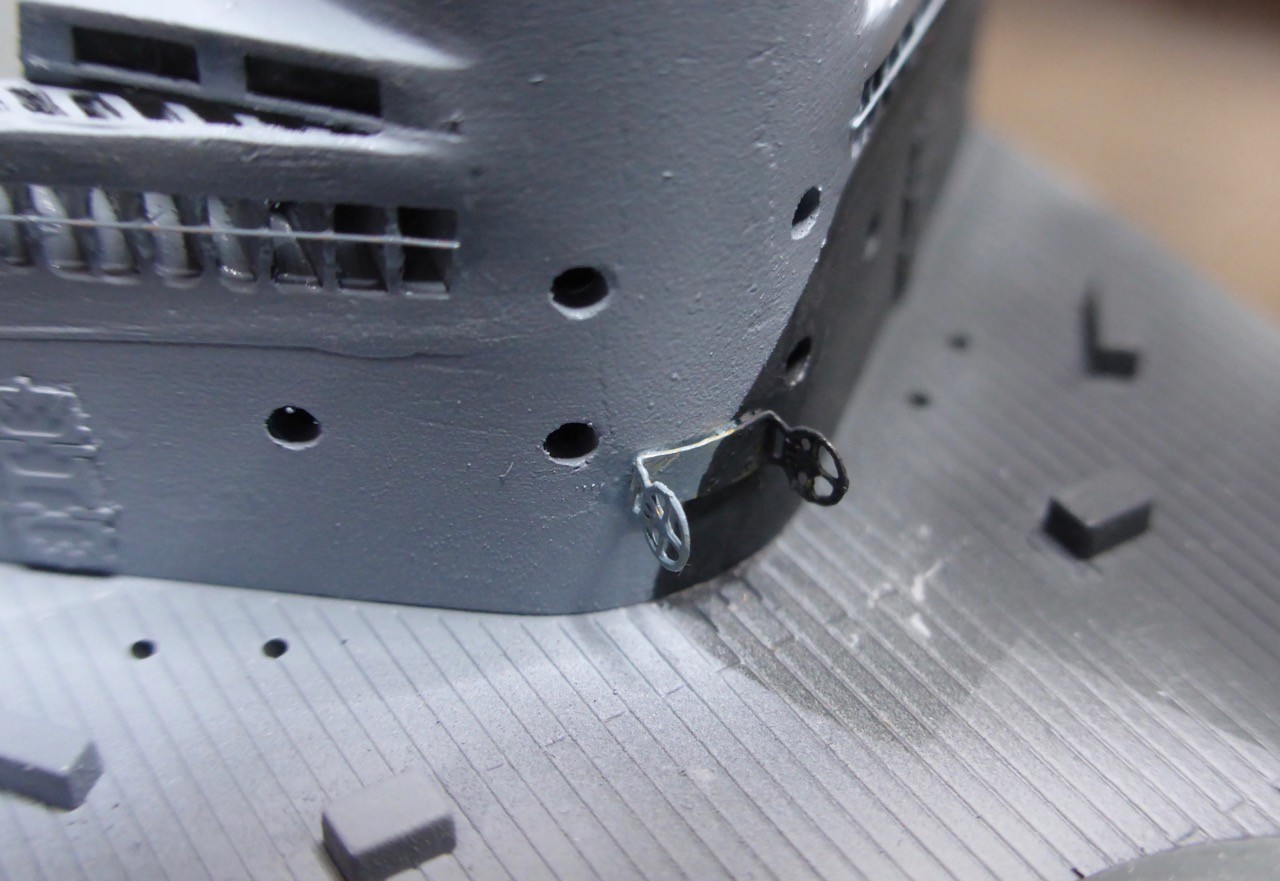
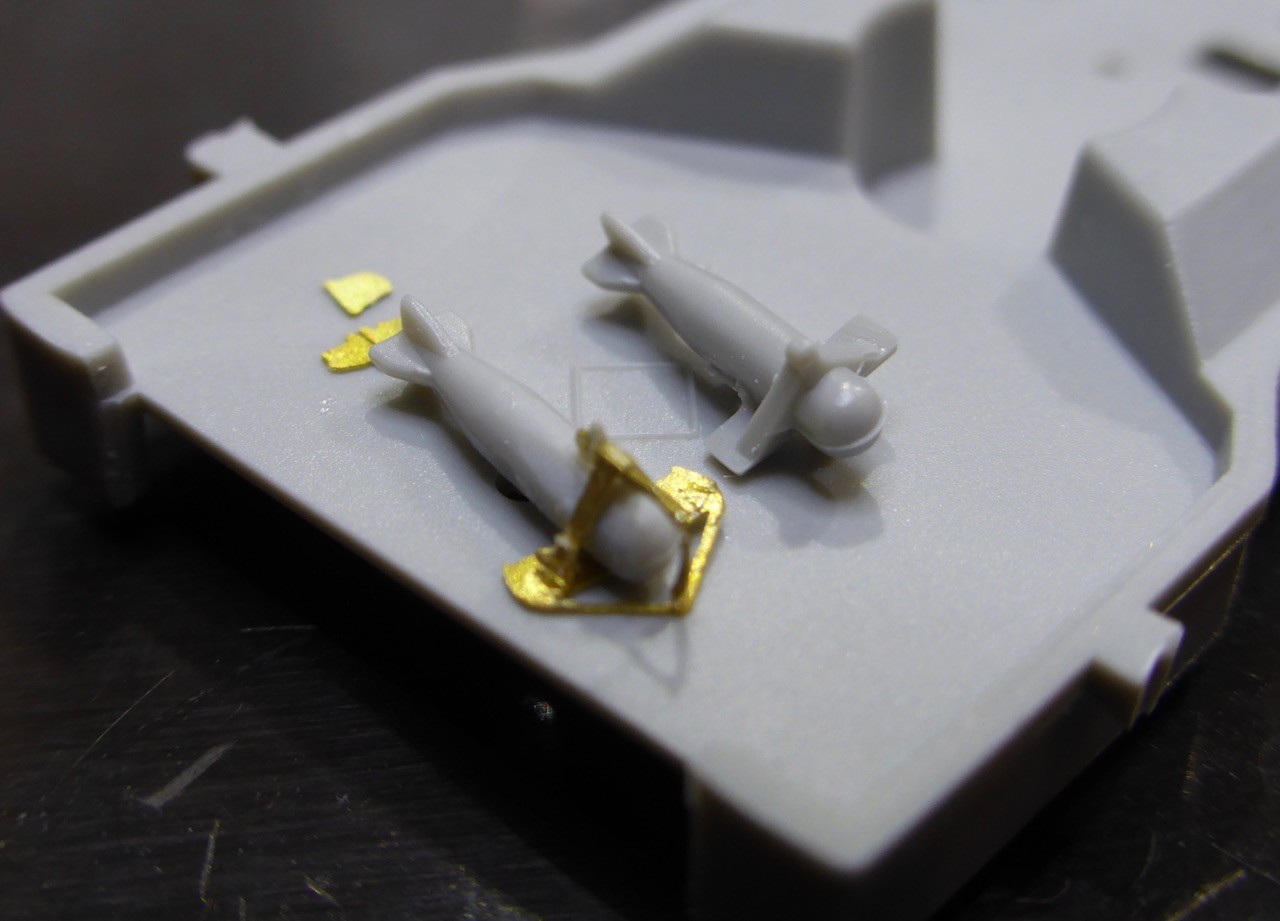
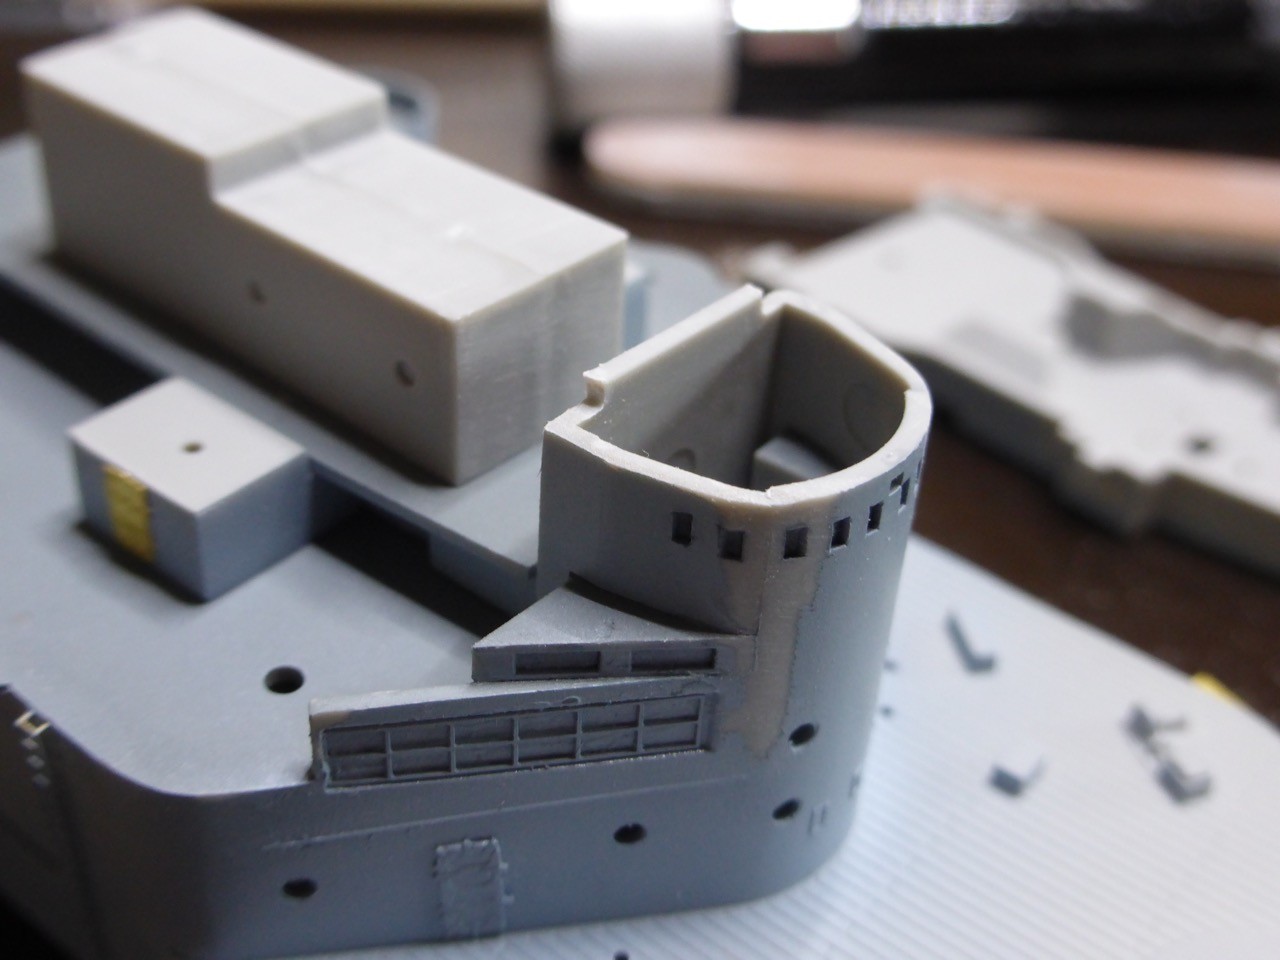
And then I realized that there are replacement wind deflectors for the lower bridge provided should have been reading the WEM instructions more thoroughly before... (but even Warren in his build never even mentioned them )
So I decided to build one and see how it looks. Since I am so familiar with all this PE, I just had a quick look at the instructions and started. Things would not fit. Somehow all the angles were wrong, and it looked awkward.
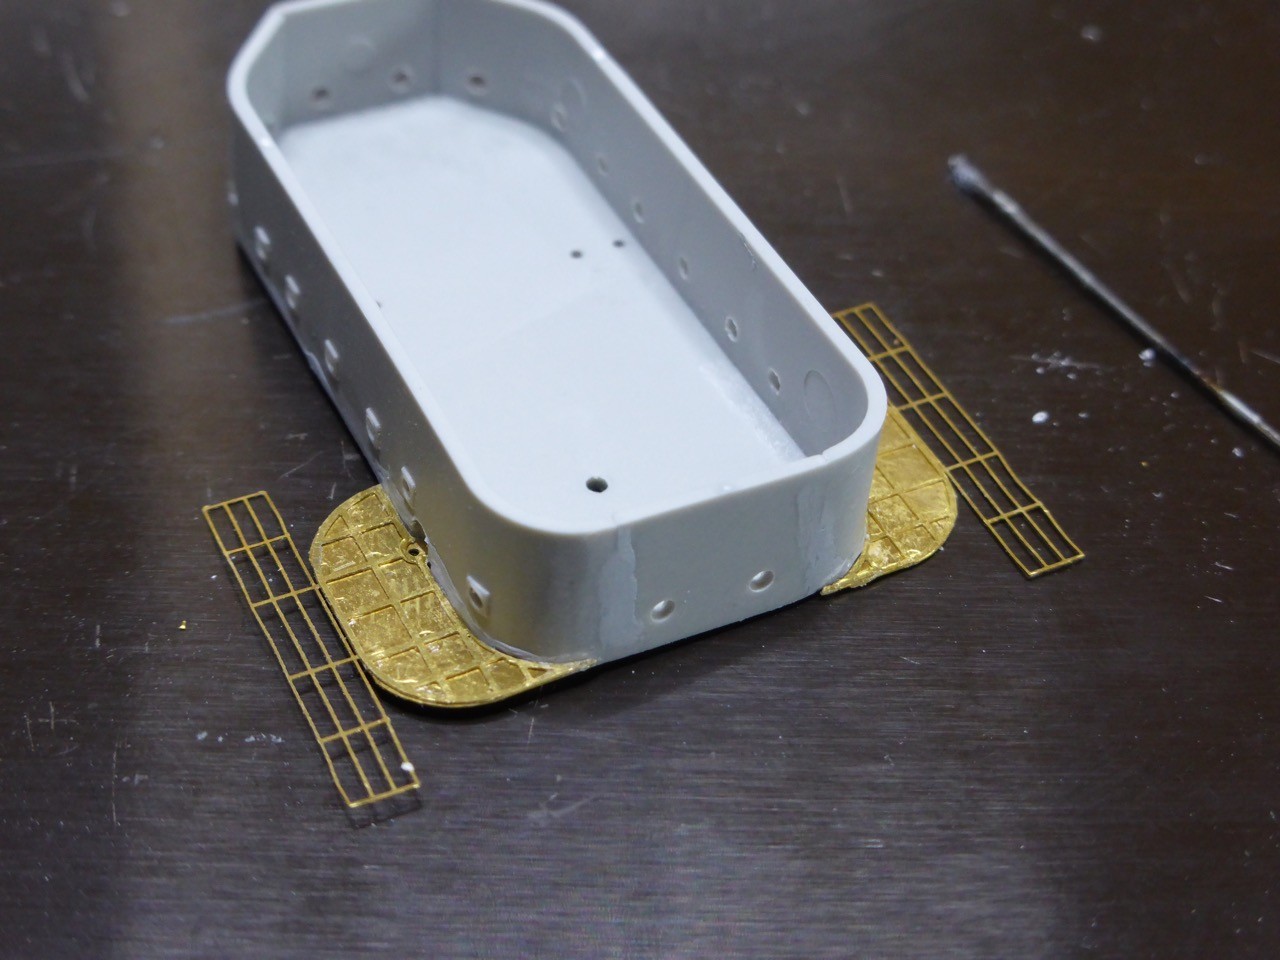
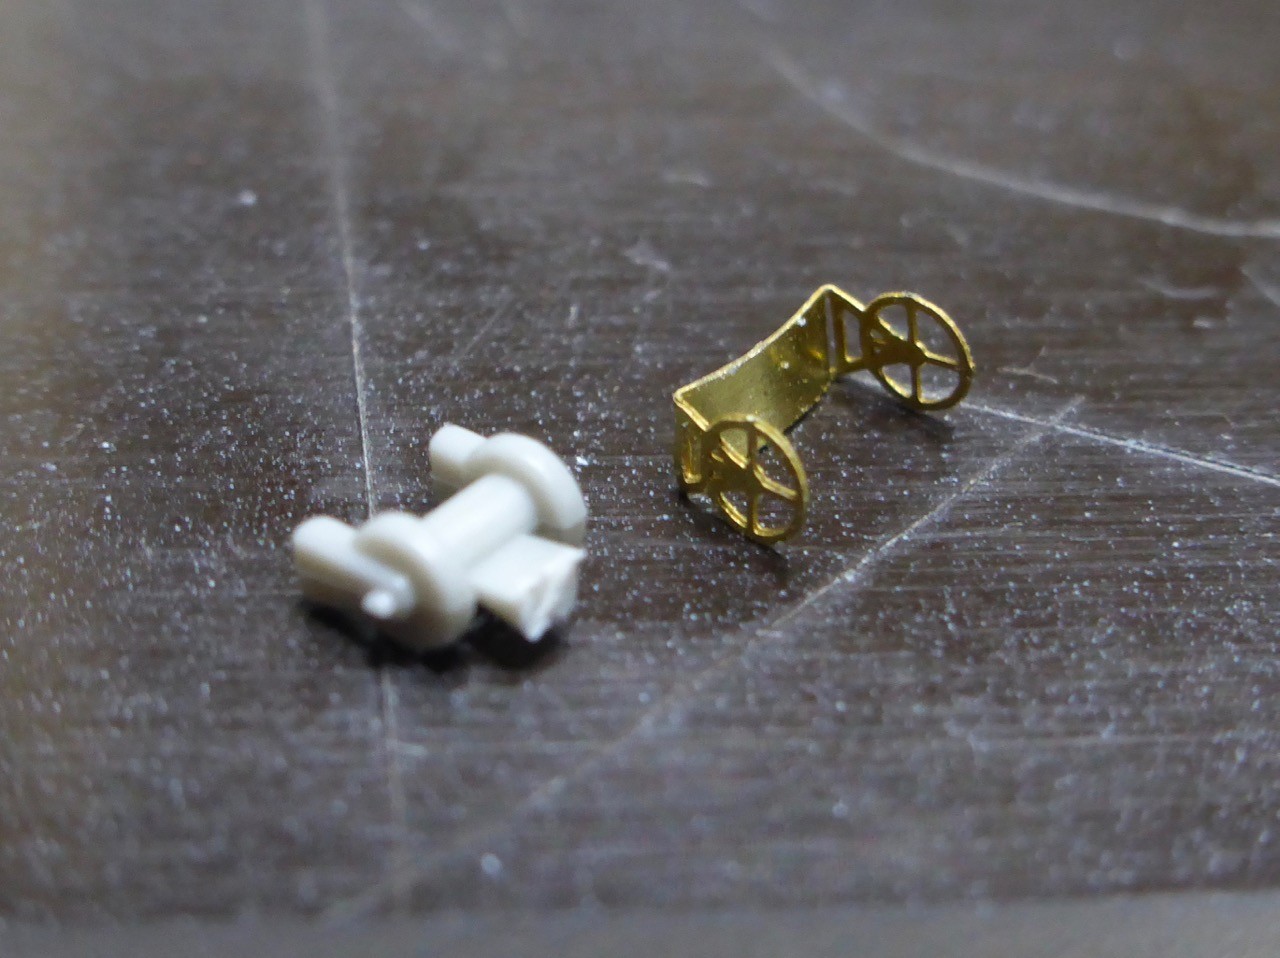
Well, I finished the port defector somehow and looked how it would fit to / into the bridge. It would not. Not at all. I had a second look at the instructions, this time even reading the text next to it. Well I had it all upside down in a way no wonder fit was so bad

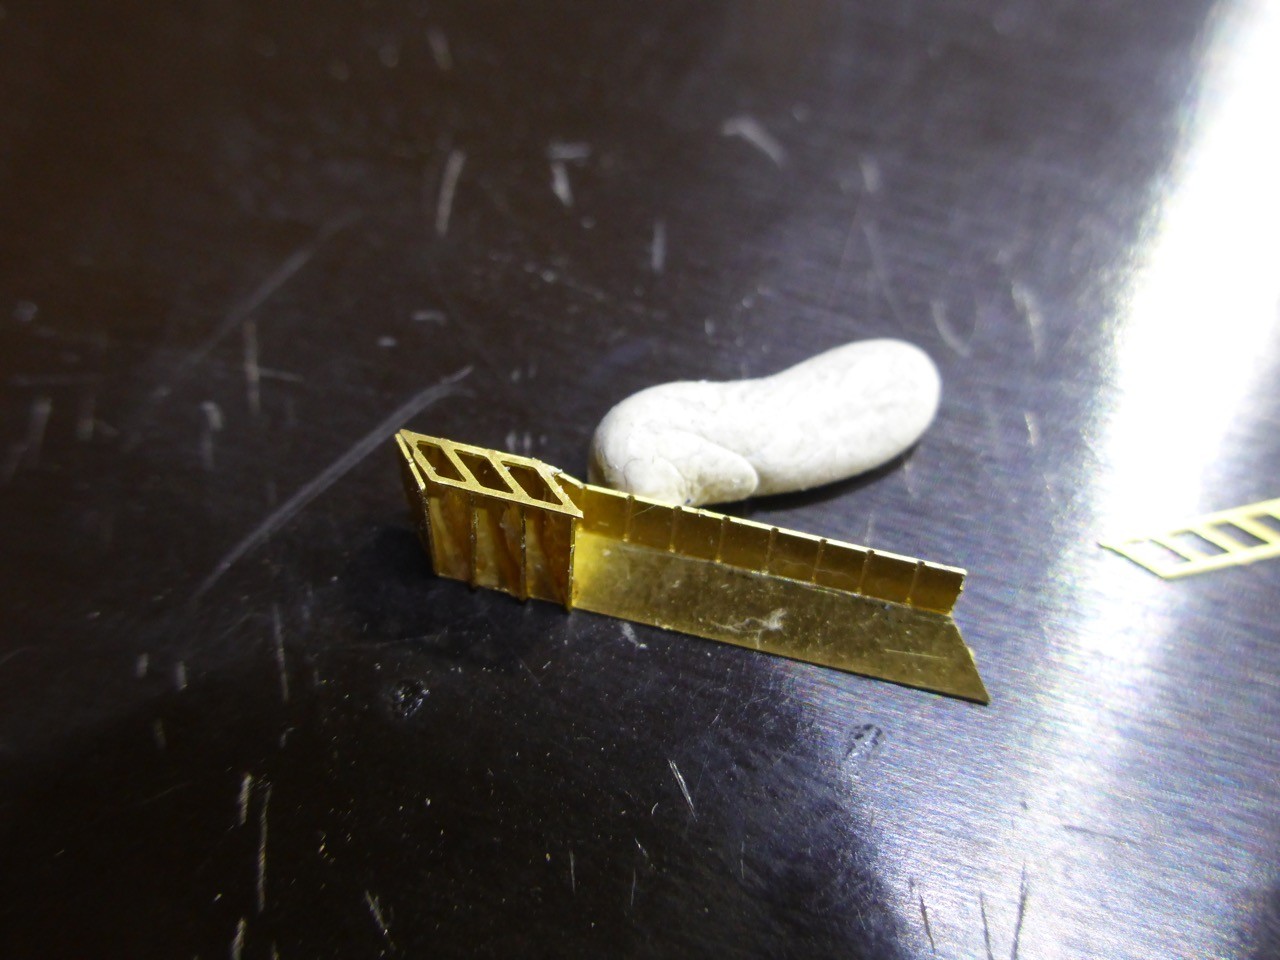
Luckily this was PE and PE only, so a lighter helped disassemble the whole thing. But this PE stuff is not to keen on assembling, disassembling and reassembling, so you can tell. But it should not look to bad in the end. (Sorry, somehow I entirely forgot to take pictures of the wrong assembled part...so story only).

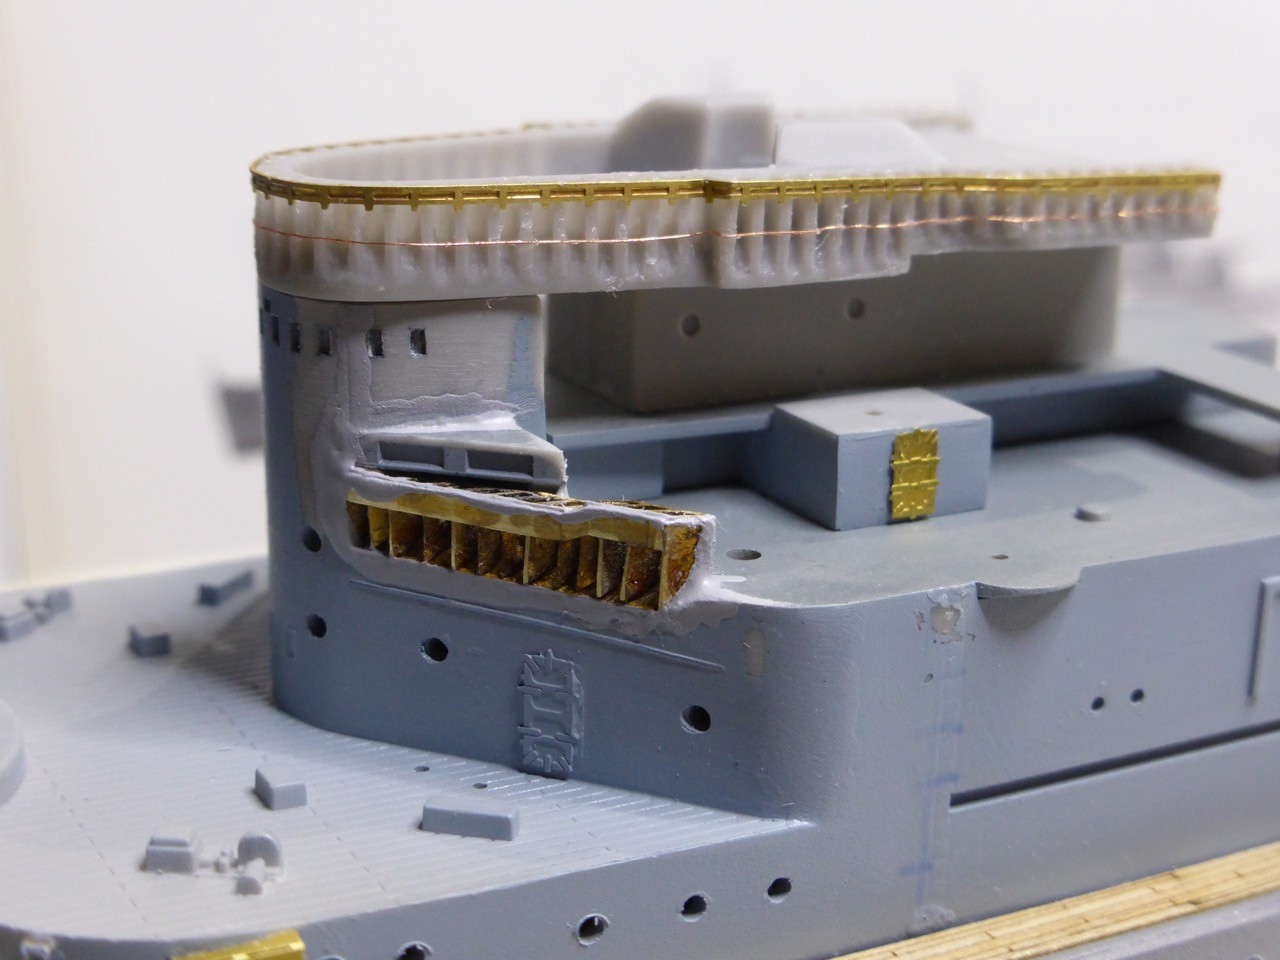
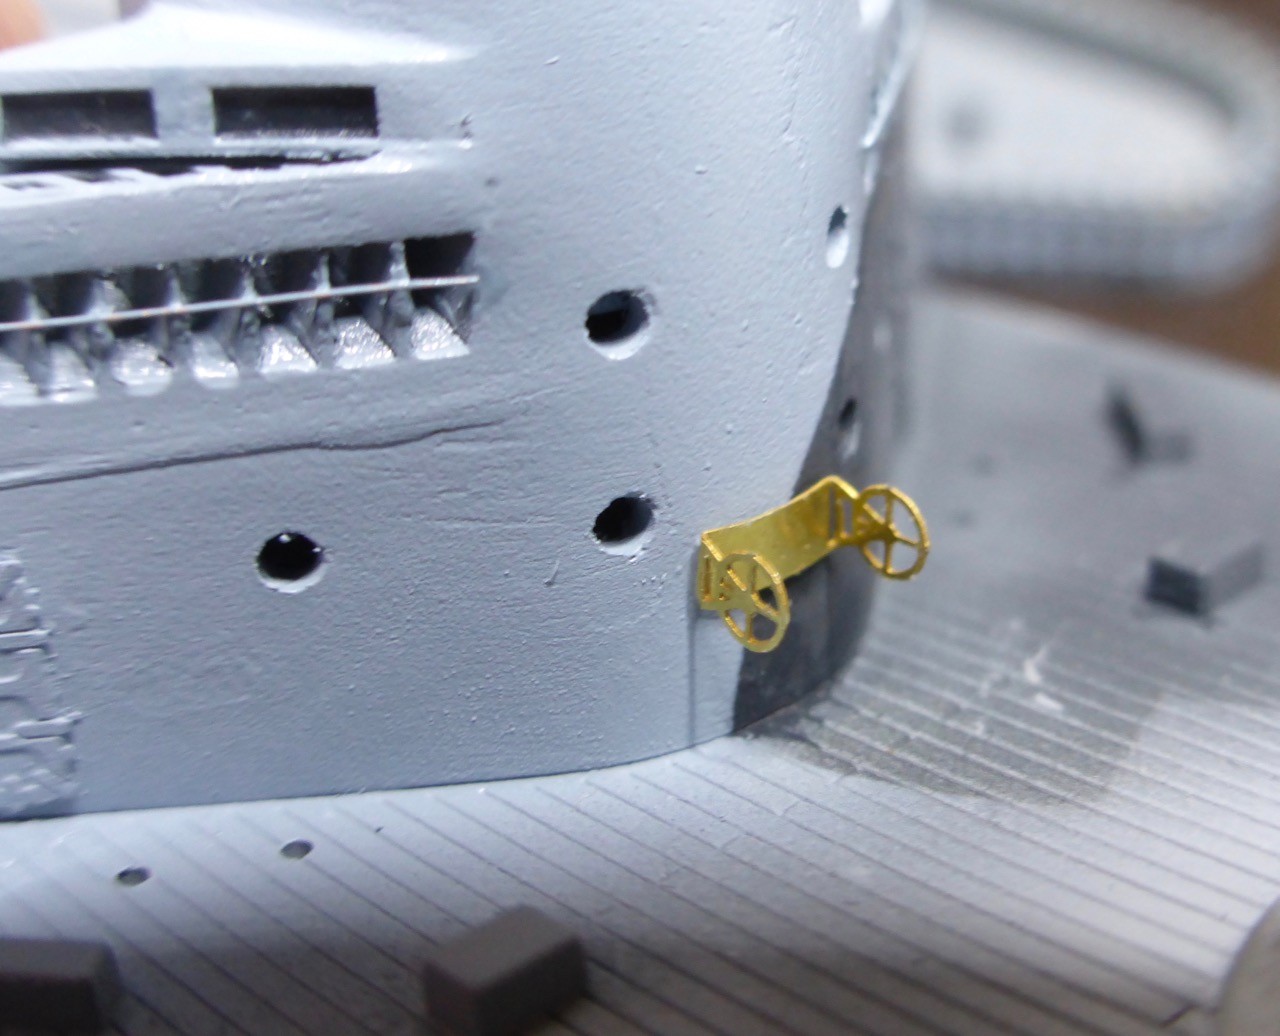
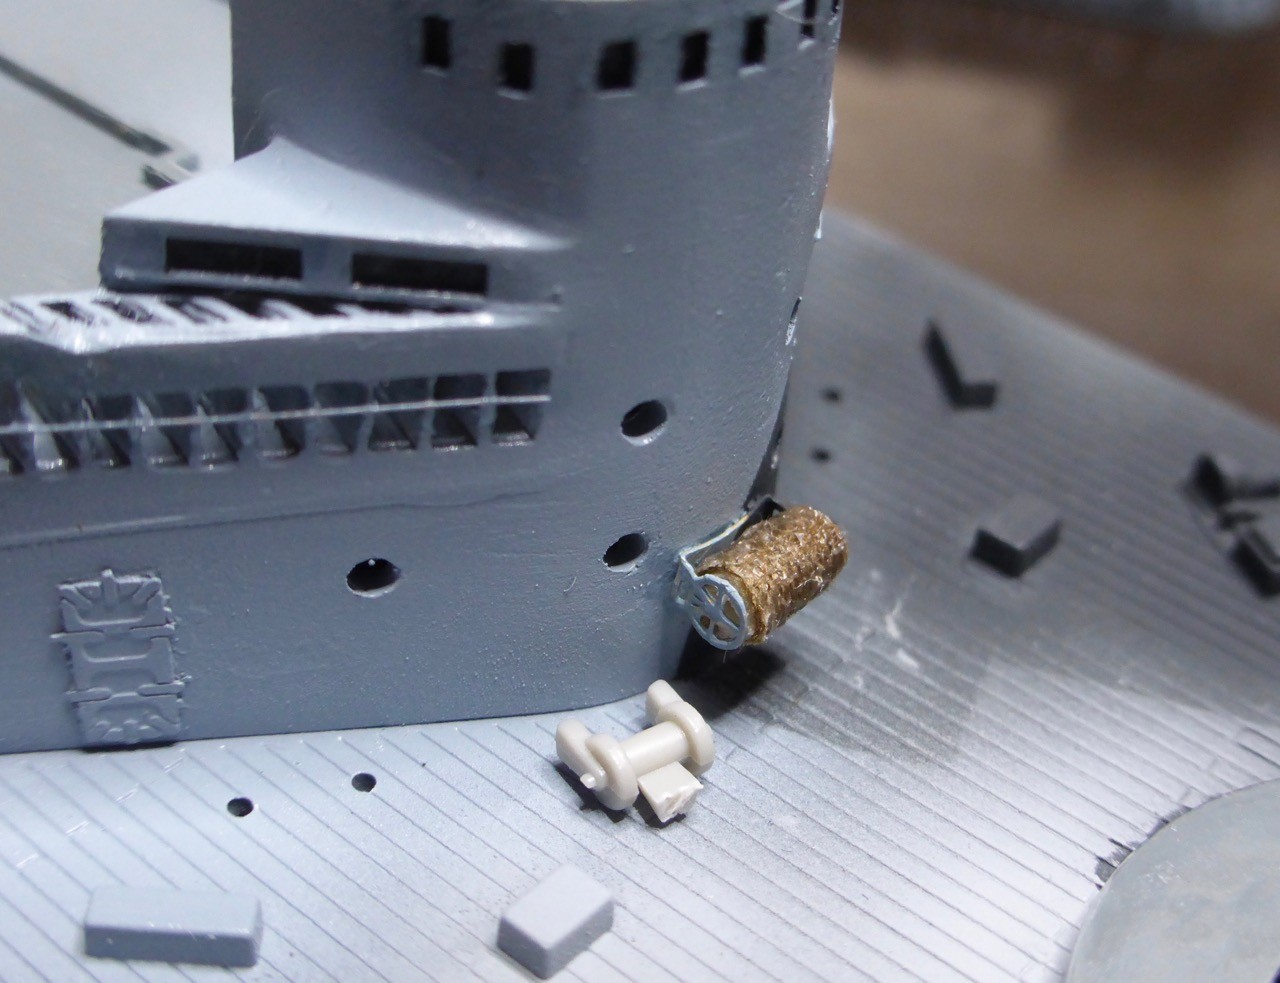
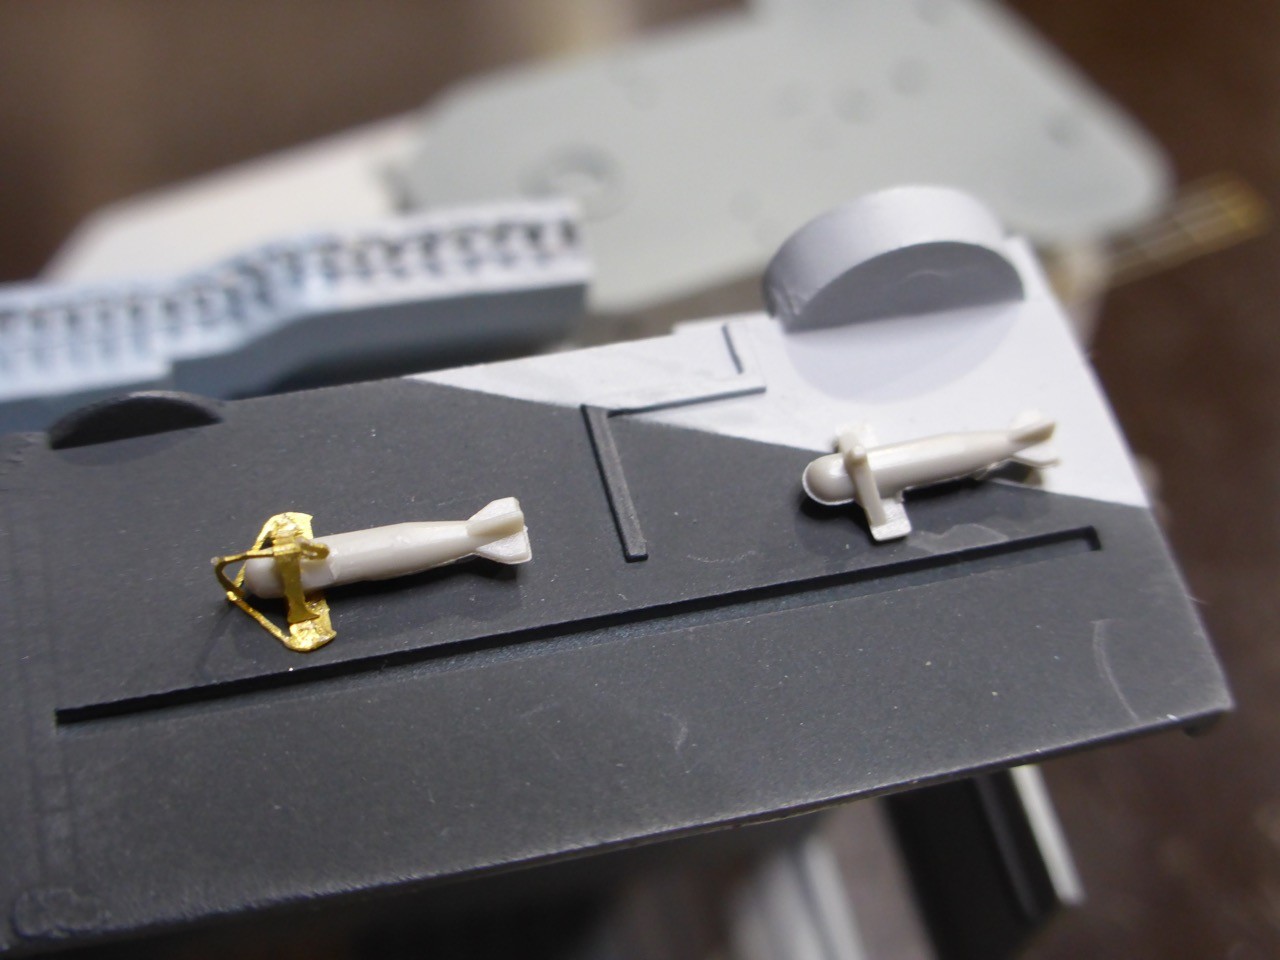
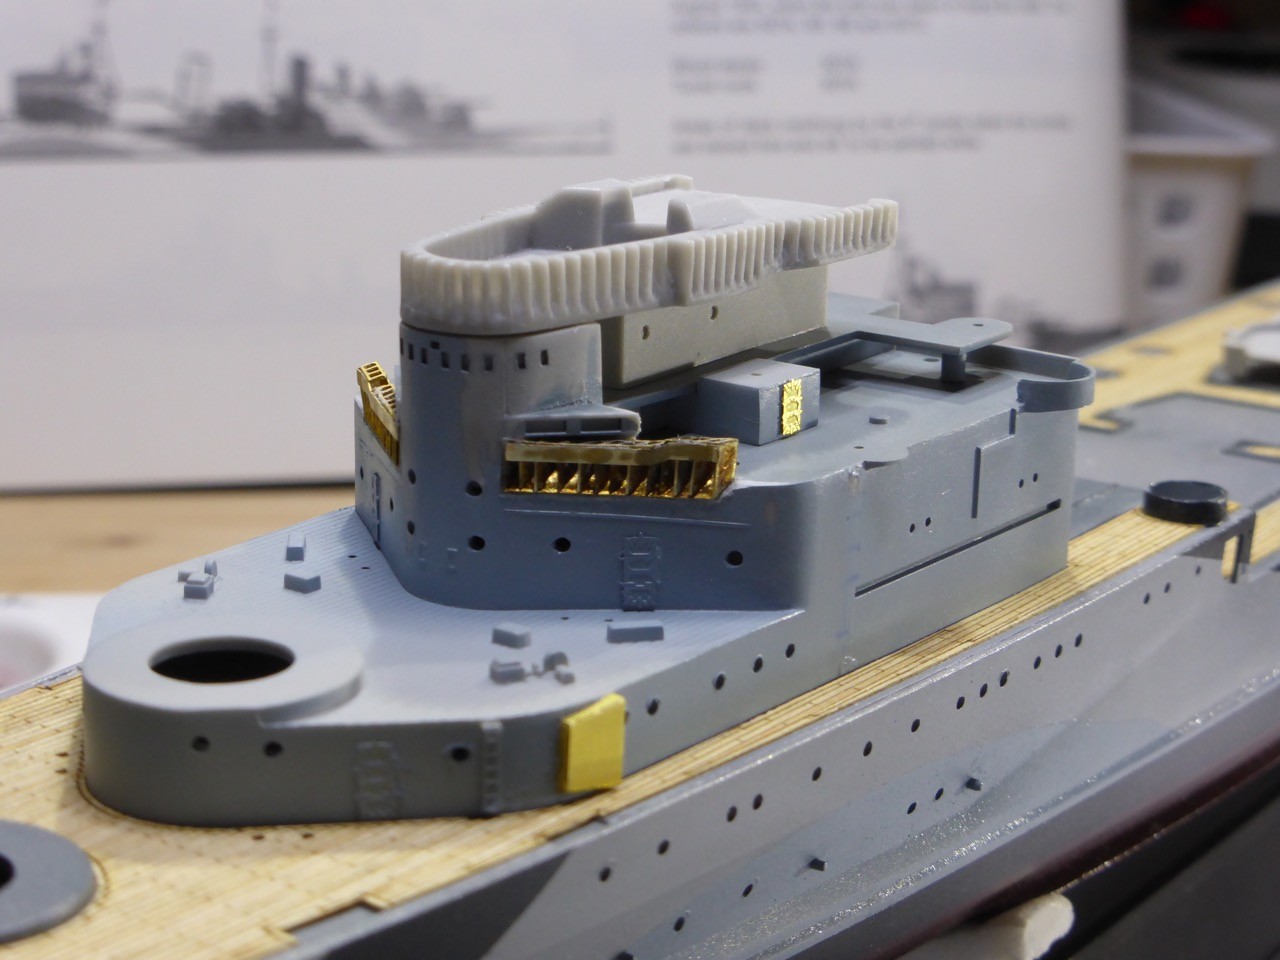
Now here comes the correct assembly:


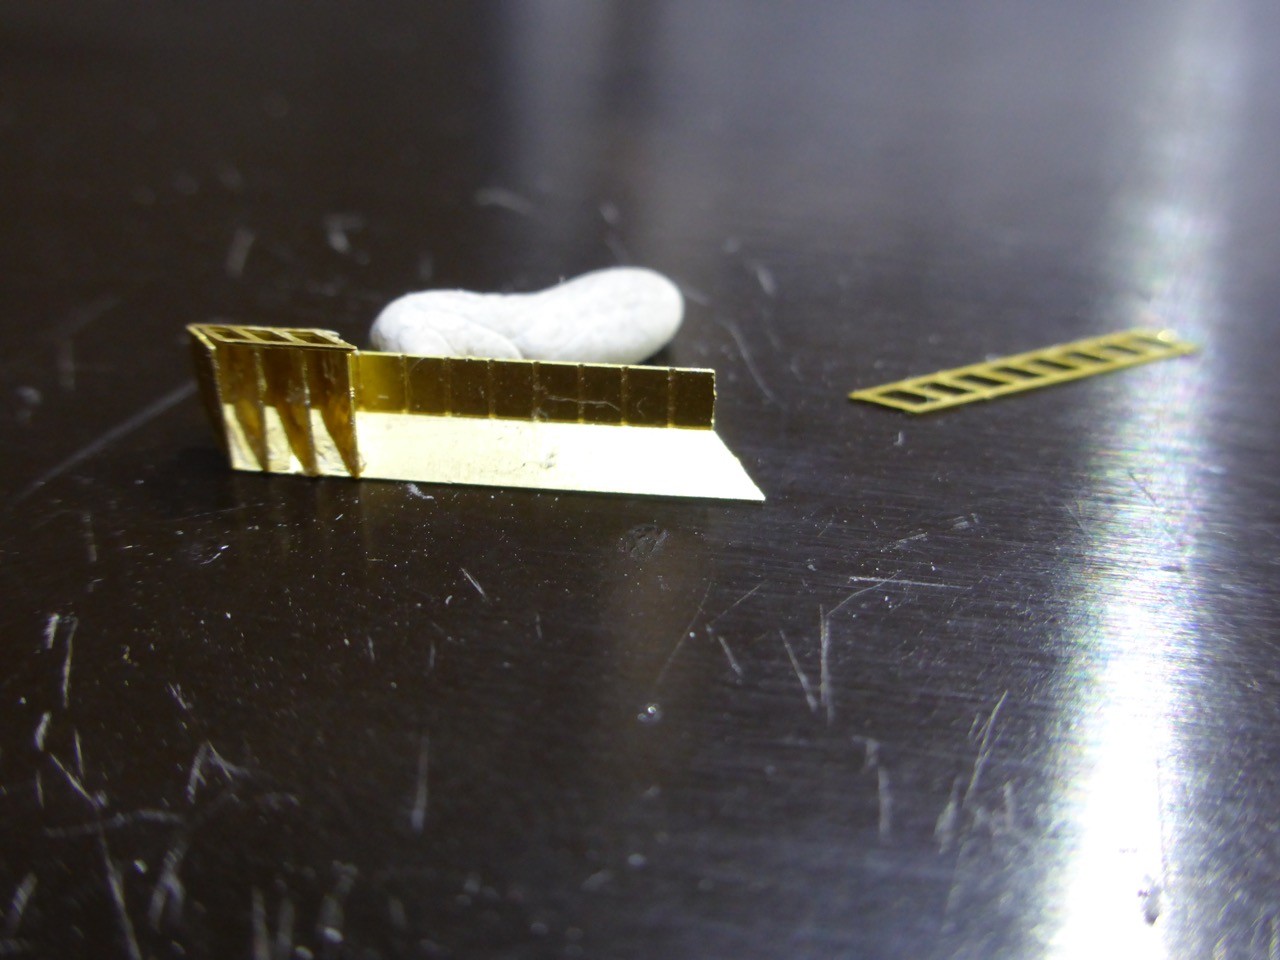
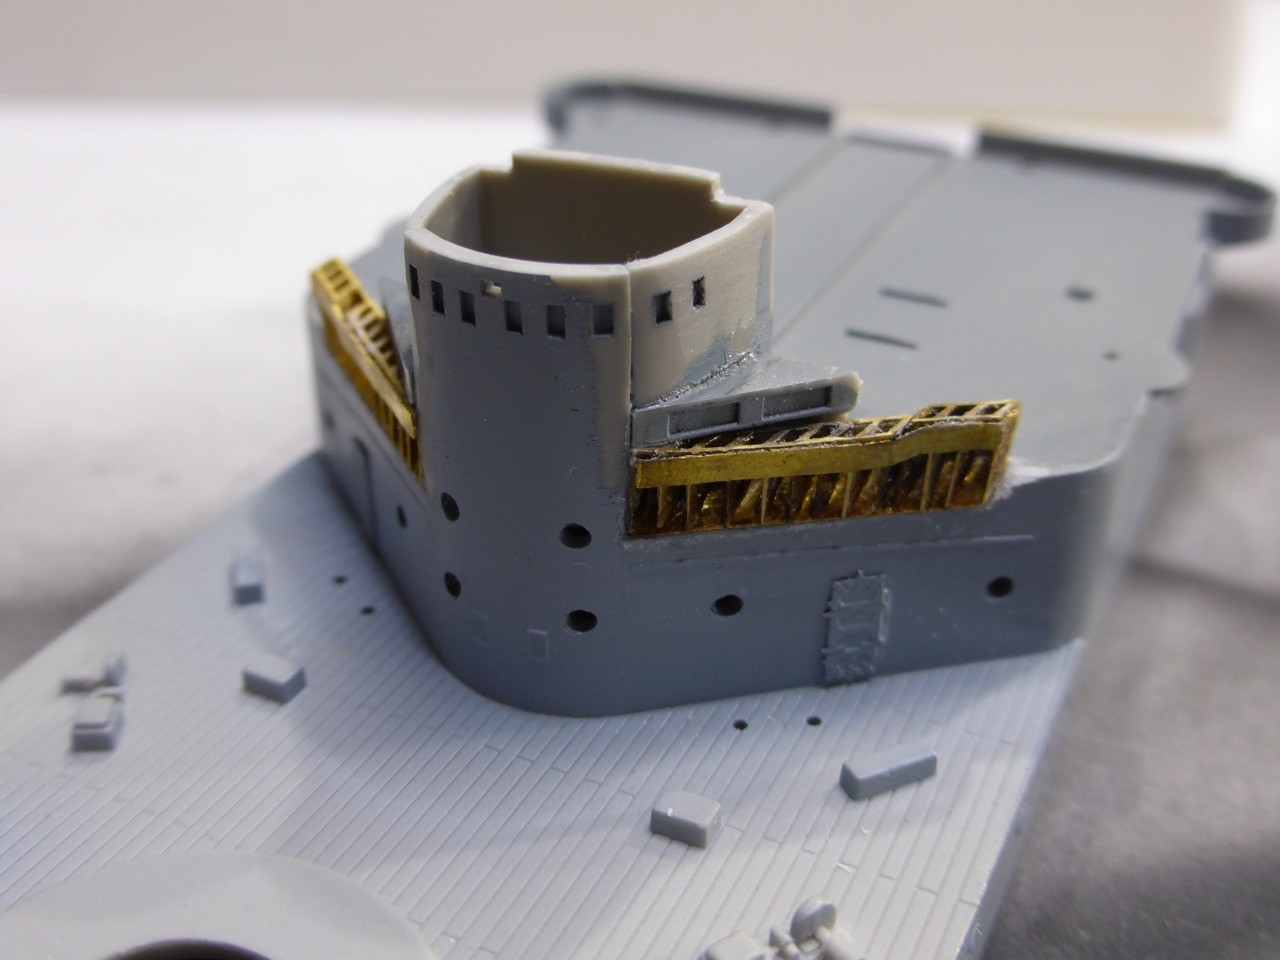
The reassembled one is fairly easy to spot from it's off color. But painting should help a bit...


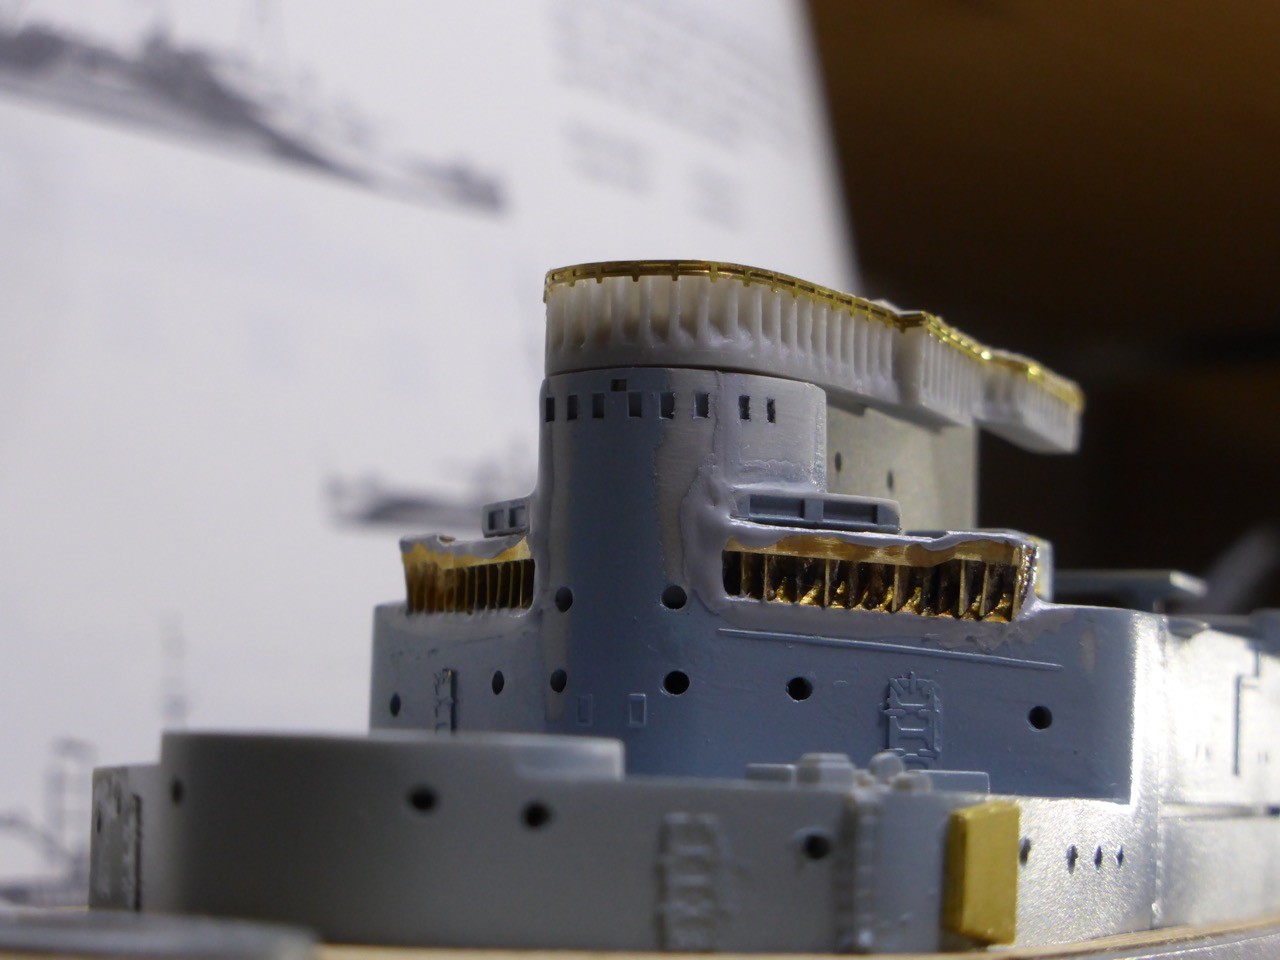
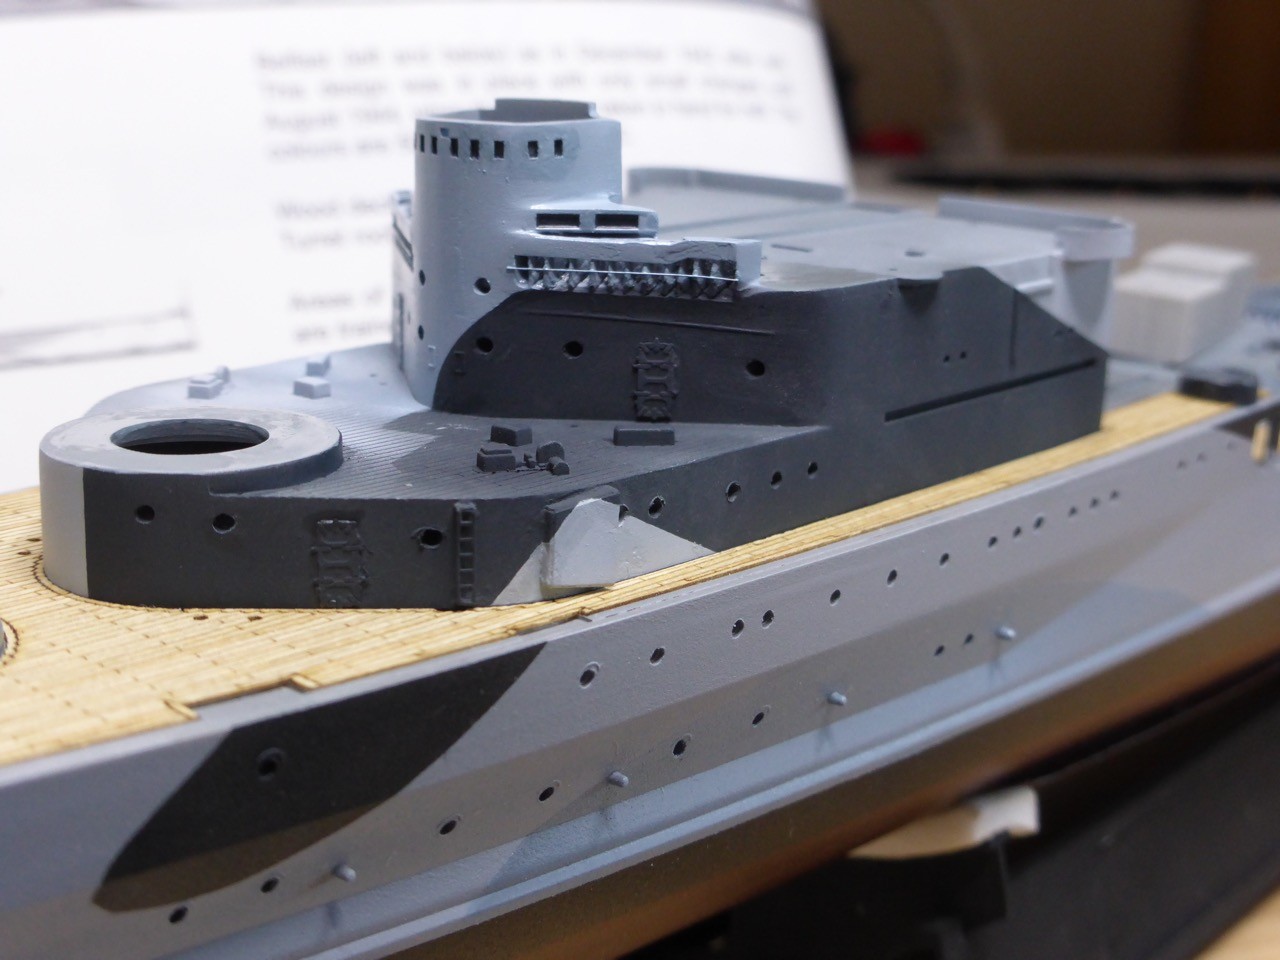
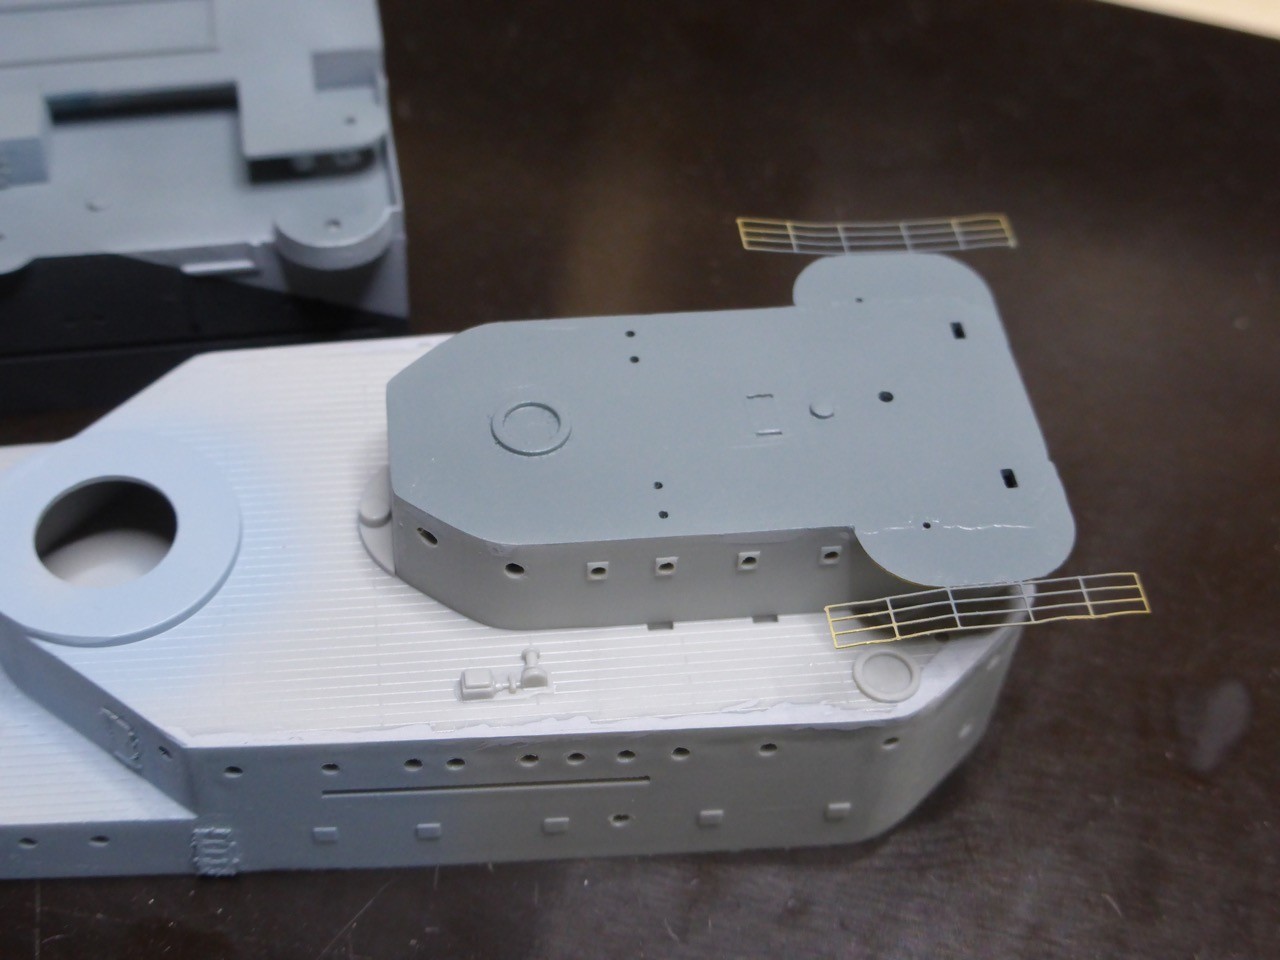
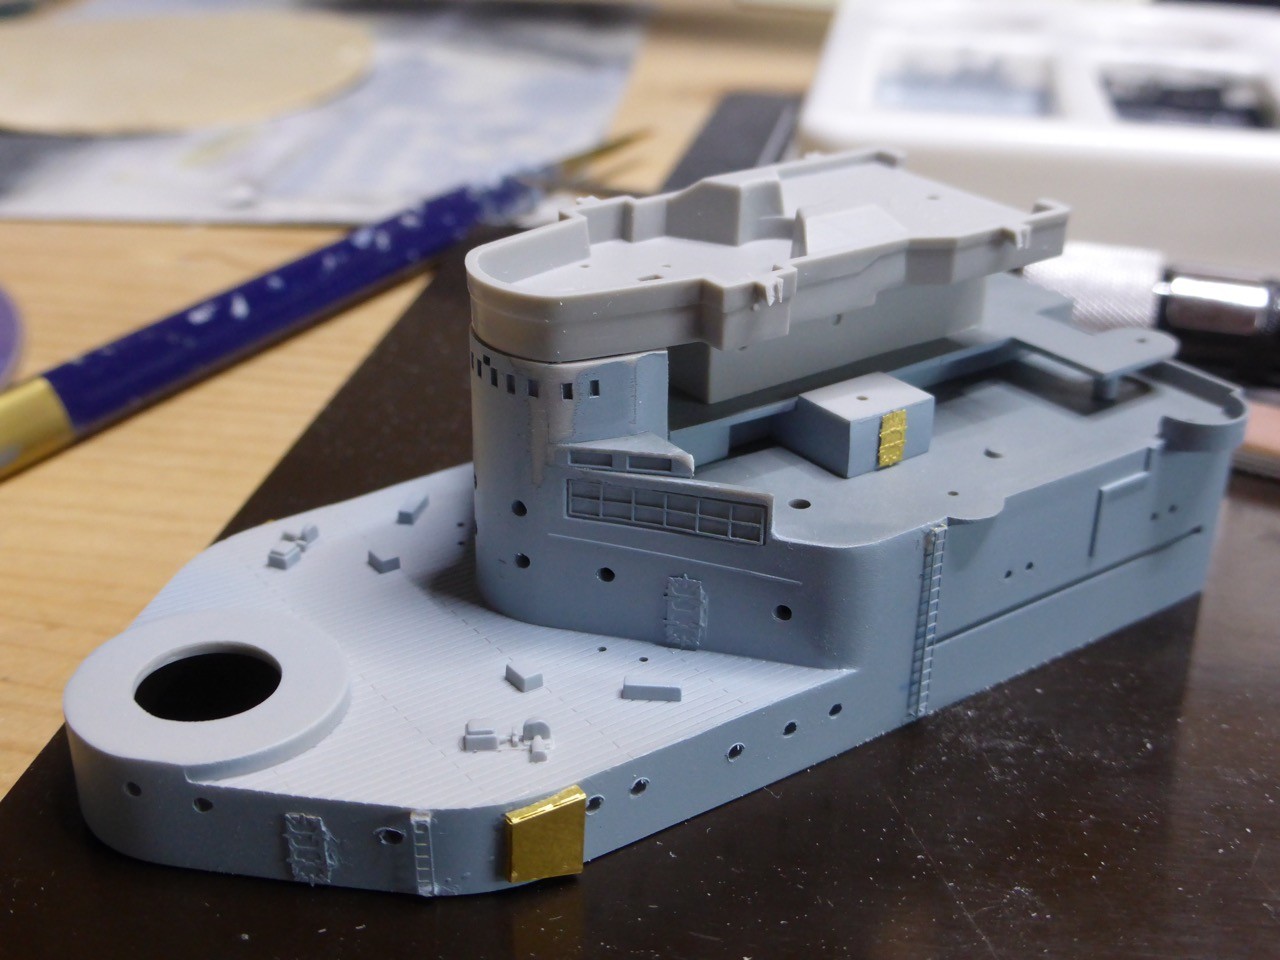
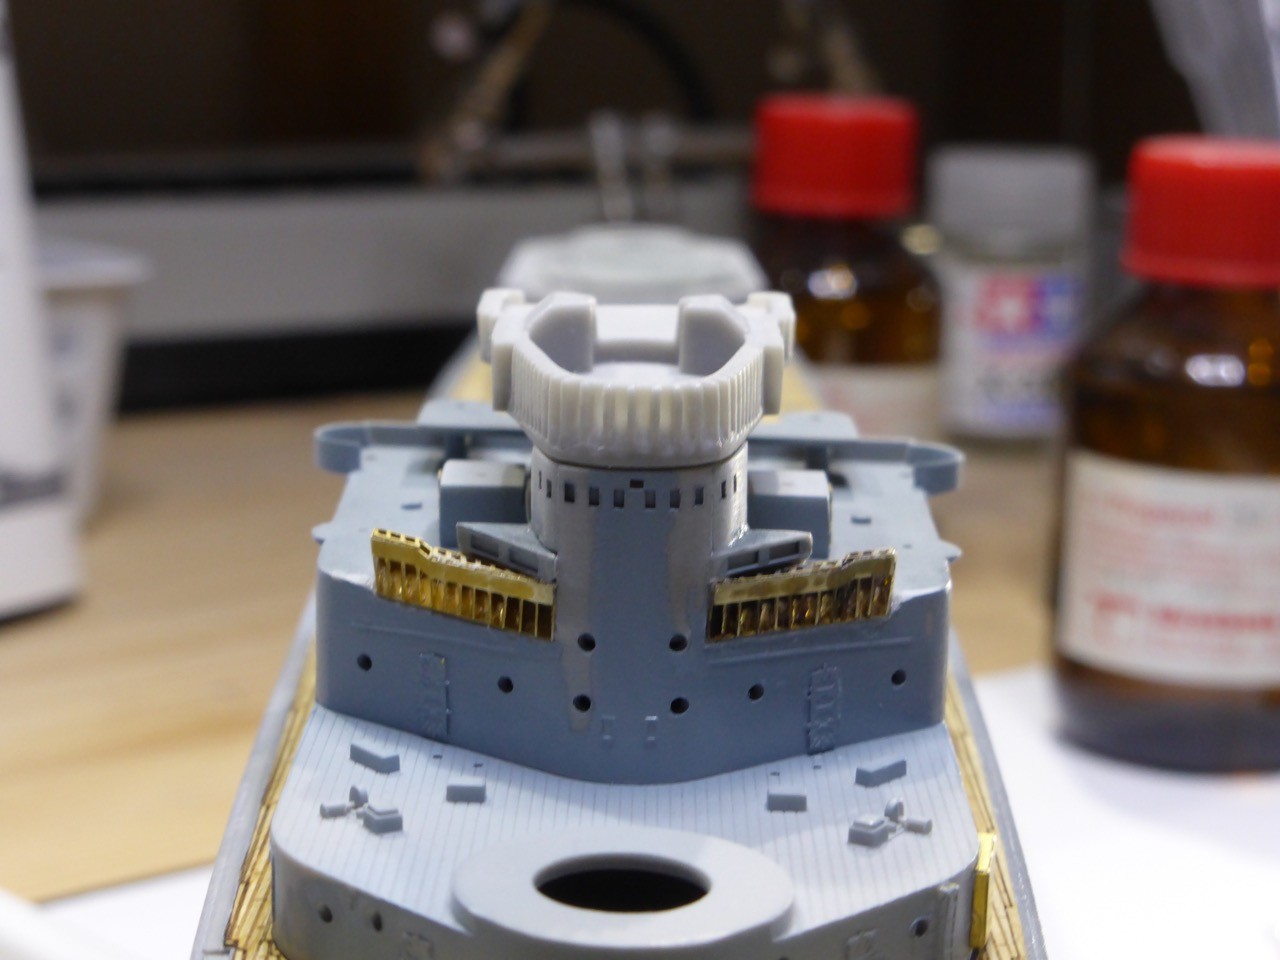
Now major surgery was needed to get those things into position. Not only had I to cut away the already glued in place parts, some major cuts to the structure are needed. I did not feel to good with that - a complete fumble would have caused major problems to parts in plain sight. But I decided to go for it:


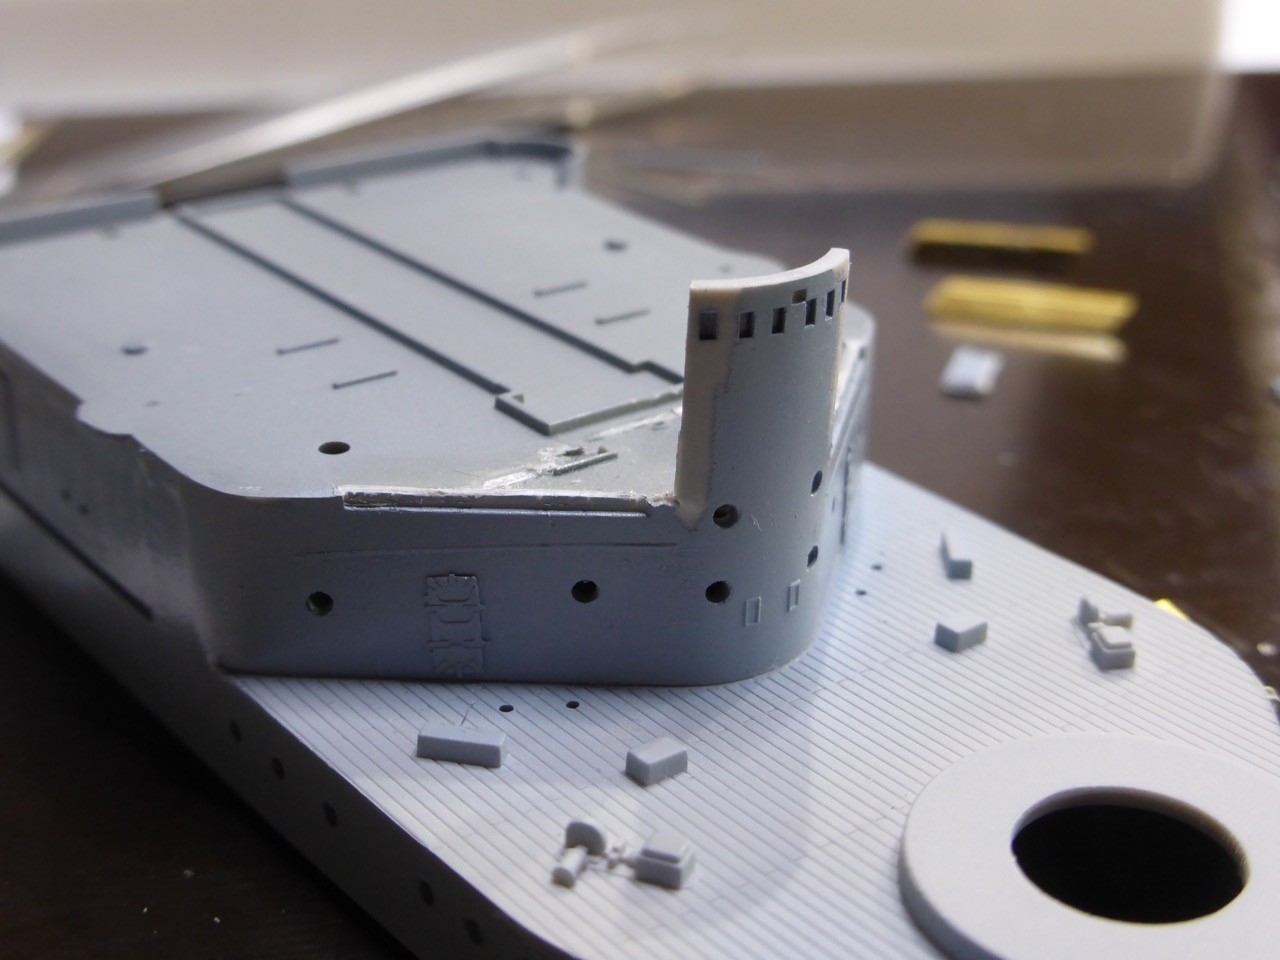
Slowly building up again:


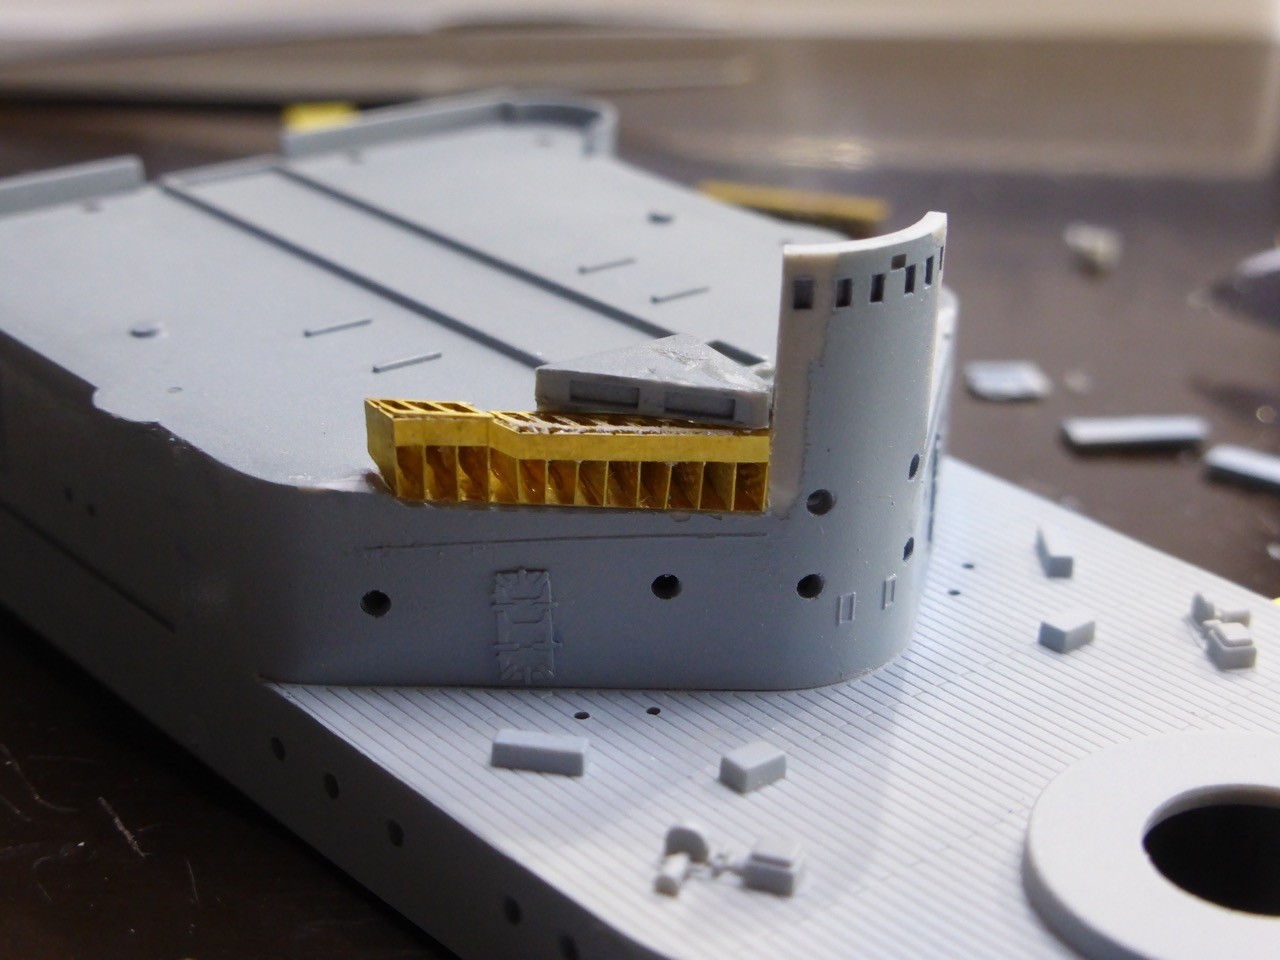
and both sides in position:


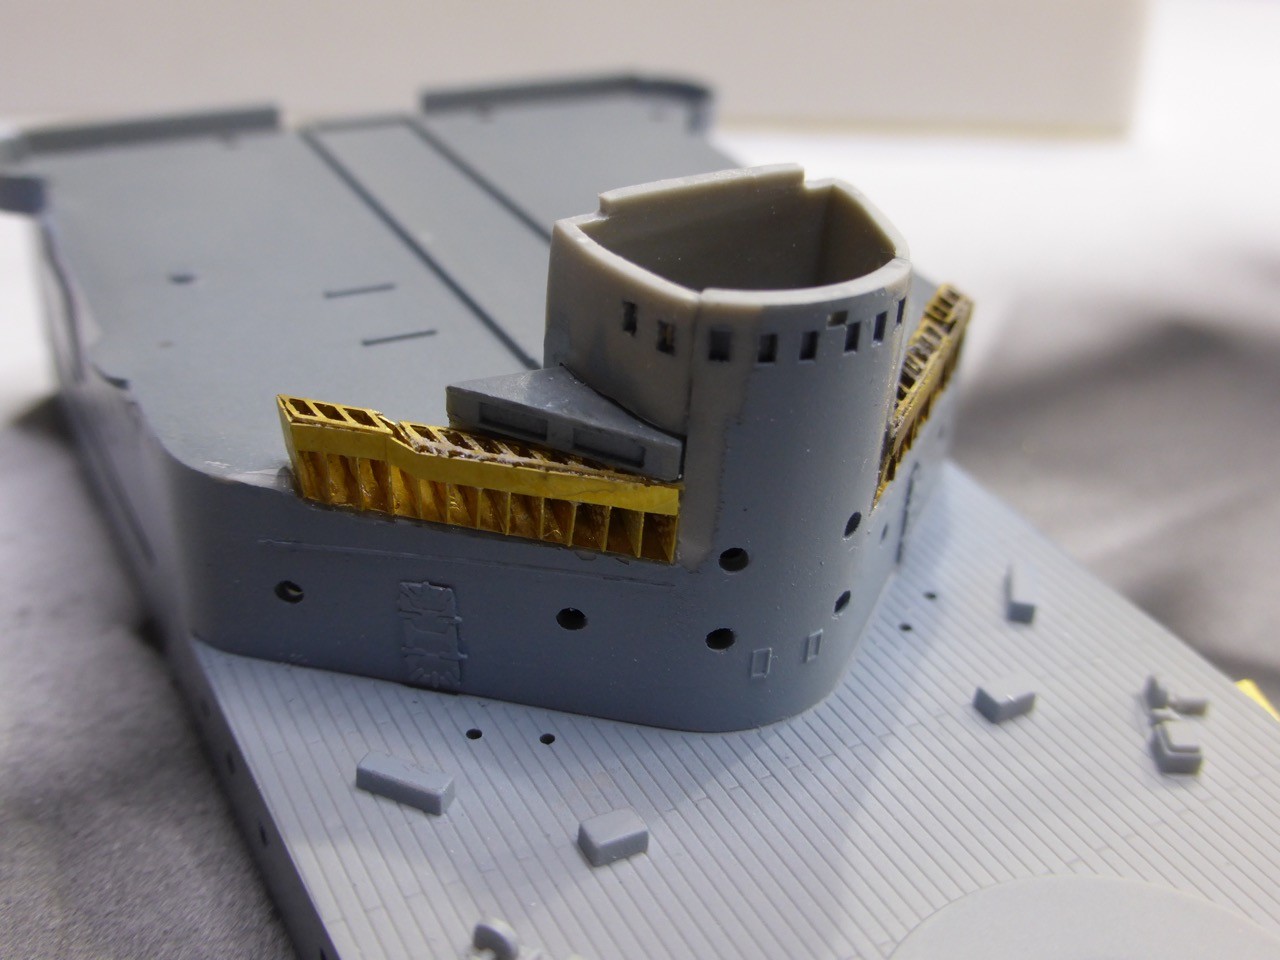
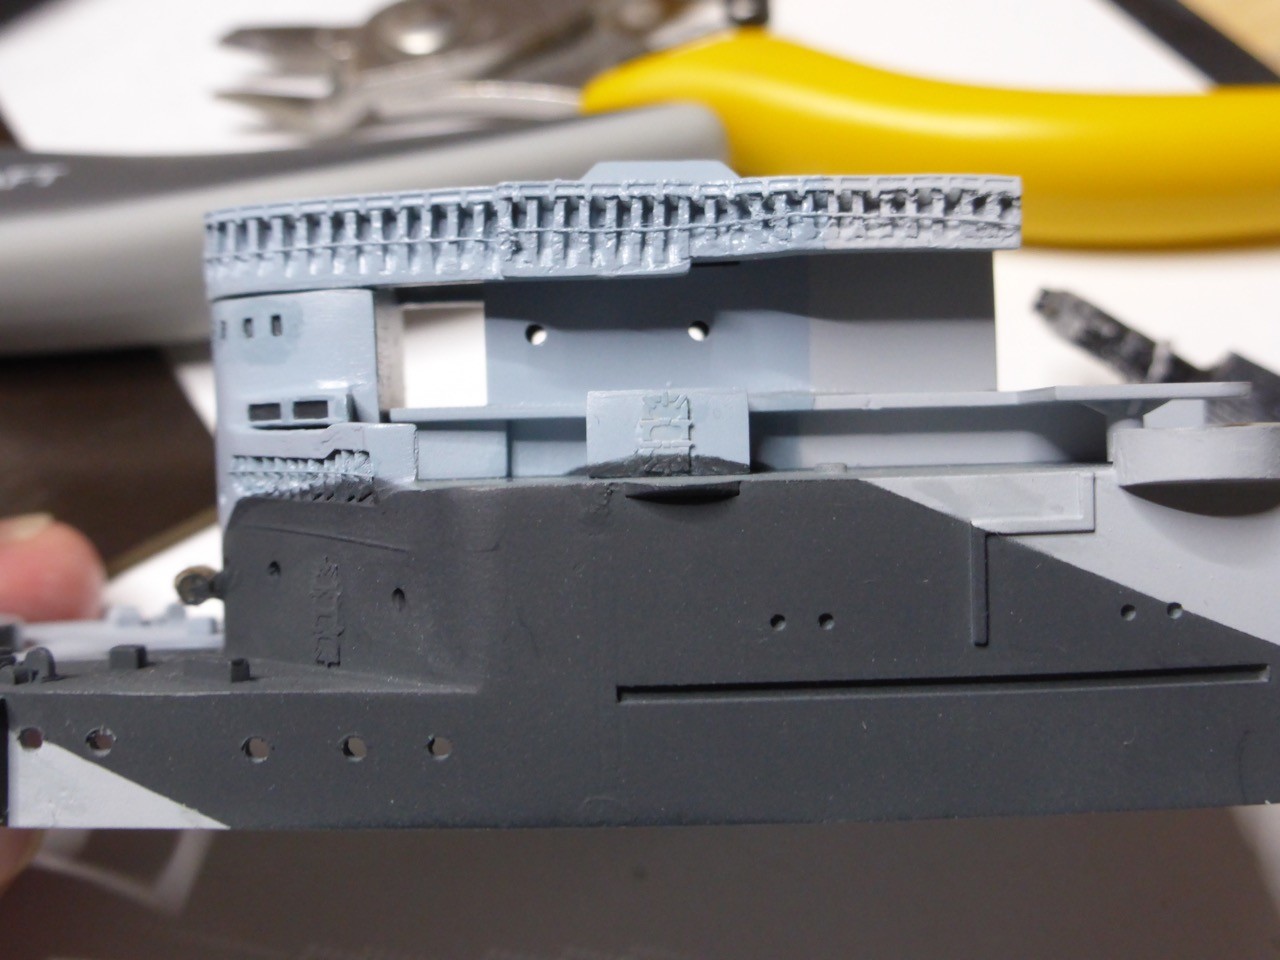
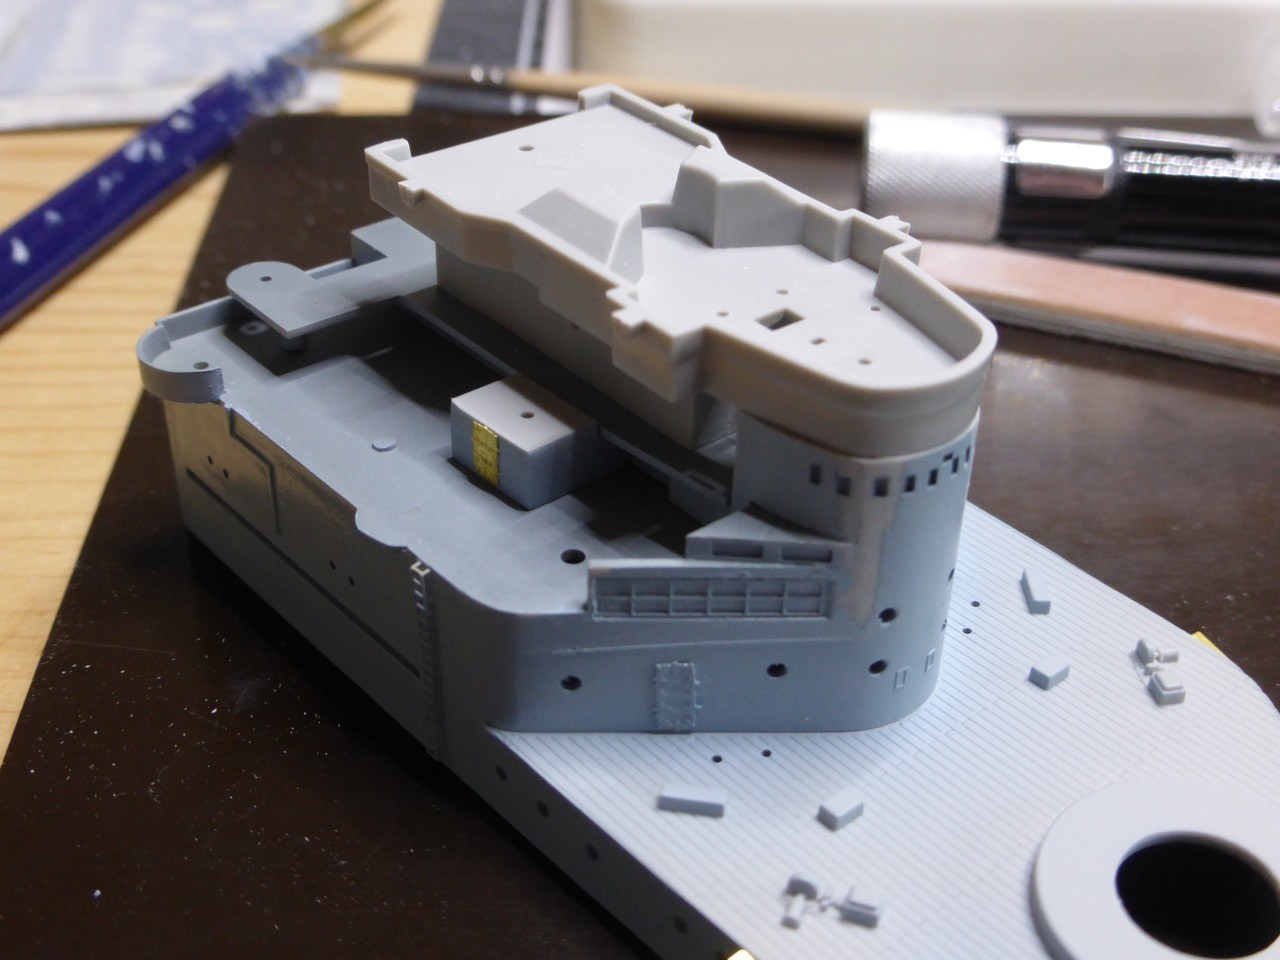
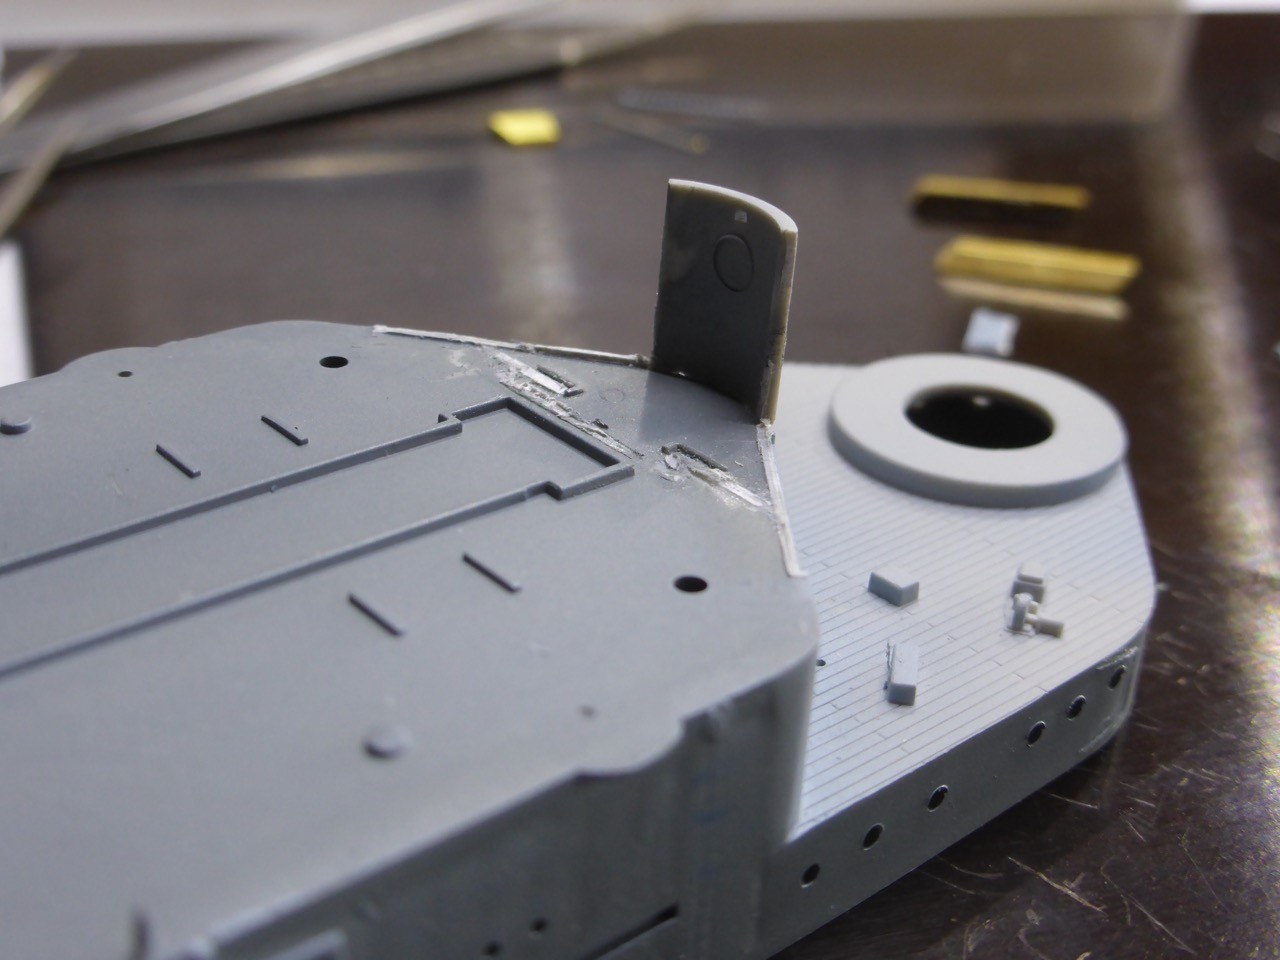
And finally some test fitting with the upper parts. Some filling and sanding to be done, but I think it was worth the effort. And I just ripped apart three ladders and one of those deflectors to the lower structure, one vertical ladder was lost. Since I have enough replacement for vertical ladders, the price is ok

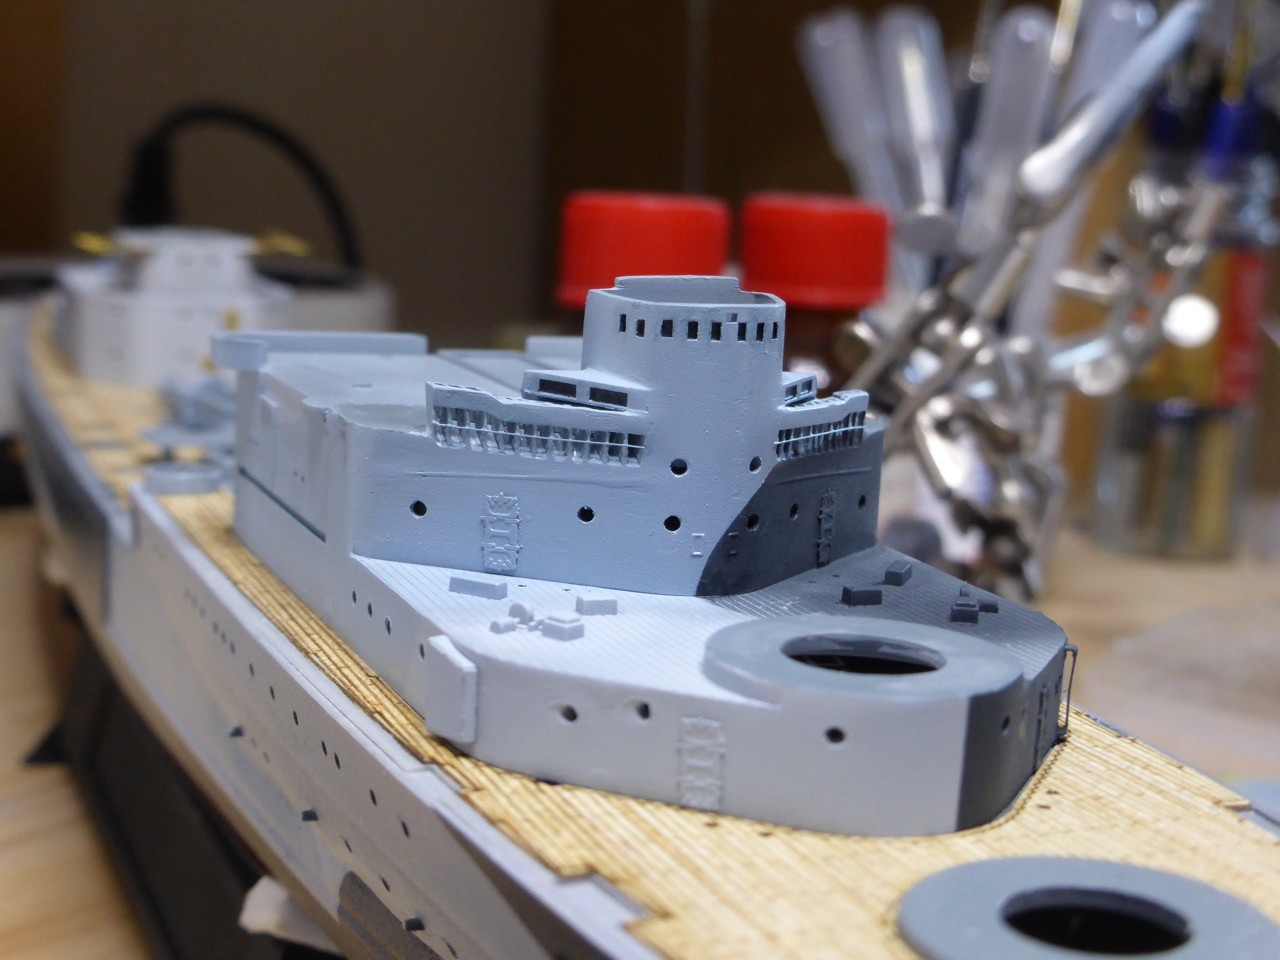
But one more thing - to me it seems the deflectors on the WEM replacement bridge are wrong. Should they not be 180 degrees around, the 'open' parts looking down?? -no, you can't turn the part 180 degrees, it is installed correctly. I'll have to think about that, have to come up with some 'closing' part on top of those deflectors I think.


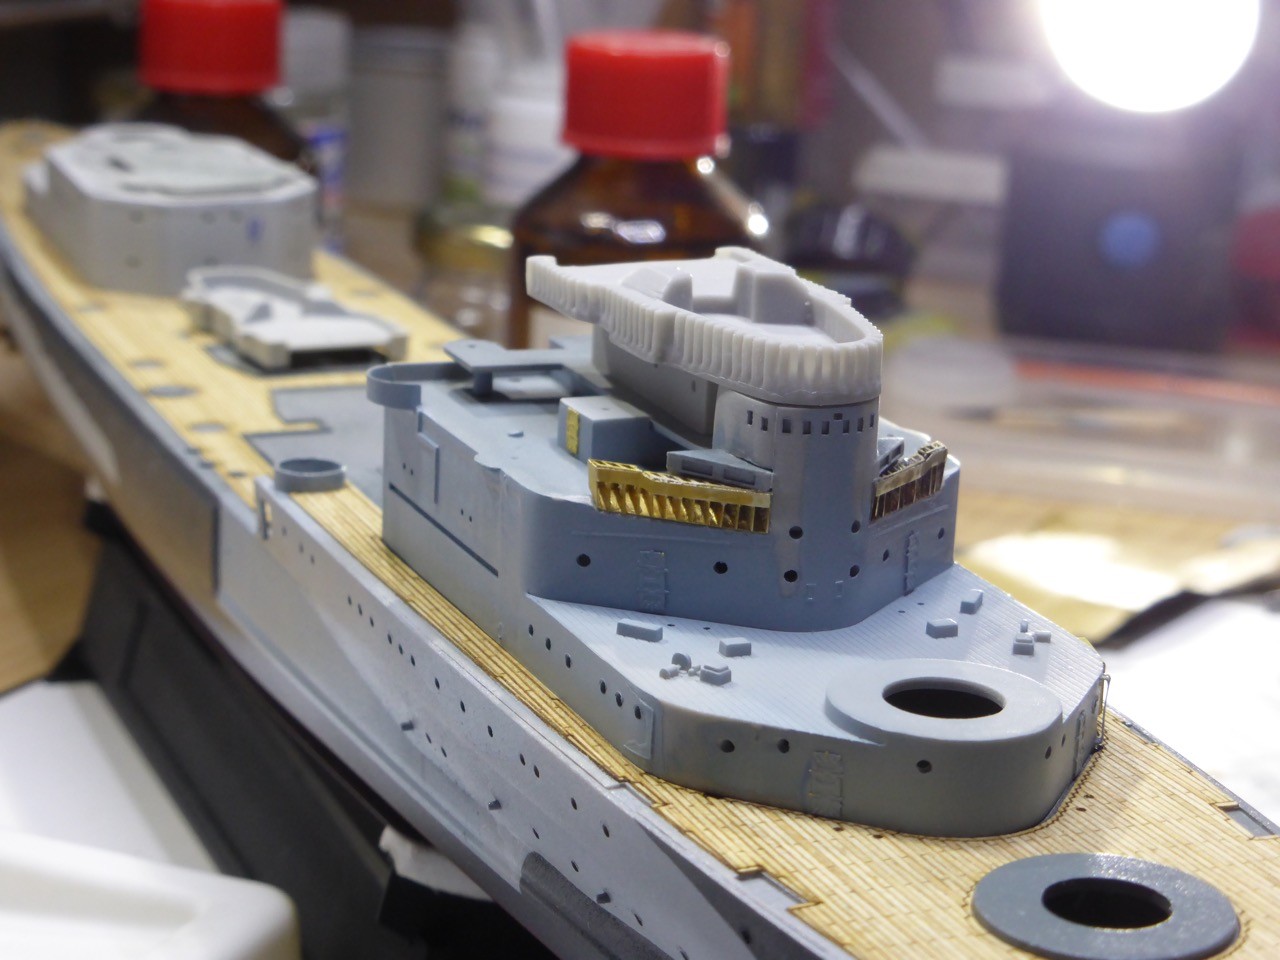
So much for today - I was hoping to make more progress, but after all this bridge structure is quite complicated, especially with all the PE parts...

For now,

Cheers

Jan
TRM5150
Visit this Community
Massachusetts, United States
Joined: January 03, 2010
KitMaker: 2,159 posts
Model Shipwrights: 1,400 posts
Posted: Sunday, September 20, 2015 - 07:10 AM UTC
Even with the sidestep application things are moving along just fine! Great catch and even better fix! Looking great Jan!!
surfsup
Visit this Community
Queensland, Australia
Joined: May 20, 2010
KitMaker: 1,230 posts
Model Shipwrights: 1,212 posts
Posted: Sunday, September 20, 2015 - 09:24 AM UTC
I really like the work you are doing on her and a nice catch with the problem.....Cheers Mark
TimReynaga
Staff MemberAssociate Editor
MODEL SHIPWRIGHTS
Visit this Community
California, United States
Joined: May 03, 2006
KitMaker: 2,500 posts
Model Shipwrights: 1,830 posts
Posted: Sunday, September 20, 2015 - 09:56 AM UTC

Quoted Text

...to me it seems the deflectors on the WEM replacement bridge are wrong. Should they not be 180 degrees around, the 'open' parts looking down?? -no, you can't turn the part 180 degrees, it is installed correctly. I'll have to think about that, have to come up with some 'closing' part on top of those deflectors I think.
Jan


Jan,
Here’s a rendering of the Belfast’s superstructure from the cover of Ross Watton’s Anatomy of the Ship: The Cruiser Belfast.
 photo da38d2ea-fcb5-46ea-ad44-4f97776b4c17_zpsflouvpok.jpg
Hope this helps!
RussellE
#306
Visit this Community
Victoria, Australia
Joined: June 27, 2010
KitMaker: 3,959 posts
Model Shipwrights: 2,777 posts
Posted: Sunday, September 20, 2015 - 03:08 PM UTC
very nice PE rescue there Jan!

looking good overall too...

Update to the Prinz is coming... sit tight!
JJ1973
#345
Visit this Community
Niedersachsen, Germany
Joined: August 22, 2011
KitMaker: 1,835 posts
Model Shipwrights: 1,832 posts
Posted: Sunday, September 20, 2015 - 11:31 PM UTC
Thank you very much, Mark and Todd! The encouragement is much appreciated - somehow unplanned sidesteps seem to become more and mor normality in my modeling world...

Thank you Russ - and sitting tight and waiting

Tim,

very nice picture, thanks a lot for that. I do have the Anatomy book, but obviously a different edition, since my cover is different and does not show this part that clear. No really good pictures of that area as well... That picture is really helpful.
And meanwhile I am a proud owner of a copy of Raven and Roberts British Cruisers of WWII - page 306/307 shows a good view of that area for the Nigeria. A Fiji type cruiser, but the bridge (in the part of the wind deflectors) seems pretty identical.

Now I am getting the idea - it's not upside down, but clearly there's something missing on top.

How about this??


Dry fitted for effect - and to show my beginning surfacer battle...


I was considering what I could use for quite a while. Styrene would be to thick, cutting PE would be tough. Now - any idea what the thing is I used?? It's a part of the degaussing cable that I had from my WEM PoW / KGV set and didn't need for the PoW...

What do you think?

Or - how do you like this? There's a kind of a cable about half way down, you can see it on Tim's picture:


Should I leave it? And install it to the lower deflectors once all the sanding is done??

Thanks again for looking in and let me know what you think!

I recon during the next days several layers of surfacer will be needed on the bridge and the scars from my 'operation', so likely no spectacular updates on that part during the next days. Maybe working a little midships or aft as well...will see.

For now,

Cheers ,

Jan
TimReynaga
Staff MemberAssociate Editor
MODEL SHIPWRIGHTS
Visit this Community
California, United States
Joined: May 03, 2006
KitMaker: 2,500 posts
Model Shipwrights: 1,830 posts
Posted: Monday, September 21, 2015 - 12:11 AM UTC
Jan, Nice fix on the WEM deflectors, I think you have nailed it!
RedDuster
Visit this Community
England - South East, United Kingdom
Joined: March 01, 2010
KitMaker: 7,078 posts
Model Shipwrights: 6,649 posts
Posted: Monday, September 21, 2015 - 01:11 AM UTC
Hi Jan,

What Tim said. Great job on the wind deflectors. The bridge looks right with the brass strip around the top, and do I detect a length of copper wire wrapped around it below the brass?

Cheers

Si
rolltide31
#377
Visit this Community
Texas, United States
Joined: June 27, 2010
KitMaker: 1,481 posts
Model Shipwrights: 1,332 posts
Posted: Monday, September 21, 2015 - 05:58 AM UTC
Jan,

Very nice repurposing of the regressing cable. Very effective in replicating the wind reflectors. Keep the updates coming.

Dave
JJ1973
#345
Visit this Community
Niedersachsen, Germany
Joined: August 22, 2011
KitMaker: 1,835 posts
Model Shipwrights: 1,832 posts
Posted: Monday, September 21, 2015 - 09:55 AM UTC
Thank you very much, Dave and Tim!! Very kind of you, much appreciated!


Quoted Text

Hi Jan,

What Tim said. Great job on the wind deflectors. The bridge looks right with the brass strip around the top, and do I detect a length of copper wire wrapped around it below the brass?

Cheers

Si


Thank you Si!!
Well, copper wire - no idea who came up with this idea But that being said, I am quite far away from using it for rigging. Even on the deflectors it is not perfectly straight as the macro shows, I think I'll redo it. Good thing, there's plenty of the stuff around, so wasting a couple inches doesn't really matter

Cheers,
Jan
JJ1973
#345
Visit this Community
Niedersachsen, Germany
Joined: August 22, 2011
KitMaker: 1,835 posts
Model Shipwrights: 1,832 posts
Posted: Sunday, September 27, 2015 - 11:30 PM UTC
All right, next chapter of the BELFAST story

In particular the forward superstructure turned out more complex than I assumed...with the brass wind deflectors, and the camouflage...a little iterative process.

So first a little bit more color on some parts.


Masking - actually twice during the process.


Results after the first step.


Trying to match lines from the hull.


Finally some more copper wire added to the lower wind deflectors. So that should be the lower forward part minus the vertical ladders, which will follow soon - some decks to follow and the hangar doors are still missing, but the base is there:


Dry fitting the upper bridge / compass platform. Here's some more work to be done, I hope I can fit it without destroying the painted on windows again...


Work on the after superstructure continued, some brass doors. Ladders will follow after paining, learned my lesson from forward part.


Another interesting structure - the searchlight platforms were to small from the kit, WEM has replacements. So cutting the kit's parts


And more brass work. Those replacement platforms are three-dimensional, in the way that they consist of a lower and an upper part that need to be glued together to resemble a grating underneath the platform deck:


Parts of the railing are connected - I decided to leave those 'flat' for the time being to minimize danger of bending them during construction. Time will tell if this is a smart approach...
The replacement platforms fit snuggly and build an even deck, only some surfacer required at the joints. I hope I manage to sand the area without breaking the railings...


Test-fitted:


And here's essentially where I stand - all dry fitted only, of course:


I hope the build will be a little more straight forward from now on - but then, the middle deck / structure may turn out a little complex as well...we shall see soon

For now I'm up to another 'real life break', I will be watching and possibly commenting during the next weeks, but most likely no bench time before mid October. Already two months gone of the campaign time

Thanks for stopping by and looking,

Cheers,

Jan
RussellE
#306
Visit this Community
Victoria, Australia
Joined: June 27, 2010
KitMaker: 3,959 posts
Model Shipwrights: 2,777 posts
Posted: Monday, September 28, 2015 - 06:49 AM UTC
mmm eye candy!

very nice work Jan!
Cosimodo
#335
Visit this Community
Auckland, New Zealand
Joined: September 03, 2013
KitMaker: 1,808 posts
Model Shipwrights: 871 posts
Posted: Monday, September 28, 2015 - 11:42 AM UTC
Great work Jan!

And enjoy the break, I think

cheers
Michael
JJ1973
#345
Visit this Community
Niedersachsen, Germany
Joined: August 22, 2011
KitMaker: 1,835 posts
Model Shipwrights: 1,832 posts
Posted: Tuesday, September 29, 2015 - 09:08 AM UTC
Thank you so much, Michael and Russ!

Well, the break should be not to bad, but more in terms of doing a little different work in a different location for about two weeks (real life), as for the BELFAST I'm quite motivated after the progress with the bridge!

Cheers

Jan
JJ1973
#345
Visit this Community
Niedersachsen, Germany
Joined: August 22, 2011
KitMaker: 1,835 posts
Model Shipwrights: 1,832 posts
Posted: Saturday, October 24, 2015 - 11:35 PM UTC
Wow! It's been four weeks since my last update here - time flies...

But eventually this weekend allowed me back on the workbench, and here is what I could accomplish - slow progress, but progress.

One big thing is to get the forward superstructure assembled up the the level of the WEM resin part, since this will involve some filling and sanding. That needs to be done before I start detailing the bridge.

One detail to warm up, a cable reel attached to the front. I think the little PE is worth the effort:


So those parts will be in the focus next:


Some paintwork and the next levels glued in place


showing the obvious gap that will need attention:


Applying the first layer of surfacer sends the signal: this will be some tedious work...


While the surfacer dries, only to apply the next layer, the paravanes wait. I decided that I will not replace the aft fins - I remember those from REPULSE, it was almost impossible to attache those tiny parts, and the benefit is not all that great:


So that's how they look:


With some color on the should be fair enough

So much for today, I can't exactly promise the next update - fall is always busy with real (office) life...but it should not be as long as last time...

Thanks for looking in ,

Cheers,

Jan

RussellE
#306
Visit this Community
Victoria, Australia
Joined: June 27, 2010
KitMaker: 3,959 posts
Model Shipwrights: 2,777 posts
Posted: Sunday, October 25, 2015 - 04:19 AM UTC
Good to see you back with another excellent update, my friend

Belfast is really coming along nicely.

Soon I will update my KGV post too-real life and illness have kept me away from the bench and MSW, but hope to be back soon
JJ1973
#345
Visit this Community
Niedersachsen, Germany
Joined: August 22, 2011
KitMaker: 1,835 posts
Model Shipwrights: 1,832 posts
Posted: Monday, October 26, 2015 - 10:34 AM UTC
Hi Russ!

Thank you very much

...and great to see updates on you King, very nice work there as well!!
I hope you are all well again?? It's early spring at your place, isn't it? So typical time for cold and flue and all those nice things...

(now waiting for some news on the Prinz )

Cheers mate

Jan
RussellE
#306
Visit this Community
Victoria, Australia
Joined: June 27, 2010
KitMaker: 3,959 posts
Model Shipwrights: 2,777 posts
Posted: Monday, October 26, 2015 - 01:59 PM UTC

Quoted Text

Hi Russ!

Thank you very much

...and great to see updates on you King, very nice work there as well!!
I hope you are all well again?? It's early spring at your place, isn't it? So typical time for cold and flue and all those nice things...

(now waiting for some news on the Prinz )

Cheers mate

Jan


You're very welcome Jan

Indeed it is spring, mate, and all the lovely things that come with that in combination with all the wonderful viruses the children bring home from childcare have certainly had their toll on me this year

I'm working a follow up to "Night of the Pom Pom" and "Revenge of the Boats" called "Return of the Prinz" Going to try to finish him for the cruiser campaign, but first I'm going to spit out a wing thing build that will be no filler, PE or AM! yee haa!
TRM5150
Visit this Community
Massachusetts, United States
Joined: January 03, 2010
KitMaker: 2,159 posts
Model Shipwrights: 1,400 posts
Posted: Tuesday, October 27, 2015 - 04:04 AM UTC
Looking great Jan! Nice to see this one make it back into the mix! Your patience seems to be paying off!
surfsup
Visit this Community
Queensland, Australia
Joined: May 20, 2010
KitMaker: 1,230 posts
Model Shipwrights: 1,212 posts
Posted: Wednesday, October 28, 2015 - 02:09 PM UTC
She is coming up a real Treat Jan. You should be very happy.....Cheers Mark
rolltide31
#377
Visit this Community
Texas, United States
Joined: June 27, 2010
KitMaker: 1,481 posts
Model Shipwrights: 1,332 posts
Posted: Wednesday, October 28, 2015 - 02:48 PM UTC
Jan,

Really enjoying this build. I haven't built any of the RN ships but they are on my future list. Really learning a lot as you move forward.

Dave
TimReynaga
Staff MemberAssociate Editor
MODEL SHIPWRIGHTS
Visit this Community
California, United States
Joined: May 03, 2006
KitMaker: 2,500 posts
Model Shipwrights: 1,830 posts
Posted: Thursday, October 29, 2015 - 05:37 AM UTC
Great work Jan!

I like the before and after shots of the paravanes that show just how much the photoetch bits improve things. Fiddly stuff, but worth the effort! I'm really enjoying this build too.
Cosimodo
#335
Visit this Community
Auckland, New Zealand
Joined: September 03, 2013
KitMaker: 1,808 posts
Model Shipwrights: 871 posts
Posted: Friday, October 30, 2015 - 07:12 AM UTC
Hi Jan,
Just caught up with the great progress you have made on this. Seconding what Tim said, how the photo etch makes such a difference, but it does seem to prolong the builds.

cheers

Michael