Ships by Class/Type
For discussions on ships by class and type.
HMS Belfast 1942 Trumpeter 1/350
RussellE
#306
Visit this Community
Victoria, Australia
Joined: June 27, 2010
KitMaker: 3,959 posts
Model Shipwrights: 2,777 posts
Posted: Tuesday, February 02, 2016 - 03:17 PM UTC

Quoted Text

Si,

thank you very much! Walri - I like that!! 
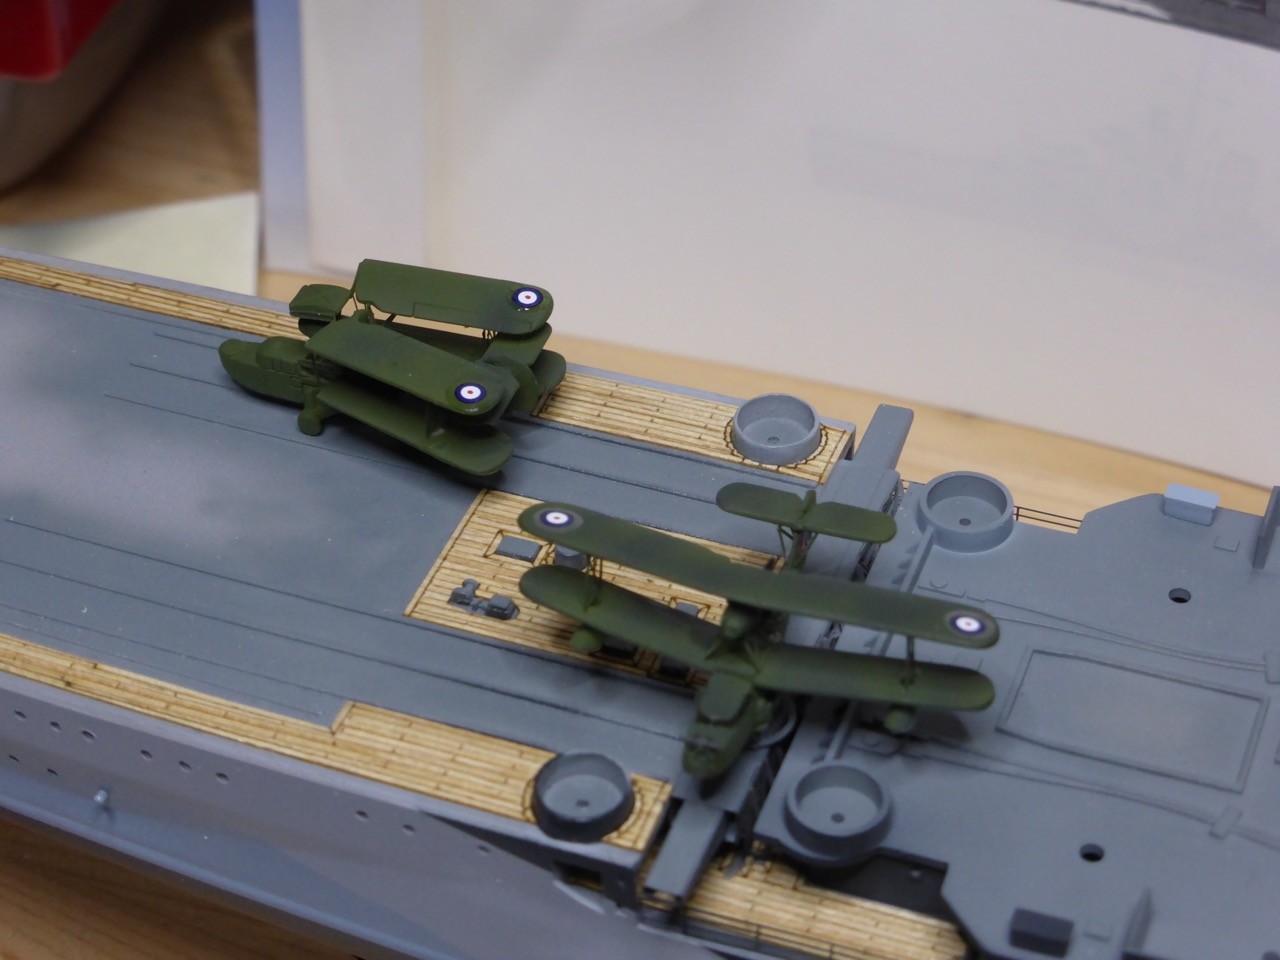
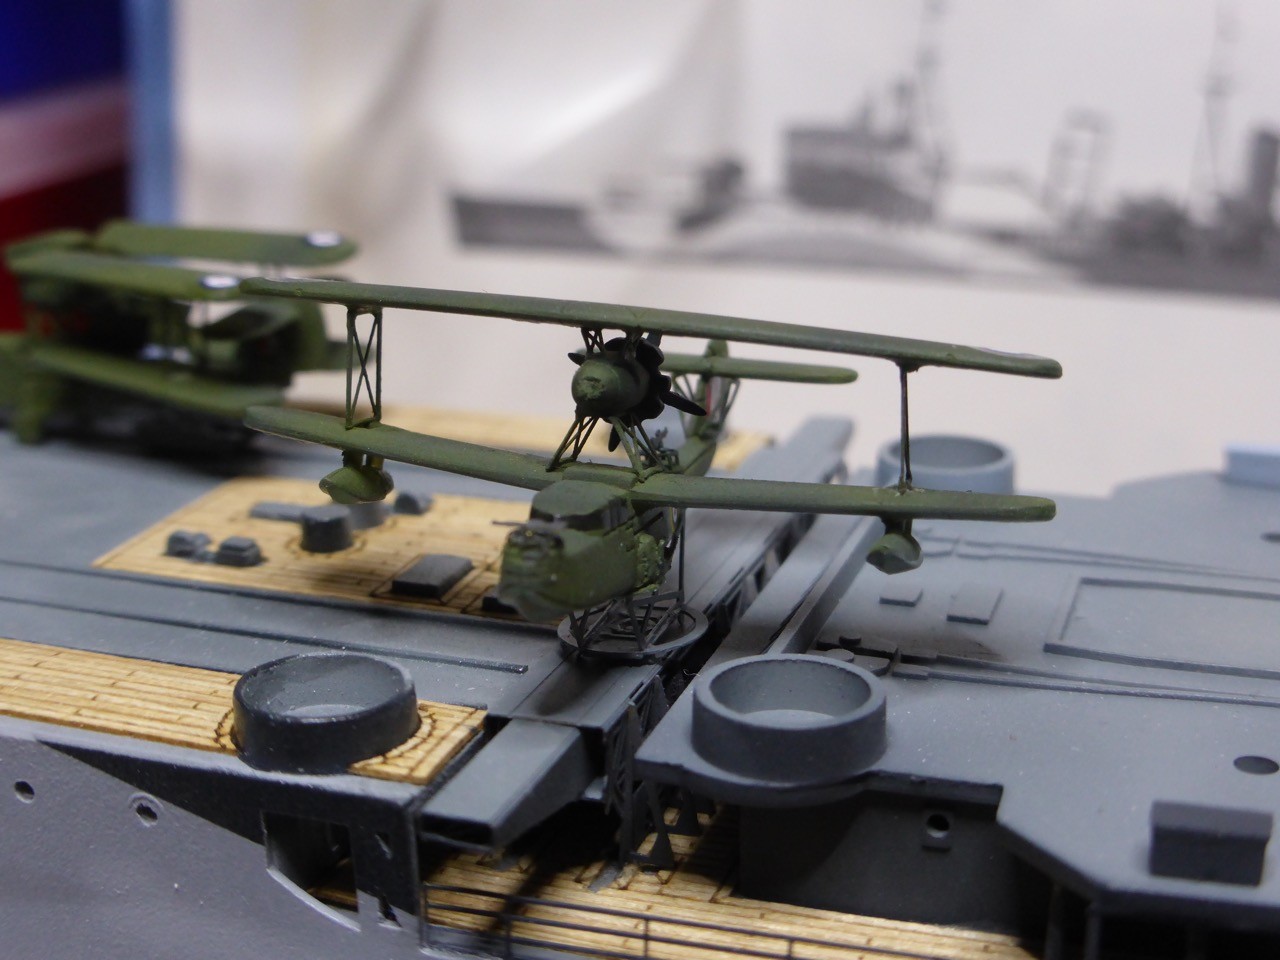
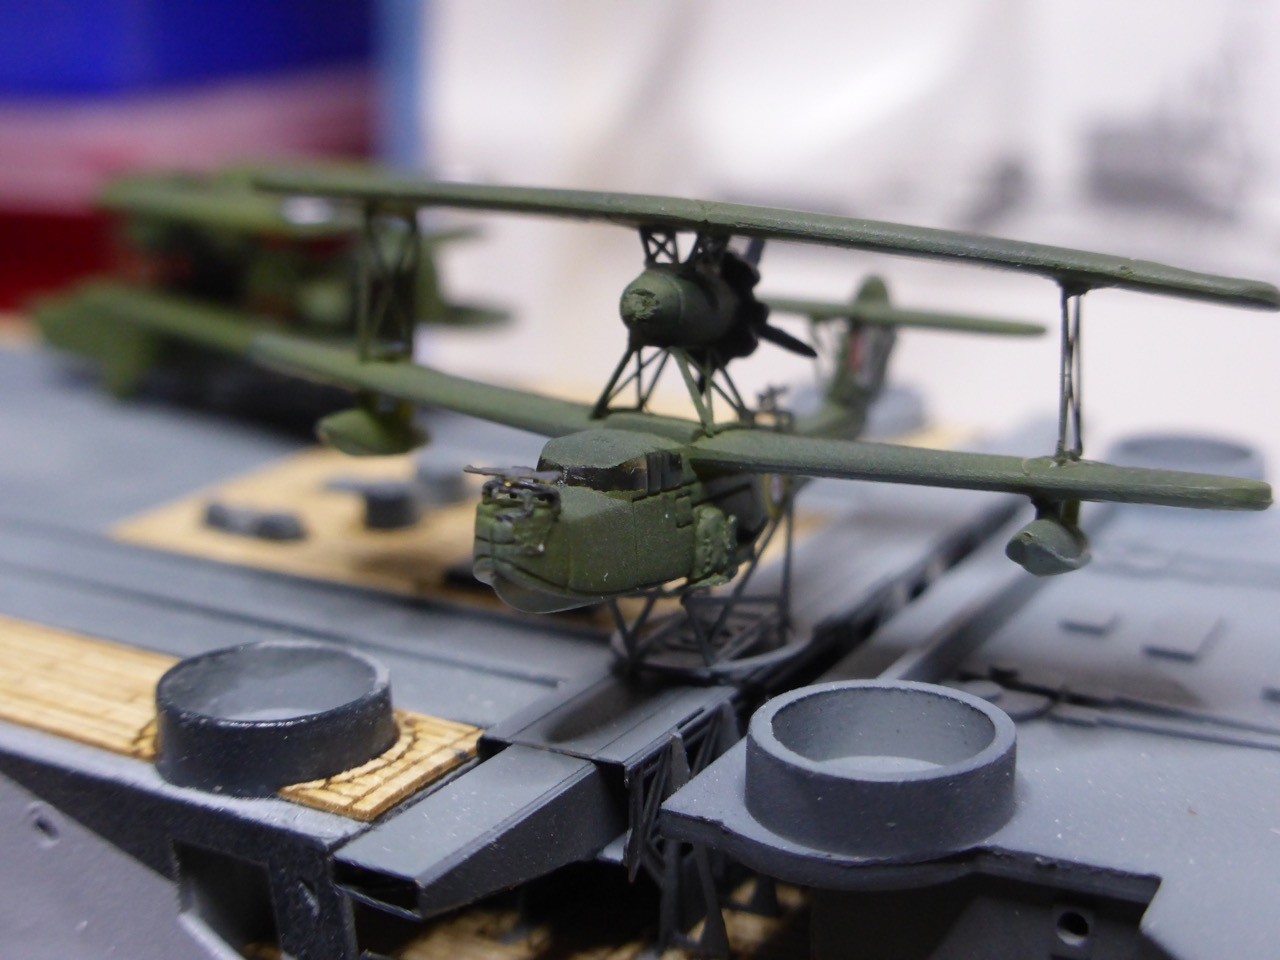
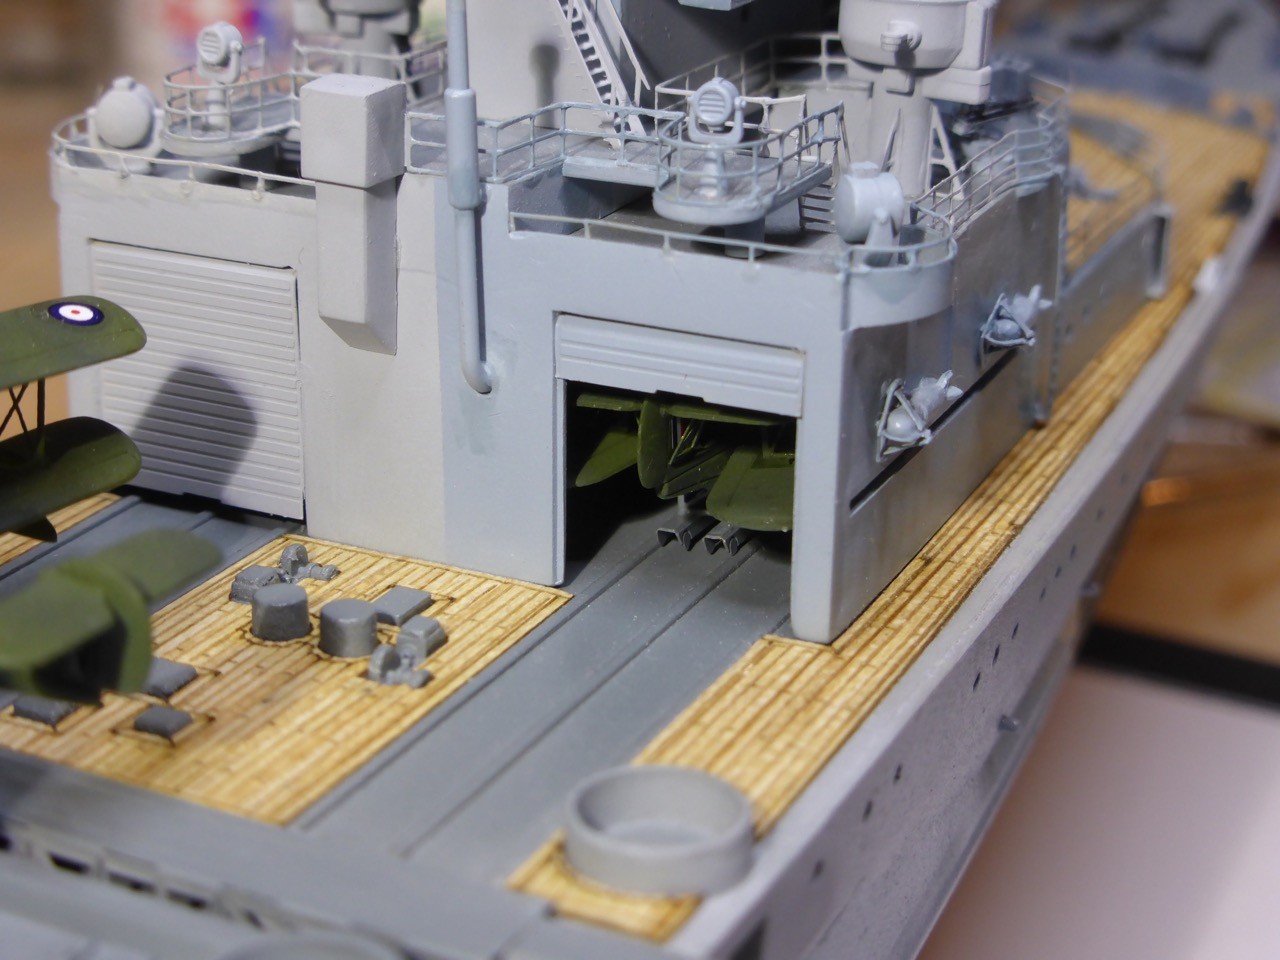
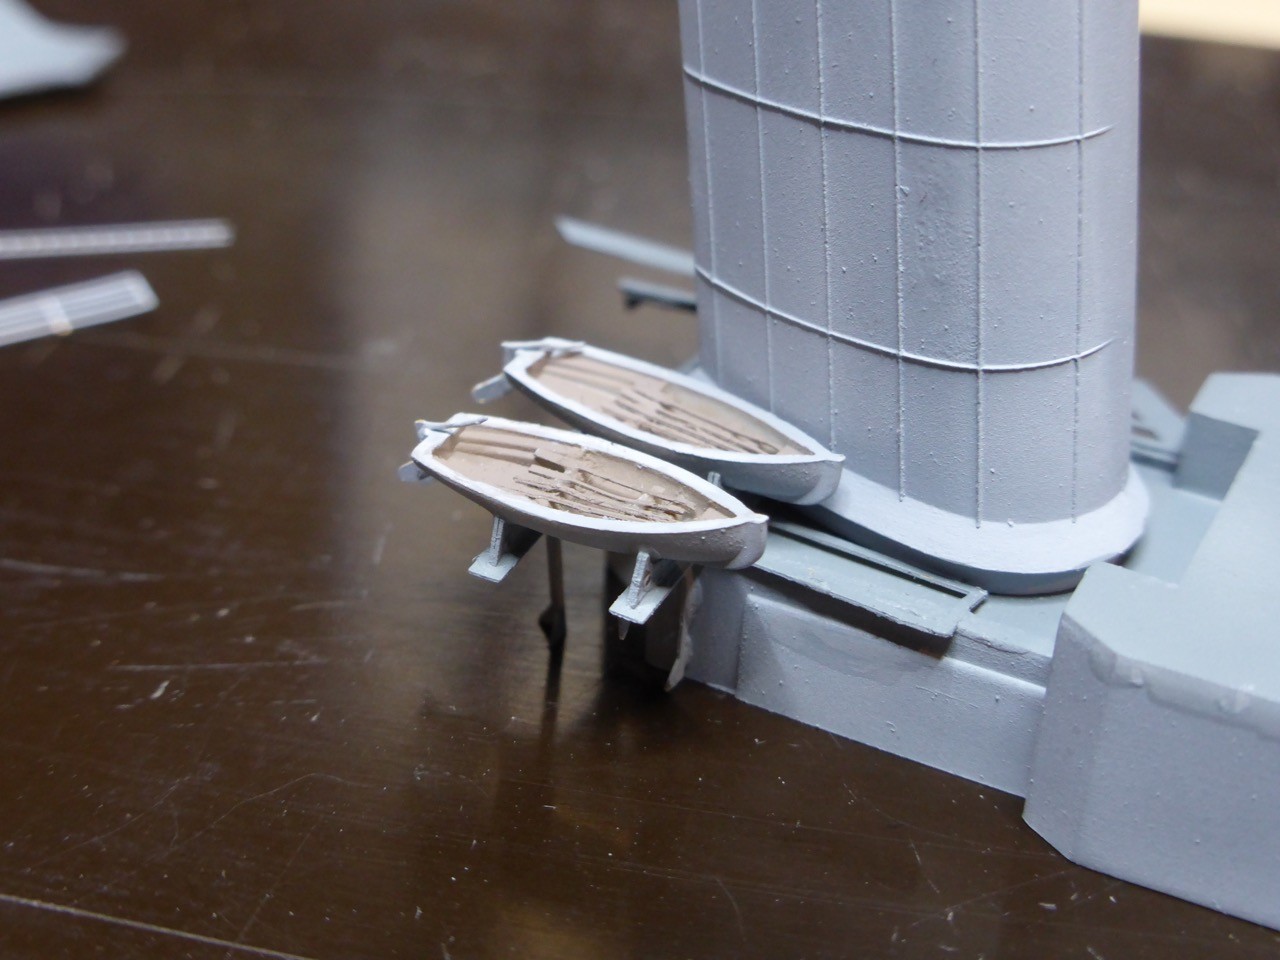
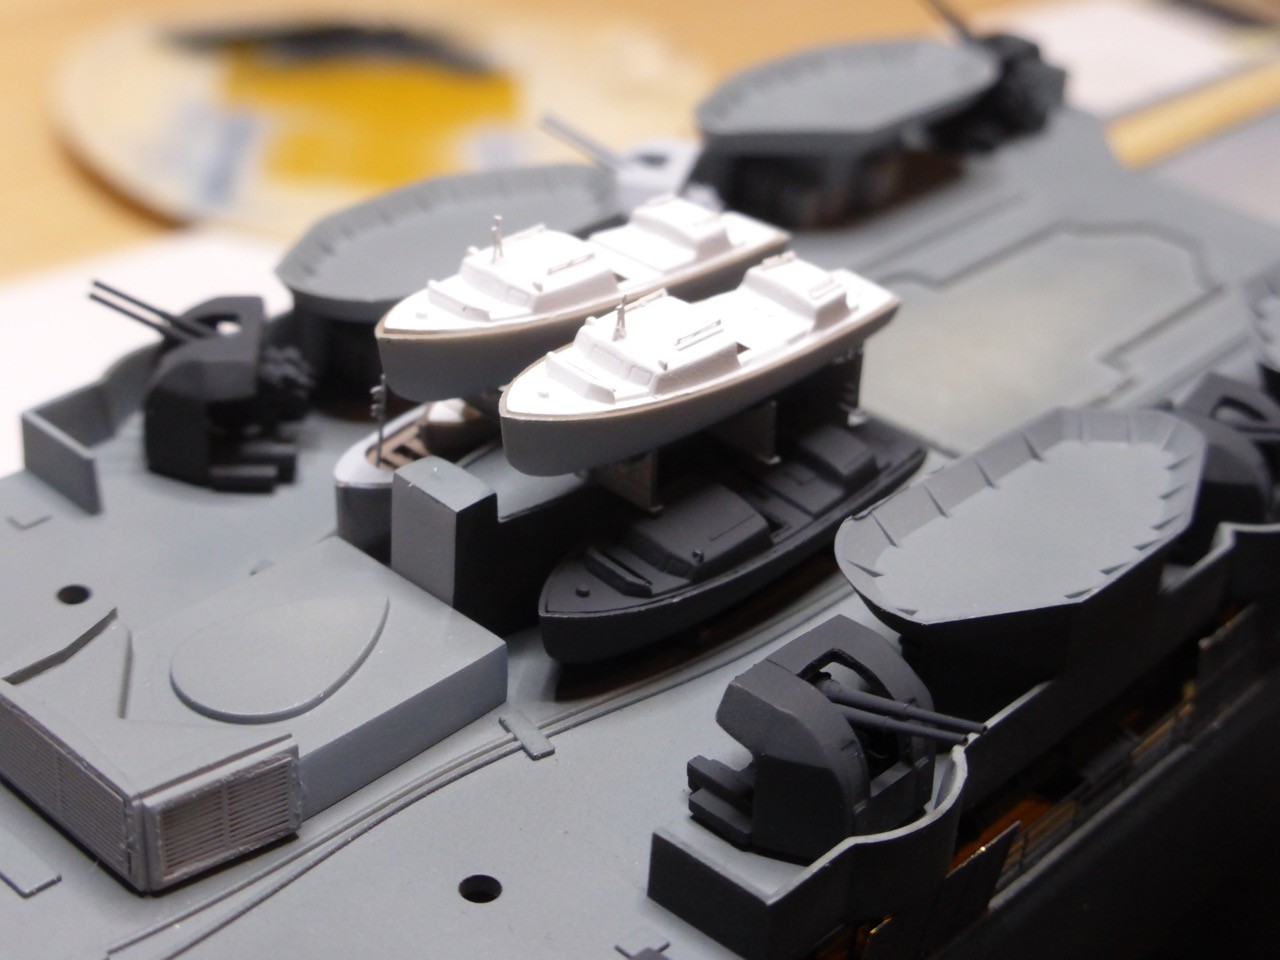
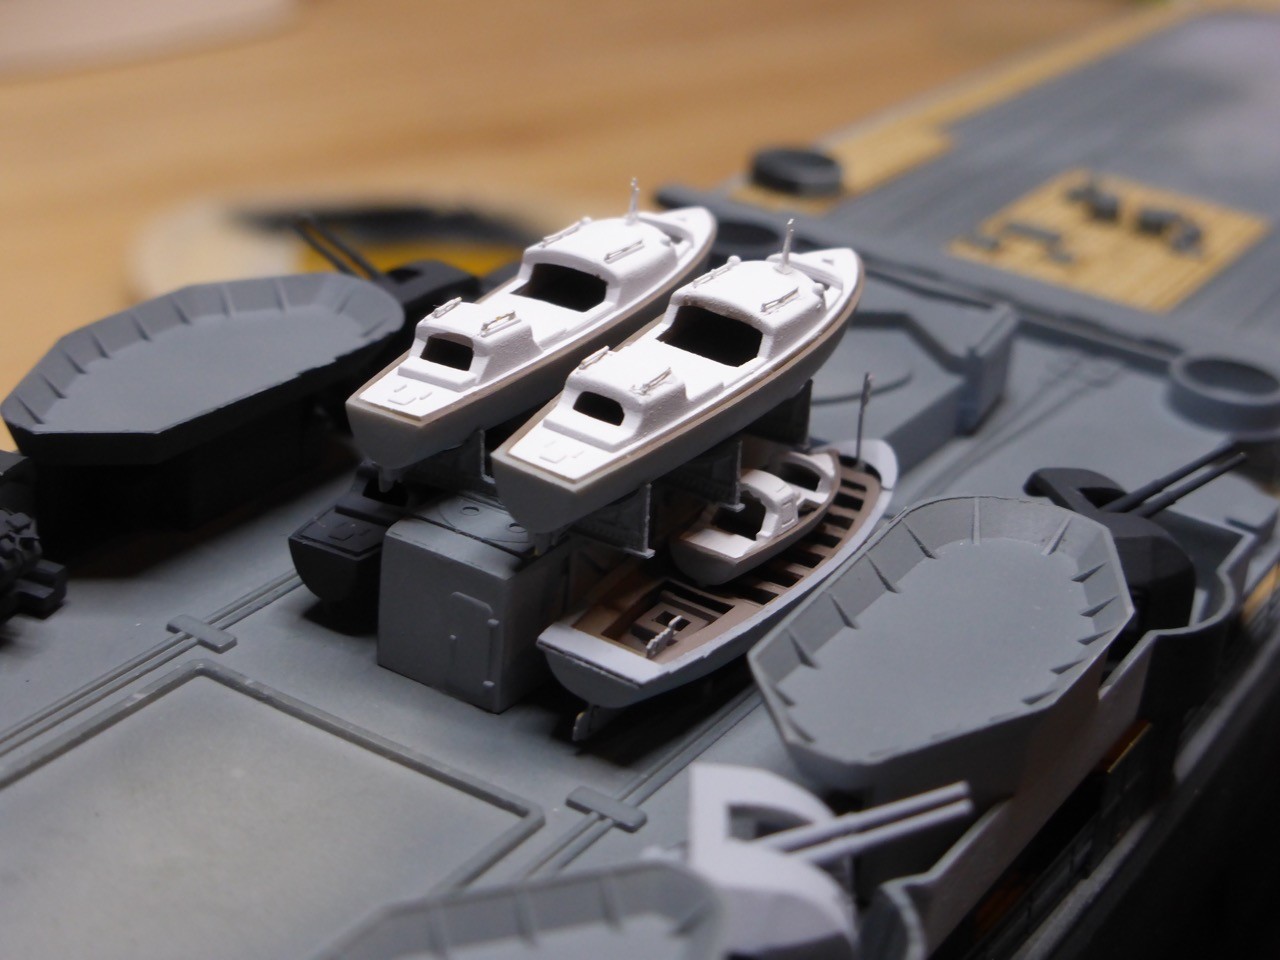
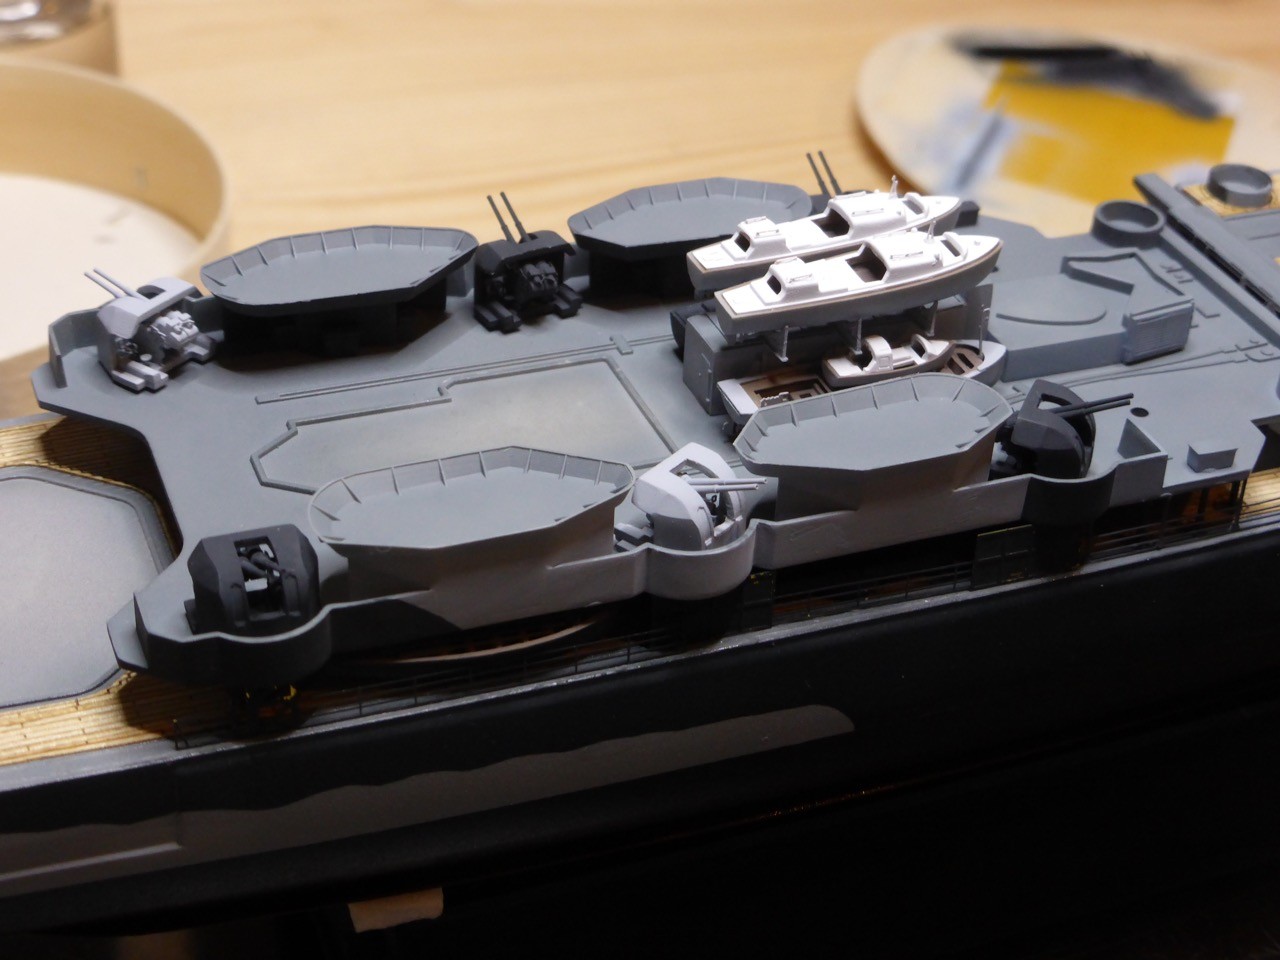
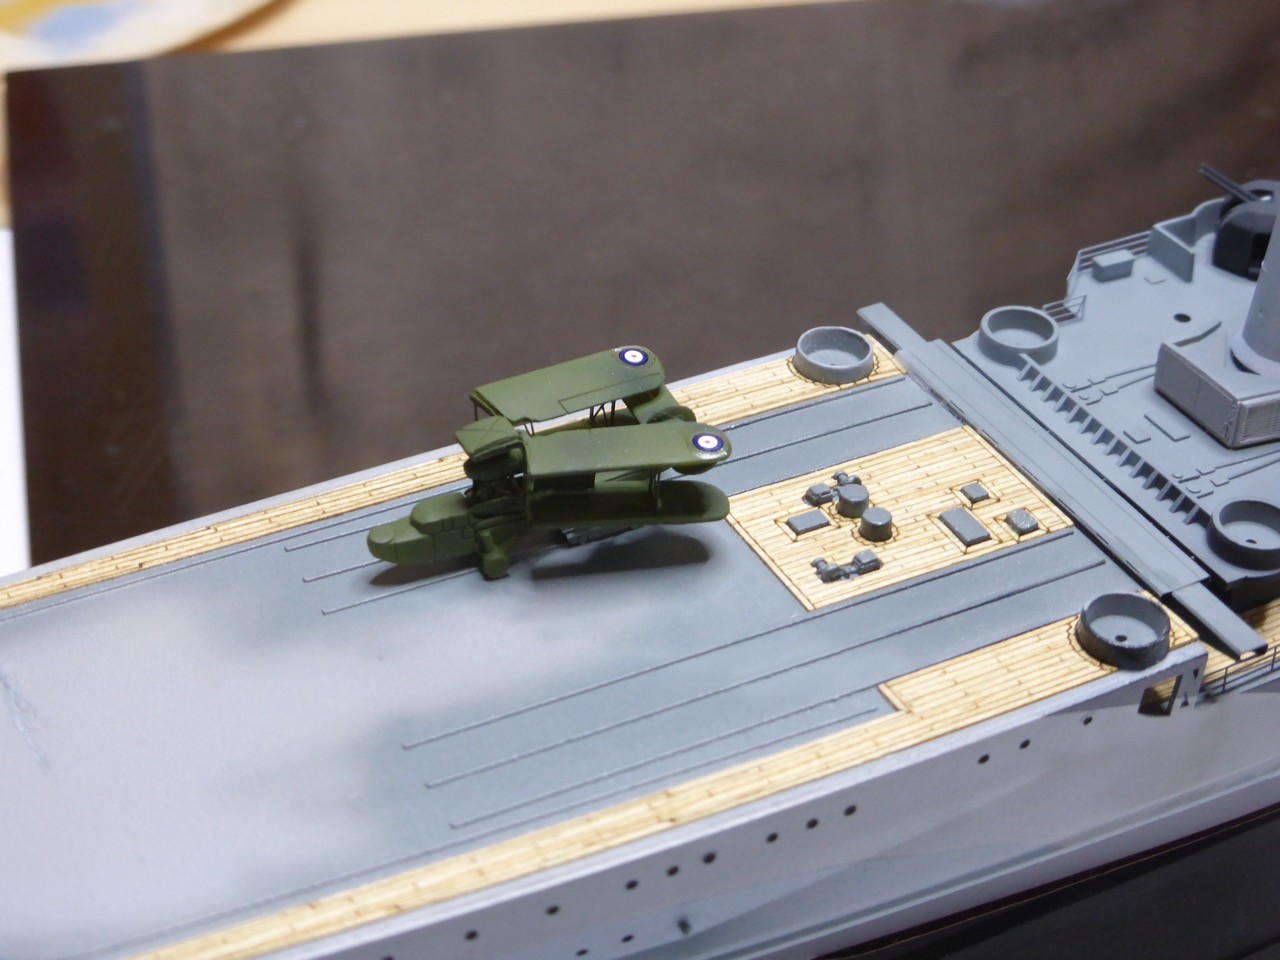
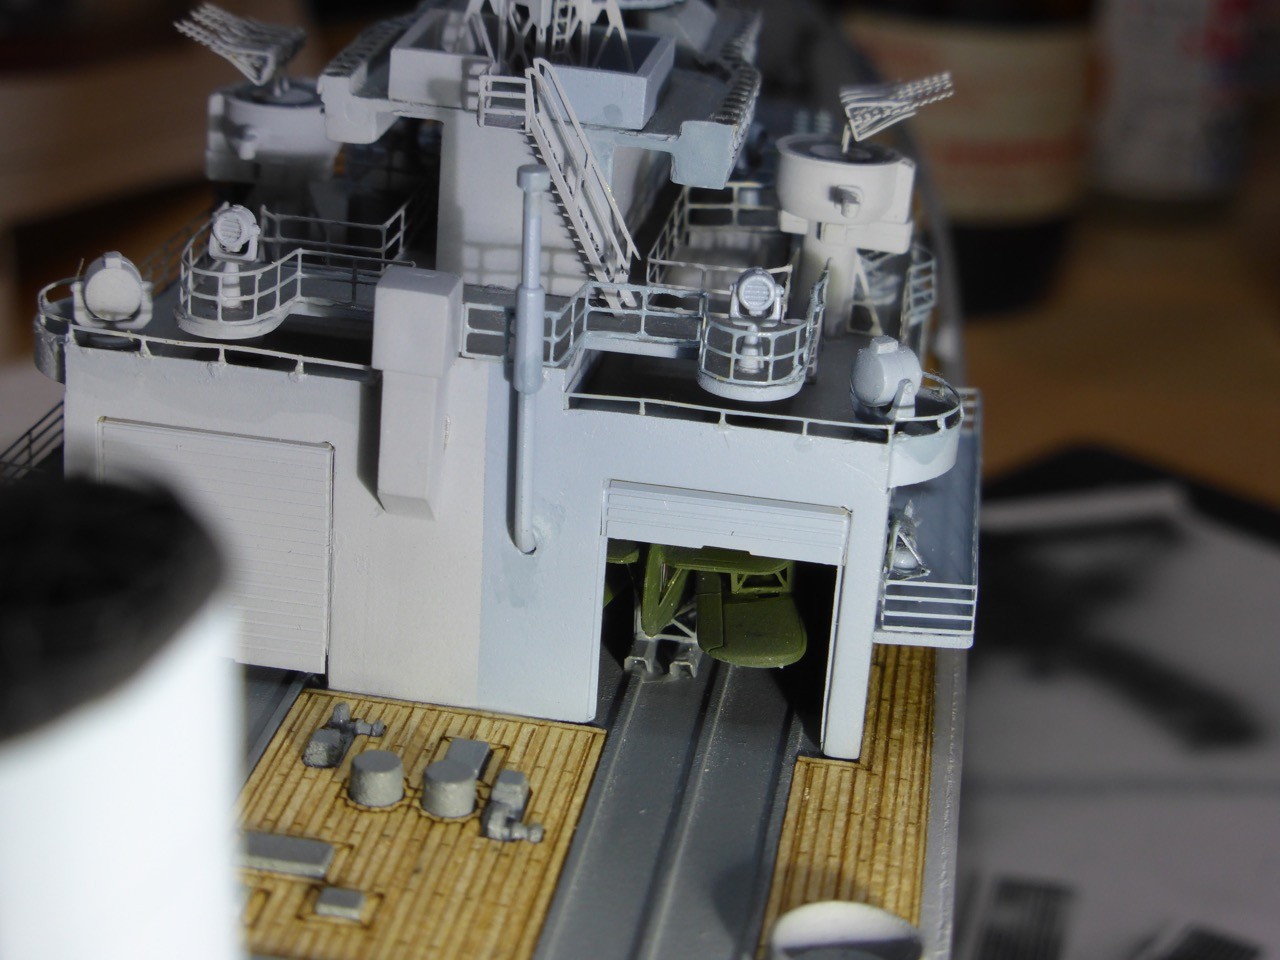
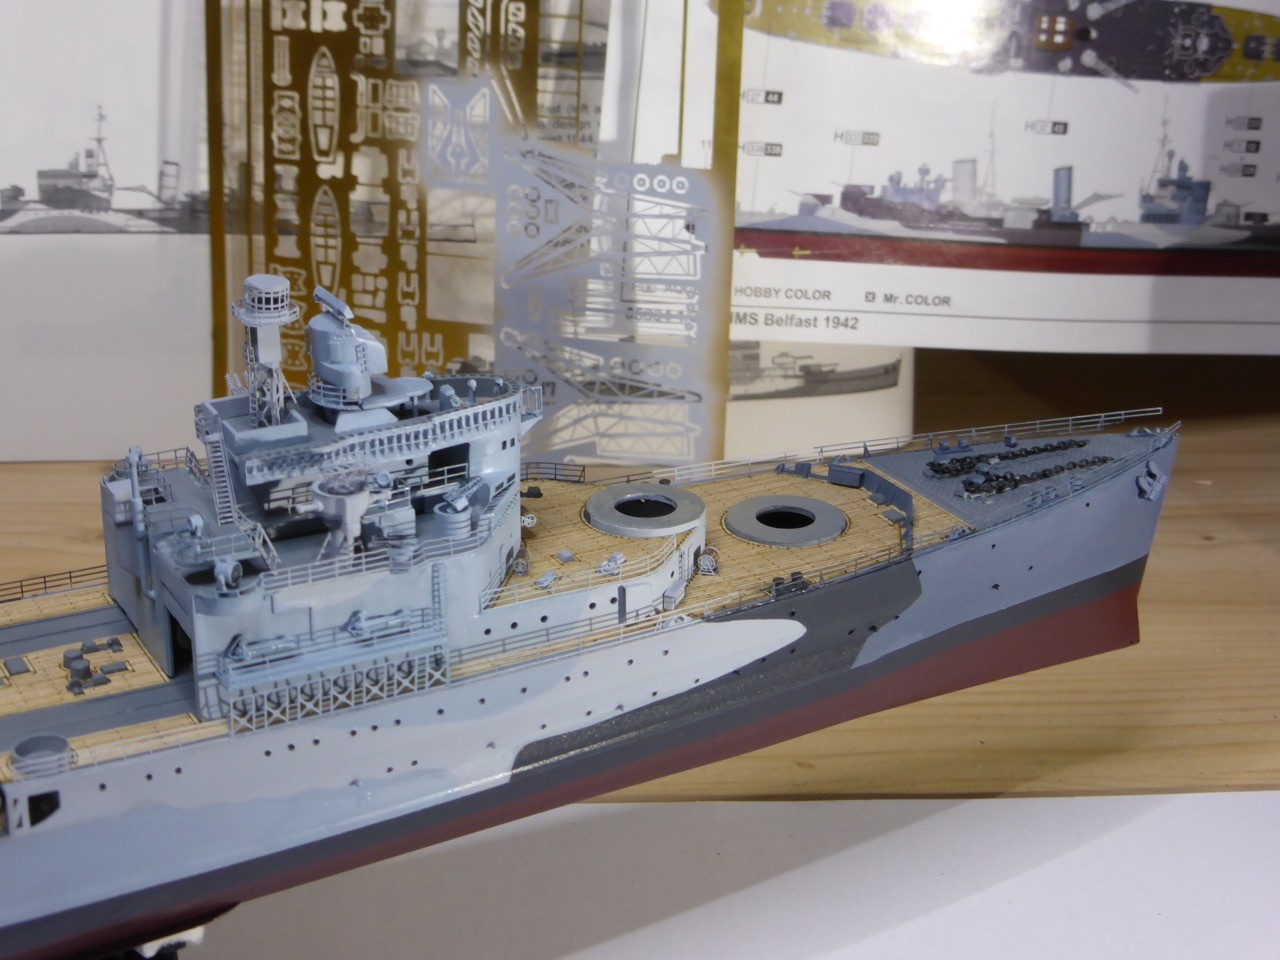
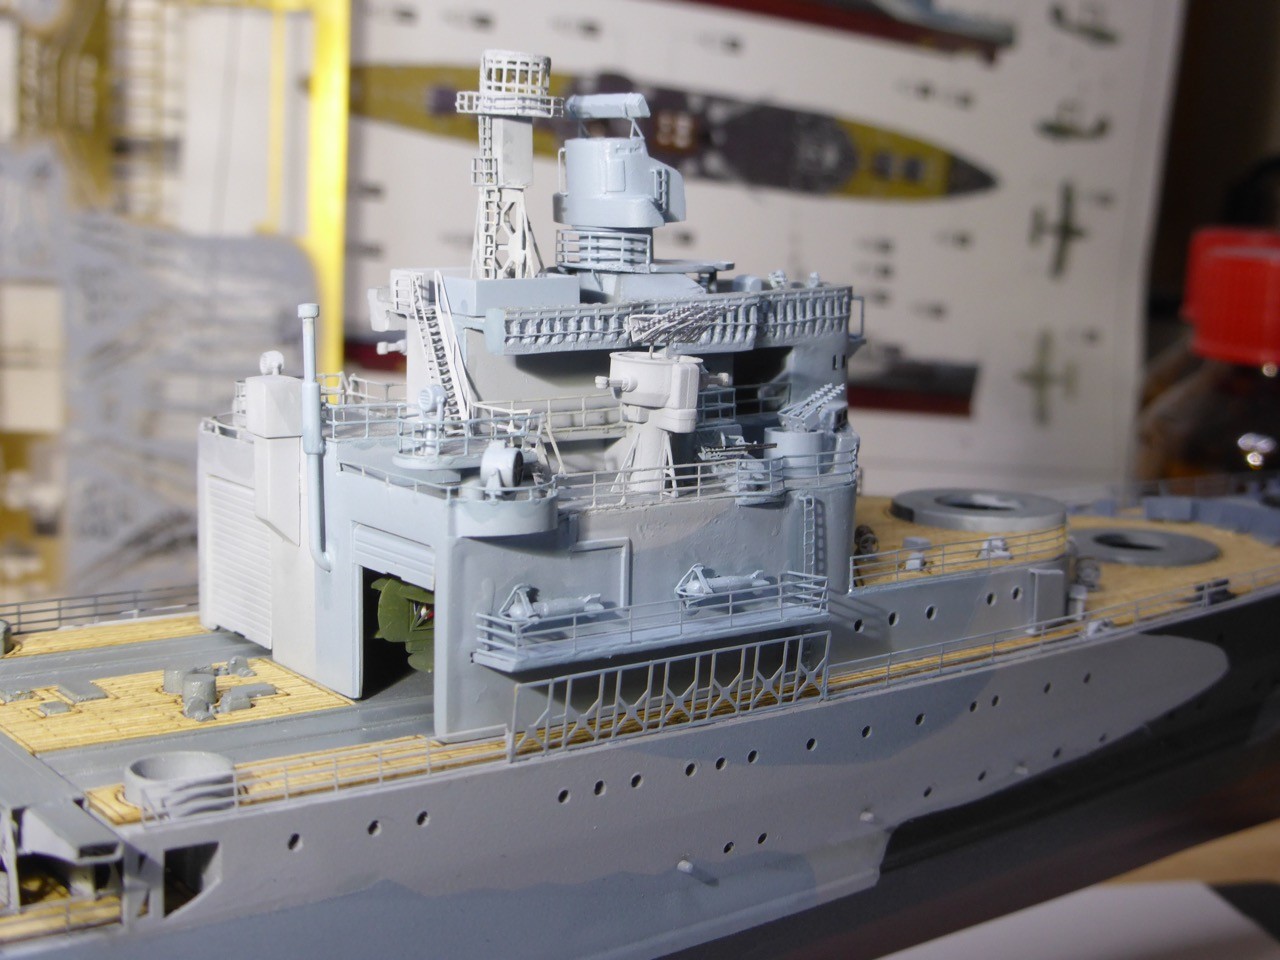
And yes, the folded one would be inside the hangar. I learned my lesson from REPULSE when I had to find out that the Walrus would not fit through the hangar door, so I placed it in front. For now, I have not installed the hangar - for two reasons, a) not to destroy all the fragile parts and b) to place the Walrus and than put the hangar on top. As how exactly that will work, i.e. how much will be visible outside, remains to be seen - trial and error.

The result will be a 'peep-tail Walrus' I presume:


Russ,

just don't talk about the wish-list, my could be very long this year. At least it's a good feeling to know that I won't run out of projects for the next ten...ahm, likely 20 years or so...with my light-speed building

Thanks a lot mate, and looking forward to some progress on your Prinz!! A beautiful ship!!

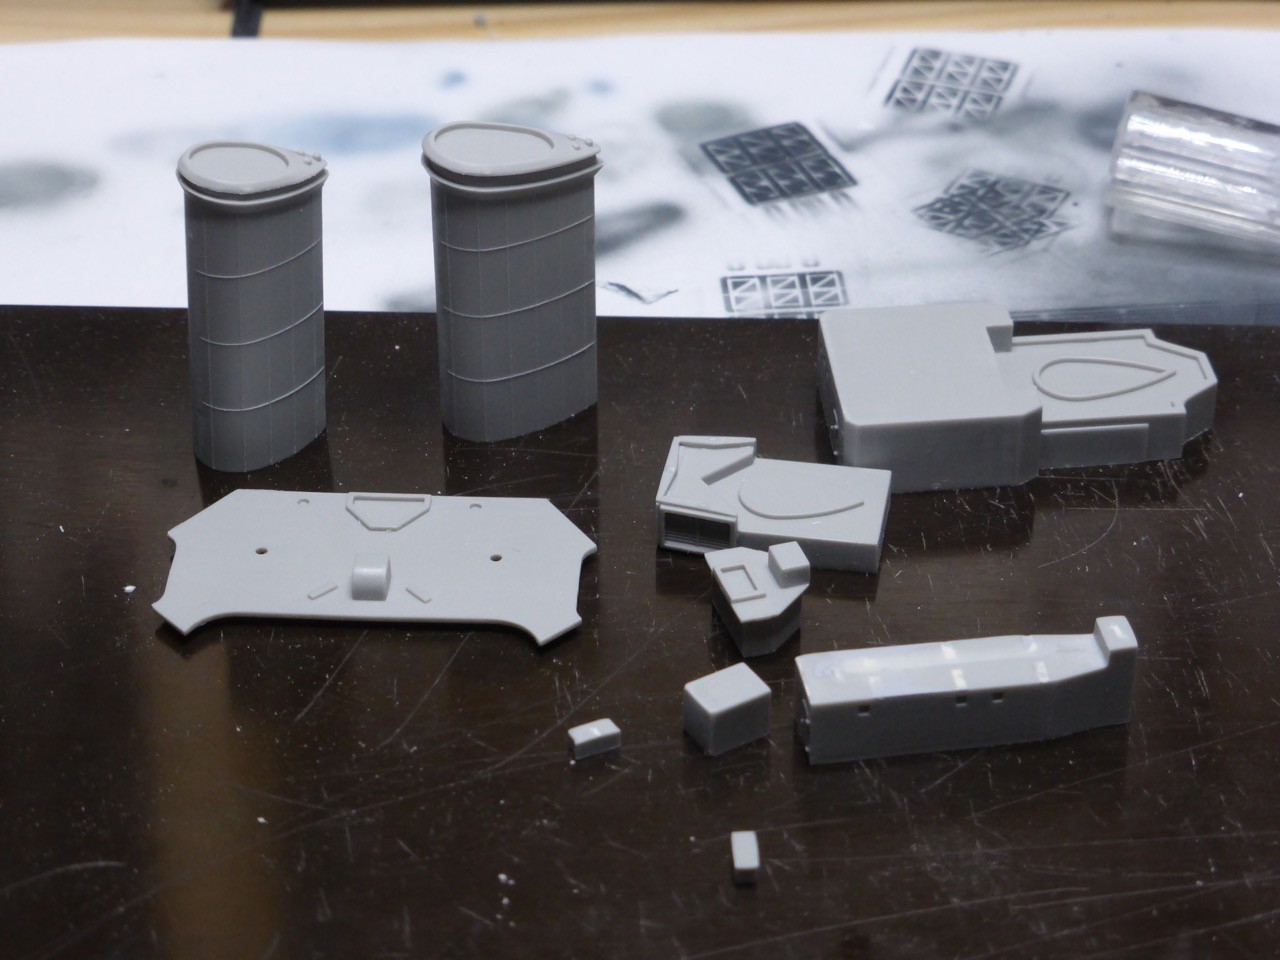
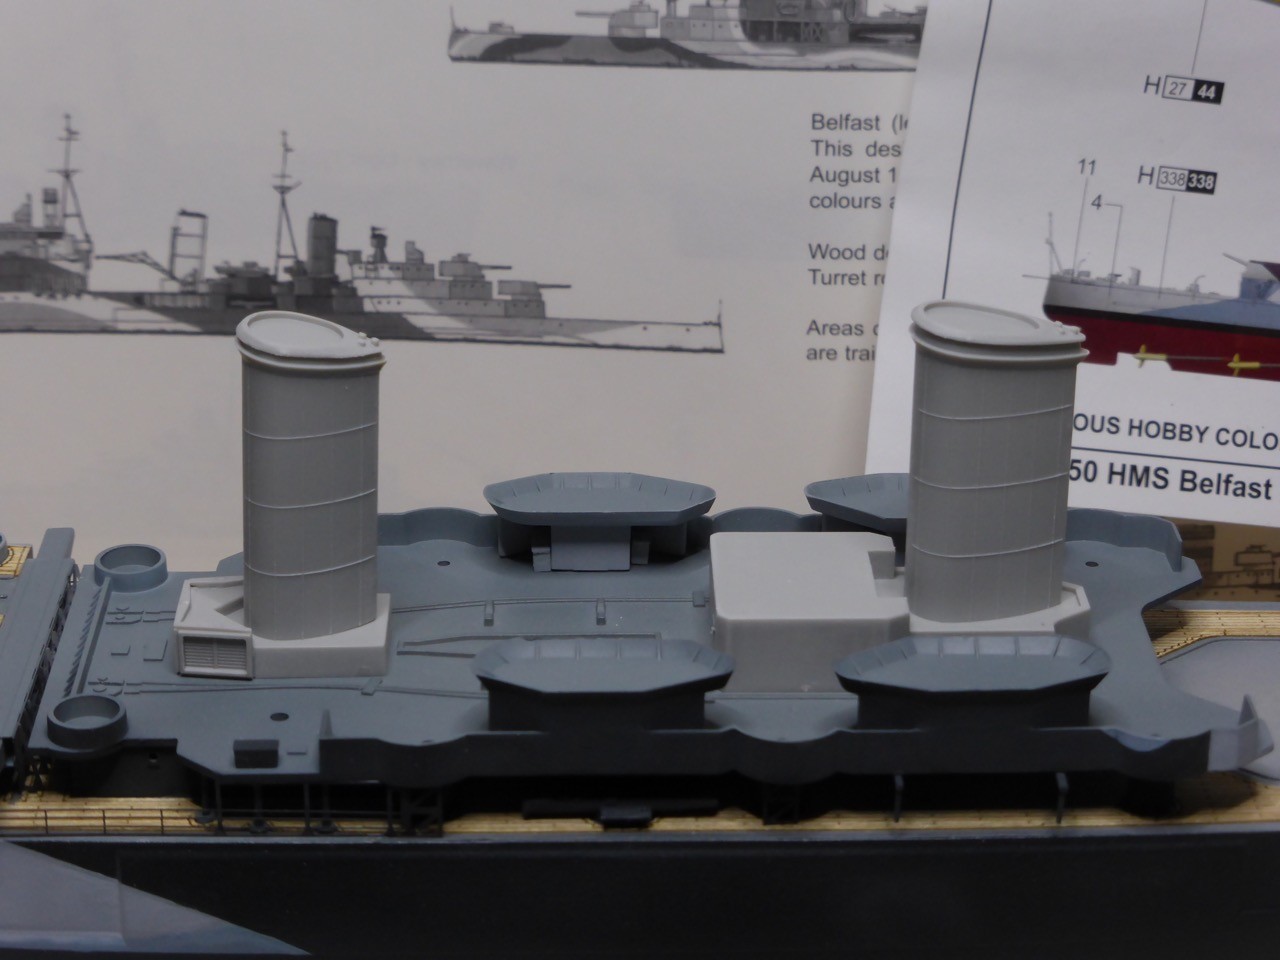
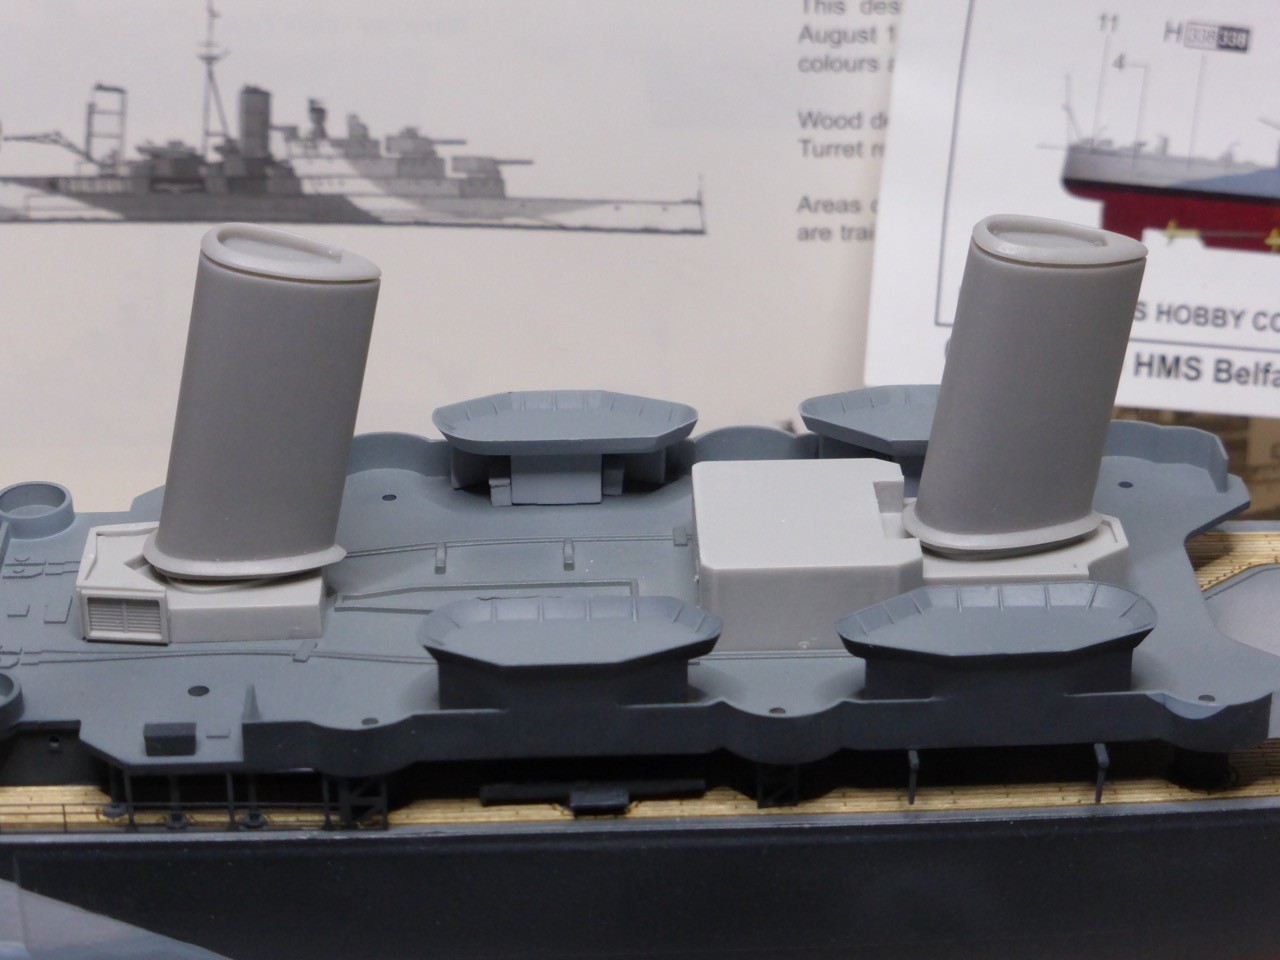
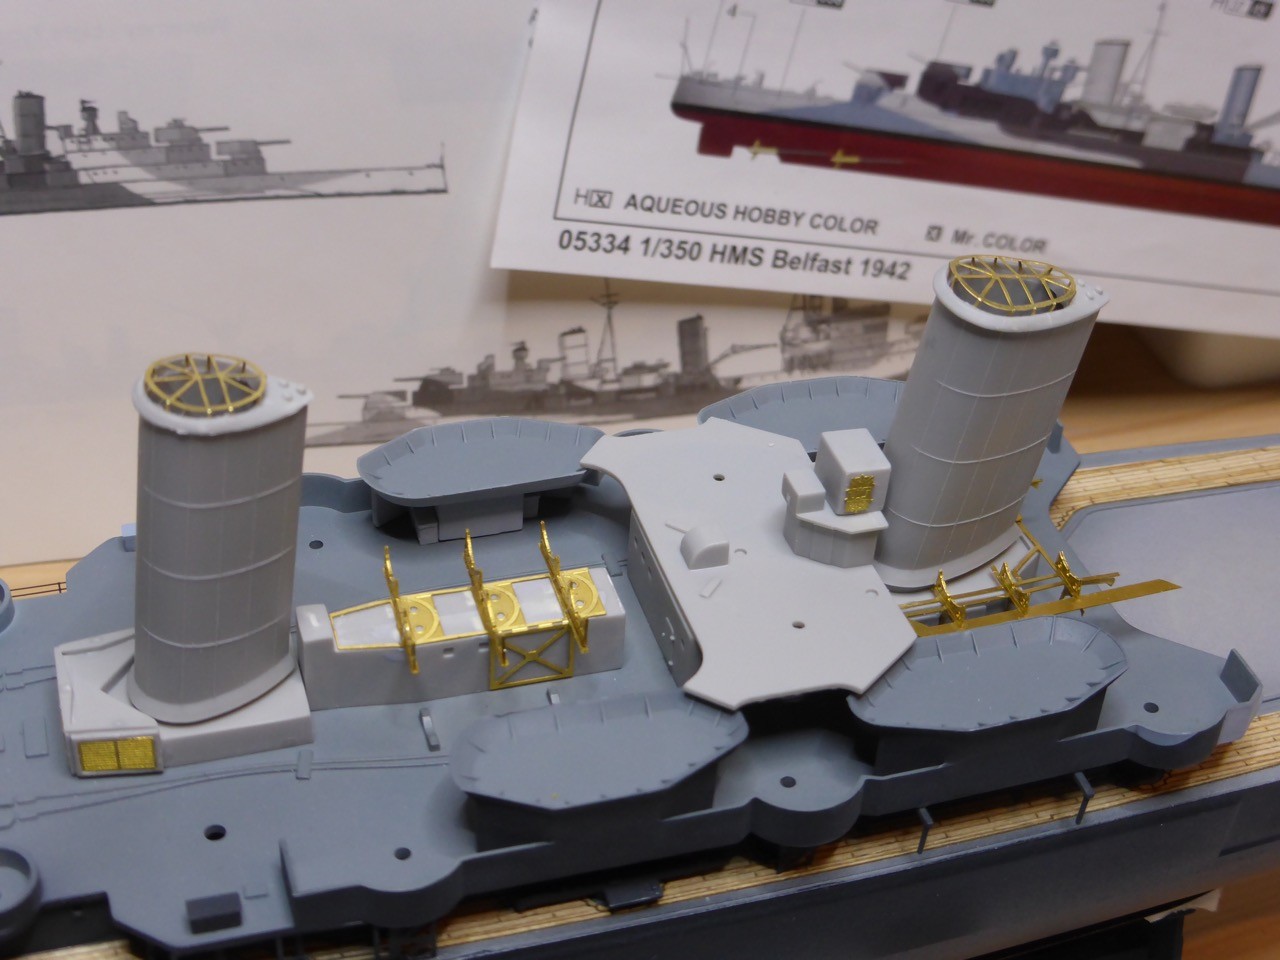
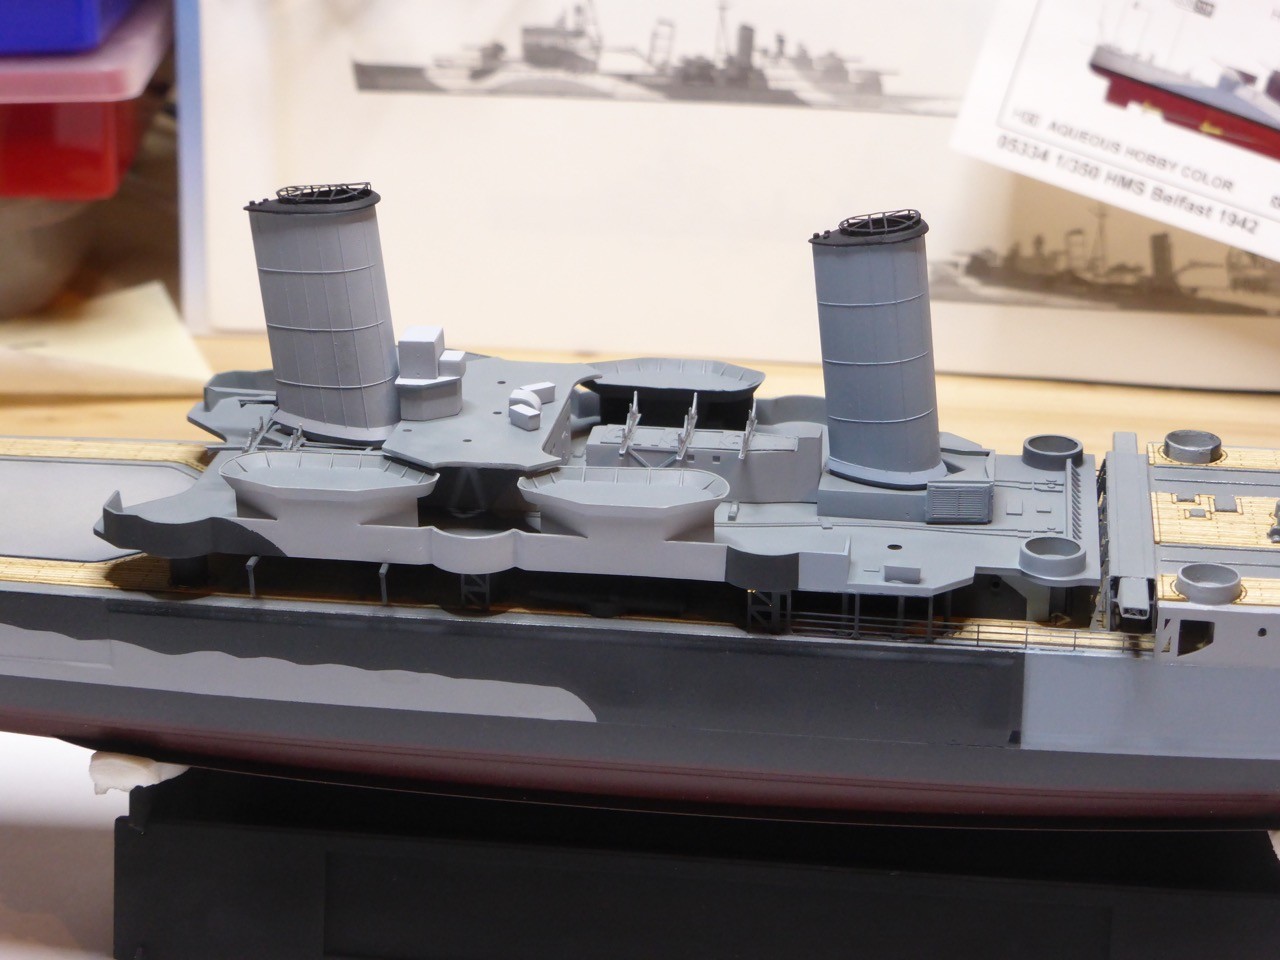
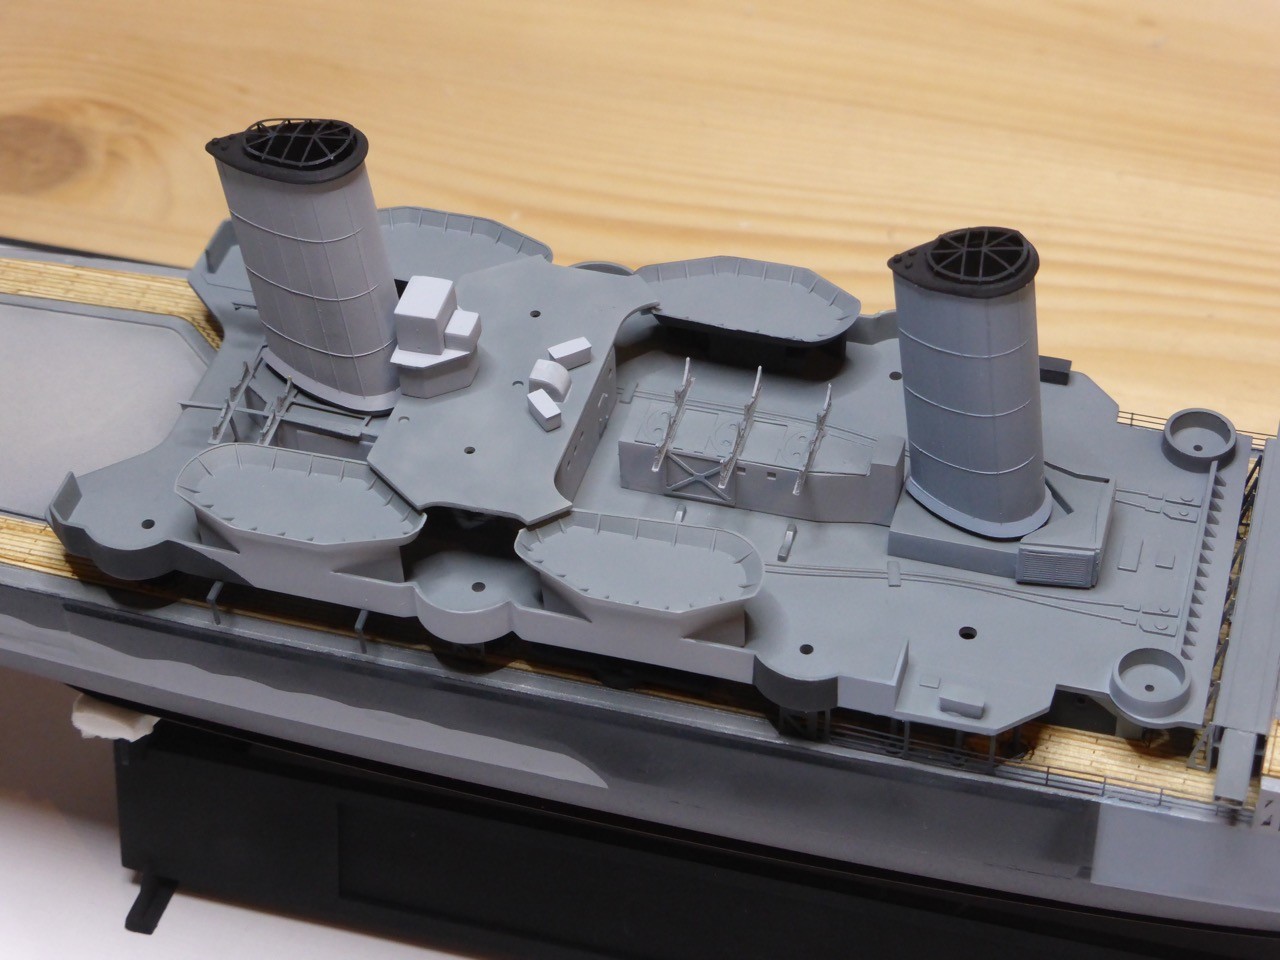
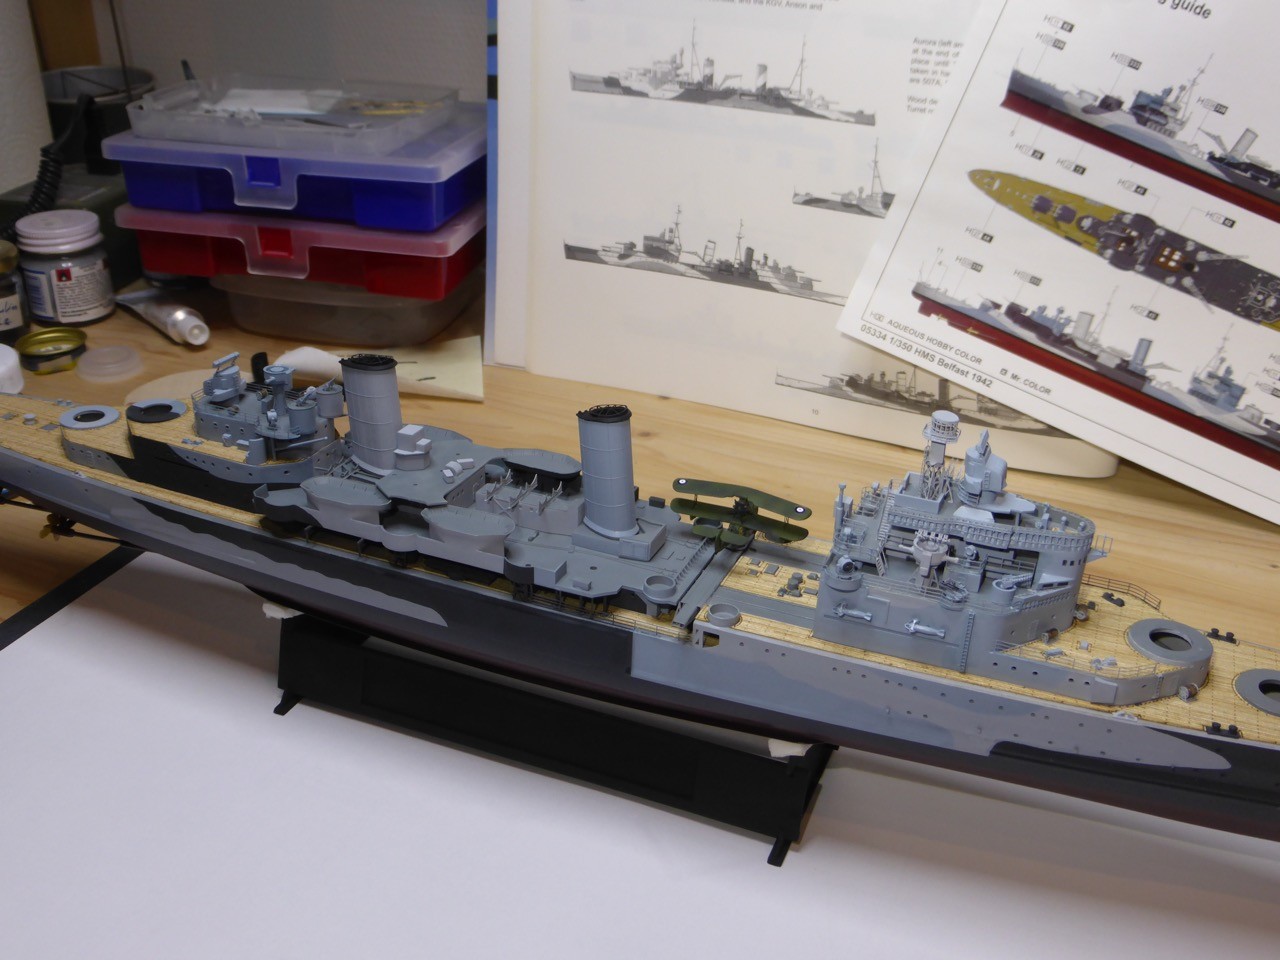
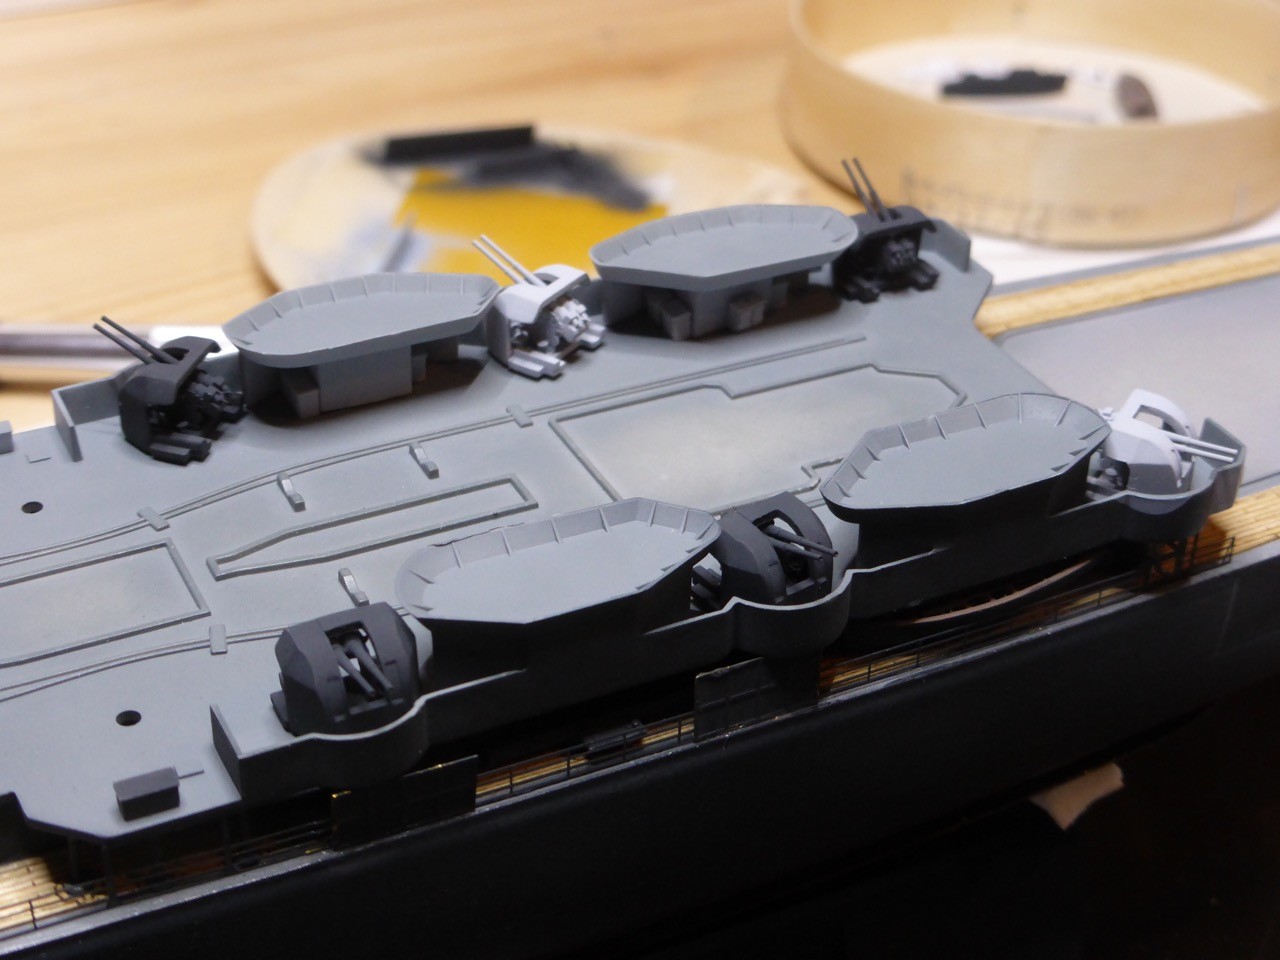
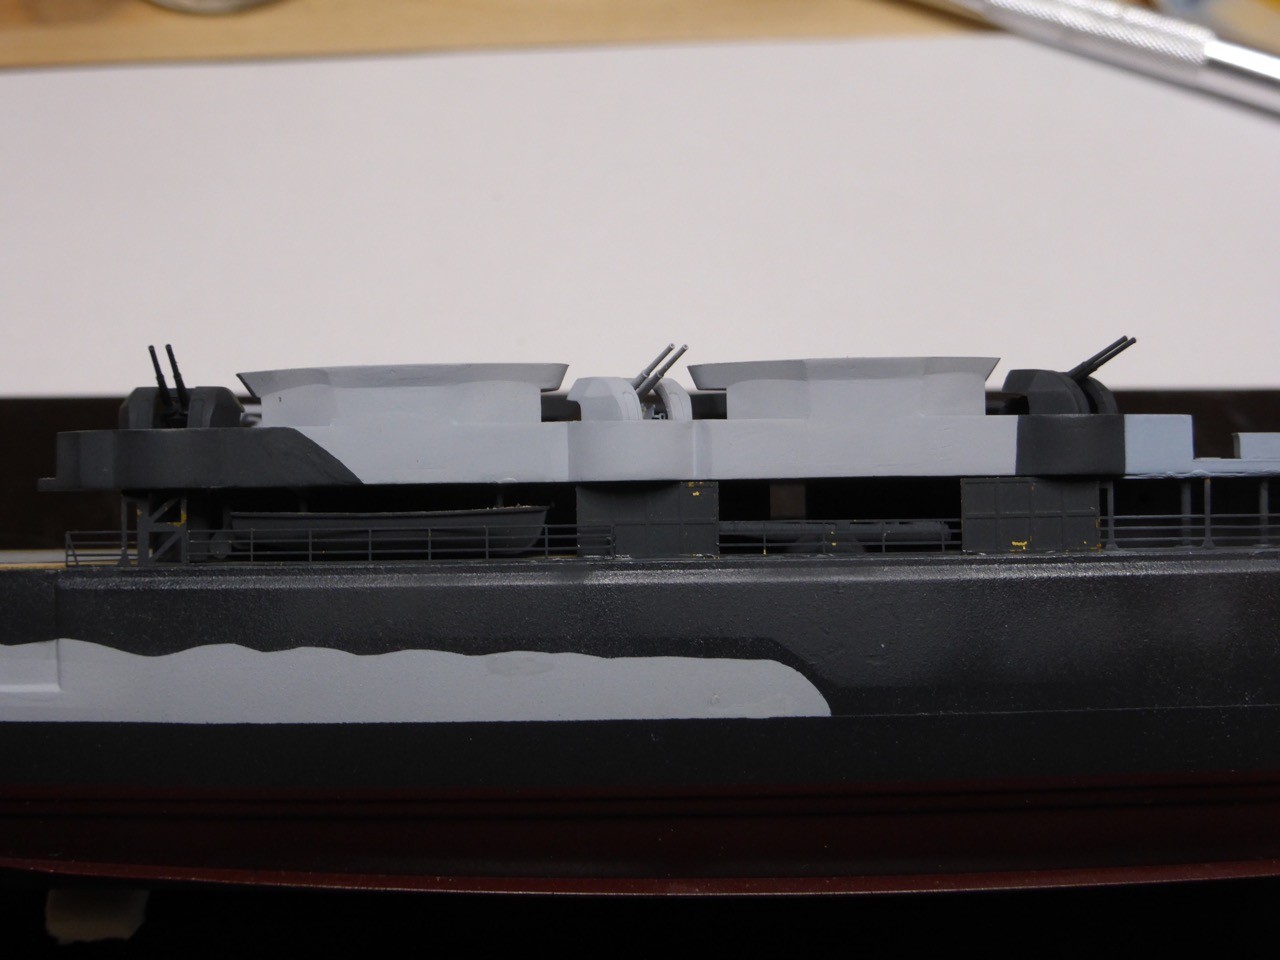
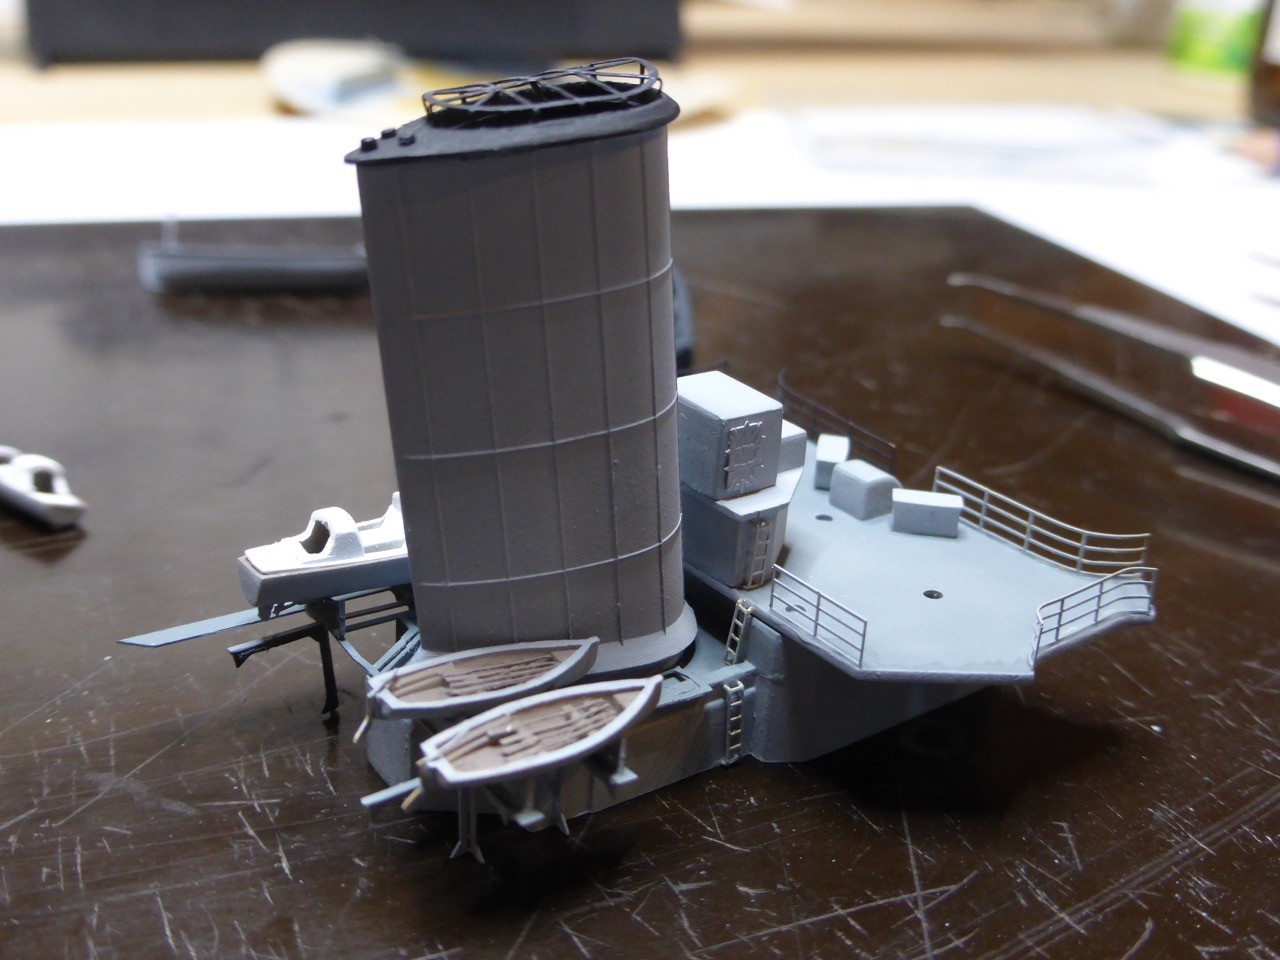
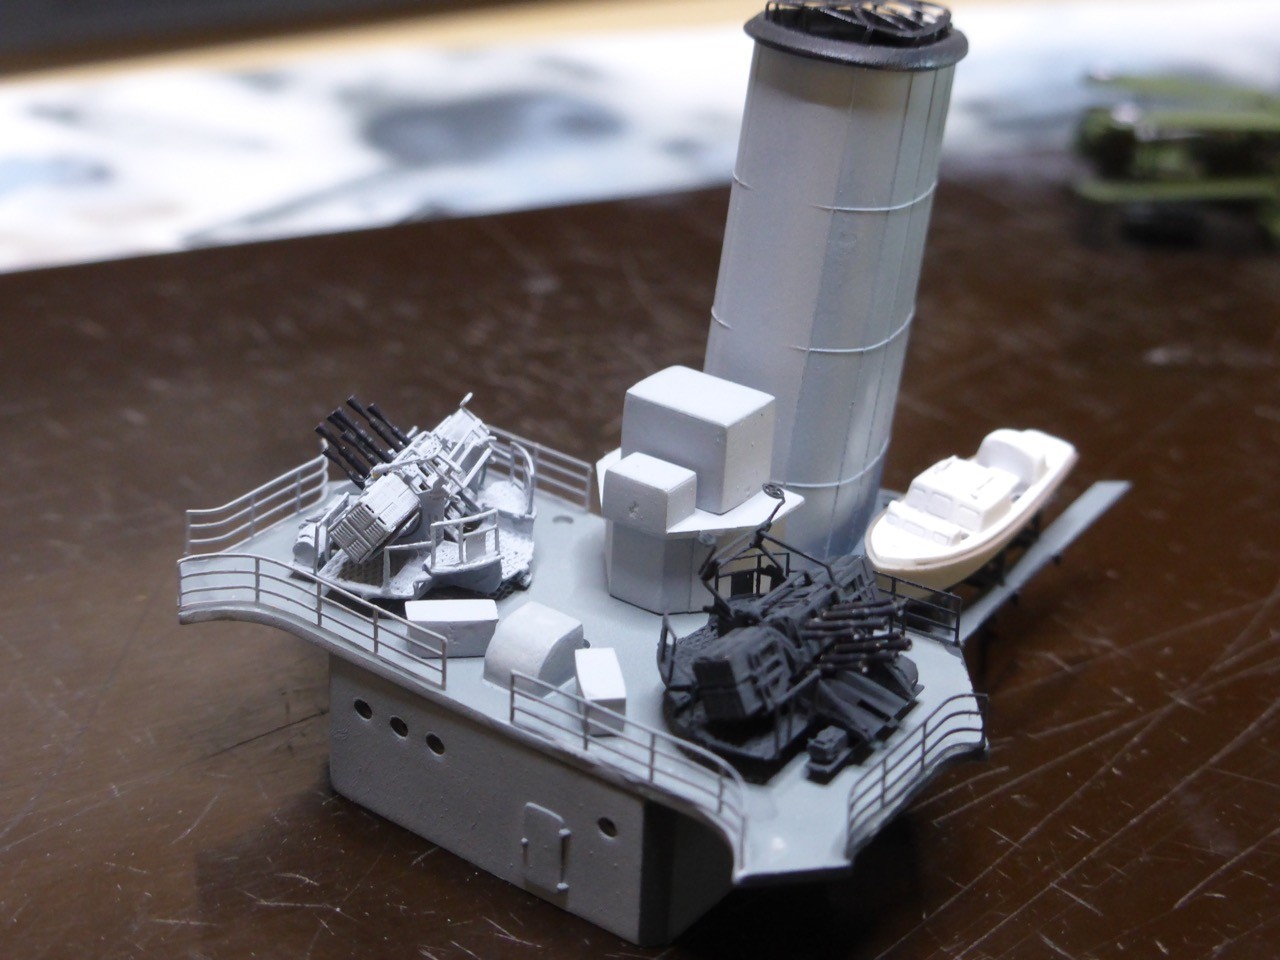
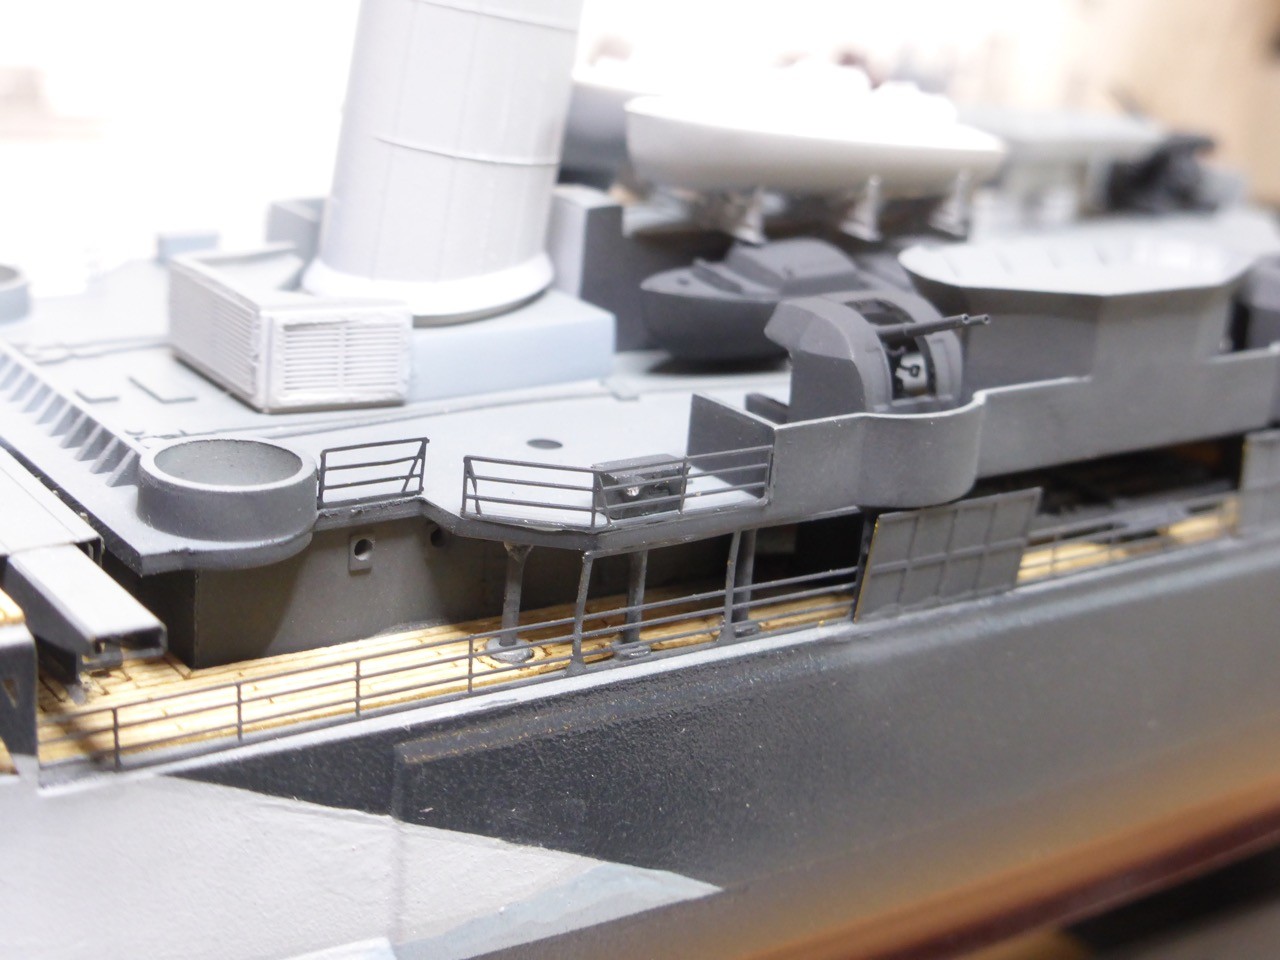
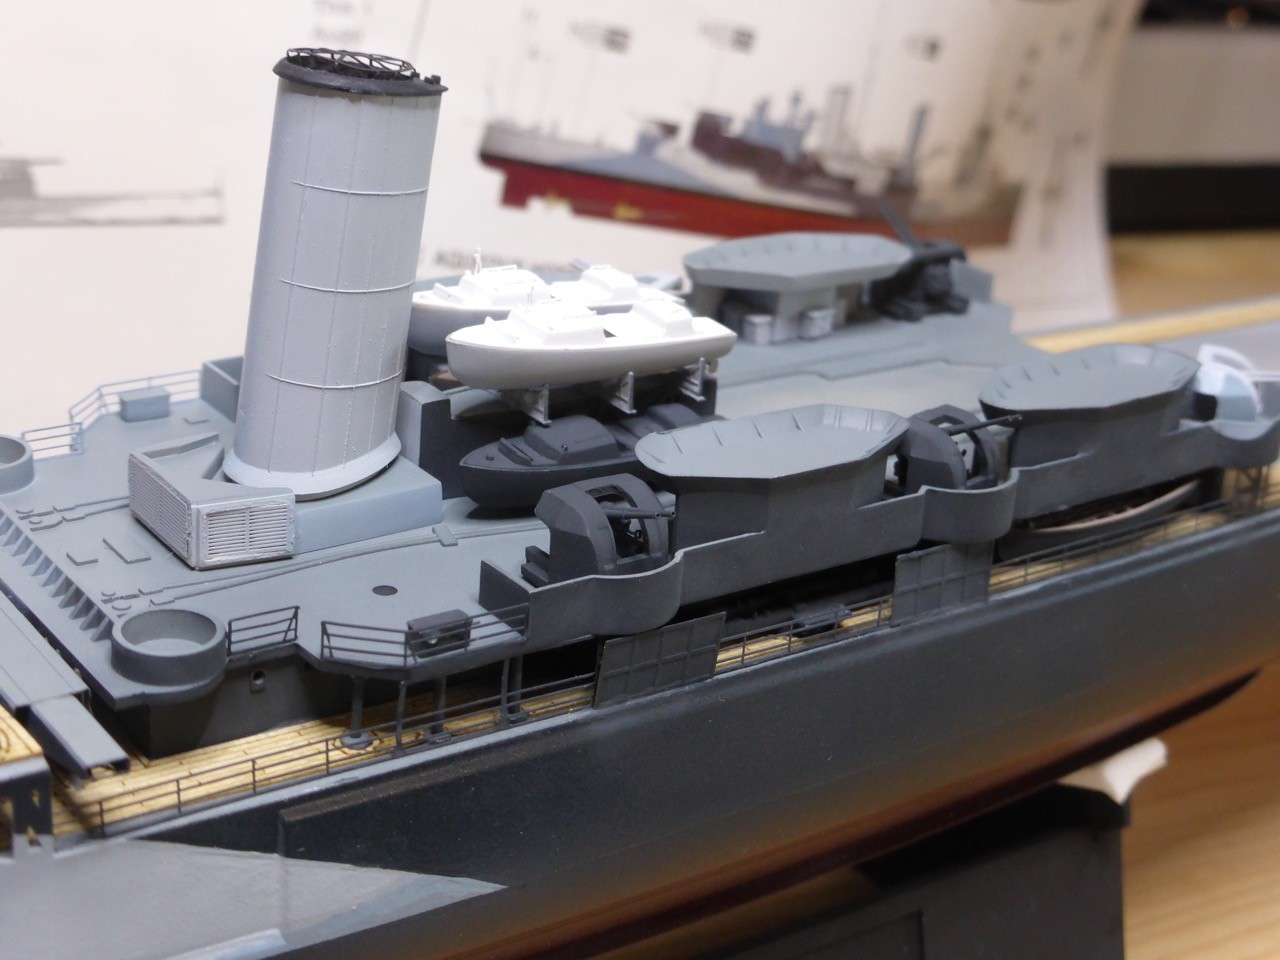
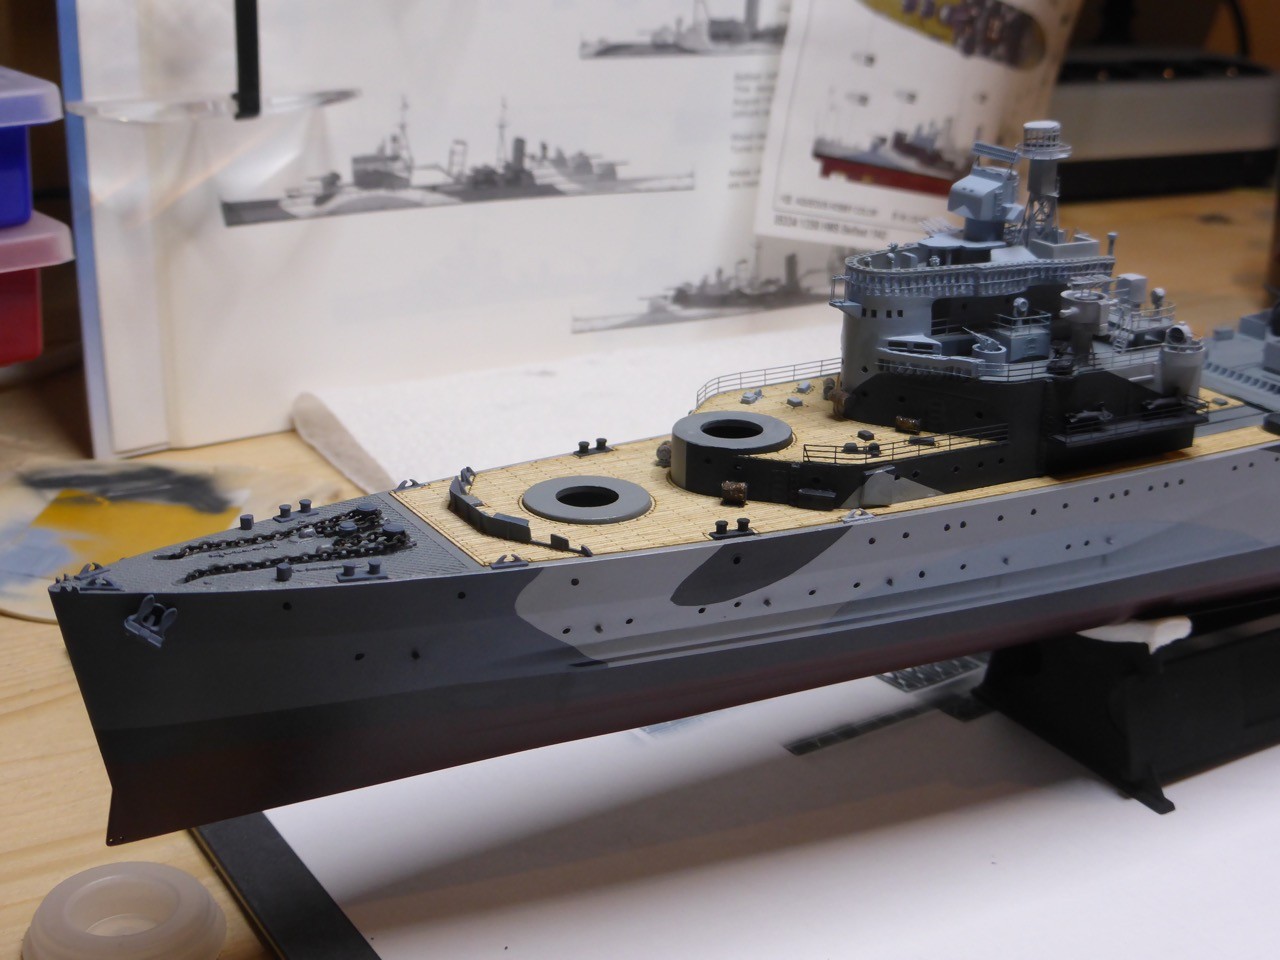
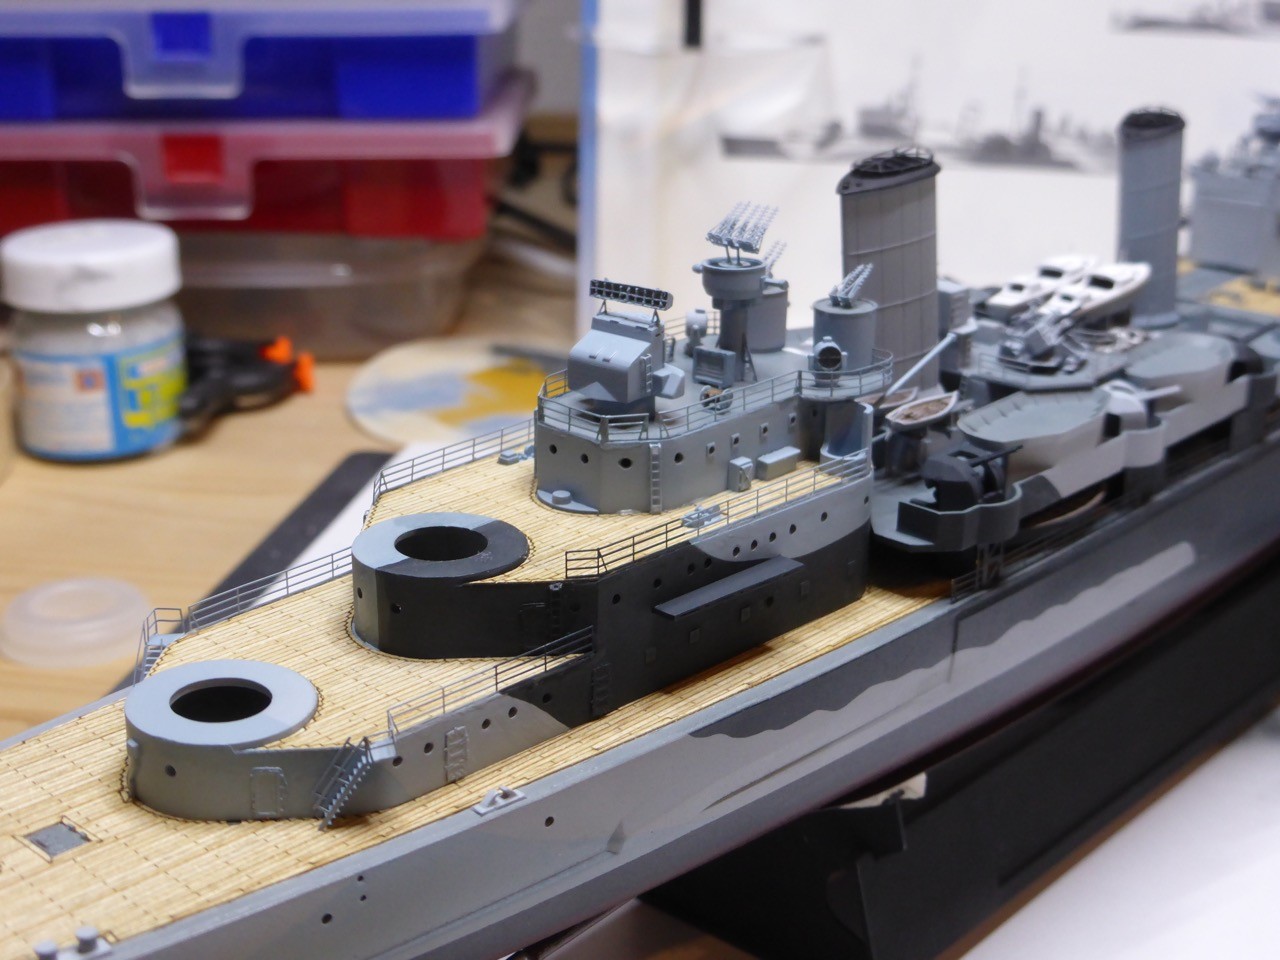
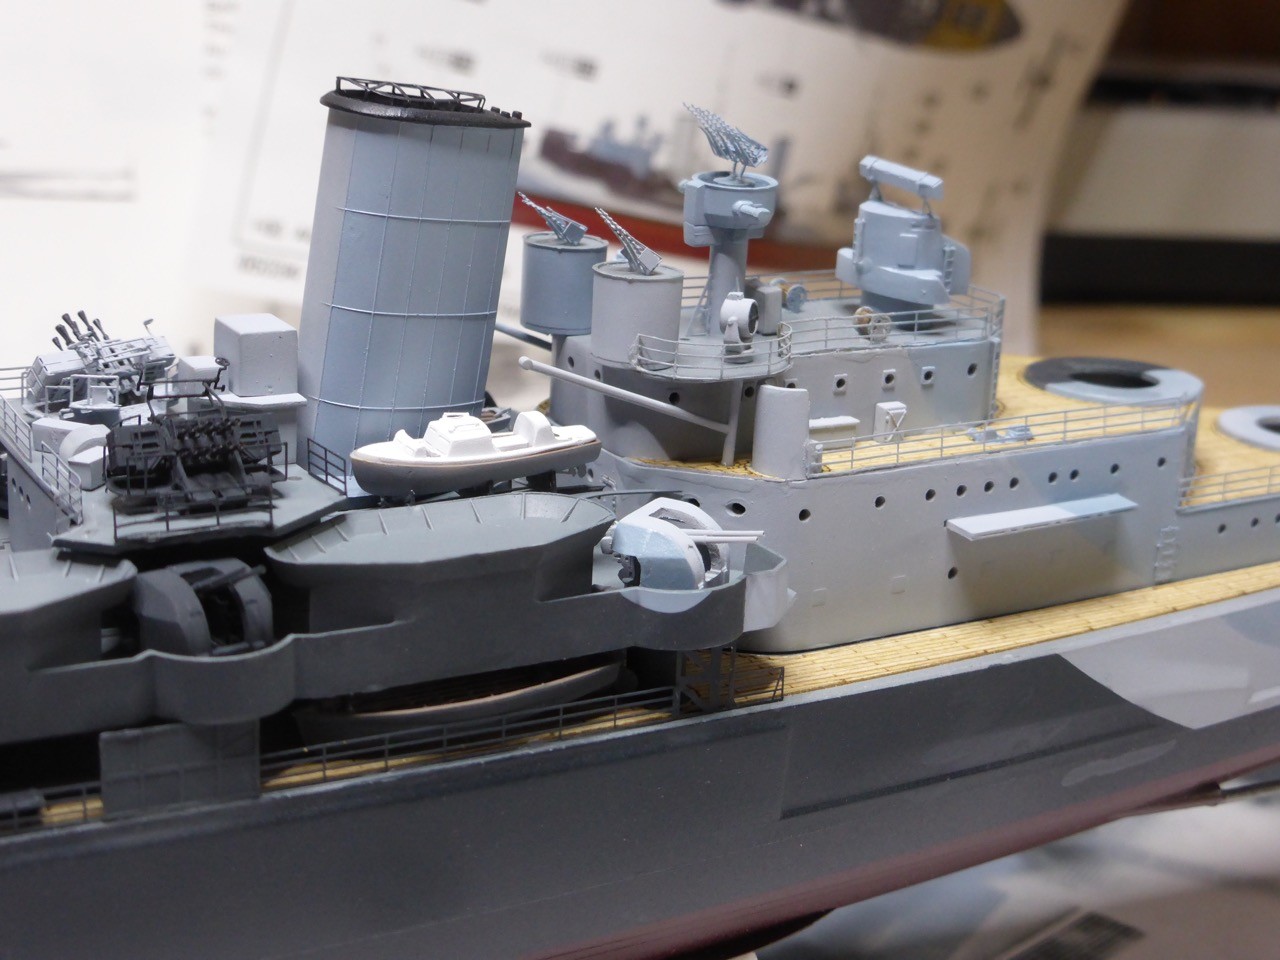
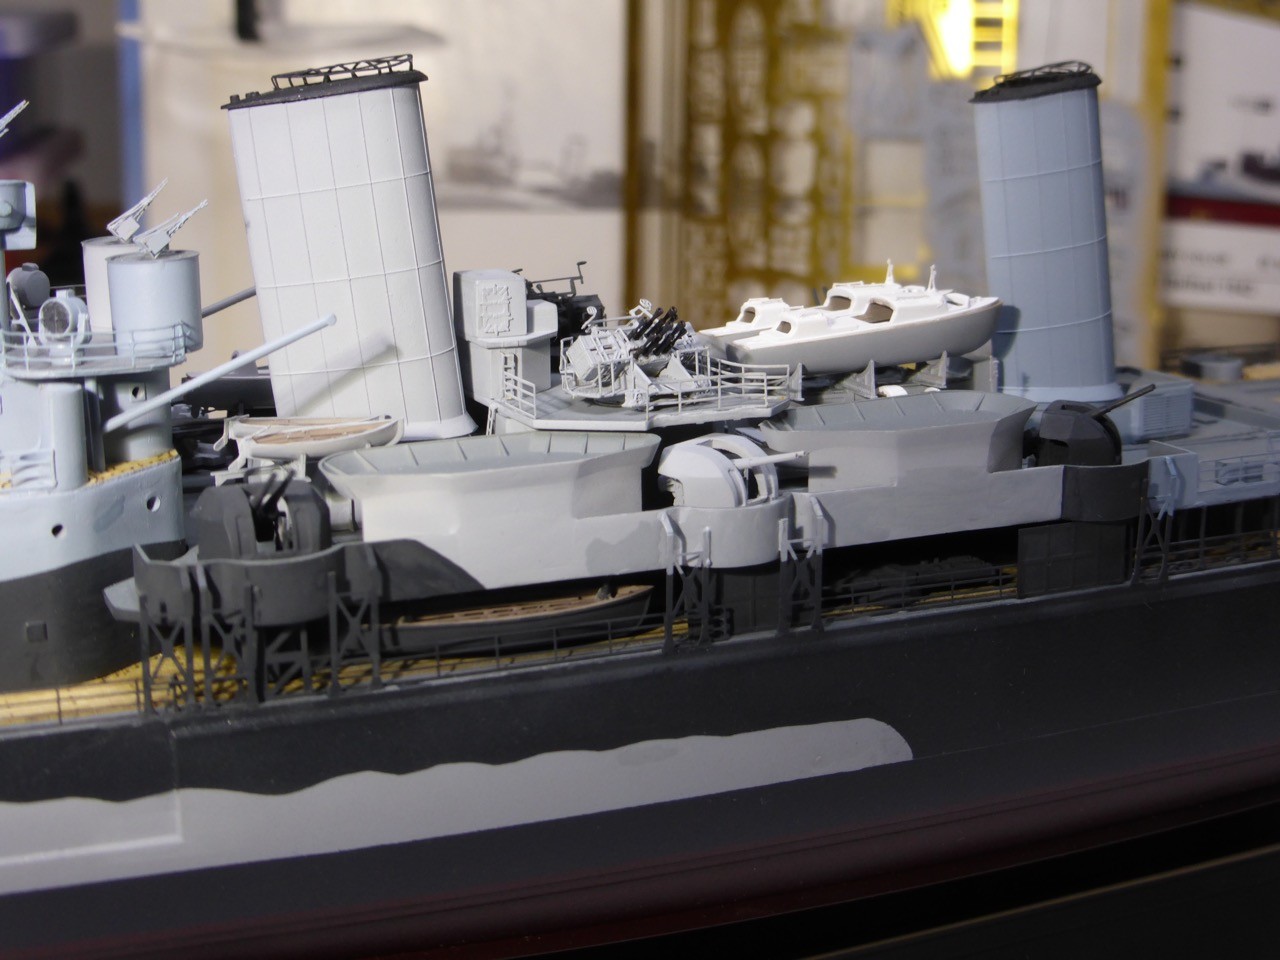
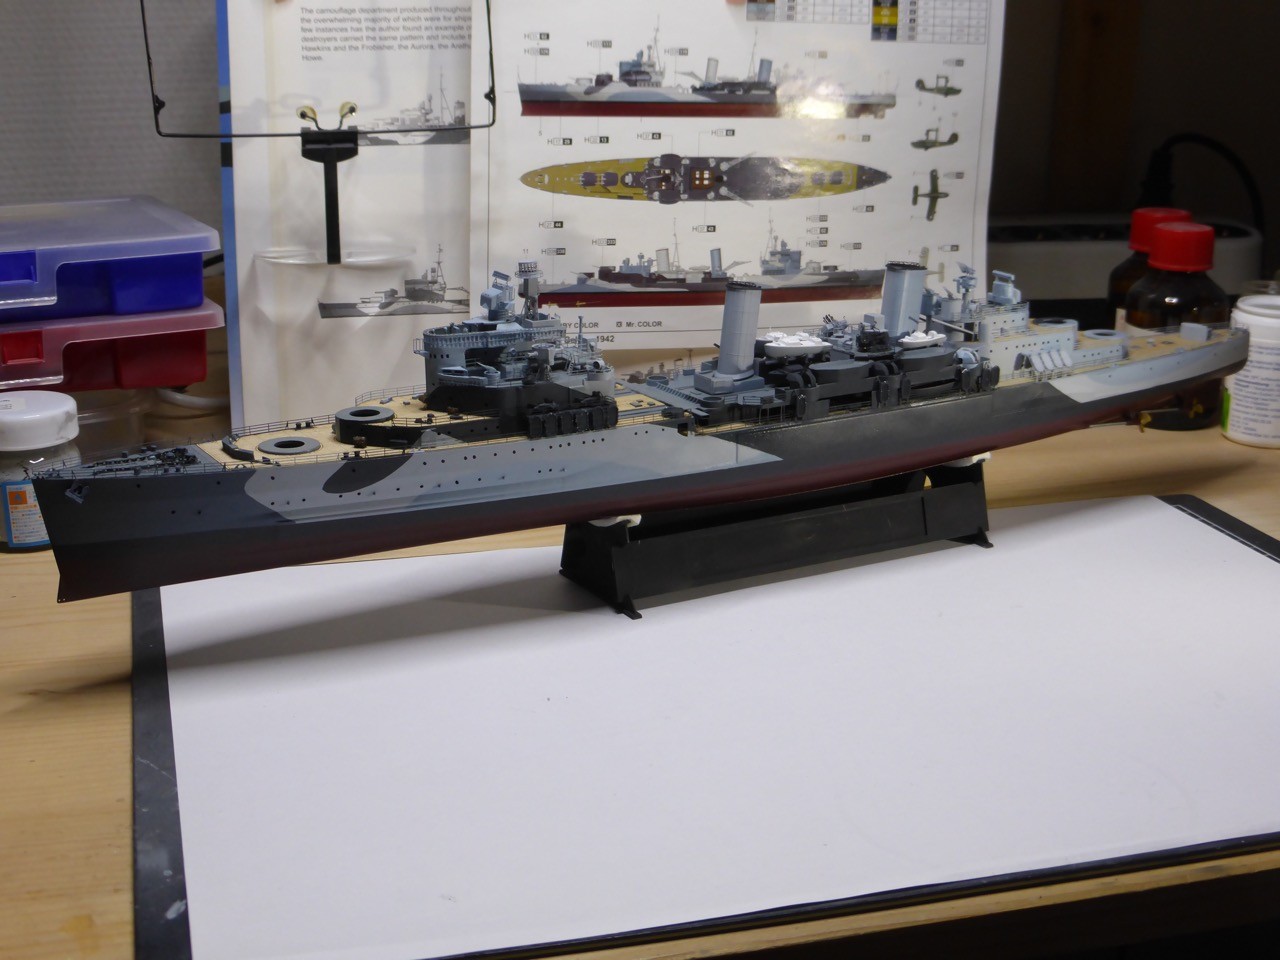
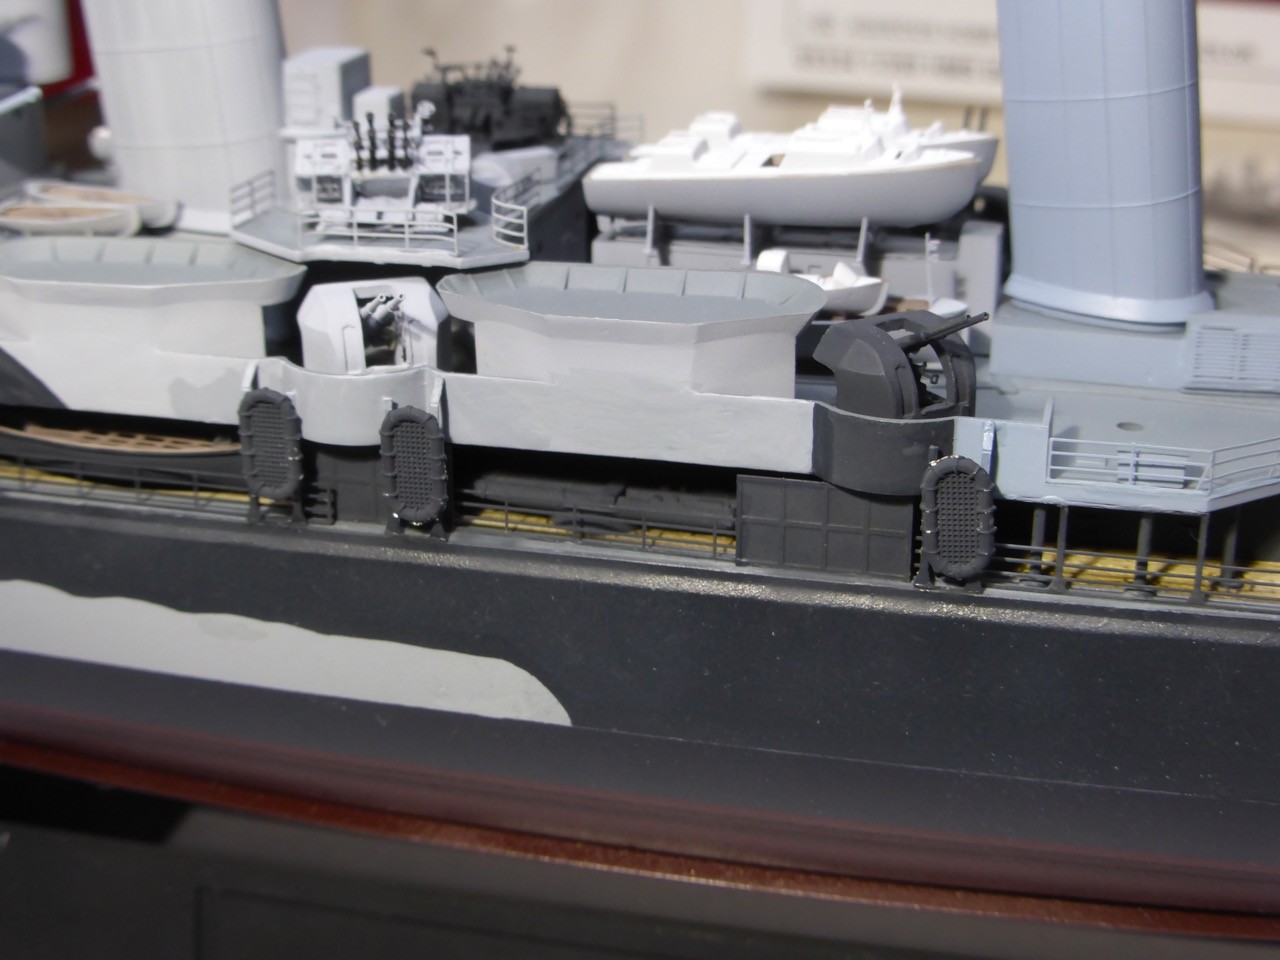
As for the stacks, well, that is pretty much the plan, however it was not 100% clear which stacks would be correct for which time... With dry fitting them and getting a whole ship impression I hope to get a better correlation to the AOTS drawings, or reference pictures from Raven and Roberts Cruiser book, to make my decision.

Thanks again,
Cheers

Jan


Very clever and funny guys "Peep tail Walri"

Great photo shopping too Jan-Belfast's secret weapon...

As for the Prinz: documents have been opened, orders read, and unbeknown to the RN the DKM has been working in secret at the dockyard shhh...
JJ1973
#345
Visit this Community
Niedersachsen, Germany
Joined: August 22, 2011
KitMaker: 1,835 posts
Model Shipwrights: 1,832 posts
Posted: Wednesday, February 03, 2016 - 12:05 AM UTC
Thanks Russ!!

Can't do that without some fun!!

So the story of the Peep-Tail Walri shall continue here in due time, I should find some good working time over the weekend!

Can't wait to see your secret progress to the Prinz uncovered

Cheers,
Jan
JJ1973
#345
Visit this Community
Niedersachsen, Germany
Joined: August 22, 2011
KitMaker: 1,835 posts
Model Shipwrights: 1,832 posts
Posted: Monday, February 08, 2016 - 01:02 AM UTC
Three day weekend and nothing really going on - well, carnival, all right, but if you're not into it, you better stay home.
It turned out to be a quite effective weekend for the shipyard

Basically three main topics - finishing the Walri, continue with the midships section, with all the brass and eventually some paint, and starting with the 4" twins.

Here we go - Walri first

As they will be positioned later on - about. The peep-tail one can be clearly identified


Some shots of the one on the catapult, wit all decals and touch ups. The finals coat of clear later on should blend in the decals.


That's about the stuff that will build the midships sections sans weapons, bouts and cranes...


The different stacks. The upright ones are the kits parts. They are not really upright, they are leaning at the same angle as the WEM ones, if you only install them correctly, and not upside down.


After crosschecking with AOTS once more I decided to use the Trumpeter ones. I think the WEM ones are for post-WWII fit. I may be wrong but decision is made.
It took me some time, however, to realize my stupid mistake with the upside-down stacks, but I rectified it later on - without any harm done. Stupid nonetheless.

First brass coming on - thanks Warren for pointing out the the brass catwalk leading to the aft structure is just slightly too long, so I could trim it in time.


Now a major diversion form the WEM instructions. Not sure if I am right, but I did it anyway. WEM asks for the supports to be installed like this:


But this way the supports end up right on top of the 4" ammunition transport lines. So I turned them around, so that the stanchions are inward, towards the superstructure, and just supporting the boat cradles.


Does this make sense? I don't know, it seems reasonable to me.

The parts are painted individually. From the way it build up I was able to spray it almost without masking. The individual parts fit pretty well into the camouflage scheme.


Ah well, and I used the PE part that would replace the workshop building, but I put it on top. It just looked nice, could have been (build the workshop underneath and have the weight of the boats carried by the structure) and it provided a better base for the PE boat cradles.

Finally the 4" twins, barrels replaced by Master turned brass barrels, and all WEM PE used. That should build those pretty simple assemblies into very nice looking guns!


But there are a lot of small parts - just four gun layers seats per gun...and some modifications to the plastic needs to be done to fit the WEM sides to the gun.
Well, luckily there are only six of them to be built

Four to go...


So here's where Belfast is at, before I have to leave you with a break of possibly three weeks - some busy weekends ahead. Good fun though, but no bench time...

Peep Tail will be jus barely visible I am afraid - we will see. But first impression is that due to the size I can't move him much farther backwards.


So here some impressions - nothing is installed yet, just dry fitted for effect


So much for today, thanks for looking and

Cheers!

Jan

RedDuster
Visit this Community
England - South East, United Kingdom
Joined: March 01, 2010
KitMaker: 7,078 posts
Model Shipwrights: 6,649 posts
Posted: Tuesday, February 09, 2016 - 02:28 AM UTC
Great job Jan,

The Walrus' look great on the catapult and in the hanger.

You could well be right about the supports for the boat racks, look like they fit that way round, I will have to take a close look at my references before I get round to my build.

Si
RussellE
#306
Visit this Community
Victoria, Australia
Joined: June 27, 2010
KitMaker: 3,959 posts
Model Shipwrights: 2,777 posts
Posted: Tuesday, February 09, 2016 - 02:33 PM UTC
Exceptional progress my friend!

Really looking good now with everything starting to be shipped
rolltide31
#377
Visit this Community
Texas, United States
Joined: June 27, 2010
KitMaker: 1,481 posts
Model Shipwrights: 1,332 posts
Posted: Tuesday, February 09, 2016 - 11:36 PM UTC
Jan,

Amazing work on your Walri and the 4" guns. Looking at the Walri they look huge sitting on your Belfast. They really make her pop. Great job.

Looking forward to seeing more progress.

Dave
JJ1973
#345
Visit this Community
Niedersachsen, Germany
Joined: August 22, 2011
KitMaker: 1,835 posts
Model Shipwrights: 1,832 posts
Posted: Wednesday, February 10, 2016 - 10:41 AM UTC
Si, Russ and Dave,

thank you so much for your kind comments!! Much appreciated!!

Si, if you find anything in your references, could you let me know? I checked the AOTS and the Raven and Roberts British Cruisers books, but I could not find any detailed drawings or pictures clarifying that particular area... And - those four platforms on the shelter deck between the 4"ers, what are they supposed to be for? I cannot imagine that they where just void spaces... I only found one indication in the AOTS declaring them as 'timber storage'. But timber would be used for shoring, and that would classically be required below waterline. I know German Navy stores that timber deep below... Any help/idea would be really appreciated!!

Dave,

those Walri look quite large, don't they? Particularly the one inside the hanger, it it is clear it would never fit through the hangar door... However, dimensions taken form Wiki for Supermarine Walrus and scaled down looks like they are spot on...
The other thing is they just look big on the smaller cruiser - they were large aircraft after all. I agree with you, they make that area pop and I like it very much, but somehow I started to be a little concerned whether they were out of scale. So they are not

Nice thing here to compare - how large the battlecruisers were compared to the Belfast - here the catapult area of my Repulse...


Thank you again and Cheers,

Jan
berndm
Visit this Community
Niedersachsen, Germany
Joined: March 26, 2014
KitMaker: 844 posts
Model Shipwrights: 151 posts
Posted: Monday, February 15, 2016 - 02:10 AM UTC
Awsome progress ! Good job on the Walrus aircraft and on the ship.
JJ1973
#345
Visit this Community
Niedersachsen, Germany
Joined: August 22, 2011
KitMaker: 1,835 posts
Model Shipwrights: 1,832 posts
Posted: Sunday, February 28, 2016 - 12:02 AM UTC
Thank you Bernd, and thank you all for your patience

But eventually it's time for another update - and then another break, since I won't be able to work on my shipyard here during the next week. So next update in around two weeks... real life issues... traveling on business, not even leave or something nice....

But here we go for this weekend!

Some color on the 4". Actually all are painted, four in dark 507a, and two in 507c, including their shields. I probably will have to do some camouflage on one or two of them, will see abut that when shipped on board. That will be by brush, though.


All guns are sitting and waiting to be assembled and installed, I initially had hoped to get that done today, but the boats took me longer than expected. And oh well, that could have been expected...

Once more Warren's build from some years ago was of great help - so I was not surprised that the WEM stuff would not fit into the boats properly.
Because of that I decided for some workarounds.
First, the open cutters, which are installed right behind the torpedo tubes. I was less and less convinced that installing them 'outboards' as is foreseen in the instructions is the right way. The way they 'hang' is very basic, and I could not think of an easy and smart way to overcome that. The not fitting etch was the last bit I needed to decide to move them in.

So the oversimplified 'mechanism' removed from the shelter deck


and instand of the WEM PE some oars were added


Some kind of woods-brown color inside, 507a outside


And both boats shipped and installed underneath the shelter deck, so that the railing can be closed outside of the boats.


Next up are the motor boats. Again I was aware that the interior would not fit.
I tried my very best wit Warren's hints, and yes, you can squeeze it in after quite some modifications.


But I decided it wasn't worth it, not at least because this way you cause some deformation to the hull and the upper part will not sit exactly flush. So I cut the PE in a way that it will serve as a floor.


This way you are 'loosing' the most forward part, but it should be ok.


Now there are three of these boats, two higher up and one quite concealed one deck below. So the first one will go down, painted 507a overall, the other ones get 507c/white/brown colors.

Here's some more paintwork and the remaining boats:


Finally for today some railings set and the torpedo sliding doors to the starboard side. All needs quite some touch ups, but that's easily done later on.


So much for today!

As always, thanks for stopping by and looking in

Next update here will be in two weeks from now!

Cheers,

Jan
RedDuster
Visit this Community
England - South East, United Kingdom
Joined: March 01, 2010
KitMaker: 7,078 posts
Model Shipwrights: 6,649 posts
Posted: Sunday, February 28, 2016 - 12:25 AM UTC
Nice work Jan

She is really looking the part.

Si
rolltide31
#377
Visit this Community
Texas, United States
Joined: June 27, 2010
KitMaker: 1,481 posts
Model Shipwrights: 1,332 posts
Posted: Sunday, February 28, 2016 - 04:05 AM UTC
Jan,

As I said, amazing work. Your problem solving and work arounds for flaws in the PE are inspirational. I know I get frustrated as hell when a PE part does not fit as advertised, especially since I do not have the refined skills to figure out how to make it work for me.

thanks for sharing your thought process through this.

Dave
RussellE
#306
Visit this Community
Victoria, Australia
Joined: June 27, 2010
KitMaker: 3,959 posts
Model Shipwrights: 2,777 posts
Posted: Sunday, February 28, 2016 - 04:18 PM UTC
Looks great Jan!

Clever work arounds on the PE-once again, companies making it true to plan, but not necessarily to fit the kit-grr! One of my pet hates!

Look forward to the next update in a couple of weeks
JJ1973
#345
Visit this Community
Niedersachsen, Germany
Joined: August 22, 2011
KitMaker: 1,835 posts
Model Shipwrights: 1,832 posts
Posted: Sunday, February 28, 2016 - 11:40 PM UTC
Si, Dave and Russ,

thank you all once more for following and for your nice comments!! This is really appreciated and keeps the motivation high!

Yeah, the PE is a little off sometimes...but still, WEM did an overall great job with the Belfast set, and I have not come across a single PE set that was correct and fitted in every single aspect...

Now I really feel the upcoming desire to finish the good Belfast, certainly nearing the finishing line. A couple more 'free' weekends would come in handy now...


Thanks again!

Cheers,
Jan
Fordboy
Visit this Community
Auckland, New Zealand
Joined: July 13, 2004
KitMaker: 2,169 posts
Model Shipwrights: 1,597 posts
Posted: Monday, February 29, 2016 - 01:21 AM UTC
Ahoy Jan

Superb updates indeed.

I like the work on the planes (Walri)and ships boats.

A great Belfast is shaping up here for sure.

Cheers


Sean
berndm
Visit this Community
Niedersachsen, Germany
Joined: March 26, 2014
KitMaker: 844 posts
Model Shipwrights: 151 posts
Posted: Monday, February 29, 2016 - 06:14 PM UTC
Your detail work is really impressive, Jan. Great to see you progressing on that ship.
JJ1973
#345
Visit this Community
Niedersachsen, Germany
Joined: August 22, 2011
KitMaker: 1,835 posts
Model Shipwrights: 1,832 posts
Posted: Sunday, March 13, 2016 - 11:05 PM UTC
Bernd and Sean,

thank you very much for your kind comments - and sorry for my very much delayed reaction, I did not check my own build log here for some time while I was away...

Thanks Russ, and here comes the detailed update, especially by your request mate!!

Ok, off we go!

Entirely unattended so far are all the carley floats. Way easier to do in 1/350 as compared to Warrens 1/72 endeavor, but I have quite a number to deal with: there are 20 provided in the kit, which will be installed in groups of 4 and 6 to the sides of the hangar/underneath the paravane and the aft superstructure. Then the WEM set provides a number of individual structures to keep some additional floats. Checking with the AotS there need another 12 floats to be installed, 6 either side of the shelter deck in smaller groupings. Luckily I did still have sufficient WEM carley floats, so it will add up to 32 of them overall.

Painted floats, the WEM structures painted still inside the fret, and the platforms that will hold the frames for the larger groupings fore and aft:


After installing all the railings and sliding doors around the torpedo tubes, I decided that time had come for the 4" AA armament. They are tucked in between the higher platforms on the shelter deck, the boats, the PomPom-platform and funnels that it appeared a good idea to install them early on vice trying to squeeze them in later on. Deviating from my principle to keep guns and stuff movable wherever possible, I glued them in place to prevent them from falling off.


The PomPom platform with three boats, some extra ladders installed.


Ship's boats and first structures installed on the shelter deck - room for the 4" already becomes limited...


The PomPoms added - they still look great!! I'd say they are fully worth the effort!


Then come some more railings fore and aft, and the paravane platforms, and the platforms that will support the carley floats aft.


The next steps look impressive, though they were probably the fastest and maybe even easiest to accomplish - installing the sub-assemblies which fit very nicely!

The peep-tail Walrus glued in place


Bridge and hangar bay added (on top of the Walrus...)


After superstructure and two inclined ladders


Funnels erected, PomPom platform installed.


Next to some touch ups (that actually never ends until the final clear coat is on...) one part of the port-aft 4" painted in B6 to blend in with the camouflage


...and here is where it stands right now!!


Don't be fooled - it certainly starts looking like a ship, even like Belfast, but there is so much small stuff still to be done. Railings, cranes, the carley floats and the extra WEM floats, several ladders, (okay, the Oerlikons and the second Walrus are ready waiting to be installed) the 6" turrets, the masts and antennas and finally all the rigging. Enough work for a couple more weekends

So much for today , I hope I could do justice to your request, Russ

The next update should be here in a week, I should find some time during the next weekend! As always, thanks for stopping by and looking!!

Cheers,

Jan

RussellE
#306
Visit this Community
Victoria, Australia
Joined: June 27, 2010
KitMaker: 3,959 posts
Model Shipwrights: 2,777 posts
Posted: Monday, March 14, 2016 - 02:52 PM UTC
And sir, you have delivered!

an outstanding update for sure!

Nearly there now, and certainly looking the "business"!

JJ1973
#345
Visit this Community
Niedersachsen, Germany
Joined: August 22, 2011
KitMaker: 1,835 posts
Model Shipwrights: 1,832 posts
Posted: Tuesday, March 15, 2016 - 10:11 AM UTC
Hi Russ,

thank you very much mate!!

I am very happy that I could come up to your expectations

With all the sub-assemblies in place, it certainly looks like great progress - and to be honest, in a way that was some long-needed motivation after working on many small things that don't apparently show

However - quite some way to go!

But - time and motivation are back. Always a bit of a struggle to continue after some time out, for whatever reason...

Cheers

Jan
RussellE
#306
Visit this Community
Victoria, Australia
Joined: June 27, 2010
KitMaker: 3,959 posts
Model Shipwrights: 2,777 posts
Posted: Tuesday, March 15, 2016 - 02:17 PM UTC

Quoted Text

Hi Russ,

thank you very much mate!!

I am very happy that I could come up to your expectations

With all the sub-assemblies in place, it certainly looks like great progress - and to be honest, in a way that was some long-needed motivation after working on many small things that don't apparently show

However - quite some way to go!

But - time and motivation are back. Always a bit of a struggle to continue after some time out, for whatever reason...

Cheers

Jan


True that, mate, but getting all those sub assemblies shipped sure helps boost the motivation doesn't it?
RedDuster
Visit this Community
England - South East, United Kingdom
Joined: March 01, 2010
KitMaker: 7,078 posts
Model Shipwrights: 6,649 posts
Posted: Sunday, March 20, 2016 - 01:23 AM UTC
Hi Jan,

Coming great, etch work is superb. the 4" and the pompoms look the pat in place, and really love the shagbat in the hanger.

Top job mate.

Si
JJ1973
#345
Visit this Community
Niedersachsen, Germany
Joined: August 22, 2011
KitMaker: 1,835 posts
Model Shipwrights: 1,832 posts
Posted: Sunday, March 20, 2016 - 10:28 AM UTC
Thank you very much, Russ and Si!!

Yes, motivation is considerably high now - just don't have time for the next update yet. Should be up tonight or tomorrow I hope. Easter itself will be away from bench-time, but I have some leave the week following easter and I should find some time there - I am really keen to finish her!! But no rush - nothing worse than spoiling anything after almost a year of work...

Cheers,
Jan
JJ1973
#345
Visit this Community
Niedersachsen, Germany
Joined: August 22, 2011
KitMaker: 1,835 posts
Model Shipwrights: 1,832 posts
Posted: Sunday, March 20, 2016 - 11:19 PM UTC
And here's the promised update!

This one should go without much words but a lot of pictures as usual. Quite a lot of work accomplished and nice (I think) progress, but pretty straight forward:

- the racks for the carley floats installed
- all remaining railings installed
- touch ups and camouflage painted by hand for the above
- carley floats shipped (touch ups and blending in still required)
- work started on the first crane.

Ok, pictures:

Floats and racks


Racks installed


Railings installed; touch ups and blending in with the camouflage; some general overviews...


Forward, underneath the paravane platforms, it can be seen that the racks are to short - they leave a significant gap. I don't really know why that is the case, but I didn't need to worry too much, since this will be entirely concealed by the carley floats.

Carley floats shipped - paintwork still required, of course!


And - last but not least - the first crane. The WEM PE was sprayed on the fret and bended afterwards. Bending proved a bit difficult - while they did some 'over-etching' for some parts, as Warren clearly shows in his blog as well, they could have done a little more here. For this quite complex structure, sometimes significant force is needed to get the bend right - and that can easily have negative effects on the rest of the structure...
I ignored the provided etched 'rope' and 'rigging', I want to build a real rigging for the cranes later on. So here's where I am at - txt will be painting.


So that's it for today. Easter itself will be family time, but I have some days off immediately after easter, so by the end of next week or so, I hope to get another update up

And then the great moment shouldn't be all that far away any more...

For now, thanks for stopping by and watching!!

Cheers,
Jan
rolltide31
#377
Visit this Community
Texas, United States
Joined: June 27, 2010
KitMaker: 1,481 posts
Model Shipwrights: 1,332 posts
Posted: Sunday, March 20, 2016 - 11:45 PM UTC
Jan,

Amazing work on your Belfast. She is coming along splendidly. The Carly floats look a bit challenging with the support structures, fine but of work there. If I were to attempt it the floats would be all winky and misaligned.

Love watching this build,looking forward to seeing more.

Dave

RussellE
#306
Visit this Community
Victoria, Australia
Joined: June 27, 2010
KitMaker: 3,959 posts
Model Shipwrights: 2,777 posts
Posted: Tuesday, March 22, 2016 - 01:20 AM UTC
Amazing work, Jan!

Nearly there now, mate. Just a few more items and she's ready for commissioning!
mgrummitt
Visit this Community
California, United States
Joined: January 07, 2014
KitMaker: 133 posts
Model Shipwrights: 105 posts
Posted: Tuesday, March 22, 2016 - 02:24 AM UTC
Great work Jan!!

I'm glad I found this build now so that I could quickly go through the build quickly. Almost there. Looking forward to the finish!!