

Hi Dave,
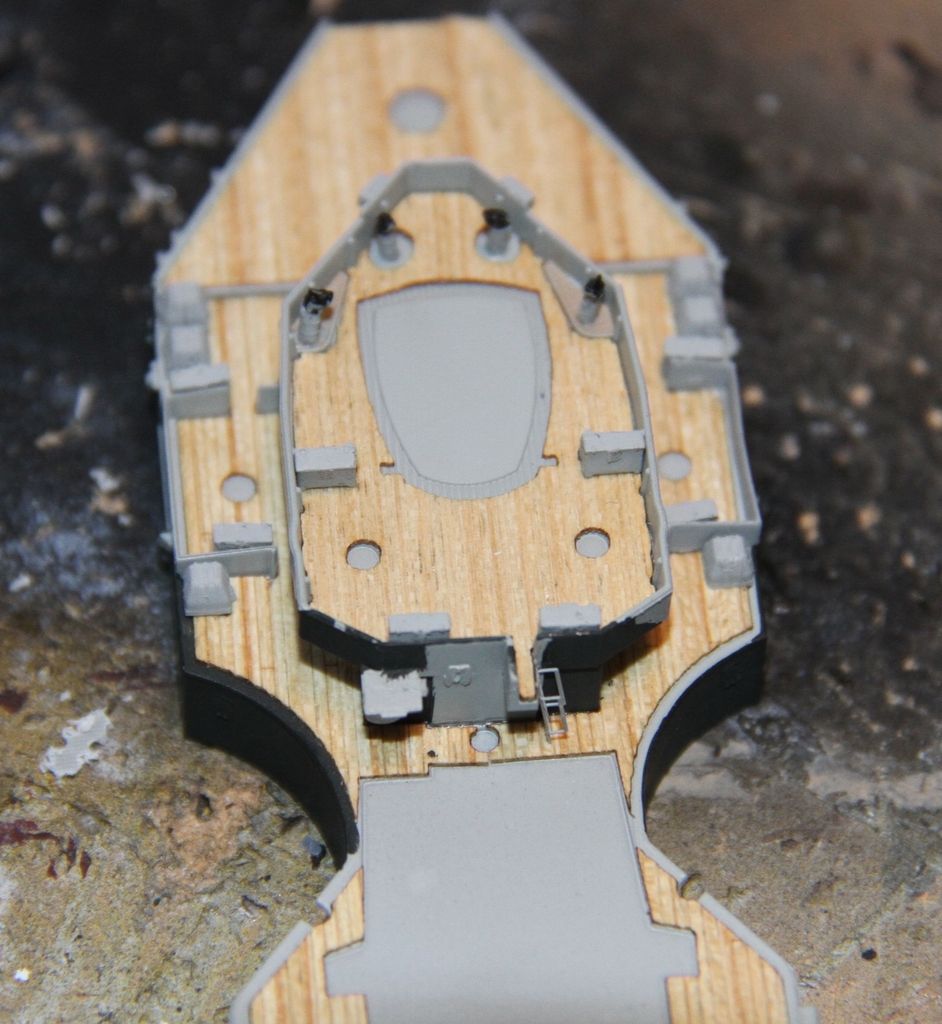
The wood gratings were so nicely moulded that it seemed rude not to put a wash over them. Gratings like that, certainly on RN ships tended to be protected with a stain or varnish of some sort because of the heavy usage they got. I am assuming the Kreigsmarine did the same.
Of course I could be wrong, but I like the effect.
Cheers.
Si


Go to modelshipwrights.com for the current dynamic site!
Campaigns
Want to be part of a group build? This is where to start, plan, and meet about them.
Want to be part of a group build? This is where to start, plan, and meet about them.
Hosted by Jim Starkweather
Official: Cruiser Campaign

RedDuster

Joined: March 01, 2010
KitMaker: 7,078 posts
Model Shipwrights: 6,649 posts

Posted: Sunday, September 20, 2015 - 01:12 PM UTC

JJ1973

#345

Joined: August 22, 2011
KitMaker: 1,835 posts
Model Shipwrights: 1,832 posts

Posted: Saturday, September 26, 2015 - 09:10 PM UTC
Hi all,
here comes another short version of my update! Running a little out of time tonight, so I will try to update the Belfast build log tomorrow...
Now here is what I accomplished over the last days:
Some brass work


...and some color, the forward superstructure turns out to be quite complicated / complex...

But getting there, slowly but constantly

Some more detail will follow. And I have to take another break for about three weeks, real life is calling...
Cheers
Jan
here comes another short version of my update! Running a little out of time tonight, so I will try to update the Belfast build log tomorrow...
Now here is what I accomplished over the last days:
Some brass work
...and some color, the forward superstructure turns out to be quite complicated / complex...
But getting there, slowly but constantly
Some more detail will follow. And I have to take another break for about three weeks, real life is calling...
Cheers
Jan
RedDuster
Joined: March 01, 2010
KitMaker: 7,078 posts
Model Shipwrights: 6,649 posts
Posted: Sunday, September 27, 2015 - 02:43 AM UTC
Hi Jan,
Nice progress, she is really starting to take shape. Looking forward to seeing more.
No progress on the Scharnhorst this weekend, was at the Brampton show today, not much ship related but a good day.
Cheers
Si
Nice progress, she is really starting to take shape. Looking forward to seeing more.
No progress on the Scharnhorst this weekend, was at the Brampton show today, not much ship related but a good day.
Cheers
Si

RussellE
#306

Joined: June 27, 2010
KitMaker: 3,959 posts
Model Shipwrights: 2,777 posts
Posted: Sunday, September 27, 2015 - 03:19 PM UTC
Very nice, Jan 

JJ1973
#345
Joined: August 22, 2011
KitMaker: 1,835 posts
Model Shipwrights: 1,832 posts
Posted: Sunday, September 27, 2015 - 10:56 PM UTC
Thank you very much, Russ and Si!!
As mentioned, I have to take a small break with my shipyard work, two weeks or so, but it will go on!! I somewhat underestimated the forward / bridge structure I have to say, with the added PE and the camouflage scheme it's a quite complex build!
 but it should be more straight forward from now on - I hope...
Cheers,
Jan
As mentioned, I have to take a small break with my shipyard work, two weeks or so, but it will go on!! I somewhat underestimated the forward / bridge structure I have to say, with the added PE and the camouflage scheme it's a quite complex build!
but it should be more straight forward from now on - I hope...Cheers,
Jan
RedDuster
Joined: March 01, 2010
KitMaker: 7,078 posts
Model Shipwrights: 6,649 posts
Posted: Monday, October 05, 2015 - 01:27 AM UTC
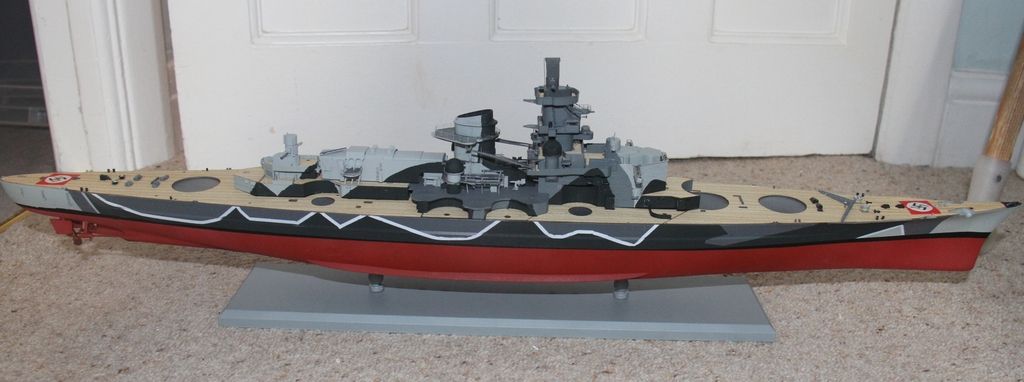
A Bit more progress.
The last two sections of the wood deck down.
Sub assemblies. The practice loaders and the midships AA directors.
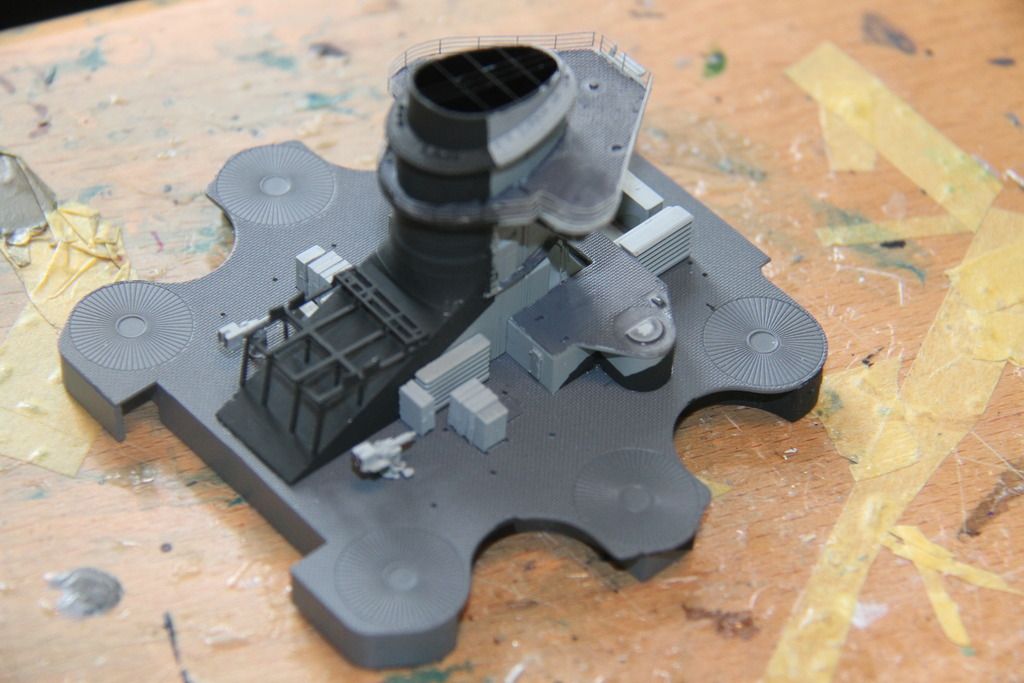
and the boat rack on the forward funnel trunking.
The funnel and its base fitted to the midships deck, along with the boat rack and some of the vents. Lots more to go down there.
Cheers.
Si
The last two sections of the wood deck down.

Sub assemblies. The practice loaders and the midships AA directors.

and the boat rack on the forward funnel trunking.

The funnel and its base fitted to the midships deck, along with the boat rack and some of the vents. Lots more to go down there.

Cheers.
Si
RedDuster
Joined: March 01, 2010
KitMaker: 7,078 posts
Model Shipwrights: 6,649 posts
Posted: Saturday, October 10, 2015 - 12:24 AM UTC
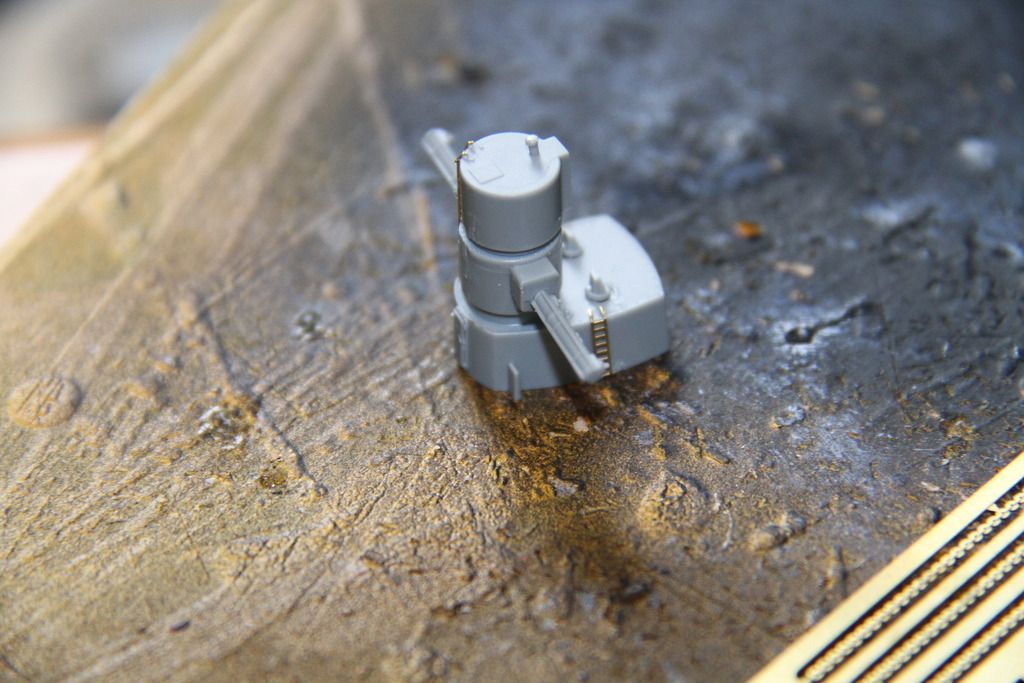
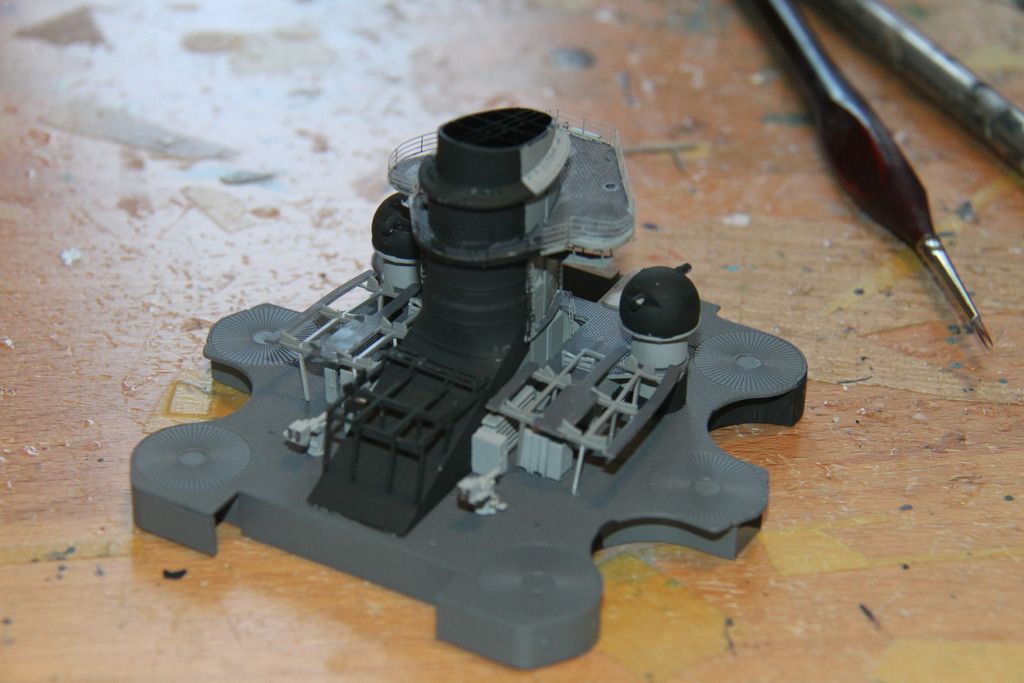
Next, as I have to load up the windy stick with some light grey, the after control tower.
Strangely, both rangefinders have two flashed over holes that need drilling out? Not a complaint, but odd.
May relate to the '41 version promised I don't know.
The tower together.
Iron ladders on the Hangers.
Practice loaders and other details on the funnel deck.
Camo and decks painted in on the hanger, needs tidying up.
small boat racks assembled and drying in place.
Cheers.
Si
Strangely, both rangefinders have two flashed over holes that need drilling out? Not a complaint, but odd.

May relate to the '41 version promised I don't know.
The tower together.

Iron ladders on the Hangers.

Practice loaders and other details on the funnel deck.

Camo and decks painted in on the hanger, needs tidying up.

small boat racks assembled and drying in place.

Cheers.
Si
RedDuster
Joined: March 01, 2010
KitMaker: 7,078 posts
Model Shipwrights: 6,649 posts
Posted: Sunday, October 11, 2015 - 12:41 AM UTC
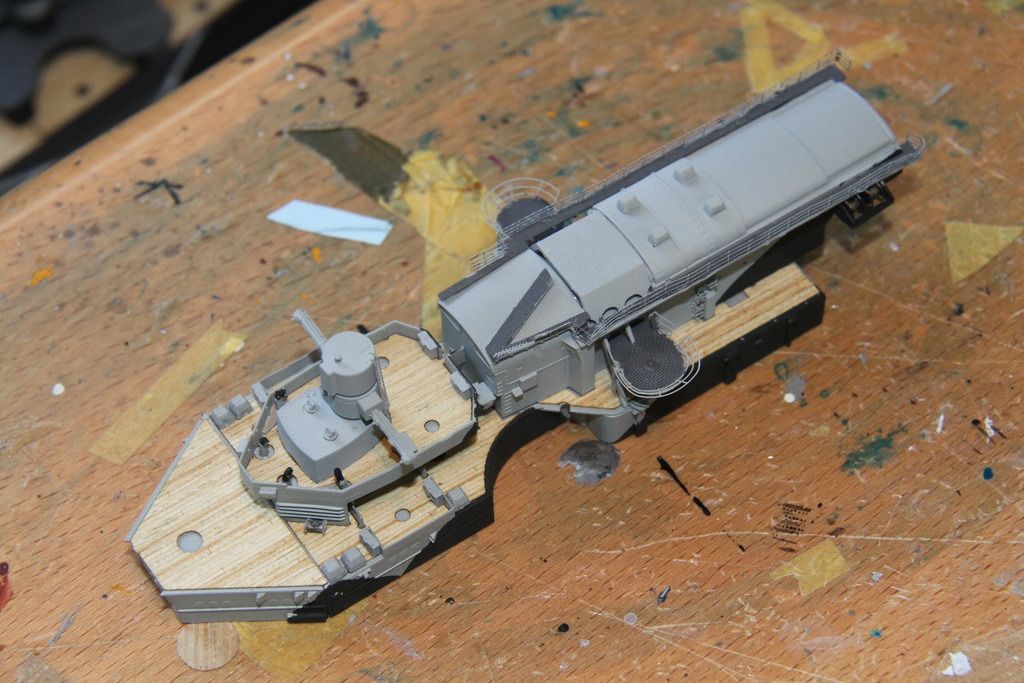
Another busy day in the workshop.
More boat racks.
Did not have enough part N21s left, (The support legs) misumbering in the instructions, every short section of rod seemed to numbered N21. Replacements were simply made from plastic rod.
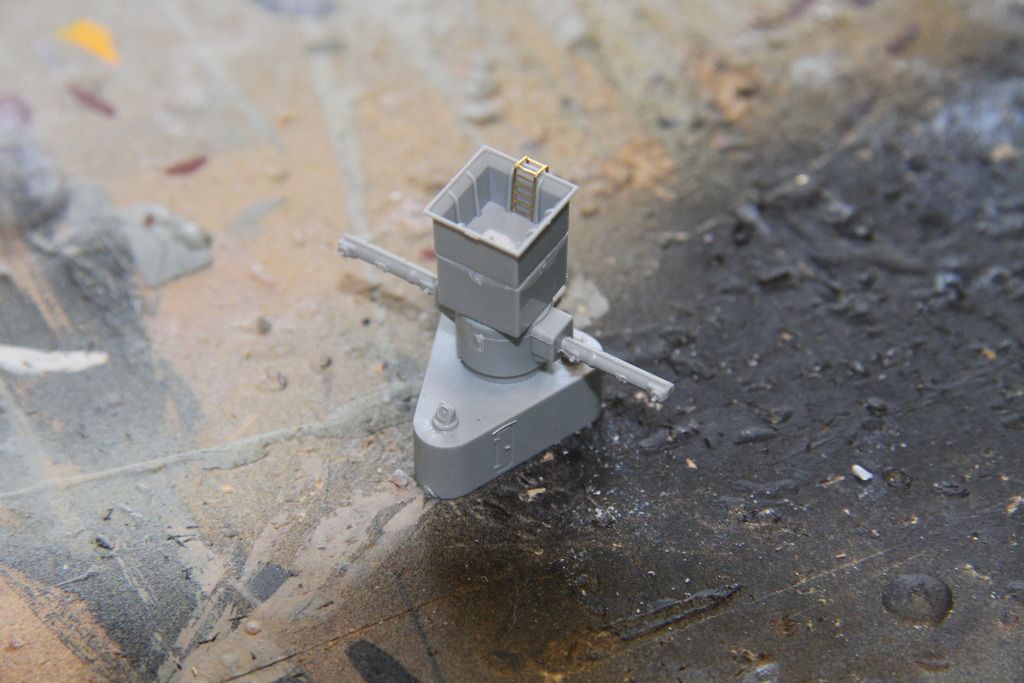
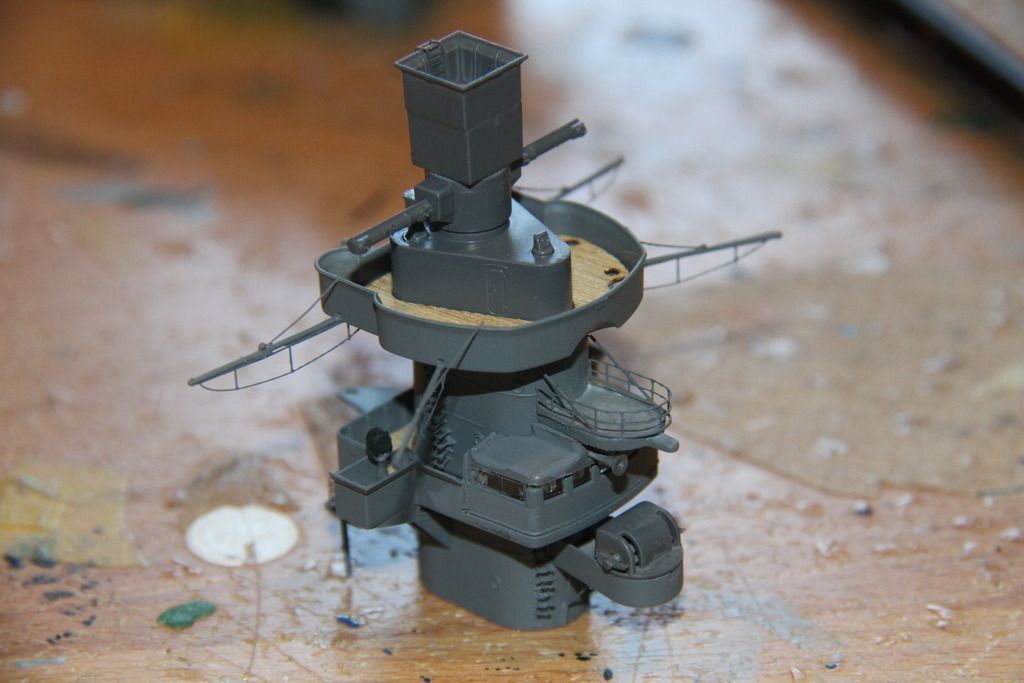
Main control top assembled.
Boat handling cranes mounted behind the bridge tower assembled.

cranes painted and fitted.
fitting the Admiral's bridge. the glazing was a poor fit, and a littke fettling was needed to get the rear bulkheads in place. The upper section of the tower is test fitted.
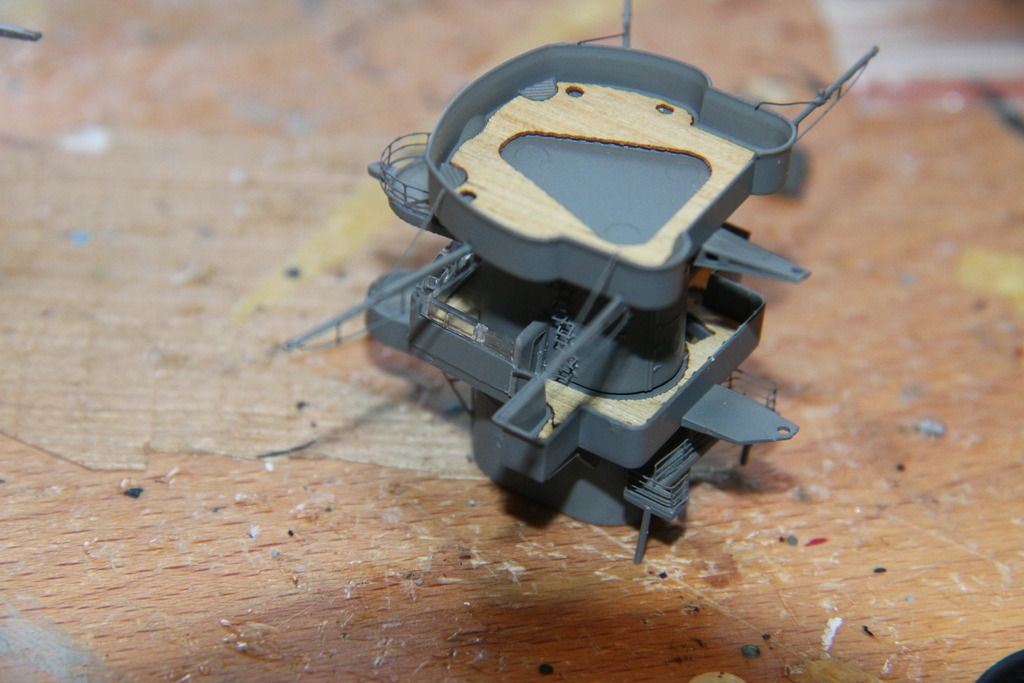
The bridge tower assembled.
A few detail parts to go on yet.
Boat racks in place on the funnel deck.
a couple of views of everything test fitted.

Looks like he is well on the way to completion. But lots sill to do, boats, radars, masts , catapult, guns etc. etc.
Cheers.
Si
More boat racks.

Did not have enough part N21s left, (The support legs) misumbering in the instructions, every short section of rod seemed to numbered N21. Replacements were simply made from plastic rod.
Main control top assembled.

Boat handling cranes mounted behind the bridge tower assembled.

cranes painted and fitted.

fitting the Admiral's bridge. the glazing was a poor fit, and a littke fettling was needed to get the rear bulkheads in place. The upper section of the tower is test fitted.

The bridge tower assembled.

A few detail parts to go on yet.
Boat racks in place on the funnel deck.

a couple of views of everything test fitted.


Looks like he is well on the way to completion. But lots sill to do, boats, radars, masts , catapult, guns etc. etc.
Cheers.
Si
RussellE
#306
Joined: June 27, 2010
KitMaker: 3,959 posts
Model Shipwrights: 2,777 posts
Posted: Sunday, October 11, 2015 - 08:13 AM UTC
Very nice, Si 
makes my efforts on the Prinz, look thoroughly lack lustre!
makes my efforts on the Prinz, look thoroughly lack lustre!
RedDuster
Joined: March 01, 2010
KitMaker: 7,078 posts
Model Shipwrights: 6,649 posts
Posted: Sunday, October 11, 2015 - 12:56 PM UTC
Thanks Russ,
Just making hay (the Scharnhorst) whilst the sun shines.
Going on a rough part count, I am well under half way through.
Cheers
Si
Just making hay (the Scharnhorst) whilst the sun shines.
Going on a rough part count, I am well under half way through.
Cheers
Si

TankSGT

Joined: July 25, 2006
KitMaker: 1,139 posts
Model Shipwrights: 84 posts

Posted: Monday, October 12, 2015 - 03:33 AM UTC
Looking good guys, very nice work.
Tom
Tom

RedDuster
Joined: March 01, 2010
KitMaker: 7,078 posts
Model Shipwrights: 6,649 posts
Posted: Monday, October 12, 2015 - 12:48 PM UTC
Cheers Tom,
We are getting there slowly but surely.
Thanks for looking in.
Si
We are getting there slowly but surely.
Thanks for looking in.
Si
RedDuster
Joined: March 01, 2010
KitMaker: 7,078 posts
Model Shipwrights: 6,649 posts
Posted: Thursday, October 22, 2015 - 11:00 PM UTC
More detail stuff.
The walkways for hanger with the etch on.

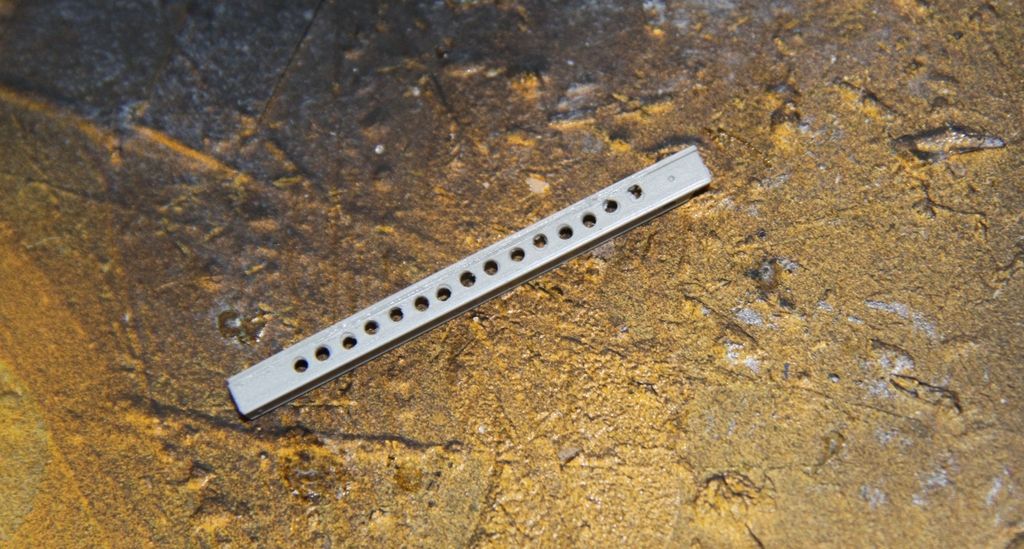
The catapult off the sprue.
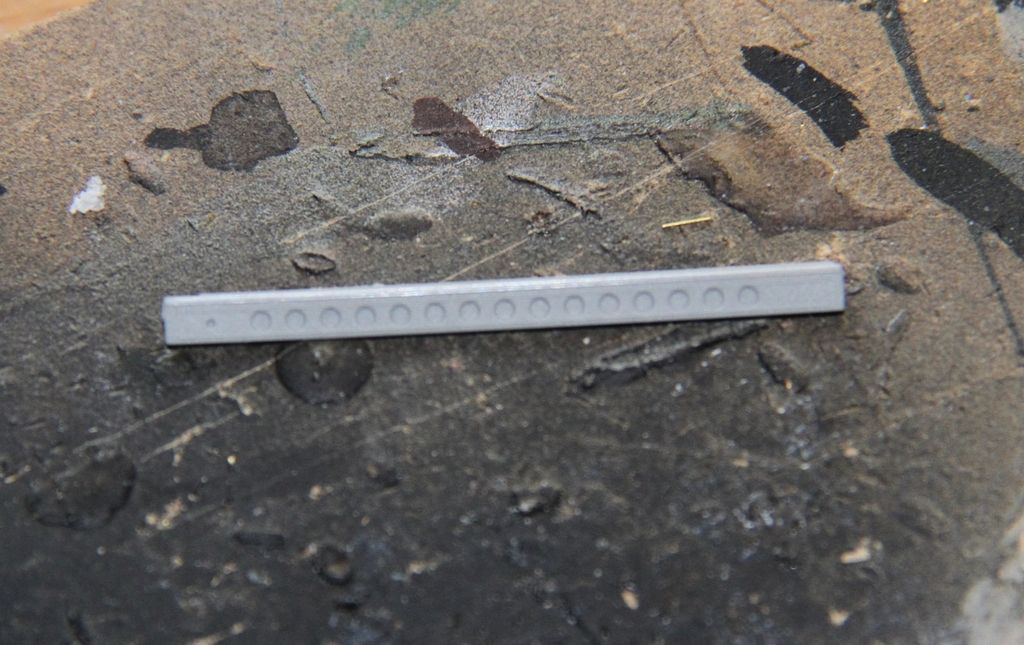
The holes drilled out.
The plastic parts of the cat together.
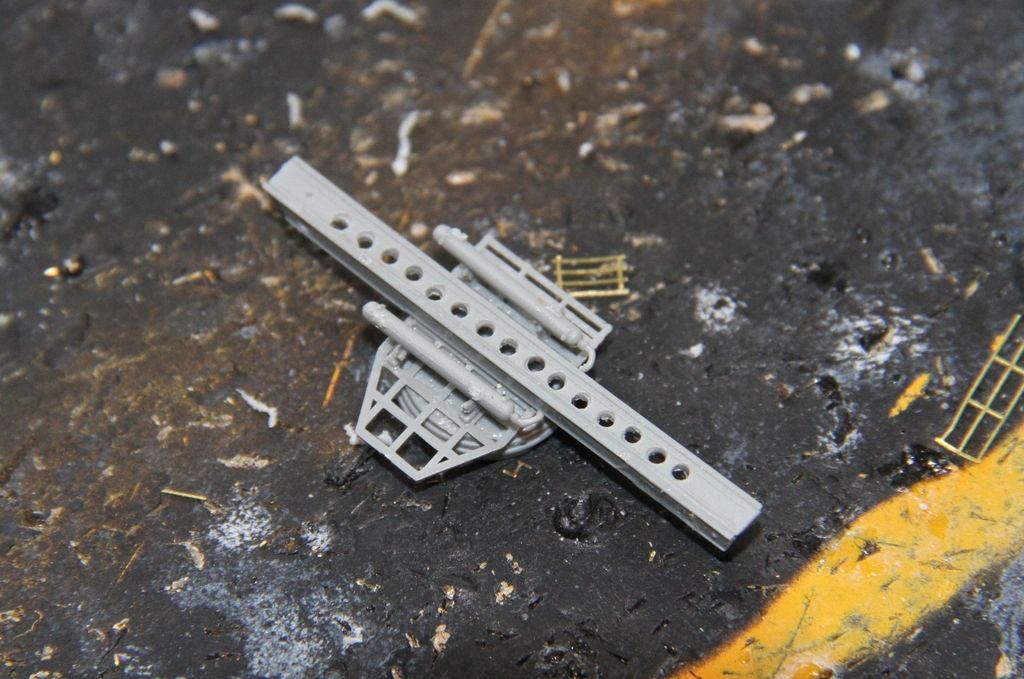
some etch from the WEM used to finish the cat.

Crane bases together, one of part N33's had fallen off the sprue, so a bit of scratchbuilding required to make a replacement.
Cranes now just need booms and igging.

Ladders and guard rails on the rear of the bridge.

More soon.
Si
The walkways for hanger with the etch on.

The catapult off the sprue.

The holes drilled out.

The plastic parts of the cat together.

some etch from the WEM used to finish the cat.

Crane bases together, one of part N33's had fallen off the sprue, so a bit of scratchbuilding required to make a replacement.

Cranes now just need booms and igging.

Ladders and guard rails on the rear of the bridge.

More soon.
Si

steve-o
Joined: February 05, 2004
KitMaker: 545 posts
Model Shipwrights: 113 posts

Posted: Friday, October 23, 2015 - 01:35 AM UTC
Hi, I'm in with Dragon's 1/700 San Diego.
Does anyone have suggestions for an after-market product, or technique for the anti-skid plates on the deck?
Looking forward to starting this one! (despite the DML hull issues)
Does anyone have suggestions for an after-market product, or technique for the anti-skid plates on the deck?

Looking forward to starting this one! (despite the DML hull issues)
RedDuster
Joined: March 01, 2010
KitMaker: 7,078 posts
Model Shipwrights: 6,649 posts
Posted: Friday, October 23, 2015 - 02:16 AM UTC
Hi Steve,
Welcome aboard. I am sure someone can assist with your requested info on aftermarket.
Looking forward to seeing it come together.
Cheers.
Si
Welcome aboard. I am sure someone can assist with your requested info on aftermarket.
Looking forward to seeing it come together.
Cheers.
Si
JJ1973
#345
Joined: August 22, 2011
KitMaker: 1,835 posts
Model Shipwrights: 1,832 posts
Posted: Friday, October 23, 2015 - 10:04 PM UTC
Si, great progress on your Scharnhorst, she is really taking shape!! Very nice work!!
Steve, great to have another one in here, looking forward to your very interesting model! However, I'm afraid I can't help you with your question on the aftermarket, I am not really knowledgeable on the 1/700 stuff, sorry.
And I eventually found some time to work on my Belfast, some small progress today, I hope to get some more done tomorrow and will be back with an uptake than
Cheers all,
Jan
Steve, great to have another one in here, looking forward to your very interesting model!
However, I'm afraid I can't help you with your question on the aftermarket, I am not really knowledgeable on the 1/700 stuff, sorry. And I eventually found some time to work on my Belfast, some small progress today, I hope to get some more done tomorrow and will be back with an uptake than
Cheers all,
Jan
RedDuster
Joined: March 01, 2010
KitMaker: 7,078 posts
Model Shipwrights: 6,649 posts
Posted: Friday, October 23, 2015 - 10:56 PM UTC
Thanks Jan,
Looking forward to seeing some more progress on the Belfast.
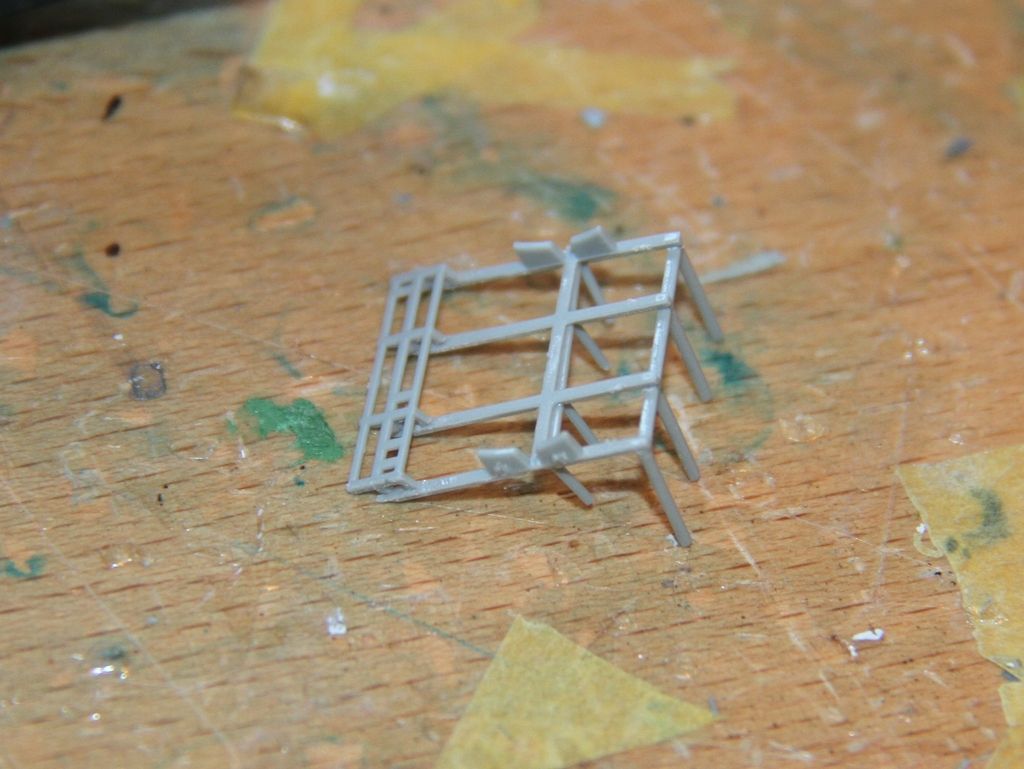
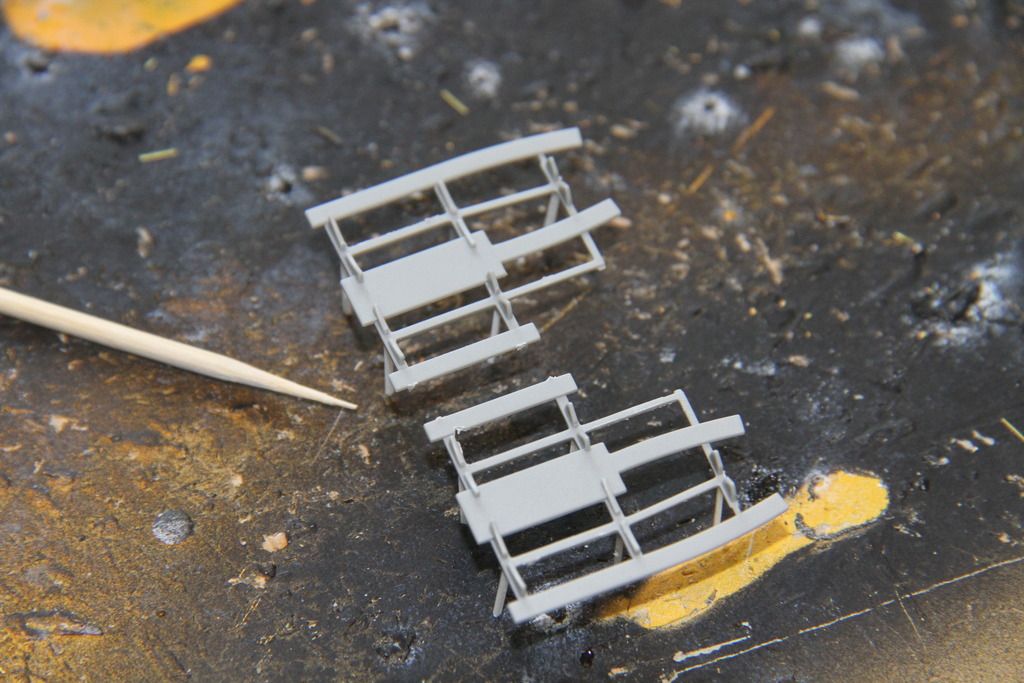
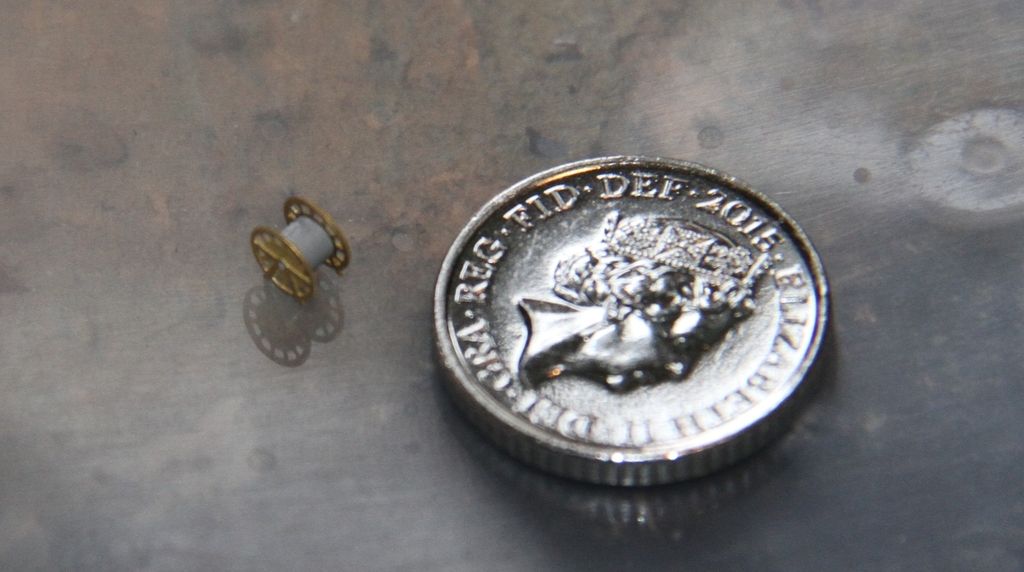
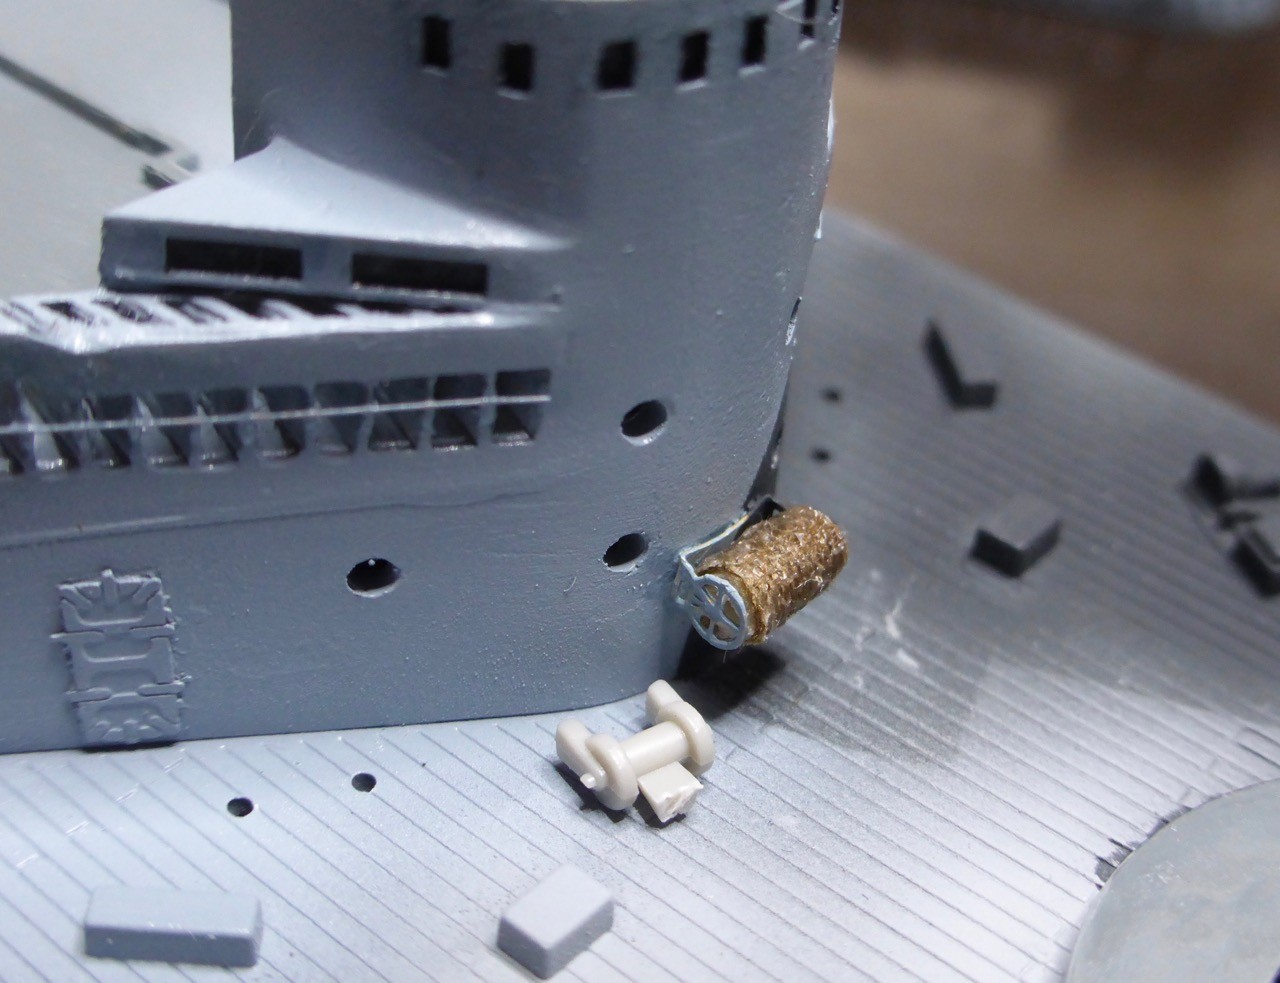
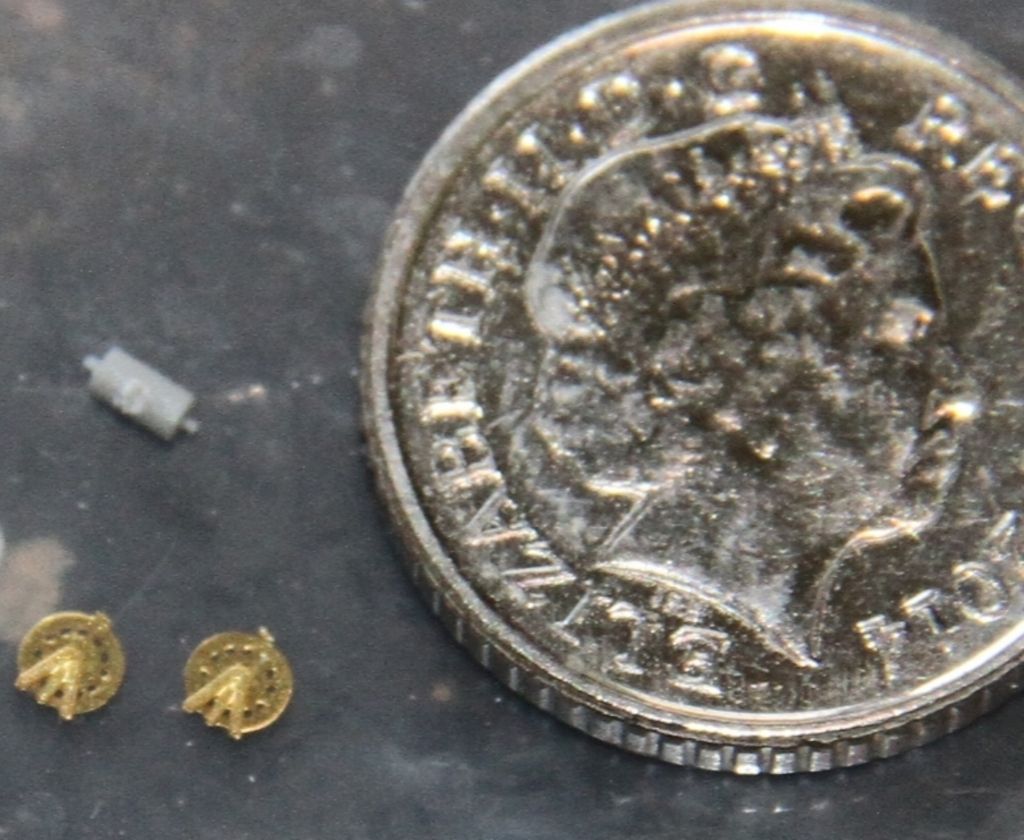
A very small update today, the cable reels for the hanger, the first one done, with a 5p piece for scale,
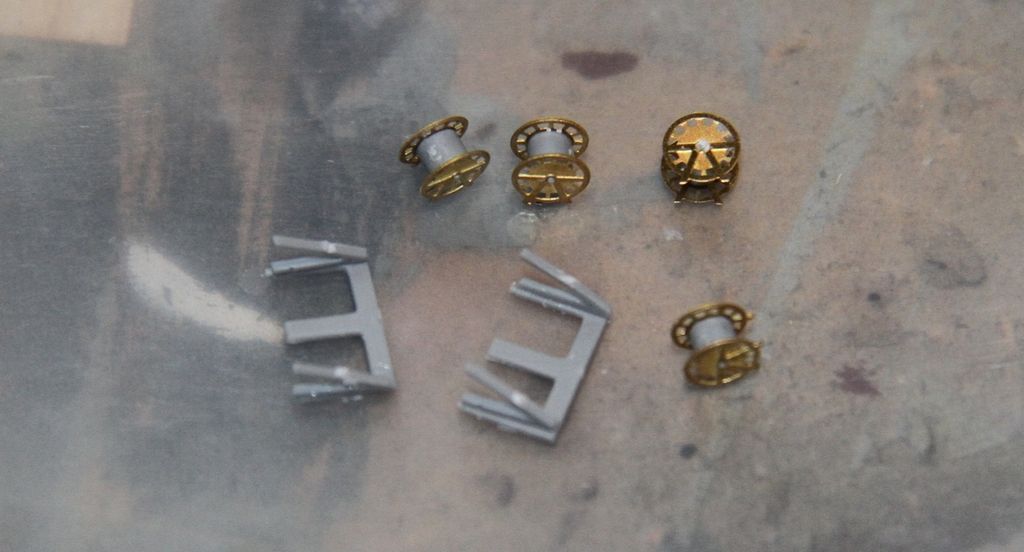
All four done with there mounting frames.
Hope to make more progress tomorrow.
Si
Looking forward to seeing some more progress on the Belfast.
A very small update today, the cable reels for the hanger, the first one done, with a 5p piece for scale,

All four done with there mounting frames.

Hope to make more progress tomorrow.
Si
JJ1973
#345
Joined: August 22, 2011
KitMaker: 1,835 posts
Model Shipwrights: 1,832 posts
Posted: Saturday, October 24, 2015 - 11:56 PM UTC
Your cable reels look good, Si! I don't know, somehow those are amongst my least favorite to build - with my approach of doing them with some sewing thread they are pretty fiddly and sometimes I end up breaking them entirely...
This one here did work, however:
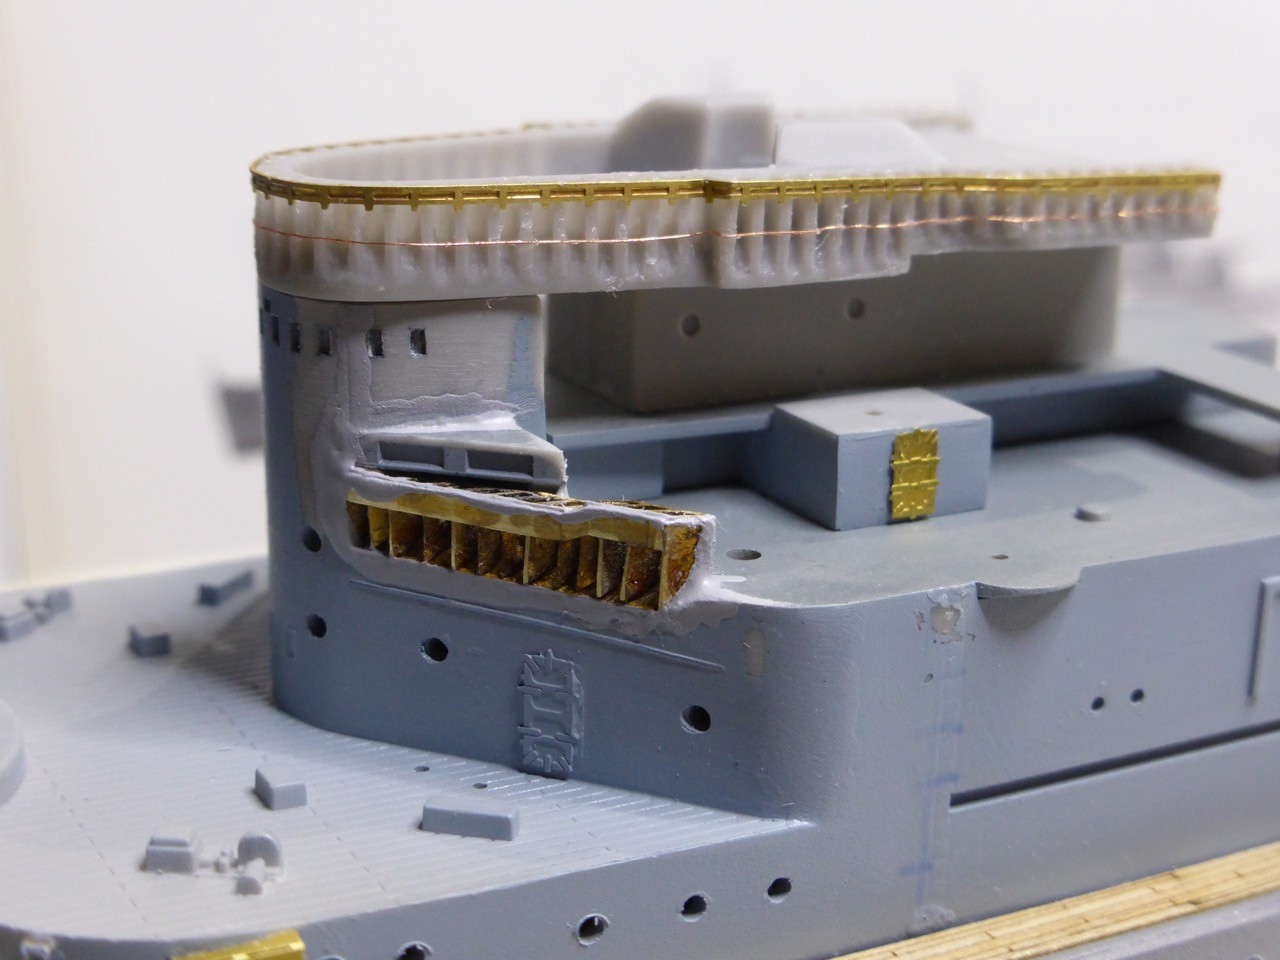
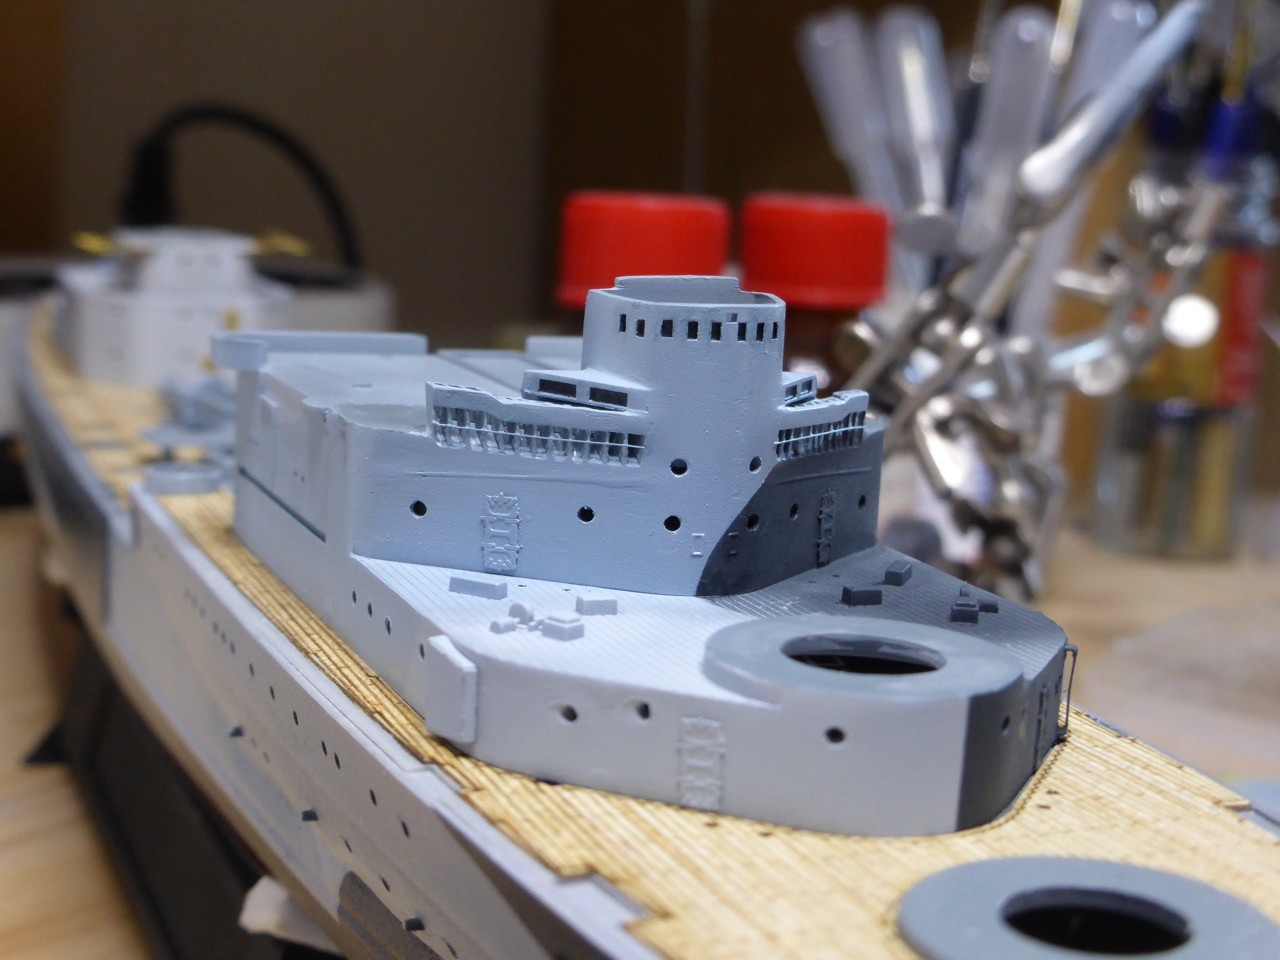
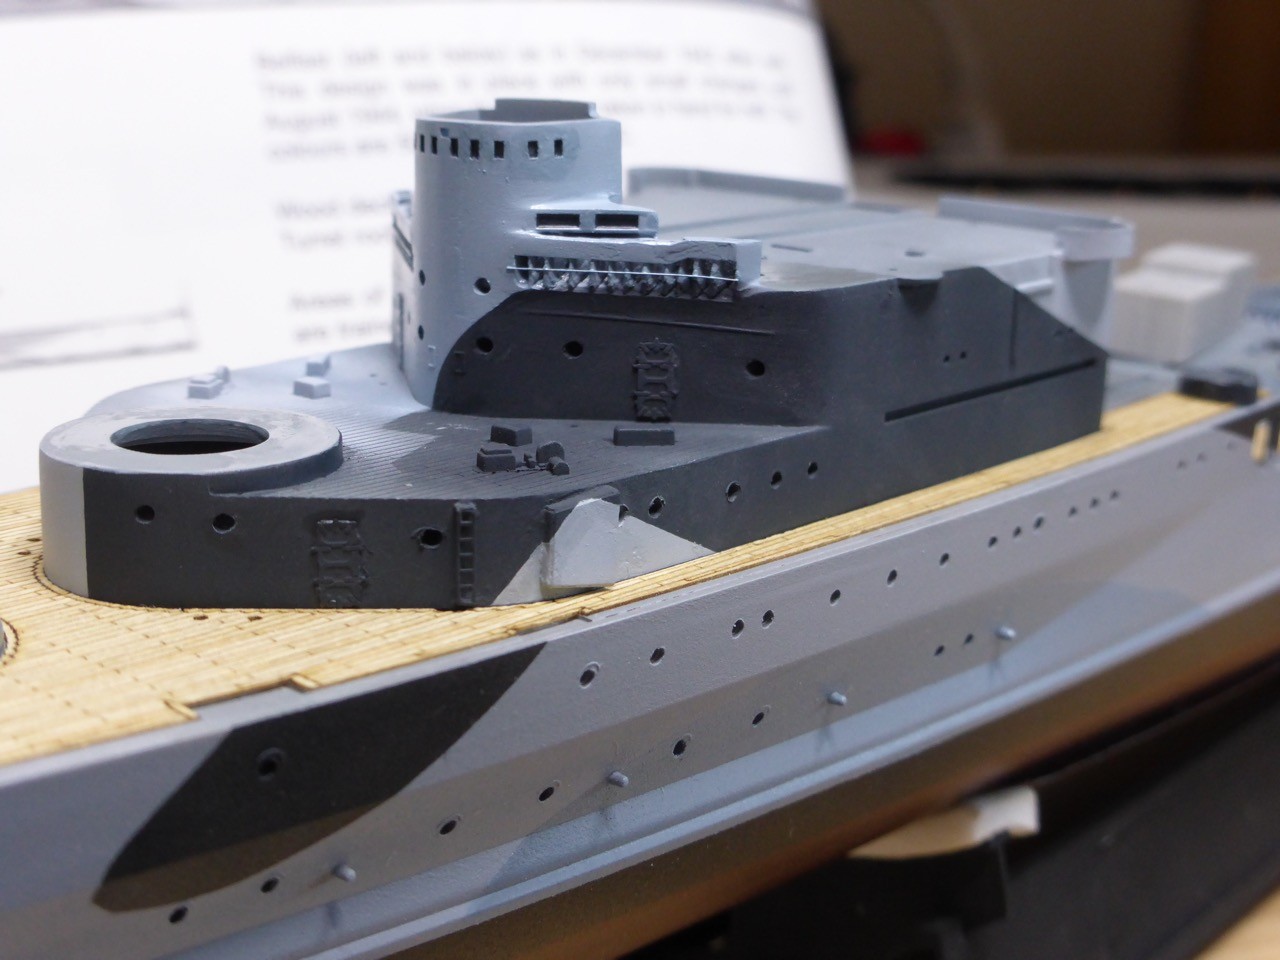
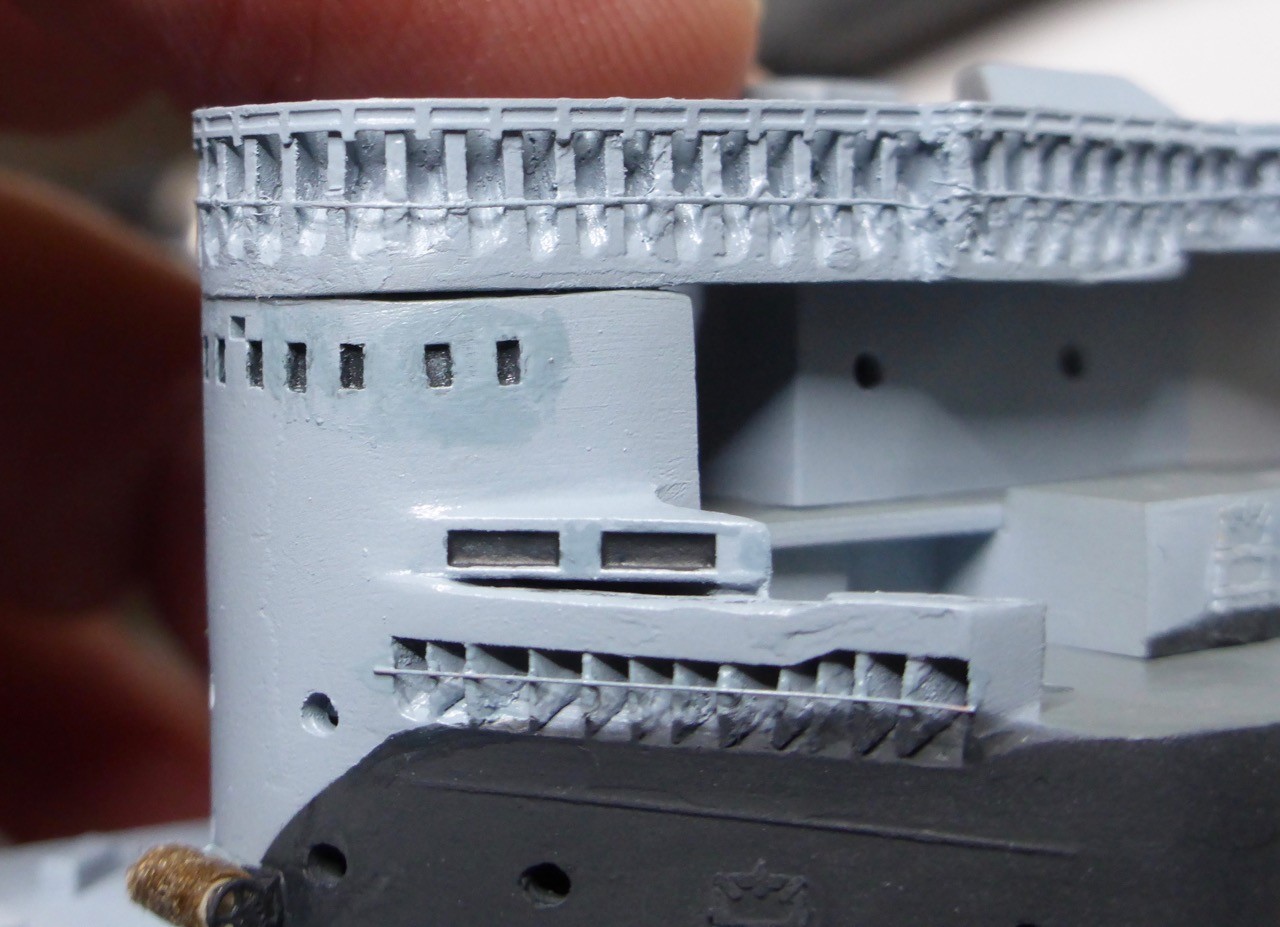
And some progress to the forward superstructure, still a long way to go:

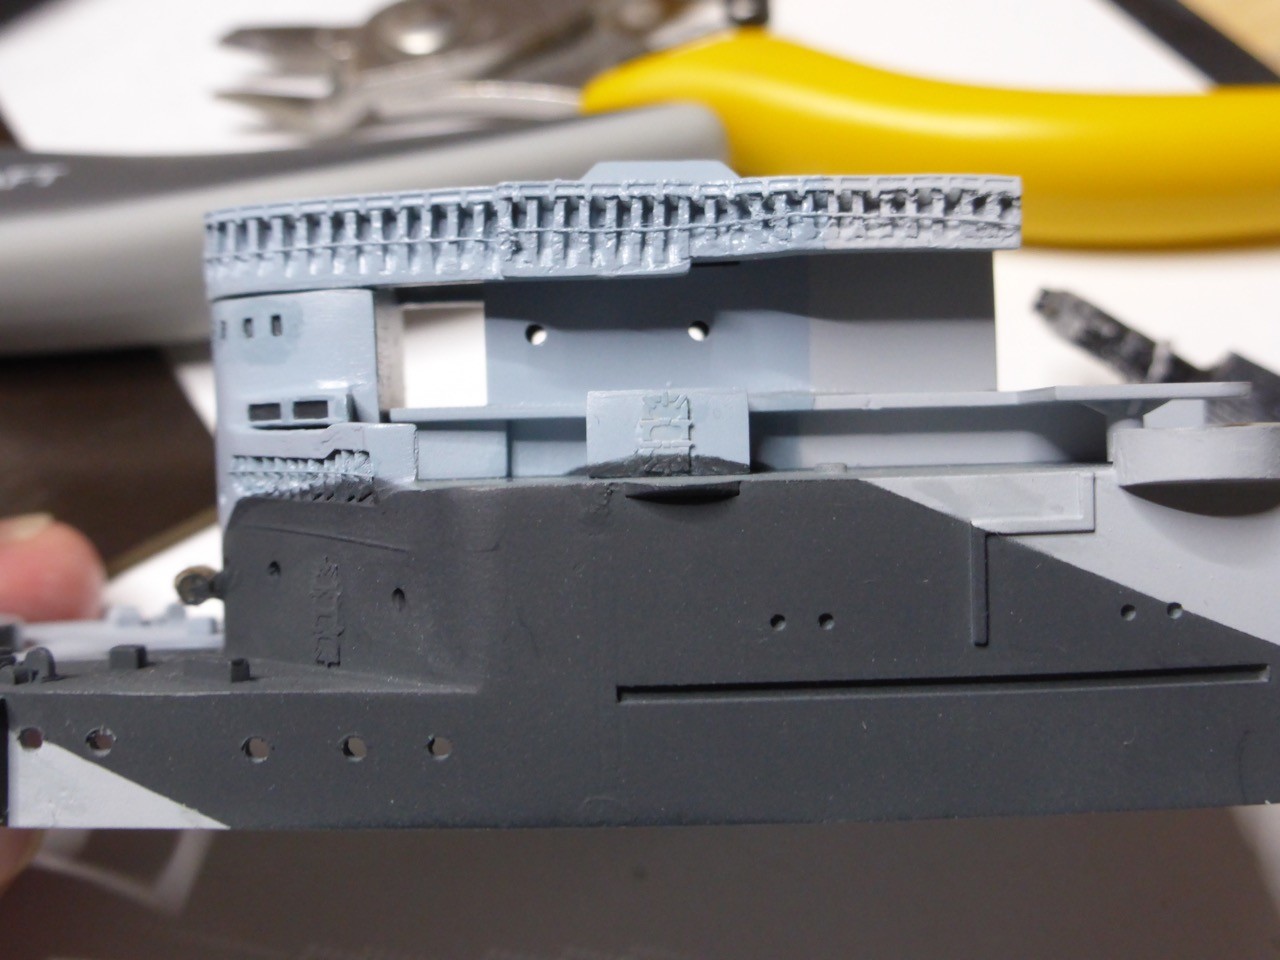
Surfacer, filling and sanding required:
That should keep my busy for a while... gal is to minimize damage to the already finished parts...


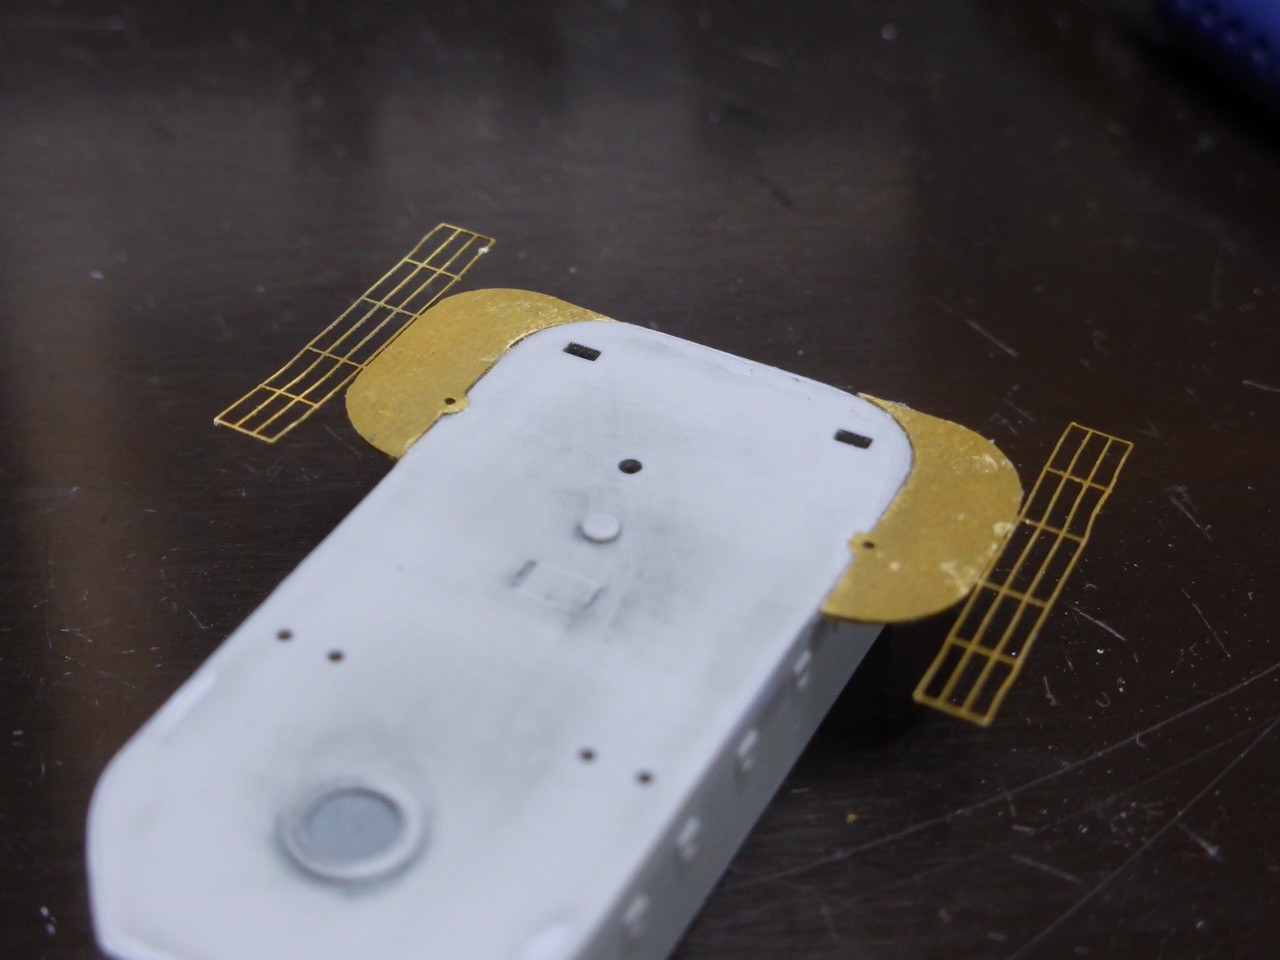
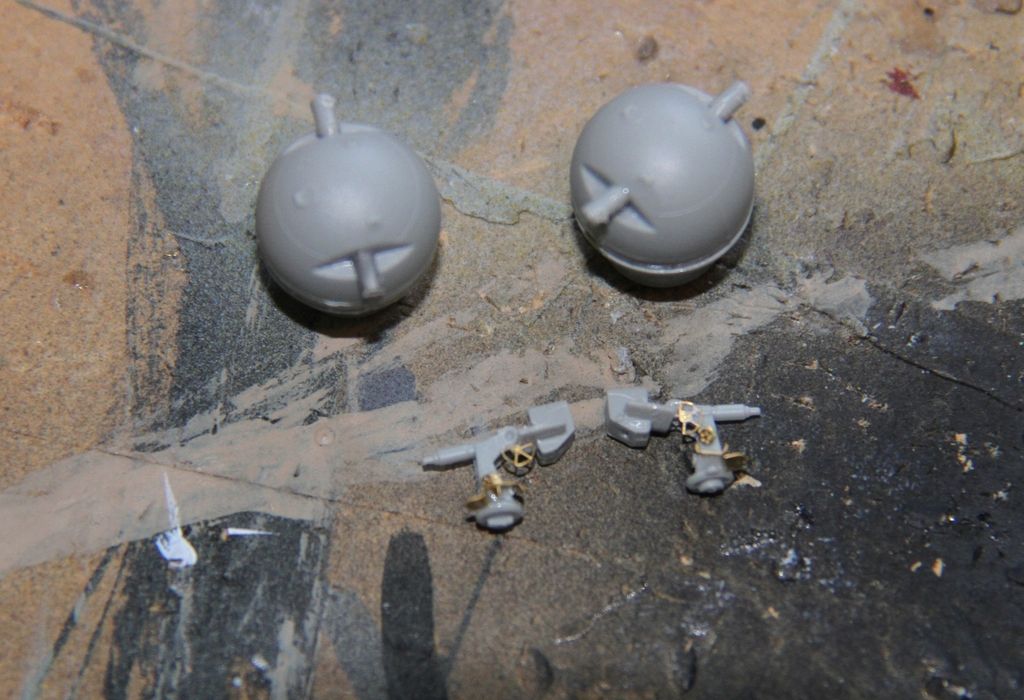
The rest of the day was taken up by a set of paravanes:

More details and explanations on my BELFAST build log, as usual!
Cheers ,
Jan
This one here did work, however:
And some progress to the forward superstructure, still a long way to go:
Surfacer, filling and sanding required:
That should keep my busy for a while...
gal is to minimize damage to the already finished parts...The rest of the day was taken up by a set of paravanes:
More details and explanations on my BELFAST build log, as usual!
Cheers
,Jan
RedDuster
Joined: March 01, 2010
KitMaker: 7,078 posts
Model Shipwrights: 6,649 posts
Posted: Sunday, October 25, 2015 - 02:28 AM UTC
I will let you into a little secret, I am not a fan of cable reels either. The Dragon parts for the Scharnhorst do make the job a little easier.
Belfast is coming on nicely. Hoping to pick up some aftermarket for mine at Telford.
Looking forward to seeing more progress.
Cheers.
Si
Belfast is coming on nicely. Hoping to pick up some aftermarket for mine at Telford.
Looking forward to seeing more progress.
Cheers.
Si
RedDuster
Joined: March 01, 2010
KitMaker: 7,078 posts
Model Shipwrights: 6,649 posts
Posted: Sunday, October 25, 2015 - 02:57 AM UTC
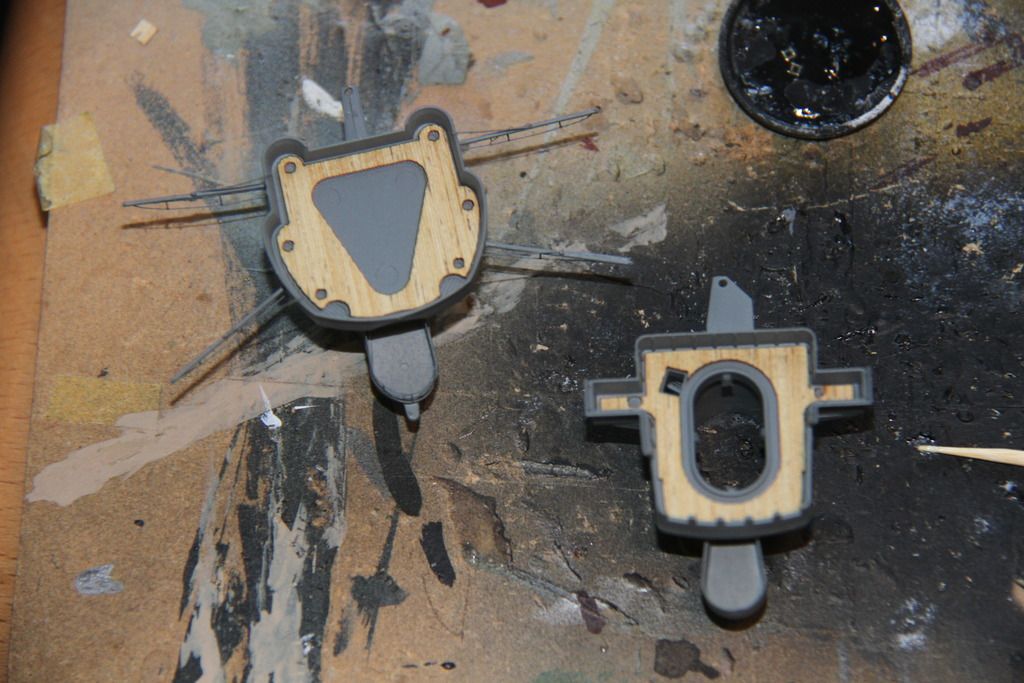
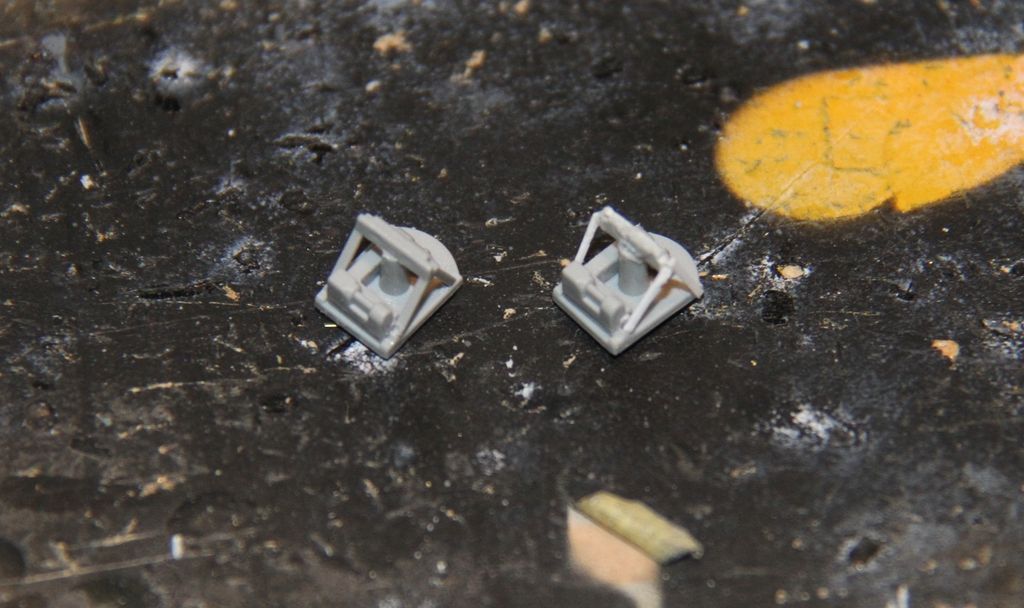
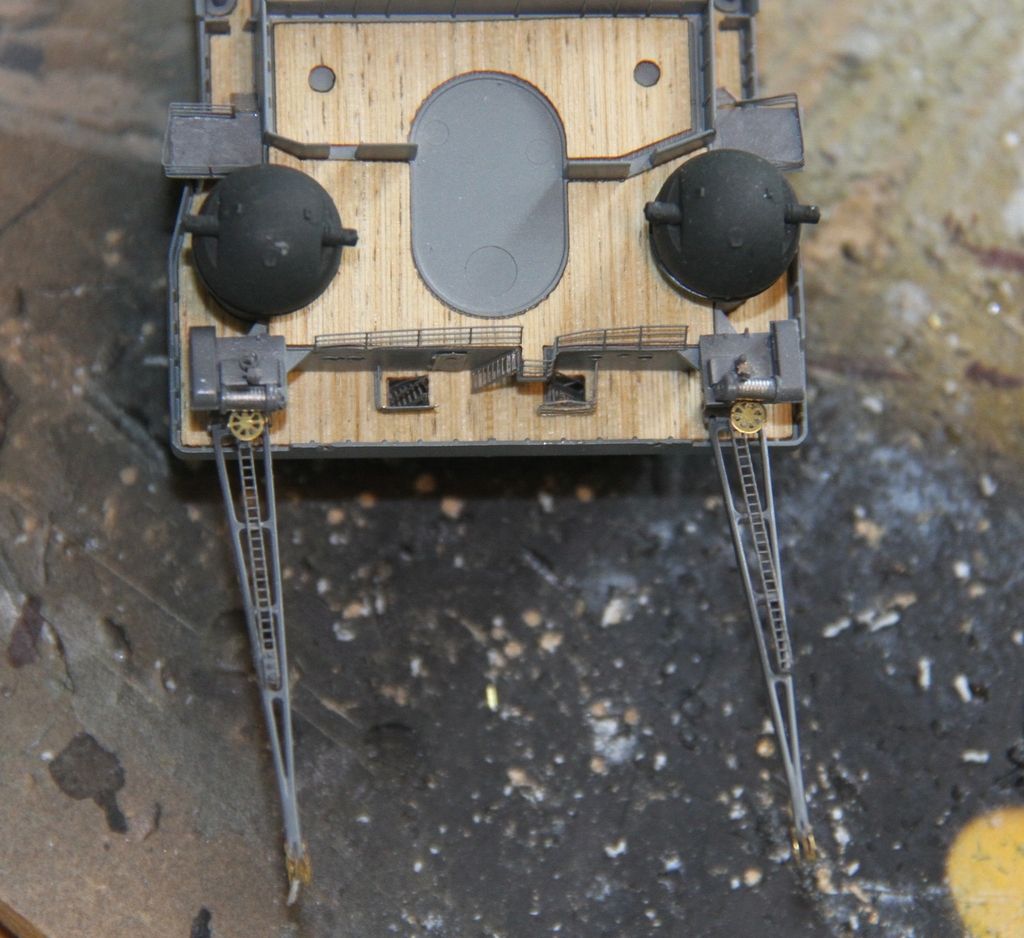
The cable reels and their frames in place on the hanger.
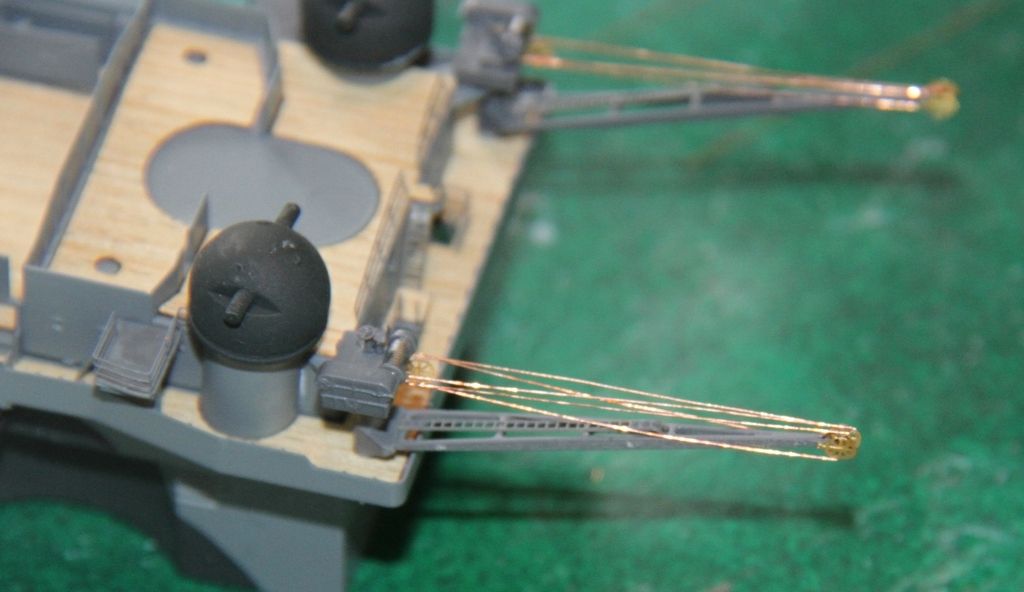
The etched blocks on the boat cranes in place.
And rigged.
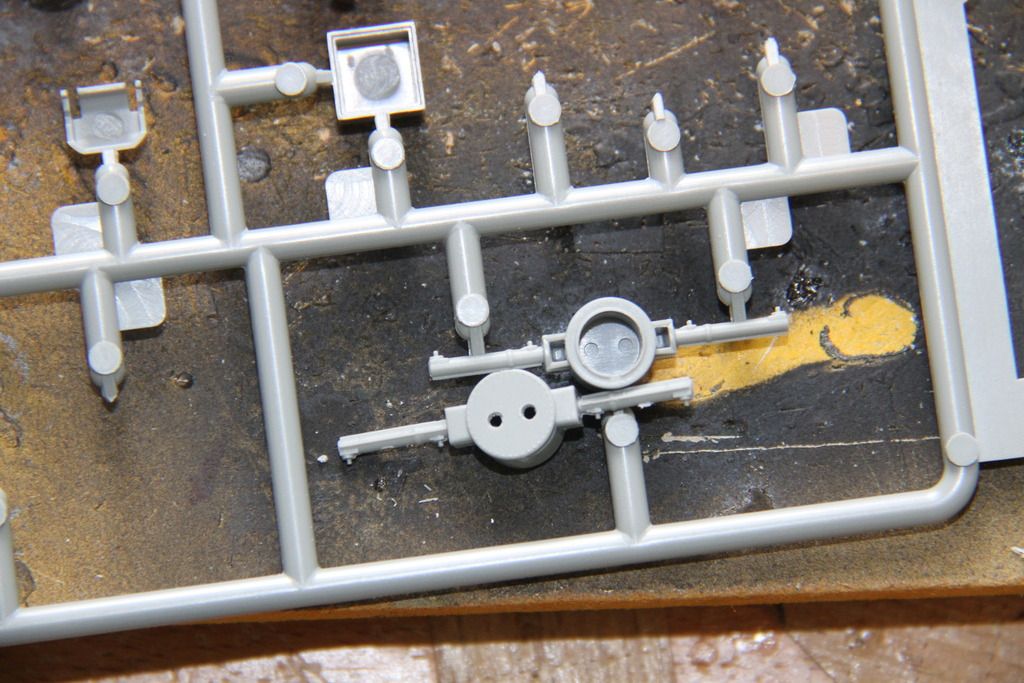
More cable reels, even smaller this time. (5p) for scale. Two end pieces are shown folded, tow straight off the fret. No mention of the fold in the instructions.
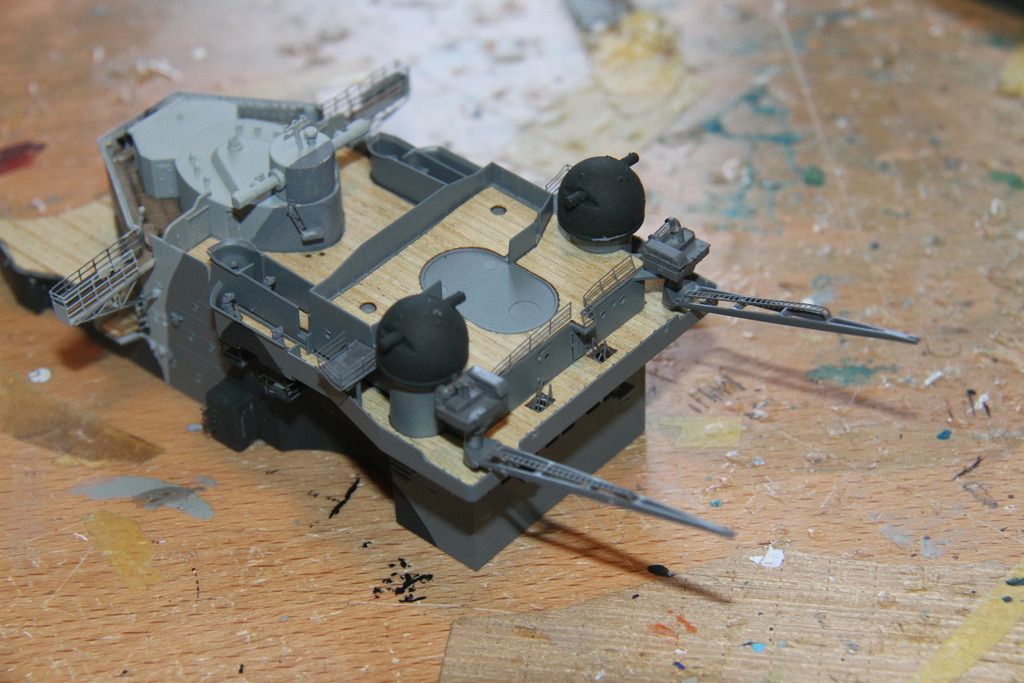
The reels in place, also for some reason the splinter shield for the port 37mm mount is moulded as a separate component, whilst the starboard shield is moulded as part of the deck.
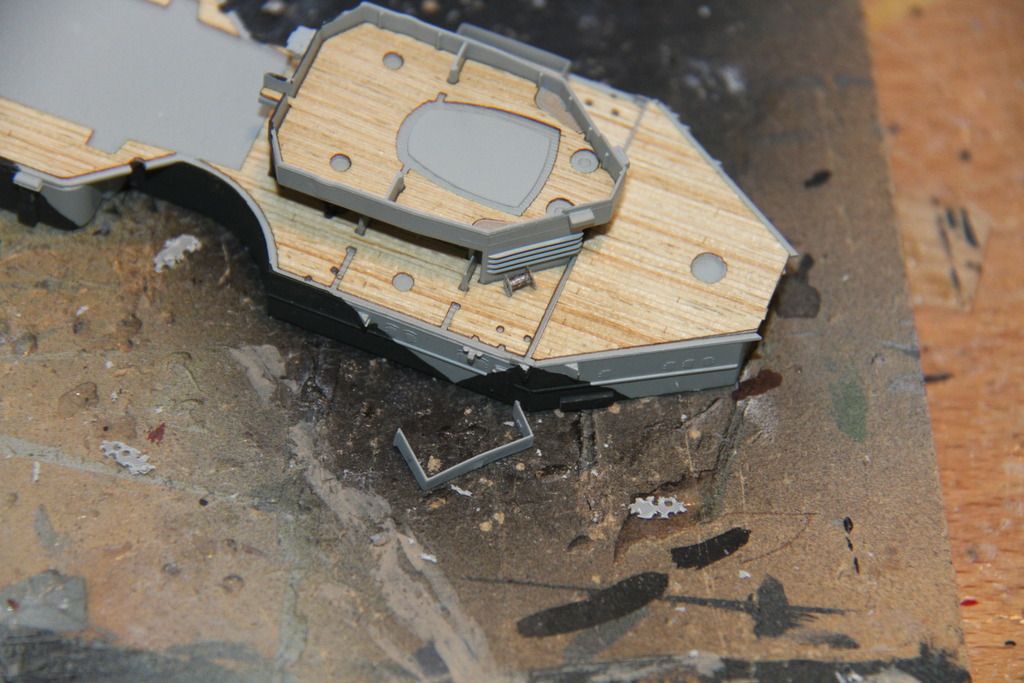
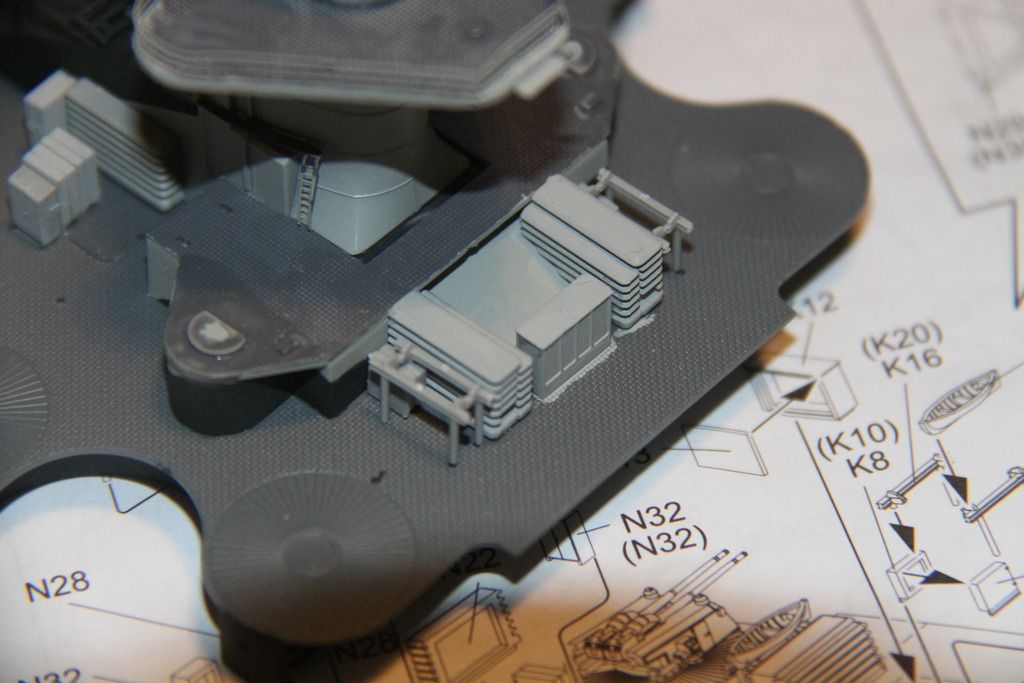
Ammo boxes, sights and a few other bits and pieces on place on the after superstructure.
Apologies, omitted to take the final shot with the hanger, along with its' walkways glued down, along with the after tower, will post that tomorrow.
Cheers.
Si

The etched blocks on the boat cranes in place.

And rigged.

More cable reels, even smaller this time. (5p) for scale. Two end pieces are shown folded, tow straight off the fret. No mention of the fold in the instructions.

The reels in place, also for some reason the splinter shield for the port 37mm mount is moulded as a separate component, whilst the starboard shield is moulded as part of the deck.

Ammo boxes, sights and a few other bits and pieces on place on the after superstructure.

Apologies, omitted to take the final shot with the hanger, along with its' walkways glued down, along with the after tower, will post that tomorrow.
Cheers.
Si
RedDuster
Joined: March 01, 2010
KitMaker: 7,078 posts
Model Shipwrights: 6,649 posts
Posted: Sunday, October 25, 2015 - 03:53 PM UTC
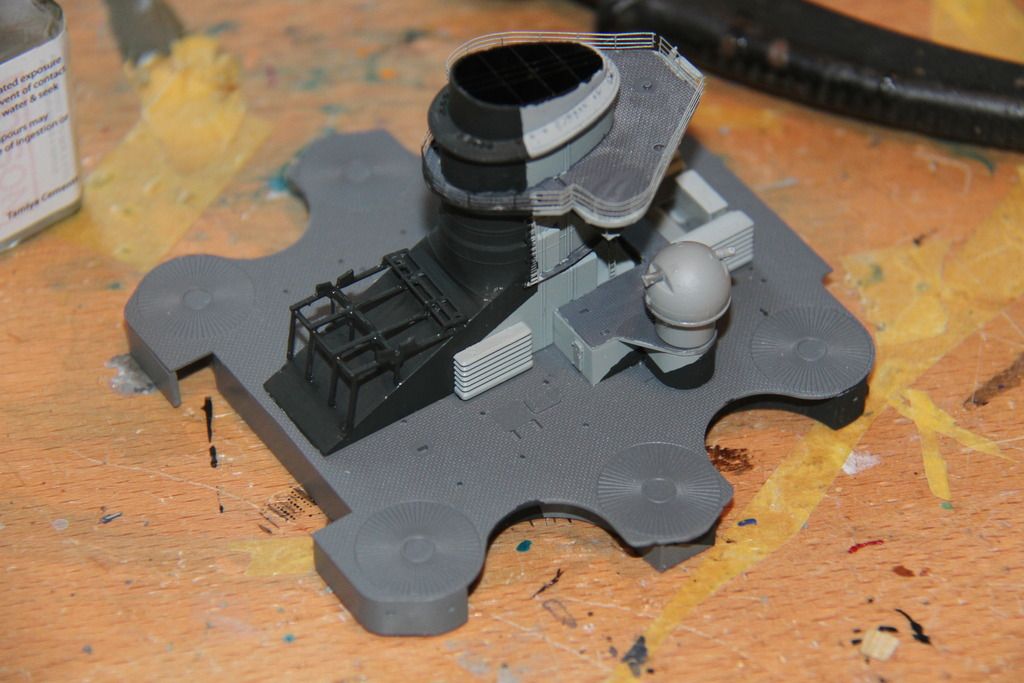
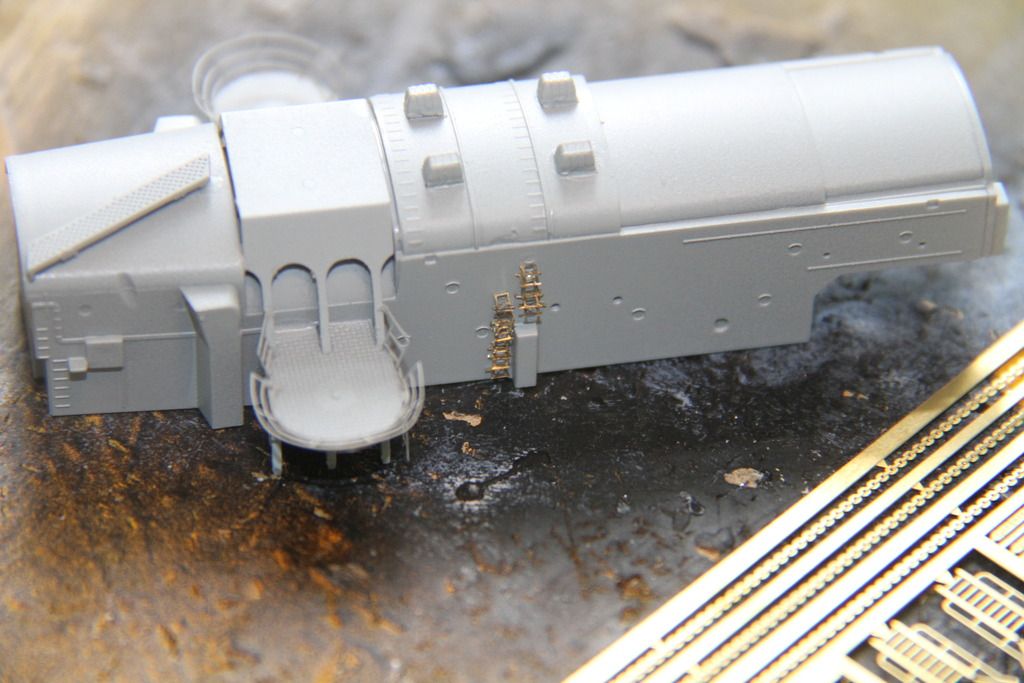
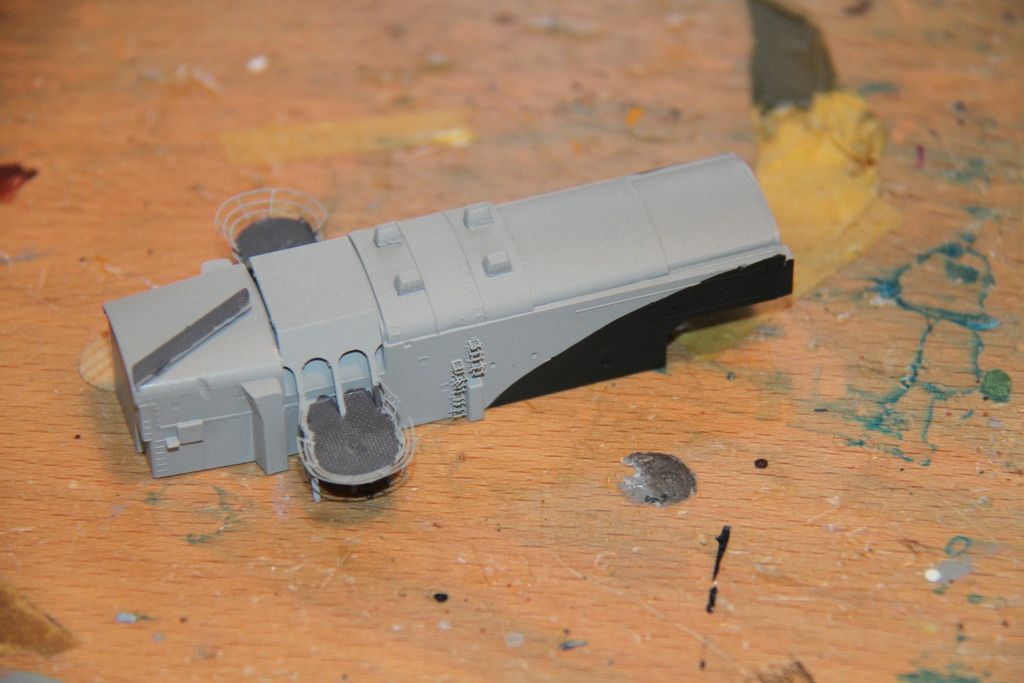
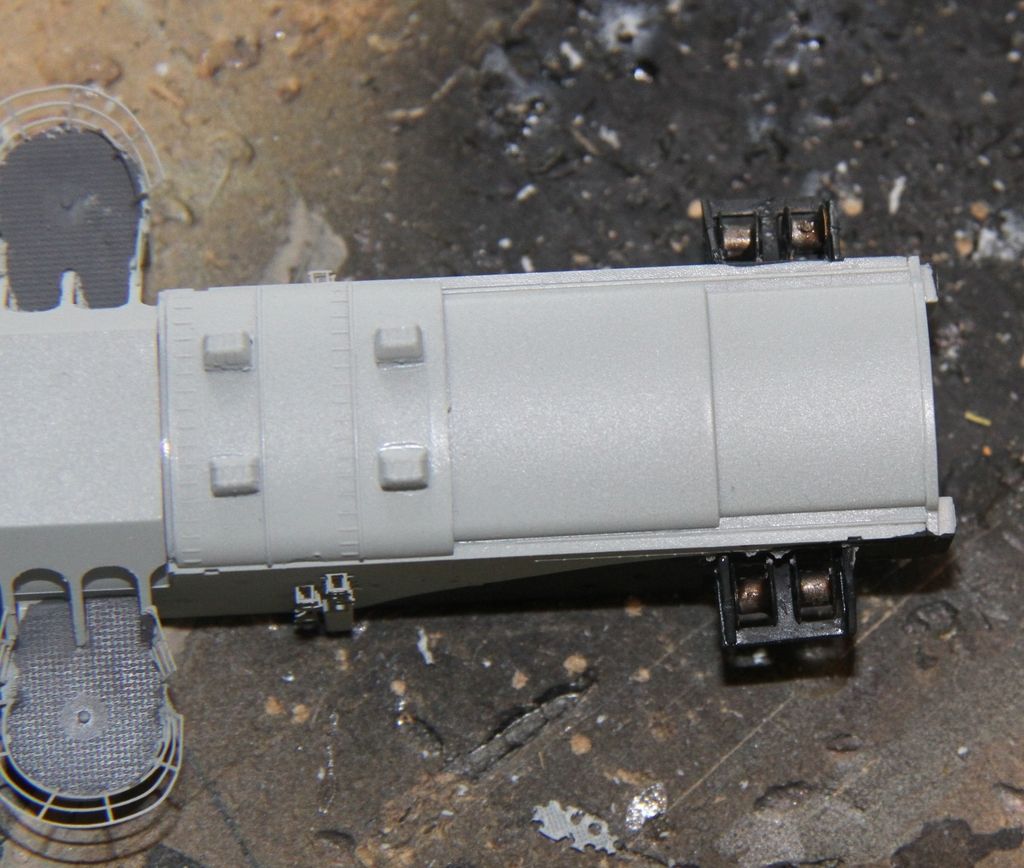
The missing photo from yesterday's update.
The after superstructure with the hanger mounted.
more soon.
Si

The after superstructure with the hanger mounted.
more soon.
Si
RussellE
#306
Joined: June 27, 2010
KitMaker: 3,959 posts
Model Shipwrights: 2,777 posts
Posted: Monday, October 26, 2015 - 02:28 AM UTC
Looking good, Si
JJ1973
#345
Joined: August 22, 2011
KitMaker: 1,835 posts
Model Shipwrights: 1,832 posts
Posted: Monday, October 26, 2015 - 10:26 AM UTC
Fine work, you're getting there pretty fast!!
Definitiv looks like a Scharnhorst aft superstructure
Cheers,
Jan
Definitiv looks like a Scharnhorst aft superstructure
Cheers,
Jan
RedDuster
Joined: March 01, 2010
KitMaker: 7,078 posts
Model Shipwrights: 6,649 posts
Posted: Monday, October 26, 2015 - 12:23 PM UTC
Thanks Russ and Jan,
This is going together rather quickly and easily for a beast of this size and complexity. I have almost all the major structural stuff done except the mainmast.
Now it is on to the detail stuff, which can take a longer. I have tackled Dragon light AA before, and it is time consuming, but worth the effort, quite a few more cable reels to go as well.
Cheers for the support
Si
RussellE
#306
Joined: June 27, 2010
KitMaker: 3,959 posts
Model Shipwrights: 2,777 posts
Posted: Monday, October 26, 2015 - 01:52 PM UTC
certainly is worth the effort, Si, and turning out another fine addition to the Heathwood Fleet
 |

WEB HOSTING BY


Copyright ©2021 Model Shipwrights and Kitmaker Network, a subsidiary of Silver Star Enterprises
All Rights Reserved. Please read our Conditions of Use and Privacy Policy.
All Rights Reserved. Please read our Conditions of Use and Privacy Policy.