General Ship Modeling
Discuss modeling techniques, experiences, and ship modeling in general.
Build blog for Heller's HMS Victory
timmyp
Visit this Community
Virginia, United States
Joined: May 18, 2008
KitMaker: 496 posts
Model Shipwrights: 404 posts
Posted: Thursday, December 31, 2015 - 02:15 AM UTC
Well, until I figure something else out, or somebody can clue me in, I guess I won't be able to post photos directly in this blog, there'll be links to the photos over on photobucket.

SO today (and last night) I finished painting part 35 (18 of them - they're only upright posts) that go around the opening on the top deck - no photo yet, but I think they look good. I painted them in a 2-step process: the first step was just to paint the rounded base, then after assembly, finish painting the rest of the post. I could have painted them on the sprue, but the flashing really needed to be trimmed off.

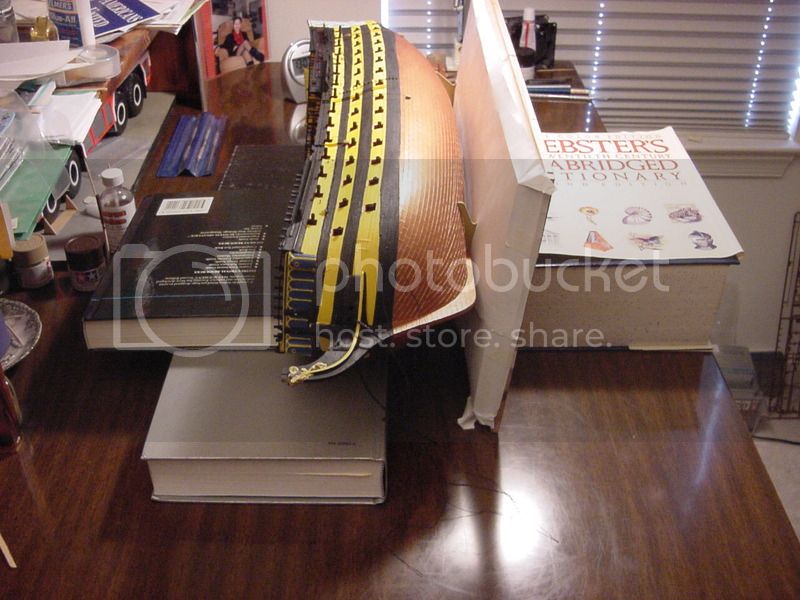
I also go all the chainplates attached, and today, I attached the chainplate support rods. Putting those support rods in was tricky, as I had to look at the underside of the chainplate to see where they were supposed to go. Trying to find the corresponding place on the hull took some doing - in the end, I put the support in place (without glue), then eye-balled where the support would attach to the hull. Initially I was using a mirror to look at the underside of the chainplates, but that wasn't too satisfactory. So when I finally got the foremast chainplate supports, I set the boat on its side, using some big books to help hold it in place


What was strange, was the middle support of the mainmast chainplate, doesn't line-up with hull - it lines-up with a cannon porthole!! Not sure what to make of that.


Now here again, Heller's very finite wisdom is on display. Of all the support rods, the mizzen & mainmasts are molded in black plastic; for the foremast, they're molded in dark brown! Why? Why couldn't they mold them in black, like the others? I know the instructions say to paint the rods to match the background hull color, but come on, would it have killed you to mold these parts in black?


And so it goes....
TRM5150
Visit this Community
Massachusetts, United States
Joined: January 03, 2010
KitMaker: 2,159 posts
Model Shipwrights: 1,400 posts
Posted: Friday, January 01, 2016 - 06:23 AM UTC
Looking really good the Tim! Nice work on those chainplates!
timmyp
Visit this Community
Virginia, United States
Joined: May 18, 2008
KitMaker: 496 posts
Model Shipwrights: 404 posts
Posted: Saturday, January 16, 2016 - 11:54 PM UTC
So yea!! I'm about 98% finished with step 9; just painting (ha ha!!) the stern galleries and sticking them on, will complete step 9. Today's effort was to finish installing the last of the cannons. Here's a tip on installing one of the cannons, the one that goes inside one of the cabins: you can just not install that cannon, or, when building the cannon carriages, don't glue the barrels on a couple of the carriages, or glue the carriage in place before installing the cabin walls. As you can see in the below picture, the space is pretty tight:


Another little construction hint: it's not listed in the sequence of assembly, but you're supposed to add a couple of ropes to parts 142 and 143 before you install them on the ship (these are 2 small deadeye holders for the mizzenmast). Fortunately, the hole where the thread goes through was still accessible after gluing the parts in place. The only question was, does the thread start on the top of the part and go down, or is it supposed to start on the underside, and go up? No matter, really, if the thread goes up, as it is close to the edge, and you probably won't be able to tell at first glance.

Now, a few words about the stern gallery: Back a few steps in the instructions, it has you putting the rudder together, and installing it in on the ship. It is important to note that the instructions say to REST the rudder in place; it doesn't say to GLUE it. If you glue it (like I did), then a small problem of the stern gallery not fitting to the ship comes up:


I don't know if you can see the rudder post through the hole in the bottom of the stern gallery, but the idea is, glue the stern gallery in place, then re-insert the rudder up through the hole in the stern gallery, THEN cement the rudder in place. As it is, I'm going to have to saw away some of the material on the stern gallery to get it to fit around the rudder post; I may or may not try to fix the damage afterwards.

With regard to painting the stern gallery, here's a couple of pix of what I've done so far (the painting got started long ago, when I first opened the box). I still have a lot to go before it's finished. One of the hardest parts of this paint job is trying to get the yellow ballustrades (right word?) yellow, without getting the yellow paint on the black between them. If anybody has some handy-dandy ideas, I'm all ears!!

Here's the inside paint job:


Here's some outside paint job pictures:


A close-up:


A bigger view:


So given the painting task at hand, I have no idea when my next post will be. But in the meanwhile, I'll check back on occasion and look for comments and questions.

Cheers!!
GrantGoodale
Visit this Community
Ontario, Canada
Joined: April 26, 2015
KitMaker: 99 posts
Model Shipwrights: 99 posts
Posted: Sunday, January 17, 2016 - 01:25 AM UTC
Hi Tim -

Great work so far. The only thing that I could suggest is painting the balustrades all black and then start dry brushing with the yellow. Tedious work.

FWIW
LCB248
Visit this Community
United States
Joined: November 24, 2015
KitMaker: 54 posts
Model Shipwrights: 18 posts
Posted: Sunday, January 17, 2016 - 07:39 AM UTC
I wonder, could you paint the black, then use MicroMask to cover the spaces in between the balustrades while painting the yellow? When the yellow dries peal up the MicroMask.

MicroMask is used by airplane modelers to cover smooth clear plastic on plane windshields, so I'm not sure if it will work well on a flat black paint surface. Test, test, test!!!
jimlolok
Visit this Community
Warszawa, Poland
Joined: February 20, 2007
KitMaker: 53 posts
Model Shipwrights: 15 posts
Posted: Monday, January 18, 2016 - 02:02 AM UTC
Have this beauty all painted and bought matching brass cannons to overcome the tedium of gluing plastic barrels.Concerning painting the stern gallery my work around was painting everything yellow then using a refillable graphic artists pen set to VERY delicately fill in the black.This is also good for the gold filigree.
Put everything back in the box for a week then spray a VERY light and quick matt coat to fix it. Graphic ink is permanent but better safe than sorry later.
It's a big kit and I did consider making it as a half model for wall mounting.
My good lady panicked when seeing the size. I had just finished the Revell Constitution but I managed to gift it the US Embassy here in Warsaw.
Maybe Victory can go to the British embassy.
GrantGoodale
Visit this Community
Ontario, Canada
Joined: April 26, 2015
KitMaker: 99 posts
Model Shipwrights: 99 posts
Posted: Monday, January 18, 2016 - 04:53 AM UTC
Larry -

Micro Mask might be a little too thick but you could try thinning it with ?

JJ1973
#345
Visit this Community
Niedersachsen, Germany
Joined: August 22, 2011
KitMaker: 1,835 posts
Model Shipwrights: 1,832 posts
Posted: Monday, January 18, 2016 - 10:28 AM UTC
That'S really some impressive work going on on your Victory!!

As for the paint job on the stern - well, let'S say it looks pretty complicated to say the least...but that doesn't really help...

I would not think that Micro Mask can be a big help - I played around with it some but in the end could not get much use out of it. You simply mirror your problem - now you need to be absolutely exact with your Micr Mask Paint job, because every little mistake will show once you remove it.
The Idea with the graphic ink pen sounds interesting though!

Cheers,
Jan
timmyp
Visit this Community
Virginia, United States
Joined: May 18, 2008
KitMaker: 496 posts
Model Shipwrights: 404 posts
Posted: Thursday, March 10, 2016 - 06:04 AM UTC
Hi all,

Sorry I haven't updated this blog, but not really much to report. Been busy with work, tax forms, and a woodworking project, so I haven't bothered to do much work on Victory.

However, thanks to everyone for giving their thoughts on how to paint the stern gallery (there are also port & starboard galleries that need similar painting). Yes, I thought about using the Micro Mask, but I don't think my local hobby shop carries it; besides, it would still be a case of careful application of the product. I figure if I have to be that careful, I might as well go ahead and just use the paint instead.

I've seen the idea of using a very fine graphic arts ink pen to fill-in the black between the ballustrades...I've got a 0000 Rapidograph, but it's so old and hasn't been used, the inside parts have "frozen" solid. So I think that idea is out, even though it would probably work well.

Previously, I used a #7 red sable to paint everything, but recently, I purchased a couple of 3-aught brushes (I was looking for 4-0, but they didn't have any). So I've been doing some painting with these finer brushes, and I'm pretty pleased with the results. The plan of attack is do the black background painting on the ballustrades, then do some dry brushing with the yellow, and try to cover up any mistakes. One thing I'm finding is, after a painting session, the ballustrades don't look equal widths when painted yellow (when looking at the whole piece from a distance. Up close, everything looks fine). So I don't know if it's bad painting, or the ballustrades weren't molded very well in the first place.

I'm not looking forward to painting the decorations at the top of the gallery - I think if things get sloppy, they're going to stay sloppy. Likewise, the painting of the filigree (?) and the figures will be a pain in the patoot. One thing I've been doing, is thinning (well, watering) down the yellow paint (Testor's acrylic Insignia yellow). That stuff is thick,especially getting down to the bottom of the jar. So getting the right viscosity (oooo! big word), and getting it consistently, is a bit tricky. Of course, the problem is, with it too thin, it runs all over the place, and too thick, it "blooshes" out when you apply the brush to the part.

But I shall endeavor to persevere!

I've got some time off coming up, so I might be able to do some painting twice a day,and maybe get this paint job knocked out.

Again, thanks to all for reading this blog & providing their thoughts.
JJ1973
#345
Visit this Community
Niedersachsen, Germany
Joined: August 22, 2011
KitMaker: 1,835 posts
Model Shipwrights: 1,832 posts
Posted: Sunday, March 13, 2016 - 12:04 AM UTC
As for your delicate paintwork - I found so called 'Easycutting' plates from a company called Infini models. They allow exact cutting of even smallest shapes from masking tape, my first trials were very successful. Maybe that could be something to help you.

Cheers,
Jan
timmyp
Visit this Community
Virginia, United States
Joined: May 18, 2008
KitMaker: 496 posts
Model Shipwrights: 404 posts
Posted: Friday, March 18, 2016 - 07:01 AM UTC
Hi Jan,

Thanks for the tip. At this stage of the game, though, I'm going forward with just painting everything the best I can, and if there's some slop at the end of the process, so be it. I've taken to using a magnifying glass to help see the details better; it's a bit tricky, trying to get the part lined up, the magnifier lined up, and my eyes lined up, all at the same time!

At this point, I'm probably going to paint the stuff that should be black, black, so that then I will just have to fix everything up with yellow. So there goes a couple more months!

This afternoon, I dry-fitted one of the side galleries to the stern gallery - looks impressive!

Cheers,

Tim
timmyp
Visit this Community
Virginia, United States
Joined: May 18, 2008
KitMaker: 496 posts
Model Shipwrights: 404 posts
Posted: Saturday, March 19, 2016 - 03:48 AM UTC
Jan,

Since you seem to be doing well with that "Easycut" product, maybe I should mail to you the stern & side galleries and let you paint them!!
JJ1973
#345
Visit this Community
Niedersachsen, Germany
Joined: August 22, 2011
KitMaker: 1,835 posts
Model Shipwrights: 1,832 posts
Posted: Sunday, March 20, 2016 - 12:00 AM UTC
Hmmm, generally, but -wait! I completely forgot, I have to leave urgently for some secret business
But nice try, certainly!!

Cheers and good luck, I really don't envy you. Free hand painting is something I try to avoid as good as I can, at least as long as it needs to be straight. Curved camouflage is sometimes best done by hand...


Jan
timmyp
Visit this Community
Virginia, United States
Joined: May 18, 2008
KitMaker: 496 posts
Model Shipwrights: 404 posts
Posted: Sunday, March 20, 2016 - 12:30 PM UTC
Jan,

Enjoy your urgent, secret business!!

You're right, hand-painting can be very difficult, especially with such intricate work being done on the galleries. But since I'm a glutton for punishment, I look at the project as a very big challenge.

Today, I did some more painting, but I was getting very frustrated with the paint. The Tamiya acrylic paint I'm using, especially the flat black, seems to dry out and clump in my brush. What then happens, the paint doesn't apply very evenly, and when I try to go back to overcoat it, my brush just picks up the paint that was just applied. It's enough to make you want to quit!

I'm using a technique on the side galleries that I was using on the stern gallery, regarding the black color that goes between the ballustrades. I paint a couple of the "in between" slots with the flat black, not worrying about neatness. After putting the paint on, I take a wet paper towel, and wipe off the excess paint from the ballustrades. Even though this leaves a bit of black paint in the details of the ballustrades, it cuts down on the amount of time I spend trying do this painting. I found that optimally, it's best to wipe off the excess paint after painting 4 or 5 of the "in between" spaces, as anything more than that, the paint starts to dry, and it's not so easy to remove.

I suppose, during all this painting, the smart money would bet to start assembling the masts & yards, and everything else that needs assembly. But like I said, after a frustrating round of painting, trying to assemble other parts may not be the smartest move. Onwards & upwards!
JJ1973
#345
Visit this Community
Niedersachsen, Germany
Joined: August 22, 2011
KitMaker: 1,835 posts
Model Shipwrights: 1,832 posts
Posted: Sunday, March 20, 2016 - 10:55 PM UTC
Hi Tim,

just risking a quick look from my secret location - I am not here, actually

I used to have trouble brush-painting Tamiya acrylics as well, pretty much with the same results you are describing. My way of doing it now - admittedly for small areas and touch ups only - is that I created a something like a kid's paintbox: I put a certain amount of the required different colors in small cups and let them dry. Than I use clean alcohol to wet my brush and use the paints like kid's watercolors. This way you keep your brush as wet or dump as necessary and you can get the pain as thick or diluted as needed every time you take on some new color. Needs a little trial and error, but works really fine for me!

Cheers
Jan

And disappearing
timmyp
Visit this Community
Virginia, United States
Joined: May 18, 2008
KitMaker: 496 posts
Model Shipwrights: 404 posts
Posted: Sunday, April 03, 2016 - 12:27 PM UTC
Jan,

Thanks for the tip. For now, though, if the brush gets too gunked up with dried paint, I give it a quick wash and carry on.

Today, I bought a new magnifying lamp. Seems to be working out quite well. The problem I had with using my little electronics "third hand" magnifier, was the lens was in a fixed position, so I was always moving the part around, trying to get/keep it in focus. Now, with this lamp, I can move the magnifying head around, as well as move the part around, and still keep things in focus.

Unfortunately, while I was painting one of the galleries today, I managed to knock the jar of yellow paint over, and spilled about half of it on the desk. I managed to get a large portion of the spill back in the jar (using an oversized paint brush), and needless to say, after cleaning up, I quit painting for the day.

My work schedule is changing soon, so I should be able to do about an hour's worth of painting a day, as opposed to the current hour per week.

Jylppy71
Visit this Community
Kuopio, Finland
Joined: April 24, 2016
KitMaker: 23 posts
Model Shipwrights: 23 posts
Posted: Sunday, April 24, 2016 - 02:14 AM UTC

Quoted Text

Well hi all,
I've been talking about starting a build blog for this kit for some time, so I figured it was about time to get it started. And why not? I turned fifty-five today.

This blog is (hopefully) going to document the construction of the Heller's kit of HMS Victory, and I hope I can give enlightenment to any who is building, or is going to build, this kit. As a lot of people noted on my review of this kit, the instructions leave a fair amount to be desired. So if I can let people know of some of the pitfalls and workarounds I've found or used, then a big part of the purpose of this blog has been fulfilled.

The beginning

I've been working on my model since 2010 (the kit was bought in '07). A lot of that time has been spent on painting the hull, cannon carronades, and deck pieces. A lot of the other time was spent clearing my desk, and doing my income taxes!

I've seen a lot of forum posts about how this model kit somehow intimidates people. Myself, I like a big challenge! But if you've never built a sailing ship model before, Heller's Victory is not the place to start. Not only are there a lot of parts (more on that later), but the assembly sequence is a bit bizarre, and you'll find yourself scratching your head quite a bit when it comes to figuring out the rigging scheme. However, there is a belaying pin-to-rope diagram, so taking a few minutes to find where the end of the rope goes to on that diagram, will be helpful. Of course, the amount of painting that is done on this ship is astronomical - not only does the outside of the hull have to be painted, but the inside of the hull gets painted, as well as both sides of all the deck pieces. This is where you'll spend scads of time - trying to figure out, on the hull, the point where a black stripe ends and a yellow stripe begins. I used the box art and the instructions, and what might be some molded-in "lines" to determine what's black and what's yellow (or ochre, if you prefer). Plus, the inside of the hull, on the upper parts, there is the moldings that are to be painted black, against a yellow background. This is where you can get a bit nutty - I found myself constantly re-touching the black, because of some over-run of the yellow, then touching up the yellow, because of some over-run of the black. And the worst thing is, I'll be painting on this thing until after I think I'm finished with it.

About the parts quantity: It looks like Heller, in their finite wisdom, rather than try to get "x' number of similar parts molded on the same sprue, they just throw in two or three sprues with that same part. For instance, the ladders that lead from the main deck (or at least, what the U.S. Navy would nowadays call the main deck) down below, were all molded in black. However, rather than try to get all the ladders on the same sprue, I found that there is one ladder on 3 sprues. And I'm not sure I'll use all the parts on the rest of the sprues. So even if the box says there's some 1000+ parts, take it with a grain of salt. Besides, each cannon assembly has 6 parts: 6 times 100 (cannons) equals 600 parts. Boom - you just slashed the parts count by more than half.

And now, about the lacks of parts quantity: it really rubs me the wrong way that Heller didn't include any black thread for the standing rigging, let alone any kind of anchor cable. Of the rigging thread they do supply, it's in two diameters, and colored white. In the instructions, they tell you to run the thread through a cup of coffee to get it colored. They don't tell you if that should be black coffee, or cafe au lait, or Folger's or Starbucks. I couldn't see brewing a new cup of coffee each time I needed to color their thread. So I went to a Canadian company (www.castyouranchorhobbies.com) to get some various sizes of black thread for the standing rigging. I went looking for some various sizes of tan colored thread for the running rigging, but the sizes weren't what I was looking for. Then, as I was sitting out on the front porch, it hit me: why not get a brown Sharpie marker, and run the thread against it, to color the thread? So that's what I did. It turns the thread a dark brown, but I'll live with it. Besides, the box art shows some of the running rigging to be dark brown, so I can't be too far off the mark.

So, I know a picture is worth a thousand words, so I'll try to upload photos so that I can then post them into this blog. Unfortunately, I uploaded a bunch of photos earlier this today, but now, I don't see them in the gallery...maybe I was supposed to "process" the photos to get them to actually upload. So now, it's off to read the forum post about uploading photos and stuff.

Currently, I'm working on step 9 of the instructions - I just finished cementing all the cannons onto the deck, so now it's time to finish painting the fixtures (or columns, or stanchions, not sure what to call them), then the finish painting the upper deck (ha ha! "finish painting" ha ha!) and try to get that installed. The instructions say to spread the hull apart to get the upper deck slid into place, but I'm not sure how that's going to work out.

One thing about the paint I'm using: I'm using Tamiya acrylic paints. Usually I paint with enamels, but I wanted to do something different this time. For everyone who might build this ship in the future, use some kind of yellow ochre for the yellow color (I'm using Testor's Insignia yellow, in acrylic). The problem is, when you look at the hull from a distance, because it's flat black/bright flat yellow, it looks like some kind of industrial warning zone. So don't use too bright of a yellow. And the red I'm using, it's glossy red, not flat red. The brightness looks sharp, but the glossiness doesn't really belong on a warship. And of all these paints, it usually takes at least 2 coats to get good coverage, with at least 1 hour dry time between coats. So if you have a preference for type and brand of paint, feel free to go with it. I have found, however, by using acrylic paint, I can go to the craft store and buy a big bottle of gold colored paint for less than 2 dollars, and I use maybe 3 brushfuls of the stuff. I say that, because up on the bow, there is some scroll work that needs to be painted gold, and I can't see ponying up the 5 or 6 dollars at the hobby shop for a jar of gold paint that is a fraction of the size I got at the craft store.

So for the rest of the blog, things might seem a bit out of sequence, as I've put parts together while waiting for other painted parts to dry or something. So that's all for now, and I thank you for taking the time to read this blog.
Cheers,

Timmy P.

Jylppy71
Visit this Community
Kuopio, Finland
Joined: April 24, 2016
KitMaker: 23 posts
Model Shipwrights: 23 posts
Posted: Sunday, April 24, 2016 - 02:30 AM UTC
Hi. I bought Heller's HMS Victory 1:100 ship and instructions that came with model are unclear. (I think copied and scaled too many times..) so especially rigging is almost impossible to build. I can't read dimensions of ropes etc. Heller didin't answer my emails when I asked't propper instructions.

So I asking You, is it possible to get propper copy of rigging from Your instruction by email or somehow?

Thank You
Jyrki Räsänen
jimb
Visit this Community
New York, United States
Joined: August 25, 2006
KitMaker: 2,539 posts
Model Shipwrights: 185 posts
Posted: Sunday, April 24, 2016 - 03:06 AM UTC
Tim,

Your Victory is really shaping up nicely. It is a very intimidating kit. I've been wanting to build a nice sailing ship kit, but I think I'll start with something simpler, like an outrigger canoe!

Jim
slug955
Visit this Community
United Kingdom
Joined: November 10, 2013
KitMaker: 195 posts
Model Shipwrights: 7 posts
Posted: Sunday, April 24, 2016 - 03:40 AM UTC
I have had this kit in my stash for many years. There is a guy who does etch for the kit on about 10 sheets. I don't know where Heller got their ideas from but some are a bit fanciful, they even missed of the hull side entries. The Victory web site used to have a section for modellers building her which was very useful.Internal paintwork was tinged white wash not red. Her restoration keeps throwing up new facts.

http://www.dafinismus.de/index_en.html
http://www.theguardian.com/uk-news/2014/mar/17/conservationists-discovered-colours-admiral-nelson-flgaship

Jylppy71
Visit this Community
Kuopio, Finland
Joined: April 24, 2016
KitMaker: 23 posts
Model Shipwrights: 23 posts
Posted: Sunday, April 24, 2016 - 06:36 PM UTC
And by the way, nice work with your Victory!
timmyp
Visit this Community
Virginia, United States
Joined: May 18, 2008
KitMaker: 496 posts
Model Shipwrights: 404 posts
Posted: Thursday, May 12, 2016 - 05:57 AM UTC
Hi Jyrki,

Congratulations on your purchase of the Victory! It's a big model, and a big investment of time and materials.

I wrote a review of this kit a couple of years ago (and it's posted somewhere here on Modelshipwrights), and I made a note at that time that instructions were very unclear and hard to read. I agree with you, the instructions look like they were once full-size drafting instructions that have been scaled down.

With regards to your rigging question, my kit came with two spools of thread: 0.3 and 0.6 mm, both of them white. That is wholley unrealistic, in my opinion. I found, on Pete Coleman's website, someone who had an Excel sheet, cross-referencing the various standing rigging components to an appropriate scale-size thread. I think I have that spreadsheet here at my workplace (where I am right now), so if I have it, I will send it you via a private message. From that spreadsheet, I searched the internet for places that sell model ship accessories; not every site has the correct diameter thread, so instead of buying a couple of threads from multiple sites, I bought a handful from one site. Again, they didn't have each specific size thread, so I rounded up or down.

I don't know if there is a similar spreadsheet for the running rigging on Pete Coleman's site; maybe you can take a look?

From you post, I'm not sure if you're starting to put the rigging in place, or if you're anticipating getting to that stage. I think on page 17 of theinstructions,it gives the belaying points of the running rigging. But as you said, it's not clear, and the print is very small, and there is no cross-reference from the circled number on the instructions, to where the thread is actually from ( for example, say line A150 is a fore top gallant sheet line... then it'd be easy to trace that particular thread.) But Heller only lists belay points by number, and then you need to sort through the various instructions on "fitting of the masts" to find the corresponding A150 marking. Not an easy task! For myself, I might try to make a chart for the various rigging numbers, and what that particular thread would be used for/go to. Of course, that's a way down the road right now, but if I do make such a chart, I'll happily give it to anybody who asks for it.

It's interesting that you say you can't read the dimensions of the ropes, etc. In the first few pages of the instruction booklet, there is a list of a lot of the rigging (but not all!!), indicating whether it should be of the 0.3 mm or 0.6 mm thread. Amazingly, nearly every thread is indicated as being of the 0.3 mm variety.

Oh, and because the thread that is included in the kit is white, I am using a brown felt-tip marker to darken the thread. Read through all my postings here, with regard to darkening the thread, and about the anchor cable.

Would it be possible that you could take a picture of your instructions (any random page is fine), and send it along? I'm curious if you have a very bad copy of the instructions. My kit came with a set in French and English; the illustrations in both are terrible.

I hope all this helps; my apologies for not responding sooner, but I have'nt logged in, in a while.

Cheers!!!!!

Tim
timmyp
Visit this Community
Virginia, United States
Joined: May 18, 2008
KitMaker: 496 posts
Model Shipwrights: 404 posts
Posted: Thursday, May 12, 2016 - 06:19 AM UTC
Hi Jim,

It seems that the word "intimidating" is about the only adjective ever used to describe this model!

I dunno, methinks an outrigger canoe might be a bit advanced - ever thought of starting out with a kayak?!

It's gotten to the point with me, that this model is not "hard", "complicated", "intimidating" (there's that word again!!), but more along the lines of "this effin' lady". (Sorry for the language, Todd!!) No sooner do I think I can do some real assembly work, I get stuck with doing an unreal amount of painting before proceeding. If nothing else, maybe I'll learn some patience.

Thanks for taking a look the blog, and I hope you make return trips!

Cheers,

Tim
timmyp
Visit this Community
Virginia, United States
Joined: May 18, 2008
KitMaker: 496 posts
Model Shipwrights: 404 posts
Posted: Thursday, May 12, 2016 - 06:26 AM UTC
Hi all,

Just wanted to let you know, that I'm done painting those stern & side galleries, and I managed to cement into place one of the stern gallery window panes (one of 9 pieces!). The trick on these window panes, is that the longest pieces have extremely little wiggle room in the left-to-right direction. I'll post a pic soon to illustrate the problem. I also cut out the bottom part of the stern gallery, so I could fit the whole thing around the rudder post (pic to be posted). Unfortunately, there are still 2 more small parts that fit under the side galleries, and will require more painting time. So, stay tuned!!
timmyp
Visit this Community
Virginia, United States
Joined: May 18, 2008
KitMaker: 496 posts
Model Shipwrights: 404 posts
Posted: Thursday, May 12, 2016 - 06:30 AM UTC
hi J,

I found the spreadsheet; it has rigging details for both standing & running rigging. Send me a private msg as to where I can e-mail it to you.

Tim