1/200 Nichimo Hatsuzuki build

#453
Texas, United States
Joined: August 28, 2016
KitMaker: 1,925 posts
Model Shipwrights: 1,298 posts
Posted: Thursday, May 07, 2020 - 11:11 PM UTC
Tim,
Interesting, the book doesn't show where the cable originates or terminates?
Mark

#306
Victoria, Australia
Joined: June 27, 2010
KitMaker: 3,959 posts
Model Shipwrights: 2,777 posts
Posted: Friday, May 08, 2020 - 10:22 PM UTC
continuing the excellent work Tim!

Yes, you've gone from small scale (1/1250) to large scale...
It's kind of a strange relationship though: the larger the scale the more detail you need to add

Stay home and build models!
In 1/72
Gloster Gladiator MkII for the Bi-planes Campaign
In 1/350
Airfix 1:350 Type 45 Destroyer
TimReynaga
 Associate Editor
California, United States
Joined: May 03, 2006
KitMaker: 2,500 posts
Model Shipwrights: 1,830 posts
Posted: Saturday, May 09, 2020 - 02:58 AM UTC
Quoted Text
continuing the excellent work Tim!
Yes, you've gone from small scale (1/1250) to large scale...
It's kind of a strange relationship though: the larger the scale the more detail you need to add
Thanks Russ,
You are right (my recent
IJN Ryujo build was 1/2400) - but the larger the scale, the more detail you can see!
It is all good, though. I have always enjoyed the experience of working out the new techniques required for each type of build.
England - South East, United Kingdom
Joined: March 01, 2010
KitMaker: 7,078 posts
Model Shipwrights: 6,649 posts
Posted: Sunday, May 10, 2020 - 08:27 AM UTC
Hi Tim,
Great progress since I last looked in, the added details is really lifting the build.
Cheers
Si
TimReynaga
Associate Editor California, United States
Joined: May 03, 2006
KitMaker: 2,500 posts
Model Shipwrights: 1,830 posts
Posted: Sunday, May 10, 2020 - 09:26 AM UTC
Quoted Text
Hi Tim,
Great progress since I last looked in, the added details is really lifting the build.
Cheers
Si
Thanks Si. I suppose every little bit helps!
Quoted Text
Tim,
Interesting, the book doesn't show where the cable originates or terminates?
Mark
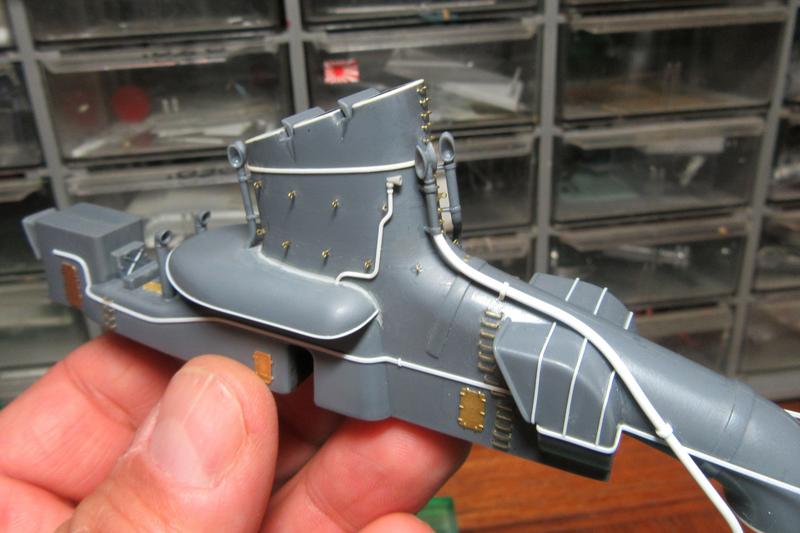
Hi Mark,
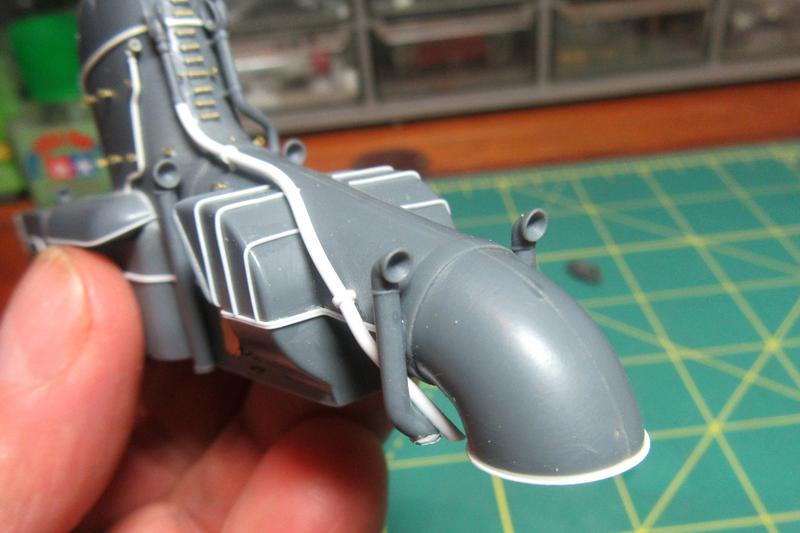
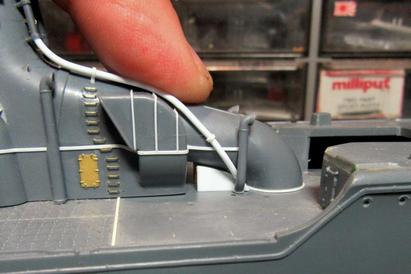
In the profile drawings by Mariusz Motyka in Kagero Publishings The Japanese Destroyer Akizuki (ISBN 978-83-62878-69-7) the cabling end points forward are obscured by the whaleboat.
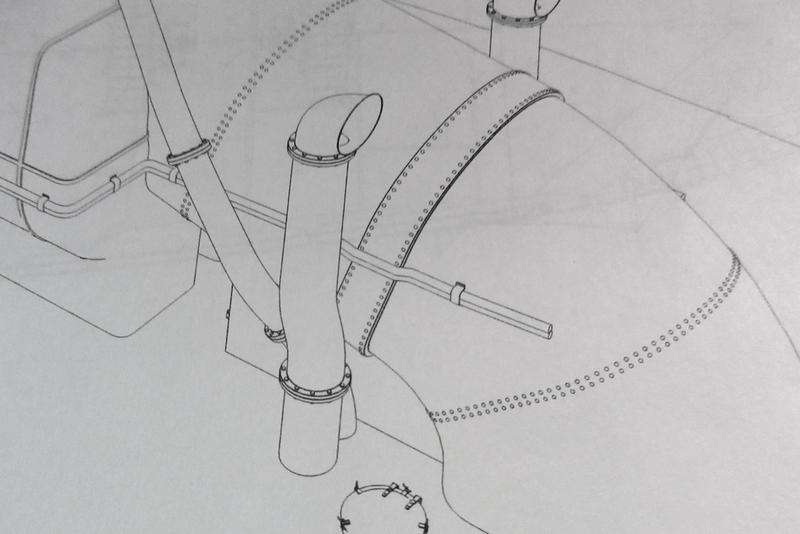
One of the isometric drawings does show the cabling forward, but it is shown terminating abruptly on the funnel uptake. My guess is that it actually continued and connected somehow to the command bridge forward.
The endpoints aft are shown disappearing into the shack aft of the funnel.
Based on this, I installed the cables to follow the curves of the funnel assembly and lead into the shack.
I made square holes for the entry points in the structure.
A friend translated the name of the shack labeled in the Japanese language Gakken book as the Direction Measure Room. This makes sense as the radio direction finder (RDF) loop will go on the roof later so a radio plotting room? If so, the cables might well have been communication links to the bridge and command center forward.
#306
Victoria, Australia
Joined: June 27, 2010
KitMaker: 3,959 posts
Model Shipwrights: 2,777 posts
Posted: Sunday, May 10, 2020 - 09:48 PM UTC
argh! Mystery vanishing cabling!
Stay home and build models!
In 1/72
Gloster Gladiator MkII for the Bi-planes Campaign
In 1/350
Airfix 1:350 Type 45 Destroyer
TimReynaga
Associate Editor California, United States
Joined: May 03, 2006
KitMaker: 2,500 posts
Model Shipwrights: 1,830 posts
Posted: Tuesday, May 12, 2020 - 01:27 PM UTC

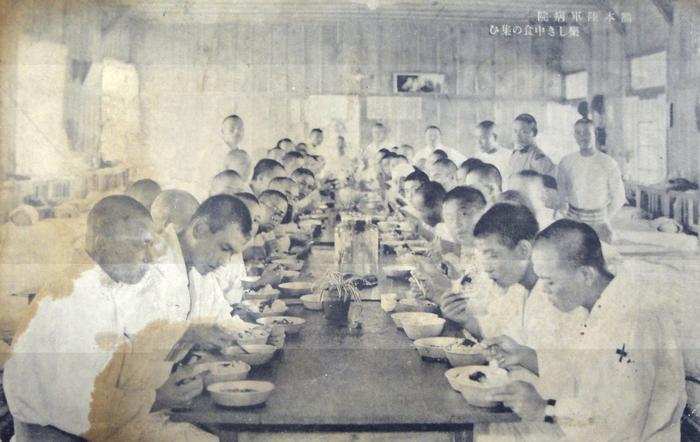
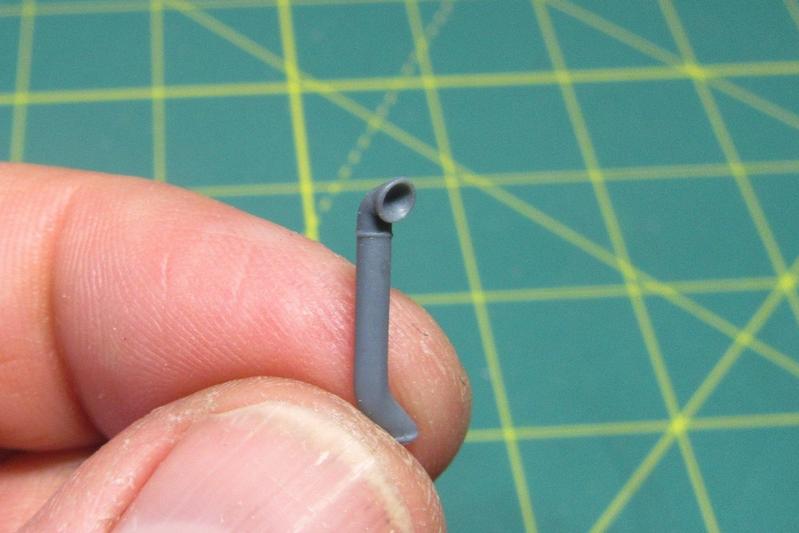
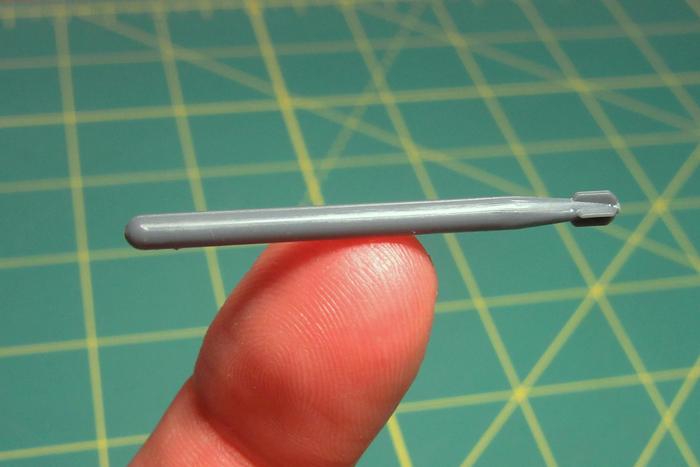
Another added bit was the ships steam horn (I had removed Nichimos mediocre molded-on version of it earlier).
The new one was built up from Plastruct .5mm (.020) styrene rod (90851) with a .023 disc cut from .015 plastic (using the Waldron Model Products Sub-Miniature punch and die set) and one of the "horns" from a 1/700 scale IJN type 22 radar part.
#345
Niedersachsen, Germany
Joined: August 22, 2011
KitMaker: 1,835 posts
Model Shipwrights: 1,832 posts
Posted: Wednesday, May 13, 2020 - 02:48 AM UTC
Tim,
great job on researching - and then, even more, on building - all those details! That really makes a difference and makes the model stand out!
Cheers
Jan
#453
Texas, United States
Joined: August 28, 2016
KitMaker: 1,925 posts
Model Shipwrights: 1,298 posts
Posted: Wednesday, May 13, 2020 - 04:46 AM UTC
Quoted Text
Tim,
great job on researching - and then, even more, on building - all those details! That really makes a difference and makes the model stand out!
Cheers
Jan
DITTO!
Mark
TimReynaga
Associate Editor California, United States
Joined: May 03, 2006
KitMaker: 2,500 posts
Model Shipwrights: 1,830 posts
Posted: Saturday, May 16, 2020 - 06:10 AM UTC
Jan and Mark, thanks! It isn't all research and creativity, though. Most of this build is just plain old routine modeling.
For example, although Nichimo faithfully reproduced the numerous air intake cowls throughout the ship, they needed some help.

The renderings are basically good, but the 1970s moldings are slightly out of round and show the vent mouths as solid.

After cleaning up the mold lines, I opened up the cowl faces with a round Dremel bit twisted by hand.
These were located throughout the ship with six around the funnel structure alone.
#453
Texas, United States
Joined: August 28, 2016
KitMaker: 1,925 posts
Model Shipwrights: 1,298 posts
Posted: Saturday, May 16, 2020 - 10:02 AM UTC
Tim,
Nothing like having a set of dental dill bits, I really give my a work out. Nice work on those cowlings.
Mark
#424
Queensland, Australia
Joined: April 23, 2015
KitMaker: 4,648 posts
Model Shipwrights: 249 posts
Posted: Saturday, May 16, 2020 - 01:37 PM UTC
Tim,
I rarely come over to the wetter side of things, but the fact that it's a 1/200 scale destroyer made me curious.
I really like the improvements you have made and look forward to seeing it all come together.
Did this destroyer carry the famous long-lance torpedo?
"Artillery adds dignity, to what would otherwise be an ugly brawl."
Frederick The Great
TimReynaga
Associate Editor California, United States
Joined: May 03, 2006
KitMaker: 2,500 posts
Model Shipwrights: 1,830 posts
Posted: Saturday, May 16, 2020 - 02:13 PM UTC
Quoted Text
Tim,
I rarely come over to the wetter side of things, but the fact that it's a 1/200 scale destroyer made me curious.
I really like the improvements you have made and look forward to seeing it all come together.
Did this destroyer carry the famous long-lance torpedo?
Thanks, and yes! Hatsuzuki carried eight of the infamous type 93 oxygen-fueled "Long Lance" torpedoes.
These would normally not be visible as they were in protected launchers, but I think I'll put one on deck on a trolley (as if being loaded) just 'cause they look so darn cool!
#345
Niedersachsen, Germany
Joined: August 22, 2011
KitMaker: 1,835 posts
Model Shipwrights: 1,832 posts
Posted: Sunday, May 17, 2020 - 05:50 AM UTC
Tim,
once again it's the small things and your attention to detail that brings the ship alive - great work on those air intake cowls!
Cheers
Jan
England - South East, United Kingdom
Joined: March 01, 2010
KitMaker: 7,078 posts
Model Shipwrights: 6,649 posts
Posted: Monday, May 18, 2020 - 06:13 AM UTC
Hi Tim,
The funnel is looking very good indeed, opening the vent cowls really adds depth.
Like the idea of the torpedo on a trolley, nice touch.
Cheers
Si
#377
Texas, United States
Joined: June 27, 2010
KitMaker: 1,481 posts
Model Shipwrights: 1,332 posts
Posted: Monday, May 18, 2020 - 11:42 PM UTC
Tim,
Amazing work on the funnel, really love to see how those added details will look once you put some make-up on her.
Cant wait to see more!
Dave
In Dry Dock #1: 1/350 IJN SHOKAKU (Fujimi)
In Dry Dock #2: 1/350 IJN Tama (Aoshima)
Queensland, Australia
Joined: May 20, 2010
KitMaker: 1,230 posts
Model Shipwrights: 1,212 posts
Posted: Tuesday, May 19, 2020 - 07:36 PM UTC
Great detail you have added to the Funnel. I love the work you have done so far.....Cheers mark
If I was your Wife I would Poison your Tea
If I was your Husband, I would drink it.
TimReynaga
Associate Editor California, United States
Joined: May 03, 2006
KitMaker: 2,500 posts
Model Shipwrights: 1,830 posts
Posted: Friday, May 22, 2020 - 02:03 AM UTC
Jan, Si, David, and Mark - thanks! She's coming together slowly...
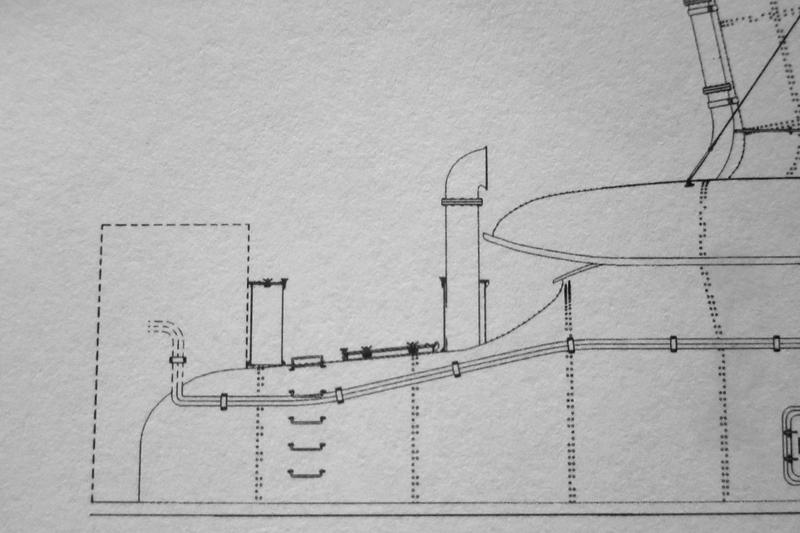
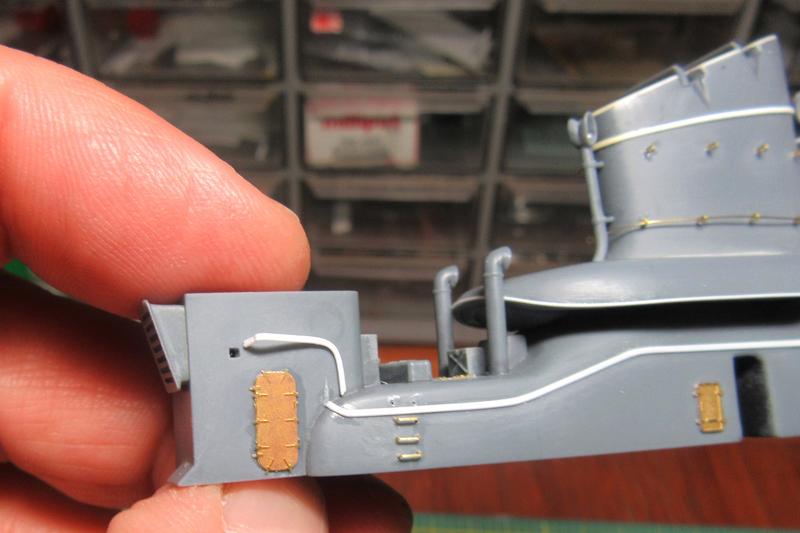
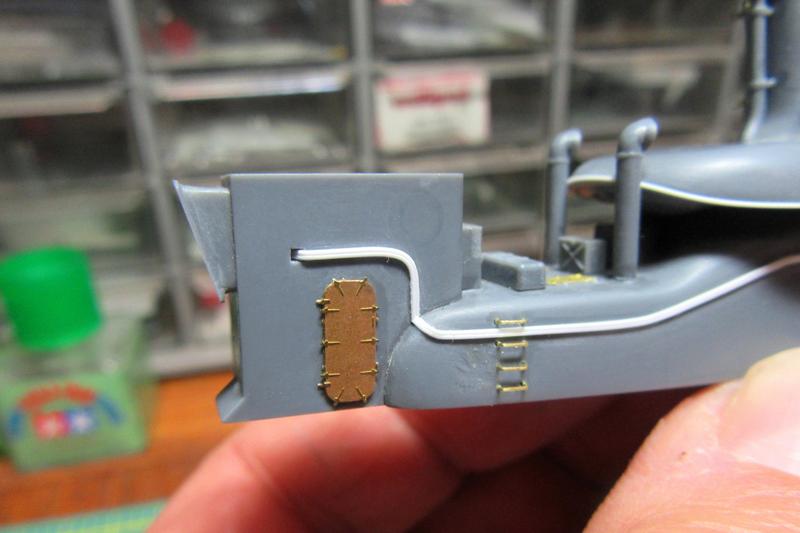
A small detail missing from the kit is the locker located between the cowl vents beneath the forward exhaust uptake.
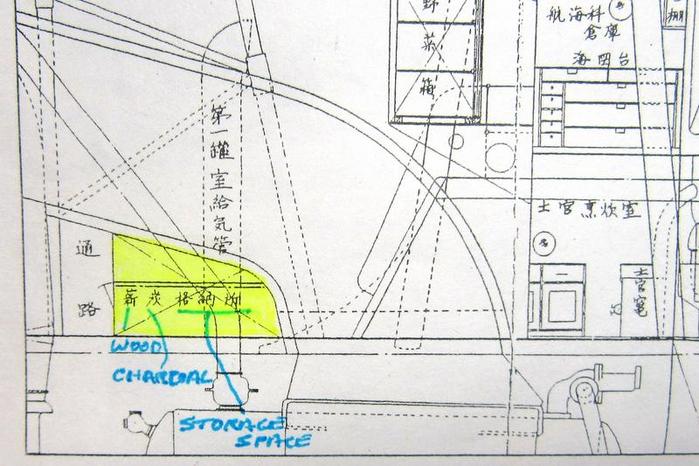
Apparently no photographs of it exist, but it is shown on plans in the Gakken Reikishi-Gunzo IJN Akizuki-class Destroyers book. My Japanese friend translated the characters as wood charcoal storage space. This seemed odd to me, but she assured me that charcoal (binchōtan) is essential for traditional Japanese cooking. This actually makes sense as the galley and mess areas were located in the spaces just forward of it under the bridge structure. Also, she noted that the rectangular box at the top center of the same drawing was labeled as the ships vegetable locker!
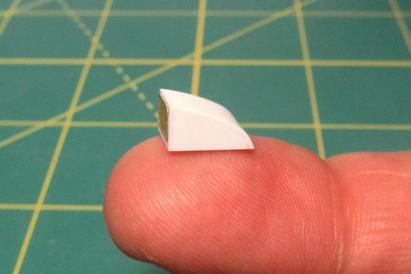
I fabricated the little charcoal bin from .020 sheet plastic and a spare etched door.
#453
Texas, United States
Joined: August 28, 2016
KitMaker: 1,925 posts
Model Shipwrights: 1,298 posts
Posted: Friday, May 22, 2020 - 04:59 AM UTC
Tim,
It appears the Japanese enjoy their BBQ also.
Mark
England - South East, United Kingdom
Joined: March 01, 2010
KitMaker: 7,078 posts
Model Shipwrights: 6,649 posts
Posted: Friday, May 22, 2020 - 07:45 AM UTC
Nice bit of scratchbuilding Tim.
All these little touches will make a real difference to the end result.
Cheers
Si
TimReynaga
Associate Editor California, United States
Joined: May 03, 2006
KitMaker: 2,500 posts
Model Shipwrights: 1,830 posts
Posted: Saturday, May 23, 2020 - 05:10 AM UTC
#345
Niedersachsen, Germany
Joined: August 22, 2011
KitMaker: 1,835 posts
Model Shipwrights: 1,832 posts
Posted: Saturday, May 23, 2020 - 07:25 AM UTC
TimReynaga
Associate Editor California, United States
Joined: May 03, 2006
KitMaker: 2,500 posts
Model Shipwrights: 1,830 posts
Posted: Sunday, May 24, 2020 - 02:43 AM UTC
Additional details added to the structure include oxygen and acetylene cylinders.
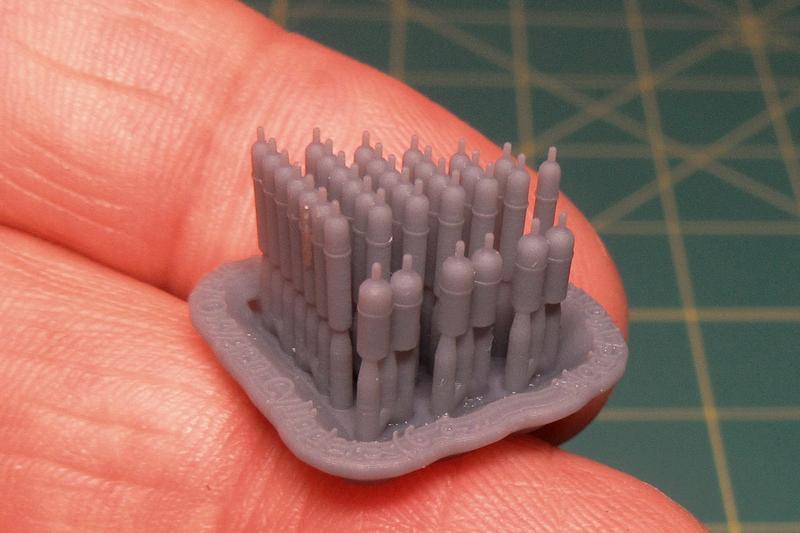
These were 3D-printed resin aftermarket items from Model Monkey
https://www.model-monkey.com/product-page/1-200-acetylene-and-oxygen-cylinders. The parts are produced using a different technology than that used by other 3D-printing companies like Shapeways, making them sharp and smooth without the Lego-like steps found on most 3D-printed parts. They are excellent!
Used for welding, gas cylinders were commonly stowed outside the superstructures of USN and IJN ships of the Pacific War era.
TimReynaga
Associate Editor California, United States
Joined: May 03, 2006
KitMaker: 2,500 posts
Model Shipwrights: 1,830 posts
Posted: Sunday, May 24, 2020 - 03:40 PM UTC
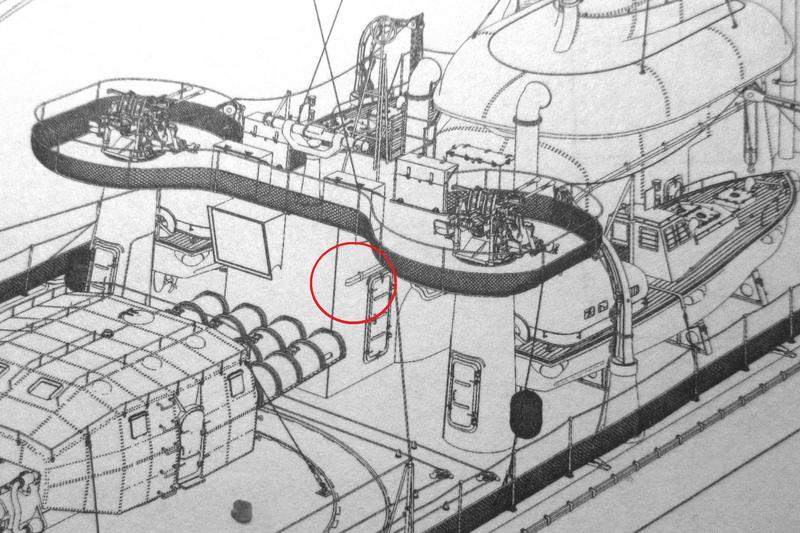
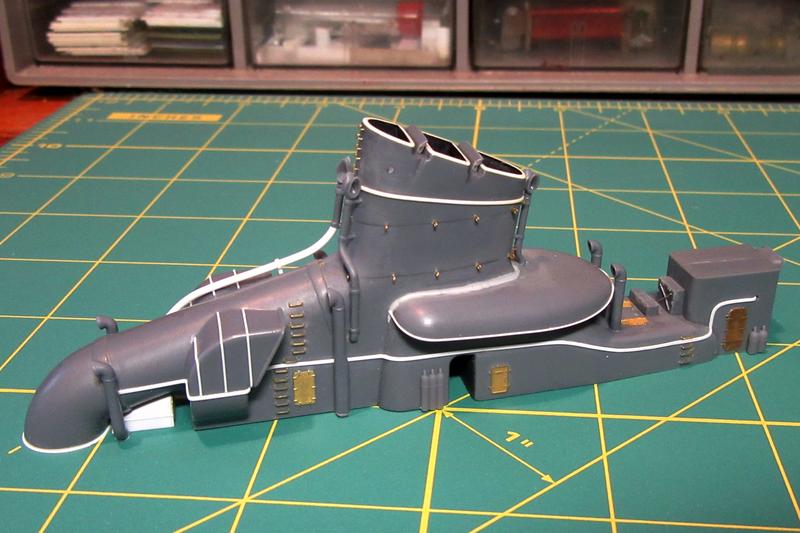
Having already attached the Direction Measure Room (radio plot) to the funnel assembly, I set about preparing the 25mm gun positions that will be attached to its roof.
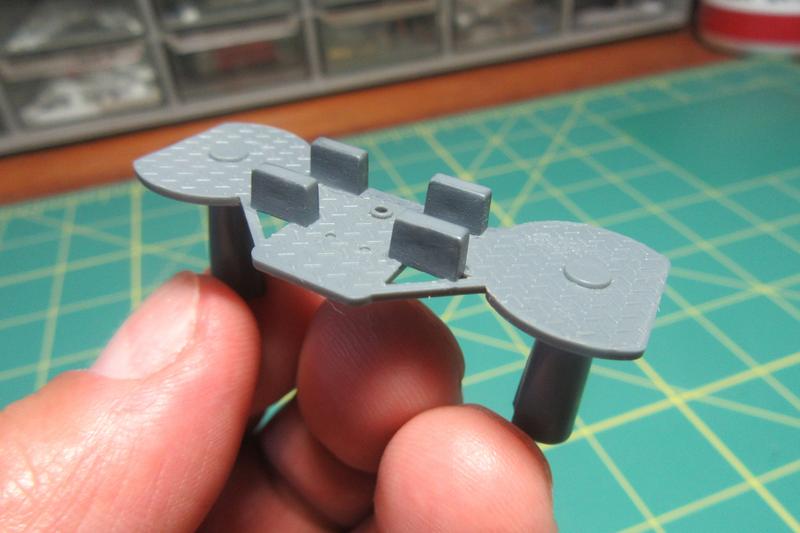
The platform and its supports look well enough, but the molded ammunition boxes on top are featureless and, despite my efforts to improve them, a bit uneven. I ended up cutting the boxes away with a plan to replace them with 3D-printed parts.
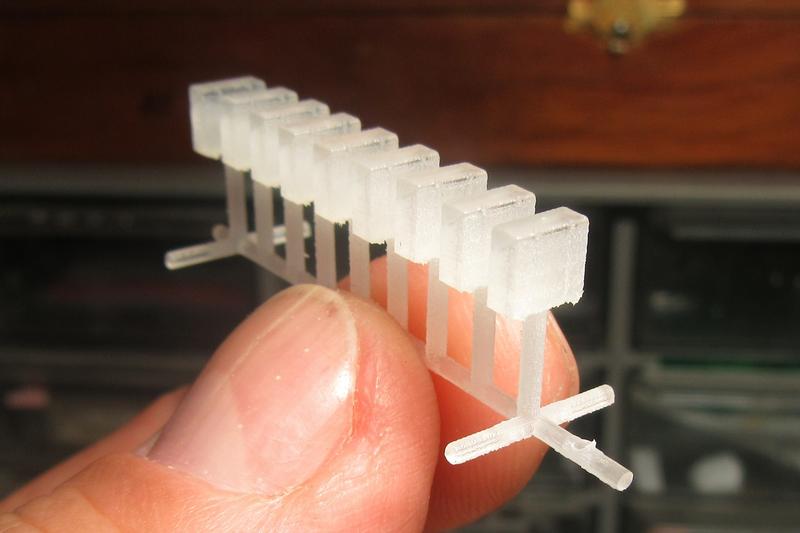
I ordered new 3D printed ammo boxes in Smoothest Fine Detail Plastic from Shapeways. While they look good in the photo, they aren't up to the standard of the Model Monkey resin gas canisters. Up close these things are a bit rough with the uneven, layered surfaces typical of 3D-printed parts. I may end up using them, but they really didnt turn out to be much of an improvement over the kit parts. Disappointing!
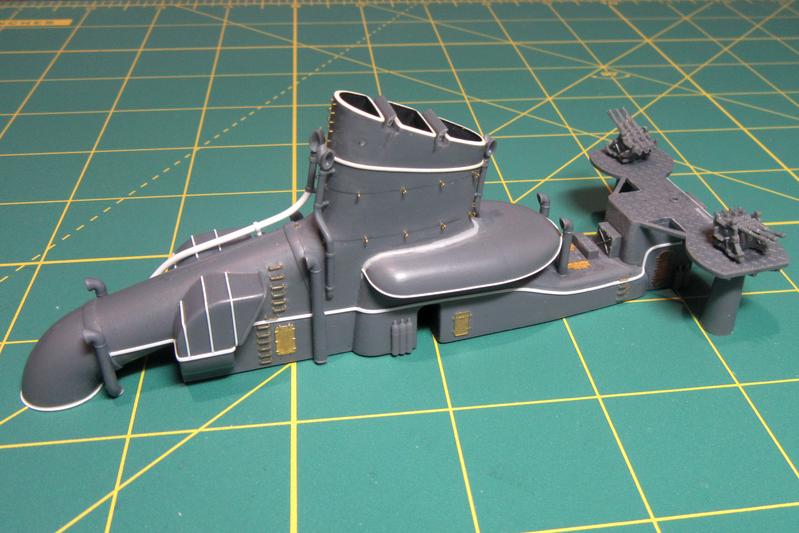
For the present, Ive attached the AA platforms over the radio room without the ammo boxes.
England - South East, United Kingdom
Joined: March 01, 2010
KitMaker: 7,078 posts
Model Shipwrights: 6,649 posts
Posted: Sunday, May 24, 2020 - 08:06 PM UTC
The funnel assembly looks excellent Tim.
Never having used the older style of 3D printed parts, will be interested to see how you deal with them.
Cheers
Si