Ships by Class/Type: Cruisers
Topics covering cruisers both past and present.
Revell Olympia build
TimReynaga
Staff MemberAssociate Editor
MODEL SHIPWRIGHTS
Visit this Community
California, United States
Joined: May 03, 2006
KitMaker: 2,500 posts
Model Shipwrights: 1,830 posts
Posted: Friday, June 28, 2013 - 11:31 AM UTC

Quoted Text

I do have one question for you, do you have a cover or case that you are going to put your Olympia in to protect all of the fine detail you added to her? Not to mention dust as well, I'd hate to have to dust a build like this. Very nice build Tim, and thank you for taking the time to share all of the little details as you've come along with her progression.


Thanks Jeremy, It's been fun!

Almost finished now; and yes, I did get a case for the model. This isn't a very good picture, but the case does look nice. I like cases not only for the protection they provide, but they also tend to give builds a more polished, professional look.


RedDuster
Visit this Community
England - South East, United Kingdom
Joined: March 01, 2010
KitMaker: 7,078 posts
Model Shipwrights: 6,649 posts
Posted: Friday, June 28, 2013 - 09:06 PM UTC
Looks absolutely splendid in the case Tim,

The work on the boats, davits and rigging really lifts the model.

Breathtaking build

Si
apalella
Visit this Community
New Jersey, United States
Joined: November 11, 2012
KitMaker: 66 posts
Model Shipwrights: 23 posts
Posted: Saturday, June 29, 2013 - 09:32 AM UTC
Tim, that is indeed one museum quality build.
Thanks for the little how too. I just couldn't get my Evergreen strips to retain their shape. Happened across some right sized Plastistruct beams at Pear Paint and decided to give them a go. Turns out they are much stiffer than Evergreen and therefore were able to retain a bend easily. My Olympia is now full steam ahead!
Thanks again and happy modelling!
-Andrew
RussellE
#306
Visit this Community
Victoria, Australia
Joined: June 27, 2010
KitMaker: 3,959 posts
Model Shipwrights: 2,777 posts
Posted: Saturday, June 29, 2013 - 10:20 PM UTC
Great work Tim! Definitely one to be proud of!
TimReynaga
Staff MemberAssociate Editor
MODEL SHIPWRIGHTS
Visit this Community
California, United States
Joined: May 03, 2006
KitMaker: 2,500 posts
Model Shipwrights: 1,830 posts
Posted: Tuesday, July 02, 2013 - 01:13 AM UTC

I finally attached the 5 inch/40cal guns guns to their mounts inside the superstructure. The mounts had been secured inside before attaching the superstructure to the deck; they couldn’t be fit through the casemate openings once the superstructure was in place.
Olympia’s 1/232 scale 5 inchers began as 152mm (6 inch) armament from Zvezda’s 1/350 scale Varyag kit. Even though it was a Russian vessel, Varyag was built in an American yard and its guns closely resembled American weapons of the era. The 1/350 scale 6 inchers would be equivalent to American 4 inchers in 1/232 – a little small. Fortunately, they are molded slightly oversized in the Zvezda kit, so they end up scaling out pretty well for Olympia!

The gun mounts are a little difficult to see nestled inside their embrasures, but they’re a definite improvement over the old Revell kit parts.

Next up: the hull mounted 2.2 inchers.
TimReynaga
Staff MemberAssociate Editor
MODEL SHIPWRIGHTS
Visit this Community
California, United States
Joined: May 03, 2006
KitMaker: 2,500 posts
Model Shipwrights: 1,830 posts
Posted: Saturday, July 06, 2013 - 12:21 PM UTC
Since the original Revell kit parts didn’t look much like the real ones, I also replaced the 2.2 inch guns.

I had previously opened up the sponsons protruding from the hull by carving away the solid lower shields, replacing them with .015 X .100 inch Evergreen stock shields bent to shape. I didn’t bother to add the interior “berth deck” behind them as nothing can be seen in there anyway, even with a penlight.


Like the the 5 inchers, I replaced these guns with 1/350 scale Zvezdza Varyag parts. In this case the Varyag’s excellent 75mm (3 inch) guns stood in for Olympia’s 2.2 inchers. Mounted on the four superstructure positions and ten hull sponsons, these were an even better match than the 5 inchers: the Varyag 1/350 scale 75mm guns scale out to 1.96 inch in 1/232 scale – very close to the 2.2 inch guns aboard Olympia.

The exterior casemate covers were ugly solid half-cylinders on the Revell plastic kit. Fortunately the Squadron/Encore set came with excellent photoetch brass replacements. They are relief-etched and there are even several spares in case you lose any. I especially liked the little notches for the gun barrels to stick out when shown closed. They just needed to be bent into shape and painted up.[

After mouning the 2.2 inchers on the little ledges inside the embrasures I attached the new covers to the exteriors. These were in two parts: a small flat segment and a curved main part. The flat segments were swung out to the hull sides and secured there when open, no problem. As for the curved sections of the covers, photos of Olympia in service show that they were set in halfway positions when open (unlike the present museum ship which has open covers dangling against the hull). I fixed them up with the last of my trusty l’Arsenal photoetch chains.


Seen from above, the bulging embrasures and their open covers make for an unusual, interesting look.
MPedersen
Visit this Community
United States
Joined: November 27, 2012
KitMaker: 1 posts
Model Shipwrights: 1 posts
Posted: Friday, July 12, 2013 - 03:59 AM UTC
Gorgeous work, I have been watching this from the begining while building my own not nearly as nice version of the Encore kit.
PetrolGator
Visit this Community
United States
Joined: July 12, 2013
KitMaker: 6 posts
Model Shipwrights: 3 posts
Posted: Friday, July 12, 2013 - 05:36 AM UTC
I just went through this thread over lunch, and wow. Spectacular. I don't know what else to say.
RussellE
#306
Visit this Community
Victoria, Australia
Joined: June 27, 2010
KitMaker: 3,959 posts
Model Shipwrights: 2,777 posts
Posted: Friday, July 12, 2013 - 09:59 PM UTC
You keep on raising the bar Tim! Great work!
TimReynaga
Staff MemberAssociate Editor
MODEL SHIPWRIGHTS
Visit this Community
California, United States
Joined: May 03, 2006
KitMaker: 2,500 posts
Model Shipwrights: 1,830 posts
Posted: Wednesday, July 31, 2013 - 12:56 PM UTC
Almost finished now, time for the flags!

The Squadron/Encore kit came with flags printed on paper.

They were correct 45 star US national flags and jacks, well printed and accurate, but they were also very big. Photos of Olympia indicate that she sometimes showed an extra large US flag when in port, but I thought it might look a little toylike on a scale model. I’m also not a big fan of printed paper as a medium for model flags since their inks tend to flake off when the flags are being formed with waves... so I opted instead to use HO-scale US flags from Microscale (set MC-4202). Intended for model trains, these water slide decals offered a number of size options which I thought looked more realistic. The colors were also more vividly printed. Unfortunately, they were also 50 star flags, so I had to fudge accuracy a bit! The pattern is: 45 star – 1st, 3rd, 5th rows: 8 stars; 2nd, 4th, 6th rows: 7 stars. The 50 star pattern is a little different – 1st, 3rd, 5th, 7th, 9th rows: 6 stars; 2nd, 4th, 6th, 8th rows: 5 stars. Luckily, there isn’t all that much visual difference between the two:

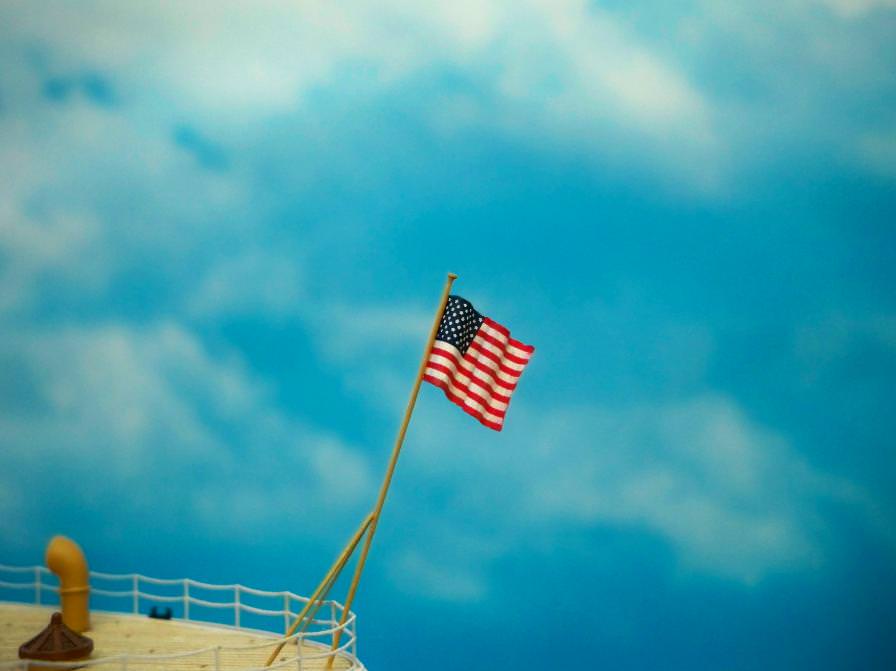
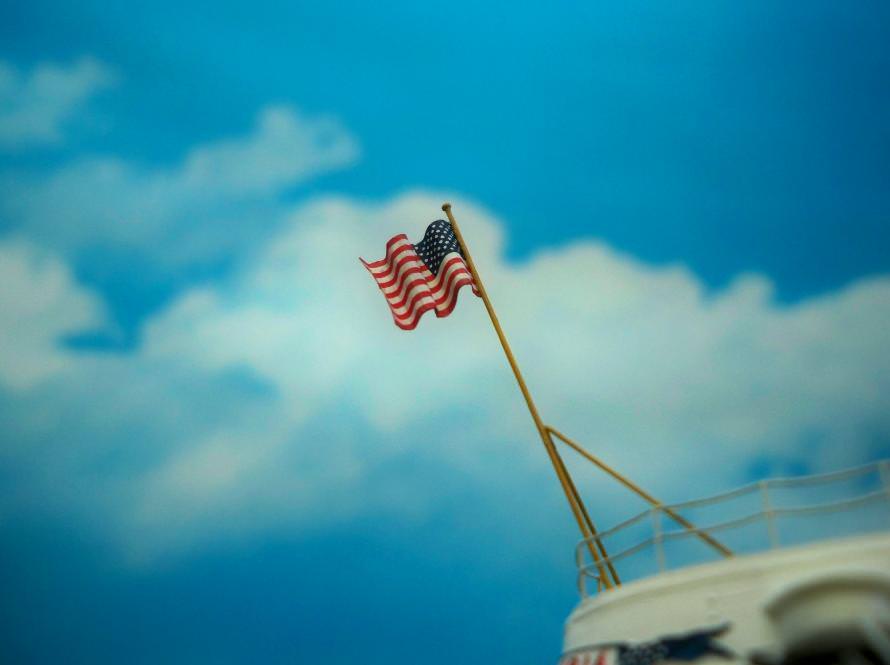
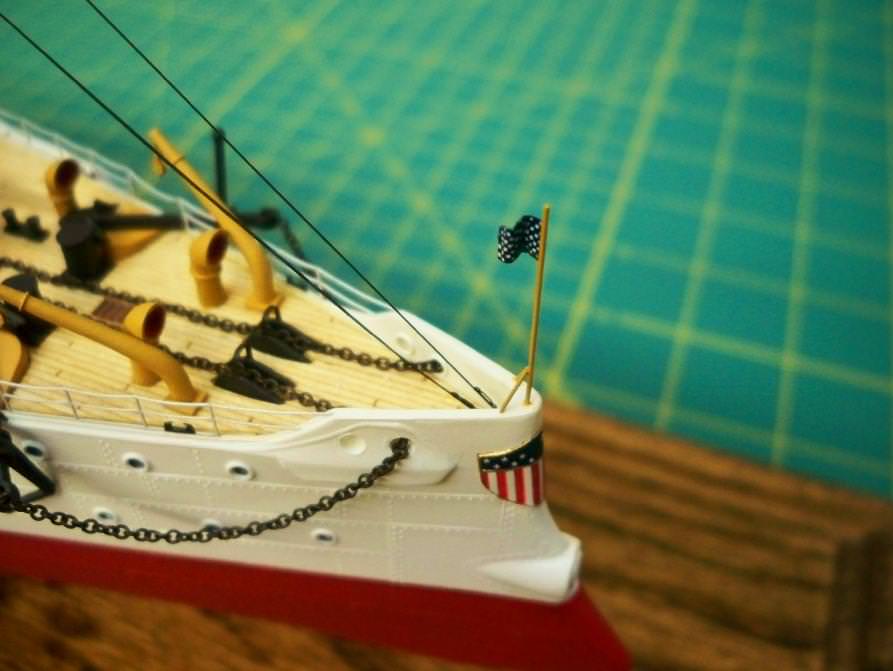
The size of the US national flag on the model also helps: at 7 X 12 millimeters, the flag is pretty small, and after compressing it even more with the waves, those stars become pretty darned hard to see, much less count! Anyway, I decided I could live with it.

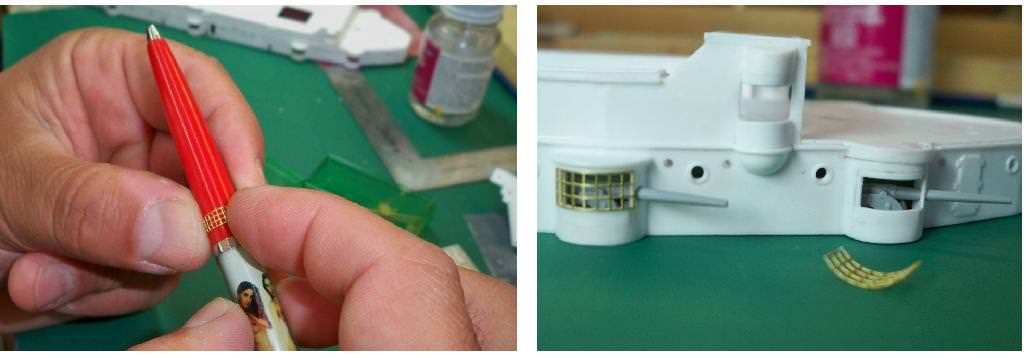
To form the flag, I applied the decals to either side of a piece of aluminum kitchen foil (the heavier-duty kind). When they were dry I trimmed the excess foil away, leaving a tiny decal/foil/decal sandwich. I then carefully formed the “waving in the wind” pattern of undulations on the flag with a round toothpick. It was then mounted to the brass wire flagstaff at the stern with Gator Glue. The exposed silver foil edges of the flag were touched up with red and blue paint, and since the flag decals were glossy I went over the ensign with a thin brushed-on coating of Testor’s Dullcote. This last bit was actually the trickiest part of the operation, since I discovered on my first attempt that the lacquer based Dullcote can melt the colors off the delicate decals if applied too liberally! I got it right on the second try though.


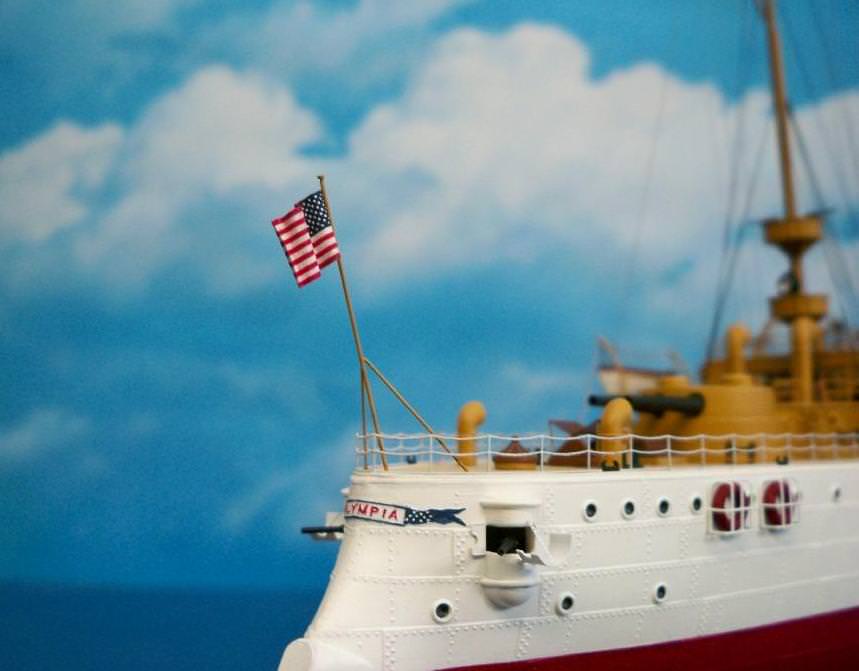
The union jack at the bow was made from the blue field and stars section cut from a second national flag. Like the national ensign it has five stars too many... but at 3 X 4 millimeters the jack is small enough that I don’t think very many people will be counting the stars!


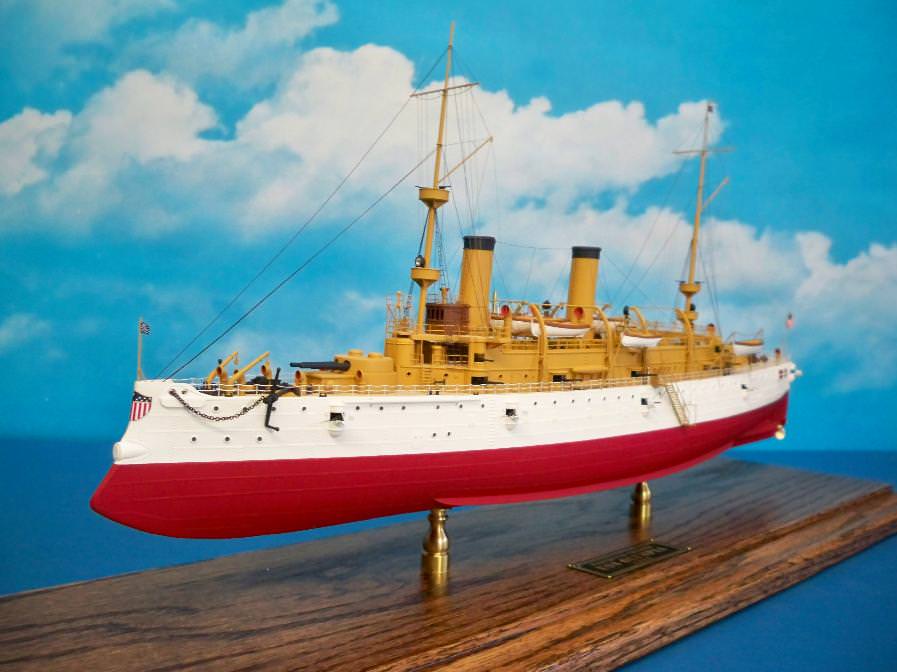
I added the Admiral's flag and commissioning pennant seen flying from the mainmast next. George Dewey was appointed Admiral of the Navy (4 Star) on March 2, 1899, so the presence of his personal flag places the model between that date and November 8, 1899, when the ship was temporarily decommissioned for overhaul (when the torpedo tubes and observation posts were removed, the hawsepipes relocated, and the federal shield on the bow replaced with ornate gilt scrollwork). The Admiral’s flag was from a wonderful US Naval Signal Flags and Pennants decal set by the now-defunct Dunagain Decals (I wish I had bought more of these sets when they were available several years ago – I use them for nearly every project, and they are steadily running out!) It was formed in the same way as the other flags.

Finally, I added the ship’s commissioning pennant just above Admiral Dewey’s flag. The commissioning pennant is flown by all US Navy and Coast Guard ships at all times on while in commission, but for some reason it is a detail omitted from most ship models. It was made from yet another national flag from the Microscale flag set. In this case I simply trimmed off the top two stripes and adjacent bit of blue field to make the narrow pennant.


The Olympia build has been a long haul, but with the addition of the flags, I guess it’s time to put this one to bed!

TAFFY3
Visit this Community
New York, United States
Joined: January 21, 2008
KitMaker: 2,531 posts
Model Shipwrights: 1,244 posts
Posted: Wednesday, July 31, 2013 - 09:57 PM UTC
Superb job Tim, congratulations on an outstanding model. Al
Gremlin56
Joined: October 30, 2005
KitMaker: 3,897 posts
Model Shipwrights: 3,301 posts
Posted: Thursday, August 01, 2013 - 04:33 PM UTC
It has been an amazing and very informative build Tim, my compliments on the fantastic work you let us enjoy,
cheers,
Julian
Shanghaied
Visit this Community
Schleswig-Holstein, Germany
Joined: June 30, 2011
KitMaker: 189 posts
Model Shipwrights: 106 posts
Posted: Thursday, August 01, 2013 - 07:14 PM UTC
Great build log Tim!

Very nice and clean model with a lot of great Details!

Tom
Grauwolf
#084
Visit this Community
Quebec, Canada
Joined: September 14, 2005
KitMaker: 2,485 posts
Model Shipwrights: 1,157 posts
Posted: Thursday, August 01, 2013 - 07:50 PM UTC
You have done an excellent job with that kit.
Congratulation!

Cheers,
Joe
TimReynaga
Staff MemberAssociate Editor
MODEL SHIPWRIGHTS
Visit this Community
California, United States
Joined: May 03, 2006
KitMaker: 2,500 posts
Model Shipwrights: 1,830 posts
Posted: Tuesday, August 06, 2013 - 03:17 AM UTC
Hello All,

I just wanted to thank all of you who have been following this Revell Olympia build log over the past months, I’ve very much appreciated your kind comments and advice. Here are some final pics of the completed model:


DanielMoscatelli
Visit this Community
Montevideo, Uruguay
Joined: August 22, 2011
KitMaker: 998 posts
Model Shipwrights: 941 posts
Posted: Tuesday, August 06, 2013 - 04:14 AM UTC
Beautiful!!!! Quite a jewel!!! Now to enjoying it!!!!

Regards Daniel
RussellE
#306
Visit this Community
Victoria, Australia
Joined: June 27, 2010
KitMaker: 3,959 posts
Model Shipwrights: 2,777 posts
Posted: Tuesday, August 06, 2013 - 10:57 PM UTC
It's been a great 20months watching your build Tim! I always looked forward to seeing your updates on this build and have always been really impressed with what you have put up.

Well done!
bdanie6
Visit this Community
New Hampshire, United States
Joined: November 09, 2008
KitMaker: 615 posts
Model Shipwrights: 50 posts
Posted: Wednesday, August 07, 2013 - 12:16 AM UTC
Tim, beautiful, beautiful build! I've been watching from the beginning and I cannot express how impressed I am with all the detail you have put into this ship. Wow!
One question...where are going to display this beauty?
Later
RedDuster
Visit this Community
England - South East, United Kingdom
Joined: March 01, 2010
KitMaker: 7,078 posts
Model Shipwrights: 6,649 posts
Posted: Friday, August 16, 2013 - 07:52 PM UTC
Great build Tim, have really enjoyed following it. (and learned stuff as well)

many thanks for sharing.

Si
HarryER
Visit this Community
Russia
Joined: September 13, 2013
KitMaker: 1 posts
Model Shipwrights: 1 posts
Posted: Friday, September 13, 2013 - 06:18 AM UTC

Quoted Text


Unfortunately, the completed gun assemblies won’t fit through the embrasure openings once the superstructure is secured to the deck, so before attaching it I installed the four aft 5 inch guns and those goofy paned windows.


Dear Tim, could you please clarify what those "goofy paned windows" are made from?

Regards,
Harry
TimReynaga
Staff MemberAssociate Editor
MODEL SHIPWRIGHTS
Visit this Community
California, United States
Joined: May 03, 2006
KitMaker: 2,500 posts
Model Shipwrights: 1,830 posts
Posted: Friday, September 13, 2013 - 07:21 AM UTC

Quoted Text


Quoted Text


Unfortunately, the completed gun assemblies won’t fit through the embrasure openings once the superstructure is secured to the deck, so before attaching it I installed the four aft 5 inch guns and those goofy paned windows.


Dear Tim, could you please clarify what those "goofy paned windows" are made from?

Regards,
Harry


Harry,

I don't know what the original paned windows were made from (glass panels inside wood frames?), but I replicated them on the model using sections of K & S Engineering 3/64 inch square photoetched brass mesh. I bent them over a pen to match the rounded shape of the casemates.

Tim
Removed by original poster on 09/14/13 - 00:07:05 (GMT).
Removed by original poster on 12/03/13 - 22:41:59 (GMT).
BravoTwoZero
Visit this Community
California, United States
Joined: June 11, 2009
KitMaker: 461 posts
Model Shipwrights: 80 posts
Posted: Tuesday, December 03, 2013 - 10:48 AM UTC
Hi Tim,

First of all, congratulations on your excellent model! It is indeed a piece worthy of displaying in a museum. I am so glad I came across your thread where you unselfishly shared your skill and knowledge. I am working on my USS Olympia and I have been reading and re-reading this wonderful thread of yours. The ship masts that came with my kit is horribly skewed. I would like to replace it with brass tubes the way you did yours. My question is, how did you drill the hole to support the mast? This will be my first attempt at working with brass tubes and have zero knowledge on how to go about it. Thanks very much in advance!

Joseph
DaGreatQueeg
Visit this Community
Napier, New Zealand
Joined: August 01, 2005
KitMaker: 1,049 posts
Model Shipwrights: 8 posts
Posted: Tuesday, December 03, 2013 - 07:15 PM UTC
Been lurking and looking when the posts pop up for this and that's a really great result for all the hard work put in!

cheers
Brent