Ships by Class/Type: Cruisers
Topics covering cruisers both past and present.
Revell Olympia build
TimReynaga
Staff MemberAssociate Editor
MODEL SHIPWRIGHTS
Visit this Community
California, United States
Joined: May 03, 2006
KitMaker: 2,500 posts
Model Shipwrights: 1,830 posts
Posted: Friday, February 15, 2013 - 02:04 PM UTC
Now that basic construction has been completed it is time to take on one of the more challenging tasks of any model ship build: the railing. Photoetch brass railing parts are tiny, flimsy, and ridiculously unforgiving of mistakes, but applying them is still one of my favorite parts of a build – this is when things really start coming together!


Despite its age and oddball scale of 1/232, there are actually three different photoetch part sets designed specifically for this model: Gold Medal Models set No. 240-4, Tom’s Modelworks set No. 240-01, and the brass photoetch sheets which come with the recent Squadron/Encore Models re-release. Any of these would make a huge improvement to the basic kit, but each has its weaknesses, too. Since I have all three sets on hand, I’ll be using parts from each for different areas of the build.

The most delicate and detailed of the offerings is the newest, the Squadron/Encore brass, which comes with their 2012 kit re-release. It is also the most comprehensive with many details not found in the others. This state of the art set is absolutely amazing, with incredible details like lightening holes on the steps of the stairs and chain railing with individual relief-etched links! Although it has its shortcomings, this set is definitely the finest overall.

Tom’s Modelworks Olympia detail parts are also very fine, although not quite as petite as the newer Squadron/Encore offering. Also, unlike the other sets, these parts are simple flat two-dimensional renderings without any relief etching. On the plus side, Tom’s has a few details absent from the Squadron/Encore and GMM sets such as support frames for the davit-mounted boats and some really cool wheel parts for the ship’s helm:

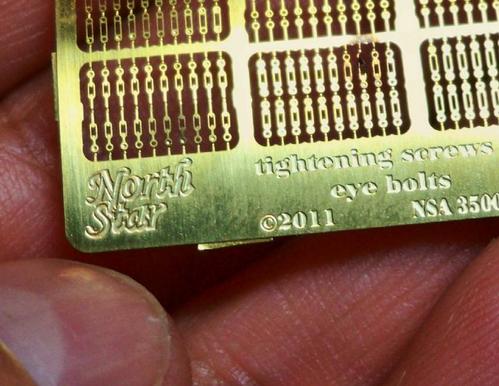
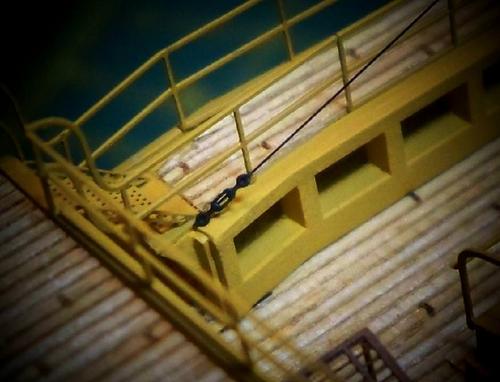
The Gold Medal Models set (which also contains parts to outfit Glencoe’s USS Oregon) is the least delicate and least comprehensive of the three. However, it has items not present in the others such as deck edge chocks, rigging blocks, eyebolts, and yardarm details. Also, it is the only one of the three which correctly provides railing to cover both the inner and outer sides of the superstructure edge catwalks. Tom’s Modelworks and Squadron/Encore evidently used the museum ship as reference, which today has only the outer rails in place, but photos show that the ship had both inner and outer rails when in service. In addition, the heftier GMM rails actually harmonize better with the heavy detail of the old Revell plastic kit parts and the pleasing but exaggerated plank effects on the Squadron/Encore wood deck.

After installing GMM rails on the superstructure side catwalks I outfitted the bridge deck with GMM railing cut into short, customized lengths to accommodate its complex contours. The ladders and rails on the wooden pilothouse were constructed from Squadron/Encore parts, as was the intricate elevated compass platform. The Tom’s set has a pretty good platform assembly also, but the Squadron/Encore version with its finely perforated deck is even better.

The Squadron/Encore set also supplied the excellent stair parts for the catwalks on the sides of the superstructure. Unfortunately, the stairways on either side of the funnel from the boat deck to the bridge deck were not provided. I used GMM parts for these instead. Even though they aren’t exactly the same as the catwalk steps, the greater length, steeper angle, and different style handrails on them help make the discrepancy less noticeable.
RedDuster
Visit this Community
England - South East, United Kingdom
Joined: March 01, 2010
KitMaker: 7,078 posts
Model Shipwrights: 6,649 posts
Posted: Sunday, February 17, 2013 - 02:22 AM UTC
Very tidy etch work Tim, a real masterpeice in the making.

Si
warreni
Visit this Community
South Australia, Australia
Joined: August 14, 2007
KitMaker: 5,926 posts
Model Shipwrights: 2,624 posts
Posted: Sunday, February 17, 2013 - 04:36 AM UTC
Do any of them have custom fitted railings?

Looking great so far.

Warren
Grumpyoldman
Staff Member_ADVISOR
KITMAKER NETWORK
Visit this Community
Florida, United States
Joined: October 17, 2003
KitMaker: 15,338 posts
Model Shipwrights: 981 posts
Posted: Sunday, February 17, 2013 - 07:51 AM UTC
Beautiful craftsmanship Tim.
TimReynaga
Staff MemberAssociate Editor
MODEL SHIPWRIGHTS
Visit this Community
California, United States
Joined: May 03, 2006
KitMaker: 2,500 posts
Model Shipwrights: 1,830 posts
Posted: Sunday, February 17, 2013 - 12:17 PM UTC
Thanks, Simon, Warren, and Dave!


Quoted Text

Do any of them have custom fitted railings?

Looking great so far.

Warren


Each of the photoetch sets does in fact have custom fitted parts, but I still cut them apart to assure as perfect a fit as I can get. Somehow long runs of railing, even when custom designed for a particular kit, never seem to fit exactly. Also, I often alter kit parts (like the corrected outline of my Olympia's bridge deck) which completely upsets the kit-specific photoetch rails approach.
I would much prefer to have generic lengths of correctly scaled railing that I could custom trim to fit each area of the model. Or maybe the usual custon fitted parts, which I think most people prefer, and a few lengths of spare railing. As it is, many photoetch sets (like Squadron/Encore's Olympia brass) include just enough railing to outfit a specific model with few or no parts left over to fix my inevitable screw ups!

surfsup
Visit this Community
Queensland, Australia
Joined: May 20, 2010
KitMaker: 1,230 posts
Model Shipwrights: 1,212 posts
Posted: Sunday, February 17, 2013 - 02:27 PM UTC
I love the work you have put into her Tim. She is looking amazing.....Cheers mark
RussellE
#306
Visit this Community
Victoria, Australia
Joined: June 27, 2010
KitMaker: 3,959 posts
Model Shipwrights: 2,777 posts
Posted: Sunday, February 17, 2013 - 06:53 PM UTC
Very fine work Tim!
CanberraBazza
Visit this Community
Australian Capital Territory, Australia
Joined: February 03, 2013
KitMaker: 5 posts
Model Shipwrights: 5 posts
Posted: Sunday, February 17, 2013 - 09:11 PM UTC
First class work Tim - a truly remarkable build. Well done and keep those pics coming!!

Best wishes

Brian
TimReynaga
Staff MemberAssociate Editor
MODEL SHIPWRIGHTS
Visit this Community
California, United States
Joined: May 03, 2006
KitMaker: 2,500 posts
Model Shipwrights: 1,830 posts
Posted: Friday, February 22, 2013 - 01:06 PM UTC

apalella
Visit this Community
New Jersey, United States
Joined: November 11, 2012
KitMaker: 66 posts
Model Shipwrights: 23 posts
Posted: Sunday, February 24, 2013 - 12:23 PM UTC
Tim,

I have the premium edition up next on my build list. I just got a new airbrush and a compressor with pressure regulator for the first time. I noticed you achieve exceptionally smooth paint finishes...do you mind giving up your secret??

Happy moedelling,
Andrew
TimReynaga
Staff MemberAssociate Editor
MODEL SHIPWRIGHTS
Visit this Community
California, United States
Joined: May 03, 2006
KitMaker: 2,500 posts
Model Shipwrights: 1,830 posts
Posted: Monday, February 25, 2013 - 04:13 PM UTC
Andrew,

I appreciate your comments on my paintwork, especially since painting is one of my least favorite modeling tasks! There really isn’t any secret, though. I prefer enamel paints, in this case Model Master semi-gloss white, Floquil flat SP Armor Yellow, and Floquil flat Engine Black. I apply the colors in light coats by airbrush at relatively low pressure. The paint mixes are thin, 2 or 3 parts thinner to 1 part paint. They don’t cover well and it takes multiple coats to build up the colors, but the pigments seem to level out best when applied this way.

In this case I also added a bit of gloss to the flat paints (5 parts SP Armor Yellow to 2 parts Floquil Hi Gloss for the "buff", 6 parts Floquil Engine Black to 1 part Model Master semi-gloss white for the black). The gloss helps level the paint as well as give the finish a very subtle sheen which, in my opinion, makes for a more convincing “painted metal” look than does simple flat paint. Adding a touch of white to the flat black adds the sheen and creates a more scale-looking "off black" color as well.

I did most of the painting for the Olympia using a no-regulator Campbell Hausefeld PowerPal from the 1980s–great for blowing up tires and pool toys, but a little rough for airbrushing models. I got by with it for many years, but my wife (bless her!) recently bought me a regulator-equipped Iwata Sprint Jet compressor. Man, this has been like moving from a scooter to a Harley-Davidson! If you haven’t used a regulator equipped compressor before, you will definitely like it.

regards,
Tim
RussellE
#306
Visit this Community
Victoria, Australia
Joined: June 27, 2010
KitMaker: 3,959 posts
Model Shipwrights: 2,777 posts
Posted: Monday, February 25, 2013 - 07:03 PM UTC
Wow that's some serously thin paint Tim! I must say you have the patience of a saint to build that many layers that slowly. I exclusively use enamels as well (either humbrol or white ensign). I use a Crescendo airbrush by Badger, which is a vacuum feed (from the bottom) and mix the following ratio, 2 parts paint to 1 part thinners. This seems to allow the paint to airbrush reasonably thick, without making the paint too dry and 'crumbing' on the surface.
apalella
Visit this Community
New Jersey, United States
Joined: November 11, 2012
KitMaker: 66 posts
Model Shipwrights: 23 posts
Posted: Thursday, February 28, 2013 - 06:12 AM UTC
Tim,

Thank you for sharing! Can't wait to get home and give my Olympia a crack!

Regards,
Andrew
TimReynaga
Staff MemberAssociate Editor
MODEL SHIPWRIGHTS
Visit this Community
California, United States
Joined: May 03, 2006
KitMaker: 2,500 posts
Model Shipwrights: 1,830 posts
Posted: Thursday, February 28, 2013 - 03:26 PM UTC
I’ve been applying the superstructure safety rails using the brass parts from the Gold Medal Models Olympia set. The GMM set has good stairs, too, but those in the Squadron/Encore set are even better, so I decided to use them. They are designed specifically for this kit and are stunningly detailed. The problem is, they are too short!

If installed at a fairly shallow angle (with the upper stair stanchions vertical and matching the height of the rail stanchions on the deck above), the stairs don’t reach the deck below. If installed at a sharper angle the stairways can span the two decks, but this screws up the upper stanchions, which now aren’t high enough. You can see this on the mock-up of the model on the Squadron Facebook page:

I could use the GMM stairs, which are the correct length, but I really like these more detailed Squadron/Encore parts...

Any ideas on how I might make them work?

TimReynaga
Staff MemberAssociate Editor
MODEL SHIPWRIGHTS
Visit this Community
California, United States
Joined: May 03, 2006
KitMaker: 2,500 posts
Model Shipwrights: 1,830 posts
Posted: Wednesday, March 06, 2013 - 05:07 AM UTC
While waiting for inspiration on how to deal with the too short stair railings, I decided to add some details to the ground tackle. The previously attached anchors looked good on the foredeck, but without restraints they just seemed to perch there precariously.


The real anchors were actually secured to the deck with small chains, so I added some around the shank and throats of each anchor using 1/350-1/400 scale photoetch brass chain from l’Arsenal (part AC400-40). The miniscule black fastening chains are difficult to see against the black anchors, but they are there!


I also added two horseshoe-shaped riding pawls made from brass border strip left over from the l’Arsenal photoetch chain set.

The riding pawl is a safety stopper for the anchor chain mounted on the riding chock (the metal fairlead for the anchor chain that prevents the chain from fouling on the deck). When heaving the chain in, the hinged pawl is "closed" or dropped towards the after side of the riding chock. The pawl bounces over the incoming chain. If an emergency occurs, such as the wildcat jumping out of gear, the pawl will catch on a link of the anchor chain and hold the chain and keep it from running out. The riding pawl is swung up to the "open" position when the anchor chain is to be run out.

Since the model is shown with the anchors secured aboard, the riding pawls should really be swung down into the “closed” position. However, I used a little artistic license and mounted them “open” to make them more visible (or maybe the boatswain is about to lower the anchors...?)

Now to figure out those stairs...

RedDuster
Visit this Community
England - South East, United Kingdom
Joined: March 01, 2010
KitMaker: 7,078 posts
Model Shipwrights: 6,649 posts
Posted: Wednesday, March 06, 2013 - 08:22 AM UTC
Looking good Tim, The way the anchor cables hang is just right

Si
TimReynaga
Staff MemberAssociate Editor
MODEL SHIPWRIGHTS
Visit this Community
California, United States
Joined: May 03, 2006
KitMaker: 2,500 posts
Model Shipwrights: 1,830 posts
Posted: Wednesday, March 06, 2013 - 01:54 PM UTC
Thanks, Si. Speaking of anchors...

My dad and I just visited the Mare Island Naval Shipyard Museum (near San Francisco) this afternoon, and I was surprised to discover a cruiser-sized naval ship’s anchor from the Olympia era displayed outside. I knew Olympia fitted out at Mare Island and operated from there between 1892-1895, so I was curious. The museum docent told me they didn’t know much about the anchor; apparently it was a forgotten relic, recovered some years ago during a dredging operation in the waters near the shipyard. The anchor has “NSYB” (Navy Ship Yard Boston) stamped on it, and it was manufactured in the 1890s.

Interestingly, B.F. Cooling’s USS Olympia: Herald of Empire (p. 30) cites an 1895 mention in the New York Herald of an accident near San Francisco where “one of the Olympia’s anchor chains gave way, almost severing an ensign’s leg.” Could this be the anchor lost by Olympia in 1895?
TimReynaga
Staff MemberAssociate Editor
MODEL SHIPWRIGHTS
Visit this Community
California, United States
Joined: May 03, 2006
KitMaker: 2,500 posts
Model Shipwrights: 1,830 posts
Posted: Tuesday, March 12, 2013 - 06:04 PM UTC


Those too short stairs in the Squadron/Encore set were frustrating, but I finally hit upon a solution. The stairs were actually the right length if angled up a bit, so I left them alone; it was the handrails that came up short...

... so I cut the rails off the stair parts.


After folding the stairs to shape and bending the individual steps to horizontal, and I mounted them separately. I then re-added the stair railings a little higher to connect with the handrails on the decks above. Simple!


RussellE
#306
Visit this Community
Victoria, Australia
Joined: June 27, 2010
KitMaker: 3,959 posts
Model Shipwrights: 2,777 posts
Posted: Tuesday, March 12, 2013 - 06:27 PM UTC
Tim, you are a genius!
skeena59
Visit this Community
Alberta, Canada
Joined: September 18, 2011
KitMaker: 4 posts
Model Shipwrights: 4 posts
Posted: Wednesday, March 13, 2013 - 05:25 AM UTC
I second that motion!
Gremlin56
Joined: October 30, 2005
KitMaker: 3,897 posts
Model Shipwrights: 3,301 posts
Posted: Wednesday, March 13, 2013 - 05:30 AM UTC
Magnificent work Tim.
Julian
Grauwolf
#084
Visit this Community
Quebec, Canada
Joined: September 14, 2005
KitMaker: 2,485 posts
Model Shipwrights: 1,157 posts
Posted: Wednesday, March 13, 2013 - 09:18 AM UTC
Ahoy Tim,

I have been following your build but never made a comment.

So here goes:


ABSOLUTELY AMAZING!

Cheers,
Joe
TAFFY3
Visit this Community
New York, United States
Joined: January 21, 2008
KitMaker: 2,531 posts
Model Shipwrights: 1,244 posts
Posted: Wednesday, March 13, 2013 - 10:45 AM UTC
Betterer and betterer! She looks great Tim. Al
TimReynaga
Staff MemberAssociate Editor
MODEL SHIPWRIGHTS
Visit this Community
California, United States
Joined: May 03, 2006
KitMaker: 2,500 posts
Model Shipwrights: 1,830 posts
Posted: Friday, March 15, 2013 - 01:14 PM UTC
Thanks guys - you may consider your exaggerated compliments gratefully devoured!

Haven’t done much modeling lately, but here’s some more of the inspiration I got during last week’s visit to the old Mare Island Navy Yard. Among the sights I photographed that day was the historic Drydock No. 1, first completed in 1889.


I didn’t realize it when I was there, but this was the same drydock where Olympia had fitted out in 1895! Here’s a picture taken of her in Drydock No. 1 back then:

Very cool!

Work, family, and other “real life” priorities seem to conspire against my modeling time... but it is Friday night, my wife is catching up on her magazines and the kids are happily watching Pixar’s 'Rise of the Guardians'. I may get some modeling in yet!


TimReynaga
Staff MemberAssociate Editor
MODEL SHIPWRIGHTS
Visit this Community
California, United States
Joined: May 03, 2006
KitMaker: 2,500 posts
Model Shipwrights: 1,830 posts
Posted: Sunday, March 17, 2013 - 03:52 AM UTC
Having completed the railings and stairs on the superstructure, I added the rest of the details. These included the binnacle to the pilothouse roof, a compass (adapted from a Revell 1/350 SMS Emden part) to the compass platform, four peloruses to the flying bridges fore and aft, and four hose reels to the superstructure sides.


I also made a start with the rigging, beginning with the funnel stays. There were thirteen of them; six for each funnel plus one running between the two:

Normally rigging would start only after the masts were in place, but I thought I’d do it a little differently this time to try to avoid knocking into the tall masts while fixing the wires to the funnels below. The stays went on fine, but now I’ll have to avoid those delicate wires when I fit and rig the masts – so this approach may not have been so smart after all!

Anyway, I made the stays from fine copper wire painted black and attached with white glue. Although it is fussy to work with, I usually use wire rather than stretched sprue or fly tippet for my rigging since it has reliably consistent diameter and its relatively greater weight tends to make it hang more realistically.

To make things a little more interesting I also added turnbuckles (“tightening screws and eye bolts”, part NSA350070) from North Star Models of Russia(http://northstarmodels.com/product-category/for-ships/) to the wires where they attach to the deck.


I’ve always thought stay wires simply disappearing into decks on ship models looked a little odd, but scratchbuilt turnbuckles in small scales like this are way beyond what I would be willing to take on. These parts solve the problem nicely. They’re super easy to apply too, just glued on over the tops of the wires.