

Hi all,
I enlisted in the campaign yesterday and have decided to build the IJN Battleship Musashi. I have the photos showing that it is a new build but I am having trouble uploading them.
I was going to use my USS Missouri but decided that it was too far along to qualify so I am starting from scratch, hopefully the after market I ordered yesterday will arrive in a timely manner. This is my first campaign and I am looking forward to learning from all of you as I go through this build.
Any suggestions and advice is greatly appreciated and sought. Thanks
Dave
"Roll Tide"


Go to modelshipwrights.com for the current dynamic site!
Campaigns
Want to be part of a group build? This is where to start, plan, and meet about them.
Want to be part of a group build? This is where to start, plan, and meet about them.
Hosted by Jim Starkweather
Official Thread: Mighty Battleship

rolltide31

#377

Joined: June 27, 2010
KitMaker: 1,481 posts
Model Shipwrights: 1,332 posts

Posted: Tuesday, June 03, 2014 - 11:19 PM UTC
rolltide31
#377
Joined: June 27, 2010
KitMaker: 1,481 posts
Model Shipwrights: 1,332 posts
Posted: Wednesday, June 04, 2014 - 01:25 AM UTC
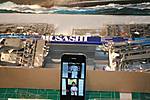
OK, so I have figured out my issue with uploading photos. So here are my initial photos of my Musashi.
and another

Dave
and another
Dave

TankSGT
Joined: July 25, 2006
KitMaker: 1,139 posts
Model Shipwrights: 84 posts

Posted: Wednesday, June 04, 2014 - 03:32 AM UTC
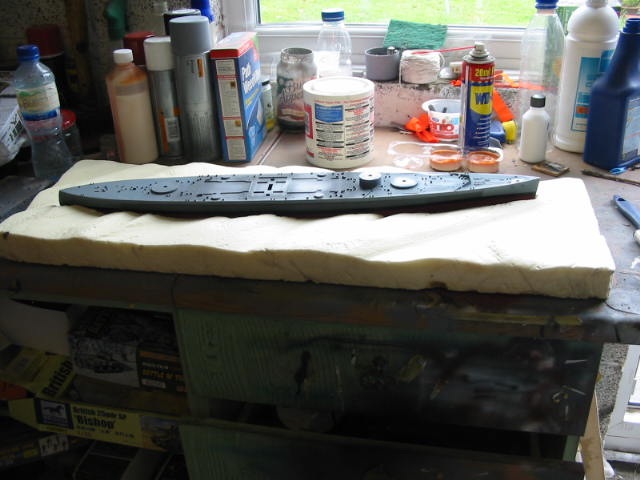
Hi all, some of last nights work, putty on the hull seam and some drilled out portholes.


A Wooden deck is not in the budget so we shall see how this comes out.
Tom


A Wooden deck is not in the budget so we shall see how this comes out.
Tom


beefy66

Joined: October 22, 2007
KitMaker: 971 posts
Model Shipwrights: 645 posts

Posted: Wednesday, June 04, 2014 - 04:07 AM UTC
Tom great start there
Javier and David nice looking subjects should mix up the variation a bit from the KGV builds.
Keith
Javier and David nice looking subjects should mix up the variation a bit from the KGV builds.
Keith
beefy66
Joined: October 22, 2007
KitMaker: 971 posts
Model Shipwrights: 645 posts
Posted: Wednesday, June 04, 2014 - 07:08 AM UTC
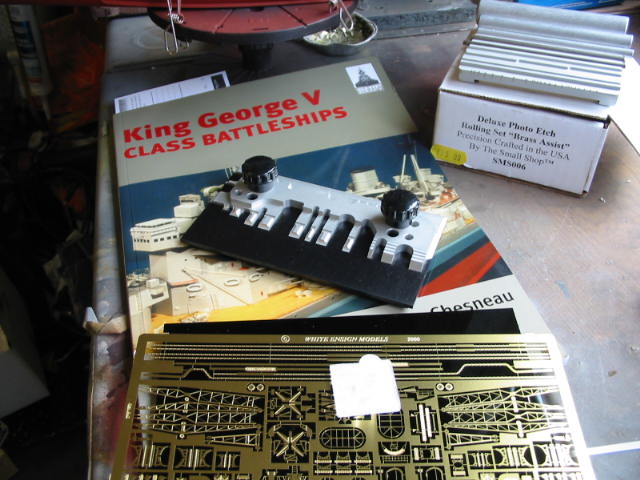
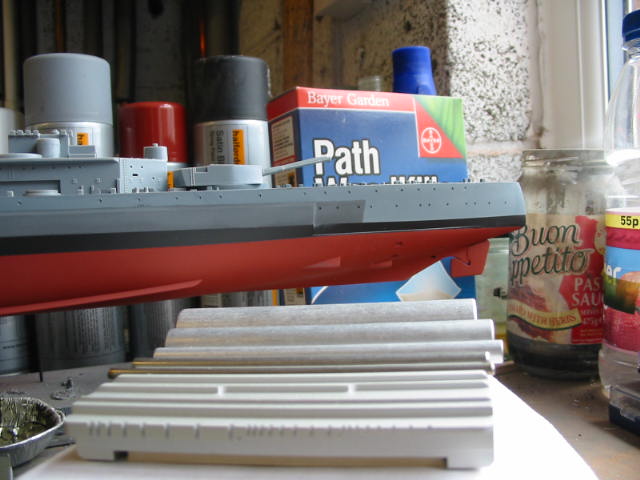
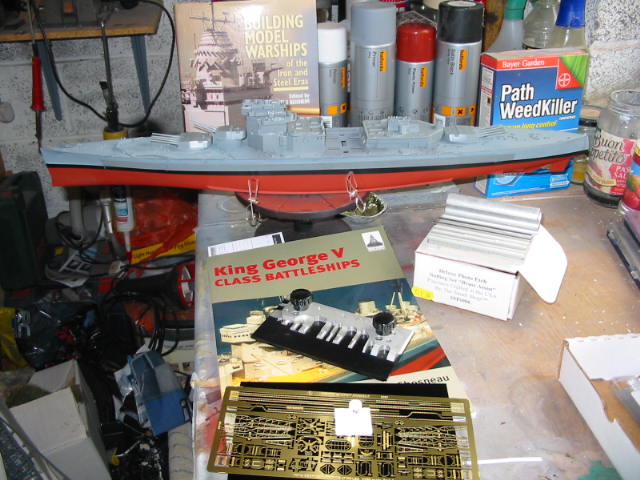
While at the Northern model show last weekend and after getting some great inspiration from you lot I decided to part with some of my hard earned Beer Token money I got 2 reference books on model ship building bargain a 2 pound and the Sea-forth book on the King George class ships I also indulged myself into getting some PE bending cutting and rolling tools from the Little cars stand. Thought I had better get some proper tools if I want to give this a good go. So this is were I,am at with the KGV Hull painted deck fitted needs some little filling great tip with the plastic card there Russell and started to dry fit some of the bridge structure
beefy66
Joined: October 22, 2007
KitMaker: 971 posts
Model Shipwrights: 645 posts
Posted: Wednesday, June 04, 2014 - 07:13 AM UTC
As you can see the hull needs some touch up around the masking and boot top areas next step the deck painting you can also see no props fitted as this will be a water line model but I want to try and do a rough sea scape to mimic the harsh weather in the north Atlantic 
Cheers Keith
Cheers Keith

RedDuster

Joined: March 01, 2010
KitMaker: 7,078 posts
Model Shipwrights: 6,649 posts

Posted: Wednesday, June 04, 2014 - 07:24 AM UTC
Thanks Tom,
Good start yourself.
Hi Keith,
Can call you "Speedy" now, you have overtaken me! looking good mate.
Si
Good start yourself.
Hi Keith,
Can call you "Speedy" now, you have overtaken me! looking good mate.
Si

RussellE
#306

Joined: June 27, 2010
KitMaker: 3,959 posts
Model Shipwrights: 2,777 posts

Posted: Wednesday, June 04, 2014 - 09:28 AM UTC
Quoted Text
Thanks Jan,
There is an awful lot to do the base kit, but it does get the detail right for the Duke. The Pontos set is very helpful, but slightly confusing in a number of areas, very little guidance as to where cable reels go, and a number of derrick booms, both stowed & deployed that have no locations given, on with even more research.
Thanks Russell,
Not as far along as it looks, does the deck you are using have cut outs for all the deck details, or are you having to strip back too? Huge amounts still to do!
Thanks again guys, looking forward to seeing you builds under way.
Si
Hi Si
the Shinsengumi deck, whilst being very fine and thin, fits pretty much over the moulded deck parts. The only exception being the hose reels which I've removed. 2 other things that require attention with this deck is that it will need a wash to bring out the planking, and then the challenge of fixing it down. It looks like I will need to use a spray adhesive.
To be honest I bought most of the after market for this kit around 5-6 years ago before the Pontos set was even on the horizon, but the more I see the work you're doing with it, and the price of the Pontos set vs what I spent on the Shinsengumi deck alone, I think the Pontos set gives you a far superior product and value for money, rectifying most of the kits flaws and allowing you to build various ships of the class, depending which Pontos set you purchase.
Hi Keith, you've sure raced ahead as well!
Good to see all the other builds starting too...


beefy66
Joined: October 22, 2007
KitMaker: 971 posts
Model Shipwrights: 645 posts
Posted: Wednesday, June 04, 2014 - 01:23 PM UTC
Not to speedy Simon All that superstructure is loose and in need of some filling and sanding before painting. I was not to sure about the hull color with the dark grey looks light but it should tone done and darken when I get round to putting some washes onto it
Cheers Keith
Cheers Keith
rolltide31
#377
Joined: June 27, 2010
KitMaker: 1,481 posts
Model Shipwrights: 1,332 posts
Posted: Thursday, June 05, 2014 - 06:41 AM UTC
Hi all,
quick question, for this build I bought a real wood deck for the Musashi, I have never worked with one before. How do you prep the ship for accepting the new deck, is it a matter of sanding the old plastic deck to remove detail? Any advice would be appreciated.
thanks
Dave
quick question, for this build I bought a real wood deck for the Musashi, I have never worked with one before. How do you prep the ship for accepting the new deck, is it a matter of sanding the old plastic deck to remove detail? Any advice would be appreciated.
thanks
Dave
RedDuster
Joined: March 01, 2010
KitMaker: 7,078 posts
Model Shipwrights: 6,649 posts
Posted: Thursday, June 05, 2014 - 07:54 AM UTC
Hi Keith,
Only joking mate, likewise my superstructure units are still loose, more painting to be done before they go down. Colours look fine from the pics.
Hi Russell,
The Pontos set is a one stop shop, most of the other decks I have used required minimal modification to fit, in this case the deck is part of a conversion and with regard to deck fittings the two ships are very different.
Hi Dave,
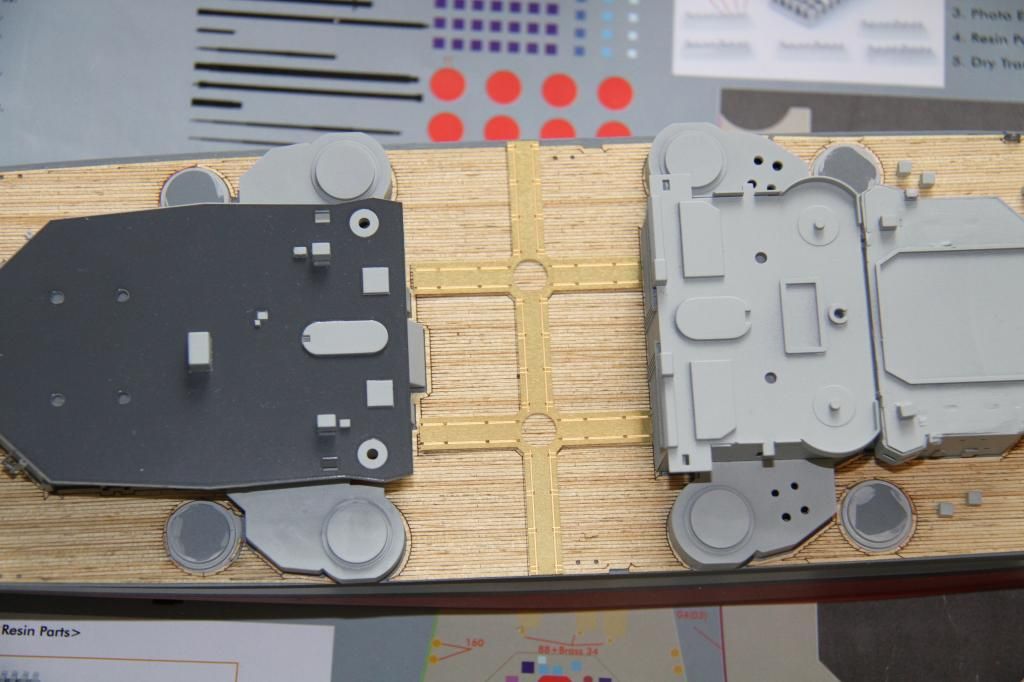
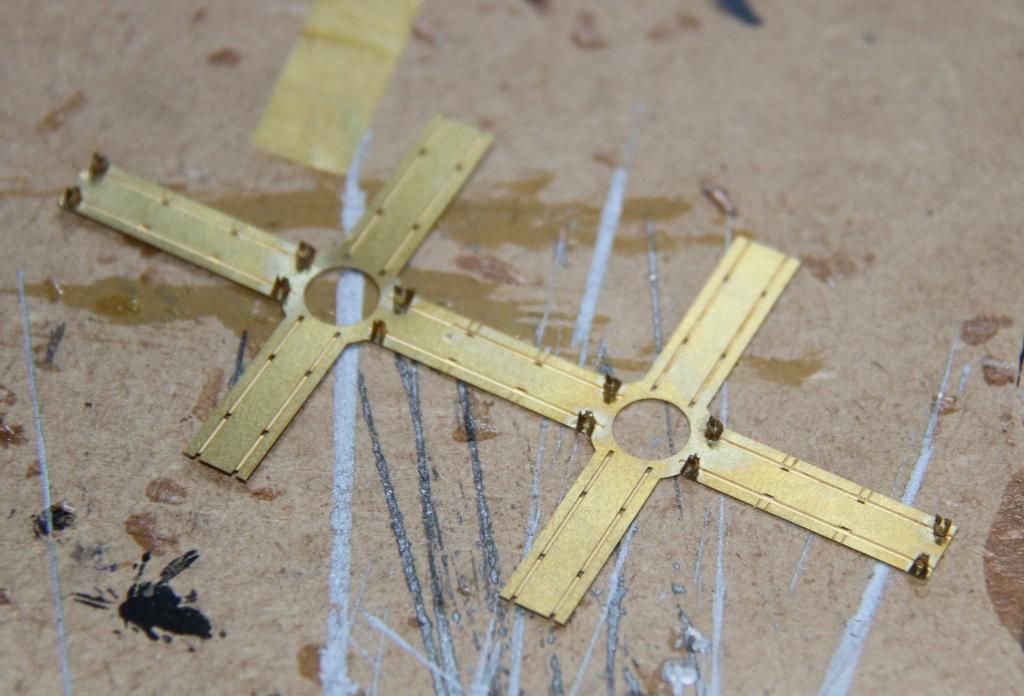
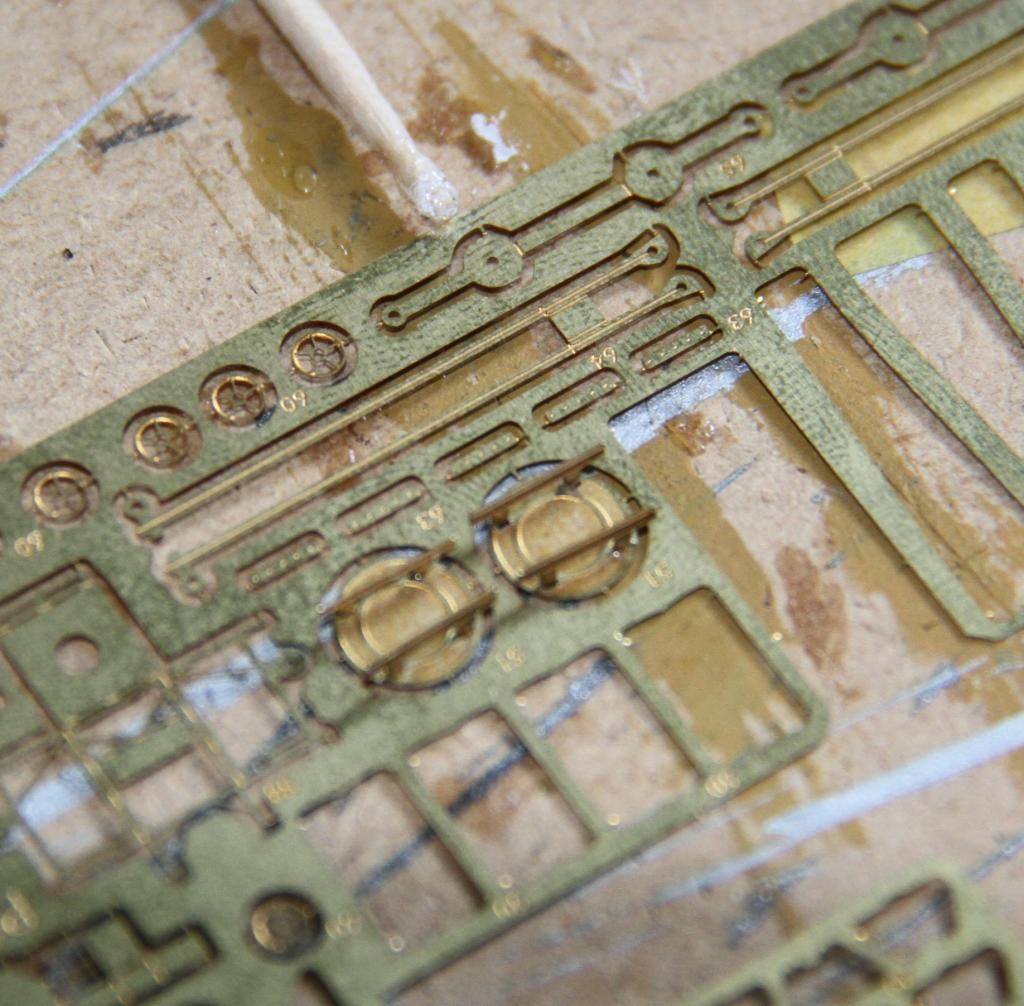
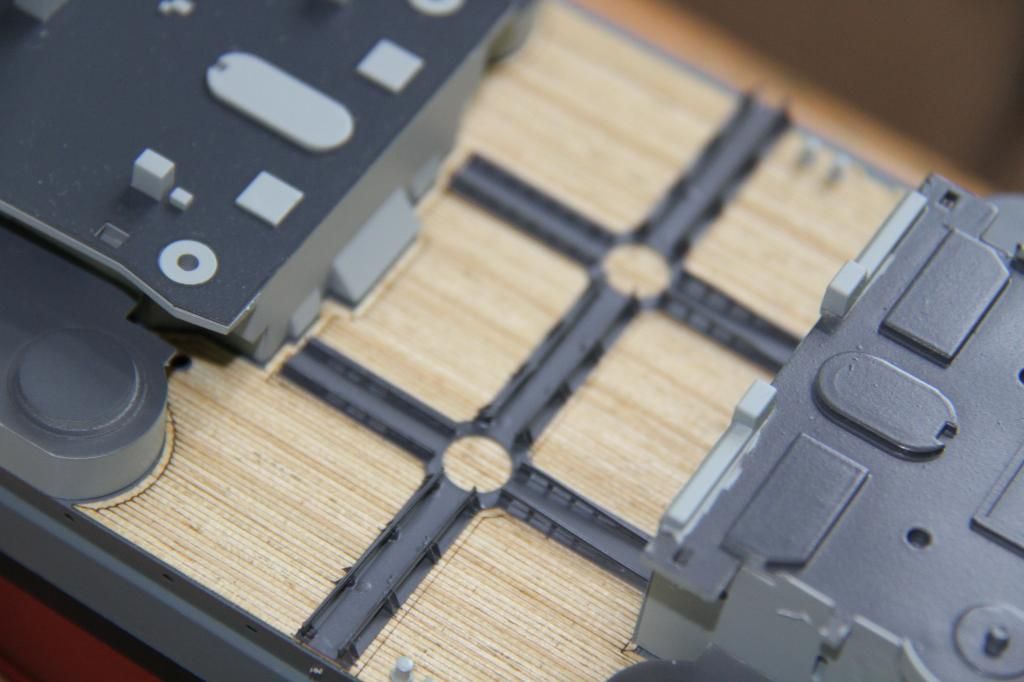
Can you post a pic of the deck, so we can have a look. the one I am using for the Duke of York required almost all the deck detail removing. The deck I used on my Dreadnought build required only a few things removed. here it is before and after all the waste deck picked off the backing sheet.
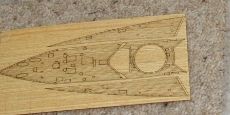
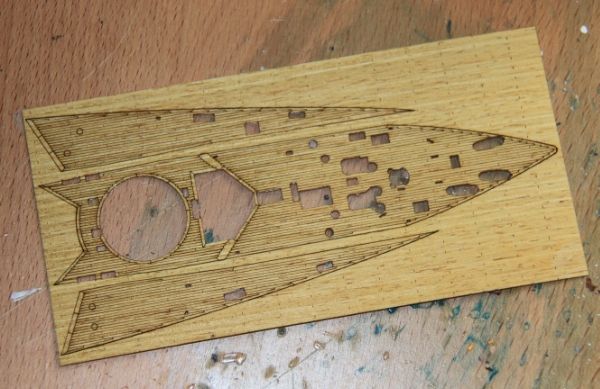
Sorry if the top pic is a bit small. only other prep pre paint the kit deck and remaining fittings, the self adhesive deck sticks better and you get a neater finish.
Si
Only joking mate, likewise my superstructure units are still loose, more painting to be done before they go down. Colours look fine from the pics.
Hi Russell,
The Pontos set is a one stop shop, most of the other decks I have used required minimal modification to fit, in this case the deck is part of a conversion and with regard to deck fittings the two ships are very different.
Hi Dave,
Can you post a pic of the deck, so we can have a look. the one I am using for the Duke of York required almost all the deck detail removing. The deck I used on my Dreadnought build required only a few things removed. here it is before and after all the waste deck picked off the backing sheet.


Sorry if the top pic is a bit small. only other prep pre paint the kit deck and remaining fittings, the self adhesive deck sticks better and you get a neater finish.
Si
rolltide31
#377
Joined: June 27, 2010
KitMaker: 1,481 posts
Model Shipwrights: 1,332 posts
Posted: Thursday, June 05, 2014 - 08:27 AM UTC
Si,
I don't have the new deck yet but once I do I will send a photo. Is it a good idea to sand of the detail from the original plastic deck and make it smooth or does it really matter?
thanks again
Dave
I don't have the new deck yet but once I do I will send a photo. Is it a good idea to sand of the detail from the original plastic deck and make it smooth or does it really matter?
thanks again
Dave
RedDuster
Joined: March 01, 2010
KitMaker: 7,078 posts
Model Shipwrights: 6,649 posts
Posted: Friday, June 06, 2014 - 08:33 AM UTC
Hi Dave,
I would not touch the kit's deck detail until your deck arrives. Then see what if anything you need to remove. Most decks are pre cut to take the kit's detail, I have found they stick better to a painted surface rather thn bare plastic.
Which manufacturer's deck are you using
Si
I would not touch the kit's deck detail until your deck arrives. Then see what if anything you need to remove. Most decks are pre cut to take the kit's detail, I have found they stick better to a painted surface rather thn bare plastic.
Which manufacturer's deck are you using
Si
rolltide31
#377
Joined: June 27, 2010
KitMaker: 1,481 posts
Model Shipwrights: 1,332 posts
Posted: Friday, June 06, 2014 - 12:04 PM UTC
Si,
I bought the Hunter teak deck for the Musashi. Hopefully I will have it in hand early next week so I can see what challenges it is going to create. I also bought the Eduard PE kit and Master turned brass barrels for the 460mm main guns. Hopefully it will all come in next week.
Thanks for the advice.
Dave

gconterio
Joined: June 24, 2010
KitMaker: 66 posts
Model Shipwrights: 3 posts
Posted: Friday, June 06, 2014 - 02:33 PM UTC
Wow, I'm behind again! For some reason I had it stuck in my head the start date was June, not May. No matter, still trying to clear my desk of a couple of KV-1 kits for the KV build on Armorama, ending in July, so lots of time.
I suppose I do need to select a subject. I have three possibilities, all 1350th:
Kniaz Suvarov
Dreadnaught
Grosser Kurfurst
All have after market brass and/or barrels. Kind of leaning toward Dreadnaught.
I suppose I do need to select a subject. I have three possibilities, all 1350th:
Kniaz Suvarov
Dreadnaught
Grosser Kurfurst
All have after market brass and/or barrels. Kind of leaning toward Dreadnaught.
beefy66
Joined: October 22, 2007
KitMaker: 971 posts
Model Shipwrights: 645 posts
Posted: Saturday, June 07, 2014 - 01:04 AM UTC
Hi Simon this is what I need to know about wooden decks as well when I get round to doing a build with one
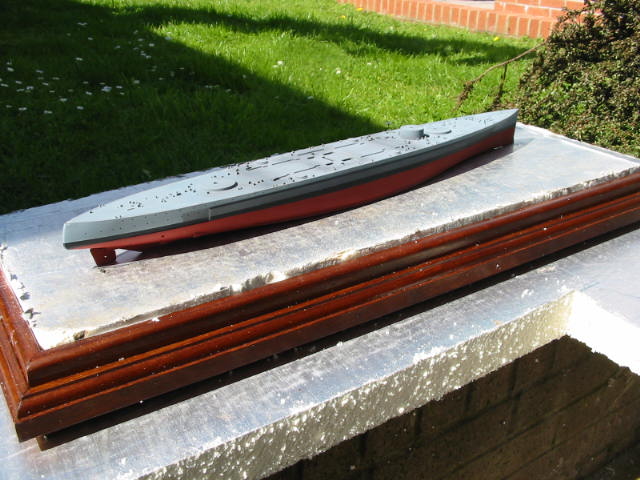
Well a friend at my model club made me a base so with the whether being sunny yesterday I made a start on the seascape I have cut some king span insulation foam to the size of the base this will sit inside the frame work I have carved out the basic shape of the waves and the hole for the KGV to sit in ans sanded smooth when happy with the basic form I then coated the king span in white PVA glue.
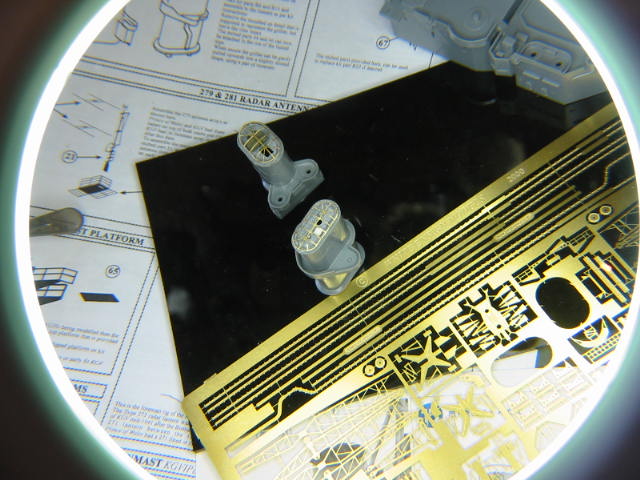
i have also been trying out my new work table lamp and magnifier by making a start on the funnels and adding some detail and PE
Cheers Keith
Well a friend at my model club made me a base so with the whether being sunny yesterday I made a start on the seascape I have cut some king span insulation foam to the size of the base this will sit inside the frame work I have carved out the basic shape of the waves and the hole for the KGV to sit in ans sanded smooth when happy with the basic form I then coated the king span in white PVA glue.
i have also been trying out my new work table lamp and magnifier by making a start on the funnels and adding some detail and PE
Cheers Keith
RedDuster
Joined: March 01, 2010
KitMaker: 7,078 posts
Model Shipwrights: 6,649 posts
Posted: Saturday, June 07, 2014 - 03:34 AM UTC
You are welcome Keith,
Your seascape is coming on splendidly & neat etchwork on the funnel caps.
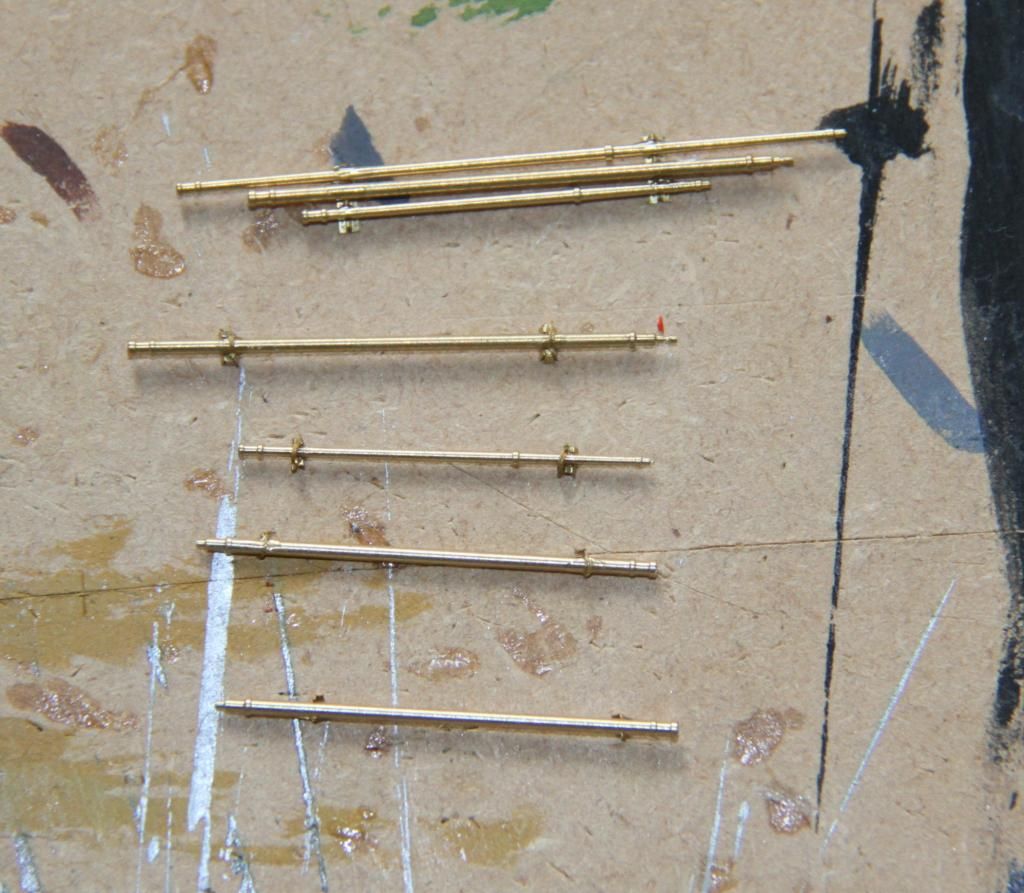
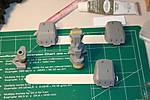
Meantime on with the Duke, having found the locations o the derrick booms on the foredeck, they are checked off against the parts list to get the correct lengths.
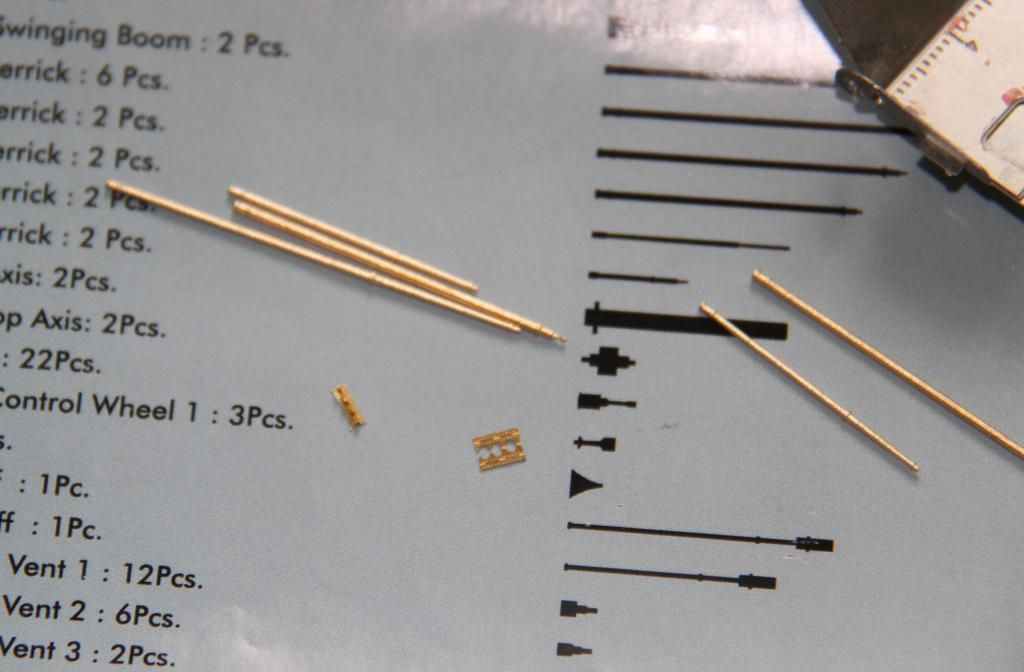
The booms, (including the two that go on the after superstructure fitted to their etched racks.
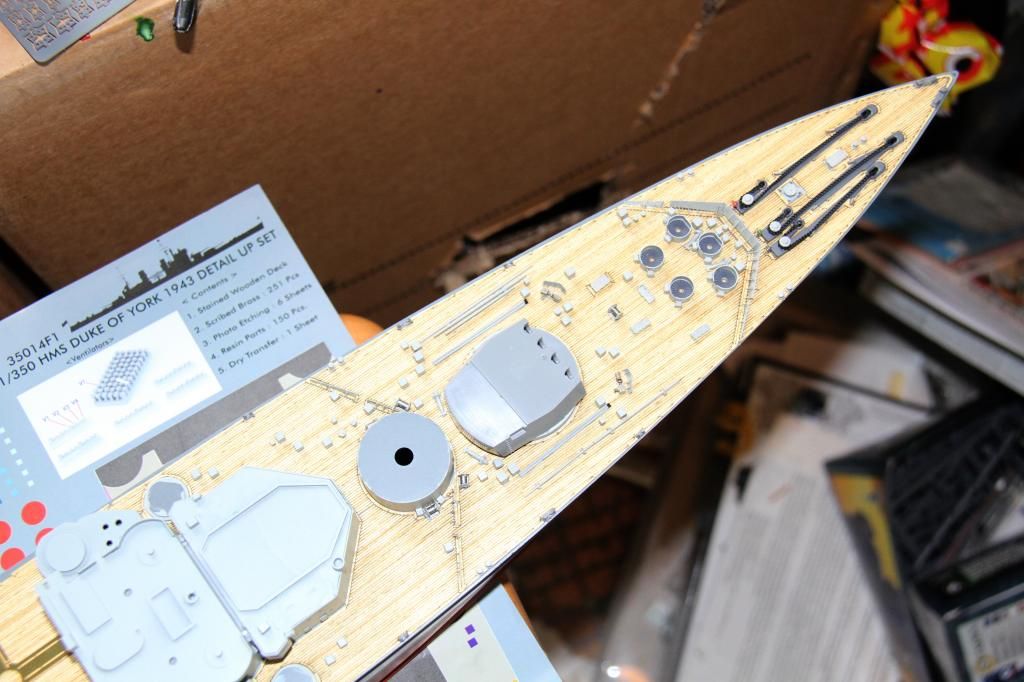
The foredeck finally completed. again checking the abovementioned pictures, the Duke did have 4 paravanes, two between the forward 3 gun tubs, and 2 just abaft A turret, the kit parts are used as no relacements or details are included in the upgrade. A turret in sat plce just to ensure it is not fouled by vents and to get the paravaes I the right place.
Catapult test fitted.
And construction started. Half the supports for the main rails on.
Si
Your seascape is coming on splendidly & neat etchwork on the funnel caps.
Meantime on with the Duke, having found the locations o the derrick booms on the foredeck, they are checked off against the parts list to get the correct lengths.

The booms, (including the two that go on the after superstructure fitted to their etched racks.

The foredeck finally completed. again checking the abovementioned pictures, the Duke did have 4 paravanes, two between the forward 3 gun tubs, and 2 just abaft A turret, the kit parts are used as no relacements or details are included in the upgrade. A turret in sat plce just to ensure it is not fouled by vents and to get the paravaes I the right place.

Catapult test fitted.

And construction started. Half the supports for the main rails on.

Si
rolltide31
#377
Joined: June 27, 2010
KitMaker: 1,481 posts
Model Shipwrights: 1,332 posts
Posted: Saturday, June 07, 2014 - 10:17 AM UTC
Hi all,
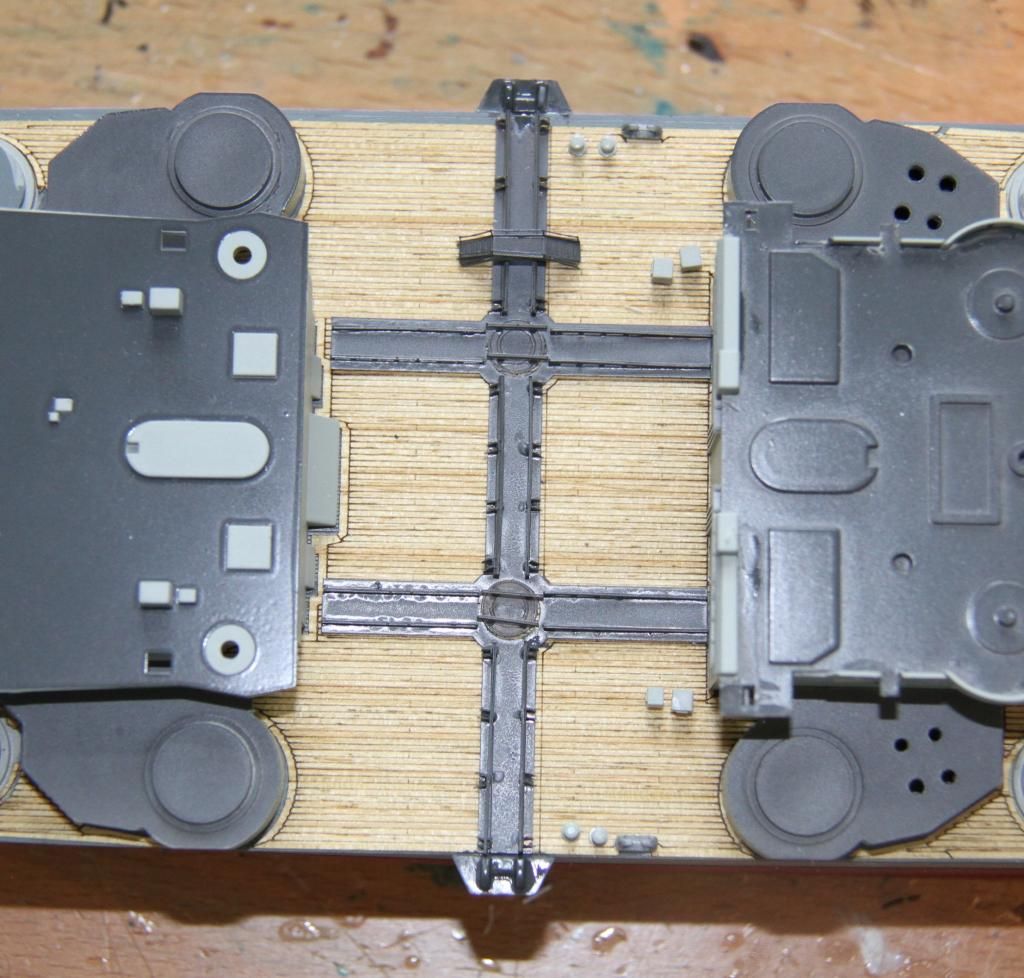
So the build begins. I have attached some photos of the initial destruction. One thing I like about Eduard PE kits is you can get the instruction on line so I down loaded them in preparation. Allows me to begin removing and sanding prior to actually receiving the kit. Hopefully it will be here in a few days. Not much work but I am finding that the fit for the Musashi is definitely not the best I have had. A lot of sanding and filling in the near future.
and another
and the last one
So far it seems to be going well. Cant wait for the PE kit to get in so I can get into the details.
More to follow
Dave

Dragon164
#226

Joined: February 20, 2012
KitMaker: 1,909 posts
Model Shipwrights: 33 posts

Posted: Saturday, June 07, 2014 - 01:09 PM UTC
Dave,
If you click on the picture frame with the chain next to the link in your gallery it will give you a link to post the larger picture.
Cheers Rob.
If you click on the picture frame with the chain next to the link in your gallery it will give you a link to post the larger picture.
Cheers Rob.

rolltide31
#377
Joined: June 27, 2010
KitMaker: 1,481 posts
Model Shipwrights: 1,332 posts
Posted: Saturday, June 07, 2014 - 11:37 PM UTC
Thanks Rob, I will try that next time. I was wondering why my photos were small.
Dave
Dave
RedDuster
Joined: March 01, 2010
KitMaker: 7,078 posts
Model Shipwrights: 6,649 posts
Posted: Sunday, June 08, 2014 - 06:41 AM UTC
Onward with the catapult.
All the supports for the rails in place.
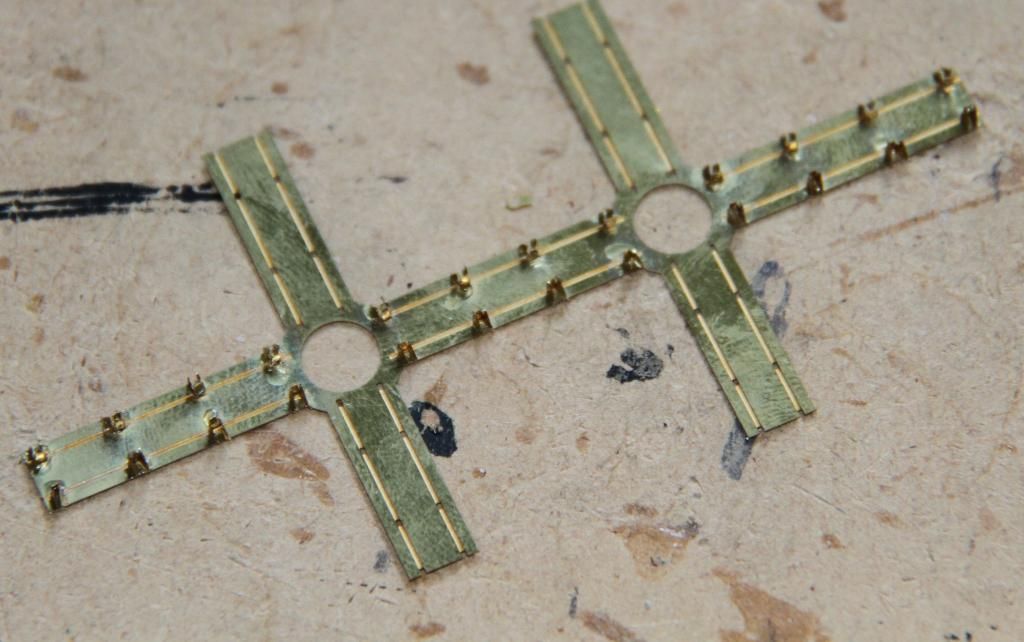
That wwas the fiddly bit done, the rails dropped neatly into the slots on the supports.
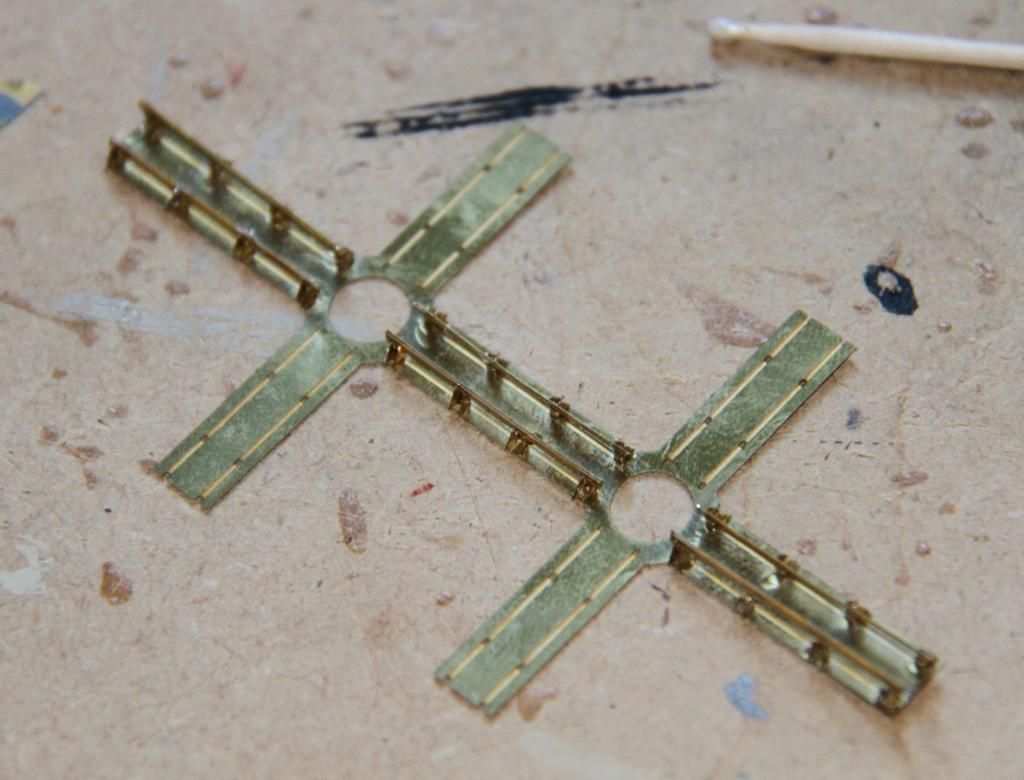
The main catapult assembly finished, along with one of the walkways. I am fitting one, because I am going to have the Walrus on the other turntable facing aft, not strictly correct but I fancy all the etched structs for the Walrus and I like the little walkways too, and minimum wastage from the Pontos set.
The turntables were assembled on the fret.
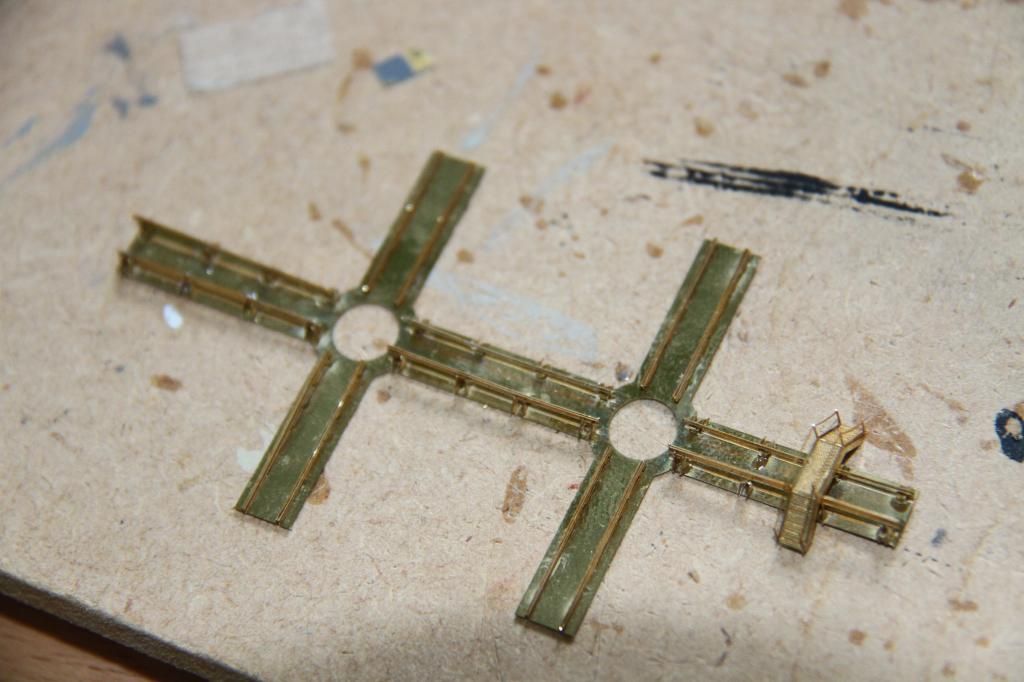
The whole lot was given a coat of Tamiya TS4, at the same time the lower superstructure units were masked off & their decks sprayed too. The main catapult section was then fitted.
The catapult completed, including the two small end pieces from the kit.
The deck colour XF63 is not quite dry in this picture.
An overview of where the build id at. Vent boxes and mooring bits have been added to the catapult deck, next job, start aft and work forward with all the gun tubs, vents & etc on the quarterdeck.
Will be a little hiatus as next weekend is a bit busy, my son is coxing for his school at The Marlow regatta on Saturday, and it is the Military Vehicle parade at Duxford on Sunday, and the MAFVA nationals.
It will give you guys a chance to catch up.


Si
All the supports for the rails in place.

That wwas the fiddly bit done, the rails dropped neatly into the slots on the supports.

The main catapult assembly finished, along with one of the walkways. I am fitting one, because I am going to have the Walrus on the other turntable facing aft, not strictly correct but I fancy all the etched structs for the Walrus and I like the little walkways too, and minimum wastage from the Pontos set.

The turntables were assembled on the fret.

The whole lot was given a coat of Tamiya TS4, at the same time the lower superstructure units were masked off & their decks sprayed too. The main catapult section was then fitted.

The catapult completed, including the two small end pieces from the kit.
The deck colour XF63 is not quite dry in this picture.
An overview of where the build id at. Vent boxes and mooring bits have been added to the catapult deck, next job, start aft and work forward with all the gun tubs, vents & etc on the quarterdeck.

Will be a little hiatus as next weekend is a bit busy, my son is coxing for his school at The Marlow regatta on Saturday, and it is the Military Vehicle parade at Duxford on Sunday, and the MAFVA nationals.
It will give you guys a chance to catch up.
Si
beefy66
Joined: October 22, 2007
KitMaker: 971 posts
Model Shipwrights: 645 posts
Posted: Sunday, June 08, 2014 - 06:58 AM UTC
Nice work there Simon coming along a treat hope you enjoy Duxford I will be missing it this year because of work commitments.
Keith
Keith
TankSGT
Joined: July 25, 2006
KitMaker: 1,139 posts
Model Shipwrights: 84 posts
Posted: Sunday, June 08, 2014 - 09:33 PM UTC
Duxford, you lucky stiffs. We don't have anything like in the states. Well enjoy. At least I have been able to visit 3 battleships and an aircraft carrier.
Share some pictures if you get the chance. That show is on my bucket list.
Tom
Share some pictures if you get the chance. That show is on my bucket list.
Tom
rolltide31
#377
Joined: June 27, 2010
KitMaker: 1,481 posts
Model Shipwrights: 1,332 posts
Posted: Monday, June 09, 2014 - 09:59 AM UTC
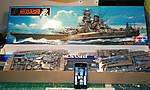
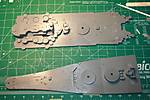
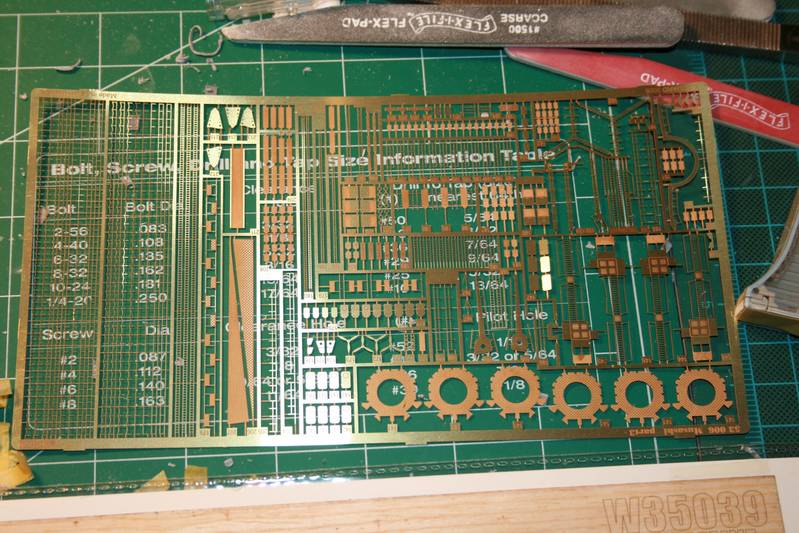
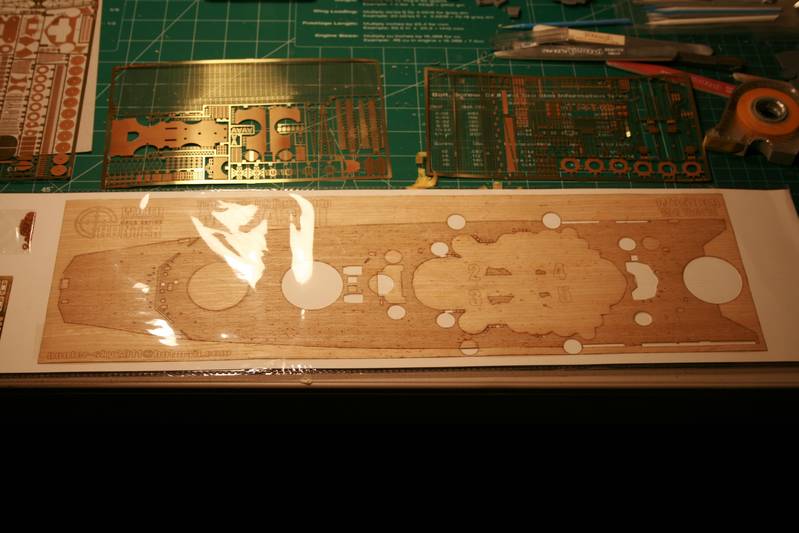
So the Eduard Kit and Hunter Deck has arrived. Ready to get down to serious building. All I need at this point are the reference materials I ordered.
Will get quite a bit done this week so more to follow.
Dave
Will get quite a bit done this week so more to follow.
Dave
RedDuster
Joined: March 01, 2010
KitMaker: 7,078 posts
Model Shipwrights: 6,649 posts
Posted: Tuesday, June 10, 2014 - 06:32 AM UTC
Hi Dave,
The Hunter deck looks nice, It would appear to be pre cut to fit around the kit detail. I presume the deck instructions will tell you what you need to do. The Eduard etch looks fairly impressive.
Hi Tom & Keith,
Will post some pics of Duxford with pleasure.
Also noticed reading back I missed the pic of the completely install Catapult, so here it is.
Si
The Hunter deck looks nice, It would appear to be pre cut to fit around the kit detail. I presume the deck instructions will tell you what you need to do. The Eduard etch looks fairly impressive.
Hi Tom & Keith,
Will post some pics of Duxford with pleasure.
Also noticed reading back I missed the pic of the completely install Catapult, so here it is.

Si
 |

WEB HOSTING BY


Copyright ©2021 Model Shipwrights and Kitmaker Network, a subsidiary of Silver Star Enterprises
All Rights Reserved. Please read our Conditions of Use and Privacy Policy.
All Rights Reserved. Please read our Conditions of Use and Privacy Policy.