

Simon, the catapult looks great. it sure has a lot of fidely bits. As a retired tanker Duxford would be like going to tanker paradise.
Ship models a a bit different then tanks, do you paint as you go, bulkheads then decks or decks then bulkheads?
I had been thinking of hand painting decks vs masking and spray painting. How do you guys approach it?
Also what methods do you fellows use for cammo painting?
Do you paint the water line first then mask the boot top then paint red and gray? It seems kind of silly but I have not built a full hull ship in decades.
Tom


Go to modelshipwrights.com for the current dynamic site!
Campaigns
Want to be part of a group build? This is where to start, plan, and meet about them.
Want to be part of a group build? This is where to start, plan, and meet about them.
Hosted by Jim Starkweather
Official Thread: Mighty Battleship

TankSGT

Joined: July 25, 2006
KitMaker: 1,139 posts
Model Shipwrights: 84 posts

Posted: Tuesday, June 10, 2014 - 07:02 AM UTC


rolltide31

#377
Joined: June 27, 2010
KitMaker: 1,481 posts
Model Shipwrights: 1,332 posts

Posted: Tuesday, June 10, 2014 - 07:27 AM UTC
Simon and all
the catapult looks great. Hope I can get as good a look with the Eduard PE Set.
To tag onto Tom's questions regarding painting, what do ya'll do for plastic prep. I remember Poly S used to have a Plastic Prep solution but I haven't been able to find it. I did read an article that mentioned using Isopropyl alcohol to clean everything off but I haven't tried it yet so any suggestions are appreciated.
thanks again. Will post more pics once I start with the PE.
Dave

wildspear
Joined: April 03, 2007
KitMaker: 960 posts
Model Shipwrights: 901 posts

Posted: Tuesday, June 10, 2014 - 02:43 PM UTC

Just got back from a job in PA, decided I better start my build. I still have some fine sanding to do but im about ready to put on the props and other bits on the hull. The wood deck and eduards pe should come in the mail tomorrow. ..hopefully
TankSGT
Joined: July 25, 2006
KitMaker: 1,139 posts
Model Shipwrights: 84 posts
Posted: Wednesday, June 11, 2014 - 06:29 AM UTC
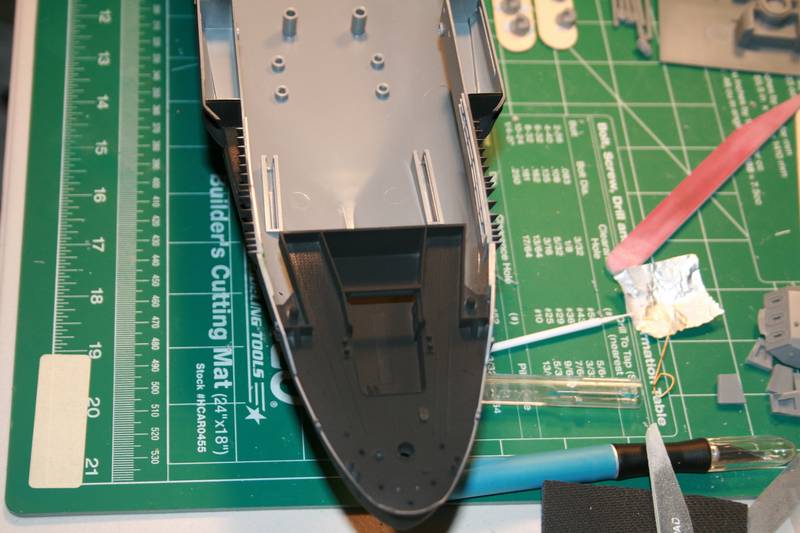
Well we are proceeding slowly but surely. My hull inside was given a bit of weight with some old bullets glued in so it will be less top heavy, and the seam was reinforced to handle the stress of sanding and to make the stand a bit more solid.

I was also working on the gun elevation.The kit comes with the guns depressed below horizontal. This looked pretty bad so I worked on a way with a bit of filing and cutting to add some elevation to the guns. One turret modified so far.

Tom

I was also working on the gun elevation.The kit comes with the guns depressed below horizontal. This looked pretty bad so I worked on a way with a bit of filing and cutting to add some elevation to the guns. One turret modified so far.

Tom

RedDuster

Joined: March 01, 2010
KitMaker: 7,078 posts
Model Shipwrights: 6,649 posts

Posted: Wednesday, June 11, 2014 - 07:23 AM UTC
Frank,
Nice to see another Battlewagon under way.
Tom,
Coming on well.
Tom & Dave
In answer to the painting questions.
The only prep I do the raw plastic is wash it in warm soapy water & air dry.
I do use IPA, but only to wipe over any heavily handled areas that are going to be masked after the first coat of paint.
I start below the waterline & work up. Spray the entire hull with Halfords Red Primer straight out of the rattlecan. Not only is it a great base coat, for most builds including the DOY, It makes a great anti fouling red. I then mask the underwater section & spray the rest with Citadel Chaos Black, this makes a great boot topping colour and also stops the a red tinge to the main hull grey (especially a light one). Mask off the boot topping & spray the hull. If I am not using a wood deck, then mask up the rest of the hull & spray the deck. (check back to P1 & see some pics of that in action, also Kitchen foil makes a great mask for large areas, as long the edges are taped down)
Superstructure, I spray the sides, and for large areas of deck (or smaller easy to mask) I mask & spray the deck, otherwise it gets the hairy stick treatment. (Mostly because I am lazy at and hate complicated masking.
Hope that helps.
Si
rolltide31
#377
Joined: June 27, 2010
KitMaker: 1,481 posts
Model Shipwrights: 1,332 posts
Posted: Thursday, June 12, 2014 - 04:02 AM UTC
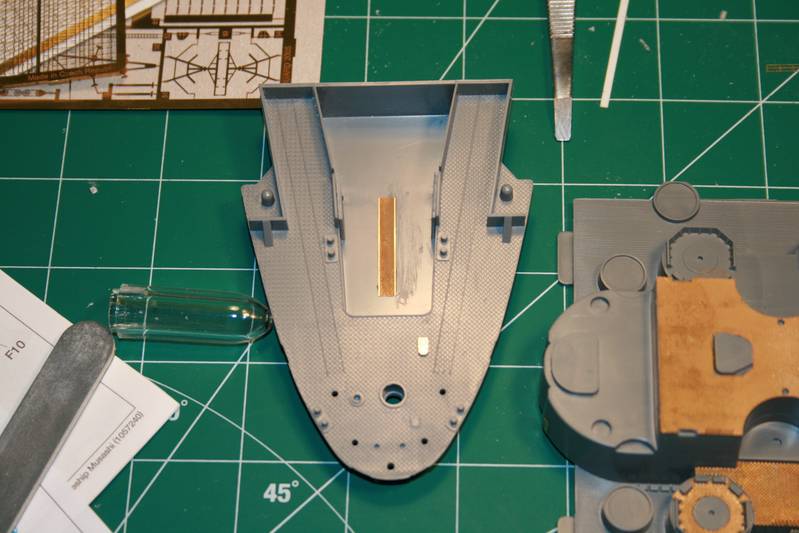
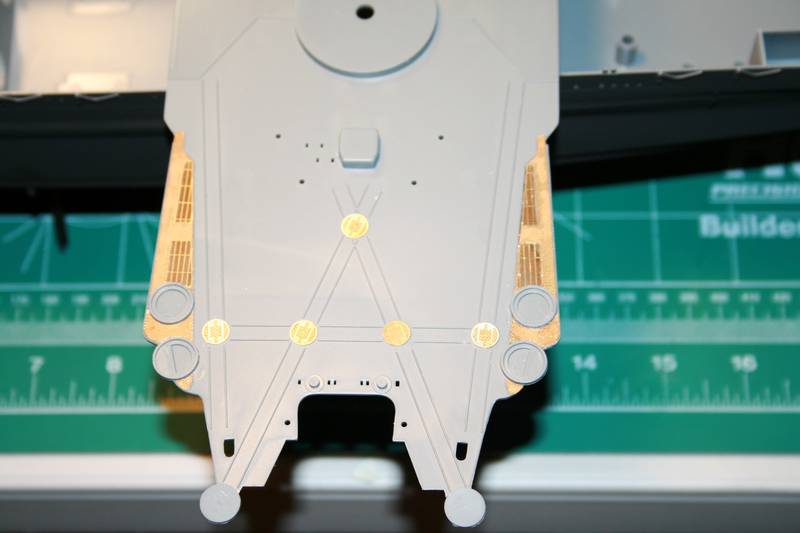
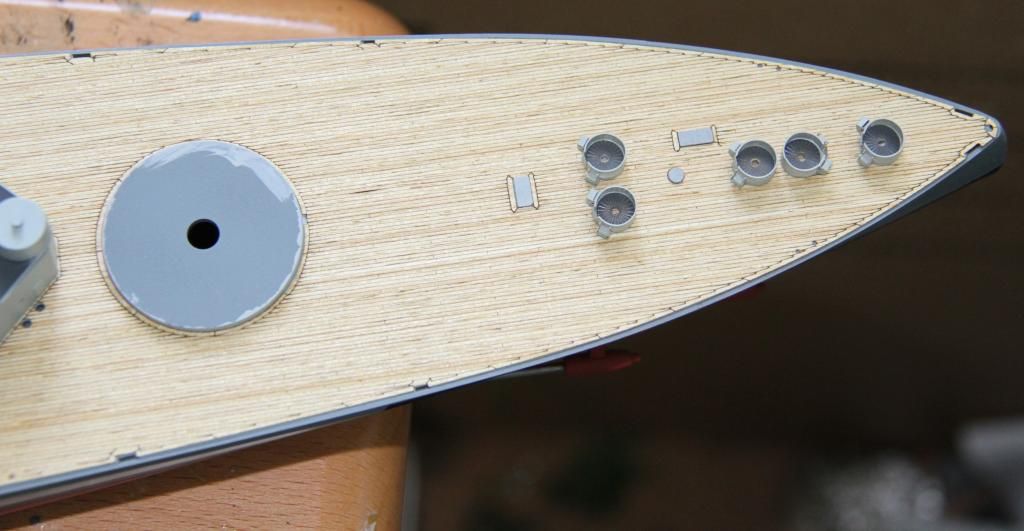
Hi all, hope everyone's build is going well. Here is an update, the Eduard PE finally came in and I have started placing the pieces on. Some of the fit are tight and required some sanding but so far so good. The instructions are great and provide enough detail to know where each part is going to go.
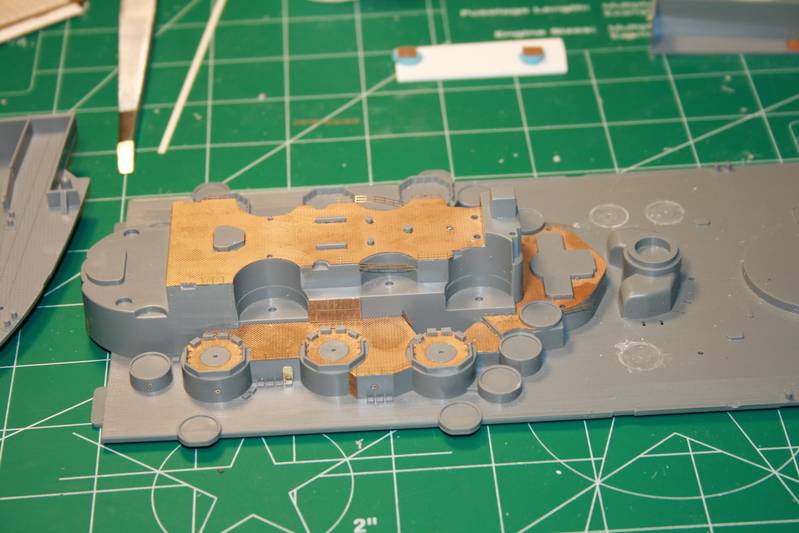
The gun decks are where I experienced the problem with fit, but with some sanding and force the plating went down.
Here is the aft hanger bay, I left the doors open as I want to show one of the planes inside the hanger being moved out.
Mt inexperience of ship building is coming into play as I am pretty much all over the instructions, both he basic model instructions and the PE instructions. Need to learn how to make a plan prior to the build. But so far things seem to be moving along pretty well. The paints are ordered and should be here in about a week so I can start showing some color. Looking forward to seeing this come together.
Well that's it for now, again, hope everyone's build is coming along.
RedDuster
Joined: March 01, 2010
KitMaker: 7,078 posts
Model Shipwrights: 6,649 posts
Posted: Thursday, June 12, 2014 - 06:42 AM UTC
Nice work Dave,
Etched non skid decks are going to add a lot to the finished model.
Si
Etched non skid decks are going to add a lot to the finished model.
Si

SqzMyLemon

Joined: December 10, 2007
KitMaker: 66 posts
Model Shipwrights: 60 posts

Posted: Thursday, June 12, 2014 - 09:44 AM UTC
Nice to see all the progress to date and I'm envious of the starts made by many of you. I'm still waiting for house renovations to wrap up before I can really get going with my BB Roma. I think I will definitely have to accomplish something on her this weekend to not fall too far behind!
It's inspirational to see the progress of all the builds so far. Happy modeling!
It's inspirational to see the progress of all the builds so far. Happy modeling!
wildspear
Joined: April 03, 2007
KitMaker: 960 posts
Model Shipwrights: 901 posts
Posted: Sunday, June 15, 2014 - 02:10 AM UTC
I have received my wood deck and eduards PE in the mail. So I'm able to some work. One question, I want to make the 5/51 guns a little better on my Arizona. I'm pretty sure that I'm going to purchase barrels for the guns. Are there any aftermarket kits for the 5/51?

RussellE
#306

Joined: June 27, 2010
KitMaker: 3,959 posts
Model Shipwrights: 2,777 posts

Posted: Tuesday, June 17, 2014 - 11:24 PM UTC
18th June 2014... up to primer coat with degaussing coil and prop shafts on... ready for top coats now. 
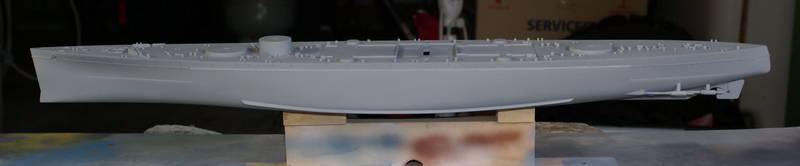
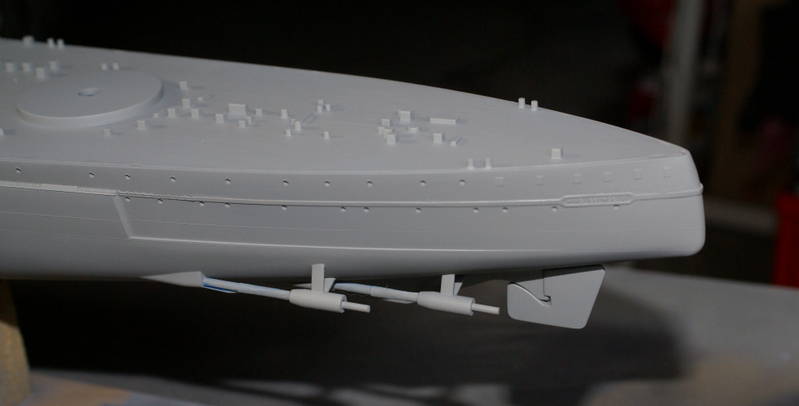
more soon...
more soon...

RedDuster
Joined: March 01, 2010
KitMaker: 7,078 posts
Model Shipwrights: 6,649 posts
Posted: Wednesday, June 18, 2014 - 07:24 AM UTC
racking job on the degausing coil Russell, they are can be tricky to get just so.
Looking good mate.
Si
Looking good mate.
Si
rolltide31
#377
Joined: June 27, 2010
KitMaker: 1,481 posts
Model Shipwrights: 1,332 posts
Posted: Wednesday, June 18, 2014 - 08:18 AM UTC
Hi all,
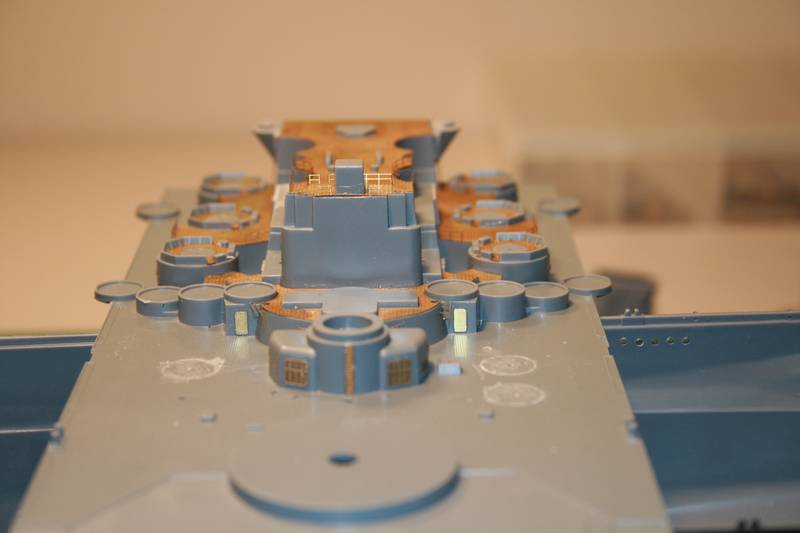
Thought I would provide an update. Today was a big day as all my paints finally arrived so I can begin painting this big monster. The PE kit is going on smoothly as you can see from the pictures.
I am done for the most part with the center island and ready to begin moving onto the front deck. I think now that I have the paint I am going to mount the decks onto the hull and continue from there. Not sure at this point.
I started on one of the Main Guns. I had some difficulty doing this on my USS Missouri but I believe I might have it down at this point. It is definitely challenging ensuring that the barrels are aligned correctly.
Once I have the barrels added I will begin with the PE detail.
Hopefully I will get some time this weekend to move this project along and get some of the painting done. If anyone has some advice on how you mount your barrels I would greatly appreciate the assistance.
That's all for now, will provide an update on Sunday. Take care
Dave

Cosimodo
#335

Joined: September 03, 2013
KitMaker: 1,808 posts
Model Shipwrights: 871 posts

Posted: Wednesday, June 18, 2014 - 05:22 PM UTC
To all the battleship builders, you're doing a fantastic job and keeping this non-participant well and truly amazed by the various builds going on here.
Keep at the good work!
cheers
Michael
Keep at the good work!
cheers
Michael

beefy66

Joined: October 22, 2007
KitMaker: 971 posts
Model Shipwrights: 645 posts

Posted: Wednesday, June 18, 2014 - 09:43 PM UTC
Russell and David both your builds looking great love your PE work lads will be starting to add a little more to mine soon it has been slow going with work the last couple of weeks 
Keith
Keith
RussellE
#306
Joined: June 27, 2010
KitMaker: 3,959 posts
Model Shipwrights: 2,777 posts
Posted: Wednesday, June 18, 2014 - 11:20 PM UTC
Thank you Si. The PE degaussing coil was a difficult one for sure. A fair bit of force was required to get it into the right spot. Even then i wasn't happy with it, but what do you do? Either the kit or the PE was out...
Looking good there David.
Thanks Micheal
Hi Keith, look forward to seeing some pics soon...
Looking good there David.
Thanks Micheal
Hi Keith, look forward to seeing some pics soon...
RedDuster
Joined: March 01, 2010
KitMaker: 7,078 posts
Model Shipwrights: 6,649 posts
Posted: Thursday, June 19, 2014 - 07:26 AM UTC
Looking good Dave,
Metal barrels, If I am mounting into plastic blast bags or gun breaches, I make a jig. Simple, rough and ready. scrap plastic card to prop the blast bag up, on it's side so it is the right height that my pin vice, laid in it's side will go straight in. Then clamp the blast bag down securely, I use a small G Clamp That way I can replicate the same hole in each one.
Sorry that is vague, but each one I have done has been different to suit the job, and off course I have no pics.
Hope you get the my drift.
Si
rolltide31
#377
Joined: June 27, 2010
KitMaker: 1,481 posts
Model Shipwrights: 1,332 posts
Posted: Thursday, June 19, 2014 - 08:56 AM UTC
Quoted Text
Looking good Dave,
Metal barrels, If I am mounting into plastic blast bags or gun breaches, I make a jig. Simple, rough and ready. scrap plastic card to prop the blast bag up, on it's side so it is the right height that my pin vice, laid in it's side will go straight in. Then clamp the blast bag down securely, I use a small G Clamp That way I can replicate the same hole in each one.
Sorry that is vague, but each one I have done has been different to suit the job, and off course I have no pics.
Hope you get the my drift.
Si
Si thanks for the advice, I am going to try something along those lines and see how it goes. Thanks again
Dave
rolltide31
#377
Joined: June 27, 2010
KitMaker: 1,481 posts
Model Shipwrights: 1,332 posts
Posted: Saturday, June 21, 2014 - 04:21 AM UTC
Hi all,
So I have finally started painting the Musashi. I figured I would go with a primer color of black to provide some pre shading prior to painting the big monster Kure Gray.
I have also started installing the deck portions. Here I have added the hanger deck to the hull.
I can definitely see the issues with painting so far. I am having issue with the paint adhering to the PE parts so if anyone has a PE prep advice I would appreciate it. I am going to give the hull an additional coat prior to painting the bottom hull tomorrow.
For the main deck I am pretty much complete adding the PE. Couple of more minor pieces around the flight deck and it should be ready for the base coat.
I finally received all of my research books which have helped a great deal. I am going to finish this Musashi as she looked when she departed for the Battle of Leyte Gulf...her final voyage. Thanks for all the help so far. That being said if you see anything in the pictures that you see I could do better please speak up.
thanks and hope everyone's build is going well.
Dave
RedDuster
Joined: March 01, 2010
KitMaker: 7,078 posts
Model Shipwrights: 6,649 posts
Posted: Saturday, June 21, 2014 - 08:55 AM UTC
Looking good Dave,
I know your pain with paint on etch, the only thing I can suggest is a mist coat of a primer before putting the final colour on. I use Halfords general purpose acrylic primer from an automotive shop, (don't put a wet coat on it will fill detail)
Si
I know your pain with paint on etch, the only thing I can suggest is a mist coat of a primer before putting the final colour on. I use Halfords general purpose acrylic primer from an automotive shop, (don't put a wet coat on it will fill detail)
Si
RussellE
#306
Joined: June 27, 2010
KitMaker: 3,959 posts
Model Shipwrights: 2,777 posts
Posted: Saturday, June 21, 2014 - 10:25 AM UTC
Hi Dave
I would suggest giving the brass PE fret & any other metal components a bath in mineral turpentine (aka white spirit) or similar solvent based thinner, prior to adding to your vessel &/or painting.
This is essential to remove the thin film of oil often left on metal components from the manufacturing process. Any oil residue will prevent any paint from adhering.
Then as Si mentioned, a very light primer coat-not too dry as it will crumb & not too wet as it will flood the detail.
Make sure the primer you chose is the same medium as your paint, IE either acrylic or enamel. This is important too, because if different the primer & paint may react badly to each other.
Hope this helps

lawlzw

Joined: April 05, 2009
KitMaker: 120 posts
Model Shipwrights: 24 posts

Posted: Sunday, June 22, 2014 - 03:13 AM UTC
Hi all,
Nice work so far! Here's my progress on DML's Pennsylvania:

Yeah that's all I have to show for now lol! Construction is pretty slow due to the PE parts; it's been awhile since I worked on such small scale ships
Enjoy your builds!
Lawrence
Nice work so far! Here's my progress on DML's Pennsylvania:
Yeah that's all I have to show for now lol! Construction is pretty slow due to the PE parts; it's been awhile since I worked on such small scale ships
Enjoy your builds!
Lawrence
wildspear
Joined: April 03, 2007
KitMaker: 960 posts
Model Shipwrights: 901 posts
Posted: Sunday, June 22, 2014 - 03:24 AM UTC

Decided to try putting on a wood deck. Went with the funnel deck(unsure of the right name). Went pretty smooth. Im using Artwox Model wooden deck. Pretty nice.
I still have work to do on the hull, but having fun with this build. ....love the Arizona

RedDuster
Joined: March 01, 2010
KitMaker: 7,078 posts
Model Shipwrights: 6,649 posts
Posted: Sunday, June 22, 2014 - 04:00 AM UTC
at last a bit more progress on the DOY.
There are five gun tubs on the quarterdeck, the resin tubs have been adorned with etched boxes and door.
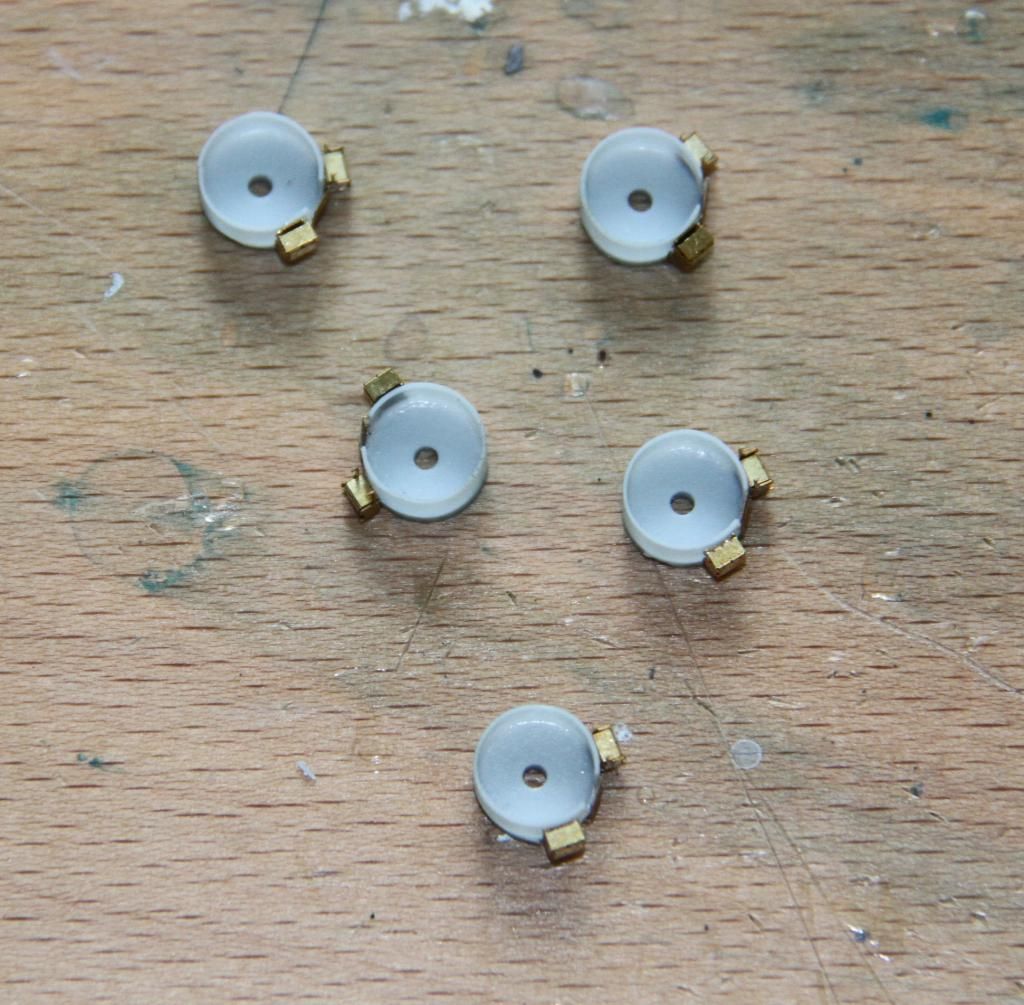
The tubs, along with vests mooring bits, etched boxes & skylights get some paint shot at them.
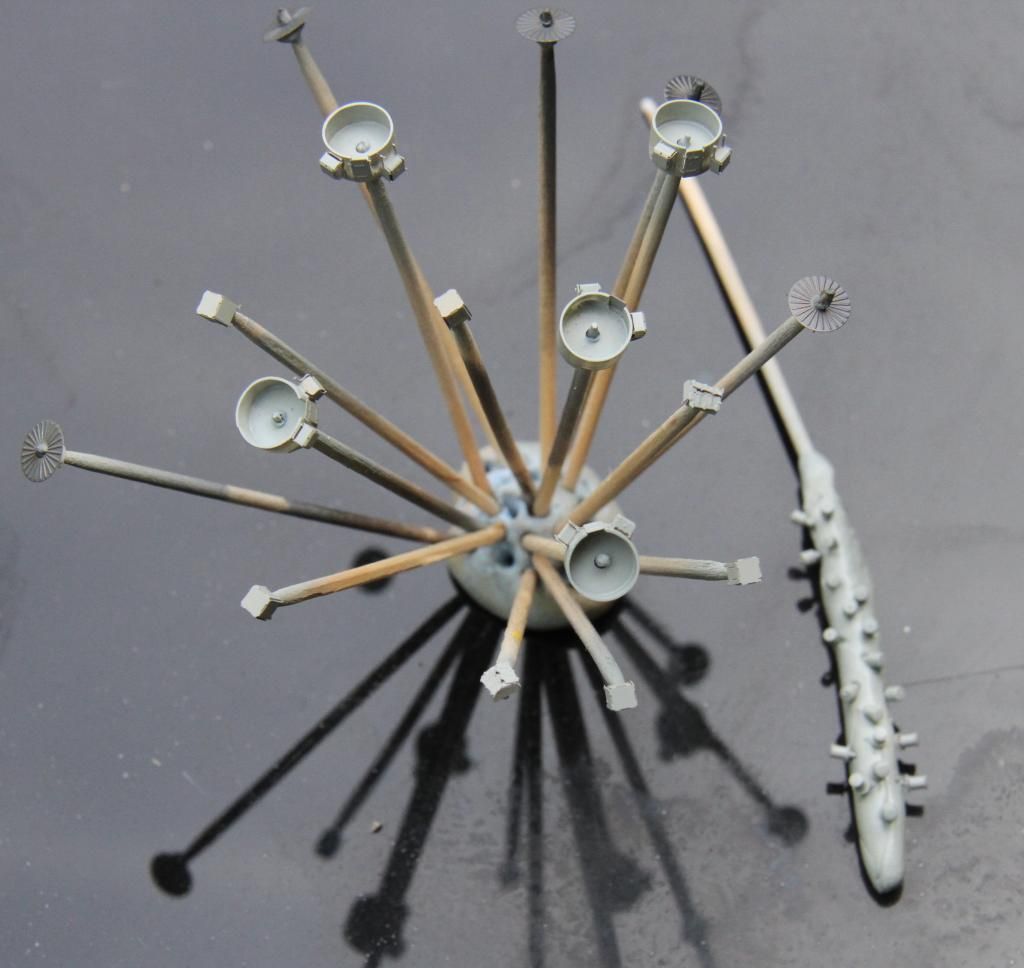
Gun tubs fitted to the quarterdeck.
Mooring bits, fairleads and vets going down, at least a couple more sessions to get the quarterdeck finished.
Si
There are five gun tubs on the quarterdeck, the resin tubs have been adorned with etched boxes and door.

The tubs, along with vests mooring bits, etched boxes & skylights get some paint shot at them.

Gun tubs fitted to the quarterdeck.

Mooring bits, fairleads and vets going down, at least a couple more sessions to get the quarterdeck finished.
Si
wildspear
Joined: April 03, 2007
KitMaker: 960 posts
Model Shipwrights: 901 posts
Posted: Sunday, June 22, 2014 - 04:23 AM UTC

Wood decks are on
beefy66
Joined: October 22, 2007
KitMaker: 971 posts
Model Shipwrights: 645 posts
Posted: Monday, June 23, 2014 - 02:05 AM UTC
Gent,s some great stuff getting done here all your the builds are progressing well this is my graveyard shift week so will not be able to get much done until the weekend when I get some time off for good behavior 
Keith
Keith
 |

WEB HOSTING BY


Copyright ©2021 Model Shipwrights and Kitmaker Network, a subsidiary of Silver Star Enterprises
All Rights Reserved. Please read our Conditions of Use and Privacy Policy.
All Rights Reserved. Please read our Conditions of Use and Privacy Policy.