The King! - HMS King George V, May 41

#306
Victoria, Australia
Joined: June 27, 2010
KitMaker: 3,959 posts
Model Shipwrights: 2,777 posts
Posted: Monday, May 18, 2015 - 02:34 AM UTC
Thanks Bryan

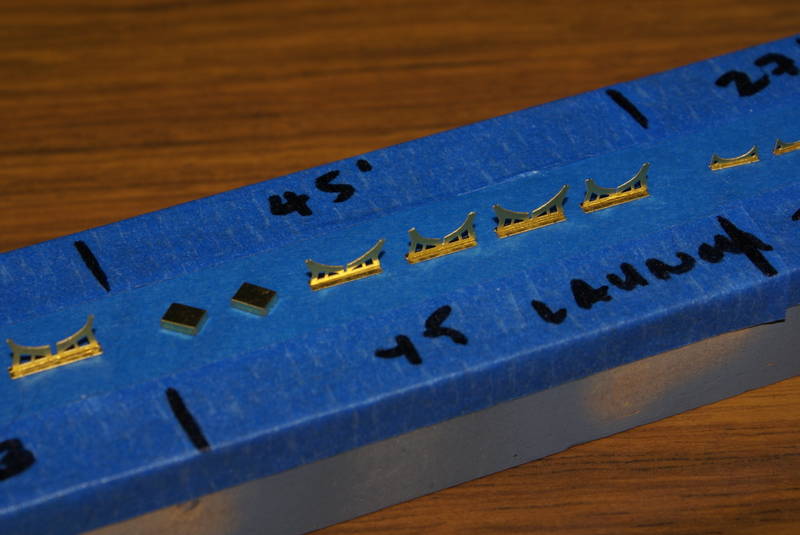
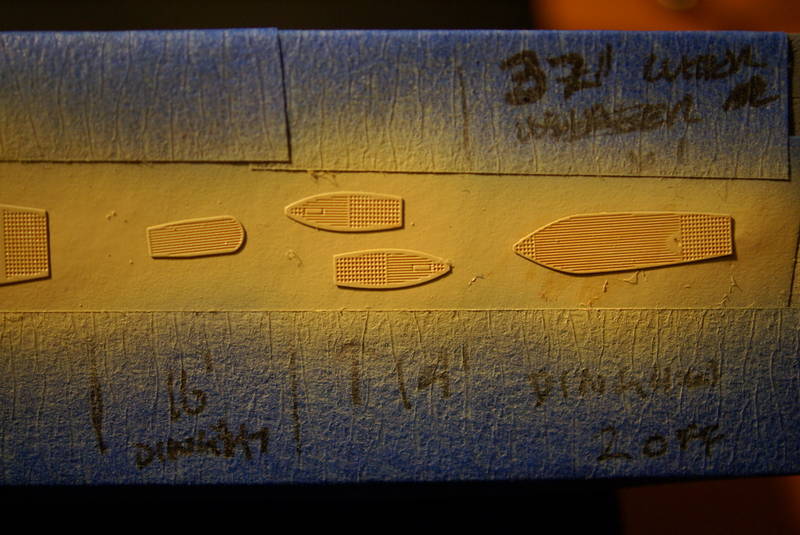
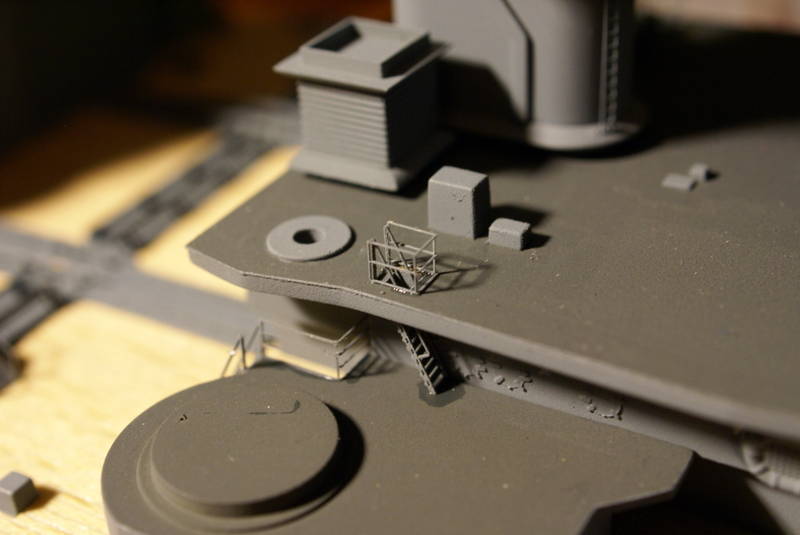
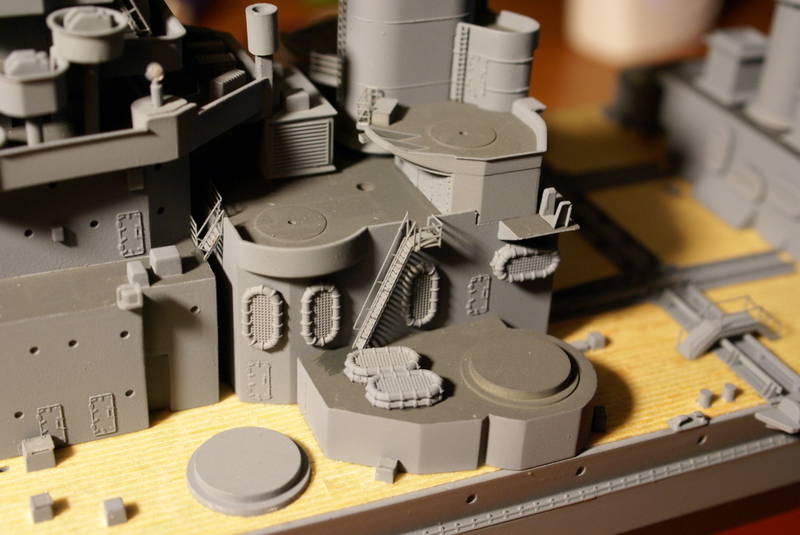
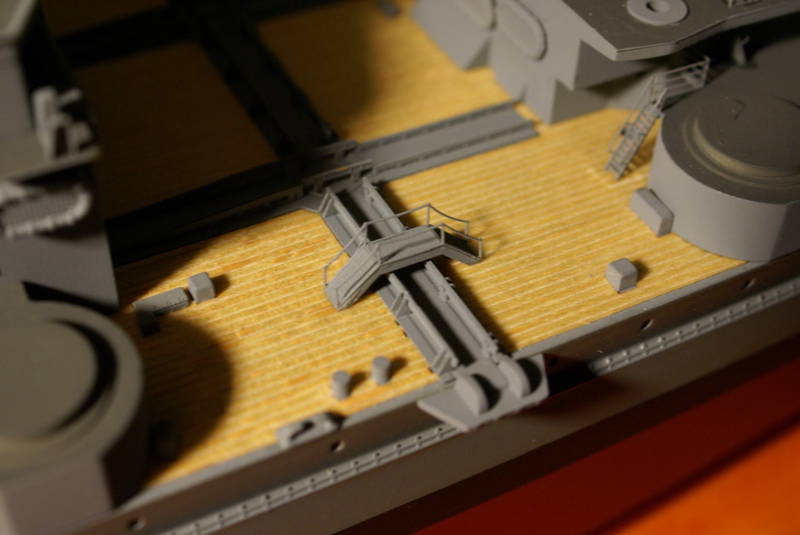
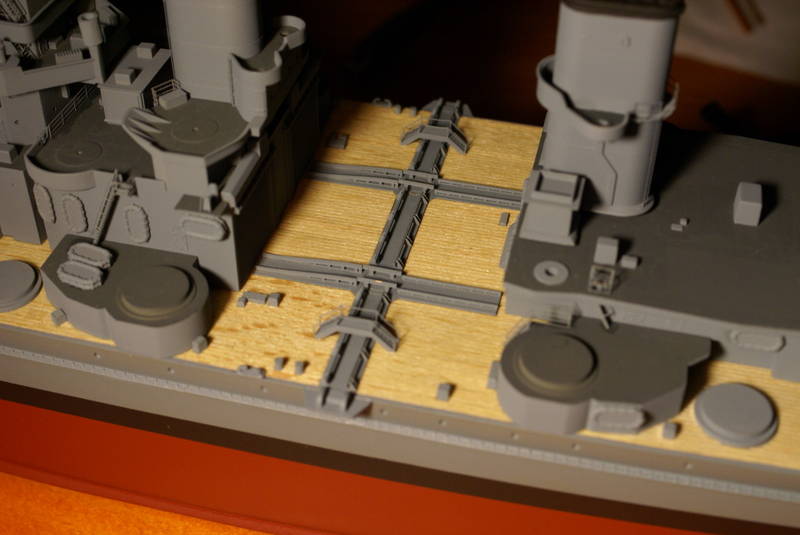
not long to go now. Working on adding in some small details at the moment, central railings, ladders etc, that won't be accessible later on, before moving onto the boats.
Pace should pick up considerably now

(I hope

)
Russ

Stay home and build models!
In 1/72
Gloster Gladiator MkII for the Bi-planes Campaign
In 1/350
Airfix 1:350 Type 45 Destroyer
Niedersachsen, Germany
Joined: March 26, 2014
KitMaker: 844 posts
Model Shipwrights: 151 posts
Posted: Monday, May 18, 2015 - 10:12 PM UTC
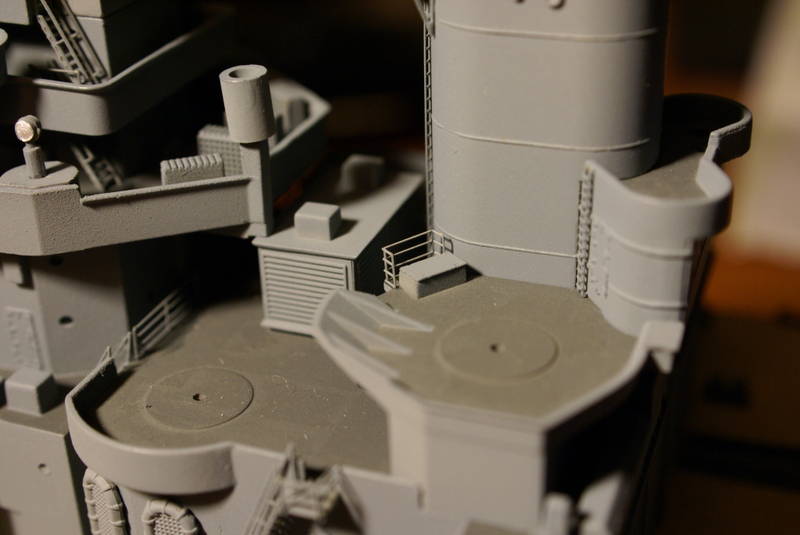
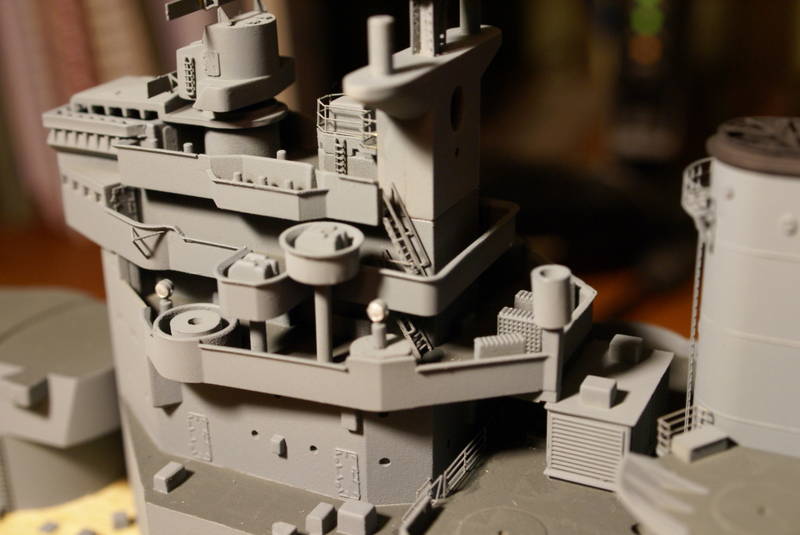
Clean build, all the neat brass details are really amazing !
#306
Victoria, Australia
Joined: June 27, 2010
KitMaker: 3,959 posts
Model Shipwrights: 2,777 posts
Posted: Wednesday, June 10, 2015 - 04:58 PM UTC
Stay home and build models!
In 1/72
Gloster Gladiator MkII for the Bi-planes Campaign
In 1/350
Airfix 1:350 Type 45 Destroyer
#377
Texas, United States
Joined: June 27, 2010
KitMaker: 1,481 posts
Model Shipwrights: 1,332 posts
Posted: Thursday, June 11, 2015 - 03:20 AM UTC
Russell,
fantastic work. Never thought to paint the lifeboats in that sequence but I do like it. Will steal that process if you don't mind.
The overall is looking very clean, beautiful work. Your demarcation between vertical and horizontal surfaces is crisp and clean.
Excellent work on the PE.
Looking forward to seeing more progress.
Dave
In Dry Dock #1: 1/350 IJN SHOKAKU (Fujimi)
In Dry Dock #2: 1/350 IJN Tama (Aoshima)
#335
Auckland, New Zealand
Joined: September 03, 2013
KitMaker: 1,808 posts
Model Shipwrights: 871 posts
Posted: Thursday, June 11, 2015 - 05:46 AM UTC
Hi Russell,
The King! is looking grander with every posting. Keep it coming!
cheers
Michael
Campaign:
Strip, Track and Trail - Porsche 917/20 - On the bench
Phantoms at 60 - F-4J Marines
Below 1000 tons - M50 minesweeper - Sailed for duty
Niedersachsen, Germany
Joined: March 26, 2014
KitMaker: 844 posts
Model Shipwrights: 151 posts
Posted: Thursday, June 11, 2015 - 11:15 PM UTC
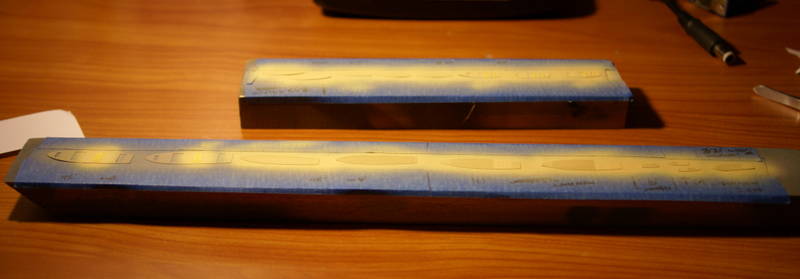
Stunning details, the ladders and stairways look perfect, your way with the boats are interesting.
Beautiful work
Massachusetts, United States
Joined: January 03, 2010
KitMaker: 2,159 posts
Model Shipwrights: 1,400 posts
Posted: Friday, June 12, 2015 - 12:09 AM UTC
Some lovely work there on the boats and PE installation Russ!! Keep it coming!!

England - South East, United Kingdom
Joined: March 01, 2010
KitMaker: 7,078 posts
Model Shipwrights: 6,649 posts
Posted: Friday, June 12, 2015 - 12:26 AM UTC
Looking great Russ,
Very tidy job on the boats so far, looking forward to seeing some more.
Cheers.
Si
#306
Victoria, Australia
Joined: June 27, 2010
KitMaker: 3,959 posts
Model Shipwrights: 2,777 posts
Posted: Friday, June 12, 2015 - 01:04 AM UTC
Thanks guys!
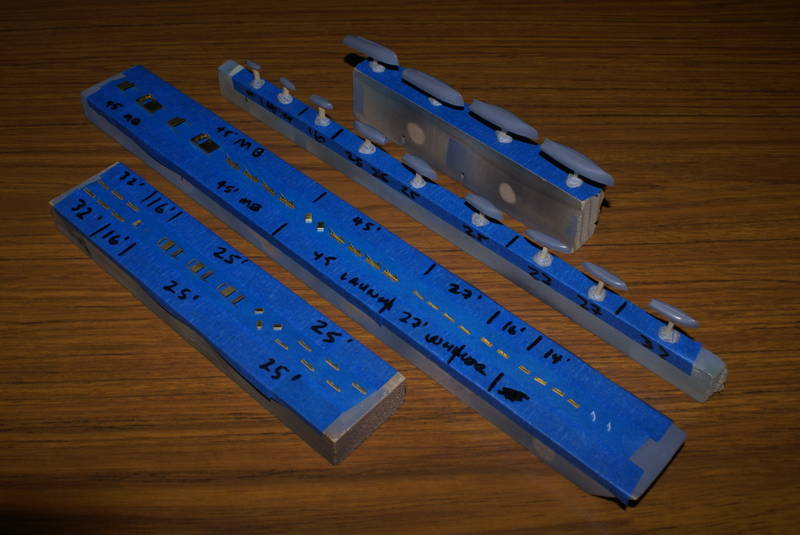
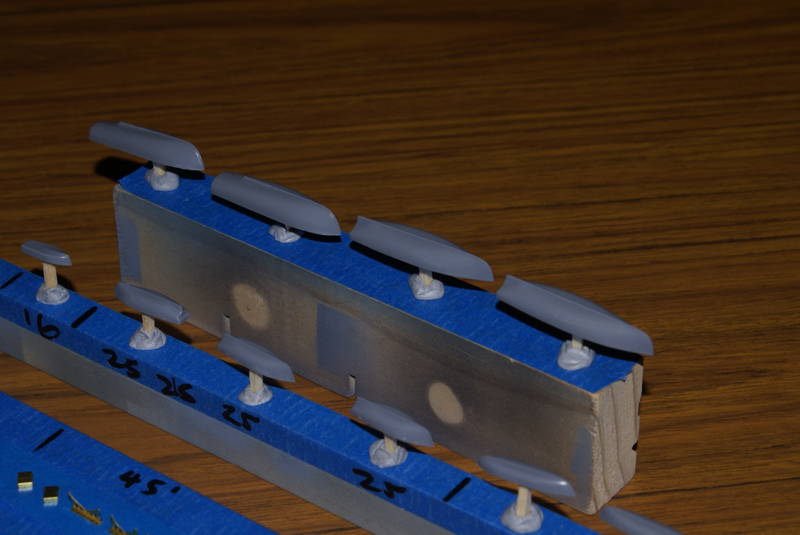
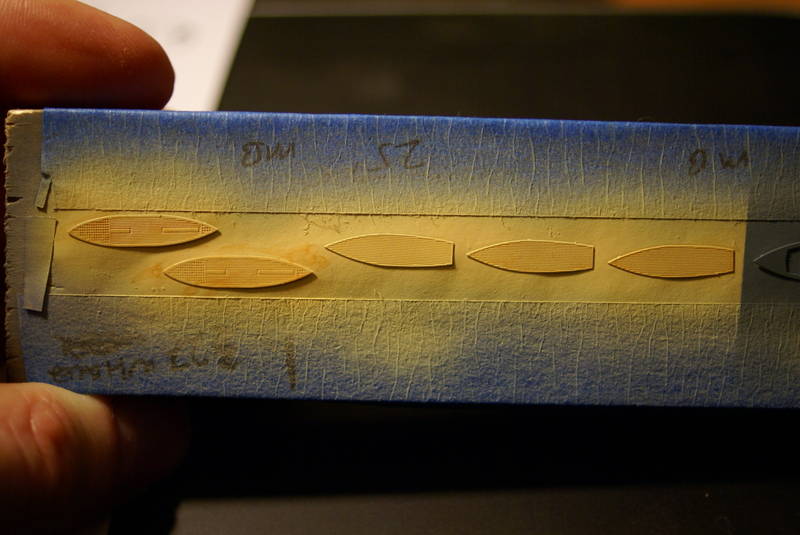
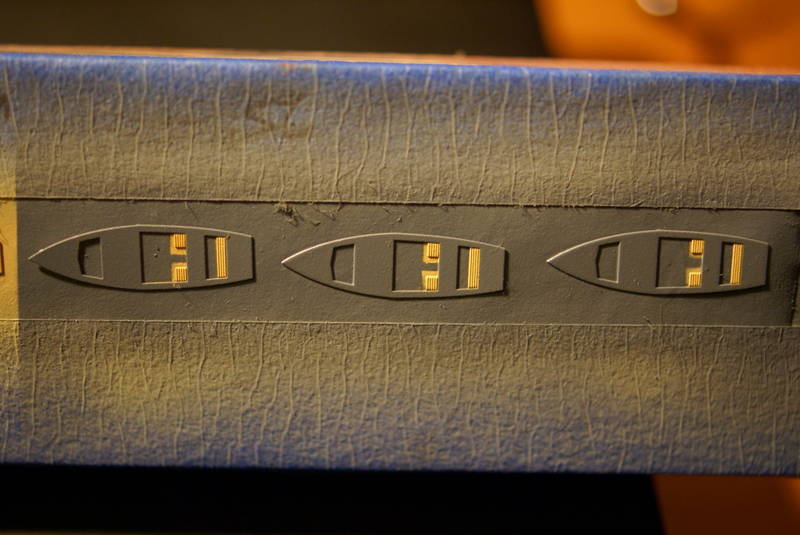
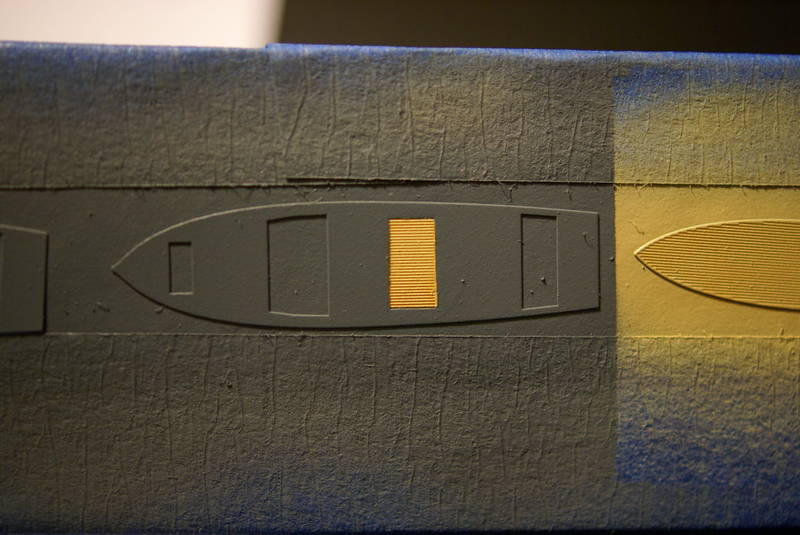
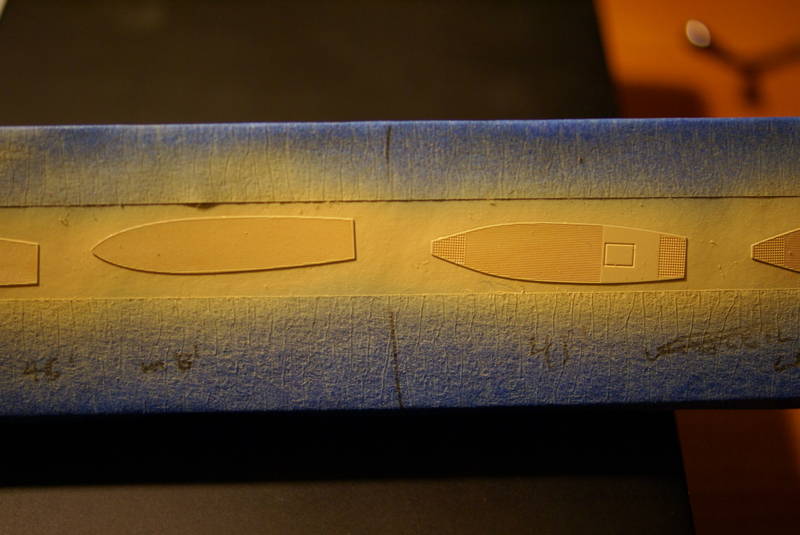
Who'd have thought ship's boats could be so complicated, hey?

Stay home and build models!
In 1/72
Gloster Gladiator MkII for the Bi-planes Campaign
In 1/350
Airfix 1:350 Type 45 Destroyer
#306
Victoria, Australia
Joined: June 27, 2010
KitMaker: 3,959 posts
Model Shipwrights: 2,777 posts
Posted: Sunday, July 05, 2015 - 04:48 PM UTC
Stay home and build models!
In 1/72
Gloster Gladiator MkII for the Bi-planes Campaign
In 1/350
Airfix 1:350 Type 45 Destroyer
#377
Texas, United States
Joined: June 27, 2010
KitMaker: 1,481 posts
Model Shipwrights: 1,332 posts
Posted: Monday, July 06, 2015 - 02:20 AM UTC
Russell,
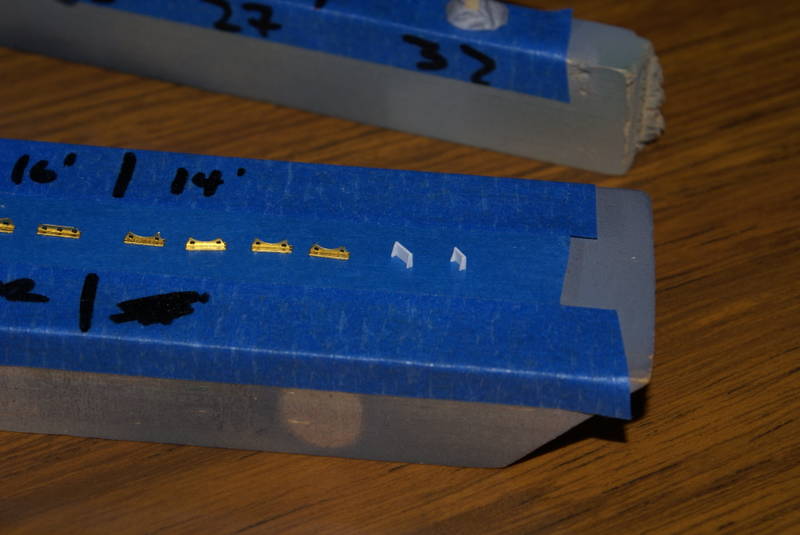
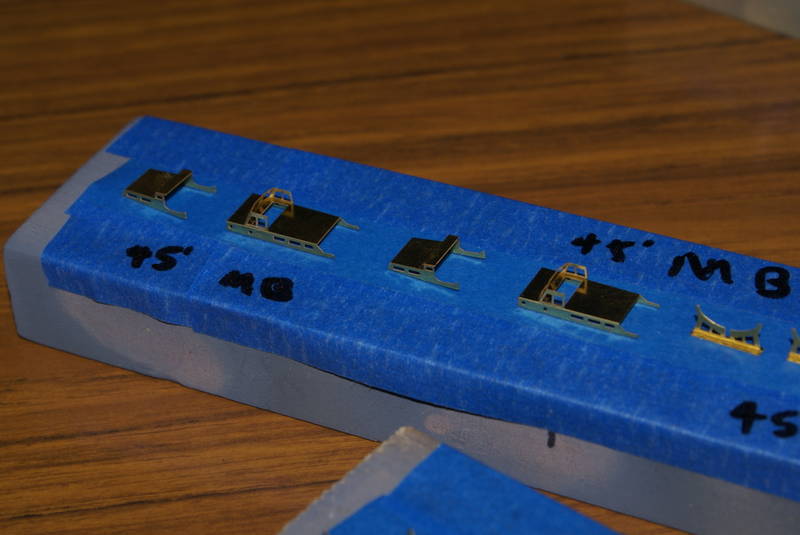
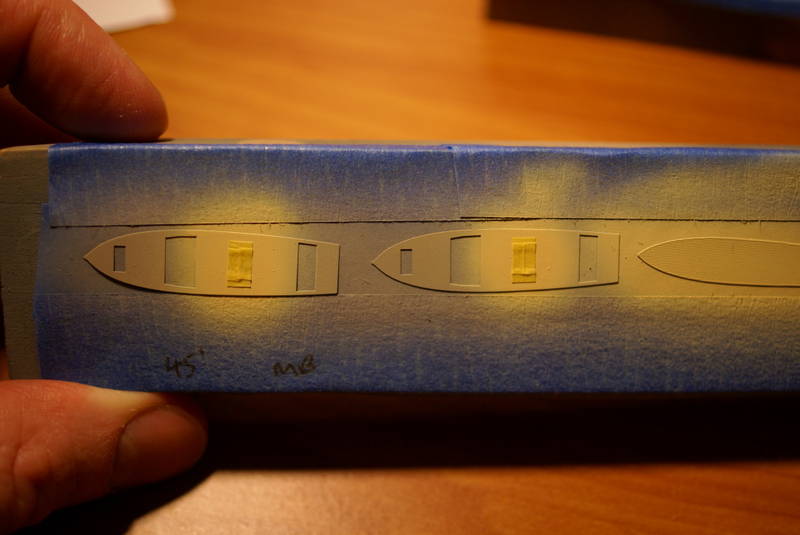
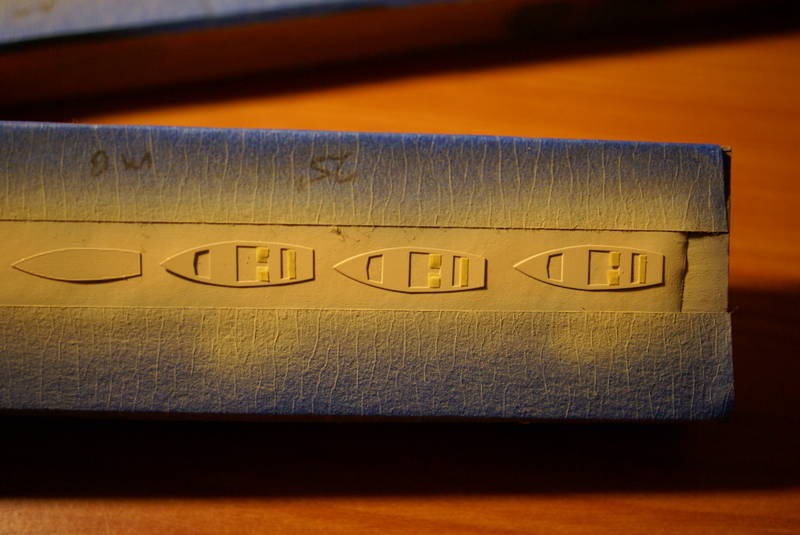
The amount of fiddly parts is impressive as is your skill in preparing them for mounting. My hat is off to you my friend.
I like the way you organize your progress in preparation for panting. I may steal that idea as I am all over the place and end up scratching my head for an hour trying to remember what parts go where.
Looking forward to seeing some color on those parts and how they all come together.
Dave
In Dry Dock #1: 1/350 IJN SHOKAKU (Fujimi)
In Dry Dock #2: 1/350 IJN Tama (Aoshima)
Massachusetts, United States
Joined: January 03, 2010
KitMaker: 2,159 posts
Model Shipwrights: 1,400 posts
Posted: Monday, July 06, 2015 - 02:26 AM UTC
Some brilliant work there Russ!! Nice to see you are banging out all he boats!! I do the "line production" myself, but I like the propped up little boats...LOL!! Yup....just like Dave, I'm stealing that myself!
England - South East, United Kingdom
Joined: March 01, 2010
KitMaker: 7,078 posts
Model Shipwrights: 6,649 posts
Posted: Monday, July 06, 2015 - 02:50 AM UTC
Hi Russ,
Felt a bit that way with the Duke, but it is worth it, putting the extra detail into the boats really lifts a model.
Keep up the good work mate.
Cheers.
Si
#306
Victoria, Australia
Joined: June 27, 2010
KitMaker: 3,959 posts
Model Shipwrights: 2,777 posts
Posted: Monday, July 06, 2015 - 03:21 PM UTC
Thanks guys!
feel free to 'steal' away. It's the only way i can keep track given the long periods between building and painting...
Am thinking of building up the searchlights, pom poms and 5.25"s before getting out the airbrush, just to get through a few more items...
Stay home and build models!
In 1/72
Gloster Gladiator MkII for the Bi-planes Campaign
In 1/350
Airfix 1:350 Type 45 Destroyer
#335
Auckland, New Zealand
Joined: September 03, 2013
KitMaker: 1,808 posts
Model Shipwrights: 871 posts
Posted: Monday, July 06, 2015 - 03:29 PM UTC
Hi Russ,
Glad to see you have found some time for the build. Ditto the others on your organisational skills.
cheers
Michael
Campaign:
Strip, Track and Trail - Porsche 917/20 - On the bench
Phantoms at 60 - F-4J Marines
Below 1000 tons - M50 minesweeper - Sailed for duty
#306
Victoria, Australia
Joined: June 27, 2010
KitMaker: 3,959 posts
Model Shipwrights: 2,777 posts
Posted: Tuesday, July 07, 2015 - 03:18 PM UTC
Thanks Michael.
Real life can be a demanding mistress at times...

Stay home and build models!
In 1/72
Gloster Gladiator MkII for the Bi-planes Campaign
In 1/350
Airfix 1:350 Type 45 Destroyer
#360
Connecticut, United States
Joined: June 18, 2003
KitMaker: 1,020 posts
Model Shipwrights: 630 posts
Posted: Tuesday, July 07, 2015 - 09:34 PM UTC
Russ,
I'm in awe of your methodical approach to the build.
"I wish to have no Connection with any Ship that does not Sail fast for I intend to go in harm's way." - John Paul Jones
#306
Victoria, Australia
Joined: June 27, 2010
KitMaker: 3,959 posts
Model Shipwrights: 2,777 posts
Posted: Wednesday, July 08, 2015 - 04:53 PM UTC
Thanks Michael.
Pom poms next methinks...
Stay home and build models!
In 1/72
Gloster Gladiator MkII for the Bi-planes Campaign
In 1/350
Airfix 1:350 Type 45 Destroyer
England - North East, United Kingdom
Joined: October 22, 2007
KitMaker: 971 posts
Model Shipwrights: 645 posts
Posted: Thursday, July 09, 2015 - 03:44 PM UTC
looks like you are going away from the instructions on the boat cradles but will be keeping notes on this to help with mine

Cheers Keith
#306
Victoria, Australia
Joined: June 27, 2010
KitMaker: 3,959 posts
Model Shipwrights: 2,777 posts
Posted: Friday, July 10, 2015 - 09:32 AM UTC
Quoted Text
looks like you are going away from the instructions on the boat cradles but will be keeping notes on this to help with mine
Cheers Keith
There are instructions?

Stay home and build models!
In 1/72
Gloster Gladiator MkII for the Bi-planes Campaign
In 1/350
Airfix 1:350 Type 45 Destroyer
England - North East, United Kingdom
Joined: October 22, 2007
KitMaker: 971 posts
Model Shipwrights: 645 posts
Posted: Friday, July 10, 2015 - 04:26 PM UTC
Yes there is instructions with them that is the little bit of paper with pictures and line and numbers on I sometimes use them myself it does help honest
Keith
Niedersachsen, Germany
Joined: March 26, 2014
KitMaker: 844 posts
Model Shipwrights: 151 posts
Posted: Friday, July 10, 2015 - 09:38 PM UTC
Thats brilliant work with all the boat details, Russel.
As well with all these clean bend and added hand rails, ladders and so on.
Excellent !
Best Wishes
Bernd
#306
Victoria, Australia
Joined: June 27, 2010
KitMaker: 3,959 posts
Model Shipwrights: 2,777 posts
Posted: Sunday, July 12, 2015 - 02:18 AM UTC
Quoted Text
Yes there is instructions with them that is the little bit of paper with pictures and line and numbers on I sometimes use them myself it does help honest
Keith
Ah... I knew there had to a be a reason for them Keith!


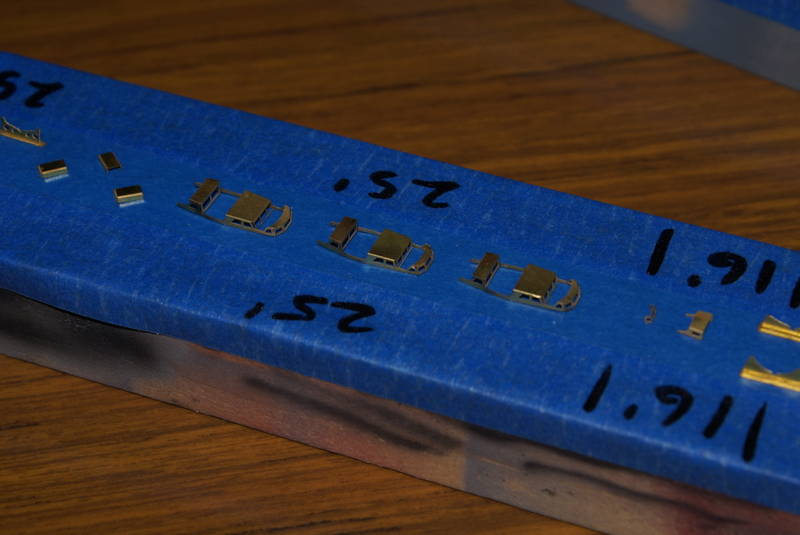
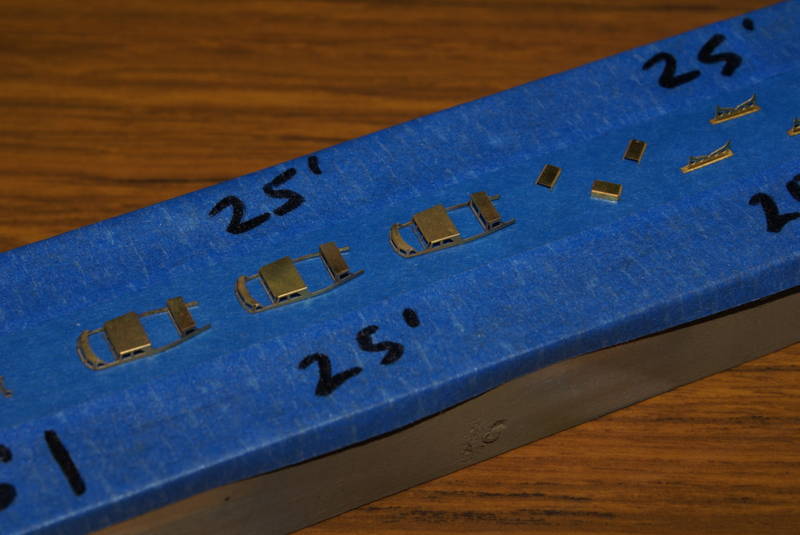
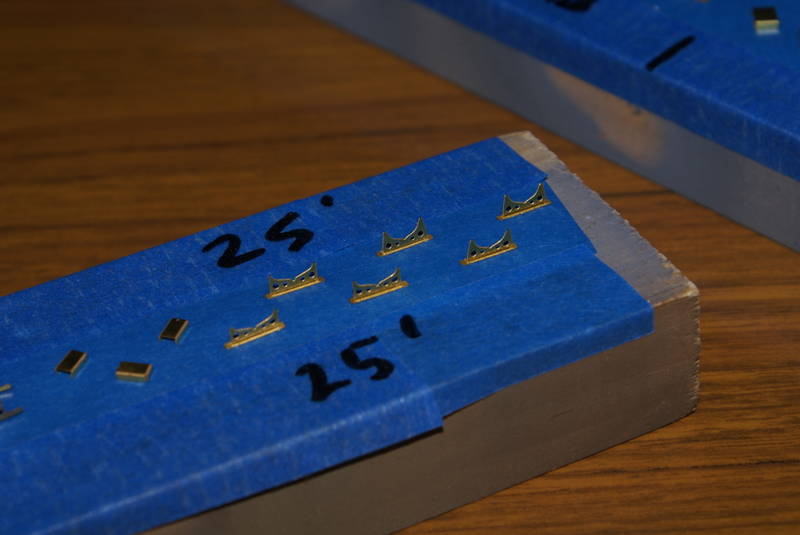
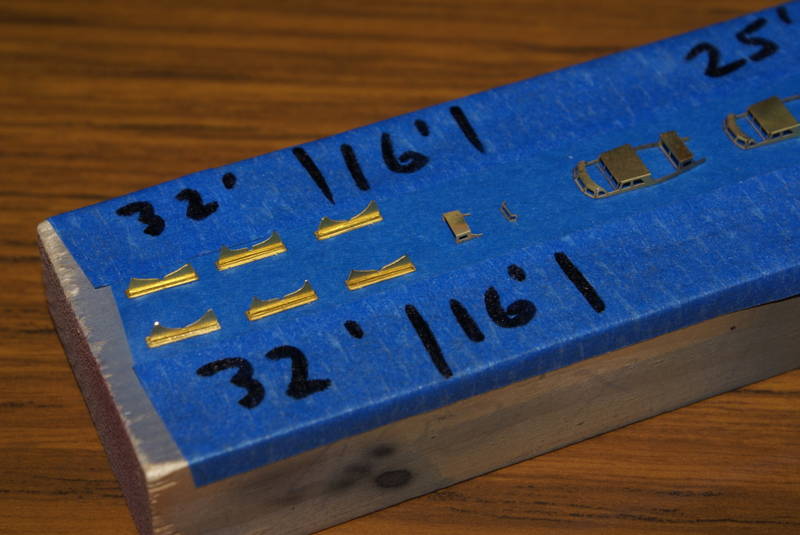
Seriously though, I like to paint things separate:
a) it gives a better paint coverage
b) its easier when applying different colours. The bottom of the ships boats I will be painting black which would be difficult if the davits were attached first.
I will use some paper plans as templates to place everything correctly on the boat deck (I hope
)
Stay home and build models!
In 1/72
Gloster Gladiator MkII for the Bi-planes Campaign
In 1/350
Airfix 1:350 Type 45 Destroyer
#306
Victoria, Australia
Joined: June 27, 2010
KitMaker: 3,959 posts
Model Shipwrights: 2,777 posts
Posted: Sunday, July 12, 2015 - 02:18 AM UTC
Quoted Text
Thats brilliant work with all the boat details, Russel.
As well with all these clean bend and added hand rails, ladders and so on.
Excellent !
Best Wishes
Bernd
Thanks Bernd... Hopefully can do as good a job on the Pom Poms!
Stay home and build models!
In 1/72
Gloster Gladiator MkII for the Bi-planes Campaign
In 1/350
Airfix 1:350 Type 45 Destroyer
#345
Niedersachsen, Germany
Joined: August 22, 2011
KitMaker: 1,835 posts
Model Shipwrights: 1,832 posts
Posted: Sunday, July 12, 2015 - 09:36 AM UTC
Russ,
great to see the King progressing!!
Your plans for the boats sound really good, should be looking awesome with all the small stuff added and individually painted!! - and looking forward very much to see your way of approaching the PomPoms - they are always a challenge

Cheers

Jan


 Didn't they realize that 80 odd years later, people would be burning out trying to model them up to add to their ship?