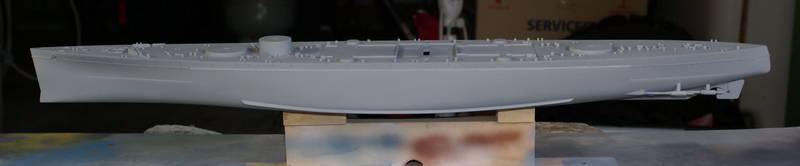
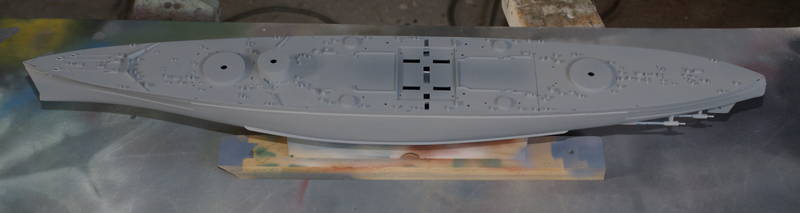
Ships by Class/Type: Battleships
Topics from the Dreadnaught era to modern day.
Hosted by Steve Joyce
The King! - HMS King George V, May 41
RussellE
#306
Visit this Community
Victoria, Australia
Joined: June 27, 2010
KitMaker: 3,959 posts
Model Shipwrights: 2,777 posts
Posted: Tuesday, May 13, 2014 - 10:51 PM UTC

Quoted Text


Quoted Text

Wow! Fantastic build, Jan.

Can only hope mine's half as good as yours.

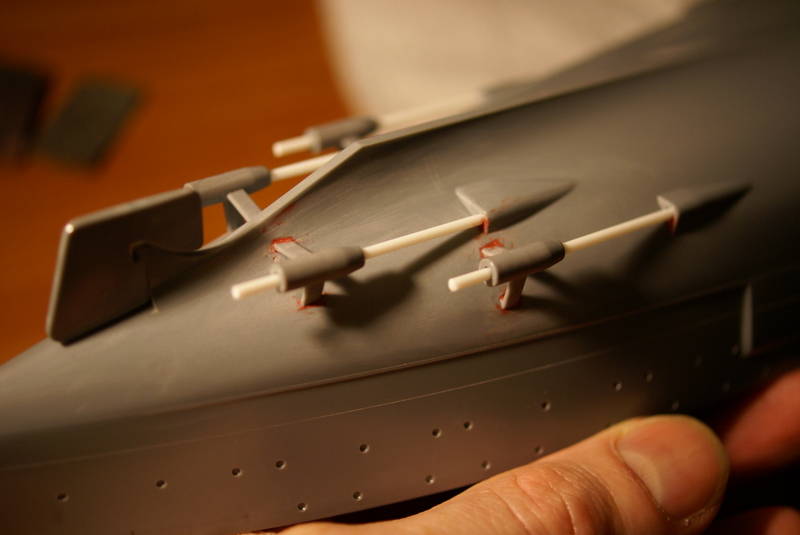
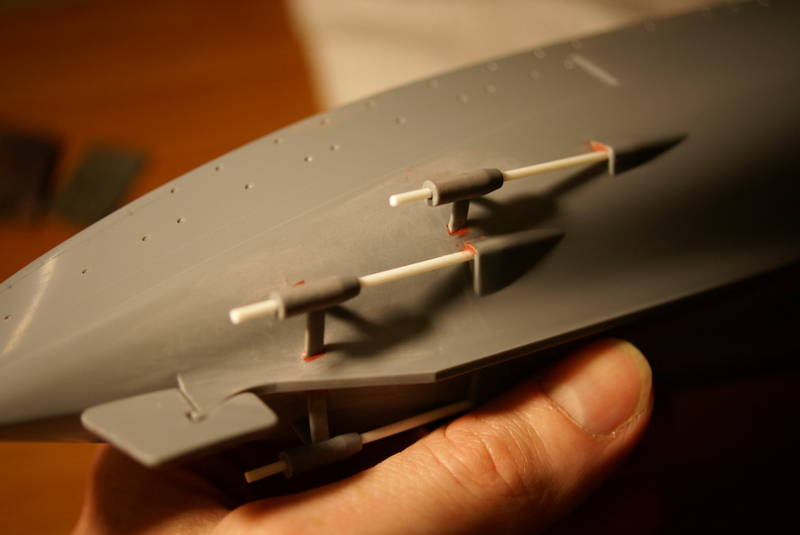
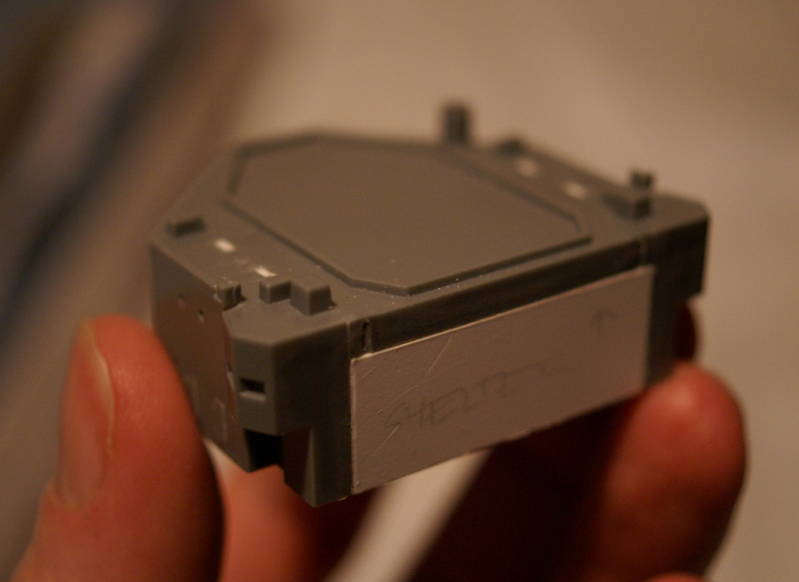
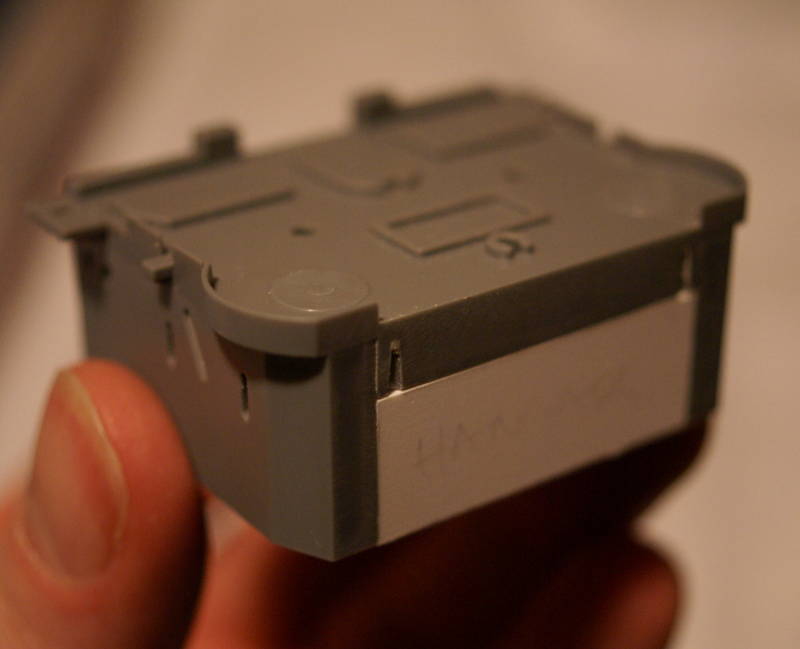
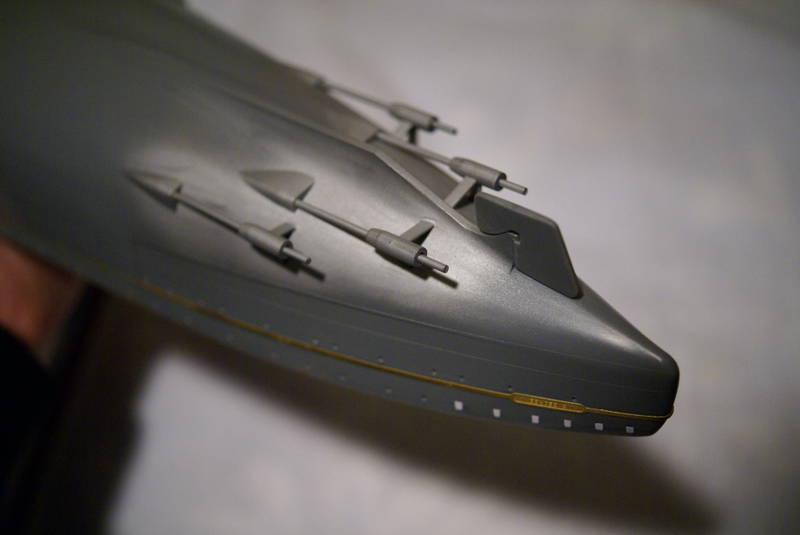
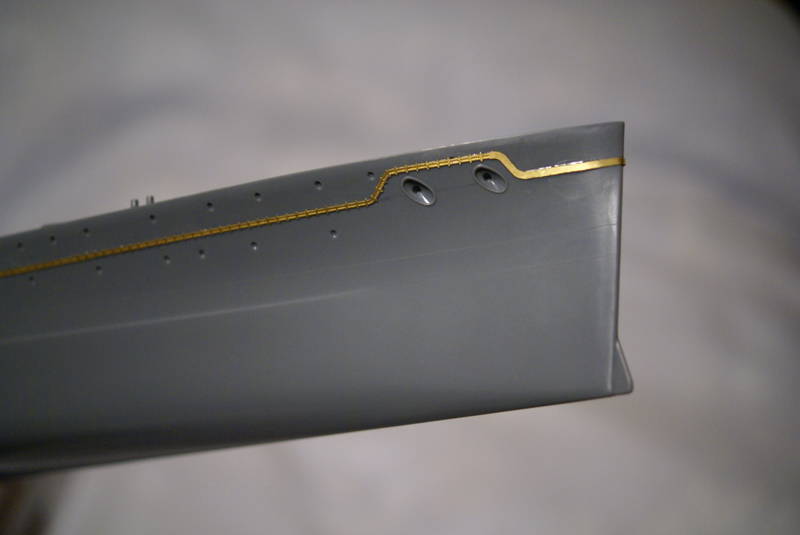
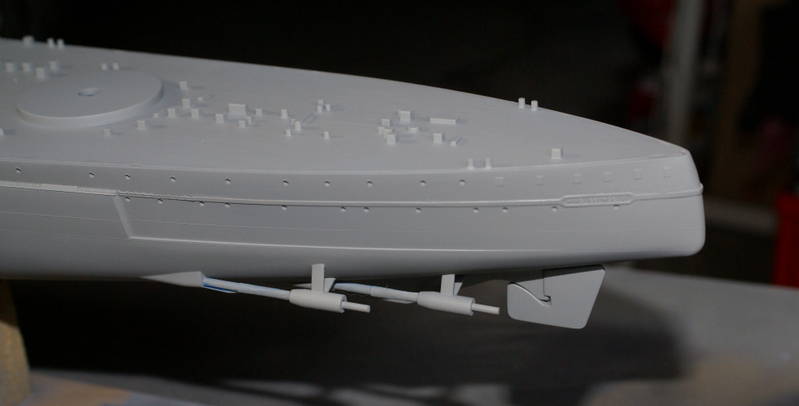
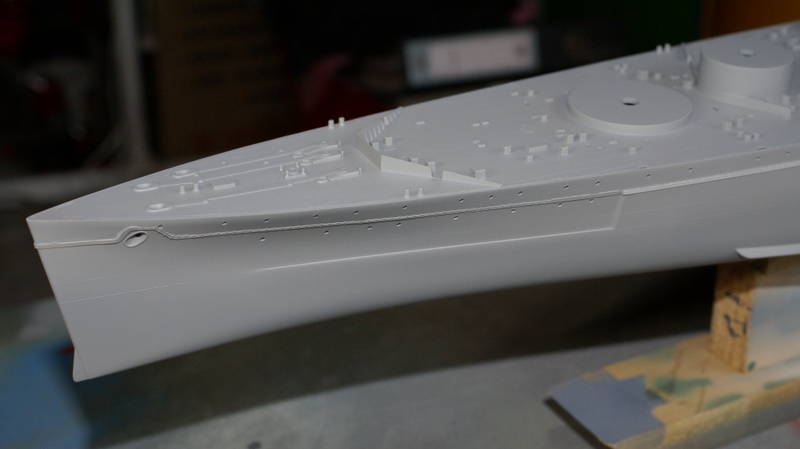
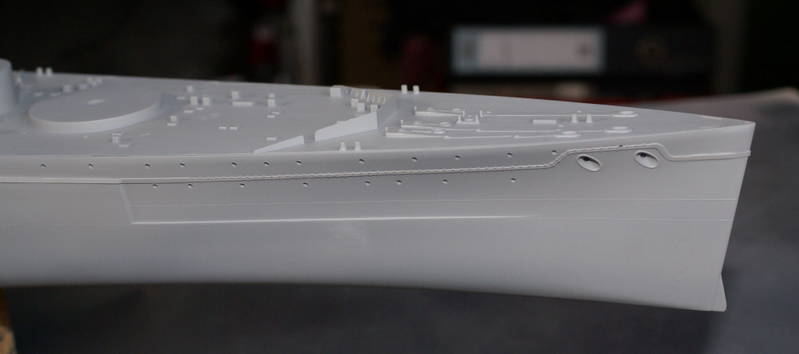
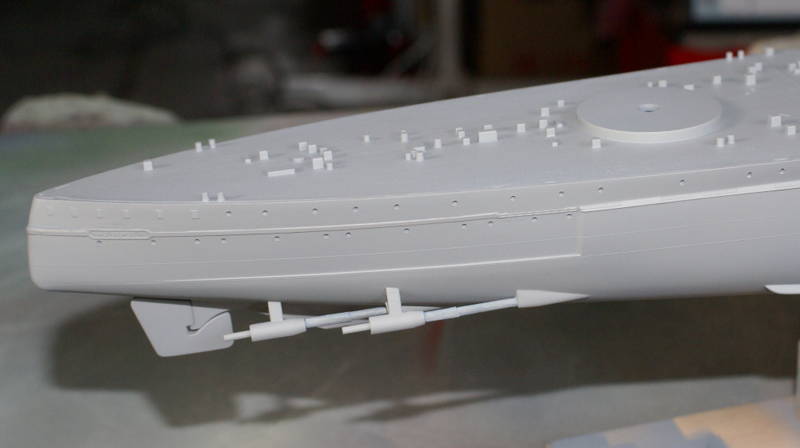
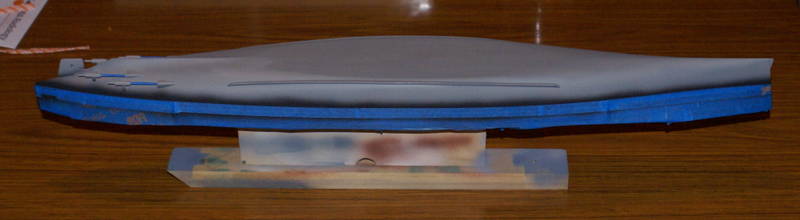
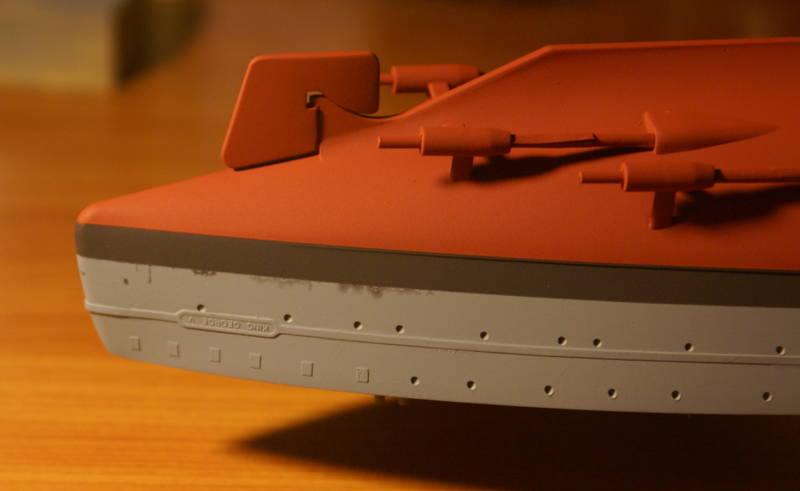
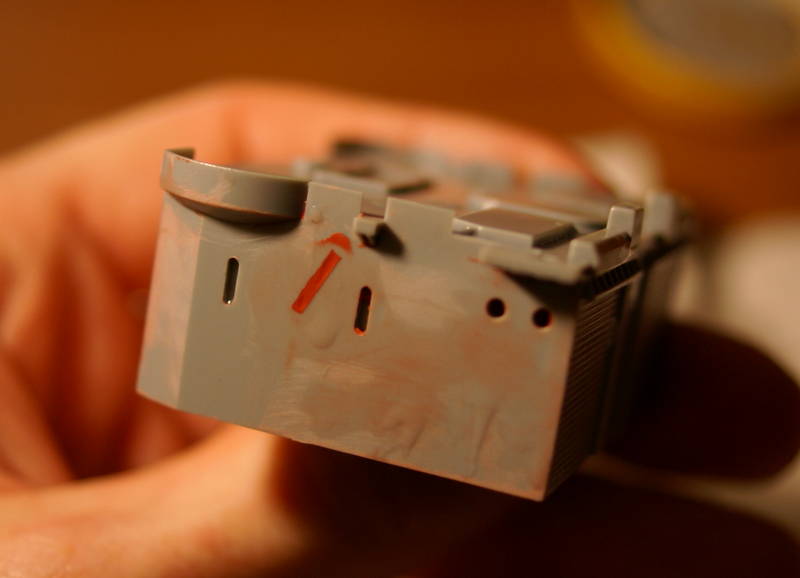
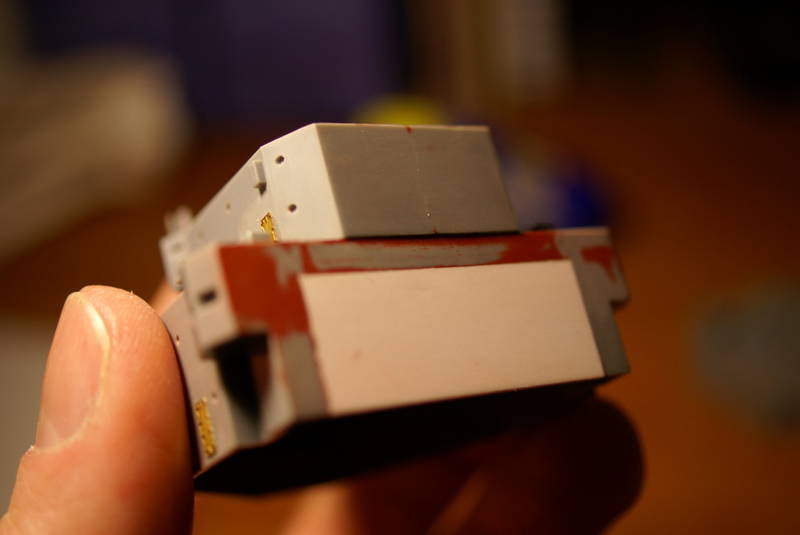
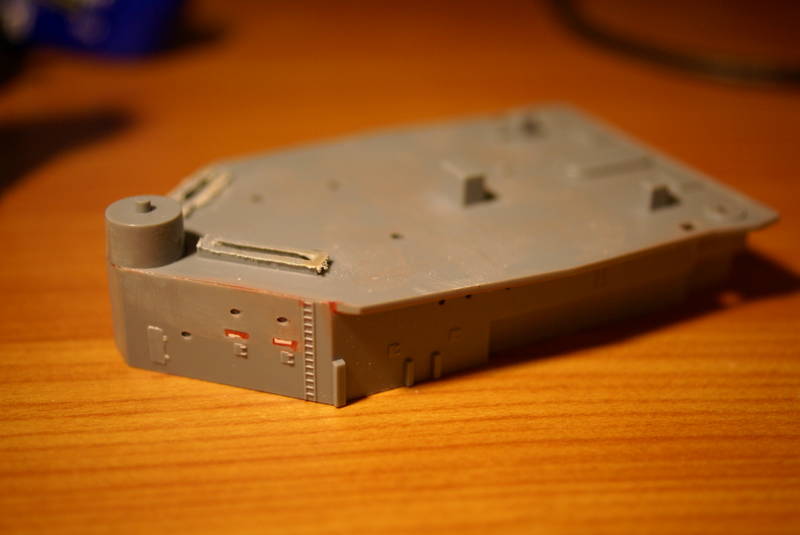
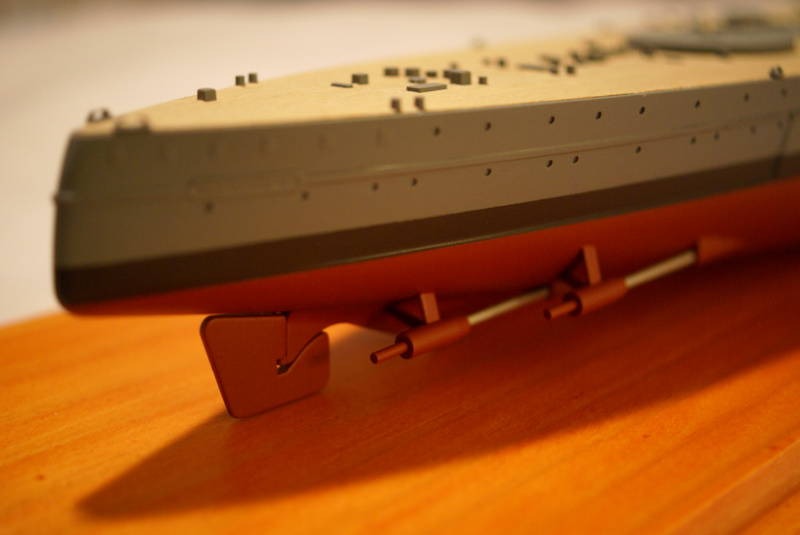
yes, you're right about the prop shaft holes in the hull. Not sure what to do about that yet...


Re the prop shafts, I presume the holes are too big and the shafts too small? Easiest fix is to just glue them in place then fill the gaps with a little CA. Or I have also used white glue successfully.

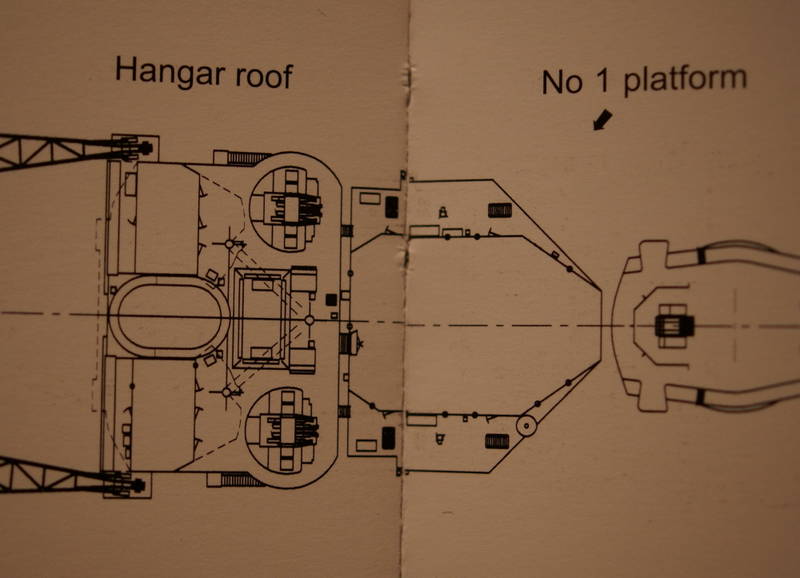
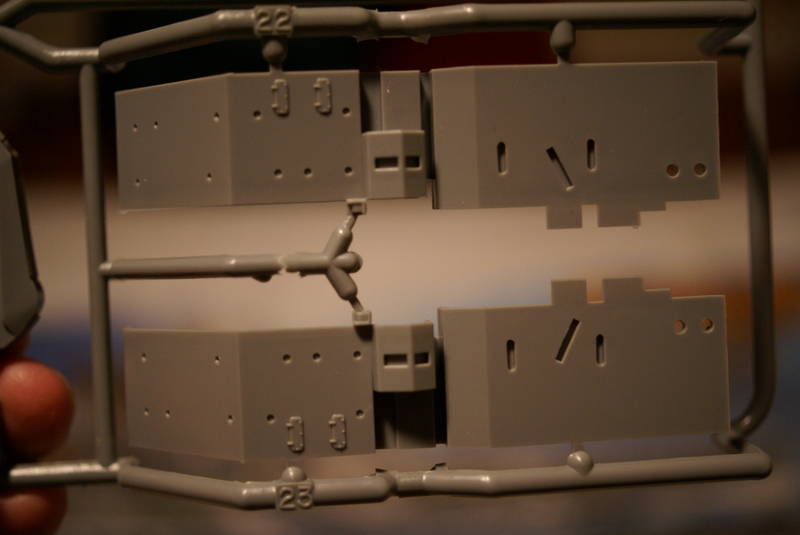
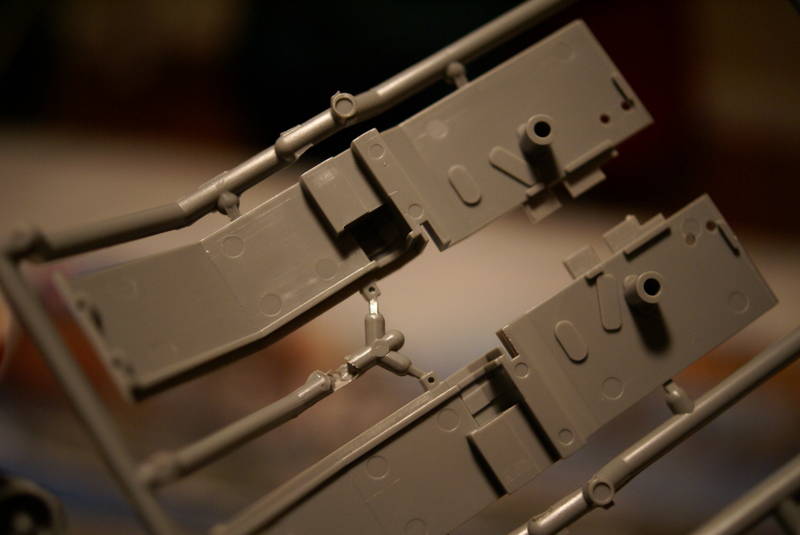
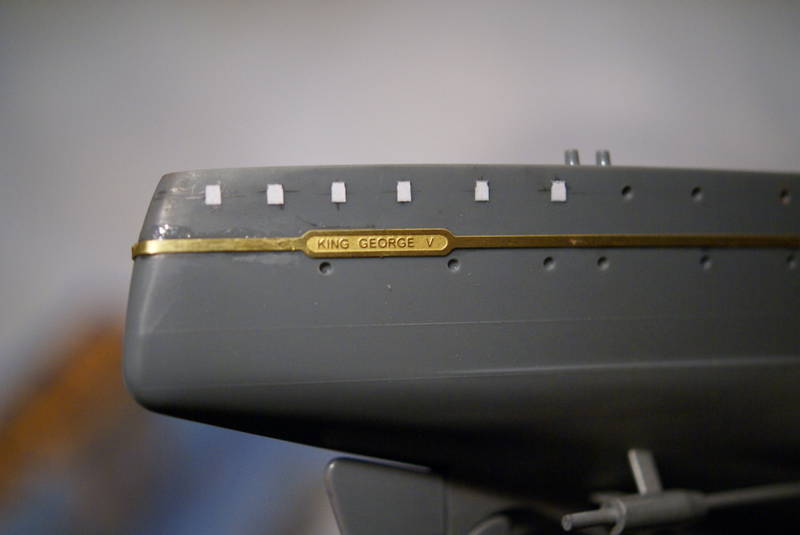
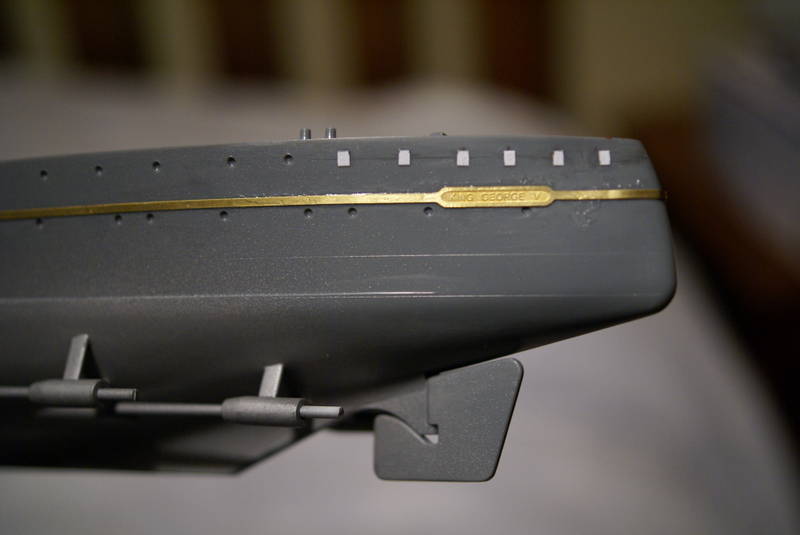
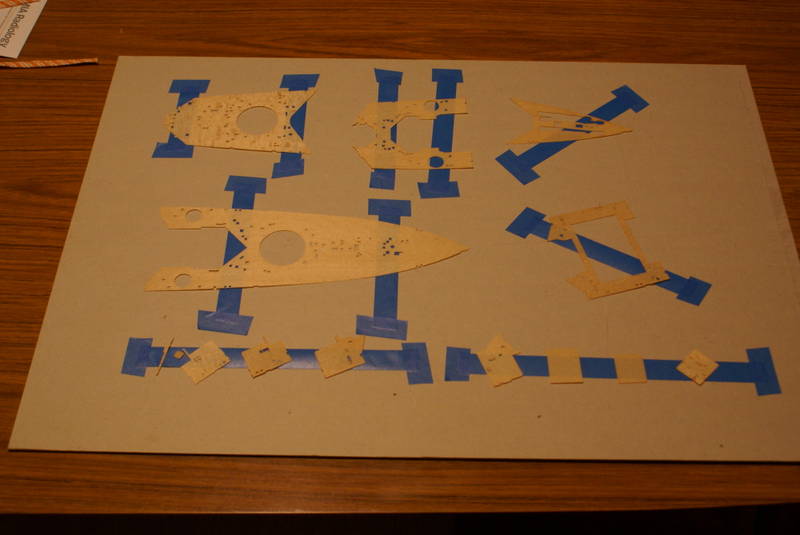
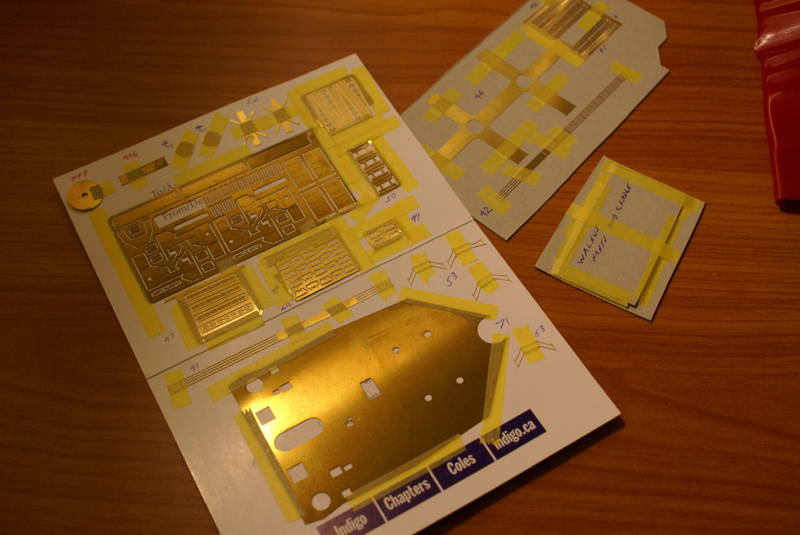
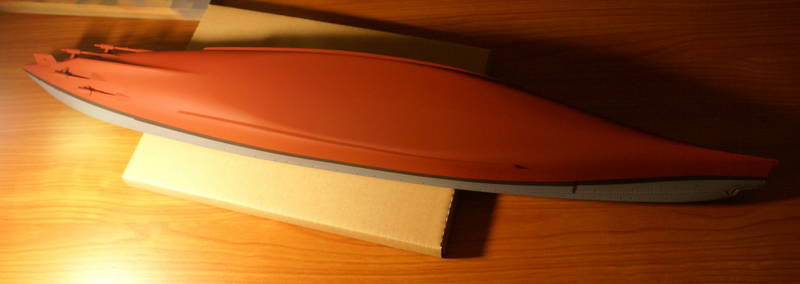
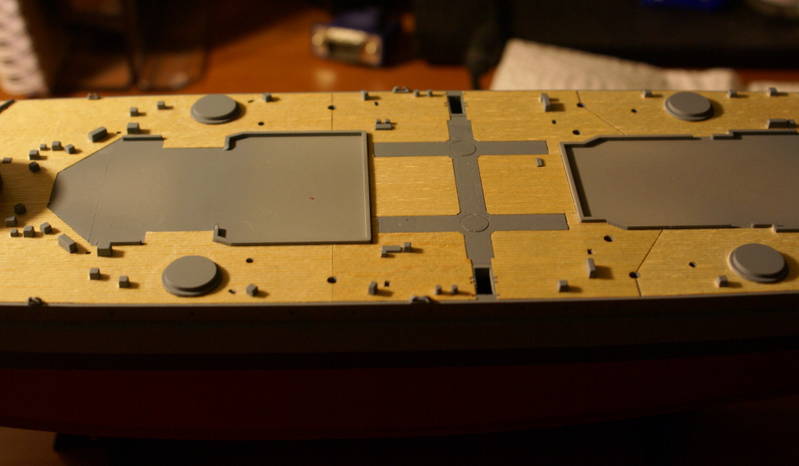
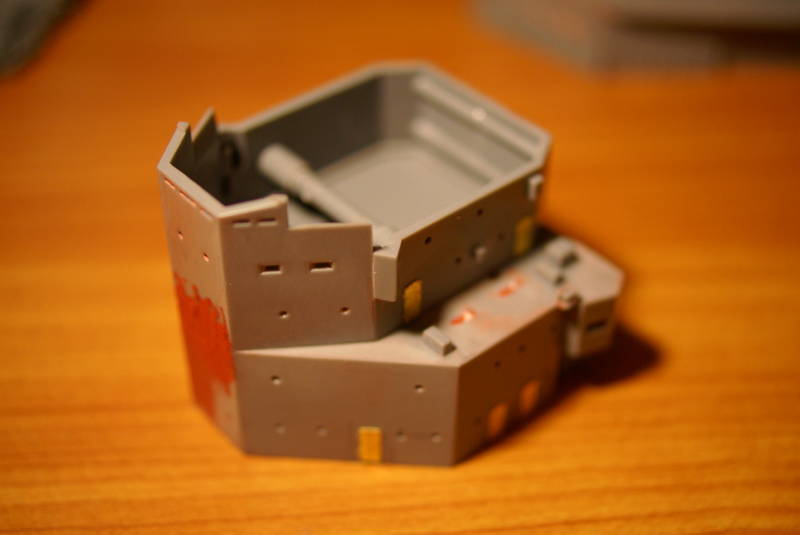
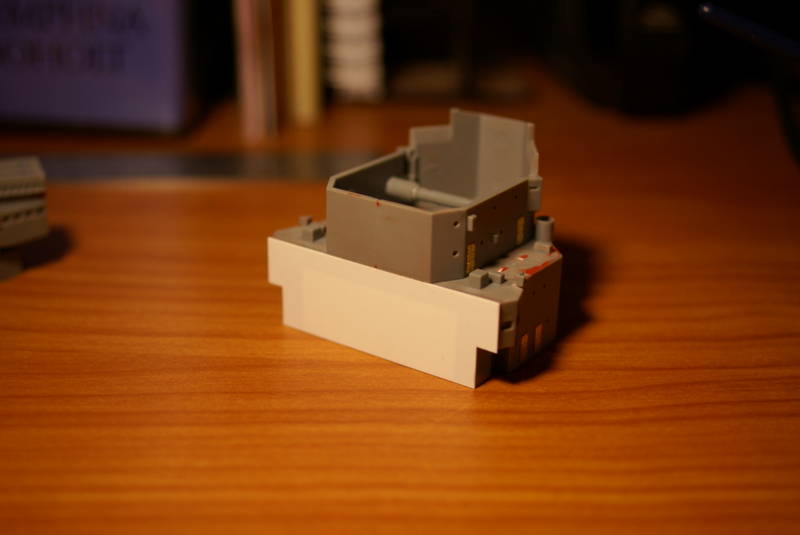
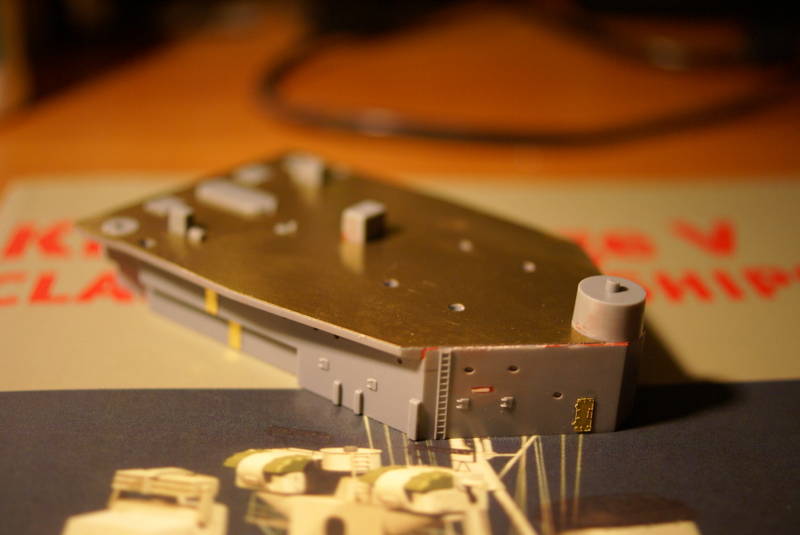
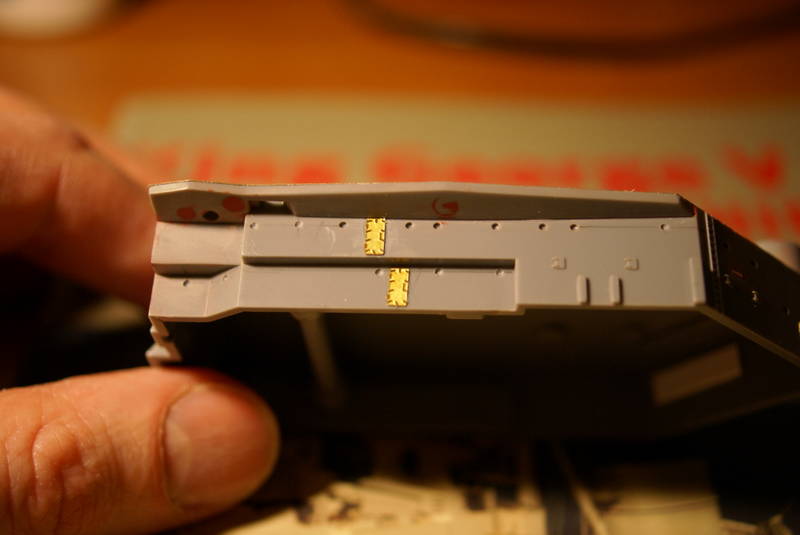
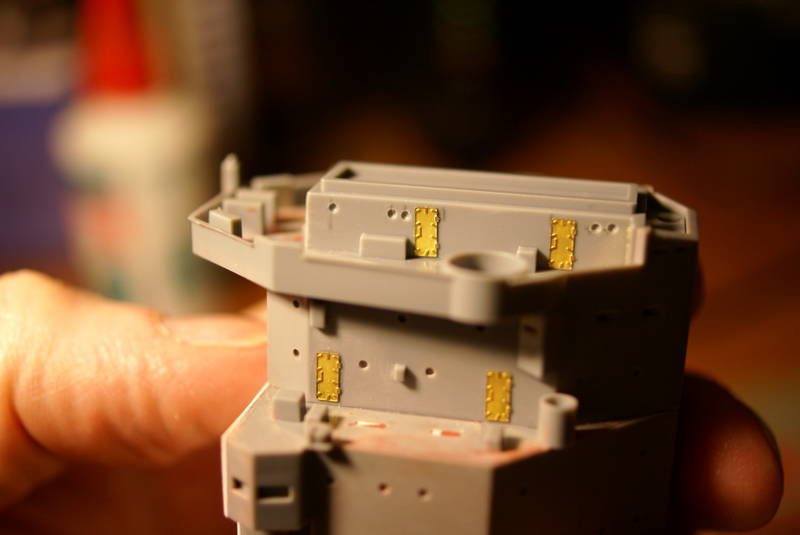
Good work so far mate. The Pontos set should be interesting, because the instructions are not renowned for their accuracy..

Cheers mate
Warren


Thanks Warren! Good to hear from you! How's Adelaide treating you?

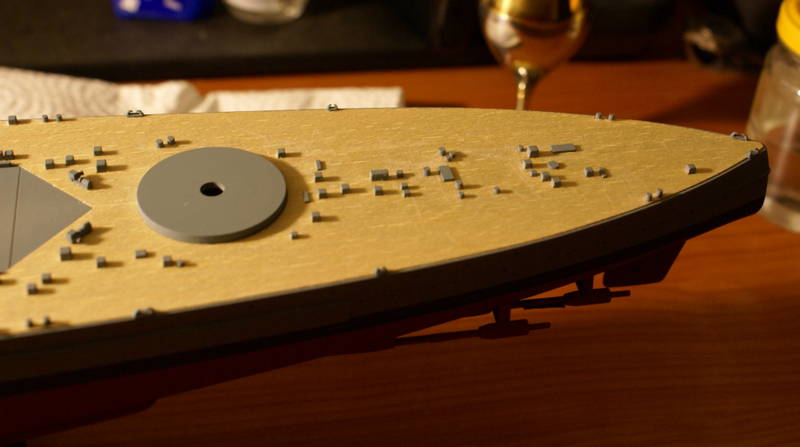
With the prop shafts, they are not truly round, so there is a gap-a concession to being able to tool the hull without sliders. Normally i'd just fill the gap and spray over, but usually i'll leave prop shafts off till after painting then fit them... Look like i'm going to have to break that rule

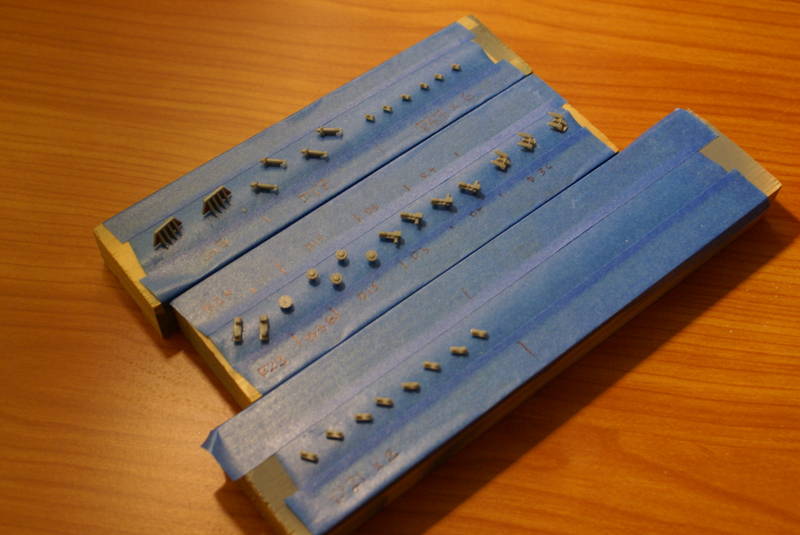
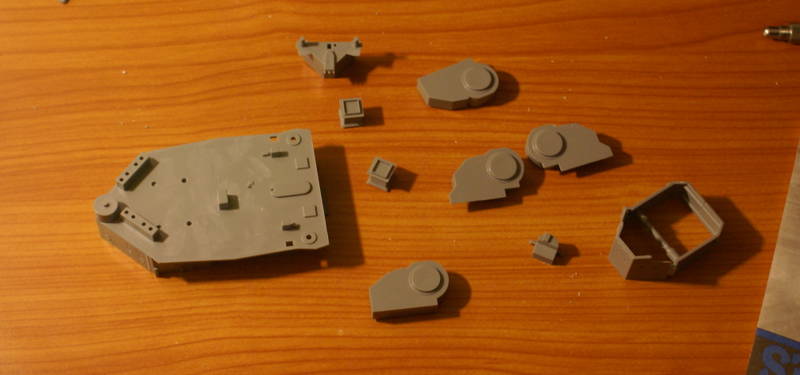
Actually using the WEM PE set, so no probs with instructions mate, but Joseph has generously offered his Pontos catapult which he won't be using in his build-so a bit of both
RussellE
#306
Visit this Community
Victoria, Australia
Joined: June 27, 2010
KitMaker: 3,959 posts
Model Shipwrights: 2,777 posts
Posted: Tuesday, June 17, 2014 - 11:19 PM UTC
June 18th,2014 update...

Kit prop shafts replaced with round stock and gaps filled


Plans clearly show that the hangar and shelter deck are separate

but the kit parts have been moulded as one piece


so I have cut them at the appropriate point and filled the hole created with sheet styrene ready for filling


a coat of something shiny to highlight any areas that need filling or sanding

one thing that separated the KGV from the other four ships of the class was the square portholes aft. This is perhaps the final link between these ships and earlier ships with the gallery walk long since discarded...

so i have cut some squares of paper and using diluted white glue added them to the hull. Maybe not it the exact correct spot, but pretty close. Degaussing cable is also added.


the scuttles on the Tamiya kit are not exactly what I'd call accurate.

A shot of primer


the prop shafts have been masked as the metal cote sprayed on earlier will suffice


ready for top coats now...
Gremlin56
Joined: October 30, 2005
KitMaker: 3,897 posts
Model Shipwrights: 3,301 posts
Posted: Wednesday, June 18, 2014 - 03:23 AM UTC
Beautiful work Russell, sharp and clean as we have become accustomed to for your builds.
Good luck to the Aussie team this evening, may the best guys win mate
Aurora-7
#360
Visit this Community
Connecticut, United States
Joined: June 18, 2003
KitMaker: 1,020 posts
Model Shipwrights: 630 posts
Posted: Wednesday, June 18, 2014 - 03:31 AM UTC
Begining to look very statley now.
Cosimodo
#335
Visit this Community
Auckland, New Zealand
Joined: September 03, 2013
KitMaker: 1,808 posts
Model Shipwrights: 871 posts
Posted: Wednesday, June 18, 2014 - 05:10 PM UTC
Russell, its looking very smart indeed.
I have just come back from London where on a sunny weekend I went over to the naval museum at Greenwich for a look. They have a KGV in an impressive 1/48 scale, which I guess given developments in the modelling world Trumpeter will be offering ships in that scale by 2020! Try sneaking that in the house and we could be offered the alternative to go live in it.
keep up the good work!

cheers
Michael
RussellE
#306
Visit this Community
Victoria, Australia
Joined: June 27, 2010
KitMaker: 3,959 posts
Model Shipwrights: 2,777 posts
Posted: Wednesday, June 18, 2014 - 10:52 PM UTC

Quoted Text

Beautiful work Russell, sharp and clean as we have become accustomed to for your builds.
Good luck to the Aussie team this evening, may the best guys win mate


Thank you Julian

yeah, we Aussies try hard at soccer, but we're just not that good at it
RussellE
#306
Visit this Community
Victoria, Australia
Joined: June 27, 2010
KitMaker: 3,959 posts
Model Shipwrights: 2,777 posts
Posted: Wednesday, June 18, 2014 - 10:53 PM UTC

Quoted Text

Begining to look very statley now.


Thank you Michael, got a coat of AP507B on today, so the royal robes are looking good
RussellE
#306
Visit this Community
Victoria, Australia
Joined: June 27, 2010
KitMaker: 3,959 posts
Model Shipwrights: 2,777 posts
Posted: Wednesday, June 18, 2014 - 10:59 PM UTC

Quoted Text

Russell, its looking very smart indeed.
I have just come back from London where on a sunny weekend I went over to the naval museum at Greenwich for a look. They have a KGV in an impressive 1/48 scale, which I guess given developments in the modelling world Trumpeter will be offering ships in that scale by 2020! Try sneaking that in the house and we could be offered the alternative to go live in it.
keep up the good work!

cheers
Michael


Thanks Michael. I too made the trek to London and specifically out to Grenwich to the NMM to see that model a couple of years back. It truly is awesome. Funny thing was I asked the attendant at the entrance where I would find it and he had absolutely no clue! Seriously, how could he miss it when it takes up the entire landing!! There were some other models tucked away in a room off to the side. Did you get in to see them too? Very stunning!

Here's a link to some pics I took- hope you enjoy

link to item
Gremlin56
Joined: October 30, 2005
KitMaker: 3,897 posts
Model Shipwrights: 3,301 posts
Posted: Thursday, June 19, 2014 - 05:36 AM UTC

Quoted Text


Thank you Julian

yeah, we Aussies try hard at soccer, but we're just not that good at it


You guys from down under gave the Dutch team a challenging match Russell,

RussellE
#306
Visit this Community
Victoria, Australia
Joined: June 27, 2010
KitMaker: 3,959 posts
Model Shipwrights: 2,777 posts
Posted: Saturday, July 05, 2014 - 11:13 PM UTC

Quoted Text


Quoted Text


Thank you Julian

yeah, we Aussies try hard at soccer, but we're just not that good at it


You guys from down under gave the Dutch team a challenging match Russell,


not quite good enough though, Julian

6th, July, 2014 update

The shinsengumi deck has no adhesive backing, so in order to seal the timber i am spraying both sides with a clear varnish to protect it. This will also allow me to add a wash to bring out the planking at a later date.

The hull has been sprayed AP507B and the boot topping mat black, waiting for RN anti fouling red

deck fittings lined up for AP507B

Thanks to my good friend in Canada, Joseph, who has kindly donated the catapult, UP launchers and Walrus parts from his Pontos set, these details can now be added too

and the kit part cleaned up in anticipation...

anti fouling red...

Thanks to my awful compressor, my airbrush decided to spit mostly thinners onto the hull when i was spraying the boot topping and so it bled under the masking

and now masked for repair


Thanks for looking in
Gremlin56
Joined: October 30, 2005
KitMaker: 3,897 posts
Model Shipwrights: 3,301 posts
Posted: Saturday, July 05, 2014 - 11:35 PM UTC
Immaculate work as usual Russell, the boot-top problem is easily solved.
Looking good.
Any predictions how Ricciardo will do this afternoon?
"One Lap Lewis" is rapidly giving the title to Rosberg
RussellE
#306
Visit this Community
Victoria, Australia
Joined: June 27, 2010
KitMaker: 3,959 posts
Model Shipwrights: 2,777 posts
Posted: Sunday, July 06, 2014 - 12:14 AM UTC
Many thanks, mate

As for Ricciardo, who knows? Certainly not me

PS, I caved & put my name down for a 1/24 Tiffy at me LHS :-)

Really starting to get into the wingy thingies of late, especially Airfix 1/72-such good value for money!!!
Gremlin56
Joined: October 30, 2005
KitMaker: 3,897 posts
Model Shipwrights: 3,301 posts
Posted: Sunday, July 06, 2014 - 12:40 AM UTC

Quoted Text

Many thanks, mate

As for Ricciardo, who knows? Certainly not me

PS, I caved & put my name down for a 1/24 Tiffy at me LHS :-)

Really starting to get into the wingy thingies of late, especially Airfix 1/72-such good value for money!!!


Going for the "Beast" too
Still twiddling my thumbs waiting for Airfix to deliver
beefy66
Visit this Community
England - North East, United Kingdom
Joined: October 22, 2007
KitMaker: 971 posts
Model Shipwrights: 645 posts
Posted: Sunday, July 06, 2014 - 12:52 AM UTC
Nice neat work with the paint job there Russell

Keith
RedDuster
Visit this Community
England - South East, United Kingdom
Joined: March 01, 2010
KitMaker: 7,078 posts
Model Shipwrights: 6,649 posts
Posted: Sunday, July 06, 2014 - 08:28 AM UTC
Looking good Russell,

Following with interest.

Si
RussellE
#306
Visit this Community
Victoria, Australia
Joined: June 27, 2010
KitMaker: 3,959 posts
Model Shipwrights: 2,777 posts
Posted: Sunday, July 06, 2014 - 09:31 AM UTC

Quoted Text


Quoted Text

Many thanks, mate

As for Ricciardo, who knows? Certainly not me

PS, I caved & put my name down for a 1/24 Tiffy at me LHS :-)

Really starting to get into the wingy thingies of late, especially Airfix 1/72-such good value for money!!!


Going for the "Beast" too
Still twiddling my thumbs waiting for Airfix to deliver


Hehehe, seems everyone's chomping at the bit to get their hands on one! Airfix are probably doing their best to get it right though...

Mine will probably sit in the stash for 5 years or so before I get a chance to work on it, so I will be living vicariously through yours and other's build logs

Looks like Ricciardo came third!! It seems like a good result all round????
RussellE
#306
Visit this Community
Victoria, Australia
Joined: June 27, 2010
KitMaker: 3,959 posts
Model Shipwrights: 2,777 posts
Posted: Sunday, July 06, 2014 - 09:32 AM UTC

Quoted Text

Nice neat work with the paint job there Russell

Keith


Thank you, Keith


Quoted Text

Looking good Russell,

Following with interest.

Si


Thank you, Si
Gremlin56
Joined: October 30, 2005
KitMaker: 3,897 posts
Model Shipwrights: 3,301 posts
Posted: Sunday, July 06, 2014 - 04:41 PM UTC

Quoted Text


Quoted Text


Quoted Text

Many thanks, mate

As for Ricciardo, who knows? Certainly not me

PS, I caved & put my name down for a 1/24 Tiffy at me LHS :-)

Really starting to get into the wingy thingies of late, especially Airfix 1/72-such good value for money!!!


Going for the "Beast" too
Still twiddling my thumbs waiting for Airfix to deliver


Hehehe, seems everyone's chomping at the bit to get their hands on one! Airfix are probably doing their best to get it right though...

Mine will probably sit in the stash for 5 years or so before I get a chance to work on it, so I will be living vicariously through yours and other's build logs

Looks like Ricciardo came third!! It seems like a good result all round????


Ricciardo did very well again. Looks like Lady Luck swung in Hamilton's direction yesterday giving him a new chance at the title.
RussellE
#306
Visit this Community
Victoria, Australia
Joined: June 27, 2010
KitMaker: 3,959 posts
Model Shipwrights: 2,777 posts
Posted: Sunday, July 20, 2014 - 11:44 PM UTC
May 21st Update:

so I managed to fix the bleed on the boot topping... But alas, when spraying a coat of clear matt varnish to give the hull a nice hard coating, a small clump of unmixed paint went through the airbrush and did this


Not happy! Now I have had to sand the hull back carefully without damaging the colour beneath the varnish. It will need coating with a clear varnish to dissolve the matt varnish so that it won't show when I re-coat with matt varnish at a later date.
Bits n pieces starting to take shape... I've decided the doors and ladders are good enough not to be replaced with PE...

The Shinsengumi deck was gloss coated on both sides before attaching to the hull. I used a 3M spray adhesive. It was important to spray each piece on a sheet of paper then place it on the hull, using blunt tweezers to burnish it down. After each piece the nozzle of the can was cleared, the old sheet of paper replaced with a new and the process repeated.


There are some gaps visible but these will disappear once superstructure starts going on...

More soon!
SqzMyLemon
Visit this Community
Alberta, Canada
Joined: December 10, 2007
KitMaker: 66 posts
Model Shipwrights: 60 posts
Posted: Monday, July 21, 2014 - 04:31 AM UTC
These wooden decks sure look great when they are attached. Nice progress on the King!
RussellE
#306
Visit this Community
Victoria, Australia
Joined: June 27, 2010
KitMaker: 3,959 posts
Model Shipwrights: 2,777 posts
Posted: Monday, July 21, 2014 - 10:31 PM UTC
Thanks mate
beefy66
Visit this Community
England - North East, United Kingdom
Joined: October 22, 2007
KitMaker: 971 posts
Model Shipwrights: 645 posts
Posted: Tuesday, July 22, 2014 - 03:48 AM UTC
Russell looks real neat with the wooden deck mate Spot On.

Keith
Gremlin56
Joined: October 30, 2005
KitMaker: 3,897 posts
Model Shipwrights: 3,301 posts
Posted: Thursday, July 24, 2014 - 05:03 PM UTC
Excellent progress Russell, the deck looks really smashing.
RussellE
#306
Visit this Community
Victoria, Australia
Joined: June 27, 2010
KitMaker: 3,959 posts
Model Shipwrights: 2,777 posts
Posted: Friday, July 25, 2014 - 12:27 AM UTC
Thanks guys!

another small update... 25th July

The wood deck has small holes for the kit ladders which will not be covered if PE ladders are used.

To fill these holes I cut slightly larger holes in the deck

then glued in a small piece cut from the left over deck pieces

first round of sanding has begun

the ends that have been filled are coming up ok

the holes for AA armament have been filled as at the time of the Bismarck episode they weren't yet fitted. Firstly I glue a small piece of plastic into the hole, then fill with putty. This way I only use a small amount of putty and hopefully avoid too many sinks.


some areas do need more putty like this ladder slot

Some kit parts have lots of sink marks that need filling


the cable reel slots were also filled to allow for the PE units to be fitted later...

and this arrived!!!

Next up a spray booth! Combined with a heater in the garage, I hope this takes the airbrushing to the next level!

Thanks for looking in
RussellE
#306
Visit this Community
Victoria, Australia
Joined: June 27, 2010
KitMaker: 3,959 posts
Model Shipwrights: 2,777 posts
Posted: Saturday, August 23, 2014 - 12:21 AM UTC
23rd August update...

work on the bridge continues

there is a mismatch between upper and lower sections that will need to be fixed

dry fit of components to see check assembly

work on the boat deck continues

to fix the mismatch i added 0.25mm thick plastic sheet. (10 thou in the old money)

the base arrived

I've finally managed to bash the hull into something i'm happy with.

several coats of clear gloss a light sand and then matt varnish up to deck level

brass sheet to the boat deck to hide all the clean up

the tamiya kit is missing many portholes and doors so i'm adding them as i go


the mismatch is now cleaned up

more port holes

an overall view with parts dry fit

these really were brutal looking ships-maybe that's why i like 'em

and my latest temptation and his little brother


thanks for looking