Campaigns
Want to be part of a group build? This is where to start, plan, and meet about them.
Official Campaign: Battle of Leyte Gulf
kirkus2269
Visit this Community
Ontario, Canada
Joined: September 06, 2014
KitMaker: 42 posts
Model Shipwrights: 38 posts
Posted: Friday, January 02, 2015 - 03:51 AM UTC


here are the rest of the (many) p.e. sets i have invested in-plenty to choose from for this build- just thumbing through the sets and looking at the myriad pieces gets me excited! i will make a full and comprehensive list of all materials and reference to be used with the first in progress shots.
Littorio
Visit this Community
England - South East, United Kingdom
Joined: September 15, 2004
KitMaker: 4,728 posts
Model Shipwrights: 1,080 posts
Posted: Friday, January 02, 2015 - 04:48 PM UTC
Wow Kirk lots of pe there.

Anyway no promises to get her finished in time but here is the first photos of what will become USS Hoel

Trumpy The Sullivans kit with L'Arsenal upgrade kit


A question, does any one know of a 1/350 John C. Butler class kit?
rolltide31
#377
Visit this Community
Texas, United States
Joined: June 27, 2010
KitMaker: 1,481 posts
Model Shipwrights: 1,332 posts
Posted: Friday, January 02, 2015 - 06:19 PM UTC
Luciano glad to see that your ready to start your project. Will be following with interest

The only 1/350 John C Butler class DE I have found is the USS O'Flaughtery made by Iron Shipwrights. Its not listed as available on their website. I found one on eBay

Dave
Littorio
Visit this Community
England - South East, United Kingdom
Joined: September 15, 2004
KitMaker: 4,728 posts
Model Shipwrights: 1,080 posts
Posted: Friday, January 02, 2015 - 07:00 PM UTC
Ha progress

It's not pretty and it's still wet but the hulls stuck together and received a coat of hull red oh and the base has been drilled and works great for holding the model while you work


whoops I can see a bit of grey plastic which should be red! Back to the spray booth in a bit.

Thanks Dave, Am I right to think the Rudderow class was the same just with different drive?
rolltide31
#377
Visit this Community
Texas, United States
Joined: June 27, 2010
KitMaker: 1,481 posts
Model Shipwrights: 1,332 posts
Posted: Saturday, January 03, 2015 - 01:27 AM UTC
@Luciano, according to this website, http://pwencycl.kgbudge.com/J/o/John_C_Butler_class.htm that is correct.

Looking at Iron Shipwrights Rudderow class resin kit it has the same low profile bridge as the John C. Butler Class DE. You might want to email Iron Shipwrights and see if they still have the O'Flaughtery available.

Dave
Littorio
Visit this Community
England - South East, United Kingdom
Joined: September 15, 2004
KitMaker: 4,728 posts
Model Shipwrights: 1,080 posts
Posted: Saturday, January 03, 2015 - 08:42 PM UTC
Thanks again Dave I'll look into it.

Anyway on with Hoel, Hoel was in measure M31/1D camo so I've made a start at painting the deck O-5 Ocean gray before adding the B-20 deck blue. The gun turrets from the L'Arsenal upgrade set are ready for primer two with resin barrels and blast bags while the aft turrets have brass barrels and no blast bags, this was after checking photos which seemed to indicate no blast bags on the aft turrets.
Superstructure only placed on, none of it is glued on.

Lastly a view of my computer screen with two photos of Hoel and the camo pattern.


RedDuster
Visit this Community
England - South East, United Kingdom
Joined: March 01, 2010
KitMaker: 7,078 posts
Model Shipwrights: 6,649 posts
Posted: Sunday, January 04, 2015 - 01:27 AM UTC
Looking good Littorio, interesting build.

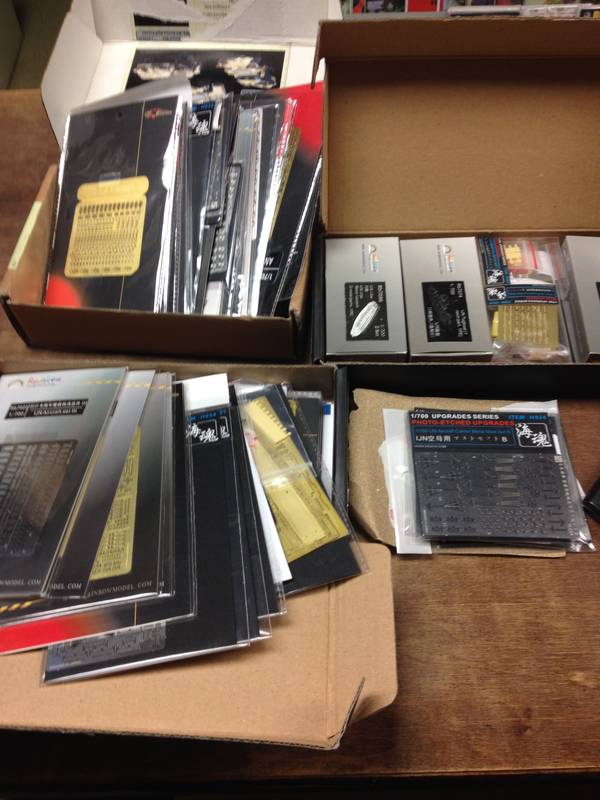
More progress on CVL22.

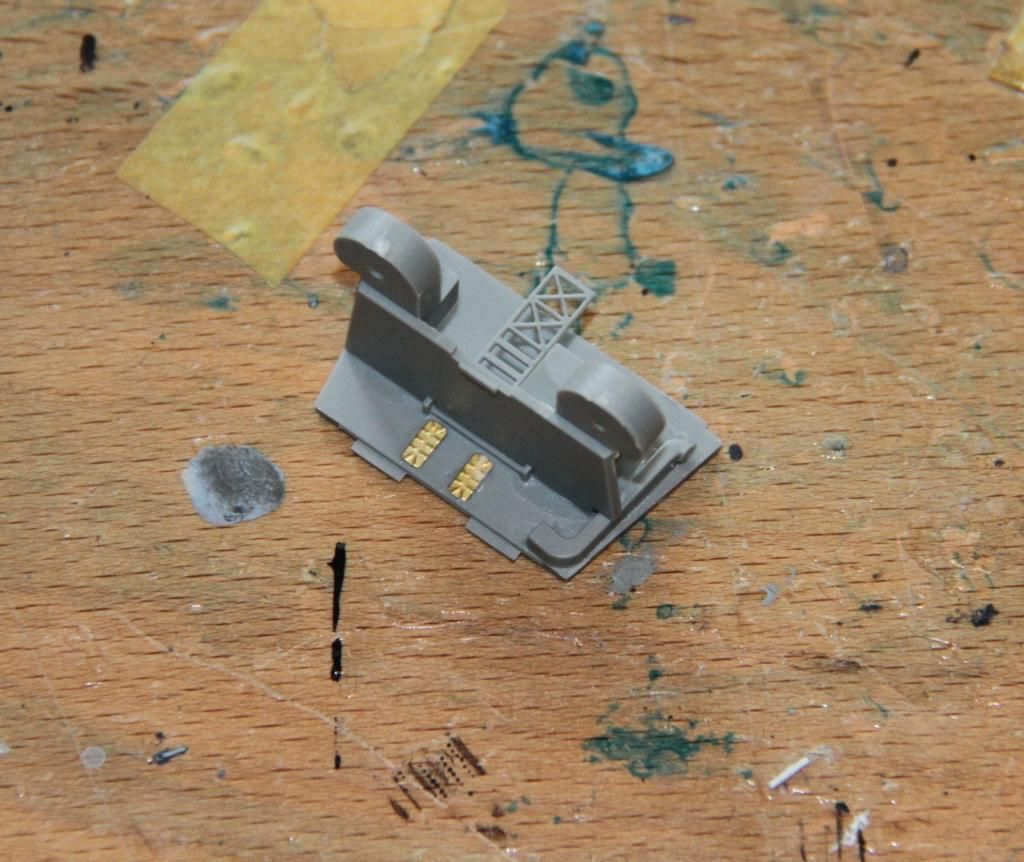
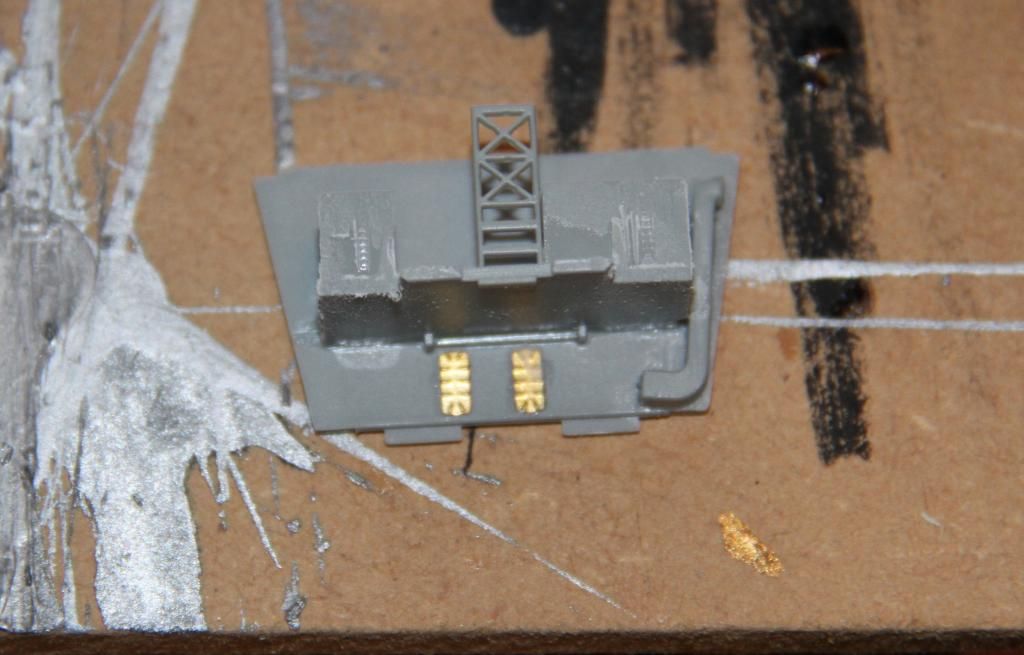
The front bulkhead done, or so I thought, more later.


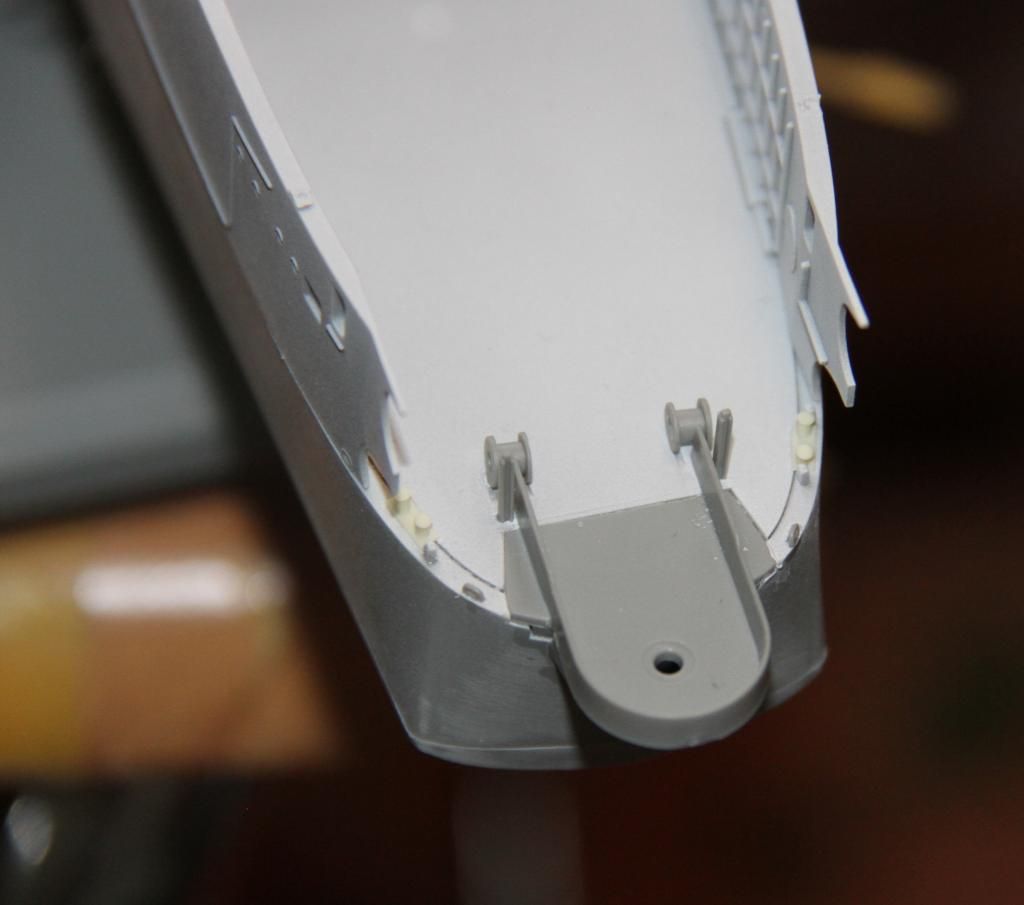
Another error in the instructions, it calls for 6 parts J10, whilst only four are provided. looking at the sprues and the drawings I reckoned the after pair should be H15.


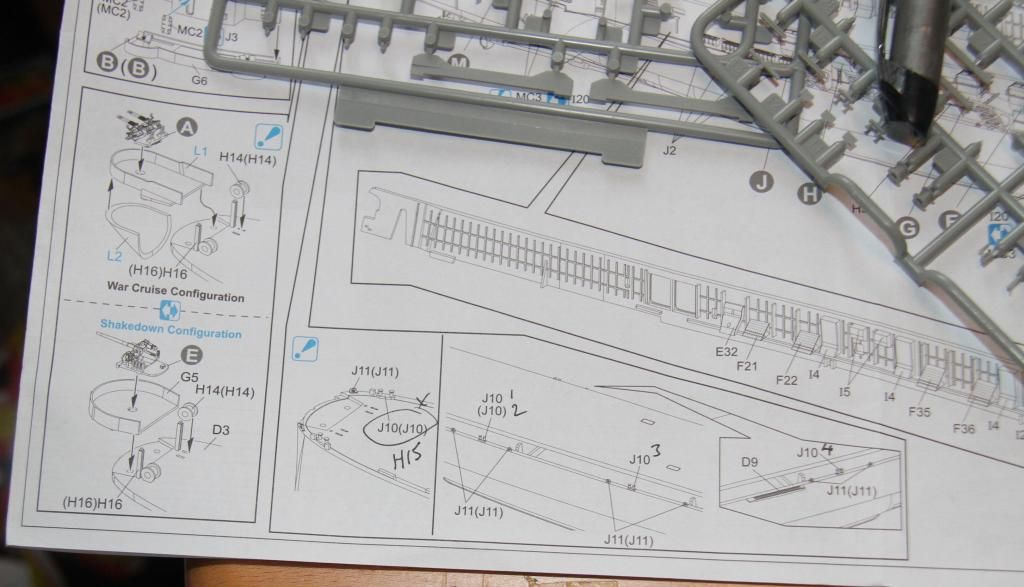
However, having found the error I managed to make one of my own & ping one H15 into oblivion, however I did have a pack of L'Arsenal bits laying around, so I took a couple of suitable sized ones from that.


Blanking plates and bulges added to forward end of the hanger sides.


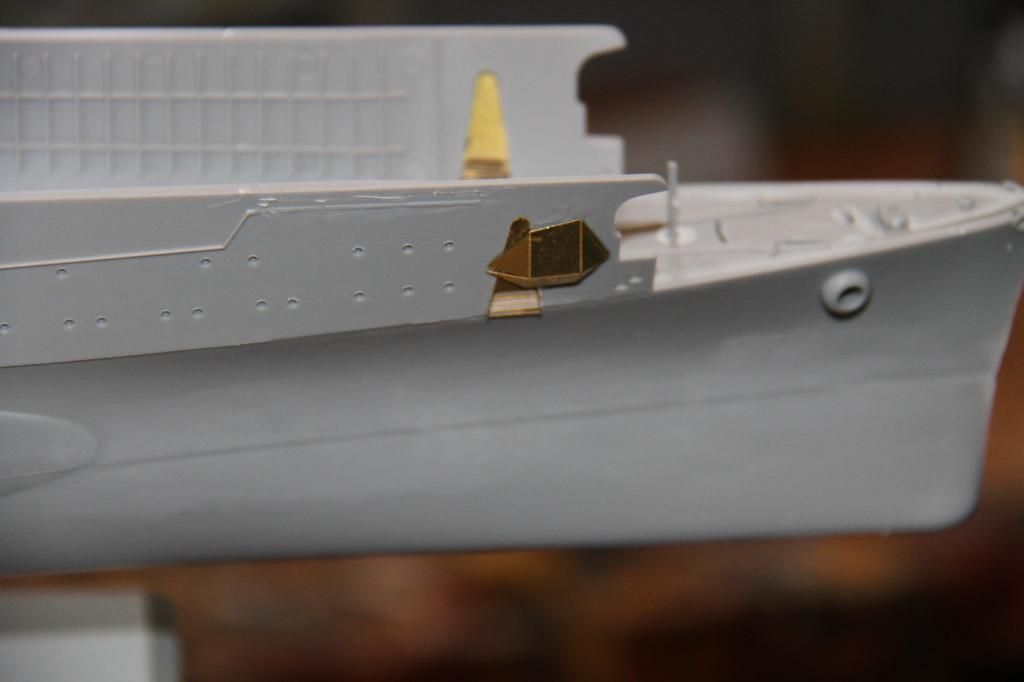
Back to the front bulkhead, the picture that showed me I needed the blanking plates and the bulges also showed the forward gun tubs had gone as well, so they were removed. Had missed that picture, mainly because it was on the cover of the book, the last place I would look!


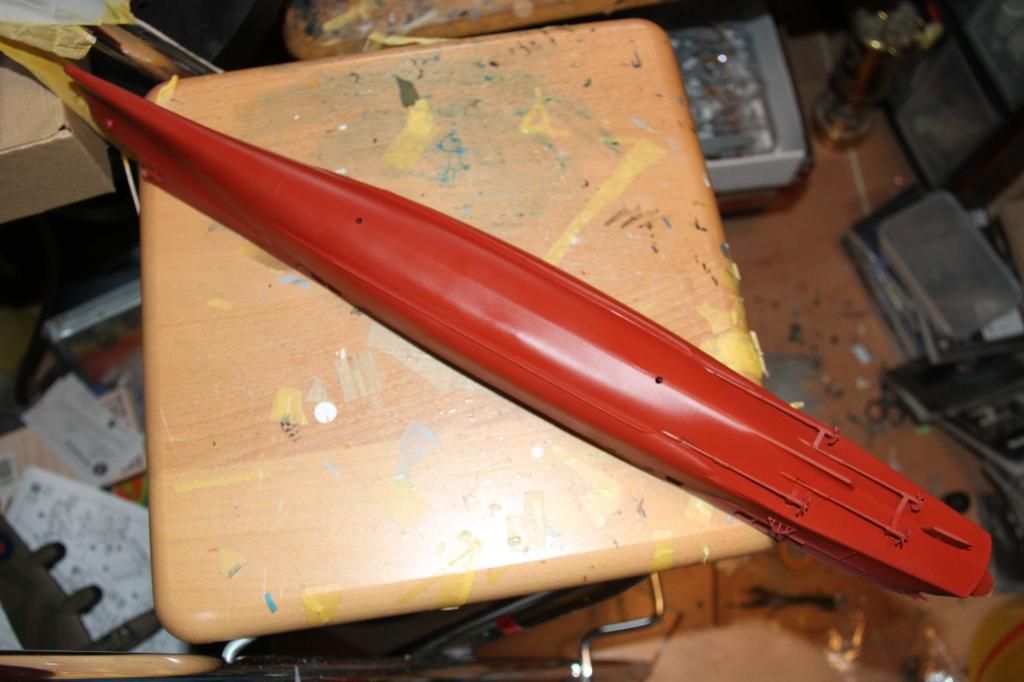
Finally, some paint shot at the hull, good old Halfords plastic primer for the hull red.


Si
IronOwl
Visit this Community
Georgia, United States
Joined: January 07, 2013
KitMaker: 572 posts
Model Shipwrights: 80 posts
Posted: Sunday, January 04, 2015 - 06:46 AM UTC
well not having power for several hours I started the Build finally able to post start pics of the Avenger Torpedo Plane.

Sascha(Ironowl)
IronOwl
Visit this Community
Georgia, United States
Joined: January 07, 2013
KitMaker: 572 posts
Model Shipwrights: 80 posts
Posted: Sunday, January 04, 2015 - 06:50 AM UTC
as of this point I have finished steps 1 & 2 and done some interior painting funny thing to me anyway is that the pilot, seat and stick were molded in 1 piece that's the first time I have ever seen that.


Sascha(Ironowl)
IronOwl
Visit this Community
Georgia, United States
Joined: January 07, 2013
KitMaker: 572 posts
Model Shipwrights: 80 posts
Posted: Sunday, January 04, 2015 - 06:59 AM UTC
I scored an IJN Light Cruiser the Isuzu with PE set for a late Christmas Present and thought about adding it to this build but I have had to store it with most of my kits due to house renovations and packing ever so slowly due to our upcoming move I went back to page 1 and caught up with whats going on here and wow ya'll are doing great work.

Sascha(Ironowl)
rolltide31
#377
Visit this Community
Texas, United States
Joined: June 27, 2010
KitMaker: 1,481 posts
Model Shipwrights: 1,332 posts
Posted: Sunday, January 04, 2015 - 08:12 PM UTC
@Luciano - the Hoel is coming along nicely. Thos L'Arsenal 5" guns look very good. Interesting that the front guns had blast bags but the stern didn't.

@Si - looking good as always.

@Sacha - your TBF is looking good. It is interesting how the pilot was molded though. Will look forward to seeing you attack the IJN Isuzu, it was a kit I was llloking at a while back.

I will have some USS Dace updates this week. Looking to reattach the bow and finnish off the torpedo tubes.

Dave
RedDuster
Visit this Community
England - South East, United Kingdom
Joined: March 01, 2010
KitMaker: 7,078 posts
Model Shipwrights: 6,649 posts
Posted: Tuesday, January 06, 2015 - 10:53 PM UTC
Thanks Dave, This kit really is fun!

The lower hull masked off.


and black from the boot topping sprayed on.


another couple of mistakes in the instructions.


the correct parts fitted.


more soon.

Si
BravoTwoZero
Visit this Community
California, United States
Joined: June 11, 2009
KitMaker: 461 posts
Model Shipwrights: 80 posts
Posted: Wednesday, January 07, 2015 - 05:24 AM UTC
Small update on my Mogami. I have added photoetch components and here are the results so far:


Very tedious, but am looking forward to getting more things done.
kirkus2269
Visit this Community
Ontario, Canada
Joined: September 06, 2014
KitMaker: 42 posts
Model Shipwrights: 38 posts
Posted: Wednesday, January 07, 2015 - 08:54 PM UTC
gorgeous!! so nice and clean- i am sure i will be referring to your pics when i build my 1/700 version....
rolltide31
#377
Visit this Community
Texas, United States
Joined: June 27, 2010
KitMaker: 1,481 posts
Model Shipwrights: 1,332 posts
Posted: Wednesday, January 07, 2015 - 09:27 PM UTC
@Si, watching you progress is always a learning event for me whether it is with you PE work or your painting. I like your method for painging the hull, never thought to layer the colors. I will adapt that method if you don't mind.

@Joe, your Mogami is looking great. Love the clean build. The degaussing cable looks like it was challenging. I have that requirement coming up soon with the Maya but luckily for me it is pretty straight forward, not a whole lot of angle to contend with.

Dave
RedDuster
Visit this Community
England - South East, United Kingdom
Joined: March 01, 2010
KitMaker: 7,078 posts
Model Shipwrights: 6,649 posts
Posted: Wednesday, January 07, 2015 - 11:28 PM UTC
Thanks Dave,

Please be my guest, I came up with his method because I hate masking, and it means I only mask any area once.

A bit more progress.

The boot topping masked and the hull sprayed white.


Along with the areas on the on two of the funnels the islands, the forward and after hull bulkheads, and forward gun tub.


A few more bits added to the underside of the flight deck, which have since been sprayed white.


The white areas masked and sprayed Haze Grey.


More masking and spraying to come.

Si
BravoTwoZero
Visit this Community
California, United States
Joined: June 11, 2009
KitMaker: 461 posts
Model Shipwrights: 80 posts
Posted: Thursday, January 08, 2015 - 10:30 PM UTC
Hi Si,

You are progressing fast with your kit. Thanks for pointing out errors. I will review your build when I work on mine.

Thanks,

Joseph
Littorio
Visit this Community
England - South East, United Kingdom
Joined: September 15, 2004
KitMaker: 4,728 posts
Model Shipwrights: 1,080 posts
Posted: Thursday, January 08, 2015 - 11:46 PM UTC
Small up date, which is very photo light so light in fact that there are none

Any way just before heading off to work I managed to put the rest of the superstructure together and apply an undercoat layer to the super and turrets, all left to dry while I'm at work.
Photos tomorrow.
Littorio
Visit this Community
England - South East, United Kingdom
Joined: September 15, 2004
KitMaker: 4,728 posts
Model Shipwrights: 1,080 posts
Posted: Saturday, January 10, 2015 - 11:57 PM UTC

Quoted Text

Small up date, which is very photo light so light in fact that there are none

Any way just before heading off to work I managed to put the rest of the superstructure together and apply an undercoat layer to the super and turrets, all left to dry while I'm at work.
Photos tomorrow.


As promised a not very interesting photo of parts in primer.


Rugbyhead
Visit this Community
New South Wales, Australia
Joined: November 23, 2013
KitMaker: 39 posts
Model Shipwrights: 36 posts
Posted: Sunday, January 11, 2015 - 03:55 PM UTC
Hi Dave, what i've been trying to do is, when typing a reply select "UPLOAD PHOTOS", the computer takes me to a pop up window and i've been selecting the model shipwrights title and I keep going in circles! I'm a plumber not a computer person as is painfully obvious!
Littorio
Visit this Community
England - South East, United Kingdom
Joined: September 15, 2004
KitMaker: 4,728 posts
Model Shipwrights: 1,080 posts
Posted: Sunday, January 11, 2015 - 04:20 PM UTC

Quoted Text

Hi Dave, what i've been trying to do is, when typing a reply select "UPLOAD PHOTOS", the computer takes me to a pop up window and i've been selecting the model shipwrights title and I keep going in circles! I'm a plumber not a computer person as is painfully obvious!


Andrew there are some photo posting FAQ posts on the site but you need to either put your photos into the gallery or a hosting site like photo bucket first then copy and paste the 'img' line into your post, you can't put your phot straight from your computer into your post.
RedDuster
Visit this Community
England - South East, United Kingdom
Joined: March 01, 2010
KitMaker: 7,078 posts
Model Shipwrights: 6,649 posts
Posted: Sunday, January 11, 2015 - 11:05 PM UTC
On with the masking.

The port side.


the starboard side.


Unfortunately as I was getting the airbrush out it started raining in my outdoor spray booth, so hopefully sprayday tomorrow.

Si
RedDuster
Visit this Community
England - South East, United Kingdom
Joined: March 01, 2010
KitMaker: 7,078 posts
Model Shipwrights: 6,649 posts
Posted: Monday, January 12, 2015 - 10:47 PM UTC
During a cap in the rain managed to get the ocean grey on.


if the weather holds might try and get the sea blue on.

Si
RedDuster
Visit this Community
England - South East, United Kingdom
Joined: March 01, 2010
KitMaker: 7,078 posts
Model Shipwrights: 6,649 posts
Posted: Wednesday, January 14, 2015 - 04:42 AM UTC
Starboard side sprayed sea blue.


and the port side.


The masking off, these two are in the raw, before I have touched up any bleed, and corrected masking errors.

Starboard side.


Port side.


Touched up and corrected. (Well nearly)

Starboard side.


Port Side.


It may not be a perfect Ms32/8A, but I am happy with it.

Si
BravoTwoZero
Visit this Community
California, United States
Joined: June 11, 2009
KitMaker: 461 posts
Model Shipwrights: 80 posts
Posted: Thursday, January 15, 2015 - 12:10 AM UTC
Si, excellent job on the camo! I wish I am progressing as fast as you are with my Mogami.
Speaking of which, here are my progress shots:

I lost the baffles for my smoke stack and did not have the patience to crawl around looking for it. I fashioned a replacement using plastic strips and here's how it looks.


I have assembled the flak emplacement for the stern.


Next step is cut the molded one from the kit and replace it with the brass piece


I have also tested applying the etched pieces to one of the turrets. I'm not too happy with the results but I guess I'll just have to live with it.


I have sealed two locator holes for the access ladders since these will be replaces by etch parts.


And lastly, I have started work on the base of the "Pagoda" structure. Just applying some more etch parts. Here's how the parts look dry-fitted on the deck.


That's all for now.

Joseph