


Go to modelshipwrights.com for the current dynamic site!
Campaigns
Want to be part of a group build? This is where to start, plan, and meet about them.
Want to be part of a group build? This is where to start, plan, and meet about them.
Hosted by Jim Starkweather
Official Campaign: Battle of Leyte Gulf

TRM5150

Joined: January 03, 2010
KitMaker: 2,159 posts
Model Shipwrights: 1,400 posts

Posted: Tuesday, February 10, 2015 - 05:17 PM UTC
That is some fantastic brass slinging Joe!!
bill_c

Joined: January 09, 2008
KitMaker: 10,553 posts
Model Shipwrights: 306 posts

Posted: Tuesday, February 10, 2015 - 08:48 PM UTC
Some really fine shipbuilding going on here! 

kirkus2269

Joined: September 06, 2014
KitMaker: 42 posts
Model Shipwrights: 38 posts

Posted: Tuesday, February 10, 2015 - 11:12 PM UTC
super awesome work on the moganmi- wow- very inspiring!

RedDuster

Joined: March 01, 2010
KitMaker: 7,078 posts
Model Shipwrights: 6,649 posts

Posted: Wednesday, February 11, 2015 - 01:38 AM UTC
Great work Joe & Dave two really excellent builds.
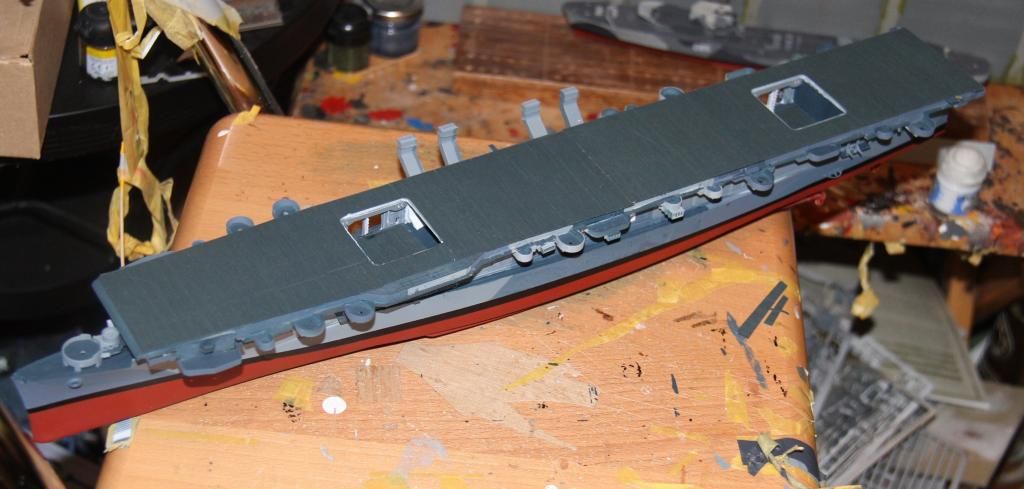
On with the Indy, the elevators.
The after elevator in the lowered position,
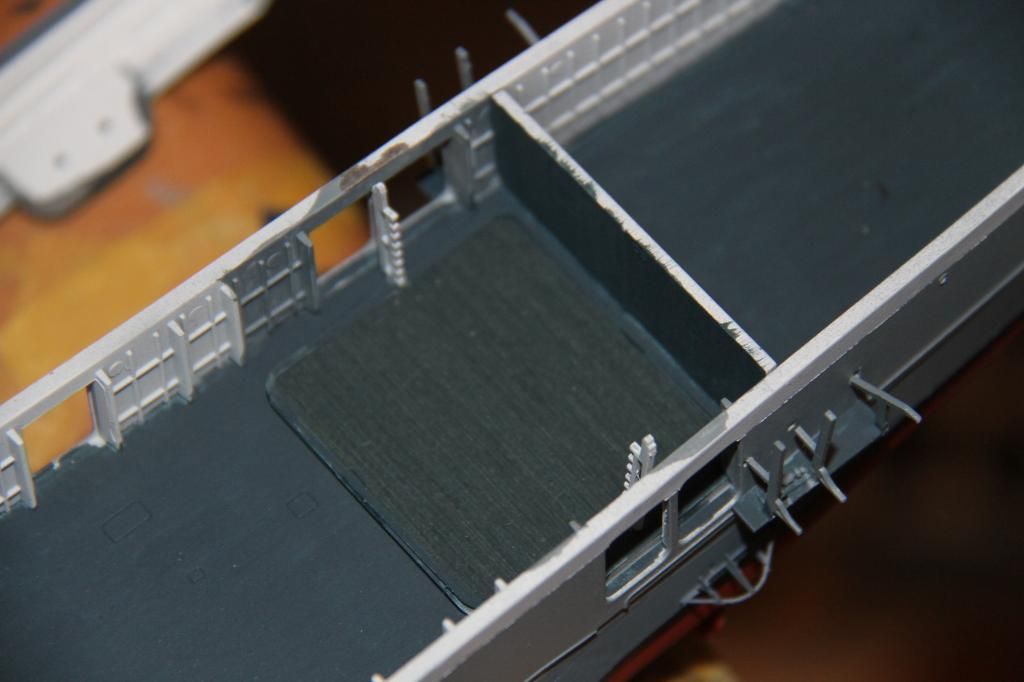
The forward elevator on it's way up.
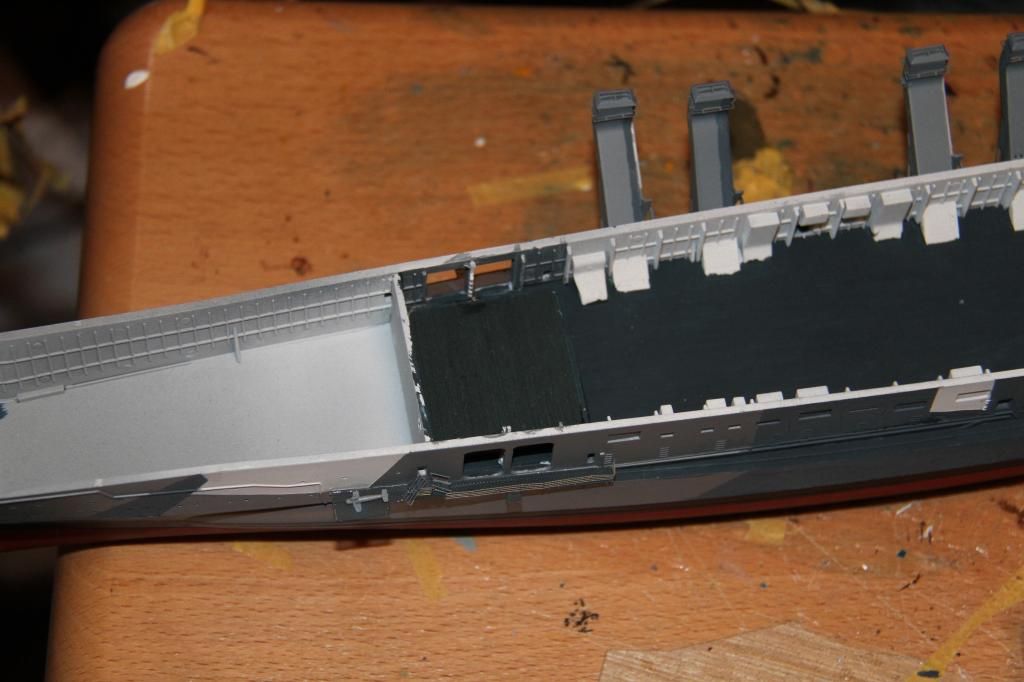
and side on.
The first attempt to get the deck on, fit issues at the aft end of the hanger.
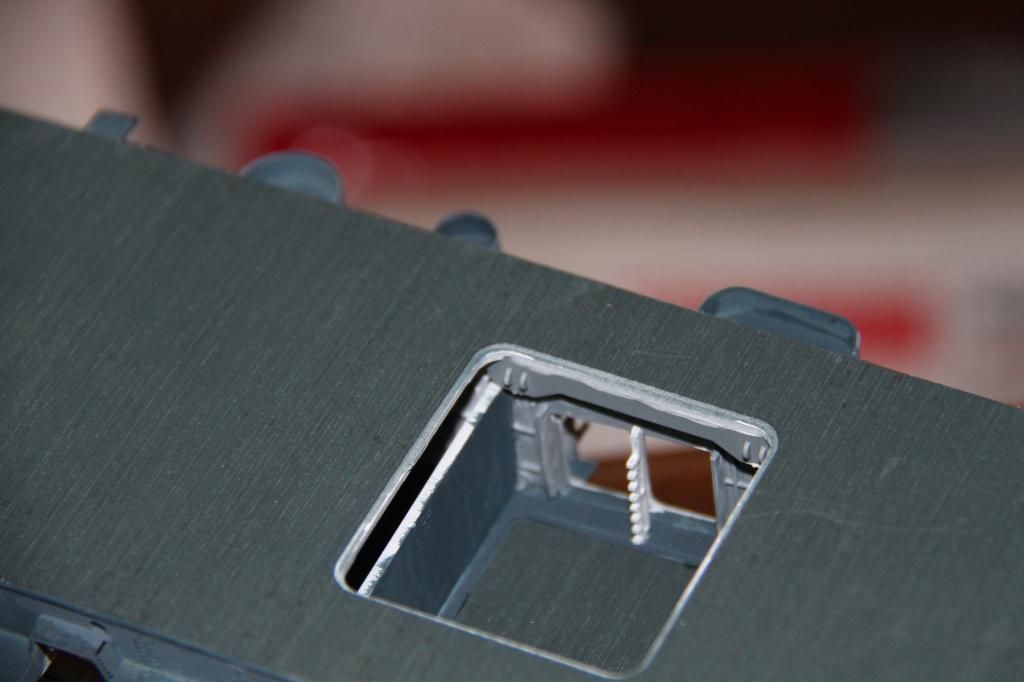
A bit of wiggling and jiggling, and it's down.
Si
On with the Indy, the elevators.
The after elevator in the lowered position,

The forward elevator on it's way up.

and side on.

The first attempt to get the deck on, fit issues at the aft end of the hanger.

A bit of wiggling and jiggling, and it's down.

Si

rolltide31

#377
Joined: June 27, 2010
KitMaker: 1,481 posts
Model Shipwrights: 1,332 posts

Posted: Wednesday, February 11, 2015 - 02:46 AM UTC
Si,
She is defeinately looking good. Looking forward to seeing what else you are going to do in the hanger bay.
Dave
She is defeinately looking good. Looking forward to seeing what else you are going to do in the hanger bay.
Dave

BravoTwoZero
Joined: June 11, 2009
KitMaker: 461 posts
Model Shipwrights: 80 posts

Posted: Wednesday, February 11, 2015 - 04:11 AM UTC
Thanks very much for all the comments on my Mogami. Much appreciated. One of the main reasons I joined this campaign, to get feedback and get encouragement to finally finish this model. That being said, I'll take a short break on my Mogami because I also signed up for other campaigns. I hope it won't take too long.
I was so pre-occupied on posting my update, I didn't get to comment on some of the works posted here.
Dave, great work on your Maya. Especially the deck. As you can see, I took the easy way out with my flight deck. Same goes for your Dace. Looks good after you re-attached the bow.
Si, you are progressing splendidly with your Indy.I think you'll be the first one to finish a kit for this campaign. Also, I didn't realize that the Varyag thread was yours! I was a lurker at the time and your thread was the one that made me buy my own Varyag kit. Great job!
RedDuster
Joined: March 01, 2010
KitMaker: 7,078 posts
Model Shipwrights: 6,649 posts
Posted: Thursday, February 12, 2015 - 02:30 AM UTC
Hi Dave,
There will be Aircraft on the elevator and maybe a couple more in the hanger, will depend what can be seen,
Thanks Joseph, doubt I will be first to finish, lots of work on the island, the catwalks, light AA deck vehicles and crew to do yet.
also appreciate your comments on the Varyag, hope you enjoy building her as much as I did.
Si

Littorio
Joined: September 15, 2004
KitMaker: 4,728 posts
Model Shipwrights: 1,080 posts
Posted: Thursday, February 12, 2015 - 06:22 AM UTC
Guy's question time: What colour should the floater nets be?
I've fitted the floater net baskets to the Hoel and I have the WEM PE nets but it doesn't tell you what colour they should be.
I've fitted the floater net baskets to the Hoel and I have the WEM PE nets but it doesn't tell you what colour they should be.

TRM5150
Joined: January 03, 2010
KitMaker: 2,159 posts
Model Shipwrights: 1,400 posts
Posted: Thursday, February 12, 2015 - 08:13 AM UTC
Looking sharp Si!! Nice to see the top go down!!
Littorio
Joined: September 15, 2004
KitMaker: 4,728 posts
Model Shipwrights: 1,080 posts
Posted: Friday, February 13, 2015 - 09:18 PM UTC
Not much to see on ship, all the work today has been getting pe and resin ready, so the photos are of bits and bobs.
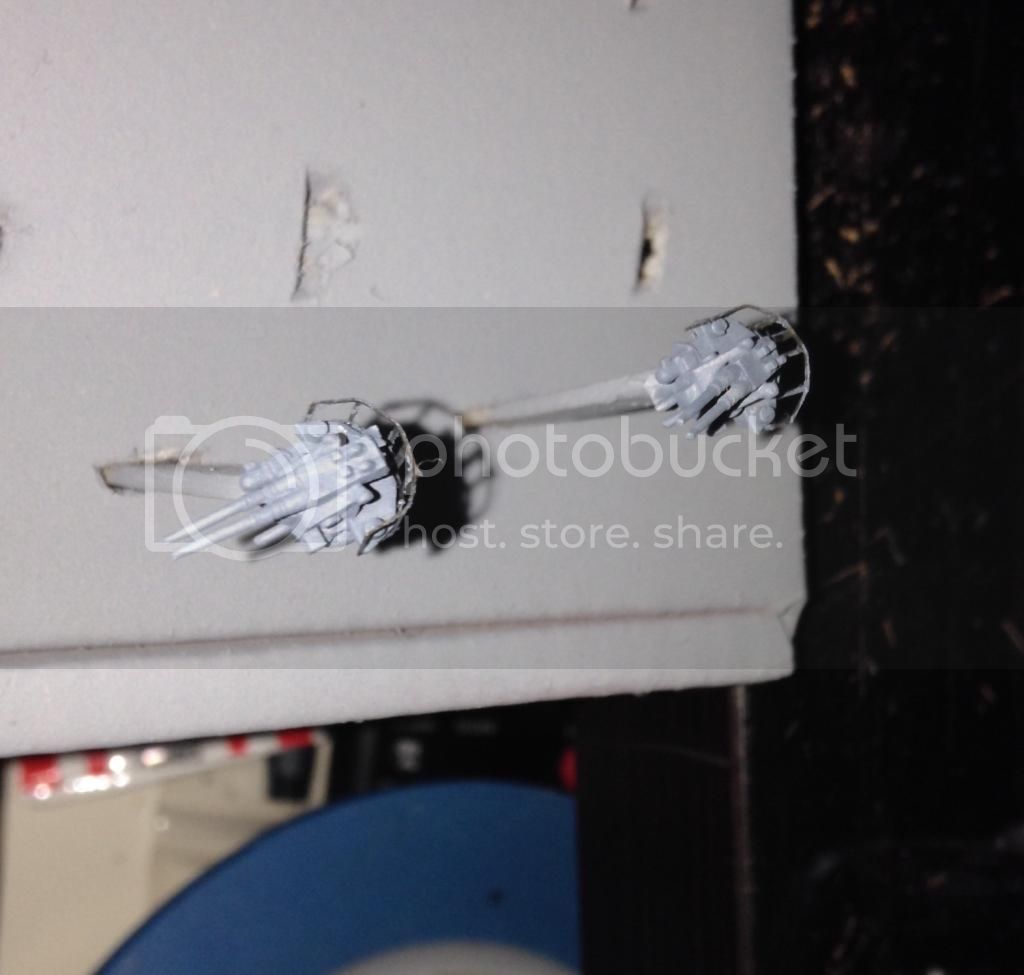
Firstly four of the 20mm mounts

Ok life rafts, 40mm seats and sights, boat details, radar parts and the final floater net basket
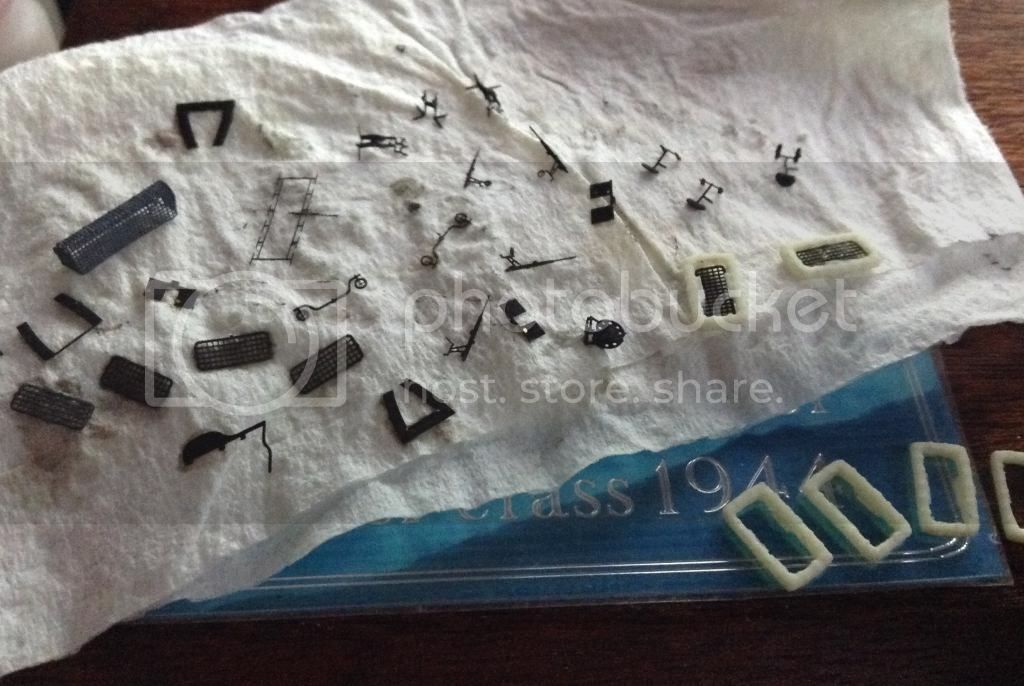
Two of the 40mm twins
Ships boats and davits ready for primer
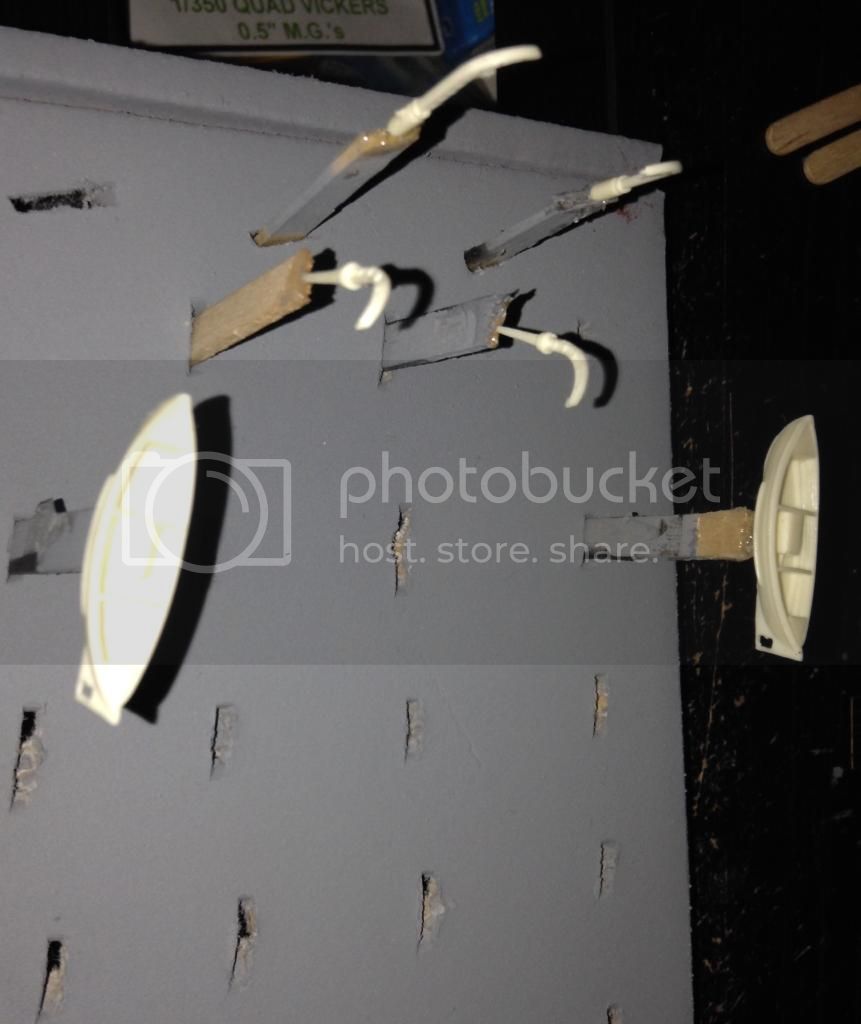
More tomorrow
Firstly four of the 20mm mounts

Ok life rafts, 40mm seats and sights, boat details, radar parts and the final floater net basket

Two of the 40mm twins

Ships boats and davits ready for primer

More tomorrow
TRM5150
Joined: January 03, 2010
KitMaker: 2,159 posts
Model Shipwrights: 1,400 posts
Posted: Friday, February 13, 2015 - 10:27 PM UTC
Very nice seeing progress on the details!! Looking very well!! 
RedDuster
Joined: March 01, 2010
KitMaker: 7,078 posts
Model Shipwrights: 6,649 posts
Posted: Saturday, February 14, 2015 - 04:01 AM UTC
Nice progress Luciano, watching with interest.
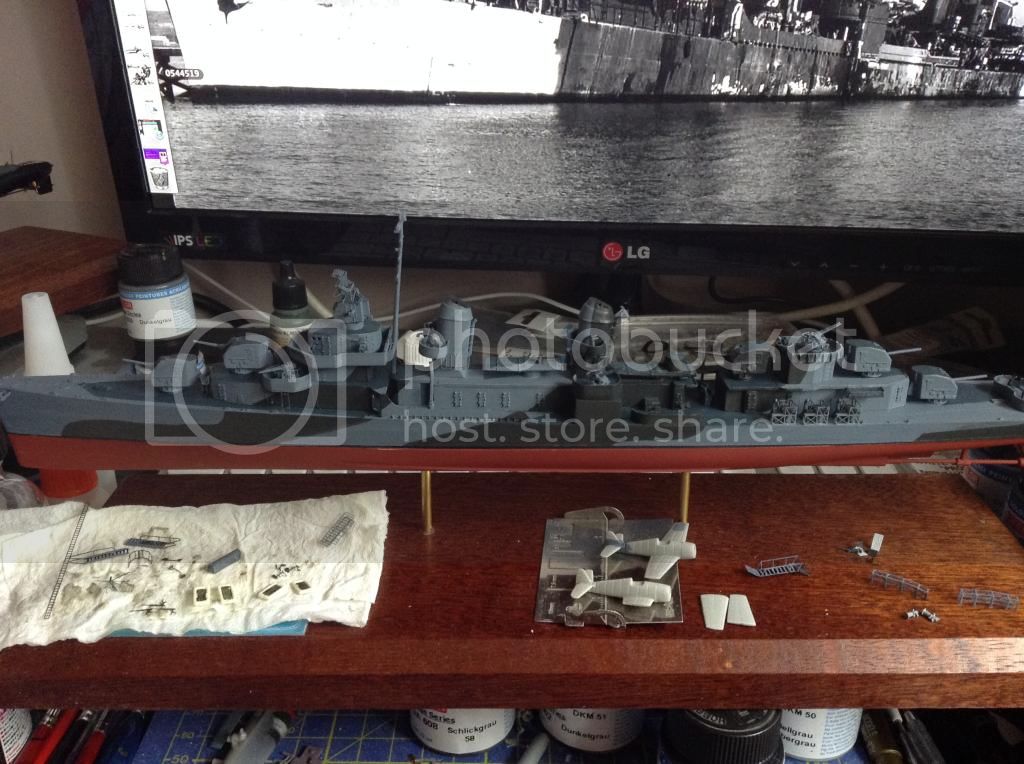
On with Indy,
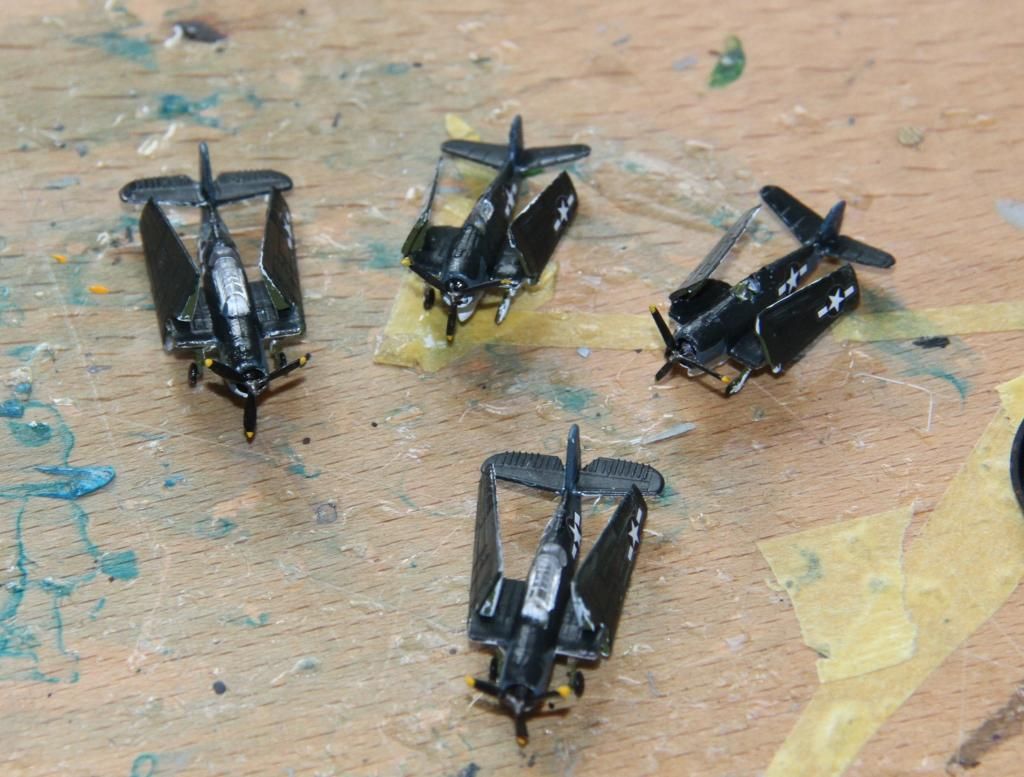
Decals on the first four aircraft.
The fusalages:-
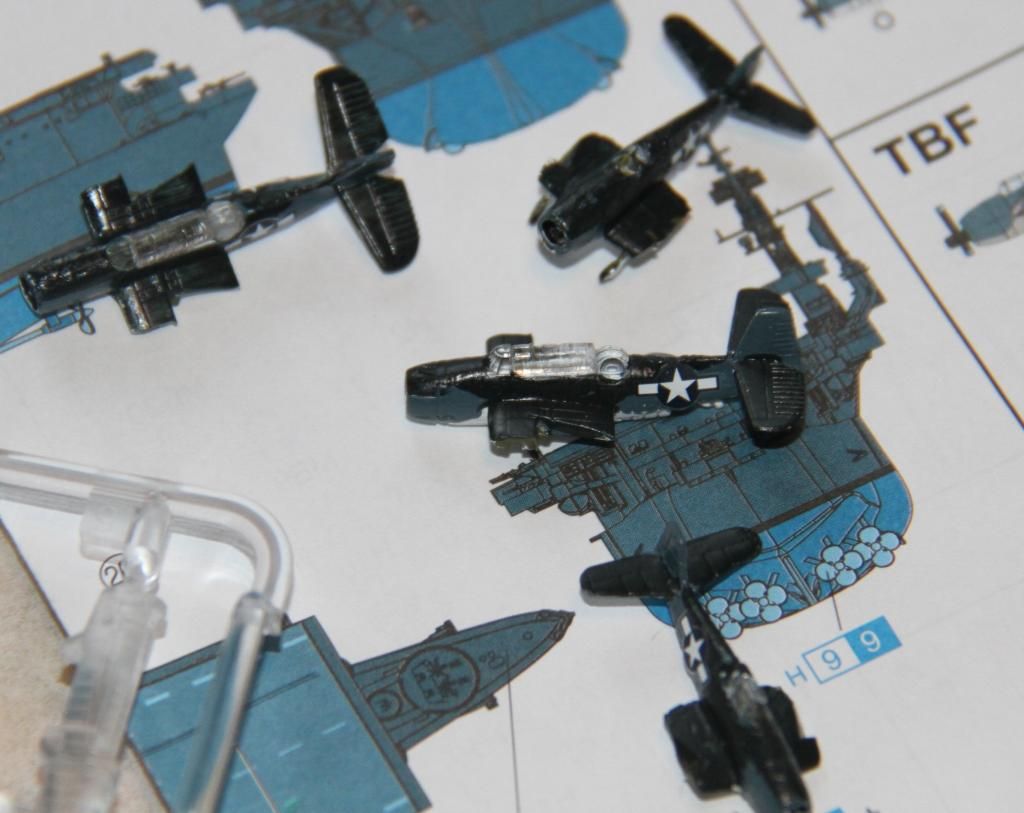
and the wings, still at this stage on the sprues.

The aircraft assembled except for the folding section of the wings.
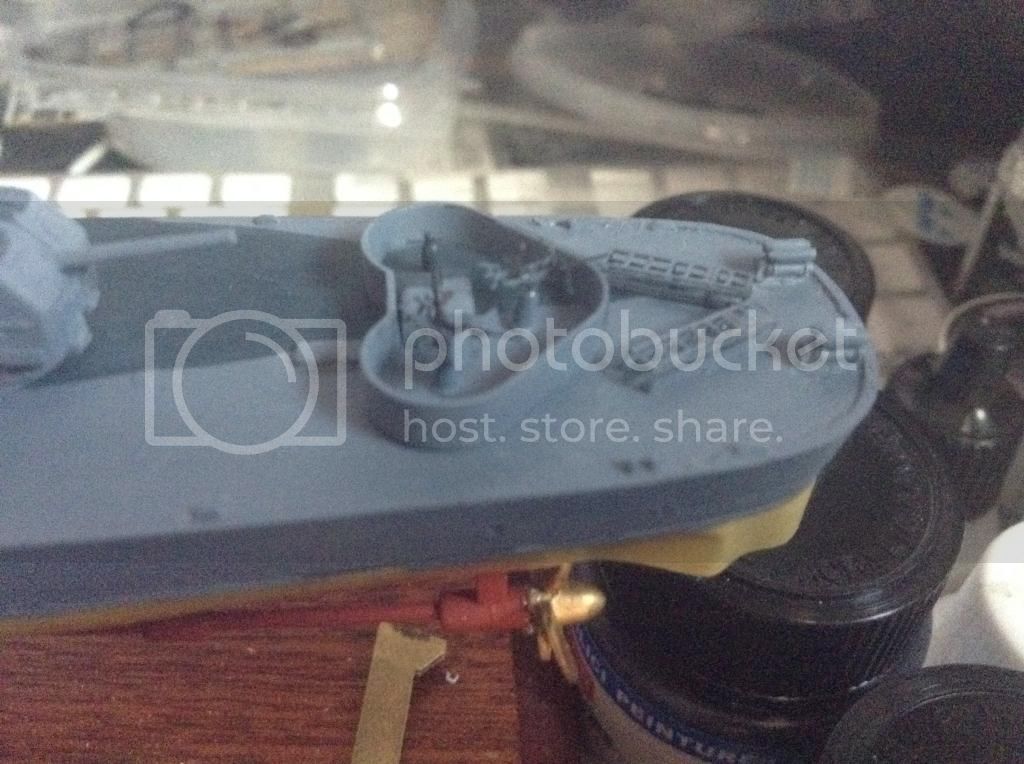
Some more detail added from the WEM etch to the elevator and the bulkead decal added,
The After lift.
and the forward one.
Si
On with Indy,
Decals on the first four aircraft.
The fusalages:-

and the wings, still at this stage on the sprues.

The aircraft assembled except for the folding section of the wings.

Some more detail added from the WEM etch to the elevator and the bulkead decal added,
The After lift.

and the forward one.

Si
Littorio
Joined: September 15, 2004
KitMaker: 4,728 posts
Model Shipwrights: 1,080 posts
Posted: Saturday, February 14, 2015 - 09:51 PM UTC
Looking nice Si.
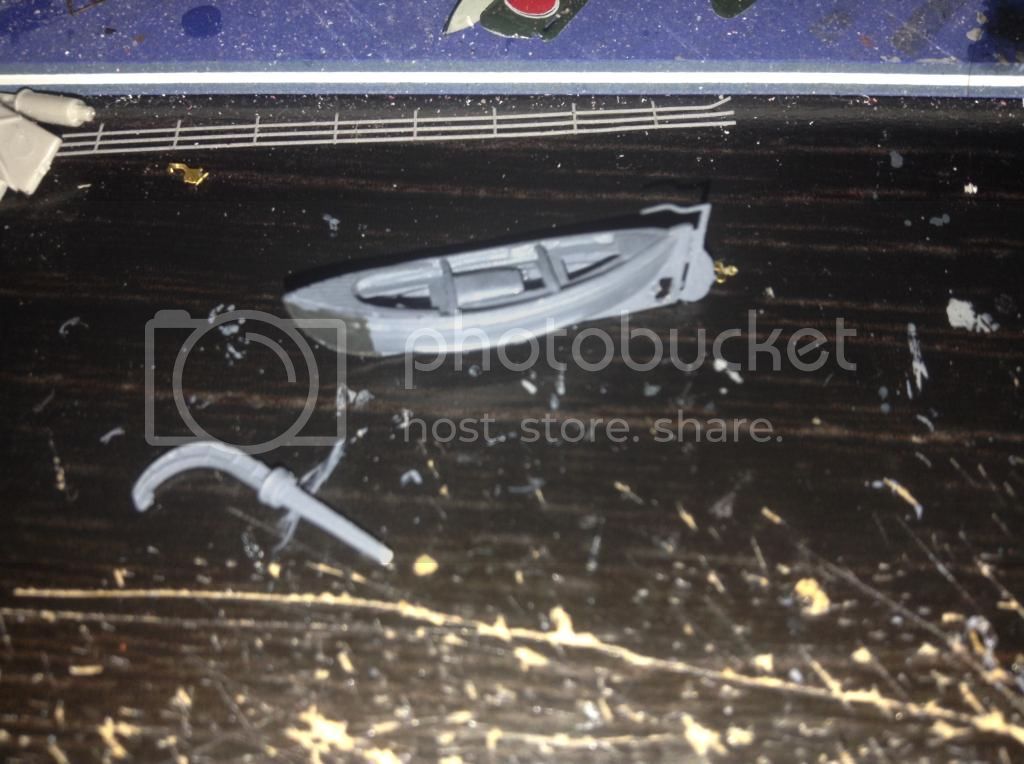
Well here's todays progress. One of the resin boats fitted with pe and painted just need to add the screw (seen behind) and the guard rail.
Both sets of torpedo tubes added although a bit odd as L'Arsenal supply you with two of the rear sets but none to replace the for'ard fit part, so I've had to use the kit for'ard torpedo tubes.


JJ1973
#345

Joined: August 22, 2011
KitMaker: 1,835 posts
Model Shipwrights: 1,832 posts
Posted: Saturday, February 14, 2015 - 10:07 PM UTC
Really good work and nice updates all here, looks sharp!! 
Cheers
Jan
Cheers
Jan
TRM5150
Joined: January 03, 2010
KitMaker: 2,159 posts
Model Shipwrights: 1,400 posts
Posted: Saturday, February 14, 2015 - 10:22 PM UTC
Some sharp work on the planes Si!! Really coming together now!!
Looking great Luciano! Nice work on the wee boats!! Torpedo tube replacement looks very nice as well!! keep up the great work!
Looking great Luciano! Nice work on the wee boats!!
Torpedo tube replacement looks very nice as well!! keep up the great work!RedDuster
Joined: March 01, 2010
KitMaker: 7,078 posts
Model Shipwrights: 6,649 posts
Posted: Sunday, February 15, 2015 - 02:50 AM UTC
Thanks Todd, I remember 1/72nd kits when I was growing up less detailed and complex than these.
Coming on Well Luciano, following with interest.
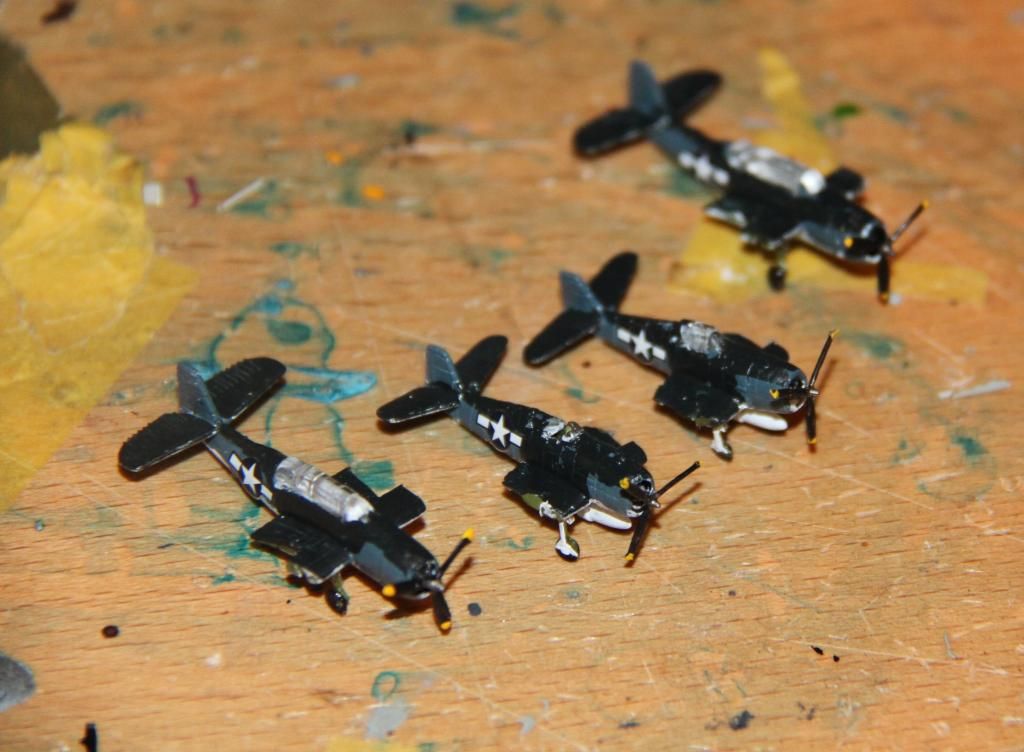
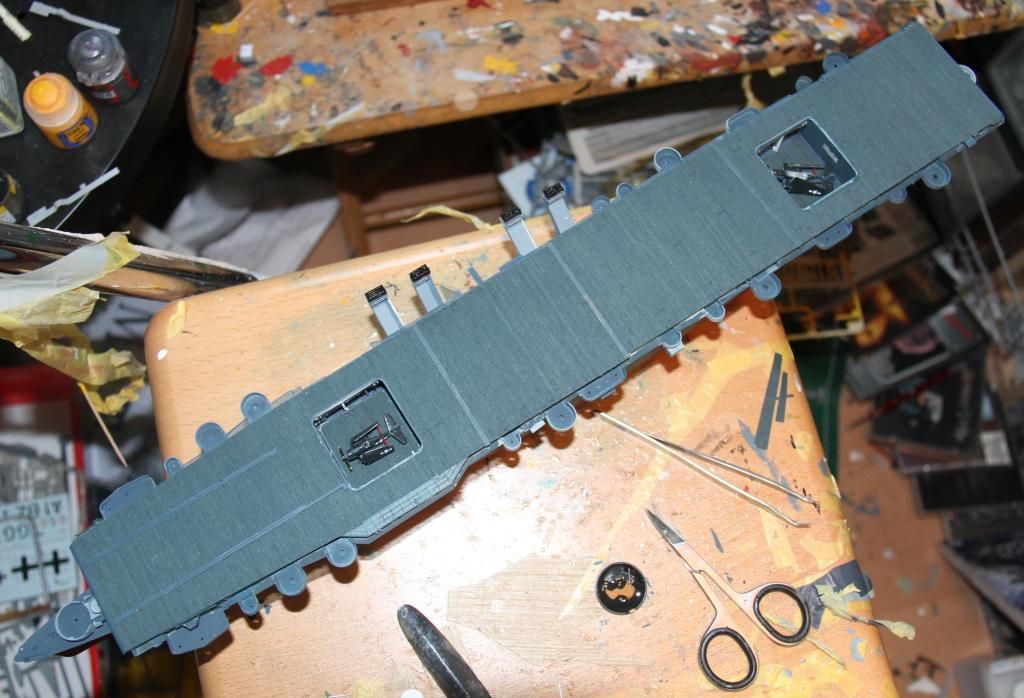
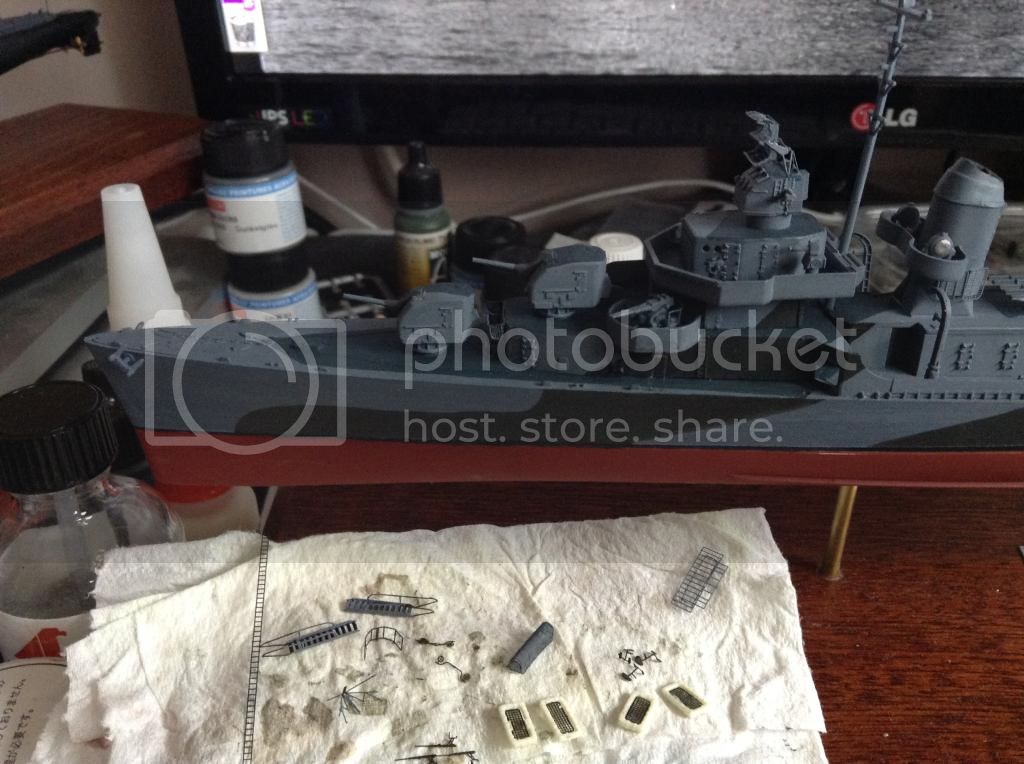
The folded wings on.
Support struts for the folded wings in place, these would have more use on the Etch than cockpit interiors.
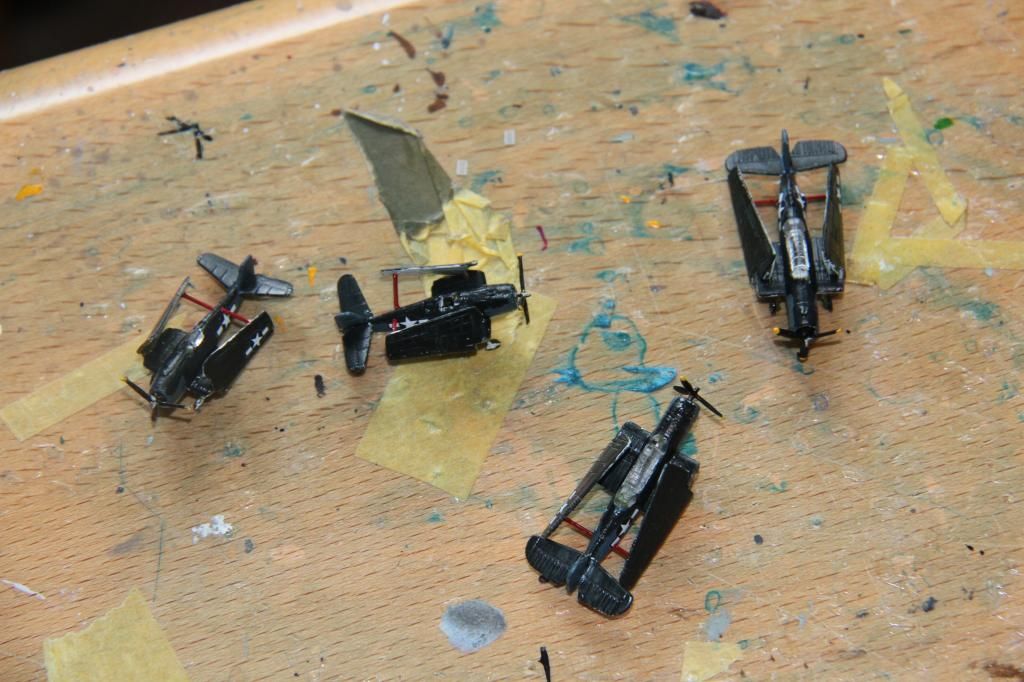
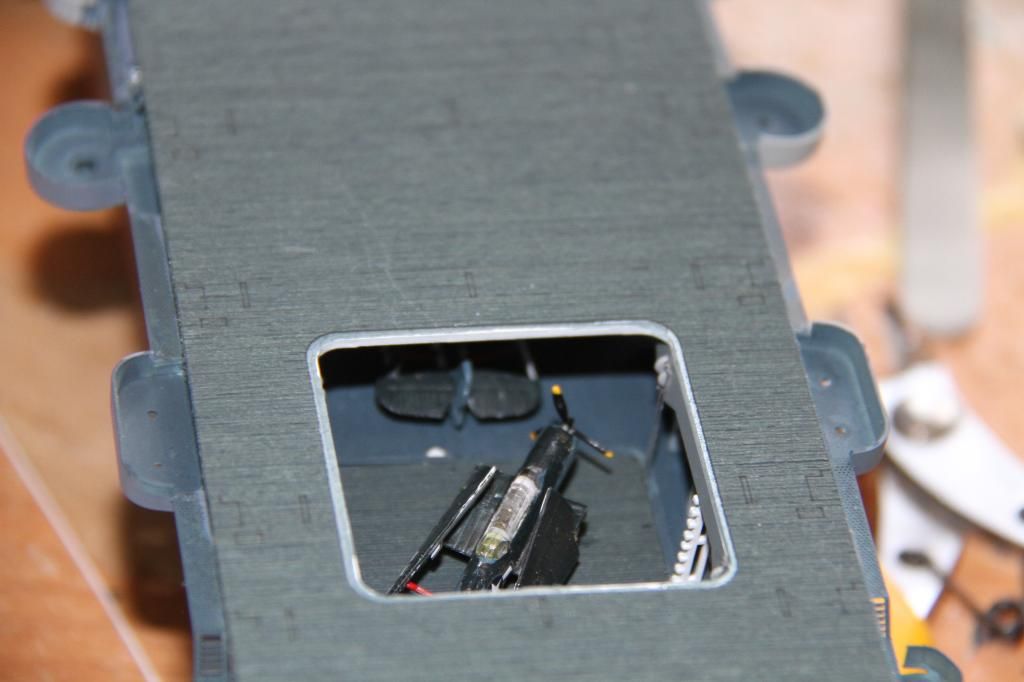
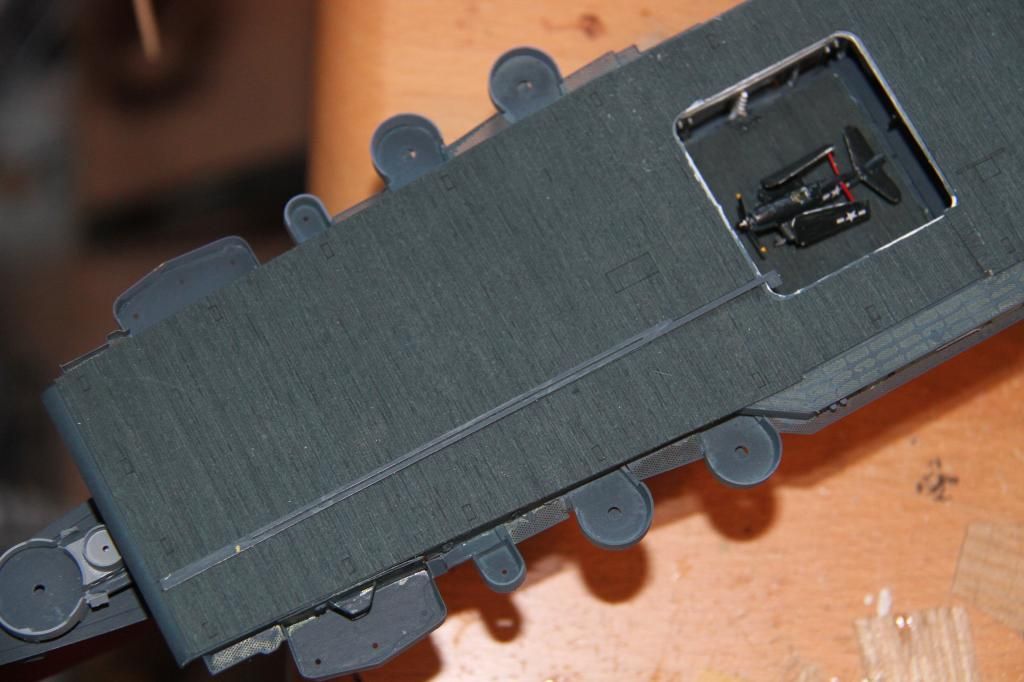
The F6F on the forward elevator with another in the hanger.
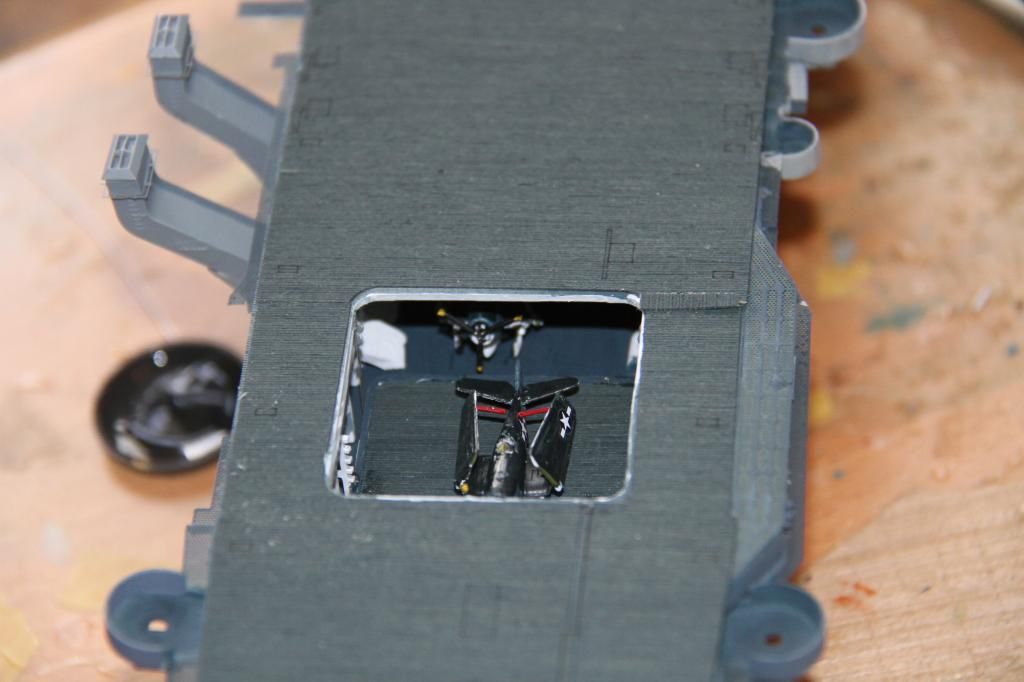
and a TBF on the after elevator with another in the hanger.
Test fit of the first of the two WEM catapults, needs a bit of a trim.
Both cats, (The starboard one was fitted sometime in mid '44) in place along with the larger deck details.
Stated work on getting the rub down transfers on, the after deck number.
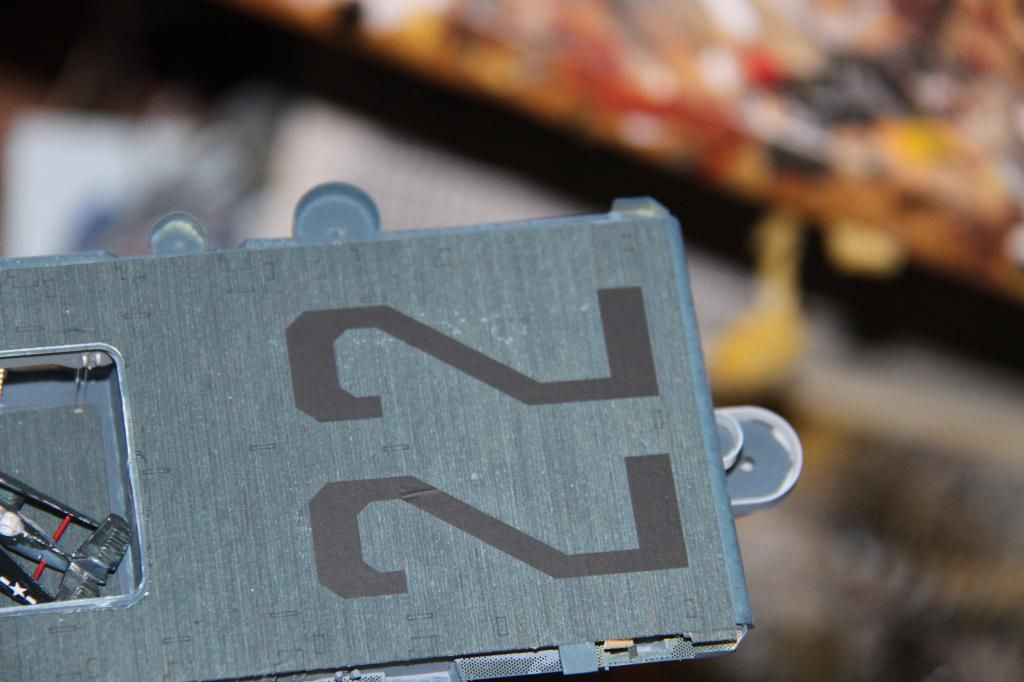
and the stat of the centre line markings.

I will get all the rub downs on before adding more detail, to avoid the risk of damage, it does take a bit of effort to get them down.
Si
Coming on Well Luciano, following with interest.
The folded wings on.

Support struts for the folded wings in place, these would have more use on the Etch than cockpit interiors.

The F6F on the forward elevator with another in the hanger.

and a TBF on the after elevator with another in the hanger.

Test fit of the first of the two WEM catapults, needs a bit of a trim.

Both cats, (The starboard one was fitted sometime in mid '44) in place along with the larger deck details.

Stated work on getting the rub down transfers on, the after deck number.

and the stat of the centre line markings.

I will get all the rub downs on before adding more detail, to avoid the risk of damage, it does take a bit of effort to get them down.
Si
TRM5150
Joined: January 03, 2010
KitMaker: 2,159 posts
Model Shipwrights: 1,400 posts
Posted: Sunday, February 15, 2015 - 04:21 AM UTC
Another fine showing!! LOL!! You are working so many fronts Si...must be a couple of of you running around in the cave!!! Those planes are just sweet!! Nice to see the marking going down!! 
rolltide31
#377
Joined: June 27, 2010
KitMaker: 1,481 posts
Model Shipwrights: 1,332 posts
Posted: Monday, February 16, 2015 - 05:13 AM UTC
Si -Your Indy is looking great. The dry transfer really bring it together. Also the airwing is looking phenomenal. I hope to have as much patience when I tackle my first air craft carrier.
Luciano - The details and ship are looking fantastic. I cant wait to see her finished. Looking forward to seeing her finished and you starting your next project.
Si and Luciano, ya'll are moving along quickly, are you going to build another for this campaign or wait until the Pacific campaign to start?
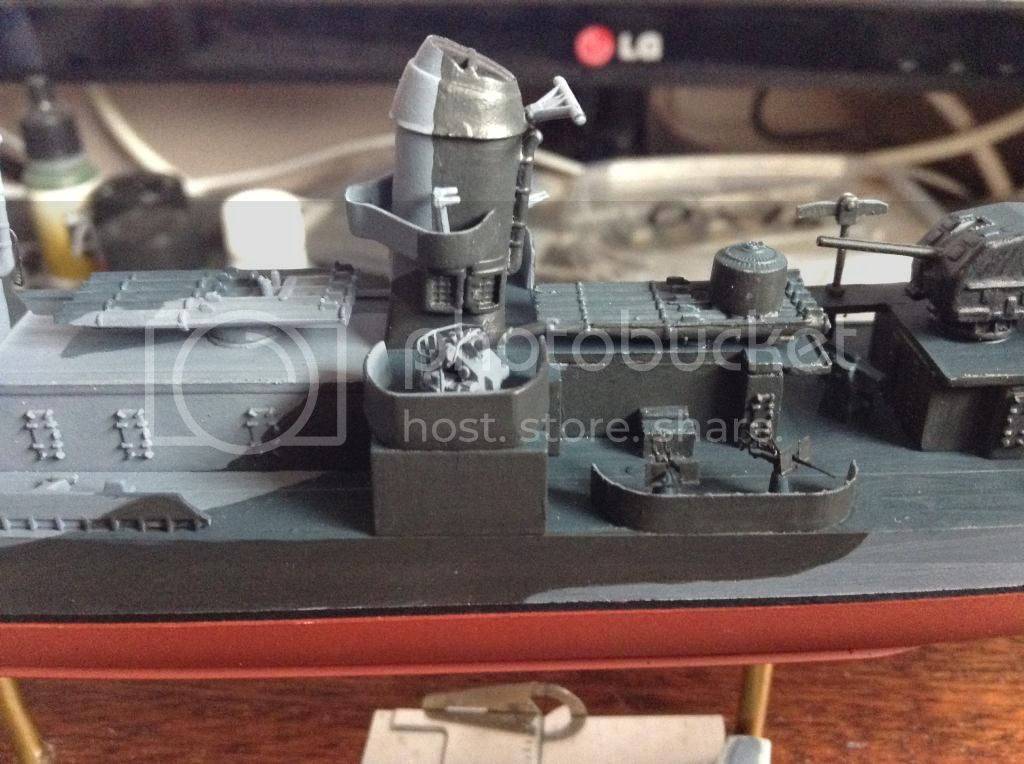
Well the Dace is in dry dock awaiting the delivery of parts so I was able to get cracking on the Maya. So here is a small update with the big update being posted in the Maya build log.
Since the IJN Maya was the only Takao Class Cruiser to receive the AA modification I wanted to make sure that I had the best AA guns instead of the kit guns. Here is a kit 12.7mm AA Gun next to one from Alliance Model Works.
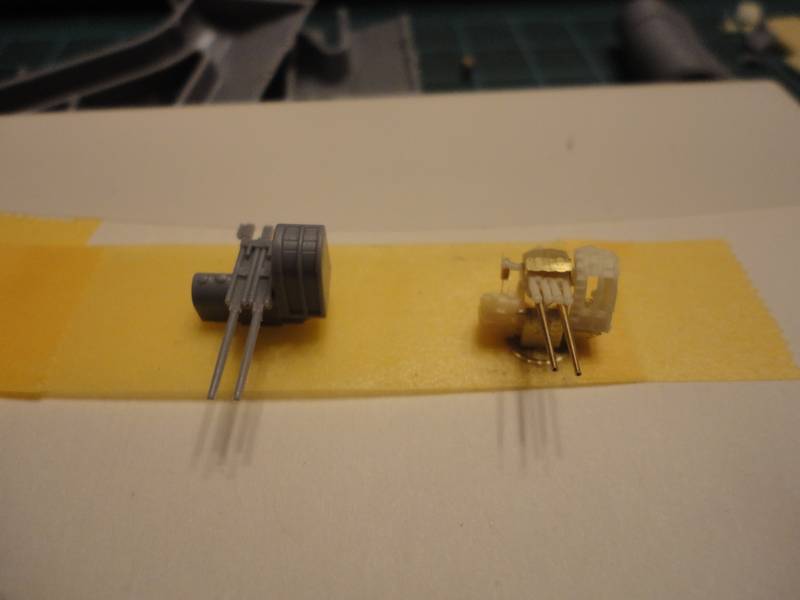
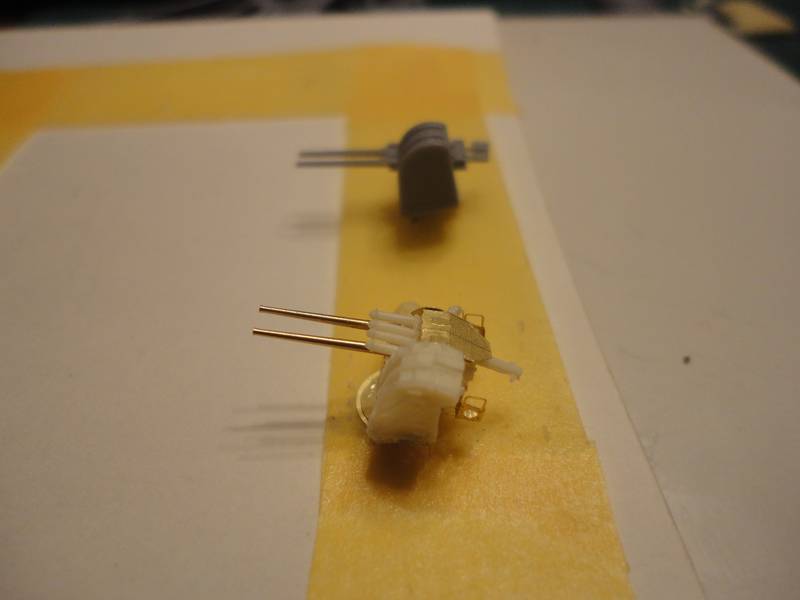
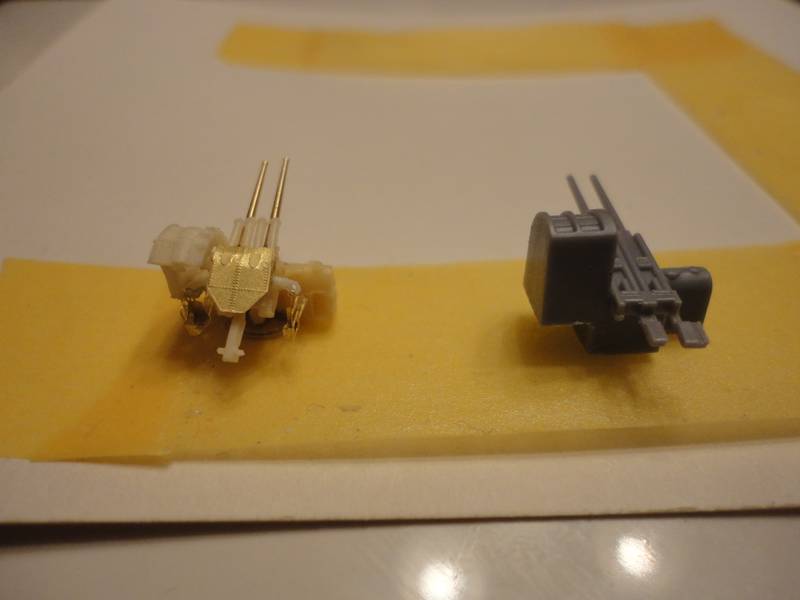
as you can see, the detail provided by the Alliance Model Works is great. That being said, they are definitely a challenge as the instructions are not the greatest.
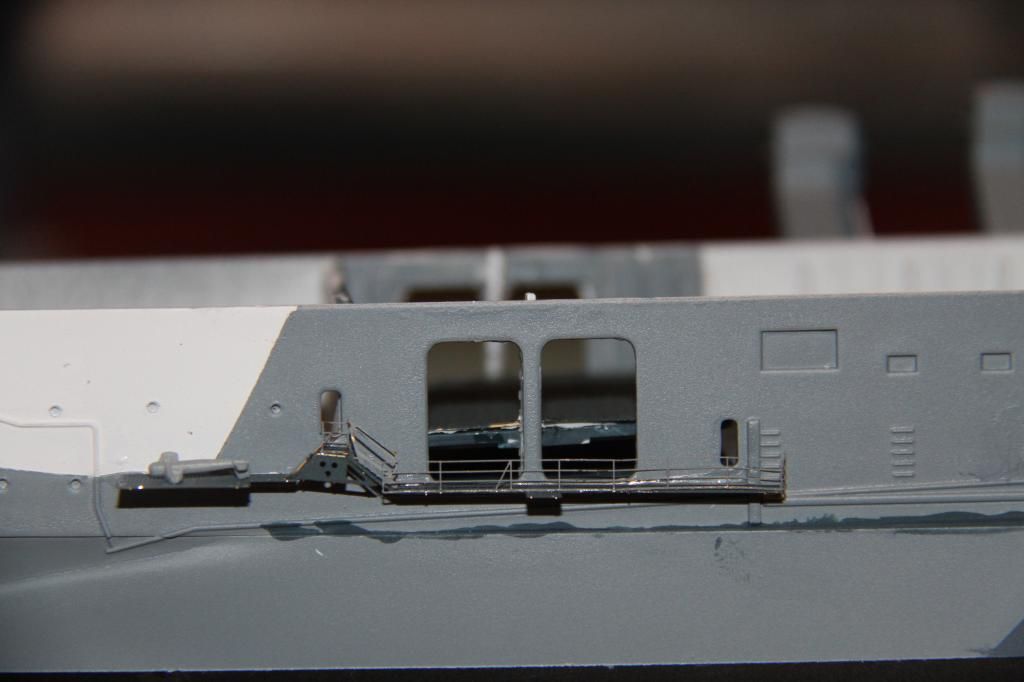
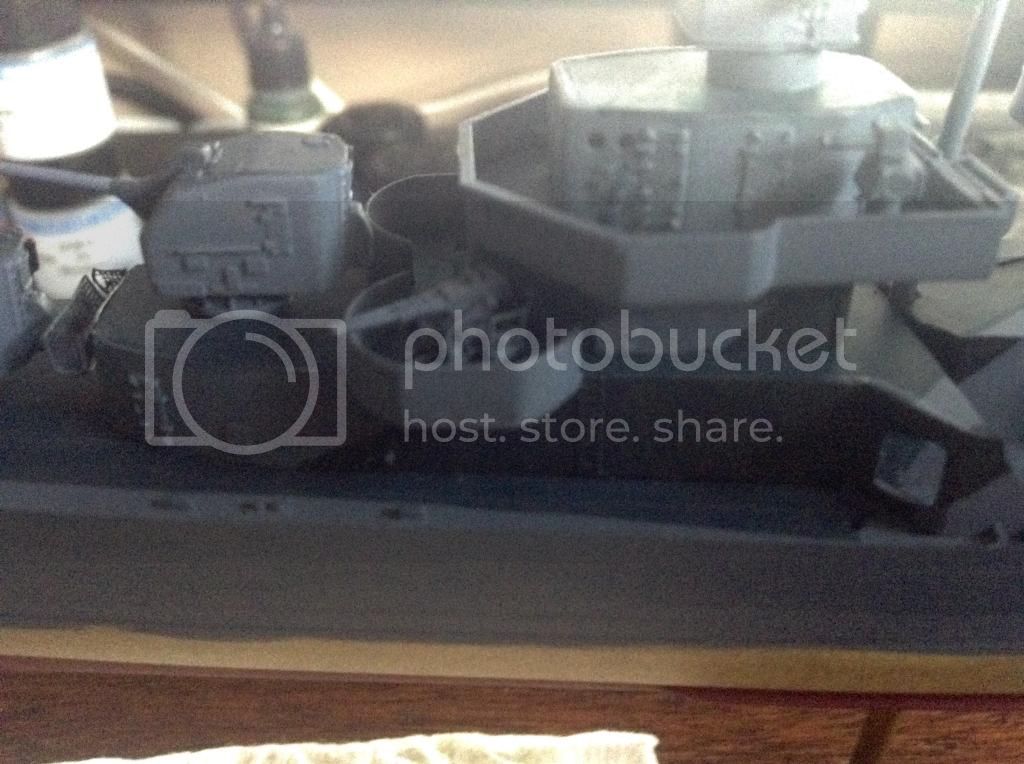
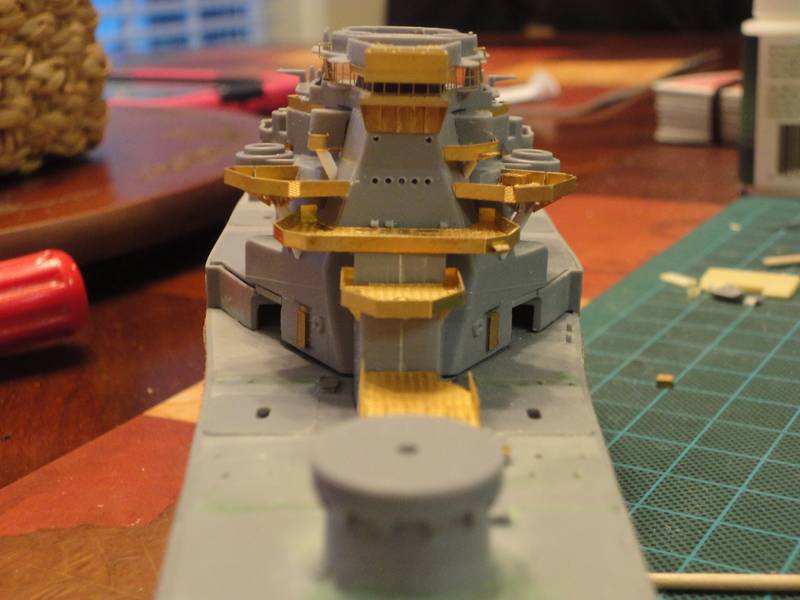
Here is the IJN Maya with the bridge dry fitted.

Sorry about the sun glare in the back. I generally take over the kitchen on the weekend, mush to my wife's consternation
Here she is from the front.
I finished adding all the fiddly parts to the hull so I plan on slinging some primer next weekend pending the weather. It has been cold here for the past couple of weekends.
More on the build log.
Everyones build is looking great.
Dave
Luciano - The details and ship are looking fantastic. I cant wait to see her finished. Looking forward to seeing her finished and you starting your next project.
Si and Luciano, ya'll are moving along quickly, are you going to build another for this campaign or wait until the Pacific campaign to start?
Well the Dace is in dry dock awaiting the delivery of parts so I was able to get cracking on the Maya. So here is a small update with the big update being posted in the Maya build log.
Since the IJN Maya was the only Takao Class Cruiser to receive the AA modification I wanted to make sure that I had the best AA guns instead of the kit guns. Here is a kit 12.7mm AA Gun next to one from Alliance Model Works.
as you can see, the detail provided by the Alliance Model Works is great. That being said, they are definitely a challenge as the instructions are not the greatest.
Here is the IJN Maya with the bridge dry fitted.
Sorry about the sun glare in the back. I generally take over the kitchen on the weekend, mush to my wife's consternation
Here she is from the front.
I finished adding all the fiddly parts to the hull so I plan on slinging some primer next weekend pending the weather. It has been cold here for the past couple of weekends.
More on the build log.
Everyones build is looking great.
Dave
RedDuster
Joined: March 01, 2010
KitMaker: 7,078 posts
Model Shipwrights: 6,649 posts
Posted: Tuesday, February 17, 2015 - 12:45 AM UTC
Thanks Todd,
Only get weekends to work on stuff, so by having 3 or 4 things on the go I don't waste time waiting for paint or glue to dry.
Thanks Dave,
Great work on the Maya, looking Excellent.
Si
Only get weekends to work on stuff, so by having 3 or 4 things on the go I don't waste time waiting for paint or glue to dry.
Thanks Dave,
Great work on the Maya, looking Excellent.
Si
kirkus2269
Joined: September 06, 2014
KitMaker: 42 posts
Model Shipwrights: 38 posts
Posted: Tuesday, February 17, 2015 - 01:38 AM UTC
hello all. great fun seeing your works progress- simon, david, luciano, todd- top marks- very inspiring and thanks for all the pics
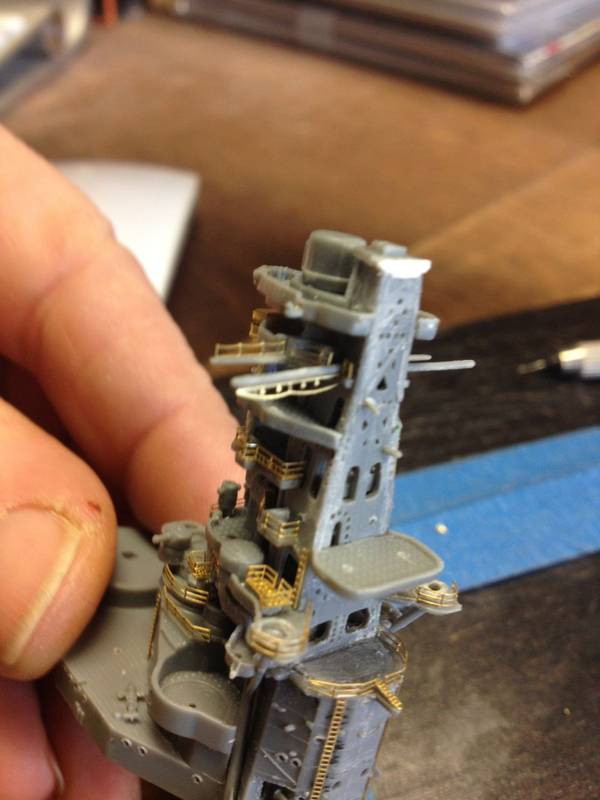
here are some of the pagoda tower bridge assembly.
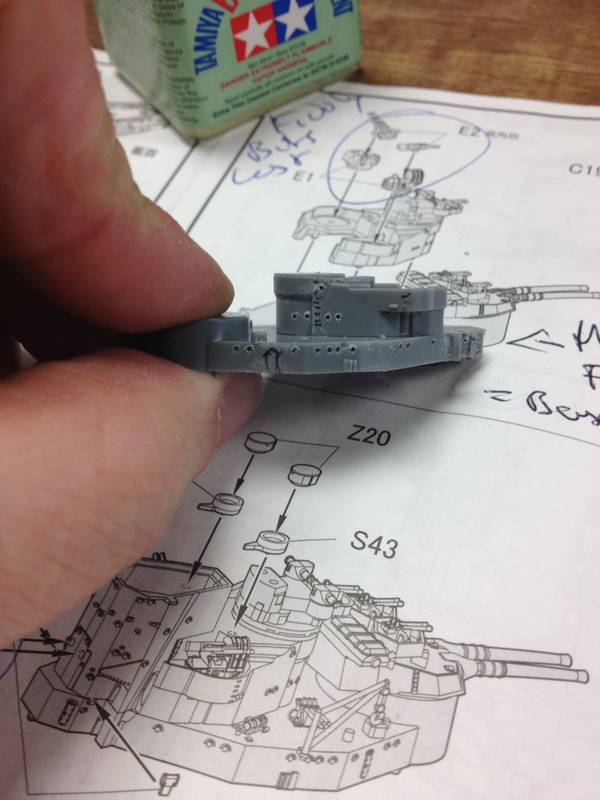
i must confess this has been a very frustrating build process. the funnel went together so well and easily that i assumed the same to be true here. however- nothing but alignment/ fit problem and so a lot of extra work and some unfortunate collateral damage.

sorry about the image quality- these are all snapped on my iPhone
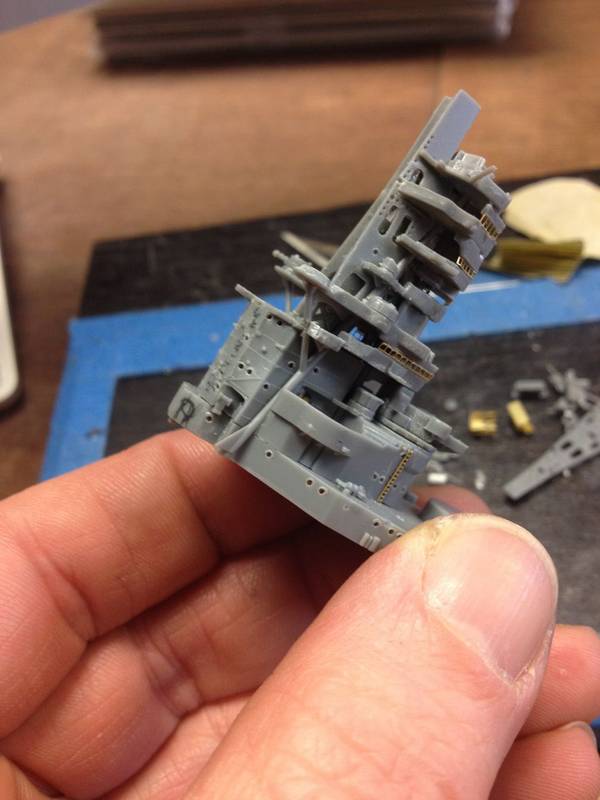
this was the second time through- i actually disassembled the entire thing and started over....ugh. for such a nice kit this is really dissapointing
lots of fill (well... relative to the size) and some some styrene shims and i'm back to the photo etch.
now typically i would have abandoned the project and chalked the failures up to a good learning experience- but i really don't want to do that on this 'group build'. most photos make everything look so easy to build (a reflection on the expertise of the modeller) however i often find it more helpful to see the mistakes and the trials of a build- we've all had them- so i offer mine here.
more finish pics VERY soon
of course comments are welcome
here are some of the pagoda tower bridge assembly.
i must confess this has been a very frustrating build process. the funnel went together so well and easily that i assumed the same to be true here. however- nothing but alignment/ fit problem and so a lot of extra work and some unfortunate collateral damage.
sorry about the image quality- these are all snapped on my iPhone
this was the second time through- i actually disassembled the entire thing and started over....ugh. for such a nice kit this is really dissapointing
lots of fill (well... relative to the size) and some some styrene shims and i'm back to the photo etch.
now typically i would have abandoned the project and chalked the failures up to a good learning experience- but i really don't want to do that on this 'group build'. most photos make everything look so easy to build (a reflection on the expertise of the modeller) however i often find it more helpful to see the mistakes and the trials of a build- we've all had them- so i offer mine here.
more finish pics VERY soon
of course comments are welcome
kirkus2269
Joined: September 06, 2014
KitMaker: 42 posts
Model Shipwrights: 38 posts
Posted: Tuesday, February 17, 2015 - 01:47 AM UTC
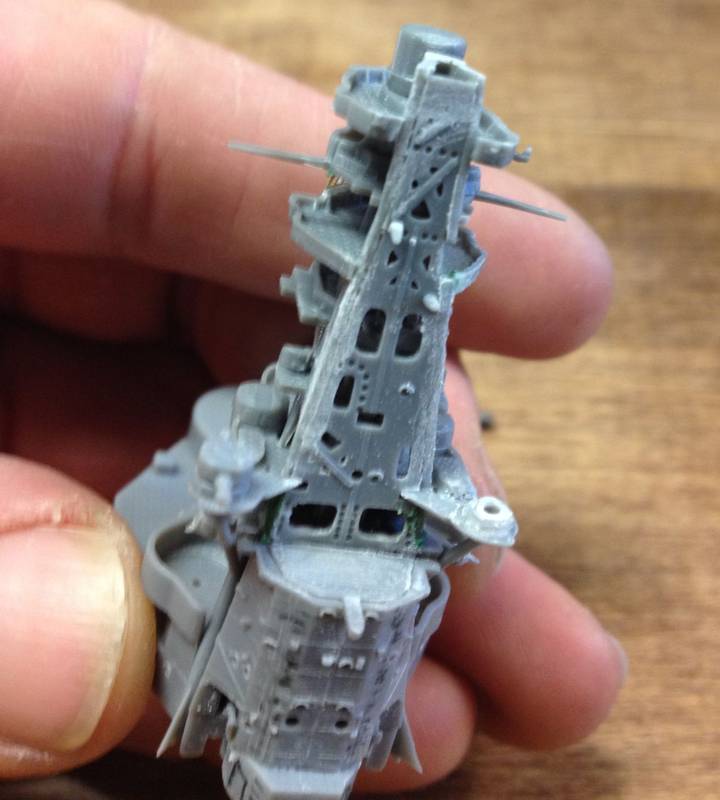
i forgot to add these....
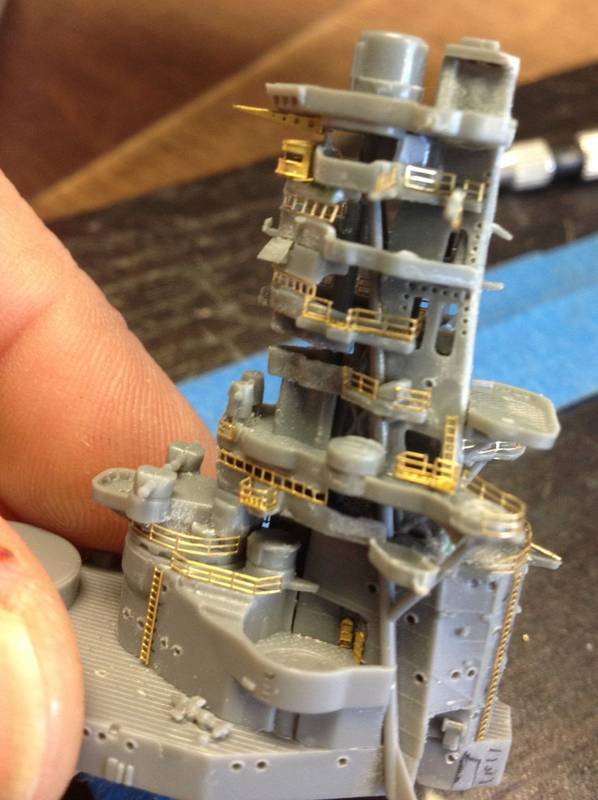
here the etch is finally starting to come back together and some of the more delicate pieces are being added
unfortunately it looks like the tower has a bit of a lean- just could not make it work any better. she may not ever float or win any awards but i'm determined to finish her off
more soon
here the etch is finally starting to come back together and some of the more delicate pieces are being added
unfortunately it looks like the tower has a bit of a lean- just could not make it work any better. she may not ever float or win any awards but i'm determined to finish her off
more soon
TRM5150
Joined: January 03, 2010
KitMaker: 2,159 posts
Model Shipwrights: 1,400 posts
Posted: Tuesday, February 17, 2015 - 02:23 AM UTC
Dave - The Alliance guns are a big improvement...very nice! Great job on the PE as well!!
Si - Time does seem to bee the biggest hurtle to get over in this hobby!!
Kirk - For what you have pushed yourself through on the build, things are looking really well! You get extra points for sticking with it!
Right there brotha!! No other real way to learn to get something right than to fail from time to time!! Looking forward to seeing the primer fly on that bridge tower!!
Si - Time does seem to bee the biggest hurtle to get over in this hobby!!
Kirk - For what you have pushed yourself through on the build, things are looking really well! You get extra points for sticking with it!
Quoted Text
chalked the failures up to a good learning experience
Right there brotha!! No other real way to learn to get something right than to fail from time to time!! Looking forward to seeing the primer fly on that bridge tower!!
rolltide31
#377
Joined: June 27, 2010
KitMaker: 1,481 posts
Model Shipwrights: 1,332 posts
Posted: Tuesday, February 17, 2015 - 10:42 PM UTC
Kirk,
Your IJN Yamshiro is looking great. I am astounded by your ability to work with the 1/700 scale PE. I have enough trouble dealing with the 1/350 myself and will never attempt that scale. Too small for my old eyes.
Great work, looking forward to seeing more.
Si / Todd,
thanks for the kind comments. The Aoshima kit is a little challenging due to the fit issues but it is coming along. She will sit in dry dock next weekend so I can move the Dace along. I finally received the parts I ordered from the 3d printer so the Dace should move along quickly.
Dave
Littorio
Joined: September 15, 2004
KitMaker: 4,728 posts
Model Shipwrights: 1,080 posts
Posted: Wednesday, February 18, 2015 - 06:05 PM UTC
Kirk your braver than me working in that small scale.
Si and Dave nice progress, Si love the little red wing braces, Dave those AA guns look nice.
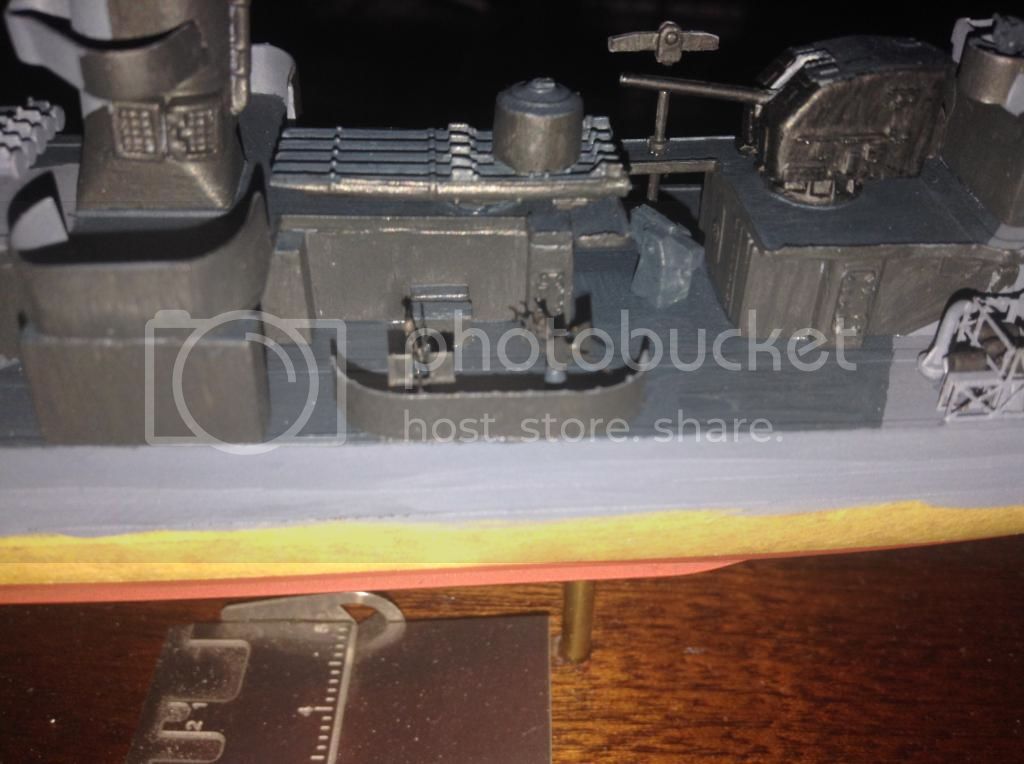
Hoel now has her camo in place, still need to complete the last twin 40mm, radar is bent to shape just waiting on the blackening agent to dry so it can be painted. The little whale boat is done, so so much better than the kit item mind you at 8 parts of brass and pe I would hope it is. The ladder for the mast is blackened and two lift rafts are going to primer.

Railing are almost ready for fitting and then some rigging and weathering.
Does anyone know the flag signal for Hoel?
Si and Dave nice progress, Si love the little red wing braces, Dave those AA guns look nice.
Hoel now has her camo in place, still need to complete the last twin 40mm, radar is bent to shape just waiting on the blackening agent to dry so it can be painted. The little whale boat is done, so so much better than the kit item mind you at 8 parts of brass and pe I would hope it is. The ladder for the mast is blackened and two lift rafts are going to primer.


Railing are almost ready for fitting and then some rigging and weathering.
Does anyone know the flag signal for Hoel?
Littorio
Joined: September 15, 2004
KitMaker: 4,728 posts
Model Shipwrights: 1,080 posts
Posted: Wednesday, February 18, 2015 - 08:41 PM UTC
Quoted Text
Does anyone know the flag signal for Hoel?
Ok found the answer, flag hoist/radio call for USS Hoel was 'Nan - Able - X-Ray - Yoke'.
I take it that the Nan flag goes to the top?
 |

WEB HOSTING BY


Copyright ©2021 Model Shipwrights and Kitmaker Network, a subsidiary of Silver Star Enterprises
All Rights Reserved. Please read our Conditions of Use and Privacy Policy.
All Rights Reserved. Please read our Conditions of Use and Privacy Policy.