


Go to modelshipwrights.com for the current dynamic site!
Campaigns
Want to be part of a group build? This is where to start, plan, and meet about them.
Want to be part of a group build? This is where to start, plan, and meet about them.
Hosted by Jim Starkweather
Official Campaign: Battle of Leyte Gulf

TRM5150

Joined: January 03, 2010
KitMaker: 2,159 posts
Model Shipwrights: 1,400 posts

Posted: Wednesday, February 18, 2015 - 08:52 PM UTC
Looking Spiffy Luciano!! Keep plugging away on her!!

rolltide31

#377
Joined: June 27, 2010
KitMaker: 1,481 posts
Model Shipwrights: 1,332 posts

Posted: Wednesday, February 18, 2015 - 08:59 PM UTC
Luciano - Your USS Hoel is looking great. Watching your progress has me all fired up to start my USS Heermann and my USS Samuel B. Roberts. Did you use a mask for the camo and did you apply with air brush or hairy stick?
looking forward to seeing the final touches on this.
Dave
looking forward to seeing the final touches on this.
Dave

Littorio

Joined: September 15, 2004
KitMaker: 4,728 posts
Model Shipwrights: 1,080 posts
Posted: Wednesday, February 18, 2015 - 09:57 PM UTC
Thanks guys.
Dave, it's all free hand with a hairy stick, I got copies of the measure schemes and just sized the correct one for Hoel on my monitor so it was 1/350.
I managed to find nearly all the measure 32 & 33 schemes and saved them on my computer for future use.
Dave, it's all free hand with a hairy stick, I got copies of the measure schemes and just sized the correct one for Hoel on my monitor so it was 1/350.
I managed to find nearly all the measure 32 & 33 schemes and saved them on my computer for future use.

rolltide31
#377
Joined: June 27, 2010
KitMaker: 1,481 posts
Model Shipwrights: 1,332 posts
Posted: Wednesday, February 18, 2015 - 10:42 PM UTC
Luciano,
My hat is off to you and all of our fellow shipwrights who have the steady hand capable of accomplishing such amazing camo schemes with a hairy stick. Im lucky if I am capable of painting a crooked line with the hairy stick so I stay away from it.
thanks for the feedback regarding th masks. I need to begin developing a data base with that information.
Dave
Littorio
Joined: September 15, 2004
KitMaker: 4,728 posts
Model Shipwrights: 1,080 posts
Posted: Thursday, February 19, 2015 - 04:45 PM UTC
No problem Dave, we all have our own way of doing things however we also can learn from each other when we see how each other tackle a problem, one of the reasons for being on here and joining campaigns especially with the great band of people we have here on the salty side.
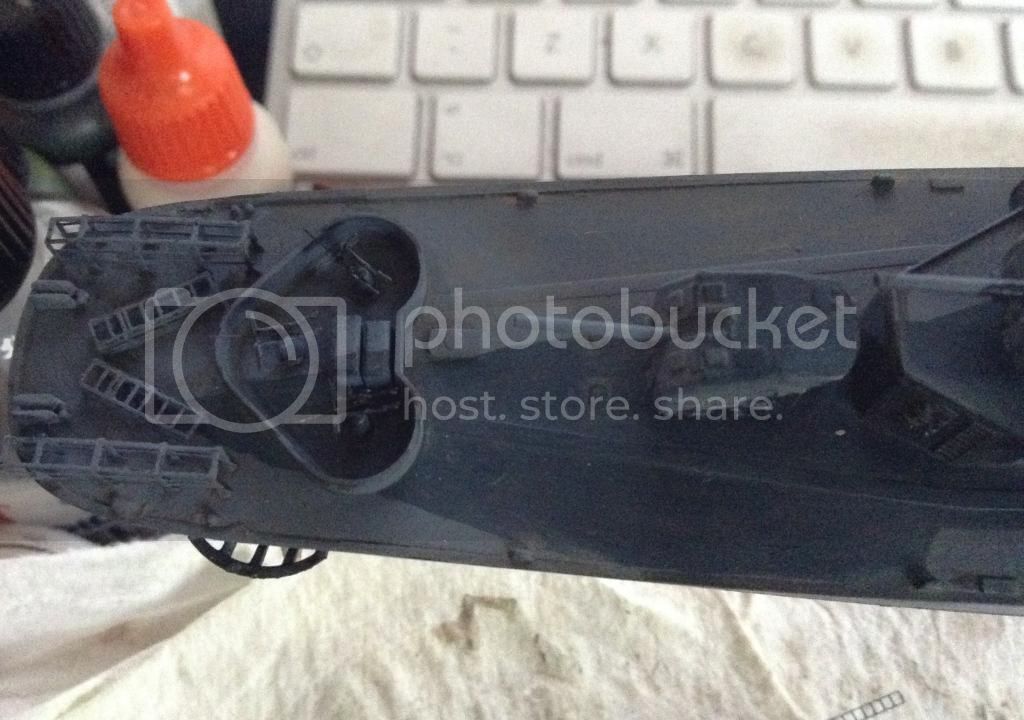
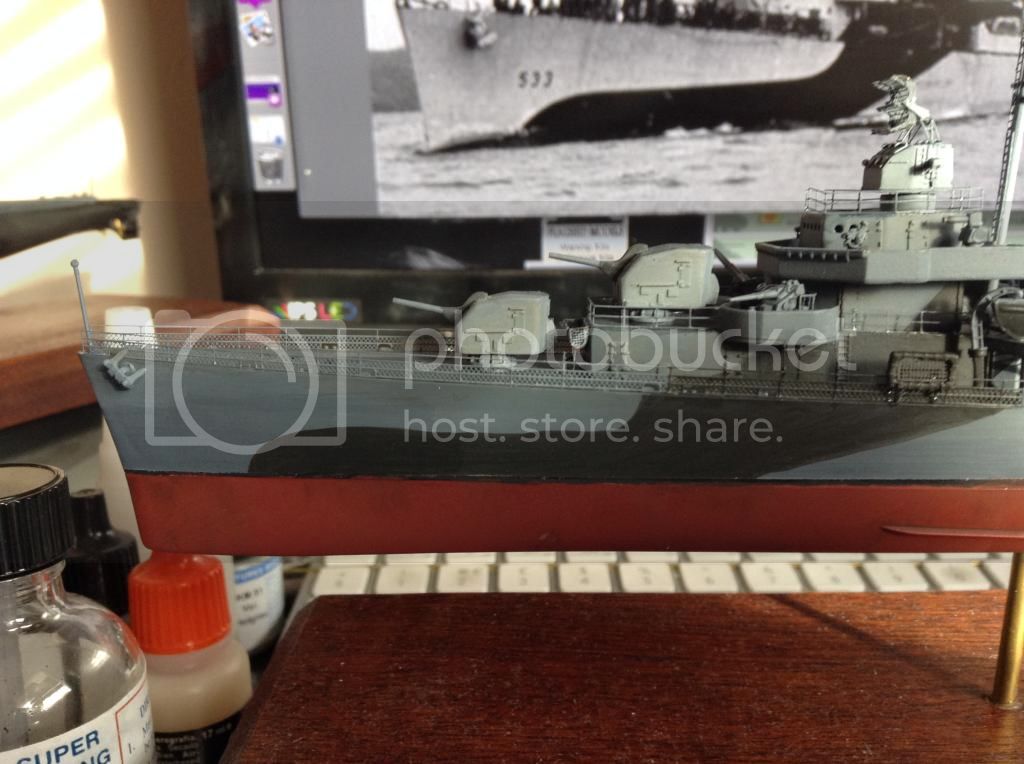
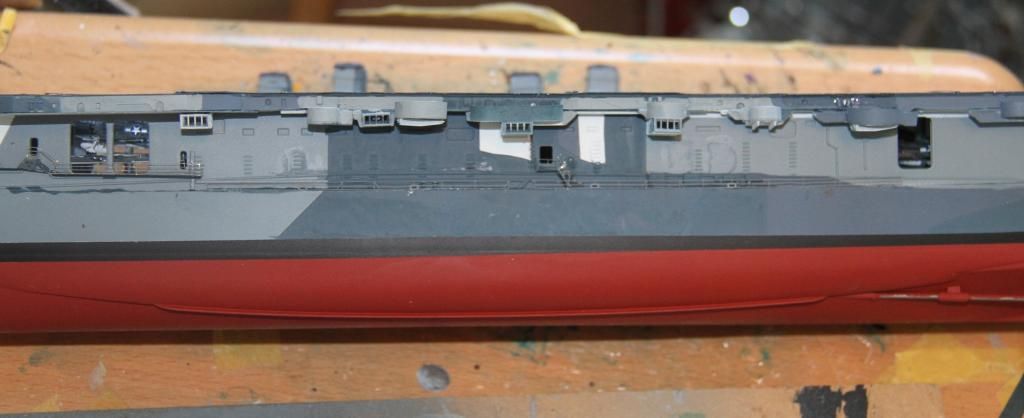
On with a quick update and the scary bit, a deck wash before the railings go on (so they don't get knocked off).


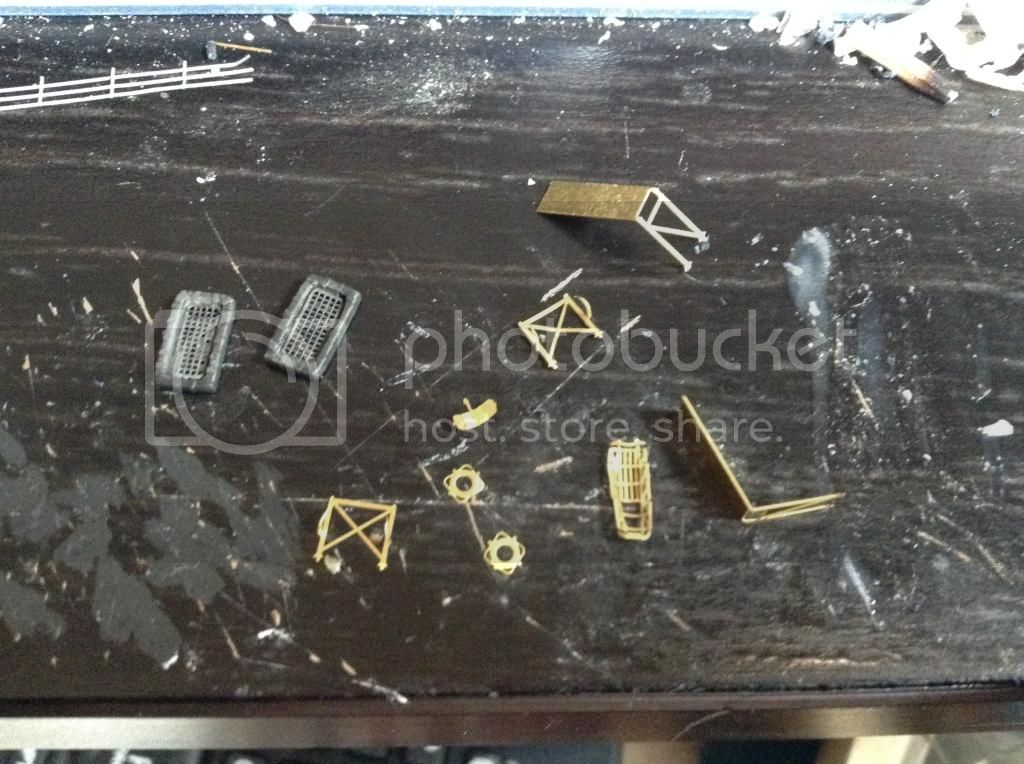
Going to have some fun as the pe set doesn't include the racks for the life rafts so I'm going to have to make my own from pe scraps.
On with a quick update and the scary bit, a deck wash before the railings go on (so they don't get knocked off).


Going to have some fun as the pe set doesn't include the racks for the life rafts so I'm going to have to make my own from pe scraps.
TRM5150
Joined: January 03, 2010
KitMaker: 2,159 posts
Model Shipwrights: 1,400 posts
Posted: Thursday, February 19, 2015 - 07:40 PM UTC
Looking good Luciano! Nice to get that weathering as you go! Nothing worse than trying to pin-point stuff after! Keep up the great work!!
Littorio
Joined: September 15, 2004
KitMaker: 4,728 posts
Model Shipwrights: 1,080 posts
Posted: Saturday, February 21, 2015 - 07:00 PM UTC
Thanks Todd
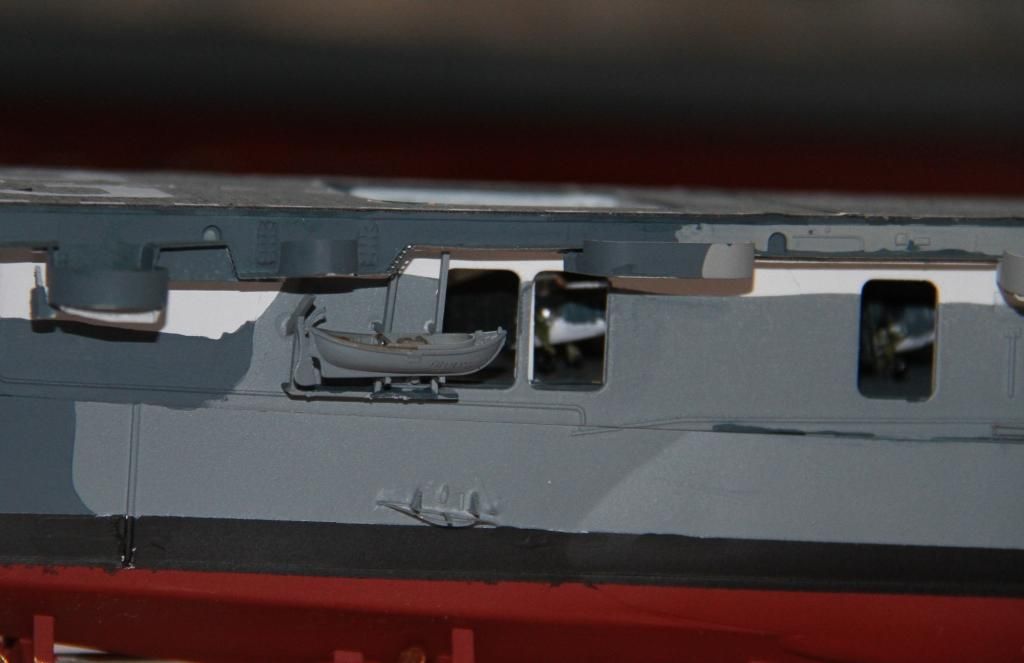
OK while checking things and looking for scrap pe for the life raft racks I also noticed that there is no SG radar in the kit or in the L'Arsenal set 'Panic'
So checked the net and the only company that did a US navy radar set was, you guessed it WEM. (L'Arsenal's site is down so couldn't check them) Then I had a stoke of luck, I have the GMM set for the Buckley class and hadn't used it all so found the pe set and there was the SG radar along with unused life raft racks so panic over, also went for two life rings and a stokes litter from the set. Anybody know where the Stokes litter was stored?
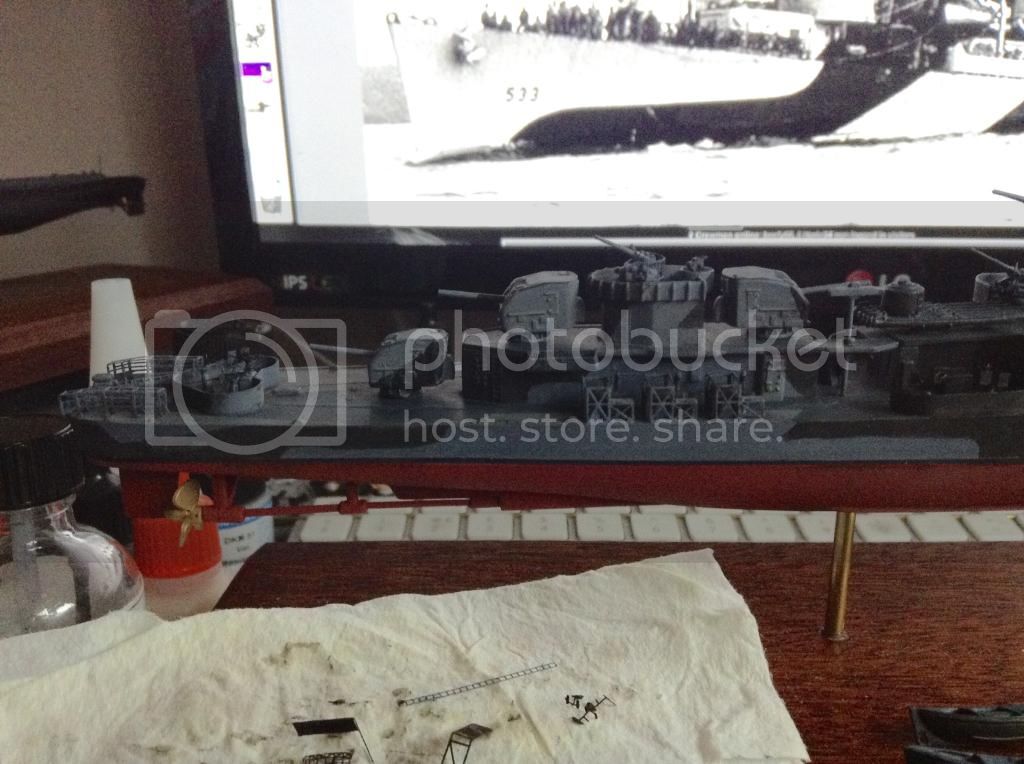
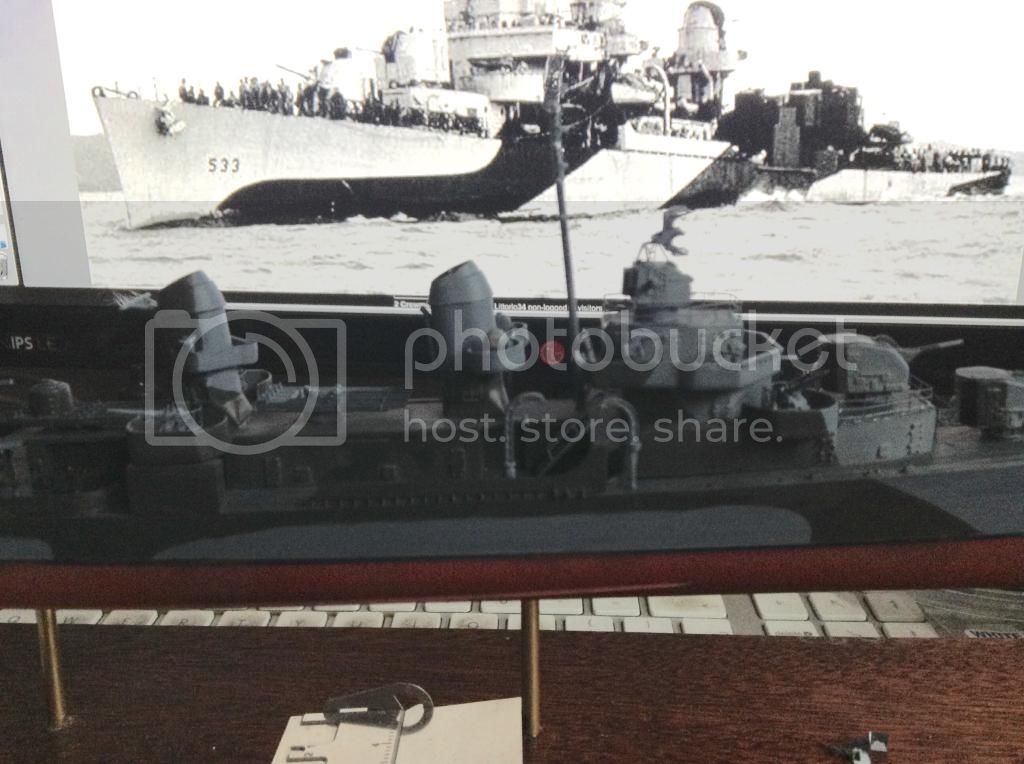
Sorry about the photo quality they were taken with my iPod
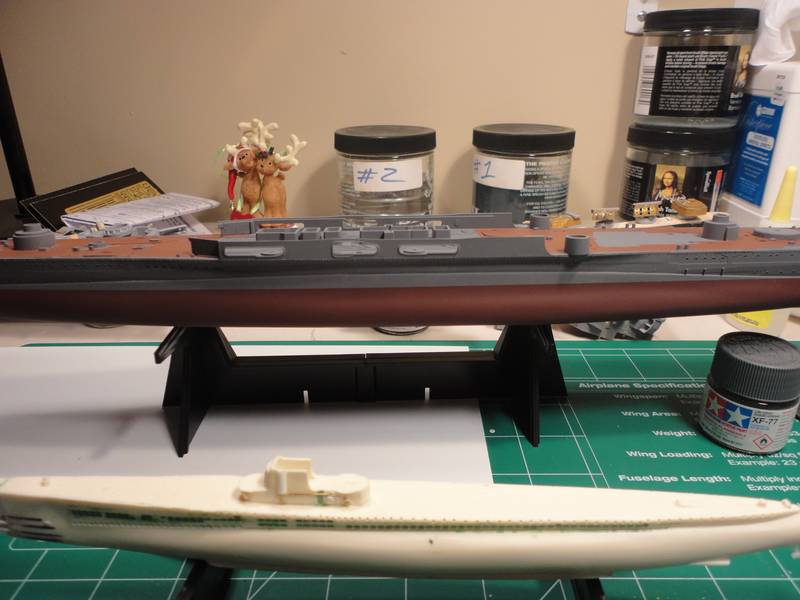
The deck wash done, under the water line hull also done although a few salt streaks will find there way down there. Some railings have been added still loads to do but the end is in sight, oh also replaced the plastic jack with a length of brass tube for better strength and it should also be a bit longer than the kit part. A coat of 'Klear' has been applied where the hull numbers will be applied a bit later.
OK that's it for several days.
OK while checking things and looking for scrap pe for the life raft racks I also noticed that there is no SG radar in the kit or in the L'Arsenal set 'Panic'
So checked the net and the only company that did a US navy radar set was, you guessed it WEM. (L'Arsenal's site is down so couldn't check them) Then I had a stoke of luck, I have the GMM set for the Buckley class and hadn't used it all so found the pe set and there was the SG radar along with unused life raft racks so panic over, also went for two life rings and a stokes litter from the set. Anybody know where the Stokes litter was stored?
Sorry about the photo quality they were taken with my iPod

The deck wash done, under the water line hull also done although a few salt streaks will find there way down there. Some railings have been added still loads to do but the end is in sight, oh also replaced the plastic jack with a length of brass tube for better strength and it should also be a bit longer than the kit part. A coat of 'Klear' has been applied where the hull numbers will be applied a bit later.


OK that's it for several days.
TRM5150
Joined: January 03, 2010
KitMaker: 2,159 posts
Model Shipwrights: 1,400 posts
Posted: Saturday, February 21, 2015 - 08:09 PM UTC
Nice recovery on the SG and rack Luciano! She's coming tether nicely! I'm sure someone will come along and help with a little insight on the Stokes basket location. Keep up the great work!
rolltide31
#377
Joined: June 27, 2010
KitMaker: 1,481 posts
Model Shipwrights: 1,332 posts
Posted: Sunday, February 22, 2015 - 01:23 AM UTC
Luciano - your USS Hoel is looking great. It is great having a spares box isn't it? Never know when your going to need something that you did before.
So not much of an update this week I'm afraid. As I said earlier this week my 3d printed parts arrived so I was able to add the rudder, rear dive planes, and the prop supports.
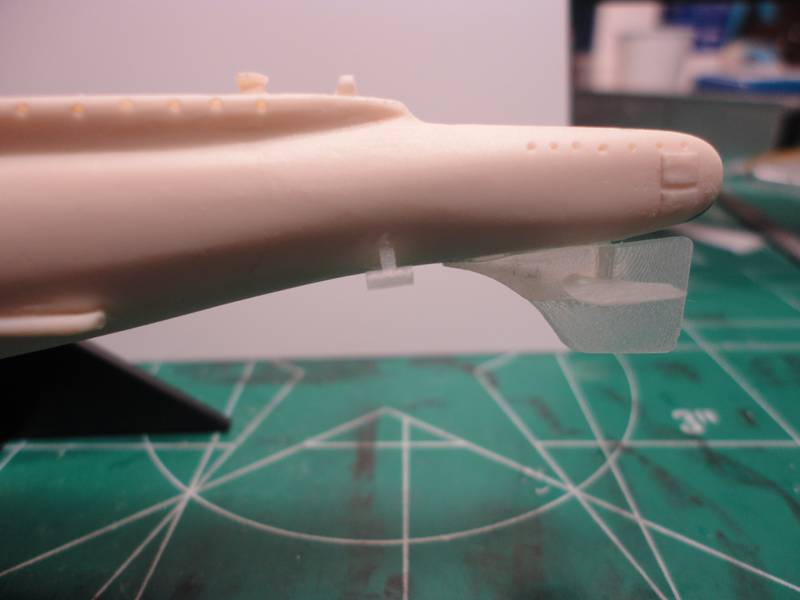
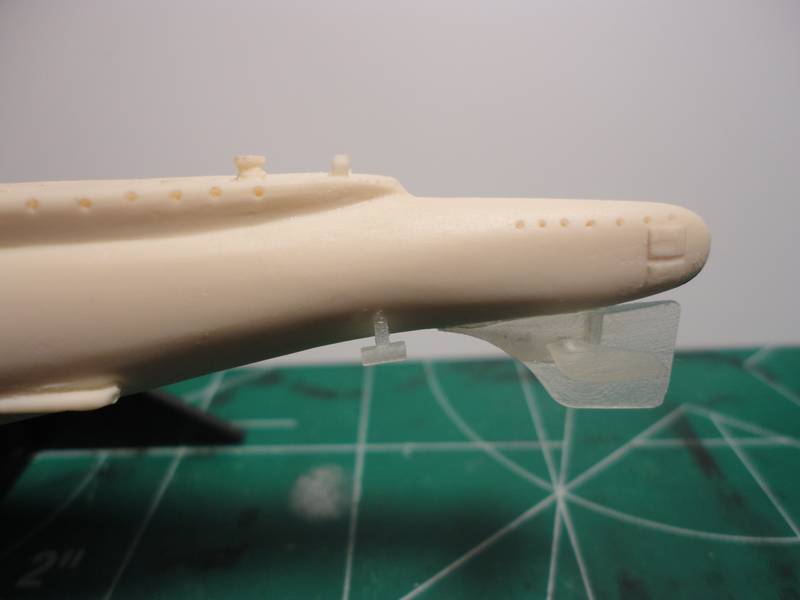
From the looks of the pictures I have some corrections to make. The supports for the propellers are not even and looks like they will align the propellers too far in board. hmmm Oh well, short lived joy I guess.
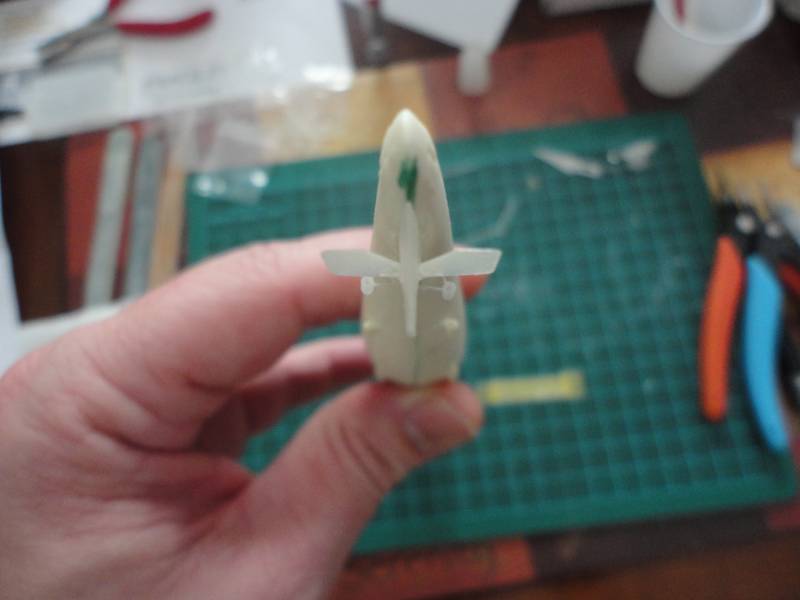
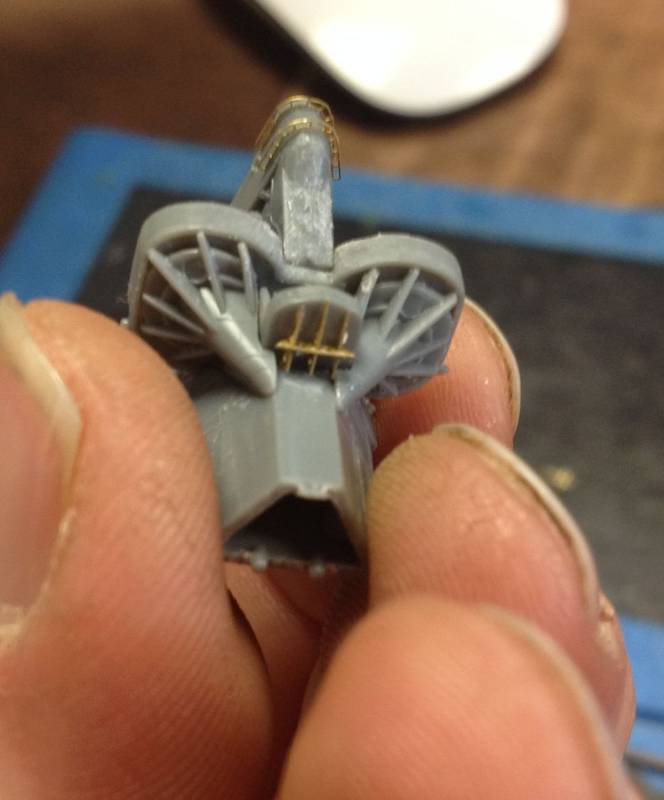
I also re addressed the port side bridge. I wasn't happy with the detail look so I found some PE fly wheels in the spares and added them to the side with some brass rod.
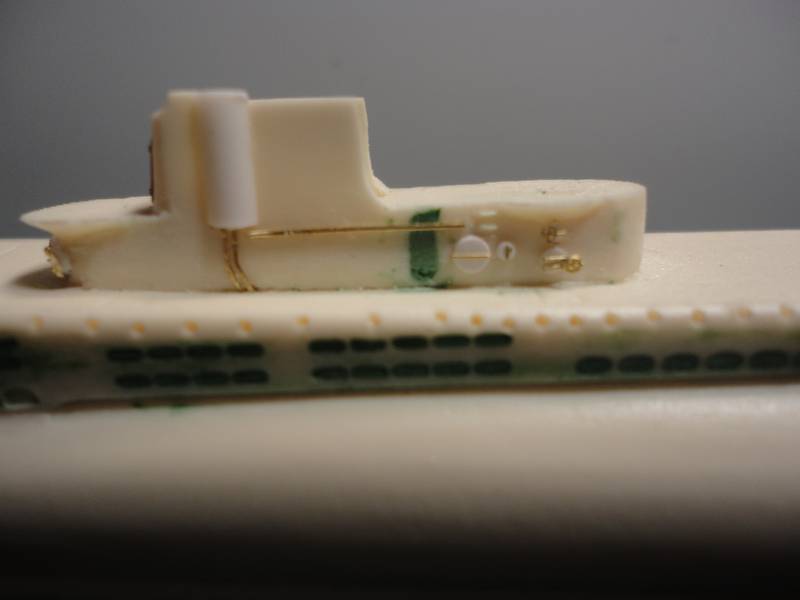
Sorry about the quality of the photo, my camera does not like close in pictures and refuses to focus. Anyway, a few more pieces to the port side and then on to the starboard side of the bridge.
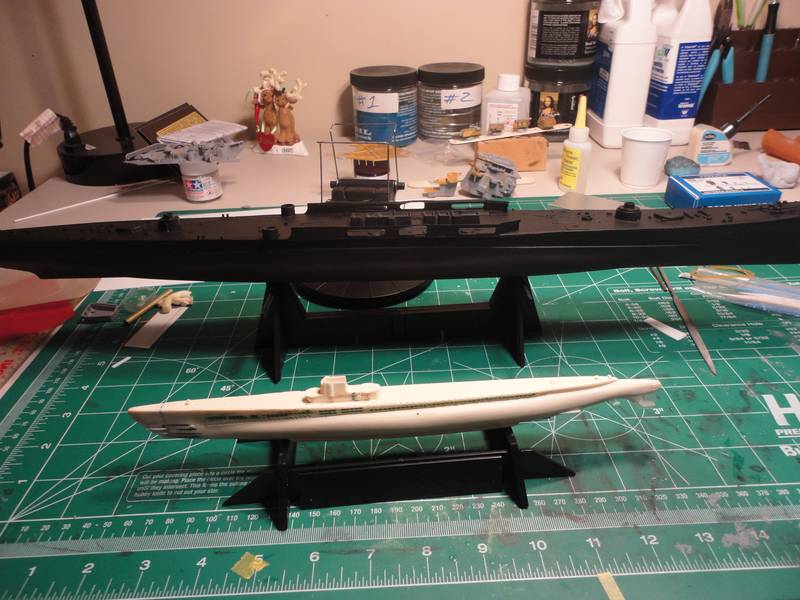
I was able to get some color on the Maya this week with a initial layer of primer. So here is a picture showing the Hunter and the Hunted.
I will give the primer a week to cure and then add the hull red next weekend.
Other than laying some paint on the Maya over the next couple of weekends I wont have much updates. I have some campaigns in Armorama that I need to clear up so Ill be shifting to that side for a little bit.
Everyones build is coming along great. Keep up the great work.
Dave
So not much of an update this week I'm afraid. As I said earlier this week my 3d printed parts arrived so I was able to add the rudder, rear dive planes, and the prop supports.
From the looks of the pictures I have some corrections to make. The supports for the propellers are not even and looks like they will align the propellers too far in board. hmmm Oh well, short lived joy I guess.
I also re addressed the port side bridge. I wasn't happy with the detail look so I found some PE fly wheels in the spares and added them to the side with some brass rod.
Sorry about the quality of the photo, my camera does not like close in pictures and refuses to focus. Anyway, a few more pieces to the port side and then on to the starboard side of the bridge.
I was able to get some color on the Maya this week with a initial layer of primer. So here is a picture showing the Hunter and the Hunted.
I will give the primer a week to cure and then add the hull red next weekend.
Other than laying some paint on the Maya over the next couple of weekends I wont have much updates. I have some campaigns in Armorama that I need to clear up so Ill be shifting to that side for a little bit.
Everyones build is coming along great. Keep up the great work.
Dave
TRM5150
Joined: January 03, 2010
KitMaker: 2,159 posts
Model Shipwrights: 1,400 posts
Posted: Sunday, February 22, 2015 - 01:49 AM UTC
Love seeing the Maya in some primer...very nice Dave!! Nice looking 3D prints. sure you have the alignments issues well in hand!! Enjoy the armor side of things!!  I have been itching to work up a Pz. IV soon myself!!
I have been itching to work up a Pz. IV soon myself!! rolltide31
#377
Joined: June 27, 2010
KitMaker: 1,481 posts
Model Shipwrights: 1,332 posts
Posted: Sunday, February 22, 2015 - 01:52 AM UTC
Hey guys,
I meant to add this in to my previous post but forgot to make the design. So here is a question for everyone. I want to display the USS Dace and the IJN Maya in a diorama depicting moments after the Dace fired her torpedoes but before the hit the Maya.
Since I am not good at making complete above and below dioramas I came up with a modified concept that I would like your opinion on.
Please see the picture below and then the description.
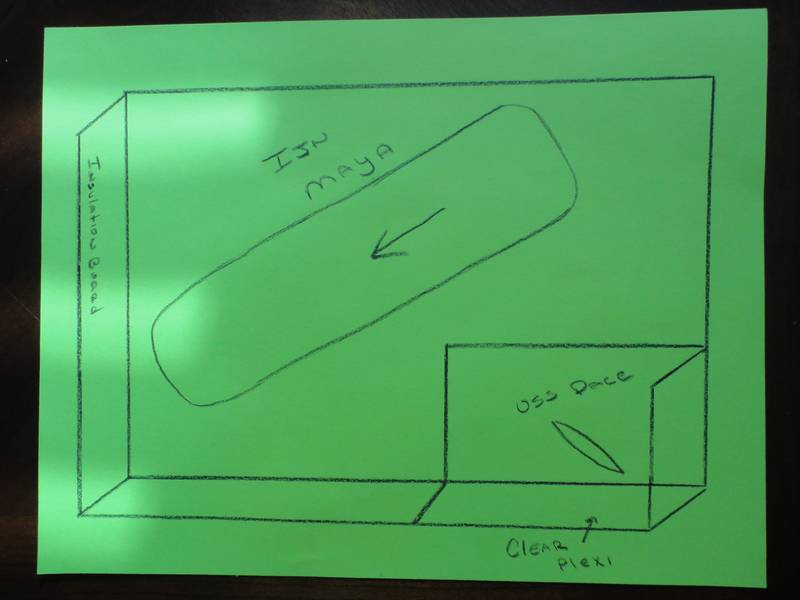
So what I was thinking was instead of a complete A/B diorama I would make a partial A/B. The majority of the surface area would be made with insulation board, painted blue and covered with medium and heavy acrylic paste with the sides being covered with stained wood.
The bottom right hand corner would be sided with clear acrylic sheet so that the USS Dace could be seen below the surface. The top would be covered with clear acrylic sheet of light diffuser and covered with medium and heavy acrylic.
So do you think this would work or would it look odd with only having a portion of the diorama sided with clear acrylic?
Oh, the torpedoes would be swimming along the surface in the area with the insulation board so I don't have to figure out how to suspend them and replicate the water disturbed by the propellers.
So let me have it, what are your thoughts, objections, and problems that you see with this concept.
thanks again.
Dave
I meant to add this in to my previous post but forgot to make the design. So here is a question for everyone. I want to display the USS Dace and the IJN Maya in a diorama depicting moments after the Dace fired her torpedoes but before the hit the Maya.
Since I am not good at making complete above and below dioramas I came up with a modified concept that I would like your opinion on.
Please see the picture below and then the description.
So what I was thinking was instead of a complete A/B diorama I would make a partial A/B. The majority of the surface area would be made with insulation board, painted blue and covered with medium and heavy acrylic paste with the sides being covered with stained wood.
The bottom right hand corner would be sided with clear acrylic sheet so that the USS Dace could be seen below the surface. The top would be covered with clear acrylic sheet of light diffuser and covered with medium and heavy acrylic.
So do you think this would work or would it look odd with only having a portion of the diorama sided with clear acrylic?
Oh, the torpedoes would be swimming along the surface in the area with the insulation board so I don't have to figure out how to suspend them and replicate the water disturbed by the propellers.
So let me have it, what are your thoughts, objections, and problems that you see with this concept.
thanks again.
Dave
rolltide31
#377
Joined: June 27, 2010
KitMaker: 1,481 posts
Model Shipwrights: 1,332 posts
Posted: Sunday, February 22, 2015 - 01:53 AM UTC
Todd,
thanks for the comments.
Looking forward to adding more color to the Maya.
I was very impressed with the level of detail that the 3d printer was able to replicate. It is amazing what they can do and definitely increases the modelers options.
I am part of the Panzer IV campaign also. But due to time constraints I think I am going to go out of the box and use it to practice my painting techniques.
Need to finish off the two Panther G's at the same time.
Dave

RedDuster
Joined: March 01, 2010
KitMaker: 7,078 posts
Model Shipwrights: 6,649 posts

Posted: Sunday, February 22, 2015 - 04:35 AM UTC
Cracking work on the Dace Dave, looking good.
Looking Luciano, really like the weathering, adds real depth.
More progress on the rub down deck markings, the foredeck numbers took some of the paint off the cats.
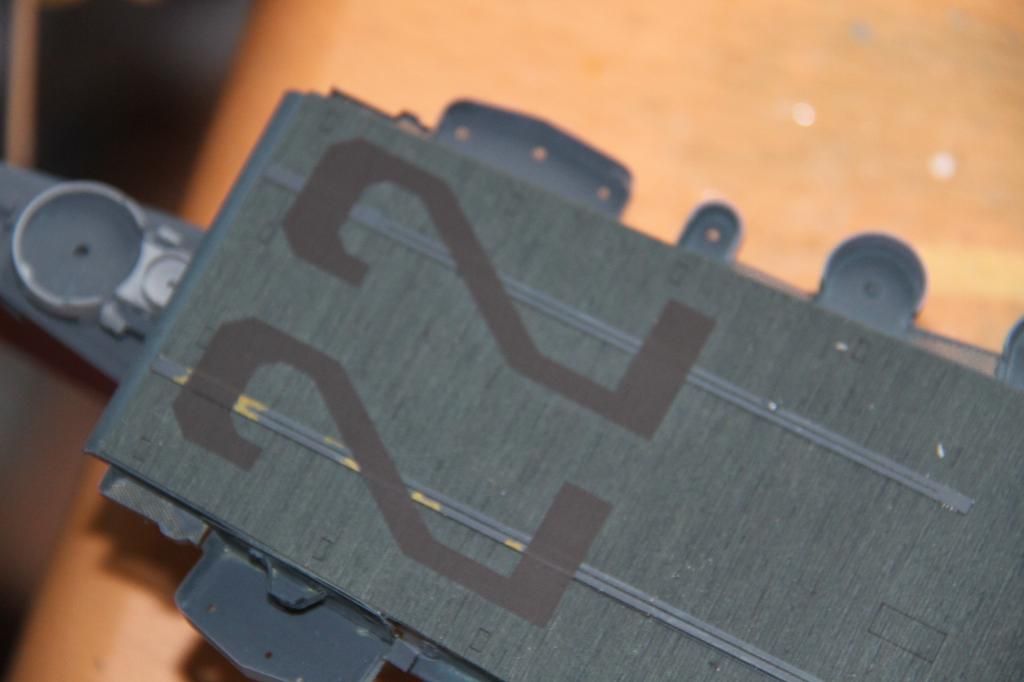
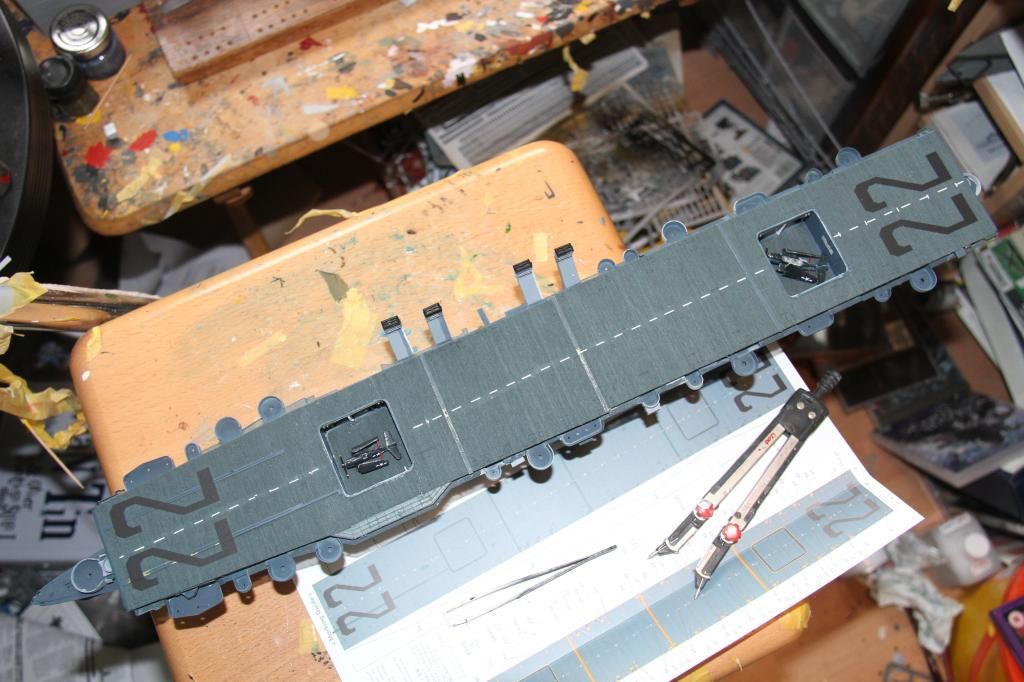
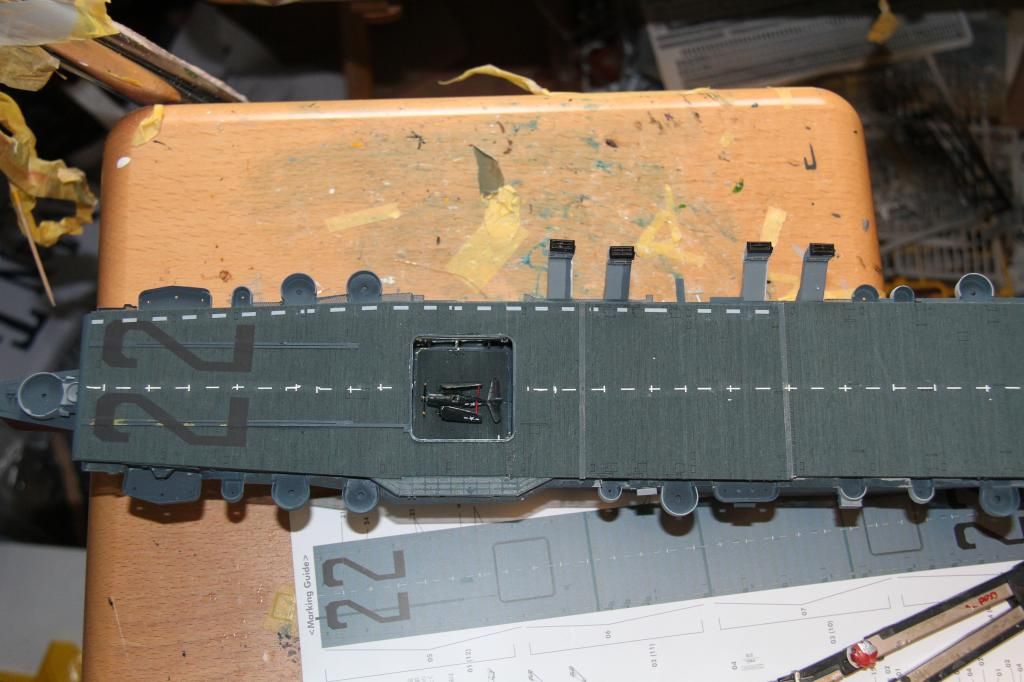
Deck markings done. There are pros and cons to rub downs, could get used to them with a bit of practice.

Si
Looking Luciano, really like the weathering, adds real depth.
More progress on the rub down deck markings, the foredeck numbers took some of the paint off the cats.


Deck markings done. There are pros and cons to rub downs, could get used to them with a bit of practice.

Si
rolltide31
#377
Joined: June 27, 2010
KitMaker: 1,481 posts
Model Shipwrights: 1,332 posts
Posted: Thursday, February 26, 2015 - 06:38 AM UTC
Si
The dry transfers look incredible. It really brings the flight deck together. Great job
Small update on the Maya. Painted the hull and the linoleum deck. No pictures yet but will post some this weekend
Dave
The dry transfers look incredible. It really brings the flight deck together. Great job
Small update on the Maya. Painted the hull and the linoleum deck. No pictures yet but will post some this weekend
Dave
Littorio
Joined: September 15, 2004
KitMaker: 4,728 posts
Model Shipwrights: 1,080 posts
Posted: Thursday, February 26, 2015 - 08:44 PM UTC
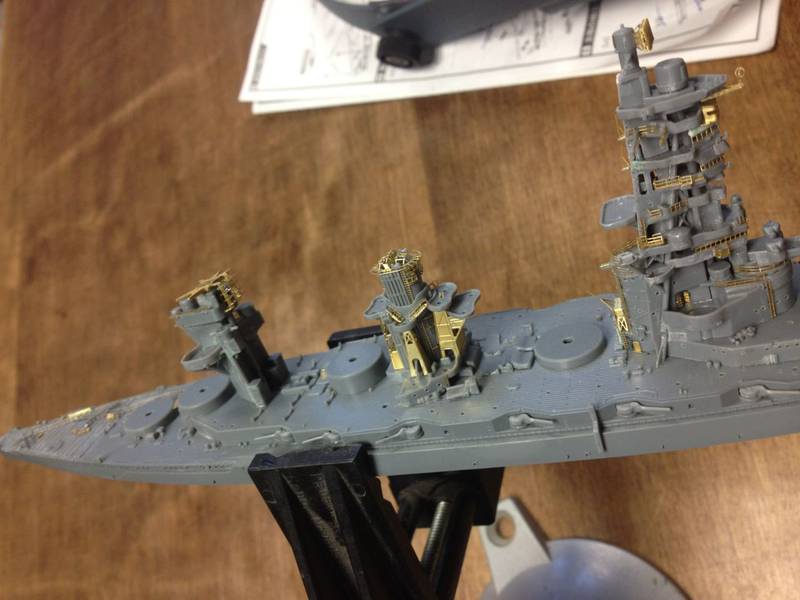
Small update and getting very close now
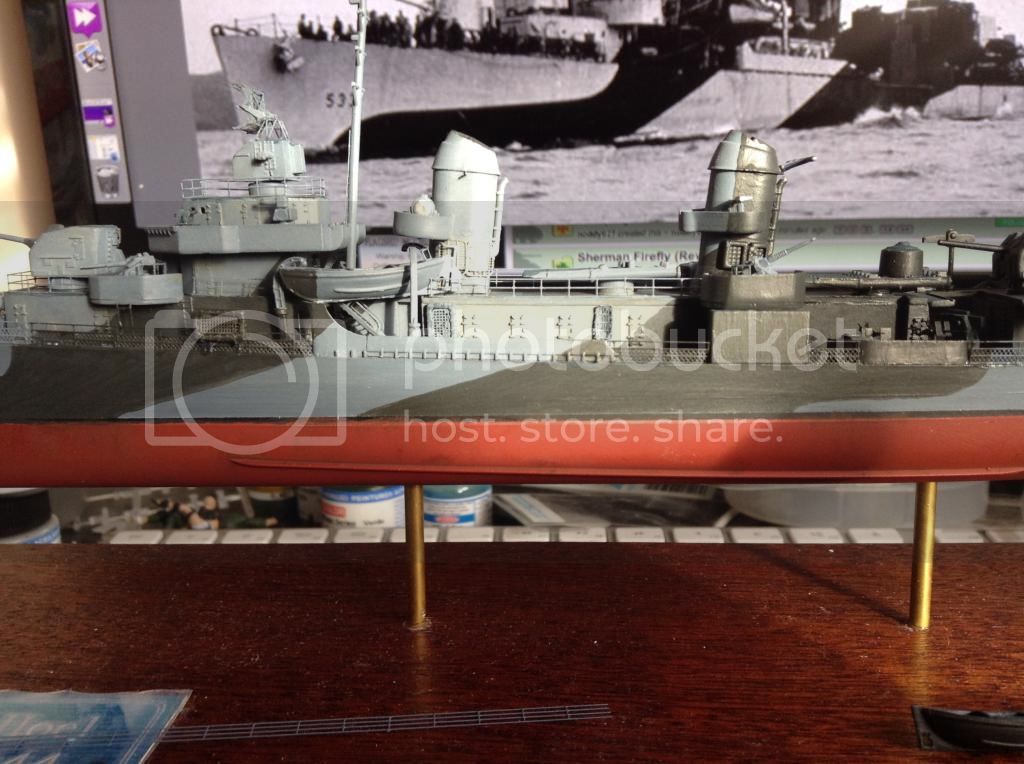
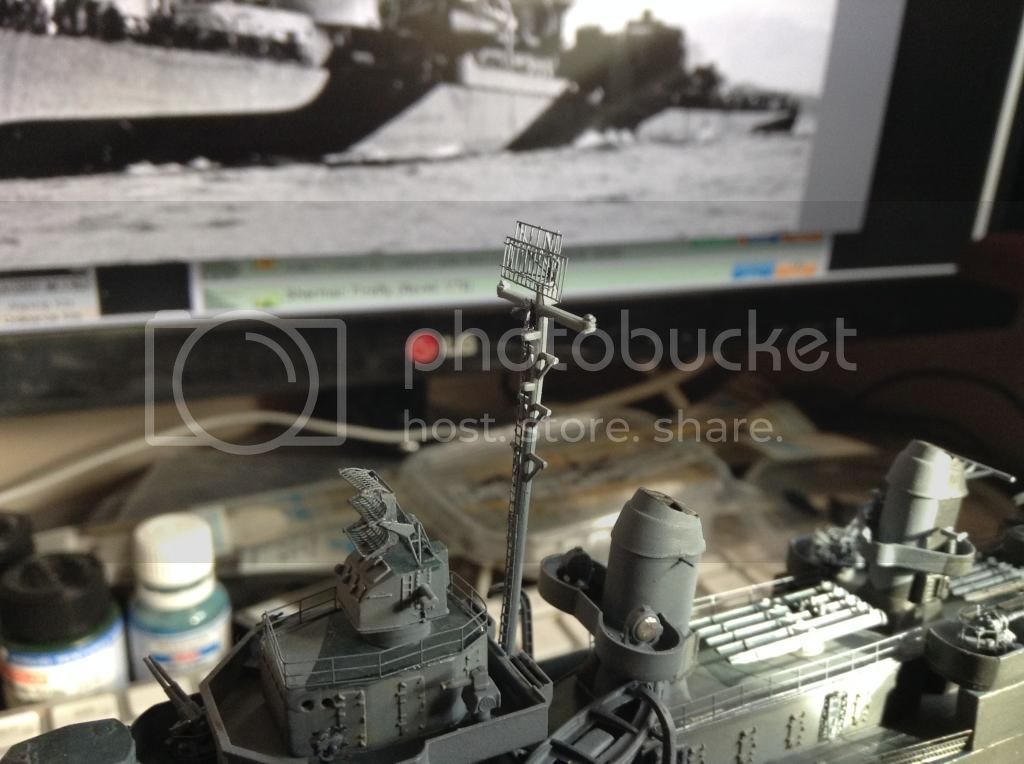
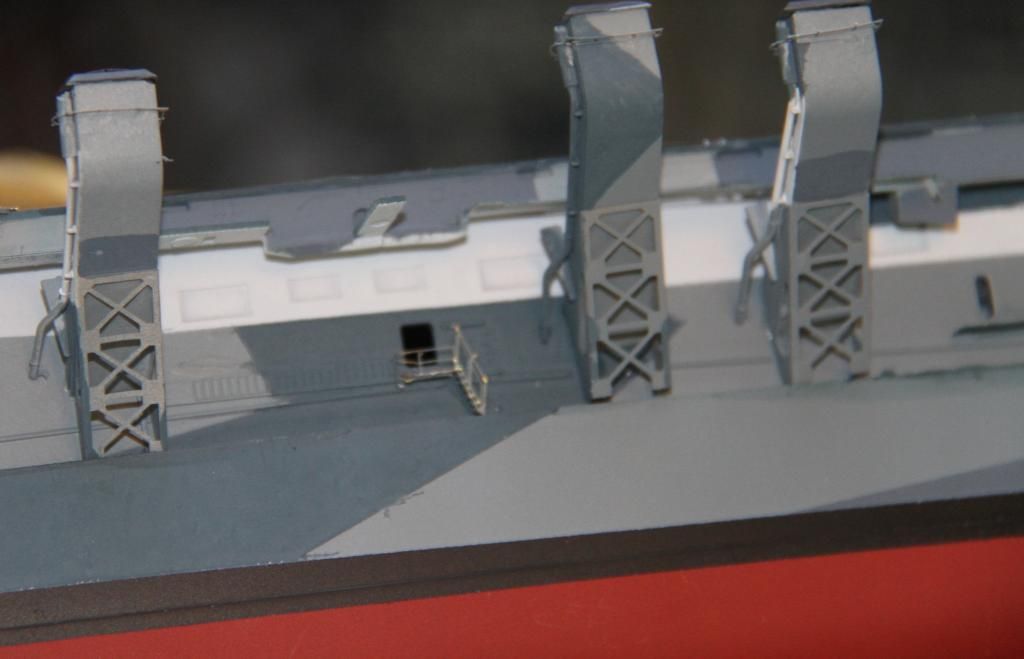
Almost finished the railings just the aft deck house left, SG radar fitted then the hull numbers and rigging.

Si those dry rub markings look good shame about the paint lift.
Almost finished the railings just the aft deck house left, SG radar fitted then the hull numbers and rigging.


Si those dry rub markings look good shame about the paint lift.
rolltide31
#377
Joined: June 27, 2010
KitMaker: 1,481 posts
Model Shipwrights: 1,332 posts
Posted: Thursday, February 26, 2015 - 09:00 PM UTC
Luciano,
Your USS Hoel looks amazing. Great work!!!
Dave
Your USS Hoel looks amazing. Great work!!!
Dave
Littorio
Joined: September 15, 2004
KitMaker: 4,728 posts
Model Shipwrights: 1,080 posts
Posted: Friday, February 27, 2015 - 12:54 AM UTC
Thanks Dave, I reckon I should have her finished next weekend.
What's left to do:
Railing for aft deck house
Hull numbers
Varnish over the hull numbers once dry
Light weathering to hull sides (used but not abused look)
Matt coat
Rigging
Navy jack, US flag and radio call flags Nan - Able - X-ray - Yoke although the radio flags (what's the correct term for these?) may have to be added at a later date as I still need to source some of these.
On the home run.
TRM5150
Joined: January 03, 2010
KitMaker: 2,159 posts
Model Shipwrights: 1,400 posts
Posted: Friday, February 27, 2015 - 10:50 AM UTC
Some nice work on those railing Luciano! Coming together! Always good when you get down to the short list!! Keep whittling away at it!!
RedDuster
Joined: March 01, 2010
KitMaker: 7,078 posts
Model Shipwrights: 6,649 posts
Posted: Saturday, February 28, 2015 - 02:06 AM UTC
Thanks Dave,
First time I have used the, but I am quite impressed with them, only thing is, you have to make sure they are in the right place, no second chances.
Si
First time I have used the, but I am quite impressed with them, only thing is, you have to make sure they are in the right place, no second chances.
Si
rolltide31
#377
Joined: June 27, 2010
KitMaker: 1,481 posts
Model Shipwrights: 1,332 posts
Posted: Saturday, February 28, 2015 - 10:45 PM UTC
Si,
I bet, a little off and they are no good. Is there anyway to remove them if a mistake is made?
I updated the Maya build log but thought I would upload a picture here to.
Here is another picture of the hunter with the hunted, this time the hunted has some color.
Plan on working the USS Dace next weekend. Should be able to sling a layer of primer within the next few weeks
Everyone's build is looking great.
Can't express how much I appreciate everyone's participation in this campaign. You guys have definitely made it a success.
thanks again for all the lessons and most of all friendships
Dave
RedDuster
Joined: March 01, 2010
KitMaker: 7,078 posts
Model Shipwrights: 6,649 posts
Posted: Sunday, March 01, 2015 - 02:23 AM UTC
Cracking work on the Dace Dave, also enjoying the campaign, learning a lot from this campaign, not generally building lot of USN ships.
On with the Indy, made a bit of mistake putting the deck on before I had finished he hull details, but then I only meant to test fit it, but once I had wrangled it on I was a bit concerned about trying to get it off. ladder, platform railings and mooring bits on ay the maindeck level.
Slight issue, I dropped the platform through the door, so a replacement was scratched, the platform from a 1/400th sunbed frame and a couple of bits of scrap railing, not perfect, but it works.
Railing and bits on around the funnels.

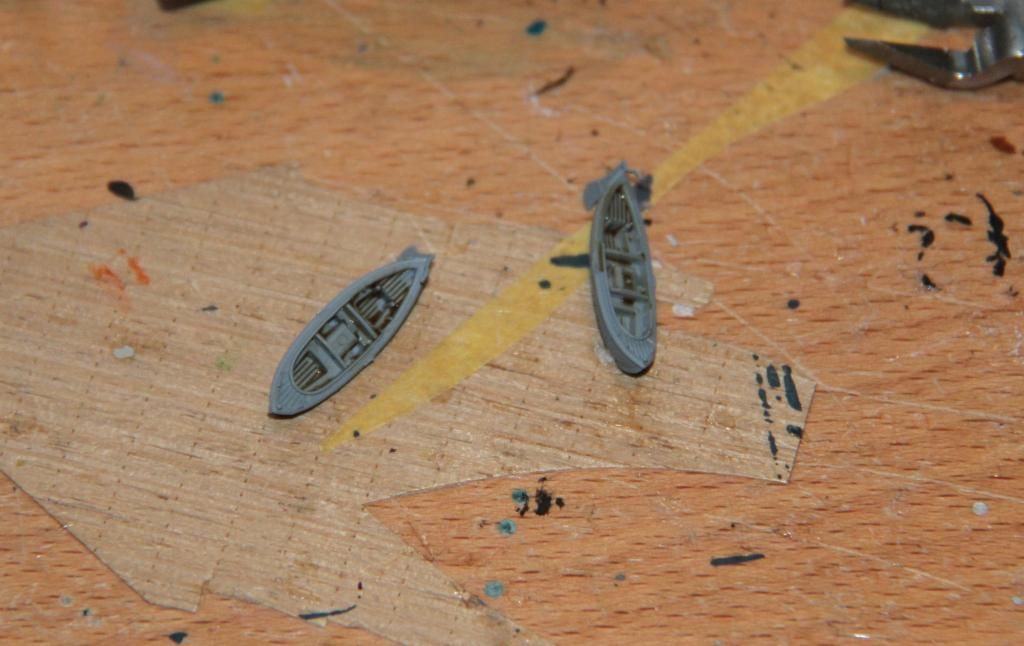
The boats painted and wash added to the interior. I am assuming, being the USN, all the planking was overpainted grey.
and fitted.
Si
On with the Indy, made a bit of mistake putting the deck on before I had finished he hull details, but then I only meant to test fit it, but once I had wrangled it on I was a bit concerned about trying to get it off. ladder, platform railings and mooring bits on ay the maindeck level.

Slight issue, I dropped the platform through the door, so a replacement was scratched, the platform from a 1/400th sunbed frame and a couple of bits of scrap railing, not perfect, but it works.

Railing and bits on around the funnels.

The boats painted and wash added to the interior. I am assuming, being the USN, all the planking was overpainted grey.

and fitted.

Si
Littorio
Joined: September 15, 2004
KitMaker: 4,728 posts
Model Shipwrights: 1,080 posts
Posted: Sunday, March 01, 2015 - 02:56 AM UTC
Dave nice progress so far keep it up, like wise having fun with this campaign and have been learning not just with the build but also the history.
Si, coming on great, from what I've learned the USN ships boats were painted the same as the background camo from both the side and above. As an example if the boat was above a deck blue deck then it would also be painted deck blue while one side may be ocean gray and the other haze grey or even split down the middle if the camo scheme demarcation is behind the boat.
With the Hoel one boat is ocean gray all over with a small bit of dull black on the port bow, while the other is ocean gray port side dull black starboard side and deck blue decking. Life rafts are the same painted to match the background camo, even seen them painted half and half.
Hope that helps you some what.
RedDuster
Joined: March 01, 2010
KitMaker: 7,078 posts
Model Shipwrights: 6,649 posts
Posted: Sunday, March 01, 2015 - 03:03 AM UTC
Thanks Luciano, sounds right to me, I was concerned about the interior, the bottom boards etc, from my research of the RN the interior of the boats tended to vary from ship to ship, especially amongst the smaller vessels, some were painted, some left bare wood.
Si
Si

kirkus2269

Joined: September 06, 2014
KitMaker: 42 posts
Model Shipwrights: 38 posts

Posted: Monday, March 02, 2015 - 10:15 PM UTC
hello all- i can't believe the rapidity, cleanliness and detail that you guys manage. i am working in the smallest scale and yet seem to be the slowest builder. good thing i still have several months before our deadline! everyone's work is really first rate and a lot of fun to watch develop. i am so glad that i joined this campaign!- a special thanks to dave for setting it all up.
luciano- unbelievable work- wowsers!! and thanks for the pics of the photo etch blackening agent. i can't believe i have never heard of or used such- i raced out to my local shop and there it was- i am now the owner of a once bottle of it.
si- great stuff- love the dry transfers- risky but worth while to be sure
dave- i think you idea for the 'above/below' diorama will turn out great if your modelling is any indication of your finish levels. loving the sub
ok here is my latest:
main sub assemblies fitted and placed
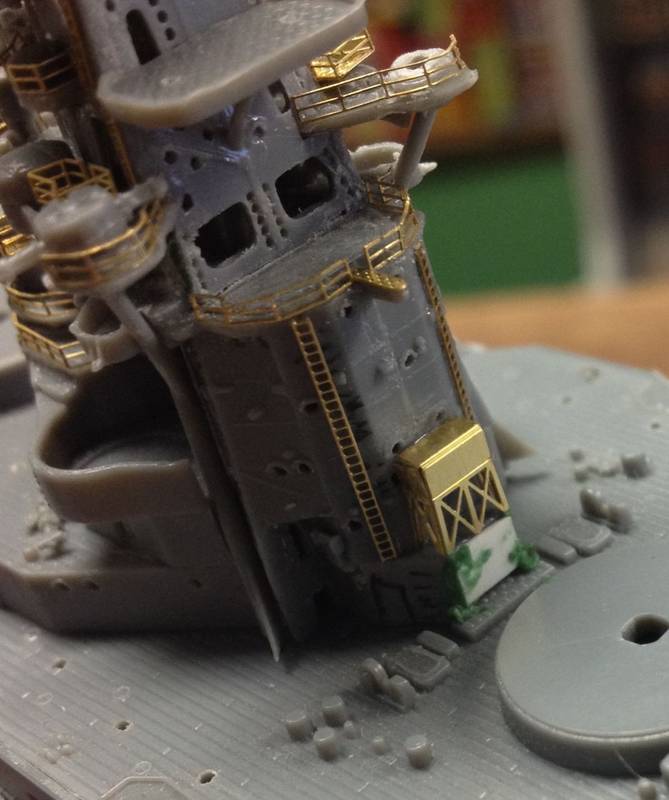
aft bridge details
endless fill on this build
i had to install a styrene sheet, sand, shape and fill to accommodate an unsightly overhang
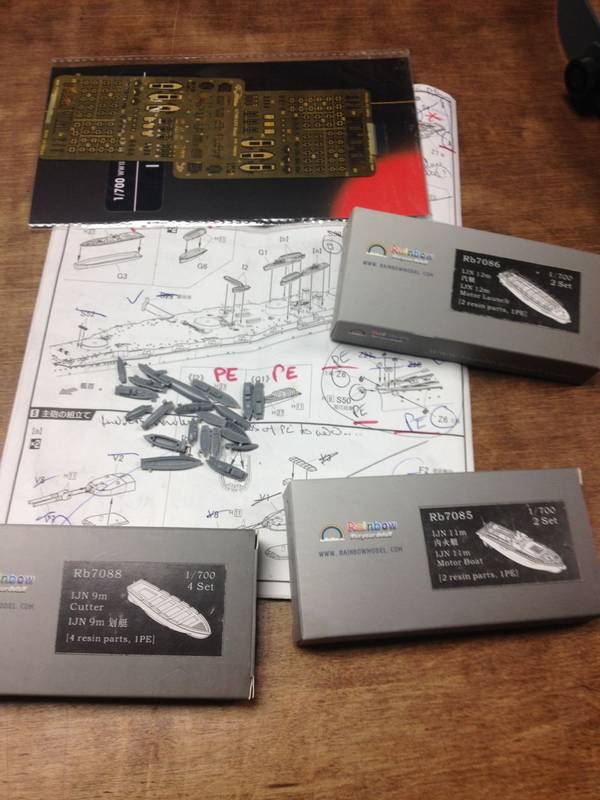
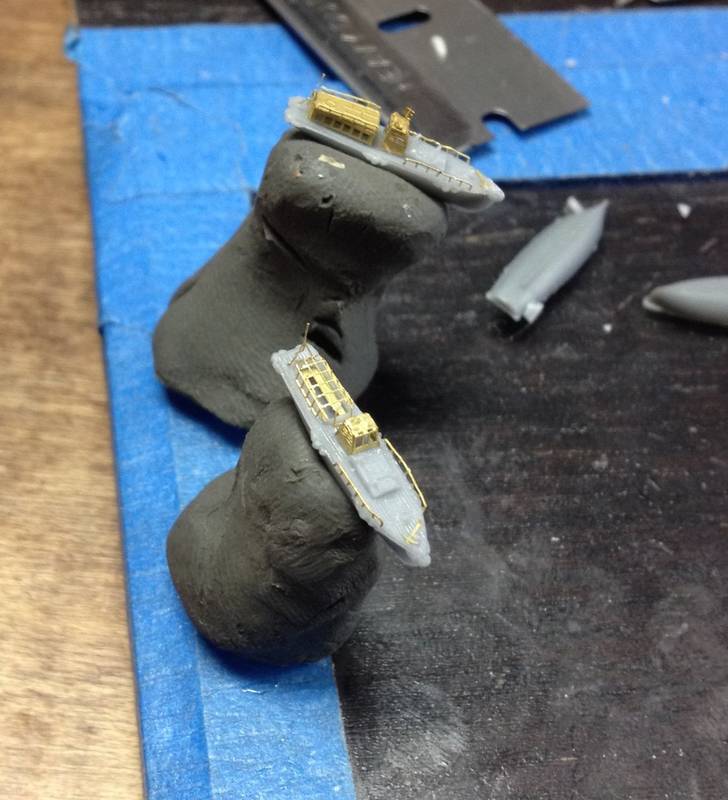
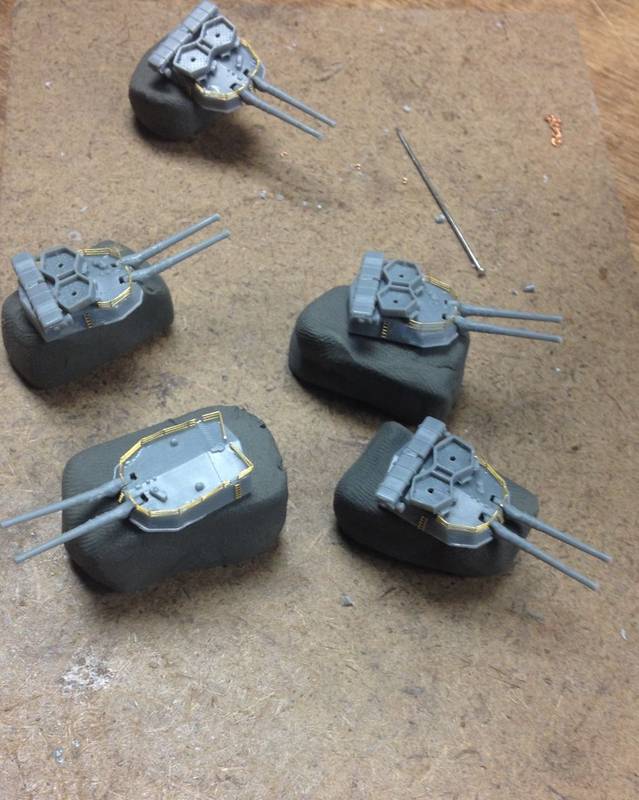
and then on to the fiddly bits like boats and main guns- flyhawk/ rainbow goodies/ etch and resin
more to come asap

luciano- unbelievable work- wowsers!! and thanks for the pics of the photo etch blackening agent. i can't believe i have never heard of or used such- i raced out to my local shop and there it was- i am now the owner of a once bottle of it.
si- great stuff- love the dry transfers- risky but worth while to be sure
dave- i think you idea for the 'above/below' diorama will turn out great if your modelling is any indication of your finish levels. loving the sub
ok here is my latest:
main sub assemblies fitted and placed
aft bridge details
endless fill on this build
i had to install a styrene sheet, sand, shape and fill to accommodate an unsightly overhang
and then on to the fiddly bits like boats and main guns- flyhawk/ rainbow goodies/ etch and resin
more to come asap
TRM5150
Joined: January 03, 2010
KitMaker: 2,159 posts
Model Shipwrights: 1,400 posts
Posted: Monday, March 02, 2015 - 10:58 PM UTC
Lovely work Kirk!! She is looking good all dressed out!! Love the add-on boats!! Nice improvement!! Keep plugging away!! 
 |

WEB HOSTING BY


Copyright ©2021 Model Shipwrights and Kitmaker Network, a subsidiary of Silver Star Enterprises
All Rights Reserved. Please read our Conditions of Use and Privacy Policy.
All Rights Reserved. Please read our Conditions of Use and Privacy Policy.