General Ship Modeling
Discuss modeling techniques, experiences, and ship modeling in general.
Build blog for Heller's HMS Victory
timmyp
Visit this Community
Virginia, United States
Joined: May 18, 2008
KitMaker: 496 posts
Model Shipwrights: 404 posts
Posted: Saturday, April 28, 2018 - 01:00 AM UTC
Well, I see in my previous posts, the pictures aren't there. I wonder what happened.

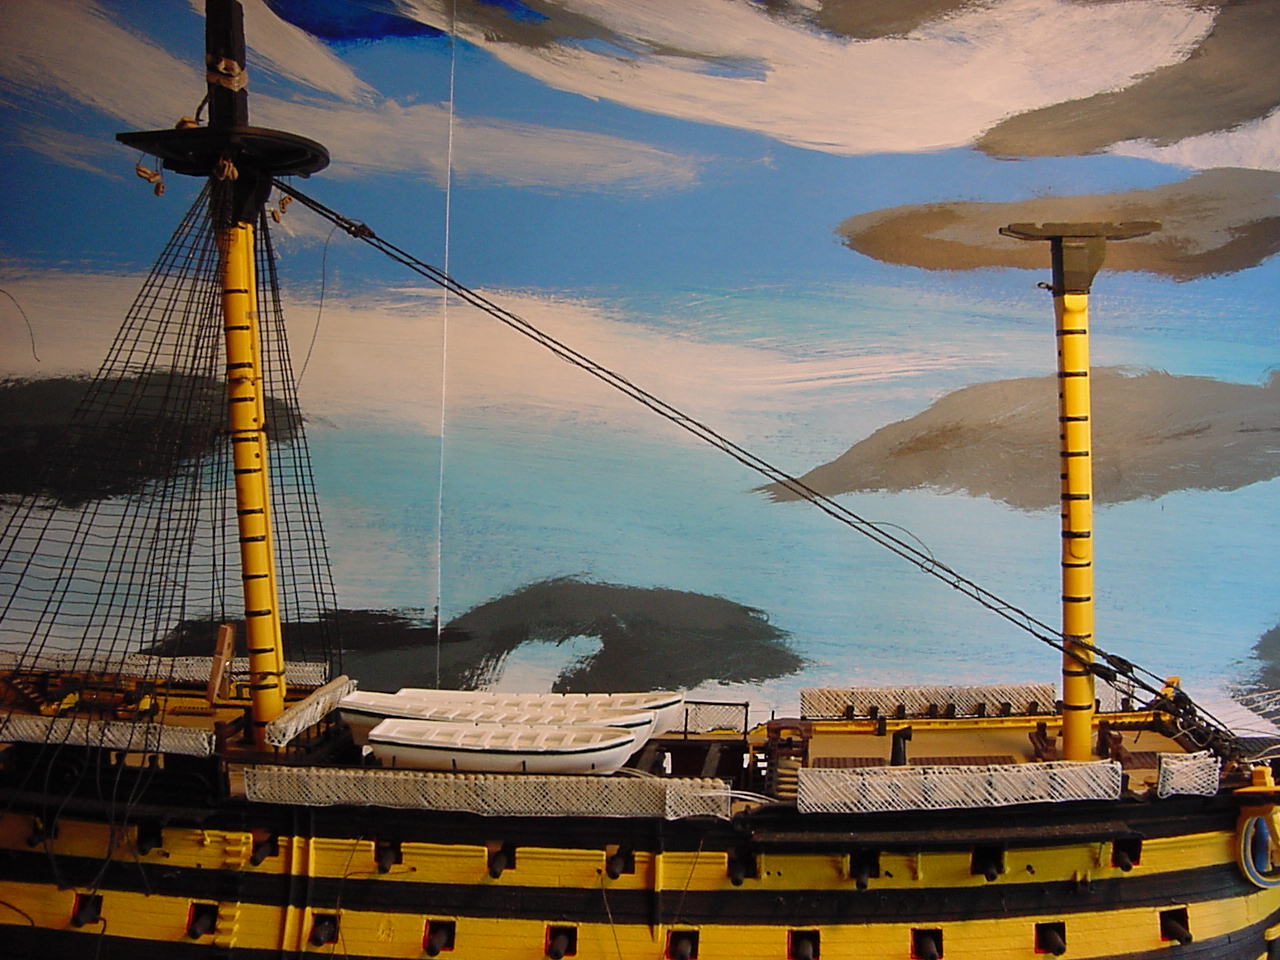
Things so far: I've been working on finishing the jeer blocks that are attached to the futtocks, and getting ready to install the mainstays.

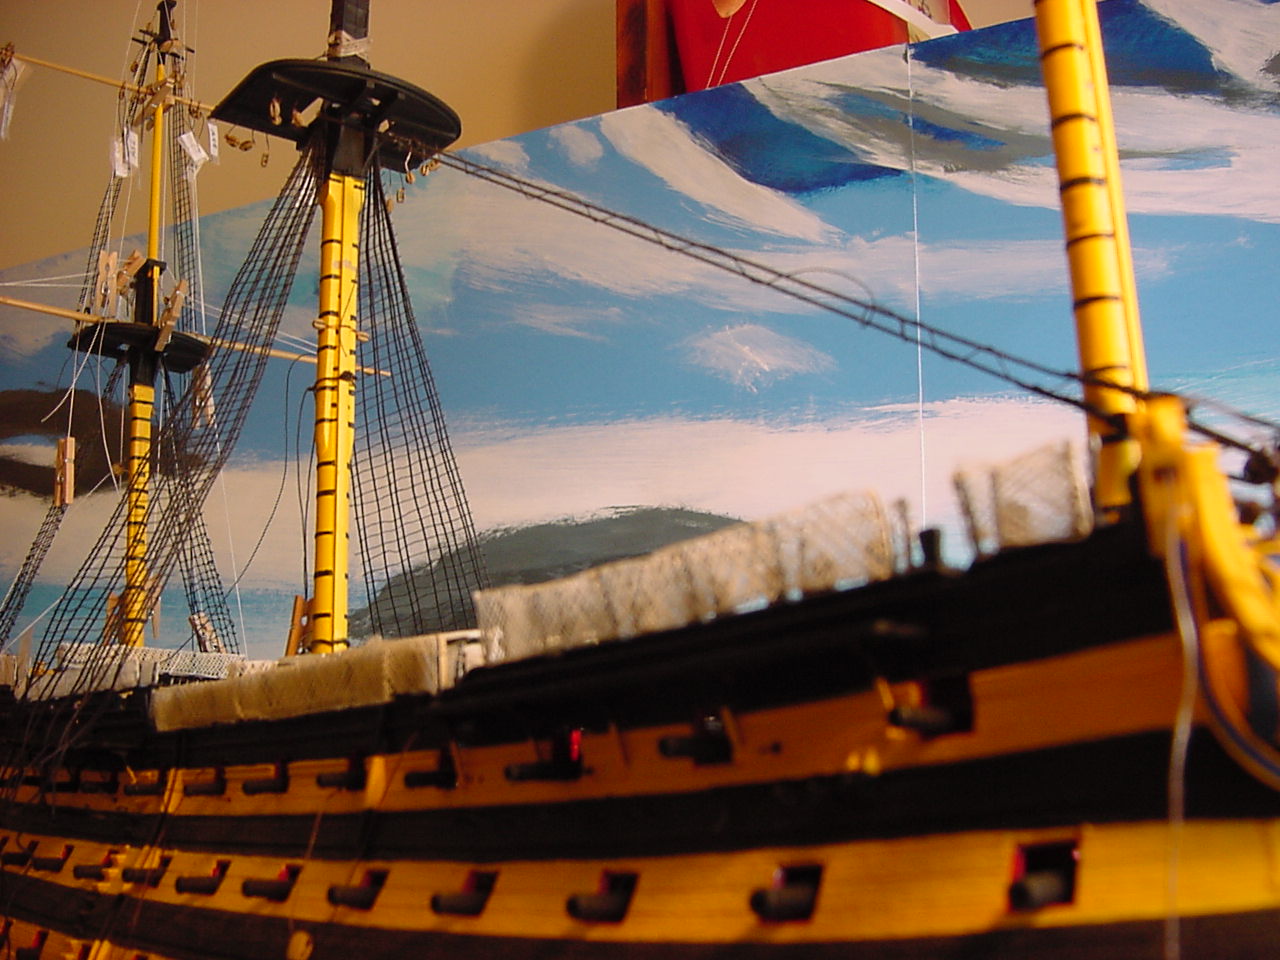
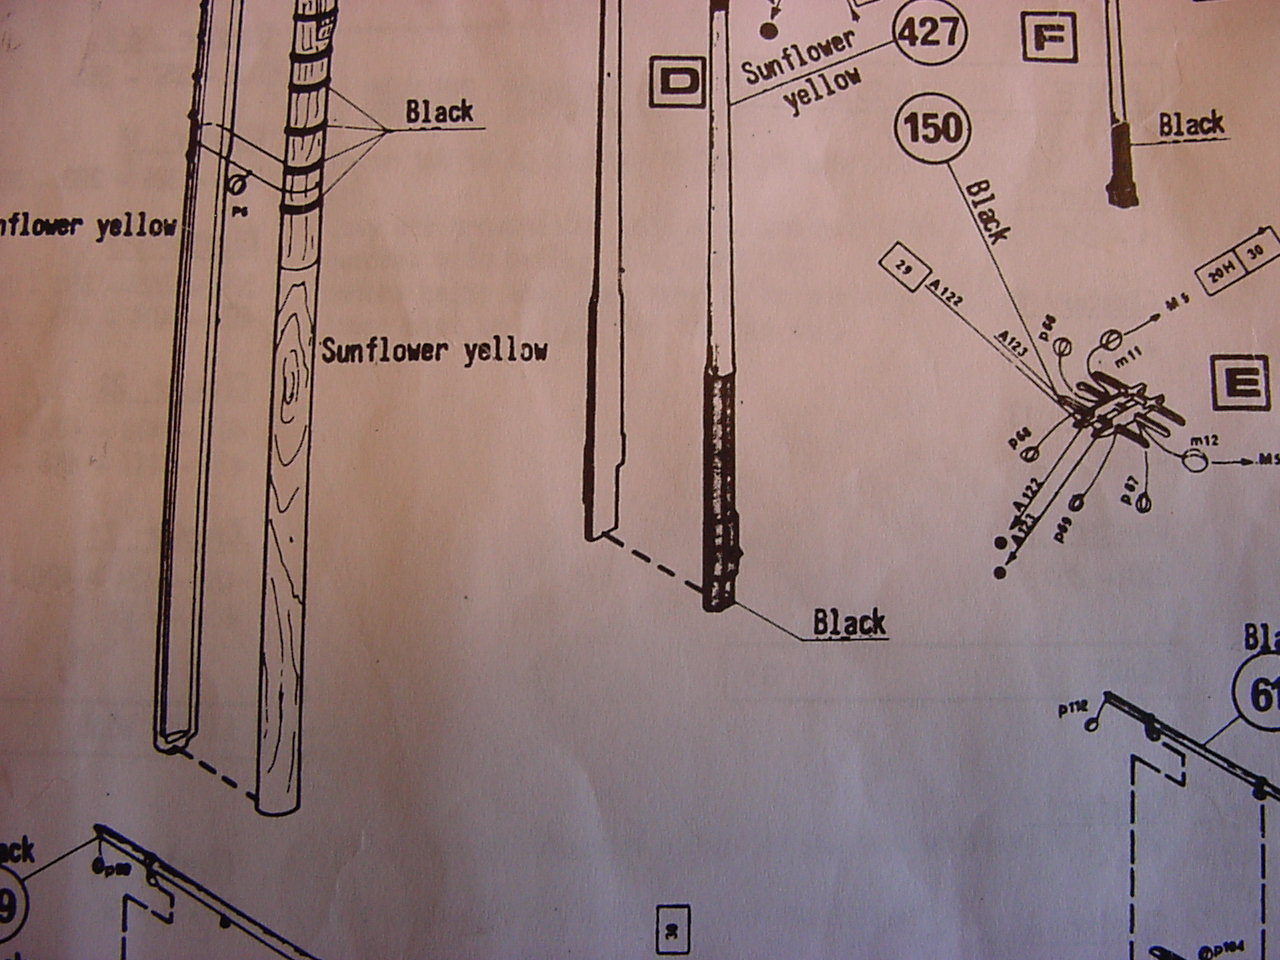
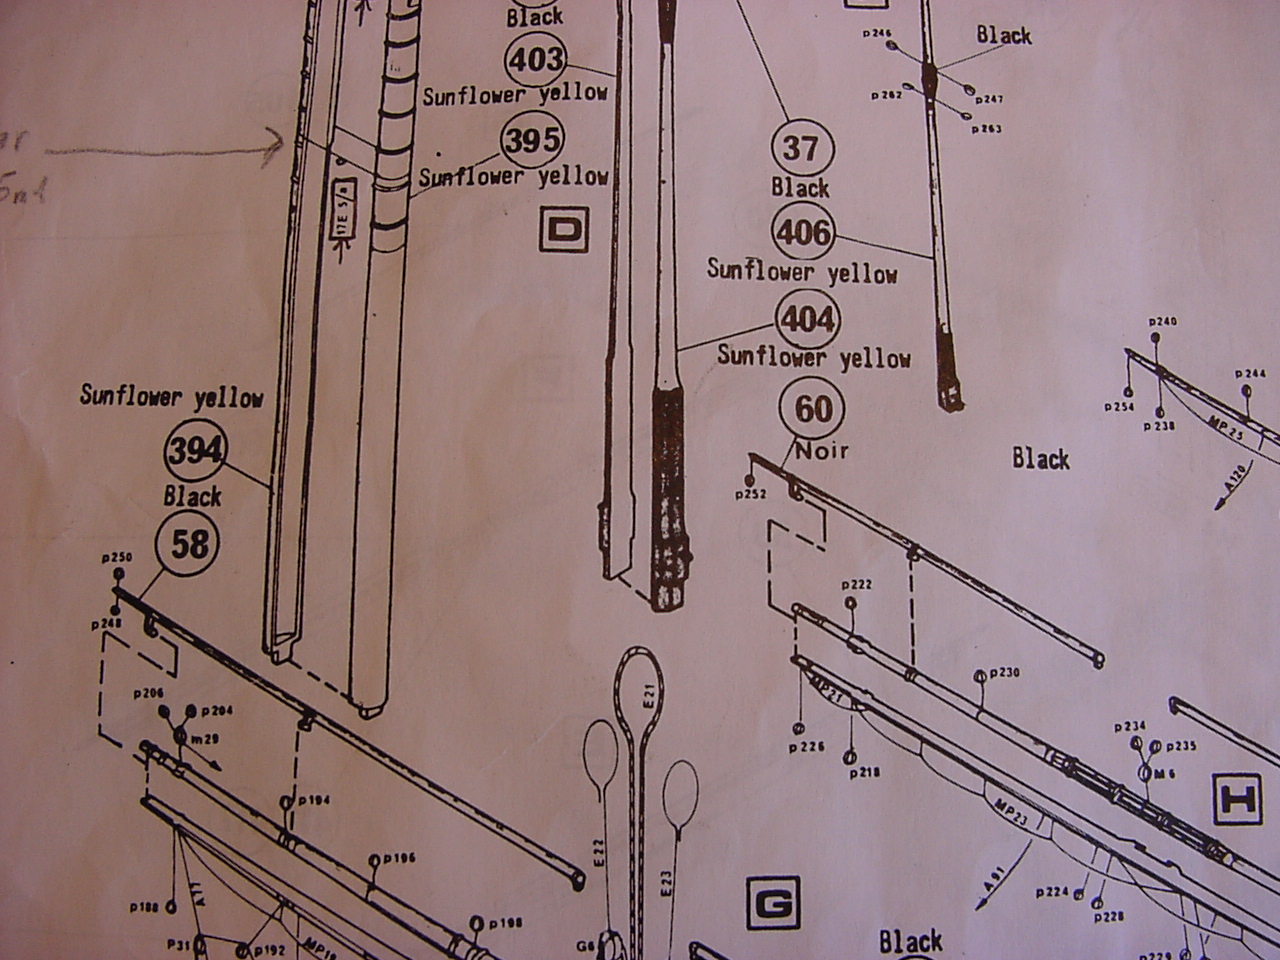
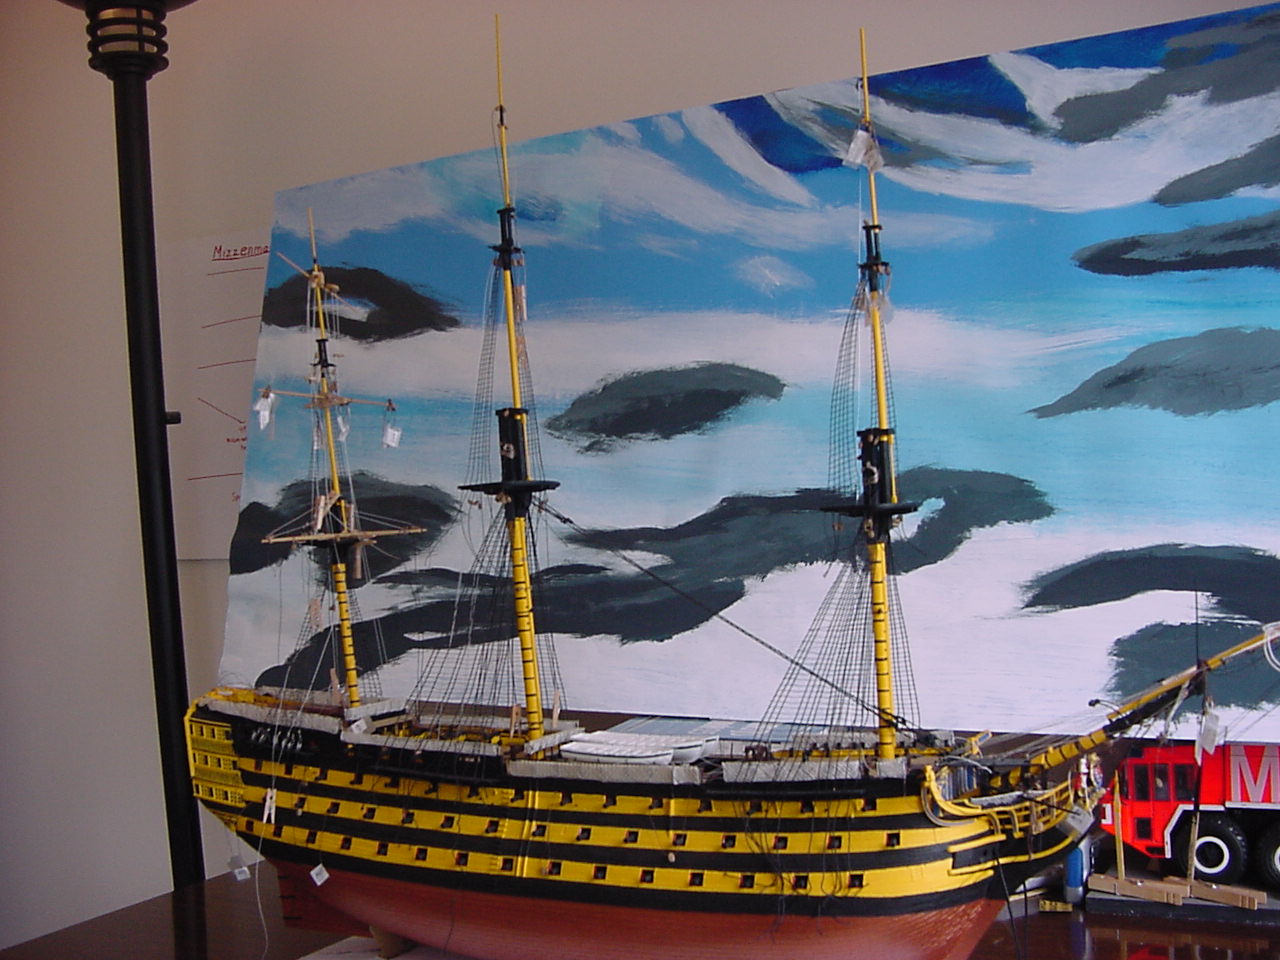
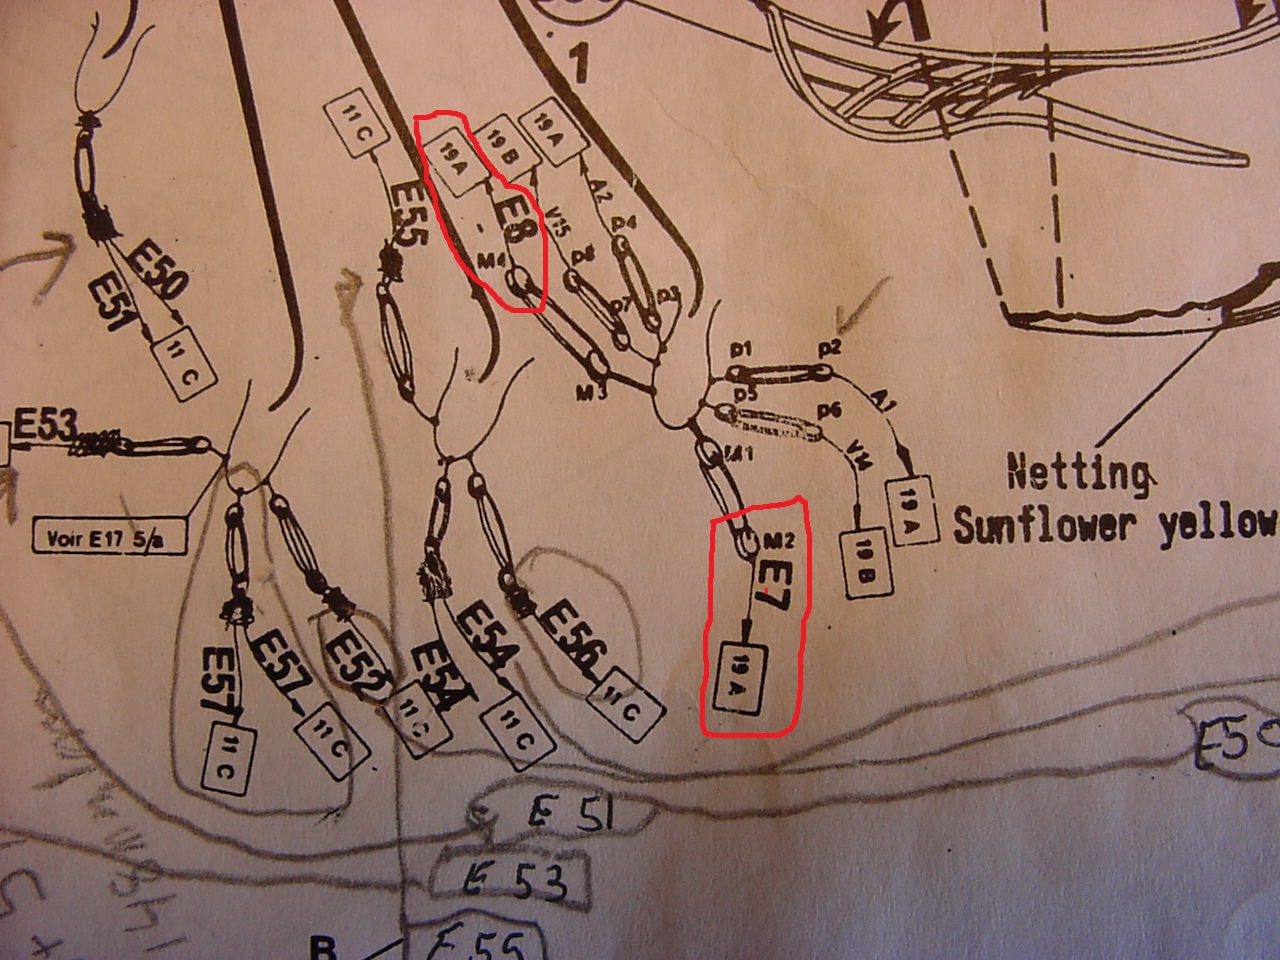
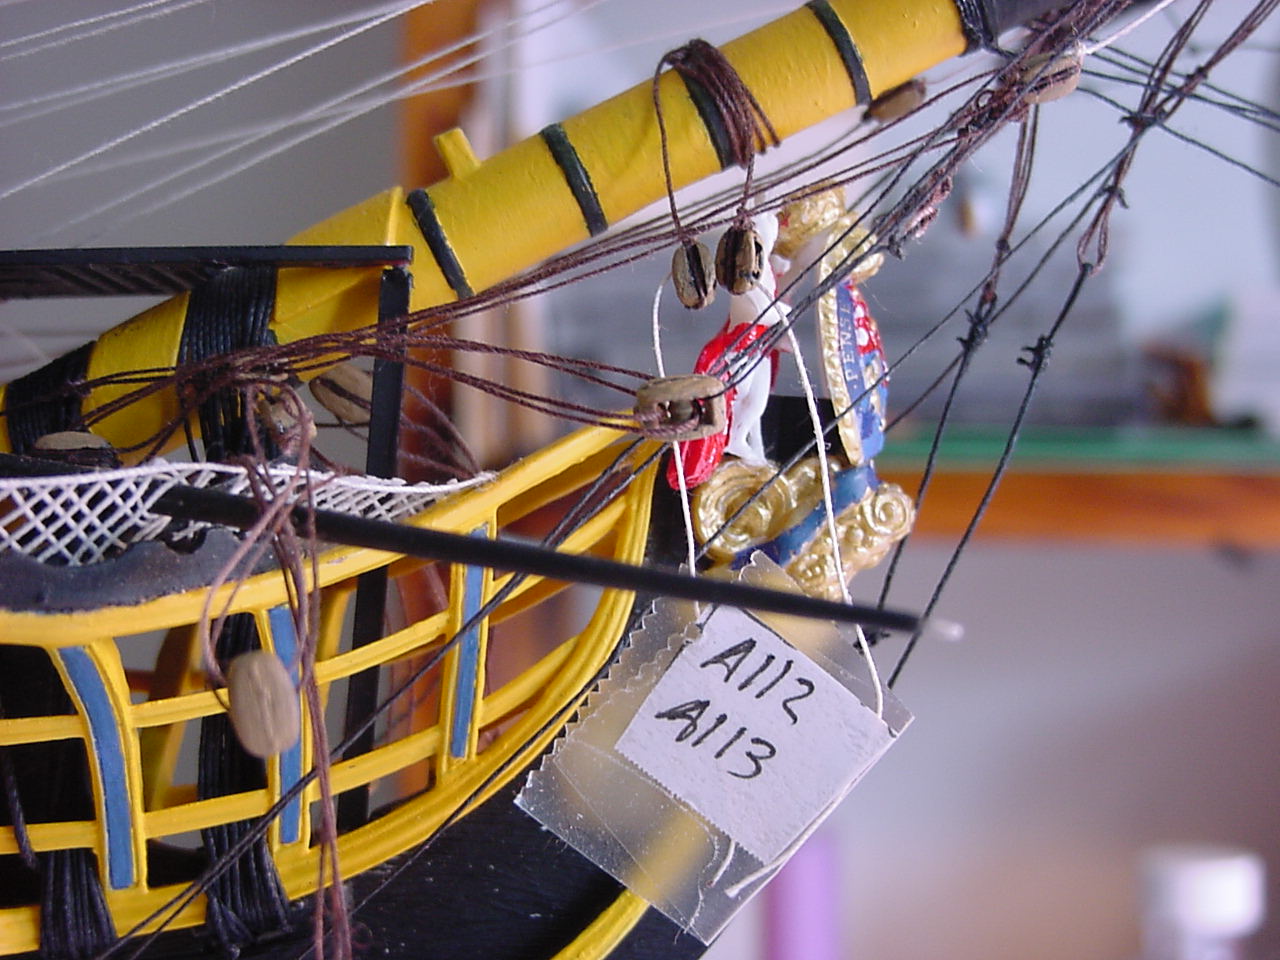
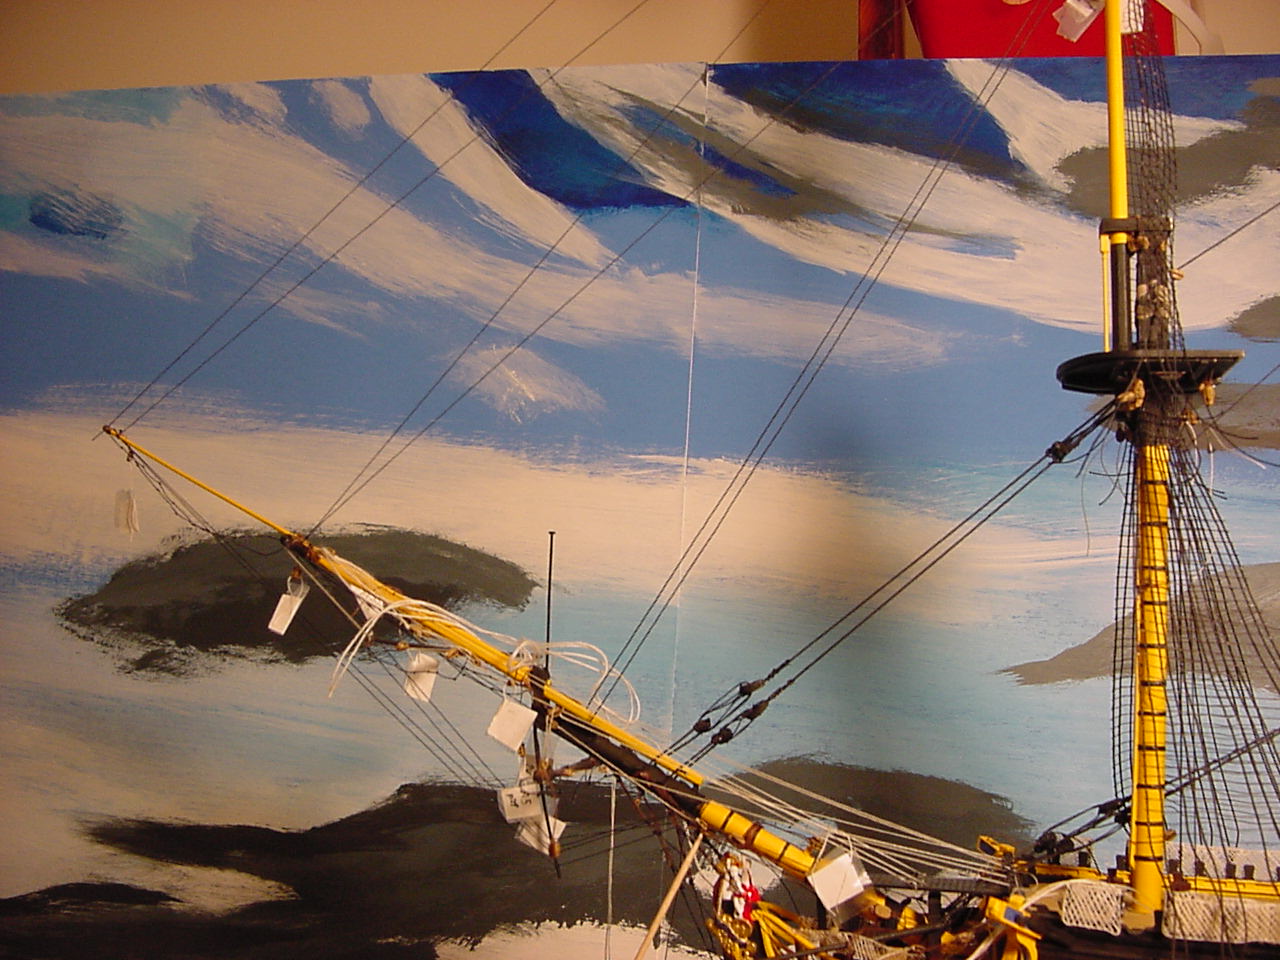
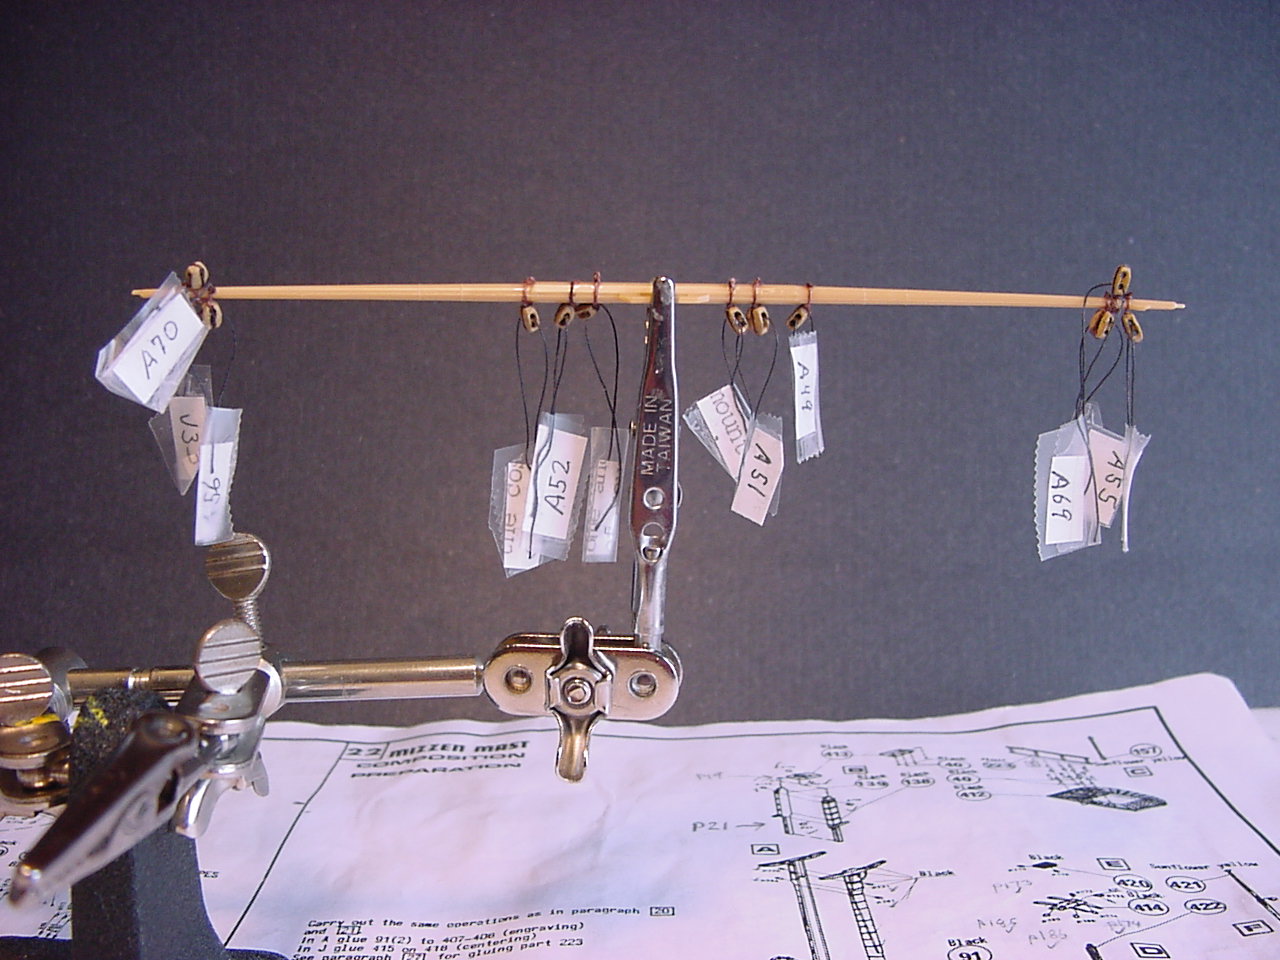
Previously, I was working on the mizzen foretop yard, getting all the blocks installed. Since there're so many blocks, I put tags on all the blocks, so I could keep straight what goes where (and apologies if I already posted this picture):


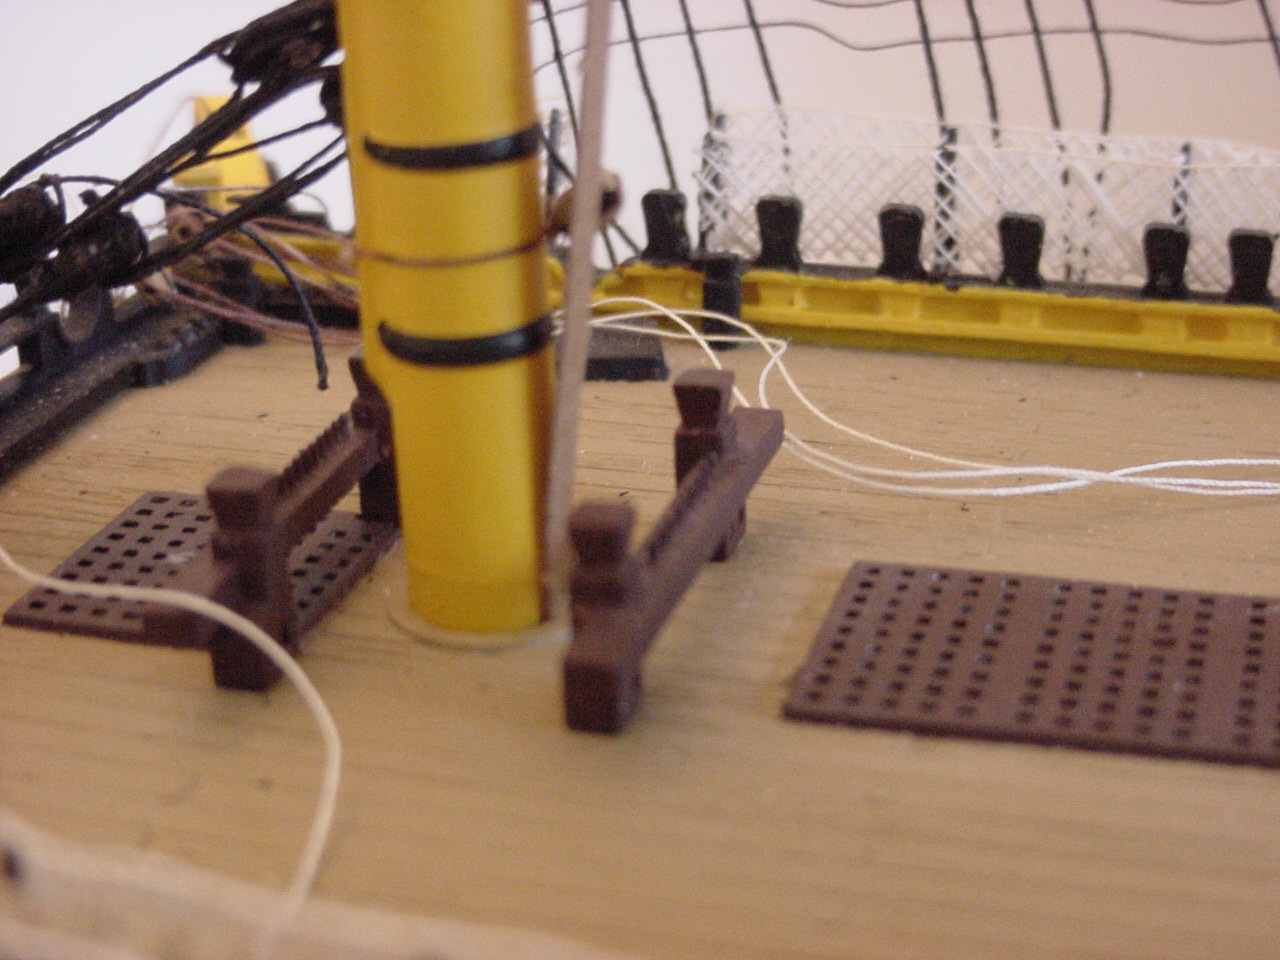
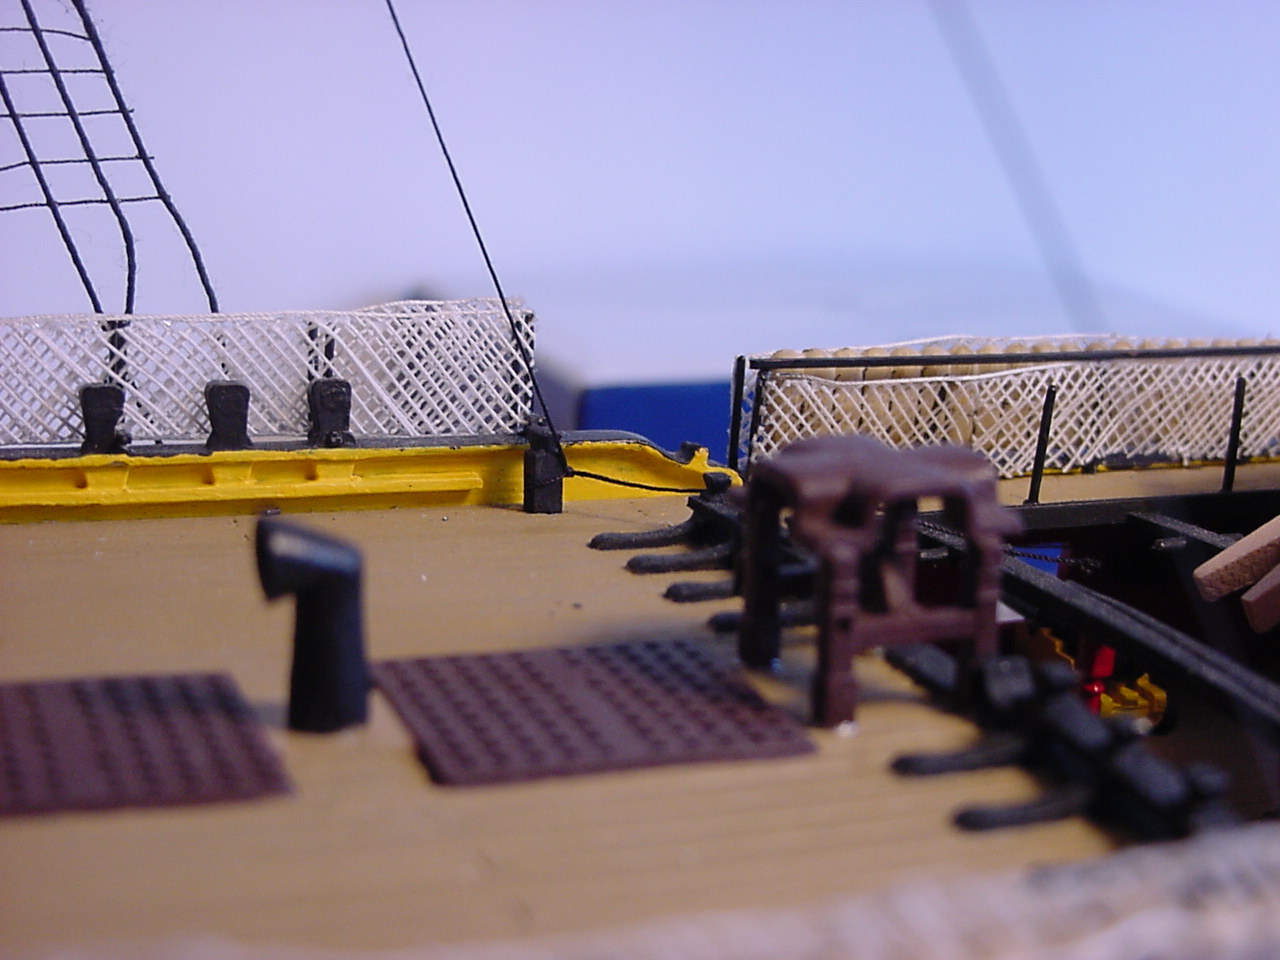
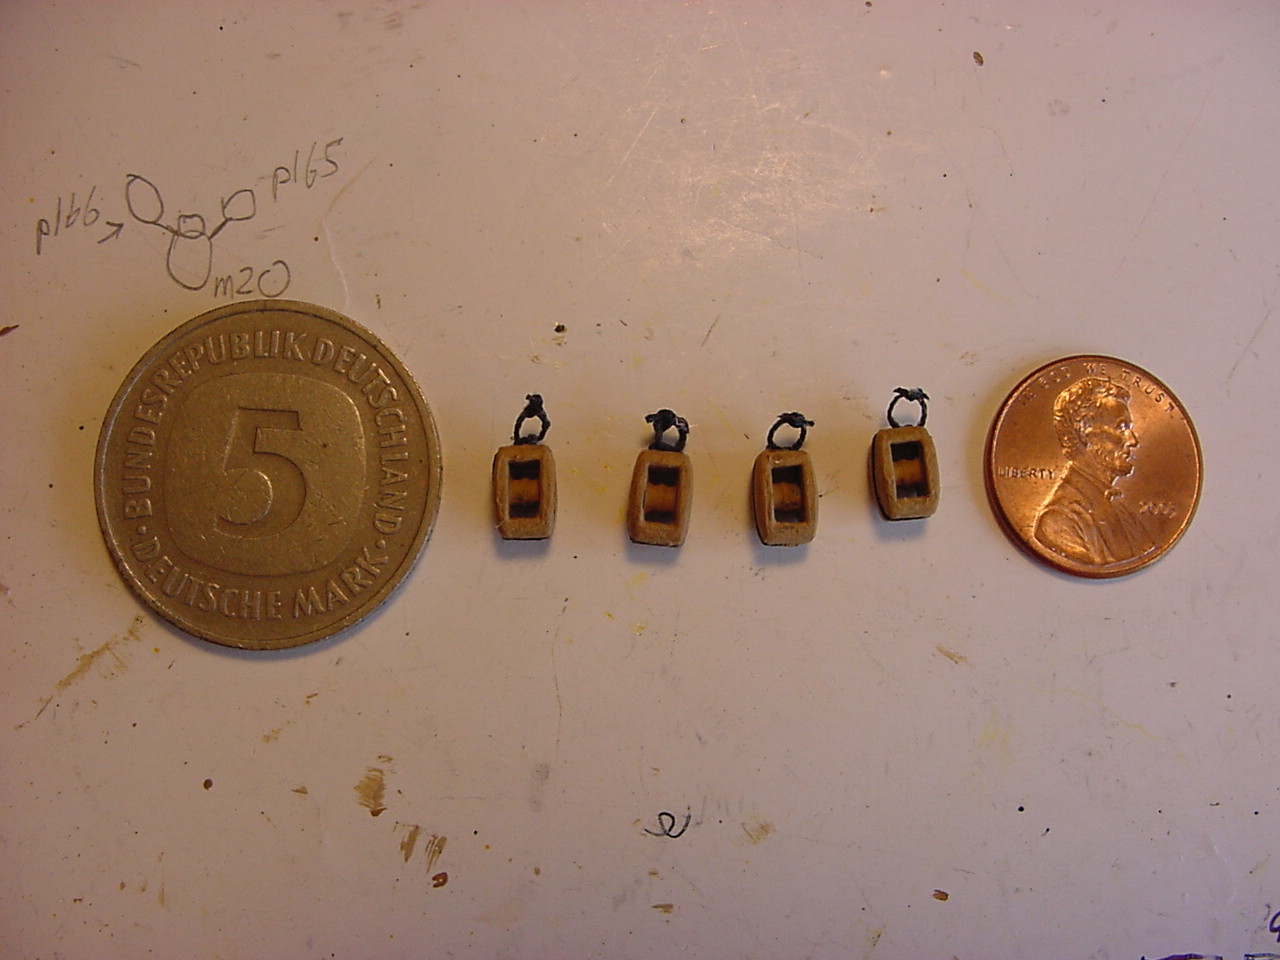
Some stuff about the jeer blocks. Here's a comparison picture:


Here's some photos of how I lashed the jeer block strops:


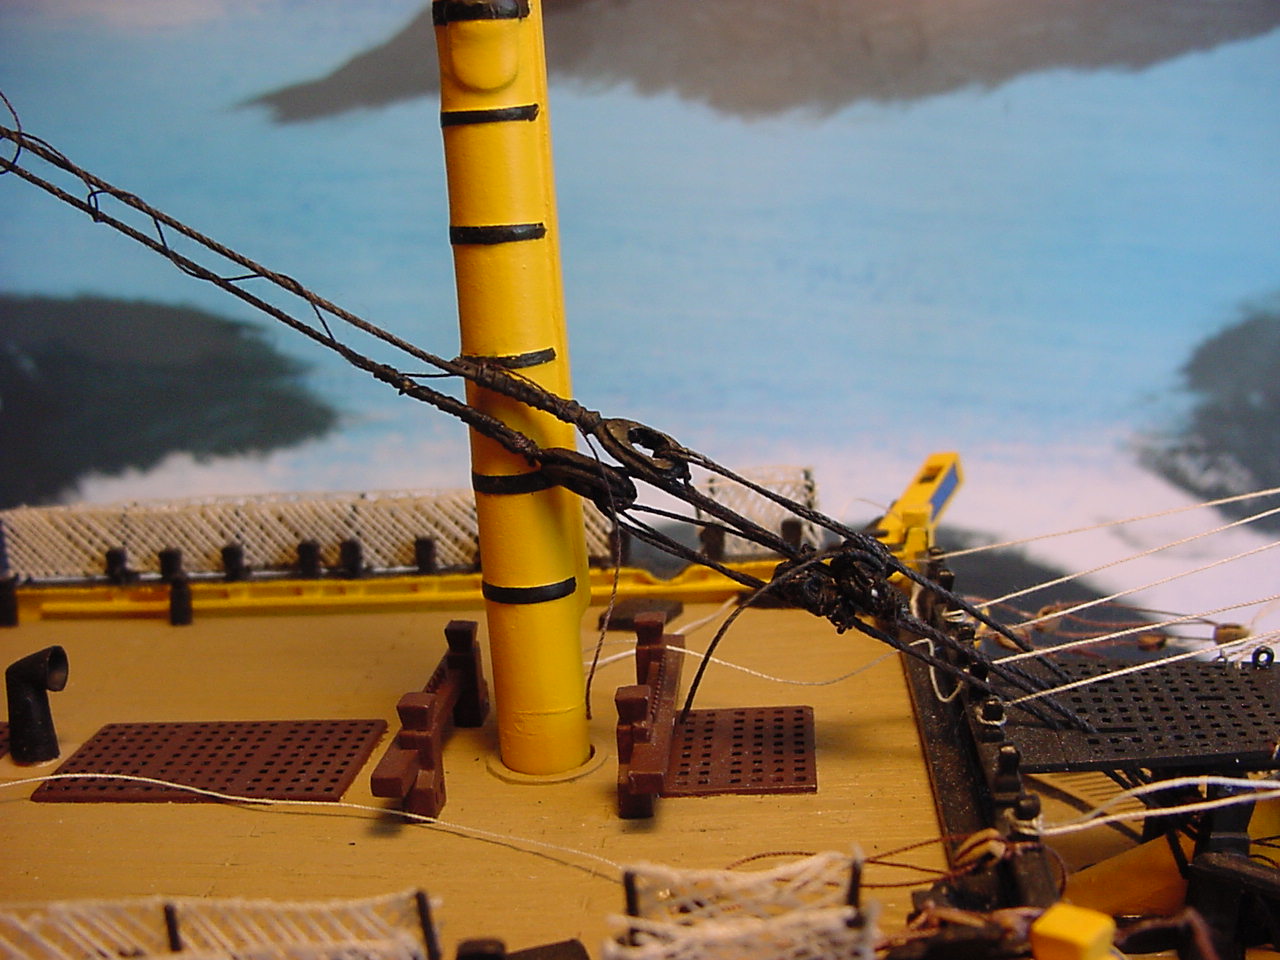
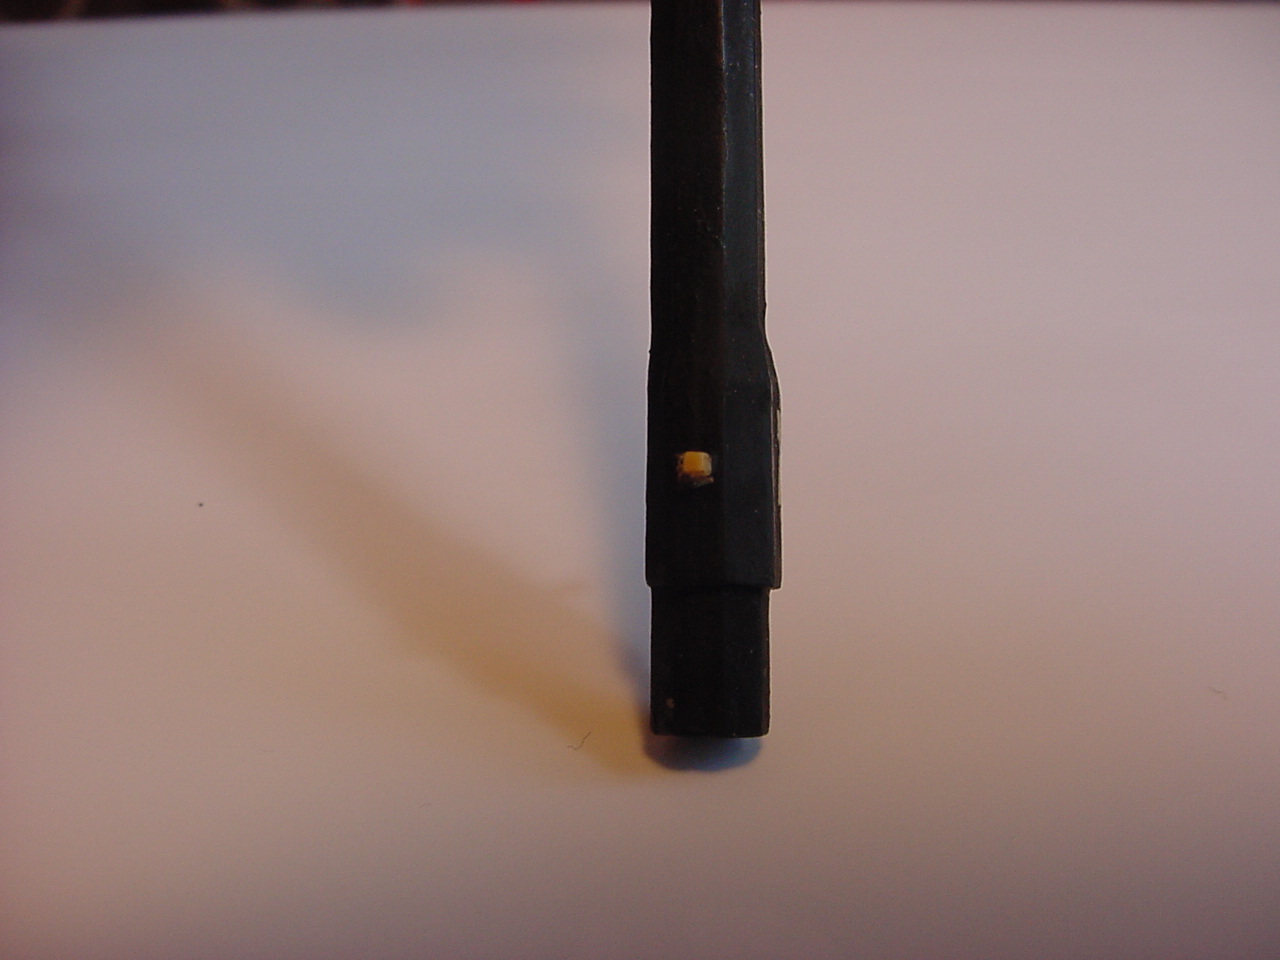
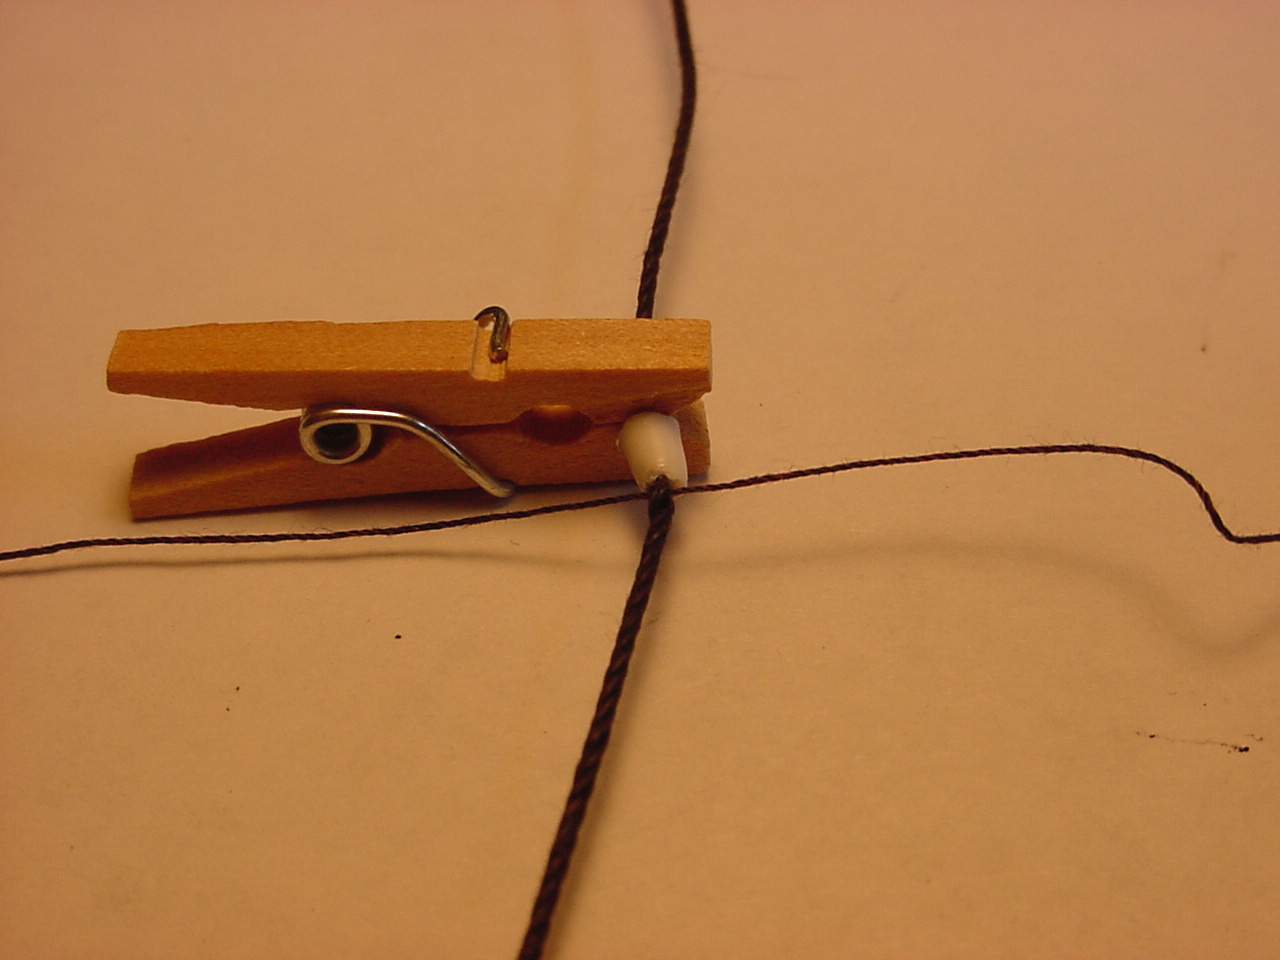
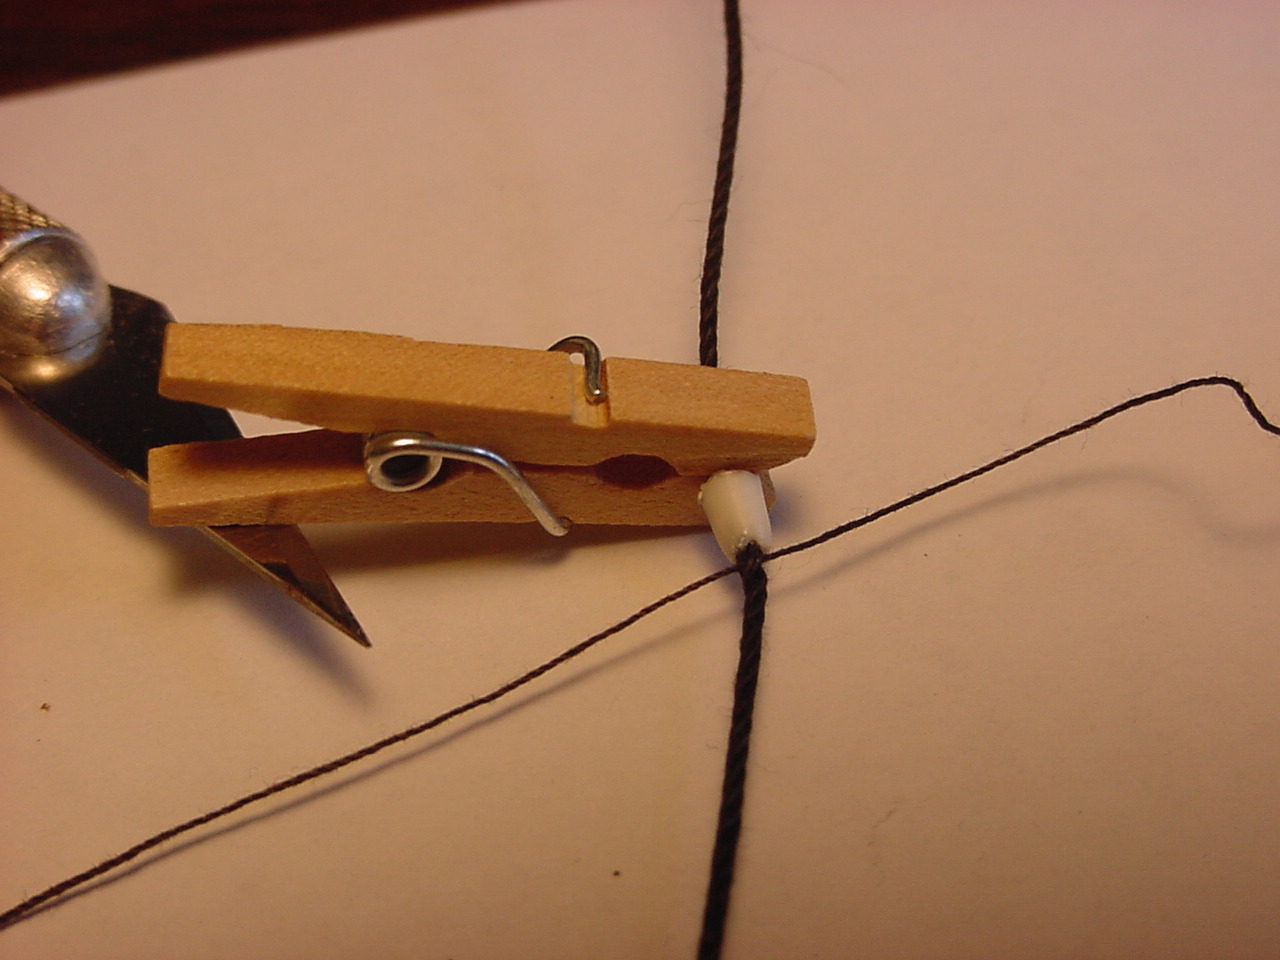
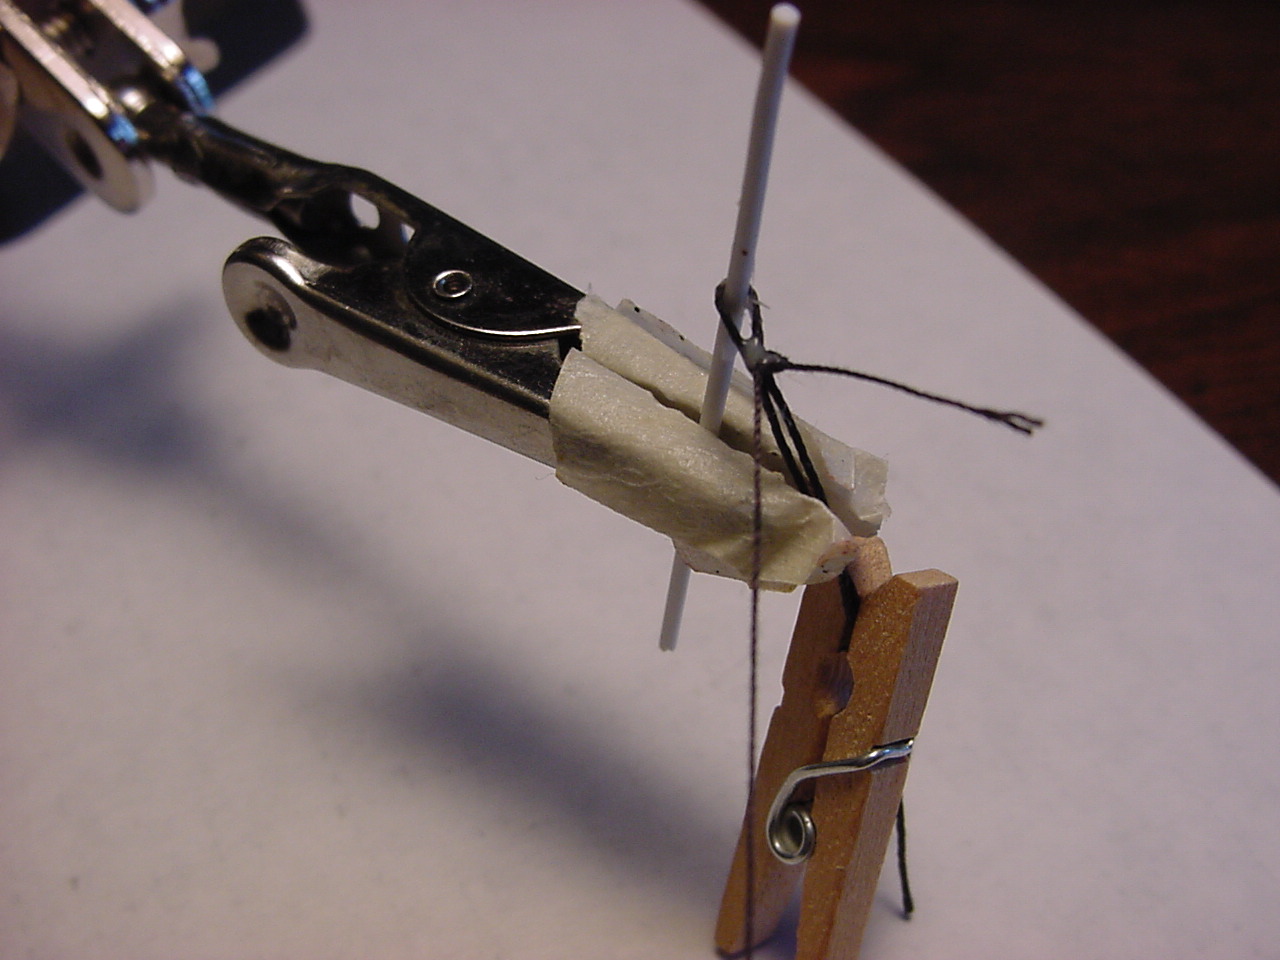
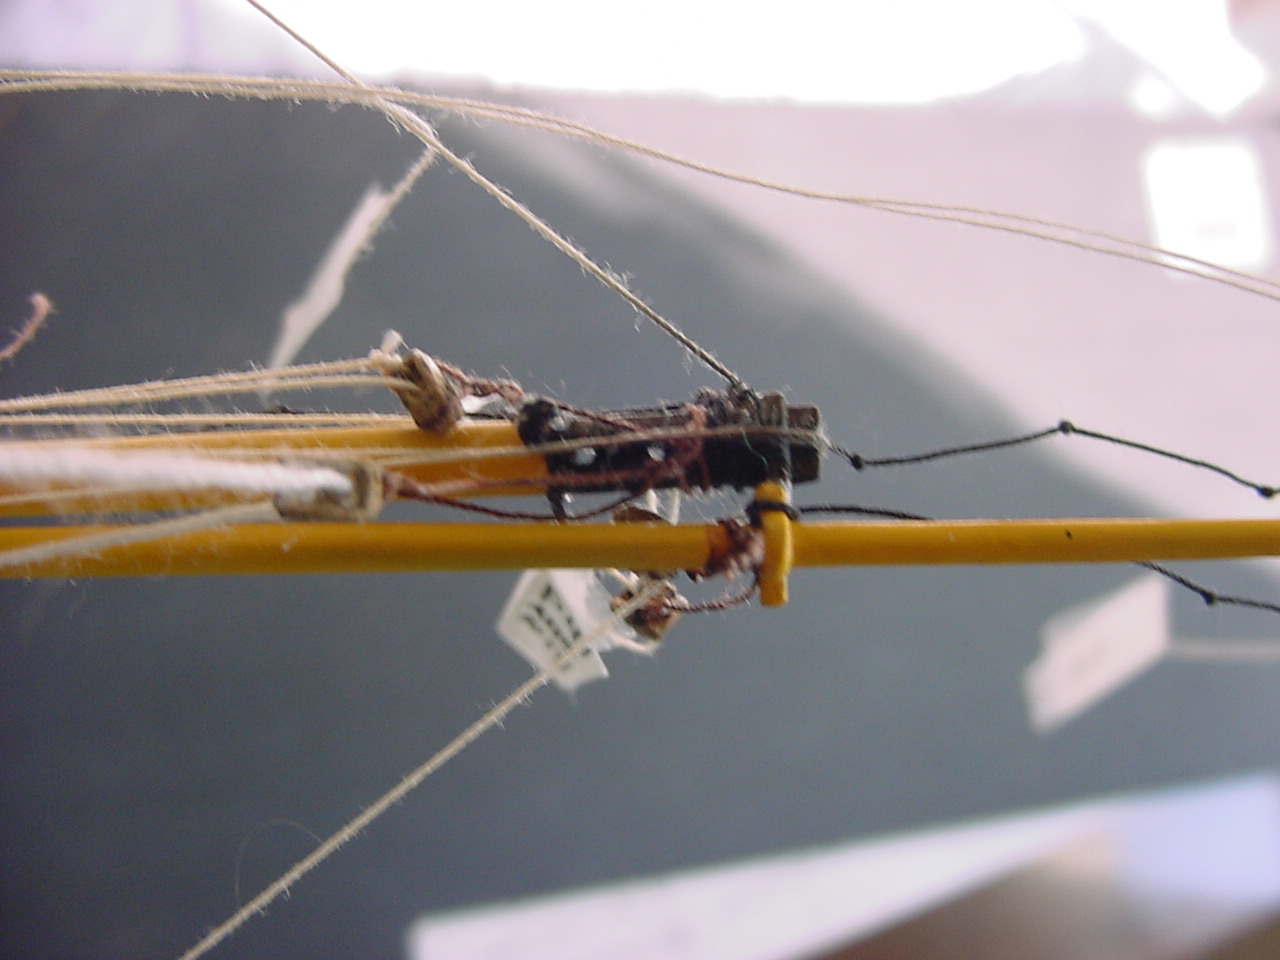
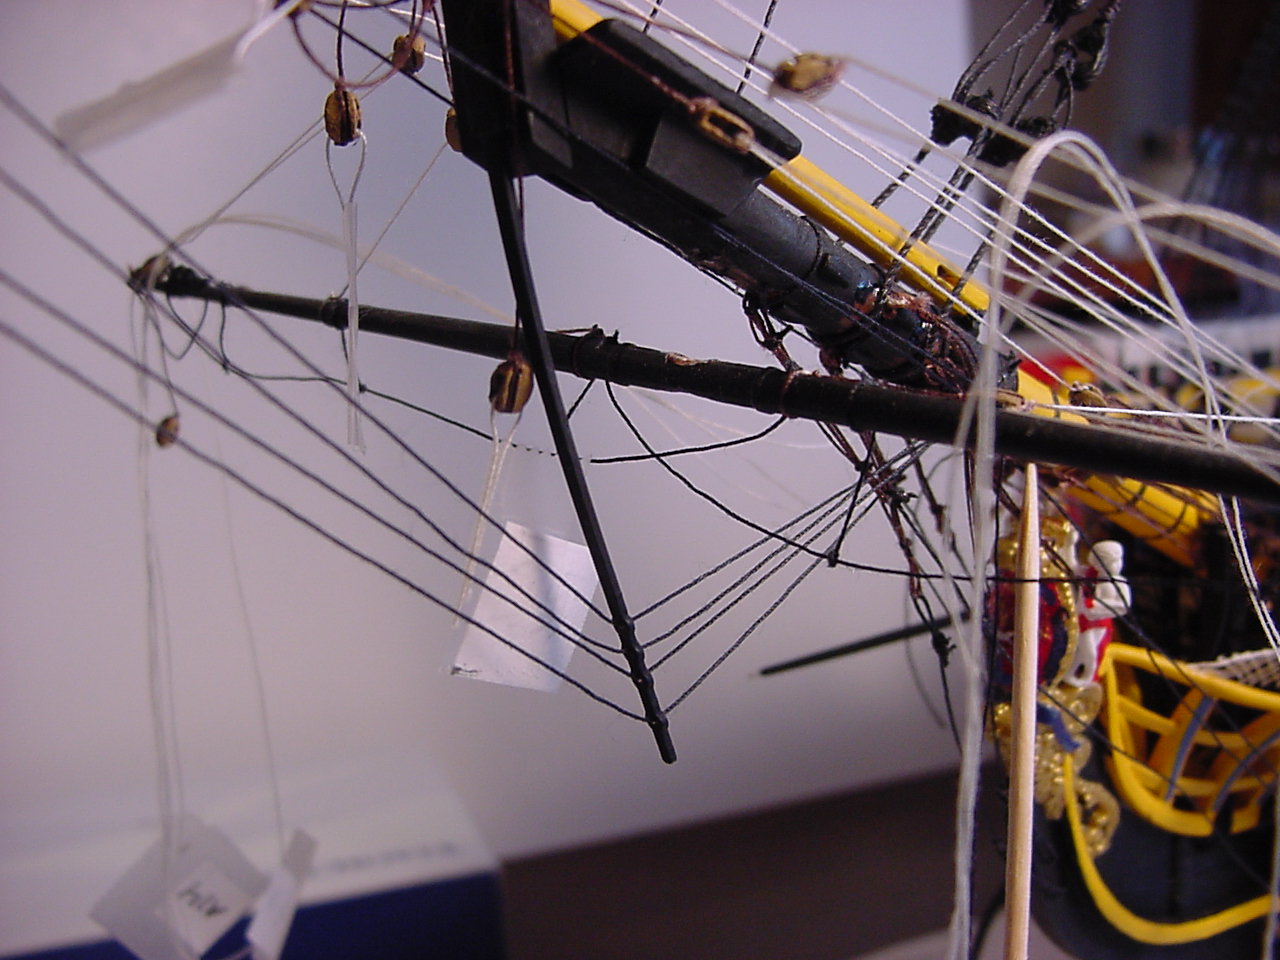
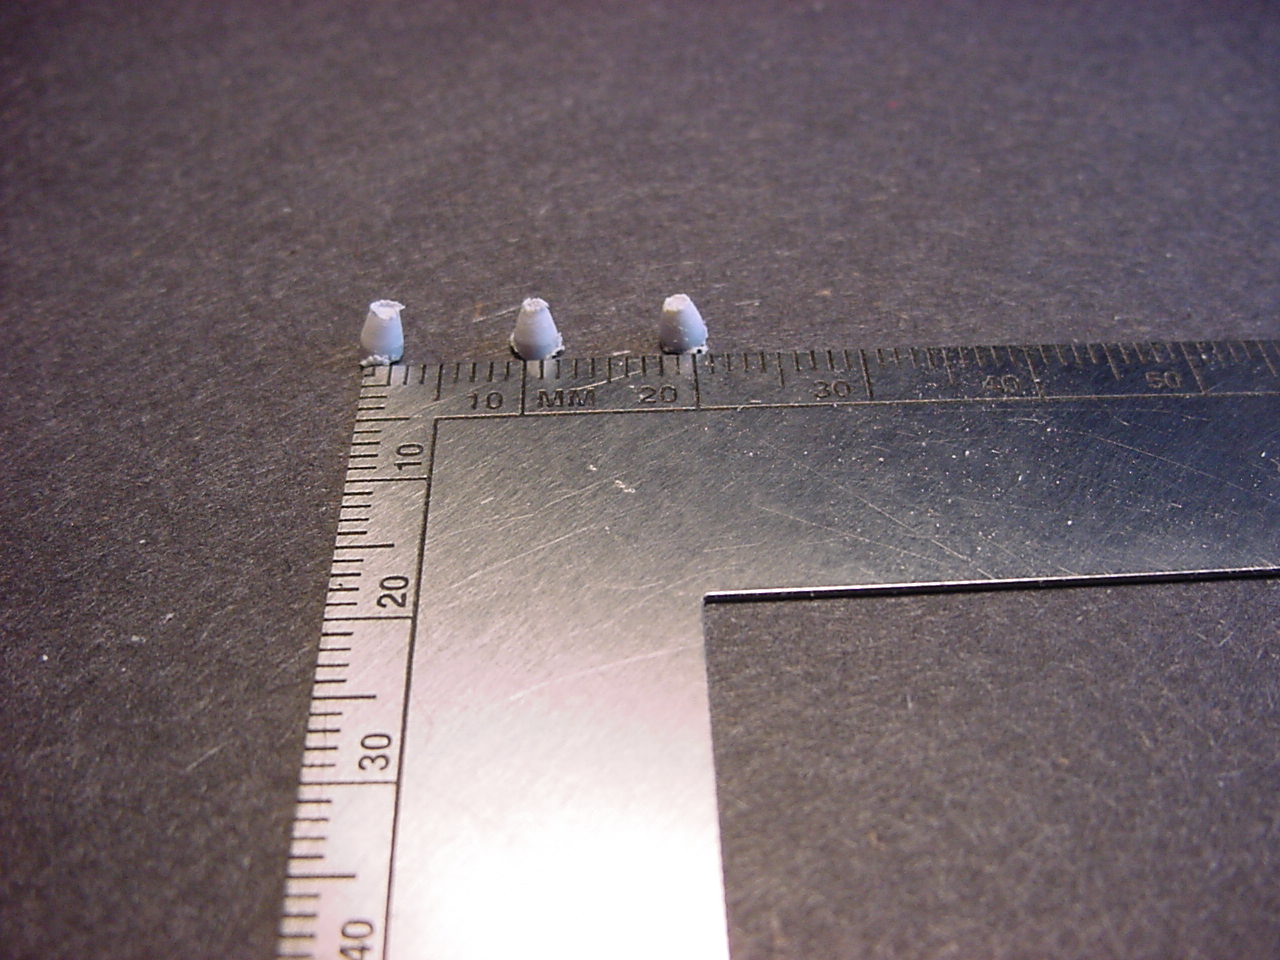
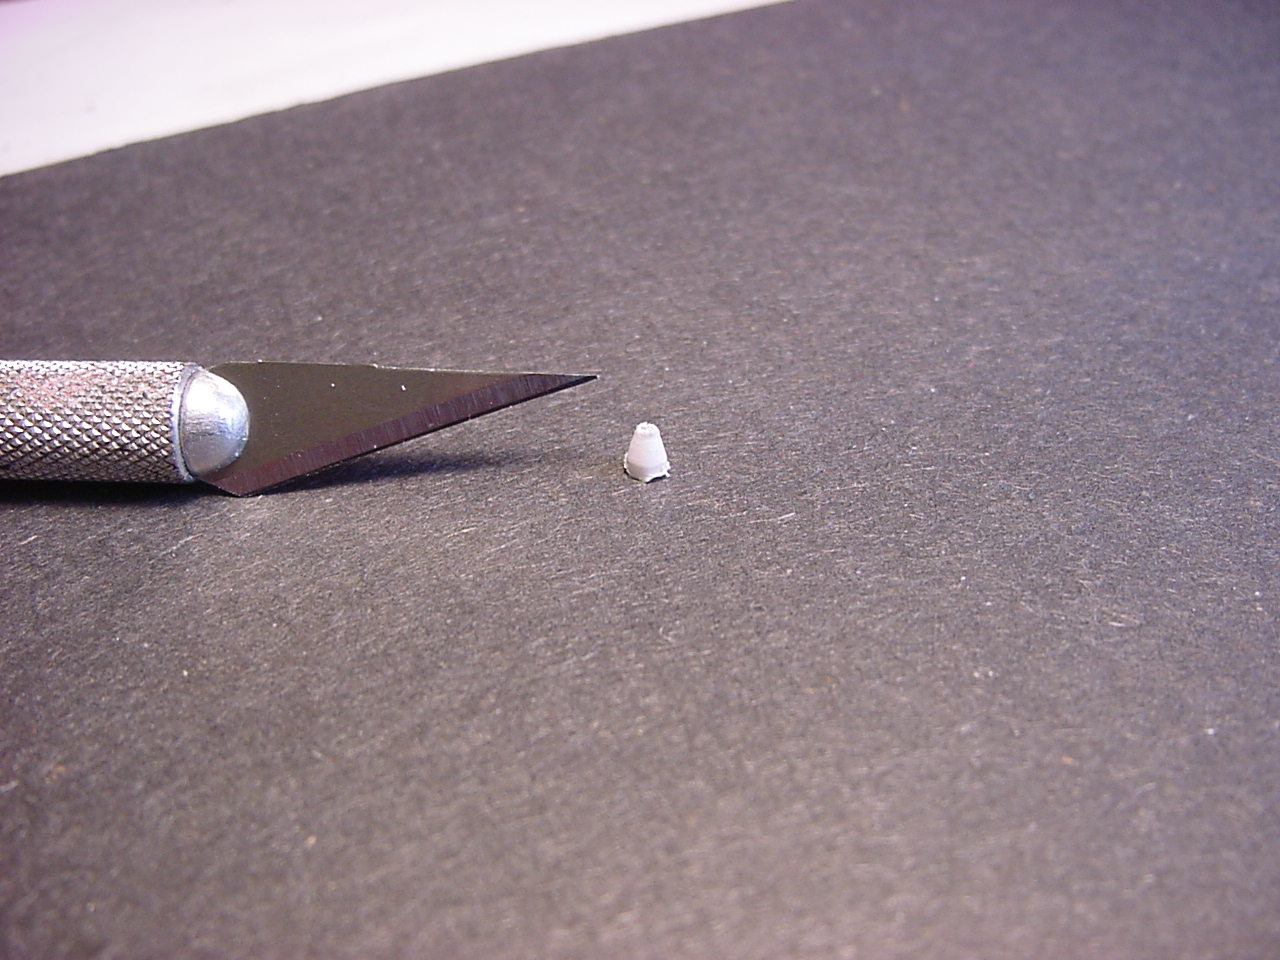
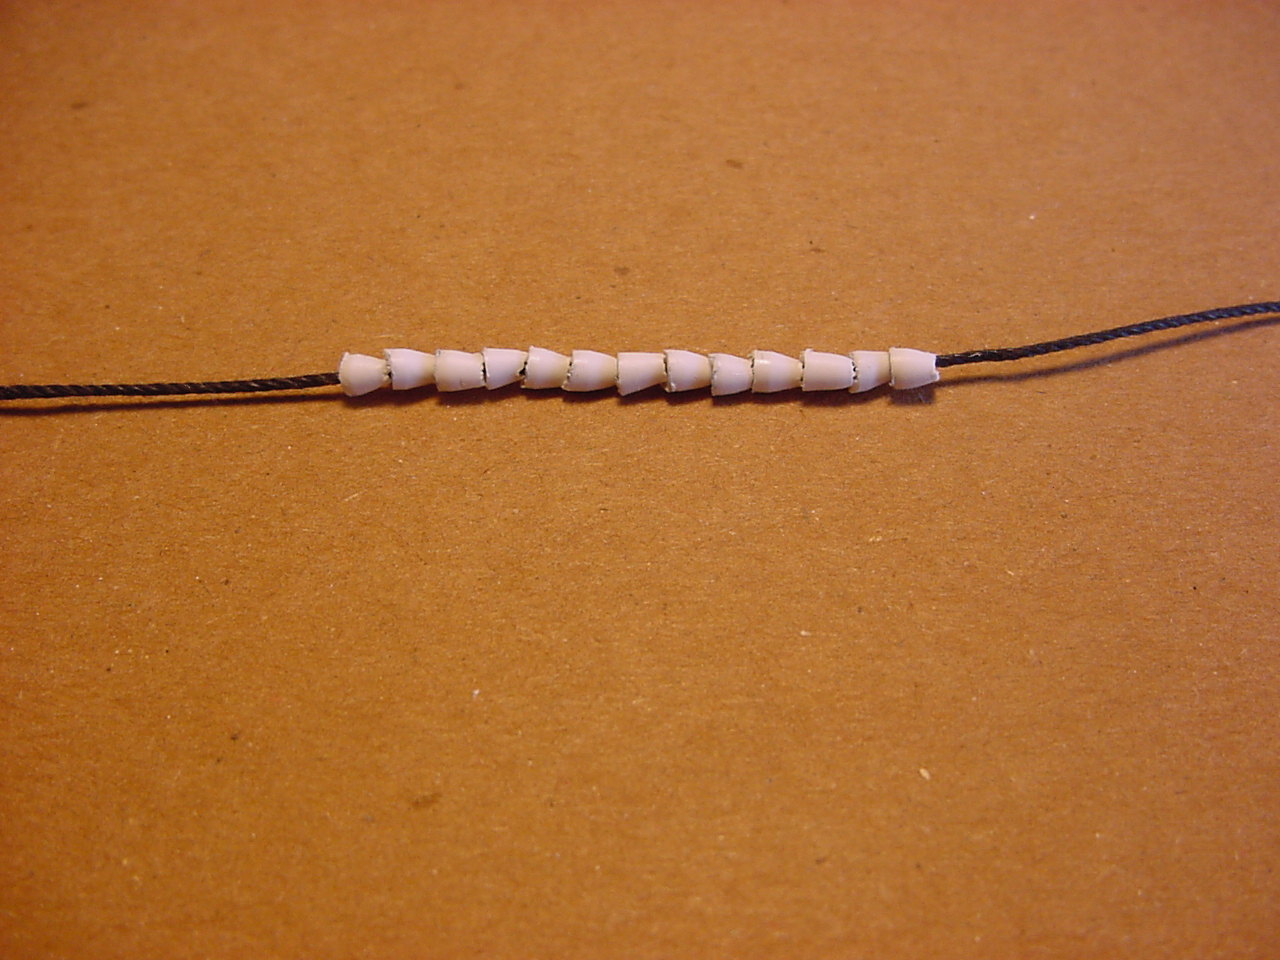
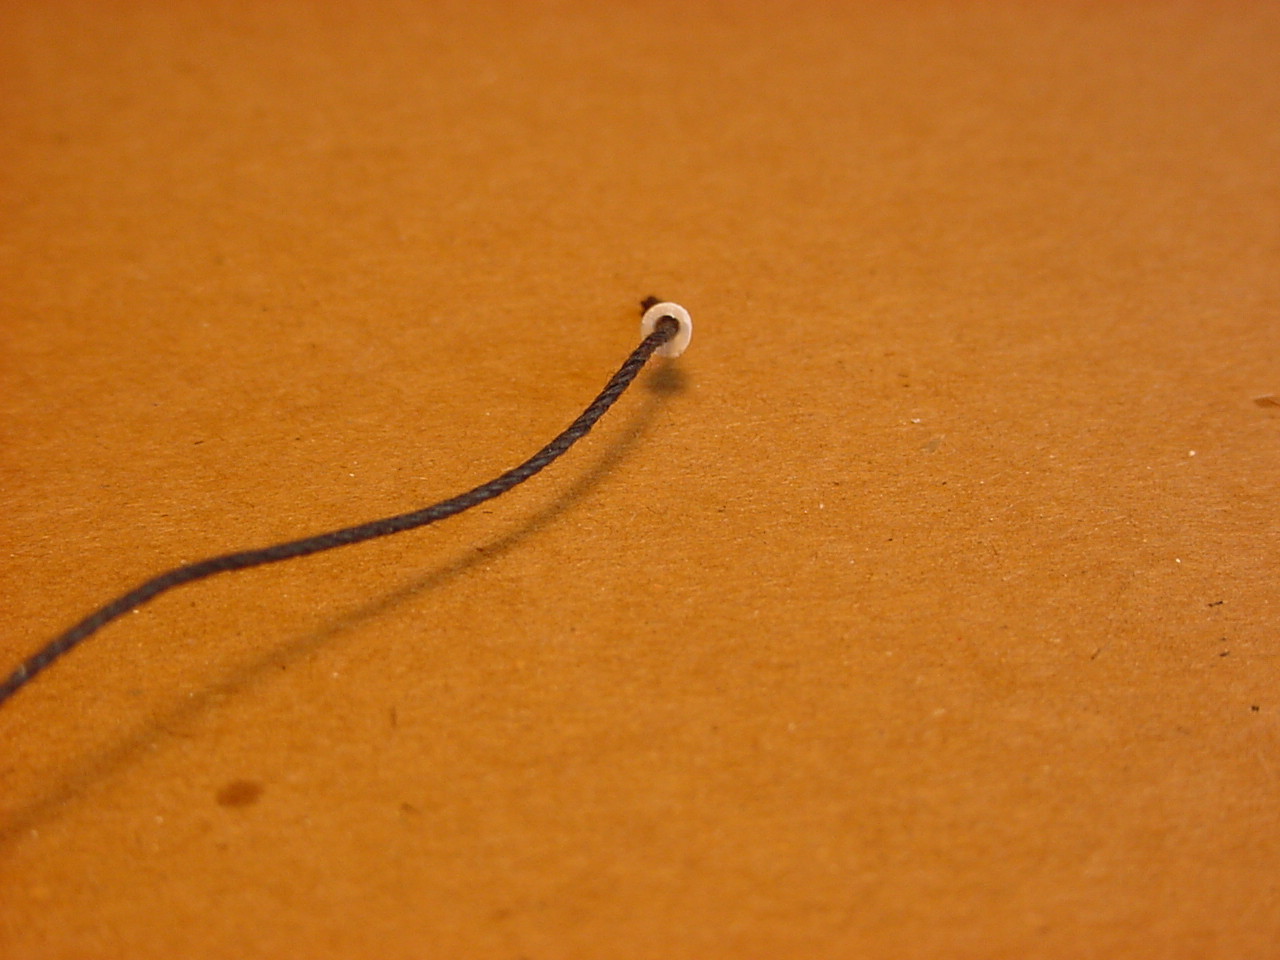
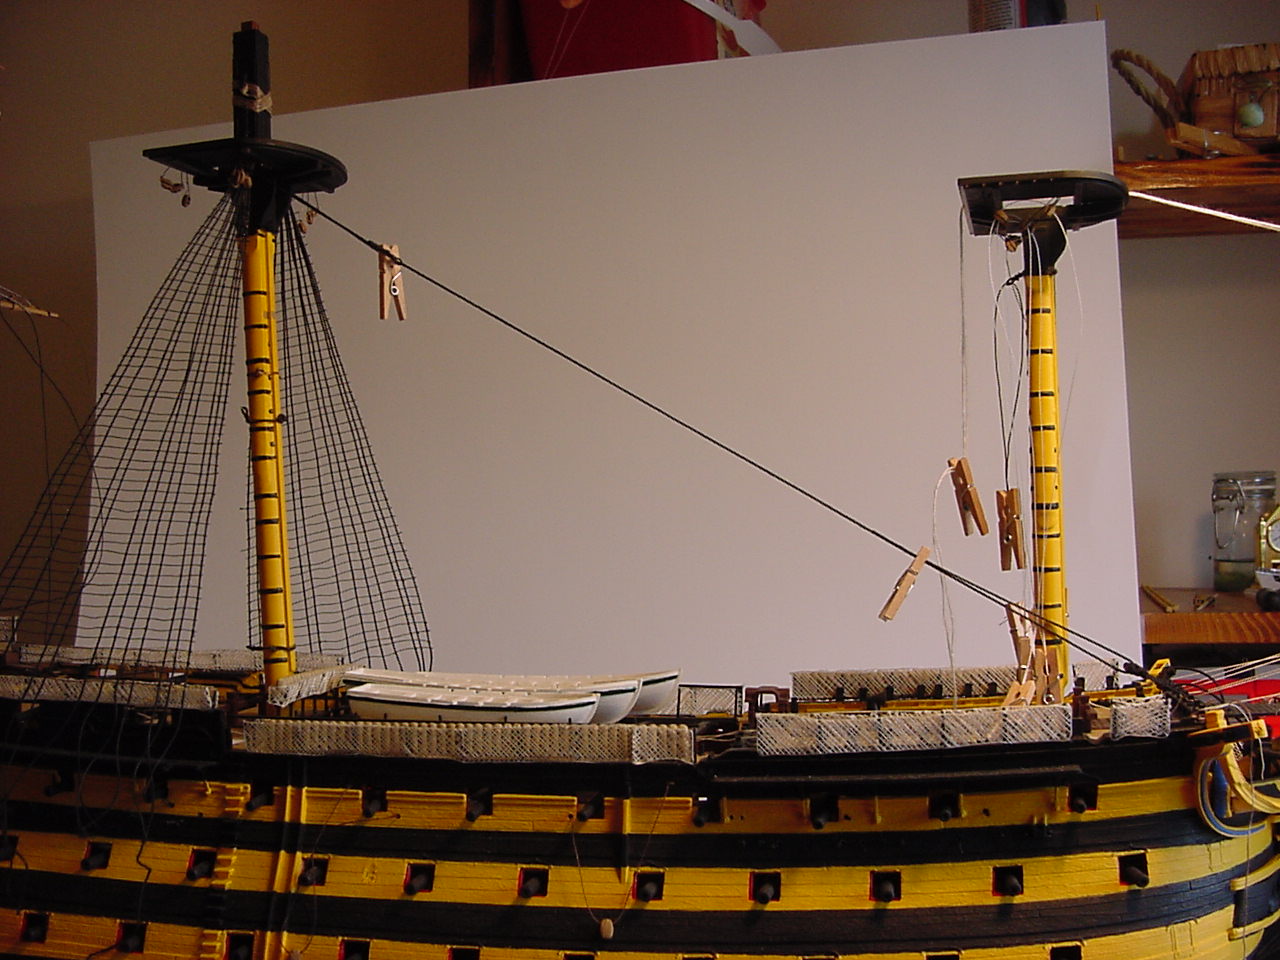
About the mainstay: In Longridge's book, he writes about how there is a thing called a "mouse" that holds the eye of the stay in place, up near the mast top. To make these mice, I took some 2.5 mm plastic rod, chucked it into my drill press, and used a file to turn it into a conical shape. Each mouse is about 2.5 mm long, and I tried to taper it down to 1.5 mm. Once that was done, and the part cut off the rod, I used a #61 (0.039 inch diameter) drill bit to make the initial hole, then used a knife blade to ream out the rest of the hole, so that the 1 mm thread would slide through the mouse. 1 mm is actually like 0.04 inches, so that's why the knife was used. (And even though, in scale, the mainstay is actually about 1.3 mm in diameter, the largest thread I have is 1 mm). Here's some pictures of the finished parts:


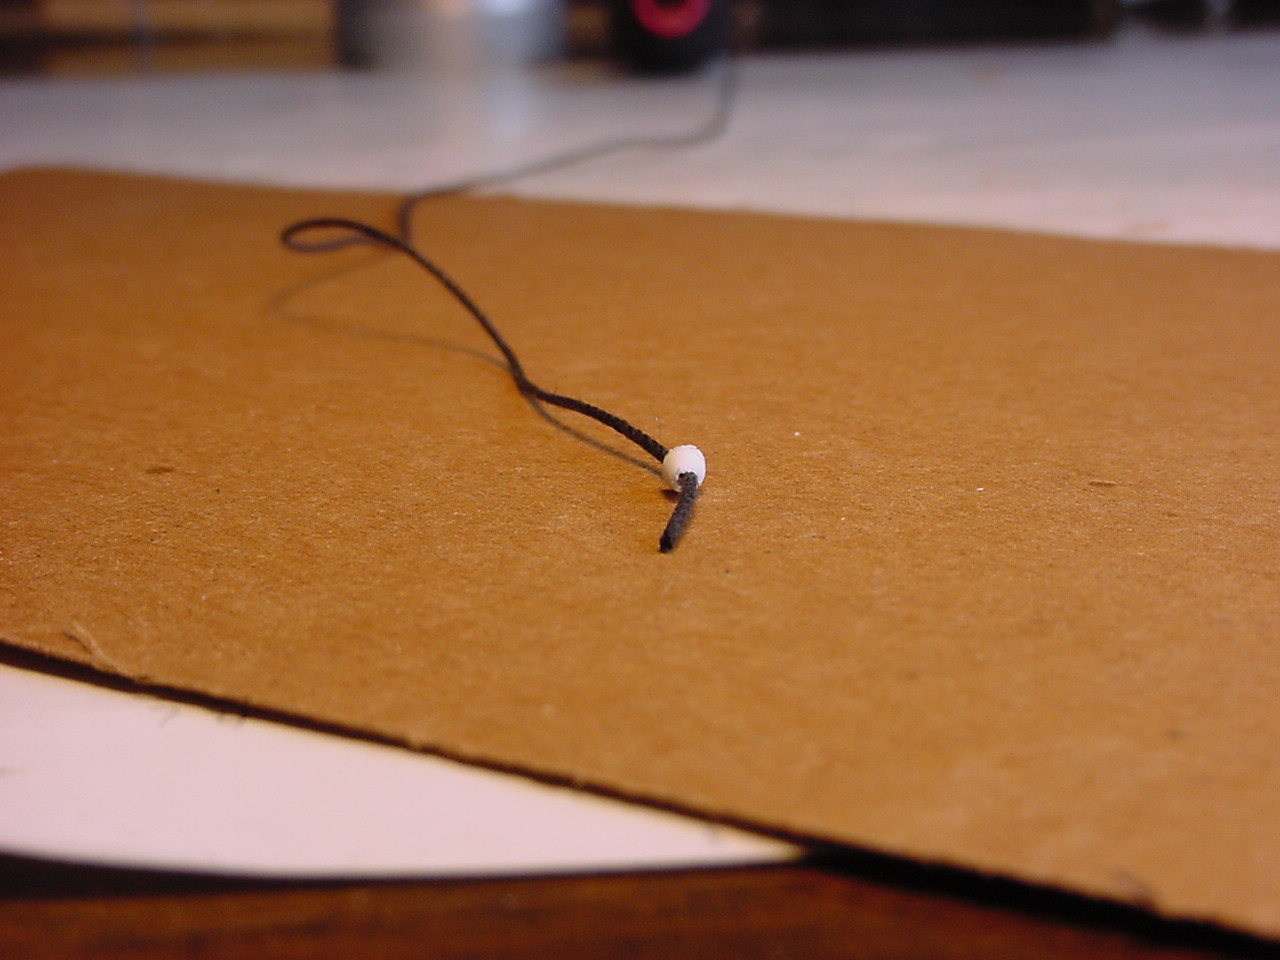
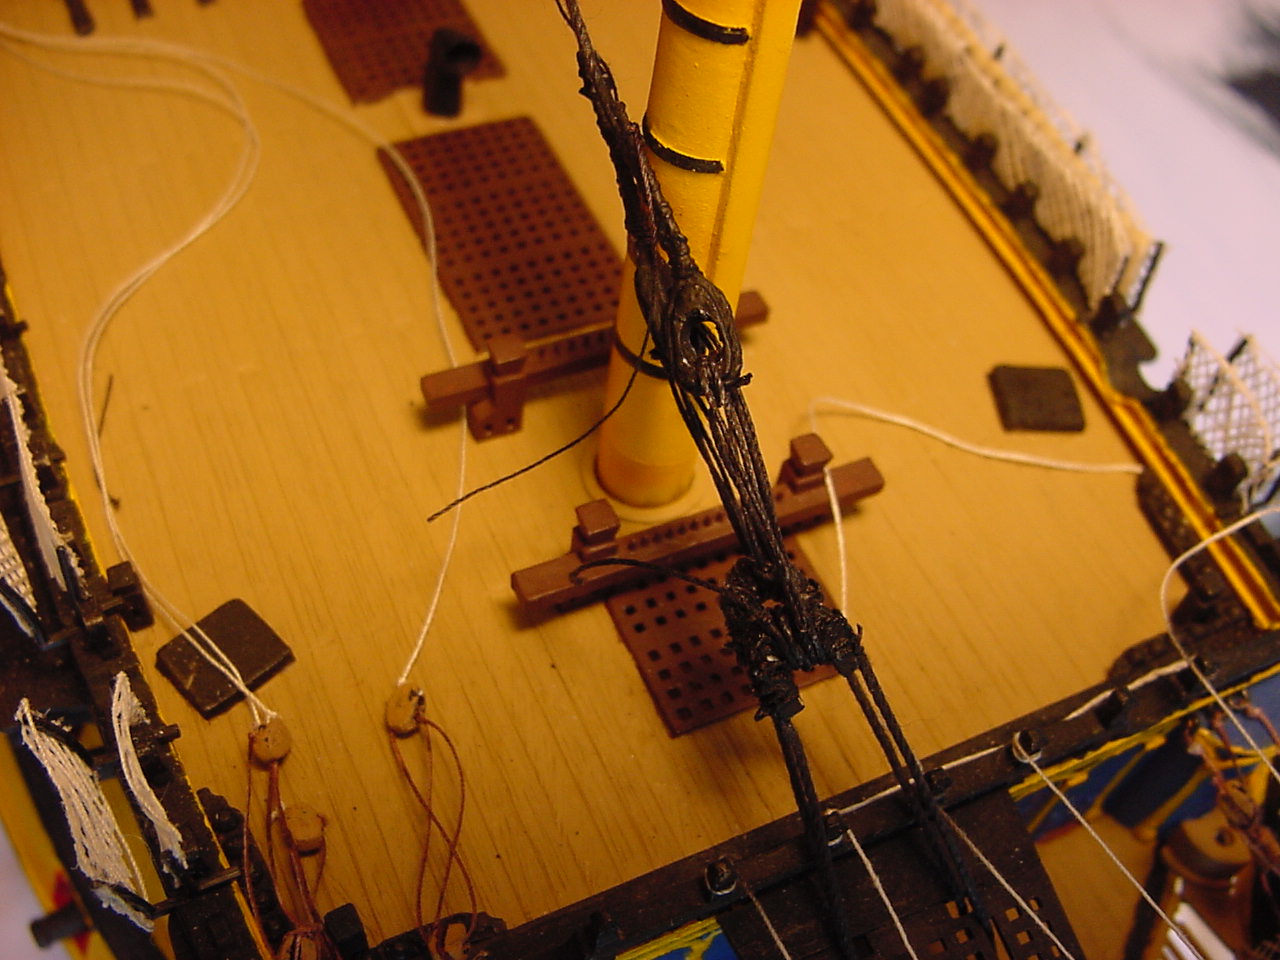
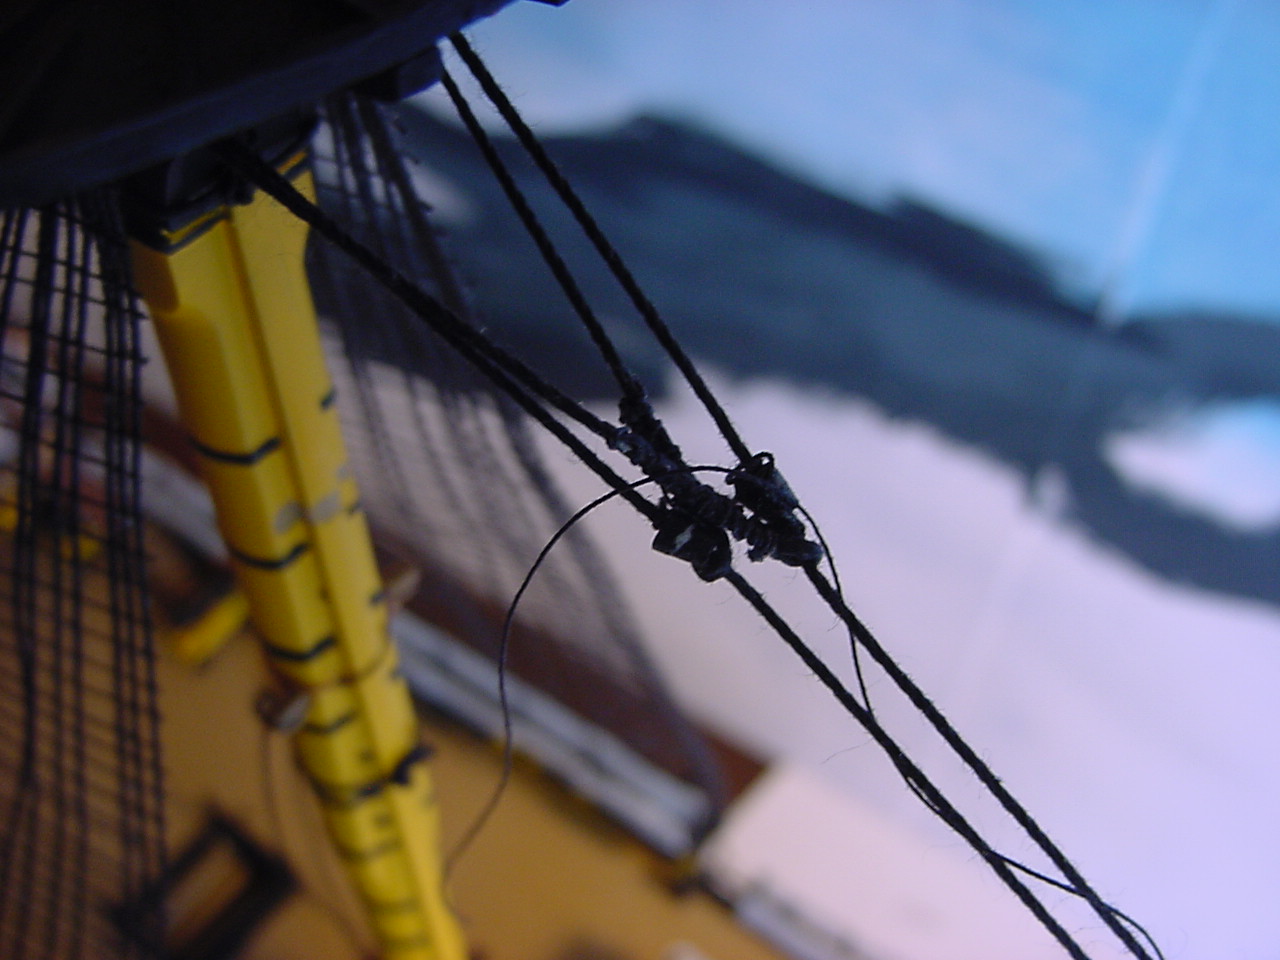
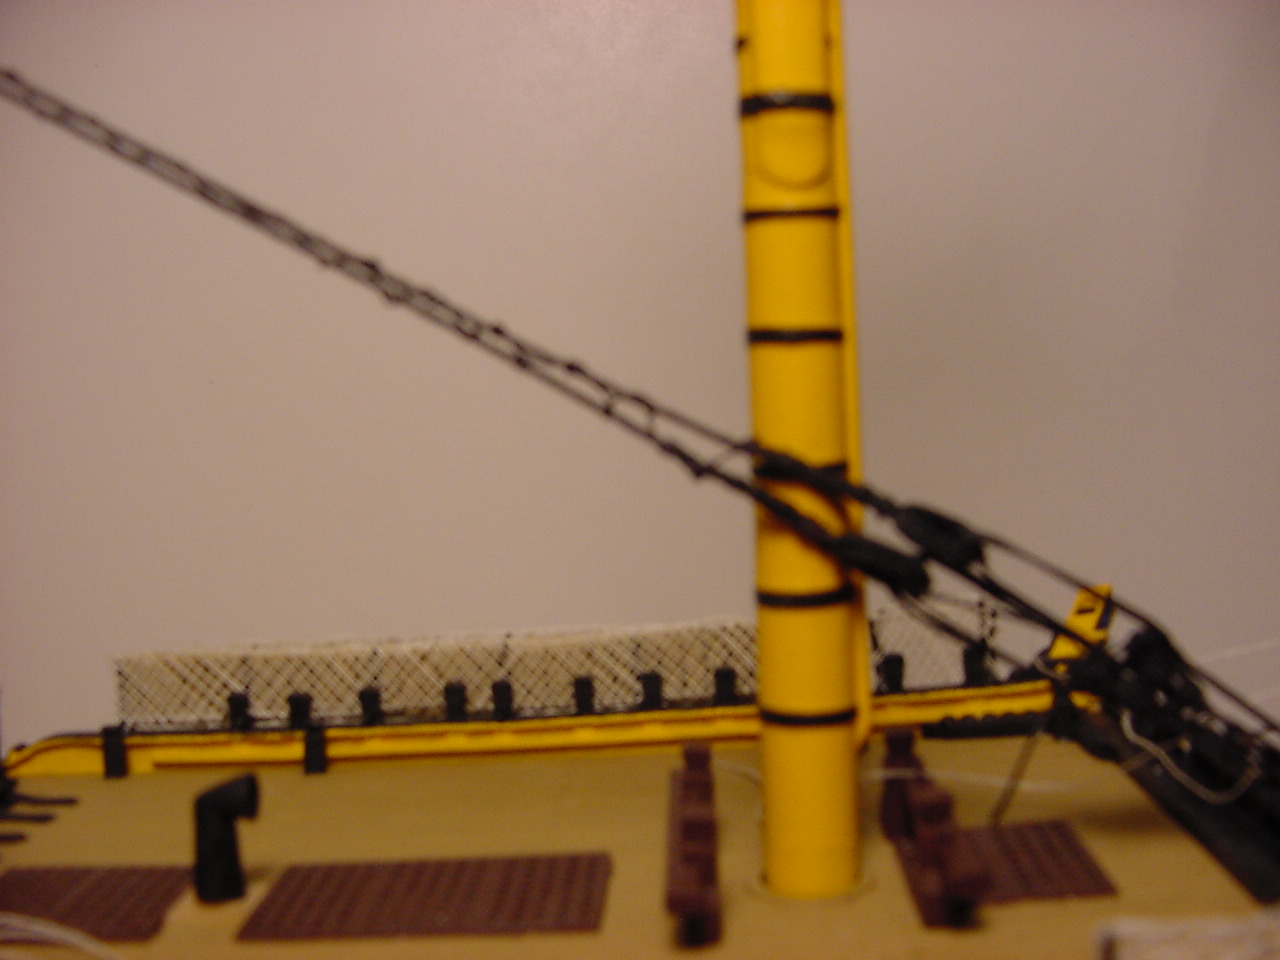
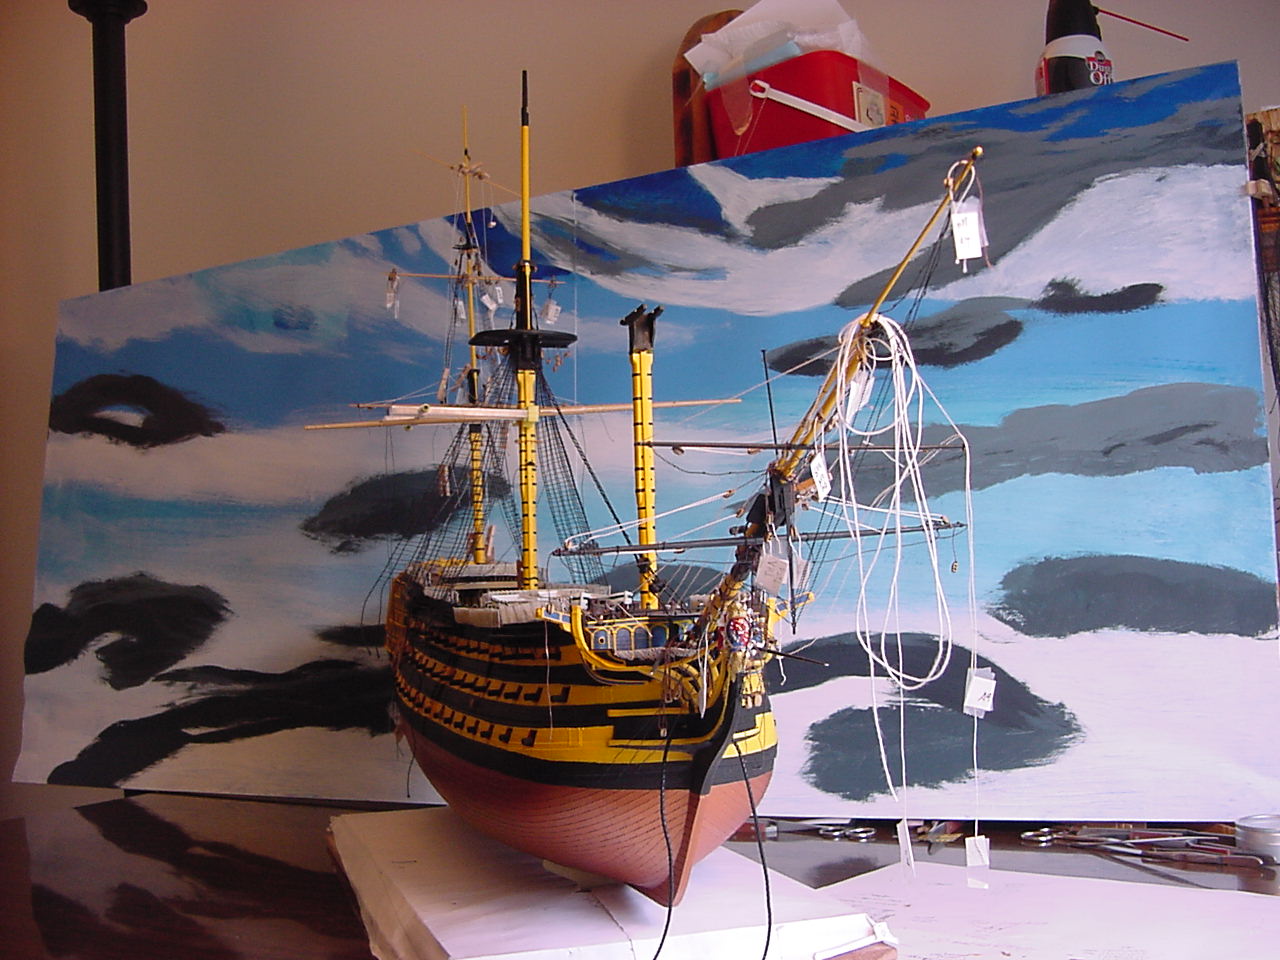
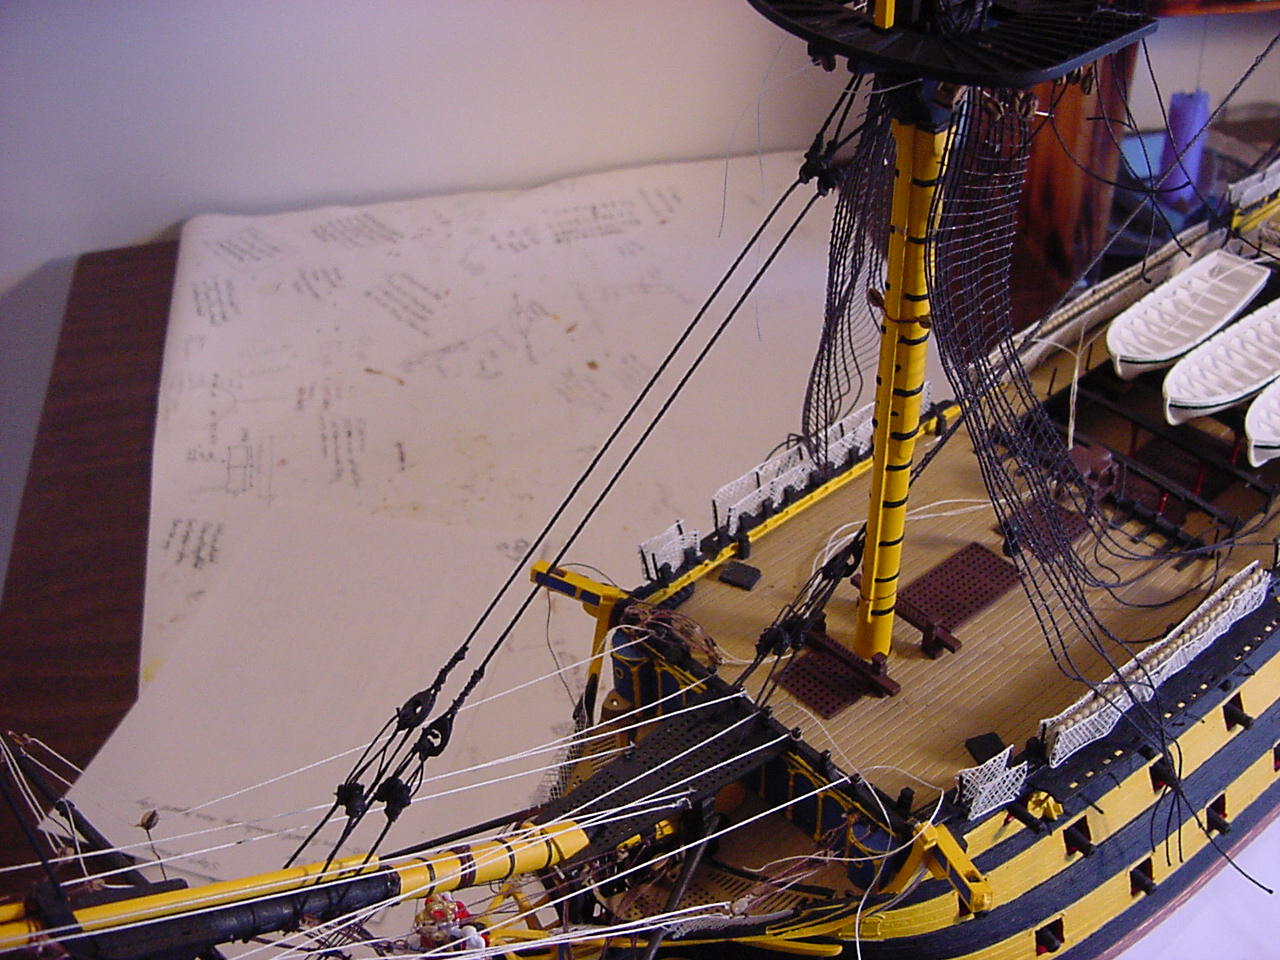
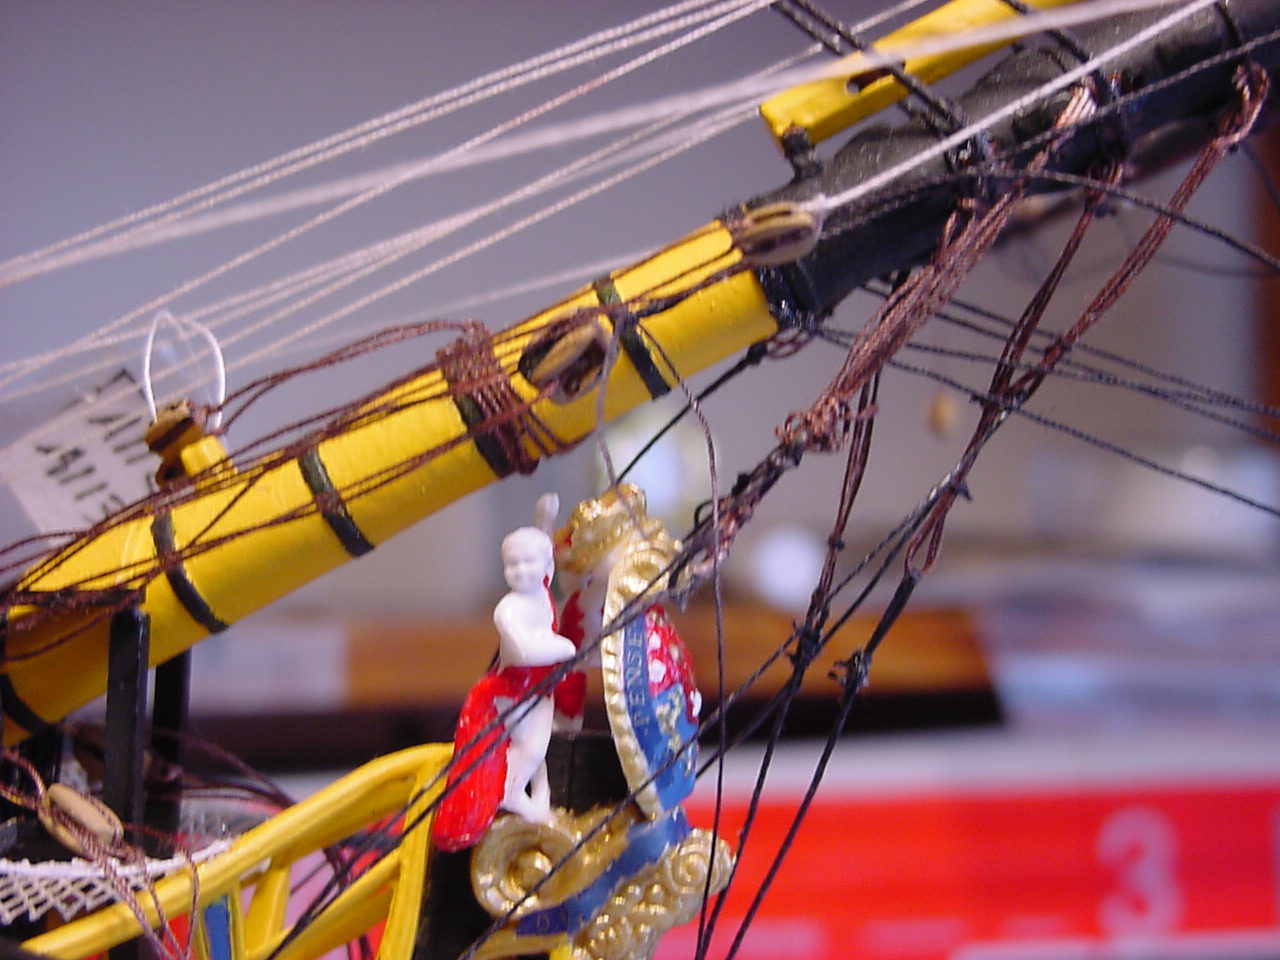
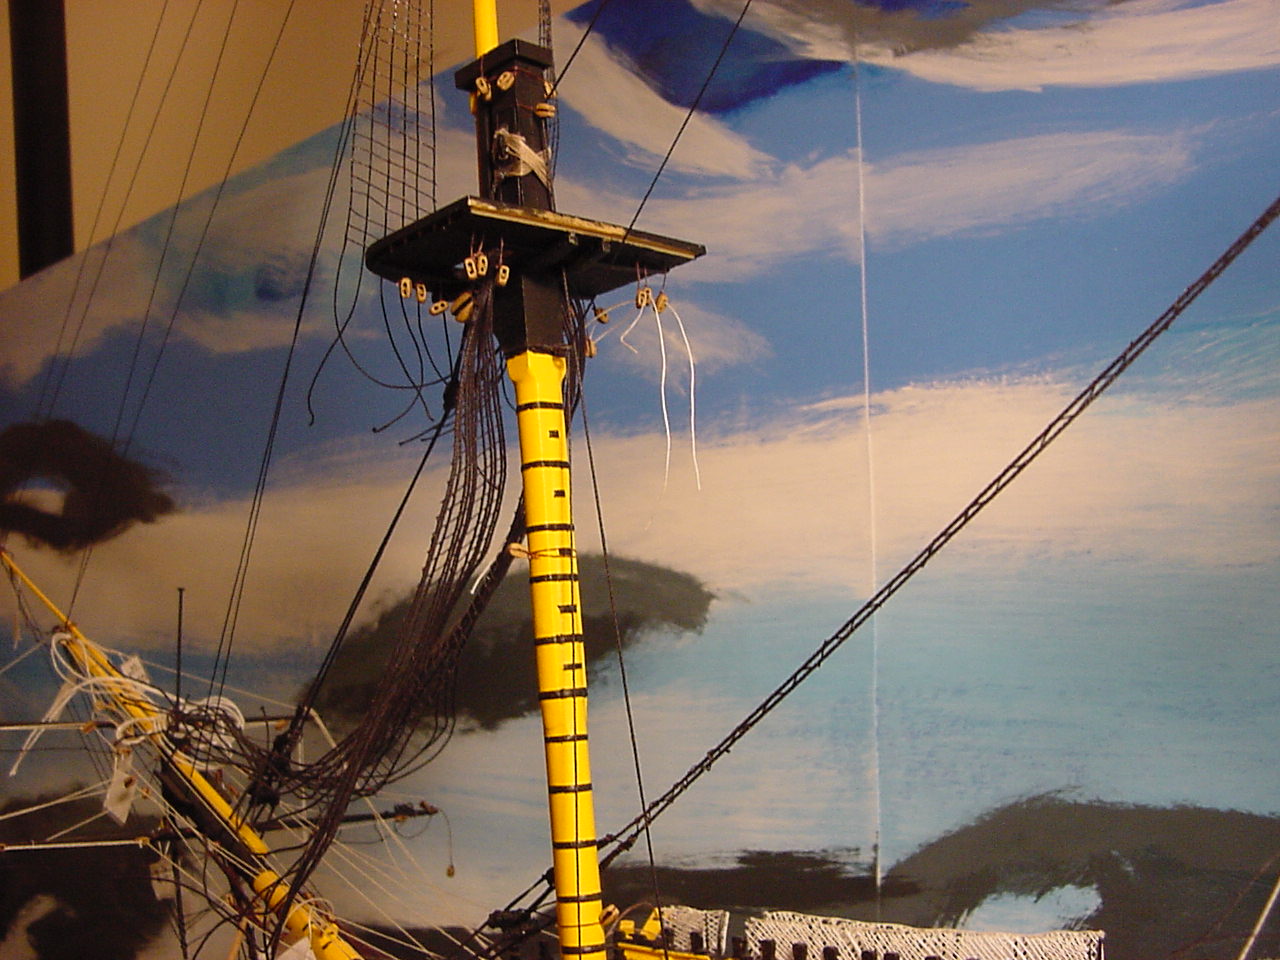
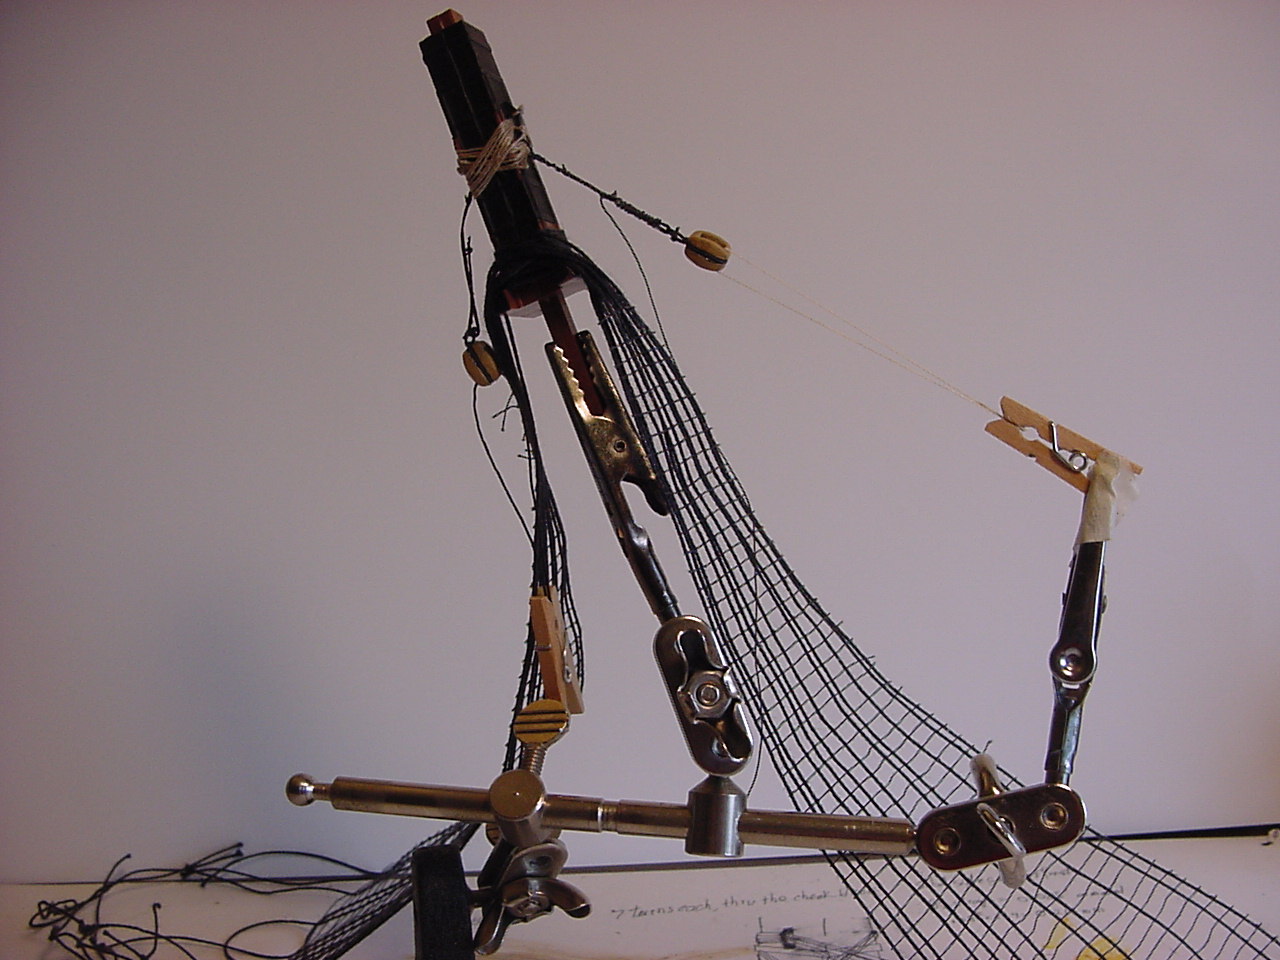
And here's a couple of view of the mouse tentatively in place:


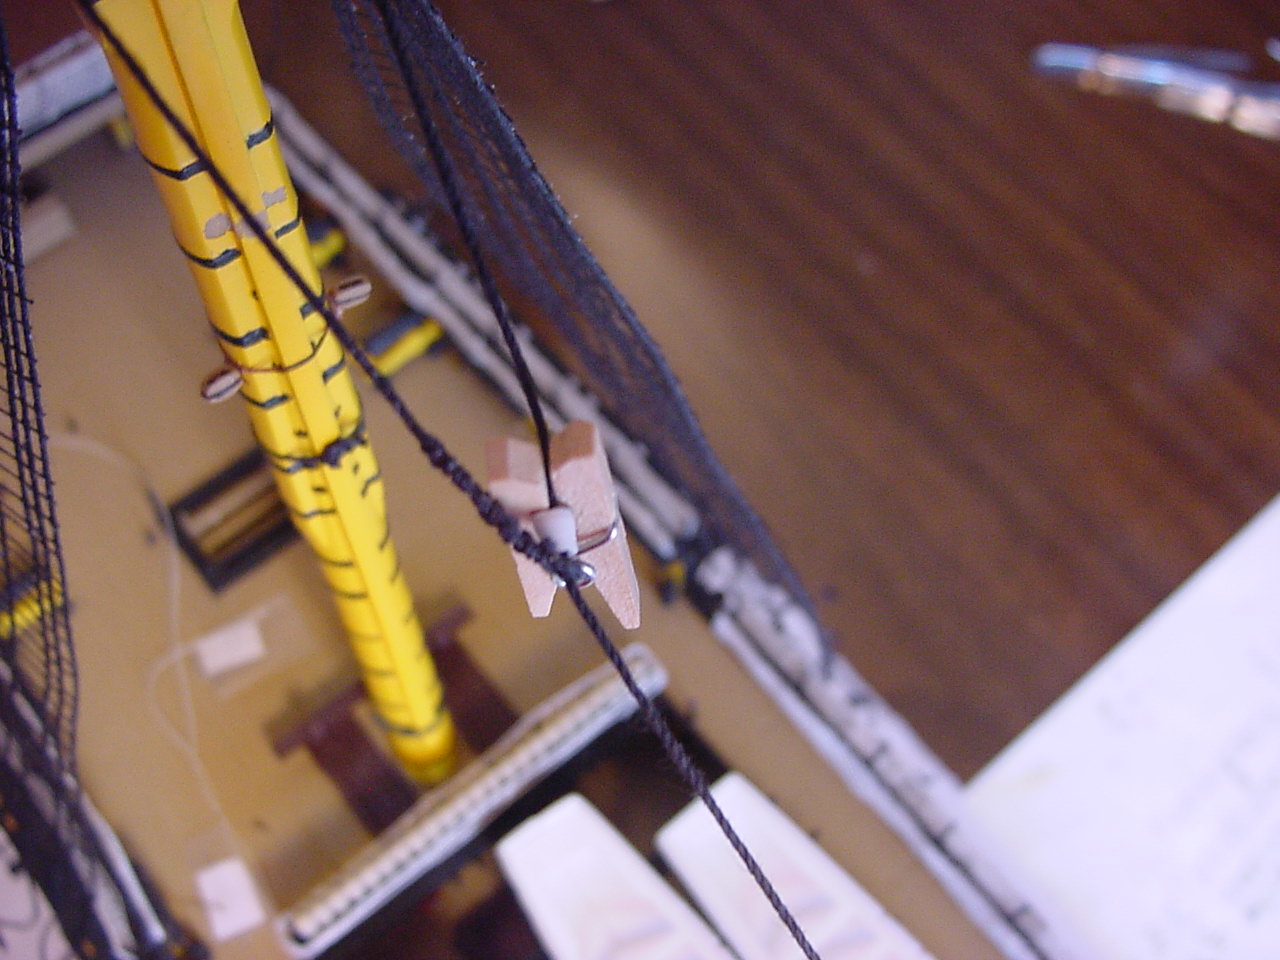
I had to be careful at this point, as I was so happy that my ideas were working out, I was already to gluing the mouse in place. But then I realized the mast isn't glued in place, nor is the top, so I had to reel myself in.

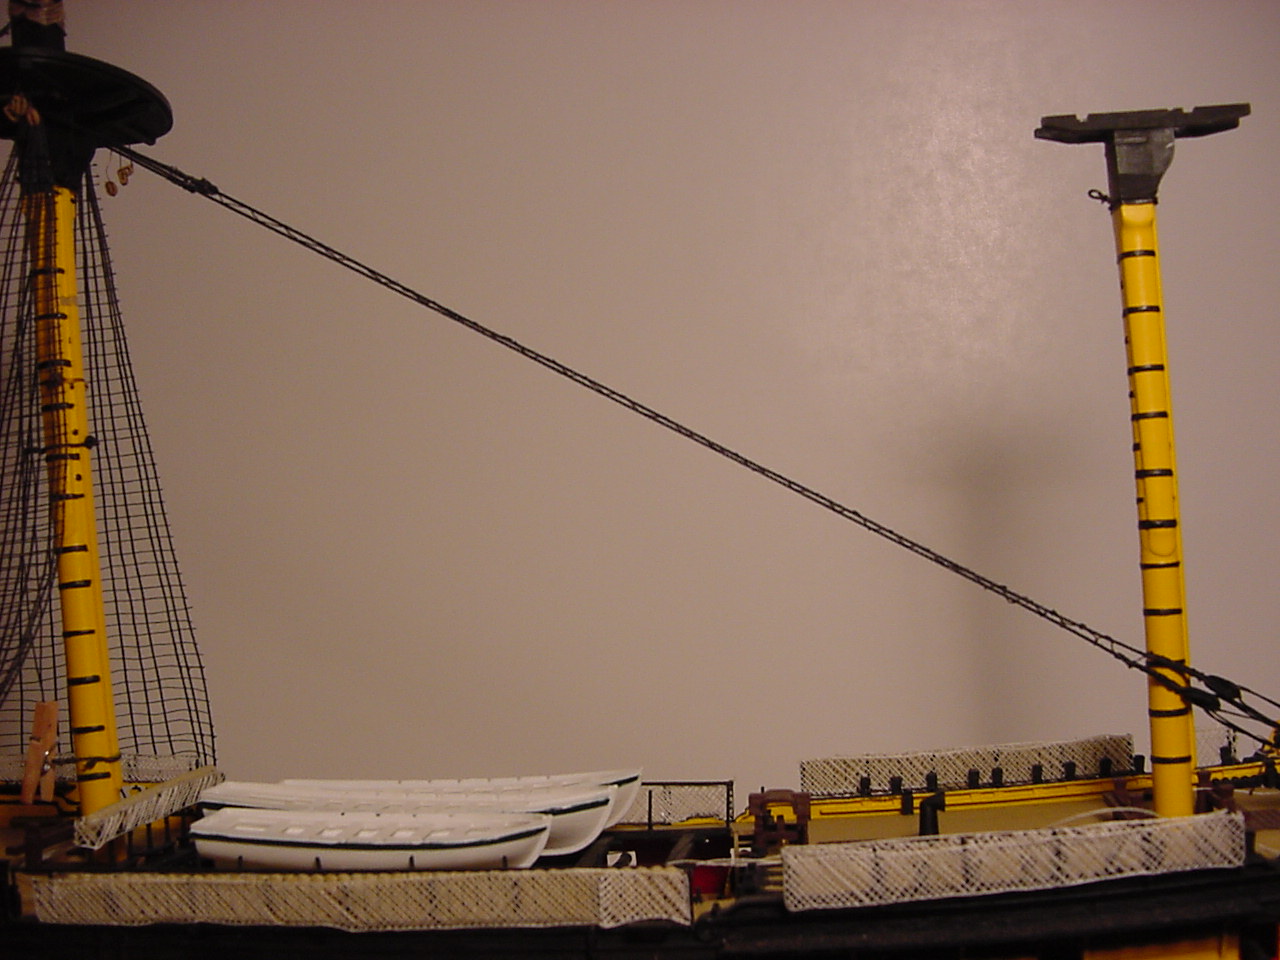
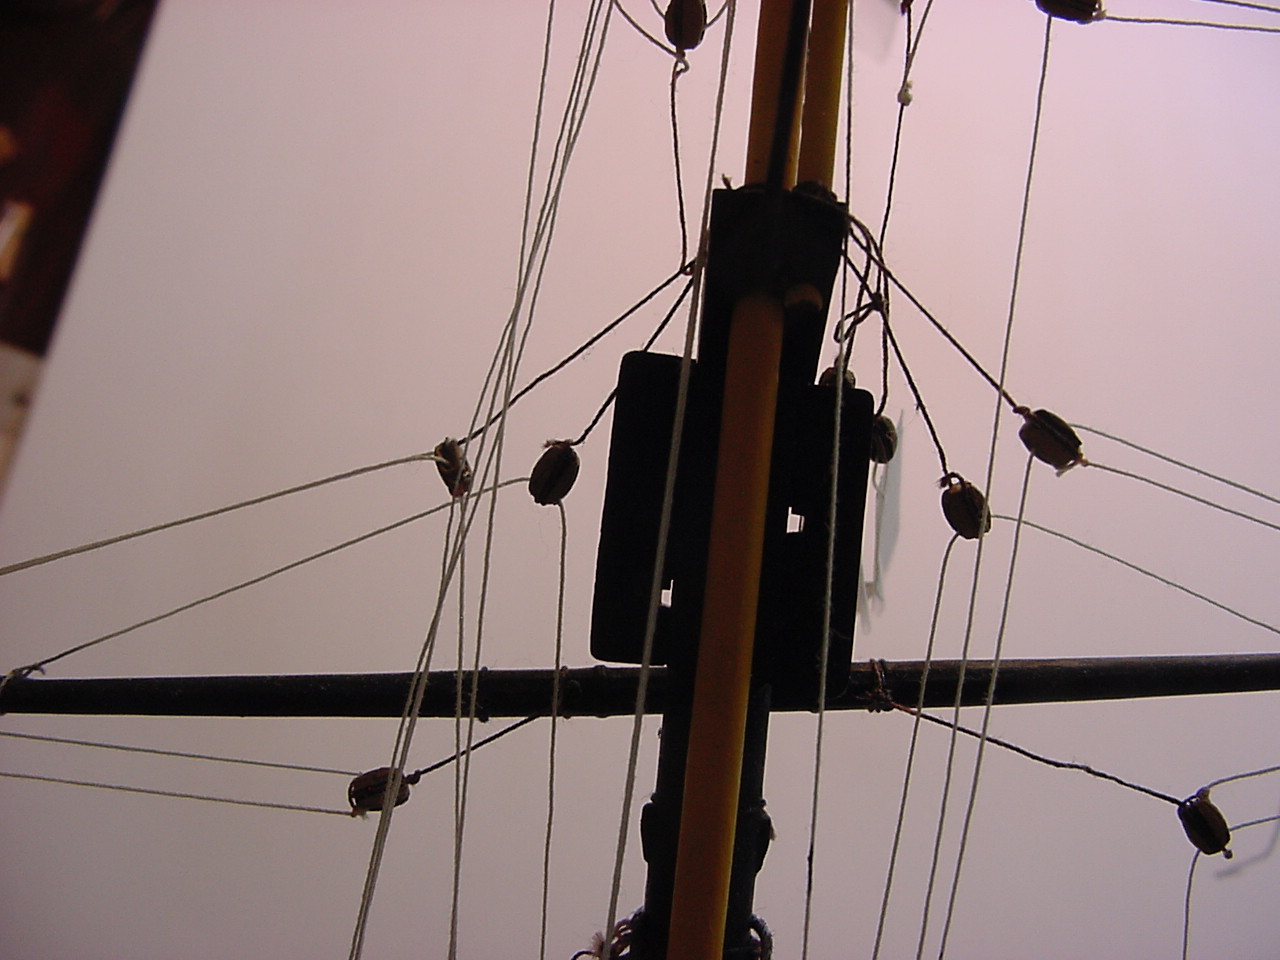
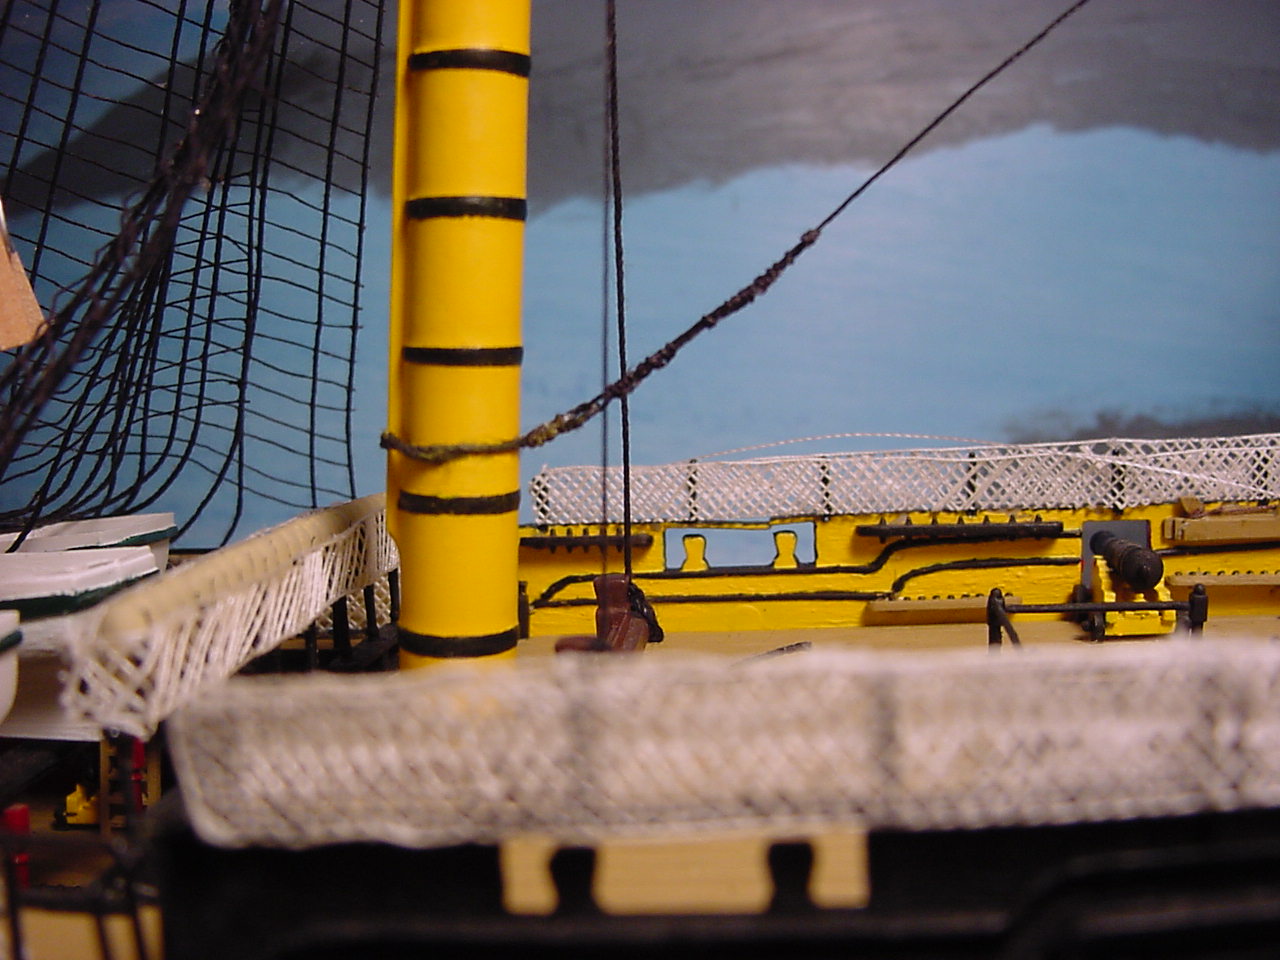
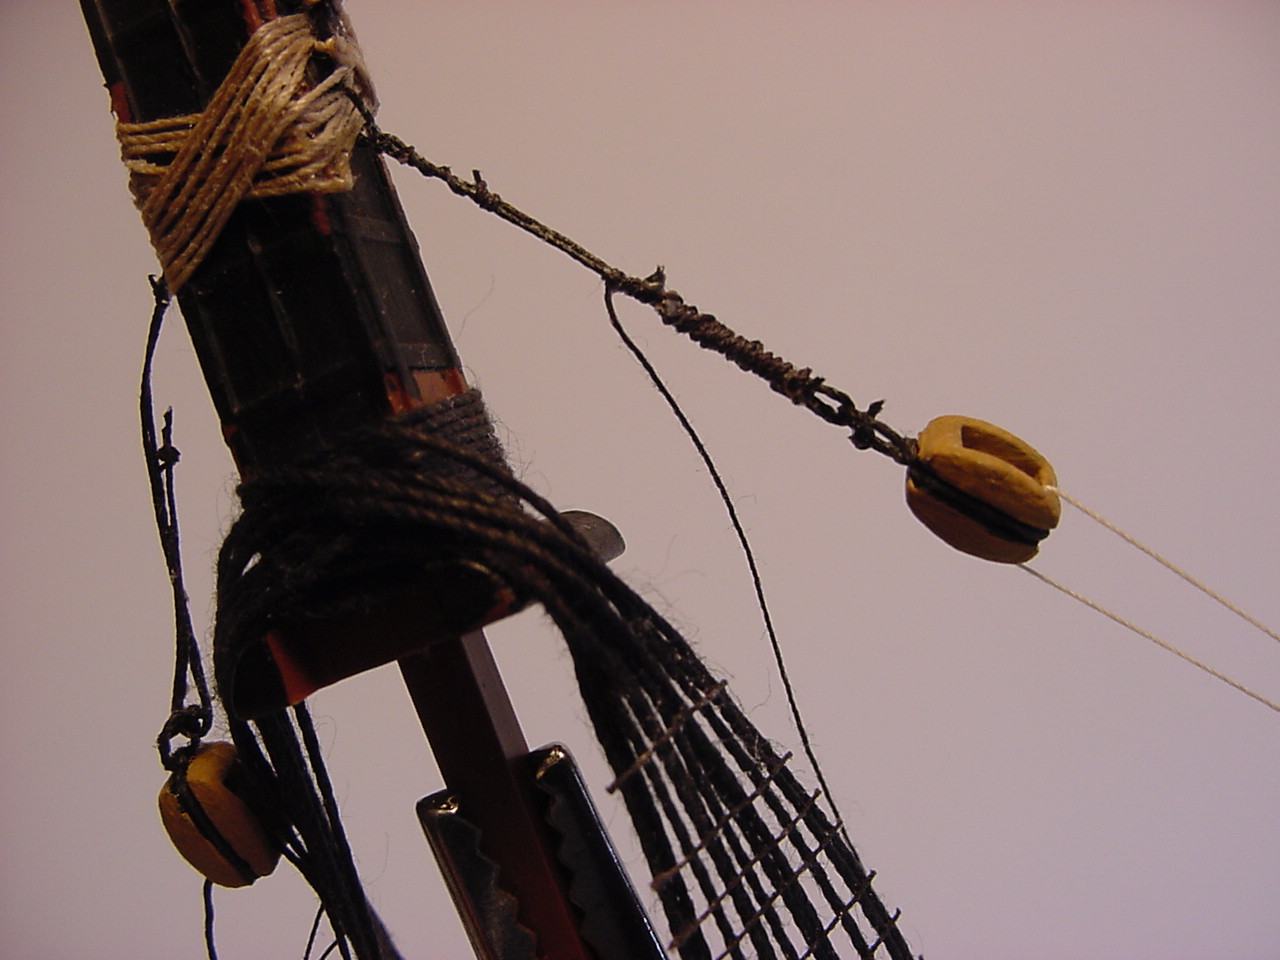
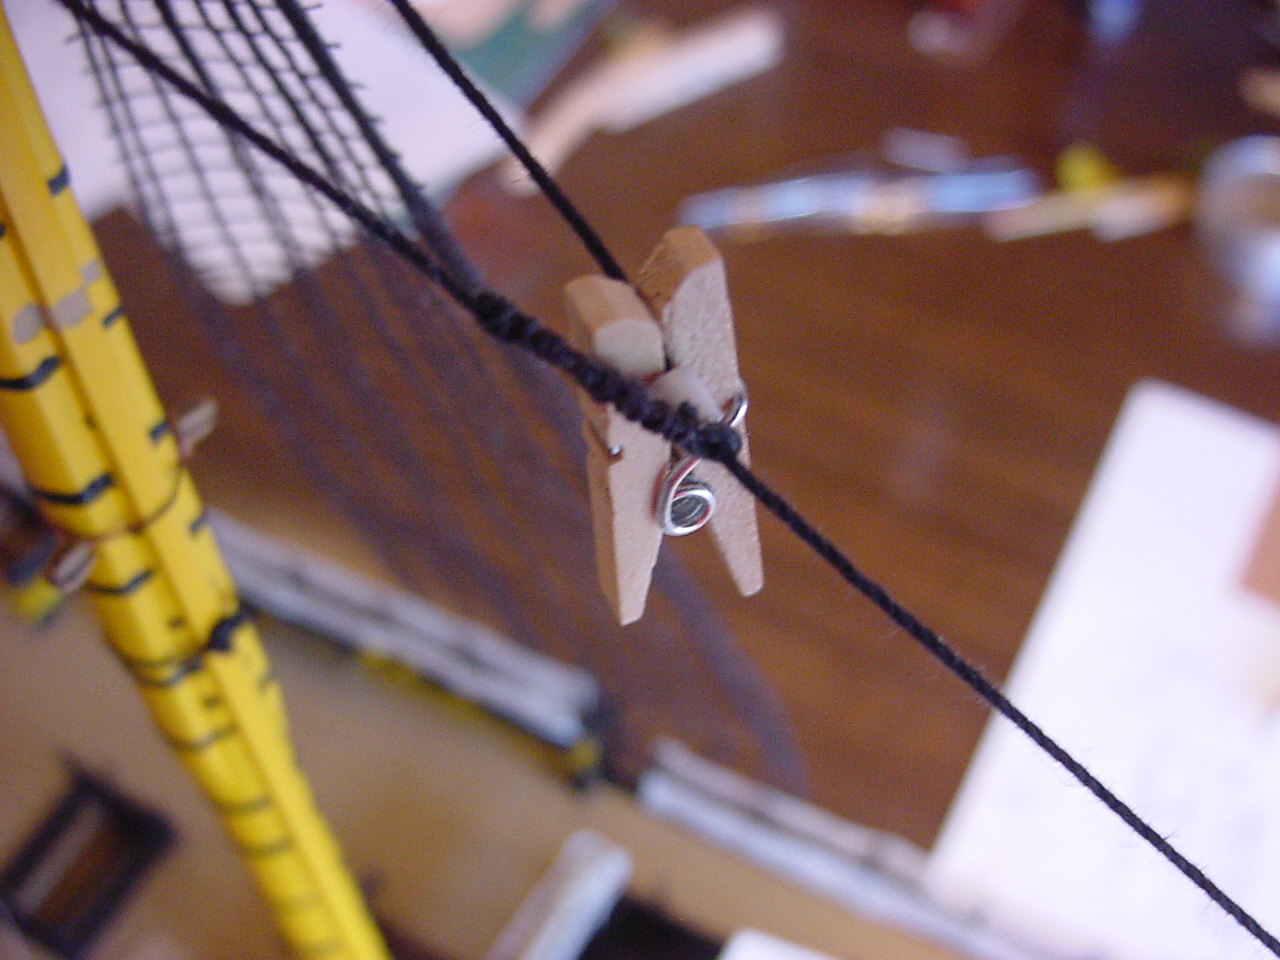
Here's a bigger view:


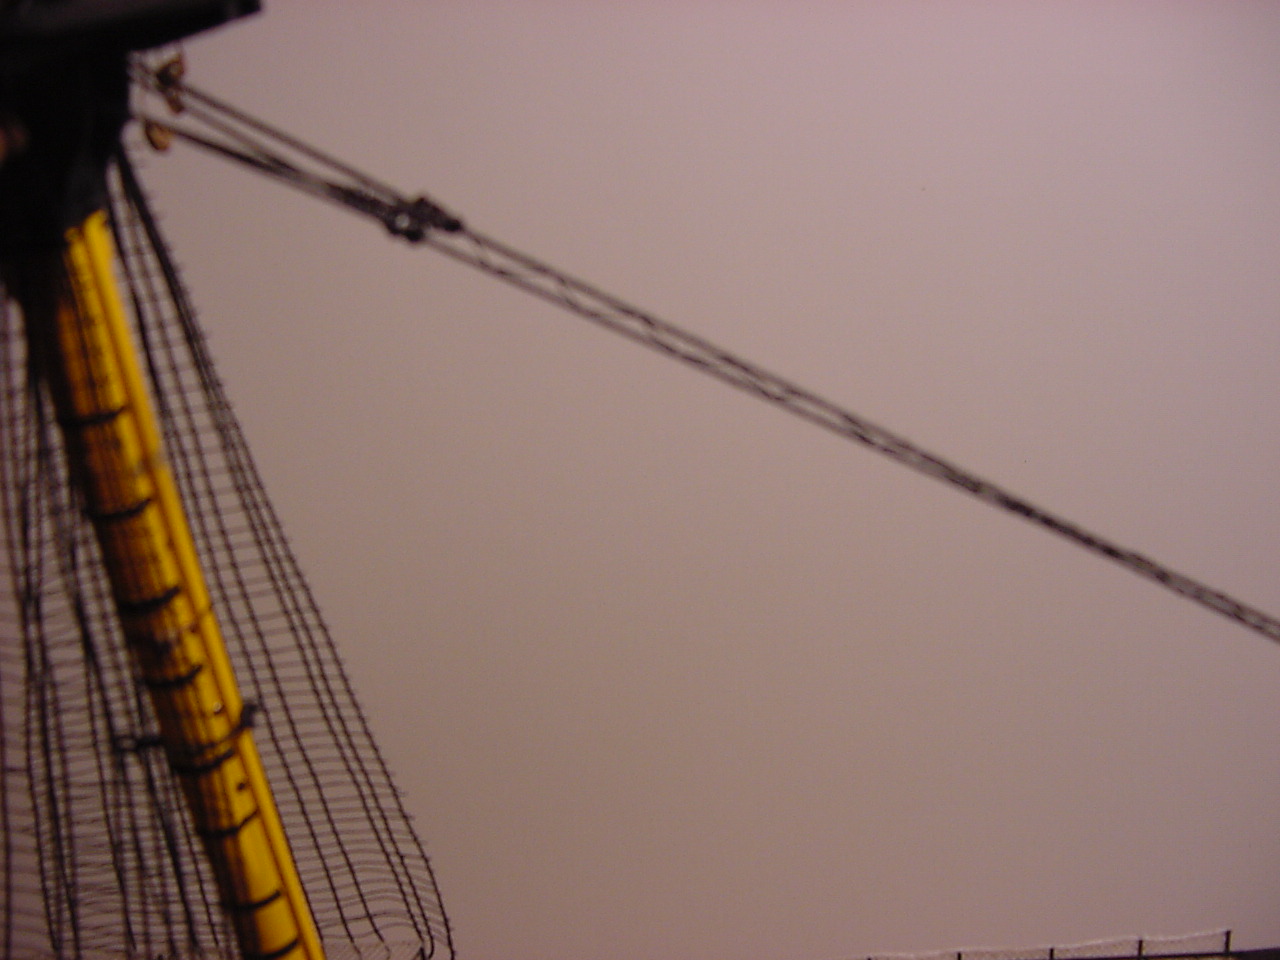
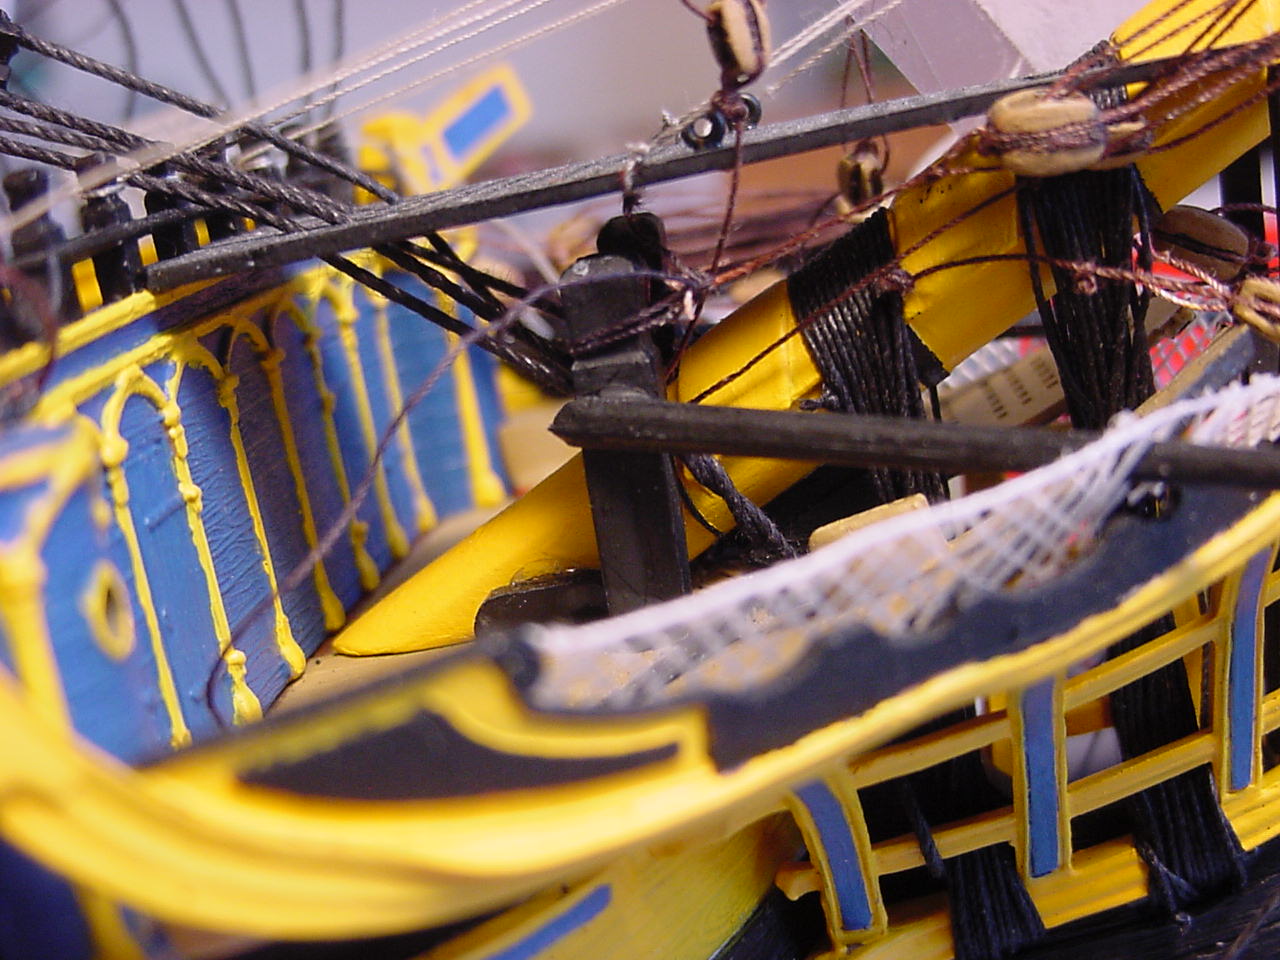
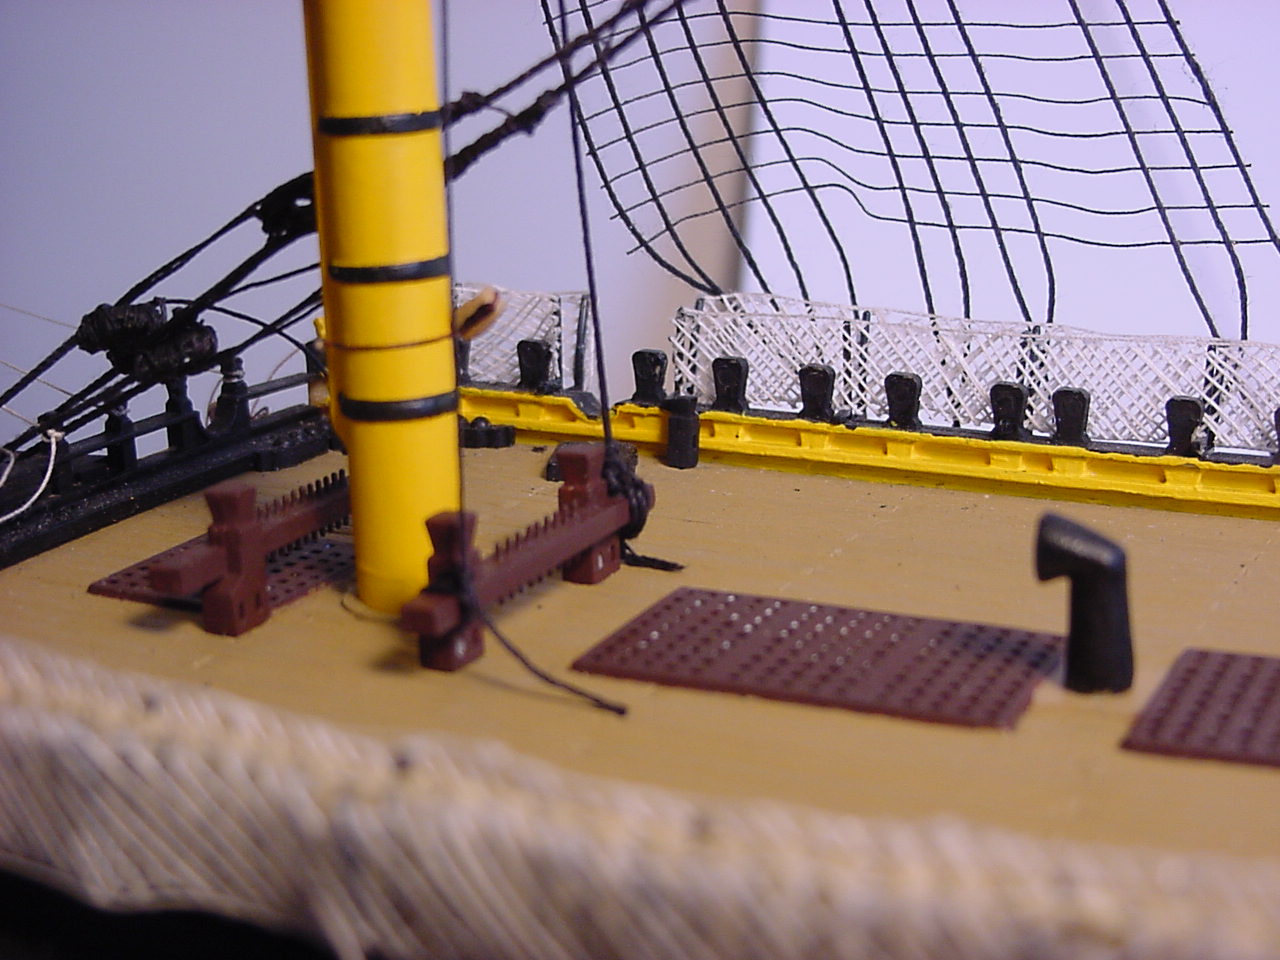
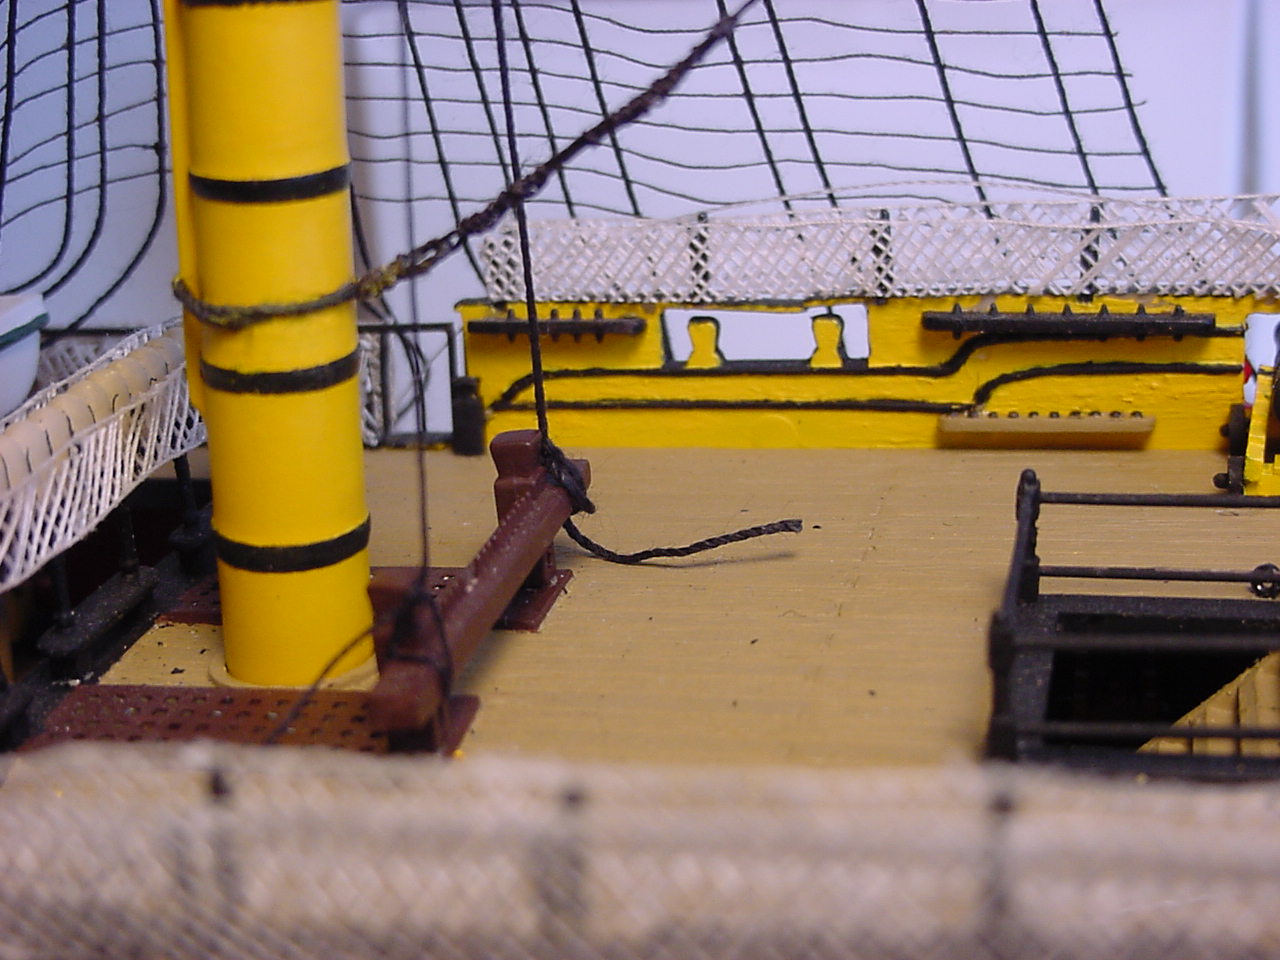
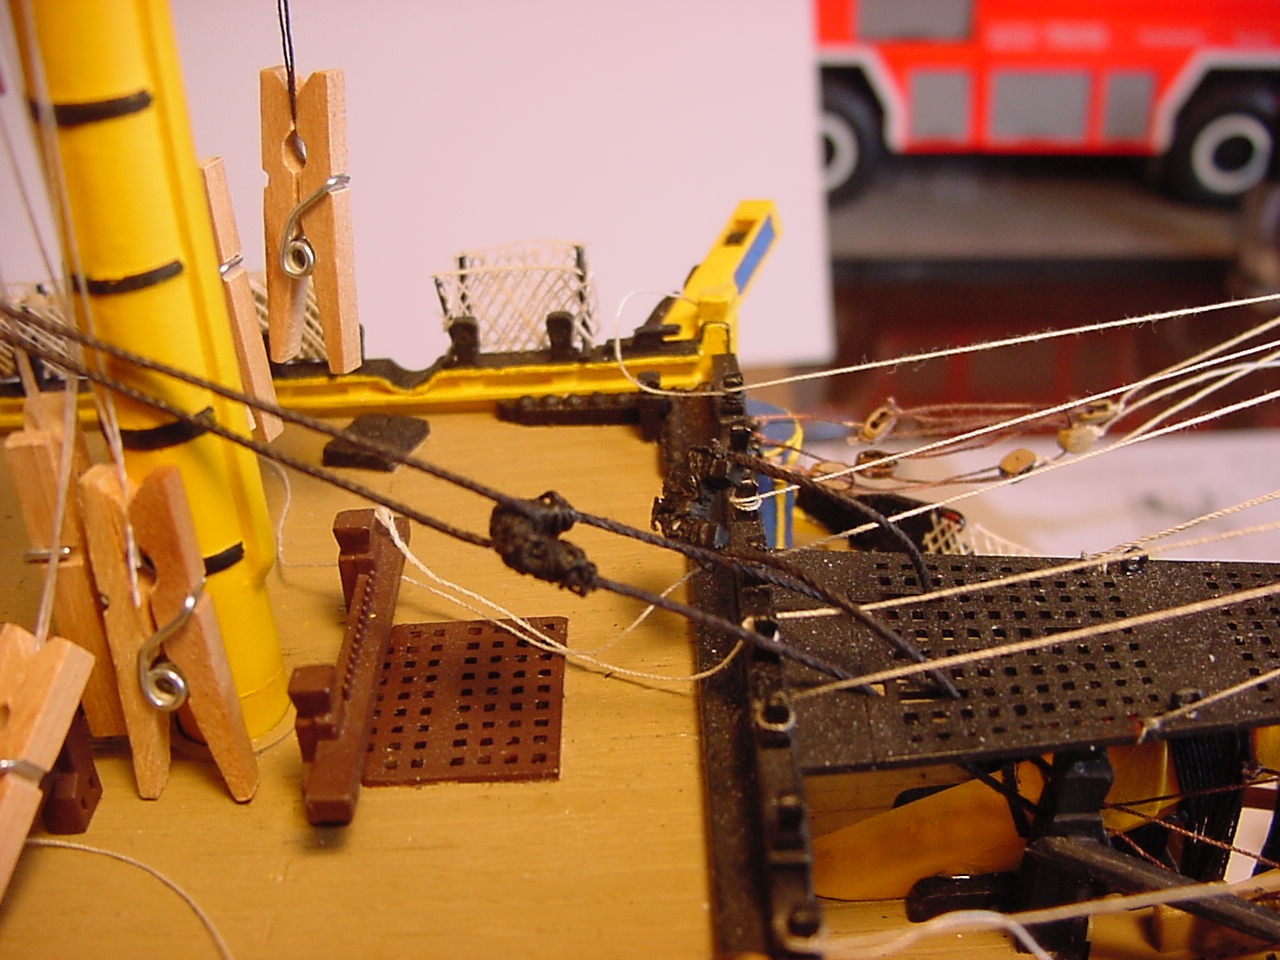
This last picture has the mainstay going through the half-heart that was installed quite some time ago. The stay actually is fitted with heart down at this end, and is then lashed to the half-heart. But all that will happen soon, after I get the mainmast and top cemented into place.


As always, thanks for taking a look. I think I actually see some light at the end of the tunnel!!

p.s. I just noticed that the posting I made about creating the half-hearts for the mainstay, and installing those parts, was back on Nov 6 2017. So, six months to get this little bit of stuff done, I figure I'll be busy with this build for a long, long time!!
timmyp
Visit this Community
Virginia, United States
Joined: May 18, 2008
KitMaker: 496 posts
Model Shipwrights: 404 posts
Posted: Sunday, May 06, 2018 - 12:31 AM UTC
Finished (for the most part) the main stay and main stay preventer; I wanted to post this pictures today, so there's still some clean-up to do:


And, of course, a shout-out to my helper:


timmyp
Visit this Community
Virginia, United States
Joined: May 18, 2008
KitMaker: 496 posts
Model Shipwrights: 404 posts
Posted: Thursday, May 24, 2018 - 05:41 AM UTC
So I managed to finish putting the "snaking" on the mainstay (the snaking is the small thread run between the stays). At first, I tried using one continue length of thread, and wrap it around one stay, make a loop, and then move the thread to either the upper or lower stay. Well, after a times of this, I didn't like the way things were turning out (and sorry for the pic being out of focus):


So in thinking things over, I decided to cut individual pieces of thread, and then glue each individual thread in place (each short thread is 5 mm). Things got a little tight in the middle of the stay, as the two stays were very close together, but things turned out ok in the end. I put all these individual threads between the stays from the starboard side; there's a bit of a bias there, when you look at the ship from other angles.

Here's another out of focus picture, but it sort of shows the snaking at the top of the stays:


And here's a long view. It doesn't show the snaking in detail, but at least it's in focus!!


Next steps: more painting!

Thanks for looking. Any comments or questions, ask away!
JJ1973
#345
Visit this Community
Niedersachsen, Germany
Joined: August 22, 2011
KitMaker: 1,835 posts
Model Shipwrights: 1,832 posts
Posted: Tuesday, May 29, 2018 - 02:36 PM UTC
Hi Tim!

Yes, I'm still there and following, for now more like catching up...real life is simply really busy for me these days - all fine but not much time at home...

Wow, now that's some progress here - and really, light at the end of the tunnel!! She's looking mighty fine, and I think it's simply amazing, your patience and endurance and dedication to fight through all the rigging, and all the issues with Heller's 'magic instructions'!

You're definitely doing a great job here, and it looks like we can hope for a commissioning here not too far out!!

Cheers,
Jan
RussellE
#306
Visit this Community
Victoria, Australia
Joined: June 27, 2010
KitMaker: 3,959 posts
Model Shipwrights: 2,777 posts
Posted: Tuesday, May 29, 2018 - 03:12 PM UTC
Amazing work Tim
timmyp
Visit this Community
Virginia, United States
Joined: May 18, 2008
KitMaker: 496 posts
Model Shipwrights: 404 posts
Posted: Tuesday, May 29, 2018 - 10:52 PM UTC
Warren & JJ,

Thank you for your kind comments.

JJ, at my current pace, commissioning might actually happen in the next decade!!

Just to update all: work schedule has been getting in the way of much follow-up, but I have started to paint the middle sections of the fore and mainmasts. This painting is to paint the ends of each mast element black. Of course, as I do the painting, I'm thinking about how I need to make the shrouds for these sections on the mast. Gee, if I did as much "doing" on this model as I did "thinking about", I would have finished it years ago!!

Anyway, thanks again for your comments!!
timmyp
Visit this Community
Virginia, United States
Joined: May 18, 2008
KitMaker: 496 posts
Model Shipwrights: 404 posts
Posted: Thursday, June 21, 2018 - 02:36 AM UTC
Construction notes:

I put together the shrouds for the middle section of the main mast...things went pretty well:


Then, after putting the ratlines on, on the other side, I noticed the shrouds were crossed:


My first thought was to just let it go, but then I decided that this wasn't going to fly. So I removed the ratlines (thank goodness for nail polish remover!), fixed the shrouds, and reattached the ratlines:


In other stuff, as I was working on the middle section of the main and foremast, I noticed that the bottom ends are...contoured?...and should fit only way into the mast tops. Here's the orientation of the fore mast, followed by the main mast:


The good news is, I got the middle section of the main mast attached, as well as the main top cap, and the yellow support post that goes between the top and the cap. Even though this was only 3 parts that got attached, it really gave me a good sense of accomplishment. I also changed the construction manner of the main mast - with the mizzen mast, I put it together before installing it on the hull; with the main mast, I'm putting it together with it already installed in the hull. This is mostly because I wanted to get the mainstays installed, and see how those stays would go together.


In other news, this new privacy and data protection stuff that's been enacted in Europe is sort of a pain in the butt. When I tried to log-in to cubeupload, I had to submit an e-mail address, plus change my password. Good thing I write all this stuff down!!

As always, thanks for taking a peek. Hope everyone is enjoying the summer!
RussellE
#306
Visit this Community
Victoria, Australia
Joined: June 27, 2010
KitMaker: 3,959 posts
Model Shipwrights: 2,777 posts
Posted: Thursday, June 21, 2018 - 12:28 PM UTC
Tim this really is becoming a labour of love for you!

Amazing how you've taken this ol' girl and breathed new life into the kit.

A pleasure to watch
timmyp
Visit this Community
Virginia, United States
Joined: May 18, 2008
KitMaker: 496 posts
Model Shipwrights: 404 posts
Posted: Wednesday, July 25, 2018 - 06:24 AM UTC
The mastodon:

timmyp
Visit this Community
Virginia, United States
Joined: May 18, 2008
KitMaker: 496 posts
Model Shipwrights: 404 posts
Posted: Tuesday, August 21, 2018 - 01:33 PM UTC
I finally installed the forestay & forestay preventer tonight:


Here's two images of the mouse I put on the preventer stay. I was trying a new technique in attaching the mouse, by running a thread through the stay itself, then wrapping the thread all around the mouse. I didn't like the way things turned out, so on the other stay, I went back to just tying thread on both ends of the mouse, and wrapping a lot of thread in between.


I also had a small...problem?... when installing the foremast. It glued down into the hull ok, but there was a lot of slack in the fore-and-aft motion of the mast. So I glued some cardboard down into the space between hull & mast, and I'll try to post the photo in a later post.


I also have found out that there are two more stays that require the use of a "mouse" to retain the loop from tightening against the mast: in Heller's drawings (instruction 15), it is stays E7 and E8 (foretopmast stay & preventer stay, respectively), and again on stays E9 and E10 (main topmast preventer stay and main topmast stay, respectively). I also am making up some collars for stays E15 and E18 (maintop stay and flagstaff (?) stay) that go from the mainmast, to a loop (collar) on the foremast, then belay to somewhere down on the deck. When I was building the foremast, I made a decision not to install these collars (and only one collar is called for in the instructions), but upon looking at instruction 30 (Sails on the foremast), it becomes obvious that the collars are needed. I'm using smaller thread for these collars, as they probably don't need to be so "beefy" as collars that hold the larger sized stays (picture(s) to follow!)

So, for the moment, that's all I've got. I thank everyone dropping in and looking around, and as always, comments are always welcome!!
timmyp
Visit this Community
Virginia, United States
Joined: May 18, 2008
KitMaker: 496 posts
Model Shipwrights: 404 posts
Posted: Wednesday, August 22, 2018 - 01:04 PM UTC
I found the photo of the gap-filling cardboard on the foremast:


And here's some pix of one of the collars:


Gack! Look at that big blob of glue!

These collars go around the foremast - one is located right above the hole in part 435 (fore top mast), and the other is installed around part 396, the "mast cap for fore top gallant".

Hopefully, I can get them installed tomorrow.
JJ1973
#345
Visit this Community
Niedersachsen, Germany
Joined: August 22, 2011
KitMaker: 1,835 posts
Model Shipwrights: 1,832 posts
Posted: Sunday, September 02, 2018 - 06:54 AM UTC
A labour of love, just as Russ says!

But you are making progress Tim, sure and certain! She is looking like the Victory by now - and I continue to be amazed with your patience and skill with all those rigging work!!

Cheers,
Jan
timmyp
Visit this Community
Virginia, United States
Joined: May 18, 2008
KitMaker: 496 posts
Model Shipwrights: 404 posts
Posted: Tuesday, September 04, 2018 - 12:48 PM UTC
A labor of love? I dunno...a labor? For sure!!
timmyp
Visit this Community
Virginia, United States
Joined: May 18, 2008
KitMaker: 496 posts
Model Shipwrights: 404 posts
Posted: Friday, September 07, 2018 - 09:33 AM UTC
So, I was looking at Heller's instructions, trying to figure out how I should attach the foretopmast stays (E7 and E8) to the bowsprit. Looking at Heller's diagram (see below),

it would seem that they are just tied directly to the bowsprit. However, in looking at Longridge's book, this is what he has to say:

"...eye, mouse, etc., are prepared as for the main stay. It passes through the hole in the starboard bee, round the sheave in the bee block and has a 24-on. long tackle block turned in the end, connected by its fall (3 1/2 in.) to a 14-in. single block hooked to the starboard knight head. The fore topmast preventer stay...is prepared in the same way. Both stays go round the topmast head outside the rigging and lie below the first and second cross tress. The preventer stay reeves through the port bee and has an 18-in. long tackle block turned in connected by its fall (3 in.) to a 12-in. single block hooked to the port knight head. The preventer stay is put over the topmast head before the other stay and lies below the latter."

Hmmmmm....the bees? Better look things over!

Oh, so here it is: in instruction 9a, we see that parts 217 and 216 (starboard and port bees) are attached to the bowsprit (parts 118 and 117):


and that stays E7 and E8 go through the holes in the bees:


And then, according to the instruction 19A, we see that they are attached to some tackle that was previously made in instruction 11B.


So here is how it tentatively looks on the model: just above the tags for some other rigging lines, I have some black thread going through an "M" size block.


Couldn't be easier!!

A few posts back, I think I erroneously wrote that only 2 more stays had to have a loop and mouse made...that should have been more like 5 more stays (the 2 for the maintopmast stays, then 2 for the foretopmast stays, and one each for the mizzen stay, mizzen preventer stay, and the mizzen topmast stay).

I also have found an inaccuracy on Heller's part: according to Longridge, the maintopgallant stays are secured to eyebolts in the deck, and those eyebolts are between the foremast and the after (or, the fife rail right behind the foremast) fife rail. Heller has no eyebolts being installed there, and according to instruction 17 (the belaying diagram), it shows stays E9 and E10 being attached to the after fife rail (one each side). I don't think I'm going to try and fabricate any eyebolts and then try to install them, so I will just go with Heller's instruction of just attaching them to the fife rail. I'm surprised that Heller would go through the trouble of getting the foretopgallant stays more or less historically accurate, but then be chintzy on how the maintopgallant stays are secured.
d6mst0
#453
Visit this Community
Texas, United States
Joined: August 28, 2016
KitMaker: 1,925 posts
Model Shipwrights: 1,298 posts
Posted: Friday, September 07, 2018 - 01:17 PM UTC

Quoted Text

I'm surprised that Heller would go through the trouble of getting the foretopgallant stays more or less historically accurate, but then be chintzy on how the maintopgallant stays are secured.


Maybe they felt you could use a break.
timmyp
Visit this Community
Virginia, United States
Joined: May 18, 2008
KitMaker: 496 posts
Model Shipwrights: 404 posts
Posted: Sunday, September 09, 2018 - 12:13 PM UTC
Maybe - but I doubt it!!
TimReynaga
Staff MemberAssociate Editor
MODEL SHIPWRIGHTS
Visit this Community
California, United States
Joined: May 03, 2006
KitMaker: 2,500 posts
Model Shipwrights: 1,830 posts
Posted: Wednesday, September 12, 2018 - 12:55 AM UTC

Quoted Text

I'm surprised that Heller would go through the trouble of getting the foretopgallant stays more or less historically accurate, but then be chintzy on how the maintopgallant stays are secured.


It's funny, I frequently find that in kits; one part of the model is cleverly designed, but an adjacent area looks like the design "B" team was at work, leaving you scratching your head. Maybe that is why this happens - multiple teams working on a kit design project? Oh, well... it keeps things interesting!

timmyp
Visit this Community
Virginia, United States
Joined: May 18, 2008
KitMaker: 496 posts
Model Shipwrights: 404 posts
Posted: Friday, September 14, 2018 - 08:16 AM UTC

Quoted Text


Quoted Text

I'm surprised that Heller would go through the trouble of getting the foretopgallant stays more or less historically accurate, but then be chintzy on how the maintopgallant stays are secured.


It's funny, I frequently find that in kits; one part of the model is cleverly designed, but an adjacent area looks like the design "B" team was at work, leaving you scratching your head. Maybe that is why this happens - multiple teams working on a kit design project? Oh, well... it keeps things interesting!


And the sad thing is, to make the model more accurate, all they had to do was mold two holes into the deck, and add a couple or eyebolt rings to the kit!
timmyp
Visit this Community
Virginia, United States
Joined: May 18, 2008
KitMaker: 496 posts
Model Shipwrights: 404 posts
Posted: Saturday, September 29, 2018 - 07:36 AM UTC
A little trouble getting stay E8 connected to the tackle. As I was trying to get the stay wound around the block, the whole kit and caboodle detached from the collar it was attached to, the collar itself being secured to the bowsprit. So I managed to get things fixed up, but only after not working on the model for a week!

Here's the stay wrapped around the block (this is the block just above the figurine):


And, to make life simple, here the tackle is attached to the knighthead:


In reading Longridge's book, it appears that I now have to make another collar with at least 2 thimbles in it, to accept the next set of stays. (I think those are stays E13 and E14).

That's all for now; thanks for looking! I'm going to submit the pictures I took of USS Constitution for a "Walk around" feature, to I hope you'll take a look at that when it's published!

Cheers
timmyp
Visit this Community
Virginia, United States
Joined: May 18, 2008
KitMaker: 496 posts
Model Shipwrights: 404 posts
Posted: Wednesday, October 03, 2018 - 01:35 AM UTC
So, I checked a little further about where stays E12 and E13 go into the bowsprit. In looking things over, I remembered that there is pre-formed sheave in the upper end of the inner jibboom (part 123), and instruction 19 (Fitting the Bowsprit) shows stays E12 and E13 going through the holes there:


The instruction shows the lines going to m2 and m3, installed in instruction 11C.

And this is Heller's depiction of the stays being attached to the blocks m2 and m3, in 11C:


For some reason, the way Heller has everything drawn, I'm reminded of horse rearing up on its hind legs when I look at this drawing!

Thanks for watching!
d6mst0
#453
Visit this Community
Texas, United States
Joined: August 28, 2016
KitMaker: 1,925 posts
Model Shipwrights: 1,298 posts
Posted: Thursday, October 04, 2018 - 09:12 AM UTC
Timothy,

That is an impressive set of rigging you have done so far. I would need more then a week to re-tackle that setup to make repairs. If you didn't have knowledge of project management before taking on this model I bet you do now...LOL Very nice work, looking forward to the finish.

Mark
timmyp
Visit this Community
Virginia, United States
Joined: May 18, 2008
KitMaker: 496 posts
Model Shipwrights: 404 posts
Posted: Thursday, October 04, 2018 - 06:09 PM UTC

Quoted Text

Timothy,

That is an impressive set of rigging you have done so far. I would need more then a week to re-tackle that setup to make repairs. If you didn't have knowledge of project management before taking on this model I bet you do now...LOL Very nice work, looking forward to the finish.

Mark


Thanks, Mark. Yeah, it took a bit of time to figure out how to make the repairs, and then to make them.

This kit is an exercise in patience, for sure!!

And I'm looking forward to the finish, too!!!
timmyp
Visit this Community
Virginia, United States
Joined: May 18, 2008
KitMaker: 496 posts
Model Shipwrights: 404 posts
Posted: Saturday, October 27, 2018 - 11:06 AM UTC
Yea me!! Finally got all the stays rigged:


On stay E5, which is the mizzen stay, I cut the thread a bit short, so this is how I fixed that little problem:


Here's a picture of all the foremast stays that are attached to the bowsprit:


In order, from left to right in the picture, or from outboard to inboard:

E17 flagstaff stay
E14 jib halyard stay
E13 stay
E12 jib stay
E8 foretopmast preventer stay
E7 foretopmast stay
E2 forestay
E1 forestay preventer

When I took the above picture, I hadn't finished the snaking on the forestay & preventer, so now that the snaking is done, here's the pic:


Interesting to note, the pattern the snaking made was something like a stairstep; I think it took me about 90 minutes to get it completed.

Here's some pix of stays E9 and E10, the maintopmast stay (E10) and the maintopmast preventer stay (E9).

The preventer stay is the thread going through a loop on the mast, and the stay itself is threaded through the block (which is higher up on the mast from the loop for the preventer stay).


And here they are belayed to the fife rail. E9 is closest in the photo.


This is stay E6 (mizzen preventer stay) and E11 (mizzen topmast stay)belayed to the fife rail around the mainmast:


And now, stays E15 (stay, first picture) and E18 (main flagstaff stay, second picture) and how they belay to part 38 (Heller calls part 38 "bitts").


And lastly, when I was installing the snaking on the foremast stays, I keep bumping part 121 (the sprit sail boom lower), to where it finally fell off, but supported by the rigging:


So, the construction tip on all this is, don't put the bow rigging in place until all the standing rigging is done - you won't have the problem of trying to weave standing rigging lines through all the running rigging. Plus, it might be a good idea to keep part 121 off until the standing rigging is completed (and if you do that, it forces you to put the a good portion of the running rigging in after the standing rigging is completed).

Next steps: installing the footropes on the mizzen mast yardarms (started that today), and then get the yardarms installed.

Thanks for looking!!
d6mst0
#453
Visit this Community
Texas, United States
Joined: August 28, 2016
KitMaker: 1,925 posts
Model Shipwrights: 1,298 posts
Posted: Saturday, October 27, 2018 - 01:02 PM UTC
Timothy,

You must have the patience of a saint you handle all that rigging and the issues you encountered doing so.
Your work is first rate, she a fine looking ship. I really like the colors you used on the hull.

Mark
timmyp
Visit this Community
Virginia, United States
Joined: May 18, 2008
KitMaker: 496 posts
Model Shipwrights: 404 posts
Posted: Monday, October 29, 2018 - 03:04 AM UTC

Quoted Text

Timothy,

You must have the patience of a saint you handle all that rigging and the issues you encountered doing so.
Your work is first rate, she a fine looking ship. I really like the colors you used on the hull.

Mark


Thanks, Mark. Sometimes I look at the hull colors, and I'm reminded of the yellow-and-black floor striping around heavy machinery!

Tim