Tim,
brave man!! Just checking in again to see you've come a rather long way since.
Fantasten work. I could not imagine doing that, so my hat is off to you!!
Cheers,
Jan
You are viewing the archived version of the site.
Go to modelshipwrights.com for the current dynamic site!
Go to modelshipwrights.com for the current dynamic site!
General Ship Modeling
Discuss modeling techniques, experiences, and ship modeling in general.
Discuss modeling techniques, experiences, and ship modeling in general.
Hosted by Jim Starkweather
Build blog for Heller's HMS Victory
Posted: Sunday, November 04, 2018 - 07:26 AM UTC
timmyp

Joined: May 18, 2008
KitMaker: 496 posts
Model Shipwrights: 404 posts

Posted: Monday, November 05, 2018 - 03:32 AM UTC
Quoted Text
Tim,
brave man!! Just checking in again to see you've come a rather long way since.
Fantasten work. I could not imagine doing that, so my hat is off to you!!
Cheers,
Jan
Thanks, Jan. Keep checking back so you can see the glacial pace that this build is moving at!!

timmyp

Joined: May 18, 2008
KitMaker: 496 posts
Model Shipwrights: 404 posts

Posted: Wednesday, November 14, 2018 - 02:20 PM UTC
Ugg, it looks like my picture hosting site has...well, I dunno, swallowed all my photos? I see now, all my previous pictures that I hosted on photobucket appear to be showing up, but the latest round of pics, hosted at cubeupload, aren't showing up (I even checked the cubeupload site, and there is the description of the photo, but no photo!). I was hoping to post a few pictures of how put some of the footropes on the mizzen yards, but until I get a better host site, I don't think I'll post any photos. I also started to paint the yardarms black, so progress is being made - the weather is supposed to be pretty bad tomorrow morning, so if I get motivated, I'll do some more painting on the yardarms.
So if anyone has any suggestions for a photo hosting site, that is reliable, please let me know. I might even just buy some space here on kitmaker, and be done with it once and for all.
Tim
So if anyone has any suggestions for a photo hosting site, that is reliable, please let me know. I might even just buy some space here on kitmaker, and be done with it once and for all.
Tim
Posted: Monday, November 26, 2018 - 06:28 AM UTC
Hi Tim,
I've been using ImageShack for years, they have a free service but I'm paying a regular small fee since I'm quite happy with their reliability - never had any issues.
Cheers,
Jan
I've been using ImageShack for years, they have a free service but I'm paying a regular small fee since I'm quite happy with their reliability - never had any issues.
Cheers,
Jan
timmyp

Joined: May 18, 2008
KitMaker: 496 posts
Model Shipwrights: 404 posts

Posted: Monday, November 26, 2018 - 02:35 PM UTC
Quoted Text
Hi Tim,
I've been using ImageShack for years, they have a free service but I'm paying a regular small fee since I'm quite happy with their reliability - never had any issues.
Cheers,
Jan
Thanks, Jan. I realized that I already have an account with Imageshack, but it's not currently active.
Overall, I'm thinking this whole thing over quite a bit, as I don't want to be caught up in another situation where all my photo posts get obliterated.
Thanks again for writing. And just to keep everyone up-to-date, I've added the footropes (horses, according to Lingridge) to the mizzen yards, and am now working on attaching all the blocks to the...driver gaff? (The upper yard that is on the backside of the mizzenmast).
timmyp

Joined: May 18, 2008
KitMaker: 496 posts
Model Shipwrights: 404 posts

Posted: Tuesday, December 11, 2018 - 02:39 PM UTC
Well, just to keep everyone up-to-date: the mizzen yards have all been painted black, the footropes (horses and stirrups, as Longridge calls them) have been installed. Haven't glued the yards to the mast yet, as I am currently working on preparing the spanker boom and horn* for attachment to the mizzen mast.
Haven't decided on a hosting site yet, so no pix!
In preparing some of the blocks to add to the horn, when I turned my Dremel tool on, I noticed the bit I had chucked in it seemed to be out of kilter. Upon investigating, I found that the shaft of the engraving bit was bent (a result of the Dremel tool getting knocked off the window ledge). So then I had the bright idea of taking some flat-jawed pliers and trying to straighten the shaft, with the result that I managed just to break the shaft. So I'm waiting for Amazon to fulfill my desires and send me a couple of new engraving bits (ETA is Friday).
Thanks for looking.
Tim
*if that's the right term. I'm pretty sure Heller calls it something like spanker horn (they use the word horn); I've seen it called the driver gaff, also. It's the upper spar, that holds the mizzen sail in place.
TimReynaga

Joined: May 03, 2006
KitMaker: 2,500 posts
Model Shipwrights: 1,830 posts

Posted: Tuesday, December 11, 2018 - 02:58 PM UTC
Quoted Text
So if anyone has any suggestions for a photo hosting site, that is reliable, please let me know.
Tim
Since leaving Photobucket I've been very happy using Imgur. They are excellent!
timmyp

Joined: May 18, 2008
KitMaker: 496 posts
Model Shipwrights: 404 posts

Posted: Tuesday, December 11, 2018 - 03:16 PM UTC
Quoted Text
Quoted TextSo if anyone has any suggestions for a photo hosting site, that is reliable, please let me know.
Tim
Since leaving Photobucket I've been very happy using Imgur. They are excellent!
Thanks, Tim. I'll go take another look at their site.
timmyp

Joined: May 18, 2008
KitMaker: 496 posts
Model Shipwrights: 404 posts

Posted: Wednesday, December 26, 2018 - 07:53 PM UTC
I just signed up with Imgur, so this is a test to see if I can figurre out how to link a photo from there to here. FYI, this is my USS Constitution, built many years ago.

Well, look at that!! It worked! I will probably be going back to previous posts & updating the photos for those posts, since Cubeupload has apparently gone south on me.

Well, look at that!! It worked! I will probably be going back to previous posts & updating the photos for those posts, since Cubeupload has apparently gone south on me.
timmyp

Joined: May 18, 2008
KitMaker: 496 posts
Model Shipwrights: 404 posts

Posted: Friday, December 28, 2018 - 06:20 AM UTC
Well, I see that my photos on cubeupload are appearing again (yea!!); of course, I find this out right after I just uploaded some pics to imgur.com (where the following pics are currently hosted).
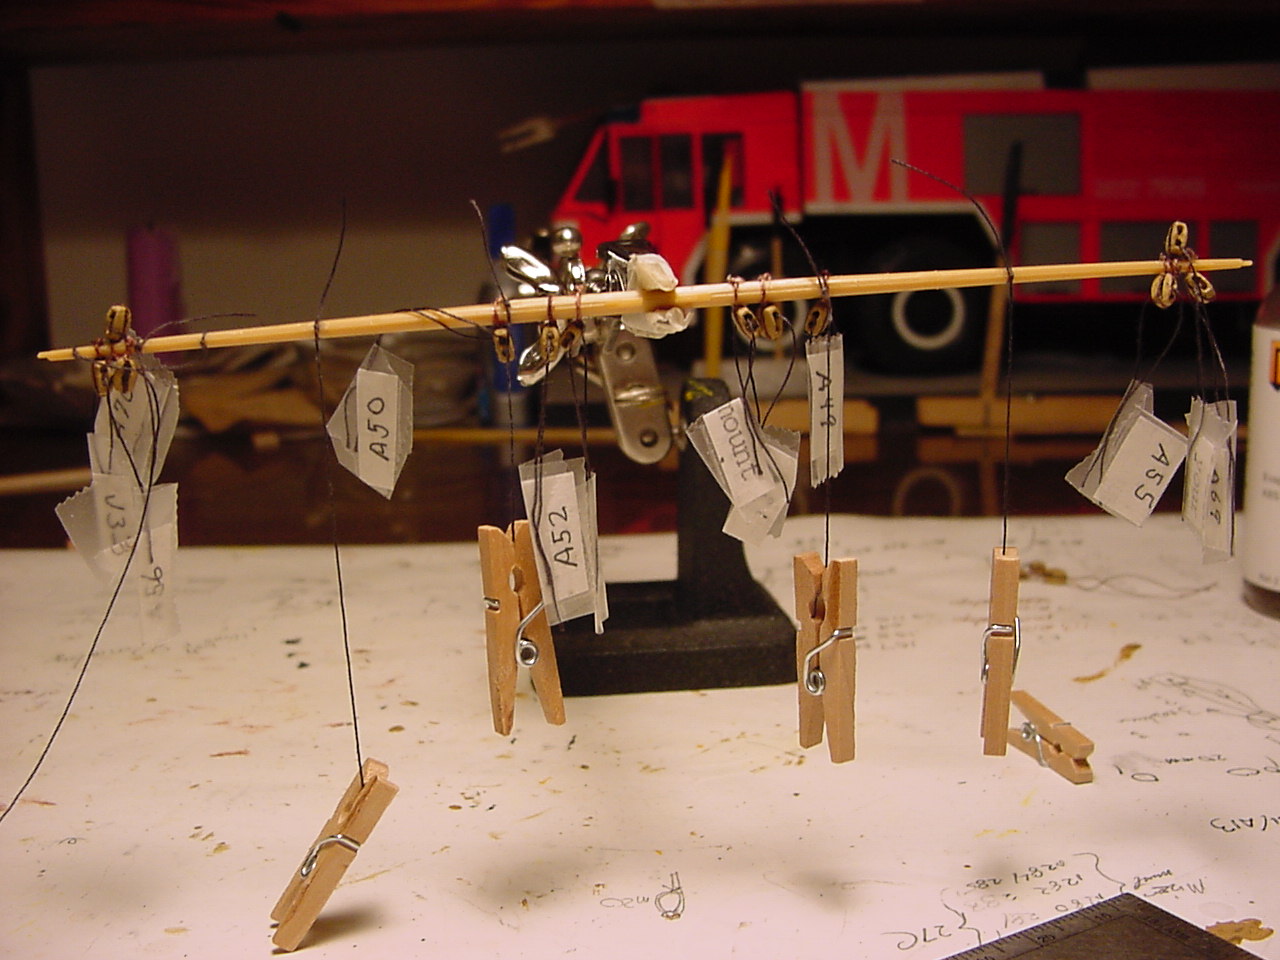
So the first pic is of the mizzen top yard, (or, the middle yard), showing the vertical strings I attached, which will become the stirrups for the horses (or footropes):

 " BORDER="0">
And here's everything glued-up. I used Elmer's white glue to strengthen & connect everything.

 " BORDER="0">
And finally, a close-up of how the horses cross each other, as they pass the mast.
[img]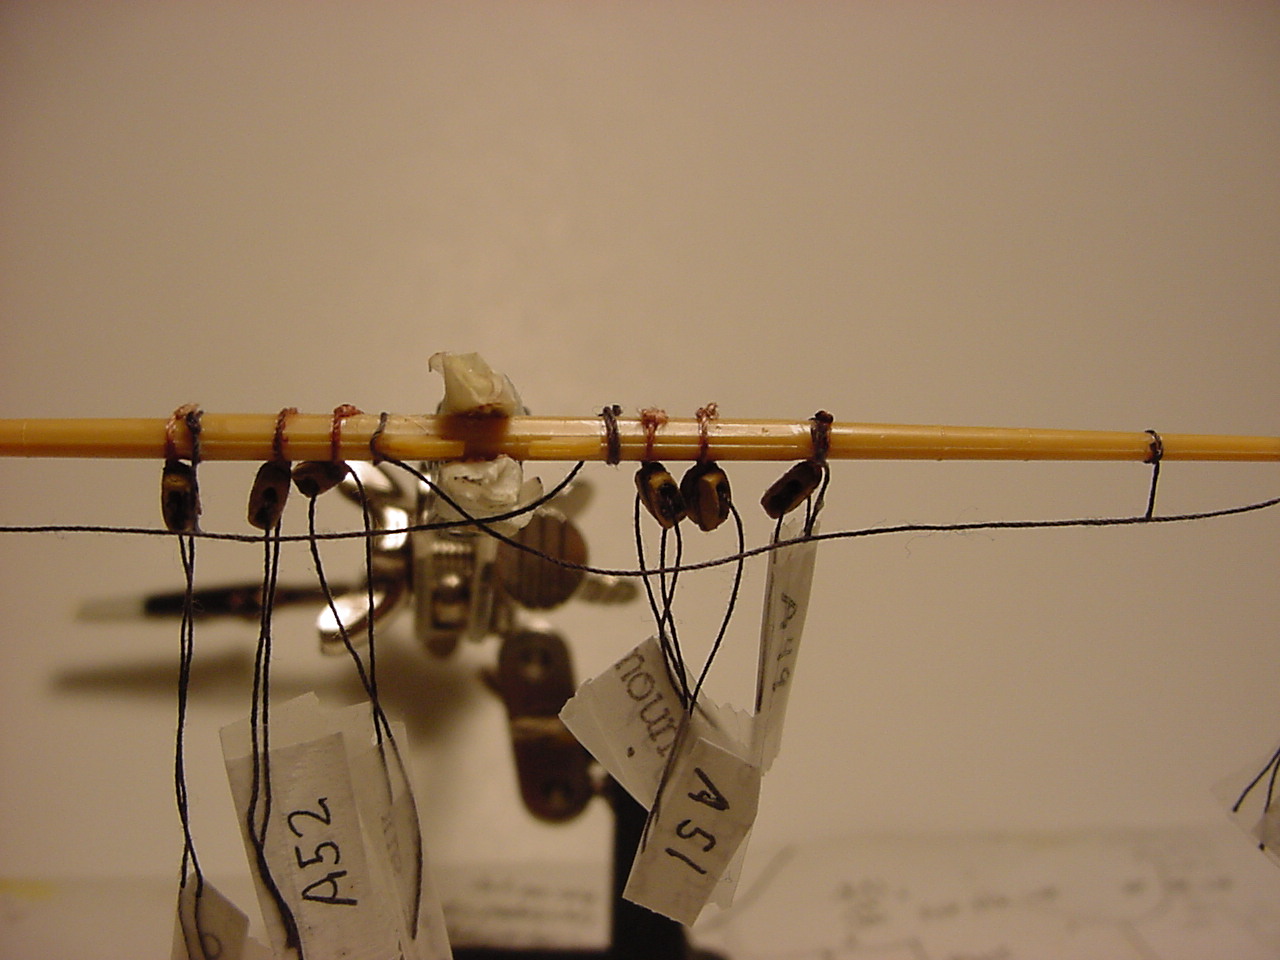 [img]
[img]
I glued what is called the "mizzen mast horn" in place a while back...and I was looking at how the rigging is done, concerning the top yard lift, and some other rigging that connects around the base of the mizzenmast. I've decided to start to install some of that rigging now, before I glue the spanker boom into place, only because by doing it now, I can give myself a little bit of room to work with, without fear of knocking something off. And before I started this post, I was getting ready to install the blocks that are involved in line A31 (which is the aforementioned top yard lift), but after preparing one of the blocks, I saw that I used the wrong size block. But it's a blessing in disguise, as in looking at the instructions, this "m" size block is attached to an eyebolt in the deck, and not to the fife collar around the mast. Good thing I looked!!
Hope everyone had a Merry Christmas, and will have a Happy New Year, too! And remember: don't drink & drive your horse!
Cheers,
Tim
So the first pic is of the mizzen top yard, (or, the middle yard), showing the vertical strings I attached, which will become the stirrups for the horses (or footropes):
 " BORDER="0">
 And here's everything glued-up. I used Elmer's white glue to strengthen & connect everything.
 " BORDER="0">
And finally, a close-up of how the horses cross each other, as they pass the mast.
[img]
 [img]
[img] I glued what is called the "mizzen mast horn" in place a while back...and I was looking at how the rigging is done, concerning the top yard lift, and some other rigging that connects around the base of the mizzenmast. I've decided to start to install some of that rigging now, before I glue the spanker boom into place, only because by doing it now, I can give myself a little bit of room to work with, without fear of knocking something off. And before I started this post, I was getting ready to install the blocks that are involved in line A31 (which is the aforementioned top yard lift), but after preparing one of the blocks, I saw that I used the wrong size block. But it's a blessing in disguise, as in looking at the instructions, this "m" size block is attached to an eyebolt in the deck, and not to the fife collar around the mast. Good thing I looked!!
Hope everyone had a Merry Christmas, and will have a Happy New Year, too! And remember: don't drink & drive your horse!
Cheers,
Tim

Posted: Saturday, December 29, 2018 - 06:50 AM UTC
Nice.
timmyp

Joined: May 18, 2008
KitMaker: 496 posts
Model Shipwrights: 404 posts

Posted: Saturday, December 29, 2018 - 02:59 PM UTC
Thanks, Mark. Your comment made me go back and look at my post, and I see that the last photo is the wrong photo! Plus I noticed another error that needs correcting...so thanks for making look!!
In other news, I spent today preparing the blocks that are attached to the eyebolts on the deck around the mizzen mast...here's a good construction tip: put those blocks in place before adding the mizzen mast, and the other deck components - you'll save yourself a bit of frustration later!! Next steps are to add the blocks that attach to the eyebolts near the signal flag boxes on the fantail, and figure out all that rigging.
Thanks all for stopping by!! (BTW, I'm not a Gator fan, but anybody who can destroy Michigan like that, I'll say hooray!!)

Posted: Saturday, December 29, 2018 - 10:15 PM UTC
Timmy you dedication to completing this ship is incredible! 

timmyp

Joined: May 18, 2008
KitMaker: 496 posts
Model Shipwrights: 404 posts

Posted: Wednesday, January 02, 2019 - 01:53 PM UTC
Quoted Text
Timmy you dedication to completing this ship is incredible!
Thanks, Russell. To paraphrase from a movie: "Some day this build is gonna end!"

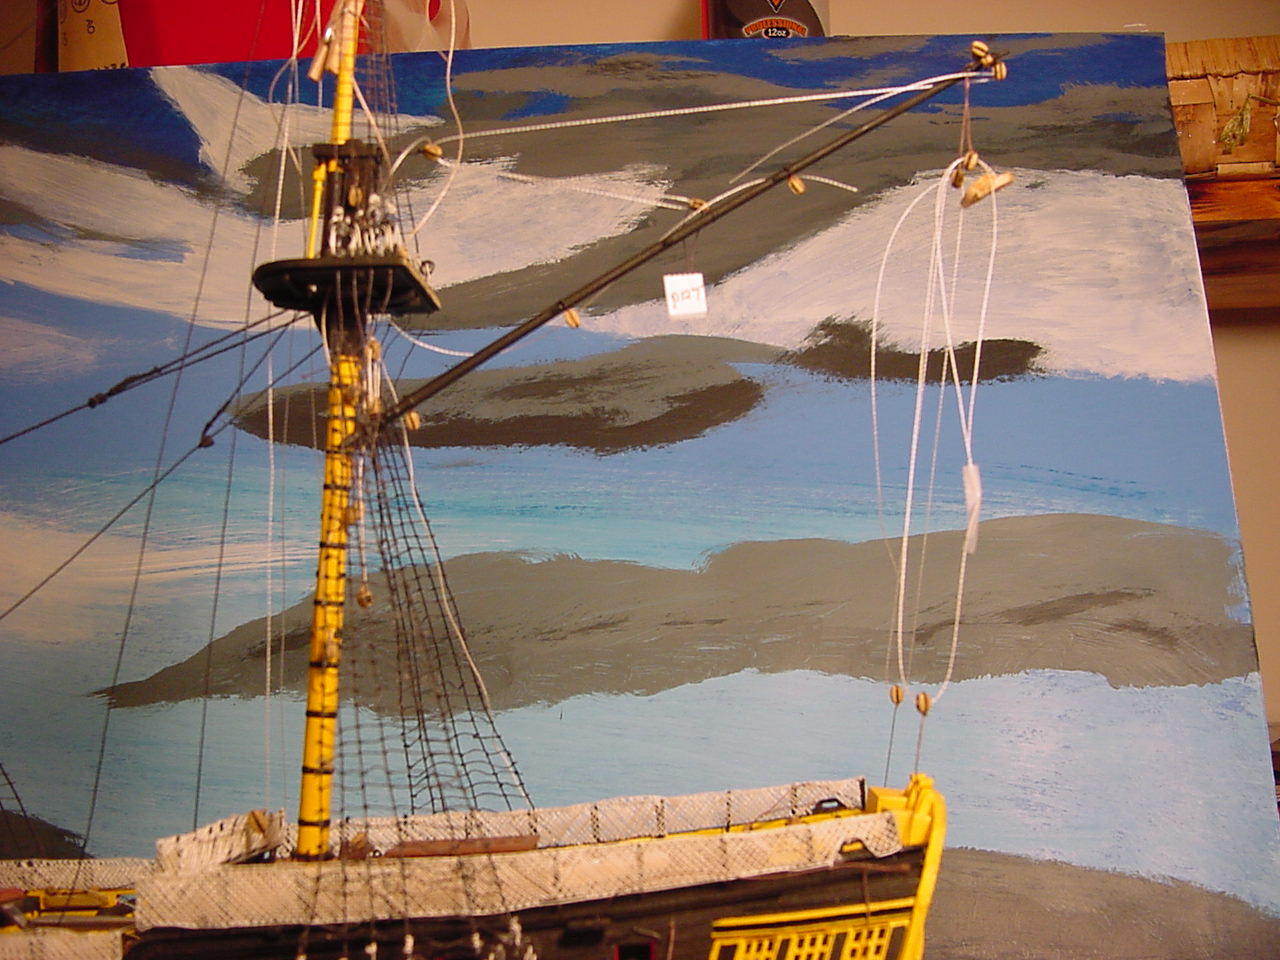
In the latest installment, I cemented the spanker boom to the mizzen mast, and I installed the blocks to their respective eyebolts, located at the very end of the deck (Longridge calls it the taffrail). Like I said in a previous post, it's best to install these blocks before the installation of the knees & signal flag boxes - I hope the pictures below explain that.
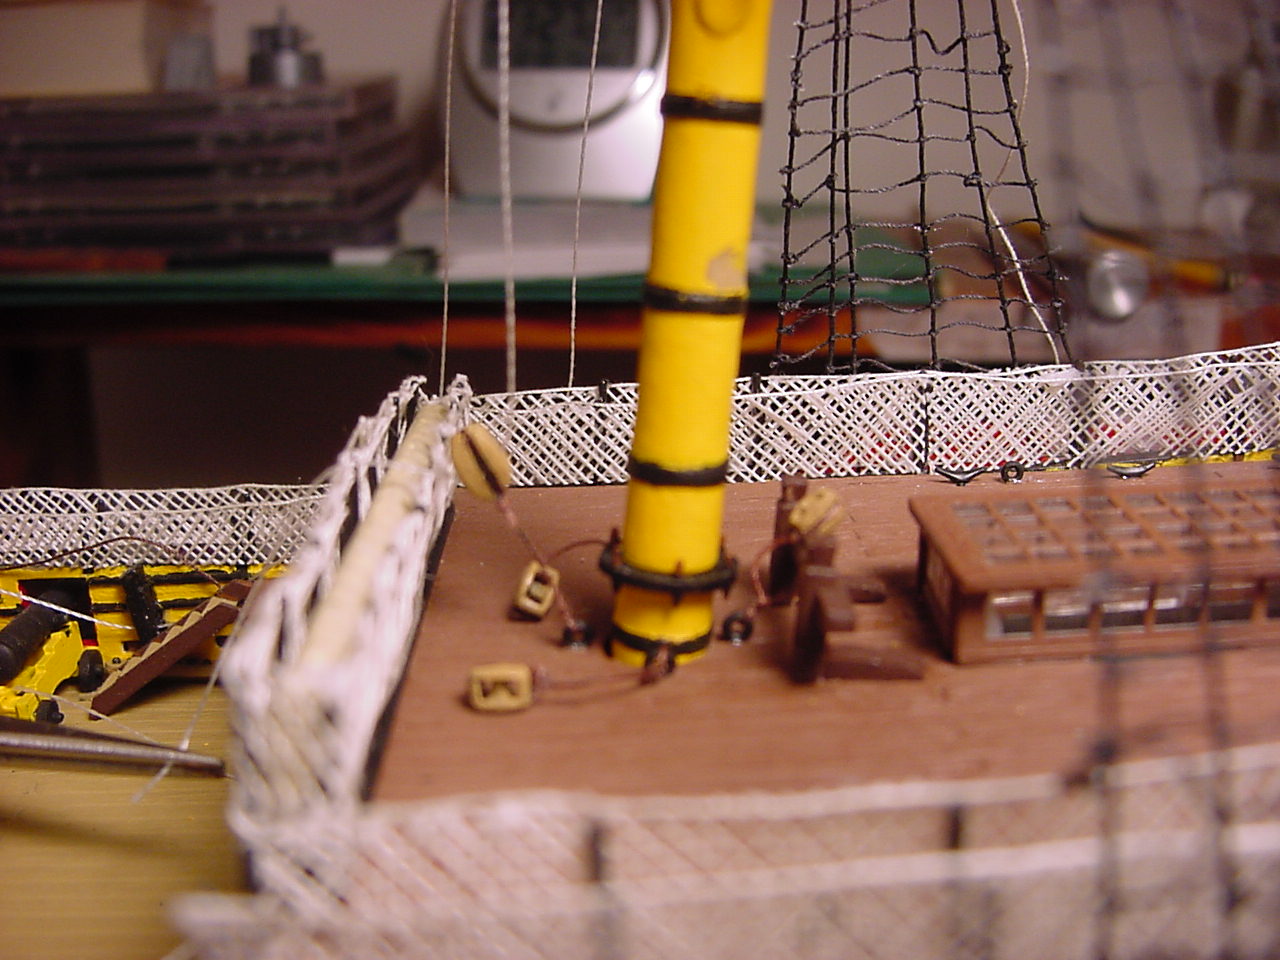
So the first picture is of the previously installed blocks to the eyebolts, located around the mizzen mast. Sorry for it being out of focus, but I can't always tell what the camera is focusing on, in macro mode.
 " BORDER="0">
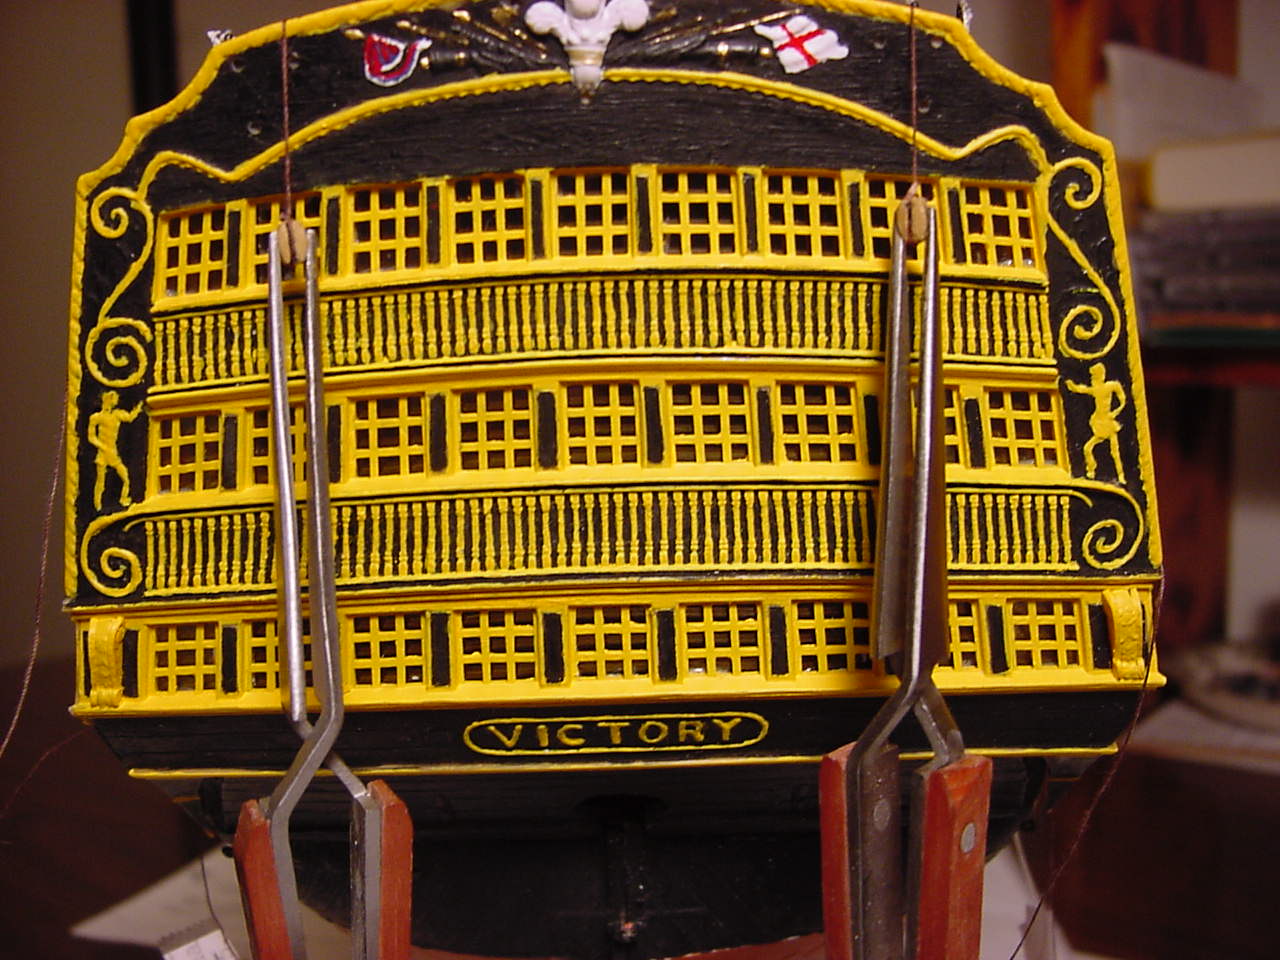
 This next pic is just a pair of blocks that make-up some of the rigging on the boom. I wanted them to be about the same length, as they pass over the stern:
 " BORDER="0">
 Here's what the vang pendants will look like (that's the rigging in the up-and-down direction in the picture):
 " BORDER="0">
 And this is some rigging for the horn (that is out of focus!)
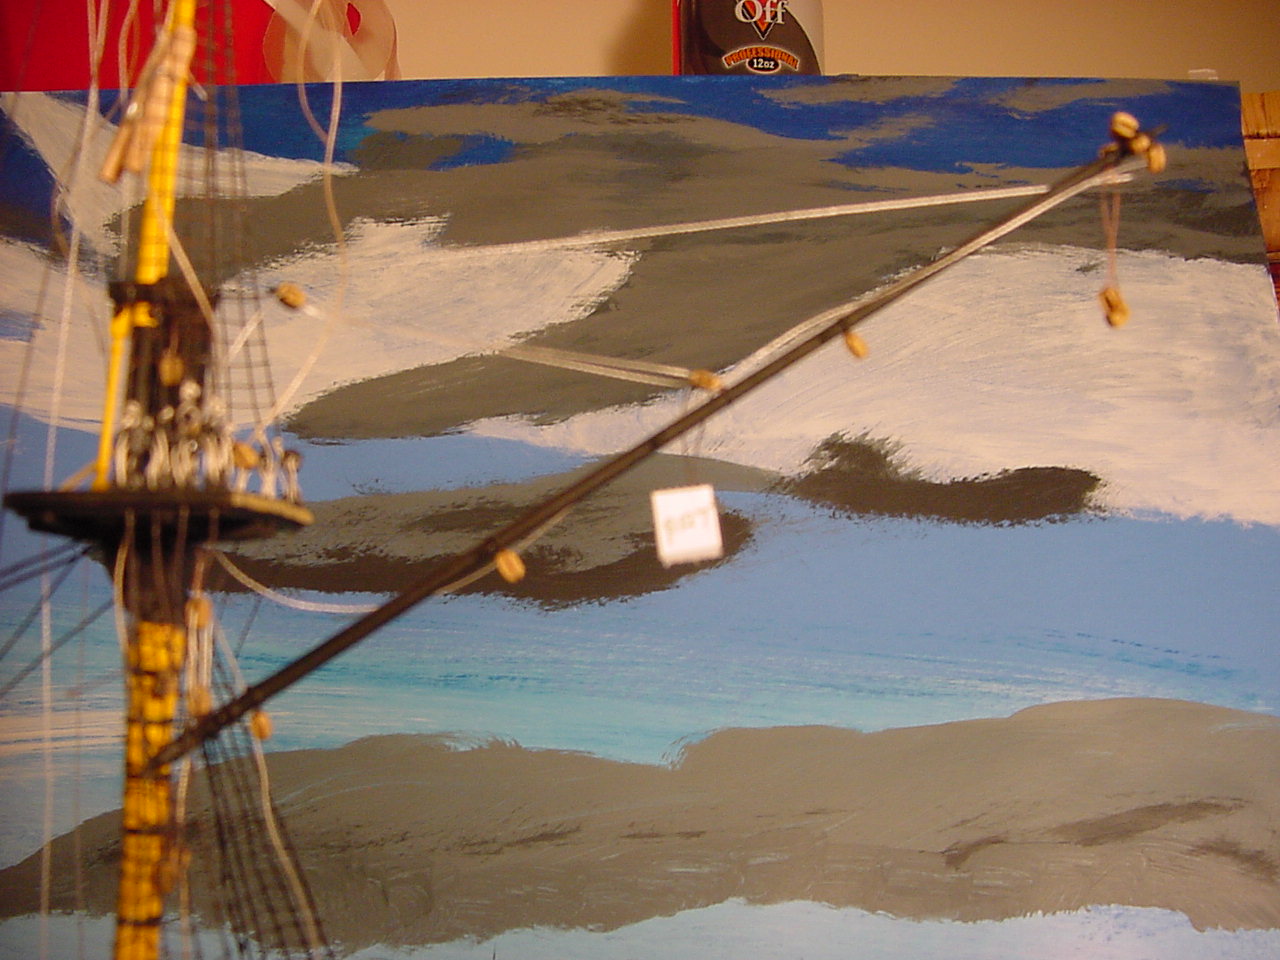 " BORDER="0">
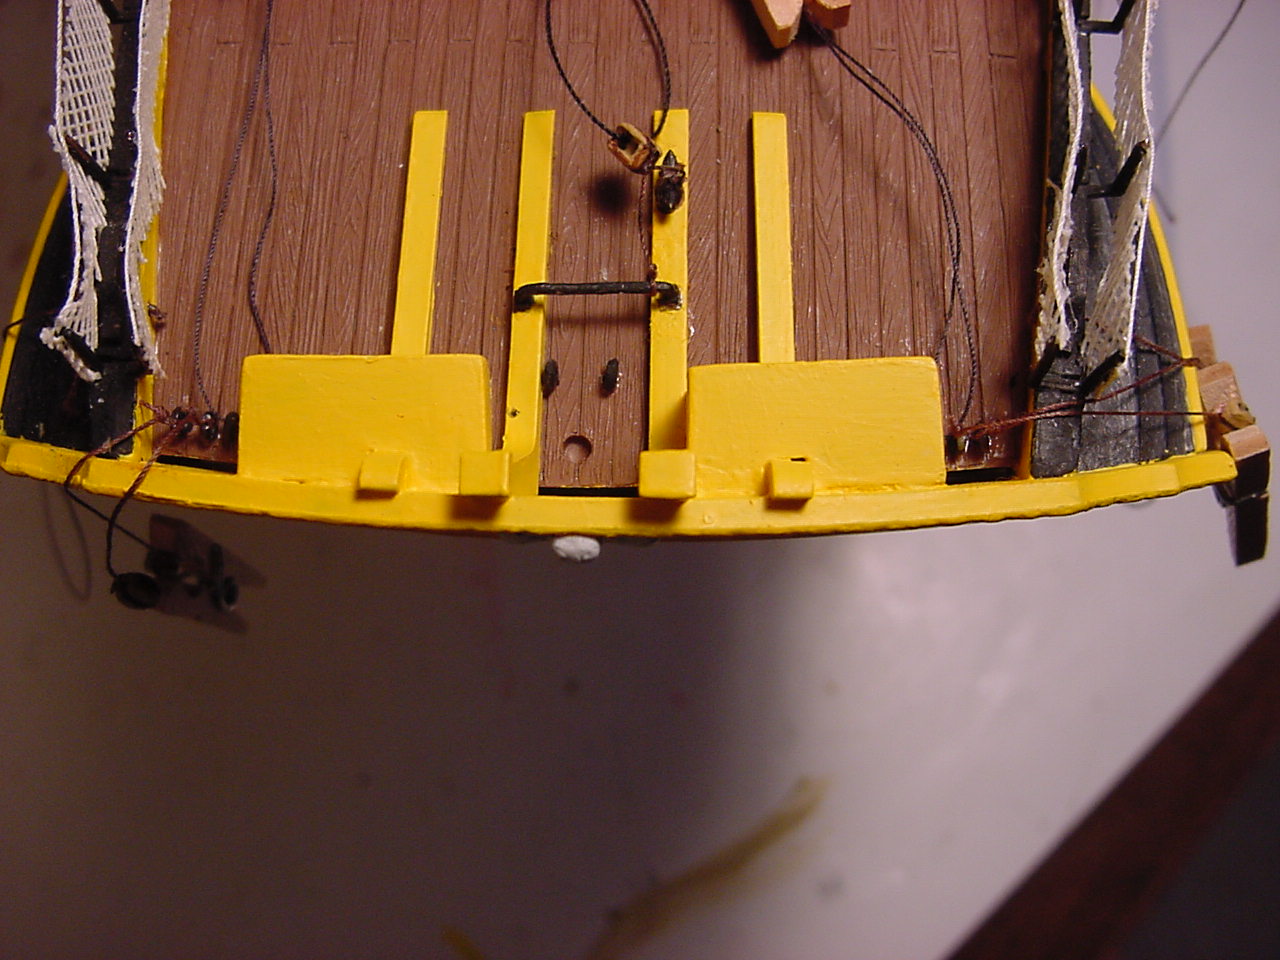
 So these next photos highlight a few problems with the overall fit of the hull, deck, and stern piece. The first picture shows how tight the distance is, between the innermost eyebolt and the signal flag box. The black thread that you see, is there as a sort of "fish line", so that when I do put the actual piece of rigging in, I can glue it to the fish line, and pull it through the eyebolt:
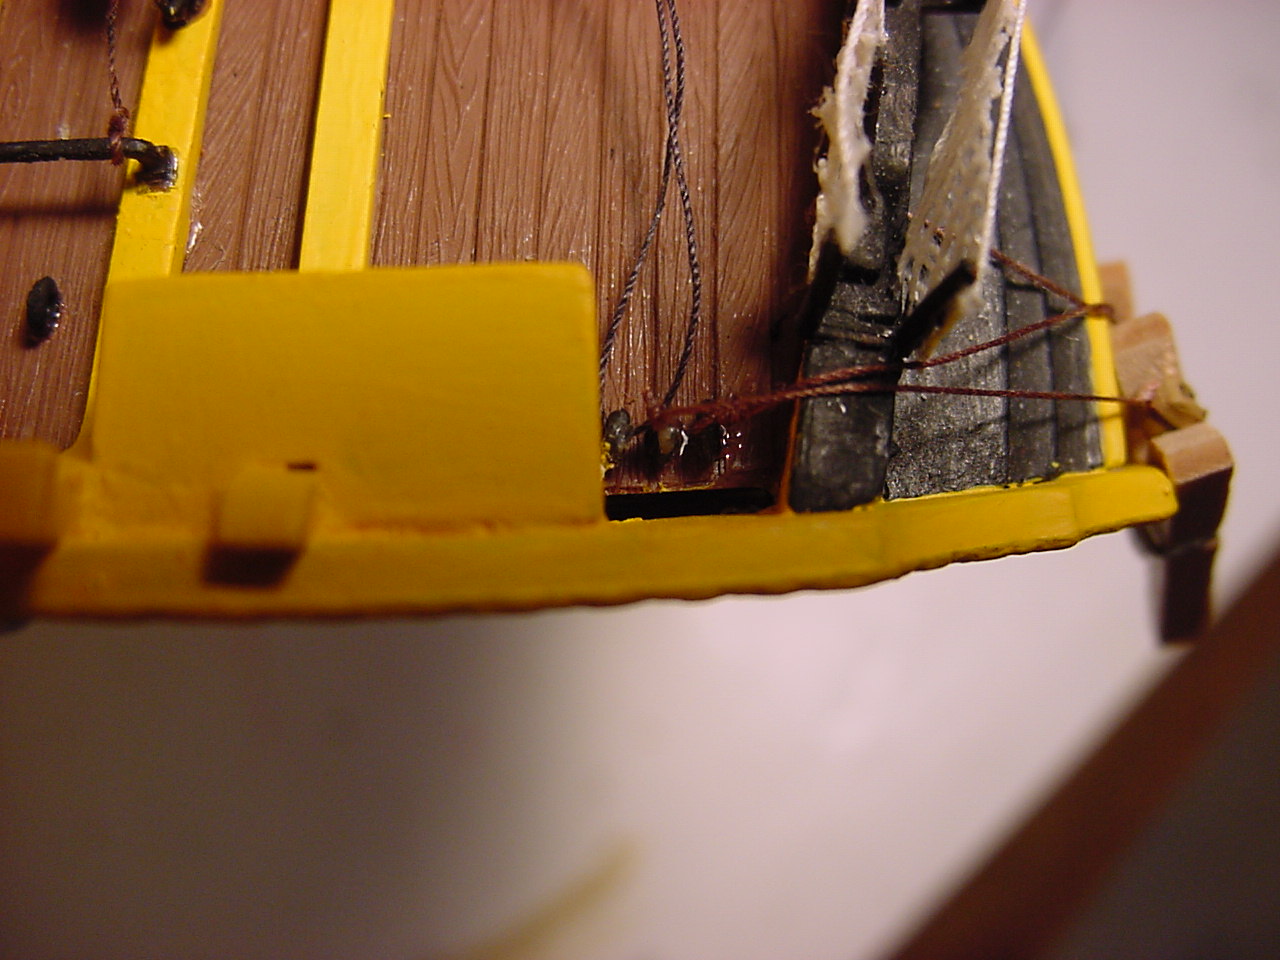 " BORDER="0">
 The next two photos sort of go together - the first one shows the gap between the deck and the stern piece, and the second one shows the mis-alignment between the stern piece, the hull, and the knees...this is exhibited by how close the left-hand eyebolt is to the knee, compared to how the right-hand eyebolt has a tad more space between it and the right hand knee.
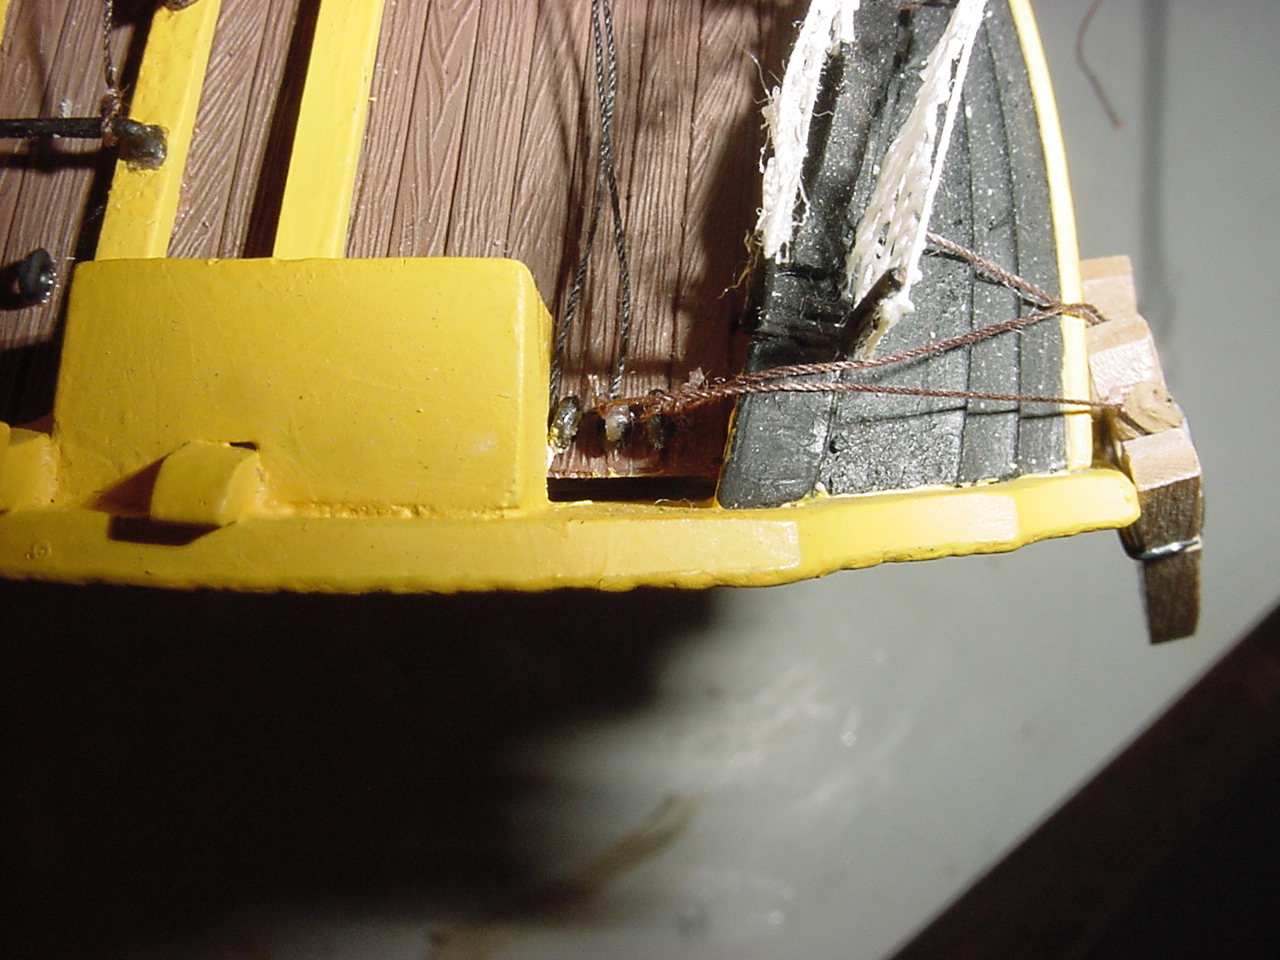 " BORDER="0">
  " BORDER="0">
 Again, thanks for taking the time to look things over! And how about them Buckeyes?! Things got a little tense there in the 4th quarter, but it all turned out for the good. Go Bucks!!!
Posted: Thursday, January 03, 2019 - 02:27 AM UTC
Timothy,
Nice job getting the rigging in place. It has to be tough getting those lines tied down in places that have to be hard to reach.
Mark
Nice job getting the rigging in place. It has to be tough getting those lines tied down in places that have to be hard to reach.
Mark

timmyp

Joined: May 18, 2008
KitMaker: 496 posts
Model Shipwrights: 404 posts

Posted: Thursday, January 03, 2019 - 11:57 AM UTC
Quoted Text
Timothy,
Nice job getting the rigging in place. It has to be tough getting those lines tied down in places that have to be hard to reach.
Mark
Thanks, Mark. And things will probably get tougher, as I add more rigging, in more hard-to-reach places! But as much as this thing is a pain in the patoot, I'm enjoying doing the build.
Overall, it's time that I start to seriously think about the sails...about 50 percent (maybe 51) of the rigging relates to the sails - sheet lines, clew lines, bunt lines. About the only rigging I can add without the sails in place are the yardarm lifts and the yardarm braces.
Cheers!!
Tim
Posted: Friday, January 04, 2019 - 12:47 AM UTC
Tim,
With the miles of rope on a sailing vessel, I can only assume that some of the riches people during the age of sail where the rope makers.
Mark
With the miles of rope on a sailing vessel, I can only assume that some of the riches people during the age of sail where the rope makers.
Mark

timmyp

Joined: May 18, 2008
KitMaker: 496 posts
Model Shipwrights: 404 posts

Posted: Friday, January 04, 2019 - 03:29 PM UTC
Quoted Text
Tim,
With the miles of rope on a sailing vessel, I can only assume that some of the riches people during the age of sail where the rope makers.
Mark
Followed by the sail makers!!!
Tim
TimReynaga

Joined: May 03, 2006
KitMaker: 2,500 posts
Model Shipwrights: 1,830 posts

Posted: Sunday, January 13, 2019 - 05:32 AM UTC
Wow, looking at that stern:

 " BORDER="0">
the little USS Constellation I'm working on at the moment seems so simple in comparison...!">
 " BORDER="0">
the little USS Constellation I'm working on at the moment seems so simple in comparison...!">
timmyp

Joined: May 18, 2008
KitMaker: 496 posts
Model Shipwrights: 404 posts

Posted: Monday, January 14, 2019 - 02:19 PM UTC
Thanks, Tim. 


Would you believe that stern piece needs more painting?


Would you believe that stern piece needs more painting?


timmyp

Joined: May 18, 2008
KitMaker: 496 posts
Model Shipwrights: 404 posts

Posted: Monday, January 14, 2019 - 03:07 PM UTC
@Tim R. - it just dawned on me, what with all the windows on the stern piece, you could probably put Lord Nelson & Lady Hamilton in there, playing ( a-hem) paddycake. 

TimReynaga

Joined: May 03, 2006
KitMaker: 2,500 posts
Model Shipwrights: 1,830 posts

Posted: Monday, January 14, 2019 - 03:22 PM UTC
Quoted Text
@Tim R. - it just dawned on me, what with all the windows on the stern piece, you could probably put Lord Nelson & Lady Hamilton in there, playing ( a-hem) paddycake.
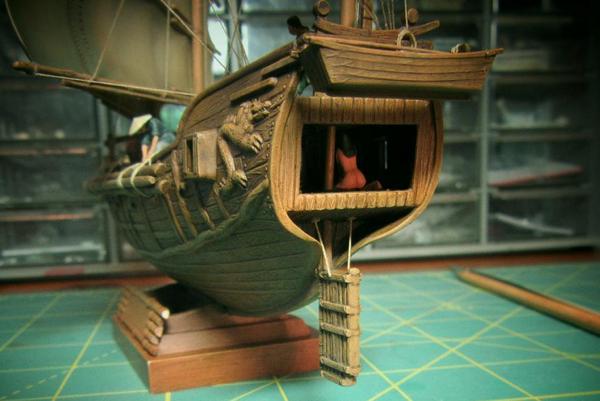
If you do go that route, be sure to get a good angle on the stern!

timmyp

Joined: May 18, 2008
KitMaker: 496 posts
Model Shipwrights: 404 posts

Posted: Monday, January 14, 2019 - 04:36 PM UTC
Quoted Text
Quoted Text@Tim R. - it just dawned on me, what with all the windows on the stern piece, you could probably put Lord Nelson & Lady Hamilton in there, playing ( a-hem) paddycake.
If you do go that route, be sure to get a good angle on the stern!

OK, thanks for that!!!!!!


Posted: Saturday, January 19, 2019 - 09:57 AM UTC
Tim,
I know I was absent for a while and missed part of you progress - but, besides the little joking about the Admiral's cabin - fantastic job. As was said, your dedication and endurance with this build is awesome, and you're building this tricky kit with it's all but good instructions into a jewel, overcoming a myriad of troubles I would likely have given up about.
Great job and you should see some light at the end of the tunnel by now...
Cheers,
Jan
TimReynaga

Joined: May 03, 2006
KitMaker: 2,500 posts
Model Shipwrights: 1,830 posts

Posted: Saturday, January 19, 2019 - 10:00 AM UTC
Quoted Text
besides the little joking about the Admiral's cabin - fantastic job. As was said, your dedication and endurance with this build is awesome, and you're building this tricky kit with it's all but good instructions into a jewel, overcoming a myriad of troubles I would likely have given up about.
Great job and you should see some light at the end of the tunnel by now...
Cheers,
Jan
I agree completely - hats off to your fantastic work!
 |


