General Ship Modeling
Discuss modeling techniques, experiences, and ship modeling in general.
Build blog for Heller's HMS Victory
timmyp
Visit this Community
Virginia, United States
Joined: May 18, 2008
KitMaker: 496 posts
Model Shipwrights: 404 posts
Posted: Sunday, January 20, 2019 - 07:11 AM UTC
Jan and Tim: thank you for you kind words & encouragement!! Yes Jan, I think I see a glimmer of light way, way, way down that tunnel!!

So in this installment, I got the rigging on the horn and boom completed. As always, there is discrepancies between what Heller instructs, and what is in my reference material. So first, a picture with the nomenclature of the rigging:
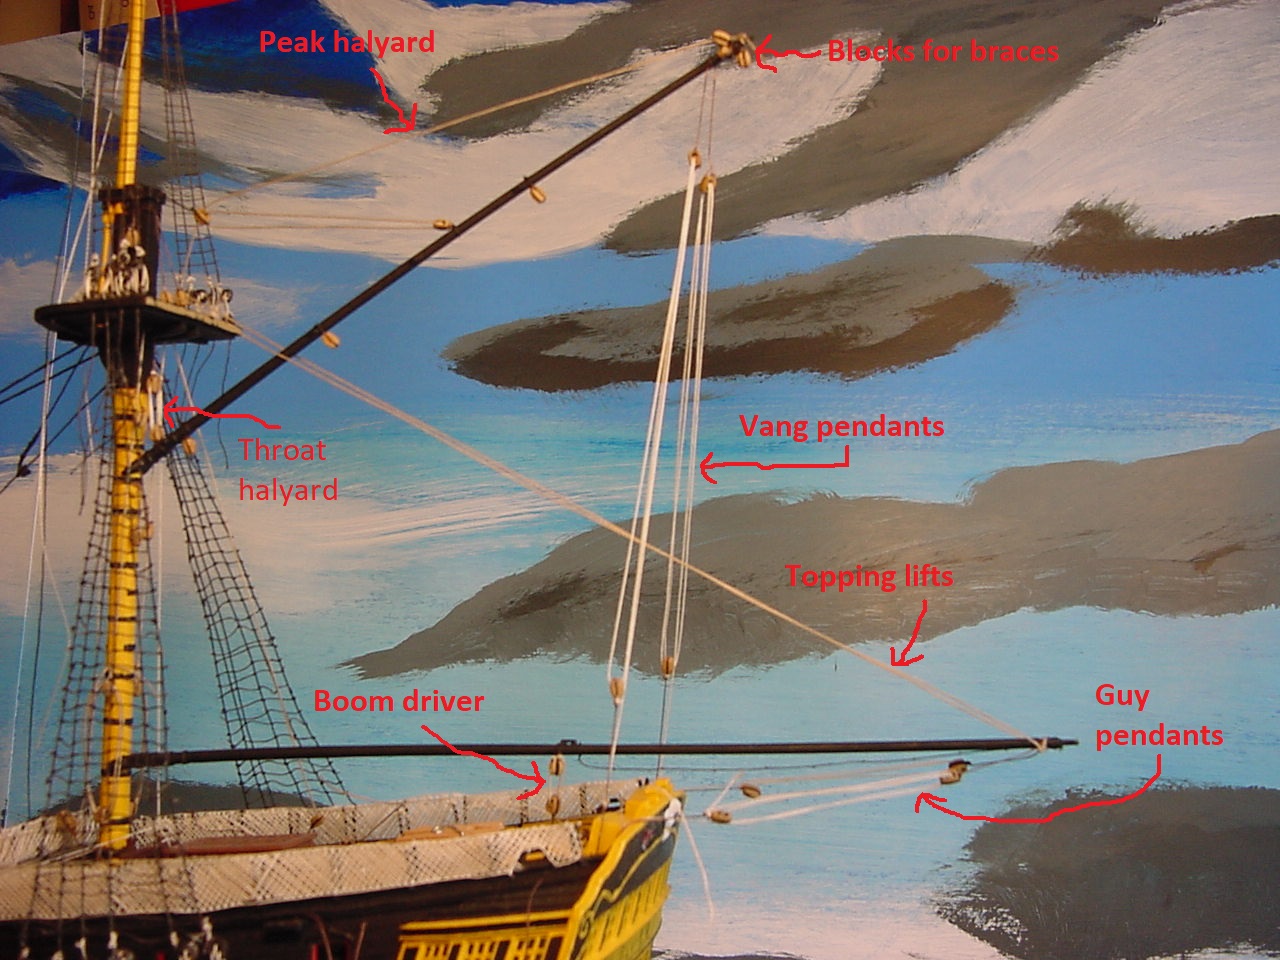
" BORDER="0">

Now, according to Longridge, the guy pendants are belayed to cleats on the taffrail. Well, Heller doesn't have a part called the taffrail, but Longridge has a good view of those cleats on the taffrail. The first picture is the taffrail on my model; the second is from Longridge's book.
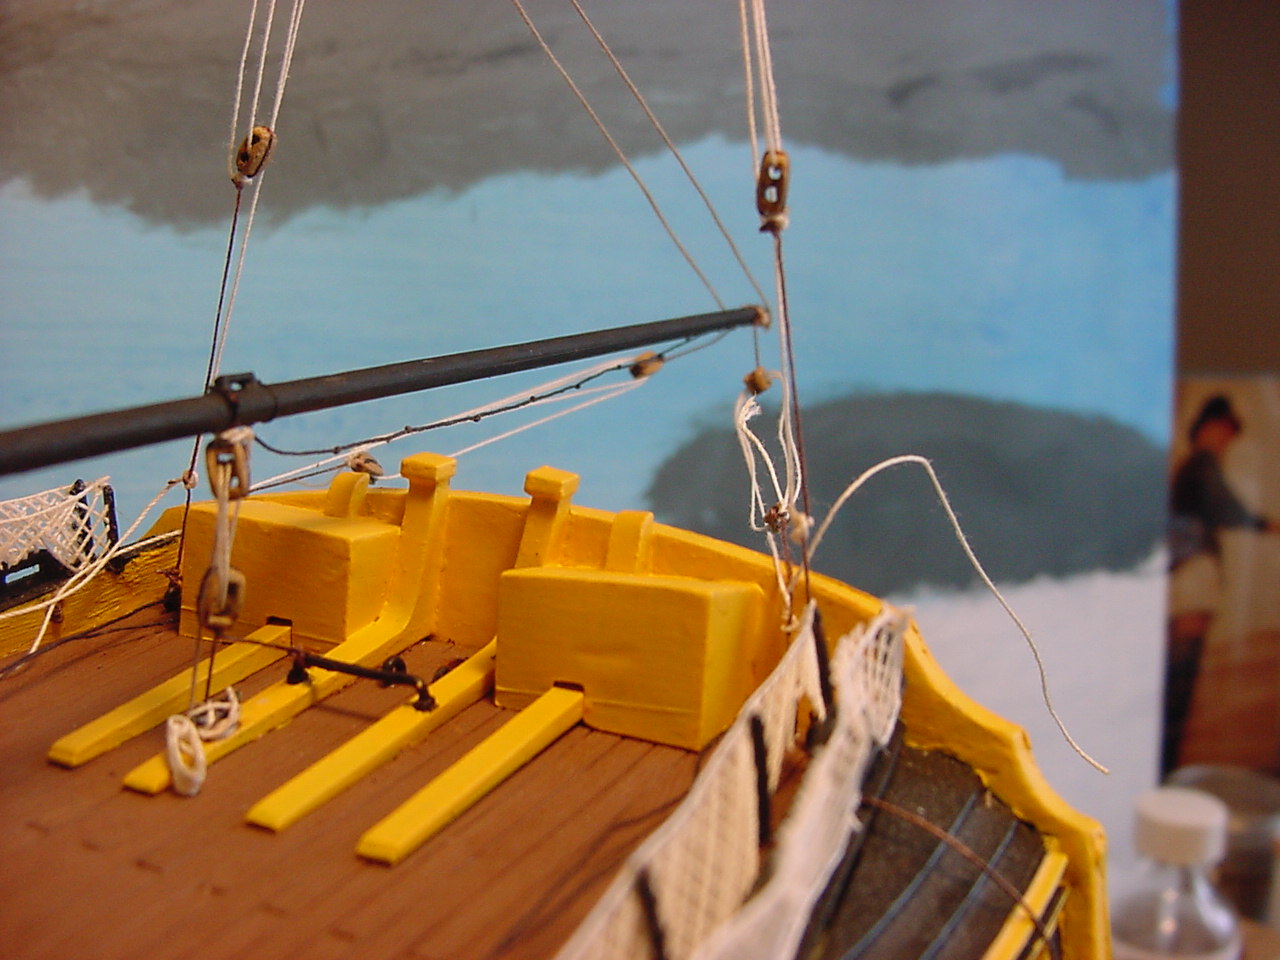
" BORDER="0">


" BORDER="0">
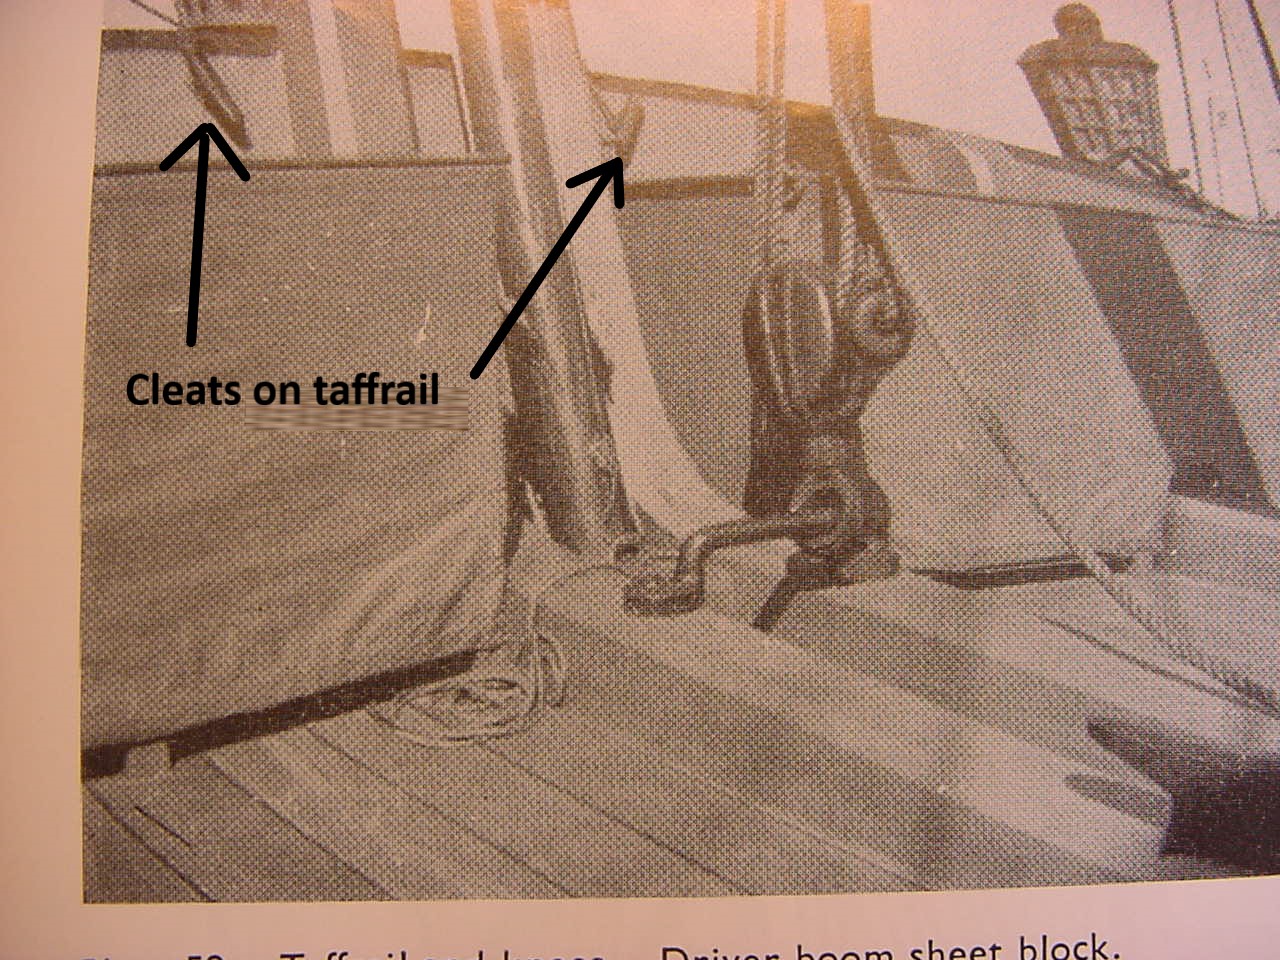
(Whoops! It looks like my editing to show the taffrail on the model didn't work - the taffrail is that part of the stern piece that butts up against the knees & signal flag boxes).

The rest of the pictures are just detailed pics of the rigging:

Port topping lift rigging detail:
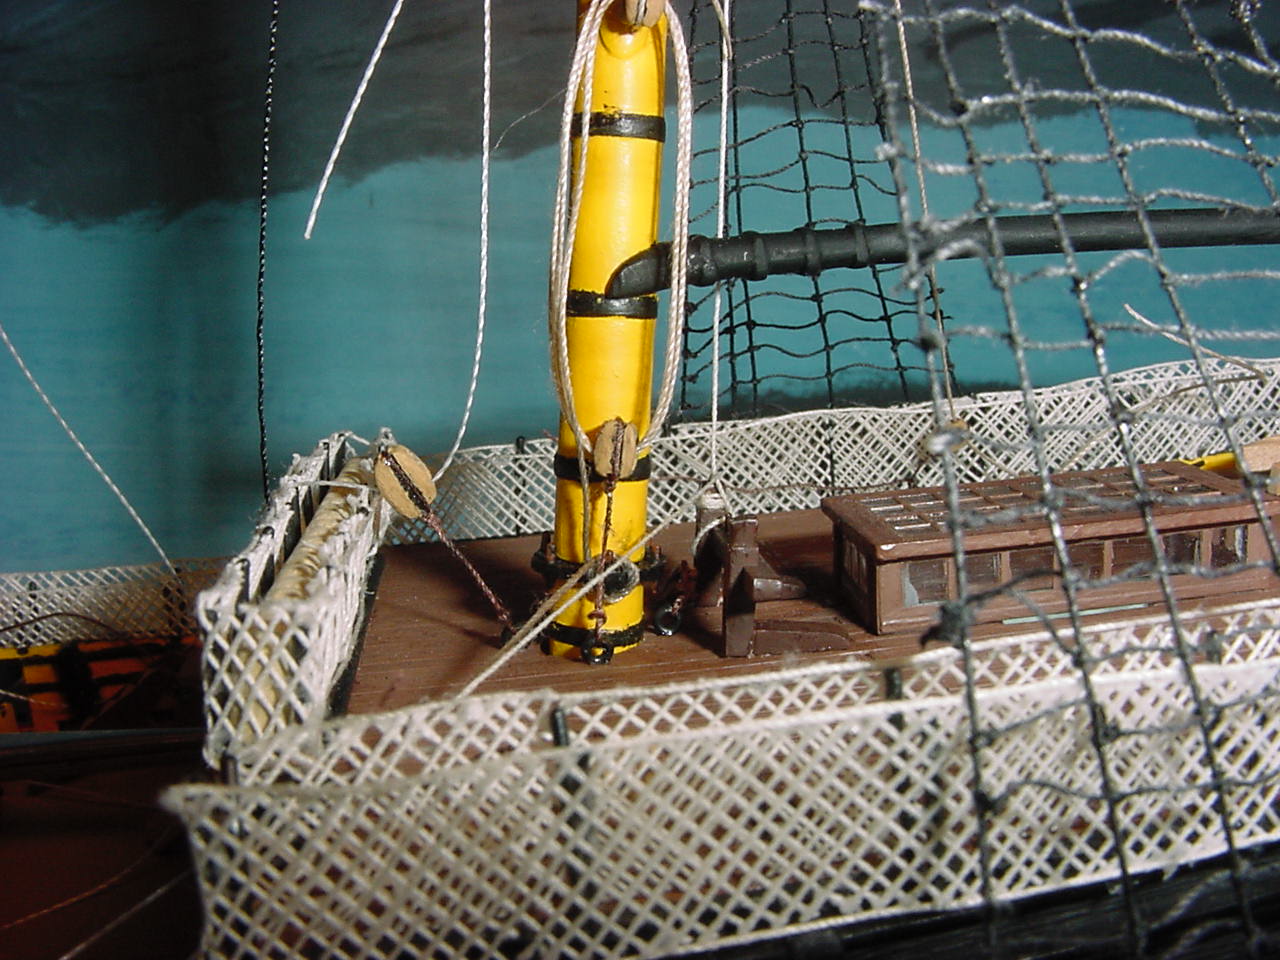
" BORDER="0">

The peak halyard belayed to the deck cleat:
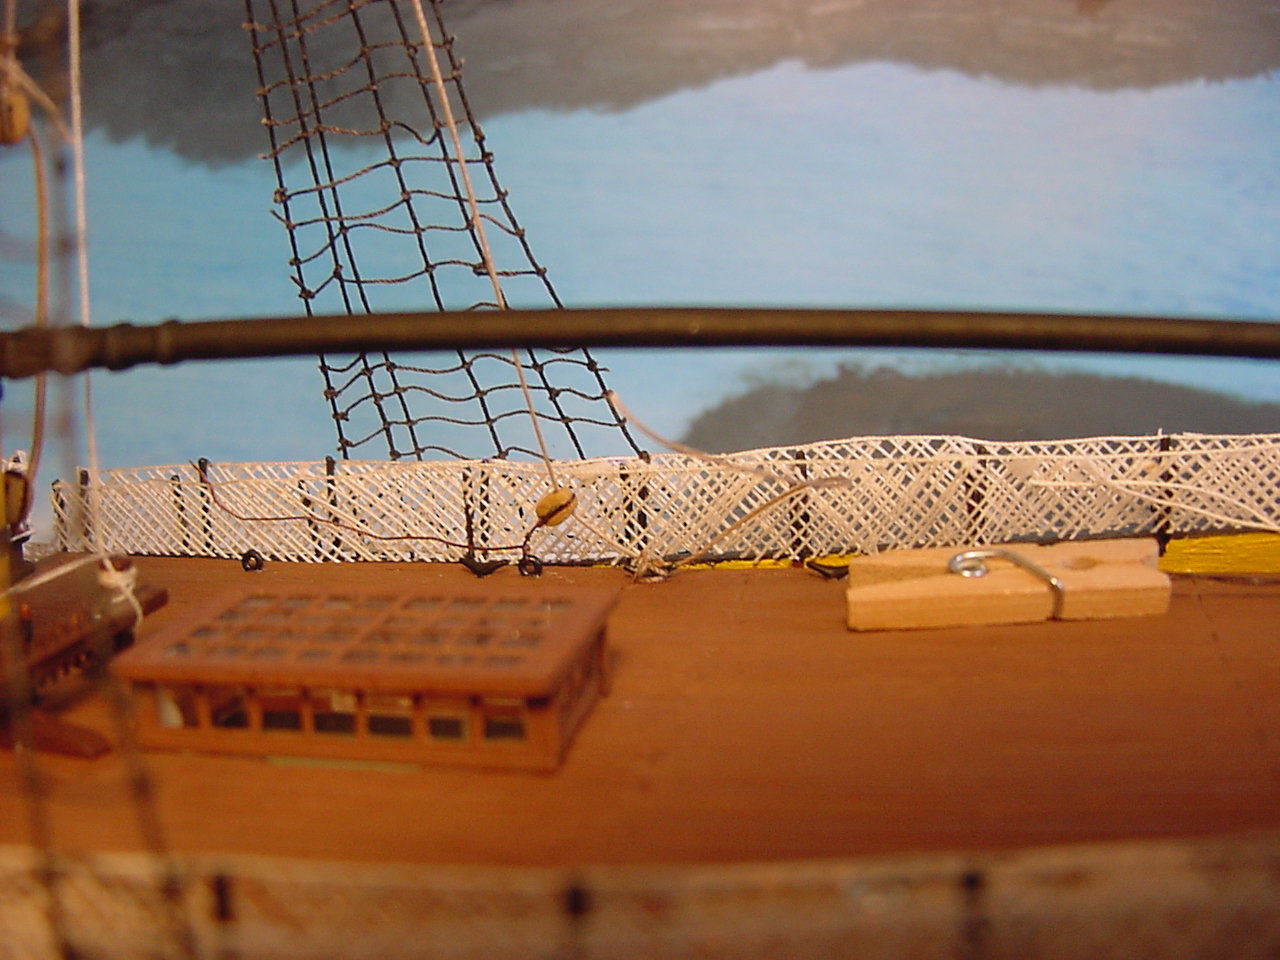
" BORDER="0">

The throat halyard. This is located at the end of the horn closest to the mast:
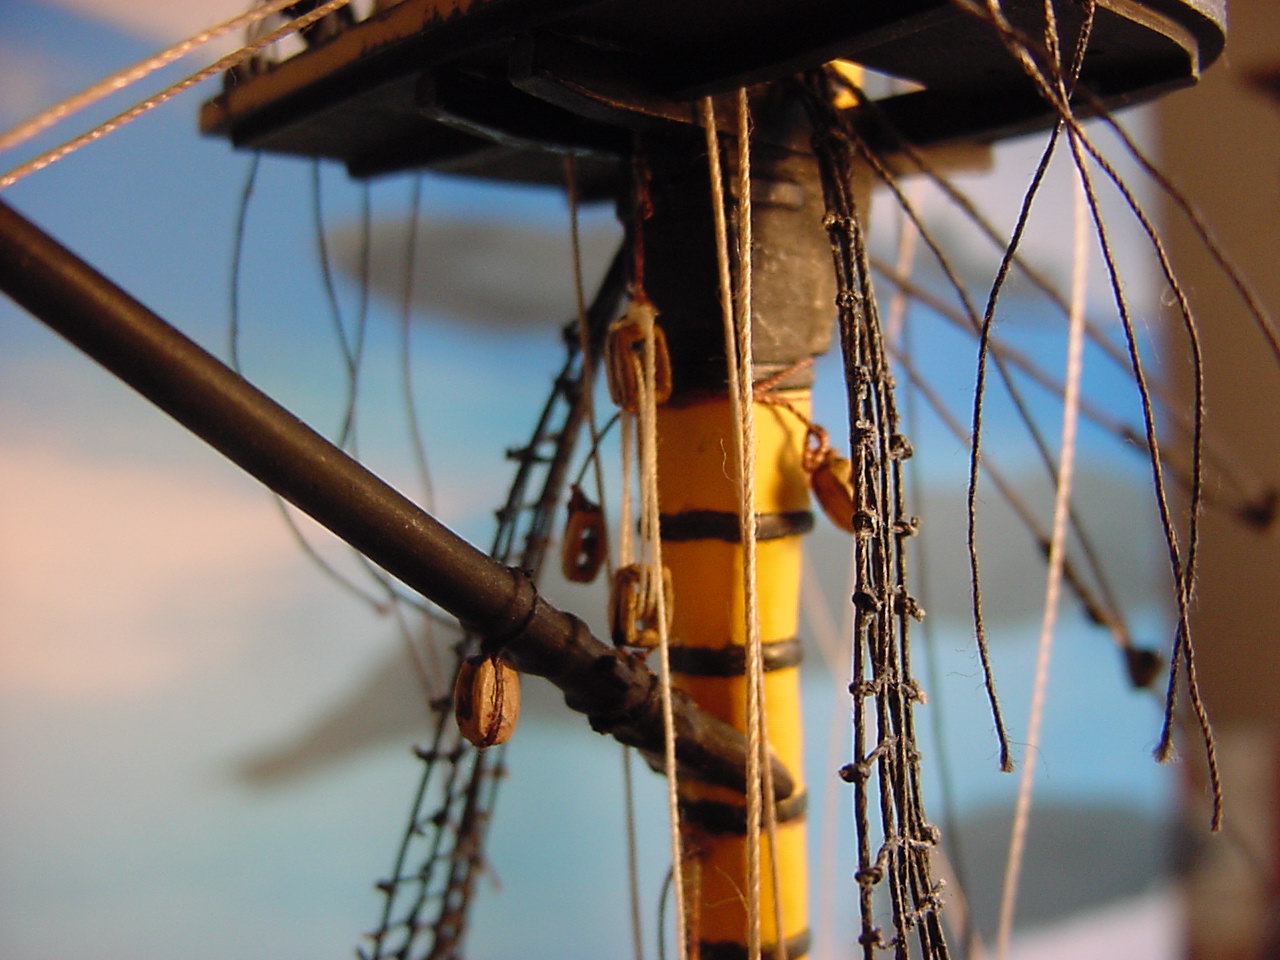
" BORDER="0">

This is the throat halyard belayed to the bitts (left thread), and to the right is the starboard topping lift belayed to the circular fife rail:
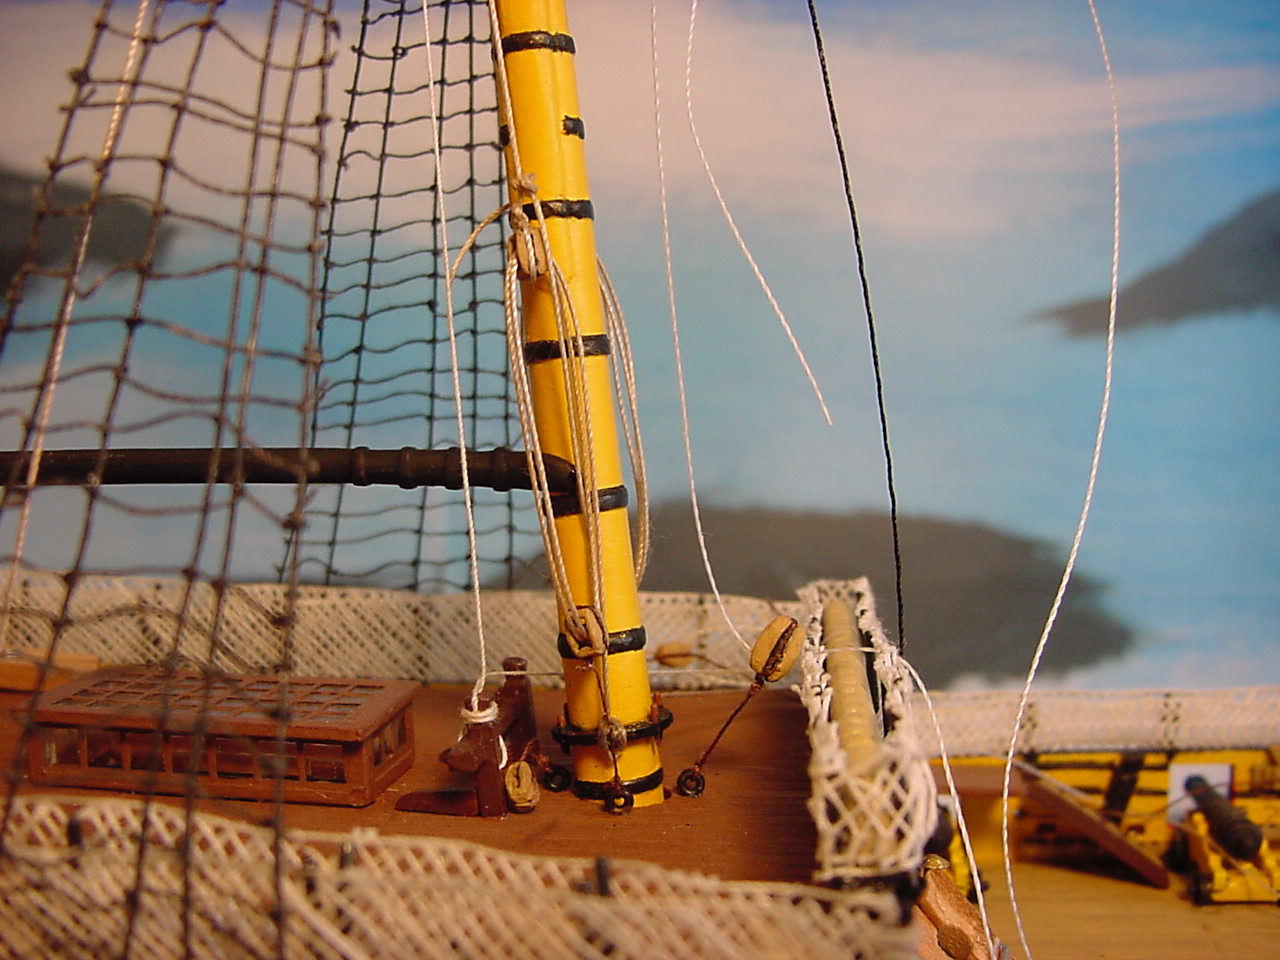
" BORDER="0">

One of the hazards of all this work, is you might bump into something that shouldn't be bumped in to! This is the case with the following picture - I was trying to belay the peak halyard to the deck cleat, but my either my tweezers or my arm bumped into the starboard vang pendant, which loosened the knot that holds the block in place. I'm not sure, right now, if I'm going to try and repair it, or let it go and hope for the best:
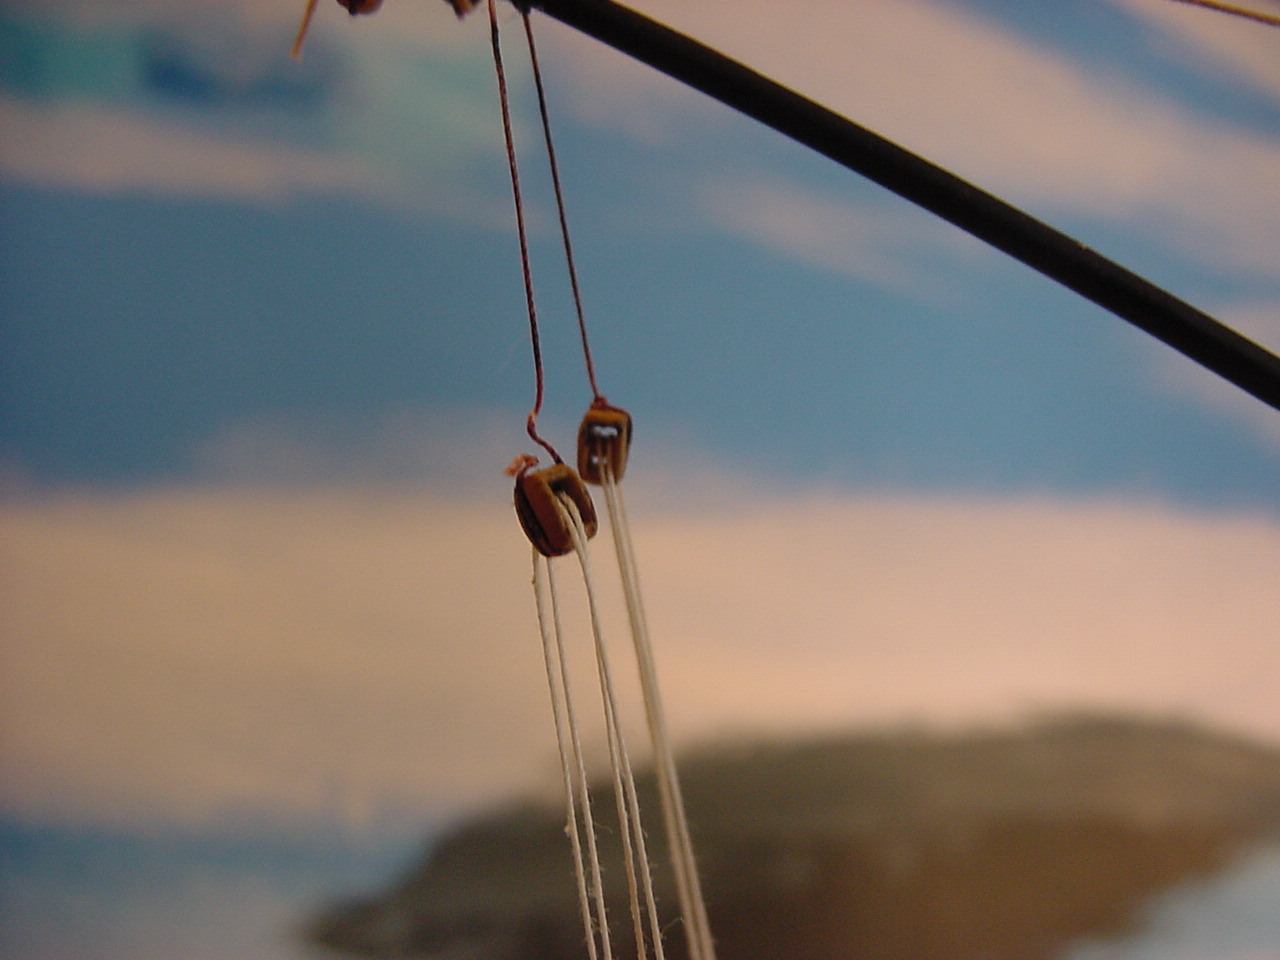
" BORDER="0">

And finally, just a picture of the blocks that are on the end of the horn. There's a total of 5 blocks here - 1 for the ensign halyard, the other 4 for yardarm braces. On those braces, the topgallant yard braces start on the yardarms, come down to the blocks and get belayed...somewhere. The top yard braces start on the end of the horn, go up to blocks on the yardarm, then come back down to the remaining 2 blocks, and then on to their belay point. It's gonna get crowded out there!
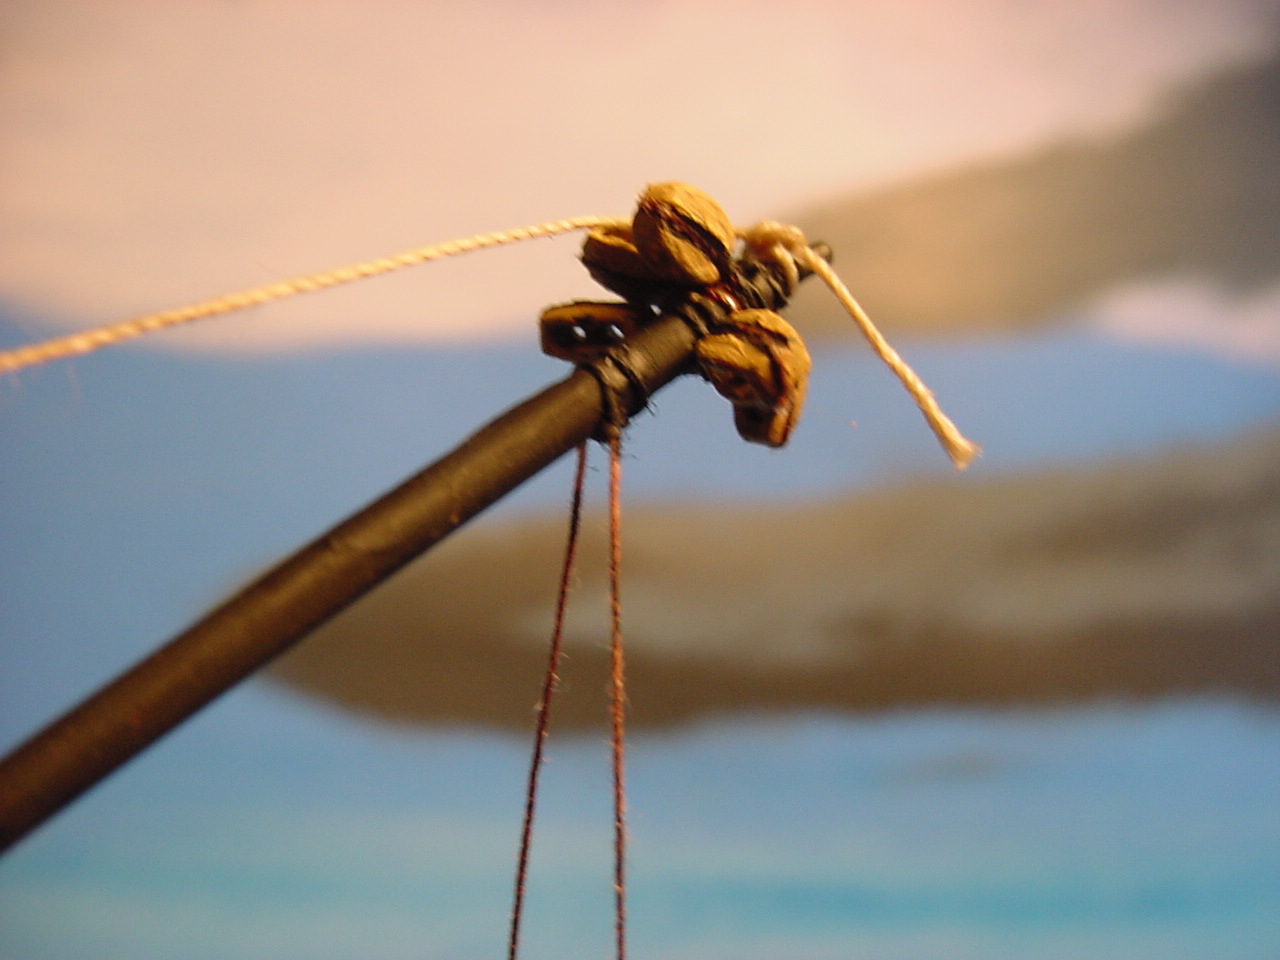
" BORDER="0">

So I guess the next steps will be to continue thinking about what to do about the sails, and either 1) install the mizzen yardarms, or 2) complete the construction of all the yardarms, and then install them in one go. Oh, and of course, more touch-up painting!!

Many thanks for all who take a look. As always, if you have any questions, feel free to ask!!

Tim
d6mst0
#453
Visit this Community
Texas, United States
Joined: August 28, 2016
KitMaker: 1,925 posts
Model Shipwrights: 1,298 posts
Posted: Sunday, January 20, 2019 - 01:40 PM UTC
Timothy,

In the second picture, what is the black line attached to the boom for, between the boom driver and the end of the boom?

Mark
timmyp
Visit this Community
Virginia, United States
Joined: May 18, 2008
KitMaker: 496 posts
Model Shipwrights: 404 posts
Posted: Monday, January 21, 2019 - 03:31 AM UTC
It's a footrope, or, as listed in Longridge & McVay's books, a horse. Putting the knots in this thread was actually pretty easy, compared to some of the other footropes I've installed.
timmyp
Visit this Community
Virginia, United States
Joined: May 18, 2008
KitMaker: 496 posts
Model Shipwrights: 404 posts
Posted: Sunday, February 03, 2019 - 06:17 AM UTC
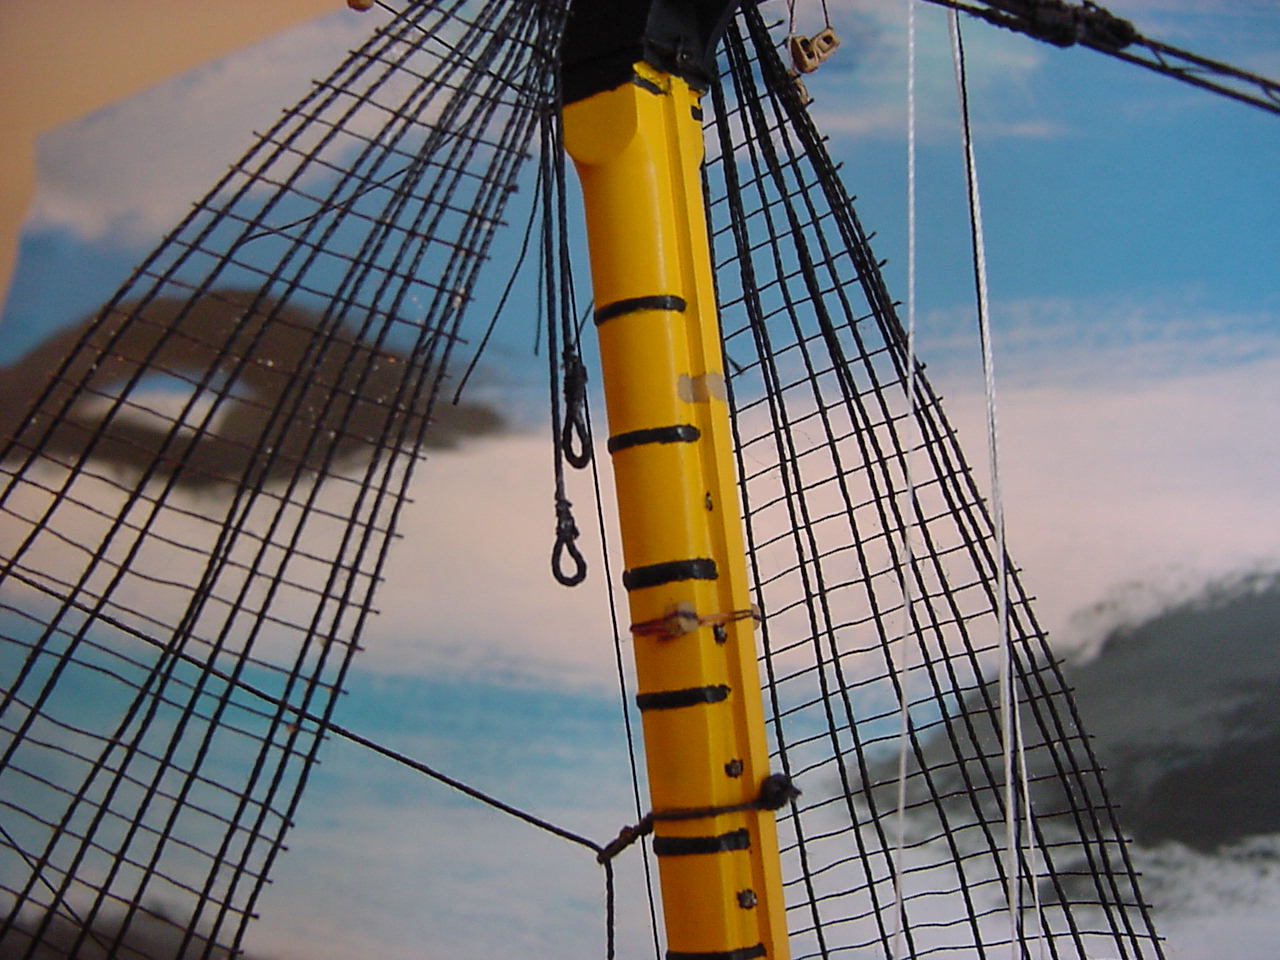
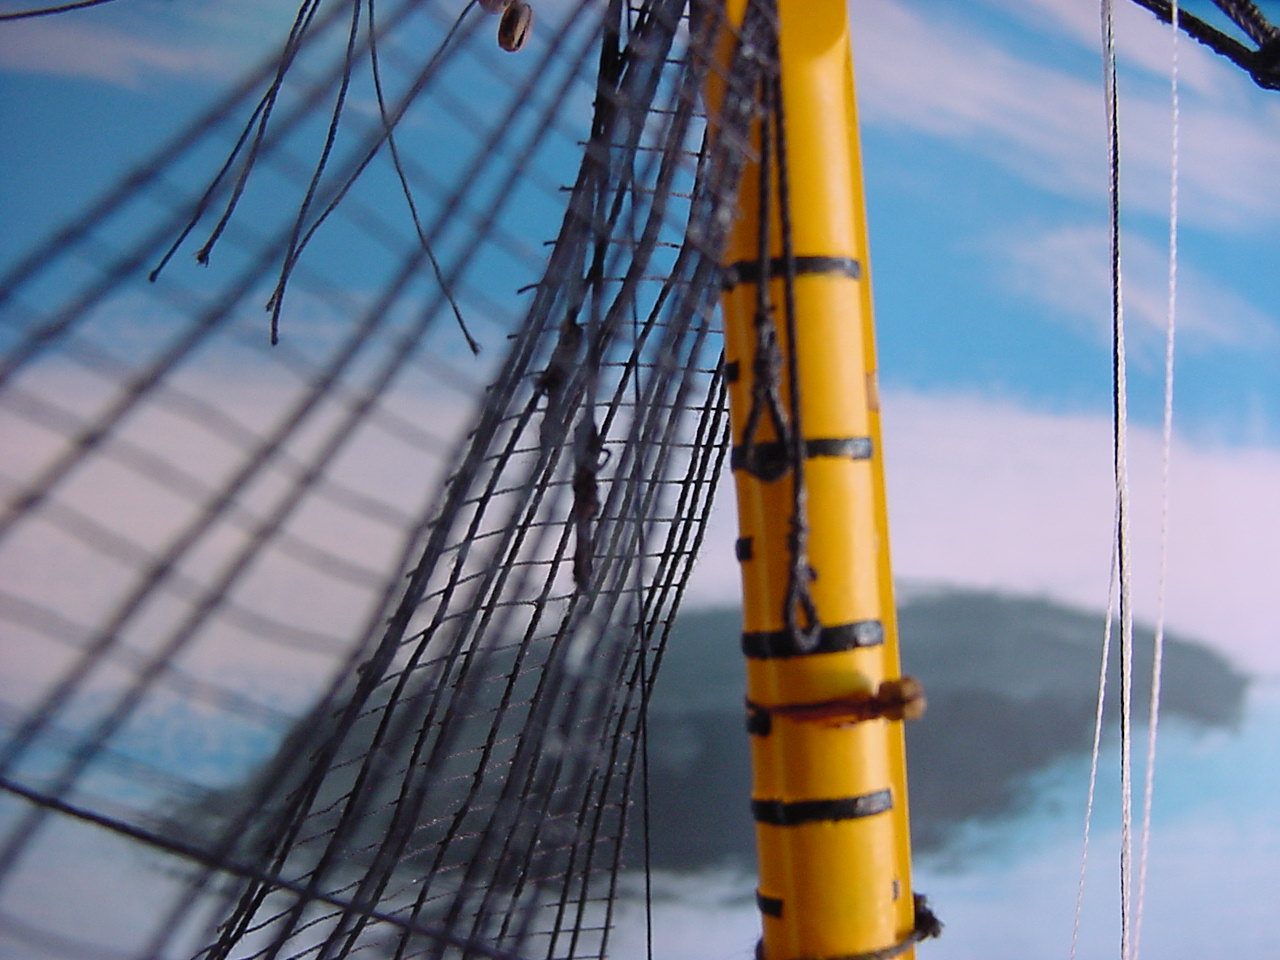
Looklooklooklook!! I installed the burton pendants. According to Longridge, the pendants are installed before the shrouds are put in place...but since the shrouds are already in place, I've put the pendants on top of the shrouds, but underneath the stays.

" BORDER="0">

A couple of close-ups:

" BORDER="0">

" BORDER="0">

And good luck to your team in the Super Bowl!!
d6mst0
#453
Visit this Community
Texas, United States
Joined: August 28, 2016
KitMaker: 1,925 posts
Model Shipwrights: 1,298 posts
Posted: Sunday, February 03, 2019 - 01:27 PM UTC
Timothy,

Nice work. I had to Goggle it as I did not know what a Burton Pendant is. But now I know, Thanks.

Mark
timmyp
Visit this Community
Virginia, United States
Joined: May 18, 2008
KitMaker: 496 posts
Model Shipwrights: 404 posts
Posted: Sunday, February 03, 2019 - 09:26 PM UTC

Quoted Text

Timothy,

Nice work. I had to Goggle it as I did not know what a Burton Pendant is. But now I know, Thanks.

Mark


Hi Mark,

They're also known as "pendants of tackle". When I was doing some early research on this vessel, one of the references I read about these pendants, came across as "All hail the mighty pendants!!"

In the instructions, Heller lists the lengths of each leg, so it takes the guess work out of how long to make each one. The close-up photos above are of the pendants around the mainmast; there is another pendant on the main mast at the topsail level, and the foremast is the same way. The mizzen mast only has a pendant at the mizzen cap.

Tim
McRunty
#491
Visit this Community
Missouri, United States
Joined: April 06, 2016
KitMaker: 602 posts
Model Shipwrights: 349 posts
Posted: Monday, February 04, 2019 - 04:42 AM UTC
Looks awesome so far! I have to tell you I am jealous of your riggings skills, as I am off all sailing ship builders. I just don't have what it takes to do it.
timmyp
Visit this Community
Virginia, United States
Joined: May 18, 2008
KitMaker: 496 posts
Model Shipwrights: 404 posts
Posted: Monday, February 04, 2019 - 07:50 PM UTC

Quoted Text

Looks awesome so far! I have to tell you I am jealous of your riggings skills, as I am off all sailing ship builders. I just don't have what it takes to do it.


Thanks, Rory. Doing the rigging, well, it's a love-hate relationship. And Heller's instructions aren't always crystal clear!!
StephenLarsen
#474
Visit this Community
North Carolina, United States
Joined: June 13, 2015
KitMaker: 67 posts
Model Shipwrights: 41 posts
Posted: Monday, February 18, 2019 - 01:19 AM UTC
Loving your build. Great work!
timmyp
Visit this Community
Virginia, United States
Joined: May 18, 2008
KitMaker: 496 posts
Model Shipwrights: 404 posts
Posted: Saturday, February 23, 2019 - 03:00 PM UTC
Thanks, Steve. Encouragement is always welcome!!

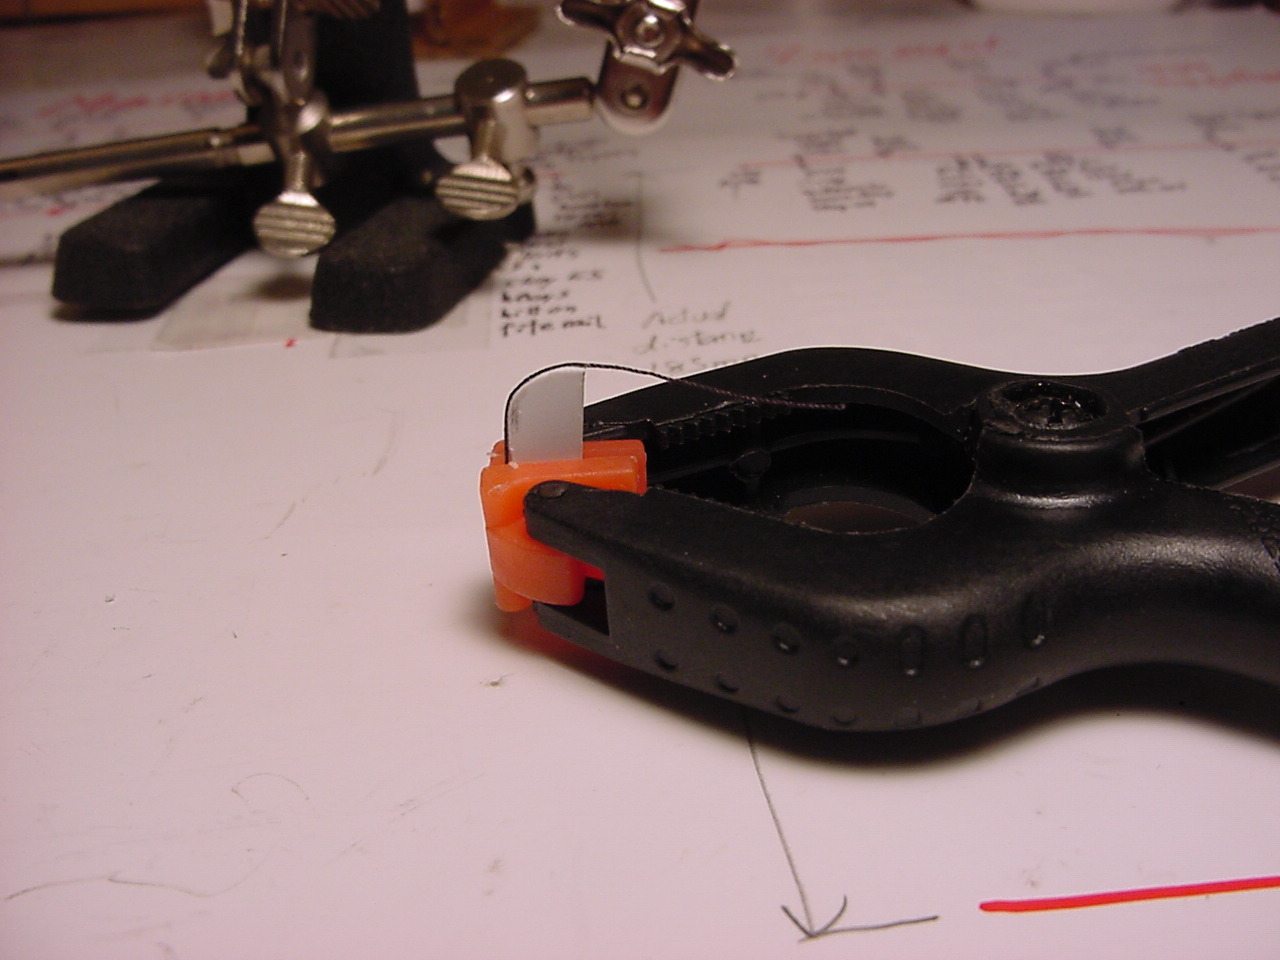
So the latest news: work continues on attaching the blocks to the yardarms. One of the hard things is getting the footropes (or horses) attached, and making the look half-way decent. Since I started making the footropes to be 5 mm down from the yard, I made a form out of sheet plastic, to try and at least get a consistent look. So here's a pic of the form I built, with some thread around it, to try and get the shape correct:

" BORDER="0">

I had trouble getting one of the footropes to sit correctly, so I wound up making a full-size form for the other footrope (this was on the fore topgallant yard, or the yardarm that sits highest on the mast)(and sorry I didn't get the focal point correct):

" BORDER="0">

In working on the fore top yard (or, the middle yardarm), this is a 2-piece yard. So in scraping/filing/sanding the mis-match of the two parts, I started to whittle away at the "hole" in the end of the yard. Big mistake!! That hole is there to accept a pin from the stud sail boom. The first pic is of the hole:

" BORDER="0">

This pic shows how the stud sail boom fits in the hole:

" BORDER="0">

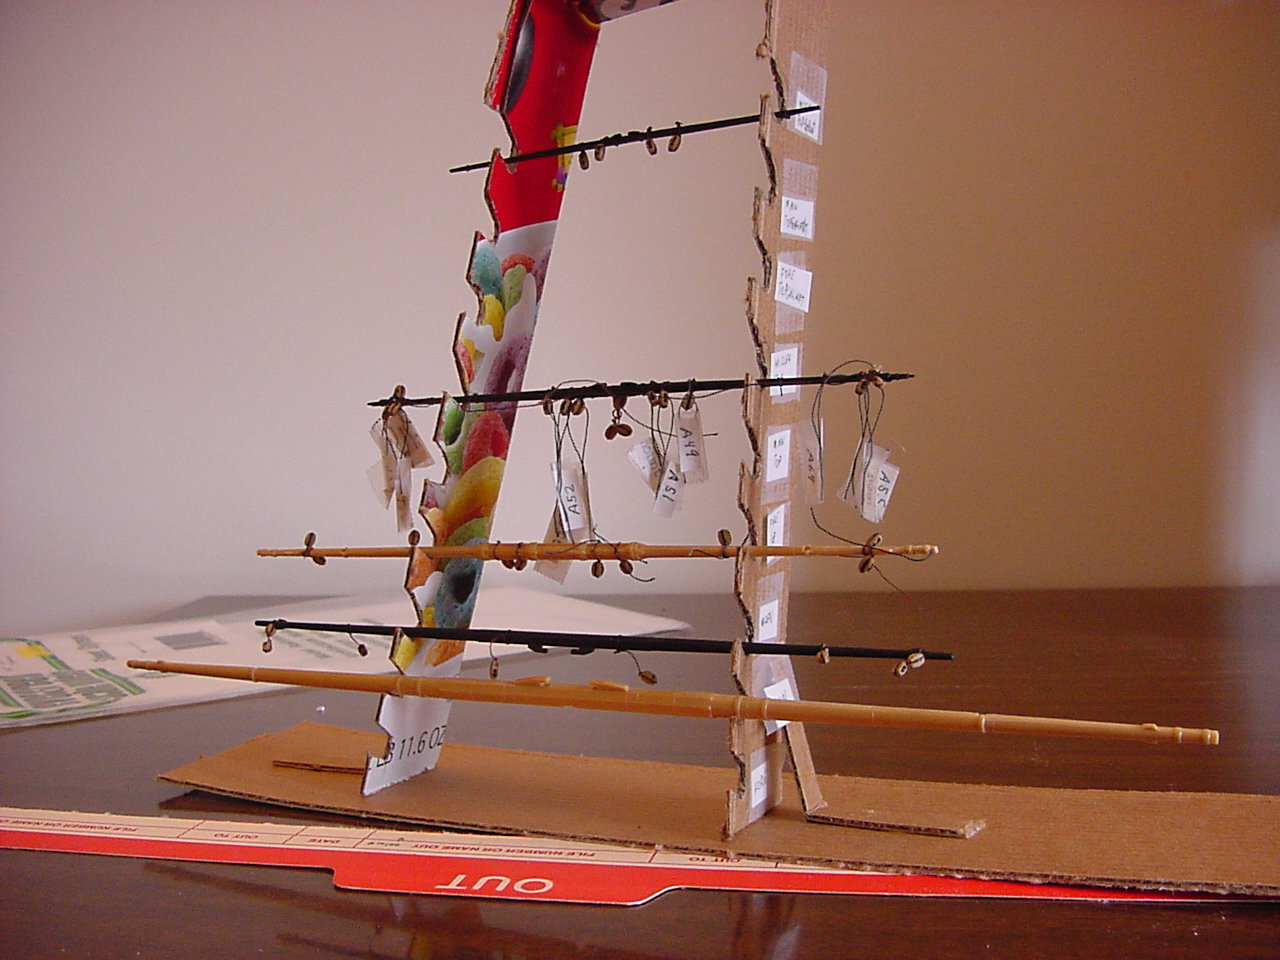
I found, after I made all the mizzen mast yardarms, that I needed a place to put the completed yard, so I built a stand out of some cardboard, to put the completed yards:

" BORDER="0">

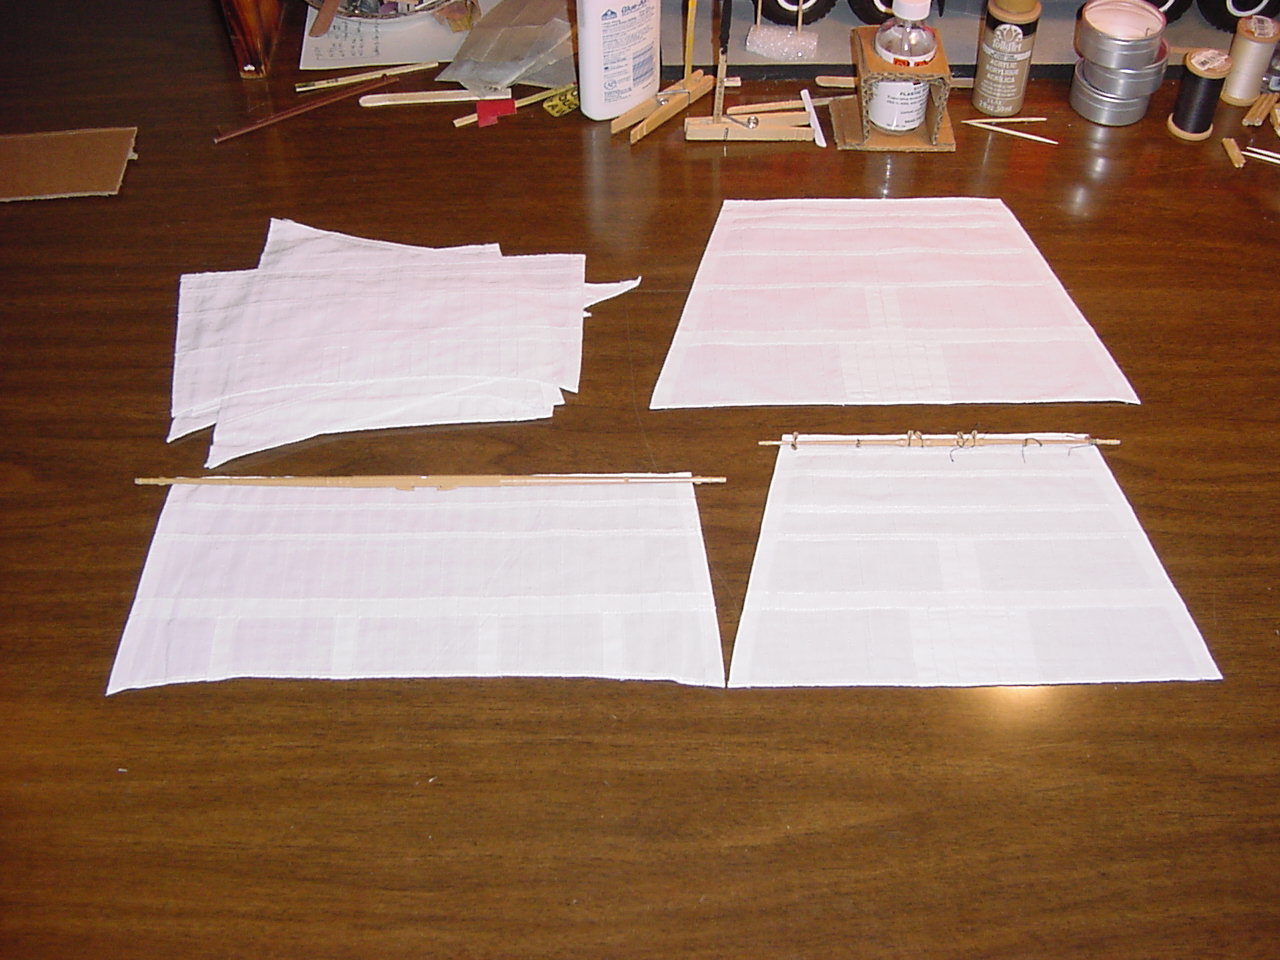
And lastly, to solve my problem of what to do about the sails, I went ahead and bought a set of cloth sails from hismodel.com...goodness me, a hundred and twenty bucks for the set. But they arrived today, and I'm glad I bought them. Here's some of the sails laid out - starting with the upper right and going clockwise, this is the main top sail, the fore top sail, the main sail, and all the rest of the sails, in one big pile:

" BORDER="0">

So that's all for now. Thanks for taking a look, and Spring will be here in a month!!
d6mst0
#453
Visit this Community
Texas, United States
Joined: August 28, 2016
KitMaker: 1,925 posts
Model Shipwrights: 1,298 posts
Posted: Sunday, February 24, 2019 - 04:55 AM UTC
Timothy,

Those are some tiny pulleys. That is a great idea on how to keep the finish masts. I see you marked some pulleys but not others, how come?

Mark
timmyp
Visit this Community
Virginia, United States
Joined: May 18, 2008
KitMaker: 496 posts
Model Shipwrights: 404 posts
Posted: Sunday, February 24, 2019 - 12:15 PM UTC

Quoted Text

Timothy,

Those are some tiny pulleys. That is a great idea on how to keep the finish masts. I see you marked some pulleys but not others, how come?

Mark


Mark,

Basically, it's because of the number of blocks on the yardarm. The more blocks, the more chance for confusion later on. Just trying to keep myself straight on what's what!
JJ1973
#345
Visit this Community
Niedersachsen, Germany
Joined: August 22, 2011
KitMaker: 1,835 posts
Model Shipwrights: 1,832 posts
Posted: Thursday, February 28, 2019 - 09:14 PM UTC
...and more rigging madness!!

Keep up the great work, Tim, I continue to admire your patience and enthusiasm to carry your fine build forward, despite quite a few obstacles to overcome!!

Cheers,
Jan
timmyp
Visit this Community
Virginia, United States
Joined: May 18, 2008
KitMaker: 496 posts
Model Shipwrights: 404 posts
Posted: Wednesday, March 06, 2019 - 03:47 AM UTC

Quoted Text

...and more rigging madness!!

Keep up the great work, Tim, I continue to admire your patience and enthusiasm to carry your fine build forward, despite quite a few obstacles to overcome!!

Cheers,
Jan


Thanks Jan! Oh yes, the madness continues, but it seems to be getting more enjoyable!

I've got some pics I want to post, but just haven't had the time to get it done - maybe this weekend, so stay tuned!!

Tim
timmyp
Visit this Community
Virginia, United States
Joined: May 18, 2008
KitMaker: 496 posts
Model Shipwrights: 404 posts
Posted: Wednesday, March 06, 2019 - 12:19 PM UTC
Musings from the treadmill:

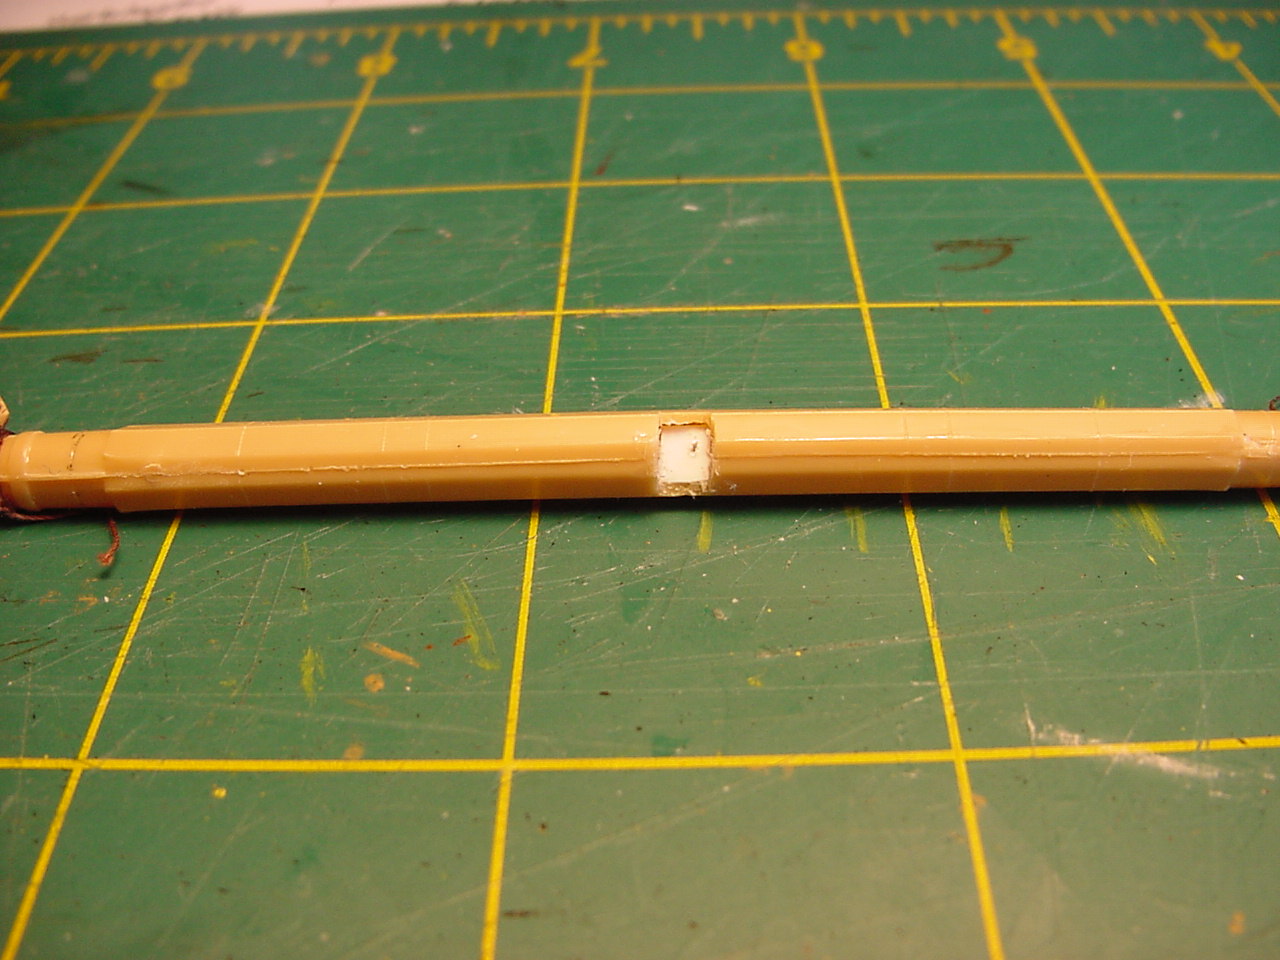
I got to thinking how the foreyard & mainyard will have a relatively minor amount of mast-to-yardarm contact, given that those two yardarms are hollow, right where they will attach to the mast. So I came up with the idea of putting a "filler" square on the mainyard (I previously cemented the two halves together, and cut out the space where it will contact the mast):

" BORDER="0">

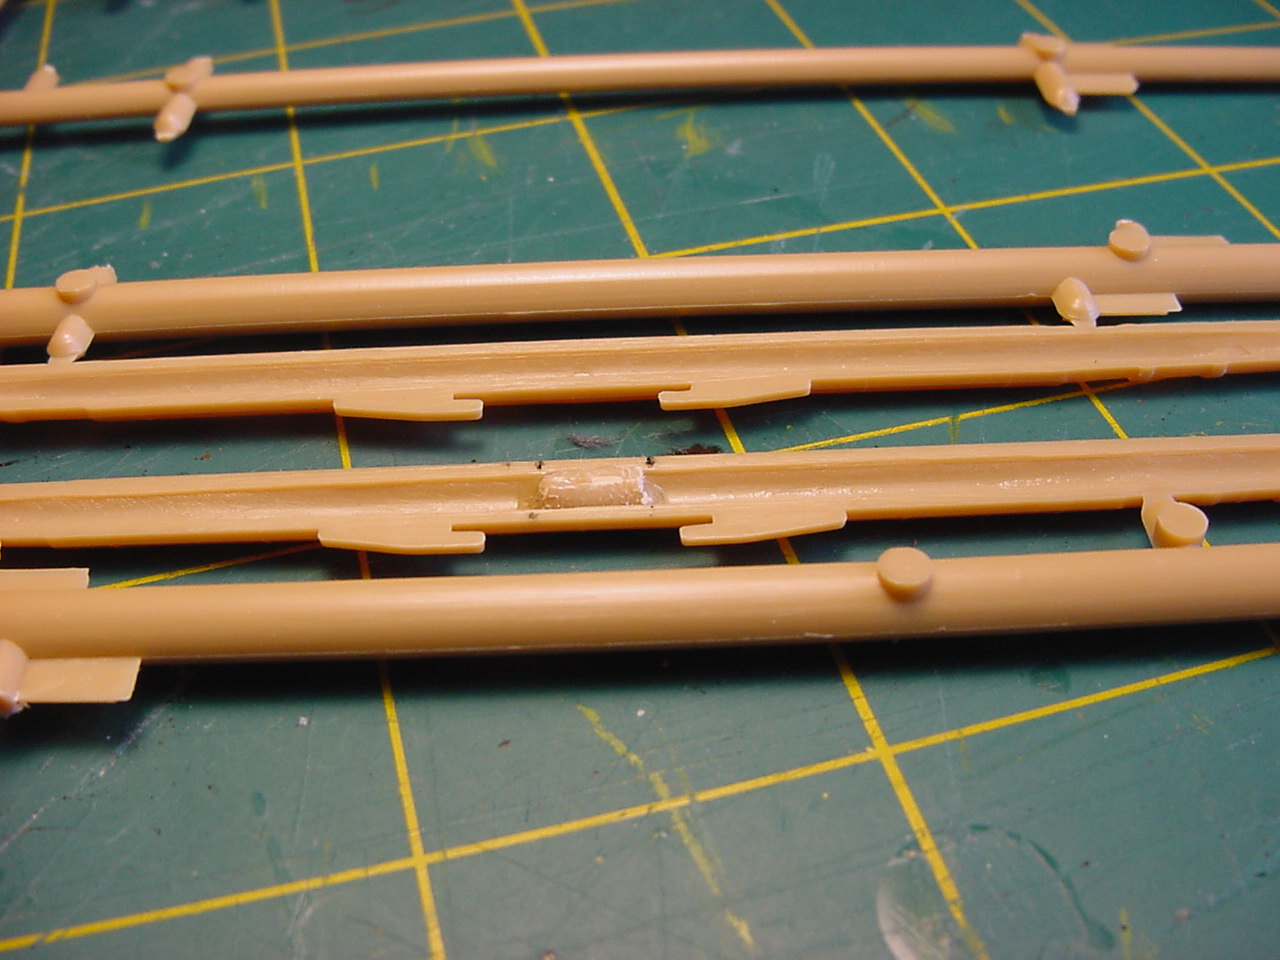
Since I haven't put together the foreyard, I glued a piece of sprue on one of the half-pieces:

" BORDER="0">

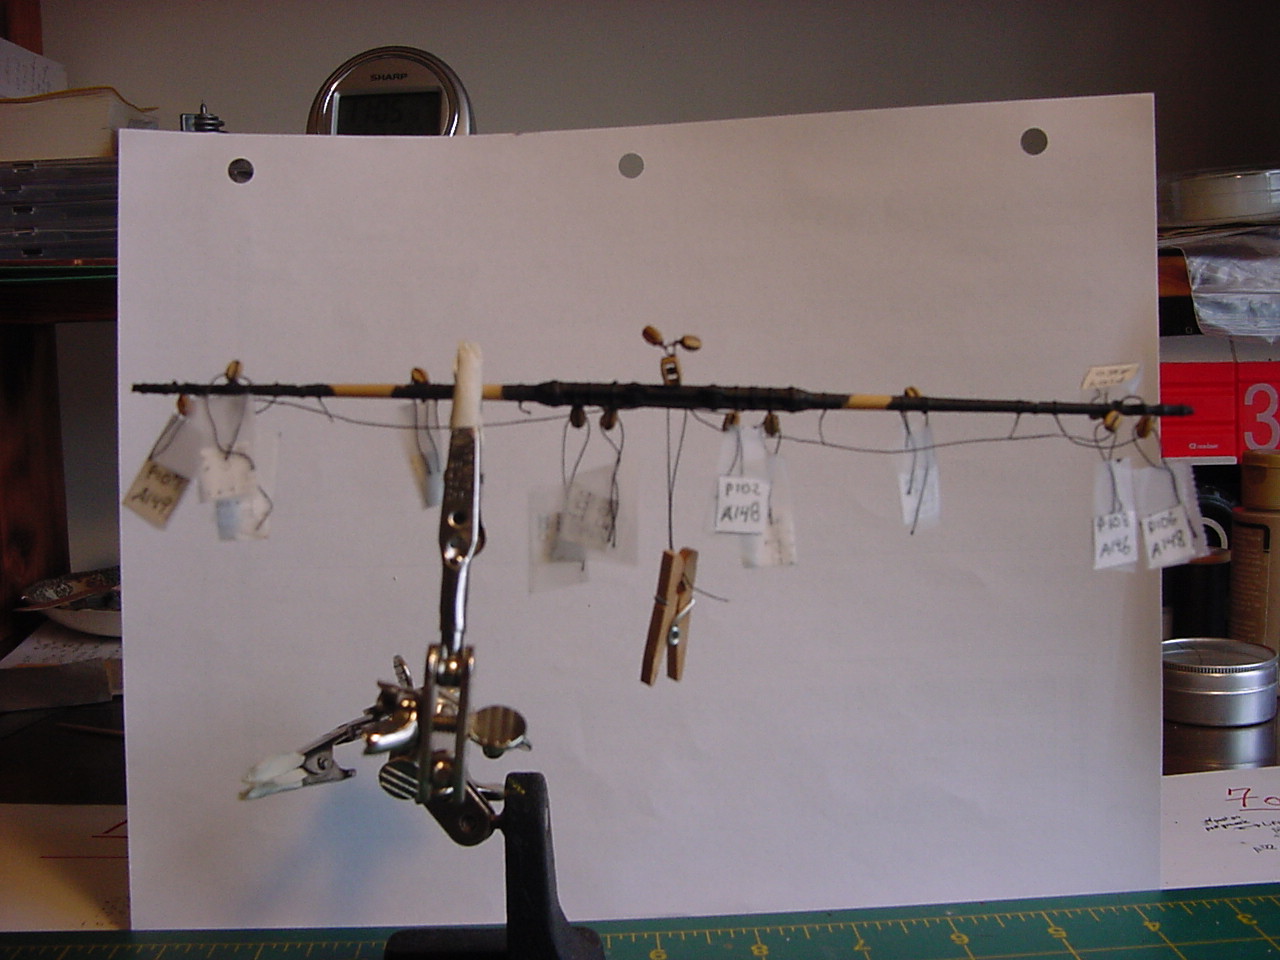
And lastly, just a picture of the foretop yard, with all the blocks & footropes installed. The lesson here is, if I'm going to tag all the blocks with what they're for, I should do it after I paint the yardarm!

" BORDER="0">

I'm closing in on putting the last of the blocks on the main yard - hopefully, I can post a picture of it this weekend.

C u later!
d6mst0
#453
Visit this Community
Texas, United States
Joined: August 28, 2016
KitMaker: 1,925 posts
Model Shipwrights: 1,298 posts
Posted: Thursday, March 07, 2019 - 06:14 AM UTC
Timothy,

By the number of pulleys you have to install are you sure you will have enough tags to fill out?......LOL.

Mark
McRunty
#491
Visit this Community
Missouri, United States
Joined: April 06, 2016
KitMaker: 602 posts
Model Shipwrights: 349 posts
Posted: Thursday, March 07, 2019 - 06:27 AM UTC
Nope, nein, nada, nyet!

I would rather bend 1000 pieces of etch than deal with all that line, pulleys, sails etc.

I really don't know how the sailing ship builders do it. I am in awe of the skill and patience involved to get it all together, organized and looking perfect.

Kudos to you sir!
timmyp
Visit this Community
Virginia, United States
Joined: May 18, 2008
KitMaker: 496 posts
Model Shipwrights: 404 posts
Posted: Saturday, March 09, 2019 - 08:48 AM UTC

Quoted Text

Timothy,

By the number of pulleys you have to install are you sure you will have enough tags to fill out?......LOL.

Mark


Mark,

If I run out of tags, it'll give me a reason to go the store and spend some money!!
timmyp
Visit this Community
Virginia, United States
Joined: May 18, 2008
KitMaker: 496 posts
Model Shipwrights: 404 posts
Posted: Saturday, March 09, 2019 - 08:55 AM UTC

Quoted Text

Nope, nein, nada, nyet!

I would rather bend 1000 pieces of etch than deal with all that line, pulleys, sails etc.

I really don't know how the sailing ship builders do it. I am in awe of the skill and patience involved to get it all together, organized and looking perfect.

Kudos to you sir!


Thanks, Rory. It's like any other model, just one step at a time.

Patience? I only work on this model for about an hour at a time...anything longer would be considered a marathon! Besides, I've been working on this thing, off and on, for almost 9 years...while I'll be glad when it's finished, I'm not rushing to get it done. Besides, I consider this my "Magnum Opus", so I want to get it right (for a change!)

Myself, I've never done anything with PE, but from the pictures I've seen on this website, those tiny little fragile parts look like a nightmare to cut, bend, and glue! My hat's off to all of you who do that work!

Thanks for stopping by!!
RedDuster
Visit this Community
England - South East, United Kingdom
Joined: March 01, 2010
KitMaker: 7,078 posts
Model Shipwrights: 6,649 posts
Posted: Thursday, March 14, 2019 - 09:16 AM UTC
Impressive work on the Yardarms, they are looking properly seamanlike. I like the tags, great way of keeping track.

vheers

Si
JJ1973
#345
Visit this Community
Niedersachsen, Germany
Joined: August 22, 2011
KitMaker: 1,835 posts
Model Shipwrights: 1,832 posts
Posted: Saturday, March 16, 2019 - 05:38 AM UTC
Constant and steady progress, Tim - and what everybody else said, especially about all your rigging - I couldn't do it!! Hats off to you!!

Cheers,

Jan
timmyp
Visit this Community
Virginia, United States
Joined: May 18, 2008
KitMaker: 496 posts
Model Shipwrights: 404 posts
Posted: Sunday, March 17, 2019 - 12:43 PM UTC

Quoted Text

Impressive work on the Yardarms, they are looking properly seamanlike. I like the tags, great way of keeping track.

vheers

Si


Thanks Si. Yes, using those tags is about the only way of keeping track, plus, they're more readable than looking at Heller's instructions.
timmyp
Visit this Community
Virginia, United States
Joined: May 18, 2008
KitMaker: 496 posts
Model Shipwrights: 404 posts
Posted: Sunday, March 17, 2019 - 12:45 PM UTC

Quoted Text

Constant and steady progress, Tim - and what everybody else said, especially about all your rigging - I couldn't do it!! Hats off to you!!

Cheers,

Jan


Thanks, Jan.

Progress note: I'm almost finished painting the main yard, and just today, I cemented the two halves of the main foretop yard. AFter that yardarm is complete, will just have the foreyard to complete, and then it'll be time to attach the yards to the masts. Can't wait!!

Thanks to everyone for looking!
timmyp
Visit this Community
Virginia, United States
Joined: May 18, 2008
KitMaker: 496 posts
Model Shipwrights: 404 posts
Posted: Thursday, June 06, 2019 - 12:49 PM UTC
Progress!

After taking an eternity to get the foreyard painted, I finally got around to gluing the mizzen yards to the mast. A bit difficult, as you have to join a cylindrical object (the mast) to another semi-cylindrical object (the yard), but all got glued up, and they all look fairly even in the horizontal plane. Here's a couple of pics:

" BORDER="0">

" BORDER="0">

And here's a "measuring stick" I made, to get the distance between yards correct (as per Heller's dimensions. The probably with their dimensioning, is that it's from yardarm to yardarm, I think in subsequent measurements, I'll reference things to the mast top.):

" BORDER="0">

Hope everyone enjoyed Memorial Day.

Tim
d6mst0
#453
Visit this Community
Texas, United States
Joined: August 28, 2016
KitMaker: 1,925 posts
Model Shipwrights: 1,298 posts
Posted: Thursday, June 06, 2019 - 01:56 PM UTC
Sweet, they do look nice and level.

Mark