

Gentlemen-
I have spent another 2 hours on trying to salvage the Oi, but came up disappointed. The surface of the kit is just too coarse now.The solvent of the primer seems to have "bitten" into the surface. I consider this kit a lost cause.
(Sorry, Nils: It seem that I an IJN do not get along!)
I am sitting in front of my stash and have decided to build WEM's fine classic 1/350 Mary Rose 1916 Torpedo Boat Destroyer.
More to come soon!
Cheers,
Guido
P


Go to modelshipwrights.com for the current dynamic site!
Campaigns
Want to be part of a group build? This is where to start, plan, and meet about them.
Want to be part of a group build? This is where to start, plan, and meet about them.
Hosted by Jim Starkweather
Stand By Torpedoes! Campaign

Tailor

Joined: May 26, 2008
KitMaker: 1,168 posts
Model Shipwrights: 676 posts

Posted: Thursday, April 15, 2010 - 09:20 PM UTC

ajkochev

Joined: June 25, 2008
KitMaker: 246 posts
Model Shipwrights: 221 posts

Posted: Friday, April 16, 2010 - 07:57 AM UTC
Quoted Text
Gentlemen-
I have spent another 2 hours on trying to salvage the Oi, but came up disappointed. The surface of the kit is just too coarse now.The solvent of the primer seems to have "bitten" into the surface. I consider this kit a lost cause.
(Sorry, Nils: It seem that I an IJN do not get along!)
I am sitting in front of my stash and have decided to build WEM's fine classic 1/350 Mary Rose 1916 Torpedo Boat Destroyer.
More to come soon!
Cheers,
Guido
P
Sorry about the loss of the kit stuff like this always flustrates me. Since it is roughed up maybe you could finish it as best as you can and use it in a sunk ship diorama or a 1946-47 ship salvage yard in Japan.
TheDiggs
Joined: April 25, 2008
KitMaker: 338 posts
Model Shipwrights: 160 posts

Posted: Friday, April 16, 2010 - 06:04 PM UTC
Guido, sorry about the loss of your build, I like the idea of making her a hulk. I had a similar experience a couple of years back with Tamiya's 1/700 Yamato. I turned her into an incense burner.

You might find as I did that having a burning hulk lying around is kind of cool. I am rather attached to my Yamato now.
You might find as I did that having a burning hulk lying around is kind of cool. I am rather attached to my Yamato now.
TheDiggs
Joined: April 25, 2008
KitMaker: 338 posts
Model Shipwrights: 160 posts
Posted: Friday, April 16, 2010 - 06:06 PM UTC
I am making some progress on my USS Bogue, I will get some pics ready when I am sober. Cheers

TGarthConnelly
Joined: August 03, 2008
KitMaker: 875 posts
Model Shipwrights: 872 posts

Posted: Saturday, April 17, 2010 - 02:28 AM UTC
I like that S-100.
Garth
Garth

Grauwolf

#084

Joined: September 14, 2005
KitMaker: 2,485 posts
Model Shipwrights: 1,157 posts

Posted: Saturday, April 17, 2010 - 07:43 AM UTC
Ahoy fellow ship modelers,
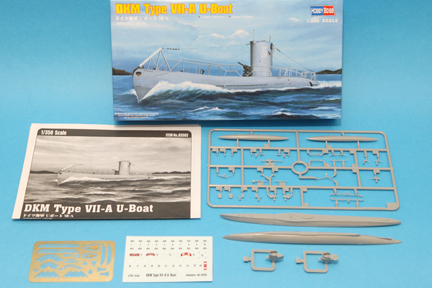
So here it is.......my entry for the campaign HobbyBoss Type VII A u boat.
Work will commence this weekend. I will post photos as I go along
of the corrections needed to make it a little more of a Type VIIA.

Cheers
So here it is.......my entry for the campaign HobbyBoss Type VII A u boat.
Work will commence this weekend. I will post photos as I go along
of the corrections needed to make it a little more of a Type VIIA.
Cheers

MrMox

Joined: July 18, 2003
KitMaker: 3,377 posts
Model Shipwrights: 985 posts

Posted: Saturday, April 17, 2010 - 08:24 PM UTC
Nice choice Joe, looking forward seeing your improvements on it.
Waterline or full hull ?
Cheers/Jan
Waterline or full hull ?
Cheers/Jan

Grauwolf
#084
Joined: September 14, 2005
KitMaker: 2,485 posts
Model Shipwrights: 1,157 posts
Posted: Saturday, April 17, 2010 - 08:50 PM UTC
Hi Jan,
I will go full hull on this one. This will allow me to correct the HB mistake
of having left the stern below the waterline torpedo tube and also will need
to eliminate one of the rudders. HB has given us a TYPE VIIA with
2 rudders!...
This way, when displayed along a B & C, the A's distinctions will be visible.
Cheers,
Joe
Tailor
Joined: May 26, 2008
KitMaker: 1,168 posts
Model Shipwrights: 676 posts
Posted: Sunday, April 18, 2010 - 06:36 PM UTC
Exellent!
That is just the kind of project that I was hoping to see here!
Cheers,
Guido
That is just the kind of project that I was hoping to see here!
Cheers,
Guido

lawlzw

Joined: April 05, 2009
KitMaker: 120 posts
Model Shipwrights: 24 posts

Posted: Monday, April 19, 2010 - 03:25 AM UTC
Hi guys... been following this campaign with some interest, so its time for me to hop on!  my contribution will be Bronco's 1/350 S-100, and here's the progress made over the weekend:

Cheers!
my contribution will be Bronco's 1/350 S-100, and here's the progress made over the weekend: Cheers!

Dougiedog

Joined: May 06, 2007
KitMaker: 72 posts
Model Shipwrights: 55 posts

Posted: Thursday, April 22, 2010 - 11:14 PM UTC
That looks neatly executed.
Tailor
Joined: May 26, 2008
KitMaker: 1,168 posts
Model Shipwrights: 676 posts
Posted: Friday, April 23, 2010 - 12:43 AM UTC
Very nice, indeed!
Dougiedog
Joined: May 06, 2007
KitMaker: 72 posts
Model Shipwrights: 55 posts
Posted: Sunday, April 25, 2010 - 10:35 PM UTC
Hi Folks
oooh oooooh excited
 and slightly hyper......there isn't a jumping from foot to foot emoticon or that is what I would be using.
Fresh from the Scottish Nationals at Perth, well not fresh, slightly dazed actually and glad I've taken the day off work to recover & unpack.
But in the spirit of this campaign I bought this beautiful beastie this weekend, too good to paint, (what would the gentlest polish be?)

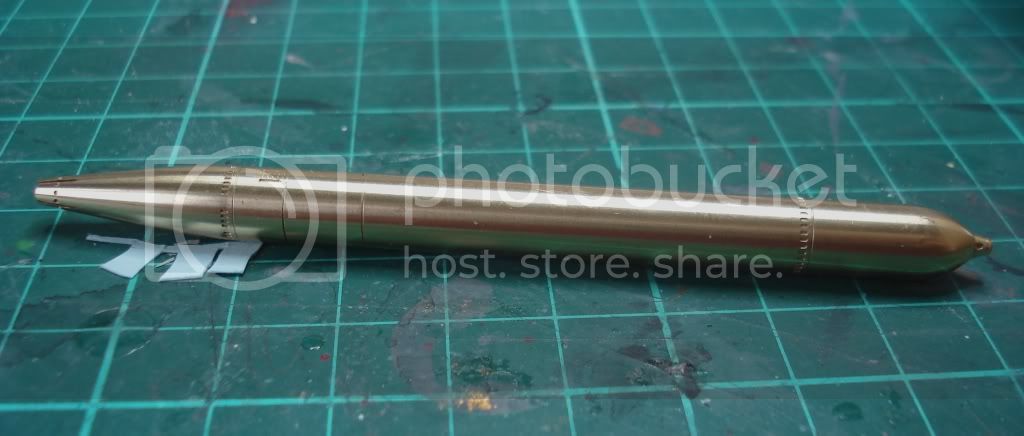
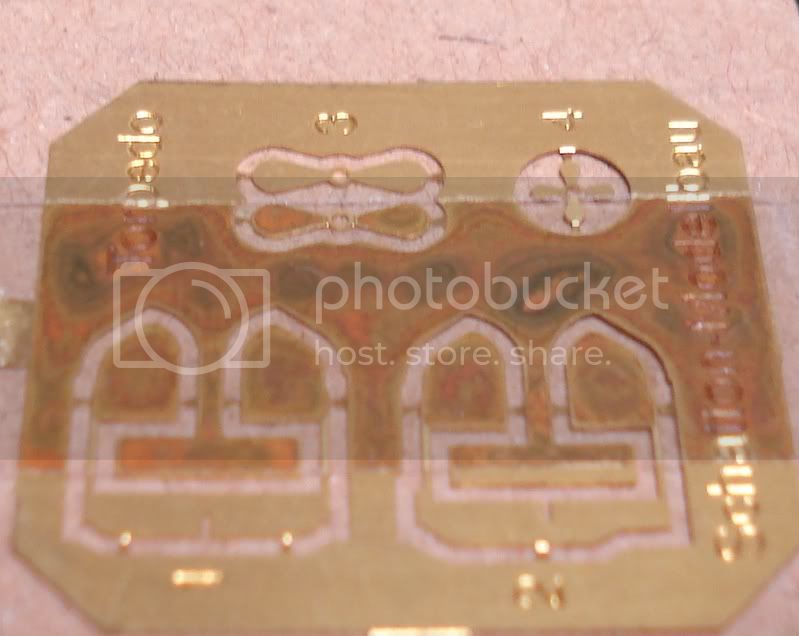
Available from Schatton-Modellbau and I bought mine off Adrian at Lonewulf Models who brought some amazing (scary?) Choroszy mini-subs. Those kits are very detailed.
Also good to meet fellow shipwrights and Keiths S-Boat is even better in the flesh and deserved its recognition in the competitions.
I'm going to keep it simple and put the torpedo on a scratchbuilt trolley, I have some suggestions for references (thanks Keith) but if you know a good image of one feel free to let me know
Cheers
Adam
oooh oooooh excited
and slightly hyper......there isn't a jumping from foot to foot emoticon or that is what I would be using.Fresh from the Scottish Nationals at Perth, well not fresh, slightly dazed actually and glad I've taken the day off work to recover & unpack.
But in the spirit of this campaign I bought this beautiful beastie this weekend, too good to paint, (what would the gentlest polish be?)
Available from Schatton-Modellbau and I bought mine off Adrian at Lonewulf Models who brought some amazing (scary?) Choroszy mini-subs. Those kits are very detailed.
Also good to meet fellow shipwrights and Keiths S-Boat is even better in the flesh and deserved its recognition in the competitions.
I'm going to keep it simple and put the torpedo on a scratchbuilt trolley, I have some suggestions for references (thanks Keith) but if you know a good image of one feel free to let me know
Cheers
Adam
Grauwolf
#084
Joined: September 14, 2005
KitMaker: 2,485 posts
Model Shipwrights: 1,157 posts
Posted: Tuesday, April 27, 2010 - 02:51 PM UTC
Ahoy fellowshipmates,
Did a little work on the Type VII A on the weekend and here is the progress shot.
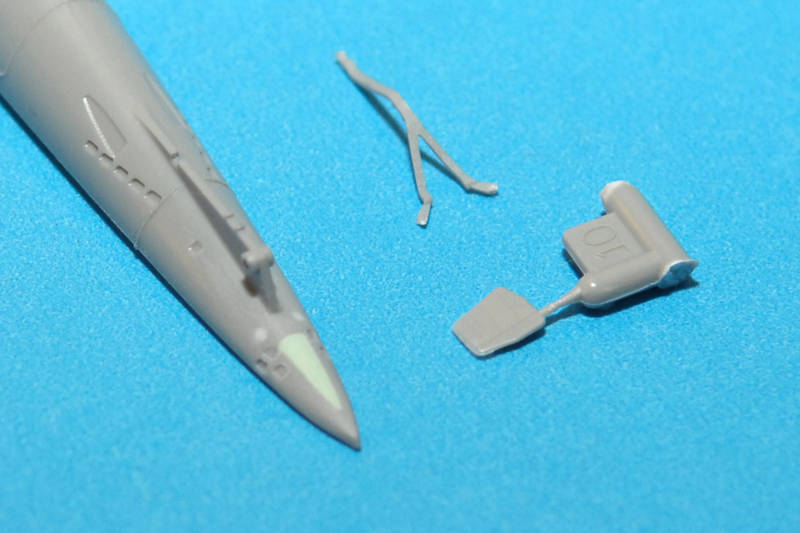
The 2 holes that are used to support the rudders were filled in.
Tiny pieces of round Evergreen stock was used here and cemented in place.
The stern torpedo tube was also filled in, for this I used Tamiya putty the
2 part polyester stuff. When dry, it was all sanded to shape.
The Y shaped part is the next part that will need to be modified. It is the rudder
support and this part is intended for the 2 rudders of the Type B and as the A's only had one rudder, it will need to be modified. Also the rudder will need reshaping.
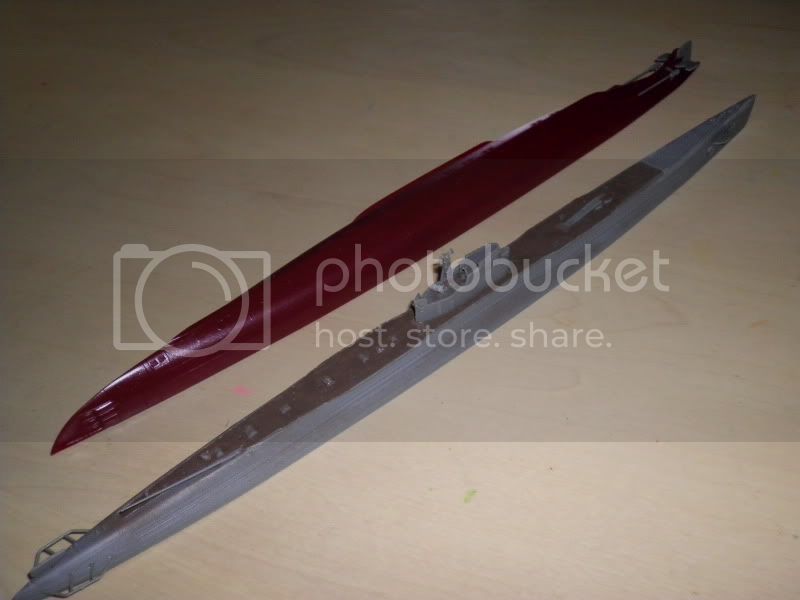
This is a photo of a Type A build in a larger scale which is presently in
"drydock" but it will give you an idea of the modifications that are required.
Hope you enjoy,
Have a nice day and happy modeling!
Did a little work on the Type VII A on the weekend and here is the progress shot.
The 2 holes that are used to support the rudders were filled in.
Tiny pieces of round Evergreen stock was used here and cemented in place.
The stern torpedo tube was also filled in, for this I used Tamiya putty the
2 part polyester stuff. When dry, it was all sanded to shape.
The Y shaped part is the next part that will need to be modified. It is the rudder
support and this part is intended for the 2 rudders of the Type B and as the A's only had one rudder, it will need to be modified. Also the rudder will need reshaping.
This is a photo of a Type A build in a larger scale which is presently in
"drydock" but it will give you an idea of the modifications that are required.
Hope you enjoy,
Have a nice day and happy modeling!

discordian
Joined: May 28, 2009
KitMaker: 239 posts
Model Shipwrights: 11 posts
Posted: Wednesday, April 28, 2010 - 07:07 AM UTC
A little progress.... Dang there's some small parts on this for a guy more used to 1:35 armor and 1:48 planes.
Tailor
Joined: May 26, 2008
KitMaker: 1,168 posts
Model Shipwrights: 676 posts
Posted: Wednesday, April 28, 2010 - 07:12 PM UTC
Good things happening here, guys! Keep it coming!
@Scott: I hope the experience gained will translate back into larger scales. If so the campaign will have served its purpose well!
Cheers,
Guido
@Scott: I hope the experience gained will translate back into larger scales. If so the campaign will have served its purpose well!
Cheers,
Guido
Dougiedog
Joined: May 06, 2007
KitMaker: 72 posts
Model Shipwrights: 55 posts
Posted: Saturday, May 01, 2010 - 05:28 AM UTC
ORP Orzel Mirage 1/400
Getting started for real now. Joined hull sides together. There are no locating pins to help align the hull sides and one side was slightly bowed so I carefully tacked the bow as accurately as I could with quick cyano' then I worked along edges of the hull with a slower glue, aligning the edges of each half hull and clamping them together firmly. It worked pretty well with just a light rub with a sanding stick being all that was needed for the seam to disappear.
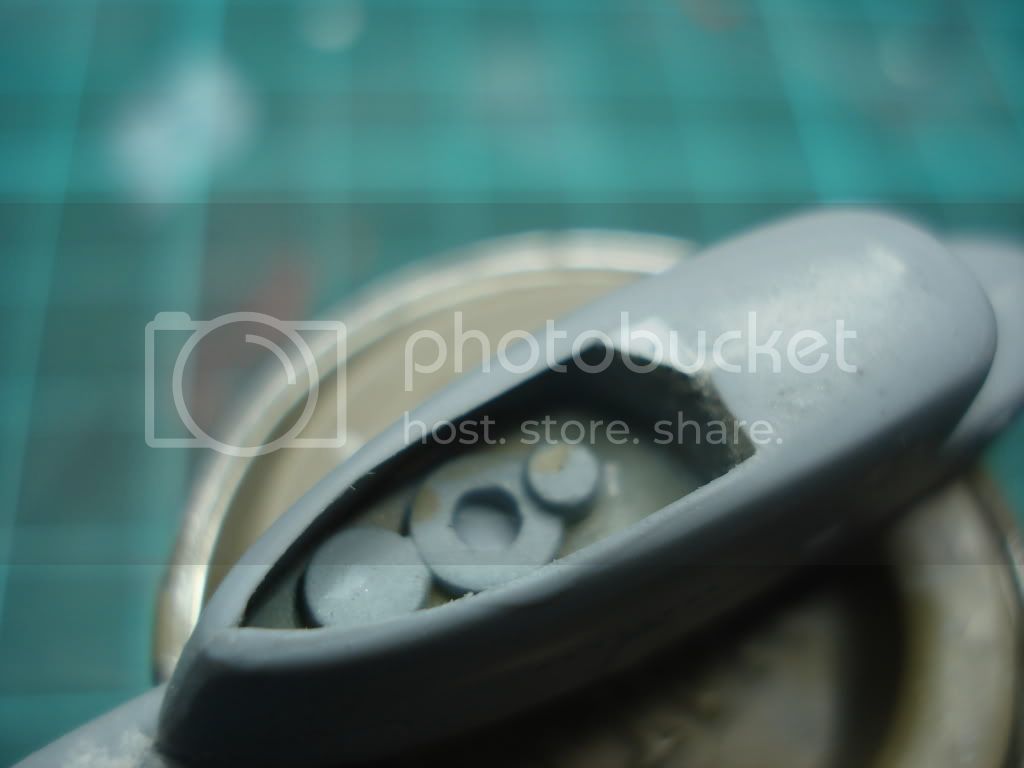
The top of the hull was slightly convex and the deck was supposed to go on top, so I pared the center away with a scalpel. The deck was a bit too wide so this was sanded but i didn't want to go too far and loose the detail of the bollards and a ridge along the edge of the deck. Even so I still ended up with
quite a seam & step which I filled, initially with plasto but this was hard to smooth so then I used milliput.
Its amazing how a close up reveals flaws

I then drilled & filed out a slot where the sail (conning tower) will go so a coffee stirrer fitted tightly so I can hold the hull to prime it.
I'm hoping that the primer will smooth the filler a bit more though I expect to be doing more sanding.
I was going to use Halfords plastic primer, which I find goes on looking pretty thick but dries to quite a thin finish (how does it do that?) but I also have Tamiya primer I'd like to try as I haven't used it before but I will be using enamels (Humbrol & Revell) for the basic hull colours and I am not sure if it is compatable. Some advise on that would be appreciated.
Cheers
Adam
Getting started for real now. Joined hull sides together. There are no locating pins to help align the hull sides and one side was slightly bowed so I carefully tacked the bow as accurately as I could with quick cyano' then I worked along edges of the hull with a slower glue, aligning the edges of each half hull and clamping them together firmly. It worked pretty well with just a light rub with a sanding stick being all that was needed for the seam to disappear.
The top of the hull was slightly convex and the deck was supposed to go on top, so I pared the center away with a scalpel. The deck was a bit too wide so this was sanded but i didn't want to go too far and loose the detail of the bollards and a ridge along the edge of the deck. Even so I still ended up with
quite a seam & step which I filled, initially with plasto but this was hard to smooth so then I used milliput.
Its amazing how a close up reveals flaws
I then drilled & filed out a slot where the sail (conning tower) will go so a coffee stirrer fitted tightly so I can hold the hull to prime it.
I'm hoping that the primer will smooth the filler a bit more though I expect to be doing more sanding.
I was going to use Halfords plastic primer, which I find goes on looking pretty thick but dries to quite a thin finish (how does it do that?) but I also have Tamiya primer I'd like to try as I haven't used it before but I will be using enamels (Humbrol & Revell) for the basic hull colours and I am not sure if it is compatable. Some advise on that would be appreciated.
Cheers
Adam
Grauwolf
#084
Joined: September 14, 2005
KitMaker: 2,485 posts
Model Shipwrights: 1,157 posts
Posted: Saturday, May 01, 2010 - 12:53 PM UTC
Hello Adam,
Nice build you have going there.
Tamiya makes the finest primer, I use it exclusively....I have tried others but
none match the fine grain of Tamiya's. Great on both metal and plastic.
Spraying light coats works best and prevents clogging up detail.
Drys to a very smooth finish and will give ample tooth for either enamels or
acrylics.
I have used the gray type, there is also white but have never used it.
Cheers,
Tailor
Joined: May 26, 2008
KitMaker: 1,168 posts
Model Shipwrights: 676 posts
Posted: Saturday, May 01, 2010 - 08:25 PM UTC
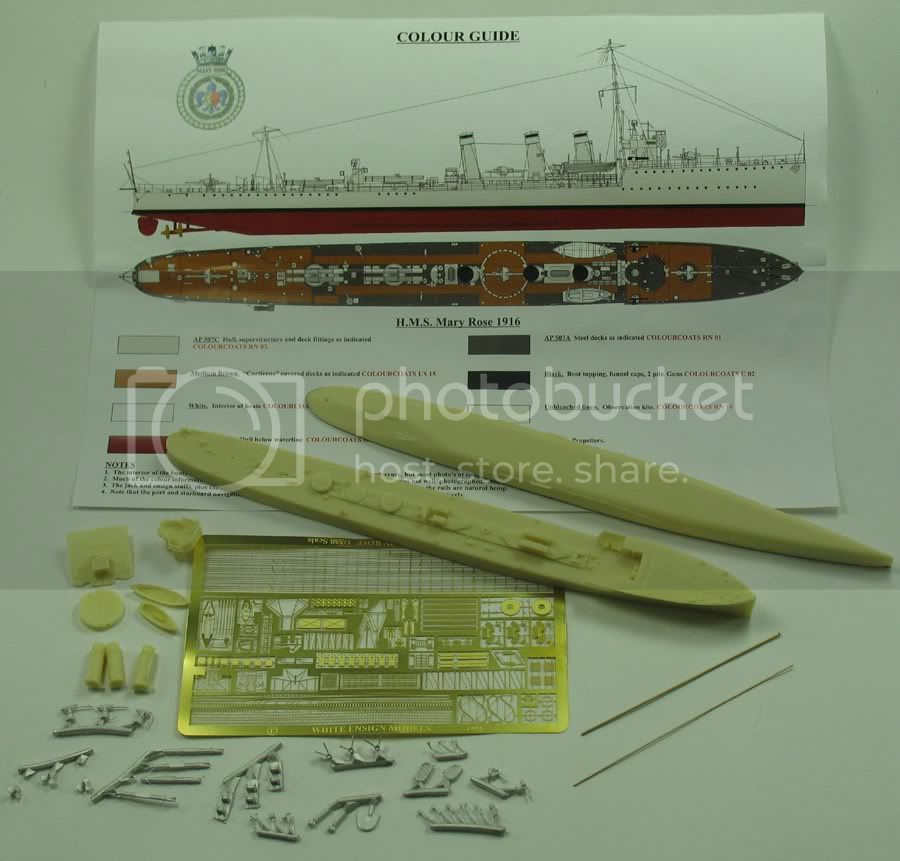
Gentlemen,
as previously mentioned I have turned my attention to building WEMs 1/350 Mary Rose kit. This Admiralty M-Class destroyer was one of total 85 ships in this class, 6 of which were built prior to WWI and were slightly smaller in dimension and featured a few differences in layout. A number of other vessels were already ordered and laid down prior to hostilities. The majority were built in the Emergency War Construction Program.
The ships of the Admiralty M-Class were hard pressed in their service doing duty ranging from fleet duty to convoy escort. A good number of them fought at Jutland.
Most ships survived the war, but had to be scrapped soon after as they were worn out beyond further use.
WEMs kit of the Admiraltiy M-Class ship HMS Mary Rose was mastered after a plan set available from Sambrook plans. It is easily one of their best kits even though it is at least 12 year old, probably even older. The casting is perfect, with no flaws whatsoever. The kit impresses by super fine cast on deck detail. Lower and upper hull parts fit is OK, but necessitates some filling and sanding for a full hull display. The parts count is moderate, with a handful of resin parts, brass rod and a beautiful photo etch sheet. Unfortunately a good number of parts are supplied in white metal. Most of them are -in my opinion- not usable. I do understand the makers need to save on cost, but what good does it do to the modeller, if such (cost-saving) parts cant be used to make a decent model? The instruction is clear-cut and provides a nice coloured painting sheet.
There is little reference available for the Admiralty M-Class. Most of it only available in used book form greatly ranging in price from Moderate to Super expensive I was lucky enough to receive help from 2 friends in the UK.
I havent decided yet, which ship to build. Probably Ill stick to HMS Mary Rose due to the limited reference.
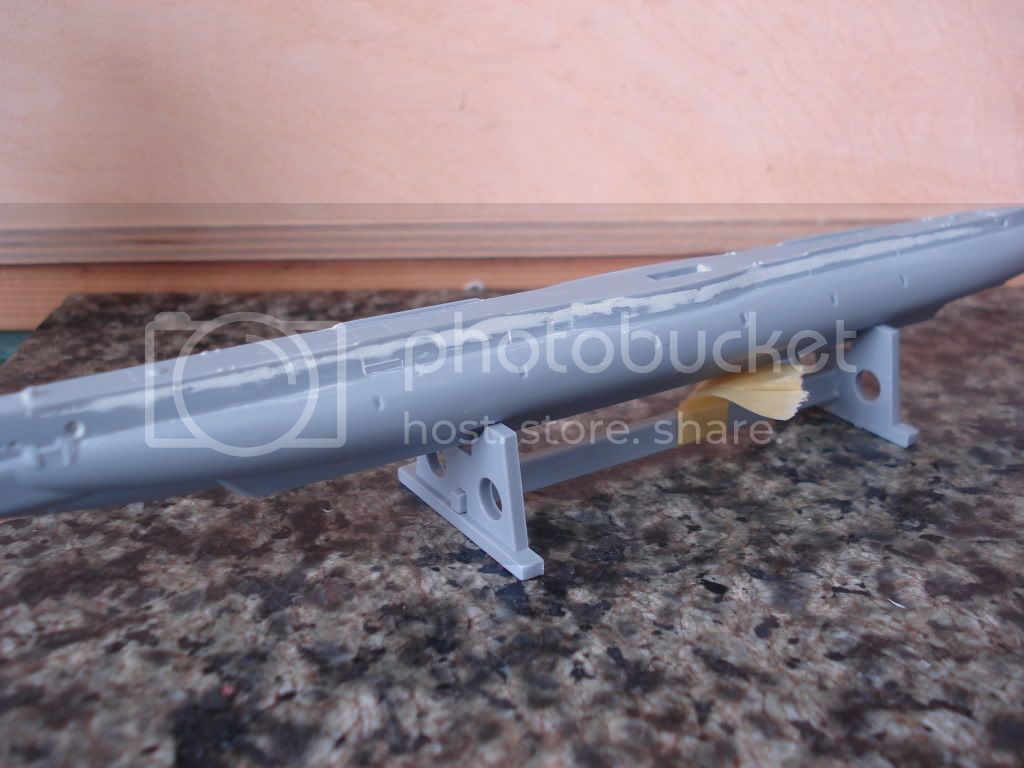
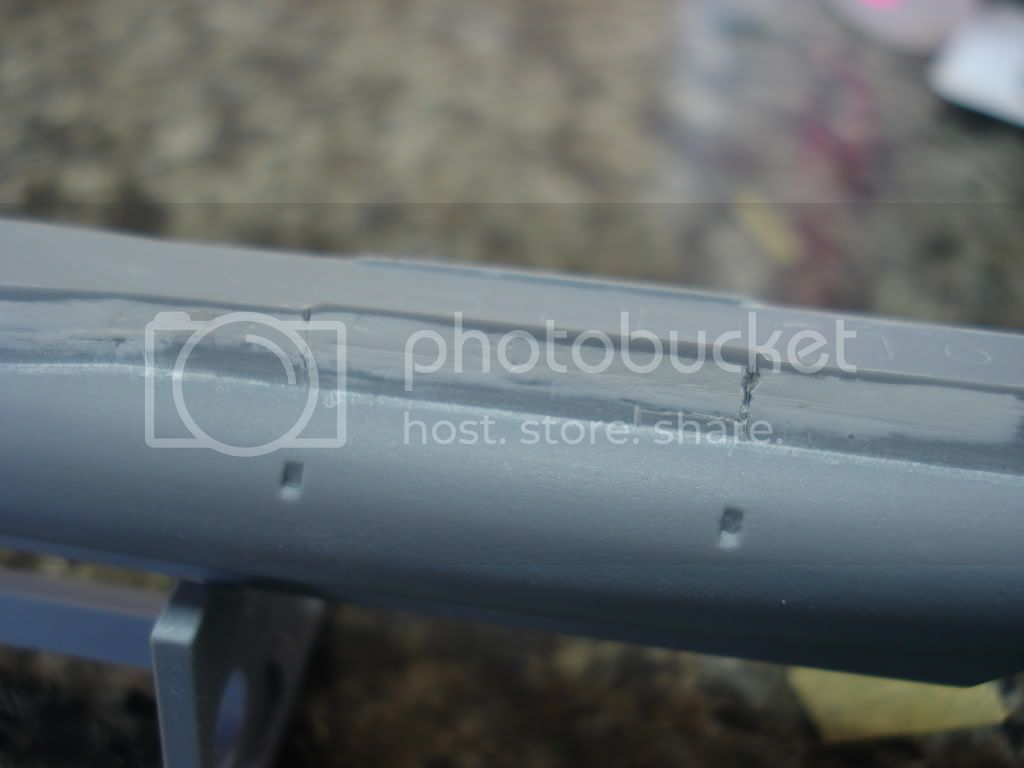
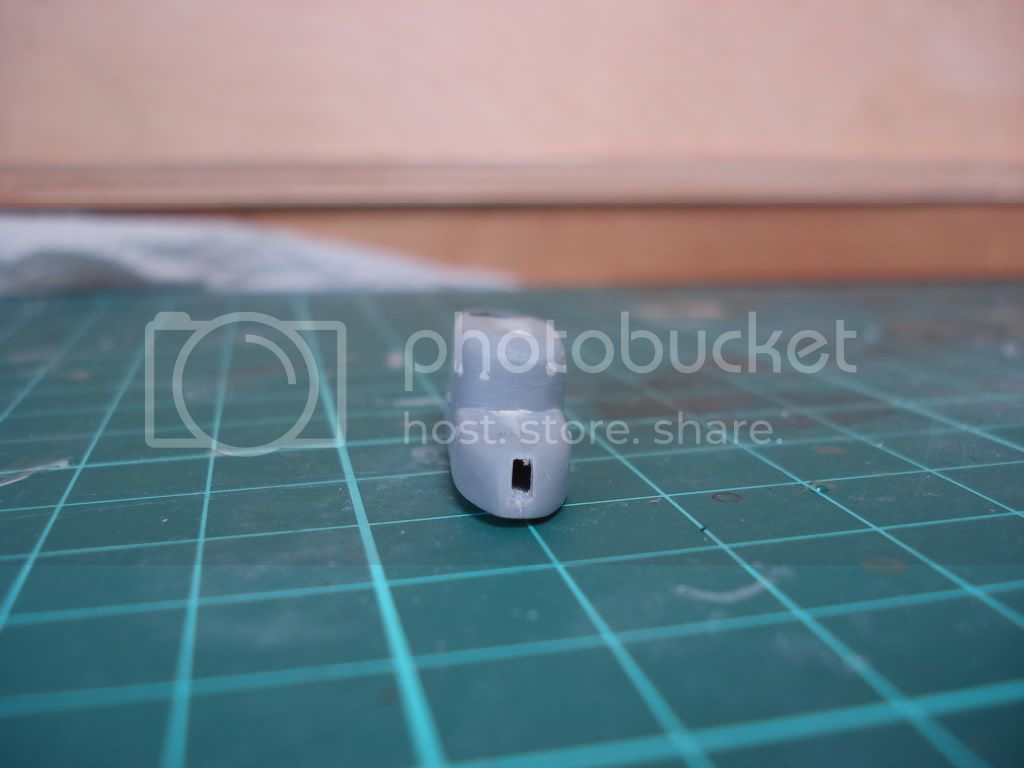
My M-Class ship will be riding a wave in a stormy sea so a good part of the lower hull will be seen. I start mating lower and upper hull. A little care must be exercised to keep filling and sanding at a minimum and have a straight stem line at the so
ame time. Curing time of epoxy glue and filler I use to remodel the torpedo tubes.
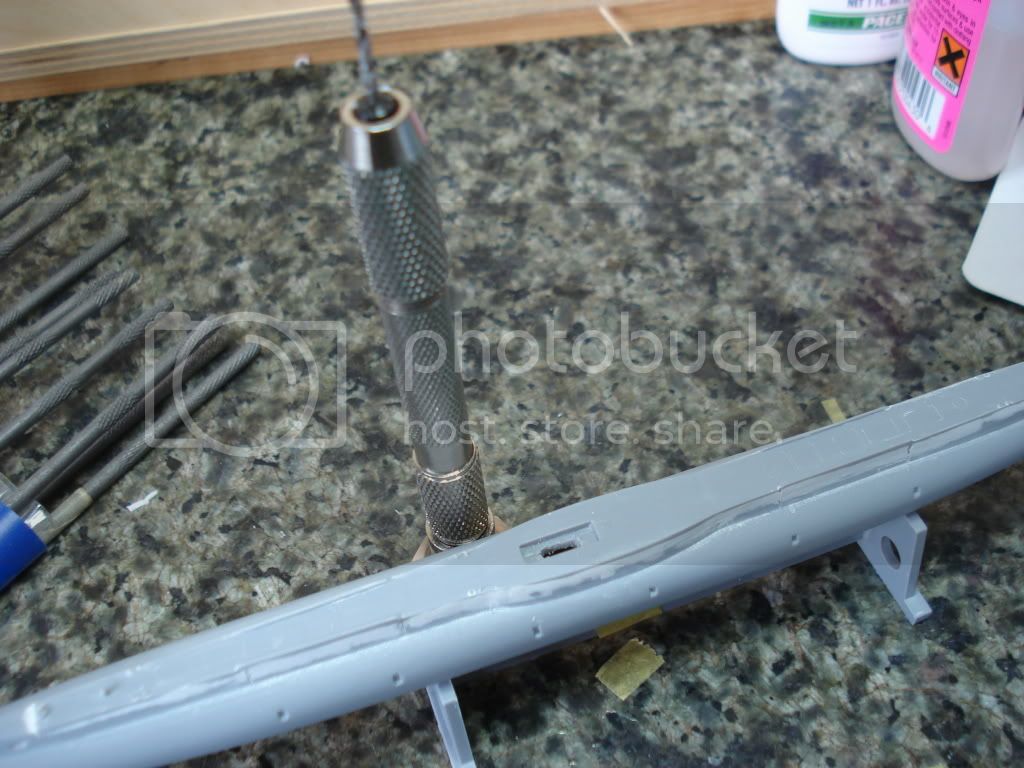
The kits parts are white metal and would stand out clumsily on the otherwise finely detailed model. Here is a pic of the kits parts:
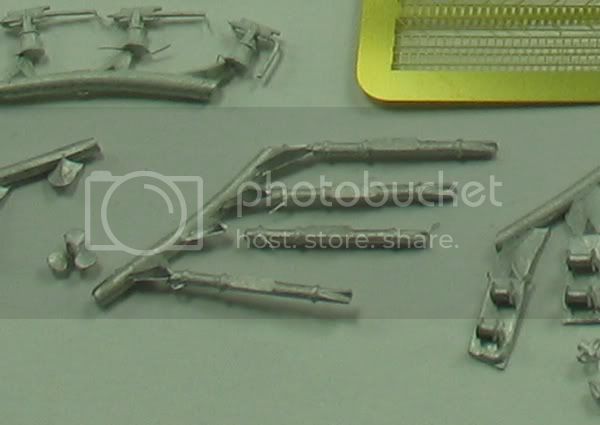
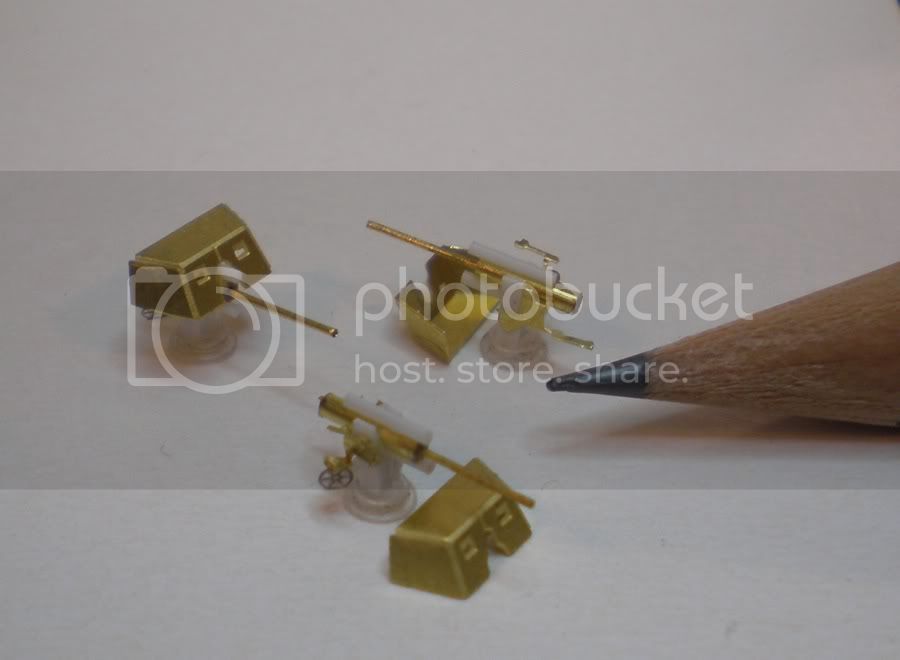
and heres the remodelled version using brass tubes and parts from the spares box:

Lets see, if we can some more work finished this weekend.
Cheers,
Guido
as previously mentioned I have turned my attention to building WEMs 1/350 Mary Rose kit. This Admiralty M-Class destroyer was one of total 85 ships in this class, 6 of which were built prior to WWI and were slightly smaller in dimension and featured a few differences in layout. A number of other vessels were already ordered and laid down prior to hostilities. The majority were built in the Emergency War Construction Program.
The ships of the Admiralty M-Class were hard pressed in their service doing duty ranging from fleet duty to convoy escort. A good number of them fought at Jutland.
Most ships survived the war, but had to be scrapped soon after as they were worn out beyond further use.
WEMs kit of the Admiraltiy M-Class ship HMS Mary Rose was mastered after a plan set available from Sambrook plans. It is easily one of their best kits even though it is at least 12 year old, probably even older. The casting is perfect, with no flaws whatsoever. The kit impresses by super fine cast on deck detail. Lower and upper hull parts fit is OK, but necessitates some filling and sanding for a full hull display. The parts count is moderate, with a handful of resin parts, brass rod and a beautiful photo etch sheet. Unfortunately a good number of parts are supplied in white metal. Most of them are -in my opinion- not usable. I do understand the makers need to save on cost, but what good does it do to the modeller, if such (cost-saving) parts cant be used to make a decent model? The instruction is clear-cut and provides a nice coloured painting sheet.
There is little reference available for the Admiralty M-Class. Most of it only available in used book form greatly ranging in price from Moderate to Super expensive I was lucky enough to receive help from 2 friends in the UK.
I havent decided yet, which ship to build. Probably Ill stick to HMS Mary Rose due to the limited reference.
My M-Class ship will be riding a wave in a stormy sea so a good part of the lower hull will be seen. I start mating lower and upper hull. A little care must be exercised to keep filling and sanding at a minimum and have a straight stem line at the so
ame time. Curing time of epoxy glue and filler I use to remodel the torpedo tubes.
The kits parts are white metal and would stand out clumsily on the otherwise finely detailed model. Here is a pic of the kits parts:
and heres the remodelled version using brass tubes and parts from the spares box:
Lets see, if we can some more work finished this weekend.
Cheers,
Guido
MrMox
Joined: July 18, 2003
KitMaker: 3,377 posts
Model Shipwrights: 985 posts
Posted: Sunday, May 02, 2010 - 12:55 AM UTC
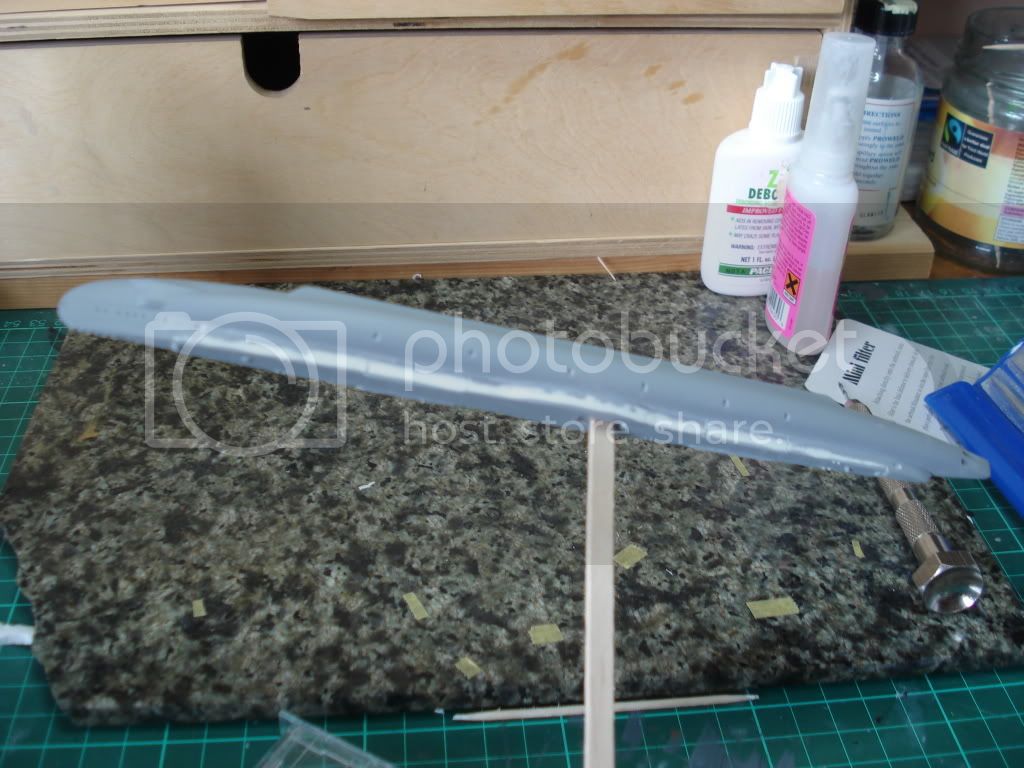
Thats one big pencil you got there mate!
Nice work !
Cheers/Jan
Nice work !
Cheers/Jan

gator
Vendor
#027
Joined: April 13, 2005
KitMaker: 5,422 posts
Model Shipwrights: 5,079 posts

Posted: Sunday, May 02, 2010 - 04:56 AM UTC
Wonderful work Guido.

Grauwolf
#084
Joined: September 14, 2005
KitMaker: 2,485 posts
Model Shipwrights: 1,157 posts
Posted: Sunday, May 02, 2010 - 08:10 AM UTC
Ahoy all,
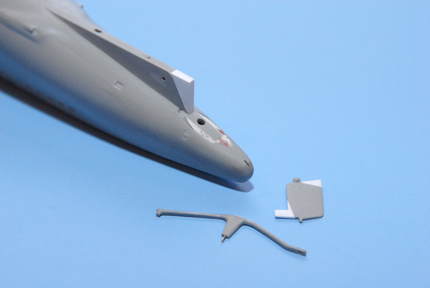
Some further work on the HB Type VII-A.
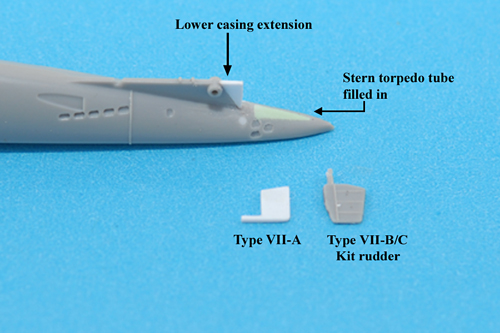
I have extended the lower hull casing and squared it off.
Next a new rudder was built, there is a significant difference between the
rudder on a Type VII-A compared to the B/C rudder.
The next modification will be the "Y" shaped bracket that holds the rudder
in place.
More to come soon.
Hope you enjoy,
Cheers,
Joe
Some further work on the HB Type VII-A.
I have extended the lower hull casing and squared it off.
Next a new rudder was built, there is a significant difference between the
rudder on a Type VII-A compared to the B/C rudder.
The next modification will be the "Y" shaped bracket that holds the rudder
in place.
More to come soon.
Hope you enjoy,
Cheers,
Joe

goldenpony

Joined: July 03, 2007
KitMaker: 3,529 posts
Model Shipwrights: 2,419 posts

Posted: Sunday, May 02, 2010 - 03:17 PM UTC
Guido,
Those tubes are great looking!

Those tubes are great looking!
Dougiedog
Joined: May 06, 2007
KitMaker: 72 posts
Model Shipwrights: 55 posts
Posted: Saturday, May 08, 2010 - 12:02 AM UTC
Hi Guys
I'm seeing amazing stuff here, Can I have your spares box Guido....Oh I'll just knock up a couple of torpedo launchers.....wow
And Joe, your building is really precise, and your approach to recording the build is really crisp and clear, the clear blue background and neatly arranged composition shows exactly what you are doing. Respect guys.
Meanwhile back at the Mirage Orzel....
I used the Tamiya primer and it was good.
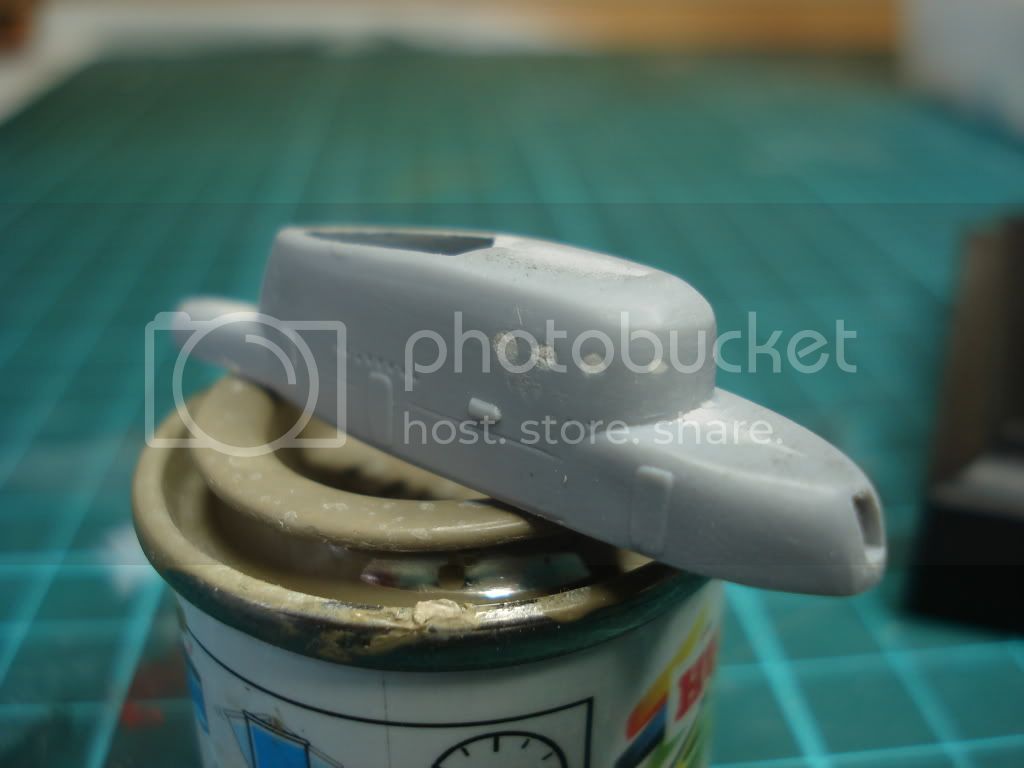
I have further tidied up the hull/deck seams and moved on to the conning tower/sail (What is the preferred term? and when did the former become the later?....)
The windows are really poorly molded, different heights and spacings on each side and no windows at the front. The top deck aperture has a straight edge rather than angled and the representation of the little spray shield at the front is gross. So more modifications. I filled in the windows and now have the dilemma of representing them by drilling out holes or using decals, I'm tending towards decals but time will tell.
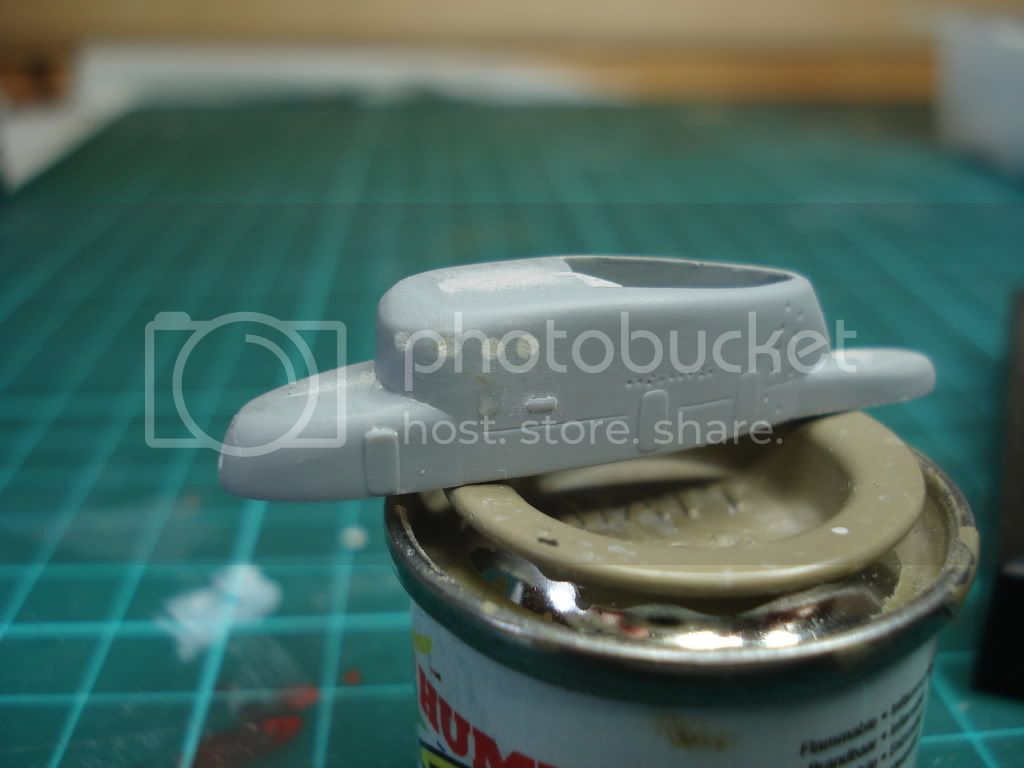
See how those drain holes are all over the place. I think this kit was based on the Nikko 1/700 kit which I think is why the colour guide lists out of production Humbrol colours.
Cheers
Adam
I'm seeing amazing stuff here, Can I have your spares box Guido....Oh I'll just knock up a couple of torpedo launchers.....wow
And Joe, your building is really precise, and your approach to recording the build is really crisp and clear, the clear blue background and neatly arranged composition shows exactly what you are doing. Respect guys.
Meanwhile back at the Mirage Orzel....
I used the Tamiya primer and it was good.
I have further tidied up the hull/deck seams and moved on to the conning tower/sail (What is the preferred term? and when did the former become the later?....)
The windows are really poorly molded, different heights and spacings on each side and no windows at the front. The top deck aperture has a straight edge rather than angled and the representation of the little spray shield at the front is gross. So more modifications. I filled in the windows and now have the dilemma of representing them by drilling out holes or using decals, I'm tending towards decals but time will tell.
See how those drain holes are all over the place. I think this kit was based on the Nikko 1/700 kit which I think is why the colour guide lists out of production Humbrol colours.
Cheers
Adam
Tailor
Joined: May 26, 2008
KitMaker: 1,168 posts
Model Shipwrights: 676 posts
Posted: Saturday, May 08, 2010 - 05:17 AM UTC
Gentlemen-
Keep up the good work!
Thanks for your kind words. The art of re-creating inadequate parts is actually to be able to break it down into smaller shapes. Of cause the kit parts help you great deal when doing it. It's not all that hard to do, you just have to sit down and go about it properly.
Here is previously mentioned pencil again. This time along with the re-built 4" guns, each gun made up of 16 parts now instead of 4. Of cause it has a lot more defnition to it then the original white metal part.
I am doing a whole lot of things to the hull right now, but the individual steps are too small to warrant a step-by-step.
I show and explain when all is done
Keep it coming, gents!
Cheers,
Guido
 |

WEB HOSTING BY


Copyright ©2021 Model Shipwrights and Kitmaker Network, a subsidiary of Silver Star Enterprises
All Rights Reserved. Please read our Conditions of Use and Privacy Policy.
All Rights Reserved. Please read our Conditions of Use and Privacy Policy.